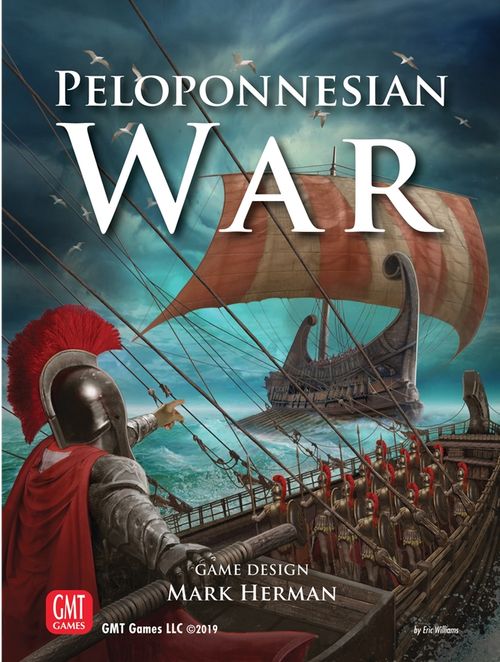
Peloponnesian War
Peloponnesian War Rulebook
Table of Contents
Table of Contents
- Game Components
- Game Overview
- Important Game Terms
- Peloponnesian War—Campaign Game Setup
- 1. Determining Victory
- 2. Sequence of Play
- 3. Political Phase
- 4. Strategic Planning Phase
- 5. Operations Phase
- 6. Combat Phase
- 7. Rebellion Expansion Phase
- 8. Administrative Phase
- 9. Armistice & Surrender Phase
- Inventory
- Index
- Peloponnesian Gazetteer
Game Components
The Map
Spaces—The map contains three types of spaces:
- Land space (square)
- Coastal space (triangle)
- Island space (circle)
Spaces are color coded to denote whether they begin the game controlled by the Delian League (Athens; in green), Peloponnesian League (Sparta; in red), or are neutral (yellow).
The land space above is initially controlled by Sparta, the Island space by Athens, and the Coastal space is neutral.
A space's type usually determines what type of unit can be placed or retained within it. In addition to the three basic types there are fortress spaces which are important in identifying and resolving sieges.
Home Spaces—Athens is the "home space" for the Delian League; Sparta is the home space for the Peloponnesian League.
Line of Communication (LOC)—There are three types of connections called "Lines of Communication" (LOCs) running between spaces:
- Land LOC
- Naval LOC
- Combined LOC
LOCs determine the types of units that can move between their attached spaces. Two spaces directly connected by a LOC are considered adjacent to one another.
Victory Points Track—The Victory Points track that runs along the left edge of the map is where you will keep track of your victory point total throughout the game.
The Counters
There are four types of counters in the game:
-
Leaders — A leader piece represents a historical personage who participated in the conflict. Each leader includes his name, a Tactical Rating and a Strategic Rating. Most leaders begin a game in one of two opaque containers called "draw cups"—one for each side—so that they may be drawn at random throughout play.
Important—Leaders with a vertical yellow or black band are only used in certain scenarios found in the playbook: leave these in the box when playing the Campaign Game [page 6].
-
Markers — The functions of the various markers are explained in their appropriate rule sections on the pages that follow.
-
Land combat units — Hoplites and Cavalry
-
Naval combat units
Green leaders and units belong to the Delian League (Athens); red ones to the Peloponnesian League (Sparta); blue ones to Thebes; and yellow ones to Persia.
Theban and Persian pieces are only used in the Fall of Sparta scenario found in the Playbook.
Elite Units
The Spartan Home Guard (HG), Athenian Peltast and Theban Sacred Band are elite units. Elite units have several special rules associated with them:
- They cannot voluntarily break down into smaller (regular) Hoplite SPs.
- If an elite unit suffers a loss in battle [6.2], it is permanently eliminated (it cannot be rebuilt). If its losses were less than its SP value, the remainder are replaced by regular Hoplite SPs.
- If involved in a skirmish [5.7], the Home Guard is immune to taking a loss (even if acting alone).
- The Home Guard may never move out of the Sparta space.
Strength Points (SPs)
Each side of every combat unit (hereafter just "unit") includes an SP value ranging from 1 to 5. You are free to exchange SPs of identical types at any time, like making change—for example, swapping a "3" SP Spartan Hoplite for three "1" SP Spartan Hoplites—and will often break down (or flip over) larger units into one or more smaller units when taking losses in battle. The pieces provided are an absolute limit as to what can be in play at any given time.
Units are broken down into six nationalities: Athenian (dark green), Athenian Ally (light green), Spartan (dark red), Spartan Ally (light red), Theban, and Persian.
A Spartan Hoplite SP represents 1000 men, while other Hoplite SPs are 2000 men. A Cavalry SP represents 2000 mounted men. A Naval SP represents 25 triremes, plus marines and rowers armed as light troops.
The Player Aids
There are two Strategy Matrices: one for Athens and one for Sparta. The matrices are used to determine the non-player side's strategy [4.1], operation objectives [5.2], and the size of the force it must use to capture those objectives. Each side's matrix is also used to record the size of its Treasury, its Bellicosity, and its Strategy Confidence Index.
There are also two double-sided player aids included, designed to give you important information at a glance during play.
The Dice
There are two dice; one red and one green. It is convenient to always represent Athens with the green die and Sparta with the red. This allows you to resolve combat with a single roll and tends to speed play.
Randomness—Throughout the game you will be called upon to make a "random" determination. If no choice is the obvious best one, assign an equal die roll range to all possible choices then roll a die to determine the actual result.
Draw Cups
You will need to provide two opaque containers (such as clean, dry coffee mugs) to facilitate the random drawing of leaders throughout the game.
Game Overview
Peloponnesian War is a solitaire game in which you will play both sides, perhaps several times each. Your objective is to shorten the war while performing well with the side you control during any given turn.
Historically, even though the Spartans were victorious their manpower was depleted. When coupled with strategic overreach this led to their defeat at the Battle of Leuctra (371 BC) only 33 years after the war's conclusion. By shortening the war you increase the likelihood that the victory will be a lasting one.
At the start of each game, you will choose to play the "Peloponnesian War" Campaign Game scenario [see pages 6-7] or one of the scenarios from the accompanying Playbook. The scenario will have you begin in control of one side or the other: the Delian League comprised of Athens and her Allies, or the Peloponnesian League comprised of Sparta and her Allies. A game turn represents three years of activity.
Given this time scale, map scale is irrelevent; units can easily traverse the map several times within a span of three years.
Each turn begins with a Political Phase in which you draw leaders for both sides, followed by the Strategic Planning Phase in which you determine the strategy that the non-player side will employ for that turn. During the Operations Phase you pay (from each side's Treasury) to conduct operations—alternating sides, one operation at a time—by moving Expeditions to objective spaces, fighting skirmishes and battles along the way. Battles can also occur during the Combat Phase, which is when all sieges will also be resolved. The success or failure of operations influences the amount of revenue received and affects each side's will to continue prosecuting the war, measured as Bellicosity. Revenue, measured in talents, is used to activate units for operations and to build new units.
Once the victory conditions for either side are met, the game is over and your performance is measured.
Important Game Terms
There are several terms that you should become familiar with in order to better understand the rules that follow.
Activation During an operation, when the Expedition enters a space with a friendly SP and pays the appropriate activation cost, the SP is activated and becomes part of that Expedition, moving with it on its operation. It costs 200 talents to activate a land SP; 400 for a naval SP. An SP may only be activated once per turn, and its activation ends when the operation ends.
Army An Army is any number of units stacked with a friendly leader, whether or not it is conducting an operation. An Army is also a Force.
Assembly Space During an operation, an Assembly space is any friendly space that contains at least one friendly unit not yet activated for the turn.
Bellicosity Bellicosity is a measure of how determined each of Athens and Sparta are in their efforts to continue the war. Each side's Bellicosity is tracked using a marker on the Bellicosity Track of the appropriate Strategy Matrix. If either side's Bellicosity reaches zero, it surrenders [9.2]. Bellicosity can never rise above 12 for any reason.
Control Control of every space is determined during the Administration Phase [8.0]. A side controls a space if: a) the space is occupied by a friendly unit; or b) the space is color-coded for that side and it contains no enemy units.
Eliminated (& Removed) If a leader or unit is specifically "eliminated," set it aside, out of play. Otherwise, whenever a leader or unit is removed from a space, place it in the Going Home box.
Enemy Athenian and Athenian Ally units are enemy to Sparta. Spartan and Spartan Ally units are enemy to Athens.
Expedition During an operation, an Expedition is the active leader and all activated SPs in the same space. An Expedition is also a Force, and usually also an Army.
Force A Force is all friendly units and/or leaders occupying a single space. An Army or Expedition is always a Force, but not vice versa.
Friendly Athenian units and Athenian Ally units are friendly to each other and to Athens. Spartan units and Spartan Ally units are friendly to each other and to Sparta.
Going Home Box All surviving SPs from the losing side in a battle are placed in this box on the map. See also Post-Combat Movement Table.
Home Space Athens is the "home space" for the Delian League; Sparta for the Peloponnesian League.
Neutral Any space not aligned with Athens or Sparta is neutral. Neutral spaces can be captured by either side to improve their strategic position. Certain "coalition" neutrals (Argos, Macedon, Syracuse and Persia) can become active and join one side or the other, bringing with them their own Forces [5.5.3].
Non-Player Side The side (either Athens or Sparta) under the control of the game system as represented by the appropriate Strategy Matrix. You conduct the non-player side's activities as dictated by the game system, but make no active decisions for it.
Objective An objective space is designated at the start of each operation. An Expedition must eventually reach its objective.
Operation During the Operations Phase [5.0], an operation consists of a leader activating units—called an Expedition—and moving them to an objective space.
Player Side The side (either Athens or Sparta) directly controlled by you.
Post-Combat Movement Table During the Going Home segment of both the Operations Phase and Combat Phase [5.4, 6.4], units in the Going Home box are replaced on the map according to the priorities on the Post-Combat Movement Table (found on one of the player aids), based on the unit's type and nationality.
Ravage As an Expedition moves toward its objective it can ravage enemy spaces as it enters them [5.8].
Rebellion A Delian League space that rebels [5.4] immediately becomes friendly to the Peloponnesian League, and vice versa. A neutral space that rebels becomes friendly to the first side to enter it.
Strategy Confidence Index (SCI) The SCI measures how successful a side's conduct of the war has been during the turn. An SCI can never exceed 6 or fall below negative 6. At the end of each turn, the SCI value affects several game functions [9.0].
Strategy Matrix The strategy matrices determine the non-player side's strategy [4.1], operation objective [5.0], and Expedition size required to capture that objective. Each side's matrix is also used to record the size of its Treasury, its Bellicosity, and its SCI.
Treasury Each side's money—represented by "talents"—is tracked by using the "000" (thousands) and "00" (hundreds) markers on the Treasury Track. If a Treasury contains more than 10,000 talents, flip the 000 marker to its +10,000 side. If a deduction or addition of 50 talents needs to be recorded, flip the 00 marker to its +50 side.
Zone of Influence (ZOI) Every Force projects a ZOI into one or more spaces, depending on its unit composition (all cumulative):
- Hoplite (only): its own space.
- if Cavalry is present: its own space and each adjacent space connected by a Land or Combined LOC.
- if Naval is present: its own space and every space within 2 contiguous Naval and/or Combined LOCs.
Examples—Assume there is a Force at space "A" on a small map with adjacent spaces B through G:
If the Force consisted solely of Hoplite SPs, its ZOI would include space A only.
If the Force contained Cavalry SPs but no Naval SPs, its ZOI would include spaces A, C, E, F and G.
If the Force contained Naval SPs but no Cavalry SPs, its ZOI would include spaces A, B, C, D and G.
If the Force contained both Naval and Cavalry SPs, its ZOI would include all lettered spaces.
Peloponnesian War—Campaign Game Setup
To set up the Peloponnesian War Campaign Game scenario, follow the procedure outlined below. You can find additional scenarios on pages 2-15 of the Playbook.
Board—Place the board in front of you on the table.
A. Player Aids—Array each Strategy Matrix in a prominent position within easy reach. Ready the other player aids for reference during play.
B. Markers—Place the Game Turn marker on the "1" space of the Game Turn track.
C. Place all three VP markers on their associated zero spaces of the Victory Points track.
Alternately, you can keep track of your VP total by using the record sheets provided.
D. Place the two Athenian (green) Treasury markers on the Athenian Strategy Matrix's Treasury Track to indicate a starting sum of 4500 talents (put the "000" marker in the "4" column and the "00" marker in the "5" column). Similarly, on the Spartan Treasury Track, indicate a starting sum of 3000 talents using the red Treasury markers.
E. Place each side's SCI marker on the "0" space of their Matrix's Strategic Confidence Index track.
F. Place each side's Bellicosity marker on the "10" space of their Matrix's Bellicosity Track.
G. Place the red Strategy marker on the Attack Athens space of the Spartan Strategy Matrix.
Set aside the green Athenian Strategy marker for now.
H. Place a Rebellion marker in the Potidaea space of the map.
Your Starting Forces—Place the following (green) Delian League pieces in the indicated spaces on the map. Hoplite, Cavalry and Naval counts indicate how many SPs of that type will set up in the given location. Allied units are denoted by "(A)" preceding the unit type.
If this is your first time playing the game, we recommend that after setting up you follow along with the Example of Play starting on page 16 of the Playbook.
I. Athens: Pericles, 6 Hoplite, 1 Cavalry.
J. Piraeus: 8 Naval.
K. Naupactus: 1 Naval.
L. Corcyra: 3 (A)Naval, 1 (A)Hoplite.
M. Chios: 2 (A)Naval, 1 (A)Hoplite.
N. Larisa: 5 (A)Cavalry, 2 (A)Hoplite.
O. Pela: 1 (A)Cavalry.
P. Amphipolis: 1 (A)Hoplite.
Q. Potidaea: Phormio, 2 Hoplite, 3 Naval and 1 (A)Cavalry—place these on top of the Rebellion marker.
Phormio's Army is considered to be besieging Potidaea, which had recently gone into rebellion.
The Non-Player Side's Starting Forces—Place the following (red) Peloponnesian League pieces in the indicated spaces on the map.
R. Sparta: Archidamus, the Home Guard, 7 Hoplite, 1 Cavalry.
S. Corinth: 5 (A)Hoplite, 5 (A)Naval.
T. Thebes: 5 (A)Hoplite, 4 (A)Cavalry.
U. Potidaea: 1 (A)Hoplite—place it underneath the Rebellion marker.
V. Available Leaders—Place all remaining Campaign Game Athenian leader counters (those without a vertical yellow or black band) in one draw cup, and the remaining Spartan leaders (again, without a yellow or black band) in the other.
W. Ready the dice. Set aside all other pieces for now.
Begin Play—Begin the game with the Spartan initial operation [see 5.2] led by Archidamus.
Historically, Athens' initial operation was to send Phormio and the force with him to besiege Potidea. The cost of the operation has already been deducted from the Athenian treasury.
Post-Combat Movement Table
During the Going Home Segment of both the Operations and Combat Phases, units (not leaders) in the Going Home box are replaced on the map based on the priorities in the table below (leaders remain until the end of the turn [9.4]). The table is also used for the placement of newly constructed units [8.2].
Procedure Segregate the SPs in the Going Home box by both unit type (Hoplite, Cavalry or Naval) and by nationality (Athens, Athenian Ally, Sparta or Spartan Ally). Based on the priorities in the Remove To column (highest priority at the top; lowest priority at the bottom), place the SPs into the indicated spaces. If a coalition neutral is active it automatically takes the highest priority.
Whenever a priority can't be met (often due to capture or rebellion), proceed to the next priority. If it is the last or only priority for that SP type and nationality, place those SPs into their friendly home space. However, if the priority indicates that those SPs are to be divided between two spaces on a 50%-50% basis and only one of those spaces has been captured or in rebellion, place all of those SPs into the other space.
| SP Type | SP Nationality | Remove To (priority order) | Active Neutrals (Argos, Syracuse, Macedon and Persia) |
|---|---|---|---|
| Hoplite | Athenian | Athens | |
| Hoplite | Athenian Ally | 1 to Amphipolis; 2 to Larisa; 50% of remainder to each of Corcyra and Chios | If Argos is an Athenian ally, 4 Allied SPs are sent to Argos after the first SP is sent to Amphipolis. Remaining SPs are apportioned normally. If Chios is captured or in rebellion, the indicated SPs go to Samos instead [see 6.9]. |
| Hoplite | Spartan | Sparta | |
| Hoplite | Spartan Ally | 50% to each of Corinth and Thebes | If Syracuse is a Spartan ally, place SPs there until 2 are present. Remaining SPs are apportioned normally. |
| Cavalry | Athenian | Athens | |
1. Determining Victory
1.1 Victory Points Track
Throughout the game you will keep track of your victory point total by using the "VP x1," "VP x10" and "VP x100" markers on the Victory Points track that runs along the left edge of the board.
1.2 Gaining & Losing Victory Points
Win Battle/Siege—Whenever your side wins a battle or conducts a successful siege, you gain 10 victory points.
Lose Battle/Siege—Whenever your side loses a battle or loses a friendly space due to a siege by the non-player side, you lose 15 victory points.
Surrender—If a scenario ends due to surrender [9.2], you receive victory points equal to 200 divided by the game turn number in which the surrender took place (round fractions up).
Miscellaneous—Some scenarios in the Playbook may award victory points for meeting certain criteria.
1.3 Endgame
1.3.1 Campaign Game—The Peloponnesian War Campaign Game scenario ends
- at the conclusion of turn 10, or
- when one side surrenders [9.2],
whichever occurs first. At the end of the game, if your victory point total is greater than 150, or if either side surrendered before the end of turn 3, you win a decisive victory.
Otherwise you lose hegemony to Thebes or Persia in the near future.
1.3.2 Non-Campaign Game Scenarios—Victory conditions for other scenarios can be found below as well as in the first section of the Playbook.
1.4 Archidamian War Scenario
The setup and rules for this foreshortened scenario are identical to that of the Campaign Game with one change—rule 1.3.1, above, is ignored and instead the game ends immediately when: a) you switch from the Spartan side to the Athenian side (remember, you begin as the Athenian); or b) an armistice occurs; or c) one side surrenders; or d) turn 3 is complete.
At the end of the game, if your victory point total is 40 or more, you win; otherwise, you lose.
2. Sequence of Play
Each turn is conducted according to the sequence shown below, which must be followed in its entirety and in the order given. Phases and Segments are each assigned an identifying rule number for ease of reference. They are explained in detail, in sequence order, on the pages that follow.
Note that some segments within the sequence are comprised of a number of steps—Continuing Operations, for example—which are undertaken, in order, several times per turn.
Political Phase [3.0] (not conducted on the first turn)
- Side Determination Segment [3.1]
- Event Segment [3.2]
- Delian League Rebellion Segment [3.3]
- Leader Selection Segment [3.4]
Strategic Planning Phase [4.0] (not conducted on the first turn)
- Strategy Determination Segment [4.1]
- Confidence Reset Segment [4.2]
Operations Phase [5.0]
- Player Side Initial Operation Segment [5.1]
- Non-Player Side Initial Operation Segment [5.2]
- Continuing Operations Segment [5.3]
- Going Home Segment [5.4]
Combat Phase [6.0]
- Siege Determination Segment [6.1]
- Battle Resolution Segment [6.2]
- Siege Resolution Segment [6.3]
- Going Home Segment [6.4]
Rebellion Phase [7.0]
- Continued Rebellion Segment [7.1]
- Rebellion Expansion Segment [7.2]
- Helot Rebellion Segment [7.3]
Administration Phase [8.0]
- Revenue Collection Segment [8.1]
- Unit Construction Segment [8.2]
Armistice & Surrender Phase [9.0]
- Bellicosity Adjustment Segment [9.1]
- Surrender Determination Segment [9.2]
- Armistice Determination Segment [9.3]
- End of Turn Segment [9.4]
3. Political Phase
Note: This phase is always skipped on the first turn.
3.1 Side Determination
During this segment, if the player side's SCI is zero or higher, you must attempt to change sides. If so, roll a die and add the SCI value to the result. If the modified result is 6 or greater, you switch sides (taking control of the opposing League). Any other result has no effect.
3.2 Event
During this segment, roll two dice, add them together, then reference the result on the Event Table [see player aid] for the current turn. If the Event is impossible to implement given the current game state, roll again until a viable Event is attained. Implement the Event immediately. If the Event calls for a side's Bellicosity to be reduced, flip its Bellicosity marker to its "-2" side.
This reduction will take effect in the upcoming Armistice & Surrender Phase.
3.3 Delian League Rebellion
During this segment, if:
- the Athenian SCI is zero or less, or
- the Delian League lost 4 or more Naval SPs the previous turn,
a Delian League Rebellion occurs. Otherwise, there is no rebellion.
If a rebellion occurs, execute the "8" Event on the Event Table. Rebellion can never occur in, or spread to, a space occupied by a friendly Force. If a friendly-occupied space is generated, reroll until a viable space is attained.
Note that it is possible for the "Oligarchic Rebellions in the Delian League" Event to occur both during the Event segment and again during this segment.
3.4 Leader Selection
During this segment, each side randomly draws a leader from its draw cup. Place the Spartan leader in Sparta and the Athenian leader in Athens. These leaders will lead their respective side's first operation [5.1, 5.2] during the ensuing Operations Phase.
3.4.1 Nicias If Nicias is in play, flip the Game Turn marker to its "Nicias +1" side.
This may become important if an armistice is declared later in the turn.
4. Strategic Planning Phase
Note: This phase is always skipped on the first turn.
4.1 Strategy Determination
During this segment, determine the type of strategy that the non-player side will pursue this turn.
- If the non-player side's SCI value is positive and you did not switch sides this turn, follow the same non-player strategy as last turn.
- Otherwise, determine a new non-player strategy by rolling a die and adding to it the Strategy Rating of the non-player leader occupying its home space. Find this modified result on the appropriate Strategy Matrix and place the Strategy marker in the matching strategy box.
A side cannot use the Attack Sparta or Attack Athens strategy if:
- the opposing side has captured hostages [6.6] at any point in the game, and
- no armistice [9.3] has yet occurred.
If the non-player strategy would violate this rule, re-roll until a viable strategy is achieved.
4.1.1 Alcibiades If Alcibiades is in play on the Spartan or Persian side (possible with an Event), add 1 to the Spartan leader's Strategy Rating.
4.1.2 Non-Player Side Defensive Strategy At the beginning of each non-player operation, if any of the Conditions for Defensive Strategy listed at the top of the Strategy Matrix apply, the non-player side must conduct an operation according to that condition. Once all the defensive strategy requirements are met and another operation is to be conducted, the non-player operations revert to the predetermined strategy.
Note that changing circumstances may dictate that the non-player side reverts to a defensive strategy later in the course of the Operations Phase.
4.2 Confidence Reset
During this segment, reset each side's SCI to zero.
5. Operations Phase
General Rule—The Operations Phase is conducted as a series of operations, beginning with your side's initial operation [5.1], followed by the non-player side's initial operation [5.2], then alternating back and forth one operation at a time in "continuing" operations [5.3]. Instead of conducting a continuing operation a side could pass—passing can be mandatory or voluntary [5.3.2]. If a side passes it cannot conduct further operations that turn. Once both sides pass, operations for the turn are over.
5.1 Player Side Initial Operation
During this segment, you conduct the first operation of the turn by performing the following activities in the order given:
-
Designate an objective space by placing the Operation Objective marker there.
-
Designate the operation's "Expedition" leader. The chosen leader must be in your side's home space (Athens or Sparta).
-
Move your Expedition leader by the shortest route to Assembly spaces [5.1.1-5.1.6] to increase the size of the Expedition. Add any number of SPs in each Assembly space to the Expedition by paying talents from your side's Treasury to activate them [5.1.5]. Once activated, SPs are part of the Expedition and are moved with it to the next Assembly space, until the desired Expedition is built.
An Assembly space may be vistited multiple times in order to activate additional SPs there.
-
The final Expedition is moved by the shortest route to the designated objective, where it ends its movement and is deactivated. Every enemy (not neutral) space entered during this move might be ravaged [5.8].
5.1.1 Building and Moving an Expedition Units can move only when activated by, and stacked with, a friendly leader: this is termed an "Expedition." An Expedition can move an unlimited number of spaces.
When an Expedition leader finds himself in an Assembly space (including the starting home space), he can add any number of SPs to his Expedition by paying their activation costs [5.1.5].
Movement Rules & Restrictions:
-
Only land units can move along Land LOCs.
-
Only naval units can move along Naval LOCs, though each Naval SP may carry one land SP across a Naval LOC [5.1.4].
-
Any type of unit can move along Combined LOCs.
-
Leaders can move along any type of LOC.
-
The Spartan Home Guard unit cannot leave Sparta.
-
An Expedition may move in and out of spaces containing an enemy Force (exception: see 5.1.6), fortress or ZOI, though it is subject to interception [5.6] when doing so.
And if successfully intercepted, an Expedition may have to fight and win a battle in order to continue moving.
-
An Expedition always follows the shortest legal route (depending on its composition) when moving to an objective or Assembly space. If more than one legal path is available, determine randomly which path it will take.
An Expedition cannot take a longer path to avoid an enemy Force, for example.
Two Notable Exceptions—
- Neither side can use the Syracuse or Argos space to determine the shortest legal route to another space if Syracuse or Argos, respectively, is still neutral [5.5.3].
- Neither side can enter Naupactus or Byzantium, or use them to determine the shortest legal route to another space, unless that side controls the space or it is the objective space.
5.1.2 Corinthian Isthmus Naval units can move across the Isthmus of Corinth (between Corinth and Cenchrae) if the moving side controls both spaces. Naval ZOIs never extend across this LOC, however, even though it is counted when determining the shortest possible route for movement purposes.
Any Force in Corinth containing at least one land unit automatically intercepts [5.6] an Expedition entering Cenchrae, and vice versa.
5.1.3 Cape Taenarum to Syracuse A player-side (only) Expedition can move directly from Syracuse to Cape Taenarum, and vice versa, as if it were traveling along a Naval LOC. Before entering the other space, however, roll a die:
1-4: The Expedition arrives in the other space safely. 5-6: A violent storm eliminates all units in the Expedition; place its leader in the Going Home box.
5.1.4 Naval Transport An Expedition may move along a Naval LOC as long as the total number of land SPs in the Expedition is less than or equal to the total number of naval SPs.
In other words, each naval SP is able to ferry one land SP.
If an Expedition has more land SPs than naval SPs, it cannot use Naval LOCs for movement nor can it use Naval LOCs for assessing the shortest possible route to its next destination.
Insufficient Portage If an Expedition fights a skirmish [5.7], is left with fewer naval SPs than land SPs, and the only possible route to its objective must still cross at least one Naval LOC (that is, no Combined LOCs are available), the excess land SPs are left in the last space along the route that they can enter so that the remaining Expedition can continue moving toward the objective.
Remember that Combined LOCs allow for both types of movement, so ignore the naval-to-land SP ratio when an Expedition is able to cross them.
5.1.5 Activation Costs When building up an Expedition in an Assembly space, pay an activation cost the instant the active leader activates an SP. Each land SP costs 200 talents to activate; each naval SP 400 talents.
There is no refund if an activated SP is later eliminated, removed to the Going Home box, or left behind.
The non-player side's total activation costs should be calculated at the beginning of its operation (before its leader begins moving) to determine if it is even feasible to assemble an Expedition of the required size, but the actual expenditure occurs only at the moment of activation.
Athenian Exception—The Athenian side cannot normally pay to activate units if it would cause its Treasury to drop below 1000 talents [see 8.1.6 for exceptions].
Spartan Exception—Spartan Hoplite and Spartan Cavalry SPs (not Spartan Allied) always cost 0 talents to activate.
Design Note: This rule reflects the unique social structure of the Spartan state, wherein a relatively small elite of citizens lived a life devoted to discipline and to the achievement of prowess in military pursuits. They were fed and maintained economically by the Helots—or peasantry—who, like medieval serfs, enjoyed none of the rights of citizenship. This arrangement allowed the Spartans to assemble their army without undergoing the expense or economic disruption that inevitably occurred when the other Greek city-states mobilized their forces.
5.1.6 Leaders Moving Alone A leader moving alone cannot enter enemy-occupied spaces, and cannot enter an enemy-colored space unless it is an Assembly space.
If a leader moving alone is intercepted [5.6], he is immediately removed and placed in the Going Home box (there's no skirmish). The operation is canceled with no further effect.
If a leader loses the last SP from his Expedition, he is immediately removed and placed in the Going Home box, even if other friendly but unactivated SPs remain in his space.
The leader lost his protective forces before being able to link up with the new forces there.
5.2 Non-Player Side Initial Operation
At the conclusion of your initial operation each turn, the non-player side conducts its initial operation. The leader occupying the non-player side's home space is always this operation's Expedition leader. Referring to the appropriate Strategy Matrix, conduct this initial operation by performing the following activities in the order given.
-
Determine if the non-player side must employ a Defensive Strategy. If any of the conditions apply, assign the objective given for that condition. More than one condition or objective may apply. If so, conduct an operation for the highest priority condition that applies—highest priority being at the top of the list; lowest priority at the bottom.
Example: At the beginning of the non-player side's initial operation, an Athenian Force occupies the Argos space (within 2 spaces of Sparta), and another Athenian Force occupies Thebes. Both conditions dictate a Spartan Defensive Strategy but the Athenian Force at Argos takes priority, therefore an Expedition of 10 Hoplites and 1 Cavalry must conduct an operation against it.
-
If conditions for a Defensive Strategy apply, skip this step and proceed to step 3. Otherwise, determine the operation's objective based on the non-player side's current strategy as follows:
a. If the current strategy is not Attack Athens or Attack Sparta, roll the green die. In the blue box below the current strategy, the die result will give you the name of an area on the map. b. Roll the red die. In the associated red box, the die result will give you the name of the space that will be the objective. c. If the resulting objective space is controlled by the non-player side, repeat steps a. and b. d. If the non-player side's strategy is Cause Rebellion [5.4], and the resulting objective space is
- occupied by an enemy Force, or
- an enemy coalition space, or
- an enemy home space,
repeat steps a. and b.
Once the non-player side has a viable objective, proceed to step 3.
Example: The Spartans' current strategy is Attack Athenian Ally. In step 2a the green die is a '2,' indicating that the operation will be directed against a space in Ionia. In step 2b the red die is a '4.' Consulting the red "Ionia" box, the objective space will be Erythrae.
If the Spartans' current strategy was instead Attack Athens, the green die would not have been rolled and the red '4' would have assigned Panactum as the objective.
-
Determine the non-player side's required Expedition size. If a Defensive Strategy is in effect, its condition dictates the size of the Expedition to be assembled. Otherwise, the size and composition of the Expedition to be assembled varies depending upon whether the objective space is a coastal, island, or land space, indicated by the letter —
5.2.1 Non-Player Expedition Building Priorities When a non-player Expedition is being assembled, certain restrictions apply to both the choice of assembly spaces and to the number of SPs that may be activated. Use common sense to resolve unusual situations in a manner consistent with the intentions stated below.
Critical Note—Units previously activated during a turn are not available to be activated for further operations that turn.
Canting those units at a 45-degree angle is a good reminder.
When assembling a non-player Expedition, adhere to the following priority scheme:
-
Activate the maximum number of SPs both required and allowed from the home space before proceeding to other Assembly spaces.
-
Activate SPs in Assembly spaces closest to the home space before moving to more distant assembly spaces.
-
Do not activate the last SP of a particular type (Hoplite, Cavalry, or Naval) in a space unless it cannot be avoided to assemble the Expedition required for the operation.
-
Do not activate the last SP (of any type) in an Assembly space unless it cannot be avoided to assemble the required Expedition. If unavoidable, denude all possible friendly-colored spaces first; enemy-colored spaces (captured in previous turns) last.
Remember: The removal of the last friendly SP from an enemy-colored space will cause control of the space to revert back to its original owner.
5.2.2 Non-Player Movement Restrictions When computing the shortest legal route to a space, a non-player Expedition must ignore the Argos or Syracuse spaces if Argos or Syracuse, respectively, are still neutral [5.5.3].
5.3 Continuing Operations
At the conclusion of the non-player side's initial operation each turn, subsequent operations may follow. Beginning with you, each side alternates taking one operation at a time until both sides pass. Each continuing operation follows all rules and restrictions set out in rules 5.1 and 5.2—as appropriate to the side—except as outlined below.
5.3.1 Auguries At the start of every continuing operation, the acting side must consult the gods to determine if the auguries favor the enterprise. Conduct an "Auguries" check by rolling a die and adding one of the following two modifiers:
- +1 if this is a non-player side operation;
-
- half the number of player-side leaders on the map (including any in the Going Home box), rounded down, if this is a player-side operation.
1-5: The operation proceeds as normal. If the active side's home space does not contain a friendly leader, draw a new one to lead the operation, placing him in the home space.
For example, since Pericles begins the Campaign Game scenario already set up in Athens, do not draw a new leader as he will lead that side's first continuing operation.
6+: The operation is canceled and the side must pass instead.
Critical Note—Units previously activated during a turn are not available to be activated for further operations that turn.
Canting those units at a 45-degree angle is a good reminder.
5.3.2 Passing During the Continuing Operations Segment, you as the player-side may always choose to pass instead of conducting another operation. Otherwise, either side must pass if:
- A modified Auguries roll is '6+.'
- No friendly leaders are available in its draw cup.
- There are insufficient unactivated units available. This could also happen during the non-player side's initial operation.
- There are insufficient funds available for activation of units.
- Paying for the operation would violate the Athenian Emergency Fund rule [8.1.6].
Once a side has passed it cannot conduct further operations that turn.
5.4 Cause Rebellion Strategy
You may voluntarily choose to designate any of your operations as a Cause Rebellion strategy. The non-player side will have had a Cause Rebellion strategy assigned to it [4.1].
A Cause Rebellion operation is treated like any other operation except that the active side must determine if the objective space rebels. The chosen objective for a Cause Rebellion cannot have an enemy Force within it nor can it be an enemy coalition space or the enemy home space.
Note: Coalition spaces can only go into rebellion via Event or Rebellion Expansion [7.2] so long as they are not occupied by a friendly Force.
Exception—The Argos, Syracuse and Pela spaces cannot be the objective of a Cause Rebellion operation if Argos, Syracuse and Macedon, respectively, are still neutral [5.5]; but other neutral spaces can.
Cause Rebellion Procedure During a Cause Rebellion operation, after designating an objective but prior to assembling an Expedition, pay 100 talents out of that side's Treasury and roll a die, adding 2 to the roll if this is a non-player side operation:
1-5: Rebellion fails. The operation is immediately canceled with no further effect. (This does not count as a pass.) 6-8: Rebellion succeeds. Place a Rebellion marker in the objective space and the operation continues as normal.
Remember: If the objective space rebels, it is now friendly to the active Expedition's side.
5.5 Neutrals
5.5.1 Neutral Spaces & Movement If an Expedition enters a neutral space that is not its objective, it continues moving without ravaging the space, though interception [5.6], skirmishes [5.7], and battles [6.0] can still occur.
5.5.2 Neutral Spaces & Rebellion If a neutral space is in rebellion, it becomes friendly to whichever side enters it first (with the space automatically captured).
If an Expedition enters a neutral objective space that is not in rebellion, the space must be captured; by siege if a fortress is present.
5.5.3 Coalition Neutrals Sometimes a scenario will assign certain neutral spaces [5.5.3.1-5.5.3.4] as actively allied with one side or the other. These spaces can also begin a game neutral with the possibility of later becoming active as the result of aggression or an Event.
Macedon, Syracuse, Argos and Persia are termed "coalition" neutrals. When a coalition neutral becomes active, immediately place its Allied SPs on the map as instructed below or in the scenario special rules. Other neutral spaces have no forces associated with them. Coalition spaces are friendly to the side they join. Once active, if an enemy unit occupies Syracuse, Argos or Pela, that space is ignored for Post-Combat Movement purposes [5.9, 6.4] until no longer occupied.
5.5.3.1 Macedon Macedon (the Pela and Macedonia spaces) begins the Campaign Game as an Athenian ally. In any scenario, once it is active Macedon will remain allied with that same side unless an Event changes its allegiance. In non-Campaign Game scenarios, until Macedon becomes an active ally, Pela cannot be the objective of a Cause Rebellion strategy [5.4].
5.5.3.2 Syracuse Until Syracuse becomes an active ally:
- Spartan units cannot enter the Syracuse space.
- The Syracuse space cannot be counted for shortest route calculation.
- The Syracuse space cannot be the objective of a Cause Rebellion strategy [5.4].
If Athens declares the Syracuse space as an objective, Syracuse immediately becomes an active ally of Sparta. When Syracuse becomes active, immediately place 2 (A)Hoplite, 2 (A)Cavalry and 2 (A)Naval in the Syracuse space.
5.5.3.3 Argos Until Argos becomes an active ally:
- Athenian units cannot enter the Argos space.
- The Argos space cannot be counted for shortest route calculation.
- The Argos space cannot be the objective of a Cause Rebellion strategy [5.4].
If Sparta declares the Argos space as an objective, Argos immediately becomes an active ally of Athens. When Argos becomes active, place 4 (A)Hoplite in the Argos space.
5.5.3.4 Persia Persia (the Sardis space) can only ever become active due to an Event roll of "5." Persia has no initial forces. Sardis cannot be designated an objective space until Persia is active.
5.6 Interception
The mere presence of an enemy Force presents no obstacle to the movement of an assembled Expedition. In other words, an Expedition Army can move through a space occupied by an enemy Force of any size. An enemy Force impedes an Expedition's movement only if the Force conducts a successful interception against it. Leaders moving alone can also be intercepted prior to acquiring a protective Army.
5.6.1 General Rules Interception is mandatory for both sides. An interception attempt must be made immediately whenever an Expedition (remember: this includes a leader moving alone) enters a space that is within an enemy ZOI.
An Expedition may be intercepted an unlimited number of times during the course of its operation, but never more than once each time it enters a space. A Force can intercept any number of times during a turn, and can do so whether or not it had been previously activated that turn. If two or more enemy Forces are eligible to intercept, determine randomly which Force will make the attempt.
Enemy Forces never coordinate or combine their strengths.
An interception is considered to occur in the space entered by the moving Expedition, though the intercepting Force does not physically leave the space it occupies.
5.6.2 Interception Procedure To attempt an interception, roll a die:
1-3: The interception fails. 4-6: The interception succeeds.
Failed Interception—If an interception attempt fails, the Expedition continues moving (if not already at its objective).
Successful Interception— If an interception attempt succeeds against a leader moving alone, remove him to the Going Home box; the operation is canceled with no further effect.
If an interception attempt succeeds against an Expedition containing one or more units, perform an immediate skirmish [5.7.1] and possible follow-on battle [5.7.2], the outcomes of which will determine whether the Expedition may continue with its operation.
5.6.3 Assembly Space Interception Interception in an Assembly space occurs before the active leader may activate any SPs in that space. Unactivated units there cannot be taken as skirmish losses [5.7.1] and do not help determine if the skirmish will turn into a battle [5.7.2].
5.7 Skirmishes
5.7.1 Skirmish Procedure A successful interception against an Expedition Army (not a leader moving alone) results in a skirmish. In a skirmish, roll a die for each side. If the result is "1," eliminate 1 participating SP on that side:
- If the Expedition occupies a Coastal or Land space, the loss must come from a Hoplite unit if possible; if not, a Cavalry unit; if not, a Naval unit.
- If the Expedition occupies an Island space, the loss must come from a Naval unit if possible; if not, a Cavalry unit; if not, a Hoplite unit.
5.7.2 Battle Check A skirmish then results in an immediate battle if any of the following conditions apply:
- The sum total of both skirmish rolls was 11 or greater; or
- The space is Land or Coastal, the sum total of participating land SPs (belonging to both sides) is 8 or greater, and at least half of those SPs belong to the intercepting side; or
- The space is Island or Coastal, the sum total of participating naval SPs (belonging to both sides) is 8 or greater, and at least half of those SPs belong to the intercepting side.
If no battle occurs, the Expedition continues with its operation.
If a battle occurs, see 6.2 Battle Resolution. If the Expedition wins the ensuing battle, it continues with its operation. If the Expedition loses the ensuing battle, its leader and units are placed in the Going Home box and the operation is canceled with no further effect.
5.8 Ravaging
Whenever an Expedition enters an enemy-controlled space while moving toward its objective (not toward an Assembly space), place a Ravaged marker in that space unless:
- it is occupied by an enemy Force; or
- a successful interception is made into the space.
5.9 Going Home
During this segment, relocate all units (not leaders) in the Going Home box to their home and coalition spaces according to the Post-Combat Movement Table [see player aid].
6. Combat Phase
During every Combat Phase there are four segments which must be conducted one at a time in the following order:
- Siege Determination Segment
- Battle Resolution Segment
- Siege Resolution Segment
- Going Home Segment
6.1 Siege Determination
The purpose of this segment is to identify every siege situation on the map that will need to be resolved after battle resolution.
During this segment, examine every fortress space currently occupied by an Army that is enemy to that space. Place a Siege marker there if either of the following conditions apply:
- No opposing units are present—place a Siege marker underneath the Army.
- An opposing Force without a leader is present and your Army is at least 5 SPs larger than that opposing Force—place a Siege marker atop the opposing Force, then place your Army atop the Siege marker.
6.1.1 Long Wall of Athens During Siege Determination, in each of Athens and Piraeus the situation is automatically a siege if that space has been designated as an objective and is occupied by a Spartan Army unless there are at least 3 more Athenian land SPs there than Spartan land SPs. However, if the Athens space can trace a contiguous line of spaces not controlled by Peloponnesian League Forces to the Euxine LOC Source, the siege automatically fails. This line can be traced through a space even if a Spartan Army is besieging within it.
Long Wall ZOI—During the Combat Phase, Athenian Cavalry ZOIs do not extend out of Athens or Piraeus. No enemy ZOI of any type extends into Athens or Piraeus during any phase.
6.2 Battle Resolution
During this segment, all battles on the map are resolved in the following order:
- All home spaces, without Siege markers, occupied by units of both sides.
- All coalition spaces, without Siege markers, occupied by units of both sides.
- All other spaces, without Siege markers, occupied by units of both sides.
- All friendly ZOI spaces occupied by at least one enemy unit not under a Siege marker.
Note that a battle will not occur merely because opposing ZOIs overlap in a common space. A unit must actually be within the other side's ZOI.
Note also that a Force may be obliged to fight more than one battle in a single Combat Phase.
Battle is always mandatory. All units in a battle space participate in that battle. If there are multiple battles within one of the four categories above, determine the order of resolution randomly.
6.2.1 Determine Battle Type To resolve a battle, first determine what type of battle it will be, in the following order:
- Null Battle: If one side is exclusively naval units and the other exclusively land units, proceed with a null battle [6.2.2].
- Naval Battle: If both sides contain naval units, proceed with a naval battle [6.2.3].
- Land Battle: Otherwise, proceed with a land battle [6.2.4].
6.2.2 Conducting a Null Battle
-
If a null battle occurs and the opposing units occupy different spaces, both sides remain where they are with no further effect.
-
If a null battle occurs where units of opposing sides occupy the same neutral space, remove all naval SPs there to the Going Home box.
-
If a null battle occurs where an Army opposes a non-Army Force in the same non-neutral space, remove the Army to the Going Home box.
-
If a null battle occurs where Armies of opposing sides occupy the same non-neutral space, remove to the Going Home box the Army that is enemy to that space.
Remember that a space in rebellion is enemy to its original (friendly) controlling side.
If a null battle occurred as a result of an interception and skirmish, the moving Expedition continues with its operation.
6.2.3 Conducting a Naval Battle Roll one die for each side, modifying each result as follows (all cumulative):
- +2 to the Athenian side if it is comprised of at least half Athenian (not Allied) naval SPs.
- +X to the side with more naval SPs, where X equals the difference.
- +X to each side, where X equals its leader's Tactical Rating. If more than one leader is present on a side, use the lowest Tactical Rating.
The side with the higher modified roll wins [6.2.3.1]. In case of a tie, the side that contributed the highest positive (non-zero) Tactical Rating wins. If still a tie, the battle is a draw [6.2.3.2].
6.2.3.1 Won Naval Battle There is no effect on the winner. The loser must eliminate a number of its naval SPs equal to:
- the difference in the modified rolls, or
- the number of naval SPs on the winning side,
whichever is less.
Check for Combined Battle If the winner of a naval battle has a number of Hoplite SPs equal to or greater than the loser's Hoplite SPs (minimum 1), both surviving Forces immediately conduct a Land Battle [6.2.4].
Otherwise:
- All surviving SPs (land and naval) and leaders belonging to the losing side are placed in the Going Home box.
- Increase the winner's SCI by 1.
- Reduce the loser's SCI by 1 unless the winner began the battle with at least 3 more naval SPs than the loser had.
6.2.3.2 Drawn Naval Battle Each side must eliminate 1 naval SP unless both sides have only one naval SP present, in which case neither side loses any. The remainder of both Forces are then placed in the Going Home box.
6.2.4 Conducting a Land Battle First, if the battle is taking place in the Sparta space, draw a random Spartan leader (if still available in the cup, and even if one is already present) and place him in Sparta. Then roll one die for each side, modifying each result as follows (all cumulative):
- +2 to the Spartan roll if the battle is taking place in Sparta.
- +2 to the Spartan side if it is comprised of at least half Spartan (not Allied) Hoplite SPs.
- +1 to a side with more Cavalry SPs than the other.
- +X to the side with the most Hoplite SPs, where X equals the difference.
- +X to each side, where X equals its leader's Tactical Rating. If more than one leader is present on a side, use the lowest Tactical Rating.
The side with the higher modified roll wins [6.2.4.1]. In case of a tie, the side that contributed the highest positive (non-zero) Tactical Rating wins. If still a tie, the battle is a draw [6.2.4.2].
6.2.4.1 Won Land Battle There is no effect on the winner. The loser must eliminate a number of land SPs equal to:
- the difference in the modified rolls, or
- the number of Hoplite SPs on the winning side,
whichever is less. [See also 6.6 Hostages.]
Reduce these losses by 1 land SP for each cavalry SP the loser has in excess of the number of cavalry SPs on the winning side, to a minimum of 1 loss. Then:
- All surviving SPs (land and naval) and leaders belonging to the losing side are placed in the Going Home box.
- Increase the winner's SCI by 1.
- Reduce the loser's SCI by 1 unless the winner began the battle with at least 3 more Hoplite SPs than the loser had.
6.2.4.2 Drawn Land Battle Each side must eliminate 1 land SP unless both sides have only one land SP present, in which case neither side loses any. The remainder of both Forces are then placed in the Going Home box.
6.3 Siege Resolution
During this segment, first remove the Siege marker from any space that no longer contains a besieging Army. Then resolve a siege for each space still containing a Siege marker. Sieges are conducted in the following order:
- All home spaces.
- All coalition spaces.
- All other spaces.
If there are multiple sieges within one of the three categories above determine the order of resolution randomly.
Sieges are resolved as follows:
Besieged Advantage—If the besieged Force has more naval SPs than the besieging Army, the siege automatically fails:
- replace the Siege marker with a Ravaged marker (if not already present); then
- reduce the besieging side's SCI by 1 (non-player) or 2 (player).
Besieger Advantage—If the besieging Army has a number of naval SPs equal to or greater than that of the besieged Force, roll a die, adding the besieging leader's Tactical Rating, then subtracting 2 if the besieged space is Syracuse:
1-3: The siege fails:
- remove the besieging Army to the Going Home box; then
- replace the Siege marker with a Ravaged marker (if not already present); then
- reduce the besieging side's SCI by 1 (non-player) or 2 (player).
4-6: The siege succeeds:
-
eliminate the besieged Force; then
-
replace the Siege marker with a Ravaged marker (if not already present); then
-
reduce the besieged side's SCI by 1 unless the fortress was neutral or in rebellion; then
-
increase the besieging side's SCI by 1; then
-
increase the besieging side's Treasury by 300 talents.
Revenue from the sale of the enslaved population.
6.3.1 Syracuse If Syracuse is being besieged, subtract 2 from the besieging Army's siege roll.
6.4 Going Home
During this segment, for each Army still on the map, roll a die and add its leader's Strategic (not Tactical) Rating:
1-5: Leave 1 SP in the space and remove any remaining SPs and leaders to the Going Home box. In a Land or Coastal space, leave a Hoplite SP if possible; if not, a Cavalry SP; if not, a Naval SP. In an Island space, leave a Naval SP if possible; if not, leave either land SP. You must also leave a Spartan or Athenian SP rather than an Allied SP, if possible.
6+: Leave all SPs in place but remove the leader to the Going Home box.
Post-Combat Movement—Then relocate all units (not leaders) in the Going Home box to their home and coalition spaces according to the Post-Combat Movement Table [see player aid].
6.5 End of Combat
The Combat Phase ends when all of the following conditions apply:
- There are no Siege markers on the map.
- There are no leaders in any spaces on the map.
- No space is occupied by units of both sides.
- The Going Home box is empty of units (though leaders will likely be present).
6.6 Hostages
Acquiring—The winning side captures hostages in any land battle [6.2.4] in which any Athenian or Spartan (not Allied) Hoplite SPs were eliminated. When this occurs, place a Hostages marker on the Attack Athens or Attack Sparta strategy box of the opposing side's Strategy Matrix, if not already there.
Effect of Holding Hostages—
- If the player side has hostages, the non-player side cannot use the Attack Athens or Attack Sparta strategy.
- If the non-player side has hostages, you are prohibited from choosing the non-player side's home space, or any space adjacent to it, as an objective.
Example: If Athens wins a land battle and one or more Spartan Hoplite SPs are lost, then Sparta can no longer use the Attack Athens strategy until after an armistice occurs.
Removal—Whenever an armistice is declared [9.3], remove any Hostage markers from the Strategy Matrices.
6.7 Leaders in Battle
Leaders are never killed in battle unless the "Leader Death" Event was rolled that turn and its conditions are met. Otherwise, whenever a leader has his Army's last SP eliminated or removed, place the leader in the Going Home box.
At the end of the turn he will be placed back in the draw cup [9.4], available for the following turn.
6.8 Coalition Neutrals and Post-Combat Movement
When certain neutrals—Argos, Macedon and Syracuse—are active on a side, they gain precedence with regard to priorities on the Post-Combat Movement Table.
In other words, the post-combat movement requirements for these spaces preempt some of the usual post-combat priorities for Athenian Allied or Spartan Allied SPs.
Once these requirements have been met—that is, each neutral has the specified number of SPs in its space—no further SPs are sent and the normal post-combat priorities are in effect for all remaining Allied SPs.
Example: Before post-combat movement begins, two Spartan Allied Hoplite SPs are present in Syracuse. The Post-Combat Movement Table indicates that if Syracuse is a Spartan ally, the first two Spartan Allied Hoplite SPs are sent there. Since two already reside there, no more will be sent, and play proceeds to the next priority.
6.9 Chios and Samos as Coalition Spaces
If the Athenian Chios coalition space is in rebellion or is enemy-controlled, Samos becomes an Athenian coalition space. Athenian Allied SPs that would be placed at Chios during post-combat movement are placed at Samos instead.
If Both Chios and Samos are in rebellion and/or enemy-controlled, the regular post-combat movement rules apply, sending these forces to Piraeus.
If, at the end of any Rebellion Expansion Phase [7.0], Chios is once again a friendly Delian League space, all Athenian Allied Forces at Samos are removed and placed at Chios.
7. Rebellion Expansion Phase
This phase consists of three segments, which must be conducted one at a time in the order shown:
- Continued Rebellion Segment
- Rebellion Expansion Segment
- Helot Rebellion Segment
7.1 Continued Rebellion
During this segment, if a rebelling space is within the ZOI of a friendly unit (that is, a unit of the same color as the space itself) and that space is not within the ZOI of an enemy unit, remove the Rebellion marker.
The rebellion has been put down.
All other rebel spaces remain in rebellion.
7.2 Rebellion Expansion
During this segment, existing rebellion may spread to adjacent spaces that are friendly to the same League—Delian or Peloponnesian; never neutral. A rebellion can spread along any type of LOC.
To check for spread, roll a die for every space that:
- is adjacent to a space that began this segment in rebellion, and
- does not contain a friendly unit (that is, a unit of the same color as the rebellious space).
Add 2 to the roll if the space is within the ZOI of an enemy unit. If the modified result is 6 or greater, the space rebels: place a Rebellion marker there.
7.3 Helot Rebellion
During this segment check the following criteria in the order shown:
- If any of Pylos, Asine, Corone, Prasiae or Epidaurus Limera are controlled by Sparta, this segment ends with no effect—skip steps 2 and 3.
- If Pylos, Asine, Corone, Prasiae and Epidaurus Limera are all occupied by Delian League units and the Helot Rebellion marker is not on the map, a new Helot Rebellion occurs with the following immediate effects:
- Reduce Spartan Bellicosity by 2.
- Eliminate 2 Spartan Hoplites in Sparta.
- Reduce the Spartan revenue this turn by 500 talents.
- Place the Helot Rebellion marker near one of the spaces.
- Skip step 3.
- If Pylos, Asine, Corone, Prasiae and Epidaurus Limera are all occupied by Delian League units and the Helot Rebellion marker is on the map, the Helot Rebellion continues with the following immediate effects:
- Reduce Spartan Bellicosity by 2.
- Reduce the Spartan revenue this turn by 1000 talents.
7.3.1 Quashing the Rebellion If a Helot Rebellion is in effect and the Spartan side recaptures any of the five spaces listed above, remove the Helot Rebellion marker from the map.
8. Administrative Phase
This phase consists of two segments, which must be conducted one at a time in the order shown:
- Revenue Collection Segment
- SP Construction Segment
8.1 Revenue Collection
During this segment each side receives a fixed amount of revenue from its League:
- Athens receives 3500 talents.
- Sparta receives 2500 talents.
For each friendly-colored space that is ravaged, in rebellion, or enemy-controlled, reduce revenue gained by that side by 50 talents.
Net revenue gained is added to each side's Treasury.
8.1.1 Thebes & Corinth For each of Thebes or Corinth that is controlled by the Delian League, reduce Spartan revenue by an additional 200 talents (so 400 for both).
8.1.2 Sicilian Revenue If Syracuse is an active ally of Sparta and Athens does not control the Syracuse space, add 500 talents to the Spartan revenue.
If Delian League units control Syracuse and exert ZOIs into every space of Sicily, add 1000 talents to the Athenian revenue.
8.1.3 Athenian Sea LOC If Athens cannot trace a path free of enemy-controlled spaces from Athens to the Euxine LOC Source, deduct 1500 talents from its revenue.
8.1.4 Epidamnos LOC If a side controls Epidamnos and can trace a path free of enemy units from Epidamnos to its home space, add 1000 talents to that side's revenue.
8.1.5 Eisphora
When playing the Athenian side, you can levee the wealthier sections of your population by implementing direct taxation.
If you are currently playing the Athenian side and Athens, Piraeus, Panactum and Decelea are all free of Peloponnesian League units and none are ravaged, add 1000 talents to Athenian revenue.
Note that this benefit is only available for you, the player. The non-player side can never receive the 1000 talents from Eisphora.
8.1.6 Athenian Emergency Fund The Athenian side may never expend funds if it would cause its Treasury to drop below 1000 talents.
Exception—This restriction is ignored if either of Piraeus or Decelea is under enemy control, or if there are 10 or more Delian League spaces in rebellion.
8.2 SP Construction
During this segment:
- Your side may spend up to 600 talents constructing new SPs.
- The non-player side may only construct up to 3 new units of the same kind, and in the same number, as that which was lost during the turn. If more than 3 non-player SPs were eliminated, choose randomly to determine which will be rebuilt. Further, the non-player side's Treasury can never be reduced below 1000 talents due to SP construction.
Each SP costs 200 talents to construct, no matter its type. When constructed, place an SP on the map according to the Post-Combat Movement Table priorities.
9. Armistice & Surrender Phase
In this phase you evaluate how the events and activities of the foregoing game turn affected each side's determination to continue the war, measured as "Bellicosity." The greater the Bellicosity, the more determined the side is, and vice versa.
This phase consists of four segments, which must be conducted one at a time in the order shown:
- Bellicosity Adjustment Segment
- Surrender Determination Segment
- Armistice Determination Segment
- End of Turn Segment
9.1 Bellicosity Adjustment
In this segment, each side's Bellicosity is adjusted as follows:
- If a side's SCI is negative, subtract the value from that side's Bellicosity.
- If a side's SCI is positive, add half the value (rounded down) to that side's Bellicosity.
- Count the number of League and coalition spaces belonging to a side that are currently captured, ravaged, or in rebellion. Divide the count by 10, round down to the nearest whole number, and subtract this value from that side's Bellicosity.
Note that Bellicosity can also be reduced during the course of a turn due to a Helot Rebellion [7.3] or certain events [3.2]. If from an Event, you can remind yourself of this by flipping the Bellicosity marker over to its "-2" side. Flip it back to its front side after implementing the reduction.
9.2 Surrender Determination
During this segment, a side surrenders if:
- its home space is enemy-controlled; or
- its Bellicosity is 0.
When a side surrenders, the game ends. Victory points are totaled [1.2] to determine whether the player has won or lost the scenario [1.3].
9.3 Armistice Determination
During this segment, if each side meets either of the following conditions:
- a Bellicosity of 6 or less, or
- a Treasury below 1000 talents,
an armistice occurs. If so, roll a die, adding 1 if Nicias was an Athenian leader this turn, then divide the modified result by 2 (rounding up). The final result is the number of turns the armistice will last. An armistice can occur only once per game.
Armistice Effects
-
Remove all Athenian and Spartan SPs (not Allied SPs) occupying captured spaces to their home or coalition spaces according to the Post-Combat Movement Table. Allied units remain where they are. Spaces entirely vacated in this way revert to the control of their original owner (or revert to neutral).
-
Remove all Hostages markers from the board. Hostage restrictions on attacking enemy home spaces is lifted for the remainder of the game.
-
Roll one Event for each turn of the armistice. If an Event cannot occur due to the current game state, do not re-roll it.
-
All Rebellions remain in play, but do not spread (except possibly via Event). During Revenue Collection calculations, reduce a side's revenue for each space in Rebellion [8.1].
-
Calculate revenue for both sides but ignore ravaged spaces and the Eisphora [8.1.5]. Multiply the totals by the number of turns of the armistice, then adjust each side's Treasury accordingly.
-
Each side constructs up to 5 SPs, though in doing so a Treasury cannot drop below 1000 talents. Build whatever units you choose for the player side. The non-player side builds all naval SPs if Sparta, or all Hoplite SPs if Athens.
Design Note: This last sentence is not backwards and is quite intentional. After the Peace of Nicias, Sparta in particular discovered that the only way to win the war was to win the naval war. This rule has the non-player side make a war-winning choice. On the flip side, Athens needed to win a land war to defeat Sparta. Alcibiades' failed Battle of Mantinea campaign is what is being attempted here.
-
Reset both sides' Bellicosity to 10 minus the number of turns of war that were fought prior to the armistice.
9.4 End of Turn
If the game did not end [1.3, 9.2]:
- Remove all Ravaged markers from the map.
- Place all leaders in the Going Home box back into their draw cups.
- Advance the Game Turn marker 1 space.
- Begin the next turn.
Inventory
Your copy of Peloponnesian War should include:
- this Rulebook
- one Playbook
- one 22" x 34" Mounted Mapboard
- two 8" x 10" Mounted Strategy Matrix Boards
- two Counter Sheets
- two double-sided Player Aids
- Victory Point Record sheets
- two 6-sided dice
Note—You will also need to provide two opaque containers (such as clean, dry coffee mugs) to facilitate the random drawing of leaders throughout the game.
Index
A Activation 4
- Activation Costs 11
Administrative Phase 20 Armistice Determination 21 Army 4
- Building and Moving 10
Assembly Space 4 Auguries 12
B Battle Resolution 15
- Battle Type 16
Bellicosity 4 Bellicosity Adjustment 21
C Campaign Game Setup 6 Cause Rebellion Strategy 13 Chios and Samos 18 Coastal space 2, 17 Combat Phase 15 Combined LOC 2, 5 Confidence Reset 9 Continued Rebellion Determination 19 Continuing Operations 12
- Auguries 12
Control 4
D Defensive Strategy 9 Delian League Rebellion 9 Determining Victory 8
E Eliminated 4 End of Combat 18 End of Turn 21 Enemy 4 Event 9
F Force 4 Friendly 5
G Going Home 15, 17 Going Home Box 5
H Helot Rebellion Determination 19 Hostages 18
I Interception 14 Island space 2, 14, 17
L Land Battle 16 Land LOC 2 Land space 2, 14 Leaders 3
- Alcibiades 9
- in Battle 18
- Leader Selection 9
- Moving Alone 11
- Nicias 9
Line of Communication (LOC) 2 Long Wall of Athens 15
M Movement 10
- Cape Taenarum to Syracuse 10
- Corinthian Isthmus 10
- Naval Transport 11
N Naval Battle 16 Naval LOC 2, 10, 11 Neutrals 13
- and Post-Combat Movement 18
- Argos 14
- Coalition Neutrals 13
- Macedon 13
- & Movement 13
- Persia 14
- & Rebellion 13
- Syracuse 13
Non-Player Side 5
- Army Building Priorities 12
- Defensive Strategy 9
- Initial Operation 11
- Movement Restrictions 12
- Strategy Determination 9
Null Battle 16
O Objective 5 Operation 5 Operations Phase 10
- Activation Costs 11
- Non-Player Side Initial Operation 11
- Player Side Initial Operation 10
P Passing 13 Player Side 5
- Eisphora 20
- Initial Operation 10
- Side Determination 9
Political Phase 9 Post-Combat Movement 5, 13, 15, 17, 18, 20, 21
R Randomness 3 Ravage 5 Ravaging 15 Rebellion 5 Rebellion Expansion 19 Rebellion Expansion Phase 19 Revenue Collection 20
- Athenian Sea LOC 20
- Eisphora 20
- Epidamnos LOC 20
- Sicilian Revenue 20
- Thebes & Corinth 20
S Sequence of Play 8 Side Determination 9 Siege Determination 15 Siege Resolution 17
- Syracuse 17
Skirmishes 14
- Battle Check 14
SP Construction 20 Strategic Planning Phase 9 Strategy Confidence Index (SCI) 5 Strategy Determination 9 Strategy Matrix 5 Strength Points (SPs) 3 Surrender Determination 21
T Treasury 5
U Units 3
V Victory Points 8
Z Zone of Influence (ZOI) 5
Peloponnesian Gazetteer
Map grid reference for every named space on the board.
| Space | Grid # | Space | Grid # | Space | Grid # | Space | Grid # |
|---|---|---|---|---|---|---|---|
| Abdera | 5A | Cyzicus | 7A | Loryma | 7E | Ptleum | 3B |
| Abydos | 6A | Decelea | 4C | Macedonia | 2A | Pydna | 3A |
| Acragas | 1E | Delium | 4C | Magnesia | 3B | Pygela |