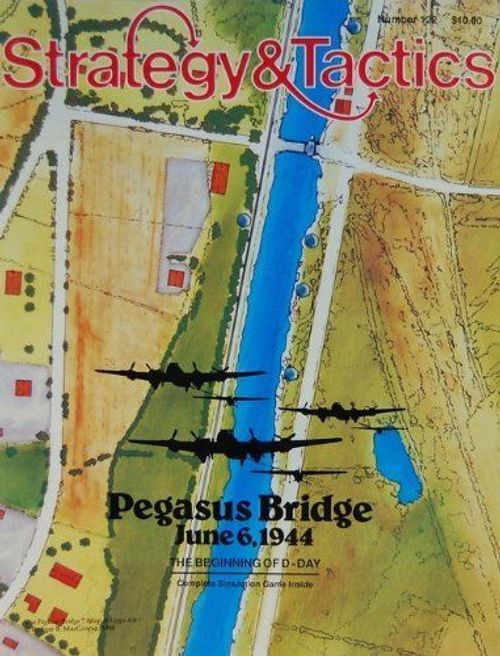
Pegasus Bridge: The Beginning of D-Day – June 6, 1944
Pegasus Bridge: The Beginning of D-Day – June 6, 1944 Rulebook
Table of Contents
Table of Contents
- 1.0 Introduction
- 2.0 Description
- 3.0 Sequence of Play
- 4.0 Glider Landing Phase
- 5.0 Land Movement
- 6.0 Fire Combat
- 7.0 Hand-to-Hand Combat
- 8.0 Bridge Demolition
- 9.0 Sappers
- 10.0 Suppression
- 11.0 Leaders
- 12.0 British Unit Breakdown
- 13.0 Reinforcements
- 14.0 Setup
- 15.0 German Garrison Restrictions
- 16.0 Victory Conditions
- 17.0 Scenarios
- Tables and Charts
- 18.0 Bibliography
- Errata
1.0 Introduction
Pegasus Bridge is a solitaire game of the British glider attack on the Benouville Bridge.
2.0 Description
Components: 200 die-cut counters, 1 rulebook, a 22" by 33" map. An opaque container and a six-sided die are also needed for game play and are not included.
[2.1] Game Map
The game map represents the area around the Benouville and Ranville bridges. It is divided into a series of areas for game purposes. Areas are connected by communication lines.
[2.2] Game Counters
Counter types: Leader (leader bonus, name, I.D. number); British infantry (front: unit size, leader name, I.D. number, movement, strength points; back: suppressed side); German infantry (front and suppressed back); Sappers; Anti-Tank Gun (and Destroyed side); Machine Gun (and Destroyed side); Tank (and Wrecked side); Mercedes Benz (and Wrecked side); Glider (and Landed side); Piat (and Unloaded side); Dummy marker; Prepared Positions (under construction / completed); Bunker (and Bunker Cleared); Bridge markers (Bridge Destroyed, Bridge Damaged); German Setup Chit; Numerical Counter; Bridge Wired marker; Game Turn marker.
3.0 Sequence of Play
Each game turn is divided into a series of phases during which specific actions occur. The following section is an outline of a game turn:
A. Glider Phase (First Turn Only) During this phase, glider movement and landings are conducted.
B. Suppression Removal Phase All suppressed German and British units are checked for suppression removal.
C. British Movement Phase
- British reinforcements are rolled for on turn 6.
- British units may move up to their full movement, prepare positions, conduct grenade attacks, and detonate or deactivate charges.
- German units may conduct opportunity fire on adjacent British units when the British units move.
D. German Movement Phase
- On game turn 4, German reinforcements are rolled for.
- All German reinforcements are moved onto the map.
- German units move, and British units may conduct opportunity fire.
E. British Fire Combat Phase Unsuppressed British units may now conduct small arms attacks, artillery attacks, and anti-tank attacks.
F. German Fire Combat Phase Unsuppressed German units may now conduct small arms attacks and tank attacks.
G. Hand-to-Hand Combat Phase British and German units in the same area now conduct hand-to-hand combat.
4.0 Glider Landing Phase
(Designers' Notes: During the assault, the six Horsa gliders approached their targets in two formations of three gliders each. The three assigned to the canal bridge maintained formation in good order right up to the landing. The lead glider, under the very able control of Jim Wallwork, slammed its nose into the barbed wire next to the bridge. The other formation was broken rather early, with one glider failing to arrive at all, while the others landed a distance from their target in a scattered condition.)
[4.1] Entry Area Selection
Gliders 1, 2, and 3 enter from the north side of the map, while gliders 4, 5, and 6 enter from the south side. Gliders 1 and 4 are considered the lead gliders.
If you choose the optional setup, you may change the initial deployment of gliders and the assignment of units to these gliders. Lead gliders must also be designated.
Each group of three gliders then is rolled for to determine which entry area is used. Each entry area lists the die roll needed to use that area as an entry point. If a die roll of six occurs, then one of the gliders is lost. Roll another die and check the following table:
Lost Glider Table
| Die Roll | Glider Lost |
|---|---|
| 1 or 2 | #1 or #4 |
| 3 or 4 | #2 or #5 |
| 5 or 6 | #3 or #6 |
The lost glider is removed from play. A maximum of 2 gliders can be lost in any one game.
[4.2] Glider Procedure
Once the entry areas have been decided, the following procedure is used:
- The lead gliders are placed in the designated entry area.
- A die is rolled and the lead glider is moved one area along the appropriate communication lines. On the next turn, the lead glider is again moved, and the next glider is placed on the area that the lead glider exited during the turn. On the third turn, the third glider is placed on the area the lead glider moved into on the first turn. Basically, the gliders move in a line.
- The second step is repeated until the gliders land. To land, the die roll must be the same as the landing die roll needed for the area entered. Each glider entering such an area lands even if a glider has already landed in the area. Breaking formation is the only exception (See step 4).
- The first time a player rolls a 6 in a landing area (triangle), the gliders in that group are said to break formation. Instead of landing, the gliders are rolled for individually and moved separately. Each of the two groups may break formation once.
- When a landing result occurs, the glider is flipped to its landed side. When all gliders have landed, each glider is checked to see if it crashed. On a modified die roll of 6 or greater, the glider crashes and the player rolls on the Crash Table. The only die roll modifier is a +1 for each glider in an area in addition to the first glider that landed in the area.
- The results list the number of strength points the unit has lost. The player must also check the Leader Casualty Table as well if any strength points are lost on the crash.
5.0 Land Movement
Movement is divided into a British Movement Phase followed by a German Movement Phase. Units in each phase move from area to area across connecting communication lines, paying movement points as they go.
[5.1] Movement Rates
British Movement Rates
- All British units: 4 movement points
German Movement Rates
- Infantry: 3 movement points
- Tanks: 3 movement points
- Car: slow = 3 m.p.; medium = 5 m.p.; fast = 7 m.p.
[5.2] Terrain Effects on Movement
The movement costs are as follows:
- Each area costs one movement point to enter.
- Each double communication line costs two movement points to enter.
- A unit may not cross a dash communications line. These are used only for fire combat purposes.
- An enemy-occupied area costs one extra movement point to enter.
- A bunker costs two movement points. (The bunker, not the area.)
- Each grenade attack costs one movement point.
- Placing a gammon bomb costs one movement point.
- To prepare a position costs four movement points.
[5.3] Movement Related Activities
British units may do other activities during movement, other than just moving. Each of these activities costs one or more movement points.
Grenade Attacks
Each grenade attack costs one movement point and may be made in the same area or in an adjacent area. Only British units may make grenade attacks, and they are limited to four attacks per unit. The British player keeps track of this on the Player Record Sheet.
When a grenade attack is made, the following procedure is used:
- Find the appropriate track on the Grenade Attack Table.
- Roll one die and apply these results:
- a. "-": no effect.
- b. 1, 2, etc.: number of strength points the German unit has lost.
- c. S: the German unit is suppressed and a Suppressed marker is placed on it.
- d. (H): Destroys a German tank if the tank is not stacked with German infantry units. If it is stacked with German infantry units, then the (H) result has no effect. (Designers' Notes: This is included to give the British a chance to lob that grenade into the open German Tank. The chances of success are slim but not impossible.)
- A number result also destroys a machine gun or A/T Gun.
Bunker Searches
The British are required to clear bunker areas for victory conditions. To do so use the following procedure:
- British unit must expend the required movement points to enter the area, plus two movement points for clearing the area. If the unit does not have enough movement points to clear, then the entire action must be done next turn.
- The player places a Bunker marker on the unit conducting the action. This means that the unit may not fire into an adjacent area during fire combat, nor may it conduct opportunity fire. It may not be fired upon from an adjacent area.
- To successfully clear an area, a die is rolled. On a result of 1-5, the area has been successfully cleared, and a Cleared Bunker Marker is placed on the area. On a die roll of 6, the clearing unit takes a loss of one strength point, but the bunker is still cleared. If a leader is present and a 6 is rolled, he should be checked for on the Leader Casualty Table.
- On a die roll of 1, the British unit has taken a German prisoner. A prisoner unit is placed in the area. To move a German prisoner unit, a British unit must be present. Together, they move as one unit with two movement points. German prisoner units left alone in an area at the end of a turn are removed from play. A British combat unit may move any number of German prisoner units.
Prepared Positions
A British unit may construct a prepared position. To do so, it costs four movement points. At the beginning of movement, a Preparing Position marker is placed on the unit. If the unit is not subject to an enemy attack during the turn, it may be flipped to its Prepared Position side. Prepared positions have an effect on fire combat.
Gammon Bombs
(Designers' Notes: Gammon bombs were plastic explosive charges that had been developed from the earlier "sticky bomb." It was a hand-thrown weapon, which was supposed to cling to the tank before exploding. In practice, the bomb had to be delivered from a very short distance to be effective. The best delivery was to actually slap it in place by hand. This made it a very unpopular weapon among infantrymen.)
A Gammon bomb attack is conducted on the Fire Combat Table, using the 1-4 column of the Small Arms Fire Line. It must be used in the same area. Only an (H) result indicates a destroyed tank, while any result other than no effect destroys the Mercedes Benz.
[5.4] German Movement
German units are moved their full movement allowance toward the nearest British unit. The restrictions to this movement are listed below:
-
If more than one British unit is equidistant, then the player assigns each British unit a numerical value of 1-6 and rolls one die. The unit with the number corresponding to the die roll is the one the German unit moves closer to.
Example: If three British units are equidistant from a German unit, the player would assign to one unit the numerical values of 1 and 2, and the second the numerical values of 3 and 4, and the third unit the numerical values of 5 and 6. If the die roll was 4, then the German unit would move toward the second British unit.
-
If an open area and an obstructed one are the two choices of areas to enter, the German units will always enter the obstructed area. This supersedes the need to make a die roll when British units are equidistant, if one is in an obstructed area and the others are not.
-
German units in an obstructed area will not end their movement in an open area, unless it is occupied by a British unit.
-
German units need not move their full movement allowance, if by doing so they would leave an obstructed area to end a Movement Phase in an open area not occupied by a British unit.
-
A German unit's movement always ends when entering an area occupied by a British combat unit.
[5.5] German Retreat
If the lead German tank is destroyed by the British on the first Anti-tank/Piat fire of the game, a die is rolled to check for retreat. The result has the following effects:
| Die Roll | Result |
|---|---|
| 1-3 | The entire force retreats toward the nearest entry area, each tank using its full movement allowance each turn until they have all exited. |
| 4 | The tank nearest to the destroyed tank retreats. If the tank cannot retreat into a road area, it retreats into an adjacent open area, and a die is rolled. On a die roll of 4-6, the tank can continue to move. On a die roll of 1-3, the tank is considered stuck. It may not move for the rest of the turn, and another die is rolled. On a die roll of 5-6, the tank crew panics and the tank is flipped to its wrecked side. |
| 5-6 | There is no retreat. |
[5.6] Tank Movement
[Designers' Notes: When the British attacked, there were 6 Mark IV German tanks in the area of Le Port. Their movement is restricted to the road areas due to the fact that it was night, and the area around the two bridges was not considered conducive to tank movement.]
Once German tanks enter the game, they have a movement point allowance of 3. They must stay on road areas, and may not cross destroyed bridge areas. When they reach the Benouville T-junction, they move toward the bridge. They are to continue moving toward the Ranville entry area, from which they will exit.
The German reinforcements follow the tanks in line, with one tank per area. When any German unit has been fired upon, the infantry units need no longer stay on the road; only the tanks need do so. One infantry unit may stack with the tank unit.
When German tank units start a turn in a road position with a British unit in a prepared position, it must attempt to move into the next road area. A die is rolled. On a 1-2, the tank remains in the same area and may not move. On a die roll of 3-6, the tank moves into the next area and the prepared marker is removed from play. The British are moved to an adjacent non-road area. If a German infantry unit is stacked with the tank, there is a +1 die roll modifier.
[5.7] Stacking
Any number of units may stack in the same area, with the exception of tanks. Only one tank may be in an area at the end of movement. An infantry unit and any number of leaders may stack with a tank.
[5.8] Major Schmidt and the Mercedes Benz
[Designers' Notes: Historically, Major Hans Schmidt had been out for a ride with a local woman. In Ranville, he heard the initial sounds of gunfire coming from Benouville and instructed the driver to investigate. After dropping off his female companion, he sat back in his Mercedes with the top down to take in the fresh air with a plate of food and a bottle of wine.]
In some instances, Major Schmidt enters on turn 6 at the Ranville entry area. Schmidt and the Mercedes Benz counter are stacked in the same area. To determine the movement allowance of the Mercedes, roll a die and check the Mercedes Benz Movement Allowance Table. The Mercedes may not enter a non-road area and must move toward the Le Port entry area as quickly as possible. Once it enters the Le Port entry area, it is removed from play. The British earn victory points for capturing or killing Major Schmidt.
When the Mercedes Benz is fired upon, the car will move at fast speed (7 movement points) for the rest of the game. If the Mercedes Benz receives a strength point loss when fired at, it is considered wrecked, and Major Schmidt is rolled for on the Leader Casualty Table.
Mercedes Benz Movement Table
| Die Roll | Result |
|---|---|
| 1-3 | Slow (3 movement points) |
| 4-6 | Medium (5 movement points) |
6.0 Fire Combat
Fire Combat takes place during the two fire phases (British and German) and during the Movement Phase as opportunity fire. There are three types of Fire Combat:
- Small Arms Fire
- Tank and Anti-Tank Fire
- Piat Fire
[6.1] Small Arms Fire
Combat units may conduct Small Arms Fire in the same area or in an adjacent area. The following procedure is used:
- British player may choose the targets British units fire at.
- All units firing at the same unit combine their strength points.
- A die is rolled and modified as follows:
- a. -1 if at a target in adjacent area
- b. -1 if target in an obstructed area
- c. -1 if target in a prepared position
- d. +1 if a British glider infantry unit is firing
- e. +1 if target is in an open area
- f. -1 if target is moving (used during Opportunity Fire only)
- All die roll modifiers are cumulative.
- After the die roll is modified and the correct column has been found, the results are applied:
| Result | Effect |
|---|---|
| S | Target is suppressed and is flipped to its Suppressed side. |
| 1, 2, 3, etc. | Number of strength points lost. If a leader is present, he must be checked on the Leader Casualty Table. If result is more than initial unit, next unit in stack suffers. |
| (H) | No effect. Only used on Piat, Tank, Gammon Bomb, and Anti-Tank fire. |
| - | No effect. |
- If a leader has to be checked, roll one die and check the Leader Casualty Table. The results are:
| Result | Effect |
|---|---|
| - | No effect. |
| W | Leader is wounded and has a movement allowance of 2. Leader also has a -1 die roll modifier during hand-to-hand combat. If already wounded, the leader is considered killed and is removed from play. |
| K | Leader is killed and is removed from play. |
Special Effects of Machine Gun Fire
Unlike other Small Arms Fire, Machine Gun Fire affects all units in the target area rather than just the one target unit. Because of this, if other units are firing with the machine gun, only one target unit is affected by the combined fire strength. The other units are checked using the machine gun's fire strength only. The same die roll is used for the resolution.
To fire a machine gun, a unit must be stacked with the machine gun counter. A unit firing a machine gun may fire small arms fire with a -1 modifier to unit's strength points.
[6.2] German Small Arms Target Selection
German units select their target based on the following priorities:
- British unit in same area.
- British unit in adjacent area.
- British unit in open area.
- Largest-size British unit.
- Random die roll.
German units may combine their small arms fire if the target is the prime target for each of the units.
[6.3] Piat Fire
[Designers' Notes: The British assault troops were equipped with a portable anti-tank weapon called a Piat. This was a short range anti-tank bomb thrower. Historically, there were two Piats available with the initial landing force having only two charges. One of these Piats did not work. For game purposes, only one Piat is available.]
A Piat may be fired at a tank in the same area or an adjacent area. Use the Small Arms Modifiers. If the result is an (H) with a number in front, the tank is destroyed. If the result is an (H) with an S in front, the tank may not move again, but may continue to fire after checking to see if the crew flees. To check this, roll one die. On a die roll of 1-2, the crew flees and the tank becomes a wreck. On a die roll of 3-6, the tank may fire, but not move.
Each time a Piat is used, the player must cross off one charge box for the appropriate Piat on the Player Record Sheet. If more than one Piat is firing at the same target, the attacks are resolved separately.
[6.4] Opportunity Fire
During the movement phases, if a moving unit enters an open area adjacent to an unsuppressed enemy unit or enters into an enemy-occupied area, the enemy unit conducts an Opportunity Fire. Opportunity fire is resolved, using the Small Arms Fire Combat procedure (see 6.1). After the combat is resolved, the moving unit resumes its movement, unless it is suppressed. Opportunity fire always takes place before a grenade attack.
[6.5] Tank/Anti-Tank Fire
Tanks have two types of fire: small arms fire with its machine gun, and tank fire with its cannon. Small arms fire is handled in the same way as normal fire, with the 5-8 column used on the Fire Combat Table. Tank cannon fire is resolved using the Tank/AT Gun line of the Fire Combat Table. Each tank counts as one strength point on the Tank/AT Gun line.
The one Anti-Tank gun in the game is the unmanned German field gun on the map. To fire it, a British unit or a German unit must be in the area. The AT gun uses the 1-2 column of the Tank/AT Gun line on the Fire Combat Table. The unit may also use small arms fire with a -3 modifier to the unit's current strength points.
Line of Sight
Before Tank/AT Gun Fire Combat can be resolved, line of sight must be determined. To be an appropriate target, it must be one of the following:
- Target must be adjacent or in the same area.
- Targets further than the adjacent area may be fired at if five or less areas away, and they have fired at the tank or anti-tank gun in the previous turn or current turn.
- Targets further than the adjacent area may be fired at if five or less areas away, and the target has fired in the current turn. To determine whether the target is in sight, use a ruler to form a straight line from the center of the area of the attacker to the center of the area of target. If the line does not go through any obstructed areas, then there is a valid line of sight and the target may be fired at.
- An area with a tank or a tank wreck is considered an obstructed area.
Tank/AT Gun Fire Procedure
- Check line of sight if required.
- Total number of tanks and/or the AT Gun firing at the same target. Locate the correct column.
- Roll a die and check the result on the Fire Combat Table.
- Only results with an (H) have any effect. The effects are as follows:
| Result | Obstructed Area (including prepared positions) | Tank | AT Gun or MG Gun Area |
|---|---|---|---|
| 1. S(H) | Place rubble marker or remove prepared position marker | Wrecked | Destroyed |
| 2. 1(H) | Same as S(H), except combat units in area lose one strength point | ||
| 3. 2(H) | Same as S(H), except combat units in area lose two strength points |
- Wrecked tanks are flipped to their wrecked side and may no longer move or fire, but do block other tanks from moving through the area. Wrecks also block line of sight.
- Rubble markers in Obstructed areas have no effect.
- Destroyed AT or MG areas mean that those guns may no longer be used.
7.0 Hand-to-Hand Combat
After all fire combat has been completed, enemy units in the same area undergo Hand-to-Hand Combat. The following procedure is used:
- Compare the combined strength points of the British units to the combined strength points of the German units. The result is a British/German ratio that is always rounded in the German's favor. Ratios greater than 4 to 1 are treated as 4 to 1, while ratios less than 1 to 2 are treated as 1 to 2.
- Once the ratio has been determined, a die is rolled and modified by the following die roll modifiers:
- a. +1 if only British glider infantry units comprise the British force
- b. +1 if any German units are suppressed
- c. +1 if all German units are bridge garrison units
- d. -1 if the British units are suppressed
- e. -1 if British were last to enter an obstructed area or an improved position
- f. +1 if Germans were last to enter an obstructed area or an improved position
- g. -1 if German infantry units are stacked with a tank
- The Hand-To-Hand Combat Table is then checked, and the results are applied. The results for the British are always to the left of the slash (colon in the table), while the results for the Germans are always to the right of the slash.
- Combat results are as follows:
- a. Eng. means that the units may not leave the area the next turn, but must undergo Fire Combat and, if necessary, Hand-To-Hand Combat in the next turn. Combat units in the next movement phase may enter the area and take part in both combats.
- b. E means that all units of that side are eliminated.
- c. 1/2 E means that 50% (round up) of that side's strength points are eliminated.
- d. - means no effect.
- German units, as in Fire Combat, have a strength point marker reflecting their new strength placed under them. British units have their losses recorded on the Player Record Sheet or strength point chits can be used.
8.0 Bridge Demolition
In German set-ups C through H, there is a possibility that Pegasus Bridge is prepared for demolition and may be destroyed before it can be seized by the British. The British sappers must check to see if it is wired, and disarm it if it is. The following procedure is used until it is disarmed:
- During the first German Movement Phase, after a British unit has fired upon, assaulted, or launched a grenade attack against a German unit, the bridge is checked for demolition.
- For the Germans to demolish Pegasus Bridge, a German unit must be in the pillbox area with no British units present, and the bridge must have a live demolition marker.
- The Germans in the pillbox area must have a British unit in line of sight or have been fired upon in order to attempt demolition.
- If the conditions of steps 1-3 have been met, a die is rolled. The die roll is then compared to the following:
| Die Roll | Result |
|---|---|
| 1-3 | Bridge Destroyed |
| 4 | Bridge Damaged |
| 5-6 | Demolition malfunctions |
- If Major Schmidt is present in the pillbox, there is a -1 die roll modifier.
- A Bridge Destroyed result means that no units may use the Pegasus Bridge areas for movement. A Bridge Destroyed marker is placed in each of the areas.
- A Bridge Damaged result means that every time a tank enters a bridge area, a die is rolled. On a result of 5 or 6, the bridge is considered destroyed, and the tank is flipped to its wrecked side.
- A Demolition Malfunctions result means that the bridge remains intact. The engineers must still disarm the bridge.
- There is only one demolition attempt made per game.
9.0 Sappers
British sappers have special abilities and uses. The following sections will outline each of these.
[9.1] Removing Demolitions
To remove bridge demolitions, a sapper unit must spend a complete turn in each of the Pegasus Bridge areas. When this is done, the wired marker is removed from play.
[9.2] Repairing a Damaged Bridge Area
To repair a damaged bridge area, a sapper unit must spend at least one complete turn in the area without moving. At the end of the Movement Phase, a die is rolled. If the die roll equals or is less than the number of consecutive turns that the sapper unit has been in the area, the bridge has been repaired.
[9.3] Makeshift Bridges
If Pegasus Bridge has been destroyed, the sapper units may be employed to create a makeshift bridge. Sappers can enter a damaged/destroyed bridge area by expending all of their movement points for the turn to enter the damaged/destroyed bridge area. At the beginning of the next turn, friendly units can use the areas to cross the bridge.
It costs two movement points to enter each area, and a sapper must be present.
10.0 Suppression
Suppression occurs during Opportunity Fire and Combat. When a unit is suppressed, it has the following restrictions:
- It may not move.
- It may not use Opportunity Fire.
- It may not use Fire Combat.
- It may not initiate Hand-To-Hand Combat, and, if defending, it suffers an adverse die roll modifier. (See 7.0)
[10.1] Suppression Removal
During the Suppression Removal Phase, each currently suppressed unit is checked for suppression removal. The following procedure is used:
- Roll one die for the unit.
- Modify the die roll by a +1 if a platoon leader, or Major Howard for a British unit, is present. Only one modifier can be used.
- Modify the die roll by a +1 if Hickman or Schmidt are present and a German garrison unit is being checked.
- Compare the modified die roll to the following:
| Type of Unit | Die Roll Needed to Remove Suppression |
|---|---|
| All British units | 1, 2, 3, 4 |
| German garrison units | 1, 2 |
| German Reinforcements | 1, 2, 3 |
- To remove suppression, flip the unit to its front (unsuppressed) side.
- Units that fail the suppression removal remain suppressed.
11.0 Leaders
Leaders have special abilities, which are as follows:
- If stacked with units of their own platoon, leaders add a +1 die roll modifier for small arms fire or anti-tank gun fire. For this purpose, Hickman has this effect on German Garrison units. Major Howard has this effect on all British units, while Major Schmidt has this effect on all German units. Neilson affects all sapper units.
- Leaders add a -1 die roll modifier for suppression removal if stacked with their own platoon. Hickman functions as such for the German garrison, and Schmidt affects all German units. Major Howard affects all British units, while Neilson affects all sapper units.
- Wounded leaders still have the same suppression and fire combat effects, but may not move except when carried by British units. British units carrying a wounded leader have a movement allowance of 2. When a wounded leader is moved, the leader is rolled for again on the Leader Casualty Table at the conclusion of movement. If a K result is rolled, the leader is eliminated and removed from play. Any other result has no effect.
- Leaders alone defend with a strength of 1 and attack with a strength of 1 with a -1 die roll modifier in hand-to-hand combat and in fire combat.
- When stacked with friendly combat units, leaders have the effect of adding a +1 die roll modifier to both hand-to-hand and fire combat.
12.0 British Unit Breakdown
The initial British units landing on gliders have the ability to breakdown into two squad units instead. When doing so, use the squad lines on the Player Record Sheet. If a unit has lost some strength points already, the strength points are divided as equally as possible between the squads. Once broken down, they may be recombined at the beginning of any turn in which they begin movement in the same area. The parent unit is equal to the combined squads' current strength.
Leaders, headquarter units, and sappers may not be broken down.
13.0 Reinforcements
Depending upon the German Setup Chit picked, the German reinforcements are rolled for on turn 4. Depending upon the result of that die roll, the British reinforcements are rolled for on game turn 6. German reinforcements enter at LePort or Benouville, while British reinforcements enter at Ranville.
[13.1] German Reinforcement Procedure
The following procedure is used to decide the German reinforcements and their turn and point of entry:
- Using the line that corresponds to the German Setup Chit picked, roll one die and compare the result to the die roll numbers listed along the line of the German Reinforcement Table.
- Once the number has been found, check the column the number is in. The force number of the heading is the German reinforcement force.
- The composition of this force is listed on the German Reinforcement Chart, as is the turn of entry.
- For the entry area, a die is rolled. On a die roll of 1-4, the reinforcements enter at the LePort entry area, while on a 5 or 6, the reinforcements enter at the Benouville entry area.
- Germans enter with the tanks first. The reinforcements are placed off map in a line with the tanks first and platoons stacked in twos. The first tank in the line is placed in the entry area at no costs. It is then moved its full movement allowance. The next unit pays one movement point to enter the entry area, while the third unit or stack pays two movement points to move into the entry area, and so on.
- German reinforcements cannot open fire until they are fired upon, or have successfully spotted an adjacent British unit, or turn 10 (turn 12 in the Historical Scenario).
- To spot a British unit, the British unit must be in an adjacent area. German tanks spot on a die roll of 5 or 6, while German infantry spots on a die roll of 4, 5, or 6.
[13.2] British Reinforcements
On game turn 6 the British reinforcements are checked on the British Reinforcements Table. The following procedure is used:
- Find the column corresponding to the German reinforcement force selected.
- Roll one die and cross-index the die roll line with the correct German reinforcement force column. The result is the composition of the British force, and the turn of entry.
- Gammon bombs and Piats are stacked under the units that will carry them. Each unit may only carry one.
- All British reinforcements enter at Ranville entry area.
- British units enter in column using the same procedure as the Germans.
- Pine Coffin is always stacked with the first units that enter.
[13.3] Optional British Reinforcement
The normal British reinforcement schedule is set up to balance the scenarios. Once you become comfortable with the game, it is suggested that you use the Optional British Reinforcement Table instead of the one outlined in 13.2.
14.0 Setup
There are no British units on the map at the start of the game. All units and officers who are to enter aboard the six gliders are sorted and placed in each of the six glider boxes on the map:
- Glider #1: Major Howard, Captain Neilson, Lt. Brotheridge and his platoon, and one section of sappers.
- Glider #2: Lieutenant Wood and his platoon, and one section of sappers.
- Glider #3: Lieutenant Smith and his platoon, Piat #1, and one section of sappers.
- Glider #4: Captain Priday, Lieutenant Hooper and his platoon, and one section of sappers.
- Glider #5: Lieutenant Sweeney and his platoon, and one headquarters section.
- Glider #6: Lieutenant Fox and his platoon, and one headquarters section.
These units remain in the glider boxes until after all the gliders have landed and any crash results have been resolved.
The initial German force is resolved using the following procedure:
- Place the correct lettered German Setup Chits in the opaque container. Check scenario rules for the correct chits. (See 17.2)
- Draw a Setup Chit from the cup and check the German Setup Chart.
- Place the listed garrison squads and dummies into an opaque container and draw one counter for each of the setup areas on the map. Place the counters facedown on the map without looking to see what they are.
- When Benouville, LePort, or Ranville are mentioned, use the appropriate entry area.
- If you are instructed to draw for the bridge being wired, place the wired counter and the number of blanks given into an opaque container. Draw one counter and place it face down in the Wired Bridge Box.
- If Major Schmidt is to enter at the Ranville entry area, stack Major Schmidt with the Mercedes Benz counter.
[14.1] Optional British Setup
The initial British setup may be changed. The player may change glider assignments as wished, but no glider may carry more than 12 strength points.
15.0 German Garrison Restrictions
On the first four turns, German garrison units may not move nor engage in combat, until a British unit moves into an adjacent area. When this occurs, a die is rolled. On a die roll of 4-6, the garrison unit is flipped to its active side and may use opportunity fire on the British unit. On a die roll of 1-3, a garrison unit is flipped to its front side and is considered to be active, but may not use opportunity fire this turn. Once active, a unit may move and fire normally. On turn 5, all German units are considered active.
16.0 Victory Conditions
Each scenario lists the number of victory points needed for the different levels of victory. Victory points are awarded for controlling various areas, destroying tanks, taking prisoners, and clearing bunkers. Victory points are lost for killed leaders and eliminated platoons.
Control of an area is determined at the end of the game. To control an area, the player's units must have been the last to occupy the area. See the Victory Point Chart for the specific victory point awards.
17.0 Scenarios
There are two basic scenarios for Pegasus Bridge.
[17.1] Historical Scenario
Historically, the British glider attack at Benouville was almost perfect. Surprise was complete on the shocked garrison, and the German high command problems helped to no end. It was one great shot with a Piat by Sgt. "Wagger" Thornton that turned a Mark IV into a Roman candle and a German counterattack into an ignominious retreat.
This scenario is intended to be used as a learning scenario. Once played a few times, it is recommended to play the Variable Force Scenario, which is much more challenging, especially at the Advanced and Expert levels.
For this scenario, German Setup Chit B and reinforcement force 3 are used. For the British, use reinforcement force B. Glider #4 is not used in this scenario, since it landed at the wrong bridge historically. The player does not have to check for any other lost gliders.
Special Tank Movement Rules for the Historical Scenario
There are also special German movement rules for the reinforcements. They are as follows:
When the German tanks reach the Benouville T-junction, a die is rolled. On a die roll of 1-3, they turn and approach the bridges. On a die roll of 4-6, they continue straight for the next two turns, at which time the tanks are turned 180 degrees and move toward the Benouville T-junction. The infantry units are moved in the opposite direction on that turn to avoid stacking violations. On the next turn, they follow the tanks, which move back to the T-junction and then toward Pegasus Bridge.
The levels of victory are as follows:
- Marginal Victory: 57-59 victory points
- Substantial Victory: 60-65 victory points
- Overwhelming (Historical) Victory: 66+ victory points
- Below 57 points is a German victory
[17.2] Variable Forces Scenario
Once the Historical Scenario has been played a few times, it is suggested that you play the Variable Forces Scenario. There are three levels of play for this scenario: beginner, advanced, and expert. It is suggested that you start at the beginner level, and, as you begin to win consistently, move to the next level.
For the Beginner Level setup, place German Initial Setup Chits A-C in a cup and follow the setup procedures.
For the Advanced Level setup, place chits A-F in a cup.
For the Expert Level setup, place chits D-H in a cup.
The levels of victory are as follows:
| Victory Level | Beginner | Advanced | Expert |
|---|---|---|---|
| Marginal Victory | 57-59 | 47-58 | 42-53 |
| Substantial Victory | 60-65 | 59-65 | 54-65 |
| Overwhelming Victory | 66+ | 66+ | 66+ |
| German Victory | 56 or less | 46 or less | 41 or less |
Tables and Charts
Fire Combat Table
Columns are selected by strength: Piat (strength 1) uses the first column; Tank/AT Gun/MG strength "1-2" uses the second column, "3-4" the third, "5+" the fourth; Small Arms Fire strength points: 1-4, 5-8, 9-10, 11-14, 15-20, 21+ (columns in that order).
| Die Roll | 1-4 (Piat 1) | 5-8 (Tank/AT/MG 1-2) | 9-10 (3-4) | 11-14 (5+) | 15-20 | 21+ |
|---|---|---|---|---|---|---|
| 0 or less | - | - | - | - | - | - |
| 1 | - | - | - | S | S | S |
| 2 | - | - | S | S | 1 | 1 |
| 3 | - | S |
(In the printed table the Tank/AT Gun/MG row shows "-" over the first column, then 1-2, 3-4, 5+ over columns two to four.)
Leader Casualty Table
| Die Roll | Result |
|---|---|
| 1 | - |
| 2 | - |
| 3 | - |
| 4 | W |
| 5 | K |
| 6 | K |
Grenade Attack Table
| Die Roll | Adjacent Area Open | Adjacent Area Obstructed | Same Area Open | Same Area Obstructed | Same Area Bunker |
|---|---|---|---|---|---|
| 1 | - | - | - | - | - |
| 2 | - | - | - | S | S |
| 3 | - | - | S | S | S |
| 4 | - | - | S | 1 | 2 |
| 5 |
Crash Table
| Die Roll | Result |
|---|---|
| 1 | No effect |
| 2 | 3 S.P. |
| 3 | 4 S.P. |
| 4 | 5 S.P. |
| 5 | 7 S.P. |
| 6 | All Elim. |
Hand-to-Hand Combat Table
British:German odds ratio. Results are British:German.
| Die Roll | 1-2 | 1-1 | 3-2 | 2-1 | 3-1 | 4-1 |
|---|---|---|---|---|---|---|
| 1 or less | E:- | 1/2E:- | 1/2E:1/2E | 1/2E:1/2E | -:1/2E | 1/2E:E |
| 2 | 1/2E:- | ENG | ENG | ENG | ENG | -:E |
| 3 | ENG | ENG | ENG | 1/2E:1/2E | 1/2E:E | -:E |
| 4 | ENG | 1/2E:1/2E |
Hand-to-Hand Modifiers
- +1 British Commandos
- +1 Germans Suppressed
- +1 British defending in obstructed area or prepared position
- +1 German garrison unit
- -1 British suppressed
- -1 Germans defending in obstructed area or improved position
Victory Point Chart
| Item | Victory Points |
|---|---|
| Pegasus Bridge Controlled (Intact) | +15 |
| Pegasus Bridge Controlled (Damaged) | +5 |
| Ranville Bridge Controlled (Intact) | +8 |
| Pill Box Controlled | +5 |
| Each German Bunker Cleared and Controlled | +2 |
| Each German MG Controlled or Destroyed | +3 |
| German AT Gun Controlled or Destroyed | +5 |
| Each Tank Destroyed | +5 |
| Each Controlled Prisoner Unit | +1 |
| Each British Leader Killed | -1 |
| Each British Platoon Eliminated | -5 |
German Setup Chits
Chit A: 3 Garrison Squads; 5 Dummies; Major Schmidt arrives at Ranville on turn 3.
Chit B: 4 Garrison Squads; 4 Dummies; Hickman at LePort; Schmidt at Ranville on turn 3.
Chit C: 5 Garrison Squads; 3 Dummies; Hickman at Benouville; Schmidt at pillbox; Draw for Bridge being wired: 3 Blanks, 1 Wired Counter.
Chit D: 5 Garrison Squads; 3 Dummies; Hickman and 1 platoon at Benouville; Schmidt at pillbox; 1 platoon at LePort; Draw for Bridge being wired: 3 Blanks, 1 Wired Counter.
Chit E: 5 Garrison Squads; 3 Dummies; Hickman and 1 platoon at LePort; 1 platoon at Benouville; Schmidt at pillbox; Draw for Bridge being wired: 3 Blanks, 1 Wired Counter.
Chit F: 5 Garrison Squads; 3 Dummies; Hickman and 2 platoons at LePort; 2 platoons at Benouville; Schmidt at pillbox; Draw for Bridge being wired: 2 Blanks, 1 Wired Counter.
Chit G: 5 Garrison Squads; 3 Dummies; Hickman and 2 platoons at LePort; 2 platoons at Benouville; Schmidt at pillbox; 1 platoon at Ranville; Draw for Bridge being wired: 1 Blank, 1 Wired Counter.
Chit H: 5 Garrison Squads; 3 Dummies; Hickman and 2 platoons at LePort; 2 platoons at Benouville; Schmidt at pillbox; 2 platoons at Ranville; Draw for Bridge being wired: 1 Blank, 1 Wired Counter; 2 Tanks: roll separately for entry and turn:
| Entry Area | Die Roll | Turn |
|---|---|---|
| Ranville | 1-2 | 2 |
| Benouville | 3-4 | 3 |
| LePort | 5-6 | 4 |
Optional British Reinforcement Table
| Die Roll | Result |
|---|---|
| 1-2 | A |
| 3-4 | B |
| 5-6 | C |
German Reinforcement Table
Die roll results (by German Initial Setup Chit chosen) giving Reinforcement Force 1, 2 or 3:
| Setup Chit | Force 1 | Force 2 | Force 3 |
|---|---|---|---|
| A | 1-4 | 5 | 6 |
| B | 1-3 | 4-5 | 6 |
| C | 1-2 | 3-4 | 5-6 |
| D | 1-2 | 3-4 | 5-6 |
| E | 1 | 2-3 | 4-6 |
| F | 1 | 2 | 3-6 |
| G | - |
German Reinforcement Chart
- Force 1 = 2 Mark IV Tanks, 4 (6-3) infantry platoons; enter turn 5
- Force 2 = 4 Mark IV Tanks, 6 (6-3) infantry platoons; enter turn 6
- Force 3 = All tanks and infantry not used in the set-up; enter turn 7
British Reinforcement Table
| Die Roll | German Force 1 | German Force 2 | German Force 3 |
|---|---|---|---|
| 1 | A | A | A |
| 2 | A | B | B |
| 3 | A | B | B |
| 4 | A | B | C |
| 5 | B | B | C |
| 6 | C | C | C |
British Reinforcement Chart
- Force A = Pine Coffin, 3 (7-3) platoons, a piat, a gammon bomb
- Force B = Pine Coffin, 4 (7-3) platoons, 2 piats, a gammon bomb
- Force C = Pine Coffin, 6 (7-3) platoons, 2 piats, 2 gammon bombs
Player Record Sheet
The rulebook includes a photocopiable Player Record Sheet (a form listing each British unit, its initial strength and current strength, Piat charges and gammon bombs). It is a blank record form and is not transcribed.
18.0 Bibliography
Ambrose, Stephen E., Pegasus Bridge, 1985. Keegan, John, Six Armies in Normandy, 1982. Wheldon, Sir Hugh, Red Berets into Normandy, 1982.
Errata
The following errata for S&T #122 were published in S&T #125 (as listed on grognard.com). They are reproduced here as printed in that list; the rules text above is the unmodified original.
- Units inside bunkers receive a -1 fire combat modifier.
- The areas with the red inner outlines are German set-up areas.
- Extra German machine gun is placed in pillbox (14.0).
- There is supposed to be a blue glider line connecting the last triangle and south of the Compass Rose.
- The approximate distance between areas varies from 50 to 200 meters, with glider entry areas being the longest and the areas around the bridge the shortest.
- British units may continue to move after clearing a bunker if they have enough movement points. (5.3)
- Leaders add a +1 die roll modifier to grenade attacks.
- British reinforcement A enters on Turn 7, reinforcement B enters on Turn 8, and reinforcement C enters on Turn 9.
- When machine guns combine fire with small arms, use the small arms line and count each machine gun as 4 small arms strength points.
- If a tank enters an area with the wrecked Mercedes, it costs an extra movement point to move through.
- Map errata: 29 lines got dropped off the map during production. (The map sections showing the missing lines are not reproduced.)