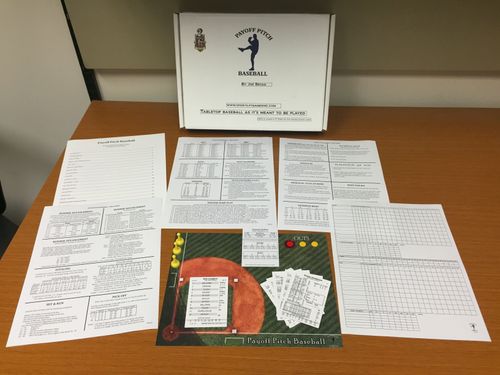
Payoff Pitch Baseball
Payoff Pitch Baseball Rulebook
Table of Contents
Table of Contents
- Getting Started
- Playing the Game
- Batter Card Abbreviations
- The Dice
- Base Running Rules
- Double Play
- Playing Infield or Corners IN
- Stealing Bases
- Catcher's Arm
- Outfielder's Arm
- Sacrifice Bunts
- Ballpark Cards
- Hit and Run
- Wild Pitches
- Pitcher Stamina
- Supplemental Strikeout Rule
- Player Usage
- Ratings and Symbols Reference Sheet
Getting Started
To play you will need two six-sided dice (referred to as 2d6 in the remainder of the instructions), two ten-sided dice of different colors or size (percentile dice), two teams, the game charts and instructions. The game may also be played using the included Fast Action Cards (FAC) or a hybrid version of both dice and FAC.
All the action in Payoff Pitch Baseball starts on the pitcher's card.
Pitcher Card Ratings
Explanations for ratings next to the number 2 through 12 are below.
- BALLPARK – this result directs the action to the ballpark chart and will result in either a WHEELHOUSE or IN-PLAY result. Re-roll the percentile dice and refer to the batter's card for the result.
- IN-PLAY – the batter has made contact and put the ball in play. The result will be a hit or an out.
- PATIENT – the batter is waiting for a good pitch to hit and will draw a walk or put the ball in play.
- PATIENT-OUT or /PATIENT/ – Similar to the PATIENT result. This reading will be followed by an out (P6, P4, G4, G6, F8, etc.). Go to the batter's PATIENT section. If the result is BB or HBP, record as normal. If not a BB or HBP, ignore any other ranges and go to the batter's OUT section. If the dice result is not within the ranges in the batter's OUT section, then use the out provided.
- TOUGH – the pitcher is making great pitches and the batter has fallen behind in the count and has the possibility of striking out or putting the ball in play.
- TOUGH-OUT – similar to TOUGH, when the percentile dice result is greater than the SO range, ignore the other readings in the TOUGH section and go immediately to the OUT section. I.E. the batter is out and cannot get a hit when the pitcher result is TOUGH-OUT.
- DEFENSE – this result directs to the defense chart to determine position and whether range or error ratings are being checked. Then go to the ballpark chart to determine if a hit or error occurred.
- ERROR or RANGE – same as DEFENSE except all checks are either error or range checks as indicated. Use the defense chart to determine the position being tested. Use the position regardless of the heading. If the pitcher result is RANGE and the Catcher (C) is chosen, use the CF position instead.
Batter Cards
Gil Hodges' card is an example of what the printed and pre-cut cards look like and of the Standard batter cards. Jim Rice's card is an example of the PDF cards. While not shown, the PDF cards are slightly larger (2.75 x 4.25 inches) than the printed cards (2.5 x 3.5 inches). Rice is also an example of the Left-Right Split cards which have different ratings based on the pitcher's pitching hand (Left or Right).
Collectively, the WHEEL, PATIENT, TOUGH, and IN-PLAY sections represent the Hitting section. WHEEL is short for WHEELHOUSE due to limited space available on the card.
The batter fielding ratings are given for each position he played during the regular season. The 'R' rating is the batter's Range rating and follows the old school grading system where A is the highest and F is the lowest (there is no E, only A through D and F... this is true for all letter grade ratings in the game). The 'E' rating is the batter's Error rating with 1 being the worst and 5 the best. The 'Arm' rating is only used for catchers and outfielders and will be explained in more detail later in the instructions.
The injury (Inj) rating can be one of four ratings, Prone, Normal, Durable and Iron. Prone is the worst and Iron is the best rating.
The 'DP' rating is the batter's Double Play rating and ranges from 4 to 12. 4 is the lowest rating and means the batter will rarely ground into a double play. 12 is the highest and means the batter will ground into many double plays.
The Steal and Sacrifice Bunt (BUNT) ratings will be explained in detail in separate sections later in this book. The printed cards move the OUT section to the right side of the card with the bunting and running ratings located directly beneath the IN-PLAY section as can be seen on the example Hodges cards.
Playing the Game
After you have selected two teams and filled in the lineups on the scoresheet, it is now time to play ball. Important note about the dice, they may be rolled all at once or you may choose to roll the 2d6 first, then the percentile dice. When playing head to head against another person, it is recommended for the player controlling the team pitching to roll the 2d6 while the batting team rolls the percentile dice. For illustration purposes in these instructions, all four dice will be rolled at the same time. Please designate one ten-sided die, or d10, as the 'tens' die and the other d10 as the 'ones' die. When rolled, read the 'tens' die first and the 'ones' die second to obtain a result of 00 to 99.
We will use the sample cards provided in the "Getting Started section" to illustrate how the game is played. First, roll the dice. The 2d6 dice yield a total of 5. Looking on Mike Cueller's pitching card, a result of TOUGH is found. The percentile dice result in 65. We find the TOUGH section on Gil Hodges' batting card and see the following ranges.
| Result | Range |
|---|---|
| SO | 1-47 |
| 2B | 48-49 |
| 3B | 50 |
| 1B | 51-61 |
If the percentile dice result was 1 to 47, Hodges would have struck out; if the result was 48 to 49, Hodges would have hit a double; if the percentile dice result was 50, Hodges would hit a triple; if the result had been 51 to 61, Hodges would have singled. Since the dice result of 65 does not fall into any of those ranges, we go to the OUT section on Hodges' card. 65 is in the range of 62-70 resulting in G4. This indicates Hodges has grounded out to the second baseman.
Let's roll the dice again and walk through another example. This time we will use Jim Rice's card. The dice roll is a 10 for the 2d6 result. The 10 result on Mike Cueller's pitcher card is PATIENT meaning we will reference the PATIENT section of Rice's card. Since Cueller is a Left-handed pitcher (indicated by the L near the top left of his pitching card), we will refer to the left side of Rice's card under the heading of vs LHP. The percentile dice result is 31, this falls within the range of 1-45 and results in a base on balls or walk.
In summary, read the total of the 2d6 roll and find the result on the pitcher's card. If the result is WHEELHOUSE (WHEEL on the batter's card), PATIENT, TOUGH, or IN-PLAY; read the percentile dice to determine a number from 01 to 99 and find the result in the appropriate section of the batter's card. If the percentile dice result is higher than the ranges in the batter's hitting section, find the result in the batter's OUT section. The included out chart provides additional details on the type of outs and possible runner advancement.
When the percentile dice result is 00, instead of referring to the pitcher's card find the 2d6 total on either the Bases Empty Rare Play chart or, if there are one or more baserunners, the Runners on Base Rare Play chart.
Batter Card Abbreviations
An explanation of the abbreviations used on the batter's card in the hitting and out sections is below.
- HR – Homerun, batter and all runners score.
- 2B – Double, the batter has a two base hit. In general, all runners will advance two bases. Refer to the included baserunning chart for additional runner advancement possibilities.
- 3B – Triple, the batter has a three base hit. All runners score.
- 1B – Single, the batter has a one base hit. In general all runners will advance one base. Refer to the included baserunning chart for additional runner advancement possibilities.
- BB – Base on balls (also known as a walk). The batter is awarded first base. Runners advance a base if forced. A runner on first is always forced to move due to the batter becoming a runner. A runner on 2nd base is only forced if there is already a runner on first base. A runner on 3rd would only be forced to advance if there were runners on 1st and 2nd, i.e. the bases were loaded.
- HBP – Hit By Pitch. The batter has been hit by the pitch and is awarded first base. Runners advance if forced.
- SO – Strikeout. The batter has struck out. All runners hold.
- L4 – Lineout to second baseman. The batter hit a line drive that was caught and is out. Runners hold.
- L6 – Lineout to short stop. The batter hit a line drive that was caught and is out. Runners hold.
- P2 – Pop fly ball caught by the catcher, either in fair or foul territory. Batter is out, runners hold.
The Dice
As mentioned earlier, the 2d6 are added together to obtain a result of 2 to 12. The percentile dice are read 00 to 99 with one die representing the "tens" digit and the other die representing the "ones" digit. As a result the percentile dice should be of different sizes and/or colors.
Unless otherwise noted, one roll of all four dice will resolve most at-bats. For example, using the sample cards provided earlier in the instructions let's assume the dice roll results were 8 for the 2d6 and 19 for the percentile dice. Applying the dice rolls to the pitcher and batter card, the result is a 1B or single. Assuming there was a runner on 2nd base when the ball was hit, the runner would move to 3rd base since runners advance the same number of bases as the hit and a single is a one base hit when using the basic advancement rules. If there had been two outs, the runners advance an extra using the basic base running rules. Additional information regarding base runner advancement can be found on the next page and on the game charts.
Base Running Rules
There are several options to choose from for base runner advancement. You may choose one of the following options or combine them.
- Basic Base Running Rules. All runners advance the same number of bases as the hit (single = 1 base; double = 2 bases; triple = 3 bases). In certain situations, runners may also advance an extra base. With two outs or when the hit comes from the batter's WHEELHOUSE [WHEEL] section, all runners advance an extra base (i.e. single = 2 bases; double = 3 bases). A Runner Advancement Hit Location Chart is provided to better visualize the hits and indicate which fielder fields the ball. To use the Hit Location Chart, refer to the d10 that represents the singles digit (for example if you are using a white d10 to represent 10, 20, 30, etc... and a blue die to represent 0 to 9, you would use the blue die result). The type of hit and fielder that fielded the ball will be given. When the hit result comes from the batter's PATIENT section, the lead runner has the option to attempt to advance an extra base. Please refer to the Coach's Choice / Attempt an Extra Base chart for additional details.
- Advanced Base Running Rules. Use the Runner Advancement Chart on the Dice Charts. To use this chart, find the lowest d6 result and reference the chart. The chart is split between type of hit (Single or Double) and the Single hit result is also split by bases occupied (Runner on 1st, Runner on 2nd). The lowest d6 result will indicate the number of bases that runner advances. For example, assume the 2d6 dice result total is 7 made up of a 3 and 4. With runners on 1st and 2nd base, the batter hits a single. We check the 2d6 and see 3 is the lowest d6 result. Checking the Runner Advancement Chart, the runner on 2nd scores while the runner on 1st base was held to advancing 1 base from 1st base to 2nd base.
- Fast Action Cards Base Running Rules. The preferred method of advancing runners is to use the Fast Action Cards (FAC). Whenever there is a single or double, draw the next FAC and refer to the appropriate base running section. If the batter hit a single, refer to the SINGLE section otherwise use the DOUBLE section. The FAC will describe the type of hit, which fielder the ball was hit to and the number of bases each runner advances. With 2 outs, there are additional rules as follows. Any runner with a RUN rating of 6 or higher advances 2 bases on a single and scores on a double. A runner with a rating of 5 has the option to try to advance an extra base with 2 outs (stretching 1 base advancement to 2 bases) and a runner with a RUN rating of 4 or lower follows the result on the card only.
Double Play
Whenever there is a runner on 1st base and less than two outs, a possible double play has occurred on a ground ball out result (G1, G3, G4, G5, or G6). First, compare the DP ratings on the Pitcher and Batter cards. We will use the lower numeric rating for this at-bat. For example, if the Pitcher has a DP rating of 8 and the Batter has a DP rating of 6, then use 6 as the DP rating. Roll and total the 2d6. If the total is equal to or less than DP rating, the batter has grounded into a double play. If needed, consult the Out chart to determine which runner is out. If the 2d6 result is higher than the DP rating and less than 11, the runner is forced out and the batter is safe at 1st base on a fielder's choice. If the 2d6 total is 11 or 12, the fielder's only play is to throw to first. The batter is out and all runners advance 1 base. Please note these results may be modified if using either an Infield In or Hit & Run strategy. Additional information and results are provided on the GROUND OUT Chart.
Playing Infield or Corners IN
When there is a runner on 3rd base, the defense may elect to play the infield or corners (1B, 3B) in. This strategy is used to try to prevent the runner from scoring, but does have some risks as well, since some ground balls that would normally be outs, will get past the drawn in fielders for a base hit (single). The defense manager needs to declare the infield (1B, 2B, 3B and SS) or the corners (1B, 3B) are playing in before the next at-bat is resolved. The advantages of playing the corners in is to prevent the runner from scoring when the ball is hit to the 3B or 1B, but still having the chance to turn the double play if the ball is hit to the 2B or SS who are playing at normal depth. Once the dice are rolled, it is too late to decide to bring the infield or corners in. Playing the infield or corners in has no affect on sacrifice bunt attempts since the defense alignment is already taken into account in the ratings.
Stealing Bases
Payoff Pitch Baseball has three distinct stealing options to choose from. It is possible to mix and match these options at any time, including within the same game if desired. Please see option 2 below for a detailed explanation of STEAL section of the batter card.
- Each manager chooses when to attempt a stolen base at any time using the runners Steal letter rating and opposing catcher's Arm rating to determine if the stolen base attempt was successful or not. To use this option, simply announce the intention to steal and use the percentile dice and stealing charts provided.
- The "Auto Steal" option. This option is used when the batter reaches first or second base and the next base is open. Compare the 2d6 total to the batter's Jump rating. Not every batter has a Jump rating. Check the batter's Steal: section. If there is a number and a letter, the number is the Jump rating and the letter is the Stealing success rating. For example, if the player card shows Steal: 4 C, the 4 is the player's Jump rating and his Stealing success rating is a C. As mentioned, some players may only have a letter (for example Steal: F or Steal: C). Those players will never automatically attempt to steal a base. If the 2d6 result is equal to or less than the number listed, the batter will attempt to steal the next base. Please note, this check is done immediately after the batter reaches base. It is not intended to be done during each subsequent at-bat. The intention is to only do one check when the batter reaches base. To attempt to steal 3rd base, the 2d6 must be doubles and less than or equal to the numeric Steal rating. There are no modifiers or adjustments when stealing 3rd base other than the 2d6 total must be equal to or less than the Jump rating and doubles. Please note this option does not incorporate the pitcher's Hold rating. There is an optional Jump chart available that incorporates both the batter's Jump rating and the pitcher's Hold rating.
- This option uses the pitcher's Hold rating. Roll all four dice and compare the 2d6 total to the pitcher's Hold rating. If the dice total is equal to or less than Hold rating, the runner gets a jump and attempts to steal the next base. If the 2d6 total is higher than the Hold rating, the runner does not get a good jump and does not attempt to steal. The runner may not attempt to steal again until the next batter. Optional rule: if the 2d6 total is higher than the Hold rating, but equal or less than the runner's Jump number, the runner has the option to attempt the steal. If this option is elected, reduce the Steal letter by 1 (A to B, B to C, C to D, D to F, F steal letter stays the same). To attempt to steal 3rd base, the 2d6 result must be doubles and the total must be equal to or less than the pitcher's Hold rating.
To resolve the stolen base attempt, combine the runner's Steal letter and catcher's Arm rating to create the rating that will be used on the Stealing chart. For example, if the runner's Steal letter is C and the catcher's Arm rating is 3, the combined rating will be C3. Locate C3 on the Stealing chart and use that column to determine the result. The Fast Action Cards (FAC) use the chance of success rating (Excellent, Very Good, Normal, Fair or Poor) which is also found on the Stealing chart.
Regardless of which option above is used, the runner may be picked off whenever double sixes are rolled on the 2d6. Refer to the included Pick Off chart to determine the result of the pick off attempt. When using the Auto Steal option, when the 2d6 equals 12 after the batter reaches base, re-roll the percentile dice and refer to the Pick Off chart.
The Jump rating (the number some players have in the Steal: section) may also have a - or + included with it. This is an optional adjustment that can be made the first time the batter reaches base. When the player has a - with his Jump number, reduce his Jump rating by 1 the first time he reaches base each game. For example a 4 B rated player would be considered a 3 B the first time he reaches base and a 4 B for the rest of the game. When the player has a + symbol next to his Jump number, increase the Jump rating by 1 the first time he reaches base. So a 4 B would be considered a 5 B the first time he reaches base and a 4 B the remainder of the game.
Catcher's Arm
Catchers have an Arm rating between 1 and 5 with 1 being the best and 5 being the worst. Combine the catcher's Arm rating with the runner's Steal letter and percentile dice roll to determine if the runner successfully stole the base or was caught stealing.
Outfielder's Arm
Each outfield position (LF, CF, RF) has an outfield Arm rating that ranges from 3 to 10 with 3 being the best and 10 the worst. This Arm rating is based on both the number of times a base runner advanced an extra base on a single or double and the number of times an outfielder threw a runner out trying to advance. This is important to realize as an outfielder who had a high number of assists may have a worse rated arm than someone who did not have any assist. The reason for this will be the outfielder who did not have an assist did not have as many base runners attempting to advance an extra base as often as the outfielder with a high number of assists. The goal of the Arm rating in Payoff Pitch Baseball is to accurately replicate how often runners advanced when the outfielder fielded the ball and not to replicate an outfielder's assist total in any given season.
Sacrifice Bunts
Much like stealing bases, there are different options that may be used. The options below should be agreed upon before starting the game and may both be used during the same game if desired.
- Each manager may determine when to attempt a sacrifice bunt. To do so, simply state the intention to attempt a sacrifice bunt, roll one six-sided die (1d6) and the percentile dice. Use the dice results and the batter's Bunt rating and the Sacrifice Bunt chart to determine the sacrifice bunt attempt result.
- This is the "Auto Sacrifice" option. With a runner on 1st base and/or 2nd base and less than two outs, instead of checking the pitcher card, first check the Sacrifice Bunt area on the batter's card. If the 2d6 total is within the range or equal to the numbers found on the batter's card, the batter attempts to advance the base runners with a bunt. Use the percentile dice roll and the batter's Bunt rating and reference the Sacrifice Bunt chart to determine if the bunt attempt was successful or not. If the 2d6 total does not match any of the numbers listed or the batter does not have a range or individual numbers in his Sacrifice Bunt area, then no bunt was attempted. Continue to the pitcher's card using the same dice roll to resolve the at-bat.
If a batter does not have any numbers listed in the Sacrifice Bunt area on his card, he will never auto attempt a sacrifice bunt. The manager may still choose to attempt a bunt with the batter at his discretion using the batter's Bunt rating.
Batters will never auto attempt a suicide or safety squeeze bunt. The manager may; however, choose to attempt a squeeze at any time. A "squeeze" bunt is done when there is a runner on 3rd base.
When attempting a squeeze play, roll all four dice and reference the Sacrifice Bunt chart as normal. If the percentile dice result is with the SH range on the chart, the runner may be safe. Next compare the 2d6 roll to the runner's Run rating. If the result is equal to or less than the Run rating, the runner is safe otherwise he is out. In either event, the batter is safe on 1st and runners advance 1 base.
To determine the fielder when using Option 2, look at the 2d6 results and choose the die with the lowest number showing. For example, on a 2d6 result of 5, the individual dice show 1 and 4. To determine the fielder, select the lowest die, 1, and refer to the Sacrifice Bunt chart. This would indicate the Pitcher has fielded the ball.
You will note there is not a bunt for a hit rating. All bunt hit attempts have been incorporated into the player's hitting ratings. This was done for a variety of reasons, foremost to streamline game play and to also prevent misuse of the bunting for a hit option by removing it completely. If desired, you may replicate the strategy of bunting for a hit using the batter's Run rating. Simply announce the intention to bunt for a hit and roll 2d6 and 1d10. If the d10 result is 0 to 3 and the 2d6 total is equal to or less than the batter's run rating, the batter is safe with a bunt single. If the d10 result is 4 to 9 or the 2d6 total is greater than the batter's run rating, the batter is out at first. In either scenario, all runner's advance 1 base. Use the lowest d6 die and Sacrifice Bunt chart to determine which fielder made the play.
A player may attempt to bunt for a hit only once per game and never as a pinch hitter.
Ballpark Cards
When the result on the pitcher card calls for BALLPARK, instead of referencing the batter card, we instead refer to the home team's Ballpark card.
If the percentile dice result is within the WHEELHOUSE range, re-roll the dice and reference the batter's WHEEL hitting section to determine the result. If the percentile dice result falls within the IN-PLAY range, then re-roll the dice and reference the batter's IN-PLAY hitting section to determine the result.
Hit and Run
The Hit and Run play is an optional strategy that may be used at any time during a game when there is a runner on 1st base or 1st base and 2nd base. When a Hit and Run is called, the runner(s) will begin running to the next base as soon as the ball is pitched while the batter attempts to make contact, usually placing the ball in a hole made by the fielders (generally the second baseman or short stop) moving to cover the base the runner is attempting to get to. The advantages to the Hit and Run are the base runner(s) advancing an extra base on all hits (i.e. two bases on a single) and greatly reducing the chance of a ground out resulting in a double play. The disadvantages are line outs result in a double play, the lead runner having a lower success of stealing the next base if the batter misses the pitch, and the chances of an extra base hit are reduced due to the batter swinging to make contact. There are additional Hit and Run instructions below the Stealing charts. One item there that may need additional instruction is when the pitch result is WHEELHOUSE whether that is directly from the pitcher's card or from the BALLPARK result. Whenever there is a WHEELHOUSE result during a Hit and Run, re-roll the 2d6. If the result is doubles (11, 22, 33, 44, 55, 66), resolve the WHEELHOUSE as normal. Otherwise, use IN-PLAY to resolve the at-bat and extend the batter's 1B range to end at 54. So a 5 - 29 rating would be 5 - 54 for this at-bat and only when the initial result was WHEELHOUSE and converted to IN-PLAY.
Wild Pitches
Most pitchers have a Wild Pitch rating starting at 30. When the percentile dice yield a result of 30 to 39 on the initial roll of the dice each at-bat and there are runners on base, check the percentile dice result against the pitcher's Wild Pitch rating. If the dice result is within the range indicated, a wild pitch has occurred. All runners advance one base. Re-roll the percentile dice to resolve the at-bat. If the dice result is within the WP range again, record a second wild pitch and then use that same roll to resolve the at-bat. If the result is not in the range, no wild pitch has occurred. All runners hold. Resolve the at-bat normally with the same dice roll.
Pitcher Stamina
Every pitcher that started a game receives a Start stamina rating number between 1 and 9. This number is the inning that the pitcher may begin to tire. Once the pitcher reaches the inning that matches his Start stamina rating, he is considered tired if he has allowed 3 or more runs. If he has not allowed 3 or more runs, then he may continue to pitch with his normal ratings until either the game ends or he has allowed 3 or more runs.
Looking at the sample Mike Cuellar card, his Start stamina rating is 8. This means Cuellar can pitch the first seven innings of a game at "full strength" with no adjustments to his card. Beginning in the eighth inning, if Cuellar has allowed 2 or less runs, he may continue to pitch at full strength with no adjustments. In the eighth inning or later, once Cuellar has allowed 3 or more runs to score, he is considered to be fatigued or tired. Once fatigued (tired), place one of the Fatigued Pitcher Adjustments cards next to the pitcher's card. The Fatigue Adjustments card has additional instructions to follow whenever the BALLPARK, PATIENT or TOUGH result is rolled on the pitcher's card. Follow those instructions to resolve the at-bat.
Any time a pitcher allows 6 or more runs he is considered fatigued and should use the Fatigued Pitcher Adjustments card.
Relief stamina will be either Short or Long. These ratings have more to do with how long and how often they should pitch. A Short relief pitcher becomes fatigued after pitching 2 innings or after allowing 2 runs. A Long relief pitcher becomes fatigued after pitching 3 innings or after allowing 3 runs. To determine reliever fatigue, count each inning the pitcher appears in as 1 inning, regardless of the number of outs recorded or batters faced. For example, if a pitcher with Short stamina enters the 7th inning after two outs and records the final out, for purposes of determining fatigue he would have pitched 1 inning. If he begins the 8th inning, that will count as 2 innings and he will become fatigue after the inning ends or after allowing 2 runs; whichever comes first.
Certain pitchers have a # or † symbol behind their rating. When these pitchers are in a Save situation (loosely defined as pitching in the 9th inning when their team has a lead of 1, 2, or 3 runs), they do not become fatigued as noted above until the game becomes tied or their opponent takes the lead. Only when the game is tied or the opponent takes the lead would the above rules apply.
In general, a Short relief pitcher should normally pitch 1 inning while a Long relief pitcher should pitch 1-3 innings per game. A Short relief pitcher may pitch more than 1 inning, but should not do so very often.
Please refer to the Pitcher's rest chart on the bottom of the Rare Play charts for suggested usage of pitchers.
Supplemental Strikeout Rule
Some pitchers have a supplemental Strikeout rating, either starting at 50 or 90 depending on the season set. For those pitchers, whenever a batter makes an out and the percentile dice result falls in their Strikeout (SO) range, record a strikeout instead of using the out listed on the batter card. This is an optional rule to fine tune the strikeout stats for some pitchers and may be ignored if desired.
Player Usage
Payoff Pitch Baseball was created with the season replay gamer in mind. To that end, players are rated strictly based on their actual statistics for the season being rated.
Since players are rated exactly as they performed, it is necessary to use players in the same manner as they were in real life. Every player card includes the player's statistics for the season with the batter cards including a breakdown of at-bats versus both left and right-handed pitchers when using the split cards. While there is nothing stopping you from playing the highest rated players all the time, doing so may have an adverse effect on the game results and may lessen the entertainment derived from playing the game.
Ratings and Symbols Reference Sheet
Pitcher Cards
- †† in the batting section or # after bunt letter in batting section = The pitcher has his own batting card in addition to a pitcher card in the card set.
- #, †, or + after stamina rating = When used in relief and in a save situation, the pitcher does not become fatigued until the game becomes tied or their opponent takes the lead.
- TOUGH-OUT = Same as TOUGH. Go to batter's TOUGH section. If strikeout, record as normal. If not a strikeout, ignore any other ranges in the TOUGH section and go to the batter's OUT section. The TOUGH-OUT rating means the batter is automatically out.
- RANGE = Resolve the same as DEFENSE except all checks are range checks. Find the position being tested as normal, disregarding the Error or Range heading on the chart or reading on the FAC. Once the position is found, perform a range check as normal.
- ERROR = Same as RANGE except all checks are error checks. Find the position being tested as normal, disregarding the Error or Range heading on the chart or reading on the FAC. Once the position is found, check for an error as normal.
- /IN-PLAY/ = This reading will be followed by an out (P6, P4, G4, G6, F8, etc.). If this is the pitcher's first inning as either a starter or reliever, read as a normal IN-PLAY result. If this reading appears during the pitcher's second or later inning, it is an automatic out. If the % dice result is not within the ranges in the batter's OUT section, then use the out provided. This rating may be played as optional and read as a normal IN-PLAY rating if preferred or when playing cross era/seasons. This rating was introduced in September 2020 with the 1986 season set.
- /PATIENT/ or PATIENT-OUT = This reading will be followed by an out (P6, P4, G4, G6, F8, etc.). Go to the batter's PATIENT section. If BB or HBP, record as normal. If not a BB or HBP, ignore any other ranges and go to the batter's OUT section. If the dice result is not within the ranges in the batter's OUT section, then use the out provided next to the /PATIENT/ reading. Introduced in September 2020 with the 1986 season set.
Batter Cards
- The runner's JUMP rating is the number rating in the player's STEAL section of their card. For example, a player may have a rating of 3 B. 3 is the JUMP rating and B is the stealing grade.
- + after JUMP rating = increase runner's JUMP rating by 1 the first time he reaches base with a steal opportunity each game.
- - after JUMP rating = decrease runner's JUMP rating by 1 the first time he reaches base with a steal opportunity each game.
- JUMP rating of 1 = Use a JUMP rating of 2 the first time he reaches base with a steal opportunity each game. Do not check for a steal again for that player in the same game.
- † after the STEAL letter = Use a catcher's ARM of 3 if the catcher has a 1 or 2 ARM rating. Catchers with an ARM rating of 3, 4 or 5 remain the same.
- 0 in HR range on batter's WHEELHOUSE section. [Optional rule] When a 00 is the percentile dice result and the batter has either a blank or 0 next to his HR result, re-roll the percentile dice (00-99). If the result is doubles (00, 11, 22, 33, 44, 55, 66, 77, 88, 99), the batter hits a HR. All other results, check the appropriate Rare Play chart using the 2d6 dice total currently on the table or on the previous FAC if using FAC cards. This is an optional rule and may be ignored if desired.