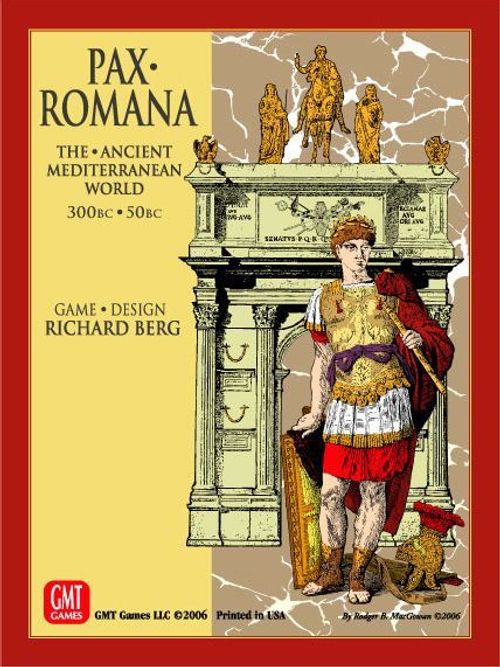
Pax Romana
Pax Romana Rulebook
Table of Contents
Table of Contents
- Part A: Overview
- Part B: Getting and Spending
- Part C: Operations
- Part D: Other Units
- Part E: Stability and Victory
- Part F: Events
- The Scenarios
Part A: Overview
1.0 Introduction
Pax Romana is a game covering the struggle for power in the Mediterranean from c. 300 BC to 50 BC. Because of the depth and breadth of its scope, we present the game in two formats:
- The Standard Game, for players who want a fun, interesting game playable in an evening;
- The Advanced Game, for gamers who want as much detail and decision-making for the military, economic and political problems and situations of the era as can be had at this scale, and do not mind a longer game.
All rules in this booklet apply to the Standard Game except those identified in the rules as belonging only to the Advanced Game. Some rules bear the notation "Standard Game Only." In all cases, these rules (and they are few) have corresponding but different rules for the Advanced Game.
The game has several scenarios, covering different eras within the game's time period, so that the game may be played by two to four people. Also included are instructions and guidelines for playing the four-player scenarios by 1, 2, or 3 players, and for playing the game with email or live online.
(1.1) The Standard Game
The Standard Game is aimed at players who want a game of moderate complexity that also presents some of the major issues and inter-relationships of the period. The game dispenses with the Event Cards, instead using (if the players choose) randomly chosen Event markers. The game also dispenses with some of the rules of the Advanced Game in order to keep playing time shorter. Three of the scenarios have been designed as "Standard Game Only" scenarios, while the main four-player scenario can be played with either the Standard Game or the Advanced Game rules; the scenario instructions (see the Play Book) explain how.
(1.2) The Advanced Game
The major new addition of the Advanced Game is card-play, using the deck of 55 cards to provide a wide selection of random events and an increase in player interaction. The Advanced Game also includes additional unit types and additional rules for the events determined by the playing cards. Three scenarios have been designed for the Advanced Game Only, while one, the main four-player scenario, can be played with either the Standard Games or the Advanced Game rules (see the Play Book).
(1.3) Game Scale
Turns are "generational", roughly 25 years of "real" time. Each LG or HI infantry unit represents about 7,000 men; each LI unit about 5000. Each cavalry unit is around 2500 mounted men. Each Galley Squadron represents 50 war galleys.
(1.4) Abbreviations and Glossary
The following terms and abbreviations are used throughout the rules:
Activation: The major unit of play, during which players conduct military, recruitment, and construction operations.
Activation Marker: Game markers, selected randomly during the Operations Phase of each Game-Turn, that determine the order in which Players become Active.
Active: The Player, Army, Fleet, or Unit operating under the Activation marker currently in play.
AM: Activation marker
Army: A stack of land units. See also Force and Unit.
Battle Point: The unit of strength for combat units, cities, and towns.
Battle Space: The Space in which a Battle is to be fought. It is the Space which the Attacker enters (by movement or interception) in order to fight, whether or not the Battle actually occurs.
BP: Battle Point
Capitals: Roma (Rome), Carthage (Carthage), Athens and Pella (Greece), Alexandria and Antioch (The East)
Control: Land Units, Garrisons, Towns, and Cities occupy (and control) the spaces they're in. On their own, Elephants, Leaders, and Galley Squadrons do not. See 5.0 for all types of Control.
CVP: Civilization Points, which along with GOP and OOP, determine the number of Victory Points each player receives during the Victory Phase.
DR: Dieroll; DRM: Dieroll Modifier
DSTP: Deep Sea Transit Point
Event Marker (Standard Game Only): A marker which, when drawn, results in a dice-roll on a Random Events Table for the scenario being played.
Finished: For Land forces, the end of the Major or Minor move. For Fleets, the point at which the fleet stops moving either voluntarily or involuntarily.
Fleet: Any number of naval units in one space. A fleet can consist of Galley Squadrons on their own. It can also consist of land units undergoing Naval Transport, whether or not Galley Squadrons are traveling with them.
Force: Any land unit or stack of land units. See also Army and Unit.
Friendly Spaces and Ports: All spaces in a player's Home Province are friendly to that player unless occupied by Enemy, Independent, Barbarian, or Soldier of Fortune units. Outside a Home Province, only spaces actually occupied by a player's land units (including Garrisons) are friendly, even if the player controls that Province. This restriction applies to Ports as well as Land Spaces.
GOP: Geographic Objective points, used to help determine Victory Points.
"Hold in Hand" Card (Advanced Game Only): Event card that players may keep until they wish to play or discard it. See also "Play When Drawn" Card.
Home Territories: Rome, Greece, The East, Carthage
Land Unit: Legion, Heavy Infantry, Light Infantry, Cavalry, Militia, Mercenary, Barbarian, Slave, and Tribal units. Garrisons, Leaders, and Elephants are not considered land units.
LOC: Line of Communication
Major Move: Conducting movement and combat (etc.) with an Army or Fleet, typically with a Leader. Players get one Major Move per Activation.
Minor Move: Conducting movement and combat (etc.) with individual units only. Players get two Minor Moves per Activation. Towns and Cities are constructed in place of Minor Moves.
MP: Movement Points
NTP: Naval Transit Point
Occupy: Land Units, Garrisons, Towns, and Cities occupy (and control) the spaces they're in. On their own, Elephants, Leaders, and Galley Squadrons do not.
OOP: Opportunity Objective Points, gained from achieving the special opportunity objectives, and used to add to VP.
"Play When Drawn" Card (Advanced Game Only): Event card that must be played immediately when drawn from the Event Deck.
SoF Player: The player who has played the Soldier of Fortune card this turn.
T: Talents, the game's term for money; in this period a measure of silver.
TP: Transit Point
Unit: One of something—Legion, Heavy Infantry, Light Infantry, Barbarian Infantry, Cavalry, Galley Squadron, etc. The number on the top right of each playing piece shows the number of units that counter represents. Note that only one unit may be moved each Minor Move—if the counter represents 2 units, you must break it down into two 1-unit counters and then move only one of them for that Minor Move.
VP: Victory Points
(1.5) Questions
Send a self addressed stamped envelope to: GMT Games, ATTN: Pax Romana, PO Box 1308, Hanford CA 93232. www.GMTgames.com. You can also reach us at www.Consimworld.com in the various gaming sections.
2.0 Components
Each game contains:
- 1 34" x 22" map
- 4 Sheets of counters
- 55 Events Cards (used only in the Advanced Game)
- 1 Rules Book
- 1 Play Book
- 2 Player Aid Cards
(2.1) The Map
The map shows the Mediterranean (and areas tangential to our story) as it was in the days of the Roman Republic, with some minor adjustments made for play purposes. The map is comprised of the following major elements: Territories, Provinces, Spaces, and Transit Points. Each of these elements is described in more detail in this section.
Geographic Appellation Note: Most of the spaces on the map have been given their Roman/Latin names. While this is not historically "accurate" for the period in which the game starts, it does make recognition easier and lends a sense of homogeneity.
(2.11) Territories. These are the large colored areas on the map. For example, the yellow area marked Hispania is a territory. Territories are separated from each other by a solid red line. Territories come in three types: Major Power Home Territories, Independent Territories and Barbarian Territories. Nearly all Territories are further divided into Provinces (covered below).
Major Power Home Territories. There are four of these on the map. The Major Powers Income and Manpower Table shows exactly what Provinces comprise what Territories. Thus, the Roman Player's Home Territory, in red, is comprised of the provinces of Cisalpina, Italia, and Bruttium, while the Greek Player's Home Territory, in green, includes four mainland provinces (Attica, Thrace, Macedonia, Peloponnesus) and a fifth province, called The Aegean Islands, made up of the spaces labeled Thasos, Limnos, and Naxos.
Independent Territories. There are nine of these: Hispania, Gaul, The Sicilies, Germania, Danube, Asia Minor, Crete*, The Chersonese*, Rhodes*, and a grouping known as Barbarians (see more below). Each of these, except for The Chersonese, Rhodes, and Crete, is further divided into Provinces. The Minor Territories Income and Manpower Table shows exactly what Provinces comprise what Territories. For example, as shown on that table, Gaul is divided into five provinces (despite what Caesar says): Britannia, Belgica, Aquitania, Lugdunensis (named, by the way, for Lug, a major god of the Celtic/Druidic pantheon), and Narbonensis.
*If the Territory in question is not subdivided into provinces, controlling it garners only 1T of income and 1 GOP; you do not get income and GOP for controlling both the Province and the Territory.
Barbarian Territories. There are five of these, all in gray: Caledonia, Greater German Tribes, Sarmatia, Scythia, and Armenia. Barbarian Territories are not subdivided. Each Barbarian Territory is treated as if it were a province. Control of a Barbarian territory garners only 1T of income and 1 GOP; you do not get income and GOP for controlling both the Province and the Territory.
(2.12) Provinces. Provinces are the areas within a Territory. For example, Lusitania is a Province within the Territory of Hispania. Provinces that belong to the same Territory are colored the same as one another and are separated from each other by a broken red line. All Provinces contain one or more Spaces, and many contain one or more Transit Points.
Additional Notes on Provinces:
- Rhodes, as noted in 12.51, is a separate, Independent Power.
- Crete and The Chersonese are independent provinces attached to no Territory. Control of these provinces has no effect on control of any Territory.
- Corinth (beside Athens) belongs to the Peloponnes province, not to Attica province.
(2.13) Spaces and Transit Points. Units move from circle to circle on the map. These circles are called Spaces or Transit Points, depending on their size. The large circles are Spaces, the small Circles are Transit Points. Following is a breakdown of the various types of Spaces and Transit Points:
Land Spaces: Large circles with solid colors and black outlines. Only land units may use these Spaces. EXAMPLE: Arretium (in Italia province, Rome territory). Special Rules: none.
Land Transit Points: Small black circles. Only land units may use these Points. EXAMPLE: Between Salonae and Lissa (in Dalmatia province, The Danube territory). Special Rules: 10.96, 10.97.
Capital Spaces: Large circles with black outlines and a building symbol inside. EXAMPLES: Pella and Athens (in Greece territory). Special Rules: 5.22, 8.15, 13.44, 14.21.
Mountain Fortress Spaces: Large circles with black outlines and a mountain symbol inside. Only land units may use these Spaces. Examples: Mazaca and Sebastia (in Cappadocia province, Asia Minor territory). Special Rules: 7.14, 9.21, 9.45, 10.43, 10.51, 10.62, 10.68, 12.13.
Alpine Pass Spaces: Mid-sized circles with brown outlines and a mountain symbol inside. Unlike Mountain Fortresses, these Spaces are not named. Only land units may use these Spaces. EXAMPLE: Between Valentia and Taurinorum (in Cisalpina province, Rome territory). Special Rules: See 9.32.
Mine Spaces: Large spaces with black outlines and a shovel and pickaxe symbol inside. Only land units may use these Spaces. EXAMPLE: Bergidum (in Gallaecia province, Hispania territory). Special Rules: See 6.11.
Port Spaces: Large circles with black outlines, colored partly in blue and partly to show the color of the Province in which they are located. These are located on coasts and islands. Both land units and naval units may use these Spaces. EXAMPLES: Lilybaeum (in West Sicily province, The Sicilies territory), Melita (in Melita province, The Sicilies territory). Special Rules: See 5.14, 6.3, 9.44, 10.43, 11.0, 12.6.
Naval Transit Points: Small blue circles. Only naval units may use these Points. EXAMPLE: Between Lissa and Barium (in Italia province, Rome territory). Special Rules: See 11.0, 12.6.
Deep Sea Transit Points: Mid-sized blue circles with wave symbol inside. Only naval units may use these Transit Points. EXAMPLE: Between Alexandria (in Egypt province, The East territory) and Rhodes (in Rhodes province, Asia Minor territory). Special Rules: See 11.0, 12.6.
Tribal Spaces: Large circles with black outlines and a green Viking helmet symbol inside. Use depends on location. EXAMPLE: Londinium (in Britannia province, Gaul territory). Special Rules: See 13.1.
(2.14) Connections. To move around the map, units follow the lines that join Spaces and/or Transit Points. These lines are called Connections, and are distinguished as follows:
- Land connections: black lines; movement only by Land units. EXAMPLE: the connections between Memphis and Hermopolis (in Egypt province, The East territory).
- Naval connections: blue lines, movement only by Galley Squadrons and Fleets (including Naval Transport fleets). EXAMPLE: the connection between Pisae (in Italia province, Rome territory) and Aleria (in Corsica province, The Sicilies territory).
PLAY NOTE: Some Spaces are connected by both Land and Naval connections, indicating that both land and naval units may move between the two. EXAMPLE: the entire SE coast of Hispania, from Malacca to Emporiae.
- The Corinthian Isthmus: Yes, you can use Naval Movement between Megara and Corinth (in Greece territory), seemingly over land. The Greeks had built a sort of canal to make transit between the two possible.
- Straits: Connections across water that allow Land Movement (not Naval Transport) between the Land Spaces indicated with a blue double arrow. EXAMPLE: the connection between Byzantium and Nicomedia (joining Greece territory with Asia Minor territory). Special Rules: See 9.33.
PLAY NOTE: Some Straits are connected by both Land and Naval connections, indicating that you may use both land and naval movement between the two. EXAMPLE: the connection between Rhegium and Messana (joining Bruttium province in Rome territory with East Sicily province in The Sicilies territory).
(2.15) Tracks. The map contains several tracks that help players remember important information as the game goes on. The counter sheets contain markers for these tracks.
(2.2) Unit Counters
The counters represent the following units (abbreviations in bold):
- Legions (Rome only): LG
- Heavy Infantry: HI
- Light Infantry: LI
- Barbarian Infantry: BI
- Tribal Infantry: TI
- Cavalry: Cav
- Elephants: EL
- Mercenary units of various types: M-HI, M-LI, M-Cav
- Militia infantry: Mil
- Galley Squadrons: GS
- Garrisons: Garr
Each combat counter shows its Power Number, its unit Type, and its BP value. Illustrated counter types include Cavalry, War Galley, Light Infantry, Tribe, Barbarian, Elephant, Mercenary HI, Heavy Infantry, Militia and Garrison.
There are also ten (10) Leaders for each Power, plus military units for various Independent Armies (such as Pontus, Pergamum, et al). There are also informational markers, use of which is described below, and Army and Fleet markers for making moving large stacks easy.
The term "unit" refers to one (1) unit of that type. The actual counter on the map can represent anywhere from 1-10 units, and you can break these down into "change" however you wish. Most unit types make up a specific number of Battle Points (BP) in combat. For example, a 1 HI unit is worth 3 Battle Points.
Other markers include Control Markers (Carthage, East, Rome, Greece), Army and Fleet markers, Pirates and Cilician Pirates markers, Civilization Points markers and VP markers.
(2.3) The Objective Opportunity Markers
The Objective Opportunity Markers are used only in certain scenarios, as per 15.4, to give the players Goals that would not normally be apparent to the other players, providing them with Victory points if achieved.
(2.4) The Event Cards (Advanced Game Only)
The 55 Event cards are used to represent, and put into play, outside events, political realities, natural happenings, etc. In general, they help make life interesting. See 17.0.
PLAY NOTE: Familiarity with what the cards do helps speed up play. However, you do not have to read all the rules for each card. How they work is explained on the card and on the Card Play Aid Sheet.
(2.5) Talents
The Talent is the game's form of currency, represented by coins in denominations of '1', '5' and '10'. Historically, a talent was an era measure of silver. Talents bear the symbol T in this game—for example, 2T is two talents. You can either use the Talents markers or keep track of Talents on the General Records Track using the "Talents X1" and "Talents X10" markers.
(2.6) Charts and Tables
Many of the rules and all of the die-roll results tables are summarized on the Charts and Tables cardstock sheets. Keep these in easy reach of all players as you play.
(2.7) The Dice
Pax uses six-sided dice in one of three ways, depending on the mechanic:
- 1d6. Roll one die, apply number.
- 2d6. Roll two dice, add them together.
- 3d6. Roll three dice, add them together.
3.0 General Course of Play
First, choose a scenario to play (the Scenarios are in the Play Book). Pax Romana has several scenarios, with some suitable for two players and some for up to four players. The full scenarios are designed for four.
(3.1) Initial Deployment
All individual Power set-up instructions are given both in the scenario instructions, as well as on the Player Aid Cards.
(3.2) Sequence of Play
Each Game-Turn follows the following Sequence.
A. Income Phase (Ignore for First Game-Turn). Each Player collects Income from controlled Provinces, Territories, Towns, and Cities (6.1).
B. Maintenance Phase. (Ignore for First Game-Turn.) Each Player pays Maintenance for all Fleets plus Armies over the allowed maximums (6.4). In addition, each Player loses Stability Points if the number of HI or LG (whether full-strength or reduced) he has on the map exceeds his current Civilization Point total (14.2).
C. Removal Phase. (Ignore for First Game-Turn.) Remove leaders (8.1), militia units (12.32), mercenary infantry (12.27), the Soldier of Fortune leader and forces (12.4), and Barbarian leaders and forces (but not face-up tribal counters or independent forces, and not BI created by some Rebellions (13.3). Convert Mercenary cavalry to Regulars (12.27).
D. Leader Selection Phase. (Ignore for First Game-Turn.) Simultaneously, each player randomly draws their Leaders for that Game-Turn, from his Pool, as per 8.2, places the first Leader drawn in his Capital and the other in any Space on the map containing at least one of his combat units.
E. Manpower Phase. (Ignore for First Game-Turn.) Players may do any or all of the following: raise Land Units, create Garrisons, and build galley squadrons (6.2-6.3) and purchase Opportunity Objective markers (15.43) when allowed to do so. Also, reduced HI or LG units must either be rebuilt to full strength or they are automatically removed and replaced by a Garrison unit (10.86). All players plan their Manpower activities secretly on a piece of paper, revealing them simultaneously after all players are ready. For competitive games, set a time limit of five minutes to make these plans.
F. Activation Phase. The player who played the most recent Activation draws an Activation Marker from the Activation pool (except for the first set of Activation Markers – see 3.3). Play proceeds according to the following sequence.
- Events Segment (Standard Game Only). If an Events Marker has been drawn, the player who drew that marker rolls to see which Event has occurred; see 16.1. After completing the Event, return to Phase F if Activation Markers remain in the pool; otherwise, go to Phase G.
- Payment Segment: The player pays 1T for using that AM. If he cannot pay, see 3.44.
- Card Segment (Advanced Game Only): The Player Draws a card from the top of the Event Deck. If he wants to, or must, play the card, all of its immediate effects are put into play before proceeding. He may play other cards from his hand at this point (17.1).
- Operations Segment: The player may undertake one (1) of the following Operations:
- a. Expansion (Major Moves and Minor Moves): Military: Move and/or attack as per 10.2-10.9. Construction: Build Towns and/or Cities, as per 7.1, in place of a Minor Move.
- b. Recruitment: Raise Land Units OR build galley squadrons using the same mechanics as in the Manpower Phase (E);
- c. Call a Meeting (Standard Game Only): See 4.1. A player Calling a Meeting does not pay the 1T in F/1 for using the AM. As a result, the Meeting Operation is an operation that Players with an empty Treasury (0T) can perform.
- New Activation Marker Segment: If Activation Markers remain in the Activation pool, return to the start of Phase F in order to draw another AM. If there are no AMs left, go to Phase G.
PLAY NOTE: There is no "Call a Meeting" operation in the Advanced Game. Instead, players can engage in Alliances (see 4.2).
G. Attrition and Isolation Phase.
- Land Forces: Apply attrition (9.43) to any Land forces that are Isolated (9.41).
- Fleets: Apply attrition to any Fleets not In Port (9.44).
H. Victory Phase.
- Tabulate Victory Points (15.0) and note any change to Stability Level (14.0).
- Determine if anyone has won an Automatic Victory (see Scenario rules).
- Return all cards to the Event Deck—except those which say "Use Once and Remove" and the card(s) retained In Hand (17.1)—and shuffle the Deck anew. Place the reshuffled deck on the table available for use in the next Game-Turn.
I. Play Order Determination Phase. Players determine the order of the first round of Activations for the next game-turn and place the first set of Activation Markers on the board in that order. The remainder of the AMs go into The Pool.
(3.3) Play Order
In the Play Order Determination Phase, the first round of Activation Markers is determined. For the first Game-Turn, the scenario rules state the initial order of AMs. In every Game-Turn after that, see 3.42.
(3.4) Activations and Activation Markers
(3.41) During each Game-Turn, who gets to "go"—undertake an Activation Phase (Phase F)—is determined primarily (but see 3.42) by drawing Activation Markers (AMs), blindly and randomly, from a "pool" (called the Activation Pool) represented by an opaque cup or some other such receptacle. Whoever's AM is drawn becomes the Active Player.
(3.42) The Activation Markers in play are determined as follows:
- At the start of each Game-Turn, each player plays one Activation before the Activation Pool comes into play. The order of play is determined by the current Victory Point level (or by the scenario instructions for Game-Turn 1). The player with the fewest VP goes first, the player with the second fewest goes second, and so on. In the case of VP ties, Stability Level determines the order for the players who are tied (lower Stability goes first). If still tied, Civilization Point level determines (lower CVP total goes first). If still tied, roll a die, with lower number going first. Place the AM markers in their respective spaces in the Activation Markers area of the map.
- After all players have played once, the remaining Activation Markers for each power go into the Pool. For the Advanced Game, each player gets three AMs; in the Standard Game, the number depends on the game length the players have decided upon (see 3.8). Events or Cards might also dictate the number of AMs.
- From this point on, the player who has just finished an Activation draws an AM from the Pool, blindly and randomly. The name on the AM is the power who goes next. However, no player may play more than two Activations in a row. If a third consecutive AM for that player appears, draw again until the action shifts to a different player. This rule is waived if (as might very rarely occur) the final three AMs in the AM Pool belong to the same player.
EXAMPLE: In Scenario II, Rome and Carthage each get 4 AMs. The Play Order (as specified in the Scenario rules in the Playbook, is Rome and then Carthage. At the beginning of the game, place a Rome AM marker in the AM #1 box of the Play Order section of the Activation Markers area of the map (top right). Place a Carthage AM marker in the AM #2 box. Place the remaining AM markers – 3 for each player – into whatever you're using as the AM Pool (a coffee cup or bowl, face-down on the table, whichever way you choose.)
Optional Rule. In playtesting, some players preferred a system in which the player with the fewest VP got the first AM of the Game-Turn, but after that all were drawn randomly. Feel free to use either system; however, be prepared to have—at times—a longer duration between your moves, especially while two other players seem to be getting all the Activations. Be prepared, also, to experience periods when events seem completely out of your control. If playing with this optional rule, the first AM of the game goes to the player listed first under the heading "Initial Play Order".
(3.43) A Game-Turn is over after the last drawn AM has been played.
(3.44) When his AM is drawn, that player must pay 1T to use it (Phase G/1). If he cannot, or chooses not to do so, he cannot use the AM. The AM is considered used, however.
PLAY NOTE: Yes, this is correct. No money, no activation. Not even if the treasury is empty because of the play of Event cards. It is critical (to say the least) that Players begin each Operations Phase with a Treasury of at least 4 Talents, in order to pay for their 4 Activation Markers, but it is highly, highly recommended to keep more Talents available to guard against unpleasant Events.
Exception (Standard Game Only): In the Standard Game only, a player may "Call a Meeting" (F/3/c), which costs no Talents.
PLAY NOTE: The Pontus AM (12.55) is always free and does not count against a player's limit of 4 AM per Game-Turn.
(3.45) Summary of Possible Actions. During his own Activation, an Active Player's possible actions can include (within restrictions):
- Moving a stack of units
- Moving individual units
- Fighting land and naval battles
- Gaining control of provinces and territories
- Constructing and rebuilding Cities and Towns
- Recruiting land or naval units
- Calling a Meeting (Standard Game Only)
- Playing Event cards for a variety of reasons (Advanced Game Only)
- Intercepting Withdrawing or Retreating enemy units
During an opponent's Activation, the non-Active Player's possible actions can include (within restrictions):
- Withdrawing before battle
- Intercepting enemy units
- Choosing whether or not to include Cities or Towns in a battle defense
- Gaining control of provinces and territories
- Playing Event cards for a variety of reasons (Advanced Game Only)
(3.5) Operations in General
(3.51) Whenever a player's AM is drawn or selected he may undertake one of the following Operations:
- Recruitment: Raise Land Units or build Galley Squadrons.
- Expansion: Perform one Major Move and up to two Minor Moves.
Major Moves allow players to move and/or attack with an Army or Fleet. Minor Moves allow players to move and/or attack with individual units as well as undertake Construction in order to build Towns and Cities as per 7.1. The Major and Minor moves may be conducted in any order the player wishes.
(3.52) All land units stacked in the same Space are considered an Army. All Galley Squadrons in the same Space are a Fleet, as are all Units (Land Units with or without Galley Squadrons) conducting Naval Transport. Army and Fleet markers are provided so that players can remove stacks of units from the map, identifying them with such markers, which correspond to the Army/Fleet boxes on the map.
(3.53) Stacking. There is no limit to the number of units of any kind that may exist in any one Space.
(3.6) First Turn Restrictions
For the first Game-Turn, only, Phases A through E are ignored.
(3.7) How to Win
Players gain Victory Points for Geographic Objectives and Civilization Points on a set scale. Players may attain extra VP from Opportunity Objective Points. See 15.0 for details on all VP sources.
The individual scenarios give specific instructions for How to Win.
(3.8) Length of Play
Pax Romana presents the players with a great many decisions, and decision-making takes time. We know some of you prefer a game that can be finished in one sitting, while others prefer a lengthier game with nearly unlimited variation. To that end, we present several formats, each with its own level of detail, so that you can play Pax Romana as you wish. The formats for the Standard Game are covered in 3.81; for the Advanced Game, 3.82.
(3.81) Standard Game Options
Basic Game: This game should take an evening to play, about 5 hours or so.
- Game covers only 5 Game-Turns
- Players get only 3 AMs per Game-Turn
- No Special Event AMs
- No Operational Objectives
Basic II Game:
- Game covers only 5 Game-Turns
- Players get only 3 AMs per Game-Turn
- Only one Special Event AM
- Only one Operational Objective per Player, selected randomly.
Basic Plus Game:
- Game covers only 5 Game-Turns
- Players get 4 AMs per Game-Turn
- Two Special Event AMs
- Only one Operational Objective per Player, selected randomly.
Ultra Basic Game:
- Full 10 Game-Turns
- Players get 4 AMs per Game-Turn
- Two Special Event AMs
- All Operational Objectives in use, selected as per 15.4.
Players should feel free to juggle the number of Game-Turns, AMs, and use of Objective markers as they feel will work best for them.
(3.82) Advanced Game Options
In the Advanced Game scenarios, each player gets four Activation Markers per turn.
The length of the Advanced Game is up to the players, as they get to choose how many turns to play. For players familiar with the game, we have found that each full turn takes an hour, depending on the playing styles of those involved.
We recommend a minimum of 5 Game-Turns, which will take about 6-7 hours with inexperienced players. The full 10-turn version gives a lot more depth, but does take more time. You can choose any number of Game-Turns you wish.
4.0 Player Interaction
PLAY NOTE: Alliances are not going to be easy to enforce in casual play, but the idea of this is that such agreements were not easily reached, given the distances and travel.
(4.1) Alliances (Standard Game Only)
Agreements between players are forbidden, unless such agreements are done at a Meeting. The convening Player may "invite" any other players to attend, and only those players may be party to any agreements reached thereat.
Players may agree to do anything not specifically prohibited by the rules. E.g., Player A may allow Player B's army to combine with his; they may agree to a mutual defense pact; they may pass Talents around, they cede Control, etc. They have 5 minutes to decide what, if anything, they will do. Good time for a Bio Break for the non-involved.
(4.2) Alliances (Advanced Game Only)
Agreements between players are forbidden, unless such agreements are done through play of an Alliance Card. Exception: see Bribery, 4.3.
A player who plays an Alliance card may open Political Talks with any one other player…and only one. The two may agree to do anything not specifically prohibited by the rules, but only for the rest of the Game-Turn. E.g., Player A may allow Player B's army to combine with his; they may agree to a mutual defense pact; they may trade cards; they may pass Talents around, they cede Control, etc. They have 5 minutes to decide what, if anything, they will do.
(4.3) Bribery
Players may use Talents to influence any move made by an opposing Player against the Player wishing to change/influence the move. This must be done at the instant such action would take place, the deal must involve a payment of Talents in return for doing or not doing a specific action, and whether or not the player lives up to that deal is up to him.
(4.4) Talking the Talk (Optional Rule)
If you prefer, and if all players agree, dispense with the restrictions on when player interaction may occur and make alliances, conduct negotiations, and stab each other in the back whenever you wish. Given the scale of the game (each turn is 25 years), diplomats and other persuaders would have been active at all times, so a wide-open approach can certainly be justified.
Part B: Getting and Spending
5.0 Control
A game of Pax Romana consists to a very large degree of attempting to gain control over (and maintaining control of) three types of locations: Territories, Provinces, and Land Spaces. Most Territories consist of two or more Provinces; most Provinces consist of two or more Land Spaces. Control is determined according to the following rules.
(5.1) Controlling Spaces
(5.11) Control and Occupation of Land Spaces. Players control Land Spaces in which they have a Town or City, a Garrison, or Land Units of any type (see Glossary). Such spaces are considered occupied by that player. A Player automatically controls all unoccupied Spaces in his Home Territory. Unoccupied non-Home Spaces are controlled by no one, even if a player controls the Province in which the unoccupied spaces are located. On their own, Elephants, Leaders, and Galley Squadrons do not provide control.
(5.12) Joint Occupation of Spaces. Only in the case of Alliances (see 4.1 and 4.2), or when fleets and land forces of opposing sides are in the same space, may the forces belonging to two players (or one player and a non-player's force) jointly occupy a space. After battle, either the defending force will retreat from the Battle Space or, if it does not, the attacking force must "regroup" back to the space from which it entered that space (see 10.97).
(5.13) Control of Naval Spaces. Naval Spaces are never controlled, although they can be occupied by a fleet.
(5.14) Control of Ports. Control of ports works exactly like control of all other Land Spaces, using the rules for occupied spaces as per 5.11. That is, a player automatically controls all ports in his Home Territory that are not occupied by an enemy, while outside of his Home Territory, a player controls only those ports he occupies. This last point is true even if he controls the Province in which the port in question is located.
PLAY NOTE: This rule means that a fleet entering an unoccupied non-Home port space must Stop and roll for Continuity (11.13), even if the fleet owner controls that province.
(5.2) Controlling Provinces
(5.21) Controlling Non-Home Territory Provinces. A player controls provinces in a Territory other than any player's Home Territory when either of the following is in effect:
a. He occupies more than half the Land Spaces in that province; or b. No other forces but his (including barbarians, tribes, and anything else) control any Land Spaces in that province.
(5.22) Controlling One's Own Home Territory Provinces. A player controls a Province in his own Home Territory according to the following:
a. In his own Home Provinces that contain a Capital space (Italia for Rome, Africa for Carthage, Attica and Macedonia for Greece, Syria and Egypt for The East—although only Syria in Scenario #6), the Player controls that Province as long as he controls (5.11) the Capital space, regardless of what else is in other Land Spaces of that province. Example: The East Player occupies Alexandria. Other players occupy Memphis, Pelusium and the Faiyum. The East still controls Egypt. Note that he can also control such a province according to 5.22b (below), should he lose the Capital space. b. A Player controls one of his own Home Provinces if he controls any Land Space in that province and no other player(s) control(s) more than half the province's Land Spaces. Example: Rome occupies Rhegium, in Bruttium, and Carthage occupies Tarentum and Croton. As Carthage controls only 2 of the 5 Land Spaces in Bruttium, and Rome has a presence (in Rhegium), Rome still controls Bruttium.
EXAMPLE OF CONTROL: The Carthaginians seek to gain control of the territory of Gaul, which has five provinces: Britannia, Belgica, Lugdunensis, Aquitania, and Narbonensis. Over the course of 2-3 activations, they do the following. First, they attack and eliminate the Tribe in Gergovia (Aquitania). Without eliminating the Tribe, they would have had to occupy 4 of the 6 spaces in order to gain control; by eliminating the Tribe, they need only occupy one space. They leave behind an LI unit and march southeast to Narbonensis, where instead of eliminating either of the two Tribes (they avoid all Tribal-controlled spaces, requiring a combination of naval transport and crossing the Alps to do so), they decide to leave Garrison units in the 3 unoccupied spaces (thereby taking control by occupying the majority of that province's 5 spaces. Next they move north to Lugdensis, where if they don't eliminate the two Tribes they would have to occupy 5 of the 9 spaces there. They attack and eliminate the Tribes, leave 1 LI in Lugdunum, and move into Belgica, where they eliminate the Tribe in Bibrax and leave a Cavalry unit in place to maintain control. Finally, they naval transport to Britannia, where they consider occupying 5 of the 8 spaces to gain control, but instead attack and eliminate the two Tribes. They have now taken control of the entire territory of Gaul—although it's difficult to imagine the Roman player just sitting back and watching all of this happen.
(5.23) Controlling Another Player's Home Territory Provinces. A player controls a Province in another player's Home Territory according to the following:
a. In such Home Provinces that contain a Capital space (see 5.22a), the Player must control more than half the province's Land Spaces, AND prevent the player whose Home Territory that province is in from occupying the Capital space. Example: In order to control Italia province, any non-Roman player must control five of the nine land spaces in Italia, including the Rome space itself. b. In such Home provinces without a Capital space (see 5.22a), the Player must control more than half the province's Land Spaces. Example: To control Macedonia, any non-Greek player would need to occupy four of the six provinces.
(5.24) Islands Needed for Provincial Control:
- The islands of Lesbos/Chios and Samos are treated as Spaces for control of Ionia, in Asia.
- The islands of Thasos, Limnos and Naxos are treated as one province (with 3 Spaces): The Aegean Islands, part of Greece.
- The Balearic Islands space is part of Hispania. It counts for GOP calculation (15.2), but it does not provide Income.
- Melita (Malta) is part of the Sicilies. It counts for GOP calculation (15.2), but it does not provide Income.
(5.3) Controlling Territories, Towns, and Cities
(5.31) A Player controls a Territory when he controls all the Provinces in that Territory. A Player who controls an entire Territory that is not his Home Territory receives one (1) GOP, in addition to the GOP he receives for the provinces therein, and 1T of Income over and above income for the Provinces in the Territory. Note that he receives no GOP for controlling his Home Territory (but he does receive the extra 1T of Income for it).
(5.32) Controlling Towns and Cities. See 7.2.
(5.4) Effects of Enemy and Non-Player Forces on Control
(5.41) Control can be denied by the presence of Enemy units (including Mercenaries), Independents, Barbarian Infantry, Soldier of Fortune units, Slave units, and Tribal markers (whether or not revealed). Forces allied to the Player (in the case of an alliance with Pergamum, for example) do not deny control, nor do they control these spaces for you.
(5.42) Galley squadrons have no effect on control; they neither control a space nor deny control of a space.
(5.43) Controlling Another Player's Home Territory. A player power is never out of the game. It can be weakened to non-existence, with all its Home Provinces under foreign control and no Land Units on the map, but after that point, if any of its Home Provinces revert to that power's control, it is back in. This can happen if the player forms an alliance with another player, who fights the power controlling the Home Provinces, or if the player controlling the Home Provinces loses or removes Units such that he no longer controls them. Furthermore, if a player loses his Home Territory but still controls other Territories, he is very much in the game.
6.0 Getting and Spending
Players receive Income for controlling Provinces, Territories, Cities, and Towns. Players collect Income, in the form of Talents, during the Income Phase. They spend Talents in various Phases, as outlined below, in order to raise Land Units, build galley squadrons, build cities, and perform maintenance (among other things). In addition, players can spend Talents to hire mercenaries, as covered in 12.2.
(6.1) Collecting Income (Talents)
(6.11) In the Income Phase (Phase A), a Player collects Income (in the form of Talents) as follows:
- 1T for each Province he controls. However, control of Ionia, Italia or Narbonensis brings 2T; control of Egypt earns 3T. In addition, control of certain provinces bring no income at all (6.14). These different ratings are noted on the map.
- 1T for each Territory he controls, in addition to the Talents from the provinces therein.
- 1T for each full-strength Town he controls.
- 0T for each reduced-strength Town he controls.
- 3T for each full-strength City he controls.
- 1T for each reduced-strength City he controls.
- 1T for controlling the silver mines at Bergidum (Hispania), regardless who controls the rest of the province (and in addition to that province if the same player controls it).
(6.12) The setup rules for each scenario list the Territories, Provinces, Cities, and Towns initially under each player's control.
PLAY NOTE: Players keep track of their Talents with the Talent markers provided, or by adjusting the Talents Track on the map.
(6.13) Players must control a province or territory in order to receive Income from them. See 5.0 for the mechanics of Control.
(6.14) Three provinces that count for Control do not provide any income. These are the Balearic islands (Hispania), Melita (The Sicilies), and Germania Magna (Germania).
(6.15) Line of Communications. For a player to receive the Income from a Province that is not part of his Home Territory, and from any Cities or Towns (or the Bergidum Mines) not in his Home Territory, he must be able to trace a Line of Communications (LOC) from the source of Income (6.11) to any friendly Land or Port Space in his Home Territory at the time he seeks to Collect Income. If he cannot, he does not collect the relevant Talents. A LOC can be of any length, and it is traced as if the Talents were actually moving; such "movement" may be land, sea or both, but see 6.16 for restrictions.
(6.16) LOC may not be traced through:
- an enemy occupied Space
- a Barbarian Infantry or Tribal marker occupied Space
- an Independent occupied Space. Exception: it may be traced through Rhodes by paying 1T to do so (i.e., 1T for each space tracing LOC through Rhodes) as per 12.51.
- a Port space occupied by an enemy Galley Squadron (if LOC traced by sea).
- a Pirate occupied Space (if LOC traced by sea).
- a Deep-Sea Transit Point (if LOC traced by sea).
(6.17) Within the parameters of the above, Land LOC may be traced by land into a Space occupied by both an enemy galley squadron and a friendly Land unit, but it may not be traced via sea in such a case.
(6.18) LOC may be traced through unoccupied Spaces in both controlled and uncontrolled provinces.
(6.2) Raising Land Units
(6.21) A Player may spend Talents to raise new Units during the Manpower Phase, as a Recruitment Operation in his Operations Phase, or both. Players who choose a Recruitment Operation when activated may do nothing else during that Operations Phase.
(6.22) During the Manpower Phase, raising land units is done secretly, with each player writing their builds on a piece of paper and all players revealing their choices simultaneously.
(6.23) Units raised in Home Provinces are placed in any controlled or unoccupied Space in that province.
(6.24) A Player may raise units in a province only if he controls that province, and that province must not be isolated (9.4). He may raise only the types of units permitted for that Territory, at the listed cost. He may initially deploy them in any controlled or unoccupied Space in the province in which they were raised.
(6.25) A Player raises Units by referring to the Major Powers Income and Manpower Table and the Minor Territories Income and Manpower Table. He determines the Province in which he wishes to raise Units and locates that Province on the appropriate table. All Provinces in a specific Territory (with the few exceptions noted on the Tables) have the same Unit types available, and as long as the Player controls any of the Provinces in that Territory, he may raise any number of those Unit type(s) available (but see 6.42 and 6.43). He pays the cost shown in parenthesis for each unit of the troop type he wishes to raise, deducting the amount from his Treasury immediately.
(6.26) As the tables show, some Powers cannot raise certain types of units. For example, Rome may not raise Cavalry or Light Infantry from its Home provinces; Greece may raise only Heavy Infantry from its Home provinces.
NOTE: The Major Powers Income and Manpower Table shows incorrectly that Greek HI units cost 1T each; they cost 2T each, as specified in 6.27 and on the Unit Chart.
(6.27) Unit Costs. Here is a summary of the cost to purchase the major units in the game. Note all units of each type costs the same no matter where they are raised:
| Unit | Cost |
|---|---|
| Legions (LG) | 2T |
| Heavy Infantry (HI) | 2T |
| Light Infantry (LI) | 1T |
| Cavalry (CV) | 2T |
| Elephant (EL) | 1T |
| Galley Squadrons (GS) | 2T |
| Garrisons (Garr) | 0T |
EXAMPLE #1: At the start of his Manpower Phase (or upon announcing a Recruitment Operation), the Greek player controls the Province of Ionia in Asia Minor. He locates Asia Minor in the Territories column of the Minor Territories Income and Manpower Table; Ionia is listed as one of the Provinces. Looking to the column on the right, he notes that he can raise Heavy Infantry and/or Light Infantry in any Province in Asia Minor, at a cost of 2T per HI unit and 1T per LI unit. He chooses to raise two HI and three LI, at a total cost of 7T, which he immediately deducts from his Treasury. Note that any other Player who controls a Province in Asia Minor may also raise HI and/or LI during his own Manpower Phase or during a Recruitment Operation.
EXAMPLE #2: Rome has gained control of Syria, and decided to spend a Recruitment Operation raising Land Units there. He locates Syria on the Major Powers Income and Manpower Table, where it is listed as a Province in the Territory known as The East. The column on the right reveals that he may raise any or all of the following: Heavy Infantry units at 2T each, Light Infantry units at 1T each, and Cavalry units at 2T each. He also notes the [Eleph] notation beside Syria in the Provinces column. This notation means that he can raise Elephant units at 1T each, because he controls that Province. He could not recruit Elephants from Judea.
EXAMPLE #3: Carthage has taken control of the province of Britannia. He decides to raise 2 Cavalry there, at a cost of 4T. However, in the final Activation of the previous Game-Turn, Rome occupied Gesoriacum (in Belgica) and Darioritum (in Lugdensis) with land units and galley squadrons. As a result, Britannia has no LOC with Carthage Territory, and Carthage may not raise the units.
(6.28) Aegean Restrictions. No HI units may be raised in any of the 5 Aegean Islands: Thasos, Limnos, Lesbos-Chios, Samos or Naxos.
(6.29) The number of counters provided in the game is not a limit to building. If you run out of a particular type of counter (even Cities or Towns), feel free to use a counter from another game, or to mix counters from two Pax Romana games, etc.
(6.3) Building Galley Squadrons
A Player may build Squadrons of War Galleys during his Manpower Phase or as part of a Recruitment Operation in his Operations Phase.
- It costs 2T to build a Galley Squadron.
- Squadrons are built in any Port controlled by that Player (but see the next bullet point). If placed in the Manpower Phase, the Port must have been in the player's control (which means actually occupied if not in his Home Territory) at the beginning of the Manpower Phase.
- Squadrons may not be built in a port space already containing one or more non-friendly Squadrons.
- There is no restriction on the number of Galley Squadrons a player may have. However, keeping galleys from turn to turn requires the payment of maintenance (6.41).
(6.4) Maintaining Land Units and Fleets
Like the Manpower Phase, the Maintenance Phase is conducted secretly, with each player writing down which galley squadrons he will maintain (and, if necessary, which land units he will maintain) and all players revealing their choices simultaneously.
(6.41) Fleet Maintenance. In the Maintenance Phase players must either pay 1T Maintenance for each Galley Squadron or remove the unit(s). The owning player chooses which Galley Squadron(s) to maintain and which to lose (see also 9.44). The decision about how many to maintain is done secretly and revealed simultaneously; you can use the "Galleys Maintained" markers for this purpose, or record it on paper. Fleets belonging to minor powers which begin the game as neutrals never need to be maintained.
(6.42) Manpower Maximums (ManMax). Each Player has a maximum number of Legion/Heavy Infantry units he may field, above which he must either pay Maintenance, at a rate of 1T per unit, or remove the un-maintained infantry. The ManMax levels depend on the Stability Level of the Power (14.0). See the ManMax table on the Charts and Tables card. And see 6.43.
PLAY NOTE: There are no such limits on LI and Cavalry, and the ManMax limit is not affected by Militia. It may be affected by Mercenaries, but only in the case of Mercenary HI units.
EXAMPLE: The East, with a Stable government, has 25 HI on the map. As per the Manpower Maximums Table, the East is allowed to field only 18 HI for "free" while Stable. The East player must pay 7T in Maintenance to keep all those units in play. He could pay 4T and remove 3 HI units, however, or any other such combination totaling 7.
(6.43) Carthaginian Limitations. Unlike other powers, Carthage may not build above its ManMax limit at any time.
7.0 Cities and Towns
PLAY NOTE: Cities and Towns form a major focus in Pax Romana. Players will quickly discover that they must be built and they must be defended. They factor into control, defense, income, and stability.
(7.1) Building and Rebuilding Cities and Towns
(7.11) A player may build and rebuild Cities and Towns. Building and rebuilding costs Talents (and sometimes units), and those Talents (and units) must be paid at the time of construction. Each construction action uses up one of the player's Minor Moves (7.11). He may therefore undertake a maximum of two Construction projects per AM.
PLAY NOTE: A Minor Move is the only time when a player may build Cities or Towns; they cannot be built as part of a Recruitment Operation or during the Manpower Phase.
(7.12) The costs to Build are as follows:
Town: It costs 2T and 1 Garrison unit (12.1) to build a Town. Towns may be built only in a Space the building player controls (although he doesn't need to control the Province). A Town is built by paying the 2T, removing the Garrison (which must have started that Minor Move in that space) and placing a Town playing piece in that Space.
City: It costs 3T and one full-strength HI (or LG) to build a City. No Garrison unit is needed. A City may be built only in a Space the player controls that already has both a non-reduced Town and a non-reduced LG or HI unit in that space (and it must have been in that space at the beginning of the current Minor Move). The player need not control the Province. A City is built by paying the 3T, removing the HI or LG (the eliminated unit is considered to have been incorporated into the City's defense strength), and replacing the Town marker with the City marker. Only full-strength HI or LG units may be used to build Cities; reduced HI/LG may not.
(7.13) Cities and Towns provide Income (6.1), Civilization Points (15.3), and Defensive benefits (7.3), as follows:
- Each Full-Strength Town: 1T of income, 1 Civilization Point, 2 Battle Points in defense
- Each Reduced-Strength Town: 0T of income, 0 Civilization Points, 1 Battle Point in defense
- Each Full-Strength City: 3T of income, 3 Civilization Points, 5 Battle Points in defense
- Each Reduced-Strength City: 1T of income, 1 Civilization Point, Battle Points in defense equal to current defense strength (either 4 BP or 3 BP).
(7.14) Cities and Towns may not be built in Mountain spaces.
(7.15) A player build or rebuild only Cities/Towns belonging to him (i.e., those that bear his power's City/Town marker). He may not rebuild Neutral Cities/Towns, nor may he build or rebuild those belonging to another player (even if he is an Ally of that player).
(7.16) The number of counters provided in the game is not a limit to building Cities/Towns. If you run out of City/Town markers, feel free to use counters from another game, or to mix counters from two Pax Romana games, etc.
(7.2) Control by Cities and Towns
(7.21) Cities and Towns control the spaces in which they are located, contributing to provincial control like any other Land unit. A City or Town belongs to its original owner until an enemy force captures it, in which case the capturing player owns it. If a City/Town is destroyed, of course, nobody owns it.
(7.22) Forces entering a Spaces with a City or Town marker must attack that space, paying the requisite 1 MP for attacking. See 7.3 for how to use Cities/Towns in battle.
(7.23) Forces using Pre-Battle Withdrawal or retreating after battle may not may not enter spaces containing enemy or neutral Town or City markers.
(7.3) Using Cities and Towns in Battle
(7.31) Cities start with 5 Wall Points. Towns start with 2 Wall Points. Whenever a force is attacked in a City or Town space, the defending player must declare whether or not the City/Town (and therefore its Wall Points) is part of the defense. Here are the possibilities:
- If the City/Town is used, the defending force adds the City's Wall Points to the total BPs for defense, and may (and sometimes must) use the City's Wall Points to absorb losses (as outlined below). In addition, neither side may use cavalry or elephants in the battle (nor may cavalry or elephants be used to absorb losses), and the defending force may not retreat voluntarily nor be forced to retreat (see 10.9).
- If the City/Town is not used, the defending force is attacked using the normal combat procedure. Both sides may use cavalry/elephants in this case, and the defending force may retreat voluntarily or be forced to retreat (according to the retreat rules – it must have lost the battle, etc.). See 7.36. If the defending force retreats, the attacker must (not "may") immediately conduct Battle against the City/Town according to 7.34; it costs no additional Movement Points to do so (the MP for attacking has already paid to enter the enemy held space).
- If an Active force is intercepted as it enters a City/Town space (10.3), and the intercepting force loses the Battle and is forced to retreat by the Active player, the Active force must (not "may") immediately conduct Battle against the City/Town according to 7.34; it costs no additional Movement Points to do so.
- The City/Town may be captured or destroyed (7.4) only once the space is unoccupied by defending combat units, and only once the Wall Points have reached their minimum (7.33).
(7.32) Each Wall Point counts as 1 BP for battle purposes (if the defender chooses to use the City/Town in battle), except that each City/Town Wall Point counts for 2 BP when distributing losses, if the defending player chooses to use the City/Town for that purpose. To indicate a loss in Wall Points, place a –1 or –2 Wall Points marker under the City or Town marker to reflect the new Wall Point level.
(7.33) A City's defense strength may never be reduced below 3 Wall Points, nor a Town below 1 Wall Point, as a result of combat. The remaining Wall Points may be eliminated by destroying the city, however (see 7.43).
(7.34) Undefended Cities/Towns. A City without an Infantry/Legion garrison defends with BPs equal to its current Wall Points, unless its Wall Points have reached its minimum (7.33), in which case the force moving into it (or remaining in it after battle) simply captures it (7.42).
(7.35) Reduced-Strength Cities/Towns. Reduced-strength Cities function as Towns for the purpose of calculating Income and Civilization Points. Reduced-strength Towns provide no income and no Civilization Points. See 7.46 for how to rebuild.
(7.36) If a force uses a City or Town as part of its defense and loses the battle, it may not retreat as part of that specific combat, either voluntarily (10.91) or by force (10.92). During any subsequent combat, it may choose not to use the City/Town, in which case the retreat option is again available.
(7.37) Neutral forces in a space with a City/Town always use the City/Town as part of their defense.
(7.4) Capturing, Destroying, and Rebuilding
(7.41) Capturing Cities and Towns. If, as a result of Battle, a City's defense strength falls to 3 Wall Points, or a Town's Defense Strength to 1 Wall Point, there are no longer any defending Infantry/Legion units in the space, and the attacking player has at least one ground combat unit remaining in the space, the City/Town has been captured by the attacking player. It is now owned by that player, and he replaces the City/Town marker with one of his own, unless he wishes to destroy it (7.43). Any remaining Cavalry or Elephant units that did not withdraw before battle are eliminated.
(7.42) An unoccupied City with 3 Wall points, or an unoccupied Town with 1 Wall Point, is captured the instant another player moves a force into it, unless for some reason (an alliance, for example), the moving player does not want to take ownership (in which case nothing happens).
(7.43) Destroying Cities and Towns. Cities/Towns are destroyed by the owning player (which might mean the player who has captured it that Activation) during a Major or Minor Move, by spending a number of MP equal to the current Wall Point level of the City/Town. The force must be in the City Space (although it need not start the Move there) for destruction to occur. Note that the destruction may take place in any Activation, including the same Activation as when it was captured. A player may not voluntarily destroy a City/Town in his own Home Territory.
(7.44) If a City/Town is attacked and not captured or destroyed, the attacker must move back to the space from which it entered the City/Town space, as per the Regrouping rules (10.97).
(7.45) Barbarian Infantry (13.2) and Soldier of Fortune Armies (12.4) may capture Cities or Towns. Barbarians may destroy them, but there is no requirement that they do so. They may simply move on if the player controlling them so wishes. Cities/Towns captured by Barbarian Infantry become Independent (replace the current City/Town marker with an Independent one). Cities/Towns captured by Soldier of Fortune Armies instantly become the property of the SoF player (replace the current City/Town marker with one belonging to that player). For Slave Armies and Cities/Towns, see 12.7.
(7.46) Rebuilding Cities and Towns. A player may use a Minor Move to rebuild the walls of one City or one Town to full strength. He pays 1T for each Wall Point he adds to the City/Town's defense strength. When a City has 5 BP or a Town has 2 BP, it is at full strength (remove the BP marker) and begins functioning in its full capacity for Income, Civilization Point, and Defense purposes.
(7.5) Sack and Plunder
(7.51) Whenever a City or Town is captured, the Attacker may choose to Sack and Plunder. To see if it does, roll the die and compare to its Leader's Campaign rating. If there are any Mercenaries in that Army, add one (+1) to that dieroll.
- If the adjusted DR is higher than that rating, his Army sacks and plunders (go to 7.52).
- If the adjusted DR is equal to or lower than that rating, nothing happens.
(7.52) When a Town or City is sacked and plundered, the following occurs:
- If a Town, the player gets Talents equal to a dieroll of 1d6 halved, rounding fractions up.
- If a City, the player gets Talents equal to the dieroll (1d6).
- If the Army contains any Mercenaries or Soldier of Fortune units, all Talents received from Plunder are halved (for the player), rounding down.
(7.53) When finished sacking and plundering, roll the die and compare it to the Leader's Campaign rating (no adjustments this time).
- If Equal to or less than that rating, the Army may continue to move.
- If higher than the rating, the Army is finished for that AM.
(7.54) Barbarian armies (13.0) must use sack and plunder, but only to determine if they may continue moving. The controlling player gets no Talents when Barbarians sack and plunder. Slave Armies (12.7) never use Sack and Plunder.
(7.55) A player never uses Sack and Plunder against Cities or Towns in his own Home Territory, even if recapturing them from an enemy player.
Part C: Operations
8.0 Leaders
(8.1) Choosing Leaders
(8.11) All Players start each Game-Turn with two (2) Leaders in play. Independent Leaders and Soldiers of Fortune do not count against that limit.
(8.12) A Player's Leaders for each Game-Turn are selected anew from his Leader Pool, during his Leader Phase. The Leader Pool for each player consists of all 10 Leader counters. No Leaders from the previous Game-Turn remain on the map; they are all removed in the Removal Phase of the next Game-Turn and placed back into The Pool, before making the new selections (but see 8.14). Leaders are chosen by drawing the counters from your Leader Pool, blindly and randomly.
(8.13) If a leader is removed from the map for any reason during the Game-Turn, whether through Leader Death (8.4) or a card such as "Disease" (17.2), he is not replaced until the Leader Selection phase of the next Turn.
(8.14) All leaders are eligible for selection each Game-Turn except for Elite Leaders, which may not be in play two Game-Turns in a row (8.3).
(8.15) When chosen, the first Leader drawn must be placed in that player's capital. (For The East and Greece, either capital will do.) The second Leader may be deployed in any friendly-occupied Space on the map. If the capital is enemy occupied, place each Leader in a friendly-occupied Space on the map.
(8.2) Use of Leaders
(8.21) Leaders are rated for two capabilities:
Tactical: this is the number of Battle Die-Roll Shifts (from 1 to 4) that Leader may apply to Land Battles (10.51), the die-roll modifier that Leader may apply to Interception attempts (10.32), and the number that determines which army (if any) gets the Die-Roll Shift in a battle involving a City/Town (10.51).
Campaign: this is a number (from 2 to 6) which, when added to the Movement dieroll, produces the number of Movement Points that Leader and his Army may use for Land Movement. It does not apply to Naval Movement except in the case of Naval Transport.
The Leader counter shows the Tactical Rating on the front and the Campaign Rating on the back; Elite Leaders are marked with a small "E".
(8.22) Leaders are not required in order to move/use an Army. Any Army without a Leader is automatically considered to have a leader with "0-0" ratings.
(8.23) Leaders Moving Alone. Leaders normally move with an Army or Fleet, but they may also move by themselves. They do so by using one of the Major or Minor Moves. Leaders moving by themselves roll for movement as usual, adding their Campaign rating to the die-roll (even if using a Minor Move). The following considerations apply:
- Leaders picking up Land Units pay the usual 1 MP to do so – but they may do so only in a Major Move.
- Leaders may be picked up by a force or unit during a Major or Minor Move. It costs the moving force/unit no MP to do so, but the leader does not get to add his Campaign Rating to the MPs available during that Move. He does, however, add his Tactical Rating to any Battles initiated by that force or unit during that move (this includes a Leader being moved with a single unit during a Minor Move).
- If using Naval Transport to move on his own, the Leader does not pay the cost in movement points to embark or debark. Leaders using Naval Transport are subject to Naval Disasters (11.2).
- If a Leader moves entirely by himself, without picking up any forces, his movement allowance is doubled.
(8.24) Leaders may co-exist in the same Space, with the same Army. Only one (player's choice) may be considered for purposes of combat and movement enhancement. It is permissible to move an Army using the Command Rating of one leader and then switch to the Tactical Rating of a different leader if that army engages in combat during that Activation.
EXAMPLE OF MOVEMENT: A Carthaginian Army led by their 4-6 Elite Leader begins a Major Move at Emporiae, in Hispania just south of the Gallic border. The Carthaginian Player rolls 1d6 for Movement and gets a 5, to which he adds the Leader's Campaign Rating for a total of 11 Movement Points. He decides to head over the Alps and into Italia to destroy the power of Rome, granting his father's dying wish. He moves north to Narbo (1 MP), and then north again into Nemausus, for which he pays 2 MP because it still contains its initial Tribal marker. He flips the Tribal marker, revealing 2 TI (no tribes), and he conducts Battle, winning easily. So he continues on, having spent 3 MP thus far. He heads north to Valentia (1 MP) and then east into the Alpine Pass for 2 MP. Here he rolls for Alps Attrition (9.43), after which he continues to Taurinorum. So far, 7 MP. His 8th MP takes him east to Mediolanum, and with his 9th he moves to Parma. He sees a Roman Army one space south in Arretium, so he spends his remaining 2 MP to move in and fight. After a brilliant victory, he knows that his father rests in peace, so he decides to hang around Italia for several years and try to convert the locals to his cause.
(8.3) Elite Leaders
Each player has at least one "Elite" leader. Elite Leaders are so indicated with a small "E" on the counter.
- An Elite Leader may never be used two Game-Turns in a row. Thus, his counter is not placed back in The Pool until the beginning of the second Leader Selection Phase after his appearance. He is removed after his first Game-Turn of appearance and placed in the Elite Leaders holding box on the map.
- Powers with two Elite Leaders may have consecutive Game-Turns with Elites, but not the same one.
- A Player may not have two Elite Leaders in play at the same time. If one is drawn after the other, place the Elite Leader back into The Pool after drawing another.
- Elite Leaders may become Conquerors, by Event (Standard Game) or card play (Advanced Game). Conquerors continue to abide by all Elite Leader rules.
(8.4) Leader Death
(8.41) Every land battle (but not Naval Battle) carries with it the possibility of a Leader being killed. This is true even if the Leader's force suffered no losses. Each player rolls two dice (2d6).
- If the Winner rolls a '12', his Leader is dead.
- If the Loser, or either player in a Draw, rolls a '2' or a '12', the Leader is dead.
(8.42) The dead Leader's force may continue to move after battle as per 9.2, but it subtracts one (–1) from the remaining MPs available because of the Leader death. Note that, in the case of the force losing the battle AND losing the Leader, the remaining MPs would be reduced by two (–2).
(8.43) If a Fleet is sunk in its entirety, any Leaders with that Fleet are also lost (considered dead).
(8.44) If a force is destroyed in its entirety, any Leaders with that force are also lost (considered dead).
(8.45) Dead Leaders are not replaced, although the counter does go back into The Pool. (Remember, you don't need Leaders to undertake Operations; they just help a lot.)
(8.46) Leaders with Garrison Units. Garrisons are not considered Land Units, so if they are alone in a space and destroyed by a force entering that space, this is not considered a Land Battle. As a result, the enemy force does not have to roll for Leader Death in such a case. If the non-active force has a Leader with the destroyed Garrison unit, the Leader is also lost (considered dead).
9.0 Land Movement
(9.1) Major and Minor Moves
(9.11) If a player has chosen an Expansion Operation (Military), he may perform:
- one (1) Major Move, in which he conducts operations with all (or some) units, of any kind—usually an Army or a Fleet—that start in any one Space, and
- two (2) Minor Moves, in each of which he conducts operations with one unit only (land, naval, garrison or Leader). The term "one unit" means "1" unit of that type, such as "1 HI", "1 LG", or "1 SQ" (see Glossary, 1.4). Example: a player could move a 1 point HI unit and one Galley Squadron as his two Minor Moves.
- as one (or both) of his Minor Moves he may, instead, undertake Construction or Rebuilding of a City or Town (see 7.1).
(9.12) To move Armies or Individual Units, a player expends Movement Points (MP). An Army's MP total for a given Major Move is equal to its Leader's (with whom it is stacked) Campaign rating plus a 1d6 dieroll. The MP total of an Army without a leader, or an Individual Unit, is equal to the 1d6 dieroll only. The player rolls for each force separately; he specifies which force he is activating, rolls the die, and immediately conducts the operation.
EXAMPLE: A 2 Campaign-rated Leader and a DR of '5' means that Army can move up to 7 MP.
(9.13) Major and Minor Moves may be conducted in any order the Active Player wishes.
(9.14) No Land unit may be moved more than once in a single Activation. For example, you cannot move a unit in a Major Move and then move it again in a Minor Move. However, Galley Squadrons may be moved more than once in an Activation as long as in all movement instances they are escorting a Naval Transport mission (see 11.32).
(9.2) Movement Point Costs
(9.21) Moving Armies or Units spend MP as follows:
1 MP to enter an unoccupied or friendly-occupied Space or Transit Point (except for Mountain spaces or Alpine Pass spaces—see below). The presence of Fleets in the Space has no effect. Note that a Space from which an enemy force has withdrawn before combat (10.4) is considered unoccupied.
2 MP to:
- enter a Space by crossing a Strait (9.33)
- enter a Mountain Space or Alpine Pass Space (9.32)
1 MP to embark and debark for Naval Transport (11.3).
1 MP to create garrisons (12.14) as part of a Movement Operation.
1 MP to pick up friendly units. There is no cost to drop them off, although dropped-off units may move no further that Move. Picked-up units assume MP's equal to those that remain for that Leader/Army.
1 MP to Attack (over and above the cost of entering the Space). An Active force must attack whenever it enters a space occupied by Enemy units (including Barbarians, Tribes, Towns, Cities, Garrisons, and Land Units – but not Elephants or Leaders alone – that do not exercise Pre-Battle Withdrawal (10.4), or any time it enters a space containing Barbarian, Tribal, or Neutral units. When entering the space, the Active force must have enough MP remaining to launch the attack assuming the defenders do not withdraw.
1 MP for a force to continue moving (over and above the cost of any spaces entered) after losing a Battle.
1 MP for an Attacker who wins a Battle to force the Defender to retreat.
PLAY NOTE: If you don't have enough MP to do what you want to do, you can't do it. For example, if for a Minor Move you roll a 1, and you want to enter a Mountain Fortress space, you simply don't have enough MP to do so. There are no "minimum moves" in the game.
(9.22) How to Move. Land units move from one Space or Transit Point to another by way of the Land Connections (including Straits) between the two. If there is no Land Connection, that army may not move there (unless there is a Sea Connection and it is being Transported). Example: There is no way a unit may move from Gergovia directly to Uxellodorum (Gaul).
(9.3) Special Spaces
(9.31) Transit Points. These are treated the same as a regular Land Space except that no units may ever stop (voluntarily or involuntarily) in one. Therefore, you may not move into a Transit Point if do not have enough MP to move beyond it into a Space.
(9.32) The Alpine Passes. Alpine passes are the Land Spaces that are located straddling the Mountain borders between several provinces (one of which is always Italy). Any Army that enters one of these Alpine Passes must roll for Alps Attrition. To check for Alps Attrition, follow the Attrition procedure (9.43). No Army may ever stop in an Alpine Pass.
(9.33) Straits. Straits are places where Land units may cross over water without using Naval Transport. The following land connections are straits:
- Between Tingi (Mauretania) and the Transit Point in Baetica. May cross into Mauretania if Tingi unoccupied or friendly controlled.
- Between Messana (Sicily) and Rhegium (Bruttium). May cross if destination is either unoccupied or friendly occupied.
- Between Sestus (Thrace) and Abydos (Ionia). Allows crossing between Europe and Asia.
- Between Byzantium (Thrace) and Nicomedia (Pontus). Allows crossing between Europe and Asia.
Note: Land units may cross straits only if there are no enemy Galley Squadrons in either of the Land Spaces (origin or destination) joined by the strait.
(9.4) Isolation and Attrition
(9.41) At the end of each Game-Turn, in the Isolation Phase, players check to see if Spaces containing their non-Garrison Land units can trace a Line of Communication (6.15) back to any friendly Space in their Home Territory. If that Space cannot do so, it is Isolated and must undergo Attrition.
(9.42) Units in Towns and Cities are never Isolated. Nor are non-player units (Barbarians, Tribes, Neutrals, etc.). Nor are neutrals currently controlled by a player (such as Pergamene units when Pergamum is allied). Mercenary units, however, are subject to Isolation.
(9.43) To determine attrition, roll one die (1d6) for each Isolated Space. The result determines the percentage of Units (not Battle Points) eliminated from that space, with all fractions rounded up. Garrison units and Leaders in the Space may not be used to satisfy losses (but Elephants can, as well as Cavalry, Infantry, Legions, Mercenaries etc.) The formula is as follows:
- Die-roll of 1-2 = 10% of units (round fractions up) eliminated.
- Die-roll of 3-4 = 20% of units (round fractions up) eliminated.
- Die-roll of 5-6 = 30% of units (round fractions up) eliminated.
Note that rounding fractions up means that attrition will always eliminate at least one unit.
EXAMPLE: Carthage has a stack of 3 HI and 3 LI isolated. On a die-roll of 4, 20% of the 6 units are eliminated. 20% of 6 is 1.2, which rounds up to 2. The Carthaginian player may choose to eliminate two HI, two LI, or one of each.
(9.44) After all Land unit attrition is completed, any Fleets that are not in a friendly-controlled Port in the Isolation Phase are destroyed. Remember that a port in a non-Home province is controlled only if occupied by a friendly Land unit, Garrison, Town, or City (but not Elephant or Leader), as per 5.11 and 5.14.
(9.45) Optional Rule: Attrition in Mountain Spaces (Advanced Game Only). Any time an Army larger than 2 units in size begins its owning player's Activation in a Mountain Fortress space, and does not move from that space during that Activation, it suffers attrition as per the formula in 9.43. The attrition occurs at the end of that Activation.
10.0 Land Battles
Any time an Army enters a Land Movement Space occupied by enemy Land units of any type, a battle occurs, unless the non-Active force Withdraws. Except in the case of Interception, the Active force is the Attacker, the non-Active force the Defender. With Interceptions, the reverse is true.
PLAY NOTE: Battle resolution takes a whole lot longer to read about than it does to play. Essentially, you roll the die, and the result multiplied by 10 is what your opponent loses. The player with the most advantages in that battle can change the results of the die-rolls in a few specific ways.
EXAMPLE: A Roman army attacks a Carthaginian army at 2:1 odds. Right off the bat, there are 2 shifts in favor of Rome. However, Carthage has a leader with a Tactical Rating of 3, while Rome's is only 2. Rome now has only 1 shift to work with. Finally, Carthage has cavalry supremacy, which provides 3 shifts in Carthage's favor. Final tally: 2 shifts for Carthage. Now, Rome rolls 4, Carthage rolls 1. This means 40% losses for Carthage, 10% for Rome. Carthage can use the two shifts to do any one of the following: (a) raise Roman losses to 30% with no change in Carthaginian losses; (b) lower Carthaginian losses to 20% with no change in Roman losses. Raise Roman losses to 20% while decreasing Carthaginian losses to 30%.
(10.1) Win, Lose, or Draw
At the end of the Battle, the player who loses the lower percentage of his force is the Winner. The player losing the higher percentage is the Loser. If the percentages are the same, the battle is a Draw.
(10.2) Land Battle Sequence
The following steps constitute the Battle sequence.
Step 1: Either the Active force pays one MP to Attack, or a successfully Intercepting force enters the Battle Space. In either case, the other force is the Defender.
Step 2: Except in the case of Interception, the Defender determines if he wishes to engage in Pre-Battle Withdrawal. If so, he follows the Withdrawal rules (10.4). If he succeeds in leaving the space, the battle is over (although the Active force may follow and re-engage—see 10.42). If not, the sequence continues.
Step 3: If the Battle is in a City or Town space, the Defender determines if he wishes to use the City or Town in the defense (7.3). If so, players may bid for Siege Expertise (10.7).
Step 4: Each player determines if he will use Elephants and, if so, follows the Elephant rules (10.66).
Step 5: Each Player calculates his Battle Points (BP) total (10.51).
Step 6: The BP totals are compared as a ratio of the Larger Force to the Smaller Force. See the Battle Odds and Shift Table.
Step 7: Each player rolls 1d6. These are the Battle Die-Rolls. Each player's result is applied (after Steps 8-10 are determined) to the opposing force.
Step 8: The number of Battle Die-Roll Shifts is determined, based on Battle Ratio, Leadership, Cavalry participation, and more. See 10.5 and the Battle Die-Roll Shifts Summary Table.
Step 9: The player with the most Shifts modifies one or both Battle Die-Rolls as he wishes.
Step 10: The modified Battle Die-Rolls are each multiplied by 10, the result being the percentage of BP lost by each force. The force losing the higher percentage is the Loser of the battle.
Step 11: The Defending player (if he is the Loser) decides if he will retreat his army (10.91). If he does so, he decreases his losses by 10% (i.e., one die-roll Shift). If he decides to retreat, and the Winner has Cavalry Superiority or Supremacy, the Winner may roll to prevent retreat (10.96). If the Defender chooses not to retreat, the Attacker may force him to do so, spending 1 MP to do so.
Step 12: Both players distribute their losses (10.52).
Step 13: If the Defender's army does not retreat, the Attacker's army must move back to the space from which it entered the battle space (10.97).
Step 14: Both sides check for Leader loss (8.4)
Step 15: The active Player determines if he wishes to continue to move. If he was the Loser, he subtracts 1 MP from his remaining MP total.
(10.3) Interception
(10.31) A force may attempt to intercept any other force that moves into a directly connected Land Space (but not into a Transit Point or Alpine Pass space, or across a Strait). Leaders on their own may intercept if the directly connected Space has a friendly Army in it (in other words, they may ride out to help with a battle that's about to occur). There are no limits to the number of times an Army, Unit, or Leader may attempt interception; whenever an enemy force moves into an eligible Space, whether during Movement, Pre-Battle Withdrawal, or Retreat from Combat, the enemy force may attempt to intercept it (the only exception is that forces that are Regrouping (see 10.97) may not be intercepted). Indeed, forces may be intercepted as they enter any given space by multiple eligible forces, with the Battles resolved one at a time.
DESIGN NOTE: The unlimited ability to intercept forces is one of the design choices that makes Pax Romana different from many other games. It's important to keep in mind the scale of this game, and the fact that movement, battle, and interception represent a range of activities over a significant duration of time.
(10.32) To intercept, roll 2d6 and add all of the following that apply:
- +? Intercepting Leader's Tactical Rating
- +3 if intercepting from a City Space
- +1 if intercepting from a Town Space
- +1 if intercepting into one's own City Space (but not Town Space)
If the adjusted DR result is 12 or greater, the Interception has succeeded. The intercepting Army moves into the target Space and immediately initiates Battle, with itself as the Attacker and the Active force as the defender.
EXAMPLE OF INTERCEPTION #1: A 2-5 Roman leader in Rome (which is a City) wishes to intercept a Carthaginian army that has moved into Pisae (which is a Town). He rolls two dice with a result of 7. He adds 2 for his Tactical Rating and another 3 for being in a City. The total is 7+2+3=12, so the interception succeeds. He would have failed on a roll of 6 or less.
EXAMPLE OF INTERCEPTION #2: A 2-5 Roman leader in Rome (which is a City) wishes to intercept a Carthaginian army that has moved into Pisae (which is a Town) in order to attack a leaderless Roman legion there. The Roman player wants his Leader to help with the battle, so he rolls for interception. He rolls two dice with a result of 8. He adds 2 for his Tactical Rating and another 3 for being in a City. The total is 8+2+3=13, so the interception succeeds. After the battle, the Carthaginian army continues his move and heads to Arretium. The Roman player may attempt to intercept once again, but this time he receives the Town benefit, not the City benefit. He rolls an 8, to which he adds his Battle Rating of 2 and the Town DRM of 1. The result is 11, and the interception attempt fails.
(10.33) Interceptions follow the normal Battle Sequence (10.2) with two exceptions:
- in the ensuing battle, the Intercepting (non-Active) force is the Attacker, while the Intercepted (Active) force is the defender. However, this is not the case if only a Leader intercepts (in which case the Active force remains the Attacker).
- Intercepted units may not engage in Pre-Battle Withdrawal (exception: 10.62).
(10.34) If a force intercepts into a non-City/Town space already containing a friendly force, all units automatically combine in the attack.
(10.35) If a force intercepts into a space containing a friendly City or Town, before attempting the interception the intercepting player declares whether or not any of the units in the Battle space will use the City/Town for defense:
- If none will use the City/Town, then if the interception succeeds all units combine in the attack
- If some will use the City/Town, then if the interception succeeds only those units combine with the intercepting army in the attack. The remaining units do not participate in the battle, but are committed to using the City/Town in defense if the intercepting army is defeated and retreats to the space from which it entered the Battle space. The attack on the City/Town must take place immediately after the intercepting force leaves the space (at no extra cost in Movement Points to the Active army).
(10.36) If an Active player moves into a space in order to fight a neutral force (Pergamum, Syracuse, etc.), and a non-Active player intercepts into the Battle Space, the neutral force and the intercepting force are considered one force for the purposes of that battle (identically to 10.34 – and 10.35 applies for the neutral force if the Battle Space contains a City/Town). However, if the intercepting/neutrals force loses the battle, only the intercepting force regroups; the neutral force remains in the space and the originally moving force immediately attacks it. If the intercepting/neutrals force wins the battle, however, the intercepting force must still return to the space from which it entered the battle; it does not stay in the neutral's space, nor does it attack the neutral. In effect, it formed a temporary alliance with that neutral for the sake of turning back the enemy force.
(10.37) The Active force may continue to move after the Battle in which it was Intercepted, if it has sufficient MP remaining. If the Active force loses the Battle, it loses one of its remaining MP.
(10.38) Land forces undergoing Naval Transport may be intercepted only once they debark (and see 10.37). Naval movement itself may never be intercepted (but in the Advanced Game, play of the Naval Ambush card is similar to interception).
(10.39) When a force conducts Naval Transport to a port space containing a friendly City/Town marker and debarks in that port space, if the force is intercepted it may use the City/Town in the defense. This is an exception to 10.34.
PLAY NOTE: In effect, the force has sailed into the port and is thus inside the City if it wishes to be.
(10.4) Pre-Battle Withdrawal
(10.41) When a moving Army enters an enemy-occupied Land Movement Space, the Defender may Withdraw. To do so, the defending player rolls the die (1d6). The result is the number of Land MP the withdrawing Army may use. It may use fewer, but must use at least one (unless prevented by cavalry or terrain from using any at all, as explained below). Once it has finished its Withdrawal Movement, it may not do so again during that Move (although it could Withdraw in a different move in the same Activation).
(10.42) If the withdrawal is successful, the active Army is considered to have spent only the MP required by the terrain in the space, not the +1 MP for entering an enemy-controlled space. If the active Army has enough MP remaining, it may continue its movement, including, if desired, pursuing the withdrawn force and attacking it.
(10.43) If the Attacking army has Cavalry Superiority or Cavalry Supremacy, it may (not must) choose to use its cavalry to hinder Withdrawal, modifying the Withdrawal die-roll as follows:
- Subtract one (–1) from the result if the attacking Army uses its cavalry superiority (10.61) to hinder Withdrawal.
- Subtract three (–3) from the result if the attacking Army uses its cavalry supremacy (10.61) to hinder Withdrawal.
- This rule does not apply if the Battle Space is a Mountain Fortress space or a Port Space from which the Defender withdraws using Naval Transport (11.3).
(10.44) At no time during Withdrawal may units withdraw into the Space from which the attacking unit directly entered the Battle Space. Nor may they Withdraw into a space occupied by non-friendly Cities, Towns, or Land units (including tribes and barbarians), unless that space is occupied solely by a Garrison—in which case they move through the space at a cost of +1 MP, and the Garrison remains in place. Note that Garrisons by themselves may never use Withdrawal. If the attacked units cannot Withdraw (or decide not to), combat ensues.
(10.45) Other Withdrawal Considerations:
-
Intercepted units may not use Pre-Battle Withdrawal. Once intercepted, they fight.
-
All units in the Space need not withdraw together. The Player may leave one or more behind and withdraw the remainder (those left behind must fight the battle). Units may be dropped off (at no cost in MP) or picked up (at a cost of 1 MP) during the Withdrawal.
-
Withdrawing units may be intercepted as per the Interception rules (10.31), but not by the currently Active force (i.e., the force that caused the withdrawal).
-
Withdrawing units may use naval transport (if they obtained enough MPs to do so), but after embarking, all restrictions of 10.95 (Retreat by Sea) apply.
-
For each instance in which a Player uses Pre-Battle Withdrawal from a Space within its Home Territory, his Stability Level drops by one (–1), even if that Province is controlled by another Player.
(10.5) Resolving Land Battles
(10.51) Battles are resolved by following these steps.
Step 1: The Players total their Battle Points (BP) as follows:
- 4 BP for each Legion (LG) unit
- 3 BP for each Heavy Infantry (HI) unit
- 1 BP for each Light Infantry (LI), Barbarian Infantry (BI), or Militia unit
- 1 BP for each Cavalry unit (but not Roman Legionary Cavalry)
- 5, 4 or 3 BP for Defending in a City (1 BP per City defense strength)
- 2 or 1 BP for Defending in Town (1 BP per Wall Point)
- 2 BP for each Reduced Legion unit
- 1 BP for each Reduced HI unit
- 0 BP for each Elephant unit
- 0 BP for each Garrison unit
Note that neither force may withhold any units from the Battle (but see 10.34).
Step 2: The BP totals are compared as a ratio of the Larger Force to the Smaller force (not Attacker to Defender as in many games). For example, 12 BP vs. 6 BP equals 2:1. Ratios are rounded to the nearest listed ratio, so that 11 BP vs. 6 BP is a 2:1, while 10 BP vs. 6 BP is 1.5:1. See the Battle Odds and Shifts Chart for help in calculating these ratios.
Step 3: The Players each roll one die. This is the Battle Die-Roll. The result, modified by the Battle Die-Roll Shifts discussed immediately below and multiplied by 10, is the percentage of losses suffered by the opposing force. For example, your unmodified die-roll of 3 means your opponent loses 30% of the force he used in this battle.
Step 4: The Players calculate the Battle Die-Roll Shifts as follows:
- The player owning the larger force gets a number of Shifts equal to his number in the Battle Ratio. For example: 2:1 odds yields 2 Shifts, 4:1 yields 4 shifts. However, 1.5:1 gives 1 shift, while 1:1 provides none. See the Battle Odds and Shifts chart.
- If either force has Cavalry Superiority (10.61), that player gets 1 Shift.
- If either force has Cavalry Supremacy (10.61), that player gets 3 Shifts.
- The player whose Leader has the higher Tactical Rating (8.21) gets a number of shifts equal to the difference between his Leader's Tactical Rating and that of his opponent's Leader, except in a battle where a City or Town is used for defense (7.3), in which case the benefit of a higher Tactical Rating is limited to only one shift.
- If the Battle is taking place in a Mountain Pass space, the Defender gets 2 Shifts.
- An Army defending against an Amphibious Attack gets 2 Shifts.
- If a player bids successfully for Siege Expertise (for battles involving a City/Town), he gets 1 Shift.
- Certain Event Cards (Advanced Game Only) provide Battle Die-Roll Shifts.
Step 5: The Player with the most shifts subtracts his opponent's Shift total from his own. The result is the number of Shifts available to that Player. EXAMPLE: Player A has 2:1 odds and Cavalry Superiority, so he gets 3 Shifts. Meanwhile, Player B gets 1 Shift, because his leader's Tactical Rating is 1 higher than Player A's leader. Player A therefore gets 2 shifts total (his 3 minus his opponent's 1). Assuming enough shifts, the die-roll may end up as low as zero (0) or as high as ten (10).
Step 6: The Player with the most Shifts now shifts either or both Battle Die-Rolls as he wishes, raising his own die-roll by 1 for each Shift (thereby increasing his opponent's losses) and lowering his opponent's die-roll by 1 for each Shift (thereby decreasing his own losses). The Player with the lesser number of Shifts gets to do nothing here (his Shifts are already factored in).
Step 7: Each Player's modified die-roll is then multiplied by 10, with the result being the percentage of losses suffered by the opposing side. The force suffering the higher percentage loss is the Loser of the Battle (the other player is the Winner, of course).
Step 8: Each Player distributes his losses (10.52).
EXAMPLE #1: Greece has a force consisting of 5 HI, 6 LI, and a 2-4 Leader. The East has 3 HI and 2 LI, and a 1-5 Leader. Greece has 21 BP vs. 11 for the East, so the Battle Ratio (rounded to the nearest listed ratio) is 2:1. Greece therefore has 2 Shifts for Battle Odds. Greece's Leader has a higher Tactical Rating by 1, so Greece gets an additional Shift. Greece rolls a 3, East rolls a 5. Greece uses its 3 Shifts to lower East's roll by 3, to a modified result of 2. The result is that Greece loses 20% of its force, while the East loses 30% of its force. Greece could have raised its own die-roll to a 6 instead, inflicting 60% losses on The East but suffering 50% of its own, or any combination of modifications it wished.
EXAMPLE #2: Assume the same forces as above, except that Greece has 4 cavalry units and The East has 2. In addition, the East has a Tactical Surprise card in his hand. Greece has the same 3 Shifts as above, plus 1 Shift for Cavalry Superiority (he as more cavalry than the East, but not three times as much, which he would need for Supremacy). He announces he has 4 Shifts, at which point the East plays the card. The result is a final total of 2 Shifts for the Greek player to distribute.
(10.52) Distributing Losses. Each player chooses how to distribute his Losses, which are calculated as follows:
- Infantry elimination based on the BP value of the unit type (as per 10.51).
- Legion or Heavy Infantry reduction as per 10.8.
- Cavalry elimination equal to 1 BP per Cavalry unit.
- City or Town reduction, as per 7.32.
(10.53) When calculating losses, all fractions are calculated mathematically (with .5 rounded up instead of down), and the loss dictated by the Shifted die-roll result for each force is the minimum number of BP that must be removed. For example, if an Army consisting of 3 HI (9 BP) suffers a 40% loss, which comes to 3.6 BP, that result is rounded up to 4 BP. The player would lose one full HI (3 BP) and flip a second HI to Reduced status (2 BP). Note that he would have no choice but to absorb 5 BP total, even though the result demanded only 4 BP, because he has no 1-BP units to soak up the smaller losses.
(10.54) When calculating losses, the Battle Points for the City or Town used in the Battle are included in the total. So if 2 LI units defend in a City (as an example), the percentage loss is based on 7 BP, not just on the 2 BP from the infantry units.
DESIGN NOTE: Factoring the City/Town into the losses represents the damage inflicted from sieges, siege assaults, etc.
(10.55) Re-Rolls (Optional Rule).
For battles in which the larger force has at least twice as many Battle Points as the smaller force—i.e. 2:1 odds—and rolls a lower number (unmodified) than the smaller force, the player with the larger force may attempt to demand a re-roll of either player's Battle Die-Roll. He first commits to the re-roll attempt (no backing out), and then totals the Tactical Rating and the Campaign Rating of his force's leader. He then rolls two dice (2d6).
- If the 2d6 result is equal to or less than the Tactical-Campaign Rating total, he succeeds. He may then re-roll his own Battle Die-Roll, subtracting one (–1) from the result, or he may demand that his opponent re-roll the smaller army's Battle Die-Roll, adding one (+1) to the result. In both cases, Elite Leaders add one (+1) to the result.
- If the 2d6 result is higher than the Tactical-Campaign Rating total, the attempt fails. The player with the smaller force may then attempt to demand a re-roll of either of the two Battle Die-Rolls. He rolls 2d6 and subtracts two (–2) from the result, comparing this to the total of his own Leader's Tactical and Campaign Ratings. If he succeeds, he then states which Battle Die he wants re-rolled, with no modifiers applied. If he fails, the re-roll procedure is finished.
(10.56) Simplified Rounding (Optional Rule).
DESIGN NOTE: Many wargames round combat ratios down in favor of the defender. Pax Romana uses mathematical rounding to determine the relative strength of the forces in battle. For example, in many games, a ratio of 26:10 would round down to a ratio of 2:1, but Pax Romana rounds the ratio up to 3:1. The dividing point is .5; for combat ratios, .5 rounds down (consider it a nod to the idea of rounding in favor of the defender). However, for determining combat losses, .5 rounds up, so if you calculate your loss to be 2.4 Battle Points, you lose 2 BP, but a loss of 2.5 Battle Points means you lose 3 BP. The following rule provides a simplified way to round numbers in battles, for those who prefer it. It does, however, alter game balance somewhat in favor of the defender.
For simplified rounding, calculate the Battle Shifts for army strength as follows:
- More BP than the opposing force = 1 shift
- At least 2x the BP of the opposing force = 2 shifts
- At least 3x the BP of the opposing force = 3 shifts
- At least 4x the BP of the opposing force = 4 shifts
- Etc.
All other shifts apply as per Step 4 in 10.51.
(10.6) Cavalry and Elephants in Battle
(10.61) Each Cavalry unit adds one BP to its force, but its effects can be far more significant. An Army with Cavalry Superiority provides one (1) Battle Die-Roll Shift; an Army with Cavalry Supremacy provides three (3) Shifts. An Army has Cavalry Supremacy if it has three times (3X) as many Cavalry units as the opponent, or if it has 2 Cavalry units and the opponent has none. An Army has Cavalry Superiority if it has more Cavalry units than the opponent, but not enough for Supremacy. Cavalry units may be negated by elephants (see 10.66).
(10.62) Cavalry may not be used in any way (either attacking or defending) for battles that take place in Mountain spaces or in battles in which a Town or City has been factored into the BP total (nor may they used to absorb losses in such cases). If Cavalry are part of a force that uses the Town or City in defense, and the non-Cavalry units are eliminated, the Cavalry is automatically eliminated. In addition, cavalry may not be used by the attacker in Amphibious Attacks.
(10.63) Cavalry fighting alone. If cavalry units are in a Space with no infantry units (Garrisons do not count as infantry), treat each cavalry unit as 1 BP. The Superiority/Supremacy rule still applies. If alone in a Mountain Fortress and attacked, Cavalry automatically executes Pre-Battle Withdrawal.
(10.64) Roman Legionary Cavalry (Advanced Game Only). Starting with Game-Turn III (250-225 BCE), Roman LG units (including those already on the map) have integrated cavalry forces. For every two (2) full-strength LG units in a stack, the Romans have one (1) cavalry unit, for the purpose of determining Cavalry Superiority. Count the number of full-strength LG in the stack and divide by 2, rounding down to get the cavalry strength (examples: 1 LG has no cavalry, 2-3 LG have 1 cavalry, 4-5 LG have 2 cavalry, etc.). The Roman player does not put cavalry units on the map for this purpose, and the cavalry may never operate separately from their LG unit. These Cavalry units do not count as BP in determining battle ratios, nor may they be used to satisfy combat losses (i.e., you can't lose just the cavalry portion of a Legion). Furthermore, Legionary Cavalry without regular Cavalry may never gain Cavalry Supremacy. The Roman player may recruit regular Cavalry units (from provinces that allow such recruitment) and use those in conjunction with the Legionary Cavalry, but until he has at least as many regular cavalry as Legionary Cavalry in the Army in question, he is restricted to Cavalry Superiority. Note that the Roman player may not "suppress" his Legionary Cavalry in order to match the numbers with regular Cavalry more easily; if he has four LG (as an example), he must use his two Legionary Cavalry units.
(10.65) Optional Rule: Legions Without Cavalry (Advanced Game Only). If players want to stick even more closely with history than 10.64 allows, they can agree to the following rule. In Game-Turn IX and X (100-50 BCE inclusive), Roman Legionary Cavalry do not exist. LG units have a straight BP value of 5.
(10.66) Elephants. Certain players start with Elephants. Otherwise, Elephants can be raised only if certain Provinces are controlled. These are indicated with an (Eleph) on the Major Powers Income and Manpower Table. It costs 1T to buy 1 Elephant unit.
(10.67) Elephants have no BP value. If an army containing elephants enters into Battle, the player owning that army commits as many as he wishes to the Battle (both players may do so if both armies contain elephants), committing a specific number before rolling for their effect. Then, prior to resolving the Battle, he rolls 1d6 for each committed Elephant unit (he must roll for all of them, even if he gets the result he wants with the very first one), with the following possible die-roll results:
- 1: Negates the use of one enemy cavalry unit and eliminates 1 additional enemy BP. The enemy player chooses which units to eliminate.
- 2: Negates the use of one enemy cavalry unit.
- 3: Negates the use of one enemy cavalry unit; eliminate the Elephant.
- 4: No Effect.
- 5: Eliminate the Elephant.
- 6: Elephants rampage. Eliminate 1 of your own BP plus the Elephant.
(10.68) Elephants may not be used (whether attacking or defending) in any battle in which a Town, City or Mountain Fortress has been factored into the BP total. Furthermore, Elephants may not exist on their own in any Space (including in City or Town spaces); if alone for any reason, they are eliminated.
(10.69) Elephants may not be used to absorb losses in Battle (although they may be used for Attrition losses). However, if all other units are eliminated, all elephants are also eliminated.
(10.7) Siege Expertise
(10.71) Players may pay for Siege Expertise to assist with Battles in which a City or Town is included in the Battle Point calculation. Before conducting the Battle, both players secretly note the amount of Siege Expertise they are purchasing, revealing that amount simultaneously and subtracting the amount immediately from their respective Treasuries (both players pay what they bid, even the loser). The player who spends the most gets one Battle Die-Roll Shift in addition to any other Shifts to which he may be entitled. If bid amounts are tied, do not bid again; both players simply pay what they bid without gaining an advantage.
(10.72) Siege Expertise must be purchased separately for each Battle, even if more than one Battle occurs against the same City/Town, by the same Attacking army, in the same Activation.
(10.73) Siege Expertise may not be used by the Attacker in an Amphibious Attack.
(10.8) Reducing Legions and Heavy Infantry
(10.81) Legions can be reduced in combat. A LG can absorb up to 2 BP of losses and be reduced (flip the counter to its Reduced side). Reduced LG are worth 2 BP. A Reduced Legion can absorb up to another 2 BP of losses, at which point it is eliminated. If an Army consisting of both full-strength and Reduced LG takes 1 or 2 BP of losses, and there are no other units available to absorb the losses, the Reduced LG is eliminated.
EXAMPLE: An army consisting solely of 2 full-strength LG fights a battle and suffers 1 BP of losses. One of the LG is Reduced, with the counter flipped over to its Reduced side. The army fights another battle and takes another 1 BP of losses. The Reduced LG is eliminated.
(10.82) Heavy Infantry (but not Mercenary HI units) can also be reduced in combat. An HI unit can absorb up to 2 BP of losses and be reduced (flip the counter to its Reduced side). A reduced HI can absorb only one BP of losses, at which point it is eliminated. If an Army consisting of both full-strength and Reduced HI takes 1 BP of losses, and there are no other units available to absorb the losses, the Reduced HI is eliminated.
(10.83) A full-strength LG or HI unit taking more than 2 BP of losses is not Reduced; it is completely eliminated instead.
(10.84) It is not permissible to reduce 2 LG/HI in a single Battle instead of eliminating a full LG/HI. For example, if a force consisting of 5 HI takes losses requiring the elimination of 4 BP, it may not reduce two HI units to satisfy the losses; it must eliminate one full HI unit instead and reduce another HI.
(10.85) When taking losses because of Attrition (9.43 and 9.45), reducing an LG or HI unit counts as eliminating one unit. Eliminating it completely counts as two units.
(10.86) Reduced LG and HI can be rebuilt in three ways:
- At the instant two Reduced LG are in the same space, they must combine into one full-strength LG. Similarly, at the instant two Reduced HI are in the same space, they combine into one full-strength HI. One of the counters is flipped to its full-strength side; the other is removed from the map.
- During a Recruitment operation, Reduced LG or HI units may be rebuilt, in place, to full-strength, at a cost of 1T each. Simply flip the rebuilt counter to its full-strength side. Isolated reduced LG or HI may not be rebuilt unless they are in a controlled province that is capable of recruiting LG or HI respectively.
- During the Manpower Phase, Reduced LG and HI may be rebuilt, where they are currently, at a cost of 1T each. If the player chooses not to rebuild a reduced unit (or cannot rebuild it), it is replaced, in its current space, by a Garrison unit (consider it disbanded in favor of settling the area). Isolated reduced LG or HI may not be rebuilt unless they are in a controlled province that is capable of recruiting LG or HI respectively.
(10.87) Reduced Legions do not contribute to the Legionary Cavalry component (10.64) of Roman Legions. In other words, an Army of 1 full-strength LG and 1 Reduced LG units has no cavalry component; similarly, an Army of 5 full-strength LG and 1 Reduced LG has a contingent of 2 Cavalry units instead of 3. As soon as the Reduced LG is rebuilt, the two full-strength LG once again have the Cavalry component available.
EXAMPLE: It's Turn III and a Roman army consisting of 4 LG is attacked. They therefore enter battle with 16 BP plus 2 Cavalry points. The Romans lose 1 BP, flipping one of the LG to its Reduced side. They are attacked again and this time they have 14 BP and only 1 Cavalry point. Reducing the LG has deprived the army of 2 BP and 1 of the cavalry points.
(10.9) Retreating and Regrouping
(10.91) Voluntary Retreats. If the Defending force loses a Battle and has not used a City or Town in its defense, it has the option of retreating retreat one or two spaces by Land, or one space by Sea. The retreating force reduces his opponent's Battle Die-Roll by one (–1 or 10%), for the purpose of calculating defender losses (whether it retreats one or two spaces).
PLAY NOTE: Remember, the Loser is defined as the force which took the higher percentage of losses, as calculated before deciding on retreats.
(10.92) Forced Retreats. If the Attacker wins the Battle, he may force the Defending Army to retreat (unless the Defender used a Town or City in the defense), as long as he has at least 1 MP remaining. He spends that movement point, and the Defending Army must retreat as if he had done so voluntarily (including reducing his losses by 10%). The Attacker now occupies the Battle Space. Note that forced retreats may not be used against forces that are not allowed to retreat (such as Tribal units and most Barbarian forces, etc., as their specific rules state), nor against defenders who used a City/Town in the Battle.
(10.93) The Attacking force may never use retreat, even if it loses the Battle. However, see 10.97. Remember that Intercepting forces are the Attacker.
(10.94) Retreats By Land. Defending forces retreat by Land as follows:
-
The retreating force must move into a connected Land Space, no more than two spaces from the Battle Space, that contains no enemy (or neutral, tribal, or barbarian) Land Units. It may not move into or through spaces with non-friendly Land Units, Garrisons, Towns, or Cities; if it has no choice, it is eliminated completely (and the Leader is considered dead). In a two-space retreat, the force may not end up in a space directly connected to the Battle space.
-
The retreating force may not retreat through or into the space from which the Attacking army entered the Battle space.
-
If a force does not have a retreat path, it may not use Voluntary Retreat (10.91).
-
If a force is forced to retreat (10.92) but cannot do so, it is eliminated.
-
If the Defending force retreats, all units in that force must retreat, and all units in the retreating force must stay together during the retreat.
(10.95) Retreats by Sea. Land forces may retreat by Sea if all the following circumstances apply (these same rules apply to land forces conducting pre-battle Withdrawal):
- the battle takes place in a port
- the retreating player has at least one Galley Squadron in that Port
- the Retreat is to a friendly-controlled Port only 1 Naval Movement Space away. The army takes the Galley Squadron(s) with it.
(10.96) Other Retreat Considerations:
- If the Winning force used Cavalry Superiority or Cavalry Supremacy in the Battle, it may (not must) try to prevent the Loser from retreating. The Winner rolls a die. On a result of "1" in the case of Cavalry Superiority, or a result of "3 or less" in the case of Cavalry Supremacy, the Loser may not retreat (and suffers full losses as a result).
- A retreating force may be intercepted by a force (but not the force it just fought) if its retreat takes it into a space where Interception is possible (see 10.3). The interception occurs after the retreating force has taken its losses from battle.
- If a force uses a City or Town as part of its defense (7.3), it may not retreat as part of that specific combat. During any subsequent combat, it may choose not to use the City/Town, in which case the retreat option is again available. Exception: A force capable of withdrawing or retreating by sea (see 10.95) may use the City or Town as part of the defense and still retreat.
- A force using Land Transit Points to reach its retreat destination may retreat through any number of such points, but only to the first Land Space beyond. After the destination is reached, total the number of Transit Points used for the retreat; the force loses additional Battle Points equal to the total.
PLAY NOTE: Unlike many wargames, there is no free "advance after combat" in Pax Romana.
(10.97) Regrouping. After the Battle is fully resolved, if the Defending army did not retreat or is not destroyed, the Attacking force is placed back on (not moved to) the space from which it entered the Battle Space. If that Space is a Land Transit Point, the regrouping army is placed there only if it has enough MP remaining to reach a Land Space. If it does not, it is placed on the last Land Space it was in before the battle. A Regrouping force may not be intercepted when placed back on its original space (or a transit point), but it may be intercepted if it re-enters the original Battle space. Regrouping is not considered a retreat.
DESIGN NOTE: As with many other aspects of Pax Romana, it is important to keep in mind the scope and scale of the game when learning how the system functions. Battles are not individual battles; they are full campaigns. When a defender is not dislodged from a space, it means that, after a series of battles, they managed to hold onto the area, even though they might have lost the battle in game terms. The attacking army does not retreat, it simply reorganizes for another campaign against that enemy.
11.0 Naval Operations
Naval operations are simple, but their effects can be dramatic. Galley squadrons can block naval transport and the crossing of straits, and players can often move armies by sea far more quickly than by land. Maintaining galley squadrons is expensive, but in most cases they're well worth the cost from a strategic perspective.
(11.1) Naval Movement
(11.11) Naval movement—movement of a fleet of galley squadrons, as well as transporting land units (11.1-11.3)—uses the Sea Connections between Ports and Naval Transit Points. Unlike land units, galley squadrons traveling by themselves do not have or use Movement Points; they have unlimited movement Capability, restricted only by Continuity (11.13). Naval transport operations do use Movement Points, however (11.3).
PLAY NOTE: A Fleet is defined as all of a player's Squadrons in one Space or moving together, or as all the Squadrons and land forces participating in a Naval Transport operation.
EXAMPLE OF TRANSPORT: The Greek player controls all his home Spaces. He also controls Syracuse (East Sicily). He wants to send an Army by sea from Pella (Macedonia) to Agrigentum (West Sicily). The Army has a 1-3 Leader. The Player rolls 1d6 for MPs and gets a 3; adding this to the Leader's Campaign Rating gives him 6 MP. He moves the Army 1 MP to Dyrrhachium on Macedonia's west coast and spends 1 MP to embark for Transport. Now, at the cost of 1 single MP for the entire trip, he sails the Army south along the Greek coast and west to Syracuse in East Sicily, passing through Corcyra, Actium, Patrae, Gythium, and the Deep Sea Transit Point between Gythium and Syracuse (he luckily escapes damage on the DSTP). He spends 1 MP to debark the Army at Syracuse and a final 1 MP to march by land one Space west to Agrigentum. Total MP cost: 5 MP. If there had been an enemy force in Agrigentum, he would have had enough MP (he would need 6 in total) to enter the Space and attack.
Example of Amphibious Attack: Having captured Lilybaeum (West Sicily), Rome decides to launch an amphibious invasion against the Carthaginian force in Thapsus (Africa). He has an Army in Lilybaeum led by a 2-3 Leader, and two Galley Squadrons as well. He rolls 3 for Movement, so he has 6 MP. He embarks his Army in Lilybaeum for Transport and, taking both Galley Squadrons along for escort, sails to a neutral Melita via the NTP in between (rolling a 3 at the NTP, resulting in no effect). Because he does not have a land unit in Melita and it is not in his Home Territory, he must Stop there and roll 2d6 for Continuity. He rolls an 8, modified to a 7 because he has a Leader, so he may Continue (at no extra cost in MP) and he sails to Thapsus. The operation has cost the following: 1 MP to embark 1 MP to sail, 1 MP to debark, and 1 MP to attack (he has no choice but to attack). The Transport and Attack have cost him 4 of his 6 MP, so he has enough to get to a debarkation space after the assault (otherwise he could not make this move at all). The Carthaginian player gains two Battle Die-Roll Shifts from the Amphibious Attack. Assuming the Roman player wins the battle, he can spend one of his last two MP to force the Carthaginian force to retreat, thereby succeeding at his invasion. If the Carthaginians win the battle, though, the Roman player would have had to sail to a debarkation space (probably Melita or Lilybaeum), because with only 2 MP remaining, he would not have had enough MP to attack again (2 MP) and sail away if he did not take the Battle Space.
(11.12) Stopping. A Fleet must Stop when:
- it enters an enemy-occupied Port, whether the enemy occupation is naval or land. If there is an enemy Fleet in that Space there may be a Naval battle.
- it enters an unoccupied Port space not in its Home Territory.
- it enters a non-friendly Port space to debark transported Land Units (i.e., the Port was non-friendly as the force arrived at it).
- a Naval Disaster die-roll other than No Effect forces it to Stop upon entering a Naval Transit Point or a Deep Sea Transit Point.
- the player wishes to do so for any other reason.
PLAY NOTE: Remember, unoccupied ports in a controlled non-Home province are not friendly.
(11.13) Continuity. Once a Fleet has Stopped, to see if it may move again that Phase, the player rolls 2d6.
- If the diceroll is a 2-7, the Fleet may Continue to move.
- If the diceroll is a 8-12, the Fleet is Finished and may move no further.
(11.14) When rolling for Continuity, the following DRM apply.
- Fleet has Leader with it: –1
- Enemy Fleet withdraws before battle (11.42): +1
- Fleet wins a battle (11.44): +2
(11.15) If a Fleet stops in a non-friendly Port or on a small circle Naval Transit Point, it must move to a friendly Port by the end of the Game-Turn or it is eliminated in the Attrition Phase. Furthermore, if a Naval Transport fleet Stops in a non-friendly Port Space because it failed the Continuity roll, the transports Land units must debark in that Space, and it must attack that Space via Amphibious Attack) if the Space is occupied by non-friendly units. See 11.33 and 11.34.
(11.16) A Fleet that enters an enemy-controlled Port does not have to Stop if the enemy player allows the phasing player's Fleet to keep moving.
(11.17) A Fleet, or a Leader moving by himself, does not have to Stop to pick up Squadrons in controlled ports. Nor does it cost MP to do so.
(11.18) Fleets that Lose a Naval battle may not move any more that Phase, after Withdrawing.
(11.19) Naval movement may never be intercepted (but see 10.36). However, in the Advanced Game, play of the Naval Ambush card is similar to interception.
(11.2) Naval Disaster
(11.21) Whenever a Fleet or Transport enters a Naval Transit Point, the player must check to see if anything untoward happens by rolling one die (1d6):
- If it is a small circle NTP, and the DR is a '6', the Fleet is Blown Off Course and must immediately Stop; it may roll to continue (11.13). If it fails, it is Finished, and stays in the NTP.
- If it is a large circle Deep Sea NTP:
- and the dieroll is a 3 or 4, the Fleet is Blown Off Course and must immediately Stop; it may roll to continue (see 11.13).
- and the dieroll is a 5 or 6, the Fleet is struck by a disastrous Storm and must Stop. In addition, roll one die; that dieroll equals the number of War Galley Squadrons eliminated AND the number of Battle Points worth of Land units eliminated. In the case of Naval Transport, if the die-roll calls for more Galley Squadrons to be eliminated than are actually present, the transported Army is eliminated completely.
- A Fleet may Finish on a standard NTP (but see 11.15), but not on a Deep Sea NTP. If it stops in a Deep Sea NTP and fails its Continuity roll, it is eliminated.
(11.22) If a Fleet or Transport begins an Activation on an NTP (because it Finished the last Activation there), the following happens:
- If it is a Fleet of Galley Squadrons only, it simply moves where it wishes, subject to the naval movement rules.
- If it is a fleet conducting Naval Transport, it conducts Naval Transport normally, except that it does not spend 1 MP to embark.
(11.3) Naval Transport
(11.31) Land units do not need galley squadrons to move by sea. They simply move as if they were a naval unit, as above. However, without a galley escort, if attacked by enemy Fleets they are automatically eliminated. They are also subject to Naval Disasters (11.21). Land units pay 1 MP to embark on naval Transport, 1 MP to sail (any distance), and 1 MP to debark (but see 11.33). They may combine Naval Movement with Land Movement. They may also use Naval Transport more than once during an Activation (although they will rarely have enough MP to do so).
(11.32) Naval Transport Considerations:
- A force may not embark for naval transport unless it has enough MP to debark at some point during its movement. If the path to its destination takes it through a Space occupied by non-friendly Land Units, it must have enough MP to conduct an Amphibious Attack (11.33) or it may not embark.
- Leader-led Fleets consisting solely of Galley Squadrons may pick up land units in a Port and keep moving without rolling for Continuity. However, as soon as the first land unit is picked up, the operation becomes Naval Transport; roll for the Leader's MP as if it were normal Land Movement, subtracting one (–1) from the result to account for Naval Movement already conducted.
- Armies being naval transported who wish to pick up land units enroute to their debarkation hex may do so at a cost of 1 MP; they do not have to debark and re-embark, nor do they need to roll for Continuity. Galley squadrons may be picked up at no MP cost and no need for a Continuity roll.
- Armies being naval transported who wish to drop off individual units enroute to their debarkation hex may do so without Stopping and at no cost in MP. However, they may not drop off units in enemy-occupied spaces (even just Garrison units) without debarking. Also, dropping off more than one unit in a space constitutes debarkation and costs 1 MP.
- If a Naval Transport fleet Stops in a non-friendly Port Space because it fails its Continuity roll, the Land units being transported must debark in that Space (and see 11.34). If there are non-friendly units in that Space, the transported force must conduct an Amphibious Attack (unless the transport force consists of no Land Units—only a Garrison, for example—in which case it is eliminated). The transported Land units may continue moving and may even conduct other Naval Transport missions in the same Activation, if they have the MP to do so. They may even conduct another Naval Transport mission using the stopped Galley Squadrons (if any were in the Fleet) as escorts (thereby allowing those GS to move more than once in the Activation).
PLAY NOTE: The third bullet point allows Armies undergoing Naval Transport to pick up additional Land Units in friendly ports along the way without the need to debark first and then re-embark, and without the need to roll for Continuation each time.
(11.33) Amphibious Attacks. The only way for transported Land units to debark in a non-friendly occupied Land Space is to conduct an Amphibious Attack. Amphibious Attacks are conducted exactly like all other Land Battles (10.5), including the possible use of Pre-Battle Withdrawal, except that
- the Defender receives two (2) Battle Die-Roll Shifts
- the Attacker may not use cavalry or elephants (the Defender may do so unless using a City/Town for defense)
- If the Defender does retreat (voluntarily or by force), the Attacker is considered debarked in the Battle Space.
(11.34) The goal of an Amphibious Attack is to conclude the battle in occupation of the Battle space. However, an Amphibious Attack may be conducted only if the Active force has enough Movement Points to debark elsewhere under the assumption that it fails to occupy the Battle Space (but without worrying about Stopping on Naval or Deep Sea Transit Points). In other words, the force must have enough MP to guarantee a landing, somewhere, without fighting a land battle. If it does not, it may not attempt the Amphibious Attack.
(11.35) Regrouping after Amphibious Attacks. If the Defender does not retreat after an Amphibious Attack, the Attacker may immediately spend 2 MP to attack again (and continue doing so as long as he has sufficient MP). However, at all times during these attacks the restrictions of 11.34 apply.
Play Note: If a player conducts an Amphibious Attack and then discovers he does not have enough MP to meet the requirements of 11.34, roll things back so that the entire amphibious exercise did not take place. There are no amphibious "suicide missions" in Pax Romana. What this means, of course, is that Amphibious Attacks must be carefully planned, and that all players should watch to make sure they're legal.
(11.36) If a naval transport stops at a Land Space occupied by non-friendly land units and simply intends to move past that space, it may do so if it makes a successful Continuation roll. If it fails that roll, it automatically performs an amphibious attack. However, the transported units may not even attempt to move past a non-friendly-occupied Land Space if it does not have enough Movement Points to conduct an amphibious attack.
(11.37) Neither cavalry, elephants, nor Siege Expertise may be used by the Attacker in an amphibious attack.
(11.38) If a Naval Transport debarks in an unoccupied space and is immediately intercepted by an enemy force, the Battle Die-Roll Shift for Amphibious Attacks does not apply.
DESIGN NOTE: When accompanying a transport of troops, a galley is acting in a defensive mode…a different usage than when moving alone, which is an aggressive move. As such, it is more susceptible to stoppage in the latter usage than in the former, where it has different duties to perform. The bottom line is, you must plan the usage of your Naval Transport and Amphibious Attack missions well, giving your units "support" in the form of MP.
(11.4) Naval Battles
(11.41) Initiating Naval Battles. Any time a Fleet enters a Port Space or Naval Transit Point occupied by an enemy Fleet, a naval battle may occur, depending on whether the latter fleet chooses to fight or withdraw (see 11.46 for what happens to Transports entering such spaces). Either way, after the Withdrawal or the Battle the moving Fleet or Transport must Stop and must roll for Continuity (11.13), unless the non-moving player "allows" the moving Fleet to pass through, in which case Movement does not Stop.
(11.42) Withdrawing from Naval Battles. When a moving Fleet enters a Space/Point occupied by an enemy Fleet, the latter may Withdraw into any Port that is three or fewer connected Spaces distant as long as no intervening Port, or the destination Port itself, is occupied by another player's Fleet (unless that player grants permission to do so). It must follow all naval movement rules during Withdrawal, including rolling for Naval Disaster in Transit Points and rolling for Continuity in non-friendly spaces. In addition, if the result of any Continuity roll during Withdrawal is a "12", the fleet may not Withdraw again during the current Activation. If the fleet cannot (or decides not to) Withdraw, combat ensues. Enemy Withdrawal adds +1 DR to a Continuity dieroll by the active Moving Fleet (11.14).
(11.43) Resolving Naval Battles. To resolve a naval battle each player totals his Squadrons' Battle Points; each Squadron is worth 2 BP. Additional BP are earned as follows:
- Presence of Leader. If there is one with the Fleet, +1BP.
- Add the roll of one die (1d6) to the total BP.
PLAY NOTE: Cities and Towns do not provide any Defensive benefits of any kind.
(11.44) The Player with the higher total wins, with the following effects:
- The losing player eliminates Galley Squadrons equal to the difference in BP, with each Squadron worth 2 BP. Round up any fractions.
- Any remaining Losing squadrons are retreated to the nearest friendly Port.
- The winning player rolls one die. If it is even, he suffers no losses. If it is odd, he loses 1 Squadron.
(11.45) Draws. If the adjusted BPs of both players are the same, there is no winner. Both Fleets lose nothing and remain in the Space. The Active Fleet must roll for Continuity (with no DRM) to move or attack again. However, if it does move, the non-Active player has the option to attack it before it leaves the Space, using the above combat rules. The Active Fleet may instead attack again, and in fact may continue to do so until it fails a Continuity roll.
(11.46) Transported Armies in Naval Battles. Armies being transported have no effect on a Naval Battle, but they can suffer the effects thereof.
- If they are involved in a Naval Battle and they do not have a Galley Squadron escort, all land units are automatically eliminated (they may not Withdraw).
- If they do have a Galley Squadron escort and they are involved in a Naval Battle and do not Withdraw, Land BP are eliminated equal to Galley Squadron BP so lost. Example: Fleet loses 2 Galley Squadrons (equal to 4 BP); it also loses 4 BP worth of land units.
- If the entire Galley Squadron escort is destroyed, all transported land units are lost.
(11.47) Other than as noted in 11.46, Fleets have no effect on Armies, and vice versa, in terms of battles. A Fleet consisting solely of Galley Squadrons may freely enter a Port space containing an enemy Army—although it will have to roll for Continuation if it wishes to move further, and if it remains in the enemy-occupied space it will be eliminated in the Isolation Phase.
(11.48) Re-rolls (10.55) are not possible for naval battles.
Part D: Other Units
12.0 Special Units
(12.1) Garrisons
(12.11) Garrisons are not combat units. However, they function in the same way as Land combat units, with the following exceptions:
- They have no BP Strength. If attacked while alone in a Space, they are automatically eliminated with no loss by the Attacker (but the Attacker must pay the usual +1 MP to enter the garrison's Space). Garrisons on their own may not Withdraw.
- They may not be used to satisfy losses. If stacked with a friendly Army that must Retreat as a battle result, they retreat with the Army.
- An enemy army using Withdrawal may move through a Garrison-controlled space by spending one (1) of its Withdrawal MP to do so; it does not eliminate the garrison, nor may it do so.
(12.12) Garrisons control the spaces they occupy.
(12.13) Garrisons may move individually (as a Minor Move) or as part of an Army. They may not end Movement in a Mountain Fortress unless stacked with an Army.
(12.14) Creating Garrisons. A player may create Garrisons:
- during a Major Move, by breaking down a regular land unit stacked with an Army; the unit breakdown costs the army 1 Movement Point (even if breaking down more than one unit), with the number of garrisons determined by the formula in 12.16. The original units are replaced with the garrison units. The newly created Garrison may move or be converted into a Town in the immediately following Minor Move if so desired (or during any later Minor Move).
- during a Minor Move, by breaking down a regular land unit according to the formula in 12.16. Breaking down a unit into garrisons consumes the entire Minor Move; the garrisons may not move further, nor may they be converted into Towns during that Activation.
- by refusing to, or being unable to, rebuild reduced-strength HI and LG units during the Manpower Phase – see 10.86.
(12.15) Garrisons may never be created without breaking down an infantry unit (in other words, you can't just create them from scratch).
(12.16) Garrison breakdown uses the following formula. Garrisons may not be returned to LI/HI/LG status.
- 1 full-strength LG or HI = 3 Garrison units
- 1 LI = 2 Garrison units
- 1 reduced-strength LG or HI = 1 Garrison unit
(12.17) Neither Mercenaries nor Militia units may be used to create Garrisons.
(12.18) When determining who controls a Space, Garrisons are treated as regular Land Units, but they have no Battle Point value.
EXAMPLE OF CREATING GARRISONS: A newly activated Greek army moves to an unoccupied Venusia (in southern Italy). It drops a Light Infantry unit there (at no MP cost) and moves on. After the army finishes its Move, the Greek player uses his first Minor Move to break the LI into 2 Garrison units.
(12.2) Mercenaries
(12.21) Hiring Mercenaries (Standard Game). A player may hire Mercenaries. He may do this in either the Manpower Phase or as one of his two Minor Moves in the Activation Phase. Exception: The Roman Player may never hire mercenaries. Mercenaries:
- Are always HI
- Are raised and placed only in non-Home provinces controlled by that player, or with a friendly force or unit regardless of their location
- Cost 2T for each unit
- Are always removed in the Removal Phase of the Game-Turn following their appearance, regardless of where they are. Example: if placed during Game-Turn 2, they are removed in the Removal Phase of Game-Turn 3.
(12.22) Mercenary Considerations (Both Games). Mercenary units count against ManMax limits—see 6.42. They may never be used to create garrisons. They are part of a player's armed forces, so they do grant Control. They also affect Sack and Plunder; see 7.52.
(12.23) Hiring Mercenaries (Advanced Game). A player may hire Mercenaries through the play of a card, or (in the case of Carthage) through the play of any "Hold in Hand" card. See 12.24 for details.
When raising Mercenaries, a player must spend 2T (and may spend no more). That 2T buys:
- 2 Mercenary LI, or
- 1 Mercenary Cav, or
- 1 Mercenary HI (note that Mercenary HI may not be reduced – see 10.82)
(12.24) Mercenary Considerations (Advanced Game Only). Mercenaries are Land Units a player may hire for the remainder of a Game-Turn. They are available only by play of a Mercenaries Card, with two exceptions:
- Rome may never hire Mercenaries.
- Carthage may also hire Mercenaries by playing any "Hold in Hand" card (but not "Play When Drawn" cards) for the purpose of raising Mercenaries. The actual event for that card is ignored, and Carthage pays for them as per 12.22 or 12.23.
PLAY NOTE: Yes, this is correct. The Carthaginian player may play ANY "Hold in Hand" card and ignore what's on the card in favor of buying Mercenaries. The Event Card simply goes onto the Discard pile. He may not use "Play When Drawn" cards for this purpose.
(12.25) Mercenary Placement (Both Games). Mercenary units may be placed in any Space in any controlled province, or with any of the Player's existing units or armies whether or not in a controlled province. When more than one Mercenary unit is hired (2 Mercenary LI, for instance), they may be placed together or split up however the player chooses.
(12.26) Mercenary Use (Both Games). Mercenary units may never be used to create Garrisons or Cities, and they may not be controlled by allied minor powers (Pergamum or Pontus, for example) or the Soldier of Fortune leader, but otherwise they perform precisely like any other unit under the owning Player's command. They control the Spaces they occupy, and they count as regular units for the purpose of establishing control of Provinces and Territories. Mercenary HI count against ManMax limits (6.2), and Mercenaries affect Sack and Plunder (7.52).
(12.27) Mercenary Removal (Advanced Game Only). Mercenary Infantry are always removed in the Removal Phase (Phase C), regardless of where they are. Mercenary Cavalry are not removed, but instead are changed into Regular Cavalry.
(12.3) Militia
(12.31) Raising Militia. Each time a Player loses a land Battle in his Home Territory in which he loses Battle Points from combat units other than Militia units themselves, or in which a City has been attacked and its defense strength lowered to 3 BP, immediately following the resolution of that Battle and before anything else occurs, the Losing player may make an immediate call for additional Land Units. This emergency levy calls up Militia units.
(12.32) Militia units operate as follows:
- Each Militia unit is a 1 BP infantry
- Militia may never leave, even temporarily, their Home Territory.
- Militia may be raised only once per Activation, but quite possibly during multiple Activations in a single Game-Turn (if the player keeps losing battles in his home territory).
- Every time a player raises Militia, his Stability level decreases by one (–1).
- All Militia are removed in the Removal Phase of the Game-Turn following their appearance.
(12.33) To raise Militia, roll 1d6 and halve the number (rounding up). The result is the number of Militia units raised (but see 12.34). These may be placed in one or more Spaces unoccupied by enemy units in the Home Territory. Each Militia unit is worth 1 BP.
(12.34) The number of Militia raised is subject to the player's current Stability Level:
- If the rolling player's Stability range is Stable, use the result in 12.33.
- If the rolling player's Stability range is Unrest, lower the number of Militia raised in 12.33 by one (–1). For example, a roll of 5, which would normally result in three militia units, now results in only two. If this –1 reduction results in 0 Militia being raised, then the player suffers the –1 Stability penalty nevertheless.
- If the rolling player's Stability range is Turmoil, Militia may not be raised at all.
PLAY NOTE (Advanced Game Only): There is a card that allows players to raise militia without having to lose a battle; see 17.2.
(12.4) The Soldier of Fortune
(12.41) The Soldier of Fortune event allows a player to use an extra army to wreak havoc on the plans of other players. Soldier of Fortune armies do not give Control to any Player; they deny control of the Space they are in to players. Exception: When played by the Roman player, this card is treated differently (see 12.47).
(12.42) When the SoF event occurs, the player:
- places the SoF units as per 12.43.
- may (not must) move the SoF and his Army as his Major Move.
- gets his normal Minor Moves even if he moves the SoF force for his Major Move.
- may use the SoF forces as if they were his own (but see 12.44) during any of his Activations for the remainder of the Game-Turn (including the current Activation).
- removes the SoF forces in the Removal Phase of the next Game-Turn.
(12.43) The player receives:
- The SoF 3-4 Leader
- 4 HI, 2 LI, 1 Cav, 1 Elephant.
He places them anywhere in his Home Territory.
PLAY NOTE: Several scenarios begin with the Soldier of Fortune already in play (historically, Pyrrhus of Epirus).
(12.44) The SoF force is treated like one of the player's armies, except that it may not pick up any of his (Home) land units or attack with them. It may move through the player's land units without stopping, and it may stack with them; if the stack is attacked, all units defend. If it loses a battle, it may retreat or be forced to retreat. There are no Soldier of Fortune galleys, but the player may provide a 1 galley squadron escort (maximum), if the Soldier of Fortune army wants to move by sea.
(12.45) Cities or Towns captured by the SoF's Army become the property of the SoF player; the City/Town marker is replaced by one of that player's City/Town markers, not by an Independent City/Town marker. Whenever a battle fought by the SoF's Army results in the destruction of a Town or reduction of a City, the SoF player decides normally whether or not to roll for Sack and Plunder (see 7.5).
(12.46) The SoF and his Army are automatically removed in the Removal Phase of the next Game-Turn.
(12.47) The Roman player never gets the SoF or his army. In the Standard Game, if he rolls the SoF event, he rolls for a different event instead. In the Advanced Game, if he gets the SoF card, he may hold onto it to ensure that no other player receives it. Alternatively, he may play the card in order to bring a Dictator into play, if (and only if) there is any enemy army in any Space in his Home Territory at the time the card is played. When a Dictator is declared, the Roman Player removes from the board one of his Leaders (his choice) and places it in his Leader Pool. He then blindly draws three Leaders from his Leader Pool. He may place one of these three (his choice) in Rome as the Replacement for the removed Leader. The other two are returned to The Pool.
DESIGN NOTE: Rome simply didn't hire mercenaries of the Soldier of Fortune kind.
(12.5) Independents
Independent Land units arise either from the initial deployment—Pergamum, Rhodes, Syracuse, and the Mamertines—or as the result of play of a card (Pontus).
Independents must be attacked if a player moves forces into their spaces, unless otherwise specified below (Rhodes, for example), or unless the player has an Alliance with them. For example, if a player moves a fleet to the Syracuse space, it must attack the Syracusan fleet.
A player who controls a galley squadron belonging to an Independent does not have to pay Maintenance for it (6.4).
(12.51) Rhodes
Standard Game. Rhodes has a well-defended island and a large navy. The use of the navy (only) is available to the player who controls Rhodes. A player controlling Rhodes starts each Game-Turn with 2 Rhodian War Galley Squadrons in Rhodes, regardless of what happened the previous Game-Turn. Players control Rhodes by occupying it.
Advanced Game. The use of the navy (only) is available to the player who plays the Rhodes Alliance card. At that point, that player now controls Rhodes' galley Fleet, which may be combined with another Fleet. That alliance remains in place until the Rhodes Alliance card is played by another player. See 17.2.
Both Games. Players may conduct Naval Movement (including Naval Transport) through Rhodes freely (and without having to Stop), unless Rhodes is controlled by another player (in which case Rhodes is treated like any other player-controlled Port). However, a player undertaking any Naval Movement into or through a neutral or allied Rhodes must pay 1T, deducting the 1T from his own Treasury or, if Rhodes is allied, giving 1T to the allied player. If the player conducting Naval Movement chooses not to pay the money, his Fleet is Stopped and may not move past the Rhodes space even with a successful Continuity roll or in a subsequent Activation (although it may move away from Rhodes in those two cases), unless it attacks and destroys (or retreats in the case of a player's Galley Squadrons) any Rhodian or Rhodian-allied Galley Squadrons in the Rhodes space.
If attacked, Rhodes' Land Units never Retreat, voluntarily or by force. Nor do Its Galley Squadrons ever withdraw or retreat (unless Rhodes is allied with a player); if a player attacks and wins a Naval Battle against the Rhodian GS, it treats the result as a Draw (11.44) and proceeds accordingly.
(12.52) The Mamertines
This group of disgruntled Campanians controls Messana at the start of the 1st Game-Turn (300-275 BCE and historically, leading to the 1st Punic War). No one controls or moves the Mamertines; they will not Withdraw or Retreat (voluntarily or by force). Their sole fate is elimination.
(12.53) Syracuse
Syracuse is an independent City, with an army and a fleet. While her days of glory – 4th century BCE – are past, she is still a power. Her units do not move while she is independent. However, a Power who captures the Syracuse space (the only way is to capture the City) gains control over any Fleets that remain. Those Fleets are replaced by Fleet counters belonging to the capturing player and are subject to the normal Galley Maintenance rules. Until Syracuse is captured, Syracusan units never Retreat (voluntarily or by force).
(12.54) Pergamum (Advanced Game Only)
This important "secondary" power controls most of what the map shows as Ionia. She is a deployed independent that maintains that status until all Pergamene units have been removed from play. Players may use Pergamum as an ally by playing the Alliance with Pergamum card (see 17.0 for details on what happens). Unless such an Alliance is in place, Pergamene units just sit in place and defend without retreating (either voluntarily or by forces).
(12.55) Pontus (Advanced Game Only)
The pseudo-Macedonian kingdom of Pontus, and its Mithridatic rulers, proved a major thorn in Rome's side for a length of time equivalent to about one turn of game play. The Pontines enter the game through the play of the Pontus Card.
When the Pontus card is played, the Independent Power, Pontus, is activated on behalf of the player playing the card, but only if there is at least one unoccupied Space in Pontus. That Player is now The Pontus Player (in addition to his other power). When activated, the following units are placed in any unoccupied Space(s) in Pontus, at the discretion of the Pontus Player:
- 4 HI
- 2 LI
- 1 Cav
- 1 Galley Squadron (placed only if a Port is open).
Note that there are no actual Pontus counters in the game; use any available neutral markers (Egypt, for example) and place a control marker of the owning player atop the stack.
The Pontus AM is immediately placed into The Pool.
When the Pontus AM is drawn, the Pontus Player takes command of the Pontine units only. He does not spend 1T for the Activation, nor does he pull an Event Card. He gets both a Major Move and two Minor Moves, but only Pontine units may participate in these moves. Pontus may not raise Land Units, and it may not stack with the Player's regular Land Units or use its galleys. Pontine units may Retreat and may be forced to Retreat.
Pontus is an Independent; her presence gives no player Control over anything, except on behalf of Pontus. Pontus, in essence, denies control to other players.
Pontus remains in the game until her last combat unit is eliminated. The Pontines have no leaders; the line of Mithridates who ruled were, essentially, 0-0 types. As long as there is a Pontine combat unit on the map, though, the Pontus AM goes into The Pool.
(12.6) Pirates
(12.61) Pirates are a function of the play of a Pirates event (Standard Game Only) or a Pirates card (Advanced Game Only), at which point a Pirates counter is placed in one of the following:
- any Naval Transit Point (but not a Deep Sea Transit Point), but not if a Galley Squadron already occupies that NTP
- an uncontrolled Port not within 1 Naval Space of Rhodes, but not if a Galley Squadron already occupies that port
- Tarsus (Cilicia/Asia), if that Port is not occupied by a player's Galley Squadron.
(12.62) Pirates block Lines of Communication (as per 6.15), as LOC may not be traced through a Pirate-occupied NTP. In addition, a Fleet moving into a Pirate-occupied NTP must Attack those Pirates, otherwise it may not enter that NTP.
(12.63) Pirates remain in place until a player's Fleet moves into that Pirate-occupied Transit Point/Port (or activates while already in a pirate-occupied space) and defeats the pirates. To defeat them, the moving player rolls one die (1d6), to which he adds the BP strength of the galley squadrons in that Fleet, plus one (+1) if the fleet has a leader.
- If the adjusted DR is a '6' or higher, remove the Pirate counter. The Fleet may check for Continuity, as if it had won a battle.
- If the Fleet does not defeat the Pirates, it must Withdraw to the last Port it passed through and is Finished for that Move.
(12.64) The Cilician Pirates. These scourges of eastern Mediterranean shipping are somewhat different from your run-of-the-mill barbarians. When brought into play, they block LOC for one Naval Space/Point in all directions from Tarsus that are not occupied by friendly galley squadrons. In addition, when rolling to eliminate the Cilician Pirates, subtract one (–1) from the player's dieroll.
(12.7) Slave Armies
(12.71) When the Slave Revolt event (Standard Game Only) or Event card (Advanced Game Only) is played (see 17.0), the affected player undergoes a Slave Revolt. First, the affected player's Stability level is decreased by one (–1). Next, a player with whom he does not currently have an Alliance places 2 BI in any one unoccupied Space in the affected player's Home Territory. It may be placed in an unoccupied Town or City space (in which case see below). Starting with the next AM drawn, each player whose AM is drawn (except the affected player) must do two things while the Revolt is "on" (in addition to his normal Activations):
- Add 1 BI to the Slave Army
- Move the entire Army one Space (ignoring Transit Points), but leaving 1 unit in any Town or City in which it began that Activation. In doing so, it may attack any units in that Space. If the only place it can move is into an enemy occupied space, the Slave Army may simply stay where it is.
(12.72) The Revolt ends when all of the Slave Army units have been eliminated. At that point, increase the Stability by one (+1).
(12.73) Slave units may not use Naval Transport. If attacked, they may neither Withdraw nor Retreat (voluntarily or by force). If the Slave Army is initially placed on an unoccupied Town or City space, or if it enters or captures a Town or City during its Movement, it does not convert the Town/City from its current ownership, but it does deny control of that Town/City for all Income, Civilization Point, and Line of Communication concerns. In addition, if attacked, it automatically uses the Town or City in defense.
(12.74) Losses of Battles or Cities/Towns to Slaves never generate Militia. Battles against a player's own Cities or Towns controlled by Slaves never result in Sack and Plunder.
13.0 Barbarians
A game of Pax Romana is certain to feature numerous Barbarians. They appear with Barbarian Invasions and Rebellions, and as Tribes of unknown strength blocking the players' way to control of various provinces. The rules here cover all three types.
(13.1) Tribes
(13.11) There are 30 Tribal Counters. Each counter has two sides: the front has a "?" to show its unrevealed side, and the back has a number showing how many Tribal Infantry the counter represents. When setting up the game, all of the Tribal Counters are placed ?-side up on the table, thoroughly mixed, and randomly placed on the map, unrevealed side up, one for each Tribal Space. Any Tribal Counters left over are kept aside, also with their unrevealed side up.
(13.12) Tribes come into play whenever a force enters a Tribal Space, at which point the Tribal Counter is flipped to reveal its initial Tribal Infantry value (the range is 2-8). As the Tribe takes losses, Tribal Infantry counters are then placed on the map in that space while the Tribal Counter is flipped back over and placed with the other Tribal Counters not in use.
(13.13) Entering a Tribal Space automatically initiates an attack against the Tribe. As a result, it costs +1 MP to enter the Space. When attacked, Tribes may neither Withdraw nor Retreat (voluntarily or by force).
(13.14) Tribal Infantry units may never move.
(13.15) Tribal units control the Spaces they occupy. As a result, they can contest a Player's control of provinces.
(13.16) Tribes may be attacked by Barbarian Infantry executing a Barbarian Invasion.
(13.17) Tribal Infantry units are removed from the map only as a result of Battles. They do not disappear in the Removal Phase.
(13.18) If an Event calls for a Tribal Counter to be returned to the map (as the Tribal Resurgence Event Card does in the Advanced Game), an unused Tribal Counter is randomly chosen and placed in an unoccupied Tribal Space, unrevealed side up. However, no Tribal Space can ever contain more than one Tribal Counter, so if there are no unoccupied Tribal Spaces on the map (highly unlikely), no Tribal Counters are placed.
(13.2) Barbarian Infantry
(13.21) Barbarian Infantry (BI) units come into play by the play of Event chits (Standard Game) or Event cards (Advanced Game). The primary Barbarian-generating Event Cards in the latter are Rebellions (13.3) and Barbarian Invasion (13.4).
(13.22) BI units control the Spaces they occupy. As a result, they can contest a Player's control of provinces.
(13.23) BI units are placed and move (if at all) according to the conditions on the Event Table (Standard Game) or Event card (Advanced Game) that causes their placement. Unless otherwise specified, they may not Move, Withdraw, or Retreat (voluntarily or by force).
(13.24) If a moving Army enters a Space that has BI it must attack those BI, using normal Land Combat mechanics. However, unless the Event card specifies otherwise (as several Barbarian Invasion events do), no one plays the BI Army, no cards are played for its benefit, and the BI may neither withdraw nor retreat. One of the non-Active players rolls the die for the Barbarian force and distributes losses.
(13.25) Some Barbarian units are removed from the map in the Removal Phase. Others are not. See the specific rules for each Barbarian Invasion or Rebellion.
(13.26) Barbarian Invasion armies are, in most cases, handled differently from other Barbarian Infantry. The player placing the invading army—and in some cases other players during that Game-Turn—controls the army as if it is one of their own. Barbarian Invasion armies may even attack other Barbarian Infantry and Tribal Infantry. These rules apply to several types of Barbarian Invasion but only one type of Rebellion, the Massive Rebellion in Gaul (see 13.3).
(13.37) Barbarian Invasion armies may attack and destroy Cities and Towns if the controlling player so desires. If they do so, they automatically attempt Sack and Plunder, but only in order to determine if they continue moving (they do not collect Talents for Sack and Plunder).
(13.3) Rebellions
This section of rules is consulted when a Rebellion card is played (Advanced Game) or a Rebellion event is rolled (Standard Game), after the dice roll (2d6) and the Rebellion Table has indicated where the rebellion has taken place. The specifics for each area are listed below.
Unless specifically indicated in the rule for a specific Rebellion, all Barbarian Infantry units that enter the game as a result of a Rebellion remain on the map until eliminated.
AFRICA. This is in effect only if the Carthaginian player has mercenaries in the province of Africa. If there are none, treat as No Event. If there are Mercenaries, remove all of them and replace each removed stack with BI equal to their BP strength. If any rebelling mercenaries are now in the same Space as Carthaginian units, the rebellious mercenaries will attack those units. If the rebels win the Battle, the Carthaginians must retreat from the space. If the rebels lose the battle they are eliminated totally from that Space (no withdrawals or retreats.) Rebels who do not lose, and rebels in other Spaces, remain in place until eliminated; they may not use Withdrawal. Africa provides no income until all such rebels are eliminated.
BRITANNIA. When the Brits rebel, all garrisons are removed from Britannia province and an army of 3 BI (with no leader) is placed in any one, unoccupied Space. This army may not Move, Withdraw, or Retreat (voluntarily or by force). No one controls Britannia until that army is eliminated.
CYPRUS. When the Cypriots rebel, no Naval Movement is allowed into or through a Cyprus space for the rest of the Game-Turn, unless the player already has a Galley Squadron in a Cyprus space, in which case this restriction is ignored.
DANUBE. All player units (not tribal markers or BI) to a maximum of 8 BP in any one Space of the provinces of the Danube Territories are eliminated. If there are no units, treat as No Event. If more than one space has player units, the player who drew the card chooses which space is affected.
GERMANY. All player units (not Tribal markers or BI) to a maximum of 8 BP in any one Space of the provinces of Germania Inferior or Superior are eliminated. If there are no units, treat as No Event. If more than one space has player units, the player who drew the card chooses which space is affected.
PLAY NOTE: German Rebellions are different from the several Germanic invasions ... lots of disruptive activity by the Germans in this game.
GAUL. If no player controls any provinces in mainland Gaul, the player may remove any one garrison in Gaul. If there are none, nothing happens.
If any one province is controlled, roll 1d6. Modify the result by adding the number of Gallic provinces (other than Britannia) that are controlled by players.
If the adjusted DR is a 1-6, this is a Local Rebellion by one or two tribes. Eliminate all the garrisons or player-owned land units (to a maximum of 8 BP) from any one Space in Gaul that is not a Town or City, and replace with 3 BI (if more than one space has player units, the player who drew the card chooses which space is affected). In addition, place 1 BI unit in every uncontrolled Space in that province. This army may not Move, Withdraw, or Retreat (voluntarily or by force). They may affect Control, however.
If the adjusted DR is a 7+, a Massive Rebellion has occurred.
- The Player designates one of the four Gallic provinces as the home for the Revolt. All player-owned land units and garrisons in that province that are not in Towns/Cities are removed.
- The Player then receives the 2-5 Gallic leader, plus BI equal to the roll of two dice (2d6). The player places this army in any Space (whether or not it is occupied) in the selected province and, as the Major Move for this Activation (and for any subsequent Activation for any Player this Game-Turn if the then-active player desires), that player may undertake Military Operations with that Gallic Army (as his Major Move). If the placement Space is occupied, the Gallic Army immediately attacks that Space, expending 2 MP to do so, using the normal Land Battle rules (including the possibility of Pre-Battle Withdrawal).
- The Gallic Army may not move out of Gaul (or go to Britain).
- The entire Gallic Army is removed in the Removal Phase of the next Game-Turn.
PLAY NOTE: Yes, it's exactly as it says: the player may use the Gallic rebels every time an AM is pulled that Game-Turn. For any player hanging around Gaul during a Massive Rebellion, this can be a Very Bad Thing.
Once a Massive Rebellion has occurred, it may never occur again. Treat any subsequent Gallic rebellions as local.
Spaces with Towns and Cities are never affected by a Local Rebellion. They may be attacked by the Gallic Army in a Massive Rebellion, though.
HISPANIA. Eliminate any one garrison unit in Hispania, and then place 3 BI in either
- Any one empty, non Town/City Space in Lusitania
- Numantia (Tarraconensis), if uncontrolled.
These units may not Move, Withdraw, or Retreat (voluntarily or by force). Units moving into a Hispanic Space that is connected to the above Space pay +1 MP for each Space so entered.
JUDEA. The following are the effects of a Jewish Revolt.
- Remove all garrison counters in Judea, and eliminate at least 1 BP of any type, in addition to the garrisons.
- Place 1 BI in any unoccupied Space in Judea. The BI goes into an unoccupied City or Town if one exists, and will use the City/Town in defense when attacked. Spaces occupied by Fleets are not considered "unoccupied".
- As long as at least one "Jewish" BI is on the map, units moving into Judea spend 2MP for each Space entered. If attacked, the BI unit may not Move, Withdraw, or Retreat (voluntarily or by force).
MAURETANIA. When the Moors rebel, place 1 BI in each unoccupied Space in the province (none get placed if all spaces are occupied). No one controls Mauretania until all rebels are eliminated. These units may not Move, Withdraw, or Retreat (voluntarily or by force).
NAVAL MUTINY. The player designates any one Fleet on the map as having mutinied. That Fleet may not move for the rest of the Game-Turn, or until the owning player pays 1T per Squadron (and he must do so for all squadrons in that Fleet)... whichever comes first.
SARDINIA. Place a BI unit in any Space in Sardinia that is either unoccupied or solely garrison-occupied. In the latter case, remove the garrison. Player Fleets are not affected. The BI may not Move, Withdraw, or Retreat (voluntarily or by force).
(13.4) Barbarian Invasions
Barbarian invasions can—as they did historically—disrupt even the best-laid plans. However, unlike some Rebellions (13.3), all Barbarian Invasion forces are removed during the Removal Phase of the following Game-Turn.
(13.41) When a Barbarian Invasion Card is played—it must be played before undertaking his Operation for that Activation—the Player rolls 2d6 and refers to the Invasion Table to determine which group of barbarians has invaded. He then performs the actions outlined in the section below that corresponds to the result of the dice roll.
(13.42) If the result calls for the placement and movement of a Barbarian force, the Player who drew the card undertakes a Military Operation with the units provided for that Invasion. These units function like all other land units, except that they may not use Naval Transport, and they may move into or through spaces that contain forces friendly to the activating player. In some cases, at the end of the Barbarian force's movement, it stays where it is, moving during no other Activations until eliminated by another player. In other cases (Germans, for example), multiple activations are possible, and even by different players.
(13.43) Relevant Event cards may be played by any Player, including the owning Player, during Barbarian operations.
(13.44) If, during any Invasion, the Barbarian Army comes within one MP of a Home Capital the affected Player (only) has his Stability reduced by one (–1), unless the space is already enemy-controlled (i.e., not controlled by the player who controlled it at the start of the game). This is a one-time penalty against any player for each Barbarian Army, however.
WESTERN GAULS. This is No Event if all of the four Gallic provinces of mainland Gaul are controlled by the players. If not, the Player rolling this receives a Gallic invasion army of:
- BI equal to the total of rolling 2 dice (2d6)
- A 1-5 Barbarian Leader
He places this Army in any Space (whether or not it is occupied) in mainland Gaul and undertakes Military Operations with this Army in addition to his normal operation(s)—Expansion or Recruitment—for that Activation. If the placement Space is occupied, the Army immediately attacks that Space, expending 2 MP to do so. This Army is treated like any other Army; there are no Movement Restrictions. The Gallic army remains on the map, unless eliminated, until the Removal Phase of the next Game-Turn, when it is removed. Only the player drawing the card may use this army, and only that one time.
EASTERN GAULS. The Player rolling this receives a Gallic invasion army in either Sarmatia or Scythia:
- BI equal to the total of rolling 2 dice (2d6)
- A 1-5 Barbarian Leader.
He places this Army in any Space (whether or not it is occupied) in Sarmatia or Scythia and undertakes Military Operations with this Army in addition to his normal Activation for that phase. If the placement Space is occupied, the Army immediately attacks that Space, expending 2 MP to do so. This Army is treated like any other Army; there are no Movement Restrictions. It remains on the map, unless eliminated, until the Removal Phase of the next Game-Turn, when it is removed. Only the player drawing the card may use this army, and only that one time.
GERMANS. A Germanic Invading Army is placed, as indicated below. The Player receives:
- BI equal to a 3d6 DR if placed in Germania Magna, or in any Space in the "Germanic Tribes" territory.
- BI equal to 2d6 DR + 2 Cav if placed in Germania Inferior or Superior.
- A 2-5 Barbarian Leader.
He places this Army in any Space (whether or not it is occupied) in the selected province and undertakes Military Operations with this Army in addition to his normal operation(s)—Expansion or Recruitment—for that Activation. If the placement Space is occupied, the Army immediately attacks that Space, expending 2 MP to do so. He now undertakes Military Operations with this Army in addition to his normal Activation for that phase. It is treated like any other Army.
The German army may be activated again by any Player who wishes to use this German Army as his Major Move in a Military Operation, except that it may not be moved back to the province/territory from which it originally came. Otherwise it remains on the map, unless eliminated, until the Removal Phase of the next Game-Turn, when it is removed. If attacked, the Barbarian army may not Withdraw or Retreat (voluntarily or by force), unless it is intercepted while being moved by a player.
PLAY NOTE: Note that the player who places the German Barbarian army in the first place gets to move it before his Major Move, whereas any player wishing to move it in a subsequent Activation must use his Major Move in order to do so.
CALEDONIANS. Remove all garrisons in Britannia. Call King Arthur for help.
ARMENIANS. Roll 1d6 for each and every occupied Space—but not Mountain Fortress Spaces—within 3 MP of Armida. If that DR is higher than the number of units in that Space (treat Garrisons as '1' and ignore unoccupied Towns and Cities), remove those units. If Armida is occupied by a non-garrison unit, this is No Event. However, if Armida is occupied solely by a Town or City, the Event still applies.
Part E: Stability and Victory
14.0 Stability
Maintaining a stable government over an extended period of time can be a truly trying and rather elusive goal. In Pax Romana, this is precisely what you try to do.
(14.1) Stability
(14.11) Each Power keeps track of his Stability on the Stability Track. As countries become less and less stable, they are less able to easily field a large army, and they become open to a variety of harmful events through the play of various cards, with the ultimate being a Civil War, an event which really throws a crimp into a player's plans for world domination.
(14.12) Not every Power starts at the same level of Stability. See the Initial Deployment for the starting Stability Levels for each Power.
(14.13) There are three ranges of Stability: Stable, Unrest, and Turmoil (as noted on the Stability Track). The ranges determine what happens when specific Events take place or Event Cards are played. They also determine the Manpower Maximums for that player (see 6.42) and the number of Militia he may recruit (see 12.34).
(14.14) A Player's Stability Level may never go above +8 or below –6.
(14.2) Adjusting Stability
(14.21) The Stability Track is adjusted (for the affected Player) each time certain events take place or Cards are played, as follows:
- The Cards will state specifically what happens in terms of the Stability Level. Adjust the track upon the play of the card.
- A Player gains one level (+1) for each non-Home province over which he gains control the instant he does so.
- A Player loses one level (–1) for each non-Home province of which he loses control the instant he does so.
- A Player loses two levels (–2) for each Home province of which he loses control the instant he does so.
- A Player gains two levels (+2) for each Home province over which he regains control the instant he does so.
- A Player loses one level (–1) each time he conducts Pre-Battle Withdrawal from a space in his Home Territory, the instant he does so.
- A Player loses one level (–1) each time he raises Militia, the instant he does so.
- A Player loses one level (–1) if a Barbarian Army comes within 1 MP of his Home Capital space (either Home Capital space in the case of Greece and The East), the instant this occurs. This happens only once per Barbarian Army, however.
- A Player loses one level (–1) the instant a Slave Army appears in his Home Territory, regaining that level (+1) the instant that Slave Army is eliminated.
- A Player gains one level (+1), during the Victory Phase of the Game-Turn, for having acquired more Victory Points than any other player during that Game-Turn.
- A Player loses one level (–1), during the Victory Phase of the Game-Turn, for having acquired fewer Victory Points than any other player during that Game-Turn.
- During the Maintenance Phase of each Game-Turn, if a Player has more HI and/or LG than he has Civilization Points (15.3) his Stability is reduced by two (–2). It is reduced by three (–3) if he has more than three times (3X) more HI and/or LG units than Civilization Points, and (Advanced Game Only) by four (–4) if more than 4X.
- A Player loses one level (–1) whenever he loses the space in which his original capital was located (one level for each capital space in the case of Greece and the East). In addition, at the end of each Game-Turn, beginning with the one in which he lost the capital, he loses another Stability level. This continues until he retakes the capital, at which point he regains one (+1) Stability level (and only one).
(14.22) Optional Rule: Disbanding HI/LG Units (Advanced Game Only). A Player may avoid the Stability Point penalty for having too many HI/LG units by Disbanding units. He does so at the start of any of his Activations during the Game-Turn, immediately following the drawing of the Event Card, by removing whatever number of HI and/or LG units he wishes from the map (presumably enough to get down to his Civilization Point limit). However, if the Event Card results in his losing the Activation (such as the Dies Irae card), he may not remove the Units that Activation. Even when units are successfully disbanded, however, he gets no money back for them; they are simply taken off the map for good. The only purpose of this action is to eliminate the Stability Point Losses that would otherwise occur in the Maintenance Phase of the following Game-Turn (and note that the choice is made even though the Stability Loss is not yet certain).
15.0 Victory
(15.1) Victory Points
During the Victory Phase of each Game-Turn, players calculate Victory Points, adjusting the markers on the Victory Point Track to reflect the new VP totals.
(15.11) The number of Victory Points each player receives for the current Game-Turn is equal to the following:
- The number of VP resulting from the GOP standings (15.2) plus
- The number of VP resulting from the CVP standings (15.3) plus
- The number of VP resulting from achieving Opportunity Objectives (15.4, only certain scenarios)
(15.12) The power which has gained the most Victory Points during that Game-Turn Phase raises its Stability Level by one (+1). The power which has gained the fewest VPs lowers its Stability Level by one (–1). In both cases, ties negate Stability changes.
PLAY NOTE: The cumulative VPs that each player possesses at the time is irrelevant…it is the number of VPs that they gained in the particular turn which affects the Stability change above.
(15.13) The VP levels at the end of each Game-Turn (not the gains or losses) determine the order of play for the first set of Activations (but only the first set) in the next Game-Turn:
- The power with the fewest VP goes first; the power with the second fewest VP goes second; and so on.
- If two powers are tied in VP, the power with the lower Stability Level gets the advantage (i.e., he gets an Activation ahead of the player with whom he was tied); if Stability Levels are tied, the player with the fewer Civilization Points get the advantage; if all these are tied, roll a die (low result gets the advantage).
(15.2) Geographic Objective Points (GOP)
(15.21) At the end of each Game-Turn players earn a set scale of Victory Points by having more (or fewer) GOP than the other players.
(15.22) Each player determines his total GOP as follows:
- 1 GOP for each Province he controls
- 1 GOP for each non-Home Territory controlled (in addition to the Provincial GOPs earned in that Territory).
- No GOP are awarded for controlling your Home Territory or Barbarian Territories.
- The number of GOP awarded for Opportunity Objectives, in scenarios where OOs are in use; see 15.4.
(15.23) Victory Points for GOP are awarded on the following scale:
- 7 VP for the player with the most GOP
- 4 VP for the player with the second most
- 2 VP for the player with the third most
- 0 VP for the player with the lowest GOP total
If players are tied in GOP, total their VP and divide evenly, rounding down fractions. Thus a tie for third (normally 2 VP) and fourth (normally 0 VP) would produce 1 VP for both players, while a 3-way tie for second (normally 4 VP for 2nd place and 2 VP for 3rd place) would produce 2 for each player (4 VP + 2 VP + 0 VP divided by 3, equals 2). Ties negate any change in Stability.
EXAMPLE: At the end of Game-Turn III, Greece and the East both have 8 provinces, while Carthage has 6 and Rome has 4. No player has earned any GOP from Opportunity Objectives (see 15.4). Rome gets zero VP because it has the fewest GOP, while Carthage gets 2 VP. Greece and East are tied for first and second place, so they split the VP for those positions between them. Therefore, they add 7+4=11 and divide by 2, rounding down, resulting in 5 VP for each player. All players now adjust the VP tracks accordingly.
(15.3) Civilization Points (CVP)
(15.31) At the end of each Game-Turn players earn a set scale of Victory Points by having more (or fewer) Civilization Points (CVP) than the other players.
(15.32) CVP are earned by a power as follows:
- 1 CVP for each full-strength Town controlled by that power.
- 0 CVP for each reduced-strength Town controlled by that power.
- 3 CVP for each full-strength City controlled by that power.
- 1 CVP for each reduced-strength City controlled by that power.
(15.33) Victory Points for Civilization Points are earned as follows:
- 5 VP for the player with the most Civilization points
- 3 VP for the player with the second most
- 1 VP for the player with the third most
- 0 VP for the player with the lowest GOP total
If players are tied in CVP, total their VP and divide evenly, rounding down fractions. Thus a 2-way tie for third (normally 1 VP) would produce 0 VP for both players, and a 3-way tie for first (normally 5 VP) would produce 3 for each (5 VP + 3 VP + 1 VP divided by 3, equals 3).
EXAMPLE: At the end of Game-Turn I, Greece has 3 cities and 3 towns, the East has 1 city and 4 towns, Rome has two cities and 1 town, and Carthage has 1 city and 2 towns (all of these cities and towns are at full strength). Greece therefore has 12 CVP, East has 7, Rome has 7, and Carthage has 5. Greece gets 5 VP while Carthage gets none. Rome and the East are tied for second and third place, so they divide the 4 VP for those placements in half, with each getting 2 VP. The Victory Points track is adjusted accordingly.
(15.4) Opportunity Objectives (Scenarios V and VI only)
DESIGN NOTE: Opportunity Objectives represent the decisions being made politically by the governments of various powers. This rule is only used in Scenarios V and VI.
(15.41) The game contains 20 Opportunity Objective (OO) markers. The back of each marker has a letter which corresponds to the Opportunity Objectives Table. That table explains what that Objective is, and whether or not there are any restrictions to that Objective.
(15.42) During the Victory Phase, each Player gains either GOP or actual Victory Points for each Opportunity Objective he has achieved by that point in the game.
(15.43) Purchasing OOs. During the Manpower Phase of a scenario where Opportunity Objectives are in use, each player may purchase one OO marker by paying a number of Talents, depending on his Stability. The costs are:
- Stable: 1 Talent
- Unrest: 2 Talents
- Turmoil: 3 Talents
A player may never purchase an OO marker if he already possesses three of them. However, he may get OO's at no cost through card play in the Advanced Game, allowing him to have more than three until he discards one (17.2), but until he has fewer than three he may purchase no more.
(15.44) Drawing OOs. All currently unpurchased OO markers are kept either in a cup, or facedown on the table. This is known as the OO Pool. At no time may players examine the contents of the OO Pool. After paying for an OO, the player draws an OO marker randomly from the OO Pool, examines the letter, checks the Opportunity Objectives Table to see what that letter means, and places the marker facedown in front of him.
(15.45) OO Secrecy. The vast majority of the time, players will want to keep their OO markers secret from the other players. If allied, however, players may want to reveal one or more of them to each other in order to coordinate operations. Players may never give OOs to each other, however. Furthermore, OO markers must be revealed by a player claiming the GOP or VP awards for attaining them. Each revealed OO marker remains revealed in front of the player until he discards it (15.46).
(15.46) Discarding OOs. Discarding an OO marker means placing it back into the OO pool, making it available for purchase by any player in a subsequent Manpower Phase. Three OO markers (L, M, and N) must be discarded immediately after use. Other than that, a player is never required to discard OO markers; once he plays an OO marker, he may continue to gain GOP each turn he fulfills its requirements. In addition, a player may, in the Removal Phase, discard any of his OO.
(15.47) Some OOs may not be used by certain players. If one of these is selected by that player, he simply picks another and returns the unusable one to the OO pool.
(15.48) OO markers must be revealed to all other player in order to prove attainment and collect GOP or Victory Points.
(15.49) The following are the possible Objectives, the number of such OO available (in square brackets), and their associated GOP or Victory Points. This information is also on each Player's Player Card.
PLAY NOTE: Unquestionably, many Opportunity Objectives are difficult to achieve, but they must not be ignored. Players must attempt to achieve the ones they picked, and they must try to keep the other players from achieving theirs. Since the Objective markers are kept hidden, each player must watch what the other players are doing in order to try to determine their objectives and stop them from meeting them.
The following OOs earn GOP, to use in calculation of VP as per 15.22:
A. Control Asia Minor [2] The player must control all Asia Minor provinces with a port (which means all except Cappadocia). 8 GOP for Rome or Carthage; 4 for Greece or The East.
B. Control Egypt [2] 8 GOP. This Objective may not be used by The East.
C. Control Hispania [2] 8 GOP; 4 GOP for Carthage
D. Control the Eastern Mediterranean. [1] The player must control Crete, Cyprus, and Cilicia. 6 GOP; 3 GOP for The East.
E. Control Gaul (Gallia) [2] 6 GOP; 3 GOP for Rome
F. Control The Aegean Sea. [1] The player must control the ports of Chios, Naxos, Cnossus, and Miletus. 6 GOP. This Objective may not be used by Greece.
G. Control Central Europe. [1] The player must control Germania Superior, Raetia and Noricum. 4 GOP
H. Control the Danube. [2] 8 GOP, 4 GOP for Greece or Rome.
I. Control Sicily and the Tyrrhenian Sea. [1] The player must control both provinces of Sicily, plus Sardinia and Corsica. 4 GOP
J. Control the Western Mediterranean. [1] The Player must control all Ports in Baetica, Mauretania, and Tarraconensis, plus the Balaeres Islands. 6 GOP; 3 GOP for Carthage
K. Have a Town or City in five (5) different Territories, other than Home Territory. [2] 6 GOP
The following OOs earn actual Victory Points in the Game-Turn in which they are used (and must be returned to the OO pool after use):
L. Be the Richest Player in the game. [1] This is determined at the end of The Income Phase and is measured solely in Talents the players have. If this is a tie, no VP are awarded. [1] 3 VP
M. Control one Home Province of any other player. [1] 3 VP
N. Control any of the following Independent Territories: The Sicilies, Germania, The Chersonese, or Rhodes plus Crete. [1] 2 VP for each of these controlled.
Part F: Events
16.0 Events (Standard Game Only)
(16.1) Event Markers
(16.11) Pax provides two Event Markers, to be used like AMs in that they are placed in the opaque cup with the other AMs at the beginning of each Game-Turn. Players may decide, before starting play of the game, whether to use one or two each turn. The more you use, the longer the game (as the Events mean the players usually have to stop and do something).
(16.12) When an Event Marker is drawn, the player who drew it rolls two dice, adding them, and consulting the Events Table to see which event has occurred.
(16.13) Most Events affect everyone, so it matters little who drew the Event Marker. However, if the Event Marker is player-specific, it applies to the player who is activated by the next AM drawn (not specifically selected), even if it is the next Game-Turn.
(16.2) The Events (Standard Game Only)
The Events that may occur, and how they affect play, are as follows:
Barbarian Invasion: Roll two dice and consult the Invasion Table for who, what, when and where. See 13.4 for details.
Conqueror: If the player who gets activated by the next drawn AM has an Elite Leader in play, he may, for any subsequent AMs during this Game-Turn, give that Leader an additional activation, in essence, providing him with two separate, successive "moves". (He goes twice.)
Disease: The player who gets activated by the next drawn AM must roll one die, comparing that dieroll to the campaign rating of his highest-rated Leader in the game (add the tactical and campaign ratings together—the leader with the higher total is the highest-rated leader—if tied, it's the player's choice). If the dieroll is the same as or lower than that rating, that Leader has died. Remove him. Note that this event affects better leaders more readily than lesser leaders.
Galley Technology: The player who gets activated by the next drawn AM has all his galley squadrons increased to a value of 3 BP in any naval battles for the remainder of the Game-Turn. If both sides get galley technology in the same turn, they each have it.
Harvest Time: The Player rolls one die and consults the Harvest Table to see which Area (Territory) of the map is affected. He then rolls another die:
- If the die is even, Harvests have been Bounteous. Increase the Stability of the Player who controls that Territory by two (+2). If no control, no effect.
- If the die is odds, there is Famine and Drought. Reduce the Stability of the Player who controls that Territory by two (–2). If no control, no effect.
Pirates: The player places a Pirate marker in any one NTP that is not within one Naval Space of Rhodes. See 12.6 for the effects of this.
Rebellion: A Rebellion has occurred. To determine where the Rebellion has occurred, and what kind of rebellion it is, roll two dice (2d12) and consult the Rebellion Table (Charts and Tables) for which territory or province has revolted. Remove all garrisons in that province (no matter to whom they belong) and reduce Stability by one (–1) for any player controlling any Spaces in the area listed. Exception: Naval Mutiny. The player designates any one Fleet on the map as having mutinied. That Fleet may not move for the rest of the Game-Turn, or until the owning player pays 1T per Squadron (and he must do so for all squadrons in that Fleet)… whichever comes first.
Revenues and Stability: This affects all players.
- If a Player has less than 3T in his Treasury when drawn, subtract one (–1) from his Stability.
- If a Player has more than 12T in his Treasury when drawn, add one (+1) to his Stability.
Slave Revolt: This card affects the player who drew the Event marker, but only if he has at least one Space with no land units in his home territory. See 12.74. If a slave revolt is already in play against the drawing player, treat this roll as No Event.
Soldier of Fortune: Player may activate a Soldier of Fortune Army as per 12.4. Romans ignore and reroll for another event.
Stability Check: Whether anything takes place depends on the current Stability Level of the Player who draws the next AM. If no one is currently at any of the three Stability Levels listed, the drawing player reduces his Stability by one (–1). The possible ramifications are:
- Unrest. Stability Level is between 0 and +3. The affected player must pay 3T for bread and circuses to keep the locals amused. If he does not have the 3 Ts, or refuses to pay, lower his Stability by one (–1) for each Talent he refuses to or cannot pay.
- Disorder. Stability Level is "Unrest". The player must, for his next (or current) Activation this phase move an Army worth at least 3 BP to his capital, in addition to what he already has there. If he does not succeed in doing so, lower his Stability by one (–1) and remove all garrisons he has, regardless where they are.
- Civil War. Stability Level is Turmoil. The affected player:
- may not undertake any further activations that Game-Turn. If he has no AM remaining, all AM for the following Game-Turn cost 2T each.
- Roll 1d6 for the allegiance of each Space occupied by the Player, including galley squadrons. If the DR is odd, remove all units in that Space, as having taken the wrong side (Towns and Cities stay in place, though).
- Remove all Leaders he has; replace with only one, newly drawn Leader, who starts in his capital.
- Once all of the above is done, return the Stability Level of the Player to –1/Unrest.
17.0 Event Cards (Advanced Game Only)
(17.1) Using the Event Cards
(17.11) There are 55 cards, representing a wide realm of possibilities germane to the historical situation. All cards (other than those retained in a Player's hand at Game-Turn's end, as below, and/or those cards that have been played and Removed from the game) are re-shuffled in the Victory Phase of the game in preparation for the next Game-Turn.
(17.12) Types of Cards. There are two types of cards: "Play When Drawn" and "Hold in Hand". The former must be played immediately after a player draws it; the latter may be kept, according to the restrictions noted here.
(17.13) The Card Segment. Each time a player's AM is played, and once he has paid for that AM, he must draw a Card from the Deck. He then may (or must, if the card is a "Play When Drawn" type or if he has too many cards in his hand) either
- play that card, and/or
- play one from his Hand, or
- do nothing and keep the card in his hand (secret from the other players).
PLAY NOTE: Some of the scenarios specify that the game begins with the Operations Segment of the Activation Phase of a specific Game-Turn. For the very first AM, therefore, no card is drawn, since the Card Segment has already passed.
(17.14) Keeping Cards. A player may have no more than 3 "Hold in Hand" cards in his possession at any one time. If he already has 3 and draws another, he must discard one of his existing 3 if he wishes to add the new one to his hand. In addition, a player may carry over to the next Game-Turn one (1) card, which he retains "In hand"; all other cards are returned to the deck for Reshuffle at turn's end.
(17.15) When Cards are Played. "Play When Drawn" cards are played during the Card Segment of the Activation Phase (immediately upon drawing them). "Hold in Hand" cards may be played during the Card Segment and/or any player's Operations Segment of the Activation Phase. No cards may be played during any other segment or phase. A player may always discard a "Hold in Hand" card as No Event if he wishes. Furthermore, a player may play as many of his "Hold in Hand" cards as he wishes during an Activation (there is no limit).
PLAY NOTE: A player may play Event cards even if he chooses a Recruitment operation instead of Expansion operations. This means that it's possible to play (for example) a Barbarian Invasion card (see 13.4), move and fight with the Barbarian army, and then recruit.
(17.16) Carthage and Cards. The Carthaginians may play any "Hold in Hand" card for the purpose of raising Mercenaries, in addition to the actual mercenary card, as per 12.24. The Event on the card is ignored.
(17.2) The Cards
The play/use of each card is described below; in some instances (e.g., Invasion, etc.), more details may be found in the actual rules. The number in parentheses after each card name is the number of copies of that card in the deck.
Alliance (2): The player who plays this card may open Political Talks with any one other player—and only one. See 4.2. This card may be held in Hand until played.
Alliance with Rhodes (1): When this card is played, the Player has formed an alliance with Rhodes (if Rhodes is currently non-Allied), for which he must pay 3T for that privilege. Until that alliance ends (see the Alliance Card), that Player:
- has the use of Rhodes' Galley Fleet (but not the HI). He does not have to pay any maintenance for this Fleet, but he must replace any lost squadrons.
- receives 1T from each player whose galleys enter Rhodes. See 12.51 for more details.
This card may be held in Hand until played.
Alliance with Pergamum (1): When this card is played, the Player has formed an alliance with Pergamum (if Pergamum is currently non-Allied). Until that alliance ends (see the Alliance Card):
- That player has the use of any and all of Pergamum's forces as if they were his own army. They may combine with any of the Player's own forces. They are activated by that Player's AM, as per 12.54.
- When taking losses, for each Player BP or galley lost, the player may eliminate a like number of Pergamenes to satisfy losses.
- When activating Pergamum (by AM), the player rolls the die. If he rolls a 1-4, nothing happens. If he rolls a '5', place the 1-4 Pergamene Leader (in theory, Attalus I) in Pergamum; if it's a '6', place the 2-5 Pergamene Leader (in theory, Eumenes II).
- Pergamene forces may not be rebuilt, nor may she ever get new units. If there are no Pergamene forces in play, treat card as No Event.
- While allied to the Pergamese, the player cannot gain control of Spaces initially occupied by Pergamese forces (even if the player's forces are the sole occupants of such a Space).
This card may be held in Hand until played.
Ambush (1): This card is played whenever another player's units enter a Land Transit Point. Roll 1d6 and halve the result (rounding up). That number of BPs (at least) are eliminated from the moving Army. May not be used against an Army moving inside its Home Territory. This card may be held in Hand until played.
Archimedes Effect, The (1): [So named for the brilliant Greek inventor who was instrumental in the defense of Syracuse against the Romans in 212 BCE.] Place the "Inventor" marker in any City Space. For the remainder of the current Game-Turn, that City gives two (2) Battle Die-Roll Shifts to the Defender in any attack against it. May be Held in hand and played later.
Barbarian Invasion (2): Roll two dice and consult the Invasion Table for who, what, when and where. See 13.4 for details. This card must be played when drawn.
Bounteous Harvests (2): Crops are so plentiful that granaries are overflowing and foraging is plentiful. Player rolls 1d6 to determine which Territory has such Goodness. Increase the Stability of the Player who controls that Territory by one (+1). If no control, no effect. This card must be played when drawn.
Change in Political Scene (1): A new party/tyrant/dictator has assumed control of your Power and decides to wipe the slate clean.
- Return your in-hand cards to deck immediately and shuffle (you don't get to play any of the cards in your hand first).
- Return all your Objective markers to your pool, and re-select (blindly) 3 new ones.
- Increase (yes, increase) your Stability by two (+2).
This card must be played when drawn.
Change in Foreign Policy (1): The Player may use this against another Player or for himself. The affected player randomly selects one Victory Opportunity Objective to return to his Pool after blindly selecting a new one. He may not return the one he just selected. This card must be played when drawn.
Conqueror (1): If the player playing this has an Elite Leader in play, he may, for this AM, give that Leader an additional Activation, in essence, providing him with two separate, successive "moves". (He goes twice.) There is no need to play or use an extra AM for this. This card must be played at the beginning of the initial Activation. It may not be played by the same player in the same Game-Turn as a Cunctator card. This card may be held in Hand until played.
Conspiracy (1): This card may be played against any other Player. The Player drawing the card designates any one, non-Elite on-map leader as being a conspirator to overthrow his government. Remove that leader from the map and reduce that Player's Stability by one (–1). This card must be played when drawn.
Cunctator (1): An Anglicized version of the Latin word for someone proficient at delaying. Playing this card allows the Player to Withdraw from Land Combat an unlimited number of times during the current Game-Turn, and without suffering the Stability loss for withdrawing from a space in the Player's Home Territory. This card may not be played by the same Player in the same Game-Turn as a Conqueror card. This card may be held in Hand until played.
Deus ex Machina (1): This acts as a card that is as a counter to a card drawn/played by someone else. You may not play it against your own draw/play. When played, this card totally cancels whatever card was just played by another player. It must be played before any use of the card-to-be-cancelled takes place. Both cards are then discarded. This card may be held in Hand until played.
Dies Irae [Day of Wrath] (1): This card affects only the drawing player. The gods are rather miffed. You must have done something to put them in such a dither. You have a choice:
- Pay 2T to the local priests to mollify the gods, or
- Cancel the AM that was just selected; you do not get to go.
This card must be played when drawn.
Diplomatic Mission into Interior (1): The player may look at the actual strength of any two Tribal Counters that are within 4 connected Land Spaces of any of his combat units (but not Barbarian, Independent, or Allied units). He does not have to tell anyone what he discovered. This card may be held in Hand until played.
Disease—Only the Good Die Young (1): The player who draws this card must roll one die, comparing that dieroll to the Campaign Rating of his highest-rated Leader in the game. If the Dieroll is lower than that rating, that Leader has died. Remove him. The highest-rated Leader is the leader whose Tactical Rating plus Campaign Rating yield the highest total (if tied, it's the owning Player's choice). This card must be played when drawn.
Famine and Drought (2): Player rolls 1d6, consulting the Harvest/Famine Table to determine which Territory has Famine and Drought. Reduce the Stability of the Player who controls that Territory by one (–1). If no control, no effect. This card must be played when drawn.
Galley Tech-Artillery Engines (1): When this card is played its provisions are in effect for that player for the rest of the Game-Turn. The Player's galley squadrons are each worth 3 BP in any naval battles. This card may be held in Hand until played. Once played, remove from game.
Galley Tech-The Corvus (1): This device allowed for easier, more efficacious grappling, and, thus, boarding. When this card is played its provisions are in effect for that player for the rest of the Game-Turn. The Player's galley squadrons are each worth 3 BP in any naval battles. This card may be held in Hand until played. Once played, remove from game.
Galley Tech-The Harpax (1): The Harpax, or harpago, was an artillery propelled grappling mechanism that was a great leap forward in effecting boarding. When this card is played its provisions are in effect for that player for the rest of the Game-Turn. The Player's galley squadrons are each worth 3 BP in any naval battles. This card may be held in Hand until played. Once played, remove from game.
Independent Expansion (1): The Player may place, at no cost, a Garrison in any unoccupied Space within 4 Spaces (traced over land only) of any of his combat units (but not Barbarian, Independent, or Allied units). This card may be held in Hand until played.
Local Insurrection (1): Player removes any one garrison unit on the map, belonging to any player. If no garrisons, it is No Event. This card must be played when drawn.
Mercenaries (3): The player may spend 2T (and only 2T) to hire Mercenary units at the cost listed below. This is not an operation. The mercenaries are placed with any Army that player has on the map, but they all must go to the same location. All Mercenaries are removed from play in the Removal Phase of the next Game-Turn, regardless of their situation. Rome may not rent mercenaries; the Roman Player treats this card as No Event. This card may be held in Hand until played. 2T buys:
- 2 Merc LI, or
- 1 Merc Cav, or
- 1 Merc HI
Naval Ambush (2): This card may be played against any force using naval transport within three naval spaces—including Naval Transit Points but not Deep Sea Transit Points—of one of your Galley Squadrons. If that force does not have at least one Galley Squadron as an escort, the land units are completely destroyed. This card may be held in Hand until played.
Pirates (2): The Player playing this card does one of the following:
- places a Pirate Fleet in any Naval Transit Movement Point; or
- places the Cilician Pirates in Tarsus (Cilicia/Asia) if Tarsus is unoccupied.
...and then see 12.6 for full details. This card must be played when drawn.
Poliorcates Effect, The (1): [So named for Demetrius Poliorcates, "the Besieger".] If the player wishes, he spends 2T and buys himself some heavy siege equipment, a Helepolis. Place the Helepolis marker with any Army. When that Army is attacking a Town or City, the Helepolis is worth 5 BP. It is never used in Defense. It may be used in only one Attack. It may not be used to cover losses; it may be used to be a Colossus statue, if you are so inclined. This card may be held in Hand until played.
Pontus (1): Play of this card activates the Kingdom of Pontus, as per 12.55. See that section for full instructions. This card may be held in Hand until played. This card is removed from the game after being played.
Raise the Militia (2): When played, first lower the player's Stability level by one (–1). Then, the player rolls the die (1d6) and halves the result (rounding fractions up). The result is the number of Militia LI he may place in any province in his Home Territory, as long as enemy combat units (including Barbarian units) exist anywhere in that Territory. Lower the number raised by one (–1) if the player's Stability level is Unrest; if the Stability level is Turmoil, this card is treated as No Event. Militia units do not cost anything to raise. However, they are removed in the Removal Phase of the next Game-Turn. This card may be held in Hand until played.
Rebellion (2): A Rebellion has occurred. To determine where the Rebellion has occurred, and what kind of rebellion it is, roll two dice (2d6) and consult the Rebellion Table (Charts and Tables) for which territory or province has revolted, and the Rebellion Rules (13.3) for what the effect is. This card must be played when drawn.
Revenues and Stability (4):
- If the Player drawing this has less than 3T in his Treasury when drawn, subtract one (–1) from his Stability level.
- If the Player drawing this has more than 12T in his Treasury when drawn, add one (+1) to his Stability level.
This card must be played when drawn.
Slave Revolt (1): This card affects the drawing player, but only if he has at least one Space with no land units in his home territory. Your Slaves are Revolting. See 12.74. This card must be played when drawn. If a slave revolt is already in play against the drawing player, treat this card as No Event.
Soldier of Fortune (1): Non-Roman players may activate a Soldier of Fortune Army as per 12.4. The Roman Player may not do so, but instead this card enables him, under applicable circumstances to use a Dictator. This is allowable if there is any enemy army in any Space in his Home Territory when Rome is Active. When a Dictator is declared, the Roman Player removes from the board one of his Leaders (his choice). He then blindly draws three Leaders from those he is not using. He may place one of these three (his choice) in Rome as the Replacement for the removed Leader. The other two are returned to The Pool. This card may be held in Hand until played.
Spies (1): When played, the player may look at the cards in the Hand of any one Player. This card may be held in Hand until played.
Stability and Opportunity (1): If your government is Stable, the Player has a choice when playing this card:
- place an additional AM in The Pool at no extra cost to play, OR
- select an additional Opportunity Objective marker to use (unless you already hold three).
May be Held in hand and played later.
Stability Check (2): This card may be played against any player with a Stability Level of +3 or lower. The use of this card depends on the current Stability Level of the Player against whom it is played. If the only Player who would qualify is the drawing Player he is forced to use this card on himself. If no one qualifies, the drawing player reduces his Stability by one (–1). The possible ramifications are:
- Unrest. This card is played against any other Player whose Stability Level is between 0 and +3. If the only Player who is at that level (or worse) is the drawing Player he is forced to use this card on himself. The affected player must pay 2T for bread and circuses to keep the locals amused. If he does not have the 2T, or refuses to pay, lower his Stability by one (–1) for each Talent he refuses to or cannot pay. If no one is at that low a level, reduce the drawing Player's Stability by one (–1).
- Disorder. This card is played against any other Player whose Stability Level is Unrest. If the only Player who is at that level (or worse) is the drawing Player he is forced to use this card on himself. The designated player must, for his next (or current) Activation this phase move an Army worth at least 3 BP to his capital (either capital if the power has two capitals), in addition to what he already has there. If he does not succeed in doing so, lower his Stability by one (–1) and remove all garrisons he has, regardless of where they are. If no one is at that low a level, reduce the drawing Player's Stability by one (–1).
- Civil War. This card is played against any other Player whose Stability Level is Turmoil. If the only Player who is at that level (or worse) is the drawing Player he is forced to use this card on himself. If no one is at that low a level, reduce the drawing Player's Stability by one (–1).
The next AM for the affected player is used to do only the following:
- Roll 1d6 for the allegiance of each Space occupied by the Player, including galley squadrons. If the result is odd, remove at least half of the Land units and half the galley squadrons, rounded up. For any Space that is made vacant by such a removal, place a garrison unit therein. If the die-roll result is even, that space remains untouched.
- Remove all Leaders he has; replace with only one, newly drawn Leader, who starts in his capital.
- Once all of the above is done, return the Stability Level of the Player to –1/ Unrest.
This card must be played when drawn.
Successor Wars Roll On (1): Little, it appears, kept the descendants of the "Successors" of Alexander the Great from continuing their efforts to be rulers of the Hellenistic World. The player who plays this card must immediately (before doing his normal moves for this activation) conduct Military Operations with any one Army (but not Fleet) of Greek units that are in Greece, or start within 3 Spaces of Greece (if in play, the Soldier of Fortune army not be used). The army must (move to and) stay within Greece; it cannot go elsewhere. Other than that, it may do anything a normal moving army would, including (and especially) attacking other Greek units, armies, and possessions. It may pick up units as it moves, but not those in Towns or Cities. However, it may attack units in Towns or Cities in order to destroy or reduce the location (but it may not engage in Sack and Plunder). Militia may not be recruited from Battles resulting from this card being played. If the card is drawn by the Greek Player, treat as a –2 to Stability instead. This card must be played when drawn.
Tactical Surprise (2): This card gives its player a Battle Die-Roll Shift of two (2) for any one Land Battle. This card may be held in Hand until played.
Traitor (1): Player may take one card—randomly—from the hand of any other player. This card may be held in Hand until played.
Tribal Resurgence (2): Draw, randomly and blindly, two Tribal Units from those not in play and place each one, "?"-side up, in any unoccupied Tribal Space (one Unit per space). If only one unoccupied Tribal Space is available, place only one; if none available, treat the card as No Event. This card must be played when drawn.
The Scenarios
The scenario rules below are from the Pax Romana Play Book (Living Rules, June 2006).
Scenario I: The Pyrrhic War—Pyrrhus Against Rome (Standard Game Only)
This scenario covers the conflict between the Roman Republic and Pyrrhus, King of Epirus. In 281 B.C., the Greek city of Tarentum, on the south coast of the Italian peninsula (in Bruttium province in Pax Romana) fell under Roman threat, and arranged for Pyrrhus to intervene. Pyrrhus defeated the Romans in battle at Heraclea in 280, and again at Asculum in 279. The latter battle saw Pyrrhus lose far too many men for him to sustain—hence the term "Pyrrhic Victory". This scenario pits the Greek player against the Roman player, with the fate of Tarentum on the line.
Players: Rome and Greece (or solitaire as either player).
Start and End: The scenario begins with the Operations Segment (F.3) of Game-Turn I and lasts until the end of Game-Turn I.
Activation Markers: Greece (3), Rome (3)
How to Win: At the end of Game-Turn I, the Roman player wins if he has captured or destroyed Tarentum. The Greek player wins if Rome's Stability Level reaches 1 or he has achieved all of the following:
- Tarentum remains at full strength and in Greek possession
- Rome has lost at least one battle
- Pyrrhus is alive and in charge of a Soldier of Fortune army of at least 5 Battle Points.
Any other result is a Draw.
Events: This scenario does not use Events. Remove the Event markers from play.
Event Cards: None
Opportunity Objectives: Opportunity Objectives are not in play for this scenario.
Tribal Units: None
Map Restrictions: Only Rome territory is in play, except for Corcyra (Macedonia), used only as the launching point for Pyrrhus's naval transport.
Leaders: All leaders are specified in the initial deployment.
Initial Play Order: Greece, Rome
Special Rules: Treasuries are not used. Rome may use one (and only one) Activation for a Recruitment operation, in which it may add two Legions anywhere in Rome territory (these may be placed together or in separate locations).
Rome
- Rome — 4 LG, a 2-4 Leader; Rome is a City.
- Placentia — 2 LG, a 1-5 Leader.
- Capua — Capua is a Town.
Garrisons: The Roman player may place one Garrison unit in any Space in Cisalpina, and one Garrison unit in any Space in Italia. The Garrison units may be placed with the Armies if desired.
Treasury: N/A
Stability Level: +6
Initial Control: The Roman Player controls the following:
- Territories: N/A
- Home Provinces: Italia and Cisalpina
- Other Provinces: None
- Cities: Rome
- Towns: Capua
* Because Greece controls Bruttium, Rome is denied both provincial control of Bruttium and territorial control of Rome.
Greece
- Tarentum (Bruttium) — 1 LI, 1 Cav; Tarentum is a City
- Garrisons — Venusia (Italia), Paestum and Brundisium (Bruttium)
- Corcyra (Attica) — 1 Greek Galley Squadron, plus the following Soldier of Fortune units: 3-4 Leader, 4 HI, 2 LI, 1 Cav, 1 EL.
DESIGN NOTE: The SoF leader represents Pyrrhus, King of Epirus.
PLAY NOTE: The restrictions of 12.44 do indeed apply to Pyrrhus and his SoF army (the Greek land units are that player's "Home" units).
Initial Control: The Greek Player controls the following:
- Other Provinces: Bruttium
- Cities: Tarentum
Scenario II: The Punic Wars—The Fall of Carthage (Standard Game Only)
This scenario allows two players to game the Punic Wars, with Rome and Carthage vying for control of the Western Mediterranean, using the Standard Game (which is best suited for this), including the Events rule (16.0).
Players: Rome and Carthage
Start and End: The scenario begins with the Operations Segment (Phase F.3) of Game-Turn II and lasts for 3 turns, through the Victory Phase (Phase H) of Game-Turn IV.
PLAY NOTE: Since the scenario starts with Phase F.3, which is after the Payment Segment, Rome is presumed to have already paid 1T for its first AM of the game (it doesn't pay again).
Activation Markers: Rome (4), Carthage (4)
How to Win: The Roman player wins an automatic victory the instant he destroys (not captures) Carthage. The Carthaginian player wins an automatic victory the instant he captures Rome. Failing either event, at the end of Game-Turn IV, the player with the most VP wins.
VP awards are different from those in 15.1, however. In the Victory Point phase, the player with the most GOP gets 2 VP, the other player none. The player with the most Civilization Points gets 1 VP, the other player none.
Events: The Events below (not those in 16.0) are used in this scenario, along with both Event Markers, unless players choose to play a Basic Game. The use of Events is recommended.
Event Cards: None
Opportunity Objectives: Opportunity Objectives are not in play for this scenario.
Tribal Units: Place all the Tribal counters in a cup. Each Tribal unit is drawn blindly and placed, one each, in the Initial Tribal Spaces ('?'), unknown side up, for all Tribal Spaces in Hispania, Gaul (but not Brittania), and Dalmatia (in Danube) ... nowhere else. (That means some counters will not be drawn.)
Map Restrictions: No units may enter any land space in Britannia, Germania or The Danube (other than Dalmatia), nor any land or naval space from Cyrenaica and Greece eastward. However, Greece may become active as an Event (see below).
Leaders: All leaders are selected as per the initial deployment. Next turn you start drawing.
Initial Play Order: Rome, Carthage.
Rome
- Rome — 1 LG; Rome is a City.
- Rhegium — 2 LG, a 1-4 Leader; Rhegium is a Town
- Arretium — 2 LG, a 2-4 Leader
- Garrisons: Parma, Neapolis, Croton, Pisae
- Cities: Rome, Capua, Tarentum
- Towns: Placentia, Ariminium, Rhegium
Treasury: 15T
Stability Level: +8
Initial Control: The Roman Player controls the following:
- Territories: Italy (1T)
- Home Provinces: All three: Cisalpina, Italia, Bruttium (4T total)
- Other Provinces: None
- Cities: Rome, Capua, Tarentum (9T total)
- Towns: Placentia, Ariminium, Rhegium (3T total)
Carthage
- Carthage (Africa) — 2 HI, 1 Cav; 2 Galley Squadrons; a 2-5 Leader; Carthage is a City.
- Utica (Africa) — 1 LI; 1 Galley Squadron; Utica is a Town.
- Cirta (Numidia) — 2 LI
- Gades (Baetica/Hispania) — 1 LI; 1 Galley Squadron
- Lilybaeum (Western Sicily) — 1 HI, 1 LI; 1 Galley Squadron; a 1-4 Leader; Lilybaeum is a Town.
- Caralis (Sardinia) — 1 LI, 1 Galley Squadron
- Garrisons: Malaca (Hispania), Aleria (Corsica), Olbia (Sardinia), Panormus (Western Sicily)
Treasury: 8T
Stability Level: +5
Initial Control: The Carthaginian Player controls the following:
- Territories: Carthage (1T)
- Home Provinces: All four: Africa, Libya, Numidia, Mauretania (4T total)
- Other Provinces: Baetica, Sardinia, Corsica, and Western Sicily (4T total)
- Cities: Carthage (3T)
- Towns: Utica and Lilybaeum (2T total)
Sicily
- Syracuse — 2 Greek HI, 1 Greek Cav, 1 Greek Galley Squadron, a 2-5 Greek Leader; Syracuse is a City
- Massena — 1 Mamertine HI
Greek Colonies
Greek Garrisons: Emporiae (Hispania), Massilia (Gaul)
Greece as an Active Power
Unless and until the Greece event occurs, Greece is neutral and no unit may enter any Space in Greece territory (although the Greek garrison spaces in Hispania and Gaul may be entered normally at any time). Neither the Greek garrisons, nor the units in Syracuse, may be moved at any time in the scenario, even if Greece becomes active.
If the Greece event does occur, and Carthage decides to enlist her aid, the following occurs:
- Macedonia and Attica, in Greece, are now open to movement into, through, etc. No other provinces are open.
- Greece is still not a separate power; they are simply a neutral controlled by Carthage. They do not build Greek units, Greek Town/Cities, etc.
- The Greeks get 4 HI, 1 Cav, and a 2-4 Leader in Pella, plus 1 Galley Squadron in Dyrrachium.
- Carthage may use this Greek Army/Navy as its own. It may even count that army's conquests outside of Greece territory towards his own GOP, Civilization Points, treasury, etc.
- No new Activation Markers are brought into play - Greek units activate only via Carthaginian AMs.
- Rome (and only Rome) may get GOP and/or VP for controlling Macedonia and/or Attica (one VP per province).
- The Greek Leader is replaced (along with the other Leaders in the game) only when Greece is active.
Scenario II Event Markers
Use two Event Markers, as per 16.0. This means that not all events listed below have a chance of occurring, and that other events may reoccur (unless noted otherwise, then reroll).
Conqueror: If the player who gets activated by the next drawn AM has an Elite Leader in play, he may, either for any subsequent AMs during this Game-Turn, give that Leader an additional activation, in essence, providing him with two separate, successive "moves". (He goes twice.)
Disease: The player who gets activated by the next drawn AM must roll one die, comparing that dieroll to the campaign rating of his highest-rated Leader in the game. If the Dieroll is the same as or lower than that rating, that Leader has died. Remove him.
Galley Technology: The player who gets activated by the next drawn AM (even if that doesn't happen until the beginning of next Game-Turn) has all his galley squadrons become worth 3 BP in any naval battles for the remainder of the Game-Turn. If both players acquire Galley Technology in the same turn, they both get the benefit of better galleys.
Gallic Invasion: The Gauls invade Italy. Place a 1-5 Barbarian Leader and 8 BI in any unoccupied Space in the Roman Home province of Cisalpina. These Gauls may be moved by the Carthaginian Player as if the entire force were an Individual Unit, i.e., as a Minor Move. They may never be split up; they always stay together. These units may not Withdraw nor Retreat (voluntary or be forced to do so) and are taken off the map in the Removal Phase of the next turn.
Greece Enters the Game: Regardless who rolls this Event, it provides the Carthaginian Player the opportunity of engaging Greece as an Ally (with the two-edged sword possibility of providing Rome with additional Victory Points). Carthage rolls the die; that result, halved (and rounded up) is the number of Talents Carthage must pay to enlist Greece as an ally.
- If Carthage does pay; see the rules on "Greece as an Active Power", above.
- If not, this is No Event.
If Greece is already active, roll again.
Hispanic Revolt: All Garrisons (both players) in Hispania are eliminated (this does not affect the Greek garrison in Emporiae, if it is still in play). If this has already occurred in the game (i.e., actually had an effect), roll again.
Revenues and Stability: This affects all players.
- If a Player has less than 3T in his Treasury when drawn, subtract one (–1) from his Stability.
- If a Player has more than 12T in his Treasury when drawn, add one (+1) to his Stability.
Mercenary Revolt: This affects the Carthaginian player only. If he has Mercenaries in play, he must pay each Mercenary HI unit in Africa and/or Libya 1 Talent each. If he fails to do so, each unpaid unit:
- Is replaced with a BI and takes control of the Space it is in, unless that Space contains Carthaginian units of any kind.
- If the Space is occupied by Carthaginian Land Units there is a battle between the latter and all the new BI in the Space.
These "Mercenary BI" remain in place until removed by force, controlling any space they are in (and therefore denying control to Carthage). If this has already occurred (i.e., has actually had an effect), roll again.
Naval Mutiny: The Samnite crews manning one of Rome's Fleets mutinies. The Carthaginian Player may remove 1 Roman Galley Squadron, regardless where it is. If this has already occurred in the game (i.e., has actually had an effect), roll again.
Numidian Revolt: The Numidians, chafing at Carthaginian control, revolt. Eliminate all Carthaginian garrisons in Numidia, and the Carthaginian player may not raise any Numidian Land Units of any kind while the revolt continues. If this is rolled again in the same Game-Turn, the revolt has ended. The revolt ends, otherwise, by the end of the following Game-Turn.
Stability Check: Whether anything takes place depends on the Stability rating of the Player who draws the next AM. If no one qualifies (i.e., no player has a current Stability Level of +3 or lower), the drawing player reduces his Stability by one (–1). Otherwise, the possible ramifications of this event are:
- Unrest: Stability Level is between 0 and +3. The affected player must pay 3T for bread and circuses to keep the locals amused. If he does not have the 3Ts, or refuses to pay, lower his Stability by one (–1) for each Talent he refuses to or cannot pay.
- Disorder: Stability Level is "Unrest" (–1 to –4). The player must, for his next (or current) Activation this phase move an Army worth at least 3 BP to his capital, in addition to what he already has there. If he does not succeed in doing so, lower his Stability by one (–1) and remove all garrisons he has, regardless where they are.
- Civil War: Stability Level is Turmoil (–5 to –6). The affected player:
- may not undertake any further activations this Game-Turn. If he has no AM remaining this turn, all AM for the following Game-Turn cost 2T each (instead of 1T).
- Roll 1d6 for the allegiance of each Space occupied by the Player, including galley squadrons. If the DR is odd, remove all units in that Space, as having taken the wrong side (Towns and Cities stay in place, though). If even, that space remains untouched.
- Remove all Leaders he has (but Carthage does not remove the Greek Leader); replace immediately with only one, newly drawn Leader, who starts in his capital.
- Once all of the above is done, return the Stability Level of the Player to –1 / Unrest.
Punic Wars Events Table
| DR | Event |
|---|---|
| 2 | Disease |
| 3 | Stability Check |
| 4 | Hispanic Revolt |
| 5 | Naval Mutiny |
| 6 | Conqueror |
| 7 | Greece |
| 8 | Galley Technology |
| 9 | Numidian Revolt |
| 10 | Mercenary Revolt |
| 11 | Revenues & Stability |
| 12 | Gallic Invasion |
Scenario III: Successor—Seleucus in Asia Minor (Standard Game Only)
Seleucus I, one of Alexander the Great's generals, became governor of Syria in 312 BC and ruler of Babylonia soon afterwards, establishing the cities of Seleucia and Antioch, along with the Seleucid dynasty. In 301 he defeated Antigonus at the famous battle of Ipsus, after which the winners split up the remains of Alexander's conquests among them. Seleucus took Syria and Mesopotamia, had himself crowned King of Syria, and spent the next 20 years taking over more and more of Asia Minor. In 282 he became the de factor ruler of Asia Minor after initiating a war against Lysimachus, defeating his army and killing him near Sardis. The next year, Seleucus' plans to cross into Thrace and take over Macedonia itself ended when he was stabbed to death by a Ptolemaic rival.
This two-player scenario pits Greece against The East, with the army of Seleucus poised to enter the fray.
Players: Greece and the East, or either power solitaire.
Start and End: The scenario begins with the Operations Segment (F.3) of Game-Turn I and lasts until the end of Game-Turn II.
PLAY NOTE: Since the scenario starts with Phase F.3, which is after the Payment Segment, Greece is presumed to have already paid 1T for its first AM of the game (it doesn't pay again).
Activation Markers (recommended): Greece (4), The East (4)
How to Win: Victory is assessed at the end of Game-Turn II. There are two levels of victory for each player: Historical and Legendary. The East gains an Historical victory by controlling the territory of Asia Minor, and a Legendary victory by controlling Asia Minor as well as both Greek capitals. Greece wins an Historical victory by controlling the territory of Greece, and a Legendary victory by controlling both the territory of Greece and the province of Ionia. Notice that it is entirely possible for both players to win Historical victories, and that it is also possible (and more likely) for one player to win an Historical victory while the other achieves no victory level at all.
Events: This scenario does not use Events. Remove the Event markers from play.
Event Cards: None
Opportunity Objectives: Opportunity Objectives are not in play for this scenario.
Tribal Units: Place all the Tribal counters in a cup. Each Tribal unit is drawn blindly and placed, one each, in the Initial Tribal Spaces ('?'), unknown side up, for all Tribal Spaces in Dalmatia, Moesia Superior, and Moesia Inferior (all in the Danube) ... nowhere else. (That means some counters will not be drawn.)
Map Restrictions: No units may enter any space north or west of Dalmatia, Moesia Superior, Moesia Inferior, or Sarmatia, nor any space west of Greece or Cyrenaica (in Africa). The westernmost Deep Sea Naval Transit space in play is the one immediately west of Crete.
Leaders: All leaders are selected as per the initial deployment. Next turn you start drawing.
Initial Play Order: Greece, The East. This is true for both Game Turns.
Greece
- Athens — 3 HI, 2 Galley Squadrons, a 2-5 Leader; Athens is a City
- Pella — 2 HI, a 2-4 Leader; Pella is a Town.
- Corinth — 2 HI; Corinth is a Town
- Thessalonice — 1 Galley Squadron
- Nicomedia (Pontus) — 2 HI
- Abydos (Ionia) — 1 HI, 1 Galley Squadron
- Celenae (Ionia) — 1 HI
- Sardis (Ionia) — 1 LI; Sardis is a Town
- Salamis (Cyprus) — 1 Galley Squadron
- Sidon (Syria) — 1 Galley Squadron
- Garrisons: Cyzicus (Ionia), Iconium and Ancyra (Galatia), Tyre, Lesbos/Chios (The Aegean)
Treasury: 13T
Stability Level: +1
Initial Control: The Greek Player controls the following:
- Territories: Greece (1T)
- Home Provinces: All five (5T total)—Attica, Thrace, Macedonia, Peloponnesus, The Aegean Islands.
- Other Provinces: Pontus, Galatia, Ionia (4T total)
- Cities: Athens (3T total)
- Towns: Pella, Corinth, Sardis (3T total)
The East
- Antioch — 1 HI; Antioch is a Town.
- Damascus — 1 LI
- Alexandria — 3 HI, 1 LI; 2 Galley Squadrons [a]; a 2-5 Leader [b]; Alexandria is a City.
- Pelusium — 1 LI; 1 Galley Squadron
- Memphis — 3 LI
- Jerusalem — No forces, but Jerusalem is a Town.
Treasury: 6T [c]
Stability Level: +4
Reinforcements: When The East player plays his first AM (i.e., the second AM of the game, after Greece's opening AM), he may place the Seleucid Army —6 HI, 2 LI, 1 Cav, 3 EL and a 2-6 Leader [d]—in Edessa, Palmyra or Damascus. They are now available to be activated. As soon as they are activated, place 5T in The East's Treasury. If all three deployment Spaces are enemy-occupied when the Seleucid Army is to be placed, it still gets placed in one of those Spaces, but it must be Activated immediately, expend 1 MP, and attack the occupants of that Space.
Initial Control: The East Player controls the following:
- Territories: The East (1T)
- Home Provinces: All five (7T total)—Egypt, Syria, Judea, Cyprus, Cyrenaica.
- Other Provinces: None
- Cities: Alexandria (3T)
- Towns: Jerusalem, Antioch (2T total)
Note: The Greek squadrons in Salamis and Sidon do not deny control of Cyprus or Syria.
[a] = Ptolemy's Fleet was still rebuilding from the major defeat suffered at the hands of Demetrius at Salamis (306 BC). [b] = Ptolemy I, Macedonian Pharaoh of Egypt [c] = See Special Rule, Baghdad Booty Call, below. [d] = Seleucus, the johnny-come-lately victor at Ipsus, moving west to claim his portion of the land-grab spoils.
Baghdad Booty Call
On Game-Turn II, when the East collects Income, the East Player must roll one die (1d6) on the Baghdad Booty Call Table to see what events to the east—in Persia and beyond—have on The East Player. Some dierolls represent peace and prosperity, some represent hard times, corruption and, occasionally, yet another outbreak of warfare between the Seleucids and the Ptolemaic Egyptians. Whatever the result, it is applied immediately.
Baghdad Booty Call Table (Standard Game Only)
| DR | Result |
|---|---|
| 1 | Add 4T to Treasury. Plus, the Successor Wars disrupt operations. Remove one East AM from the AM Pool (East gets one less activation that Game-Turn) |
| 2 | Add 2T to Treasury |
| 3 | Successor Wars disrupt operations. Remove one East AM from the AM Pool (East gets one less activation that Game-Turn). |
| 4 | Subtract 1T from Income/Treasury |
| 5 | Subtract 2T from Income/Treasury |
| 6 | Subtract 4T from Income/Treasury |
Scenario IV: Carthago Delenda Est—The Western Mediterranean (Advanced Game Only)
The Punic Wars scenario (above) examines the conflict between Rome and Carthage from the moment of the first showdown, corresponding to Turn II of this game, as a fast-playing game with lots of action, using the Standard Rules. The Carthago Delenda Est scenario carries that conflict several steps further, beginning the game a full turn earlier and using the full suite of Advanced Game rules, including the Event Cards. It begins in the historical period before the Rome-Carthage tensions flared up, and it allows players to get a stronger sense of why the Western Mediterranean became such a hotbed of military activity in the period represented by the early turns of Pax Romana. The scenario begins with Rome under threat from Pyrrhus of Epirus (controlled here by the Carthaginian player), and it ends if—and this is a big "if"—the City of Carthage is destroyed.
This scenario is an excellent introduction to the full Pax Romana scenarios (Scenarios #5 and #6). Essentially, it takes the full campaign game and compresses it into only the western half. It provides a full range of strategy challenges and introduces you to the numerous decision points that crop up in Pax repeatedly.
Players: Rome and Carthage.
Start and End: The scenario starts with Phase F.1 of Turn I (300-275 BC). It concludes at the end of the Victory Phase of Turn VII (150-125 BC), or at the moment the City of Carthage is destroyed (whichever comes first).
Activation Markers: Rome (4), Carthage (4)
How to Win: If the Roman player destroys the City of Carthage, Rome wins. If Carthage survives, even as a reduced City under Carthaginian control, Carthage wins. It's as simple as that. Note that Rome must destroy the City to win, not just reduce or capture it.
Event Cards: Place the "Soldier of Fortune" card (#45) in the Discard Pile. Remove the following cards from the Event Deck: #1, #2, #3, #4, #11, #12, #17, #23, #26, #27, #28, #29, #33, #35, #36, #43, #44, #47, #49, #50. Shuffle the remaining cards and place them face down on the map.
Tribal Units: Place the Tribal counters in a cup. Tribal units are drawn blindly and placed, one each and "?" side showing, in the Initial Tribal Spaces in the provinces and territories listed in the "Map Restrictions" section below, unknown side up, until all Tribal Spaces are covered.
Opportunity Objectives: Opportunity Objectives are not in play for this scenario.
Map Restrictions: The following full Territories are in play: Rome, Germania, Gaul, Hispania, Carthage, The Sicilies. Everything else is out of play, except for Raetia and Noricum in The Danube territory. In addition, Corcyra in Macedonia is in play only as a launching pad for the Soldier of Fortune army (i.e., until this army naval transports to Italy), after which all of Greece territory is out of play. Any die-rolls on Event Cards that result in actions being taken in locations outside these map restrictions (the Barbarian Invasion card, for example) are treated as No Effect and the card simply discarded.
Leaders: All leaders are selected as per the initial deployment. Next turn you start drawing.
Initial Play Order: Carthage, Rome (and see Special Rules below).
Special Rule #1: Carthage begins the game with the Soldier of Fortune army (Pyrrhus of Epirus), which starts in Greece, under its control. For this Activation only, the Carthage player does not use an Activation Marker to command it. Furthermore, the Soldier of Fortune card remains in the Event Deck, and there are no Minor Moves associated with the SoF Major Move. Carthage must immediately naval transport the SoF army to Italy in order to protect Tarentum and, if the Carthaginian player wishes, to threaten and even attack the Romans. Essentially, Carthage pretends, in part, to be the historical Greece for this Game-Turn, protecting the Greek possessions in Italy as long as possible—and nicely for the Carthaginians, protecting Tarentum can mean attacking Romans. After the SoF move, Carthage uses the first AM of the game (according to the Play Order) and play proceeds from there. From that point on, the SoF army is activated according to the normal rules (12.4), except that it may operate only in the Rome or Sicilies territories.
Special Rule #2: If Pyrrhus captures a City or Town, it becomes Independent, and it may not be traced through by either player for Line of Communication purposes. Furthermore, Pyrrhus never uses Sack and Plunder, nor may he destroy Cities/Towns (he just wasn't that kind of guy). Soldier of Fortune armies activated by future cards operate according to the normal SoF rules.
Special Rule #3 (Optional): If Pyrrhus fights a Battle in which both he and his opponent lose at least 40% of their armies, roll 1d6. On a roll of 5 of 6, control of the SoF army immediately switches to the other player and, if the Battle took place during a Major Move by the SoF, that Major Move is finished. If control switches to Rome, the Roman player places the SoF army, without actually moving it, in Syracuse (which is considered Greek—and thus accessible to Pyrrhus—only for this purpose), and he may now use the SoF army (as one of his Major Moves) to threaten Carthaginian interests in Sicily (only). If control switches back, the Carthaginian player places the SoF army (again without actually moving it) back in Tarentum or, if Tarentum has fallen to Rome, on any Port space in Italy. This rule does not apply to future Soldier of Fortune armies.
PLAY NOTE: Special Rule #3 reflects the fact that Pyrrhus campaigned in both Italy and Sicily, turning away from attacking Rome after suffering extensive losses even in victory. The rule is optional, but it proved a lot of fun in playtesting. Special Rule #2 reflects Pyrhhus' historical reluctance to sack and destroy cities.
Independents
- Syracuse: 2 HI; 1 Galley Squadron; Syracuse is a City.
- Greece: 1 LI, 1 Cav in Tarentum (Tarentum is a City); Garrisons in Emporiae (Hispania), Massilia (Gaul), Venusia (Italia), Paestum and Brundisum (Bruttium).
Carthage
- Carthage (Africa) — 1 HI, 1 Cav, 1 EL; 3 Galley Squadrons; a 2-5 Leader; Carthage is a City.
- Utica (Africa) — 1 LI; Utica is a Town.
- Thevestis (Numidia) — 1 Cav
- Cirta (Numidia) — 1 LI
- Gades (Baetica/Hispania) — 1 LI; 1 Galley Squadron
- Lilybaeum (Western Sicily) — 1 HI, 2 LI; 1 Galley Squadron; a 1-4 Leader; Lilybaeum is a Town.
- Caralis (Sardinia) — 1 LI
- Garrisons: Malaca (Hispania), Aleria (Corsica), Olbia (Sardinia), Panormus (Western Sicily)
Treasury: 13T
Stability Level: +5
Initial Control: The Carthaginian Player controls the following:
- Territories: Carthage (1T)
- Home Provinces: All four (4T)—Africa, Libya, Numidia, Mauretania
- Other Provinces: Baetica, Sardinia, Corsica, Western Sicily (4T total)
- Cities: Carthage (3T)
- Towns: Utica and Lilybaeum (2T total)
Pyrrhus, King of Epirus (controlled by Carthage)
Corcyra (Attica): 1 Greek Galley Squadron, plus the following Soldier of Fortune units: 3-4 Leader, 4 HI, 2 LI, 1 Cav, 1 EL.
Rome
- Rome — 4 LG, a 2-4 Leader; Rome is a City.
- Placentia — 2 LG, a 1-5 Leader.
- Capua — Capua is a Town.
Garrisons: The Roman player may place one Garrison unit in any Space in Cisalpina, and one Garrison unit in any Space in Italia. The Garrison units may be placed with the Armies if desired.
Treasury: 18T
Stability Level: +6
Initial Control: The Roman Player controls the following:
- Territories: None*
- Home Provinces: Italia and Cisalpina (3T total)*
- Other Provinces: None
- Cities: Rome (3T)
- Towns: Capua (1T)
* Because Greece controls Bruttium, Rome is denied both provincial control of Bruttium and territorial control of Rome.
Scenario V: Pax Romana—The Rise of Rome (Standard or Advanced Game)
The Pax Romana scenario covers the history of the Mediterranean world and beyond from the days following the Successor Wars in Asia Minor, at the end of the 3rd Century BC, to the end of the Roman Republic in the middle of the 1st Century BC. If you play the entire thing with the Advanced Game rules, it will take roughly 15-25 hours. Using the Standard Game rules, you can cut that number to 12-18 hours. Either way, it's a long game, but its rewards, we believe, are many.
The deployment shown here allows the players to start with as historical a situation as we could muster at this level of gaming. It reflects the remarkably muddled and unstable situation in the eastern Mediterranean. The First Successor War has just ended (at Ipsus, with Seleucus' defeat of Antigonus and Demetrius at Ipsus, off-map to the east), and most of the players therein—meaning Greece, Asia and Mideast powers—are in a rather amorphous state of flux and turmoil, reflecting the results of that battle:
- Demetrius and his huge "Asian" fleet controlled Sidon, Tyre and Cyprus. He had only 9000+ land troops, or 2 HI, at Ephesus. However, Demetrius had taken the opportunity to, once again, insinuate himself into Greek politics by getting himself re-appointed to run Athens. (Don't ask how or why.)
- "Greece" (Lysimachus [in Thrace] and Cassander) had taken that opportunity to grab much of "Asia", except for the coastal cities.
- As usual, Ptolemy (in Egypt) is sitting and watching events unfold, waiting to see where best to go. And Seleucus is on the way. Luckily for the Mideast player, Seleucus is on his side (in game terms).
Players: Rome, Greece, Carthage, The East.
Start and End: The scenario starts with Phase F.3 (Activation Phase, Operations Segment) of Turn I (300-275 BC). It concludes at the end of the Victory Phase of Turn X (75-50 BC), or at the end of the Victory Phase of the Game-Turn designated by the players before the game begins, or whenever a player achieves an Automatic Victory (see "How to Win").
Activation Markers: Rome (4), Carthage (4), Greece (4), The East (4)
How to Win: At the end of any Game-Turn, if one player has 150 or more VP, he achieves an Automatic Victory. Failing that, at the end of the last selected Game-Turn, the player with the most VP wins.
Events (Standard Game Only): The Events in 16.0 are used in this scenario, along with both Event Markers, unless players choose to play a Basic Game (see 3.81).
Cards (Advanced Game Only): All Cards are in play. Remember to remove the "Soldier of Fortune" card to the discard pile. Shuffle the remaining cards (The Deck) and place them face down.
Opportunity Objectives: All Opportunity Objectives are in play.
Tribal Units: Place the Tribal counters in a cup. Tribal units are drawn blindly and placed, one each, in the Initial Tribal Spaces '?'-side up, until all Tribal Spaces are covered.
Map Restrictions: None.
Leaders: All leaders are selected as per the initial deployment. Next turn you start drawing.
Initial Play Order: Greece, The East, Carthage, Rome.
Greece is considered to have played the Soldier of Fortune card before the game begins. This means that the Greek player begins with the SoF rules in play (see 12.4), and that the Greek player must use its first Activation to move the Soldier of Fortune army (only three of Greece's four AMs are placed in the AM Pool).
Duration (Standard Game Only): See 3.8 to determine the length of play, but always start with Game-Turn I.
Duration (Advanced Game Only): We recommend a minimum of 5 Game-Turns, but always start with Game-Turn I.
Independents
- Pergamum: 3 HI in Pergamum; 2 HI, 1 Galley Squadron in Ephesus; 1 LI in Miletus; Miletus is a City
- Rhodes: 2 HI, 3 Galley Squadrons; Rhodes is a City
- Syracuse (Eastern Sicily): 2 HI; 1 Galley Squadron (use a Pergamum galley unit); Syracuse is a City.
- Massena (Eastern Sicily; The Mamertines): 1 HI.
Rome
- Rome — 4 LG, a 2-4 Leader; Rome is a City.
- Placentia — 2 LG, a 1-5 Leader.
- Capua — Capua is a Town.
Garrisons: The Roman player may place one Garrison unit in any Space in Cisalpina, and one Garrison unit in any Space in Italia. The Garrison units may be placed with the Armies if desired.
Treasury: 18T
Stability Level: +6
Initial Control: The Roman Player controls the following:
- Territories: None*
- Home Provinces: Italia and Cisalpina (3T total)*
- Other Provinces: None
- Cities: Rome (3T)
- Towns: Capua (1T)
* Because Greece controls Bruttium, Rome is denied both provincial control of Bruttium and territorial control of Rome.
Carthage
- Carthage (Africa) — 1 HI, 1 Cav, 1 EL; 3 Galley Squadrons; a 2-5 Leader; Carthage is a City.
- Utica (Africa) — 1 LI; Utica is a Town.
- Thevestis (Numidia) — 1 Cav
- Cirta (Numidia) — 1 LI
- Gades (Baetica/Hispania) — 1 LI; 1 Galley Squadron
- Lilybaeum (Western Sicily) — 1 HI, 2 LI; 1 Galley Squadron; a 1-4 Leader; Lilybaeum is a Town.
- Caralis (Sardinia) — 1 LI
- Garrisons: Malaca (Hispania), Aleria (Corsica), Olbia (Sardinia), Panormus (Western Sicily)
Treasury: 13T
Stability Level: +5
Initial Control: The Carthaginian Player controls the following:
- Territories: Carthage (1T)
- Home Provinces: All four (4T)—Africa, Libya, Numidia, Mauretania
- Other Provinces: Baetica, Sardinia, Corsica, Western Sicily (4T total)
- Cities: Carthage (3T)
- Towns: Utica and Lilybaeum (2T total)
Greece
PLAY NOTE: Greece starts the game with an initial position—especially in Asia Minor—that appears to be far better than the other players. Most of this is the positive side of the power of the Greece-oriented Successors. The downside is that the position is one of vulnerability, because of the low Stability level and the threat of losing Asia Minor to the large army ready to enter for The East.
- Athens — 3 HI, 2 Galley Squadrons, a 2-5 Leader; Athens is a City
- Pella — 2 HI, a 2-4 Leader; Pella is a Town.
- Corinth — 1 HI; Corinth is a Town
- Thessalonice — 1 Galley Squadron
- Tarentum (Bruttium) — 1 LI, 1 Cav; Tarentum is a City
- Nicomedia (Pontus) — 2 HI
- Abydos (Ionia) — 1 HI, 1 Galley Squadron
- Celenae (Ionia) — 1 HI
- Sardis (Ionia) — 1 LI; Sardis is a Town
- Iconium (Galatia) — 1 LI
- Salamis (Cyprus) — 1 Galley Squadron [a]
- Sidon (Syria) — 1 Galley Squadron [a]
- Garrisons: Emporiae (Hispania), Massilia (Gaul), Venusia (Italia), Paestum and Brundisum (Bruttium), Cyzicus (Ionia), Ancyra (Galatia), Tyre, Lesbos/Chios (The Aegean).
Special Instructions (Standard Game Only): If Players have chosen a game in which Events are used (see 3.8 and 16.0), the game begins with Greece having drawn the Event marker (or one of the two if using both) and rolled the Soldier of Fortune Event. Remove the Event marker (or one of the two Event markers) from the Activation pool for this Game-Turn only. The Soldier of Fortune is set up as follows. See 12.4 for details on what he and his army may and may not do.
Special Instructions (Advanced Game Only): Greece begins the game having drawn the Soldier of Fortune card (see 17.1) before play starts (Greece has also paid its 1T for the activation). Remove the Soldier of Fortune card from the Events Deck and set up the Soldier of Fortune units as stated below. See 12.4 for details on what the Soldier of Fortune and his army may and may not do.
Corcyra (Attica): 1 Greek Galley Squadron, plus the following Soldier of Fortune units: 3-4 Leader, 4 HI, 2 LI, 1 Cav, 1 EL.
DESIGN NOTE: The SoF leader represents Pyrrhus, King of Epirus, who made life difficult for the Romans in Italy and for the Carthaginians in Sicily. The Greek player may, of course, send him wherever he wishes.
Treasury: 15T
Stability Level: +1
Initial Control: The Greek Player controls the following:
- Territories: Greece (1T)
- Home Provinces: All five (5T total)—Attica, Thrace, Macedonia, Peloponnesus, The Aegean Islands.
- Other Provinces: Bruttium, Pontus, Galatia, Ionia (5T total)
- Towns: Pella, Corinth, Sardis (3T total)
- Cities: Athens, Tarentum (6T total)
Note: Greece does not control Eastern Sicily (because of the presence of the Independent 1 HI [The Mamertines] in Massena, nor does she control Tarraconensis or Narbonensis, despite her presence therein (Tribes negate).
[a] = These galleys—plus the small garrison in Tyre—are what is left of the Asian Fleet of the Greek-based diadochi. They do not provide control.
The East
DESIGN NOTE: For play purposes we have combined two "kingdoms"—the Seleucids (Syria) and the Ptolemids (Egypt)—into one. Historically, they rarely cooperated to any extent. However, if played separately, neither stands a chance of winning the game.
- Antioch — 1 HI; Antioch is a Town.
- Damascus — 1 LI
- Alexandria — 3 HI, 1 LI; 2 Galley Squadrons [a]; a 2-5 Leader [b]; Alexandria is a City.
- Pelusium — 1 LI; 1 Galley Squadron
- Memphis — 3 LI
- Jerusalem — No forces, but Jerusalem is a Town.
Treasury: 6T [c]
Stability Level: +4
Reinforcements: When The East player plays his first AM (i.e., the second AM of the game, after Greece's opening AM), he may place the Seleucid Army—6 HI, 2 LI, 1 Cav, 3 EL and a 2-6 Leader [d]—in Edessa, Palmyra or Damascus. They are now available to be activated. As soon as they are activated, place 5T in The East's Treasury. If all three deployment Spaces are enemy-occupied when the Seleucid Army is to be placed, it still gets placed in one of those Spaces, but it must be Activated immediately, expend 1 MP, and attack the occupants of that Space.
Initial Control: The East Player controls the following:
- Territories: The East (1T)
- Home Provinces: All five (7T)—Egypt, Syria, Judea, Cyprus, Cyrenaica.
- Other Provinces: None
- Towns: Jerusalem, Antioch (2T total)
- Cities: Alexandria (3T)
Note: The Greek squadrons in Salamis and Sidon do not deny control of Cyprus or Syria.
[a] = Ptolemy's Fleet was still rebuilding from the major defeat suffered at the hands of Demetrius at Salamis (306 BC). [b] = Ptolemy I, Macedonian Pharaoh of Egypt [c] = See Special Rule, Baghdad Booty Call, below. [d] = Seleucus, the johnny-come-lately victor at Ipsus, moving west to claim his portion of the land-grab spoils.
Baghdad Booty Call (Scenario V)
Each Turn, when the East collects Income, the East Player must roll one die (1d6) on the Baghdad Booty Call Table to see what events to the east—in Persia and beyond—have on The East Player. Some dierolls represent peace and prosperity, some represent hard times, corruption and, occasionally, yet another outbreak of warfare between the Seleucids and the Ptolemaic Egyptians. Whatever the result, it is applied immediately.
Each time the Baghdad Booty dieroll result does not result in the outbreak of the Successor Wars, the East player adds one (+1) to the die-roll the next time he rolls on the Baghdad Booty Call Table. For example, if neither the Game-Turn II or the Game-Turn III die-rolls result in the Successor Wars event, the East player would modify the Game-Turn IV roll by +2. Eventually, of course, the Successor Wars will happen, and possibly several times over the course of an entire game.
Baghdad Booty Call Table (Standard Game Only)
| DR | Result |
|---|---|
| 1 | Add 6T to Treasury. In addition, the Successor Wars disrupt operations. Remove one East AM from the AM Pool (East player gets one less activation this Game-Turn). |
| 2 | Add 4T to Treasury |
| 3 | Add 2T to treasury |
| 4 | Subtract 2T from Income/Treasury |
| 5 | Subtract 4T from Income/Treasury. |
| 6 | The Successor Wars disrupt operations. Remove one East AM from the AM Pool (East player gets one less activation this Game-Turn). |
Baghdad Booty Call Table (Advanced Game Only)
| DR | Result |
|---|---|
| 1 | Add 5T to Treasury, plus outbreak of Successor Wars in the East**. |
| 2 | Add 3T to Treasury |
| 3 | Add 1T to treasury |
| 4 | Subtract 2T from Income/Treasury |
| 5 | Subtract 4T from Income/Treasury |
| 6 | Outbreak of Successor Wars in the East**. |
** Conducted as follows:
- The East gets only three Activation Markers (instead of the usual four) for the upcoming Operations Phase.
- The Greek Player (yes, the Greek player) must immediately—even though this is not the Operations Phase—conducts Military Operations with the force (which may include Galley Squadrons) commanded by any one Leader in The East (remember, the Leaders aren't removed until Phase C), attacking the army belonging to the other Leader in The East, if the latter is within Movement range (after rolling the die for Movement). If it turns out such army is not, the campaign must be against any other army or garrison that is at least 3 spaces distant, but within campaign range.
- If the two leaders for The East are in the same hex when this occurs, things get especially exciting. Roll a die for each unit; on a 1-3, that unit is under the command of one leader; on a 4-6, the other. Do this for each unit until finished. The Greek Player now takes command of one of the armies (his choice), rolls the die for a Major Move, and proceeds to attack the other, which is commanded by the Player for The East.
- In all battles fought during this event, no army may Withdraw at any point, and no Army may voluntarily retreat after combat until it contains fewer than half as many Battle Points as the other.
- If Greece and the East are allied when a Successor War in the East occurs, one of the other players takes control of the attacking army for this event.
Scenario VI: Mare Nostrum—The Ultra-Historical Scenario (Advanced Game Only)
For players who want even greater historical detail, this scenario does it all. The major change is the separation of The East into two separate powers—the Seleucids and the Ptolemids (Egypt). The Seleucids are a player power, played by whoever would have taken The East in Scenario #5. Egypt is a neutral power governed by the rules covered below. The less major change is that a set of restrictions and special rules governs the play of Soldier of Fortune army controlled by the Greek player at the beginning of the scenario.
PLAY NOTE: The Seleucid player uses the counters for The East; Egypt has its own counters, used for this scenario only.
Scenario Setup: Follow all setup instructions for Scenario #5 (Pax Romana—The Rise of Rome) as far as the end of the setup instructions for Greece. Then follow the instructions below.
Changes to Home Territories: (1) Home Territory for The East consists of Syria, Judea, and Cyprus; (2) Home Territory for Egypt consists of Egypt and Cyraenica.
Special Rule: The Soldier of Fortune Army controlled by Greece at the beginning of the game (representing Pyrhhus of Epirus) is confined to the territories of Rome, the Sicilies, Germania, the Danube, and Gaul.
Ptolemaic Egypt (Independent)
- Alexandria: 3 HI, 2 LI; 1 Cav, 1 EL; 2 Galley Squadrons [a]; a 2-5 Leader [b]; Alexandria is a City.
- Pelusium: 2 LI; 1 Galley Squadron
- Memphis: 3 LI; a 1-4 Leader.
[a] = Ptolemy's Fleet was still rebuilding from the major defeat suffered at the hands of Demetrius at Salamis (306 BC). [b] = Ptolemy I, Macedonian Pharaoh of Egypt
The East
- Antioch — 1 HI; 1 LI; a 1-4 Leader; Antioch is a City.
- Damascus — 1 LI
- Jerusalem — 1 LI; Jerusalem is a Town.
Treasury: 6T [a]
Stability Level: +4
Reinforcements: When The East player plays his first AM (i.e., the second AM of the game, after Greece's opening AM), he may place the Seleucid Army—6 HI, 4 LI, 2 Cav, 3 EL and a 2-6 Leader [b]—in Edessa, Palmyra or Damascus. They are now available to be activated. As soon as they are activated, place 10T in The East's Treasury. If all three deployment Spaces are enemy-occupied when the Seleucid Army is to be placed, it still gets placed in one of those Spaces, but it must be Activated immediately, expend 1 MP, and attack the occupants of that Space.
Initial Control: The East Player controls the following:
- Territories: The East (1T) [d]
- Home Provinces: All three (4T) — Syria (2T) [c], Judea, Cyprus.
- Other Provinces: None
- Cities: Antioch (3T)
- Towns: Jerusalem (1T)
Note: The Greek squadrons in Salamis and Sidon do not deny control of Cyprus or Syria.
[a] = See Special Rule, Baghdad Booty Call, below. [b] = Seleucus, the johnny-come-lately victor at Ipsus, moving west to claim his portion of the land-grab spoils. [c] = Syria has an Income of 2T for this scenario only. [d] = The East territory consists of Syria, Cyprus, and Judea for this scenario only.
Baghdad Booty Call Table (Advanced Game Only — Scenario VI)
| DR | Result |
|---|---|
| 1 | Add 7T to Treasury, and Successor Wars erupt.** |
| 2 | Add 4T to Treasury |
| 3 | Add 2T to Treasury |
| 4 | Add 2T to Treasury, and Successor Wars erupt.** |
| 5 | Subtract 2T from Income/Treasury |
| 6 | Subtract 4T from Income/Treasury |
Baghdad Booty Call. Each Turn, when the East collects Income, the East Player must roll one die (1d6) on the Baghdad Booty Call Table to see what events to the east—in Persia and beyond—have on The East Player. Some dierolls represent peace and prosperity, some represent hard times, corruption and, occasionally, yet another outbreak of warfare between the Seleucids and the Ptolemaic Egyptians. Whatever the result, it is applied immediately.
Controlling the Ptolemaic Egyptians
The Ptolemaic forces come into the game in three ways: through play of the "Successor Wars Roll On" Event card (see below), as a result of a die-roll of "1" or "4" on the Baghdad Booty Call Table (see above), and as a result of a player entering (i.e., invading) Egypt or Cyraenica. The following rules cover who actually controls the Ptolemaic forces and what that player may or may not do with them. That player is called the Ptolemaic player.
- When Ptolemaic territory (Egypt or Cyraenica) is invaded, two Egypt AMs (use the two Event AMs) are immediately placed in the AM pool. When each of these AMs is drawn, the Ptolemaic forces are controlled by the player with the most Victory Points, unless that player is The East or currently allied with The East. In such case, the player with the next highest Victory Points has control. The Egypt AMs remain part of the AM pool until all non-Egyptian units have left Ptolemaic territory, although the Ptolemaic player might change from turn to turn if the Victory Point situation changes.
- When Ptolemaic territory is invaded, the Ptolemaic player rolls 1d6; the result is the number of additional BP of combat units (HI always preferred) placed in Ptolemaic territory (wherever the Ptolemaic player wishes).
- When the "Successor Wars Roll On" Event card is played, the player who played the card takes control of the Egyptian forces and chooses either Option A or B from card description below (see "Change to Successor Wars Event Card").
- When the Successor Wars result from a die-roll on the Baghdad Booty Table, the player with the first AM in the upcoming Activation Phase becomes the Ptolemaic player, unless that power is either The East player or allied with The East player (if either is true, control of the Ptolemid forces passes to the player with the second AM, and so on). That player must immediately follow the instructions in Option B of the card description below (see "Change to Successor Wars Event Card").
- Guidelines for the Ptolemaic player include the following:
- The Ptolemaic player must always defend Egypt province at all costs.
- At no time will the Ptolemaic Egyptians allow Alexandria to be defended by fewer than 3 BP of combat units (in addition to the city itself).
- The Ptolemid forces must attempt to retain control over both home provinces at all times.
- The Ptolemaic player must not attack if the defending enemy force has a BP total greater than two (2) higher than the Ptolemaic force doing the attacking.
- The Ptolemaic player automatically rolls for Militia units (using the standard Militia rules) after losing a battle in Ptolemaic territory (Egypt or Cyraenica). These Militia are removed in the Removal Phase of the following Game-Turn.
- The Ptolemid forces are free to leave Egypt or Cyraenica in order to conduct military operations, including those specified in Option B of the Successor Wars card description below, but their first priority is defense.
Change to Successor Wars Event Card: When the Successor Wars card is drawn, use the following instructions in place of those in 17.0.
Successor Wars Roll On (1): Little, it appears, kept the descendants of the "Successors" of Alexander the Great from continuing their efforts to be rulers of the Hellenistic World. The player who draws this card may do either of the following (not both):
- Option A: Greeks Against Greeks. The player who plays this card must immediately (before doing his normal moves for this activation) conduct Military Operations with any one Army (but not Fleet) of Greek units that are in Greece, or start within 3 Spaces of Greece. The army must (move to and) stay within Greece; it cannot go elsewhere. Other than that, it may do anything a normal moving army would, including (and especially) attacking other Greek units, armies, and possessions. It may pick up units as it moves, but not those in Towns or Cities. However, it may attack units in Towns or Cities in order to destroy or reduce the location (but it may not engage in Sack and Plunder). If the Greek Player chooses Option A (which probably means that Option B no longer exists because the Egyptians have been eliminated), he does none of the above, but instead reduces his Stability two levels (–2).
- Option B: Ptolemids Against Seleucids. Prior to his own Activation, the player must conduct Military Operations with any one Egyptian Army. The army must attempt to attack an Army of The East (i.e., a Seleucid Army) and/or reduce/destroy cities/towns controlled by The East. It will head for the nearest Seleucid Army or Town/City, and will attempt to take Seleucid Towns or Cities even if the latter are occupied as a result of slave revolts. At the end of this Operation, he places what's left of the Egyptian Army in Pelusium or Alexandria. Note that Option B may not be chosen if Egypt has been conquered (see #7 above).
This card must be played when drawn.
Optional Rules for the Ultra-Historical Scenario
The following optional rules are designed to help with play balance and to satisfy the desire for greater historical detail that several playtesters (and other people with an interest in the game) expressed. All of them have a strong historical basis, and each of them have the potential to affect the game significantly. In playtesting, all of them proved useful and simple to implement, but we won't pretend that they received as much playtesting as the rest of the game. Use them if you wish, and especially if you see that one power needs to be cut down to size in order to keep the game fun for the others, but be beware that they could have unexpected effects.
A. The Quarreling Greeks (Optional Rule). At the end of the Income Phase, after adding his Income to his Treasury, the Greek player rolls one die (1d6). The result is the number of Talents deducted from the Greek Treasury.
B. The Carthaginian Council (Optional Rule). Keep track of the net number of Stability Points gained by the Carthaginian player each Game-Turn (i.e., the number at the start of the turn subtracted from the number at the end of the turn). At the end of the Income Phase, after adding his Income to his Treasury, the Carthaginian player rolls one die (1d6) for every Stability Point gained. For each roll of 1 or 6, he loses 1T from his Treasury.
C. Civil War, Type 2 (Optional Rule). The instant a power gains control of its four Territories at one time (the four can include his Home territory), its success has placed it in danger of Civil War. Immediately, and then afterwards upon drawing his first Activation Marker each Game-Turn, the player controlling that power immediately rolls two dice (2d6). To the result, he adds the number of Territories he controls. If the result is 12 or lower, the game proceeds normally. If the result is higher than 12, Civil War has broken out and the player immediately:
- Subtracts two (–2) from his Stability Level;
- Rolls 1d6 for the allegiance of each Space occupied by the Player, including galley squadrons. If the result is odd, he removes at least half of the Land units and half the galley squadrons (rounded up in both cases) from that Space. For any Space that is made vacant by such a removal, he places a garrison unit therein. If the die-roll result is even, that space remains untouched.
- Removes all Leaders he has and replaces them with only one, newly (and randomly) drawn Leader, who starts in his capital.
Scenario VII: The Early Going—Pax Romana First-Turn Scenario (Four Players, Standard or Advanced Game)
This scenario gives you an Advanced Pax Romana scenario consisting of only one game-turn of six (rather than four) Activation Markers. The scenario is playable in roughly two hours (experienced players will finish it in 90 minutes or so), and gives you an excellent look at the nature of the four-player game.
Scenario Setup: Follow all setup instructions for Scenario #5 or #6 (your choice), except for the changes shown in Special Rule #1 (below).
Players: Rome, Greece, Carthage, The East.
Start and End: The scenario starts with Phase F.3 (Activation Phase, Operations Segment) of Turn I (300-275 BC). It concludes at the end of the Victory Phase of the same Game-Turn.
Activation Markers: Rome (6), Carthage (6), Greece (6), The East (6). See Special Rule #1.
How to Win: At the end of the Game-Turn, the player with the most VP wins.
Events (Standard Game Only): The Events in 16.0 are used in this scenario, along with both Event Markers (however, if the "Soldier of Fortune" event is rolled, treat it as No Event). Place both Event markers in the AM pool at the start of the game.
Event Cards (Advanced Game Only): All Event Cards are in play, except for Conqueror (#13) and Soldier of Fortune (#45). Shuffle the remaining cards (The Event Deck) and place them face down.
Opportunity Objectives: Opportunity Objectives are not in play for this scenario.
Tribal Units: Place the Tribal counters in a cup. Tribal units are drawn blindly and placed, one each, in the Initial Tribal Spaces, '?'-side up, until all Tribal Spaces are covered.
Map Restrictions: None.
Leaders: All leaders are selected as per the initial deployment. Next turn you start drawing.
Initial Play Order: Greece, The East, Carthage, Rome.
Setup Changes: The following changes from Scenario #5 are in effect for the setup of this scenario:
- Greece does not get the Soldier of Fortune army at the start of the game. Nor does it come into the game at any time (remove the Soldier of Fortune Card from the deck).
- Rome controls Tarentum, which bears a Town marker and a single LG unit.
- The Greek LI and Cav units placed at Tarentum in Scenario #5 are now in Brundisium, along with a Greek HI unit.
Special Rule #1: After playing through the Activation markers listed in the initial play order and the three remaining activation markers for each player in the AM Pool (plus the Event markers if playing the Standard Game), place two AMs for each player (plus one Event marker if playing the Standard Game) back into the AM Pool. Before restarting play, however, replace each player's worst on-map leader with his best Elite leader in the Leader Pool, then have each player roll the die, adding 6 to the result. The total is the number of Talents each player receives immediately, with which to conduct a Manpower Phase (he may spend as many or as few as he wishes at this time), and with which he pays for his two remaining AMs. After doing the Manpower Phase, draw the next AM.
Special Rule #2: If playing the one-turn version of Scenario #6, use all the rules for the Ptolemaic Egyptians.