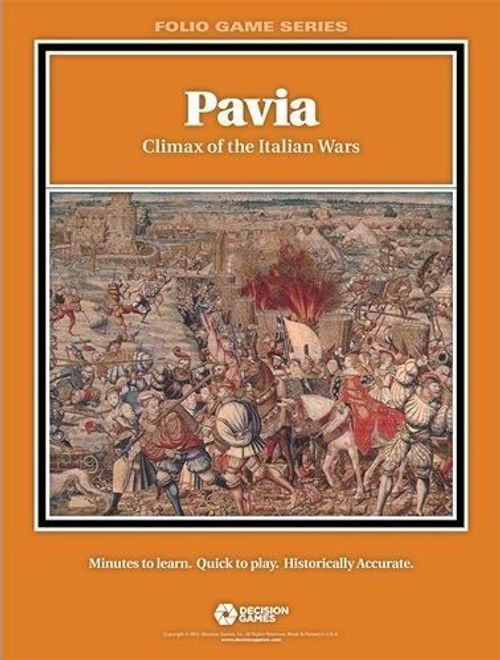
Pavia: Climax of the Italian Wars
Pavia: Climax of the Italian Wars Rulebook
Table of Contents
Table of Contents
Part I: Pike & Shot Standard Rules
1.0 Introduction
The Pike & Shot system consists of these standard rules and a number of individual (Folio) games. Each folio contains the map, counters, and exclusive rules depicting a battle from the pike & shot era (1494-1660). Players command the opposing forces in the situation faced by their historical counterparts. The goal is to reach the victory conditions in the folio rules, usually the capture of key terrain and/or the destruction of enemy units.
Unless specified otherwise in the exclusive rules, each hex on the map represents 200 yards from side to side. Game turns represent 45 minutes. The infantry units are tercios of 1,000 to 3,000 men, battalions of about 750 men, and loose shotte of about 500 men. Cavalry units are mostly regiments averaging about 500 men. The artillery counters—artillery was not yet formally organized as units—represent 3-5 heavy cannon or up to a dozen smaller weapons.
2.0 Components
Each game consists of
- these Standard Rules explaining the mechanics of play
- an Exclusive Rules folder with the set up and victory conditions for the Folio, and the Terrain Effects Chart (TEC) and Combat Results Table (CRT)
- a map of the battlefield, including the Turn Record Track (TRT; see 3.1)
- a die-cut sheet of playing pieces (counters)
Players must provide a 6-sided die.
2.1 The Rules
These standard rules explain how units move and fight, how leaders affect play, and the general course of a game. The exclusive rules have specific instructions on how to set up and win a particular battle, and may include rules additions or changes to the standard rules.
2.2 The Map & Terrain
Each map contains the terrain from an historical battlefield. The hex grid regulates the placement and movement of units. Terrain has been altered to fit the grid, but the spatial relationships retain the historical time-space problems. Each hex has a unique 4-digit number to aid set up and play.
The primary terrain type is clear terrain, representing open country over which most battles of the era were fought. It generally has no effect on play. Other terrain types do affect movement and combat; these effects are summarized on the Terrain Effects Chart (TEC) in the exclusive rules.
Some terrain features lie on the hexside between two hexes. Such hexside terrain affects movement and combat across that hexside only, and have no effect on units in either adjacent hex.
2.3 The Counters
Most of the counters represent combat units (2.4). Others represent key leaders (9.0) or fulfill a game function. The counter types and the rules section describing their uses are indicated here:
[Counter-type illustration from the printed Standard Rules not reproduced.]
2.4 Combat Units
Combat is conducted by infantry, loose shotte, cavalry, and artillery. Each counter contains the following data:
- Army: The background color denotes which counters belonging to each army; these are listed in the exclusive rules.
- Unit ID: The unit's historical identification. This unit is the Imperial Baldiron infantry regiment from the Breitenfeld folio. Each folio includes an order of battle.
- Fire Factor (FF) is the measure of the unit's ability to inflict damage by firing at an opposing unit (5.3).
- Melee Factor (MF) is the measure of the unit's ability to attack or defend in melee combat (5.4).
- Movement Allowance (MA) is the maximum number of movement points (MP) a unit may expend during each of its movement phases (4.0).
2.5 Reverse Printing
The front side of a combat unit represents an intact formation. Its reverse side represents the unit with its formation disordered (see 6.1 & 6.2).
Loose shotte and dragoons have no reverse printing as they always are disordered (but see 10.1). Heavy artillery is backprinted in enemy colors in case of capture (12.6), while light cannon are backprinted for movement (12.7).
3.0 Sequence of Play
After deciding which player will play each side, set up the map and counters according to Section 15.0 in the exclusive rules. The players then alternate moving and attacking with their units during the game turns (3.1) to reach the victory conditions established by Section 16.0 in the exclusive rules. Victory is determined at the end of the last game turn unless the scenario allows for an instant victory on the occurrence of a particular event.
3.1 The Game Turn
The game is played in a series of Game Turns, tracked by moving the Game Turn marker along the TRT. Each turn consists of six phases. Only the actions specified for each phase may occur in that phase; a player may not go back to change a move or execute a forgotten action without permission of his opponent. The exclusive rules for each folio specify which player is the First Player and the number of turns in the game.
- I. Weather Phase. Check the weather if required by the exclusive rules.
- II. First Player Movement Phase (3.2). The first player moves his units. The second player's eligible units react to that movement.
- III. First Player Combat Phase (3.3). The first player's units attack enemy units or recover from disruption. The second player's units may react in several ways.
- IV. Second Player Movement Phase (3.2). The second player moves his units. The first player's eligible units react to that movement.
- V. Second Player Combat Phase (3.3). The second player's units attack enemy units or recover from disruption. The first player's units may react in several ways.
- VI. Game Turn Marker Phase: If the last turn has been completed, determine the winner (see the exclusive rules). If more turns remain, advance the Game Turn Marker and return to the beginning of the sequence.
3.2 Movement Phase Overview
In each of his movement phases, a player may move any or all of his units (4.0). Leaders enhance the speed of movement (7.3), friendly units may block movement (4.4), and enemy units may react to a unit's movement by attacking it (4.5).
3.3 Combat Phase Overview
In each of his combat phases, a player may use any or all of his units to attack enemy units (5.0). There are two kinds of attack. Fire attacks (5.3) inflict damage on enemy units but do not gain ground. Melee attacks (5.4) inflict damage and gain ground. Leaders enhance the combat power of a unit (7.3), especially in melee. Enemy units may react to an attack by firing or retreating away from the attacking unit (5.5).
4.0 Movement
In each of his movement phases, a player may move any or all of his units. Leaders greatly enhance movement, friendly units may block movement, and enemy units may react to it.
4.1 Movement Procedure
Units are moved one at a time from hex to adjacent hex. One unit's movement must be completed before that of another begins.
4.2 Movement Points & Terrain
Entering a hex requires the expenditure of at least one movement point (MP) from the unit's movement allowance (see 4.3). Unused MP may not be accumulated or transferred to another unit.
Some kinds of terrain require more than one MP (consult the Terrain Effects Chart) to enter. Some hexside terrain costs one or two MP (noted as +1 or +2 on the TEC) to cross, in addition to the MP cost to enter a hex. If a unit has too few MP available, it may not make the move.
Note some terrain cause certain unit types to be disordered (6.2).
4.3 Movement Allowances
Each unit has a printed movement allowance (MA) on its counter; this is the maximum number of movement points it may expend in a single movement phase. A unit may use its entire MA only if it begins its move stacked with or adjacent to an active leader (see 7.3).
If no eligible leader is present, tercios and battalions move a maximum of one hex, cavalry a maximum of three hexes. Note this is not an MP limitation—any number of MP may be expended—but a restriction on the distance moved.
Loose shotte (10.0), dragoons (11.11), and light cannon (12.7) are not affected by leaders; they always move freely.
4.4 Movement & Other Units
A moving unit may not enter an enemy-occupied hex under any circumstances. A moving unit generally may enter or leave hexes adjacent to enemy units without prohibition (but see 4.5).
A moving tercio or battalion may not enter a hex containing another friendly infantry or cavalry unit. Cavalry and loose shotte may move through friendly units, but may not remain in the same hex with one. All units may move through and stop in a hex with artillery (see also 12.7).
Player Note. The prohibition against infantry entering an occupied hex reflects the density and rigidity of their formations. In game terms it means you must plan your moves carefully.
4.5 Movement Reaction
If a unit moves from a hex adjacent to an enemy infantry unit (tercios, battalions, and loose shotte) directly into another hex adjacent to the same infantry unit, the infantry may react by firing at the moving unit (5.3).
Cavalry units never react by fire; instead they react by launching a melee attack (or charge) against the moving unit. Note cavalry units react to movement two hexes away (see 11.4).
Artillery never reacts.
In all types of reaction, conduct the reaction against the moving unit in the hex being exited. Suspend the movement while resolving the reaction. It is possible for a single move to provoke more than one enemy reaction; in that case, conduct all reactions against the same hex. If the moving unit is forced to retreat or rout (6.3-6.4) by the reaction, its movement ends at the end of the retreat; otherwise, its movement continues from the point of interruption.
A unit may react to any number of enemy units in a single movement phase.
Experienced Player Note. There are no zones of control in this system. The reaction rules reflect the difficulty of forestalling enemy movement by sluggish formations armed with short-ranged weapons. However, it would not be possible to circumnavigate an enemy unit; reaction may have been slow, but it was present.
5.0 Combat
In each of his combat phases, any or all of a player's units may attack an enemy unit. There are two forms of combat: fire and melee. Artillery may attack enemy units by fire only. Infantry and cavalry may attack by either fire or melee, never both in the same combat phase. In lieu of attacking, a player's units may attempt recovery (see 6.0).
The Combat Results Table is used to resolve all forms of combat. The rows at the top indicate the type of combat to be resolved. On each row, the strength of the attacking unit, or the differential between the attacking and defending units, determines which column of results is used. A die roll determines the specific combat result to be applied.
5.1 Attacking Units
In general, all of a player's units may attack during each combat phase. Individual units also may attack by reacting to enemy movement (4.5) or combat (5.5). See 8.0 through 12.0 for specific combat rules by unit type.
5.2 Defending Units
During the combat phase there is no requirement to attack all adjacent enemy units; the attacking player may choose to ignore some. An enemy unit under attack may be able to react (5.5).
Any number of units may attack a single defender in the same combat phase, but each attacking unit attacks alone. All units to attack a single defender must be declared before the first attack is resolved; it is possible some attacks will be "wasted" because of combat results against the defender.
A single enemy unit may be attacked in a given combat phase by fire or by melee, but not by both.
5.3 Fire Combat
Fire combat is conducted during combat or reaction. Only units with a fire factor (FF) greater than zero may attack by fire. All firing units use the procedure below, but see 8.0 through 12.0 for specific rules by unit type. The target unit may be able to react (5.5).
Fire Combat Procedure
- Determine Firing Line. Find the line on the Combat Results Table (CRT) appropriate for the firing unit.
- Determine Column. Locate the column on that line containing the firing unit's fire factor.
- Resolve. Roll one die. Cross-index the die with the column to find the result. Apply any result (6.0) before the next unit attacks.
5.4 Melee Combat
Melee occurs during the combat phase or by cavalry units reacting to enemy movement. Only units with a melee factor (MF) greater than zero may attack by melee; however if a unit with a positive MF and a zero FF attacks into or across terrain requiring use of the FF as the MF (see the TEC), the zero factor is used to calculate the melee. All units attacking by melee use the procedure below, but see 8.0 through 12.0 for specific rules by unit type. The target unit may be able to react (5.5).
Melee Combat Procedure
- Exchange Fire. An eligible attacker fires using the Reduced Fire line on the Combat Results Table (CRT). An eligible defender fires using the appropriate line on the CRT. Firing is simultaneous. Apply the results; if either unit retreats, the melee ends. If the defender retreats, the attacker may advance (6.6).
- Calculate the Differential. If neither unit has retreated, subtract the defending unit's melee factor from the attacking unit's melee factor. Locate the differential on the Melee Combat line of the Combat Results Table (CRT).
- Resolve. Roll one die, cross-index the die with the column to find the result. Apply the result (6.0).
Design Note. In certain kinds of terrain, infantry units use their FF as their MF; see the TEC. The pikemen forming the core of tercios and battalions were of little utility in restricted terrain, so the combat was conducted largely by the shot contingent, who also carried swords. Cavalry would be unable to retain the formations that gave them great physical impetus (reflected in their melee factors).
5.5 Combat Reaction
There are three possible reactions to combat: fire, melee, and retreat before melee. If the defending unit has and exercises the option to retreat before melee (10.6, 11.3), it retreats (6.3). The attacker may advance into the hex and the melee is over.
Reaction fire may occur as a result of enemy movement, an enemy attack by fire, or an enemy attack by melee. The reacting unit conducts reaction fire using the procedure in 5.3.
Reaction fire occasioned by enemy movement or melee attack is conducted before the movement or melee takes place. Resolve the fire against the enemy unit in the hex it occupied prior to the movement or melee in question.
Reaction fire to an enemy fire attack is conducted simultaneously with the enemy fire attack. Resolve both fires before applying the results.
A unit may react to any number of attacking (or retreating) enemy units in a single phase.
6.0 Combat Results
The application of a particular combat result may vary with the type of combat. The results from the CRT never eliminate units; the actual number of men killed in the initial collision of combat was low. Most casualties occurred when a unit broke apart—rout in game terms—so elimination comes as a result of aggravations during rout.
6.1 The Results
Each intersection of die roll and column on the CRT provides one of the following results.
- NE = No Effect. All units remain in place with their status unchanged.
- A = Attacker Disordered. Flip the attacking unit to its disordered side (6.2). If it already is disordered, it must retreat (6.3). Firing units ignore this result. Ordered infantry (non-disordered tercios and battalions) attacking cavalry in melee ignore this result.
- AA = Attacker Disordered & Retreats. Flip the attacking unit to its disordered side (6.2) AND retreat it (6.3). If the unit already was disordered, it routs (6.4) and the defending player receives a fortune of war (6.5). Firing units ignore this result.
- D = Defender Disordered. Flip the defending unit to its disordered side (6.2). If it already is disordered, it must retreat (6.3). Ordered infantry (non-disordered tercios and battalions) attacked in melee by cavalry ignore this result. Loose shotte ignores this result from artillery fire. If the affected unit retreats from a melee combat, the attacker may advance into the hex (6.6).
- DD = Defender Disordered & Retreats. Flip the defending unit to its disordered side (6.2) AND retreat it (6.3). If the unit already was disordered, it routs (6.4) and the attacking player receives a fortune of war (6.5). If this result is inflicted in a melee combat, the attacker may advance into the hex (6.6).
- M( ) = Melee Combat Only. Ignore this result in fire combat. In melee combat, apply the result in the parentheses. Since both sides are affected, it is possible both sides may retreat or rout. Apply the defender's result first.
- AF or DF = AF (Attacker) or DF (Defender) Receives a Fortune of War. The indicated player receives a fortune of war (6.5) in addition to any FOW from an enemy rout.
6.2 Disorder & Recovery
A disordered unit functions normally, though with reduced factors and more severe effects from certain combat results. Charge and Pursuit capable cavalry (11.6, 11.7) lose their special capabilities. Note that artillery (12.0) always is ordered while loose shotte (10.0) and dragoons (11.11) always are disordered.
Each unit has a factor used to recover from disorder. During the owning player's combat phase, if the unit is not adjacent to an enemy unit, roll one die. If the die roll is less than or equal to the unit's recovery factor, the unit recovers; flip it back to its ordered side. There is no penalty for failure to recover.
The unit also may attempt recovery by playing a fortune of war (6.5) on it. The procedure is the same, but ignore adjacent enemy units.
Leaders may assist recovery (7.2).
Design Note. Much of a unit's combat power derived from its formation, which welded many individuals into a compact, rigid mass. While combat killed and wounded some men, the more important aspect was disordering formations. A disordered unit was weaker and therefore more vulnerable: most of the casualties in these battles were inflicted on units after they fell apart rather than during the fighting.
6.3 Retreat
A retreating unit moves away from the enemy unit firing at it or conducting a melee against it. Infantry retreats one hex, loose shotte retreats two hexes, cavalry retreats three hexes.
A unit may not retreat into or across prohibited terrain or into an enemy-occupied hex. If forced to do so, the unit is eliminated; remove it from the map and set it aside (it may count toward victory conditions). If the unit's retreat takes it off the map, remove it from play; it does not count as eliminated but does not return to the game.
Retreating units are subject to enemy reaction (to include reaction from the unit that caused the retreat if another hex adjacent to it is the only open retreat route). Reaction may lead to further retreats or routs.
If the only hex available for the retreat is occupied by another friendly, the retreating unit moves into that hex. The retreating unit then routs (5.9) from that hex. The friendly unit retreated across is disordered; if already disordered there is no further effect. The retreating unit routs each time it is forced to retreat through a friendly unit. The opposing player receives an FOW after each rout.
Editor's note: this paragraph cites "(5.9)" for rout; the rout procedure is printed as 6.4 and no 5.9 exists in this text. Reproduced as printed.
6.4 Rout
A rout is conducted just like a retreat with four additional effects.
- The retreating unit (of all types) must retreat five hexes, and must end up five hexes away from its combat hex or off the map, whichever comes first.
- If an enemy reaction against the routing unit yields a D or DD result, the routing unit is eliminated; remove it from the map and set it aside (it may count toward victory conditions).
- After the rout movement is complete, the opposing player receives a fortune of war (6.5).
- A rout after a cavalry charge (11.6) results in an elimination; remove the unit from the map and set it aside (it may count toward victory conditions). The opposing player still receives the fortune of war.
Editor's note: item 4 cites "(11.6)" for the charge; the charge rule is printed as 11.7. Reproduced as printed.
6.5 Fortunes of War
During a combat phase, either player may be awarded a fortune of war (FOW) as part of a combat result or due to an enemy rout. Each FOW allows the player to conduct one of the actions listed below. The FOW is conducted immediately after resolution of the combat (including any retreat or rout). These actions are independent of the combat phase: it is possible for a unit that fought already in this combat phase to fight again, or for a unit being attacked by fire to be attacked by melee (or vice versa), or for a defender yet to be attacked to be driven off in combat. After playing the FOW, to the extent possible, continue with the active player's combat phase as though the FOW had not occurred.
There may be times a player has more than one FOW after a combat. Only one FOW may be played on a single unit after an individual combat, but any number may be played on a single unit in given combat phase.
- Recovery: Roll for recovery from disorder for any friendly unit. Ignore the presence of enemy units. No leader is needed, but one may contribute if stacked with the unit. The unit may participate in combat in that same phase if it has not done so already.
- Move. Any one friendly unit may be moved. Normal movement rules apply, including enemy reaction.
- Reaction. Any one eligible friendly unit may conduct reaction (fire, melee, or charge) against an adjacent enemy unit. This may be done regardless of other actions already taken or yet to be taken during that combat phase.
6.6 Advance
If the defender retreats or routs as a result of melee (not fire combat), the attacking unit may advance into the vacated hex. The advance does not trigger enemy reaction.
Cavalry units have the capability of advancing more than one hex (11.3).
7.0 Leaders
Every regiment has its colonel (or more likely, its lieutenant-colonel), and every army has its generals. Most of these men were capable of conducting the routine functions of command. Occasionally, there appeared a leader who rose above the routine to make a definitive mark on a battle. These men are represented by counters. Leaders are not required for units to act, but enable units to go above and beyond their minimal capabilities.
7.1 Leader Movement
Leaders are not combat units. They may move through friendly units freely during the movement phase. A leader may stack with (remain in the same hex as) another unit.
Leaders pay 1 MP for each hex entered regardless of terrain, though they may not enter or cross prohibited terrain or enemy-occupied hexes. A leader moving alone does trigger enemy reaction.
A leader alone may retreat before melee from any enemy units in the same manner as cavalry retreats before a melee by infantry (11.6), but if unable to retreat the leader is eliminated.
Once a leader moves, he cannot enable units to use their full MA (7.2); as a reminder, flip a moved leader to show his reverse side. Flip him back to his front side at the beginning of the combat phase.
7.2 Leader Effects on Movement
Leaders enable most units to use their full MA during movement (loose shotte, dragoons, light cavalry, and light cannon do not need a leader).
To receive the leader benefit, the leader may not have moved in that phase. If the unit starts in or adjacent to the leader's hex, the unit may use its full MA. If not stacked with or adjacent to a non-moved leader, the unit's movement is restricted (one hex for infantry, three for cavalry).
The leader need not remain with any of the units so enabled.
7.3 Leader Effects on Combat & Recovery
On Fire Combat. When stacked with a firing unit, add the leader's fire factor to the unit's (but not to artillery).
On Melee Combat. When stacked with a unit engaged in melee combat, add the leader's melee factor to the unit's. If the unit retreats or routs, the leader moves with the unit, even off the map.
On Recovery. When stacked with a unit attempting to recover, add the leader's melee factor to the unit's recovery factor. The unit always fails on a roll of "6."
7.4 Leader Casualties
A leader may become a casualty during combat any time his hex is targeted by fire of any kind, or any time he participates in a melee (attack or defence). Roll two dice for each affected leader; on a roll of 11 or 12 he is a casualty; remove him from the map. If stacked with a unit that is eliminated during a rout (6.4).
Editor's note: the final sentence of 7.4 is printed without a verb and is reproduced as printed; the sense appears to be that a leader stacked with a unit eliminated during a rout is also removed.
8.0 Tercios
The dominant unit on the battlefields of this era was a solid block of pike-armed infantry (plus a few halberdiers), similar to the phalanx of old. Over time, these units acquired a supporting layer of arquebusiers and/or musketeers, arranged in a variety of patterns. The archetype of these units were the Imperial tercios, a term used generally for infantry formations in the era and this game. Clumsy and slow, but powerful and all-but-proof against cavalry, tercios formed the backbone of most armies.
Because the tercio is the standard formation, the basic game rules were written with it in mind; there are no special rules for tercios in general, though some folios may have them.
9.0 Battalions
This term, along with "squadron," was used during the era, to refer to any group of infantry or cavalry operating as a single body on the battlefield. In the game, it is used to describe a variation on the tercio—usually associated with Maurice of Nassau and Gustavus Adolphus of Sweden—that first appeared midway through the era eventually supplanting the tercio entirely.
Individual battalions were thinner, smaller, and more maneuverable than tercios. They achieved almost the same impact in combat—more of their manpower, both pike and musket, was focused forward—at a cost of greater vulnerability to the flank and rear. In later iterations, this vulnerability was reduced by carefully interlaced deployment.
9.1 Facing
A battalion always must be placed in a hex so that the front (top) of the counter faces a vertex (see the diagram). It thus has two front, two flank, and two rear hexes. It may change its facing during its movement phase only.
9.2 Battalion Movement
A battalion moves normally into either of its front hexes. The unit may move backward into a rear hex or sideways into a flank hex, but such movement costs its entire MA (it may move just the one hex).
The battalion may change its facing during movement in either of the two following ways.
- It may pivot inside the hex at a cost of 2 MP per vertex. This does trigger reaction if adjacent to an enemy unit, but the reaction takes place after the facing is changed. The pivot may not be made in the same movement phase as movement to flank or rear, but may be made if the units is moving without benefit of a leader.
- It may pivot one vertex per hex entered during movement into its frontal hexes. The pivot must be in the direction of movement; counter-clockwise moving into the left front hex, clockwise moving into the right-front hex. This costs no additional MP.
9.3 Battalion Firing & Reaction
A battalion firing (while attacking or reacting) into its frontal hexes uses the Infantry & Cavalry Fire line on the CRT. A battalion firing (while attacking or reacting) into its flank or rear hexes uses the Reduced Fire line on the CRT (see the diagram).
9.4 Battalion Melee Combat
A battalion may initiate a melee only into its frontal hexes; it may not initiate melee through a flank or rear hex.
It defends normally against an enemy melee initiated from the front hex. When an enemy melee is initiated from a flank or rear hex, the attacker uses the Charge line on the CRT.
10.0 Loose Shotte
The pike is a useful weapon only when employed en masse in a rigid formation. This necessarily means a pike formation will be slow-moving and ill-suited to combat in restricted terrain. In some situations, it was advantageous to detach a unit's firearm contingent from the pike block. In some folios, one or both sides may have loose shotte units deployed at the beginning of the game. In all others, a player may create additional loose shotte units by detaching the shot portion of a standard infantry unit from its pikes.
10.1 Loose Shotte Counters
There are two counters used to create loose shotte: the unit itself and a marker for the parent unit. Each folio contains a few of each type; for convenience, they are backprinted in opposing colors. The countermix is not a design limit; players are free to coin additional counters.
10.2 Loosing & Regaining Shotte
Unless noted in the exclusive rules, all tercios and battalions may create or regain a single loose shotte (LS) unit. Both actions take place at the beginning of the unit's movement. The parent unit may be disordered.
To loose shotte, place an LS unit in any unoccupied adjacent hex, and an LS marker on the parent unit. The LS marker is considered part of the parent unit and remains with it until shotte is regained. It indicates any reduction of fire and/or melee factors to the parent unit.
Loosing does not count as movement; each counter may move in that phase. The units are independent for all purposes thereafter.
Regaining shotte reverses the process. The LS unit and parent units must begin a movement phase in adjacent hexes. Remove both the LS unit and the LS marker; the rebuilt unit may move normally.
Player Note. No attempt has been made to ensure a particular loose shotte unit will rejoin its parent unit. Players wishing to track "ownership" are free to do so.
10.3 Loose Shotte Movement
Loose shotte movement generally is less restricted than that for other units. It is less affected by terrain and never needs a leader to move its full MA.
LS also may move through other units of any type without restriction, paying no additional MP. Note the reverse is not true: infantry and cavalry units may not move through LS.
10.4 Loose Shotte Combat
A loose shotte unit has four special characteristics in combat.
- It always is disordered (6.2); it does not have an ordered side and cannot recover.
- It ignores D results from artillery fire.
- If forced to retreat (6.3); it retreats two hexes instead of one (it still routs five hexes).
- It may attack enemy units two hexes distant through skirmishing (10.4).
Editor's note: the skirmishing rule is printed as 10.5, and the cross-reference here reads "(10.4)". Reproduced as printed.
10.5 Skirmishing
A loose shotte unit may fire at an enemy unit two hexes distant (one intervening hex) if the intervening hex is an unoccupied clear hex (only) and the loose shotte unit is not adjacent to another enemy unit. Resolve the fire using the Reduced Fire line on the CRT; the enemy unit may react if possible (e.g. cavalry could retreat and enemy LS could react by skirmishing, but a tercio could not fire back).
Design Note. Skirmishing does not represent long-range fire. Instead, it accounts for individuals moving forward to fire, then dropping back. The Spanish called this fighting a la disbandada.
10.6 Loose Shotte Reaction
Loose shotte reacts to enemy fire or movement by fire. If it is melee attacked by an enemy tercio or battalion (but not by cavalry or enemy loose shotte), it may retreat before melee. It retreats two hexes; this does trigger enemy reaction, if applicable. The attacking unit may advance.
11.0 Cavalry
For a thousand years cavalry had dominated the battlefields of Europe. The development of the pike block was only a first step in the renaissance of infantry. Against a shaken pike formation, or almost any combination of slow-firing firearms and cannon, cavalry's speed and dexterity left it a dangerous force capable of cutting down soldiers wholesale.
11.1 Cavalry Types
There are four types of cavalry, all but dragoons identified with a letter in the unit ID: cuirassiers (C), harquebusiers (H), and light cavalry (L). Dragoons are identified with a different unit symbol.
Of these, cuirassiers were the standard type. The rules in this section apply to them; harquebusiers, light cavalry, and dragoons have special characteristics described in sections 11.7, 11.8, and 11.9 respectively.
Editor's note: the printed text here cites sections 11.7, 11.8 and 11.9 for harquebusiers, light cavalry and dragoons, but the printed headings for those types are 11.9, 11.10 and 11.11. Reproduced as printed.
Cuirassiers derived their name from an armored breastplate, the last vestige of knightly armor usually but not always worn in this era. In game terms this type covers a lot of ground, from fully-armored, lance-armed gens d'armes of the early period, to the breast-plate-wearing, pistol-wielding troopers conducting the wheeling tactic known as the caracole in the middle period, to the hell-for-leather Swedish and English cavalry of the late period.
11.2 Cavalry Movement
There are no special cavalry movement rules, but keep in mind they may be affected more adversely by terrain and may move through friendly units freely. Light cavalry (11.8) and dragoons (11.9) have some differences.
Editor's note: the cross-references in this section are printed as 11.8 (light cavalry) and 11.9 (dragoons); the printed headings are 11.10 and 11.11. Reproduced as printed.
11.3 Cavalry Combat
There are three special combat rules affecting a cavalry unit.
- If forced to retreat (6.3), it retreats three hexes (it still routs five hexes).
- If engaged in a melee against ordered infantry (tercio or battalion), the infantry ignores an A or D result.
- If able to advance after combat (6.6), it advances two hexes (the advance does not trigger reaction).
Some cavalry units have the capability to charge (11.7) or pursue (11.8). Dragoons (11.11) have several special capabilities.
11.4 Cavalry Movement Reaction
Cavalry does not fire in reaction to enemy movement. Instead, it may initiate a melee attack against a moving unit. That unit may be adjacent to the cavalry or two hexes away (one intervening hex).
Reaction against adjacent units is done per rule 5.5. Resolve the melee (including attacking and defending fire) against the moving unit in the hex it is attempting to exit.
When reacting against a unit two hexes away, the cavalry must not be adjacent to another enemy unit and the hex intervening between it and the moving unit must be unoccupied. The reacting cavalry moves into the intervening hex, then conducts the melee. This reaction movement does not trigger counter-reaction by enemy cavalry, but does trigger reaction fire from enemy infantry.
11.5 Cavalry Reaction to Attack by Fire
When fired upon by infantry or cavalry (not artillery), eligible cavalry may fire back (5.3) or retreat before combat. If it fires, use the Infantry & Cavalry Fire line on the CRT. If it retreats, it must retreat three hexes; this does trigger reaction fire.
11.6 Cavalry Reaction to Attack by Melee
If enemy infantry (any type) attempts to initiate melee against cavalry, the cavalry may stand and fight or retreat away from the melee. If it fights, it fires using the Infantry & Cavalry Fire line on the CRT.
If it retreats, it must retreat three hexes; this does trigger reaction fire. The attacking infantry may advance into the cavalry's hex.
11.7 Charge
Charging is a special form of melee available only to cavalry units marked with a C next to the unit type icon. Charge-capable cavalry is not required to charge; it may initiate regular melee instead. Note disordered cavalry never has charge capability; if a charging cavalry is disordered by any enemy reaction or terrain, the charge ends immediately (though it may conduct a normal melee).
A charge is conducted like a normal melee with the following exceptions.
- The charging cavalry must move at least one and no more than three hexes in the preceding movement phase.
- Charging cavalry does not fire during melee resolution, but the defender does.
- Enemy infantry receiving a DD result or routed as a result of the charge is eliminated. (Ordered tercios and battalions still ignore a D result).
- At the end of the charge, the cavalry is disordered; if already disordered as a result of combat, there is no further effect.
When reacting, charge-capable cavalry has the option of normal melee or charging. When charging during reaction, it need not move the minimum one hex.
Player Note. If necessary to distinguish charging from non-charging cavalry, mark the charging unit with a blank counter or coin, push it across the combat hexside, change its orientation, or use some other agreed-upon method.
Design Note. The all-out cavalry charge was part and parcel of all cavalry melee; no units avoided it entirely, all units used it in combination with firepower and more measured advances. This rule covers those units—among them Francis' Gendarmes, Gustavus' Swedes, and Rupert's Royalists—that brought the practice to a higher form.
11.8 Pursuit
A cavalry unit with a P next to its unit symbol may pursue. Any time the unit engages in melee and the enemy unit retreats or routs (but not a retreat before combat), the pursuing cavalry follows the enemy unit to its destination hex. If the enemy unit moves off the map, the pursuing cavalry also leaves the map and may not return. At the end of the retreat/rout movement, even off-map, the enemy unit is eliminated and the pursuing cavalry disordered (no effect if already disordered).
11.9 Harquebusiers
Harquebusiers were a cuirassier variant, armed with carbines rather than pistols, giving greater firepower at the cost of less flexibility in a melee. They operate like cuirassiers in all ways except they may react to enemy movement by firing at them.
11.10 Light Cavalry
Trained for pursuit and harassment (and often recruited from wild border tribes), light cavalry units were of varying value in line combat.
They operate just like cuirassiers except they
- are affected differently by some terrain;
- do not require a leader to use their full MA;
- may advance three hexes after combat.
11.11 Dragoons
Jacks-of-all-trades, dragoons were trained to fight mounted and dismounted, carrying swords and pistols for the former, carbines for the latter. Intended for outpost and skirmishing duties, they were of limited value in line combat.
Special dragoon characteristics are:
- Movement. It is affected differently by some terrain types and never needs a leader to utilize its full MA.
- Order. It is always disordered (6.2); it does not have an ordered side and cannot recover.
- Fire Combat. It ignores D results from artillery fire. It may skirmish like loose shotte (10.4).
- Melee Combat. It may retreat before combat from anything except cavalry. It retreats three hexes like other cavalry (it still routs five hexes).
- Reaction. It reacts to enemy movement by fire only.
12.0 Artillery
The cannon of the time were slow to move and fire. For the most part they were deployed in a permanent position prior to the start of a battle. Often they were owned and operated by private citizens who hired themselves out to one army or the other (in truth, the same could be said for many infantry or cavalry units), and were always willing to switch sides if the price was right.
12.1 Artillery Movement & Order
Artillery generally cannot move (but see 12.7). All other units, friendly and enemy, may move on top of or through an artillery unit without hindrance.
12.2 Artillery Fire
During his combat phase, each of the active player's artillery units may be fired using the following procedure. Units targeted by artillery may not react, but loose shotte and dragoons are less affected by artillery fire.
Artillery Fire Procedure
- Line of Sight. Determine if the artillery has a line of sight (12.3) to the target.
- Range. Determine the range to the target by counting the number of hexes from the artillery counter to the target; do not count the artillery counter's hex, do count the target unit's hex.
- Fire Strength. Subtract the range from the artillery's fire factor; if the result is zero or less, the artillery cannot fire at that target. Add one if the artillery unit is on a hill (the location of the target unit is immaterial). Leaders cannot influence artillery fire.
- Resolve. On the Artillery Fire line on the CRT, locate the column containing the fire strength. Roll one die to determine the result. Apply the result (6.0).
12.3 Line of Sight
A line of sight (LOS) is a line from the center of the firing hex to the center of the target hex. If any intervening hex or hexside is blocked, the artillery may not fire. If the LOS is congruent to a hexside, the LOS is blocked only if both hexes adjacent to that hexside are blocked; ignore the terrain on the congruent hexside. Units in the LOS, friendly or enemy, block the LOS only if they are adjacent to the artillery or to the target.
Terrain in the firing and target hexes may prohibit artillery fire into or out of that hex (see the TEC).
12.4 Artillery Combat
Artillery has no melee factor; it cannot participate in melee combat. It is unaffected by any combat; it cannot be eliminated, disordered, or routed, but may be captured (12.6).
12.5 Artillery Reaction
Artillery never reacts.
12.6 Artillery Capture
Each artillery counter belongs to one player or the other at all times, beginning with the folio set up. If at any time during play an enemy unit enters the artillery counter's hex, the counter is captured and switches sides. Flip the counter over to display the capturing side's colors (note the fire values generally are lower). Henceforth it belongs to the capturing player for all purposes. It may not be fired in the phase of capture. An artillery counter may switch sides any number of times during the game. Capture may affect victory conditions.
12.7 Light Cannon
Light cannon are guns light enough to be dragged alongside infantry units, either by horses or the gunners themselves. At the beginning of each movement phase, the owning player may flip each light cannon unit to either its firing side or its moving side. It cannot be flipped to its firing side in a hex where the terrain causes infantry to be disordered.
If flipped to the moving side, it moves, using infantry terrain costs (but is not disordered by any terrain); it may not fire in the following combat phase. It may move through and stack with friendly units, but only one artillery unit may end a movement phase in a single hex. If flipped to the firing side, it fires—using the procedure in 12.2—but cannot move during its movement phase.
Light cannon cannot be captured; if an enemy unit enters the light cannon's hex, the cannon unit is eliminated (it may count for victory conditions).
Design Note. Most armies had light cannon for infantry support, most mobile enough to move with the infantry. These guns are incorporated in the infantry fire factor. The units represented by light cannon counters account for those instances where enough light cannon were gathered into a single battery (group) large enough to influence the fighting.
13.0 System Notes
13.1 Designer's Notes
The starting point for this design was the Thirty Years' War Quad from SPI. The concept of this redesign was to retain the size and scope of the original—half-map, half-sheet of counters, simple rules—while addressing some of its shortcomings.
The particular shortcomings addressed were the lack of differentiation in units and tactics: what makes the era interesting is the rock-paper-scissors relationships of pike & shot, fire & melee, caracole & charge, tercio & battalion. In the original, units were virtually identical—this one a tad faster, that one a bit stronger—as was the combat. I also felt the degradation of unit capability by disorder was too severe.
The first step in the design process was to give each unit separate factors for fire and melee and to differentiate the methods of using them in combat. I early on rejected separation of the pike and shot portions of infantry formations, partly due to the limitations of counter and map space, but also because there were so many variations in reality it would have clogged the rules. That done, it was relatively easy to give Swedish battalions, Imperial tercios, and bodies of musketeers different capabilities.
You will note the lack of a separate morale rating. In this era it was the formation that was of overwhelming importance: as long as the formation was intact, the individual men (even relatively poor soldiers) would stand firm. The object of combat was to break down a unit's structure, a matter of killing and/or physically pushing men aside rather than scaring them out of place. Once the structure was shaken, even the best soldiers were vulnerable. The combat ratings, especially the reverse-side melee factor, and the recovery factor, reflect a unit's durability and willingness to reorganize (i.e. its morale) so the additional factor was unnecessary.
Differentiating cavalry was somewhat easier but equally necessary. This not only meant giving different units varying capabilities, but modifying combat results to take into account the effect of pike blocks on cavalry.
The original artillery rules were simple and clean and have been retained almost intact. The only changes were the reduction in combat values (not all the original crew would switch sides) and the addition of the light cannon units.
Another addition to the system was the limitation on movement for units not near a leader. This was done to portray the generally torpid pace of maneuver. Armies of the period had no permanent higher organizations. Unit deployment on the battlefield, to include creation of the individual battalions/squadrons, was done on the day of battle one unit at a time. As a rule, advances and maneuvers were undertaken by entire lines. The capability to maneuver large groups broke down quickly in combat.
Finally, I incorporated the fortunes of war rule I have used in other games. Not only does this add the spice of chaos to play, it also creates the snowball effect common to the era's battles; one success creates another. This not only rewards a player who has set up the initial success, but it allows for a more-rapid disintegration of an army without resorting to keeping track of losses.
All these changes have added some complication to the game, particularly in the checklists for several tactics and unit types. The payoff is that players have more options. The choice of Pavia and Breitenfeld as the first two games was deliberate. One occurred near the beginning of the pike & shot era, the other at the transition between its middle and late periods. Together, the games offer nearly every combination of unit and tactic.
Finally, I would like to give a special nod to my chief playtester and critic, Karl Laskas. His knowledge of the period, and willingness to stand up for it, was crucial to several key elements of the game.
13.2 Players Notes
As you may gather from the designer's notes, success in this system will go to a player who understands the capabilities of different unit types, and understands the specific capabilities of his own army.
It is important to to note that a single one-on-one combat rarely results in anything decisive. To break an enemy unit, you generally will have to hit it at least twice. To break a line, you must hit several units repeatedly. Not unlike the Napoleonic era, artillery and skirmishers are excellent tools for shaking up an enemy line.
Since your front line is likely to take damage as well, you must have reserves immediately available to exploit any opening in the enemy line or plug gaps in yours. If you have charge-capable cavalry, this is where they belong; they are deadly against disordered units.
On a larger scale, you must have a plan. You cannot overwhelm the entire enemy army at once, so you must select a point and concentrate against it (they didn't use the term Schwerpunkt, but they would have understood the idea). Remember that these armies are anything but nimble, so once they get headed in one direction it is difficult to change course. Keep a reserve.
Placement of leaders is crucial. You'll never have enough of them: several are necessary to keep a major attack moving, at least one should be in place with your reserve, they add hugely to melee attacks and are vital for recovery. It probably is best to move them last during each of your movement phases so you can gauge carefully where they will be most necessary for combat in that turn, and movement the following turn.
Part II: Pavia Exclusive Rules
The Pavia Exclusive Rules apply on top of the Pike & Shot Standard Rules above. Where they add to or change a standard rule, the exclusive rule governs this folio.
14.0 Introduction
The battle of Pavia, fought on 24 February 1525, was the decisive—but not final— clash of the Italian Wars, a decades-long struggle between Valois France and Habsburg Spain for control of the Italian Peninsula. It came about during the desultory French siege of Pavia. Francis' army, initially much larger than the relieving Imperial army under Lannoy, had dwindled by attrition and the departure of numerous Swiss mercenaries. Seeing his opportunity, Lannoy conducted a night march to surprise the French camps, placed in the peaceful setting of the Mirabello hunting preserve. The ensuing battle was an unusual one as the woods and hedges minimized the value of pike blocks and heavy cavalry, instead putting a premium on bands of musketeers in a long, rolling bushwhack.
15.0 Setting Up
Decide which player will play which side, sort the various counters by color, then set them up in the hexes noted below.
15.1 Army Colors
- French: pale gray
- Imperial: orange
15.2 Game Length & First Player
The game lasts eight turns. The Imperial player moves first. Place the Turn marker in box "1" of the TRT, mist side up (see 17.4). Set aside the four loose shotte units with no ID and the four loose shotte markers; they are used per rule 10.0.
15.3 French Historical Deployment
C = Cuirassier, D = Dragoon, H = Harquebusier, L = Light Cavalry, Ldr = Leader, LS = Loose Shotte, Artillery = any heavy cannon counter belonging to the army.
- Main Body: Ldrs Francis, Lorraine & Suffolk; Gendarmes (six units); L•Francis, Lorraine (three units), LS Suffolk (four units), LS Highland, Francis field artillery (two units)—within four hexes of Francis' camp (hex 0506).
- Flourance's Wing: Ldrs Flourance, Tiercelin, & de la Pole; L•Tiercelin, Landsknechts (two units), Black Leg, LS Flourance (three units)—within three hexes of Flourance's camp (hex 1418).
- Montmorency's Wing: Ldr Montmorency; LS Montmorency (four units); two heavy artillery—in any hex from 0725 to 1028 (the French Earthworks).
- Siege Line Guard: LS Medici (two units)—within two hexes of Montmorency's camp (hex 0623).
- Gate Guards: three LS from the main body and/or Flourance's wing (any combination at the discretion of the French player)—one LS per gate (hexes 0603, 1420, 1906). This deployment is optional.
- D'Alençon's Command: Ldr D'Alençon; L•D'Alen; LS D'Alençon (four units)—set aside; they enter pursuant to rule 15.4.
Editor's note: rule 15.4 is the Imperial Deployment section. The reference to rule 15.4 for the entry of D'Alençon's command is printed in this section as is; the entry procedure is actually in rule 17.6. Reproduced as printed.
15.4 Imperial Deployment
- Rearguard: LS Rearguard (three units), two heavy artillery—in any hex from 1722 to 1727 (the Imperial Earthworks).
- Advance Guard: Ldr Del Vasto; L•Del Vasto; LS Del Vasto, LS Cordoba, LS Ripalda—within one hex of 1705.
- Pavia Garrison: Ldr Leyva; LS Leyva (six units)—set aside; they enter pursuant to rule 12.6.
- Main Body: all other Imperial units—in any hex outside the hunting preserve walls and on or northeast of the 18xx hexrow.
Editor's note: rule 12.6 is the Artillery Capture rule in the Standard Rules. The entry of Leyva's garrison is governed by rule 17.5, and that is where the entry procedure is printed. Reproduced as printed.
15.5 Free Set Up
Players are free to use the following set up instead of 15.3 and 15.4. The French may set up anywhere inside the area defined by the hunting preserve walls and the French earthworks. The Imperial units may be set up anywhere outside the hunting preserve on or northwest of the 18xx hex row, and/or within the Imperial earthworks.
16.0 Victory Conditions
- Minor Victory: more enemy than friendly units eliminated.
- Major Victory: at least twice as many enemy than friendly units eliminated.
- Epic Victory: at least thrice as many enemy than friendly units eliminated.
The victory shifts one level in favor of the Imperial player for each French camp hex entered by an Imperial player during the game (it does not matter if the hex is recaptured).
The victory shifts one level in favor of the Imperial player if any unit of D'Alençon's command is on the map at the end of the game.
The victory shifts one level in favor of the French player if they capture the two Imperial artillery counters.
17.0 Special Rules
17.1 Loosing Shotte
Only pike units with a fire factor greater than zero may loose shotte.
17.2 The Highlanders
The French Highlander unit (Stewart's Regiment) was in many ways a throwback to the Anglo-Scottish wars. Armed with pike and sword, the men were fierce but undisciplined. It is treated as a battalion (9.0), though lacking a shot component. It also possesses the ability to charge. This is resolved in the same way as a charge by cavalry (11.7).
17.3 Transit Box
The road connecting hexes 2409 and 2416 represents a road circumventing the unseen portion of the hunting preserve. Imperial units (only) may use the road by moving from either of the mentioned hexes onto the road, or from the road to either of the hexes. They expend 1 MP from either hex to reach the road, spend one full turn on the road, then return to the playing area by expending 1 MP to enter either hex. On the turn of exiting the road, treat each unit as having been adjacent to a leader at the start of its move.
17.4 Mist
The swampy battlefield was covered in mist in the early morning. The turn marker is printed with Mist on one side and Clear on the other; it starts the game with the mist side showing. During the Game Turn Marker Phase of each game turn, roll one die. If the result is less than or equal to the turn number (e.g. 1 on turn 1, 1 or 2 on turn 2, etc.), the mist clears. Flip the marker to its Clear side. Once the mist clears, it remains clear for the rest of the game.
During mist turns:
- Artillery fire is resolved using the Reduced Fire line on the CRT.
- Infantry and cavalry attack by fire and reaction fire is resolved using the Reduced Fire line on the CRT (reaction fire against an attack by melee still uses the Infantry & Cavalry line).
- No charge or pursuit combat is allowed.
17.5 Fortress of Pavia & Leyva's Sortie
The hexes forming the fortress may not be entered or attacked by French units.
The artillery printed on the Pavia hexes are Imperial artillery units. They cannot move or be captured.
The Pavia garrison under Leyva had been alerted to Lannoy's attack and ordered to sortie as a diversion.
On any turn after the first, Leyva's command may enter the map at either Entry Hex I (0123 and/or 0425). Each unit pays 1 MP to enter the entry hex and may move normally thereafter (treat each as having been adjacent to a leader a the start of its move). If the entry hex is occupied by a French unit, it may be attacked by the city's artillery and/or by Leyva and one unit. If the French unit retreats, Levya's command may enter normally (treat the combat as having taken place prior to the movement phase). This process may continue until the end of the game or until the command enters.
Any or all Imperial units (not just Leyva's) may exit the map through the "I" hexes by expending 1 MP. Once exited, they are out of the game but do not count as destroyed.
17.6 D'Alençon's Command
On any turn after the first, the French may summon D'Alençon's command (manning the siege lines to the west). Announce the decision at the beginning of a French movement phase; the units arrive at Entry Hex F (0108) on the following turn. Each unit pays 1 MP to enter the entry hex and may move normally thereafter (treat each as having been adjacent to a leader a the start of its move).
If the entry hex is occupied, D'Alençon and one unit may attack the occupying Imperial unit. If the Imperial unit retreats, D'Alençon's command may enter immediately (treat the combat as having taken place prior to the movement phase). This process may continue until the end of the game or until the command enters.
The command may exit the same hex at any time by expending 1 MP from the entry hex.
D'Alençon's entry and/or exit will affect the victory conditions.
18.0 Folio Notes
18.1 Designer's Notes
Pavia is often given as one of the possible start dates for the Pike & Shot era (others go back to 1494). That, and the clear differences between it and Breitenfeld, fought at the height of the era, made this battle a good choice as one of the flagship games for the new system.
There were a number of challenges in the design. Unlike most battles in the era, this was not a battle of consent. The time needed to deploy the clumsy armies of the time meant it was almost impossible to force an enemy to fight. As a result, battles tended to be fought at a time and place acceptable to both sides (in some cases, they were arranged beforehand by messenger) with time to deploy. Fortunately, the "surprise" in the battle was akin to Shiloh; the French were not caught in bed, but had not yet formed as an army so entered the action piecemeal.
The units in the battle represented a mix of eras. The tercio was in its infancy, still almost pure pikemen with only a smattering of shot (and many of those armed with crossbows). Many of the loose shotte units in the game are more properly men-at-arms, infantrymen armed with crossbow, or with sword and buckler (the Highlanders being the latter, but trained, if that is the word, to fight in a mass). In this regard the Imperials were well ahead of the French; Del Vasto's command in particular was a precursor to the musketeers (arquebusiers) of the Pike & Shot era proper.
The heavy cavalry of both sides were lancers rather than cuirassiers; the French were just beginning to carry firearms as a secondary weapon. The lack of a charge capability for the Imperial lancers is a matter of numbers more than a lack of training.
Fortunately, most of the unit characteristics could be handled through factor manipulation rather than needing a special rule.
The last issue was one of battle length. Pavia ended historically shortly after Francis was captured, although both armies were capable of continuing. I put the time limit in place to prevent player's taking too long a view and pulling back to form for battle. In reality, the Imperials were committed to an attack and given the nature of command and control could not have been called back.
18.2 Player Notes
Each player commands a force with strength and weaknesses. The French are split up, and dependent on the Gendarmes for attack power (the Gendarmes were the premier cavalry in all of Europe at that time, the rest of the French army being mediocre at best). They must charge forward to pen the Imperials in the narrow axes of advance in the northern part of the preserve. However, the constricted terrain there favors loose shotte, the Imperial strength, and minimizes the utility of heavy cavalry and artillery.
The Imperials have the advantage in numbers and firepower, but will have trouble deploying onto a wide front, and are vulnerable to massed cavalry attacks once they do.
For both players, then, the battle comes down to being cautiously aggressive. Each must attempt to draw small enemy groups onto favorable ground, then crush them with massive assaults. Meanwhile, the bulk of the enemy force must be diverted through careful application of small bodies (which themselves become vulnerable to ambush). Barring a big mistake by one player, the battle will be nip-and-tuck to the very end.
19.0 Orders of Battle
Sources regarding numbers and organization of either army are, to say the least, conflicting, though most agree overall numbers were roughly equal. The following is a composite of a number of OBs modified by Inherent Military Probability and a few good old-fashioned guesses. The organization of the Imperial army is based on its order of march on the night 23-24 February. The French organization is based on its various camps. The Stratioti were mercenaries, recruited mainly in the Balkans.
19.1 French Army
Commanded by Francis I, it had a probable total of
- 10,000 Pikemen
- 9,000 Men-at-Arms (infantry, including crossbowmen and shot)
- 3,500 Heavy Cavalry (Gendarmes)
- 2,000 Light Cavalry
- 53 cannon
Main Body (Francis, with Suffolk & Lorraine)
- French Gendarmes
- Royal Light Cavalry (includes Stratioti)
- Stewart's Highland Regiment
- Genouillac's Artillery (c. 20 Light Cannon)
- Swiss & French Pikemen
- French & Mercenary Men-at-Arms
Eastern Camp (Flourance, with de la Pole & Tiercelin)
- Tiercelin's Light Cavalry Regiment
- Two Landsknecht Regiments
- Swiss Black Legion
- French & Stratioti Men-at-Arms
Southern Camp (Montmorency)
- French & Mercenary Men-at-Arms (includes Medici's Black Band)
- 30+ Heavy Cannon
Western Group (D'Alençon)
- French & Mercenary Men-at-Arms
- Regiment of Light Cavalry
Imperial Army
Commanded by Viceroy Carlos de Lannoy, it had a probable total of
- 13,000 pikemen
- 10,000 Men-at-Arms (infantry, including crossbowmen and shot)
- 1,000 heavy cavalry
- 1,500 light cavalry
- 16 cannon
Advanced Guard (Del Vasto)
- Arquebusier Companies of Quesada, de Cordoba, Ripalda
- Regiment of Light Cavalry
Vanguard (Pescara)
- Spanish & Italian Men-at Arms
Center (Lannoy)
- Lancers
- Regiment of Light Cavalry
- Four Landsknecht Regiments
- Spanish Men-at-Arms
Bourbon's Division (with Frundsberg)
- Four Landsknecht Regiments
- Spanish Men-at-Arms
Rearguard
- Mixed Men-at-Arms
- 16 Heavy Cannon