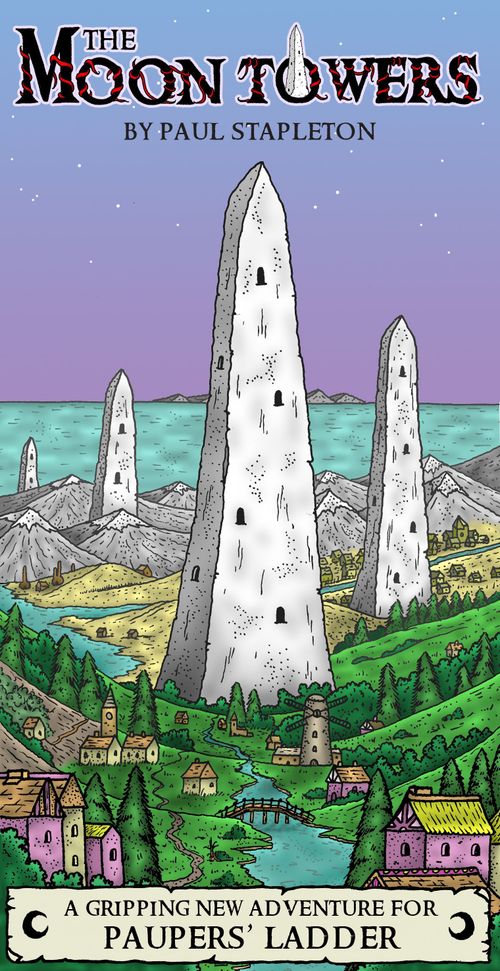
Paupers' Ladder: The Moon Towers
Paupers' Ladder: The Moon Towers Rulebook
Table of Contents
Table of Contents
Components
- 14 Bird cards: New Birds will accompany you.
- 30 Talent cards: Talents give your Pauper abilities.
- 13 Curse cards: Curses will afflict your Pauper.
- 75 Equipment cards (including 10 Rarities): City Shops have fresh stock.
- 240 Region cards: New towns, friends and foes await. Then there's the Moon Towers...
- 4 Pauper cards: 8 new Paupers to play, each with their own story.
- 8 Recipe cards: Some different Recipes to use.
- 38 Quest cards: New Quests for you to complete.
- 25 Crescents: These are artefacts you can collect.
- 5 Moonweed tokens: Moonweed prevents you drawing Region cards.
- 4 Virtue markers: These keep track of learned Virtues.
- The Golden Charm: The golden charm is a luckier version of the lucky charm.
The components for solo play are detailed on page 11.
Meet the Paupers
Sarah Bracker: Sarah was responsible for some of Lilacsville's most popular and most potent real ales. Unfortunately she fell from grace after causing the demise of several dignitaries from Bluevale during a frenzied tasting session. She's still a dab hand with a bag of hops though.
Derrius Burr: Any morning, come sun, hail or snow, Derrius will be hauling his net at Grayhaven's jetty. Preferring the quiet, contemplative life fishing affords him, he spends his days selling his daily catch to the local market before heading off for a pint or three. He'd love to fish the wide open seas around Brighthelm, but saving up for a decent boat is difficult when The Briny Brewer demands his attention.
Grenary Hopps: In the woodlands around Greyhaven's better-heeled quarter, the name of Grenary Hopps is whispered in the breeze. Poacher turned gamekeeper turned poacher again, she lives off the meat she catches, sharing her spoils with the rest of the city's poor. She keeps meaning to do something with the skins too. They're starting to smell.
Rummy Kether: Rummy was once a court jester, skilled in the arts of mirth, chuckle and the occasional pun. Unfortunately she indulged in the last of these once too often, falling so spectacularly flat that she stunned a crowd of 500 into a painful, embarrassed silence. Since that day she's plied her trade to a less sophisticated audience, and just about scrapes a living as a result.
Maud Nebbity: It's a source of constant irritation to Maud that nobody ever stops to admire the efficiency of Bluevale's sewer system. It's just one of those things that only garners comment when it stops working. And because Maud takes such pride and care in her work, it never stops working. So nobody ever thinks to thank her. Nobody ever thinks to give her a pay rise either.
Bobby Scrobbit: In Bobby's more active days, you'd have found him wandering a ruined tower, a mountain trail or a fetid swamp in his endless search for exotic stock. A 6 foot human superstore, his trail took him far and beyond, and he was far more worldly-wise than the adventurers who'd seek out his artefacts. These days he runs a pop-up artisan showroom in Lilacsville's prestigious discount and wholesale district.
David St. Hube: People don't give much thought to scrolls. Whether they contain the news, a summons or a powerful spell, there they are and that's that. However, all those words have to be painstakingly written, and that's where David St. Hube comes in. Night into day he translates all sorts of esoteric scribbles into legible lettering. And one day he plans to visit some of these places he's written so much about.
Groatsworth: A regular around the pest racing circuits of Bluevale, Groatsworth is what happens when you give an ageing spiv his dad's old wedding suit and tell him to look like a self-made man. Although his principles are sound (wouldn't rob a kid, looks after his own and loves his mum), Groatsworth still has little to show for all the years of trying.
Setting Up The Moon Towers
The Moon Towers requires all the cards and tokens from The Moon Towers box, as well as some cards, tokens and playing pieces from the Paupers' Ladder box.
Here's how to set up both a solo and a 2-4 player game. The rules for playing a solo game are on pages 11-14.
- Place the Paupers' Ladder board on a suitably sized surface with enough space for players to place their cards.
- From The Moon Towers box, separately shuffle the Beach, Forest, Swamp, Mine, Mountain, Quest, Rarity and Equipment decks. Place each deck face down near the board, with enough space next to each deck for discard piles.
- Draw 4 cards from the top of the Rarity deck and place 1 face down on each of the 4 City Shop tiles.
- Draw 16 cards from the top of the Equipment deck and place 4 face down on top of each Rarity card (so each City Shop has a deck of 5 cards on it).
- Draw 4 cards from the top of the Quest deck. Place 1 face up on each of the 4 City Quest tiles. Read them aloud as they're placed.
- Take the Recipe deck from the Paupers' Ladder box and remove all cards named unlock, thief, storm and dragonfire. Replace them with the 8 Recipe cards from The Moon Towers box. Shuffle the Recipe deck and place it near the board, purple side showing.
- From The Moon Towers box, separately shuffle the Talent and Curse decks. Place both decks face down near the board, with enough space next to each deck for discard piles.
- From the Paupers' Ladder box, place all 50 Gems near the board. This is the . From The Moon Towers box, place all 25 (face down) and all 5 tokens near the board. This is the .
The Moon Towers Card Decks
The Moon Towers has its own dedicated decks of Region, Equipment, Rarity, Quest and Pauper cards, as well as 8 new Recipe cards. All these cards have a crescent icon running along the right hand edge of the illustration so they can be identified.
The Talent, Curse and new Bird cards don't have this icon as they can be used with both The Moon Towers and Paupers' Ladder.
New Elements
The Moon Towers comprises new elements: Talent cards, Curse cards, Crescents, Moonweed, Moon Towers, elementals, new Birds and the golden charm. Some of these can also be added to a game of Paupers' Ladder or One Lonely Pauper. The following pages explain these new elements.
Talent Cards
Talent cards give your Pauper an ability. Each player's Pauper starts the game with 1 Talent. When a player learns a Virtue, they may replace that Talent with a new one. A Pauper can only have 1 Talent at a time. Talents are always used in The Moon Towers, and can also be used in Paupers' Ladder and One Lonely Pauper.
Set up: Thoroughly shuffle the Talent deck and place it face down near the board.
Using the Talent deck: At the start of the game, each player draws 2 cards from the top of the Talent deck and reads them. They choose 1 to keep as their Pauper's Talent (placing it face up near their Pauper card). The other Talent card is discarded.
Your Pauper's Talent is in effect throughout the game, unless you choose to replace it when you learn a Virtue.
Each time you learn a Virtue, draw 2 cards from the Talent deck as before. You may discard them both, or keep 1 to replace your Pauper's current Talent card (remembering to discard your Pauper's current Talent).
Talents in Paupers' Ladder & One Lonely Pauper: Talent cards work exactly the same when used in Paupers' Ladder and One Lonely Pauper. If you're using Talent cards, you must also use Curse cards (see below).
Example card: STORY TELLER. "When your Pauper moves into a City Region, collect 1 Gem."
Example: With the storyteller Talent, your Pauper can collect 1 Gem every time they move into a City Region.
Curse Cards
Curses have a negative effect on your Pauper, and can be acquired in a number of ways. They can be removed when your Pauper explores in a City Region (see next page). Curses do not affect Birds.
Curses are always used in The Moon Towers, and can also be used in Paupers' Ladder and One Lonely Pauper.
Set up: Thoroughly shuffle the Curse deck and place it face down near the board.
Using the Curse deck: When your Pauper is Cursed, draw a card from the top of the Curse deck and place it where the card instructs, face up (in the example above, the Curse card is placed face up on your Purse). If you're told to place the Curse on your Pauper card, put it on the illustration of your Pauper, next to your Aviary.
The effects of a Curse are immediate and last until they've been removed (see next page). There's no limit to how many Curses your Pauper can have.
Example card: INNUMERATE. "Place this on your Purse. When your Pauper buys Equipment, they must also pay 1 Gem to the bank."
Removing Curses
Your Pauper has an extra option when they explore in a City Region: they can visit the chemist's guild to remove Curses. It costs 2 Gems for each Curse you want removed. You can remove as many Curses as you can like in a turn, so long as you can afford the cost. Pay these Gems to the bank.
If you have fewer than 2 Gems in your Purse, the chemist's guild will still offer a reduced, free service: You can remove 1 Curse per turn, for free.
After removing Curses, your Pauper's turn ends. They can't complete a Quest in that City or visit the City Shop in the same turn.
Curses in Paupers' Ladder & One Lonely Pauper: If your Pauper draws an Outcome card numbered 1 in a fight they are Cursed, even if the hazard was defeated. Draw a Curse card and place it as described above.
If you're using Curse cards, then you must also use Talent cards.
Example card: BOUNTY HUNTER. "Pay up to 3 Gems. Add 1 to your Strength for each Gem spent."
Crescents
Crescents can be collected by your Pauper and your Bird in a variety of ways. There is no limit to how many Crescents you can carry. They are only used in The Moon Towers.
Set up: Place all Crescents face down near the board. This is the supply.
When collected, Crescents are taken from the supply. When they're sold or discarded, they're placed face up next to the supply. If all the Crescents are discarded, flip them all over to form a new supply.
There are 8 different types of Crescent and they are as follows:
- Hunter Crescent: Place it face up in your Trophy Room. The number on the Crescent counts towards learning the Virtue of bravery.
- Flower Crescent (showing Gems): Place it face up in your Purse. It can be used as Gems, up to the value shown. It can be discarded to count towards learning the Virtue of generosity.
- Buck Crescent (showing +2): Place it face up in your Inventory. When your Bird or Pauper fights a hazard, you may discard it to add the number on the Crescent to their Strength. You can discard more than 1 Buck Crescent in a fight.
- Harvest Crescent (showing the golden charm): Place it face up in your Inventory. You can discard it instead of rolling the lucky or golden charm to give this result.
- Snow Crescent: Place it face up in your Inventory. You can discard it at the end of your Pauper's turn. Your Pauper gets another turn, or ignores having to miss a turn.
- Worm Crescent: Place it face up in your Journal. This counts as 1 completed Quest, and counts towards learning the Virtue of fellowship. Alternatively you can sell it in a City Shop for 3 Gems.
- Pink Crescent (showing a pawn): Place it face up in your Inventory. You can discard it to move your Pauper up to 3 Regions for free this turn, instead of 1.
- Flower Crescent (showing a clover): Place it face up in your Inventory. You can discard it to immediately learn any 1 Recipe In Learning. Alternatively you can sell it in a City Shop for 3 Gems.
Hazards and Crescents
Hazards showing this icon in the lower right corner of their card are carrying Crescents. When you defeat them, you can either place their card in your Trophy Room, collect their Gems, or collect their Crescents.
If you collect their Crescents, take from the supply as many Crescents as the icon shows (2 in the example above). Reveal them, then discard 1 Crescent of your choice. Keep the rest as described on page 5.
Example card: SCARECROW. "BIRD FAIL: Your Bird is now untrained." The card shows a Crescent icon with the number 2 in the lower right corner, so this hazard carries 2 Crescents.
Region Cards and Crescents
Some Region cards require you to place Crescents on them when they are drawn. Take that many Crescents from the supply and place them face down on the Region card (so in the example to the right, take 3 Crescents from the supply and place them face down on the card as shown). A Crescent can be collected by your Bird or Pauper when they explore this card. Reveal and collect 1 Crescent, placing it as described on page 5.
Example card: SANDWORM NEST. "When drawn, place 3 Crescents from the supply face down on this card. A trained Bird can take 1 of these Crescents and miss its next turn. The nest stays in this Region until there are no Crescents left here."
Moonweed
Moonweed is a particularly virulent creeper that acts as thick roots for Moon Towers. It can prevent your characters drawing cards from certain Region decks. Moonweed is only used in The Moon Towers.
Set up: Place the 5 Moonweed tokens near the board.
Using Moonweed: Some Moon Towers produce Moonweed when they are drawn. Place a Moonweed token on top of the Region deck specified (so in the example to the right, place a Moonweed token on top of the Mountain deck). Players cannot draw cards from this Region deck all the time the Moonweed is present. They can still encounter cards on the board in this type of Region.
The Moonweed is removed when the Moon Tower producing it is defeated.
Example card: COLD TOWER. "When this card is drawn, place Moonweed on top of the Mountain deck."
Moon Towers
There are Moon Towers in each type of Region. They can only be fought by Paupers, as Birds are not strong enough. They are only used in The Moon Towers.
When a Moon Tower is drawn, place it on an empty tile in the Region being explored. Place 2 Crescents from the supply face down on it (see the example to the left). The Moon Tower will have 1 of the following 3 effects:
- Curse: When the Moon Tower is drawn, one or more Paupers are at risk of being Cursed, according to the text on the card. These players draw a card from the Curse deck, placing in the usual way.
- Moonweed: When the Moon Tower is drawn, place a Moonweed token on top of the Region deck specified (see above for Moonweed's effects).
- Power: Until this Moon Tower is defeated, hazards of the type shown receive a +1 bonus to their Strength in fights.
Example card: HARVEST TOWER. "When this card is drawn, the Pauper's with the most learned Recipes must roll the lucky charm. [sad face icon]: They are Cursed."
If your Bird encountered the Moon Tower, their turn then ends. If your Pauper encountered the Moon Tower, they must fight it (see next page).
Fighting Moon Towers
This is the procedure for fighting a Moon Tower (an example fight against a Moon Tower is shown on the back of the Symbolic Guide reference sheet).
-
Ask for help: Before starting the fight, you may ask another player to help you. They can either accept or refuse. If they refuse, you can ask another player to help you, and so on. Only ONE other player may help you in a fight against a Moon Tower (for solo rules on this, see page 14).
-
Draw an Outcome card and reveal it. This is your Pauper's Strength. If another player is helping you, they also draw an Outcome card and reveal it. The number on their Outcome card is added to your Pauper's Strength.
-
Your Pauper can use weapons, Recipes, Equipment and Talents to increase their Strength as in a regular fight. The player helping you cannot do this.
-
Your Pauper may pay 1 Gem to use the lucky charm as in a regular fight. The player helping you cannot do this.
-
If your Pauper's total Strength is equal to or greater than the Moon Tower's Strength, you have defeated it and can now earn your reward. Go to 6.
If the Moon Tower's Strength is greater, you have failed to defeat it. Your Pauper is Cursed. Draw a Curse card and apply it to your Pauper. If another player helped you, their Pauper is also Cursed. Go to 7.
-
Reveal the 2 Crescents on the Moon Tower card. A defeated Moon Tower earns you 1 of 3 rewards (see below). If another player helped you in this fight, they also earn a reward. The player who drew the highest numbered Outcome card chooses their reward first. In the case of a tie, the player who helped you chooses their reward first.
-
Strength: Add the card to your Trophy Room, where the Moon Tower's Strength counts towards learning the Virtue of bravery.
If another player also earned a reward, they choose to keep 1 of the Crescents, discarding the other. If not, both Crescents are discarded. In either case, go to 7.
-
Fame: Add the card to your Journal where it counts towards learning the Virtue of fellowship.
-
Moon Guard Hazards
The Moon Towers adds a new type of hazard: moon guards. These ethereal beings protect Moon Towers and can be found in all Regions.
Each moon guard has an effect on all Moon Towers on the board (either adding to their Strength or making them immune from being fought). This effect is detailed on the moon guard's card, and applies until they are defeated.
Example card: MOONWRAITH. "EFFECT: +2 Strength to all Moon Towers."
Elementals
Elementals are creatures of rock, flame, air and water. There is 1 elemental in each type of Region deck. Elementals are only used in The Moon Towers.
Each time you fight an elemental, roll the lucky charm and the golden charm together, adding 8 to the numbers rolled. This is the elemental's Strength for this fight (so if you roll 1 and 2, the elemental's Strength is 11).
A defeated elemental can be discarded right away to learn the Virtue of magnificence. Alternatively you can use it for its points value in your Trophy Room (where it will always be worth 8 points, regardless of its Strength in the fight), its Gems or its 3 Crescents (see page 6 - Hazards and Crescents).
Example card: ELEMENTAL. Strength: 8 plus the lucky charm and the golden charm.
New Birds
The Moon Towers adds 14 new Birds to the game, making 18 in total. All these Birds can be used in both The Moon Towers and Paupers' Ladder.
Set up: Shuffle the 14 Birds from The Moon Towers with the 4 Birds from Paupers' Ladder. From the bottom of the deck, draw 4 Bird cards and place them trained side up next to the board.
Example card: BOOBRIE. "Pay 4 Gems to train the boobrie."
Golden Charm
The golden charm is a luckier version of the lucky charm. You'll be told when to roll the golden charm, and the results of that roll. It is generally only used in The Moon Towers, but may be used in Paupers' Ladder in conjunction with certain Talent cards.
New Paupers
The Moon Towers has 8 new Paupers. As with Paupers' Ladder, there are 4 that can be used in a 2 player game, and 4 that can be used in a 3-4 player game. They can all be used in a solo game, and each has their own unique starting Equipment.
These Paupers can only be used with The Moon Towers. You cannot use Paupers' Ladder Paupers in their place, or vice versa.
New Equipment Card Icons
Although Equipment works in the same way as Paupers' Ladder, new icons have been added to show how often your Equipment can be used:
- 1: Your Pauper can use this Equipment once. It is then discarded.
- 2: Your Pauper can use this Equipment twice before it is discarded. After its first use, flip the card 90 degrees to show you've used it once. After the second use, it is discarded.
- ∞ (infinity): There is no limit to how many times your Pauper can use this Equipment.
- Weapon icon: This is a weapon that your Pauper can use every time they fight a hazard. You can carry multiple weapons, but only 1 weapon (of your choice) can be used in a fight.
Starting the Game
Each player chooses a Pauper as usual, taking their matching playing pieces, Virtue marker and Outcome deck. Then they choose their Bird companion from the ones available. Once that's done each player draws 4 cards from the Recipe deck, drafting their 3 Recipes In Learning as usual.
After the Dispensary has been set up, each player chooses their starting Talent by drawing 2 cards from the Talent deck. The cards will describe how they're useful. Each player keeps 1 Talent, which is placed face up near their Pauper card. The other is discarded.
Lastly, each player takes 5 Gems from the bank and places them in their Purse as usual. They may then buy 1 Equipment card from their starting City Shop as usual. The game then begins!
Example card: HERBALIST. "When your Pauper is in a Region containing an Ingredient, instead of exploring you may discard the Ingredient and roll the lucky charm. [lucky charm]: Collect 2 Gems. [golden charm]: Learn 1 Recipe In Learning immediately."
Game Objective
The objective of The Moon Towers is to learn 3 of the 5 Virtues. Some differ from their Paupers' Ladder equivalents.
- Generosity: During your turn, if you discard enough Gems from your Purse to the bank (40 in a 2 player game, 30 in a 3-4 player game) you learn the Virtue of generosity. You can also discard Flower Crescents from your Purse to count towards this total.
- Knowledge: You start the game with 3 Recipes In Learning. You can learn a maximum of 5 Recipes. When you learn your 5th Recipe you learn the Virtue of knowledge.
- Bravery: During your turn, if you discard enough Strength points' worth of hazard cards from your Trophy Room (40 in a 2 player game, 30 in a 3-4 player game), you learn the Virtue of bravery. You can also discard Hunter Crescents from your Trophy Room to count towards this total.
- Magnificence: If you discard an elemental from your Trophy Room you learn the Virtue of magnificence. Subsequent elementals you defeat can be placed in your Trophy Room for their points value.
- Fellowship: Completed Quests are placed in your Journal. Worm Crescents placed here count as 1 completed Quest. You can also place defeated Moon Towers in your Journal. If you discard enough completed Quests and/or Moon Towers from your Journal (4 in a 2 player game, 3 in a 3-4 player game), you learn the Virtue of fellowship.
Trophy Room card text for the two Virtues above: "Discard 30 Strength to learn the Virtue of bravery." and "Discard 1 elemental to learn the Virtue of magnificence."
Talent
You can learn a Virtue at any point during your turn, and you do so as soon as you've fulfilled its requirements. When you do, move your Virtue marker 1 space along the Virtue track in the usual way.
Each time you learn a Virtue, draw 2 cards from the top of the Talent deck. You may keep 1 of these as your Pauper's new Talent. Discard your Pauper's current Talent if you do.
Playing a Turn
This works exactly the same as it does in Paupers' Ladder, with both your Bird and Pauper taking their turn in either order to (optionally) move and then explore. However, some Region cards have new effects which have not yet been covered.
Fragile Ingredients
Fragile Ingredients can be found in all types of Region. When your Bird or Pauper occupies a Region containing a Fragile Ingredient, you may remove it from the board before exploring in that Region.
Fragile Ingredients are collected and used in the same way as regular Ingredients.
Example card: FRAGILE BONEMEAL. "You may discard this card before exploring in this Region."
Moonstrike!
Moonstrikes work in the same way as natural disasters in Paupers' Ladder. When a Moonstrike is drawn, discard all cards in the type of Region described. Then you choose to discard 1 or 2 Quests from the board, replacing them with cards from the top of the Quest deck. Then return the Moonstrike to the box, as each will only occur once in a game.
Example card: MOONSTRIKE! "Discard all cards from Forest Regions and replace 1 or 2 Quests. Remove this card from the game, then reshuffle the whole Forest deck."
Hazards Carrying Rarities
Some hazards can provide a Rarity when you defeat them. This is shown by a yellow-backed haversack icon in the lower right corner of the card. Should you choose to collect its Rarity (as opposed to its Gems or points value), draw a card from the Rarity deck and add it to your Inventory. Then discard the hazard card.
Example card: SNABBET. "FAIL: Discard 1 Crescent."
Failing to Defeat Hazards
Some hazards penalise you if you fail to defeat them in a fight. When this happens, follow the fail text on the card. If the card states either Pauper fail or Bird fail, then the penalty only applies if that character was involved in the fight (e.g. if your Bird fails to defeat a scarecrow, they become untrained. If your Pauper fails to defeat a scarecrow, nothing happens).
Example card: SCARECROW. "BIRD FAIL: Your Bird is now untrained."
Hazards With Special Effects
Some hazards (such as the moon guards on page 7) have a special effect which will be detailed on their card. In the example to the left, you can't use weapons in a fight against the mire bloat.
A hazard's special effect is in play until it is defeated.
Example card: MIRE BLOAT. "EFFECT: You can't use weapons in this fight."
Playing Solo
The Moon Towers can be played solo. Where the rules for solo play differ from a 2-4 player game, they are explained below. These rules are based on One Lonely Pauper.
Solo Components
- Time token: This measures how many turns are left.
- 2 Life tokens: These measure how healthy your characters are.
- Solo sheet: Place your Time and Life tokens here to keep track of your game.
Note: These components can be used with the One Lonely Pauper expansion, and these rules can be used for a solo game of Paupers' Ladder.
Setting Up the Solo Game
Set up is the same as in a 2-4 player game except you can leave the Pauper cards to one side for now. Your choice of Pauper will depend on the difficulty level you choose to play at.
Starting the Solo Game
Choose a difficulty level to play from those shown below. Then choose your Pauper, Bird, Talent and 3 Recipes from the Dispensary. Lastly, you may buy 1 Equipment card from your starting City Shop. Note that in a solo game you start with 3 Gems in your Purse instead of the usual 5.
1: Choose a Difficulty Level
There are 4 difficulty levels. Each lets you choose from certain Paupers, and gives your characters a number of Lives and a Time allowance (see below).
- EASY: Choose a 3-4 player Pauper. Your Pauper and Bird each have 5 Lives. Time allowance is 15.
- MID: Choose a 3-4 player Pauper. Your Pauper and Bird each have 4 Lives. Time allowance is 14.
- HARD: Choose a 2 player Pauper. Your Pauper and Bird each have 3 Lives. Time allowance is 13.
- V. HARD: Choose a 2 player Pauper. Your Pauper and Bird each have 2 Lives. Time allowance is 12.
Place the solo sheet near your Pauper card so the difficulty level you're playing at is displayed. Place the Time token on the numbered space on the track that corresponds with the difficulty level you are playing (e.g. 15 in an easy game).
At the start of each turn you will move the Time token 1 space towards zero. The Time token can also (through your characters' actions) be moved away from zero. It cannot go above 15.
If the Time token is on the zero space of the Timeline at the start of your turn, the game is over and you have lost.
2: Choose a Pauper
Choose a Pauper from the ones available (e.g. in an easy game choose any Pauper showing 3-4 in the top left hand corner). Place 3 Gems in your Purse. Place 1 Life token on the numbered space of the Pauper's Life track matching the number of Lives they start with (e.g. 5 in an easy game).
3: Choose a Bird
Choose a Bird from the 4 available. Place it in your Aviary so the untrained side is showing. Place the other Life token on the numbered space of the Bird's Life track matching the number of Lives they start with (e.g. 5 in an easy game).
This example shows the solo sheet set up for an easy game.
Your characters lose a Life when they fail to defeat a hazard in a fight. Lives can be restored by paying a Gem in a City Region (see page 13). If either of your characters loses all their Lives, the game is lost. When Lives are gained or lost, move that character's Life token correspondingly.
Neither character can have more Lives than they started with.
4: Choose a Talent
Choose a Talent in the usual way.
5: Choose Your Recipes In Learning
Draw the top 4 cards from the Recipe deck. Choose 3 as your starting Recipes In Learning and discard the other. You can inspect both sides of these cards.
During the game the Dispensary is always comprised of the top 4 cards in the Recipe deck. When choosing subsequent Recipes, draw these 4 cards. Choose 1 to keep and discard the rest.
Example cards shown: CAJOLER, FLEETFOOT, SWIM, THIEF.
6: Buy Equipment From the City Shop
This is done in the usual way.
Solo Game Objective
You must learn 3 of the 5 Virtues before either of the following occurs, in which case the game is lost.
- At the start of your turn, the Time token is on the zero space of the Timeline.
- Either of your characters loses their last Life.
Solo Playing a Turn
If the Time token is on the zero space of the Timeline at the start of your turn, the game is lost.
Otherwise, move the Time token 1 space towards zero. Then take a turn with both your Pauper and your Bird in the usual way, in either order.
Earning More Time
When either of your characters does any of the following, you earn more Time before the game ends. Move the Time token 1 space away from zero.
- Defeats a hazard (whether you use it for Gems, Ingredients, Crescents, Equipment or your Trophy Room).
- Completes a Quest.
- Learns a Recipe.
- Learns a Virtue. (NOTE: This moves the Time token 3 spaces away from zero, instead of 1.)
Example cards shown: CREEPING ROT ("PAUPER FAIL: Your Pauper is Cursed."); ELEMENTAL FIRE ("When your Pauper fights an elemental, roll the lucky charm twice. Add both numbers rolled to your Strength."); A MIDNIGHT FLIT ("A merchant in Corniton wants to escape, and he's willing to pay. Pay 1 Gem to move from Corniton to any coastal Region. Reward: 3 Gems or 1 Equipment.").
Once per turn, you can pay 3 Gems to move the Time token 1 space away from zero. This can be done at any point during your turn.
Removing Region Cards
Once per turn, you can move the Time token towards zero to remove a card from any Region not currently occupied by either of your characters. This can be done at any point during your turn.
Removing the following types of card requires you to move the Time token this many spaces towards zero:
- Events: 1 space.
- Ingredients: 1 space.
- Hazards, 4-5 Strength: 2 spaces.
- Hazards, 6-7 Strength: 3 spaces.
NOTE: Hazards with 8 or more Strength can't be removed in this way.
Healing in City Regions
When either of your characters explores in a City Region, they can visit the healer and pay 1 Gem to the bank to restore 1 Life. Their turn then ends. They cannot do anything else in this City Region this turn.
Each character can only heal 1 Life per turn.
Solo Fighting Hazards
This works in the usual way, except that when a character fails to defeat a hazard they lose 1 Life. This is in addition to any other consequences of failing the fight (such as losing Gems, becoming Cursed etc).
Hiding From Hazards
When either of your characters encounters a hazard other than a Moon Tower or a trap, they can choose to hide instead of fighting. Roll the lucky charm and consult the table below to see what happens.
- [sad face icon]: You are unable to hide and must fight the hazard as usual.
- [smiling face icon]: You safely hide. Your character's turn ends.
- [smiling face icon with 2]: You safely hide. While you're hiding you find 1 Gem. Your character's turn ends.
Remember, you can't hide from Moon Towers or trap hazards.
Solo Moon Towers
When a Moon Tower is placed on the board and its effect is to Curse Paupers, your Pauper will always be considered the target and must follow the card's instructions accordingly.
As in a 2-4 player game, if your Bird encounters a Moon Tower they don't fight it. Follow the card's instructions as usual. Your Bird's turn then ends.
Solo Fighting Moon Towers
Fighting Moon Towers works the same as in a 2-4 player game except in lieu of asking other players to help you, your Bird can help you instead.
Your Bird can help you if it is in the same Region as the Moon Tower, or a Region connected to it. When this happens, draw 2 Outcome cards instead of 1. Choose the highest as your Pauper's Strength and discard the other. If your Bird is trained then you also add 1 to your Pauper's Strength. Your Pauper can use weapons, Recipes, Equipment, Talents and the lucky charm in the usual way.
If you fail to defeat a Moon Tower in a fight, then as well as being Cursed your Pauper loses 1 Life. If your Bird helped you then they also lose 1 Life.
If you defeat a Moon Tower in a fight, you get 1 of the 3 rewards. This is the case whether your Bird helped you or not.
Winning the Game
You win the game as soon as you have learned any 3 of the 5 Virtues.