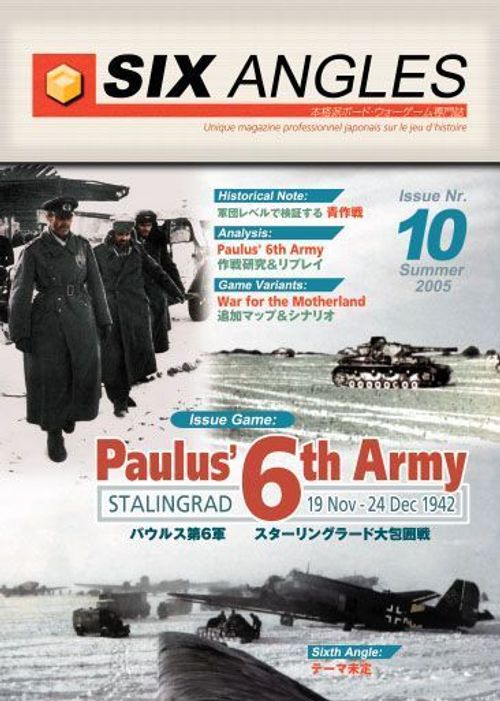
Paulus 6th Army
Paulus 6th Army Rulebook
Table of Contents
Table of Contents
1.0 Introduction
Paulus' 6th Army is an operational simulation of the action within the Don River basin area from November to December, 1942.
This game represents the first significant operational victory of the previously inferior Soviet Red Army over the Wehrmacht. For this reason, the battle of Stalingrad in often referred to as the "turning point" of the Second World War.
Paulus' 6th Army is designed for 2 people. One player takes command of the Soviet Red Army and the other player commands the German and Rumanian forces.
There are 3 scenarios in the game and each can be played as a separate game. Each scenario has a set number of identical turns. After all turns of a scenario have been finished, the players determine the winner.
Each game turn is three days. Each hex on the map is approximately 5.5 kilometers from side to side. Units are divisions, brigades and regiments.
2.0 Components
2.1 The Map
The game includes one 22x34" map of the Stalingrad/Don Basin region in southern Russia where the campaign took place. The terrain is overlaid by a hexagonal grid, which regulates the movement and position of the playing pieces. Each hexagon (hex) has a four-digit reference number.
There are various charts and tables printed on the map. These include the Game Turn Track, Terrain Effects Chart, Combat Results Table, Soviet Preliminary Bombardment Table, and the German and Soviet Reinforcement Tracks.
2.2 Unit Counters
There are 4 counter sheets (800 counters total) which represent the units that fought in the historical campaign. Each unit has an individual identification, higher command identification, unit type, attack strength, defense strength, movement type and movement allowance and stacking points. Throughout the rules, "unit" refers to combat units of each side.
2.21 Unit Information
- Attack Strength: The relative numerical value of a unit when attacking.
- Defense Strength: The relative numerical value of a unit when defending.
- Garrison ID: The location to which the unit was historically assigned.
- Movement Allowance (MA): The movement capability of the unit, expressed as a number of Movement Points (MP).
- Set Up/Reinforcement Code: The set up hex number if the unit begins the game on the map. If he unit is a reinforcement, it is the turn when the unit arrives.
- Size: XXXX = army; XXX = corps; XX = division; X = brigade; III = regiment; II = battalion; KG = kampfgruppe
- Stacking Value: The amount that each unit counts towards the stacking limit of a hex, represented as dots. If a unit does not have any stacking dots beneath its unit type symbol, it has a stacking value of 1.
- Supply Range: The range in hexes that a headquarters or supply unit may supply units. Every hex counts as one, regardless of its terrain. The supply range of all Soviet headquarters units in the game is seven hexes, (exception: the 62nd Army Headquarters has a supply range of two hexes).
- Unit ID: The historical name of the unit.
2.23 Unit Identification
Axis:
- Pz = Panzer (armored)
- Mot = Motorized (motorized infantry)
- Jg = Jaeger (mountain infantry)
- KG = Kampfgruppe
- Lw = Luftwaffe
- Ur.z. = Urlauberzuge (holiday return soldier)
- Be.h. = Baueinheiten (Construction Force)
- Es.b. = Eisenbahn (railroad repair troops)
- Vg.d. = Versorgungsdienste (logistic support force)
- BdLw = Bodenpersonal der Luftwaffe (air force terrestrial operator)
- Fl.Pl. = Flugplatz (airfield)
- Rum = Rumanian
- C = Croatian
Kampfgruppe Commander Abbreviations:
- Birk = Birkenbiehl
- Bsff = Bischoff
- Gobl = Goebel
- Ludw = Ludwig
- Miko = Mikosch
- Prus = Pruskowski
- Quen = Quentin
- Saub = Sauber
- Sauv = Sauvant
- Sbru = Sauerbruch
- Seyd = Seydel
- Smns = Simons
- Strk = Strack
- Tsch = Tschoekell
- Unre = Unrein
- v.Br = Von Brese
- v.Hu = Von Huenersdorff
- v.Op = Von Oppeln
- v.Pw = Von Pannwitz
- Zoll = Zollenkopf
Soviet:
- G and Gd = Guards
- SK = Strelkovyi Korpus (the infantry corps)
- KK = Kavaleriiskii Korpus (the cavalry corps)
- TK = Tankovyi Korpus (the tank corps)
- VPU = Vinnitskogo Pekhotnogo Uchilishcha (infantry school pupil)
- Sh = shock (the Gunzi section)
- OPA = independence the heavy weapons infantry
2.24 Unit Colors
- German Wehrmacht = ash green
- German Luftwaffe = blue
- Rumanian = light green
- Croatian = yellow green
- Soviet = light red
- Soviet Guard = dark red
- Soviet Marine = light brown
In addition to the overall unit color, there are different colors inside the unit's type box, showing either corps or army affiliation.
Units with a colored band under their attack strength, defense strength and movement points are motorized. Units without the colored band are non-motorized units. The difference between the two is important for movement (see 5.14) and advance after combat (see 6.73, 6.75 and 6.77).
2.25 Game Markers
There are both Game Turn and Phase markers to use on the Game Turn Record Track and the Phase Record Track respectively as a reminder of the game's progress.
Out of Supply markers come in three varieties, representing the eventual worsening of a unit's abilities the longer it remains Out of Supply.
Disruption markers are placed on units which retreat as a result of combat, showing a restricted ability to take part in offensive operations.
Reserve markers are used to indicate units placed in Reserve status.
Soviet Offensive Supply markers (on the reverse of Soviet supply units) are used to indicate a Soviet headquarters which is receiving a greater share of the current supply load in order to enhance attack operations.
2.3 Components
- One 22x34" mapsheet
- Four different sheets of counters (800 total)
- Two double-sided player aid cards
- Six Angles #10 (with Japanese rules)
- Two 6-sided dice are also required to play the game.
3.0 Sequence of Play
The game is composed of game turns, each of which consists of a Soviet player turn and a German player turn. When both players have completed their player turns, one game turn is over.
3.1 Outline Sequence of Play
A. SOVIET PLAYER TURN
- Soviet Movement Phase a. Headquarters Offensive Supply Status b. Place Reinforcements c. Move Non-Headquarters Units d. Move Headquarters units
- Soviet Combat Phase
- German Reaction Phase
- Soviet Exploitation Phase
- Soviet Supply Phase a. Determination of Supply Status b. Surrender Check c. Remove Reserve, Disruption, Offensive Supply Markers
B. GERMAN PLAYER TURN
- German Movement Phase a. Place Reinforcements b. Move Non-Headquarters Units c. Move Headquarters units
- German Combat Phase
- Soviet Reaction Phase
- German Exploitation Phase
- German Supply Phase a. Supply Airlift b. Determination of Supply Status c. Surrender Check d. Remove Reserve, Disruption, Offensive Supply Markers
C. ADVANCE THE GAME TURN MARKER
3.2 Narrative Sequence of Play
A. SOVIET PLAYER TURN
-
Soviet Movement Phase
a. Headquarters Offensive Supply Status: At the beginning of the Soviet Movement Phase, the Soviet player may place a Headquarters in an Offensive Supply state by consuming a Soviet Supply marker, and flipping it over to its Offensive Supply side in order to indicate the new supply state.
b. Place reinforcements: Reinforcements scheduled to enter on the current turn are placed in the appropriate hexes as indicated on the reinforcement tracks.
c. Move non-headquarters units: The Soviet player may now move his non-Headquarters units freely, up to their individual movement allowances. Note that Out of Supply and Reserve markers reduce the MA of their units and restrict entry into enemy Zones of Control. MA fractions caused by halving or quartering are rounded up.
Units beginning the Movement Phase within the Supply Radius of a Soviet Headquarters which is receiving Offensive Supply may conduct Overruns during their Movement Phase. Other units may not conduct Overruns.
During his Movement Phase, the Soviet player may designate some of his units as being in Reserve at the start of their movement by placing a Reserve Marker on them. Up to one unit per Soviet Army may be placed in Reserve. This will grant these units greater freedom of movement during the Soviet Exploitation Phase, at the cost of some of their regular movement and combat abilities. Reserve units halve their MA during the Movement Phase, and may not enter enemy ZOC.
Units beginning the Movement Phase Out of Supply have their MA reduced by the amount shown on their Out of Supply marker, even if they move back into a supplied status during the Movement Phase.
d. Move headquarters units: The Soviet player may now move his Headquarters units.
-
Soviet Combat Phase
In this phase, the Soviet player may use his units to attack Axis units in Soviet Zones of Control. Note that units marked Out of Supply have reduced combat strengths, and that Reserve units may not participate in a regular Combat Phase attack.
If the attacking Soviet units are within the supply range of a Soviet Headquarters unit receiving Offensive Supply, a favorable shift of the combat odds is applied.
Combat is not mandatory, but left to the player's discretion. Combats are resolved one at a time, in the order desired by the phasing player.
Units marked as Out of Supply may attack, however, their Out of Supply state is increased by one should they do so. At no time may a unit be in an Out of Supply state greater than three.
B. GERMAN PLAYER TURN
The German player turn is the same as the Soviet player turn with the players reversing roles. However, the Offensive Supply step of the Movement Phase is not used and an additional Air Supply step is added to the German Supply Phase.
In the German Movement phase, the German player may designate up to four stacks to be put in Reserve mode, and during the Soviet Reaction phase, the Soviet player may react with up to two Exploitation-capable (armor, mechanized and motorized infantry, bicycle) units (units, not stacks). Soviet units may only use half (fractions rounded up) their Movement Allowance to react.
C. ADVANCE THE GAME TURN MARKER
At the end of the German player turn, the Game Turn ends. Advance the Game Turn marker to the next space on the Turn Record Track and begin the next turn.
4.0 Stacking & Zones of Control
Restrictions apply as to how many units can stack per hex. In addition, most units exert a Zone of Control into the six hexes surrounding the unit's current hex. Zones of Control affect movement, combat, and supply.
4.1 Stacking
4.11 Stacking limits are enforced at the end of each phase. Therefore, in the process of movement or retreat or advance after combat, the limit may be temporarily exceeded (exception: see 4.16).
4.12 As a general rule, up to four stacking points (dots) of units may exist in a hex. A unit with no stacking dots beneath its type symbol is considered to be worth one stacking point (exception: see 4.13).
For example: A Soviet armor corps displaying four dots below it's unit type symbol counts as four stacking points even though it is only one unit and therefore would "fill" a given hex.
4.13 Headquarters units, supply units, airfields, and other markers do not count against stacking limits.
4.14 Stalingrad city hexes are a special exception to stacking limits, in that any number of units may stack within them. However, only a number of units equal or less than the normal stacking limit (4 stacking points) may participate in combat at any given time. The four units may be freely chosen from the units available in the hex, and may differ with each combat. In order to ease congestion, players should use the Stalingrad holding hexes printed on the map.
4.15 A player may not examine enemy stacks beyond seeing the top unit at any point in the game, except when resolving a declared attack or overrun.
4.16 Overruns may not be conducted from an overstacked hex.
4.17 If a hex is found to be overstacked at the end of any phase, units in excess of the stacking limit are eliminated (owning player's choice).
4.2 Zones of Control (ZOC)
4.21 All units exert a ZOC into their six adjacent hexes (exception: headquarters, supply units, airfields, and units marked as Out of Supply 3 do not exert a ZOC).
4.22 ZOC do not extend across unbridged major river or lake hexsides. Other terrain does not affect ZOC.
4.23 Entering an enemy ZOC costs no additional MP. Exiting an enemy ZOC costs 3 additional MP. Only German panzer, panzergrenedier, and assault guns may move directly from one enemy ZOC to another without completely exiting all enemy ZOC first.
4.24 A unit or stack that is forced to retreat into a hex in an enemy ZOC that is not occupied by a friendly unit loses one step per stack if German, one step per unit if Soviet or Axis Ally (see 6.63).
4.25 Units marked with Reserve or Disruption markers may not enter enemy ZOC during movement.
4.26 The presence of a friendly unit serves to negate enemy ZOC in its hex for purposes of supply (see 7.32) and retreat (see 4.24, 6.63 and 6.68) only. ZOC also affect advance after combat (see 6.74).
4.27 A unit may only attack an enemy unit that is within its ZOC (see 6.11).
4.28 Multiple ZOC overlapping a hex have no additional effect. When friendly and enemy ZOC overlap, both sides are considered to exert their ZOC on the hex. Friendly units continue to negate overlapping ZOC in their hex for purposes of supply and retreat.
4.29 Units with an attack strength of zero may only enter or retreat into an enemy ZOC if accompanied by one or more friendly units with attack strength of one or more or if the hex is currently occupied by a friendly unit with a non-zero attack strength.
5.0 Movement
Each unit has movement points (MP) which are used to move the unit. Each unit may spend up to its MP every friendly movement phase.
5.1 Procedure
5.11 The MP cost to enter each hex or cross each hexside is listed on the Terrain Effects Chart (TEC) (printed on the map).
5.12 Each unit or stack moves individually. Only units beginning a movement phase stacked together and having the same printed MA may move (and Overrun) together.
5.13 Hexside terrain (stream, minor and major rivers) costs MP to cross in addition to the MP cost to enter the hex. Units moving along connected track, road and railroad hexes pay the MP cost listed on the TEC and ignores the MP cost of the other terrain in the hex.
5.14 Motorized and non-motorized units pay different MP costs when moving through some terrain (see the TEC).
For example: An infantry unit crossing a stream while entering a woods hex pays 3 MP. A motorized unit doing the same would expend 5 MP.
5.15 As long as it does not start its movement in an enemy ZOC, a unit may always move a minimum of one hex, even if it does not have sufficient MP to do so, provided the hex it enters is not otherwise prohibited terrain. This includes Out of Supply and Disrupted units, and applies to both the regular movement and exploitation phases.
5.16 Movement is voluntary. The player only moves the units he desires.
5.17 When a player removes his hand from his moving units, those units are finished moving.
5.18 Out of Supply units may move (and perform Overruns), but if they do so, their Out of Supply level is increased by 1, even if they end their movement in the supply radius of a headquarters or supply unit (see 7.42).
5.2 Restrictions
5.21 Units may not enter hexes occupied by enemy units (exception: units other than headquarters and supply units may enter hexes containing only enemy supply units). No additional MP are required (see 8.21). Units may not exit the map (exception: 11.251).
5.22 A unit which starts its movement phase in an enemy ZOC may leave that ZOC by spending 3 additional MP. A unit may leave enemy ZOC multiple times in one movement phase as long as it pays the 3 additional MP each time (however, see 5.23).
5.23 German panzer, panzergrenedier and assault gun units may move directly from one enemy ZOC to another. Units other than these types may not move directly from one enemy ZOC to another.
5.24 Disrupted and Out of Supply units have their MA reduced (see 6.82 and 7.4).
5.25 MP may not be transferred between units nor accumulated from turn to turn. Units with zero MA may never move (including retreat; see 6.66).
5.26 Reserve and Disrupted units may not enter an enemy ZOC during movement.
5.27 During a movement phase, there is no limit to the number of units which may pass through a hex, but at the end of the movement phase or the beginning of an overrun (5.4), stacking limits (4.1) are enforced.
5.28 Soviet headquarters and supply units must move along roads, tracks, or railroads including when headquarters retreat (see 6.62). There is no such restriction on German units.
5.3 Reserves
5.31 During the movement phase, a player may designate units as being in Reserve, so as to more fully utilize them during their exploitation phase. You may designate Reserve units at any time, so long as you do it before the unit moves. Units which have already moved may not be placed in Reserve.
5.32 Reserve units may move with half (fractions rounded down) their MA in the movement phase, but may not enter an enemy ZOC or conduct an Overrun. As no ZOC entry is allowable, Reserve units may not take part in the Combat phase.
5.33 Reserve units may be released in their exploitation phase, during which they may move and conduct Overrun using their full MA (exception: see 5.43).
5.34 During the Soviet Movement Phase, the Soviet player may designate one unit (unit, not stack) per Soviet headquarters as being in Reserve. The unit must be within the Headquarters' supply range and may not be in an enemy ZOC.
Important Note: It does not matter which headquarters the unit belonged to at the start of the game, only that it meets the current conditions, and that the limit of one unit per headquarters is not exceeded.
For example: A unit which started the game belonging to 21st Army may be placed in Reserve by 5th Army, provided it meets the supply and ZOC restrictions.
5.35 During the German Movement Phase, the German player may designate up to four stacks (stacks, not units) as being in Reserve. The types of units and their MA do not matter in this case.
5.36 Units which are Out of Supply or start their movement phase in an enemy ZOC may not be placed in Reserve. Additionally, German and Soviet headquarters, supply units, alert battalions, or Rumanian/Croat units may not be placed in Reserve.
5.37 German units that begin their movement phase stacked together may split to create a Reserve stack, with the remainder moving normally.
5.38 If a friendly unit performing Reaction Movement enters the ZOC of an enemy Reserve unit, the Reserve marker is immediately removed.
5.39 Reserve status is only effective during the Player Turn in which it is designated. Units ending the Exploitation phase still in Reserve status have their Reserve status revoked, and the Reserve marker is immediately removed.
5.4 Overrun
5.41 Overrun is a form of combat which may be performed during a player's movement, reserve or exploitation phase as long as all other restrictions of those phases are met. When a unit moves adjacent to an enemy unit, it is possible for the unit to attack the enemy in his own hex.
5.42 In order to perform an Overrun, the moving unit must expend MP equal to 3 plus the cost of the terrain involved in entering the enemy unit's hex. Overruns are not allowed into terrain that costs 3 or more MP. This restriction cannot be avoided by using road/track/rail movement costs, but is dependant on the base terrain of the hex being Overrun. Overruns are not allowed across minor or major river hexsides.
5.43 Units beginning their movement phase Out of Supply may not conduct Overruns. Soviet units which begin their movement phase outside the supply range of a Soviet headquarters with Offensive Supply may not conduct Overruns.
5.44 Motorized units may perform as many Overruns during their movement phase as they are capable given their MA. Non-motorized units may perform 1 Overrun per movement phase, regardless of their MA. A unit may be targeted by multiple Overruns during a single movement phase.
5.45 Multiple units that begin a movement phase stacked together may perform Overruns together. The units may "split" after the Overrun is completed and finish their movement separately. An Overrun may not be launched from an overstacked hex at the moment of Overrun. Separate stacks of units may not combine and then conduct an Overrun during the same movement phase.
5.46 Overruns are conducted in the same fashion as regular combat (see 6.3). If the Overrun succeeds in removing all enemy units from the attacked hex, the Overrunning units may continue moving after entering the target hex of the overrun at no additional MP cost. If the Overrun fails to remove all defending units from the attacked hex, the Overrunning stack ends its movement in the hex from which the Overrun was launched. If the Overrun removes all defending units, but the attacking units take any step losses, the Overrunning units end their movement in the attacked hex.
5.47 A Soviet stack performing an Overrun which suffers an adverse result must take at least half (rounded up) the losses as step losses (see 6.43).
5.48 Defending units which retreat during an Overrun may not retreat into the hex from which the Overrun was launched. If the Overrunning units are destroyed or forced to retreat, the defending units may not advance after combat.
5.49 Units of either side which are forced to retreat as the result of an Overrun are marked with a Disruption marker (exception: defending non-Reaction-eligible units are not marked; see 5.52 and 5.53) at the end of their retreat.
5.5 Reaction Movement
5.51 Players may perform Reaction Movement during their reaction phase of the enemy player turn. Such movement is performed normally, including Overruns.
5.52 During the German Reaction Phase of the Soviet player turn, the German player may React with up to two stacks (stacks, not units). Only non-Disrupted exploit-capable units (armor, assault guns, and motorized infantry) may move (see 6.84).
5.53 During the Soviet Reaction Phase of the German player turn, the Soviet may react with up to two units (units, not stacks). Only non-Disrupted exploit-capable units (armor, motorcycle, mechanized and motorized infantry) may move (see 6.84).
5.54 Units that are Out of Supply, in an enemy ZOC, or that are Disrupted may not conduct Reaction Movement. Axis Ally (Romanian & Croat) units and Soviet units not within the supply range of a Soviet headquarters at the beginning of their reaction phase may not perform Reaction Movement.
5.55 Reacting German units use their full MA during their reaction phase. Soviet units may only use half their MP during their reaction phase.
5.56 If a friendly unit performing Reaction Movement enters the ZOC of an enemy Reserve unit, the Reserve marker is immediately removed.
5.57 During the German Reaction Phase of the Soviet player turn, the German player may, if he chooses, place any units scheduled to enter as reinforcements during that Game Turn. However, these units may not move during the German Reaction Phase.
5.6 Exploitation Movement
5.61 Exploitation Movement is handled exactly like regular movement, with the following 5 exceptions:
- Units in Reserve status may move using their entire MA; others may only use half their MA.
- Disrupted units may only use one-quarter of their MA (see 6.82).
- Units which begin their exploitation phase in an enemy ZOC may not move.
- Headquarters and supply units may not move.
- Out of Supply units may move, but if they choose to do so, their Out of Supply level is increased by one (see 7.42).
6.0 Combat
Combat is performed between adjacent units of both sides. The phasing player is always the attacker and the non-phasing player is always the defender.
6.1 Restriction
6.11 Units may only attack during the combat phase (exception: see 5.4). Units may only attack enemy units which are within their ZOC at the moment the attack is performed.
6.12 Attacking is optional at the discretion of the phasing player.
6.13 There is no limit to the number of attacks during one combat phase. Units may only attack or be attacked once per combat phase. Within the above restrictions, the attacking player chooses his attacking units and the defending hex.
6.14 When multiple attacking units are involved in a combat, combine their attack strengths into one sum. When multiple defending units are involved in a combat, combine their defending strengths into one sum. It is not possible to attack units within a hex individually. Attacking units within a single hex may attack separate hexes or not at all.
6.15 Units may not divide their attack or defense strengths for more than one battle.
6.16 Units in one hex may attack defenders in multiple adjacent hexes as one attack. Conversely, units in multiple attacking hexes may attack one defending hex as one attack. However, multiple attacking hexes may not attack multiple defending hexes as one attack. When there are multiple defending hexes of differing terrain types, the terrain most advantageous to the defender determines the combat effects.
6.17 Out of Supply units have their attack and defense factors modified as shown on their Out of Supply markers (see 7.43 and 7.44), but otherwise may conduct combat as normal. Units with attack strengths of zero (including Out of Supply 3 units) may not attack.
6.18 Axis Ally units (Rumanian & Croat) may combine in combat with German units and/or Axis Ally units of a different nationality at no penalty.
6.19 Headquarters units are considered to have an attack strength of zero, and a defense strength of one.
6.2 Combat Modifiers
6.21 A stack defending in a forest hex adds 2 to its total defense strength. A stack defending in a town adds 1 to its total defense strength.
6.22 A stack defending in a Stalingrad urban hex doubles its total defense strength.
6.23 If all attacking units in a combat are attacking across stream hexsides, the defending stack adds 2 to its total defense strength.
6.24 Units attacking across a minor river or a bridged major river halve their attack strengths. Units attacking across a pontooned major river modify their attack strength to one-third normal.
6.25 In order to gain the defensive benefit for streams, minor and major rivers, all attacking units must be attacking across the stream, minor or major river hexsides. If even one unit is attacking from the same side of the obstacle that the defending unit is on, the benefit is lost.
6.26 Attacks are not allowed across unbridged or unpontooned major river hexsides, or across lake hexsides.
6.27 Divisional Integrity. When three units belonging to the same German division participate in the same combat, add 4 to their total attack or defense strength. When three units belonging to the same Rumanian division participate in the same combat, add 2 to their total attack or defense strength. This bonus is granted to each division meeting the requirements in a combat. However, divisions consisting of two or less units, and divisions with any units marked Out of Supply 3 do not count as meeting the requirements and the bonus is not received.
6.28 The 369th Croation Regiment is considered as part of the German 100th Jaeger division for the purposes of Divisional Integrity. Divisions consisting of more than three units (for example: the German 14th or 6th Panzer Divisions) need only have three units participating to gain the bonus.
6.29 All combat modifiers are cumulative, whether attack- or defense-related. Modifications should be applied in the following order, to keep fractional values accurate:
- Terrain modifiers (see 6.21-6.26)
- Out of Supply effects (see 7.75-7.77)
- Divisional Integrity (see 7.43-7.45)
6.3 Combat Procedure
Individual combats are resolved using the following procedure:
-
Total the modified attack strengths of all attacking units and the defense strengths of all defending units participating in the combat. Use these totals to determine a combat odds ratio by dividing the total defense strength into the total attack strength. Round off any fractions in favor of the defender.
For example: An attack strength total of 16 versus a defense strength total of 4 is 4:1. An attack strength total of 19 versus a defense strength total of 4 is also a 4:1.
-
Odds of greater than 9:1 are resolved as 9:1. Odds of less than 1:4 are allowed, but result in the immediate elimination of all attacking units.
-
Soviet attacks resolved during the Soviet Combat Phase that have at least half (fractions rounded up) of the attacking units within the supply range of a Soviet headquarters with an Offensive Supply marker receive a +2 column shift bonus.
For example: So a 3:1 attack that meets the above requirement would become a 5:1 attack.
-
The attacker rolls two dice and compares the sum with the appropriate odds column on the Combat Results Table. The results are applied immediately.
-
If, as a result of combat, all defending units are either destroyed or retreated from the defending hex, attacking units (within stacking limits) my advance after combat into the vacated hex.
-
Combats are resolved individually, and the results of each combat must be applied fully and immediately before moving on to the next.
-
When the attacking side contains Out of Supply units, the Out of Supply level for each of such units is immediately increased by one after resolving the combat.
6.4 Combat Results
6.41 Combat results are expressed as two numbers or symbols, with a slash in between. Results to the left of the slash apply to the attacker and those to the right of the slash apply to the defender.
6.42 If the result is a number, the affected player must fully apply that number as any combination of either step losses and/or hexes of retreat to his forces involved in the combat. If the result is a dash ("-"), the affected player suffers no losses in the combat. Soviet units have special restrictions on combining step losses with retreats (see 5.47 and 6.43).
6.43 If attacking Soviet units take losses during the Soviet Combat Phase or when conducting an overrun as the attacker, at least half (fractions rounded down) must be taken as step losses. The remainder may be taken as retreats. A Soviet defender may always satisfy results as he chooses.
6.44 Combat results are applied to the defender first.
6.45 A result of "E" on the CRT is a total elimination of the affected force.
6.46 Out of Supply units which attack raise their Out of Supply level by one after resolving the combat. Defending units never raise their Out of Supply levels due to combat.
6.5 Step Losses
6.51 Units consist of one or more steps, most having two. Some Soviet units (Tank corps, mechanized corps) have more than two steps, which is shown with multiple counters for the same unit, bearing the designation "Repl" in the upper-right corner of the counter. Supply units have no "steps" (see 6.56 and 8.2).
6.52 When a step is lost due to the application of combat results, a counter with two steps is flipped to its reverse side for one step loss. A further step loss would lead to the removal of the unit.
6.53 Soviet tank, mechanized, and Shock corps have either six, eight, or five steps. Losses would be taken as follows: Full strength counter, flipped counter, next weakest replacement counter, flipped, etc., until the final step is removed.
6.54 When applying attacker step losses, the largest unit involved in the attack must lose the first step.
6.55 The owning player determines how to apply combat losses or retreats to his units. When applying step losses to units involved in a combat, all units must lose at least one step before any unit may lose two.
6.56 Step losses may not be applied to Supply units. When applying losses to a stack containing a mixture of combat units and headquarters or airfields, losses must be applied to combat units first before applying them to the headquarters or airfield.
6.57 In cases where more losses are called for than can be taken by the affected units, any excess is ignored (exception: see 6.73).
6.6 Retreat
6.61 The owning player always retreats his units. Units may be retreated individually although if any undestroyed units in the hex retreat, all must retreat. Regardless of the number of units involved, each hex of retreat satisfies one point of combat result. Units must retreat toward their supply source, if possible. At the end of the retreat, mark all retreating units with a Disrupted marker.
For example: A stack of three units retreats one hex. This counts as "one", not "three" towards satisfying the combat result.
6.62 Units may not retreat into or through terrain in which it is not permissible for them to move. Units may retreat off-map (Axis may use the west or south edge; Soviets the east and north). Units retreating off the map count as having retreated whatever number of hexes was required. These units may then reappear as reinforcements during the next game turn at the closest entry point to where they exited the map, unless that entry hex is occupied by enemy units. Units may not retreat off an enemy map edge. Soviet headquarters units may only retreat along track/road/rail hexes.
6.63 Retreating Soviet and Axis Ally units that must enter an enemy ZOC unoccupied by a friendly combat unit or headquarters must lose one step per unit (unit, not stack). German units that retreat into an enemy ZOC must lose one step per stack (stack, not unit). In the case of a mixed German/Axis Ally stack, each Axis Ally unit will lose one step, while the German forces lose one step total from the stack. Step losses incurred due to entering enemy ZOC during retreats do not count towards satisfying combat results. Units marked Out of Supply 3 may not retreat into an enemy ZOC at all (see 7.45).
6.64 Units that retreat into hexes in an enemy ZOC that are occupied by friendly combat units or headquarters (not supply units) do not take step losses (see 6.63). Units may exceed stacking limits while retreating, but may not end their retreat overstacked. Units may retreat one additional hex to avoid overstacking.
6.65 Units that end a retreat overstacked are eliminated.
6.66 Retreat is treated as movement, therefore units with a movement allowance of zero may not retreat, and all results against them must be satisfied with step losses.
6.67 Supply units may not retreat. When combat units retreat out of a hex also occupied by a supply unit, the supply unit is left behind and may be destroyed or captured (see 8.2).
6.68 Units which end their retreat in a hex occupied by friendly units which is attacked later in the same combat phase do not apply their defense strength to the new combat. If any adverse result is suffered by the actively defending units, the unit(s) that previously retreated into the hex must suffer step losses (and destruction, if enough) before any remaining result is applied to the active defenders.
For example: A one-step German unit retreats into a hex that is attacked by the Soviet player immediately afterwards. The previously retreated unit doesn't contribute its defense strength to the combat and, if a combat result affects the German side, the previously retreated unit must take the first number as a step loss.
6.69 If multiple hexes are available for retreat, the following priorities are followed:
- A hex not in an enemy ZOC.
- A hex in enemy ZOC occupied by a friendly unit not violating stacking restrictions.
- A hex in enemy ZOC occupied by a friendly unit which violates stacking restrictions.
- A hex in enemy ZOC with no friendly unit.
Hexes which allow for the unit to be or remain supplied take precedence over unsupplied hexes in this priority list.
6.7 Advance After Combat
6.71 After all combat results are applied, if the defending hex is completely vacated (whether through retreat or elimination), surviving attacker units may advance after combat and occupy the target hex. Advance after combat is not mandatory, and is done at the discretion of the attacker. The decision to advance after combat must be made immediately or not at all. Advance after combat does not apply to overruns.
6.72 Advance after combat is handled like retreat, with no expenditure of movement points. Advance after combat never causes an increase to the Out of Supply level of an attacking unit. Units with an MA of zero may not advance after combat.
6.73 Units may advance after combat a number of hexes equal to the number of defender losses satisfied by retreating. Results satisfied by defender step-losses do not add to the permissible advance length. The first hex advanced into must be the hex vacated by the defender. The attacker chooses his own path after the first. Motorized, mechanized, and armor units may advance up to three hexes; other units may advance only one hex.
6.74 Units advancing after combat ignore enemy ZOC in the first hex of their advance (i.e., the defending hex in the combat). ZOC in hexes after the first hex stop advances after combat and any unused advance allowance is lost.
6.75 If defending units receive an "E" result, the attacking units are allowed an advance after combat of either three hexes (armor, mechanized, and motorized units) or one hex (all other units).
6.76 Units which did not participate in the combat, even if stacked with units that did, may not advance after combat. Units that retreat as a result of combat may not advance after combat. Units that take step losses may advance after combat.
6.77 Armor, mechanized, and motorized units may only advance across a bridged/pontooned minor or major river hex not following a road or track if it is the first hex advanced into. After the first hex, any such crossing during advance after combat must follow a road or track. Unbridged/pontooned major river hexes may not be crossed during advance after combat.
6.78 If all attacking units are destroyed or retreated as a result of combat, victorious defending units which do not retreat may advance after combat. In this case, the first hex entered must be one of the hexes from which the attack was launched.
6.79 Units advancing after combat may not end their advance in violation of stacking limits. Stacking limits may be exceeded temporarily during the advance.
6.8 Disruption
6.81 Units which retreat as a result of combat or Overrun are marked with a Disruption marker at the end of their retreat.
6.82 Disrupted units have their MP reduced to ¼. In the case of units which have their MP reduced by being Out of Supply, this reduction is applied after the OOS reduction.
For example: A German panzer regiment with an MA of twelve which is marked with an Out of Supply 1 marker has to retreat, becoming Disrupted. Its effective MA would be 12 x ½ (for the OOS1) = 6 x ¼ (for the Disruption) = 1.5, which rounds to 2. If the unit was OOS Level 2, it would be 12 x ¼ = 3 x ¼ = .75, which rounds to 1.
6.83 Disrupted units may not enter an enemy ZOC nor perform an Overrun (even against a unit with no ZOC).
6.84 Disrupted units may not move in their reaction phase, even if otherwise qualified to do so (see 5.52 and 5.53).
6.85 Disruption is effective only for one player-turn. All Disruption markers are removed during the Supply Phase of the current player-turn.
7.0 Supply
Supply concerns influence everything an army does. If the proper levels of ammunition and fuel are not given to a unit, its survival chances decrease considerably. Therefore, each player must work effectively to supply their army.
7.1 Supply Determination
7.11 During a player's supply phase, the supply status of all his units is determined. Supply status is marked as a result of one of three conditions:
- Units previously marked with Out of Supply markers which are currently found to be Supplied remove their Out of Supply markers (regardless of level).
- Units previously Supplied now found to be Out of Supply are marked with an Out of Supply 1 marker.
- Units previously marked Out of Supply and are still Out of Supply increase their Out of Supply level by 1 (to a maximum of 3).
7.12 Headquarters, airfields, and supply units are always considered Supplied and cannot be placed Out of Supply.
7.13 During the German Supply Phase, if a German unit that would otherwise enter Out of Supply 3 status can trace a supply line 4 or fewer hexes to a German headquarters, it does not go Out of Supply 3, but instead remains in Out of Supply 2 status. It does not matter which headquarters the Out of Supply 3 German unit belonged to at the start of the game.
7.2 General Supply
7.21 To be considered Supplied, a German or Axis Ally unit must be able to trace a valid supply line of any length to an Axis supply source (exception: alert battalions; see 7.22).
7.22 Soviet units and German alert battalions must be within the supply range of an appropriate headquarters unit to be considered Supplied. The headquarters must also be able to trace a valid supply line (of any length) along a combination of road, track and railroad hexes to a friendly supply source for a supplied state to exist. Soviet units and German alert battalions may not trace supply directly to supply sources (exception: 7.35).
7.23 Each headquarters has a printed supply range. If a supply line equal to or less than the supply range exists between a headquarters and a unit, then the unit is considered within the supply range. Supply ranges are expressed as hexes and are counted from the headquarters (exclusive) to the unit (inclusive).
For example: A Supplied headquarters with a supply range of seven can supply any friendly unit seven or less hexes from the headquarters itself as long as a valid supply line exists between the headquarters and the unit.
7.24 A single headquarters may supply any number of friendly units and a unit may be supplied by any friendly headquarters.
7.3 Supply Lines and Supply Sources
7.31 A supply line is a continuous, unbroken line of hexes from a unit or headquarters traced to a supply source. A supply line may not enter an enemy-occupied hex or enter or cross a prohibited hex or hexside to be considered valid.
7.32 A supply line may not be traced through an enemy ZOC. Supply lines may be traced through an enemy ZOC if a friendly unit occupies the hex in question.
7.33 Supply lines may not be traced across pontooned major river hexes. All other paths otherwise not prohibited, are permissible.
7.34 Entry hexes A, B, C, and D are Soviet supply sources. Entry hexes E, F, and G are German supply sources.
7.35 The German player may consume supply units to Supply his units (see 8.4). German supply units are received through successful air transport (see 8.3).
7.36 The Soviet player may use entry hexes marked A and B as a notional headquarters with a range of seven hexes for purposes of General Supply (see 7.22). If a German or Axis Ally unit is in an A or B entry hex during the Soviet Supply Phase, that hex may not be used as a supply source for the rest of that turn.
7.4 Out of Supply Effects
7.41 Units bearing an Out of Supply marker reduce their attack and defense strengths and MP (fractions rounded down in ALL cases) as listed below. Out of Supply units may not conduct Overruns.
Note (sentence as printed; it is incomplete in the source): In order to more easily distinguish the ownership been provided in separate colors for Axis and Soviet units, but their effects are the same. These values are also printed directly on the Out of Supply markers.
7.42 Whenever an Out of Supply unit performs one of the following actions, increase it's Out of Supply level by 1 (per action):
- Move during their movement phase
- Attack during their combat phase
- Move during their exploitation phase
- Still Out of Supply during their supply phase
7.43 An Out of Supply 1 unit has its attack strength and MP halved. Its defense strength is normal.
7.44 An Out of Supply 2 unit has its attack strength and MP quartered. Its defense strength is halved.
7.45 An Out of Supply 3 unit has its attack strength reduced to 0. Its defense strength and MP become 1 (exception: see 7.46). Units marked Out of Supply 3 no longer project a ZOC and cannot retreat into an enemy ZOC unless that hex is occupied by a friendly unit.
Note: Out of Supply levels accumulate from 1 to a maximum of 3, but their effects are not cumulative. Only the effects of the current Out of Supply level apply. No unit may be at an Out of Supply level greater than 3.
7.46 Soviet corps which are Out of Supply 3 have attack strengths of 0. Their defense strengths are quartered and their MP reduced to 1. Special Corps Out of Supply markers (XXX) are provided for these units.
7.5 Surrender
7.51 At the start of a player's supply phase, if any of his Out of Supply 3 units are completely surrounded by enemy units or enemy ZOC not negated by a friendly unit, there is a possibility that a portion of the Out of Supply 3 unit may surrender.
7.52 For each unit meeting this condition, the owning player rolls one die:
- German:
- 1-4: No Effect
- 5-6: Lose 1 Step
- Axis Ally:
- 1: No Effect
- 2-6: Lose 1 Step
- Soviet Unit:
- 1-3: No Effect
- 4-6: Lose 1 Step
Terrain die roll modifiers:
- Town/City: -2
- Village: -1
Step losses due to surrender may result in unit elimination.
8.0 Supply Units
8.1 General Rules
8.11 Bother German and Soviet supply units operate identically in regards to movement, combat and capture. They differ in regards to how they are received and used (see 8.3-8.5).
8.12 Supply units cannot move during the movement phase in which they are received (exception: 12.13).
8.13 Supply units move as motorized units. Soviet supply units can only move along road, track, or railroad hexes. German supply units are under no similar restriction and can move freely.
8.14 Supply units have no attack or defense strengths. If an enemy unit, through movement or advance after combat, ever occupies a hex containing a friendly supply unit, the supply unit is either captured or destroyed (see 8.2).
8.15 No more than 12 Axis and 10 Soviet supply units may be on the map at one time. Any supply units received or captured in excess of these limits are lost.
8.2 Capturing Supply Units
8.21 If a friendly combat unit with MA greater than an enemy supply unit's MA enters the supply unit's hex (through movement or advance after combat), it may attempt to capture the supply unit. Roll one die:
- 1-2: The enemy supply unit is captured and replaced with a friendly supply unit.
- 3-6: The enemy supply unit is eliminated and removed from play.
If the combat unit has an MA equal to or less than the supply unit, the supply unit is eliminated and removed from play. It costs no additional MP to enter a hex with a supply unit.
8.22 Captured supply units may not move during the phase in which they are captured.
8.23 Even though supply units have no combat strength, a retreating unit may not enter a hex containing an enemy supply unit by itself. As it pertains to retreating, enemy supply units are considered enemy combat units.
8.3 German Air Transport
8.31 Beginning on Game Turn 3, the German player may receive supply units as reinforcements during his movement phase. Roll one die on the table below:
- 1: 2 supply units
- 2-5: 1 supply unit
- 6: 0 supply units
Only one supply unit may be placed per airfield per turn. Supply units in excess of existing German airfields are lost.
For example: If the German player only controls 1 airfield, the maximum number of supply units he may receive is 1. If he doesn't control an airfield, he need not bother to roll the die.
8.32 No more than twelve supply units may be received via air supply throughout the game.
8.33 Supply units arriving via air transport may not be consumed on the turn they are received.
8.4 German Supply Unit Special Rules
8.41 German supply units are consumed during the German Supply Phase, allowing them to be treated as an Axis supply source. To show a supply unit is being consumed, flip it over to its reverse side, which shows a supply range of seven hexes. In this state, it acts like a Soviet headquarters with a range of seven hexes and can supply all German and Axis Ally units within its supply range.
Note: Supply units may not be consumed in this fashion on Game-Turn 12.
8.42 All unit types other than armor, panzergrenedier, and assault gun units receive supply from the supply unit automatically. Armor, panzergrenedier, and assault gun units are a special exception. For each such unit attempting to draw supply from the supply unit, roll a die. On a result of 1-3, the unit is Supplied. On a result of 4-6, the unit is not Supplied and must either be marked Out of Supply or have it's current Out of Supply marker increased by 1.
8.43 The decision to consume a supply unit must be made at the beginning of the German Supply Phase, before supply lines are checked. Any number of supply units may be consumed during a single turn (exception: see 8.33). Consumed supply units are removed at the end of the current German Supply Phase.
8.44 Consumption of supply units is not mandatory. The German player may choose to refrain from consuming supply units.
8.5 Soviet Supply Unit Special Rules
8.51 Soviet supply units are consumed to place Soviet headquarters units in the same hex in "Offensive Supply".
8.52 At the start of the Soviet Movement Phase, Soviet supply units may be consumed. The supply unit is immediately flipped over to its Offensive Supply marker side.
8.53 Soviet units beginning their movement or exploitation phase within supply range of a Soviet headquarters bearing an Offensive Supply marker may perform Overruns. Other Soviet units may not perform Overruns.
8.54 Soviet attacks resolved during the Soviet Combat Phase that have at least half (fractions rounded up) of the attacking units within the supply range of a Soviet headquarters with an Offensive Supply marker receive a +2 column shift bonus.
8.55 Soviet headquarters marked with an Offensive Supply marker may provide supply as a normal headquarters, even if the headquarters is unable to trace a valid supply line to a normal supply source (see 7.22).
8.56 A Soviet headquarters may be placed in Offensive Supply even if it cannot trace a valid supply line to a supply source, as long as it begins its movement phase stacked with the necessary supply unit.
8.57 All Soviet Offensive Supply markers are removed at the end of each Soviet Supply Phase.
9.0 Soviet Preliminary Bombardment
The Soviet Uranus offensive depended on heavy concentrations of artillery and rocket launchers (the dreaded "Katyusha").
9.11 The Soviet 5th Tank Army, 21st Army, 57th Army, and 51st Army are provided with Artillery Support markers, which are backprinted with their Artillery Support points available. For reference:
- 5TA: 7 points
- 21A: 5 points
- 51A: 6 points
- 57A: 6 points
9.12 On Game Turn 1 of Scenarios 1 and 3, before the Soviet Movement Phase, the Soviet player performs his Preliminary Bombardment. Resolve this bombardment with the following procedure:
-
The Soviet player declares which army is conducting the bombardment.
-
The Soviet player declares a target hex. The target hex must be adjacent to a Soviet unit belonging to the same army headquarters as declared in #1 above..
For example: The 26TK belongs to 5TA and 5TA bombardment points may be used on any hex adjacent to 26TK.
-
The Soviet player then declares how many Artillery Support points will be used against the target hex. Artillery Support points may be divided into multiple bombardments as desired by the Soviet player, as long as the total is not exceeded.
For example: The 21A could bombard five different hexes with one point each, or three hexes with one point each and one with two points, or one hex with all five points.
-
The Soviet player rolls one die and compares that number with the column of the Artillery Support points used on his Preliminary Bombardment Chart (found on the Soviet player aid card). The result is the number of step losses caused in the target hex. Only Rumanian units take step losses from Preliminary Bombardment; German and Croat units do not.
For example: A hex containing a two-step Rumanian unit, a one-step Rumanian unit, and a two-step German unit is hit with a result of "3". Both Rumanian units would be destroyed, while the German is untouched. Sneaky little Germans!
-
Continue resolving Preliminary Bombardments for the specified Soviet army until all of its Artillery Support points have been used and then proceed to the next army.
All Preliminary Bombardments must be resolved before proceeding with the first Soviet Movement Phase.
9.13 Preliminary Bombardments target the entire hex. The Soviet player cannot target a specific unit within the hex, where multiple units exist.
9.14 Terrain has no effect on Preliminary Bombardments.
9.15 The German player must apply the results of Preliminary Bombardments as step losses. Preliminary Bombardment results may not be satisfied by retreating.
9.16 Units eliminated by Preliminary Bombardments are considered "Routed" instead of eliminated. Routed units do no go into the dead pile, but are instead placed into the special Routed Units boxes of the Rumanian Army whose entry point is closest to where the unit was destroyed. It is possible that these units may return as reinforcements during the German Movement Phase of Game Turn 2 (see 10.2).
10.0 Reinforcements
During the game, both players will receive reinforcements as shown on their reinforcement tracks (printed on the map).
10.1 Appearance
10.11 Soviet reinforcements appear at the beginning of the Soviet Movement Phase.
10.12 Axis reinforcements may appear at the beginning of the German Movement, German Exploitation, or the German Reaction Phase. The units must be eligible to move in the given phase in order to appear in that phase.
10.13 Some German reinforcements are shown with a letter designation only. These units may appear on any given hex bearing that letters designation, providing the hex is not occupied by or in the ZOC of a Soviet unit.
10.14 Reinforcements appear at one of their designated entry hexes (exception: German alert battalions; see 10.31).
10.15 A player may delay the appearance of a reinforcement unit until the next Game Turn if desired (exception: see 10.21). If the entry hex or hexes in which a unit is scheduled to appear are occupied by enemy units, the unit may appear on any map edge hex within 10 hexes of its stated entry hex.
10.16 Reinforcements are always treated as being Supplied on the turn they enter. Reinforcements always appear at full strength. There is no additional MP cost to place reinforcements on the map and reinforcing units may move freely during the phase of placement. Stacking limits may be temporarily exceeded in order to place reinforcing units.
10.2 Return of Routed Units
10.21 At the beginning of the German Movement Phase of Game Turn 2, half (fractions rounded up) of the units in each Routed Units box are returned as reinforcements via the army's appropriate entry hexes. Those units that remain in the Routed Units boxes are considered eliminated and moved to the dead pile. Returning Routed units may not be delayed like normal reinforcements.
[Source numbering: there is no 10.22 in the translation.]
10.23 Units that return from the Rumanian 3rd Army box arrive in entry hexes marked "G;" those from Rumanian 4th Army arrive in entry hexes marked "E."
10.24 Returned Routed units are treated as normal Rumanian units with no special restrictions.
10.3 German Alert Battalions
At this point in the war, the German army would gather together elements of support units, such as railroad operators, construction personnel, police units, and lightly wounded soldiers into ad-hoc units to fill gaps in their broken front lines. Alert Battalions are used to represent such units.
10.31 Alert battalions appear as reinforcements. They may be placed in any Supplied hex adjacent to the Chir River as long as it is not occupied by or in the ZOC of a Soviet unit.
10.32 Once placed on the map, an alert battalion is treated as any other German infantry unit and may move and fight freely (exception: alert battalions must trace supply to a German headquarters, unlike regular German units (see 7.22)).
11.0 Scenarios
Three scenarios are provided in Paulus' 6th Army.
11.1 Scenario Set Up
11.11 The starting and ending turns, the game length, the portion of the map used, unit setup & reinforcements, and the victory conditions are listed separately for each scenario.
11.12 The German player sets his units up first in each scenario.
11.13 Overstacking is not allowed during setup.
11.14 Where setup information is given as a range or line of hexes (i.e. "From XXXX to YYYY"), each hex within that range must either contain a unit or be in the ZOC of a friendly unit.
11.2 Scenario #1: Operation Uranus
This scenario showing the initial rush for the Kalach crossings is included as an introductory scenario using only half the map. The initial breakout of the Soviet right-wing of Operation Uranus is depicted.
11.21 This scenario begins with Game Turn 1, and lasts till the end of Game Turn 3. Only hexes on or north of hexrow 29xx are used.
11.22 The Axis player sets up his units according the Scenario 1 portion of his set up chart:
- Rumanian 1st Corps (6 units)
- Rumanian 2nd Corps (6 units)
- Rumanian 7th Cavalry Division
- Rumanian 5th Corps (6 units)
- Rumanian 4th Corps (7 units)
- German 11th Corps (10 units)
- German 22nd Panzer (2 units)
- Rumanian 1st Armored
- German 14th Panzer
- Ludw squadron
11.23 The Soviet player then sets up his units according the Scenario 1 portion of his set up chart:
- 1st Guards Army (8 units)
- 5th Tank Army (17 units)
- 21st Army (13 units)
- 65th Army (12 units)
11.24 Only reinforcements listed as entering between Game Turns 1 and 3 and in entry hexes marked "A", "B", or "G" are used in this scenario.
11.25 Victory
11.251 At the end of the Game Turn 3, the Soviet player must have exited units totaling 20 or more attack strength points off the south edge of the play area to win.
11.252 If the Soviet player does not win, the German player wins instead.
11.3 Scenario #2: Winter Storm
This smaller scenario using only half the map shows Von Manstein's attempt to rescue the encircled Sixth Army, Operation "Wintergewitter" ("Winter Storm").
11.31 This scenario begins with the German player turn of Game Turn 8 and continues through Game Turn 12 (skip the Soviet player-turn of Game Turn 8). Only hexes on or south of hexrow 31xx are in play.
11.32 The Axis player sets up his units according the Scenario 2 portion of his set up chart. Additionally, the 23rd Panzer division (3 units) starts the game in hex 5233.
11.33 The Soviet player then sets up his units according to the Scenario 2 portion of his set up chart.
11.34 Only reinforcements scheduled to appear on Game Turns 8 and 9 are used in this scenario. Their entry is modified as follows:
- Those scheduled to appear at entry hexes marked "A" do not appear.
- Those scheduled to appear in entry hexes marked "B" and others appearing between 3117 up to 3105 appear one turn later than scheduled in entry hexes marked "C".
11.35 Victory
11.351 At the end Game Turn 12, if at least 45 steps of German units can trace a supply line to a valid Axis supply source, the German player wins. Headquarters, alert battalions, airfields, supply units, and Axis Ally units do not count toward this total.
11.352 If the German player does not win, the Soviet player wins instead.
11.4 Scenario #3: The Campaign Game
This scenario reproduces the entire picture, from Operation Uranus and the initial encirclement of the German 6th Army, through Von Manstein's attempt to relieve the besieged von Paulus. This is the full campaign game.
11.41 The scenario begins on Game Turn 1 and ends at the end of Game Turn 12. The entire map is in use.
11.42 The Axis player sets up his units according the Scenario 1 & 3 portions of his set up chart.
11.43 The Soviet player then sets up his units according the Scenario 1 & 3 portions of his set up chart:
11.44 All reinforcements shown on the players' reinforcement tracks are used in this scenario.
11.45 First Game Turn Restrictions. The German 51st Corps and Soviet 62nd Army were still heavily engaged in brutal city-fighting and were not in a position to react to or affect conditions outside their immediate operations. In order to represent this historical condition, use the following special restriction.
11.451 During Game Turn 1:
- Of the 24 units of 51st Corps that begin the game set up in Stalingrad hexes, only 9 may leave a Stalingrad urban hex, either through movement or as a result of combat. If retreats or advances which would result in more than nine units needing to leave urban hexes occur, advance is disallowed, and all combat results must be taken as step losses.
Beginning on Game Turn 2, the above restriction is lifted and all 51st Corps units may move, retreat, and advance after combat freely.
11.452 The units of the Soviet 62nd Army are assigned a similar restriction; however, these units may retreat freely if defending.
11.46 Victory
11.461 At the end of Game Turn 12 the players total their Victory Points (exception: the Soviet player should keep a running total of his Victory points per 10.463). [Source cross-reference reads "10.463"; the Soviet Victory Point rules are numbered 11.463 below.]
11.462 The German player receives 1 VP for each surviving German and Rumanian unit on the map, excluding headquarters, alert battalions, supply counters, Croat units, and Out of Supply Rumanian units. Each Supplied Axis unit ending the game in a Soviet reinforcement entry hex (A, B, C, or D) is worth 10 VP instead.
The German player receives 5 VP for each on-map airfield.
Note: German supply units may not be consumed for during Game Turn 12. [Sentence as printed in the source; it is incomplete.]
11.463 Soviet Victory Points are tabulated at the end of each Game Turn and are recorded on the Soviet Victory Point Track (located on the map).
a) At the end of Game Turn 5 and every Game Turn thereafter, the Soviet player receives 1 VP for each Soviet division or corps (unit, not step) within the "Chir River Bridgehead Area".
b) Out of Supply, regiment or brigade-size, headquarters and supply units do not count for Victory Points.
The "Chir River Bridgehead Area" is composed of all hexes on the west side of the Don River and west of the Chir River (west of the line 4633-3625-0334, up to the rivers' edges).
Important Note: At the end of any turn, if the Soviet player has accumulated 70 or more Victory Points, the game immediately ends in a Soviet Strategic Victory.
11.464 The Soviet player then deducts his Victory Point total from the German player's Victory Point total. Compare the final Victory Point total to the Victory Results Chart to find which side won and how impressive the victory.
12.0 Optional Rules
Any Optional Rules may be used with the agreement of both players.
12.1 German Tiger Battalion
The German may use the 503rd Schwerepanzer battalion. This unit was composed completely of Tiger I's and though they were ordered to join the Don Army Group in 1942, in reality they did not arrive until mid-January 1943. This rule supposes that the unit arrives in the Don River basin earlier than it historically did.
12.11 When using this rule, the German player receives the 503rd as a reinforcement on Game Turn 8, at entry area "G".
12.12 If the 503rd Battalion participates in a German Overrun, a +2 column shift is applied to the combat odds. In addition, if the 503rd is involved in an Axis attack during the Axis Combat Phase, a +1 column shift is applied to the combat odds.
12.13 If the German player opts to receive the 503rd Battalion, the Soviet player receives 1 additional supply unit which appears as a reinforcement on Game Turn 9 in any entry hexes (A, B, C or D). This supply unit may move normally in the turn in which it appears (as an exception to 8.12).
12.2 River Assault Crossing
In the game, for purposes of rules simplification, unbridged/pontooned Don River hexsides are considered uncrossable and prohibited terrain. In really, it was possible to advance to the other side of the river using bridges constructed by engineers. If this rule is used, the historicity of the game is improved but the game balance shifts somewhat to the Soviet player.
12.21 At the beginning of the movement phase, infantry or marine units which are not in an enemy ZOC may move across one Don River hexside at a cost of all their MA. The hex being entered may not be occupied by an enemy unit (except a supply unit) and may not be in an enemy ZOC.
12.22 Only infantry and marine units (not including cavalry or alert battalions) may use River Assault Crossing. Units performing a River Assault Crossing are marked with an Out of Supply marker when beginning the crossing.
12.23 Units moving via River Assault Crossing are immediately marked with a Disruption marker after completing their movement.
12.24 This River Assault Crossing rule has no effect on the tracing of supply lines. In other words, unbridged and unpontooned Don River hexsides may not have a supply line traced over them if this rule is in effect.
12.3 Infiltration Movement
Soviet armor units, as much as any other unit, may not move directly from one enemy ZOC to another. In reality, if opposing units were not equipped with sufficient anti-tank capability, a limited degree of such Infiltration Movement was possible. In order to recreate this, Soviet Infiltration Movement may be allowed. This rule increases the historicity of the game, but shifts the balance somewhat to the Soviet's advantage.
12.31 A Soviet armor or mechanized unit may attempt to move directly from one enemy ZOC to another. The Soviet player rolls one die. If the result is greater than the total attack strengths of all Axis units exerting a ZOC into the target hex, the Soviet unit may move directly into the next enemy ZOC hex at an additional cost of 3 MP.
12.32 If the result is equal to or less than the total attack strengths of all Axis units exerting the ZOC, the attempt fails and the unit loses one step and may continue to move normally.
12.33 If the total attack strengths projected into the target hex is six or greater, it is not possible to conduct Infiltration Movement. Infiltration Movement may not be attempted into hexes in which a ZOC is exerted by an Axis armored, assault gun, or panzergrenedier unit regardless of the total attack strengths exerted.
12.34 Soviet units may not attempt Infiltration Movement across minor or major river hexsides, regardless of the presence of bridges or pontoons. Where the attempt is otherwise legal, road/railroad movement costs may be used in an Infiltration Movement attempt.
12.35 Axis units with effective attack strengths of 0 even if armored/assault gun/panzergrenedier, do not block Infiltration Movement. If the target hex of an Infiltration Movement attempt has a ZOC with an effective attack strength of zero, the additional 3 MP cost is ignored.
12.4 Hitler's Desperate Defense Order
As is well known, Von Paulus and the 6th Army had been issued orders by Hitler himself to hold Stalingrad at all costs, which denied any attempt at a breakout, and restricted 6th Army's ability to maneuver. If you would like to represent this historical restriction, apply this rule. This rule is applicable only during Scenario #3: The Campaign Game.
At the end of Scenario 3, the Soviet player receives 10 VP for each Stalingrad urban hex containing a Soviet unit.