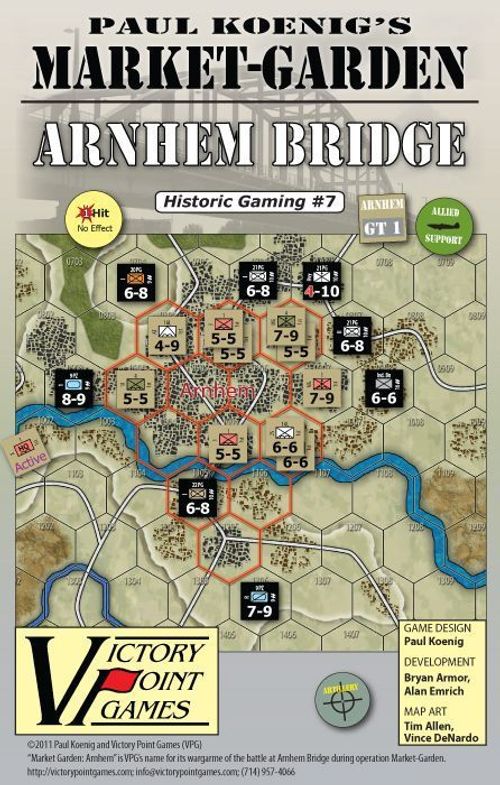
Paul Koenig's Market Garden: Arnhem Bridge
Paul Koenig's Market-Garden: Arnhem Bridge Rulebook
Table of Contents
Table of Contents
- Standard Rules
- Arnhem Bridge Exclusive Rules
- Optional Rules
Standard Rules
[0.0] Using These Rules
New gaming terms, when they are initially defined, appear in dark red lettering for quick referencing.
The instructions for this game are organized into major "Rules" sections as shown in large green CAPS font, and represented by the number to the left of the decimal point (e.g., Rule 4.0 is the fourth Rule). These Rules generally explain the game's components, procedures for play, the game's core systems and mechanics, how to set it up, and how to win.
With each Rule, there can be "Cases" that further explain a general concept or basic procedure. Cases might also restrict the application of a Rule by denoting exceptions to it. Cases (and Subcases) are an extension of a Rule shown in the way that they are numbered. For example, Rule 4.1 is the first Case of the fourth Rule; and Rule 4.1.2 is the second Subcase of the first Case of the fourth Rule.
Important information is in red text. References to examples of a Rule or Case are in blue text and this font.
Text in shaded boxes provides the voice of the game's designer, who is addressing you to explain an idea or concept that is not, itself, a Rule or a Case.
[1.0] Introduction
Paul Koenig's Market-Garden is a series of small-format, competitive introductory-level wargames covering the critical first three days of Operation Market-Garden, where the Allies attempted to seize a series of bridges in Holland and end WWII before Christmas. Each game in the series covers a separate bridge: Arnhem, Nijmegen, and Eindhoven. As a player, you must command your German or Allied forces so as to capture key objectives on the board while keeping your casualties down (and your opponent's casualties up).
The design of these games is based upon Paul Koenig's D-Day Series, which in turn was loosely based upon Paul Rohrbaugh's Blood & Steel, first published by Micro Design Group (MDG) and later by L2 Design Group.
[2.0] Game Equipment
- 1 11x17" map with tables
- 1 sheet of 40, double-sided game pieces
- 1 sheet of 28, double-sided markers
- 1 Standard Rules booklet
- 1 sheet of Exclusive Rules covering the specifics for each bridge
Note that players will need to provide a 6-sided die and an opaque cup to play the game.
[2.1] The Game Map and Scale
Each game map in this series represents the area around a Market-Garden bridge where the actual campaign took place. A hexagonal grid has been superimposed to regulate movement and the position of the playing pieces. A unit must always be located in a specific hex. Explanations are on the Terrain Effects Chart, which, along with other tracks and tables, is located on the game map itself.
Each hex represents approximately 600 meters and each (day) turn is 4½ hours of real time. Each night turn is 10½ hours of real time.
The map is divided into hexagons (we call them "hexes" for short) which define units' positions just like the squares of a chessboard. The map also shows important terrain such as woods, rough, towns, cities, roads, rivers, streams, and so forth.
[2.2] The Playing Pieces
The playing pieces represent the actual military units that fought in this campaign. The numbers and symbols on the playing pieces represent the strength and type of unit represented by that playing piece. The German player controls the German (black and gray) units. The Allied player controls all of the other (beige and green) units. Each military unit's set up hex or Game Turn (GT) of entry is printed on its reverse side. The game's markers help remind players of certain information and unit statuses during play.
Sample Game Pieces and Unit Type Symbols (pictured): Headquarters, Infantry, Heavy Weapons, Armor (Panzer), Armored Infantry, Armored Reconnaissance, Anti-Tank, Glider Landing Troops, Parachute Troops; Combat Strength and Movement Allowance; German unit and Allied unit; Artillery Support marker; Allied Support marker; 1 Hit marker (front) and 2 Hits marker (back).
The non-marker playing pieces are hereafter referred to as "units."
Unit Sizes:
- Division (9,000 to 18,000 men)
- Brigade (2,000 to 4,000 men)
- Regiment (1,500 to 3,000 men)
- Battalion (450 to 700 men)
- Company (90 to 170 men)
Unit size is provided for historical interest only and has no effect on game play.
Historical Designations (United Kingdom / German): 11th Battalion / Panzer Battalion; 4th Regiment / 10th Panzer Rgt.; 1st Airborne Division / 9SS Division.
Unit identification is used for determining that unit's formation (i.e., the Brigade or Regiment identification above its Unit Type Symbol box). When a Headquarters activates, all the units of that formation can conduct their activities for that turn.
Combat Strength measures a unit's value in battle as expressed in Strength Points; higher numbers are stronger.
Movement Allowance determines how far the unit can move expressed in Movement Points; higher numbers are faster.
The six-sided die that you must provide has nothing to do with the movement of units.
The Rule of Halves: Whenever a value is halved for any reason, always round fractions up!
[3.0] Setting Up the Game
- Place both players' HQ units, for units starting on the map, together in a single opaque container (a.k.a. the Command Cup), mix them, and set that cup aside within easy reach.
- The German Player sets up first as indicated on the back of each German unit and / or the game's Exclusive Rules. The German Player also sets aside his Artillery Support markers.
- Then the Allied player sets up any of his on-map units as indicated on their reverse side and the game's Exclusive Rules. Some other units for both players may be brought into play as Reinforcements (see that game's Exclusive Rules). The Allied player also sets to one side his Allied Support markers.
- Set the remaining markers, plus the die, within reach of both players.
- Place the Game Turn marker in the number 1 box on the Game Turn Record Track.
After following these Steps to set up the game, the players begin the game and follow the Sequence of Play (below) until Game Turn 10 is completed.
[4.0] Sequence of Play
How the Turns Work: The players jointly conduct each Game Turn, which consists of a number of Phases that are followed in the exact order listed below. All actions in one Phase must be finished before the next Phase can begin.
- Paratroop Landing Phase (5.0): The German Player conducts Anti-Aircraft Fire against Allied reinforcement units arriving this turn (see Exclusive Rules).
- Support Phase (6.0): Day turns only! Artillery and Allied Support markers might be allocated to either player.
- Operations Phase (7.0): Day turns only! Return all HQ counters to the Command Cup. Add any new HQ counters to the cup for formations that arrive this turn. Players alternate drawing an HQ unit from the cup. When it is drawn, any or all of the units in that formation that are on the map may conduct Movement and / or Combat.
- German Redeployment Phase. Night turns only! The German Player (only) may move any or all of his units that are not adjacent to enemy units, up to 1/2 of their Movement Allowance.
- Housekeeping Phase. Advance the Game Turn marker or, if the last turn is completed, determine the winner according to the Victory Conditions (12.0).
[5.0] Paratroop Landings
On some turns (depending on which game in this series you are playing), before conducting the Support Phase, the Allied Player receives his newly landing reinforcements. The German Player shoots at these units before they enter play.
Procedure
The German Player conducts a special Defensive Fire (abstractly simulating anti-aircraft fire and small-scale attacks on the landing sites not represented by counters in the game). The German Player must roll one die for each Allied unit arriving as a reinforcement during the Paratroop Landing Phase, consulting the Paratroop Landing Table on the map.
For Example: On Game Turn 6 in the Nijmegen game, two Allied units are scheduled to arrive. For each unit, if the German Player rolls a die. One a 1 or 2, he misses and there is no effect on that unit. If he rolls a 3 or 4, the targeted unit suffers 1 Hit. On a 5, it suffers 2 Hits. On a 6, the unit fails to arrive (or any of many reasons; e.g., lost, destroyed).
Exclusive Rules: See that game's Exclusive Rules for a complete listing of Allied reinforcements by Game Turn, plus any special rules that may apply to the Paratroop Landings.
[6.0] Support Phase
At the beginning of each Day Turn, the German Player rolls to determine how many Artillery Points the German side receives that turn. Then the Allied Player rolls for his Allied Support Points for that turn. Artillery and Support points are used in combat to alter the strength of an attack or defense.
[6.1] Artillery Points
The German player rolls one die. On a 1 or 2, he receives 1 Artillery Point. On a 3 or 4, he receives 2 Artillery Points. On a 5 or 6, he receives 3 Artillery Points.
[6.2] Allied Support Points
The Allied player receives his Support Points (i.e., air assets). He rolls one die. On a 1 or 2, he receives 1 Support Point. On a 3 or 4, he receives 2 Support Points. On a 5 or 6, he receives 3 Support Points.
When used, Artillery and Allied Support markers are placed anywhere on the map.
[7.0] Operations Phase
Make sure that all of the HQ units for formations that currently have any units on the map are in the Command Cup and mixed thoroughly.
Procedure
HQ units are drawn blindly from the Command Cup by either player (or both players alternating, as desired). One is drawn at a time and that formation is activated. When that formation's activation is complete, another HQ unit is drawn from the Command Cup and this process is repeated until the cup is empty. After that last formation has completed its activation, the Operations Phase is over.
General Rule
When an HQ is drawn, all of its formation units on the map immediately become "Active." You can easily identify a formation by the color inside the box at the center of each unit (including the HQ). Units in the same formation share the same color.
Do not draw the next HQ unit until all of the units in that formation have had their opportunity to conduct an Operation for that turn. Once activated, a formation's individual units may perform one of the following "Operations:"
- Movement (the unit may spend its full Movement Allowance and conduct Close Combat, as per 10.0);
- A Full Fire Attack (with some exceptions, the unit does not move but can conduct a Full Fire Attack upon an adjacent hex); or
- Combined (the unit may both move 1/2 its Movement Allowance - including entering Close Combat - and conduct a Mobile Fire Attack which uses only 1/2 its Combat Strength; Important: see 8.4)
[7.1] Wait Your Turn, Soldier
Only units of the currently Active formation may perform an Operation. They do so in any order desired, but each unit must complete its Operation before the next unit in that formation undertakes its own.
[7.1.1] Exception: Firing in Concert
Only units performing the same type of Operation and that are firing on the same target hex can perform them jointly during that turn.
For Example: A unit conducting Combined Operation could not sidle up to an enemy unit and join another friendly unit that is conducting a Full Fire Operation in an attack against it. They can both attack that enemy unit on the same turn, but they must do so separately, as they are performing different Operations.
[7.2] Next!
All Operations for the units in the active formation must be completed before another HQ unit is drawn from the Command Cup to activate the next formation that turn. Once the last HQ unit is drawn and that formation has completed its Operations, the Operations Phase ends and the Housekeeping Phase begins.
[8.0] Movement
A player may move none, some or all of his Active units through any combination of hexes up to the limit of their printed Movement Allowance, paying the appropriate Movement Point cost to enter each hex or cross certain hexsides. A player does not move any of the opposing player's units!
Procedure
The player moves his units from hex to adjacent hex in a continuous path of hexes. Skipping or jumping over hexes is prohibited. Units can be moved in any direction or combination of directions.
[8.1] Effects of Terrain on Movement
These are summarized on the Terrain Effects Chart on the map. In addition to the Movement Point (MP) cost to enter a hex, there might also be an additional cost (+MPs) to cross certain hexsides. These costs are cumulative. If a unit cannot afford to pay the total MP cost to move to an adjacent hex, it cannot enter it.
For Example: A unit wants to initiate Close Combat (2 MP) in a hex containing an enemy unit across a slope hexside (+1 MP to cross) in a hilltop hex (3 MP to enter). The total MP cost would be 6 MPs. If it had only 3 MPs remaining of its Movement Allowance, it could not enter that hex (and therefore not initiate that Close Combat attack).
[8.1.1] Prohibited Terrain
Units may not move across River hexsides except at Bridges) nor off the map into "imaginary" adjacent hexes.
[8.1.2] Road Movement
Road movement (i.e., from one hex containing a road to an adjacent hex connected by that same road through a road hexside) always reduces the cost to enter the adjacent hex to 1 Movement Point regardless of the terrain in that hex or the hexside crossed to enter it.
[8.2] Stacking Limit
Players may stack up to two units in a hex. This applies to both players collectively and at all times. Units may never be placed, moved or Retreated (11.0) in violation of this limit.
Thus, a hex with two friendly units in it cannot be entered by an enemy unit seeking to initiate Close Combat in that hex (as per 10.0), as that hex is already fully stacked.
[8.3] Effects of Enemy Units on Movement
Units need not stop when moving adjacent to enemy units (i.e., there are no 'Zones of Control' in these games). They must stop when entering a hex with an enemy unit and immediately engage in Close Combat.
Movement Example: The British unit moves along connected road hexsides for 1 Movement Point (MP) per hex. Note that the German unit in no way hinders the British unit's movement.
[8.3.1] Blocked Entry Hexes
If an enemy unit blocks a reinforcement's entry hex, that reinforcement unit can either enter at any hex adjacent to the prescribed entry hex OR conduct normal Close Combat against the blocking unit. If the reinforcement unit is forced to Retreat (9.2.3), then Case 11.1 applies and that unit never arrives. A reinforcement unit cannot conduct a Full or Mobile Fire Attack from off the map.
[8.4] Combined
Units may move up to half of their printed Movement Allowance and then conduct a Mobile Fire Attack (at half its Combat Strength) or vice-versa (i.e., shoot first and then move).
[8.4.1] Operations Unity
A unit cannot move, conduct a Mobile Fire Attack, and then move again; all of one takes place first, and then all of the other takes place, for each unit conducting a Combined Operation.
[8.4.2] Close Combat
Units conducting a Combined Operation can perform Close Combat if they have sufficient Movement Points to do so, but they should make their Mobile Fire Attack before moving if they do so (see 10.3).
[9.0] Fire Combat
Friendly units may attack enemy units using three different kinds of Fire Attacks (Full, Mobile, and Close). Units must be adjacent to, or in the same hex as, the target unit in order to attack it.
The player conducting the Fire Attack is dubbed the "attacker;" the player who is receiving that attack is the "defender."
Procedure
For each Fire Attack, perform all of the following Steps in order:
- Preparation: The Attacker indicates the target hex containing at least one enemy unit; he then indicates which attacking unit or units are conducting that single type of Fire Attack (i.e., Full, Mobile, or Close; different attack types cannot be combined) and adds their Combat Strengths together to determine the Attack Factor (AF) for that battle. Units conducting Mobile Fire (8.4) have their Combat Strengths halved individually before they are totaled.
- Defensive Support: The Defender may assign his available Artillery or Allied Support Points to the battle.
- Offensive Support: The Attacker may assign his available Artillery or Allied Support Points to the battle. If available to him, each player may commit up to one Artillery or (for the Allied player) up to two Allied Support Points to each battle that turn, whether attacking or defending. Defensive Support lowers the Attack Factor (AF) for that battle by 1 per Point assigned, Offensive Support increases it (thus, only the net difference applies).
- Terrain Effects: Terrain considerations might also modify the Attack Factor, as per Case 9.1. If this is a Close Combat, this "Terrain Effects" Step becomes a Defensive Close Fire Step (see 10.0).
- Combat Resolution: The Attacker rolls one die. If the roll is less than the net Attack Factor (AF), one "Hit" is scored on the Target unit. If the roll is equal to the AF, an "Exchange" occurs where both sides receive a single Hit. If the roll is greater than the AF, the result is a "Miss."
[9.1] Terrain Effects on Combat
Fire Combat is prohibited across River hexsides. AF modifiers are listed below:
- +1 AF if the target hex is a Clear hex.
- -1 AF if the target hex is Woods or Town.
- -1 AF if all Attacking units are across Stream hexsides from the Defender (cumulative with other terrain effects).
- -1 AF if all attacking units are across Slope hexsides from the Defender (cumulative with other terrain effects). Exception: A unit on a Hilltop hex may fire across a Slope hexside to an adjacent hex without penalty.
- -2 AF if the target hex is a Rough or City hex.
- -3 if the target hex is a Hilltop hex.
For Example: A defending unit receives a Full Fire or Mobile Fire Attack. Because that defending unit is in a Woods hex and all of the Attacking units are across Stream hexsides, the Attack Factor for that battle is reduced by two (-2).
Terrain Effects modify a single attack's total (i.e., combined) Attack Factor, not each individual unit's Combat Strength.
[9.2] Hits
A unit that receives a Hit has a 1 Hit marker placed under it; if it already has a 1 Hit marker under it, then it is flipped over to its 2 Hits side. If a unit with 2 Hits suffers another, it is eliminated and removed from play.
[9.2.1] Hit Effects
There is no penalty if a unit has only 1 Hit; units with 2 Hits have their Combat Strength reduced by one (-1); i.e., "-1 CS." This reduction is made after any halving effects.
[9.2.2] Targeting
When there is more than one unit participating on a side that suffers a Hit in given battle, the Active Player conducting Operations chooses which specific unit receives that Hit.
[9.2.3] Hits and Retreating
A player's forces that suffer a Hit in a Full or Mobile Fire attack may Retreat (11.0). A player's unit that suffers a hit in Close Combat must Retreat (exception, see 11.2); if this occurs to both sides due to an Exchange, the Defender's Retreat is conducted first - and see 11.2).
[10.0] Close Combat
One friendly unit may enter a hex containing one enemy unit via movement (i.e., during a Movement or Combined Operation only) for a cost of two additional (+2) Movement Points. The moving friendly unit must immediately engage in Close Combat by alternately conducting Close Fire Attacks in "rounds" with the enemy unit with each side using their unit's full Combat Strength until that hex no longer contains two hostile units.
Procedure
Close Combat is conducted normally through Step 3 of the Combat Sequence. Step 4 of the Combat Sequence is changed to the Defensive Close Fire Step. During this Step, the defending unit must conduct a Close Fire Attack against the attacking unit. If that Defensive Attack inflicts a Hit (even in an Exchange), then the attacking unit conducts a Retreat (11.0) and that Close Combat is over (exception, see 11.2).
If the Defensive Close Fire Attack missed, then the attacking unit must conduct a Close Fire Attack against the defending unit (as per Step 5 of the Combat Sequence). If this Offensive Attack inflicts a Hit (even in an Exchange), then the defending unit must conduct a Retreat (11.0) and that Close Combat is over.
If the Offensive Close Fire Attack missed, then either player (beginning with the defender) has the option to Retreat (11.0) and end that Close Combat. If both players decide to stay, then conduct another Round of Fire by repeating Steps 4 and 5 of this Close Combat Sequence (including the option to retreat between Rounds of Fire).
[10.1] Terrain Effects on Close Combat
Terrain has no effect when determining either side's Attack Factor during a Close Fire Attack!
[10.2] Support Points in Close Combat
In Close Combat, the net value of support points remains consistent and in full force modifying both sides' AF as they fire throughout every round of battle.
For Example: If Allies have a 1 Support Point net advantage, then each Round the Germans will have -1 AF and the Allies will have +1 AF.
[10.3] The End
A unit that initiates a Close Combat battle must end its turn after the battle's resolution. It may not initiate further movement or Fire Attacks that turn.
[11.0] Retreats
Each Hit in battle can prompt a Retreat. Units are always Retreated by their owning player into an adjacent hex not occupied by enemy units (nor friendly units in violation of the Stacking Limit, see 8.2). Units that must Retreat (9.2.3) but cannot are eliminated instead.
[11.1] On the Edge
Units can retreat off of the edge of the map. If they do, they cannot re-enter play but they are not considered eliminated for victory purposes.
[11.2] Capture!
An undamaged attacking unit (only) that suffers an Exchange result from Close Fire may opt to take a second Hit in lieu of Retreating to hold that ground. Otherwise, that hex will be left vacant due to both sides being required to Retreat as per 9.2.3.
[12.0] How to Win
At the conclusion of the last turn of the game, both players determine how many Victory Points (VPs) they have earned according to the schedule provided in that game's Exclusive Rules. The player with the higher total VPs is declared the winner.
Arnhem Bridge Exclusive Rules
Arnhem Bridge - 17-19 September 1944. These Exclusive Rules are for the Arnhem Bridge game only. They supplement the Standard Rules and provide the specific details required to play this specific game.
[4.0] Sequence of Play
Paratroop Landings
The historical Drop Zones for the British airborne units are located off-map to the north. The historical arrival times of British reinforcements have been calculated as "off-map movement" to reach the game map from these Drop Zones. When a British reinforcement arrives (not the starting units), the German Player rolls on the Paratroop Landing table normally, prior to the unit entering the map (representing on-going fighting at the drop zones):
On a 1 or 2, the unit arrives intact; on a 3 or 4, it arrives with one Hit; on a 5, with two Hits; and on a 6, it never arrives but does not count towards Victory Points).
[7.0] Operations Phase
The German 16th v infantry battalion is an independent unit. The German Player may activate it with any German HQ, but it can only be activated once per turn.
[8.0] Movement
[8.5] Reinforcements
Both players receive reinforcements during the course of play.
Procedure: Arriving HQs are placed in the Command Cup before the Support Phase. Units enter the map through one of the hexes listed via a Movement or Combined order.
Game Turn 1: When activated, Allied starting units enter the map via any of the four roads on the west (left) side of the map, north of the Lower Rhine River. These Allied starting units do not roll on the Paratroop Landing Table (as described in 4.0, above) as they had the element of surprise.
Game Turn 2: When activated, the German Recon/9th v unit arrives as a reinforcement via the road at hex 0104. The German Player wants to exit this unit off the bottom map edge by the end of the game (see 12.0).
Game Turn 3: When activated, the three units of the 19/9th v and the three units of the 21/10th v arrive via any of the four roads on the east (right) side of the map. Since this is a Night turn, their Movement Allowance is halved.
Game Turn 6: When activated, the Allied Player receives the remaining eight units of the British 1st Airborne Division. The German Player rolls on the Paratroop Landing Table for each unit before it enters the map. These units enter the map via any of the four roads on the west (left) side of the map, north of the Lower Rhine River.
Game Turn 7: When activated, the three units of the 10/9th v arrive via any of the four roads on the east (right) side of the map. Since this is a Night turn, their Movement Allowance is halved.
[8.5] Arnhem Bridge
Units can conduct Full Fire Attacks across Arnhem Bridge at ½ Strength.
[12.0] How to Win
At the conclusion of the last turn of the game, both players determine how many Victory Points (VPs) they have earned according to the schedule below. The player with the higher total VPs wins. Important: Arnhem contains quite a few city and town hexes. Therefore, the Standard Rules are amended thus: only specific objective cities and towns count towards Victory Conditions. These hexes are identified by their red hex border.
- 2 VPs for each Objective City hex occupied by a friendly unit at the end of the game
- 1 VP for each Objective Town hex occupied by a friendly unit at the end of the game
- 1 VP for each eliminated German unit (Allied Player only)
- 1 VP for each eliminated Allied unit (German Player only)
- 1 VP for each German unit remaining on the map at the end of the game, regardless of Hits (German player only)
- 1 VP for each Allied unit on the map at the end of the game, but only if it has no Hits (Allied player only); damaged Allied units still in play are worth 0 VPs
- 5 VP for occupying both sides of Arnhem Bridge (i.e., hexes 1005 and 1105) at the end of the game; this is in addition to the points for those specific Objective hexes
- 10 VP if the German Player fails to exit the Recon/9th v unit (pictured on the sheet) off the bottom portion of the map before the end of the game (Allied player only)
It is vital for the Germans to have this unit available at Nijmegen bridge to the south. Failure to exit this unit would have a major effect on the larger campaign.
Exiting the Map: The Recon/9th v can exit the map via any road hex along the bottom map edge, spending 1 Movement Point at that hex to exit off the map and, after doing so, cannot re-enter play. The Allied Player does not receive the 10 VP if the unit is exited via Retreat (11.0).
Designer's Notes
The key to the Allies winning might be simply preventing the Recon/9th v from exiting the map. This is worth a whopping 10 VP. At all cost, try to kill this unit! In addition, hammer at the Germans mercilessly. Use Full Fire whenever possible. Try not to be tempted to use multiple units in a single attack. The automatic Hit is attractive, but a judicious use of firepower could lead to maximum casualties. Finally, push for the bridge and surrounding objective hexes with all speed.
The keys to a German victory are twofold: 1) The Recon unit must be exited! Failure to do this is catastrophic. Leave a temporary hole in your line if you must, but don't let this unit get killed! And 2) Hold Arnhem at all costs. If the British take both sides of the bridge, you're in big trouble. A final word of advice: when attacking, search out intact (undamaged) Allied units. It is far better, in terms of Victory Points, to give every Allied unit a single Hit than to kill only a few.
Optional Rules
These Optional Rules are provided for any game in this series. They add additional realism and gameplay options, but at the cost of some added complexity. Players may use any or all of them in any combination desired, as agreed upon before commencing play. These rules supersede the Standard Rules when there is a conflict.
[14.0] Optional Rules
[14.1] Leadership
Set aside the Leadership marker with the other Support markers during set up (3.0). On Day Turns, before rolling for other Support points (e.g., Artillery), both players roll off to see if either side gains possession of the Leadership marker.
Gaining the Leadership Advantage (Procedure): If one player rolls at least two higher than the other, the higher-rolling player receives the Leadership marker and may keep it until he "spends it" (see below) or it is seized from him by the other player using the above procedure on a later turn. If the rolls are tied or there is only a one point difference between them, the Leadership marker remains where it is.
The player with the Leadership marker spends it (returning it to the unused stock of Support markers) by performing one of the following powerful Leadership Feats:
- Automatic Activation: Use the Leadership marker to automatically activate the HQ unit of your choice. Simply remove that HQ unit from the Command Cup and activate its units.
- Battlefield Leadership: Re-roll any combat die roll - OR - ignore a retreat result in Close Combat and continue the battle there.
- Force March: Double the Movement Allowance of any one Activated unit. If used during a Combined Operation, that unit may move up to its full Movement Allowance and still Fire.
- Receive Corps Artillery: Use the Leadership marker in a single battle to count as one additional (+1) Support point.
- Temporary Attachment: Any one friendly unit whose formation has not yet been Activated that turn can be "attached" to another HQ at any time during the other HQ's Activation. It cooperates fully with that formation and not with its normal parent HQ unit for that turn only.
- Unit Recovery: Reconstitute one eliminated unit from any formation when it is Activated, and place it back on the map.
Reconstituted Unit: When an eliminated unit is reconstituted, it is returned to play and placed on the map with a "2 Hits" marker under it (i.e., it's still in a bad state, but at least it returns to the map, which is very important). It cannot conduct an Operation on the turn that it is reconstituted.
Placement: When returned to the map, newly reconstituted units must be placed in one of the following locations (i.e., this is where the unit "rallies" and regroups):
- A hex not adjacent to an enemy unit, and with another (single) unit from its formation.
- An empty hex not adjacent to an enemy unit that is adjacent to a hex containing one or more units from its formation.
- A Town or City hex that is occupied by a (single) friendly unit from any formation and at least three hexes away (i.e., two intervening hexes) from the nearest enemy unit.
If no such location exists, that unit may not be reconstituted and brought back into play at that time; that replacement opportunity is "lost."
[14.2] Interdiction
The Allied player, may, after rolling for Support Points but before the drawing of the first HQ unit, trade in up to three of his Artillery or Allied Support points (or the Leadership marker, if in his possession) for an equal number of Interdiction markers. He must place them on the map, no more than one per hex. For the duration of that Game Turn (only), that interdicted hex costs both sides two additional (+2) Movement Points to enter or exit.
Remove all Interdiction markers at the end of the turn.
[14.3] Indirect Fire
Heavy Weapons companies (only; as indicated by their red combat value, the arrow in their symbol box, and "Hvy" on their side) can fire "indirectly" at up to two hexes distance, if desired.
- Indirect Fire can only be conducted as a Full Fire Attack (not as Mobile Fire).
- Units conducting Indirect Fire do so at half strength.
- The -1 Attack Factor penalty if all attacking units are across a Stream from the defender does not apply if all attacking units are using Indirect Fire.
- Heavy Weapons units can fire across River hexsides.
- There are no "line of sight" limitations for Indirect Fire.
- Units conducting an Indirect Fire attack need not suffer a Hit from an Exchange result unless the defending force in that battle included either a Heavy Weapons unit or has at least one Support Point allocated to its side. That is, the defending force needs something with sufficient range and striking power to "Hit back" at the attacking unit that is using indirect fire.
[14.5] Overruns
A unit with a Movement Allowance of 10 or more can continue moving after initiating a Close Combat attack - and it can even make multiple Close Combat attacks in the same turn. The overrunning unit's movement must immediately cease if it suffers a Hit during a Close Combat that it initiated. That unit must complete its entire move before another Active unit can commence its movement.