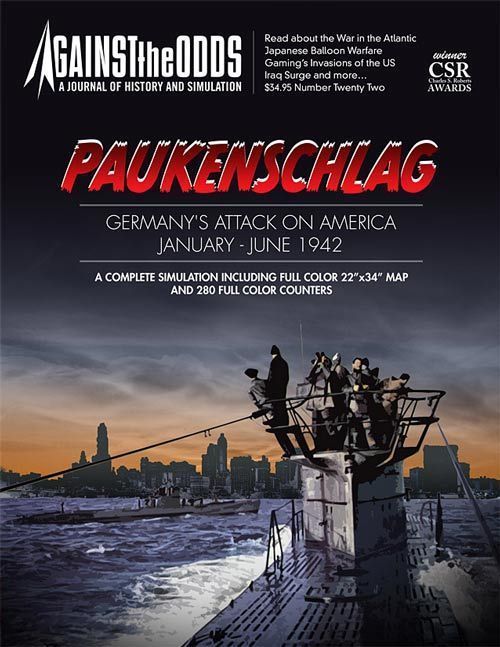
Paukenschlag
Paukenschlag Rulebook
Table of Contents
Table of Contents
- Read This First
- Counter and Marker Reference
- 1.0 Introduction
- 1.1 Game Scale
- 2.0 Game Components
- 3.0 Game Concepts
- 4.0 Supplies
- 5.0 Sequence of Play
- 6.0 Movement
- 6.1 Operational and Tactical Movement
- 7.0 Specific Position on the Grid (OSL and TSL)
- 8.0 Detection
- 9.0 Combat
- 10.0 Convoys
- 11.0 U-Boat Fuel
- 12.0 Aircraft
- 13.0 Random Events
- 14.0 Special Convoys
- 15.0 Reinforcements
- 16.0 Historical Setup
- 17.0 Variant – Scenarios
- 18.0 Victory
- 19.0 Designer's Notes
- Publisher Addenda (as of Oct. 21, 2008)
Read This First
We have organized the overall structure of these rules so that it introduces concepts following the sequence of play. They are written in a format known as the Case System. This approach divides the rules into Modules, each of which deals with an important aspect of the game. The Modules are numbered sequentially and have a title. Each Module is divided into Sections, treated as main subtopics within the Module. These are also numbered sequentially. Finally, most of each Section consists of Cases: the specific, detailed rules that govern the game. Their sequential numbering follows a logical progression based on the Module and Section of which the Cases form part. Look for these numbers to determine where a Case is located in the rules.
Example: 3.1.4 is the number of the fourth Case of the first Section of the third Module of the rules.
Learning to Play. Begin by familiarizing yourself with all the components listed for this game. Then, quickly leaf through the cards and rules, reading all the titles of the Modules and Sections. Set up a game scenario or part of a scenario (after you have read the appropriate Module) and play a test game against yourself. Try to refer to the rules only when you have a question, and remember that the numbering system we use makes it easier to look up the rules. Although a test game may take you one or two hours, it is the fastest and most enjoyable way to learn (except if you have an experienced friend to teach you). We do not recommend trying to learn the rules literally. We have written these rules in the most understandable way possible, but they are not designed to be memorized. Absorbing the rules as you play is the best approach to mastering this game. We are always open to suggestions on how to improve the understandability of our rules. Write to us (see the addresses in 2.0) if you have an idea about how we can communicate better with you.
Counter and Marker Reference
Page 2 of the source is a graphic reference with sample counters. Only its printed labels are reproduced here; the counter images are not.
Unit types shown: Naval Surface Unit; U-boat Unit; Aircraft Unit.
Convoy markers and their placement. Labels: Map ID; Map Speed; Map Formation; Map Formation; Ver 14.1 Map; Ships Box. Callout: "The Ships marker shown here records 10 for Convoy no. 5."
Other markers. Labels: Turn; Contact; Discovered; Ships Sunk; Tons Sunk 1; Tons Sunk 10; Tons Sunk 100.
1.0 Introduction
Note: the Introduction is reproduced in the Table of Contents above as printed; see also section 1.1 for scale.
1.1 Game Scale
Each strategic zone is 550-600 miles from one end to the other. Each operational square is 55-60 miles from side to side. Each tactical square is 6-7 miles from side to side. Each turn represents three days.1 Each U-boat represents one ship. Each convoy represents 10-50 ships. Each US naval unit DD, ASW, and WPG represents two ships; each US CV and BB is one ship. Air units represent squadrons of 6-12 aircraft. One turn in the game is one week.
2.0 Game Components
Paukenschlag includes the following components:
- One map measuring 56 x 86 cm
- 280 die-cut counters
- This rules booklet
The players will also need one six-sided die (d6) and one ten-sided die (d10) to play (provided only in the deluxe edition). Treat a die result (DR) of 0 as 10.
If any of these components are missing or damaged, write to:
Against the Odds Magazine, PO Box 165, Southeastern, PA 19399-0165 USA, Attn: Paukenschlag. Or send an e-mail to: [email protected]
We hope you enjoy this game. If you have any difficulty interpreting the rules, please write to the postal address above, or send an e-mail to [email protected], expressing your questions so that they can be answered with a simple sentence, word, or number. If you send a letter by mail, you must include a sealed envelope addressed to yourself to receive a response. We recommend e-mail as the best way to get a question resolved. Although we gladly receive comments and suggestions about the interpretation of game events, we cannot promise to answer questions about theory or design plans. You may also check the Against the Odds and Paukenschlag discussion forums at www.consimworld.com.
2.1 The Game Map
The game is played on a stylized map based on the grid squares that the German U-boats used. The Strategic Map shows the areas of the East Coast, the Gulf and the Caribbean Sea, as well as the Atlantic. The icons represent a variety of targets that represent airfields, factories and ports. The Operational/Tactical Specific Position grid (OSL/TSL) is used to represent a specific square from which a naval unit or U-boat begins its movement when detections, interceptions and combat are involved.
2.1.1 Map Cards and Tables
Also included is a Turn Record Track, which is used as an aid to record the game turn.
2.2 Game Pieces
The die-cut game pieces (or counters) should be carefully separated before play. The counters are of different types depending on the information that appears on each one. In general, the pieces represent one of three types of counters: naval surface units, U-boats, or aircraft. US aircraft units represent 6-12 aircraft. Most surface units and U-boats are one or two ships. German aircraft units represent six aircraft.
2.2.2 Combat Unit Type Symbol
There are different types of combat units: Aircraft, U-boats, Transports (TR), Destroyers (DD), Aircraft Carriers (CV), Battleships (BB), Anti-submarine "Trawlers" (AST), and Coast Guard Patrol Boats (WPG).
Air-Air Strength. Used between enemy and friendly air units during air-to-air combat. Units with a strength in a circle can only defend.2
Aircraft Type. Aircraft are grouped into three general classes. Within those classes, each type varies in its capabilities:
SEARCH
- P Patrol: Discover and attack U-boat
- E Recon or Anti-Sub: Discover or attack U-boat
- A Anti-submarine: Discover or attack U-boat
- R Reconnaissance: Discover only
BOMBER
- B Bomber: Discover or attack
- D Dive Bomber: Discover or attack at airfields
FIGHTER
- F Fighter: Discover or CAP3 or escort or attack (surface U-boat only)
The reverse side of an aircraft unit indicates the status of "Has Flown" (US) or "On the Ground" (German).
Note: Aircraft 0-47 of type "R" cannot fight (these units have no combat strength) and can only conduct Reconnaissance missions.
Combat and other symbols.
- Anti-Aircraft Strength. Used when attacking an enemy aircraft.
- Bombardment Strength. Used when a ship attacks enemy bases on land.
- Bombing Strength. Used by aircraft when attacking enemy targets (factories, air bases).
- Defense Strength. The capacity of a ship to resist damage and/or defend itself against attack from enemy aircraft or ships.
- Flotation Factor. Related to damage, this number is used to determine whether a ship survives an attack or is neutralized or sunk.
- Movement Points (MP). The number of areas/squares a unit can move on the map and the OSL/TSL.
- Surface Attack Strength. Used against other surface ships.
2.3 Markers
Markers are special counters used to record various game functions such as the Game Turn, Discovered, Lost Freighter, etc. See page 2 of this rules booklet for more information.
2.4 Dice
The game uses one six-sided die and one ten-sided die to resolve combat and other factors through which the performance of a combat unit will vary. In these rules, the abbreviations DR6 and DR10 are used to indicate the roll of a six-sided die or a ten-sided die, and DRM indicates the modifier to the die roll, a positive or negative number used to adjust the applicable DR. Unless otherwise stated, a D10 result of 0 is read as 10 (not zero).
2.5 Cards and Tables
Several cards and tables simplify and illustrate the game and produce results for certain game actions.
2.6 Game Terms
Strategic Map. The orange globe located at the top of the map represents the planning of movement and the general position of each player. The boxes located within this map are Strategic zones.
Operational Specific Position (OSL). The blue grid printed on the lower part of the map is used when opposing naval units end their movement in the same Strategic zone.
Tactical Specific Position (TSL). The same blue grid is also used when opposing naval units end their movement in the same square on the OSL. Combat and detection occur at this level.
Note: One grid, located on the map, is used for both the OSL and the TSL. Players first resolve all OSL actions to determine whether any combat will be resolved on the TSL. The TSL boxes with letters temporarily store game units from the OSL for deployment and the possible resolution of combat on the TSL (Sections 5.5 and 6.1).
Wolfpacks. The German U-boats operating as a group to track and attack Allied ships/convoys.
3.0 Game Concepts
Before continuing with the main body of the rules, there are several important concepts with which players should become familiar.
3.1 Stacking
There is no stacking issue in this game.
3.1.2 Enemy Units and Stacking
Opposing units may stack in the same zone or square.
3.2 Zones of Control
There is no Zone of Control in this game.
3.3 General Game Course
The game design is based on a movement system almost identical to the one the German U-boats and their adversaries used. It can be considered a kind of folding and unfolding system. Therefore, the game uses a Strategic Map where units move from one zone to another. When opposing naval units are in the same zone, the general position of each unit is determined on the Operational Specific Position grid (OSL). While naval units move on the OSL, opposing units may try to intercept each other or may avoid each other. When opposing units occupy the same OSL square, the game moves to the Tactical Specific Position grid (TSL) to determine their exact position, and any resulting combat is resolved. In a similar way to what happens on the OSL, units move and try to intercept or avoid each other on the TSL too. When enemy units end up in the same TSL square, or are within range of each other on the TSL, naval combat between U-boats and surface ships takes place.
For each zone on the Strategic Map where opposing naval units are located, the process described above is carried out. This can make a turn go slowly or very quickly. If a zone contains no enemy naval units, nothing much happens.
4.0 Supplies
There is no supply rule. Both sides are always supplied. However, see Module 11.0 regarding fuel limitations for German U-boats.
5.0 Sequence of Play
Each turn is subdivided into a number of phases. The game will alternate to and from the OSL and TSL grids once the Naval and Air movement on the Strategic Map has been completed.
5.1 Random Events Phase
One of the two players rolls a ten-sided die. The results will apply to one of the players for the rest of the game (see Module 13.0). The composition and destination of a new convoy is determined, if a marker is available (maximum of one new convoy per turn, see Module 10.0).
After movement has been completed, the areas where opposing naval units are located will change to the OSL grid for the game and possibly from there to the lettered TSL box for possible interception and resolution of combat again on the TSL grid.
5.2 Repair Phase
Hits on Air Bases and Ports may be removed (see Cases 12.5.4 and 12.5.5). Fighter units may be placed on Combat Air Patrol (CAP) missions (Case 12.1.2).
5.3 US Air Unit Movement Phase
Any eligible aircraft may now move only on the Strategic Map to attempt to Detect. If any U-boat is discovered, the game moves to the OSL (and perhaps the TSL) after Naval Movement has been completed. If a U-boat is discovered while on the surface, the aircraft may attack it immediately (Sections 8.4 and 9.9). The aircraft cannot discover a submerged U-boat. Air units may be placed on Combat Air Patrol (CAP). Air units on CAP attack any enemy Bomber that enters the zone on the next turn.
Note: If playing with the optional rules in Module 17.0, the German Air units alternate movement with the US units. The US player moves first.
5.4 Naval Movement Phase
Naval units move on the Strategic Map one stack/unit at a time, with the players alternating the movement of their units/stacks; the US player goes first each turn.
U-boats may be discovered if they are in a zone that contains an air unit. The US player rolls a D6. This indicates whether a U-boat is submerged or discovered, using the appropriate marker.
5.5 OSL/TSL Grid Sequence
Source heading: "Secuencia de la Rejilla de Posición Específica Operacional y Táctica (OSL/TSL)". The source prints the number 5.5 with no separate title; the title above is the translation of the heading that follows it in the source.
When opposing naval units end their movement in the same zone of the map on the Strategic Map, and when air units discover U-boats, the additional movement is completed using the sequences outlined below. First, use the grid to establish the Operational Specific Position (OSL). Mark the zone of the Strategic Map where there are opposing naval units with the Contact marker, and then remove these units to deploy them on the grid for OSL play.
-
Each player rolls two D10. All US ships and U-boats are placed in the position shown by the roll (see Section 7.1) of a D10 twice for each unit. Place them on the OSL.
-
Each player rolls another D10. The player with the higher result may decide to move first or second. This continues until opposing forces end up in the same square or the US ships leave the OSL. If this happens, return the units to the Strategic Map. U-boats remain undetected in the zone on the Strategic Map and contact is lost.
When U-boats and surface units end their movement in the same OSL square, the units are removed from the grid and placed in the lettered TSL box. While on the OSL, each U-boat may attempt to discover ships using Sonar (Section 8.1). The Allied player may attempt to detect the U-boats on the OSL with Huff/Duff4 (Section 8.3). If this fails, nothing happens in that round. If the detection of any surface ship is positive on the OSL, it is detected by all U-boats. All U-boats are subject to detection if Huff/Duff is used (Section 8.3).
Detection to engage the unit in combat must be made for undetected units when on the TSL grid. If detection fails on the grid during OSL play, nothing happens. The units involved return to the Strategic Map. If there are other Strategic Map zones with opposing forces, the OSL process begins again after marking the map zone with the Contact marker and deploying the units on the grid.
Note: See Case 6.1.1 for Secret Planning of naval units (recommended for non-solitaire and advanced play).
5.5.1 Combat
When opposing units end their movement in the same grid square during OSL play, they are placed in the lettered TSL box (see Section 7.1). The units are deployed for play on the TSL grids in the same way as units are deployed for OSL play. Each unit in the lettered TSL box rolls a D10 twice to determine its deployment in the initial grid square. If units are discovered during TSL play, combat may occur. The side that discovers the other first also fires first. Any escorting surface warship may then attack the U-boats (see Section 7.2). Note: It is very unlikely that a surface warship discovers a U-boat first. Each U-boat may fire four times (use the U-boat List).
Combats in other zones where opposing ships end their movement on the Strategic Map are resolved separately, one by one. When there are no more combat situations, continue with Section 5.6 on the Strategic Map.
5.6 German U-boat Movement Phase
U-boats (surface only) may move again on the Strategic Map (up to a second time if they moved under Case 5.4). Similar to Case 5.3, U-boats on the surface may be discovered and/or attacked if they are in a zone that contains an air unit. Any U-boat that is discovered during this phase is marked as such. Note: play using the OSL/TSL and combat will not be carried out until after this phase.
Designer's Note: This second movement capability represents the low US level of preparedness for fighting this war, as well as the aggressive patrols carried out with relative impunity by experienced U-boat captains during their "happy time".
The source document does not print a Section 5.7; the numbering goes from 5.6 to 5.8.
5.8 Air Unit Return Phase
Air units on the Strategic Map and on CAP now return to their bases.
Once all the previous phases have been completed, the game turn ends and the Game Turn marker on the Turn Record Track advances one space. All game activity must follow the indicated sequence of play and may not be carried out outside that sequence.
6.0 Movement
Movement in this game is relatively simple. On the Strategic Map, a Slow Convoy may move one zone per turn; a Fast Convoy, two zones. All other surface ships may move two zones per turn. A U-boat may travel one zone when submerged, or two zones when on the surface. Likewise, when moving on the OSL/TSL grid, U-boats move 2 grid squares when on the surface, and 1 when submerged. U-boats have limited fuel and must leave from the East edge of the map when it runs out (see Section 11.2).
Aircraft with a range of zero may only fly in the zone where the unit is based. Aircraft with greater ranges may fly beyond the zone where they are based (see 12.1). All air, naval and U-boat units may move in any direction or combination of directions while on the OSL or TSL (horizontal, vertical or diagonal). (See the correction to this point in Section 6.1, footnote 6.)
Rule added 03/07/2008: A Neutralized ship is "dead in the water" (it cannot move) in the round following the one in which it became Neutralized. In the next round and in subsequent turns, assuming it survives that time, the Neutralized ship has an MP of 1.
6.1 Operational and Tactical Movement
Movement on the OSL/TSL grids applies only to enemy naval units in the same Strategic zone on the game map. Speeds are the same per square: 2 MP (normal and surface) or 1 MP (neutralized and submerged). Exception: Some ships (DD 11 and 12, both BB, CV) may move 3 MP in their normal condition on the OSL/TSL grid. Before a U-boat moves, the German player must decide whether it is submerged or on the surface.
Naval units move on the Strategic Map one stack/unit at a time, with the players alternating the movement of their units/stacks; the US player goes first each turn. It is recommended that players turn their units/stacks slightly to differentiate those that have moved from those that have not. Note: See the Secret Planning variant of naval unit movement in Case 6.1.1 below.
Naval units and aircraft may move through other zones while on the Strategic Map without adverse effects. Only the final zone where movement ends, and the presence of enemy ships there, determines whether the OSL/TSL grid is used. If the zone where movement ends has no enemy ships, nothing further happens. If there are enemy ships, the units involved are removed and placed on the OSL grid, and each player determines its exact position using the D10. Units move in alternation until opposing ships end up in the same square or not. Units may move on the OSL/TSL grid horizontally or vertically, but not diagonally (see Section 10.2).5 If the units actually occupy the same OSL square, the TSL is used and the same procedure is repeated. Once all OSL and TSL grid play has ended, the surviving units are returned to their original zone on the Strategic Map.
6.1.1 Secret Planning (Variant)
During the planning phase, both players determine where their naval units or U-boats will end their movement on the Strategic Map. This is kept recorded in secret at all times on a sheet of paper. US Convoys must plan two turns in advance. German U-boats must plan only where the U-boat will end its movement in the current turn. Convoys and their assigned escorts must have a movement plan, and must move each turn. U-boats and naval units not assigned as escorts may decide not to move in a turn.
During US movement, the player announces in which zone each convoy ends its movement on the Strategic Map. The German player tells him whether there is any U-boat in the zone. If there is, go to Case 5.6.1 for the possible use of the grid in TSL and OSL play. During German movement the opposite occurs, and if any DD, Convoy or other Allied ships are present, Case 5.6.1 is used. Either player must declare the presence of his ships.
Written movement plans are only used to demonstrate movement if discussions arise over possible illegalities ("play fair!"). Until enemy forces end their movement in the same zone on the Strategic Map, no counter appears on the map, except air units. Note: Secret Planning is not used on the OSL and TSL.
The source refers to Case 5.6.1 in this variant, but no Case 5.6.1 is printed in this document.
7.0 Specific Position on the Grid (OSL and TSL)
After movement has been completed, if opposing naval units are in the same Strategic zone on the map, the German player decides whether to pursue or ignore them before the OSL is actually used. If he decides to pursue, the OSL, and possibly the TSL, will be used. If the German player decides to ignore any Allied ship in the Strategic Map zone, nothing happens on the grid that turn (no detection and no combat will take place). Exception: Air units in the same map zone, if lucky, may be able to attack surface U-boats (see Section 8.4).
7.1 Specific Position on the Operational Grid (OSL)
When the German player has one or more U-boats in the same map zone where there are Allied naval units, and decides to attempt detection and interception, play proceeds to the OSL determination grid. Mark the Strategic Map zone with the Contact marker and transfer all naval units, surface and U-boats, to the OSL/TSL grid area. Players roll a D10 twice to determine the position of each U-boat and naval unit on the OSL grid. The first die is always read as "tens"; the second die is always read as "units". Thus, if the first die is a 7 and the second a 9, the specific square on the OSL/TSL grid is 79. If the die shows a zero, roll again. If a convoy has assigned escorts, the convoy and its assigned escorts are all deployed in the same square.
7.1.1 OSL = Detection
Although units are on the map, they cannot be intercepted or attacked until they are discovered. U-boats, while submerged, are only discovered if an aircraft is lucky or if they are located with Huff/Duff (Module 8.0). Surface ships may only move on the OSL toward the same nearest edge of the map until a U-boat is discovered. Once a U-boat is discovered, the Allied player may move some or all surface ships on the OSL without restriction. Surface ships may also be discovered by a U-boat on the grid during OSL play. If this occurs, the U-boat may move toward them to intercept and attack during TSL play. Other U-boats on the OSL may move toward them to intercept and attack if the German player decides to use radio communications and accepts the risk of detection by Huff/Duff (Section 8.3). A U-boat that has no discovered target cannot move except to avoid being discovered. It may move freely once an enemy ship or convoy has been discovered. Each U-boat may attempt to discover before movement.
Since U-boats attacked in wolfpacks, all U-boats on the grid during OSL play (that can reach the enemy force) should try to end their movement in the same square as the convoy or enemy ship before using the TSL process. This should minimize the use of the TSL grid to once per turn. In other words, once a U-boat or U-boat stack enters a grid square during OSL play with any surface unit or stack, all are removed from the grid to the lettered TSL box. No other U-boat or surface naval unit may be included/placed in this particular lettered TSL box.
Example: If five U-boats are on the OSL grid, but only 3 are able to end their movement in the same enemy square before the convoy leaves the grid (the convoy escapes until the new turn), the TSL grid is used with only those 3 U-boats and combat is resolved with only those 3 (assuming all end their movement in the same square). This will also force the German player to coordinate his U-boats to reach the interception square as efficiently as possible.
The OSL grid play is carried out in a series of rounds:
- Determination of Initiative
- Detection
- Movement of the unit with Initiative
- Movement of the other party (not Initiative)
- Combat (TSL play only)
Any number of rounds may occur on the grid during OSL play until the opposing naval units end in the same square with one or more U-boats, and then they are moved to the lettered TSL box, or all surface units escape, leaving the grid during OSL play. Note: Even if surface units leave from different edges of the grid during OSL play, they are returned to the Strategic Map zone where the Contact marker is located.
7.2 Specific Position on the Tactical Grid (TSL)
When opposing naval units end their movement in the same grid square during OSL play, the units are removed and placed in the lettered TSL box. If a convoy or naval units leave the grid during OSL play before any U-boat can intercept and end its movement in the same grid square during OSL play, nothing further happens: the convoy/ship has escaped for this turn. Assuming that interception during OSL play has been successful, play proceeds once more to the TSL grid as follows:
-
Roll two D10 per convoy or naval unit, as was done for OSL play, to place the units on the TSL grid. A zero means roll the die again.
-
Units discovered on the OSL remain discovered on the TSL. If not detected while on the TSL grid, a unit must be discovered before it can be attacked. Before movement, either side may attempt to discover. If the attempt fails, a U-boat with no discovered enemy targets cannot move. This may happen if, during play, its original target is eliminated (use a piece of paper to note and keep track of which convoy/ship is discovered by which U-boat(s)). Likewise, DDs or ships that are not part of the convoy that fail to discover the U-boats cannot move and attack submerged U-boats, and may only move toward the same grid edge during TSL play. U-boats, before movement, must decide whether to move submerged or on the surface.
2a) At the start of each round, the players roll for initiative. The player with the highest DR has the initiative and goes first in the round. The players alternate movement and may attempt detection (if previous attempts have failed) before movement, any number of times, rolling once per naval unit or U-boat on the grid.
2b) Units continue moving and attempting detection on the grid until there are no units of one side left in the play area. There is no fixed number of rounds for TSL play. If opposing naval units fail to discover each other, or all surface units leave the grid without being detected/intercepted, nothing further happens to those units in that Strategic zone: they avoided contact or escaped for the current turn. Note: even if units leave from different edges of the grid, they are still returned to the Strategic Map zone where the Contact marker is located. If a U-boat starts movement in the same grid square as opposing units, combat is resolved before any movement, unless it is not detected. If it is not detected, then movement occurs first.
- If U-boats end their movement in the same square as discovered naval units, naval combat takes place. Naval combat can only occur on the grid during TSL play. The players resolve combat with the player who has the initiative going first, or, if he has failed to discover the enemy, the opponent goes first.
Combat is resolved with one unit at a time per square. Additional movement is prohibited. Once all combat has ended, the following combats between units in another, different lettered TSL box are carried out. Once all TSL actions have ended, the surviving units are returned to their zone on the Strategic Map and the Contact marker is removed.
Example: After both players have planned their movement, zones CB and DD on the Strategic Map reveal that enemy naval units are occupying each zone. The first zone chosen for resolution is CB, and that map zone is marked with the Contact marker. Both players must now determine the specific position of each naval unit on the OSL grid. It turns out that two convoys are in zone CB. Convoy A has an escort of 2 Destroyers. Convoy B has none. Both players roll a DR10 each to determine initiative. The US player gets the higher result. The dice are rolled twice for Convoy A, and the result is grid square 99, while Convoy B ends in grid square 12. The ships are placed on the grid. The German player has three U-boats, all on the surface. Each is rolled for, and they end in grid squares 83, 26 and 99. Since only U-boats can discover on the grid during OSL play (there is no Huff/Duff unit here), the German player rolls once per U-boat. In the first round, the U-boats fail detection. The US player moves first. Convoy A is slow, but it successfully leaves the OSL and returns to the CB area (the Strategic Map zone), escaping until the next game turn. However, Convoy B, also slow, moves one square to the right, to square 13. Since the U-boats failed to detect the convoy, they cannot move. Round two begins. The German player gains the initiative and one of the U-boats discovers Convoy B. Since all the U-boats are on the surface, they may move two squares toward the convoy. Convoy B moves one square. At some point, the U-boat that began in square 26 will end in the same square as Convoy B before any of the other U-boats. However, there is another U-boat that is able to reach the enemy before it leaves. So the German player delays the entry into the enemy square of the nearest U-boat until the other U-boat arrives. Eventually this happens and the grid is used for TSL play. The entire process is now repeated: initiative, detection, movement. Only when the U-boats end their movement in the same square as the enemy can they carry out attacks. After all combat has been carried out, resolution for Convoy B ends. The resolution for the second convoy would now take place. However, Convoy A has moved out of the Strategic zone and is safe for the current turn. If there is any other zone on the Strategic Map where enemy naval units occupy the same zone, the process is carried out using the OSL and TSL grid. Thus, in some turns the game turn may last a long time, while in others it will be short.
8.0 Detection
After movement of opposing naval units has ended in the same zone of the game map, the units involved are placed on the OSL grid following the procedure described above. Just because they are now placed in view, this does not mean they have actually been detected. When the TSL is used, both U-boats and certain surface ships may use detection devices.
Surface ships and U-boats may use Sonar (Active or Passive) and Radar to attempt detection. Sonar may be used to discover targets on the surface or submerged. Radar may only be used to detect targets on the surface. Air and surface units may also use Huff/Duff to detect U-boats (submerged or on the surface).
8.1 Active and Passive Sonar
Active and Passive Sonar allow units to detect each other on the grid during TSL play (also during OSL play for U-boats). U-boats may not use Passive Sonar when moving at their maximum speed on the surface (2 squares).
Active Sonar emits wavelengths that allow detection of others but at the same time allows the user to be detected by others that are listening. When Active Sonar is successful (regardless of who is searching), both the searcher and the prey are discovered, because both are listening. US ships with ASDIC may use it whether moving or not. However, trying to locate a U-boat that is moving reduces the chances of a successful detection.
Each eligible U-boat or surface naval unit may make one Sonar detection attempt per round. U-boats, however, may attempt once with Passive Sonar, and if it is not successful, again using Active Sonar, but ONLY if the Passive Sonar attempt has failed. Surface units may only attempt detection once using Sonar (Active or Passive).
8.1.1 Active Sonar
Any DD, WPG, AST or U-Boat may attempt to discover an enemy unit anywhere on the grid during TSL play up to a distance of 8 squares (not counting the square where the detecting unit is), using Active Sonar. For each unit attempting to discover the enemy, the player controlling it rolls a D6.
Notes: +2 if the surface naval unit attempting detection moves. +1 to all Active Sonar detection attempts in zones DN, DM, EB, EC, ED and EF. -1 DR if the U-boat attempting detection is on the surface:
| Result | Outcome |
|---|---|
| 1-4 | Enemy unit detected |
| 5 or more | Detection attempt failed |
A BB or CV may only use Active Sonar to discover a U-boat if both are in the same grid square during TSL play.
8.1.2 Passive Sonar
Any unit may attempt to use Passive Sonar to discover an enemy unit up to 2 squares away on the grid during TSL play if it does not move; if it moves, Passive Sonar may only be used against an enemy unit in the same square or the adjacent square. For each unit attempting detection, the player controlling it rolls a D6.
Notes: Subtract 1 from a Passive Sonar DR if the target has used Active Sonar earlier in that round. Add 1 to the DR if the unit attempting detection moves.
| Result | Outcome |
|---|---|
| 1-4 | Enemy unit detected |
| 5 or more | Detection attempt failed |
8.2 Radar
Both sides also have surface radar, which may be used to detect on the grid during TSL play. A U-boat must be on the surface to use radar. A submerged U-boat cannot be detected by radar. U-boats using radar have a range of only two squares. US ships have a range with radar of three squares. When a unit is discovered, place a Discovered marker on the unit. If the same unit moves out of range, the unit immediately ceases to be Discovered and the marker is removed.
8.2.1 US Radar (variant)
US BB, CV and DD units may search via radar up to 4 squares. Use the 3rd column to resolve the search at the 4th square of range.
8.3 Huff/Duff
Only the US has Huff/Duff,6 a device that was accurate in locating submerged U-boats by means of their radio transmissions. Ships or aircraft of any type with a red "H" printed on the right side (0-47, PBY, B 17 and B 24) have this capability.7 Whenever a U-boat has successfully discovered a convoy, the German player must decide whether to contact other U-boats that are also on the grid (at any distance) during TSL or OSL play. If the German player decides to do so, and if the U-boat is within a range of 7 squares of a naval unit on the grid with Huff/Duff, during TSL play, or if some air unit with Huff/Duff is in the Strategic Map zone and the players use the grid during OSL play, the US player rolls a DR6 for each U-boat on the grid. A DR of 1-3 results in the U-boat being discovered. If the DR is 4 or higher, there is no detection, but only the U-boat that discovered the convoy may move toward the convoy. All others must remain in place until some other warship is discovered. The US player rolls once for each unit with Huff/Duff present on the grid during OSL/TSL play. Note: Although aircraft are only deployed on the Strategic Map, an aircraft with Huff/Duff is assumed to also be on the OSL/TSL grid where the U-boats are located and may roll for detection.
8.4 Aerial Detection
Detecting a U-boat by aerial observation was a matter of considerable luck. If a U-boat is on the surface in a Strategic Map zone that also contains some aircraft, roll a D10 for each aircraft in the zone. A result of 1 discovers the U-boat. Any aircraft in the same zone capable of attacking U-boats (see 2.2.2) may then immediately attack the U-boat individually (Section 9.4). However, after the first attack, there is a possibility that the U-boat will submerge before subsequent attacks. Roll a D10. Add 1 to the DR for each attack made on the U-boat after the first. With a second modified D10 DR of 6 or more, the U-boat submerges and ceases to be Discovered, and any future attack is cancelled. The aircraft that discovered or attacked is turned to its "Has Flown" side once the detection/attack has been resolved. Note: Do not turn over any Bomber or Search aircraft that was unable to attack because the U-boat submerged.
9.0 Combat
All naval combat occurs only on the grid during TSL play when enemy naval units end their movement in the same square. Combat is considered simultaneous, and any result applies after both sides have attacked.
The types of combat are: U-boat Torpedoes, Anti-Submarine Warfare, Surface-Surface, Air-Surface and Air-Air.
9.1 U-boat Torpedo Combat
Torpedo combat occurs when a submerged U-boat fires its torpedoes at a ship on the surface. Each U-boat may fire four times at the same target, or fire at up to four targets, resolving each hit separately in a combat segment. As the U-boat uses up its torpedoes, it records the number of torpedoes remaining on the U-boat List. When none remain, the U-boat can no longer attack. The German player may take these units off the game map to avoid their loss by moving them across the Strategic Map to zones BE or CF and removing them from the map afterward.
To resolve Torpedo Combat, use a D6.8 Simply roll once for each torpedo fired using the U-boat Torpedo Combat Table. Note the type of target. If the result is equal to or less than the number indicated, a hit is assured.
If a hit occurs, roll the die for a possible failure each time a torpedo hits a target. If a failure result occurs, nothing happens to the targeted ship; the torpedo simply did not explode. If a hit is scored, use the Surface-to-Surface Combat Table to determine the number of flotation hits. Create an odds ratio by comparing the attack strength with the defense strength of the ship for each torpedo fired (equal to the U-boat Torpedo CF of 6). Add the hits together if more than one torpedo has hit. For example, two hits would equal 12. If the total number of hits is equal to or less than half of the target's Flotation Factor, the target is not affected (the damage control group has been able to contain the attack). If the total number of hits is greater than half, but not more than the Flotation Factor, the ship is neutralized and can only move up to 1 MP (if it only has 1 MP, as for example a Transport, it is dead in the water and cannot move at all). Turn the unit over to show this status. If the target was already neutralized, it is sunk and removed from the game. If the number of hits is greater than the Flotation Factor, the ship is sunk.
Rules added 03/07/2008:
- For each hit, roll another D10. If the DR = 0 the hit is a failure. Each hit against a Convoy is treated as if it were against a single TR unit. (Aside printed in the source, in the author's voice: "I cannot imagine why anyone would want to pump multiple torpedoes into a TR.")
- The DRM against a Convoy in Tight Formation should be +1 (not -1).
9.2 Anti-Submarine Warfare (ASW) Combat
ASW combat occurs when a ship marked with a red "A" printed on the left side of its counter uses its depth charges to attack a U-boat. The U-boat must be in the same grid square during TSL play as the attacking ship. A ship may attack only one U-boat. If there is more than one in the same square, the attacker selects which U-boat is being attacked. Only ships capable of ASW combat (DD, WPG or AST) may attack U-boats. Consult the Anti-Submarine Warfare Card, which shows with how many ASW factors they attack. Roll a D6 to resolve the attack. If a numbered result is obtained, a second D6 is rolled. If the second DR is greater than the number shown on the Table, the U-boat is destroyed. If the second DR is less than the Table result, and if the second DR was a "4", then the U-boat must surface (and possibly engage in Surface-Surface combat). Any other result of the ASW attack has No Effect on the U-boat.
9.3 Surface-Surface Combat
This form of combat occurs if a U-boat on the surface and an enemy ship fire at each other. Again, both must be in the same grid square during TSL play. Using the Surface-Surface Table, the players add and compare all the Combat Factors of the attacking surface units with the Defense Factor of the target to obtain an odds ratio (round any fraction in favor of the defender). Locate the appropriate odds column and roll a D10.9 The result is the number of hits. Combat is simultaneous, regardless of which hits are resolved first.
The player controlling a ship that is hit in Surface-Surface combat rolls a D6 and adds the hits of the attack. If the modified DR is greater than the ship's flotation/defense factor, the ship is turned to its reduced/neutralized side. If the ship was already reduced/neutralized, it is destroyed and removed from the game. If the modified DR is less than or equal to the ship's flotation/defense factor, nothing happens. Note: Subtract 2 from the DR if the ship hit is a BB. There is only one round of surface combat between enemy naval units.
Note: See Section 12.7 for shore bombardment by ships and U-boats.
9.4 Air-Surface and Air-Air Combat
Air-Surface combat occurs when an aircraft attacks a discovered U-boat that is on the surface (very rare) and bombs it, or when German long-range bombers drop their bombs on their targets.
German aircraft, and those based on an aircraft carrier, that arrive over their targets may or may not encounter enemy aircraft or AA fire. When German Bombers attack their targets, only one target may be selected. If there is AA fire or any enemy Fighter, these attacks are resolved in the following order, before the bombers' attack. Each round is considered simultaneous, with losses removed after each round:
- CAP Fighters vs. Escort Fighters. CAP fighters that successfully drive off the escort fighters skip this step and go to:
- CAP Fighters vs. Bombers.
- AA vs. Bombers.
After the CAP and AA combat has concluded, the bombing attacks are resolved. Roll once for each Bomber that survives and resolve the attack on the Bombing Table.
Units that are capable of attacking U-boats (see 2.2.2) that are in the same zone as a discovered U-boat may attack if they were not the aircraft that discovered the U-boat. Exception: PBY aircraft are the only air units that may do both. Using a D10, a DR of "1" sinks the U-boat that is on the surface. Any other DR has No Effect.
9.4.1 CAP Fighters Drive Off Escort Fighters
A Fighter on CAP may attempt to "drive off" escort fighters and attack an enemy bomber directly. For each CAP Fighter, the player controlling it rolls a D10. Modify the DR as follows (use everything that applies):
- -1 If the Air-Air Factor of the CAP Fighter is higher than the escort.
- -1 If there are more CAP Fighters than escort Fighters.
- +1 If the Air-Air Factor of the CAP Fighter is lower than the escort.
- +1 If there are more escort Fighters than CAP Fighters.
If the modified DR is 4 or less, the CAP Fighter has successfully driven off the escorts and may attack an enemy bomber instead of the escort. If the modified DR is 5 to 10, the CAP Fighter must engage the escort in combat in the 1st Round. If the modified DR is greater than 10, the CAP Fighter is destroyed immediately and cannot fight anyone.
9.4.2 Air-Air Combat Procedure
Units that engage in Air-Air combat are placed off the map in a position convenient to both players. Both players resolve combat in the 1st and/or 2nd Rounds of Section 9.4 above, forming pairs of enemy air units. Excess Fighters in the 1st Round may be held back for use against enemy Bombers in the 2nd Round. A given air unit may not have another (second or more) enemy air unit(s) deployed against it until the air units of both players each have at least one enemy air unit lined up against it. A given air unit may only be used in one Air-Air combat round. All combat within an Air-Air combat step is simultaneous. The players compare the Air-Air factor(s) against enemy units to obtain an odds ratio, and a D6 is rolled on the Air-Air Combat Table. Results are applied after both players have rolled on the Table.
9.4.3 US Long-Range Search Aircraft
The US B-17 and B-24 air units (marked with a unit type "E" on their counters) may be used either for Reconnaissance or for Combat missions, one or the other (not both in the same turn). If used on a Reconnaissance mission, the units may attempt to locate U-boats up to 2 zones away and use Huff/Duff (Case 8.1.2).10 If used for Combat missions, these air units have a range of 1 zone and may make attacks on U-boats under Section 9.4.
PBY aircraft are the only air units that may perform both Reconnaissance and Combat missions in the same turn.
10.0 Convoys
Each turn, a convoy may enter the game if a convoy marker is available. Only one new convoy may enter the game per turn. However, the number of convoys that may be in play in any turn is limited to those in the counter mix.
10.1 Convoy Determination
The Convoy Entry Table on the Map is used to determine the starting area for a new convoy. Until May, no convoy has DD escort. The Convoy Destination Table also determines the possible destinations for each Convoy when it enters the game. The convoy's speed is determined, slow (one square or zone) or fast (two squares or zones), as well as the number of ships in the convoy, the convoy's formation (In Line, Loose11 or Tight) and its tonnage capacity. Use the appropriate markers. Note: A convoy without a formation marker is understood to be in Tight Formation.12
10.2 Convoy Movement
Convoys, when moving on the grid during OSL or TSL play, may only move horizontally or vertically across the grid in the same general direction as their movement on the Strategic Map. For example, if a convoy began in Florida and its destination was New York, then any movement on the grid during OSL or TSL play would be in a north-south direction, not west-east.
10.3 Convoy Composition
A convoy may consist of any number of ships from 1 to 40. Use a convoy marker on the game map and on the grid during OSL and TSL play. If a convoy has an escort, the escort moves at the same speed as the convoy. If a convoy is reduced to only one ship, remove the convoy marker and place a Transport (TR) ship unit. When a U-boat sinks a ship, the convoy's original total is adjusted to reflect the ships remaining in the convoy (use the markers on the Game Record Track to do this).
Example: If Convoy 1 loses 2 ships out of its 30, the 28 remaining ships are recorded by the Allied player, the x10 marker is placed on space 2 and the x1 marker on space 8 of the Game Record Track.
If a ship within a convoy becomes dead in the water, place an individual TR ship unit in the square, and the rest of the ships (represented by the convoy marker) continue moving. When a convoy ship is sunk, a Lost Cargo marker is drawn at random from an opaque container (a cup, an envelope or another opaque container). The tonnage value on the back of the Lost Cargo marker is revealed to the German player for victory purposes before it is returned to the container. Adjust the convoy's number and tonnage capacity on the Game Record Track as well, and then return the Lost Cargo marker to the opaque container so that it may become part of the pool again for a subsequent cargo loss.
10.4 Convoy Tonnage Determination
The US player determines how many ships are in a convoy, and their tonnage,13 at the start of the game and when required as reinforcements, whenever there are fewer than 9 convoys on the map. Use the appropriate markers to record the number of ships in a convoy using the numbered spaces on the Turn Record Track or the Sunk Tonnage Track (either is appropriate for the US player). The convoy's destination should be recorded on a sheet of paper (the back of the Target List would do) and kept secret from the German player (reveal this information at the end of the game). One convoy is created per turn, up to a maximum of 9 in the game, as well as by the Random Event for Convoy AT-10. When a convoy is attacked, any losses are deducted from the convoy total. For each loss, draw a Lost Cargo marker and keep recording the cumulative sunk tonnage total, using the appropriate markers on the Sunk Tonnage Track to determine the victory point award (made at the end of the game). A cumulative total of ships sunk by the German player should also be recorded on this same track, using the appropriate markers to determine the victory point award. Tonnage counts are read as thousands; that is, a marker showing 16 represents 16,000 tons.
11.0 U-Boat Fuel
German U-boats had limitations in their operations due to fuel and to the number of torpedoes each one carried. To facilitate the endurance of the U-boats, other U-boats, the "Milk Cows" (tankers), were sent to resupply their brethren at sea.
11.0 U-Boat - Fuel
Each U-boat has a total of six fuel points. Use the U-boat List to record the expenditure of fuel for each U-boat. When all of a U-boat's fuel points have been spent, the U-boat must move toward BE or CF and leave the map, or end its movement in the same zone containing a U-boat Milk Cow tanker. Once a U-boat leaves the map, it remains out of play for four turns. A U-boat that has left is available again at the start of the fifth turn after its departure from the map. Place the U-boat unit in the turn space when it can re-enter play. A U-boat that refuels off the map may re-enter by way of zones BE or CF of the Strategic Map.
A U-boat Milk Cow (Cow) may refuel up to 10 U-boats. To do so, each U-boat must begin its movement in the same zone as the Milk Cow (the Milk Cow may have moved to the U-boat's square beforehand). Both must remain in the zone, in their surface state, and neither may move. No U-boat may detect or attack. At the end of the turn, the U-boat is refueled and may remain on the map until its six new fuel points are spent. Once the tanker has refueled 10 U-boats, it has no more fuel and is removed from the game (however, the Milk Cow unit may re-enter as a reinforcement, but no more than 1 may be in play at any one time).
11.2 U-boat Fuel Consumption
A U-boat consumes one fuel point per turn when moving in Slow Mode, and two fuel points in Fast Mode. The consumption of two fuel points allows a U-boat to move one or two zones on the Strategic Map. If a U-boat does not move, it still spends one fuel point to maintain its position in the current zone. Record the remaining fuel of an individual U-boat on the U-boat List. Fuel is only consumed by movement on the game map, not on the OSL or TSL grid.
12.0 Aircraft
There are numerous types of aircraft with different capabilities. See 2.2.2 for the key.
12.1 Aircraft - Range
An aircraft with a range of zero may only fly in the zone where the unit is based. An aircraft with a range of 1 may fly to any zone adjacent to the one where the unit is based and may attempt to detect any U-boat that happens to be on the surface. See 9.4.3 for an explanation of the variable range of an "E" type aircraft.
12.1.1 Base Change. US air units (only) may move to another air base instead of carrying out a Reconnaissance or Combat mission. Any air unit may be rebased to any other air base that has fewer than 8 hits (see Case 12.7.4).14 There is no range limit to the new base. Note: This represents not only the relocation of the aircraft, but also of its ground support personnel and logistical resources (this was not an easy thing for the US to do at this point at the beginning of the war).
12.1.2 Combat Air Patrol (CAP). Fighter ("F") type units may be placed on CAP at the start of each game turn. Place the unit on the map and declare its CAP mission. This unit may be used to defend any target in that area. A fighter on CAP may not be used to detect or attack any other enemy unit; the unit may only defend against attacks by other enemy air units. Fighters are returned from CAP to any base in the same area at the end of the turn.
12.2 Aircraft - Detection
Until March, only visual detection may be carried out. If detection succeeds, the aircraft may attack immediately, once per aircraft (see Section 8.3).15 If the variant scenario is being played, the German player also has long-range Bombers based in the Azores and the Canary Islands.
12.3 German Bomber Procedure
Each Bomber moves across the map toward its chosen target. Before completing the mission, any US Fighter unit may attempt to intercept it by rolling a "1-2" on a DR10 per Fighter type. Resolve any Air-Air combat and then AA, in that order. A Bomber that survives then attacks its target and is placed back at its air base.
12.4 Anti-Aircraft Base
Each factory or air base has an intrinsic AA unit with a number of Hits. Use a D6 to resolve the attack. If the die result is equal to or less than the number of Hits, the AA fire causes the Bomber to abort. Each Bomber that attacks the target suffers AA fire. If the die result is two less than the AA strength, the Bomber is shot down. Thus, if the AA unit is 3 and a 1 is rolled, the Bomber is shot down. AA forces are not destroyed or affected by bomber attacks.
12.5 Bombing
Any number of Bombers (types "B" and "D") may drop their bombs on a target. Bombers attack by level bombing or dive bombing.
12.5.1 Level Bombing. Any aircraft of type "B" may carry out level bombing against a target that is a ship, airfield or factory. In each case, each Bomber attacks individually and the appropriate column on the Air-Surface Combat Table is consulted, crossing the result of a D10 with the BF (Bombing Factor, bombs) of the Bomber and modifying the DR as necessary.
12.5.2 Dive Bombing. An aircraft of type "D" may dive bomb against a ship or airfield target. In each case, each Bomber attacks individually and the appropriate column on the Air-Surface Combat Table is consulted, crossing the result of a D10 with the BF (Bombing Factor, bombs) of the Bomber and modifying the DR by -1. Hits on airfields accumulate, while hits against ships apply immediately (see below).
12.5.3 Bombing Damage. After all attacks by all Bombers against a specific target have been completed, roll a D10. If the target is a factory, a result of 1-5 indicates that the bombing was against a wrong target or failed; any hits are ignored and no VP is awarded. If the target is a city or port, all Bombers hit their target.
At the end of the game, VP are awarded as follows:
- 2 or 3 points of Damage accumulated at the end of the game on a specific target = 1 VP
- 4 or 5 points of Damage = 2 VP
- 6 or 7 points of Damage = 3 VP
- 8 or more points of Damage = 4 VP
No VP is awarded if there are only 1 or no Damage Points at the end of the game.
Note: No US Bomber may fly from the US and bomb the Azores or the Canary Islands. German air bases may only be bombed using aircraft from the CV Hornet.
Ships may suffer damage from bomb hits as follows:
- Hits of less than half of the target ship's Defense Factor (DF) = No Effect.
- Hits equal to and/or not exceeding the DF of the target ship = the ship is Neutralized. A ship that is already neutralized is sunk.
- Hits greater than the DF of the target ship = the ship is sunk.
12.5.4 Repair of Bombing Damage. The US player receives 5 repair points per turn to carry out repairs. The German player has 2 repair points per turn to use on his airfields. Repair is carried out at the start of a new turn, before anything else happens. Only 3 repair points may be used on any single city, factory or airfield in a turn. Any complex that has accumulated 8 or more points of damage is considered irreparable and no repair may be made (at least within the time span covered by the game).
Note: Unused repair points may not be accumulated and saved for a later turn. Any point not used in the current turn is lost (that is war, accept it!).
Any neutralized DD, WPG or AST that spends an entire turn in a port (does not move or attack) is turned back to its normal state during the Repair Phase of the next turn. Battleships and the CV Hornet cannot be repaired if neutralized (at least not within the time span of the game).
12.5.5 Bombing Damage to Airfields and Ports. Airfields/Ports are not usable if 6 or more points of damage have been inflicted. No repair point may be applied to any complex that has accumulated 8 or more points of damage. Record the damage level inflicted and repaired on the Target List. When repair points are used to reduce damage, adjust the damage level on that target. Damage repair points may be used all at once or spread out. For example, if a factory has 5 points of damage and 3 repair points are used, the new damage level is 2. Note: AA factors are not affected by damage.
The CV Hornet may not serve as an aircraft base if neutralized. Its air units may NOT change base to a land air base.
12.5.6 Bombing Damage to Aircraft on the Ground. For aircraft that are in a base that has received bomb hits from ships/aircraft, roll a D10 for each aircraft in the base. Subtract 1 from the DR for every 6 points of damage inflicted on the air base. If the modified DR is "1" or less, the unit is eliminated; 2 to 6 means the unit is turned to its Has Flown/On the Ground side; 7 or more means No Effect.
12.6 Return of German Bombers
German Bombers need another turn to return to their air base. When a Bomber leaves and returns, it remains in the On the Ground state for one turn. Place the air unit in the Turn Space of the Turn Record Track to indicate when this unit may be played again. For example, an aircraft that bombs in turn 1 will be available again in turn 3.
12.7 Shore Bombardment
US warships with a bombing factor may bombard German air bases if they end their movement in the same zone. Use the Air-Surface Combat Table and roll for each warship that bombards, using the ship's bombing factor. Note that BBs have a large BF, and the US player must roll multiple times on the table to match the unit's BF. For example: a BB with a BF of 6 may have the US player roll 2 times on column 3, 3 times on column 2, or any other combination as long as the BF is not exceeded. Smaller ships with a bombing factor of 1 may only perform a Shore Bombardment mission in combination with other ship(s) that have a Bombing Factor, and the player controlling them may choose which columns to use (2 and/or 3), if applicable. Record any hits on the Target List.
12.8 German Aircraft Problems
If the Germans had put their first 1940 plans against America into practice, the long-range Me-264 bomber might possibly have been operational by 1942; historically, only a few were built before the end of 1942. The He-177 was operational in March 1942, and the FW-200 had been modified. All three models faced the same problems: engines that were not very reliable for long flights (2,000-4,000 miles to the East Coast from either island group), the weather, crew fatigue, and target identification. The He-177 and FW-200 had a 50% chance of their engines catching fire during flight (definitely not good when flying for very long periods over the Atlantic). Flight time would average 7-8 hours, so pilot and crew fatigue would be a problem. Target identification would be almost non-existent, since even U-boats had inadequate navigation aids, as they generally used pre-war tourist maps to travel along the coast.
12.8.1 Reliability of the German Long-Range Bomber. When an aircraft takes off, for each zone the aircraft flies into, roll a D10 (except in any zone adjacent to the airfield from which it took off). For each zone the aircraft crosses, including the target zone, add 1 to the DR. Use the German Aircraft Issues Table. (The table itself is not reproduced in this booklet.) Bombers that are lost never return and are not replaced.
When a German Bomber enters a zone with an enemy convoy, the Bomber automatically detects it. It now has two options: attack it immediately by dropping its bombs on the convoy, or ignore it. If there is any U-boat in the same zone that has not yet detected the convoy, the U-boats detect it automatically. When a convoy or ship is bombed, roll a D10 per aircraft. If the result is 1 or 2, a ship is sunk. If this is a TR or a tanker, draw a tonnage marker. If the DR = 10, the aircraft is hit and lost and is removed from the game. Long-range Bombers that survive are then returned to their base.
12.9 Attack on German Air Bases
Due to the enormous distance, the only resource the US player has for bombing German air bases is the Carrier Task Force, consisting of the battleships North Carolina and Washington, the aircraft carrier Hornet, and its seven escort destroyers. This TF was historically at Key West, Florida, and moved at the end of January to Norfolk, Virginia. Incredibly, it reached Norfolk without being attacked! If Random Events allow, this TF may move toward the German air bases and bomb the airfields with ships and aircraft. If the airfields become unusable, the German Bombers may no longer be used in the game. See 12.7 for the procedure for bombing with warships/DDs.
12.10 US Aircraft Availability
The number of air missions the US player may fly per turn is limited as follows (see 2.2.2 for mission eligibility):
- February and March:16 Maximum of 1 for attack against a U-boat (by any eligible aircraft type) and 2 for Reconnaissance missions (by any eligible aircraft type) from zones BA to DC.
- April: Maximum of 3 for attack against a U-boat (by any eligible aircraft type) and 5 for Reconnaissance missions (by any eligible aircraft type) from zones BA to DC.
- February and March:17 Maximum of 1 for attack against a U-boat (by any eligible aircraft type) and 1 for Reconnaissance missions (by any eligible aircraft type) from zones DB and DM.
- April: Maximum of 2 for attack against a U-boat (by any eligible aircraft type) and 2 for Reconnaissance missions (by any eligible aircraft type) from zones DB and DM.
PBY air units and Fighters are NOT subject to these mission limitations. Excess air units in these areas are on the ground, but some or all air units in the game may change base without restriction (Case 12.1.1). From May until the end of the game there is no restriction on the number of Combat or Reconnaissance air missions that may be flown (subject to the availability of eligible aircraft).
13.0 Random Events
During the Random Events segment of the turn, one player (play gently and alternate with your opponent!) may roll a D10 to determine whether any event that has not already occurred in previous turns takes place. Each Event, except "No Event" and "Increased Home Front Assignment," may occur only once per game.
- 1, 2 = The US Carrier Task Force Hornet is ordered to attack the German air bases in the Canary Islands and the Azores. The naval units indicated in Section 14.2 move toward the islands (at the Allied player's choice) to attack. If this result comes up after March, or the variant scenario is not being played, treat it as "No Event". This Event, if put into effect, changes the AT-10 TF Event, which must be treated as "No Event".
- 3, 4 = Convoy AT-10 to Iceland is cancelled and the clauses of Section 14.1 do not apply. The seven DDs (6-12) of the Hornet TF are diverted to coastal defense only in zones CA and DC. If this result comes up after January 15, treat it as "No Event". This Event, if put into effect, changes the Hornet TF Event, which must be treated as "No Event".
- 8, 9 = Increased Home Front Assignment. The US player may return to the game one eliminated DD, WPG, AST or air unit. Note: This is the only form of replacement in the game!
- 5, 6, 7 or 10 = No Event.
14.0 Special Convoys
There are two special historical convoys: the AT-10 and the Hornet Carrier Task Force.
14.1 Convoy AT-10
This convoy leaves New York on 15 January. Use the reverse side of the Convoy 9 unit (marked AT-10). Convoy AT-10 must move east to zone BC and exit by the north edge of the map. This convoy carried 5,000 US troops and was heading for Iceland. The convoy consists of 10 TRs and two DDs as escorts (use DDs 3 and 4 for this); its speed is Fast and its formation is Tight. Surprisingly, it was never attacked by any U-boat. To reflect this strange event, if any U-boat is in the same zone after movement, instead of automatically going to the OSL and TSL, roll a D10. If the result is 1 or 2, the U-boat is aware of the convoy and uses the OSL and TSL grid play normally.
14.2 Hornet Carrier Task Force
This force leaves the CA area (Norfolk) on turn 4. It was never detected or attacked (what lucrative targets!). If any U-boat is in the same zone, the force is discovered only on a die result of 1 or 2, using a D10. If it is discovered, the OSL and TSL grid is used for play. The rules in this section only apply if the Random Event of Module 13.0 has not occurred first. Unless a Random Event intervenes, this same TF must leave from zone CA, go to zone EB and exit (that is, moving along the East Coast). If Random Events occur, the CV and BBs do not have to exit the map, but remain in the game as regular units. All units in this TF move at a rate of three zones or squares.
The Hornet's aircraft consist of 3 SBD, 2 F4F, 1 TBD and 1 B-25. These units are marked with a black "C" printed on the right side of the counter. The SBD, F4F and TBD air units may move and attack any German unit/air base in the same zone as the carrier (range 0). See below for the carrier's B-25 air unit.
14.2.1 The Carrier's B-25
The B-25 carried by the Hornet was not an aircraft normally carried on an aircraft carrier. Since some of these aircraft were used in the historic Doolittle raid against Tokyo, if this air unit is based on a carrier, it is a "one-shot" weapon, that is, an exceptional and unique case.
The carrier's B-25 air unit may only be used once in the game to move and attack from the CV Hornet. Meanwhile, until this occurs, none of the other aircraft on the carrier may move or attack, since the B-25s occupy the entire flight deck (they were too large to move and store in the lower decks). The carrier's B-25 air unit has a range of 1 zone (the aircraft actually flies toward neutral Portugal, where the surviving aircraft and crews will be interned). Due to the surprise nature of this form of attack, any Bf-109 Fighter on CAP has no effect and cannot intercept the B-25s (only AA fire will oppose the air unit's attack).
The US player may also decide not to base the B-25 unit on the Hornet and instead base it at any land air base. The decision to do so must be taken before the start of the game, when the US player sets up. If the US player decides that the carrier's B-25 will be based on land, the B-25 air unit is considered an additional land-based B-25 unit and its base will be any US airfield.
15.0 Reinforcements
Reinforcements that arrive may only be used after they are activated in a game turn. Reinforcements are placed in their designated areas. Reminder: If there are fewer than 9 Convoys in the game, the US player will enter a convoy as a reinforcement per Module 10.0.
15.1 US Reinforcements
Note: see Section 12.12 for the limitations on US "B" and "R" air units (as printed; no Section 12.12 appears in this document).
February 1 (Turn 5)
- Miami (Airfield P): 1x O-47, 1x B-24
- Boston (Airfield C): 2x B-17
- Savannah (Airfield M): 3x B-25
- Puerto Rico (Airfield Q): 1x P-36
February 15 (Turn 7)
- 3x P-39 and 4x P-40 fighters in Savannah (Airfield M)
- 3x P-47 and 4x O-47 in Norfolk (Airfield I)
The fighter lines for February 15 are printed in the source directly after the German February 15 entry; they are US aircraft types and are listed here as US reinforcements.
March 1 (Turn 9)
- Puerto Rico (Airfield Q): 1x P-39
- Norfolk (Airfield I): 2x B-25, 3x PBY
- Savannah (Airfield M): 4x A20
- New York (Airfield G): 1x O-47, 2x A20
- Miami (Airfield P): 2x O-47, 3x B-17
Note: See Section 12.12 for the limitations on US "B" and "R" air units.
April 1 (Turn 13)
- New York (Airfield G): 2x A29, 2x O-47
- Norfolk (Airfield I): 1x B-18
- Puerto Rico (Airfield Q): 1x B-18
- Havana (Airfield N): 1x B-18
- Miami (Airfield P): 1x O-47
- 12x AST in zones BB, CA, DC (place 2 in each zone)
- 12x Coast Guard WPG in zones BB, CA, DC (4 in each zone)
- 4x Coast Guard WPG in zone DN
Note: 4x DDs released. Note: See Section 12.12 for the limitations on US "B" and "R" air units.
May 1 (Turn 17)
- Miami (Airfield P): 1x A29 (zone DM)
- Savannah (Airfield M): 2x A20, 1x B-17
- Puerto Rico (Airfield Q): 1x O-47, 1x B-18
- Norfolk (Airfield I): 1x B-24, 1x B-25
- Havana (Airfield N): 1x A20
Note: All remaining DDs released. End of the limitations on US "B" and "R" air units.
June 1 (Turn 21)
- Miami (Airfield P): 4x B-24, 2x PBY
- Puerto Rico (Airfield Q) and/or Havana (Airfield N): 1x B-18, 1x PBY
15.2 German Reinforcements
February 1 (Turn 5)
- 8x U-boats in zones BB, CA, DC, and/or CB
- 4x U-boats in zones ED, EC, and/or EB
February 15 (Turn 7)
- 2x U-boats in zones DN, EC, DB, and/or DM
March 1 (Turn 9)
- 6x U-boats, 1x U-boat Milk Cow* in zones BB, CA, CB, and/or DC
May 1 (Turn 17)
- 4x U-boats, 1x U-boat Milk Cow* in zones DO, DN, DB, and/or DM. Note: The U-boat Milk Cow may only enter the game if the one that entered in March has left or been eliminated.
- 6x U-boats in zones DN, EB, EC, ED, and/or DO
* Note: No more than one U-boat Milk Cow may be in play at any time.
The zones indicated are those from which the U-boats may begin. After that they are free to move in all directions. There is no limit to the number of U-boats that may occupy a zone. Do not read a reinforcement as two (or the number shown) U-boats for each zone. The number of U-boats arriving is the total for that turn, not the total for each zone. Except for the Milk Cow, the U-boats are randomly selected to enter in that specific turn.
16.0 Historical Setup
Convoys are placed according to the Map tables (Convoy Determination and Convoy Entry tables). Place all Lost Cargo markers in an opaque container (a cup or envelope, for example).
16.1 US Setup
The US units are set up first, as follows:
- 1x DD (1) squadron in Norfolk. 4x DDs (2-5) in New York or Boston. They are in port, and only one of them is released (see Section 14.1).
- CV Hornet, 2x BBs, 7x DDs (6-12) in port in Havana.
- 1x O-47 aircraft each in: Boston (Airfield C), New York (Airfield G) and Savannah (Airfield M).
- 5x P-40 fighters, 1x B-17, 1x B-18 and 5x B-25 in New York (Airfield G).
Note: The US player must decide whether to keep the B-25 air unit of the carrier on the Hornet or change it to a land base (see Case 14.2.1).
16.2 German Setup
The German units are set up second, as follows:
- 5x U-boats in zones BB and/or CA.
- 5x U-boats in zone CF.
The U-boat units are randomly selected for setup. For German aircraft, see Section 19.0.18
17.0 Variant – Scenarios
Books about "wonder weapons"19 and "what if"20 scenarios, which examine what could or would have happened under different circumstances, are all the rage today. One of the most speculative imagines the intense German efforts before and during the war to create bases and prepare very long-range aircraft capable of attacking the US East Coast. The Plan Amerika and Valkyrie scenarios presented below examine the kind of effort the Luftwaffe could have made, given the great success in aircraft development and Hitler's achievement of firm friends in southwest Europe, capturing Gibraltar and gaining access to the Azores and the Canary Islands. Could a handful of aircraft over America, combined with a highly successful U-boat campaign, make the US overreact and focus its attention on the defensive weapons themselves? Players can now explore these imaginary themes...
17.1 Plan Amerika
None of the Me-264s are used. Instead, the FW-200 and He-177 aircraft are used. These were operational in 1940 and 1942 respectively, and had a range sufficient to reach Boston from the Azores. The problem was that they could only be based in the Azores, which had limited aircraft capacity. In this scenario, the historical U-boat setup is used. Add the following air units to the German order of battle:
- 8x FW-200
- 5x He-177
- 2x Bf-109
Note: The FW-200/He-177 may only bomb in zones BB, DC, CA, ED.
17.2 Plan Valkyrie
This scenario is the extreme "what if...?" case. The Germans control both the Canary Islands and the Azores. In this scenario, the historical U-boat setup is used. Add the following air units to the German order of battle:
- 3x Me-264 (Canary Islands)
- 1x Bf-109 (Canary Islands)
- 8x FW-200 (Azores)
- 1x Bf-109 (Azores)
Note: The Me-264s may bomb any zone. The FW-200s may only bomb in zones BB, DC, CA, ED. The He-177s are not used in this scenario.
17.2.1 Base Limits
German air units may not change air bases during the course of the game. The German capacity to move a large number of ground personnel and resources would be seriously limited, to say the least. If an air base becomes inoperable, the aircraft based there are lost.
17.3 Surprise
In either of the two scenarios above, the historical setup system is used. Due to surprise, the first time German Bombers attack anywhere on the map, there is no AA fire and no air-to-air combat by any US fighter.
18.0 Victory
The German objective was to cause the greatest possible damage. Their U-boats alone had sunk 65 ships by March, and by May almost two million tons had been lost. The objective of the air attacks, had they flown, would have been to damage American factories.
When a ship is sunk, adjust the Ships Sunk and Tonnage Sunk markers on the Record Track. At the end of the game, the German player must have achieved the following:
- Sunk at least 40 Allied ships; and
- Sunk two million tons of Allied cargo.
If the Module 17.0 Variants are in play, the Luftwaffe must also have gained at least 40 VP in hits on US factories, ports or air bases.
Note: If the CV Hornet, a BB or any TR ship of Convoy AT-10 is sunk, each one counts as 50,000 tons for the German victory calculation. (This represents the loss of trained crews and aircraft, as well as expensive warships. For TR units it means extremely high casualties, with probable disastrous results for the Home Front, from the sinking of a troop transport.)
If the German player fails to achieve all of the conditions indicated above, the US player wins the game.
The source prints the two victory conditions separated by a rule line; they are read here as joined by "y" ("and") as printed.
19.0 Designer's Notes
Submarine games are a real challenge for a game designer. The nature of combat makes them ideal for computer games (my old favorite was Microprose's Red Storm Rising) and the opposite for a board game. I know only a few submarine wargames, and most of them, in my opinion, turn out to be the most boring wargames. So when I first learned of the Paukenschlag topic, it immediately caught my attention: an operation that began with simply a few U-boats against an entire continent! Until then I had no idea that anything like that had happened. At first I played with hexes for the map. I always try something different, and then this struck me: using what the real U-boat commanders used to plot their movements. U-boats were rather slow underwater and fast on the surface, hence the two speeds. The German player, like his historical counterparts, has to be aggressive and sink as much as possible before the US and British forces can exert their full pressure. No sunbathing allowed!
I simplified the detection elements, keeping the critical elements that had an impact. A U-boat could sometimes discover ships on the surface up to 50 miles away, but ASW ships could not detect a sub until it was fairly close. An aircraft trying to discover a sub on the surface was also problematic. The encounter between opposing forces was, to a large extent, due to luck or probability. The U-boats knew the general routes of the convoys and the number of ships they could expect to find. So they either waited for them or moved in search of prey.
All this makes the design of a game about a whole submarine campaign above all a challenge, since the replay factor and the lack of different strategies are substantial design challenges. The design of a submarine wargame is much more difficult than the design of a typical land battle with its game pieces. That is why, always looking for a twist, I explored the Luftwaffe's plans to bomb the East Coast of the US and found out that without some "what if...?" extremes in the history, it could not have happened. To summarize: the Germans would have had to pull out of their hands a viable bombing plan to attack American ports and key industrial plants, using long-range German bombers. By comparison, their own efforts against England in 1940 (almost as if it were in their backyard) suffered from a lack of intelligence on key targets and British vulnerabilities.
The bombers themselves were in various stages of development at the start of the war in 1939. The Germans had already taken the idea of the Me-264 out of their hands and were trying to adapt both the FW-200 and the He-177 for long-range bombing. During the war itself they investigated air-to-air refueling techniques and, rarer still, towing large auxiliary fuel tanks (with wings!) behind the bombers in an effort to increase their range. Assuming great success here in getting these aircraft operational, small numbers of them might have been available. Germany needed the necessary permission/consent from Spain and Portugal to have air bases in the Canary Islands (3,500 miles from the US coast) and/or the Azores (within 2,000 miles). Hitler wanted the islands. Could he have reached an agreement with all parties?
Each of the prerequisites indicated above was unlikely, but for me the idea is a very interesting component of the game and worth exploring. Let the dice fly high!
Publisher Addenda (as of Oct. 21, 2008)
The following is the publisher's addenda sheet for this issue, in English, transcribed from the Against the Odds errata file (errata_pauk.pdf). It supersedes the translator's corrections above where they differ. The Spanish translation renders the state called "Crippled" here as "neutralizado".
The Rules
- 1.1 Game Scale (correction): A turn represents one week (not three days). The map's Turn Record Track is correct.
- 2.2.2 Air-to-Air Strength (clarification): Change "Units with a circled strength may only defend" (no aircraft strengths are circled) with "Only fighters can attack using Air-to-Air combat".
- 6.0 Movement (addition): A Crippled ship is "dead in the water" (cannot move) in the round following the one in which it became Crippled. In the next round and subsequent turns, assuming it survives that long, the Crippled ship has an MP of 1.
- 6.1 Operational and Tactical Movement (correction): Units may move diagonally, as well as horizontally and vertically (disregard the prohibition against moving diagonally).
- 7.1.1 OSL Detection (clarification): Only if one side has detected unit(s) in the OSL square at the end of movement will all units in the square be removed to the TSL. If all units in the OSL square are undetected they are quite literally "ships passing in the night", and therefore no TSL can ensue (at least at the end of that round).
- 8.1.1 and 8.1.2 (correction): Ranges for sonar are the same for both OSL and TSL play (not just TSL as worded).
- 8.3 Huff Duff (correction): O-47 units do not have Huff Duff (the counters are correct).
- 9.1 U-Boat Torpedo Combat (additions):
- Use a D10 (not a D6) to resolve U-Boat Torpedo Combat.
- For each hit roll another D10. If the DR = 0 the hit is a dud. Each hit on a Convoy is treated as if against a separate TR unit (can't imagine why anyone would want to pump multiple torpedoes into a TR...).
- The DRM against a Convoy in Tight Formation should be +1 (not -1).
The Counters
- The factors on the top of the two Me-109 fighter units should be 6-0-0 (not 6-0-6).
The U-Boat Roster
- The Damage log section of the roster is for use in a variant (to be published in a future issue). Players do not need to fill out this section of the roster to play the game.
Footnotes
-
Correction 03/07/2008: One turn represents one week, not three days. The Turn Record Track on the map is correct. (Translator's note.) ↩
-
Clarification 03/07/2008: No aircraft have their strength inside a circle. It must be changed to: "Only fighters can attack using Air-Air combat." (Translator's note.) ↩
-
(Combat Air Patrol) Combat air patrol (medium to very high altitude patrol flight to locate enemy aircraft). (Translator's note.) ↩
-
Huff-Duff is an acronym formed from the initials of High Frequency Direction Finder (HF/DF), coined during World War II and which became famous as a way to refer to this type of equipment. (Translator's note.) ↩
-
Correction 03/07/2008: Units may move diagonally as well as horizontally and vertically (ignore the prohibition against diagonal movement). (Translator's note.) ↩