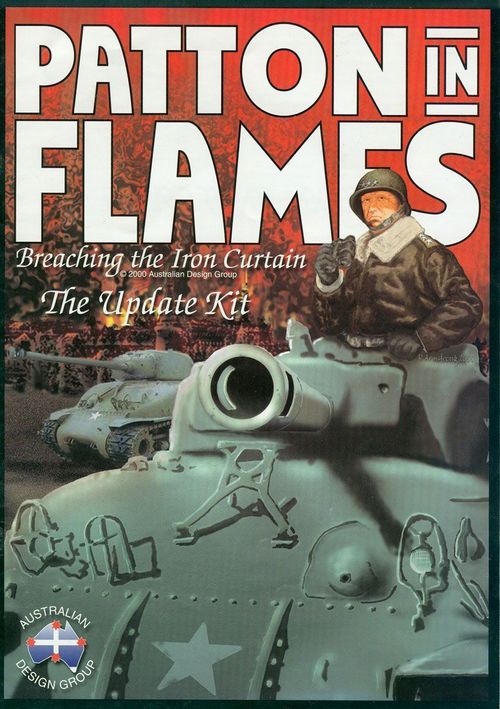
Patton in Flames
Patton in Flames Rulebook
Table of Contents
Table of Contents
1. Introduction
Patton in Flames is Australian Design Group's latest game in the World in Flames series. It postulates the cold war heating up into World War III either in 1945 or 1948. The 1945 campaign starts in March 1945 with a prostrate Third Reich being wooed by both sides in an attempt to carry out General Patton's fantasy plan for world domination. The 1948 campaign starts with the Berlin airlift crisis and the first Arab-Israeli war dragging the superpowers in for a final confrontation. Both campaigns use the standard final edition World in Flames rules except where they conflict with those here.
World in Flames rules 5.1, 9.3 ~ 9.6, 9.10, 13.2, 13.3, 17, 19.5 ~ 19.10 & 20 are all ignored in Patton in Flames. You may also play with or ignore all the optional rules from World in Flames. Finally, no major power is restricted in who they may declare war on.
2. Minor Influence
Instead of the rigid alliance method stated in WiF 19.619.10, Patton in Flames allows far greater freedom in the political allegiance of minor countries. The following rules supercede WiF 19.619.10. This option also replaces all trade agreements between the major powers and the minor countries (see WiF 5.1).
2.1 The Political Allegiance Track
The political allegiance track at the end of the rules is for recording the status of the minor countries that have flags included in the game. All other minor countries are full allies of their controlling major power (see 11. below). When the game starts, the flag of each minor country named on the track is set up in that box (e.g. the Indian flag is set up in the Soviet 2 box). All other flags are set up in the "0" square. As you influence each minor country, move its flag up or down the track. If its flag is towards the red end of the track, it is favouring the Communists. If it is towards the green end of the track, it is favouring the Democracies. Note that a minor country is neutral (even if not in the neutral zone) as long as it is not aligned with any major power. Whether the flag is in a square, or left or right of it, determines which particular major power it is favouring. If the flag is in the square, it favours the USA or the USSR. If it is to the left of a square, it favours France. If it is to the right of the square, it favours the Commonwealth or Communist China. Minor countries may never favour Germany, Italy, Japan or Nationalist China. Once a minor favours a particular major power, it can only change its favour to a different major power if its flag first moves into the 0 square. The number of the square the flag is in (or left or right of it), tells you the degree of influence a major power has over the minor country:
- 2, 3 or 4 square (Half Resources): the minor country is neutral but your major power can transport and use half its resources;
- 5, 6 or 7 square (Full Production): your major power can transport and use all of its resources and factories;
- 8, 9 or 10 square (May Enter): as well as all the production, you may trace supply through the minor country and any units of your major power can enter the minor, even while neutral. Units of other major powers on your side can not enter;
- 11, 12 or 13 square (Mobilisation): as well as the previous benefits, your major power may align the minor country simply by announcing it. Set up the minor's units (see WiF 19.4). After you do that, units of other major powers on your side can enter the minor, provided they satisfy the foreign troop commitment rule (see WiF 18.2). Only half the minor's land and aircraft units can leave the minor's home nation. All units that leave can only enter countries and sea areas adjacent to the minor;
- 14 or 15 square (Active Ally): as well as the previous benefits, its units that can leave the minor are not restricted to adjacent countries and sea areas;
- Full Ally square: as well as the previous benefits, major powers that co-operate with the controlling major power are no longer subject to the foreign troop commitment rule in the minor. The minor's flag can never move again until conquered (when you place it in the conqueror's force pool to indicate conquest) or if an atom bomb is dropped (see 9.6(b)).
If, at the end of any step, the flag of a minor country you have declared on your side is below 'Mobilisation', the minor becomes neutral. Remove all its units from the map, repair pool, construction pool, and production spiral. Move all the units any other major power on your side has in the minor to the production spiral to arrive as reinforcements in the next turn. If your major power has units in a minor country at the end of any step when its flag is below the level where your units could enter it, move those units to the production spiral to arrive as reinforcements in the next turn.
2.2 Declaring war, encroaching, conquest & bombing
You may not declare war on a minor country in which you already have any units. If you declare war on a minor country, move the flag from its present square to the other side's full ally square. If it presently favours a major power on the other side, it becomes a full ally of that major power. If the flag's present position is on your side of the track or in the 0 square, the major power from the other side with the lowest political cost to control that minor takes control. If equal, the major power (from amongst them) with the most usable factories takes control.
Example: The USSR declares war on Ecuador whose flag is in the "0" square of the political allegiance track. France and the Commonwealth both have the lowest political cost (1) for Ecuador, but the Commonwealth has the most usable factories, so Ecuador becomes a full ally of the Commonwealth and its flag is moved to the Commonwealth full ally square.
If one of your land units enters a minor you are at war with, move its flag to the other side's full ally box, if not already there. When a minor is declared war on, set up all its units as per WiF 19.4. If your major power is completely conquered, all minors influenced by you become influenced at half their value (half of 'full ally' is 8) to another major power on your side. Use the above method to work out which major power on your side gains control.
Panama Canal
While Central America is conquered or aligned by a major power, you may only move through the Panama Canal if you have the permission of the major power controlling the canal. While neutral, access through the Panama Canal is available to all major powers regardless of its position on the Political Allegiance.
Atom/Hydrogen bombs
(WiF 11.7.1, PiF option 23) If you drop an atom or hydrogen bomb on a minor country it immediately becomes a full ally of a major power on the other side as if you had declared war on it even if that minor is currently on your side (this is the only way you can move the flag out of your full ally square while unconquered). If you drop an atom or hydrogen bomb on a minor country or major power home nation, all partisans there consider you the aggressor and are controlled by the other side even if it is your home country or a minor you control. They remain opposed to you until the other side drops an atom bomb there.
2.3 Getting political points
In any production step, you can buy political points in 1 or more minor countries for 1 build point each. There are no gearing limits on political points. When a major power drops an atom bomb, the major power controlling the hex being bombed gains 5 political points. When a major power drops a Hydrogen bomb, the major power controlling the hex being bombed gains 10 political points. When a major power declares war on a minor country, each major power on the other side gets political points equal to the highest number shown against any major power on the political cost chart (excluding itself) for that minor country.
Example: The USA declares war on Bolivia. The USSR gets 4 political points, Communist China only gets 3 as Communist China is the only major power which has a 4 for Bolivia.
During the production step, a major power gets 5 political points for each objective it has captured (or re-captured) this turn that it still controls now. You can gain any number of points from each objective during the game as major powers capture and re-capture the same objective, but you do not gain any points from an objective you gain and lose control of (or vice versa) in the one turn. In the first pre-set up minor influence step, the major powers get these political points: The Commonwealth ~ 20, France ~ 10, USA ~ 30, USSR ~ 45 and Communist China ~ 5.
In the second pre-set up minor influence step, they get the same number of political points, plus any they saved from the first minor influence step.
2.4 Minor influence step
There is a new step in the end of turn stage - the minor influence step. It falls between step E5 (production) and step E6 (intelligence). In the minor influence step, you may convert your political points into influence levels. Major powers can also convert the political points they get in the pre-set up minor influence steps into influence levels. There are 2 of these pre-set up minor influence steps. They occur, one after the other, before you set up the game.
2.5 Automatic influence
Before you convert your political points into influence levels, some minor country flags will move automatically 1 square towards the full ally square of the side they are currently favouring. They can move into the full ally square in this way. The political allegiance track has some squares marked with a turn and an arrow. In that turn, all flags on that, or a higher numbered, square move into the next higher square.
Example: In Sep/Oct, all minor flags in the Communist +9 through +15 squares move 1 square towards the Communist full ally square. All minor flags in the Democracy +9 through +15 squares move 1 square towards the Democracy full ally square.
2.6 Buying Influence levels
In each minor influence step, each major power can convert its political points into influence levels. Only the major powers specified on the Political Cost Chart (see pg. 19) may buy influence levels in minor countries. Each influence level costs 1-8 political points, depending on which major power is buying the influence level and which minor country it is buying it for. The costs are shown on the political cost chart.
Example: The Commonwealth must convert 3 political points to get 1 influence level in Bolivia. France needs to spend only 1 and the USA 2 for the same influence level.
It costs 1 extra political point to get an influence level in a minor country that contains a major power (not its controlled minors) land unit from the other side. It costs 1 less political point (minimum 1) to get an influence level in a minor during the first pre-set up minor influence step only.
Example: In the first pre-set up influence step, it only costs the USA 1 to influence Bolivia and the Commonwealth 2. It still costs France 1.
Secretly write down how many influence levels each of your major powers is getting and for which minor countries. When everyone is finished, apply the influence levels. Start with the highest influence levels (not political points) bought by any major power for any one minor country, then apply the second highest, and so on. Ties are won by the side that has the initiative (the Communists during the pre-set up minor influence steps). If major powers on the same side are tied for the same minor:
- the major power who has spent the most political points on the minor this step applies its points first;
- if equal, the major power who has spent the most political points on all minors this step applies its points first;
- if equal, the major power with the most usable factories applies its points first.
Example: In the first pre-set up minor influence step, The USSR has 5 influence levels in Argentina and 3 in Central America. Communist China has 3 levels in Central America. The USA has 6 levels in Brazil and 2 in Argentina. The Communists announce that their highest influence levels is 5. The USA announces its 6 in Brazil and applies them first. The USA says that its next highest is 2, so the USSR goes next, applying its 5 Argentinian levels. The Communists announces that its next highest is 3, so it goes next. The USSR and Communist China are tied but, since China spent 12 political points on Central America and the USSR only 9, China applies its levels in Central America before the USSR. Finally, the USA applies its levels in Argentina.
Move the minor country's flag 1 square along the political allegiance track for each influence level being applied. Move it towards the Communist end for Communist influence levels and the Democratic end for Democratic influence levels. When it leaves the 0 square, it must favour the major power applying the influence levels.
Example: Continuing the previous example, when China moves the Central America flag, it must favour China rather than the USSR.
If the minor country is already favouring a different major power on the same side, a major power can only apply half the influence levels it bought for that minor. The rest are lost.
Example: Continuing the previous example, when the USSR applies its 3 influence levels in Central America, they are halved to 2, because Central America is already favouring China.
It costs 2 influence levels to cross an influence hurdle against the direction it is pointing (i.e. to a lower number).
Example: Continuing the previous example, when the USA applies its levels in Argentina, it must spend both of them to cross an influence hurdle and Argentina ends up in the USSR +4 square.
You can't apply influence levels to move a minor country flag into the full ally square.
2.7 Secondary flag effects
When a flag marked with a lightning flash moves, all the minor countries shown on the back of the flag move a third as many influence levels in the opposite direction than the number of squares (not influence levels) moved. If the affected minors move out of the '0' square, the major power with the lowest political cost to control that minor takes control. If equal, the major power (from amongst them) with the most usable factories takes control. Flags moved because of a declaration of war, the dropping of an atom bomb or a secondary effect, do not cause a secondary effect.
Example: The Brazilian flag is in the USSR's 6 space. The USA has spent 45 political points to gain 15 influence levels in Brazil. After taking into account the two barriers, the Brazilian flag is moved into the USA 7 square. The Brazilian flag has a lightning flash and lists Argentina and Chile on its back. So, the flags of those countries each move 4 squares (one third of 13) in the other direction (i.e. towards the Communists). Chile's flag was in the French '+2' square. As it costs 2 to cross a barrier against the arrow, it moves only 3 spaces towards the Communists. As Chile has a lower political cost for the Soviets than the Communist Chinese, its flag ends its move in the +1 USSR box. Even though the flags of Argentina and Chile also have lightning flashes, their secondary moves don't cause any further secondary effect. If the USA had declared war on Brazil, rather than trying to influence it, its flag would have ended in the Soviet's full ally box, but there would have been no effect on Argentina or Chile.
2.8 Saving political points
You may save political points. Keep track of your current total in the notes column of your builds chart.
Option - Corruption: At the end of each minor influence step (including the 2 pre set-up rounds), you lose 1/5 (20%) of your remaining political points.
3. The Maps
3.1 Post World War II political boundaries
The Patton in Flames maps are the revised World in Flames maps with the post war political boundaries in pink. The names of these post war countries and territories are stated on the maps in grey. These new territories and countries are only in existence in the Defcon 5 campaign (see 11.3). Green factories are only usable in the DefCon 5 campaign during which they have the same capabilities as blue factories.
3.2 China
China is unusual in that the one country is a home nation to two major powers. ChungKing is the capital of Nationalist China. At the start of the game, the Communist Chinese player must designate a city under Chinese Communist control to serve as its capital. Blue factories in China are usable by whichever Chinese major power currently controls them (in effect, the Chinese major powers treat these factories as red). In the DefCon 5 campaign (see 11.3 below), Manchuria is part of the Chinese home nation.
4. Production
4.1 Production multiples
Each major power's production multiple is 1 for the whole game. The only two exceptions are: (a) a major power's production multiple increases by 0.5 in a turn that an enemy land unit makes a land attack against any of its units in a hex in its home country (the UK only in the case of the Commonwealth) that turn; and (b) a major power's production multiple increases by 0.5 in a turn if it had built a Hydrogen bomb (see 9.6(b) below) in any previous turn. These modifiers are cumulative (e.g. The USSR's production multiple would be 2 in a turn that the USA launched a land attack inside the Soviet Union this turn and the USSR had built a Hydrogen bomb in a previous turn). Nationalist and Communist China do not gain this benefit if the only attack in their home country was made by Chinese units.
4.2 New production types
In the production step, you can buy political points in 1 or more minor countries for 1 build point each. There are no gearing limits on political points. The USA and USSR can also buy atomic research. Each research roll costs 5 build points. There is a gearing limit to research rolls.
5. Activity Limits
The activity limits set out in the World in Flames combat charts are used in Patton in Flames with the one change that the USSR has 1 extra air mission in every action (e.g. she gets 5 air missions in a combined action rather than 4).
6. Ending the Game
A side wins, and the game ends, when it has conquered or aligned every home country on every map. Failing this, the campaign set up gives the number of objectives each major power requires to win the game (see 11 below).
7. Atomic Research
During the production step, when you reveal what you have spent your build points on, you can roll one die for each research roll you bought. Each turn, you get as many atomic research points as your highest dice roll. When you reach 100 points, you have developed the atom bomb. This is only important if you are playing with the optional World in Flames V-weapons and atom bombs rule (see WiF 11.7.1). When you reach a total of 200 research points, you have developed the hydrogen bomb and gain the production bonus in addition to the actual effect of the bomb. The campaign set up states how many research points the USA and USSR start with.
8. No Carrier Planes
If a carrier plane is destroyed in air-to-air combat or by anti-aircraft fire, rotate the CV 90 degrees. The CV is not damaged but may no longer fly planes. At the end of the air mission or naval combat, or when the CV aborts, put it into the repair pool. If a CV with no planes suffers a damage result, put a "damage" marker on the aircraft as normal.
9. Optional Rules
You can use any of these optional rules.
9.1 Railway movement bonus
Land units pay 1 less movement point (minimum 1) to enter a hex when they move along a railway. This reduction occurs after you apply any weather effects.
9.2 Air Cav units
Air Cav (ACV) units are a new unit type. Even though ACVs are cavalry class units, they may not move during the land movement step. Instead, they move like aircraft. In particular:
- they pay aircraft movement costs (and don't pay 1 less movement point to enter a hex along a railway);
- each move counts as an aircraft mission against activities limits;
- in storm and blizzard, or if they start their move out of supply, they can only fly to a friendly controlled hex;
- they can move into or through hexes containing enemy units or ZOCs;
- they can be intercepted and escorted by aircraft in their final hex; and
- they do not change the control of the hexes they move through.
However, there are some exceptions:
- they may only fly during the air transport, paradrop or rebase steps; and
- they do not return to base nor turn face-down (except as a result of combat - see below).
They can also make rail moves and may be transported by a TRS. They can not be transported by AMPHs or by any ATRs. In air-to-air combat, ACVs have an air-to-air rating of 0.
During the paradrop step, if they end their move in an enemy controlled hex, they must attack it, just like a paradrop into an enemy hex. This counts as a land attack against activity limits. Their ZOCs after moving to an enemy controlled hex are affected exactly like a PARA unit's ZOC when it paradrops. If the only defending unit is a notional unit, the ACV automatically wins the combat (even if attacking with other units) without having to turn face down. If it survives the combat, it takes control of the hex.
9.3 Walther Submarines
The Germans have one sub counter marked with a red 'W'. It may always decline naval combat after search rolls and before combat even if it has been committed this round. A committed Walther sub that declines naval combat must immediately return to base and is then turned face-down.
9.4 HG Flying Panzer Corps
The HG (Herman Goering) corps is an ARM unit. It is also marked with a Para symbol. This corps is air-transportable and paradroppable like any other Para. However it takes 2 ATRs (or 1 large ATR) to transport it. If 1 of the ATRs is destroyed while transporting the HG corps, it too is destroyed. If either ATR is aborted, all remaining units must abort at the end of the air combat.
9.5 SS Reorganisation
It costs twice as much as normal to reorganise an SS unit with a non-SS HQ and vice versa (e.g. It would cost Italy 8 reorganisation points to reorganise an SS unit when Germany is not doing a land impulse).
9.6 World in Flames optional rules
You can use any of the World in Flames optional rules with Patton in Flames. There are 4 rules that require amendment:
(a) Partisans. Use the partisan table printed in the rules instead of the World in Flames table. African minor countries have a Partisan value of 2 unless otherwise indicated on the map. All other minor countries have a Partisan value of 1 unless otherwise indicated on the map. When you roll 'Africa' on the chart, roll for every country in Africa. Chinese partisans are Communist Chinese controlled and must set up in Nationalist controlled Chinese hexes. Germany is always treated as two countries for the purposes of partisans, even when it is a single country. The Ukraine is treated as a separate country to the USSR for the purposes of partisans.
(b) V-weapons and atom bombs. Any 4-turn aircraft may carry one hydrogen or atom bomb instead of their normal bomb load. If you drop an atom/hydrogen bomb on a minor country it immediately becomes a full ally of a major power on the other side as if you had declared war on it (see 2.2) even if that minor is currently on your side (this is the only way you can move the flag out of your full ally square while unconquered). If you drop an atom/hydrogen bomb on a minor country or major power home nation, all partisans there consider you the aggressor and are controlled by the other side even if it is your home country or a minor you control. They remain opposed to you until the other side drops an atom bomb there.
The atom/Hydrogen bomb counter provided with the game is placed on the pilot track. Whenever you produce an A/H bomb, move it up the track to show your new stockpiled total of bombs. Whenever you fly an A/H bomb mission that results in the bomb being dropped or the carrying aircraft being destroyed, reduce your total by 1.
Example: The US start the Defcon5 campaign with 2 A bombs. They do not drop any on the first turn, and build 3 more in the May/Jun production step. They move their A bomb marker from the 2 space to the 5 space on the Pilot track. In the Jul/Aug turn they fly an a bomb mission but the bomber is aborted so the A bomb marker is not moved. In the next impulse they fly two more missions which result in one of their carrying bombers being destroyed and another successfully dropping the bomb. The marker is lowered by two.
You can only fly as many A/H bomb missions in an impulse as you have A/H bombs remaining. When you build your first H bomb, you lose all remaining A bombs. Turn over your A/H bomb marker to show how many H bombs you have (which of course is only 1 in your first turn of building H bombs due to gearing limits). Dropping a Hydrogen bomb has the same effect as dropping two atom bombs on the target hex.
(c) Ships in Flames. If playing with Ships in Flames, use Ships in Flames units wherever possible. When required to use Patton in Flames ships, reduce their first time cost to that of the SiF first time costs. Reduce the second time costs of PatiF naval units (except TRSs) by 2.
(d) Lend Lease of Foreign sourced aircraft. Ignore the restrictions of this rule when playing Patton in Flames. All foreign sourced aircraft are available to the controlling major powers throughout all campaigns of Patton in Flames.
10. Links to World in Flames
10.1 Maps
The Patton in Flames maps are fully compatible with World in Flames, you simply ignore the green factories and post-war boundaries when playing WiF.
10.2 Counters
You can also use the Patton in Flames counters if you are playing World in Flames. Add all PatiF convoy points if desired. The other PatiF counters are marked with a "T" on their back. If the "T" is red, the unit is an addition to the WiF force pools when available. If the "T" on a naval unit is white, don't use the unit in WiF. If the "T" on a land unit is white, this (heavy) unit replaces the World in Flames unit that has the same designation. Once the Patton in Flames unit is available, you can remove its WiF unit from the game in any production step. When you do so, put the PatiF unit in the force pool. If the unit you removed from the game was on the map or the production spiral, its replacement only takes one turn and only costs half its normal cost the first time it is built. If the "T" is black, treat it as white if the unit's background colour is white and as red if the unit's background colour is red. You can build heavy weapons units ahead in the same manner as other units (see WiF 13.6.5).
Example: You have no US Heavy Weapons MOT in your force pools during a production step of 1942. You decide to build one ahead from 1943. You pick a Heavy Weapons MOT randomly from those in 1943 only to find that its equivalent non-heavy weapons type is currently on the map. This unit is removed from the game and its equivalent Heavy weapons type is placed on the production spiral to arrive as a reinforcement in the following turn. This unit costs 5 to build (2.5 as it is a unit already on the map and another 2.5 for building it ahead one year). If its equivalent non-heavy weapons unit was not on the map it would have cost 8 (5 + 2.5) to build and taken 3 turns to arrive as a reinforcement.
11. Campaign Information
Here we explain how to sort out the counters, how to lay out the maps and how to set up your units to start playing.
11.1 Set up
11.1.1 Which game?
Your first step is to choose which game to play. Patton in Flames has two campaigns, the 1945 Eagle vs the Bear and the 1948 Defcon 5 campaign game. Both campaigns pit the Communists vs. the Democracies. The 1945 campaign starts with the Axis powers (Germany and Japan) prostrate before the combined might of the Democracies and Communists. As World War III commences on the dying embers of World War II, both sides try to woo the remaining Axis units to defect for the ultimate showdown. The 1948 campaign postulates the cold war heating up to a hot war over the Berlin airlift crisis and Arab Israeli war. In this campaign, Italy has joined the Democracies, while Germany and Japan start the game conquered but can be liberated by their controlling major power.
11.1.2 Which side?
After you have decided which campaign you are playing, you now decide who is on which side. The 1945 and 1948 campaigns are for 2-7 players. In a 7 player game, each player gets 1 major power. In a 2 player game, 1 plays the Communists and 1 the Democrats. If you have 3-6 players, 1 player plays more than one major power from the same side.
Bidding. After deciding the major power groups, players now bid for each group. Each bid represents the number of objectives, more or less, than the number you are expected to control at the end of the game (see each campaign's victory objectives). A bid must be a whole number of -20 or greater. Bidding is auction style - you can bid any number of times. The eventual highest bidder chooses any of the major power groups and takes no further part in the bidding. The remaining players go through another round of bidding, again starting at -20. The new highest bidder chooses one of the remaining major power groups. The bidding continues until there is only 1 player left. That player gets the last group for 0, minus the total of the other players' unmodified bids. Each player's modified bid is calculated at game end, and equals their bid plus their currently controlled major power's expected total of objectives. The number of objectives each major power is expected to control is shown in the campaign information for each campaign (see 11.2 & 11.3). When you combine major powers into one group, you combine their expected total as well.
Example: Five of us sit down to play a game of the 1948~53 Defcon 5 campaign. We decide to group the French and Italian major powers into one group and the USA and Nationalist China into another. The first round of bidding was mainly a two way bidding war between Susan and me. Susan wins with a bid of 5 and picks the USA and nationalist China. Her modified bid is 27 (22+5). Pretty aggressive - I guess the other Democrats can kiss lend-lease good-bye. Next round, Mike & I fight it out. I dip out at 5. Mike wins with 6 and chooses the USSR for a modified 14 (8+6). Although it is unusual for the following bids to be higher than the initial, I guess Mike is counting on internal Allied disputes to make his job easier. In the next round, I bid Braddles up to 1, and (typically) he chooses the Commonwealth for a modified bid of 22 (21+1). The 4th round starts with just Greg and me left. Because the total bids so far are 12 (5+6+1), the last group will go for -12 less whatever we bid. Greg makes the highest bid at -5, and chooses France and Italy with a modified bid of 6 (7+4-5). This leaves me with Communist China for a total of -2 (5-7).
Record your bid on the builds charts. Your modified bid will be subtracted from your objective total at the end of the game (see WiF 13.8).
11.1.3 Laying out the maps
Next, you lay out the maps in a line. (The source text does not include the diagram of the map layout.) Lay the USA minimap to either the left of the Western Europe map or the right of the Pacific map. When playing Patton in Flames, ignore the Maginot line. It only is used in World in Flames campaigns.
11.1.4 Cutting out the counters
Step 4 - pop or cut out the counters provided with the game. Countersheets 31-35 contain 1000 counters. 951 of these represent military units. Aircraft and naval units are depicted by silhouettes. Land units are depicted by symbols. The unit description chart on the back of the US mini-map explains this in some detail. The military units are printed in different background colours to differentiate nationalities. All minor country, and some Commonwealth units are also identified by letters. Again, the unit description chart explains this. Note that all land units (except Partisans) are heavy weapons units. These are designated by a bar on the left hand side of the NATO symbol. This is only relevant if you are using these units in a game of World in Flames (see 10.2).
11.1.5 Sorting out the counters
Sort your units into force pools. Each major power needs a separate force pool for each unit type. So, you need one each for ACV, CAV, INF, MIL, GAR, MOT, MTN, MAR, PARA, MECH, ARM, HQ-A, HQ-I, SUB, CL, CA, BB, CV, TRS, AMPH, Convoy points, FTR, LND, NAV and ATR. You only have 1 force pool for each type regardless of how many countries contribute units to your force pools. Some of these unit types come with different costs. For example, some LND will cost you 4, some will cost you 5 and some will cost 6 build points. Separate each unit type into a sub-force pool for each cost (first cycle cost only in the case of naval units).
Example: Rumania is aligned to the USSR. In these games, all 4 cost Soviet and Rumanian FTRs will go into the one force pool.
This will leave you with a lot of force pools, and organisation becomes important. Just forming piles on the side of the table is unsatisfactory. A good option is using a separate zip lock bag for each pool - these are cheap and pack away well. A more sophisticated (but more expensive) method is to use professionally made counter trays. Alternatives to those include egg cartons, and plastic boxes that you can buy in sewing, hardware and fishing tackle stores.
Set aside all units with an availability date on their back that is later than the game's starting year. They will become available later (see WiF 4.1.1). You can remove any of your other units from the force pools if they have a year on their back that is at least 4 years earlier than the game's starting year. For example, if you were playing the Defcon 5 game, which starts in 1948, you could remove any unit that had '1944' or earlier on its back. Once removed, these units can never return to the game, so be careful. You can also remove any of your naval units from the game if they were sunk before the game began (see the red or white dates on the back of the counter). The scenario information may specify that you should add some minor country units (or even some conquered major power units) to your force pools.
11.1.6 Setting up
This rule explains how to set up the units and markers.
Administrative counters. Consult the scenario information and put the year marker in the appropriate space on the year track for this game's starting year. Put the turn marker in the appropriate space on the production circle for the first turn of this game. For the Defcon 5 campaign, use the 1941 space when you reach 1951. Put the initiative marker in the appropriate space on the initiative track, turned to the side which starts the game with the initiative. Put the impulse marker in the left-most space of the impulse track. Set aside the remaining markers for now.
What units to set up. Now consult the set-up chart (see the end of the rules) for the campaign you are playing. The set-up chart is broken down by campaign and by major power. Set up each major power in the order listed for your campaign.
The set-up chart is further divided by rows for geographical locations, and columns for unit types. A number in the set-up allows you to set up that many units of that type. If a type is specified but not a number, you get 1 unit of that type. Chinese Communist naval units are differentiated from Chinese Nationalist naval units by a red star on the front of the counter. Some units must be of a particular nationality. The nationality abbreviations used on the set ups are:
Aus Australia; Al Albania; Be Belgium; Bu Bulgaria; Can Canada; Cz Czechoslovakia; Eg Egypt; Gr Greece; Hu Hungary; In India; Indo Indonesia (NEI); Ir Iraq; Is Israel; It Italy; Le Lebanon; Mon Mongolia; Ne Netherlands; NK North Korea; No Norway; NZ New Zealand; Ph Philippines; Po Poland; Ru Rumania; SA South Africa; SK South Korea; Sy Syria; Vi Vietnam; Yu Yugoslavia.
Some units types and terms have also been abbreviated. They are: CP Convoy point; CVP Carrier plane; [fu] face-up; [fd] face-down; NSU naval supply unit; P Pilot (not in SiF) do not set up this unit if playing with SiF.
Some of the columns relate to aircraft set-up. Aircraft types are differentiated according to the time taken to build the unit. Ignore the PiF aircraft, SiF naval and AfA, AsA and MiF columns. These units are only set up if you have the appropriate World in Flames kit. The World in Flames scenario booklet explains how to set up these units. If there are not enough units in the force-pool to set up a unit, and you have not removed any of those units from the force-pool, you may randomly select a unit of that type from those available in the next year (or years if necessary). Unless the set up specifies a particular unit, choose the units randomly. All Commonwealth units are British unless otherwise indicated.
Where to set up. The left-hand column of the set-up chart shows where to set up your units. If there is a date there, set up the units in those spaces of the production circle. Set up ships face-up if the next abbreviation to the right of the unit is "[fu]", face-down if it is "[fd]".
Example: I am the USSR player setting up the USSR units for the DefCon 5 campaign (see set up Chart for campaign 11.3) and playing with SiF. The left-hand side of the second last row of the USSR set-up states 'Jul/Aug'. I set up a TRS face-down and a sub face-up on the Jul/Aug section of the Production Circle.
If the left-hand column has the words 'construction pool' or 'repair pool', set up the units in those pools. Mostly, the left-hand column will mention a geographical location. A set up that specifies "Europe", "Asia", "Pacific" or "America" means you can set up the listed units on that map(s). "India" includes Ceylon. "US east coast" is any hex on the east coast of the USA. "US west coast" is any hex on the west coast of the USA. If the set up gives you some latitude (e.g. "Europe" or "Burma"), you can set up the unit in any hex you or a co-operating major power controls in that place. You must set up all on-map naval units in ports. The campaign information details who controls what territory at the start of each campaign. Some of this will specify a start line and a direction away from it that you must set up. The start lines are colour coded to match the years marked along them. Pink start lines are combinations of several years' start lines. All units must conform to stacking limits after set up (see WiF 2.3). After you have finished setting-up, you can make naval moves out to sea with your naval units. Treat this as a naval action you conducted last turn, so the units must finish their move, then drop to a lower sea-box section as if they had stayed at sea last turn (see WiF 13.4). Believe it or not, you are now ready to play (see, wasn't that easy)!
Campaign rules
Most of the campaign information below is self explanatory. "Players" is the maximum number of players for this campaign. "Maps used" tells you what parts of the maps are used. You can only enter hexes on the areas in use. Only objectives in the play area count for victory purposes. "Sides" tells you which major powers are on which side. "Initiative" tells you who has the initiative for the first turn (you do not roll for initiative this turn). "War status" tells you who is at war with whom. All minor countries in the game, not controlled by a major power, are neutral. "Control" shows who owns what at the start of the campaign. "Victory objectives" states the number of objectives you are expected to obtain by the end of the game.
11.2 Eagle vs the Bear: Mar/Apr 1945 ~ Jul/Aug 1948
First turn: Mar/Apr 1945
No. of turns: 20
Players: 7
Maps used: All
Sides: The USSR, Communist China and Japan comprise the 3 Communist major powers. The Commonwealth, France, Nationalist China and the USA comprise the 4 Democratic major powers.
Initiative: Democrat +1, Democrats start with initiative.
Last weather modifier: Nil.
War status: The Commonwealth, France and the USA are at war with Germany and Japan. The USSR is at war with Germany. Nationalist China is at war with Communist China and Japan.
Control: As specified on the map except that: the USA has conquered Sardinia, Sicily, Iwo Jima, the Marianas Islands, the Marshall Islands and Germany (west of the 1945 start line) and is aligned with Brazil, Iceland, Greenland, the Philippines, the Admiralty Islands, New Britain (west of the 1944 start line), Dutch New Guinea (east of the 1944 start line), Guadalcanal, the 3 Gilbert Islands hexes and Pacific hexes 1915, 1916 and 2016; Japan has conquered China (east of the 1945 start line), Hong Kong, Malaya, Dutch New Guinea (west of the 1944 start line), the rest of the Netherlands East Indies, North Borneo, Christmas Island (East Indian Ocean), East Timor, the Philippines, Wake Island, Guam, Nauru, New Ireland, New Britain (east of the 1944 start line), and all islands exclusively in the Bay of Bengal; and is aligned with Manchuria, Korea, Siam and French Indo-China; Communist China controls Lan Chow and Sian and every hex adjacent to these cities; the USSR has conquered Germany, East Prussia and Hungary (all east of the 1945 start line), Albania, Rumania, Estonia, Latvia, Lithuania, Bulgaria and Persia and is aligned to Yugoslavia and Poland (both east of the 1945 start line) and Greece; the Commonwealth has conquered Iraq, Italian Somaliland, Italy (south of the 1945 start line) and Libya (AfA option 1: and Eritrea) and is aligned with Belgium and Ethiopia; Germany has conquered the Netherlands, Denmark, Norway, Poland and Yugoslavia (west of the 1945 start line), and is aligned with Czechoslovakia, Hungary (west of the 1945 start line) and Italy (north of the 1945 start line); Bessarabia, the Finnish borderlands and East Poland are part of the Soviet home nation; South Dobruja is part of the Bulgarian home nation; and Transylvania is part of the Rumanian home nation.
Intelligence points: The USSR (9), USA (8), Commonwealth (7), France (3), Japan (4) and Communist China (2).
Production: All major powers start with a production multiple of 1.
A-bomb Research: USA: 80, USSR: 20
Special rules
Germany. All countries that start the game under German control may be liberated (see WiF 13.7.5) when conquered by the Democratic or Communist major powers except for Germany itself which can only be conquered and never liberated. Once liberated by one side, they can only be conquered by the other and not liberated (e.g. Vienna is occupied by the the USA who then liberate Austria. Subsequently, the Soviets occupy Vienna and conquer Austria).
All German units that start the game in West Germany, the Netherlands, Italy, Austria, Denmark and Norway are set up and controlled by the Soviet player. They move and fight in the Communist player turn. All German units that start the game in East Germany (including Berlin), Czechoslovakia, Hungary, Yugoslavia, Poland and East Prussia are set up and controlled by the US player. They move and fight in the Democratic player turn. German units move and fight normally except that they may never cross a national boundary if this means that they would change control (e.g. you can't move German units from East to West Germany or vice versa).
Immediately before you resolve a land attack against German units where you have obtained odds of at least 1-1 (i.e. after the odds ratios are determined but before rolling dice - see WiF 11.16.5) roll one die for each defending German land unit and compare it to the following table:
| Attacking Major Power | Die Roll |
|---|---|
| Commonwealth | 3 |
| France | 1 |
| USA | 4 |
| USSR | 2 |
Add 1 to the die roll if the unit is an SS unit. Subtract 2 if the unit is out of supply. If your modified roll is less than or equal to the above number, the German unit defects. If more than one major power is attacking, use the lowest of the above numbers (e.g. the Commonwealth and US are attacking an SS unit and would need to roll a 1 or 2 for the unit to defect). If any German unit remains, resolve the combat normally. If none (including any notional unit) remain, the combat is automatically successful as if you had rolled a 10 on the 5-1 combat table (allowing a blitz result if you are fighting on the blitz table).
All defecting units are placed on the production spiral to arrive as reinforcements in the following turn in the home country of the major power that the unit defected to. If more than one major power attacked, they defect to the major power with the highest number in the above table (e.g. continuing the above example, if the SS unit did defect it would defect to the US, not the Commonwealth). All defecting units are treated as units of the major power that they defected to for all purposes with the following exceptions: (a) when destroyed, they may never be rebuilt; (b) they can never co-operate with any other major power; and (c) they must always remain stacked with a unit (land, air or sea) of their controlling major power. If for any reason they do not, they are immediately destroyed.
All German units are hostile to all other major powers. Both sides may attack any German units (even those you control), and they can defect to either side. You can also have the German units you control attack non German units that you control (though if you do you lose the game immediately due to stupidity!). Note that only German land units can defect. Their naval units and aircraft units may not. All destroyed German land, air and naval units are permanently removed from the game.
Option: HQ units never defect.
Germany has no production and may not produce any units. Blitzed German land units arrive as reinforcements in East Germany if Blitzed by a Communist major power or West Germany if blitzed by a Democratic major power. They are placed in an eligible city by their controlling major power.
Co-operation. The USA co-operates (see WiF 18) with the French and the Commonwealth. No other major powers co-operate with each other.
Politics. All aligned minor countries which have flags are considered full allies of their controlling major power. India, Pakistan, North Korea and South Korea do not exist as independent countries. You can't buy influence in any of these countries, nor any countries that are aligned or conquered at the start of the game.
Unformed Minor Countries. Egyptian, Israeli, Jordanian, Lebanese, Syrian, Pakistani, Vietnamese and North and South Korean units are not used in this campaign.
Victory objectives: Commonwealth ~ 29, Communist China ~ 3, France ~ 8, Japan ~ 2, Nationalist China ~ 0, USA ~ 20 and USSR ~ 5.
Player's Notes
Communists: The Communists have a tough row to hoe at the start of the game. The Soviets have more Germans on their front than the Democrats do and the Germans are less likely to defect to the Communists than the Democrats. However, they must still try to attack as many Germans as quickly as possible not only to gain a lot of defecting Germans but also to liberate as many minor countries as possible. You want to set up one or two German corps in Norway and Denmark to make life as hard as possible for the Allies in any invasions they might try. The rest of your Germans need to set up in West Germany, Italy and the Netherlands to slow up the Democrats as much as possible. Always stack the German corps two high if possible to minimise the number of automatically successful Democratic attacks. If you can throw in enough aircraft to get the odds of any attack below 1-1, by all means do it as this will mean that the Germans units under attack will not defect. As for your own units, you want to set up your European units in assault formation (ARM, Mech and Mot stacked together) to maximise the number of blitzable stacks you can create. Once you have busted through the screen of Germans you must then decide whether you are going to try to continue your offensive into Western Germany. Alternatively, you could screen the Democratic major powers from any further advances there while you turn the bulk of your forces elsewhere, either south into the Middle East, rich in both oil and objectives, or to help your allies out in China and the Pacific. One trick is to leave an enclave of Germans in Kiel protected and bypassed by Soviet forces. You can then use your Soviets to protect the German fleet from land attack. Of course, the Allies will eventually destroy them by invading Kiel directly, but this could be costly in losses, and could allow the German fleet to cause substantial damage in the meantime. Regardless of which you choose, you should set up at least one TRS or Amph in Vladivostok to enable your troops to move into the Pacific to slow up any US drive there. The Japanese initially face overwhelming US air and sea power and must react to US and Commonwealth threats across the Pacific. However, as the pressure is reduced in China, you can beef up your forces in the Japanese home islands to ward off any Operation Olympic, or even use them offensively to grab back territory from the impudent US player. This can be particularly effective late in a turn after the bulk of the US fleet has sortied. Protect your navy at all costs. Just having a Japanese fleet in being is invaluable in tying down US and Commonwealth ships, limiting the number of offensive sorties they can launch. As for the Communist Chinese, they should try to expand southwards as rapidly as possible in conjunction with the Japanese army to maximise the amount of territory you can occupy in South East Asia before the bulk of the US Pacific forces can be deployed against you. As to political advice, please see the Player's notes in 11.3.
Democrats: The Democrats have an easier time in Europe than the Communists as the Germans are more likely to join your side against worldwide Communism. However, this is more than balanced out by the serious situation in Asia. First off, you must try to maximise your advantage in Europe by launching as many attacks as you can against the Germans by the Americans only. You could also occasionally launch attacks by the Commonwealth if necessary, and by the French only when you have high odds. Once you have cleared out the Germans you are facing, you want to try to use your superior airforce to help drive back the Russians from Central Europe. Be careful in your attacks though. The Russians outnumber you in land units, and if you lose too many units in attacks, having a large air force and navy is not going to be any help as their bases are overrun throughout Europe. Even while contesting Soviet advances in Europe, you must still focus a large amount of materiel in the Pacific. Here, you have three major areas where you could intervene, China, Japan or Siberia. In China, your Nationalist Allies will be hurting badly under the triple hammer blows of the Japanese, Soviets and Communist Chinese. South East Asia is rich in resources and objectives and if you lose it all, it can be hard to reconquer. However, since you do not co-operate with the Nationalist Chinese, effective intervention is difficult as you need to satisfy the Foreign troop commitment rule. It may in fact be easier to invade behind Japanese lines where you are not restricted. A second option is to try to finish off the Japanese. This could be tough however as the Japanese are far from beaten and can reinforce with substantial units in Manchuria. However, if successful it will provide you with the greatest benefit as you could knock out a major power in one fell swoop. An alternative is to invade Siberia directly. This can severely hurt Soviet production and reinforcement of China, while also allowing you to swing eastwards forcing the Soviets to rail troops to block you, or southwards to mop up the Kwantung army. No matter which option you go for, any invasions will require naval moves that will slow down your drive in the European theatre of operations. Whenever possible, try to move everything in one naval move, leaving the rest of your turn free for land impulses. Just as in World in Flames, you can also minimise any co-ordination problems this might cause, by having the Commonwealth and French doing a land when the USA does a naval and vice versa. This allows you to plug any gaps or have your allies do the invading off your ships, all in the one impulse. Finally, you may want to accelerate units, particularly your aircraft units. It is amazing how dominant those post war aircraft can be when faced with piston engined opponents. Good hunting!
11.3 DefCon 5: May/Jun 1948 ~ Jul/Aug 1953
First turn: May/Jun 1948
No. of turns: 32
Players: 7
Maps used: All
Sides: The USSR and Communist China comprise the 2 Communist major powers. The Commonwealth, France, Italy, Nationalist China and the USA comprise the 5 Democratic major powers.
Initiative: Communist +2, Communists start with the initiative.
Last weather modifier: You do not roll for weather on the first impulse. The weather is fine everywhere as if you had rolled a '10'.
War status: The USSR is at war with the Commonwealth, France, Italy and the USA. Nationalist China is at war with Communist China. The Commonwealth, France, Italy and the USA are surprised on the first impulse of the game.
Control: As specified on the map except that: the USA has conquered West Germany (including Berlin), Japan (and all her territories except Formosa, Hainan, Manchuria and Korea) and Libya and is aligned with Austria (all mountain hexes and west thereof), South Korea, Israel and the Philippines; the USSR has conquered East Germany, East Prussia, Austria (east of the Austrian mountains), Estonia, Latvia and Lithuania and is aligned with Albania, Egypt, Jordan, Syria, Lebanon, Mongolia, Rumania, Hungary, Bulgaria, Poland, North Korea, Indonesia and Czechoslovakia; the Commonwealth is aligned with Belgium and the Netherlands; Communist China is aligned with Vietnam and controls all hexes in China (and Manchuria) within the 1948 Communist Chinese borders; Nationalist China controls all Chinese (and Manchurian) hexes outside of Communist Chinese hexes including Formosa and Hainan; Manchuria is part of the Chinese home nation (both Nationalist and Communist); Bessarabia, the Finnish borderlands and East Poland are part of the Soviet home nation; Silesia is part of the Polish home nation; Rhodes, Leros and the island in hex EE1911 are part of Greece; South Dobruja is part of the Bulgarian home nation; Transylvania is part of the Rumanian home nation; and India, Pakistan and Ethiopia are neutral minor countries.
Intelligence points: The USSR (15), USA (10), Commonwealth (5), France (3), Italy (2) and Communist China (5).
Production: All major powers start with a production multiple of 1.
A-bomb Research: USA: 120, USSR: 60
Special Rules
Major Power militia set up. The Commonwealth, US, Italian, French and USSR (and their controlled minors) militia set up at the start of the game are set up in their home cities face-down.
Germany and Japan. Japan and Germany begin the game conquered. Neither East nor West Germany have a capital at the start of the game, but are instead considered conquered territories. During any production step that every factory in Germany (both east and west) or Japan is controlled by one major power, that major power may liberate that major power (note this means Japan can be liberated in the first turn provided all the factories remain under US control). It costs the liberator 50 build points to liberate Germany or Japan. The liberated country becomes a major power controlled by the liberating player. All hexes controlled by the liberator in the liberated major power revert to its (Germany/Japan's) control. All units included in the game belonging to that country from that year or earlier are now available and the country is treated as a normal major power for all purposes (e.g. it has separate production, its blue factories are usable, its action limits are as per the Major Power Activities limits chart etc.). All partisans in that country are immediately removed and only appear in future turns in that country in hexes controlled by an enemy major power.
Option: You do not add the SS units to the German force pools when you liberate Germany.
Italy. Italy is conquered just like every other major power (i.e. when Rome and every printed Italian factory is controlled by a Communist major power).
Co-operation. The USA co-operates (see WiF 18) with the French, Commonwealth and Italians. No other major powers co-operate with each other.
Vietnam and Indonesia. Vietnam (Indo-China) and Indonesia are minor countries in which enemy major powers partially occupy them at the start of the game. These enemy major powers start the game only controlling the hex that their units occupy. Vietnam and Indonesia are only conquered when every city and port in their country is enemy controlled. Furthermore, their partisans may be placed on the map in any hex in their home country (even friendly controlled hexes). In their home country, if all their land units in a hex being attacked are face-up, those units may retreat before combat (immediately after an attack is declared against them). If they do, there is no combat die roll and the attack is treated as if the attacker had rolled a "-/R*" result (i.e. they cannot retreat into an enemy ZoC unless they retreat onto a friendly land unit, they are turned face-down after the retreat, the attacker may advance after combat etc).
Vietnamese, Chinese and Indonesian partisans. The Vietnamese (Indo-Chinese), Communist Chinese and Indonesian partisans were very effective throughout the post world war II era. To reflect this, their partisans have additional benefits not available to any other country. Whenever two of their partisans are stacked in the same hex at any time during a production step, the partisans controlling player may destroy these two units and replace them in the same hex with an INF, MIL or GARR belonging to that minor country. These units are like any other unit of that country requiring supply to move and fight without restrictions etc.
Victory objectives: Commonwealth ~ 21, Communist China ~ 5, France ~ 7, Italy ~ 4, Nationalist China ~ 0, USA ~ 22 and USSR ~ 8.
Player's Notes
Communists: The Communists have a much easier time of it in Europe in this campaign. Not only are there no nazis left to worry about, but you start on the Elbe with minimal corps facing you. You really need to go all out in those first two turns slashing and burning in all directions. Use your offensive chits aggressively, the first one in the first impulse. The question is how? One possibility is to use it in an air action, to disrupt as many NATO corps as possible before destroying them gradually during the rest of the turn. The second approach is to use it in a land action to double 10 (using Zhukov) attacking corps. This should see at least 6 Democratic corps destroyed in the first impulse (out of their 10 starting in Germany). However, as you only get 4 air missions in a land action, the rest of the NATO forces are free to flee across the Rhine. Possibly the best solution is to use it in a combined action allowing your subs to hunt Democrat convoys, your aircraft to disrupt all their land units, and your land units to destroy all remaining opposition. As the disrupted NATO units cannot move for the rest of the turn, you can mop them up at your leisure. Finally, all your remaining aircraft can rebase to the front at the end of the first impulse, allowing them to continue the offensive in future impulses. Once you have destroyed the Democrat's initial defence line, you must push on ruthlessly. You will need to cross the Rhine, Meuse and Dyle before you can use your superior forces in the plains of Central France. Feel free to use your second offensive chit to increase the odds of paras attacking across the Rhine to help you breakthrough this vital barrier. If you do bust into France, you must decide whether to continue into Spain or Italy. As Gibraltar is so important, I recommend you screen Italy until you have reached the Mediterranean. However, if the Italian forces are weak, you should veer southwards to knock them out of the game. If you get stopped, you might look to go over to the defensive in Western Europe over the winter of 1948/49 to allow you to conquer Turkey and the middle east, areas easy to attack and hard for the Democrats to defend. In China, the Communists should have sufficient firepower to knock out the Nationalists, particularly with the aid of partisans. However, if the Nationalists set up in Mukden, you will need your Soviet Allies stationed in Siberia to send an expeditionary force southwards to dig them out. Remember that this will require an HQ (due to the Foreign troop commitment rule), but the earlier this is done the better as it allows the Soviet HQ to then rail westwards to help the drive on the Rhine. After you have secured China, you shouldn't stop but should continue to head southwards until all the lands of Asia are freed from the talons of western imperialists.
Democrats: The Democrats have some severe problems at the start of the game as they have dozens of places they need to defend (Germany, France, Italy, Netherlands, Belgium, Israel, Turkey, China and potentially Pakistan), with minimum land forces to do it with. Your first priority must be West Europe. Every spare corps must be thrown into the cauldron as quickly as possible. Your set up units must set up in forests and cities wherever possible to minimise overruns. Also set up corps either on the coast or next to each other to minimise being placed out of supply particularly by the 2 Paras that the Soviets start the game with. Even with these precautions your losses are going to be considerable. With whatever you have left, try to scuttle across the Rhine and hold every hex, even with only one corps if necessary. If the Soviets cross this barrier, the French are going to be in serious trouble. All you can do if this happens is build lots of militia and pray for bad weather. Once the winter of 1948 arrives, you should be given enough respite to reform your shattered lines. Your big advantage is your navy. Use it aggressively. Your CVs provide excellent air cover allowing you to reduce the odds of most attacks. Furthermore, the Soviets may well end up being victims of their own success particularly if their advance leaves their aircraft out of range of the action. As for your Italians, they will be hard pressed just ensuring the political integrity of Italy and cannot be expected to provide support elsewhere, except for their navy which can help to escort your convoys. If you do manage to stabilise in Europe, look at making invasions anywhere where there is 5 or more feet of sand. The Communists control a lot of coastline and most of it is pretty well undefended. If you invade sufficiently far enough away from their main concentrations of units, you might be able to destroy their reinforcements as they are railed to the front piecemeal. Furthermore, if the Soviets weaken their front lines sufficiently, this might allow you to bust your way back into Central Europe. One great place to provide support is Israel. With the addition of just a couple of corps, your combined US/Israeli army should be able to knock out the Egyptians, Jordanians, Syrian and Lebanese, securing the middle east as well as threatening a drive through Persia into Russia. In the east, you need to be a lot more cautious. The Nationalist Chinese can very rarely afford to launch attacks against anyone other than the odd weak partisan. Furthermore, you will need to ask the USA to send an expeditionary force comprising an HQ and several corps into mainland China to garrison your factories and resources, hunt down partisans and provide front line support against the Communist Chinese (hey, I never said this was going to be easy). If you fail in this task, you might find that all of mainland Asia is lost to you, making it a very hard road back. As you need to capture objectives to win, the more you lose, the harder your task will become.
Politics: Patton in Flames provides an exciting political system that makes every game different. At the start of the game, every major power has points they can spend to bring minor countries on to your side or stop them from going on to your opponents. The Allies with their big economy will eventually be able to get many minors on their side, but the Communist blitz in the early stages can give them the critical minors they need for an overwhelming victory. A conservative Soviet ploy might see the Communists gain the Yugoslavs, or stop the Turks joining the Allies. Both of these will have immediate benefits in either widening the main front, or removing the requirement for screening troops against the Turks. A bolder ploy is to save all your points on the first pre-set up round for a massive blitz on one or two key minors on the second, and they don't come any more key than Spain or Switzerland. If the Soviets get either of these two minors to mobilisation level on the first turn of the game, either France or Italy will be outflanked, outmanouvered and destroyed piecemeal. If Spain goes, Gibraltar might also fall in the first impulse. Spain and Switzerland are expensive to manipulate, but the reward could be immense. The only way to stop this is for the Allies to play conservatively by using their political points in both rounds in dribs and drabs, some in Switzerland, some in Yugoslavia, some in Switzerland and some in Turkey, all to stop these minors mobilising. Even if you don't get them on your side, you must at least stop them becoming Communist. At the same time, you must still leave some points over for the countries that give you economic benefits such as Venezuela, Brazil, and Mexico, or strategic benefits such as Central America, or both as in the case of Sweden and Norway. A very tricky balancing act. During the game, you want to spend your points judiciously, buying minors who will give you the maximum economic benefit for the minimal outlay. With this, you can then start influencing others. Remember, even if you only influence a minor by +3, the natural movement will sooner or later have it as one of your best friends.
I hope these player's notes provide you with some guide as to how to play and win at Patton in Flames. More extensive notes will be released in our upcoming annual. Till then, good luck and good gaming!
Counter Errata
The 4th Canadian is an INF not a MIL.