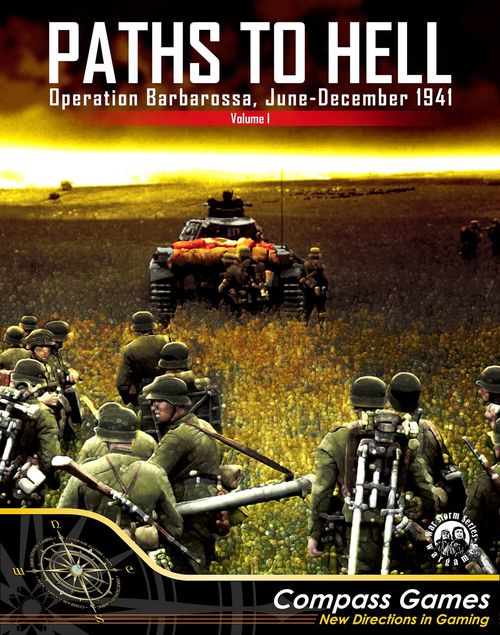
Paths to Hell: Operation Barbarossa, June – December 1941
Paths to Hell: Operation Barbarossa, June – December 1941 Rulebook
Table of Contents
Table of Contents
- 1. Introduction
- 2. Game Components
- 3. Sequence of Play
- 4. Stacking
- 5. Movement
- 6. Spotting
- 7. Officers
- 8. Attack
- 9. Close Assault
- 10. Morale
- 11. Risky Action
- 12. Terrain
- 13. Terrain Markers
- 13.1 Improved Positions (Risky Action)
- 13.2 Barbed Wire (Risky Action)
- 13.3 Roadblocks (Risky Action)
- 13.4 Pontoon Bridges (Risky Action)
- 13.5 Anti-tank Ditches (Risky Action)
- 13.6 Dragon's Teeth (Risky Action)
- 13.7 Minefields (Risky Action)
- 13.8 Trenches
- 13.9 Fortifications
- 13.10 Smoke
- 13.11 Rubble (optional rule) (Levels: Built-up: 1, Dispersed: 0.5)
- 14. Flame-thrower Tanks and Engineers
- 15. Amphibious Tanks
- 16. SMG Units
- 17. Battalions
- 18. Overlays
1. Introduction
The War Storm Series is a game series designed to simulate combined arms company level combat. It is based on the principle of simultaneous execution, or simply "WE GO", a hybrid system of turns and "real time". The system's emphasis is on command, by officers, the game's heart.
2. Game Components
2.1 The Game Board
The game is played on a board formed by one or more maps that abstractly represent the locations in which the various battles took place. A hexagonal grid has been superimposed on the terrain to facilitate movement and combat. The distance between the opposite sides of each hexagon (hereafter hex) represents a distance of approximately 150 to 200 meters. The terrain types represented on the board and how they affect movement and combat are explained elsewhere. Each hex has a center dot to facilitate line of sight determinations.
Each map has a letter which identifies it and which is used to number its hexes. E.g., hex A413 is on map A.
Each of the maps has an arrow indicating north, which is only used to resolve the effects of Off-Board Artillery (8.1.3). Each individual scenario lists the maps used therein and their relative orientation.
Units entering by a road line up off-map behind the first unit and count road MPs while moving up to the map. If units can enter from the side of the map, they set up on the half hexes, treating the half hex as the first hex being entered and as a full hex for entering the map. The half hexes are not playable during the game.
Distance calculation: All distances are measured in the same manner: do not include the hex you begin counting from but do include the hex you finish in. E.g. the distance between two adjacent hexes is one hex.
2.2 Counters
There are two types of counters: combat units and markers.
2.2.1 Combat units
Combat units are playing pieces that represent officers, troops, weapons, etc. In the upper left corner a flag can be seen which serves to identify the side to which the unit belongs.
All combat units, except officers, have three steps. Steps represent the number of men forming the unit, which decrease as they suffer losses. This affects both the morale and firepower of the unit. A unit that has not suffered any steps lost is represented by the front of the counter. The first step lost is indicated by placing a hit counter on the unit. When a unit loses its second step, remove the marker and flip the unit to its reduced side (crossed by a red stripe). Except for units with intrinsic transport, which show their transported side and for which a -2 hit counter should be used. When a unit loses its third step the unit is completely eliminated and removed from the board.
Combat units have one or two boxed numbers which display their fire factors (FF), with their range in superscript, and are color coded by attack type (see section 8, Attack). The color of each box indicates the type of munitions used by the unit.
2.2.1.1 Land combat units
These are divided into the following categories:
- Officers: There are three kinds of officers: infantry officers, support weapons officers and tank officers. The latter are distinguished by a blue rectangle on their right side. Officers marked by a vertical red stripe on their front side are replacement officers.
- Troop units: These represent groups of between 30 and 40 soldiers, that is, approximately one platoon. Troop units may be of two types: Infantry; Cavalry.
- Weapons units: These represent groups of 3-4 weapons or vehicles with their accompanying crews (20-25 soldiers). Weapons units may be of the following types: Machineguns; Mortars; Artillery; Anti-tank guns; Infantry guns; Anti-aircraft guns.
- AFVs (Armored Fighting Vehicles): Tracked: Tanks, Halftracks. Wheeled: Armored cars.
- Transport units: These represent groups of 3 to 5 vehicles with their corresponding drivers.
Land combat units are grouped into formations. A formation is a group of land combat units which are under the control of the same officer.
2.2.1.2 Air units
Air units represent between one half and one squadron of aircraft and are either Bombers or Close Support aircraft.
2.2.2 Markers
Markers are used in the game to provide information to the players regarding the status of combat units, the number of hits they have suffered and other significant data regarding them or the terrain they occupy. The rules indicate when one should mark combat units or hexes and with which kind of marker.
2.3 Scenarios
The scenario cards provide all the information needed to simulate a brief combat or skirmish:
- The historical introduction. This provides the name of the battle and information about it, like the dates and participating units.
- Order of battle. This indicates, separately for each side, which specific combat formations are represented in the scenario. For example: "Elements of the French II/94 (second battalion, 94th Infantry Regiment)." The scenario card indicates the place of entry or deployment of the combat units for each side. For example: "Deploy in or adjacent to hexes H1314 and 1211." The card also indicates which side of the map belongs to each player.
There follows an enumeration of the units that each side uses in the scenario and if they are veterans or green troops. Veterans use the fire column to the right of the column determined by their fire factor. Green units use the column to the left. Example: A unit with a FF of 10 would attack on the 12 column if veteran, or the 9 column if green.
Example of reading a scenario OOB:
- "1 x Officer, 3 x French infantry, 1 x H-39 (x2)." This indicates that one should take from the counter mix one French infantry officer, three French infantry units, and one H-39 vehicle unit. The (x2) in parentheses indicates that the OOB consists of two identical formations with the same composition. To determine which specific units participate, take all of the French infantry officers and place them in an opaque container. Draw one blindly and then take the three infantry units with the same ID and one vehicle of type H-39, which does not have an ID since it does not normally belong to a specific formation but is added to this formation for this scenario. Then repeat this process again as the scenario indicates that two identical formations are used in this scenario.
- "1 x Officer, 2 x French MMG." Take the two French MMG officers and place them in an opaque container, draw one and then take two of the MMGs with the same ID as the officer.
- "1 x Officer, 3 x French infantry (x3)." Repeat the same process used for the other French infantry units: place the remaining French infantry officers in the container, draw one leader and take the three infantry units with the same ID. Repeat this two more times.
Finally, each side may have additional markers. For example: 3 x Improved Position. These Improved Positions are in play from the start of the scenario, protecting three combat units selected by the player or as the scenario indicates.
- Map orientation: This illustrates the correct layout of the maps that form the game board used in the scenario. The letters on each map are used to ensure the correct orientation of each. The arrow to one side indicates which side of the game board is north.
- Victory conditions: These indicate what each player must do to win the scenario. Some scenarios may have the possibility of ending in a draw or in different grades of victory (marginal, tactical or decisive) depending on the victory points the players earn.
- Duration of the scenario: The game ends after all of the indicated number of turns have been completed, after which both players check to see if they have complied with their victory conditions. The Turn marker should be placed on the track to indicate each turn as it is played.
- Special rules: These rules apply only in the scenario in which they appear.
- Anti-Air points and aircraft units, if any appear in the scenario.
- If they appear in the scenario, the type, density and location of minefields will be indicated.
- Historical outcome: A brief description of the result of the historical battle.
- Reinforcements: if the scenario does not indicate where reinforcement units enter the map it is the free choice of the player where they enter.
2.4 Fractional Numbers
During the game it is sometimes necessary to divide two numbers, which may result in fractions. In such cases, count only the whole number result and discard any remainder. For example, a result of 1.5 hits is converted to 1 hit, while 0.8 hits has no effect.
Exception: If one is calculating fire factors, always round up. For example, if a unit has a halved fire factor of 2.5, this becomes a 3.
3. Sequence of Play
Each scenario is divided into turns. Each turn represents the passage of about 12-15 minutes. Each turn is divided into the following phases:
- Command Phase
- Initiative Phase
- Activation Phase and Performing Actions
- Marker Removal Phase
3.1 Command Phase
At the beginning of each turn, both players must simultaneously determine which of their land combat units are "in command" and which are "out of command."
Units are in command if they are at a distance from their officer which is equal to or closer than his command range (number in the upper right corner of the photo of the officer). They are out of command, and marked as such, if they are farther away. Command range is measured as indicated in section 2.1, so that, for example, an officer with a command range of 0 may only place units in-command that are stacked with him, and an officer with a command range of 1 may only command units which are stacked with him or are in adjacent hexes.
If at the end of a formation's activation or after a retreat, a unit is now out of the command range of its officer, it is marked "Out of Command."
3.2 Initiative Phase
At the beginning of each turn, the players must determine which side has the initiative, that is to say, which side will get the first activation this turn. To do this, each player rolls a six-sided die (hereafter 1d6) and modifies the result as follows:
- +1 if the scenario indicates the player is the attacker
- +1 if the player had the initiative during the preceding turn
- +/-n as indicated by the scenario.
If the result is a tie, both players roll again with the same modifiers until one side or the other has a higher modified roll and wins the initiative.
3.3 Activation Phase and Performing Actions
3.3.1 Activation
During the Activation Phase the players alternate activating an officer or out of command unit, beginning with the player with the initiative. The officer or unit cannot already be marked as "Finished."
If an officer is activated, all in-command units of his formation activate automatically and can perform an action.
Out of command units can be activated independently (even if stacked), costing one activation for each. To activate such a unit, it must pass a morale check following the procedure in 10.2. If it fails, it is marked as finished, it loses its activation, and the opportunity to activate passes to the opposing player. If it passes the check, it can perform an action.
Once an activation has been performed or attempted by one player and the corresponding action has been completed, the opposing player then does the same. In this way, the players alternate activations until both either cannot or choose not to activate units and pass consecutively.
When both players pass consecutively, they remove markers according to the procedure described below and the turn ends, or, if it is the last turn, the game ends.
3.3.2 Performing Actions
After each activation, the activated officer and the units of his formation (or the out of command unit) may perform a single action. Thus, for example, they may either move or fire, as these are distinct actions. Once an action has been resolved, place a "Finished" marker on the unit that has performed it.
When an officer is activated, he and any units of his formation that are in-command may perform the same action or different actions. For example, the officer may direct an artillery mission, one unit of his formation can move to one hex, another to a different hex, and the third can open fire. These actions are resolved in whatever order the controlling player desires, but one unit must complete its action before another can perform its action, except as listed below.
A list of the possible actions that a unit may perform follows, although certain actions may only be performed by specific types of units.
Officers may:
- Direct one or two artillery missions. It is irrelevant whether the artillery missions are on-board or off-board. An on-board artillery mission consists of firing one or several artillery units stacked in a single hex. Important: If an officer directs two artillery missions as his action, the rest of his formation cannot perform any action and must be immediately marked as "Finished".
- Direct one or two air missions in the same manner as artillery. An officer may not direct both an artillery and an air mission in the same activation.
- Rally himself, if he is marked as routed.
- Rally routed units of his formation.
- Move, as described below.
In-command units of the activated formation and out-of-command units may:
- Open fire, that is to say shoot at enemy units. Units may form a firegroup as described under Rule 8 (Attack), allowing more than one unit to take this action simultaneously.
- Move. Units may move within the allowable map area. Units may use part of their movement to mount or dismount transport.
- Assault. In an exception to each unit needing to finish its action before another unit can perform an action, all units that will participate in the assault can move adjacent to the target hex and assault it as per the rules on Assault (Rule 9). A mounted cavalry unit that assaults is said to be "charging."
- Load/unload: An artillery unit may be loaded (limbered) onto or unloaded (unlimbered) from a transport unit.
- Construct an improved position.
- Attempt a risky action (page 20).
- Prepare for reaction: that is, place a Reaction marker on a unit, which allows it to be activated as described later.
3.4 Units in Reaction
As has been mentioned above, a player may prepare units for reaction, placing a "Reaction" marker on the unit, which allows it to be activated as it is described in this section. Artillery and mortars may not be prepared for reaction.
Once the opponent has announced an activation, the player may activate one of his units in "Reaction" and fire upon the activated enemy units (this may occur at any time during the enemy activation, even in the middle of movement, but the enemy cannot be attacked in the hex from which it begins to start the order). If a unit is fired upon while it is moving through a hex with one or more units without exceeding stacking rules, they will apply to that unit all pertinent modifiers with the exception of the -1 modifier for "6 infantry steps in one hex," as the firing unit is only firing on the moving unit, not all units in the hex. However, if two or more units with a combined size of 6 steps or more are moving together and are fired upon in "Reaction", the modifier will apply.
However, units that will perform no action other than firing, rallying, or directing artillery or directing air or artillery missions may not be fired upon in reaction.
Any unit or units marked for Reaction that are able to fire may do so. Units that are stacked and belong to the same formation may combine their fire even if they are not adjacent to their officer. Units may not combine fire with adjacent reacting units, even if they belong to the same formation. A player may choose to react with only some of his units that are able to react, and save the remainder for another action or activation by his opponent.
The scenario may indicate that certain defending units are marked with Reaction markers at the start of play. Any such markers provided by the scenario are placed by the defender during initial deployment.
Once a unit marked with a Reaction marker is activated for reaction, it is marked as "Finished". Reacting does not count as an activation (only marking a unit or units for later reaction); therefore after his opponent's activation, the reacting player will take his normal activation.
Exception: Reaction without marker: Units that have not yet activated may react as above even if they are not marked for reaction, as long as they are in-command, but their fire factor (FF) is halved.
3.5 Marker Removal Phase
To conclude the turn both players remove:
- All "Out of Command" markers from units that have moved into command range of their officer.
- All "Finished" markers.
- If desired, "Reaction" markers.
Units which possess Reaction markers gained in preceding turns, in addition to reacting in the manner described previously, may be activated normally, that is by formations (if in command) or individually (if not), to perform any actions normally possible (not just for a fire action).
In addition, if one player only has units marked for reaction remaining for activation, regardless of the turn in which they were marked, and the other player passes, the turn ends.
It is recommended that in order to distinguish units that have been marked for reaction in the current turn from those marked in previous turns, the players rotate all reaction markers that will remain in play during the Marker Removal Phase.
4. Stacking
A maximum of 9 steps of combat units of the same side and an unlimited number of officers may occupy the same hex. A single hex may only contain combat units of one side, except during close assault, in which case the limit is 9 steps for each side (18 total) and an unlimited number of leaders (for more details, see 9. "Close Assault"). Transport vehicles do not count towards stacking limits, only the units (if any) that they are transporting. Officers do not count towards stacking limits.
Exception: During retreats after failed assaults or rout, stacking limits do not apply. The stacking rules are only enforced at the end of each unit's movement, retreat or rout. If a unit or units are forced to retreat or rout into a hex whose stacking limit would be exceeded, their retreat or rout is extended until they reach a hex that is not overstacked.
Example: A formation of 3 German infantry units without any hits (9 steps) begins a rout after morale failure from hex A310 towards the north. From there they rout to A410, where there are two infantry units without any hits (6 steps) and finish their rout in A408. However, there is a reduced infantry unit in A408 (1 step), which would cause the hex to be overstacked, so the units continue routing to A507, where there are no other units.
5. Movement
5.1 Types of Movement
Each type of combat unit possesses a different type of movement, indicated by the color of its movement factor:
- Foot (white). This group also includes units which utilize animal transport (cavalry units).
- Wheeled (yellow). There are two types of wheeled units: motorized and unmotorized. Motorized units move according to the costs under the "Wheeled" column on the Movement Chart. Unmotorized units, which are marked with a red T, move according to the costs under the "Wheeled" column except when moving on paved roads and dispersed buildings, for which they apply the costs under the "Foot" column. This is because unmotorized units cannot move faster than the crew pushing the weapon.
- Tracked (black).
5.2 Movement Capacity
The movement capacity of a unit is represented by the number in the lower right-hand corner of the counter (its movement points, or MPs) although the number of hexes they can travel is influenced by diverse factors, such as the type of movement or the terrain over which they move (see Movement Chart).
To move from one hex to another costs a unit movement points. If a unit does not have sufficient movement points remaining to enter a particular hex, it may not do so.
Movement Chart (Terrain Cost)
| Terrain type | Foot | Wheeled | Tracked |
|---|---|---|---|
| Open | 1 | 2 | 2 |
| Rough | 2 | 4 | 3 |
| Built-up Area | 1 | 0.5-2 | 0.5-2 |
| Woods | 2 | 6 | 4 |
| Light Woods | 2 | 4 | 3 |
| Road | 1 (+1 hex) | 0.5 | 0.5 |
| Trail | 1 |
Exception: All wheeled or tracked units can expend all of their movement points to move one hex, even if the cost to enter the hex is greater than their movement capacity. Example: Although according to the Movement Chart the cost for an 18 Pdr gun (wheeled movement type) to move from A509 uphill to A510 costs 8 MPs (2 for open and 6 to move uphill), it may make the move by expending all its MPs.
Movement points may not be accumulated from one turn to another nor may they be shared between units. A unit need not expend all of its MP.
The cost to cross a minor river or climb each level of elevation is indicated in the chart with a "+" symbol; this number is added to the cost of entering the desired hex. For example, to pass on foot from A1412 to A1311 costs 3 movement points (2 for light forest + 1 for moving one level uphill).
No unit may enter a hex occupied by enemy units, except via close assault.
5.3 Double Time
Units whose movement type is "foot" may move via Double Time and thereby gain three extra MP. However, such movement may not begin, end, or pass through hexes adjacent to enemy units. In addition, a unit may not employ Double Time on consecutive turns; once a unit has finished using Double Time, mark it with the corresponding marker as a reminder.
5.4 Movement via Road or Trail
Units that move via road or trail ignore all terrain costs except the additional cost for crossing linear obstacles, for example moving uphill.
If a unit moving by foot has spent its entire movement capacity moving along roads, it obtains a bonus of one hex additional movement along the same road. To enter a hex with a road or trail from a hex other than one entered by the road or trail has a cost equal to the underlying terrain. For example, from D309 to D409 costs 2 movement points, since the road passes through light forest.
5.5 Units with Intrinsic Transport
A number of units (motorized, mechanized, cavalry and motorcycle troops) have intrinsic transport that allows them to move around the battlefield more quickly, although usually at a cost to their combat abilities. The following rules apply to all units with intrinsic transport:
Units with intrinsic transport have on their rear side an illustration of their transport and on the front side an illustration of the corresponding dismounted unit. In addition to the unit itself, their intrinsic transport may carry any number of officers.
A unit that is towed or mounted on intrinsic transport moves at the speed of its conveyance and uses its movement costs for terrain. When it dismounts or is unlimbered the counter is flipped to its front side (artillery, anti-tank or infantry). To dismount or unlimber the unit (flip the counter to its front side) requires half the unit's movement points. After the unit is flipped, mark it as "Finished".
To mount or limber the unit (flip the unit to its transport side) also requires half its movement points (calculated from its transport side). The unit may continue to move with its remaining MP.
Units that are mounted or limbered may not be fired upon independently of their transport (or vice versa). Both are treated as the same unit.
In addition to the above, each type of unit with intrinsic transport has its own special rules, as indicated below.
5.5.1 Motorized Units (Artillery, Anti-Tank, and Infantry)
- Motorized artillery, anti-tank and infantry may not take any other action than movement when flipped to their transport side.
- Motorized Infantry units that dismount from their transport may not remount unless the scenario specifically indicates. Motorized Artillery and anti-tank units may limber and unlimber any number of times unless the scenario rules indicate the contrary.
- Motorized artillery, anti-tank and infantry units may only be attacked with AP or ART fire, whether they are mounted/limbered or not. They are recognized by having their movement on the front side in a yellow box (wheeled movement).
5.5.2 Mechanized Units (Artillery, Anti-Tank, and Infantry)
- Mechanized infantry units retain their vehicles when attacking; this is reflected by their higher firepower. They are identified on their front by a black rectangle. Such units are prohibited from entering terrain that is prohibited to tracked vehicles, even while dismounted.
- Mechanized infantry, artillery and anti-tank units may mount/limber and dismount/unlimber from their transport any number of times as desired unless the scenario rules indicate the contrary.
- The transport sides of mechanized artillery, anti-tank and infantry units are considered to be AFVs. They gain the advantages of armored vehicles while they are being transported, so that they may not be attacked with AP fire. While mounted/limbered they may only be attacked with AT or ART fire. Once dismounted/unlimbered, they may only be attacked with AP or ART fire.
- Mechanized units on their transport side with a fire value may use it just like other AFVs: they may fire, participate in an armored assault or give armored support to an attack.
5.5.3 Cavalry
- Cavalry units may mount/dismount as many times as the player wishes unless the scenario rules indicate the contrary.
- Cavalry units have different values on their mounted and dismounted sides. When dismounted, a cavalry unit is treated like infantry. Mounted cavalry, when it fires, sees its firepower reduced by half.
- When cavalry charges, it may increase its movement points by 50% but may not also benefit from the road bonus nor use Double Time. To charge, the cavalry units may not cross any type of prohibited terrain and do not require a pre-assault morale check to engage in hand-to-hand combat against the enemy.
- Mounted cavalry units may not charge against units that are in a built-up area, forest or marsh. After a unit charges, the following turn it may not charge again and may only use half of its normal movement points (ignoring fractions). Cavalry, like infantry, may only be attacked by AP or ART fire.
- Fire on mounted cavalry gains a -1 on the fire table as they are larger than normal targets.
5.5.4 Motorcycles
- Motorcycle units are reconnaissance units and are indicated by a red 'R' on their right side.
- Motorcycle units may mount/dismount as many times as the player wishes unless the scenario rules indicate the contrary.
- Motorcycle units retain their vehicles when dismounted; although they are dismounted, they may not enter terrain prohibited to wheeled units. Motorcycle units may only be attacked by AP or ART fire.
- Mounted motorcycle units may not assault and if assaulted they immediately dismount for free (flip them to their infantry side).
5.6 Reconnaissance
Reconnaissance units (identified with a red 'R' on their right side) are able to more easily detect enemy forces. In the game, this is represented by a positive modifier on the Spotting Chart as follows: Small (green) targets +1 stationary / +2 moving; Medium (yellow) +2 / +4; Large (red) +2 / +4 (see the Recon Units row of the Spotting Chart).
Whenever an officer of a different formation is within the command range of an officer of, or adjacent to a unit of, a reconnaissance formation, he may benefit from the modifier if he can see the same hex as the officer/unit. Officers of reconnaissance units gain a beneficial modifier when directing artillery fire.
5.7 Prohibited Terrain
For some units, entering certain types of terrain is prohibited due to their movement type. Prohibited terrain is indicated on the movement table by the word "No" under the movement type. The presence of prohibited terrain does not alter the effects of terrain markers (see rule 13) such as barbed wire, roadblocks, dragon's teeth and anti-tank ditches other than to make the hex impassable to the given unit type.
6. Spotting
A unit is able to see every hex on the board that is within its line of sight (hereafter LOS). A unit can see another unit if the hex is in its LOS and it is within the spotting distance.
Spotting Chart (first number: stationary target; second number: moving target; distances in hexes)
| Terrain | Inf./AT, Small (Green) | Art./Cav., Medium (Yellow) | Mot./Mech., Large (Red) |
|---|---|---|---|
| Open/Road/Trail | 7 - 10 | 8 - 12 | 12 - 18 |
| Rough/Marsh | 5 - 8 | 7 - 9 | 9 - 14 |
| Wood/Disp. Buildings | 3 - 5 | 4 - 6 | 4 - 8 |
| Light Wood/Fields | 4 - 6 | 6 - 8 | 6 - 10 |
| Built-up Area | 2 - 4 | 3 - 5 | 3 - 6 |
| Crest Line | +1 - +2 | +2 - +4 | +2 - +4 |
6.1 Spotting Units
For a unit to see another, in addition to having the unit's hex in its LOS, it must be at a distance equal to or closer than that given in the Spotting Chart. It is possible that a unit, although it can see another hex, cannot spot an enemy unit located in that hex. In that case, the enemy is considered hidden.
The possibility of spotting a unit depends on its size and the type of terrain in which it is encountered. The size of a unit is determined by the color of the small circle on its right-hand side: green (small), yellow (medium) or red (large).
The Spotting Chart gives the maximum distance in hexes at which an enemy unit can be seen. The first number in each column corresponds to a stationary target and the second to a moving target. A target is considered stationary if it has not moved during the current turn and a moving target is a unit that has moved this turn or is currently moving, even if it has not exited the hex it is in.
When two units are at different elevations, spotting becomes easier. If the difference in elevation between the units attempting to spot is one level, the "crest line" modifiers are applied. Add one to the listed modifier for each additional level of difference.
Example: An infantry unit in open terrain which is stationary will be visible up to 7 hexes away, 10 hexes if it moves. An enemy unit that is one level above the unit will be able to see it up to 8 hexes away, 12 if it moves. A unit two levels above will see it 9 or 14 hexes away, and so on.
The spotting distance may be modified by various factors, such as weather. Any such modifiers will be described in the scenario.
6.2 Line of Sight (LOS)
In order for a unit to see an enemy, in addition to being within the distance given by the Spotting chart, it must be able to trace an unobstructed straight line from the center of its hex to the center of the target hex. This line is called a "line of sight" (LOS). To facilitate tracing an LOS the use of a string is recommended.
An LOS extends indefinitely unless it is blocked. A hex that blocks LOS is itself in LOS.
Combat units never block LOS, whether traced at ground level or along a slope. Any scenario in which new terrain appears will indicate if it blocks LOS or not.
6.2.1 Line of sight along flat ground
A LOS along flat ground crosses hexes at the same elevation. Woods, Light Woods, Dispersed Buildings, Built-up Areas, and Hill hexes encountered along the trace block LOS if the trace of the LOS is at the same level as their hex.
LOS is also blocked if it passes along a hexside separating two hexes containing blocking terrain. If only one of the hexes has blocking terrain, LOS is not blocked.
Finally, LOS is also blocked if it crosses 3 or more rough or cultivated hexes (or any combination thereof).
6.2.2 Line of sight along slopes
Line of Sight along slopes applies when the two hexes are at different heights. LOS may only be traced along slopes if the higher of the two units is in a crest hex. If the higher unit does not occupy a crest there is no LOS. For a unit to be considered in "crest" status, the LOS in question must cross the crest in the unit's own hex.
Blind hexes and slope LOS: Certain types of terrain block LOS downslope only in the hex directly behind them (tracing from the spotting hex). Such hexes are woods, light woods, dispersed buildings and built-up area hexes (although these may not block slope LOS under conditions described below). Any hex containing a crest line that is crossed by the LOS (other than a crest line in the hex occupied by the higher unit) also creates a blind hex in the adjacent hex behind it, unless the difference between the height of the two units is less than or equal to the distance between them.
Blocking hexes and slope LOS: The following hexes block all slope LOS:
- A hex with a crest line that would create a blind hex that also contains other terrain that would create a blind hex (e.g., a hill hex with woods).
- Hill hexes at an equal or higher elevation than the higher unit.
LOS examples (diagrams not reproduced):
- Example A (flat LOS): The unit in B cannot see the unit in C because the woods blocks LOS. The unit in A can see the unit in C because the LOS passes along a hexside between two hexes and only one (the woods) is blocking terrain.
- Example B1 (slope LOS): The unit in A cannot see the unit in B because the woods makes B a blind hex. Nevertheless it can see the unit in C.
- Example B2 (flat LOS): The unit in D cannot see the unit in E because there is a hill hex between them.
- Example C (flat LOS): The unit in A cannot see the unit in B because the LOS crosses two orchard and one field hex, and is therefore blocked.
- Example D (slope LOS): The unit in A cannot see the unit in B because the LOS crosses a hill hex at the same level as the higher unit (A) and is therefore blocked.
- Example E (flat LOS): The unit in A cannot see the unit in B because the LOS crosses along a hexside separating two hexes containing blocking terrain.
7. Officers
Land combat units are grouped into formations. A formation is a combination of land combat units that are under the command of the same officer. If an officer is activated, all of the units under his formation also activate automatically and may perform an action as described in section 3.3. In the scenarios it will be indicated if there are high-ranking officers (i.e. officers without a formation) and the actions they can perform.
7.1 Hits on Officers
If an officer is alone in a hex he is eliminated if:
- He is assaulted. To achieve the elimination of the officer at least one enemy unit must pass the pre-assault check.
- An enemy unit fires on the officer and achieves at least one hit.
If an opponent eliminates all of the friendly units accompanying the officer in the hex in an assault, the officer is eliminated.
If an officer is accompanied by units of his formation and these suffer one or more hits (either via attack or assault), the owning player must check if the officer becomes a casualty or not. To do this, roll 2d6 subtracting 1 for each hit one of his subordinate units suffered in the attack. If the modified total is 1 or less, the officer is eliminated.
AFV leaders are assigned to a specific AFV counter. If the vehicle is eliminated and the leader survives, place him in the friendly AFV of his formation nearest to the spot where the officer lost his vehicle. If there are no remaining AFVs, he is removed from play.
The elimination of an officer takes effect immediately, causing an instant morale check for his formation.
7.2 Replacement of Officers
The officers with a red vertical stripe on their front are replacement officers. If an officer is eliminated during a turn, he is substituted by a replacement officer of the same type at the beginning of the following turn (officers with a vertical red stripe on the front of the counter represent an officer of lower rank than the one eliminated). The replacement officer is placed with a unit under his command (the owning player decides which).
7.2.1 Formations that have lost their officer
From the moment an officer has fallen until he is replaced the following rules apply:
- The units of the officer's formation remain "out of command," and may only be activated under the rules for such units.
- The base morale of the formation is that of the fallen officer, without adding his leadership value. This is calculated according to the general rules contained in rule 10, "Morale of formations and units." Once the replacement officer takes command, his morale is used as the formation's base morale, adding his leadership value.
- If the officer dies after having given orders, these are followed even if he has fallen before the action(s) have been completed (assuming the unit passes the morale check caused by his loss). Common examples are: The death of an officer in defensive fire prior to an assault does not prevent the assault; the death of an officer by reaction fire when he moves does not prevent the moving unit from finishing its movement.
7.3 Coordination of Officers
Two officers of the same side may attempt to coordinate in order to activate together. To do this, the active player selects an officer (which in case of failure to coordinate will be the one activated), then selects another officer who is no further away than double the first officer's command range (and who, even if coordination fails, is not marked as "Finished").
He rolls a d6 and successfully coordinates if the result is less than or equal to the sum of the coordination values of the two leaders. Coordination allows the activation of the two formations simultaneously as if all of the corresponding units belonged to the same formation.
Example of play (running example on pages 9-10): The French player wishes to coordinate Captain Landry (hex 311) with Captain Moreau (hex 710) to attack the town occupied by the Germans. Landry can attempt to coordinate with Moreau as they are 4 hexes apart (equal to double the command range of Landry). The French player rolls 1d6 and achieves a 3, so the coordination is successful, since the result obtained is the same as the sum of the two coordination values of Landry (1) and Moreau (2).
Next, the French player proceeds to activation and decides to open fire on the German units in hex 410 (dispersed buildings) with the two infantry units under command of Captain Landry (hexes 211 and 311) forming a firegroup with FF 10. The result of the attack die roll is a 5. The two values are cross-referenced on the Combat Chart and the result is a 5, which is divided by 4 (the defense value of dispersed buildings against an AP attack). The result is one hit, which is equivalent to one step loss. The German player chooses which of his two units in 410 is marked with one step loss.
Next the 81mm mortar fires a smoke mission against hex 510. The result of the die roll is 3, so the mission is successful.
Finally the French player, making use of the smoke as cover, assaults hex 410 with Captain Moreau's formation. But that is another story!
8. Attack
There are three kinds of attack, depending on the target type and the type of munitions employed. Not every kind of attack affects the same target types, as shown in the following table:
| Type of Munition | Infantry, weapons unit or transport unit | AFV |
|---|---|---|
| Anti-tank (AT) | No effect | AT attack |
| Anti-personnel (AP) | AP attack | No effect |
| Artillery (ART) | ART attack | ART attack |
Combat unit counters have one or more boxed numbers which represent their fire factor (FF), with their range in superscript. The color of each box indicates the kind of munitions used by the unit:
- Yellow: Anti-personnel (AP). Exception: MMGs may use their AP factor to attack AFVs with an armor level of 0, but in all respects (targets affected, modifiers, divisors) this is considered an AT attack.
- White: Anti-tank (AT)
- Orange: Artillery (ART)
- Red: Flame-throwing (see page 24, "14. Flame-thrower Tanks and Engineers")
Fire groups. It is possible to combine units into groups for an attack of the same type by adding their fire factors. Only units that belong to a single formation, are adjacent and are in command may form a fire group. If two or more armor units with different guns happen to have the same penetration factor, they are allowed to fire together.
Maximum range. Any combat unit can use its entire fire factor against an enemy unit within its range. If the target is farther than their normal range but less than twice the range, they may attack at half-strength. Example: A French infantry unit (FF 5, Range 2) can attack with 5 factors up to two hexes away, and may attack with 3 factors at a range of 3 or 4 hexes.
8.1 Artillery (Artillery and Mortars)
8.1.1 Activation
There are two ways to activate artillery, for indirect fire (that is to say, aided by the spotting of an officer providing fire coordinates) or direct fire.
- Direct fire. Only on-board artillery can perform direct fire. In such a case, the artillery unit activates normally (along with the rest of its formation when activated by its commanding officer or alone if out of command) and may form fire groups with other units of its formation. Artillery firing using direct fire may only fire on hexes in its LOS. This is resolved as a concentrated bombardment.
- Indirect fire. An activated officer may choose to direct (spot for) 1 artillery mission (on or off-board; if on-board it must be a unit of his formation) and later activate the units of his formation, or direct 2 artillery missions, losing the ability to activate his units that turn. He may not direct both artillery and aerial missions in the same turn. The enemy may not reaction fire against an officer directing artillery. Off-board artillery can only attack hexes which are in the LOS of the activating officer. When on-board artillery is conducting indirect fire against a target not in their LOS, they can only do so if it is under command to their officer which is having the target in his LOS. However, it is not allowed if the artillery unit is located in a woods or light woods hex and the line of sight crosses an adjacent woods or light woods hex.
8.1.2 Indirect artillery attacks
Indirect artillery attacks (whether on-board or off-board) may be of two types:
- Concentrated, which attacks the target hex alone with the entire FF of the firing unit.
- Dispersed, which attacks the target hex and all adjacent hexes with half the FF of the firing unit.
If various batteries attack the same hex or hexes simultaneously, the FF used on the combat table is the sum of all attacking factors, modified by the type of artillery and form of attack.
8.1.3 Off-board Artillery
In addition to "close support" pieces (so-called because they are found near infantry units in order to support them against MG positions or fortifications), officers can call in support from artillery batteries assigned to the battalion or regiment. These batteries are normally located in the rear, far from the front, although they have sufficient range to bombard enemy positions. This type of artillery is available by scenario rule only and is represented in the game by "off-board artillery" (designated by an observation point and a caliber).
8.1.3.1
Off-board artillery batteries can be full-strength or depleted, depending on whether or not they are at full complement (number of guns and crew).
The fire factors of batteries differ depending on whether they are full-strength or depleted, as shown on the Off Board Artillery Chart. The scenario will tell each player how many batteries he possesses, their caliber, and if they are full-strength or depleted.
Example: According to the Off Board Artillery Chart, a depleted battery of 105mm caliber fires on the 6 FF column of the Combat Chart (whereas if it were full-strength it would fire at strength 10). These fire factors apply if the attack is concentrated, affecting only the target hex (for example, A714). If the attack were dispersed it would affect the target hex (A714) and the six adjacent (A713, 814, 815, 715, 615 and 614) but at half-strength, that is to say on the 3 column (depleted) or 5 (full-strength) of the Combat Chart.
8.1.3.2 Off-board artillery attack procedure
Having activated one or two off-board artillery missions, place the artillery Target marker in the target hex (or markers, if you wish to attack the same hex with two missions). The attacker declares if he is attempting a concentrated or dispersed bombardment. Roll 1d6 for each mission. The German and British artillery subtract 1 from the result. If the target hex doesn't have enemy units or they are hidden, add 1 to the die roll. If the officer directing the artillery is part of a reconnaissance formation, subtract one from the die roll (if not part of a reconnaissance formation, there is no modifier).
- If the result is 1, 2 or 3, the attack occurs in the selected location.
- If the result is 4 or 5, the Target marker drifts 1 hex to an adjacent hex; roll 1d6 to know the direction (a result of 1 is the north hex of the target, according to the map's arrow, and the rest follow clockwise). Example: if the target was A710 and you get a 5 the attack would be in A611.
- If the result is 6 the Target marker drifts 2 hexes. Make a drift roll as above, and the attack will take place two hexes away in that direction.
If at the end of the process the artillery target marker is in the LOS of the officer who is directing the mission, he may resolve the mission or, if he prefers, remove the marker and use it in a subsequent turn. If the marker is out of LOS, the attack is lost.
The rest of the attack resolution procedure is the same, for both on/off-board artillery, as rule 8.3.
8.1.4 Procedure for indirect fire with on/off-board artillery
This functions exactly like off-board artillery except:
- If the result is 1, 2, 3, or 4, the attack occurs in the selected location.
- If the result is 5 or 6, the Target marker drifts 1 hex.
If at the end of the process the artillery target marker is in the LOS of the officer who is directing the mission, he may resolve the mission or, if he prefers, remove the marker and use it in a subsequent turn. If the marker is out of LOS, the attack is lost.
Example: The mortar lacks LOS to the target, so must use indirect fire. The French player places an 81mm mortar Target marker in hex A610 and decides to perform a concentrated bombardment. He rolls 1d6 without modifiers, since the directing officer (Capt. Girard) can see the hex. Note that the Spotting Chart indicates that a small unit (green circle) situated in a dispersed building hex can be seen at a maximum range of 3 hexes, but as Capt. Girard is two levels above the target, the maximum sighting range is increased by two (one for each level), placing the target within view. The result of the roll is a 4, which indicates the bombardment successfully lands on the target hex, but if the result had been a 5 or 6 it would have drifted one hex, after which we would proceed to resolve the attack as described in 8.3.
8.1.5 Smoke
Smoke shells are used to blind the enemy; they do not inflict hits and may be fired by artillery in the same way they fire normal ammunition, although they may only be fired as a concentrated mission, affecting a single hex. Each scenario indicates how many smoke missions each side possesses. A smoke column is considered to have an altitude 3 and occupies the entire hex.
Each Smoke marker has two sides. On one of these the smoke is black and on the other it is grey. Black smoke blocks LOS. Grey smoke does not block LOS, but has the following effects on fire through it:
- Fire into or out of the hex containing grey smoke is modified by shifting the fire one column to the left.
- Fire that crosses the hex containing grey smoke is modified by shifting the fire two columns to the left.
- If the hex contains black smoke, all fire into, out of, or through the hex is prohibited.
Some scenarios with engineer formations will indicate that they have access to smoke grenades. The procedure to lay smoke with engineers is as follows: when the engineer unit is activated, prior to performing any other action, the player may place a grey smoke marker with 4 activations indicated in an adjacent hex. The number of such hexes that may be laid will be indicated by the scenario; each time one is placed the number available is decreased by one. Each engineer unit may lay smoke once per turn.
Smoke markers have numbers ranging from 1-4 on their grey side and 5-8 on their black side, representing the number of activations the smoke persists on the board. The duration of smoke depends on the kind of unit firing it:
| Firing unit | Duration |
|---|---|
| Full-strength off-board artillery | 8 activations |
| Depleted off-board artillery | 6 activations |
| Full-strength on-board artillery | 6 activations |
| Reduced-strength on-board artillery | 4 activations |
| Mortars and Engineers | 4 activations |
If the smoke mission is successful, a Smoke marker is placed in the target hex (or the hex to which the mission scattered) with the number corresponding to its duration oriented to the hex ID number.
At the end of each activation, rotate each Smoke marker 90 degrees clockwise to the next lowest number. When the number moves from 5 to 4, flip the marker to its grey side (to note that it now modifies fire rather than blocking LOS). When the marker reaches '1' and the following activation is finished, it is removed from the board.
Example: The French player decides to activate Captain Girard, who begins by directing one of the smoke missions which his side may use with his 81mm mortar situated in hex 812. His target is hex 1008, which he is allowed to target as even though it is not in the LOS of the mortar, it is in the LOS of Capt. Girard. The procedure for firing smoke is described in section 8.1.4, since the mortar is on-board artillery. He rolls 1d6 and gets a 3, and so the smoke falls in the target hex, in which he places a Smoke marker on its gray side indicating strength 4, as indicated by the Smoke Chart. In this example we only show the grey side of the marker as it is the only kind of smoke that mortars produce. Next Capt. Girard orders one of his infantry units to hex 911, after which he ends his activation. Then the German player activates his officer F and moves his MG34 to 1206, one of his infantry units to 1107 and the other to 1006. At the end of his activation, the German player rotates the Smoke marker to strength 3. After this the French player activates another officer, successfully coordinates with a second officer, and performs actions with both leaders and their troops. Then he rotates the Smoke marker to strength 2. Now it is the German turn to activate an officer and perform actions with his troops. At the end of this German activation, the marker is rotated to strength 1. Neither the French nor the German player has more officers to activate, so the turn ends. At the beginning of the next turn, the German player wins initiative, and activates his officer F, who orders all of his units to prepare for reaction. After this, the Smoke marker is removed from the map.
8.2 Aerial Attack
Each scenario will indicate the number and type of aerial missions available, if any, as well as the anti-air points possessed by each side.
8.2.1 Air missions
Air missions may be either close support or bombardment. The player randomly selects an air unit of the type corresponding to each mission or the one indicated by the scenario, as appropriate.
The activated officer may choose to direct 1 air mission along with activating the units of his formation, or may direct 2 air missions, losing the capability of activating the units of his formation. He may not direct one artillery mission and one air mission.
The enemy may not reaction fire against an officer activated to direct air missions. The leader directing the mission must have a LOS to the target hex.
The player who activates the mission or missions assigns targets by placing one air unit in the enemy hex or hexes he wishes to attack. Two air missions may have the same target, but may fire as a single fire group only if they are of the same type (bombardment or close support).
Once the missions have been assigned, the enemy may fire anti-air points in response, if he has any.
Once anti-aircraft fire is resolved, if the air mission was not aborted, the player directing the mission(s) rolls 2d6 for each to see if they have located the enemy, using the Air Location Table. The enemy is considered to be hidden if it is out of sighting range from the officer directing the mission.
To locate the enemy it is necessary to obtain a result within the range indicated for each case, depending on the terrain type in which the enemy unit is located and if it is hidden or not. (The Air Location Table is a chart; see the series chart sheet.)
If the enemy is not located, the air mission is lost.
If the enemy is located, he is attacked in the following manner:
- If the mission is Close Support, the attacker rolls 2d6. The effect of the air attack depends on the result:
- 2-10: The attack is made against the target hex.
- 11: The attack is made against an adjacent hex occupied by enemy troops. If there is no such hex, the attack is made against an adjacent hex occupied by friendly troops. If there is no such hex either, the air mission is lost.
- 12: The air mission is lost.
- If the mission is Bombardment, the attacker rolls 2d6. The effect of the air attack depends on the result:
- 2-8: The attack is made against the target hex.
- 9-10: The attack is made against an adjacent hex occupied by enemy troops. If there is no such hex, the attack is made against an adjacent hex occupied by friendly troops. If there is no such hex either, the air mission is lost.
- 11-12: The air mission is lost.
An air attack is resolved as an ART attack. Each air unit counter indicates the FF used for its missions.
If there are both AFVs and infantry units in the attacked hex, the hits are distributed first among the unarmored units only. Example: An air mission achieves 2 hits against a hex in which there are 2 infantry units and one AFV. Only the infantry units will receive hits.
Once used the air mission cannot be employed again during the game, whether it was successful or not.
Certain air units have a red emblem, which indicates that they affect more than one hex (for example, a Pe-2 will attack 2 hexes each time with a FF of 16). When the player attacks with one of these air units he decides which side of the hex he will attack from (after rolling to locate the enemy as above), and the air mission will affect both the hex determined by the location roll and the next hex opposite the side from which the air unit will approach.
Example: A Russian Pe-2 attacks hex 509, in which there are enemy units, with a FF of 16, entering via hexside 4 (counting the northern hexside as 1 and proceeding clockwise). After making the attack on 509, the air unit will move to 508 and perform a second attack on that hex with a FF of 16. Afterwards, it is removed from the map.
8.2.2 Anti-aircraft points
In each scenario, and for each side, the number of anti-aircraft points available for use against enemy Close Support and Bombardment missions is indicated.
The resolution of anti-aircraft fire takes place after the placement of air missions by your opponent. To resolve it, roll 2d6 for each enemy air mission:
- If the result is greater than the number of anti-aircraft points you possess, the air mission is resolved without a problem.
- If the result is equal to the number of anti-aircraft points, the enemy air mission is resolved, but with a +2 to the attack die roll.
- If the result is less than the number of anti-aircraft points, the air mission is aborted and lost.
The 88mm Flak36 AA gun: This unit can attack both ground units (via AT attack), and engage in reaction fire against any air bombardment missions that take place within 5 hexes of the unit, even if two or more missions are taking place. If the owner decides to use the 88mm gun as an AA unit, add 3 to his anti-aircraft points if it is marked for reaction and 1 if not. Once the AA fire is resolved, mark it as "Finished". Units already marked as "Finished" cannot contribute to AA fire.
The GAZZ Truck and the Sdkfz 6/10 and Sdkfz 10/4 halftracks guns: These units can attack both ground units (via AT or AP attack), and engage in reaction fire against any air bombardment missions that take place within 3 hexes of the units, including against multiple air missions if they are within range. If the owner decides to use the guns as an AA unit, add 2 to his total number of anti-aircraft points if it is marked for reaction and 1 if not. Once the units' AA fire is resolved, mark it as "Finished". Units already marked as "Finished" cannot contribute to AA fire.
8.3 Attack Resolution
Regardless of the type of attack, the basic procedure to resolve it is as follows:
a) Declare the type of attack, AP, AT or ART.
b) Count the distance in hexes to the target and check if there is an LOS between the attacker and the target. AP and AT attacks may only be made against spotted enemy units. ART attacks may be made against unspotted enemy units, but the FF is reduced by half. Units cannot fire on each other if there is a friendly unit blocking the line of fire, unless it is an indirect ART attack. If there are enemy units in multiple hexes along the line of fire, the closest must be attacked, unless it is an indirect ART attack or the attack is up or downslope.
c) Add the fire factors of the firing units (if the range is farther than their normal range, divide by two).
d) Look for the FF on the combat results table. If the exact factor does not exist, use the next lowest column. Example: a stacked formation, combining its FF, has a total FF of 7 and opens fire against an enemy unit within normal range. On the combat results table there is no column for a FF of 7, so the '6' column will be used to resolve the attack.
e) Roll 2d6 and apply any relevant modifiers (listed in the Attack Chart).
f) Cross-reference the roll with the FF column to determine the effect of the attack.
g) Divide the result by the defense value of the target hex. The result is the number of hits the hex suffers and which are allocated to the units in the hex that are affected by the type of attack used.
h) Allocation of hits and resolution of step losses.
i) If a unit is eliminated, perform a morale check.
j) Or for each hit over the original number of units which compromise the formation, not counting the officer.
8.4 Allocation of Hits and Step Loss Resolution
8.4.1 Allocation of hits
The hits received by a hex must be allocated among all of the units in the hex that can be affected by the type of attack employed. Example: If a hex containing 2 AFVs and 1 infantry unit (all without any step losses) suffers 2 hits from an AT attack, one hit must be allocated to each AFV. The infantry unit cannot be affected as it is immune to AT attacks.
An AFV can only be affected by an ART attack if its caliber requirements are met. An AFV can only be affected by an AT attack if its penetration requirements are met (see 8.4.2). If these requirements are not met, the AFV(s) are ignored for purposes of distributing hits. Example: if a hex with a heavy AFV and two infantry units receives three hits from an ART attack by a 75mm gun, these three hits must be distributed among the infantry units, as a heavy AFV is not affected by 75mm ART fire.
All hits on a hex containing only one unit are applied to this unit.
If there are more units in the hex being hit, the hits must be allocated to them in the following manner:
- If there are both veteran and green units in a hex, the green units are assigned hits first.
- Units with fewer step losses are assigned hits before those with more step losses. In addition, one must attempt to equalize the steps lost by all stacked units affected by the attack. Example: A hex in which there are 2 units on their reduced sides and one on its full-strength side receives 3 hits. Two hits are applied directly to the full-strength unit. The remaining hit is randomly assigned to one of the three units.
- When more than one unit is eligible to receive a hit, the hit is randomly assigned to those affected. Use a d6 assigning numbers to each unit (1-3 and 4-6 if there are two units, for example).
Special: In aerial attacks hits are assigned to unarmored units before AFVs.
8.4.2 Determination of step losses
Not all hits produce step losses. For infantry, transport, and unarmored weapons units, each hit is equivalent to one step lost, but hits on AFVs only produce step losses if they comply with the requirements of caliber (ART attack) or penetration (AT attack).
Caliber requirements. Hits produced by an ART attack cause step losses to AFV units depending on the kind of AFV (light, medium or heavy) and the caliber of the gun.
- If the caliber is less than 100mm (or it is an aerial attack with an FF of 8 or less), only light AFVs may be affected. Roll 1d6 for each hit, and apply 1 step loss for each result of '6'.
- If the caliber is between 100 and 120mm (or it is an aerial attack with an FF between 9 and 16), medium and light AFVs may be affected. Roll 1d6 for each hit, and apply 1 step loss to a medium AFV if the result is '6', or to a light AFV if the result is '5' or '6'.
- If the caliber is larger than 120mm (or it is an aerial attack with an FF greater than 16), any AFV may be affected. Roll 1d6 for each hit and apply 1 step loss to a heavy AFV if the result is '6', to a medium AFV if the result is '5' or '6', and to a light AFV if the result is '4', '5', or '6'.
Example: A hex contains 1 FT-17 counter and 2 infantry counters. An 81mm mortar unit makes an ART attack against the hex that results in 3 hits. As the ART attack is of sufficient caliber to affect all of the units, each one is assigned 1 hit. The infantry units each suffer 1 step loss as a result, while for the FT-17 the hit requires a 1d6 roll. Since the FT-17 is a light AFV it will suffer a step loss if the roll is a 6.
Penetration requirements. Hits produced by an AT attack will cause step losses to AFVs if they comply with the penetration requirements. After a hit is produced against an AFV, check the Penetration Chart and cross-reference the type of AT gun with the distance to the target. If the number obtained is greater than or equal to the armor value of the target, the hit results in a step loss. Since a hex may contain vehicles of differing armor values, it is possible that some hits will result in step losses and others will not.
Example: A hex contains a Somua (armor value 5) and a Char B1 (armor value 7). A German 37mm gun makes an AT attack against them from 2 hexes away, and inflicts 2 hits. This translates to 1 hit per tank unit. The hit on the Char B has no effect as the armor value of 7 is higher than the penetration factor (5) of a 37mm gun at two hexes. The hit on the Somua will cause a step loss as the penetration factor is equal to or greater than its armor value.
Exception: When a MMG fires against AFVs with an armor value of 0, for each hit received roll 1d6. For each 6 rolled, the AFV suffers a step loss.
8.4.3 Step-loss markers
If a full-strength unit (with three steps) suffers a step loss it remains on its front side, but gains a -1 marker on top of it. Markers with -2 must be used for units that have different pictures on their front and back. Example: a motorized infantry unit that has a truck on its back.
When a unit loses its second step, remove the Step Loss marker and flip it to its reduced side. Upon losing its third step, the unit is eliminated, and removed from the board. When a formation loses a unit, it must make a morale check.
8.4.4 Effect of step losses on fire factors
A full-strength unit, with three steps, has the FF given in the square or squares on its full-strength side. The first step loss suffered by the unit reduces its FF as follows:
- By 1, if its FF is between 1 and 6.
- By 2, if its FF is between 7 and 11.
- By 3, if its FF is between 12 and 15.
- By 4, if its FF is 16 or more.
The second step loss that a unit receives flips it to its reduced side, on which appears a new (and lower) fire factor. The units with intrinsic transport (see 5.5) are not flipped when they receive the second hit. Their new combat value will be half of their combat value, rounded down. So a 6 motorized unit will have 5 after the first hit and 3 after the second (see a German infantry). And a 5 unit will have 4 and 2 (see French or Soviet Infantry).
9. Close Assault
A close assault is a movement of units of one side into a hex occupied by enemy units. There are four kinds of close assault: hand-to-hand combat, armored assault, anti-armored assault and armored support.
- An assault happens WITHIN the defender's hex, respecting the stacking rules for close assault (9 steps per side).
- To execute a close assault, the assaulting units must be in a hex or hexes adjacent to the hex occupied by enemy units and declare an assault.
- To assault the enemy, the units must have sufficient MP to enter the target hex and (except in the case of armored assault) pass the pre-assault morale check.
- If the target hex, or any of the hexes from which the assault is launched, contains both AFVs and unarmored units, the rules in 9.4 "Armored support" apply.
9.1 Hand-to-Hand Combat
Hand-to-Hand combat (HtH) occurs between units of foot movement type according to the following sequence:
- Declaration of the assault.
- Individual or stacked movement of all assaulting units.
- Defensive fire against the hex(es) from which the assault is being launched, by the defenders in the assault hex. If the assault is launched from more than one hex, the defender may choose which one or ones he will fire at and with which defending units or firegroups.
- Pre-assault morale check by assaulting units.
- Defensive fire against units that have passed their pre-assault morale check (only defending units which did not fire in the previous defensive fire opportunity may fire).
- Morale check by defeated units, unless there are none because the assault continues.
- Assaulting units are marked as "Finished" (even if they failed their pre-assault morale check) as are the assaulted units.
9.1.1 Pre-assault morale check
Each attacking unit that is going to participate in the assault must first pass the corresponding pre-assault morale check.
If a unit fails the check, its activation finishes in the hex from which it launched the assault and is marked as "Finished." If it passes the check, it enters hand-to-hand combat, alone or in conjunction with other units of its formation that pass the pre-assault check.
An officer located in the hex from which the assault is launched may choose to remain there or join the assault (without a morale check), as long as at least one of his units passed their pre-assault morale check. The officer only adds his leadership value if he chooses to participate in the HtH combat. If the player decides not to risk his officer and keeps him out of HtH combat, his leadership factor does not affect the pre-assault morale check roll. If none of the units pass their pre-assault morale check, the officer returns to his origin hex and there is no assault.
If more than 9 steps of units are attempting an assault, once 9 steps have passed the pre-assault morale check, the rest are marked as "Finished".
9.1.2 Defensive fire
Any formation or unit marked with a "Reaction" marker may engage in defensive fire with its full FF before being assaulted, and is then marked as "Finished".
Any formation which has not been activated or is marked as "Finished" may engage in defensive fire at half its FF. Routed units may not engage in defensive fire. Units that are out of command can fire but are not allowed to form firegroups.
Each defending unit or firegroup may fire in only one of the two following defensive fire opportunities. Some units or firegroups might fire in the first, while others fire in the second:
- Once the assault has been announced, but before the pre-assault morale check, in which case the defensive fire affects all the units in the hex from which the assault will be launched (and which is adjacent to the target hex).
- After the pre-assault morale check, in which case it only affects the units that pass the pre-assault morale check. In this case the defense value of the assaulted hex is applied.
9.1.3 Assault resolution
This is performed in the following sequence:
- Determine, using the corresponding chart, the combat strength of each unit participating in the assault. The combat strength of a unit is determined by its type and the number of step losses it has suffered. Each side adds together the combat strengths of their participating units.
- Consult the Odds Chart and cross-reference the combat strength of the attacker with that of the defender. The result is a combat odds ratio. Example: The attacking units have a combined strength of 11 and the defender has a strength of 4. The chart indicates '2.5:1' which is the column of the Hand-to-Hand Combat Chart used to resolve the assault.
- Roll 1d6 and modify the roll according to the conditions listed at the bottom of the chart. Cross-reference the number obtained with the appropriate odds column to obtain the result of the hand-to-hand combat.
- Apply the result. Each result on the HtH Combat Chart is given as two results separated by a slash. The first applies to the attacker and the second to the defender. The first number in the result is the number of steps lost. In addition, R1 or R2 may appear, which indicates the number of hexes which the losing side of the assault must retreat. Retreats as a result of losing a HtH combat are made according to the procedure given below. If the result of the combat does not require either side to retreat, the assault continues into the following turn, according to the rules for "Continuation of assaults."
- Morale check by the defeated side. Only the side forced to retreat from the assaulted hex is considered the losing side of the assault. If there is only one defeated unit, it must pass a morale check. If there are two or more defeated units, their formation must make a morale check.
9.1.4 Continuation of assaults
If the result of the HtH Combat Chart is that the combat continues as neither side was obligated to retreat, the following special rules apply:
- The assault will continue when the assaulting or assaulted player activates the unit or formation involved in the assault. If after one player activates their unit the HtH combat is still undecided, the other player may choose to activate their participating formation.
- If the attacker or defender would prefer to abandon the hex instead of continuing combat, they may choose, when the formation in the hex is activated, to withdraw from HtH Combat. If they do so, the withdrawing units, before leaving the hex, may be fired at by the enemy units in the hex at full-strength. Any units so firing are marked "Finished". If they are already marked "Finished", they may still fire, but at half-strength.
- If a hex has units from different formations, when activating an officer who commands one or more of the units in the HtH hex, he may activate all of the units in that hex, even though some belong to other formations, in order to resolve the HtH combat or, if he prefers, he may withdraw to an adjacent hex. In either case mark the activated units as "Finished".
- To determine the result of the continuing assault, proceed according to the general rules for HtH combat, except that one should recalculate the odds ratio if either side participating in the assault has suffered losses. In addition, only those modifiers listed in the table "Die roll modifiers for continuing assaults" apply.
- The hex in which the assault continues may be fired on by units of either side, but all hits are distributed among all units in the hex as if they belonged to the same side. ("Die roll modifiers for continuing assaults" are below the Defensive Values Chart.)
9.1.5 Retreats after losing hand-to-hand combat
The losing side of an assault must retreat 1 or 2 hexes according to the result on the HtH Combat Chart.
The attacker who loses an assault must retreat from the hex by the hexside through which it assaulted or through either hexside adjacent to it.
The defender who loses an assault must retreat from the hex by the side opposite that through which the attacker entered or through either hexside adjacent to it. If the attacker entered the hex through multiple hexsides, the defender may retreat by any hexside opposite one by which the attacker entered or one adjacent to these.
If the losing side of an assault (attacker or defender) must retreat 2 hexes, the second retreat must be in the same direction as the retreat into the first hex.
A unit which loses an assault is eliminated in two cases:
- If it is forced to retreat into prohibited terrain or off the board.
- If it is forced to move through or stop in a hex adjacent to enemy units that did not participate in the assault, and there are no friendly troops in the hex. All enemy units attempting a pre-assault morale check are considered to have participated in the assault, whether or not they passed.
9.1.6 Reinforcement of HtH Combat
Only units of the formation(s) which are in the HtH hex may reinforce it in following turns. Example: If in the previous turn the result was a continuing assault, in subsequent turns the player who activates any of the formation in the HtH combat hex may reinforce said HtH hex with units of that formation that are outside the hex. The procedure is the same as that for initiating HtH combat, including passage of a pre-assault morale check. An officer may add his leadership value to the morale check if he is outside the hex and attempting to enter it, but not if he is already in HtH combat or chooses not to enter the hex. If it passes the morale check, the unit may enter the hex, if it fails, it is marked "Finished". If after resolving the new HtH combat it still continues the other player may reinforce the hex using the above procedure.
9.1.7 Special rules
- An artillery, anti-tank or mortar unit or formation that loses an assault is automatically eliminated.
- If demoralized units/formations are assaulted, they surrender immediately and are removed from the board, along with their officer if he is present with them, even if he is not routed. To achieve the surrender all that is required is that one assaulting unit pass its pre-assault morale check.
- If an officer alone in a hex is assaulted, he is automatically eliminated. To achieve this all that is required is that one assaulting unit pass its pre-assault morale check.
Example of hand-to-hand combat (running French vs. German example): After moving into hex 510, in which there is a grey Smoke marker, Captain Moreau declares an assault into hex 410 with the three units of his formation. Next, the German units in 410 (one German infantry unit with one step loss and a MG34 unit at full-strength) perform defensive fire as a fire group. The FF of the firegroup is 9 (4 for the MG34 + 5 for the infantry, who have a FF of 6 reduced by 1 as they have suffered a step loss). Since the fire is made into a hex with a grey Smoke marker, the column used is shifted one to the left, from 9 to 8. The modifiers to the German defensive fire are: -1 for more than six French steps in 510 and another -1 for firing on moving units (-2 total). The result of the 2d6 roll is 11. Subtracting 2, the result is 9, which is crossed with the 8 fire column, which produces no losses. Captain Moreau and his men escape any losses from the defensive fire thanks to the smoke cover produced by his mortars.
After receiving the defensive fire, each of the assaulting units has to make the pre-assault morale check. The morale of these units, which do not have any step losses, is 9 (since Captain Moreau's morale is 7 and his leadership value is 2). 2d6 are rolled for each unit, needing a 9 or less to pass the pre-assault morale check. In this case the results obtained are 5, 7, and 9, and so all three units will assault hex 410. Captain Moreau decides to accompany his men (without needing to check morale).
Having reached this point, let's proceed to the assault resolution. The combat value in defense of the German units is 6 (the infantry with one step loss has a value of 3 and the MG34 without losses is also worth three). The combat value of the assaulting French units is 12 (each of the infantry units without a step loss has a value of 4). Consulting the Combat Odds Chart we get a result of "2:1," which is the column of the Hand-to-Hand Chart which will be used for resolving the assault. 1d6 is rolled with a result of 2. To this result the following modifiers apply: +1 for an assault in a built-up hex. After applying these modifiers the final result is 3, which on the 2:1 column gives a result of 1/1R2. This means that one French unit receives a step loss as does the MG34. In addition, the German units must retreat 2 hexes. Captain Moreau has succeeded in liberating the village, but must check to see whether he has been eliminated, since one unit of his formation has suffered a step loss. 2d6 are rolled and 1 is subtracted from the result (since the French suffered one step loss). A 9 is obtained, so Moreau remains alive, since to be eliminated he would have had to roll a 2 or less.
9.2 Armored Assault
Armored assault is conducted by AFVs against any enemy combat unit or formation other than AFVs or transport units. It is resolved in a manner similar to hand-to-hand combat, with the following exceptions:
- The assaulting AFV must have sufficient MPs remaining to both enter the target hex and leave it.
- The assaulting AFV need not pass a pre-assault morale check.
- In response to the declaration of an armored assault, the assaulted units may conduct defensive fire by those units with AT/ART ammunition and attempt anti-armor assaults.
- Each AT/ART unit may potentially attempt defensive fire. However, if all of the AT/ART units in the hex being attacked have not been activated or are marked as "Finished", no matter how many there are, one, and only one, may perform defensive fire at half its FF.
- Each infantry unit marked for reaction may attempt an anti-armor assault, which is resolved in the hex in which the AFVs are located (adjacent to the assaulted hex). If all the infantry units in the assaulted hex are marked as "Finished" or have not been activated, one, and only one, of them may attempt an anti-armor assault, after which it is marked as "Finished".
Resolution of armored assault. First of all, the attacker must determine the FF of the armored assault, which depends on the class of AFV and the number of step losses it has suffered (see charts). The assaulting player rolls 2d6 and applies the following modifiers (only):
- -1 if the target is AT-guns or artillery
- +1 if the target is infantry in dispersed buildings or built-up area
The modified roll is cross-referenced with the corresponding FF column on the Combat Chart to obtain the result of the assault. This number is divided by the defense value of the terrain in the assaulted hex. The result is the number of hits, which are applied to the defending units to determine their step losses.
If the defender suffers any step losses, they lose the assault and must retreat in the following manner:
- If they are in a built-up hex, they retreat one hex.
- If they are in any other terrain, after retreating one hex, they must retreat further (up to 2 additional hexes) towards the nearest hex in the direction of their lines that does not contain open terrain. They need not move to this hex by the shortest route.
A defending unit that loses an armored assault is eliminated in two cases:
- If it is forced to retreat into prohibited terrain or off the board.
- If it is forced to move through or stop in a hex adjacent to enemy units that did not participate in the assault, and there are no friendly troops in the hex.
The defending units, after retreating, must pass a morale check.
AFVs that win the assault remain in the hex that was assaulted. If the defender did not suffer any step losses, the assaulting AFVs must leave the assaulted hex in any desired direction, as long as they have sufficient MPs and the hex that they enter is not occupied by the enemy. They may not attempt another armored assault during their activation.
9.3 Anti-Armor Assault
Anti-armor assault is performed by units that move by foot (except AT and ART) into a hex occupied by enemy AFV or transport units. An anti-armor assault can also be made as a response to an armored assault as described in the previous section.
Anti-armor assault can be performed by a group of activated units. Assaulted units may fire defensively: the first time at normal FF, in succeeding phases only if they first pass a morale check and if passed only at half FF. If there is more than one assaulted unit in the hex, they may add their assault factors together when they fire on their attackers.
Assault is vs. AFVs or armored transports. If in the hex there is more than one enemy AFV, there is a -1 modifier at the pre-assault morale check for each AFV in the hex. Example: in an assaulted hex there are 3 AFV units, so the morale check is made with a -3 to the assaulting units' morale. If an assaulting unit passes the check, it executes the assault. Make one roll for all the units successfully assaulting, adding together the FF indicated on the Combat Strength table and rolling on the Combat chart. However:
- If the assault is against armored transports, the FF of each assaulting unit is that one column to the right of that given on the Combat Strength Table.
- If the assault is against trucks, the FF of each assaulting unit is that two columns to the right of that given on the Combat Strength Table.
Always use '2' as the defender's divisor when calculating the effects of the attack, regardless of the terrain in the hex being assaulted and the type of vehicle attacked.
Once the assaults have been resolved, the assaulting units retreat to the hex from which they assaulted, unless no enemy units remain in the target hex. In that case, they may remain in the target hex if they desire. If they have suffered any step losses they must make a morale check.
If the assaulted AFV has received any hits it must make a morale check. If it passes, it has the opportunity to withdraw to an adjacent hex.
Example: 3 French units attempt to assault a hex with two Pz38 units. The French officer has a morale of 7 and a leadership rating of 2 and the French player decides the officer will enter the combat. He makes morale checks with his infantry units, needing to roll a 7 or less (morale of 7, plus 2 for leadership, -2 for two AFVs in the hex), and rolls a 5, 7 and 8. Two of the infantry units pass and enter the hex with the leader. None of the participating units have step losses, so we look to the table of assault FF and we see that the Pz38 defend on the combat table with a FF of 12 and the French attack on the combat table with a FF of 8 if they have not suffered any step losses.
9.4 Armor Support
An assault with armor support is one in which the attacker has a combination of infantry and AFVs, and the defender does not have an AFV in the hex.
To make an assault with armor support the infantry and AFV units must begin their movement in the same hex.
In such a case, apply the hand-to-hand combat rules, with the attacker adding the combat value of their participating infantry and AFV units as given in the "Assault Combat Value Chart". The only changes to the general rules are:
- Assaulting infantry units that have armor support do not need to pass a pre-assault morale check.
- The defender may choose to perform either defensive fire or anti-armor assault in response to the assault (of course, the latter applies only if the attacker has AFVs).
- Step losses must be assigned to the participating infantry units before AFVs.
- Retreats must obey the rules given for HtH combat, including AFVs losing the assault.
If the attacking units belong to different formations, they may attempt to coordinate in order to receive the armor support bonus.
Armored support may not be used against a hex with enemy AFVs.
Example of play (second running example): Hauptmann Apfelbaum orders the units located in hex 606, the MMG and infantry unit, to fire on the enemy position in hex 807, defended by 2 French infantry units. The sum of the two units' FF is 10 (6 for the infantry and 4 for the MMG), and this shot has a modifier of -1 (for 6 or more steps of infantry in the target hex). The result of the die roll is a 6, which is a 5 with the modifier. We cross-reference this result on the Combat Chart with the 10 column (the total FF of the attacker), applying the result obtained, which is a 5 with a die roll of 5. This result is divided by the defense value of the terrain in which the defender is located (in this case woods), which can be found on the Defense Value Chart. The divisor given by the chart is 4, and so we divide 5 by 4, which produces a result of 1. The German player has scored a hit, and now the French player decides which of his two units receives the step loss.
Now the rest of the formation under the command of Hauptmann Apfelbaum is ordered into the woods (hex 807) with the intention of assaulting and evicting the French units. They move from hex 605 via 705 and 806, but before beginning the assault the French units reaction fire. They can avail themselves of this possibility because they are marked for reaction. The French units have chosen to engage in reaction fire against the German infantry, so we add together the FF of the French units and obtain a 9 (5 for one full-strength infantry and 4 for the infantry unit with a step loss). A die is rolled to which various modifiers are applied: a -1 for firing against a unit moving on foot (white movement value), another -1 for 6 or more steps in the target hex, and a +1 for having armored vehicles in the same hex with the infantry. We consult the Combat Chart again and locate the 9 column (the FF total). The dice are rolled and the result is an 8, to which we apply the modifiers: -1, -1, and +1, making the final result a 7. This result applied to the 9 column produces a result of 3, which is divided by the terrain defense value, which in this case is "open ground = 2", which produces one step loss, and the German player must decide which of his infantry units receives the step loss.
Now the German infantry along with the StuG enter the woods and initiate the assault (in an assault supported by armor no morale check is required). First we add up the combat odds for the Hand to Hand Combat: French: 2 infantry units, one with a step loss (each unit has a HtH value of 4, from which we subtract one for each step loss = 4+3=7). Germans: 2 infantry units, one with a step loss, 4+3=7 and one StuG unit = 8, so that the German total is 15. To obtain the combat odds ratio we divide the attacker's value (15) by the defender's value (7), which gives us 2:1 odds. The modifiers to the die roll are the following: -1 for combined assault, -1 for an assaulting unit having a morale 8 or higher (Hauptmann Apfelbaum) and another +1 as the defender is in woods. The total die roll modifier is -1 (-1, -1 and +1), the German player rolls the die, 1d6, and obtains a 3, to which we apply the modifier, resulting in a final roll of 2. We check this result on the Hand-to-Hand Combat Chart on the 2-1 column and find the result is 1/2R1. This result means that the German player receives a step loss and the French player receives 2 step losses and must retreat 1 hex, the Germans gain the objective.
10. Morale
The morale of units and formations represents the mental stamina and cohesion of the soldiers that comprise them. The higher the morale, the better chance they have of staying in combat after suffering step losses, losing an assault or encountering any other negative effect. If a unit out of command suffers a hit it must pass a morale check.
As has been noted, a formation is a collection of land units who are under the command of the same officer.
The morale of a formation is equivalent to the morale of its officer added to his leadership value. However, the morale of a formation is reduced by one for each step loss suffered by the formation greater than the number of units that comprise it (not counting the officer). Example: a formation begins with four units and one officer. During combat it loses one entire unit and the other three suffer three step losses (combined). The total is 6 steps lost (3 for the eliminated unit and 3 more from the remaining units). The formation's morale is thus reduced by 2 (6 minus 4).
The morale of a unit is equal to the morale of its formation. However, the leadership value of the commanding officer is added only if the unit is within his command range. Moreover, the morale of a unit is reduced by one for each step loss it has suffered.
10.1 Formation Morale Check Procedure
Formations must check morale under the circumstances herein described, assuming that all of the units that comprise them at a given moment are either affected by the event that caused the morale check or have LOS to the hex that triggered the check. If all the units of a formation do not fulfill this requirement, only the units that comply are required to check morale as described in 10.2.
Procedure for checking morale for formations: Roll 2d6. If the result obtained is less than or equal to the morale of the formation, it passes the morale check and, despite the negative effect suffered, it maintains its strength and continues to fight. If the result is greater than the formation's morale, the effects depend on the difference between the roll and the morale of the formation: a) If the roll is greater than the morale by 1-4, the formation is routed, a marker is placed on the affected units, and they must rout as described in 10.4. b) If the result is greater than the morale by 5, the formation disintegrates and is immediately eliminated from the game. c) If the formation is already routed (that is, marked as such), when it makes a morale check, a result that is 3 or more greater than the morale causes disintegration.
10.2 Unit Morale Checks
Units must check morale when the rules so indicate, as well as whenever something causes its formation to check morale, but the unit is not involved in the command check either because it did not suffer the event that caused the morale check or it does not have LOS to the hex that caused it. Only units that fulfill these requirements need check morale.
Procedure for checking morale for units:
- If a unit is required to make a pre-assault morale check, is out of command and attempting to activate, or is attempting to cross barbed wire, roll 2d6. Special Note: When trying to activate an out-of-command unit, its morale is reduced by 1. In an anti-armor assault the assaulting unit's morale is reduced by 1 for each unit if the assault is against AFVs or armored transports present in the hex. If the result is less than or equal to the unit's morale, it may assault, activate, or cross the barbed wire, respectively. However, if the result is greater than the unit's morale, it may not assault, activate or cross the barbed wire and is marked as "Finished".
- If the morale check is triggered because the unit lost an assault (hand-to-hand, armored, or anti-armor), roll 2d6. If the result is less than or equal to the morale of the unit, it has met the challenge and there is no other effect. However, if the result is greater than the unit's morale, the consequences depend on the difference between the roll and the morale of the unit: a) If the result is greater by 1-4, the unit is routed and marked as such, and it must rout as described in 10.4. If the unit is stacked with its commanding officer, he also is marked as routed. If multiple units are stacked with their officer and some rout and others do not, he is not demoralized. Exception: an artillery, anti-tank or mortar unit which fails a morale check is automatically eliminated. b) If the result is greater by 5 or more, it disintegrates and is immediately eliminated from the game. c) If the unit is already routed (i.e., marked as such), when it makes the check, a roll that is 3 or more greater than its morale causes disintegration.
10.3 When Must Morale Be Checked? (players' reminder)
A Formation must check morale whenever:
- One of its component units is eliminated.
- When more than one of its component units loses a hand-to-hand combat as either the attacker or defender.
- When its officer is wounded or killed.
- After an armored assault, if more than one assaulted unit suffers a step loss.
- For each hit over the original number of units which comprise the formation, not counting the officer.
A Unit must check morale whenever:
- They attempt a close assault (pre-assault morale check).
- They seek to activate when out of command.
- A single unit loses a hand-to-hand combat as either the attacker or defender.
- After an armored assault, if only one unit suffers a step loss.
- After an anti-armor assault, if the vehicle suffers a step loss.
- A unit's command is required to check morale, but the unit is not in the hex that triggered the check nor does it have LOS to the hex. Only the units that comply with this restriction need to check morale separately.
- Before crossing barbed wire, as described in 13.2.
- If a unit out of command suffers a hit it must pass a morale check.
10.4 Rout
10.4.1 A formation or unit, immediately after being marked as "Routed", must conduct rout movement. In later turns, it may not move or activate except to leave enemy line of sight or to move to a hex with cover (such movement costs an activation). Routed units may not conduct defensive fire. Once Rallied, routed units regain their normal abilities. Routed officers may only attempt to rally themselves.
10.4.2 Rout movement. A formation or unit, immediately after being marked as Routed, must move away from the hex that caused the rout, that is to say, the assaulted hex or the hex the fire came from that caused the step loss that led to the failed morale check.
The routing formation or unit retreats towards its lines (that is to say, toward its side of the board) 3 hexes (or 5 for vehicles). The side of the board belonging to each player will be given by the scenario.
A unit's movement is considered to be 'towards its lines' when the unit leaves its hex through one of the two (or three, depending on the hex grid) sides of the hex nearest to its side of the board.
A routing formation or unit is automatically eliminated in two cases:
- If it is forced to move into prohibited terrain or off the board.
- If it moves through or stops in a hex adjacent to enemy units, and there are no friendly troops in the hex, unless it can trace an alternate legal route.
Alternate legal route. If a routing formation or unit is cut off by prohibited terrain or the presence of enemy units that would otherwise cause its elimination, it may change its direction of route, albeit under two conditions:
- It may not move closer to the hex that caused its rout than the hex it began its rout from.
- It must move if possible towards its own lines.
If there is no alternate legal route, the unit or formation is eliminated.
10.4.3 Fire against routed units. If units marked as "Routed" are fired upon, they must rout again towards friendly lines, but in this case they use their full regular MP and pay movement costs corresponding to the terrain they pass through. To trigger this effect one need only achieve any effect on the combat table, even if the terrain divisor prevents any step losses from being inflicted.
10.4.4 Assault against routed units. Routed units that are assaulted surrender immediately, including their officer if he is stacked with them, even if he himself is not routed. To trigger this effect it is sufficient that one enemy unit pass its pre-assault morale check. Routed units don't surrender if other non-routed units are present in the same assaulted hex and they don't have to leave the assaulted hex.
10.5 Rallying Routed Units
10.5.1 The units of a routed formation may return to action if they rally. Officers marked as "Routed" may not attempt to rally units in their formation until they have rallied themselves.
Officers not marked as "Routed" may attempt to rally routed units of their formation.
Commissars not marked as "Routed" may attempt to rally routed units or officers of any formation. Commissars may only rally units and other Commissars of the same side.
Higher-ranking officers may attempt to rally subordinate officers and units of these subordinate formations.
10.5.2 Procedure. To rally, the officer or commissar must be activated. If the officer is not marked as "Routed", he may attempt to rally any units of his formation that are stacked with him (although armor officers may rally any units within command range).
If the officer is marked as "Routed", first he must attempt to rally himself. If he succeeds, he ceases to be routed and may immediately attempt to rally any units of his formation stacked with him (or within command range in the case of an armor officer). The morale of a routed officer is that indicated on his counter, without adding his leadership value.
If a higher-ranking officer attempts to rally subordinate officers and units of their subordinate formations, the base morale of the unit for rally purposes is that of the higher-ranking officer (including his leadership value).
Roll 2d6 for each unit attempting to rally. If the result is less than or equal to the morale of the unit, it rallies.
The rallied unit removes any Routed marker and may be activated (if it is not "Finished") in the same turn in which it is rallied, but not in the same activation in which it is rallied (at least one opponent activation must intervene).
If the result of the rally die roll is greater than the unit's morale, it has failed the attempt and the unit is marked as "Finished".
Exception: if a Commissar fails the rally attempt, place a 'Discipline Failure' marker on it and consider it to be finished. Each time a Commissar fails the rally of a unit marked as 'Discipline Failure', the unit loses 1 step. Once rallied, remove the 'Discipline Failure' marker.
A dead Commissar cannot be replaced by another Commissar.
Example 1: One routed unit with one step loss tries to be rallied by its officer, who is not routed, who has a morale of 7 and a leadership value of 1. The formation to which the unit belongs originally had four units, but one of these has been eliminated and the other three have 3 step losses between them. The total step losses the formation has suffered is therefore 7. The morale of the formation is reduced by 3 (7 steps lost - 4 original units = 3), so the morale is 7 (morale of commanding officer) +1 (leadership) -3 (step losses suffered) = 5. Therefore the rallying unit has a base morale of 5, but since it has one step loss, this is reduced by 1, i.e. it has a morale of 4. 2d6 are rolled and if a 4 or less is achieved, the unit rallies.
Example 2: If, in the above situation, instead of being rallied by its commanding officer, Commissar Yazin (9 morale and +1 leadership) made the attempt, the situation would be distinct, even if the other conditions remain the same. The morale of the unit would be 10 (morale of the Commissar, in place of the commanding officer) -3 (for steps lost) = 7.
10.6 Morale Modifications to Hand-to-Hand Combat
When in a hand-to-hand combat not all of the units have the same morale, add the morale of all participating units and divide by the number of units. This value is the one used to determine the morale modifier for HtH combat.
11. Risky Action
It is considered a Risky Action, every action in which the unit/formation is more vulnerable to enemy fire or assault (fire and assault modifiers):
- Cross a river
- Construct an Improved Position
- Cross/Remove a Barbed Wire
- Construct/Remove a Roadblock
- Construct/Crossing a Pontoon Bridge
- Construct a crossing over an Anti-tank ditch
- Remove Dragon's Teeth
- Entering or sweeping Minefields
When a unit performs a Risky action, place a Risky Action marker on it. If at any time a unit/formation fires at a hex in which are units performing a Risky Action, there is a -2 modifier to the fire roll. Similarly, if such units are assaulted, there is a +2 modifier to the HtH combat.
12. Terrain
The maps contain different types of terrain which influence the movement, sighting, attack and defense of combat units. The majority of these terrain types may also be crossed by a road or a trail which may modify movement as described in 5.4.
Ground level and hills (every hill level: +1). Ground level is any hex that is not a hill hex. A hill is any hex or combination of hexes which are raised above ground level. Hills may have one or more levels of elevation. The hex or combination of hexes within a given crest line forms one hill level. Flat ground is at level 0. Each hill level adds one to the elevation of the ground on which it rests.
Crests. A crest is the exterior boundary of an individual hill level. Example: hex A510 has a crest on its six sides. Hex A602 has crests on all sides except that shared with hex A502. Hex A503 has a crest on two sides: those shared with A602 and A604. Hex A306 has no crest.
For a unit to be in 'crest status' with respect to LOS effects, the LOS must cross a crest hexside in the hex containing the unit.
For a crest hexside to improve a unit's defense, the attacker must be at a lower level and the LOS must cross a crest hexside in the hex containing the unit.
12.1 Open Ground (Level: 0)
Open terrain is any hex devoid of another terrain type that would affect fire or the LOS through the hex. Open ground has a greenish brown color.
12.2 Rough Terrain (Level: 0.5)
Rough terrain represents rough ground covered by stones, debris, pits, rubble, or small boulders. LOS is blocked if it crosses 3 rough or field hexes (or a combination of these). If the LOS crosses 1 or 2 rough or field hexes, any AP attack is modified by +1.
12.3 Built-up Area (Level: 1)
Each such hex represents a group of buildings and streets and the usual features of a town or city. The underlying terrain may be either brown or grey, depending on whether the streets of the town or city are paved or not.
To enter a built-up area via a road costs an infantry unit 1 MP and AFVs and wheeled vehicles 1/2 MP. To enter a built-up area via a hex which is not connected by a road costs an infantry unit 1 MP and AFVs and wheeled vehicles 2 MP.
12.4 Dispersed Buildings (Level: 1)
Each dispersed building hex represents a small group of structures, which may be a hamlet, farm buildings or suburban homes. They may be distinguished from built-up areas as they contain only two building depictions.
To enter a hex with dispersed buildings costs infantry, AFVs and wheeled vehicles 2 MP.
12.5 Woods (Level: 1)
Woods represents dense forested areas with underbrush.
12.6 Light Woods (Level: 1)
Light woods represents sparsely forested areas without any underbrush in which the trees are not closely spaced. They may be distinguished from woods as they contain only four tree depictions.
12.7 Fields (Level: 0.5)
These represent a wide variety of cultivated areas: ploughed fields, fallow ground, harvested and still awaiting harvest. Any hex like those depicted (Fields A-D) is considered to contain fields. If the LOS passes through three or more rough or field hexes (or a combination of these), it is blocked. If the LOS crosses 1 or 2 rough or field hexes, any AP attack is modified by +1.
12.8 Marsh (Level: 0.5)
A marsh represents ponds of deep water and soft ground with vegetation. Only foot units may move through marsh.
12.9 Rivers (Level: 0)
Rivers are bodies of water which cross hexes containing other types of terrain. They are represented by a thick blue band.
The scenario will note whether the river is considered major, minor, or dry, depending on the amount of water flowing through it. A river hex is considered as a hex of the type of terrain through which it flows, except for purposes of movement. Example: A605 is woods.
Exception: A dry river has no effect on movement.
12.9.1 Minor rivers
A minor river may be crossed (that is, forded) at any point and by any kind of unit, unless the scenario indicates otherwise. Units crossing must add the terrain cost of the other terrain in the hex to the cost indicated in the Movement Chart.
A unit that finishes its movement in a hex with a minor river is considered to have crossed it. If the enemy assaults it, he need only pay the cost of the other terrain in the hex.
If a unit wishes to pass through a hex with a minor river without crossing it, the cost to enter is the cost of the other terrain in the hex.
12.9.2 Major rivers
Major rivers, due to the large quantity of water flowing through them, are prohibited terrain to all units, but this prohibition is not absolute, for:
- A unit may enter major river hexes as long as it doesn't end its movement in them and does not cross the river. Example: A unit in 1308 may move to 1208 and then to 1108.
- It is possible to cross major rivers at the bridges printed on the maps. The movement cost is the same as a road.
- It is possible to cross major rivers at non-bridge hexes by conducting one of the following risky actions:
- All units may cross a major river at fords if specified in the scenario as if the hex were a minor river.
- All units may cross a major river using a pontoon bridge if the scenario so indicates.
- All units may cross a major river using boats if the scenario so indicates. To cross by boat, a unit must begin its movement in a hex adjacent to the river and end movement in a hex adjacent to the river on the opposite side. There may not be enemy units in the hex.
- Only foot units may cross a major river using pontoon bridges constructed by engineer units during the scenario.
12.10 Roads and Trails
The presence of a road modifies the movement effects of the terrain in a hex according to the terms described in "5. Movement". These represent paved surfaces. (Trails are unpaved tracks; see the Movement Chart.)
12.11 Railroad
Count movement costs according to the other terrain in the hex.
13. Terrain Markers
13.1 Improved Positions (Risky Action)
13.1.1 A unit in open terrain, woods, light woods, crest line, orchard, or fields (whether or not there is a road in the hex) may attempt to construct improved positions that will aid their defense against any AP or ART attack (however, the improved position will not improve their defense against assault). To construct an improved position requires two activations by the same unit.
In the activation in which a unit begins construction of the improved position, place an "IP Construction" marker on top of it. The following turn, after marking the unit as "Finished", flip it over and from that time it is active, and a +1 modifier is applied to any AP or ART attack on the hex in which the marker is located.
If after the marker is placed but before it is flipped, the unit attempting to construct an improved position abandons the hex or is assaulted by the enemy, it loses the marker immediately. The position is considered assaulted as long as at least one enemy unit passes its pre-assault morale check.
The hex also loses the Improved Position marker (whether finished or not) if it is devoid of units of the side that constructed it.
13.1.2 If an Improved Position marker is given by the scenario, it is active from the start of the game, protecting the hex selected by the owner. At least one friendly unit must be set up in the hex.
13.1.3 When a HtH assault against an Improved Position results in only one side occupying the hex, regardless of the victor the marker is removed from the hex.
13.2 Barbed Wire (Risky Action)
Barbed Wire is allocated to the players at the start of the scenario according to the scenario instructions. Barbed wire impedes the normal movement of combat units: only fully-tracked vehicles (not halftracks) may cross barbed wire. The rest of the time barbed wire is considered prohibited terrain.
However, infantry units may attempt to cross barbed wire. To do so, they must begin movement in a hex adjacent to the wire and pass a morale check as described in 10.2. If they pass, they have crossed the barbed wire, and must be placed in a hex on the opposite side that is free of enemy units. If the unit fails the morale check, it stays where it is. In both cases, after the morale check the unit is marked "Finished".
If a unit or formation that is not a fully-tracked vehicle is forced to retreat into a barbed wire hex after losing an assault, it is eliminated.
Barbed wire may be destroyed in several ways:
- If a tracked vehicle passes through the barbed wire hex. This movement costs +1 MP.
- By the action of off-board artillery. The artillery must make a concentrated attack against a hex with barbed wire and obtain an effect of 3 or more on the Combat Chart.
- By engineers. In order for an engineer unit to remove a Barbed Wire marker it must be activated in a hex adjacent to the barbed wire and make a morale check. If it passes, the marker is removed and the engineer unit is placed in the hex where the barbed wire was located; if it fails, it stays in place. In both cases, the unit is marked "Finished".
13.3 Roadblocks (Risky Action)
Roadblocks are located in a road hex to impede normal transit along the road. Only foot units may cross a roadblock (although they must pay 1 MP above the normal cost of the terrain). The scenario instructions will indicate whether either player has roadblocks to place.
In addition, during a scenario an engineer unit can construct a roadblock in any road hex passing through or adjacent to a woods or light woods hex. To do so activate the engineer unit in the hex where the roadblock is desired for two consecutive turns without performing any other action. Once the second activation is finished, the roadblock is placed.
If for any reason the engineer unit leaves the hex in which the roadblock is being constructed, all effort up until that point is lost.
An engineer unit may remove a roadblock using the same procedure as for removing barbed wire.
13.4 Pontoon Bridges (Risky Action)
Pontoon bridges are placed in a river hex to allow or facilitate the crossing of the river by combat units. The scenario instructions will indicate if any pontoon bridges are at the disposal of the players, and if they may be crossed by any unit or only certain types.
In addition, during the game an engineer unit may construct a pontoon bridge which will permit foot units and guns pushed by their crew to cross. To do so, the engineer unit must be activated in a hex adjacent to the river where the pontoon is to be constructed on two consecutive turns without performing any other action. When the second activation is finished, the pontoon is operational. The cost of crossing a pontoon bridge is in addition to the terrain through which the river crosses.
13.5 Anti-tank Ditches (Risky Action)
Anti-tank ditches are provided by the scenario instructions. They prohibit the movement of wheeled or tracked units and may be placed in any hex other than marsh, rivers, or built-up areas. Units moving by foot must expend an additional 2 MPs to enter the anti-tank ditch hex.
An engineer unit can construct a crossing over the ditch using the same procedure as for constructing roadblocks. Once the crossing is finished, wheeled or tracked units may cross the anti-tank ditch with an expenditure of 2 additional MPs.
13.6 Dragon's Teeth (Risky Action)
Dragon's teeth are provided by the scenario instructions and prohibit the movement of wheeled or tracked units in their hex. Foot units expend 1 additional MP to enter the hex with dragon's teeth. An engineer unit can destroy the dragon's teeth in a hex using the same procedure as for constructing roadblocks. Dragon's teeth may be placed in any type of terrain except marsh and rivers.
13.7 Minefields (Risky Action)
An engineer unit can be activated to detect minefields in adjacent hexes. The owner of the engineer unit simply asks his opponent if minefields are present. If they are, his opponent places the appropriate Minefield counters in those hexes. Whether there are minefields or not, the engineer unit is marked as 'Finished'.
13.7.1 There are different kinds of minefields in the game. They may be dispersed, normal or concentrated, depending on their density. They also vary in their attack, being either anti-personnel, anti-tank or mixed.
The FF of a minefield depends on its density: dispersed minefields have a FF of 3, normal minefields have a FF of 6, and concentrated minefields a FF of 10.
- An AP minefield attacks all foot units entering the hex (including guns pushed by their crew).
- A mixed minefield attacks all units entering the hex.
- An AT minefield attacks all AFV and transport units entering the hex.
The scenario instructions will indicate to the players the number and type of minefields which are available as well as the area where they may be placed. Minefields may be placed in open, woods, light woods, or fields.
The player with minefields notes on a sheet of paper the location of each hex with mines, their type and density, keeping this information secret from his opponent until the mines are revealed by entry of the appropriate type of unit.
If there is no attack, it is not necessary to reveal the Minefield marker. For example, nothing will happen if an infantry unit enters an AT minefield hex. In this way the enemy will not know its density and location.
When a minefield is triggered and the moving unit is attacked, place the marker as per the written deployment, revealing its type and density to your opponent. To resolve the attack roll 2d6 and cross-reference the result with the FF of the minefield. The effect of the attack is then divided by 2 to calculate the number of hits inflicted, which are divided among the moving unit(s) according to the general rules for distributing hits and calculating step loss. As AT mines attack the undersides of vehicles, which are the most weakly armored, one does not make a penetration check, which means that each hit will cause a step loss to the vehicle.
13.7.2 Sweeping minefields. A minefield may only be swept by engineers or special minesweeping vehicles according to the following rules:
- Engineers or minesweeping vehicles must begin their movement adjacent to the minefield.
- To enter the minefield, first determine whether the mines detonate or not by rolling a d6. If an engineer unit is sweeping, the mines detonate on a roll of 1, but the engineer unit is only affected if it is an AP or mixed minefield. If a vehicle is sweeping, the mines detonate on a roll of 1 or 2 (but the vehicle is only affected if it is an AT or mixed minefield).
- If after entering the minefield the mines do not detonate, the sweeping operation is completed successfully. Mark the unit as 'Finished' and reduce the density of the minefield by one level (concentrated to normal, normal to dispersed; a dispersed field is removed). To reduce the minefield level, replace the marker with one of the next lower number.
Having 2 or more engineer units in the same hex does not reduce the difficulty of sweeping mines.
13.8 Trenches
A Trench marker may only be placed in a hex before the scenario begins, as provided by the scenario instructions. Trenches may be placed in open, woods, light woods or field hexes. Up to 6 steps and an unlimited number of officers may be placed underneath a Trench marker. AFVs may not occupy a trench. Outside of the trench normal stacking rules apply.
Adjacent Trench markers are considered to be connected and it costs 1 MP to move from one to another if they are at the same level. To enter a trench from outside costs one MP in addition to the MP necessary to enter the hex itself. If a unit has sufficient MP to enter a hex, but not the trench inside, it does not benefit from the trench's protection. Wheeled units can't cross a Trench marker.
13.9 Fortifications
The scenario instructions will indicate the type of fortification to be used, and to which hex vertex the white arrow needs to be pointed. The red bar at the top of the marker indicates where the LOS of the fortification starts. You can only make defensive fire if the assault is by the arc of vision that you see in the picture.
When applying hits by artillery of 105mm caliber or greater (and aerial attacks of FF 9 or greater), reduce the value of the fortification by 1 for each hit. Units inside the fortification are not affected. If there are units outside of the fortification, when distributing hits the fortification counts as one unit, but hits must be assigned to units outside the fortification before the fortification itself.
Example: in a hex with a fortification of value 4 there are two infantry units outside of it. If two hits are caused by an artillery attack, assign one to each infantry unit. If 3 hits are caused, one is assigned to each infantry unit and the third to the fortification.
The maximum stacking in a fortification is 6 steps. AFVs may not occupy a fortification. Outside the fortification normal stacking rules apply.
A fortification is destroyed when the hex is occupied by enemy units as long as no friendly units are in the hex, either inside or outside the fortification, or by artillery fire that reduces its value to 0.
All indirect ART attacks and all AP attacks made against the front of a fortification will affect the troops inside. The divisor used when calculating the attack is the value of the fortification, or 3, whichever is greater. A fortification may not be attacked if there are units outside of it.
If you attempt to assault a fortification and there are enemy units outside of the fortification, first conduct the assault against those outside.
When assaulting a fortification add 2 to the die roll on the HtH table.
MG Bunkers function the same as a normal bunker/fortification except that the stacking limit in an MG Bunker is one unit or three steps of MGs. The marker "MG Bunker" has two arrows on the counter. When placing the marker, align it with a hex so that each of the arrows points to a hex vertex as indicated by the scenario.
13.10 Smoke
The function of Smoke markers and their effects are described in section 8.1.5 Smoke.
13.11 Rubble (optional rule) (Levels: Built-up: 1, Dispersed: 0.5)
When a successful ART attack with a FF of 12 or more is made against a built-up or dispersed building hex, 1d6 is rolled, and the result obtained is added to the hits which the troops in the hex received. The hex is converted into rubble if the resulting total is the following:
- 9 or more for a built-up hex or
- 7 or more for a dispersed building hex.
If the first attack does not succeed in converting a hex into rubble, place a "Rubble +X" marker in the hex, where X is equal to the number of hits received by the target troops. In a later ART attack against the same hex, the value of this marker is added to the rubble die roll.
Hexes converted into rubble are indicated with a Rubble marker, and from that point the following special rules apply:
- The movement cost for the hex is 2 (foot), 3 (tracked) and prohibited (wheeled).
- In addition, an anti-armor assault attempted by units in a rubble hex receives a -1 modifier to the die roll, not modifying the hex defense value.
Example: A German Stuka air unit (FF 20), after spotting the enemy, attacks a built-up hex in which 3 French infantry units are located. The German player rolls the dice and gets a 3. He applies the -1 modifier for 6 or more steps of infantry in the target hex, producing a result of 2, which determines the result on the Combat Chart, in this case a 10. After applying the divisor for a built-up hex against ART fire (5), 2 step losses are produced, which are distributed among the infantry units. Next 1d6 would be rolled to see if the hex is converted into rubble, except in this case the roll is a 6 +2 for the steps lost, resulting in an 8, whereas a 9 is needed to turn the hex into rubble. So the hex is marked with a "Rubble +2" marker. In the following turn if the German player makes a new attack against the hex and inflicts 1 step loss, he will roll 1d6, adding 1 (for the step loss this turn) and 2 (for the Rubble +2 marker). If the resulting total fails to reach 9 again, swap the "Rubble +2" marker for a "Rubble +3" marker and so on.
14. Flame-thrower Tanks and Engineers
Flame-thrower tanks act identically to other AFVs. Such a unit has a 'flame-throwing factor' within a red box on its counter. This number is used in armored assault and as armor support as indicated in the table.
The flame-thrower engineers are a better modifier assaulting or being assaulted in HtH. They are identified by an "A" in a red square.
15. Amphibious Tanks
For an amphibious tank, ignore the terrain cost of the Minor river when crossing it, only taking into account the cost of the other terrain in the hex. Amphibious tanks can cross Major rivers with a cost of 5 MP. Some amphibious tanks, like the Russian T-38, every time they try to cross a Major river must roll a d6 for each unit; if the result is a 6 the unit loses a step. After the die roll, regardless of the result, the unit continues its movement. They are identified on their front by a blue circle with an "A".
16. SMG Units
SMG units have a range of 0, so they can use their entire fire factor only in their hex (when being assaulted, for example). They can attack at half strength to adjacent hexes (think of it as 1 being twice the true SMG range of 0.5, shown as 0 on the counter).
17. Battalions
Ground combat units are grouped into company formations. A company is a collection of units that are under the command of the same officer. A collection of companies that are under the command of the same officer form a battalion.
Each scenario will indicate if there are battalion officers present and, if so, which companies are part of the battalion under the battalion officer's command.
If the scenario indicates the presence of battalion officers, use the Battalion Morale Display. The morale of each battalion has three levels or states: Normal, Shaken and Routed. At the beginning of the game place the morale marker for the battalion in the leftmost space of the display in the row corresponding to its initial morale state, according to the scenario. Each time one of the following situations occurs, move the marker to the right (negative number) or left (positive number) the number of spaces indicated:
| Event | Marker movement |
|---|---|
| Death of battalion officer | -2 |
| Death of company officer | -1 |
| Lost assault (any type) | -1 |
| Company eliminated | -2 |
| Company routed (not caused by rout of battalion) | -1 |
| Lost objective (as given by scenario) | -1 |
| Routed company rallies | +1 |
| Assault won (any type) | +1 |
| Objective taken (as given by scenario) | +1 |
| Beginning of new day (as given by scenario) | +x |
When the marker reaches or is to the right of the Shaken space, the battalion officer must make a morale check modified by the morale modifiers listed at the top of the corresponding column on the Battalion Morale Display.
If the battalion officer passes this morale check, the morale marker is moved one space to the left, and the battalion remains Shaken. If he fails this morale check, the battalion is Routed.
The morale check is made once the formation whose actions prompted the movement of the marker has finished its activation and before activating any other friendly or enemy unit. This morale check is not considered an activation of the battalion officer and is made each time the morale marker, after a movement starting in the Normal section, enters the Shaken space or any space to the right.
The companies of a Routed battalion are each marked as Routed and act correspondingly. They are marked as Routed immediately after the failure of the morale check, regardless of their previous state, retaining any 'Finished' markers they might have. Note that if one of the Routed companies rallies, the Battalion Morale Marker will move one box to the left and the battalion will no longer be Routed, but the individual companies retain their Routed markers and must be Rallied individually.
If the morale check is passed, move the morale marker to the space to the left of the 'Shaken' space. The battalion retains Normal morale. If the morale check is failed, the battalion becomes Shaken. The companies of a Shaken battalion may hold their positions or retreat, but may not move closer to the enemy. They may attempt anti-armor assaults, fire on the enemy, move away from the enemy, mount/limber or dismount/unlimber, be placed in Reaction, and construct Improved Positions. A unit entering the map may do so normally even if its battalion is Shaken, but in its next activation must comply with the penalties suffered by the rest of the battalion.
When the marker reaches the Rout space (last section of the Battalion Morale Display), the battalion officer makes a morale check modified by the morale modifiers listed in the corresponding column on the Battalion Morale Display. The morale check is made once the formation whose actions prompted the movement of the marker has finished its activation and before activating any other friendly or enemy unit. This morale check is not considered an activation of the battalion officer and is made each time the morale marker enters the Rout space.
The morale modifiers corresponding to each column of the Battalion Morale Display affect all morale checks by the company officers of the battalion.
17.1 Battalion Officers
Battalion officers are represented by a unit that includes the battalion staff and security forces. They are identified on their front by a red square with a "BT". As indicated in the section on Battalions, the morale checks to see if a battalion becomes Shaken or Routed are made by the battalion officer. In addition, battalion officers may perform any of the following actions when activated:
- Attempt to rally the officers of their companies
- Order artillery or aerial attacks
- Move
- Make a battalion morale check modified by the morale modifiers listed in the corresponding column on the Battalion Morale Display.
If the battalion officer chooses to attempt a morale check and fails, nothing happens. If he succeeds, the effects depend on the morale state of the battalion:
- Shaken Battalion: move the Battalion Morale Marker to the space to the left of the Shaken space; the battalion returns to Normal morale.
- Normal Battalion: If no unit from the battalion has been fired upon by the enemy this turn, move the Battalion Morale Marker to its starting space as given by the scenario.
Battalion officers provide the same spotting benefits as Reconnaissance units.
Battalion Officers and Step Losses: All battalion officer counters represent the security forces and staff of the battalion. The battalion officer is eliminated if:
- The enemy opens fire on the counter and inflicts a step loss.
- An enemy assault causes a step loss.
A battalion officer has a strength of 2 in HtH combat. If a battalion officer is lost, follow the procedure described in 7.2 "Replacement of Officers."
18. Overlays
Each Overlay has a letter which identifies it. The front of each multihex overlay has one small "1" in one hex and one small "2" in another hex. These numbers are used to orient the overlays on the map (for example the overlay in scenario 6 "Assaulting the Line" is placed in hexes 1) B504 and 2) B904 facing south). This overlay has three bunkers/fortifications; the middle small bunker is for MG only and the other two for fortifications, the letters around the hex are for bunker and fortification orientation on the map.
In each scenario using an Overlay, the scenario will indicate and explain the terrain and possible elements represented.
Note: Any Overlay from any module of WSS games can be used with any other to design your own map when creating a Point-Based Scenario.