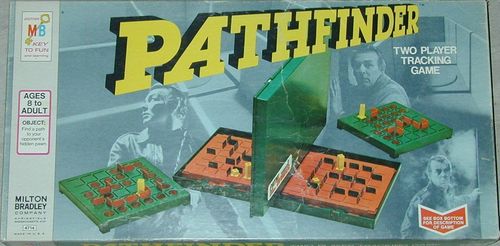
Pathfinder
Pathfinder Rulebook
Table of Contents
Table of Contents
Preparing the Game
Your Pathfinder game stores inside a carrying case whose base has two orange HOME GRIDS and whose cover doubles as a BARRIER SCREEN. Also included are two TRACKING GRIDS, BARRIER CHIPS in two colors, red TRAIL DISCS, tall pawns and short pawns (see FIG. 1).
Figure 1 — Identifying Game Pieces
Figure 2 — Inserting the Barrier Screen
- While resting the case, label up, on a playing surface, remove the cover by pressing in the two catches on either side of the handle.
- Lift out the two TRACKING GRIDS and give one to each player.
- Now, set up the BARRIER SCREEN by pushing the handle of the cover down into the channel that separates the two orange HOME GRIDS. (FIG. 2)
Setting Up for Play
- The first time you play, some of the small playing pieces must be removed from the runners by twisting them and then pulling.
- Give each player 30 dark and 30 light BARRIER CHIPS, 30 TRAIL DISCS, 2 tall pawns and 1 short one.
- Sit facing each other on opposite sides of the BARRIER SCREEN so that neither one of you can see the other's HOME GRID.
- Place your TRACKING GRID on one side in full view of both of you.
- Now, place the small pawn on any square on your HOME GRID and build barricades around it by inserting the dark BARRIER CHIPS lengthwise into the slots. The barricades must be built so that at least one route can be traced from a square in column one to the square on which the short pawn is placed. You may use as few or as many of your dark chips as you like.
Figure 3 — Building the Barricades
This is a sample grid having one path, indicated by the dotted line, from square F-1 to the short pawn on square E-5. An opponent would be able to enter the barricades at any of squares F-1, E-1, D-1, B-1, A-1, even though only square F-1 would allow you to reach the pawn. The others are dead ends. Also, the opponent could not enter at C-1 because of the barrier chip placed in the slot to the left of it.
Object
Be the first to find a path through your opponent's barricades to the square on which he has hidden his short pawn.
Playing the Game
-
Choose one of the players to go first.
NOTE: You will be using your TRACKING GRID and light colored BARRIER CHIPS to reconstruct parts of your opponent's barricades as you try to find a path to his hidden pawn.
-
If you are the first player, select which square in COLUMN 1 you think begins a path into your opponent's barricades. Ask if it can be entered at that square.
NOTE: To identify a square, trace horizontally to the left side of the grid to find the correct letter, and vertically to find the correct number. Remember, you are naming the squares themselves, and not the slots that divide them.
-
Ask for example, "May I enter at B-1?" If your opponent says "Yes," there is no barrier preventing entry at B-1 and you may enter. Place one of your tall pawns on square B-1 of your TRACKING GRID. Your turn continues.
-
Now decide on any square next to the one you occupy that seems likely to form a path. Ask if you can move into it. DIAGONAL MOVEMENT IS NOT ALLOWED AT ANY TIME.
FOR EXAMPLE: "May I move from B-1 to B-2?" If your opponent tells you "Yes," move your tall pawn into the next square.
-
Continue to go from square to square, moving your tall pawn as you do, until you receive a "No" answer to tell you there's a barrier blocking your path on the side you want to enter. Your tall pawn now remains where it is on the path, and you place an orange BARRIER CHIP in that slot on your TRACKING GRID (see FIG. 4). It is now your opponent's turn.
Figure 4 — Coming Up Against a Barrier
If Fig. 4A represents your opponent's home grid, you can see that he has a barrier chip between squares B-3 and B-4. Thus, if you were to ask to go from B-3 to B-4 you would get a "no" answer. A light colored chip is placed in the slot between B-3 and B-4 on your tracking grid as shown in Fig. 4-B.
-
As you move from square to square, always place a red TRAIL DISC on the square you occupied last. This will help to identify your path in case you want to reverse direction. You may go back on your steps at any time you like. This will usually be when you come to think you are following a false trail or when you find yourself in a dead end.
Sample Grids
Here are some sample barricade layouts you can try while first learning to play Pathfinder.
[Four sample barricade diagrams appear on this page of the source; they are not transcribed here.]