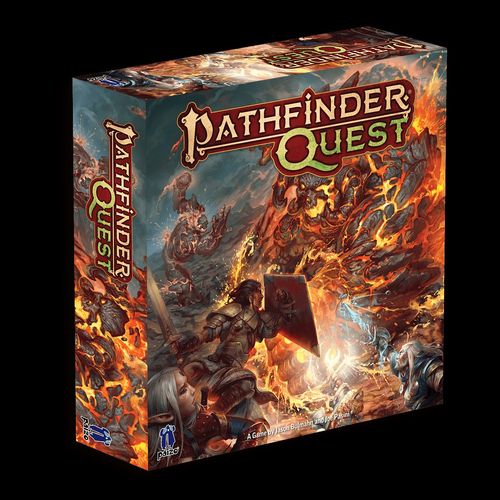
Pathfinder Quest
Pathfinder Quest Rulebook
Table of Contents
Table of Contents
Contents
- Rulebook
- Adventure Book
- Challenge Book
- Campaign Sheet
- 17 Map Tiles
- 10 Quest Dice
- Time Tracker Dial
- 24 Ancestry Cards
- 24 Portrait Cards
- 24 Class Level Cards
- 129 Class Cards
- 35 Enemy Cards
- 112 Item Cards
- 8 Initiative Cards
- 76 Damage Tokens
- 18 Reminder Tokens
- 16 Action Tokens
- 8 Challenge Tokens
- 8 Fire/Debris Tokens
- 7 Water/Lava Tokens
- 4 Time Tokens
- 1 Quest Token
- 24 Character Pawns
- 96 Enemy Pawns
- 12 Pawn Bases (not shown)
- 13 Miniatures (Deluxe version only, not shown)
Get Started Here!
In Pathfinder Quest, you play as a group of four heroic adventurers exploring a dangerous world of deadly high fantasy and fearsome monstrous foes.
Pathfinder Quest comes with a dozen adventures, each featuring a variety of exciting encounters, including thrilling combats against treacherous foes and exploration challenges where overcoming dangerous obstacles and making the right clutch decisions make the difference between victory and defeat!
A series of several adventures form a Pathfinder Quest campaign, an evolving tale of heroism, brave victories, and narrow escapes where the choices made along the way creates a different story each time you play. Replaying the campaign with different characters and choices can lead to totally different outcomes!
Two books will be your constant companions: the Adventure Book, which contains the setup and story for each adventure, and the Challenge Book, which contains the outcomes to various challenges you face and decisions you make.
But don't open these just yet! First, you'll need to create the heroes you'll be playing during the campaign.
Creating Characters
To create a level 1 character, follow the steps below. You'll need four characters in total. Note: If you have fewer than four players, one or more players will need to control multiple characters.
Alternatively, you can use four premade iconic characters to get going faster, and then create your own characters after the first adventure (or continue with the iconics, as you choose!) These premade characters appear on page 15.
1. Choose Your Ancestry and Background
Choose an ancestry card. This card represents the culture your character hails from. It also includes a background, which details a bit of your character's backstory. You will keep this card for the entire campaign (though you will be able to change your choice at the end of the introduction adventure, once you know how the game works.)
In addition, take a portrait card and matching pawn or miniature that best represents your character.
2. Choose Your Class
Select a class level card and use the "Level 1" side. This represents your character's adventuring profession and determines their skills and abilities.
- Cleric: You'll cast spells that protect, heal, and enhance your allies.
- Fighter: You'll be up front in combat, dishing out punishment and guarding your allies.
- Oracle: You'll cast spells and use visions of the future to make more informed decisions.
- Ranger: You'll stay at range from most enemies, dealing damage from afar.
- Rogue: You'll use cunning and positioning to deal damage to enemies.
- Wizard: You'll cast spells to deal damage and give tactical advantages.
Don't worry about all the specifics listed on your class level card; they'll be explained as you need them. (If you need a reminder later, see page 7.) Again, you can make a different choice after the introduction adventure.
3. Get Your Starting Cards
Look for your class below to see which cards to take from your class deck and which item cards to take from the item deck. In some cases, you'll choose between multiple cards: you can look at your options before keeping one (or more) and returning the others to the class deck.
For more information about how these cards work, see Class Cards on page 7 or Item Cards on page 13, but don't worry too much about the class card choices, as you'll be able to change them at the end of the introduction adventure.
Cleric
- Class cards: Take cards 1 and 3. Take either card 2a or 2b. Take either card 4a or 4b.
- Item cards: Take cards 3 and 6.
Fighter
- Class cards: Take cards 1 and 2. Take either card 3a or 3b.
- Item cards: Take card 4.
Oracle
- Class cards: Take card 1. Take one of these cards: 2a, 2b, or 2c. Take two of these cards: 3a, 3b, or 3c.
- Item cards: Take card 8.
Ranger
- Class cards: Take either card 1a or 1b. Take either card 2a or 2b. Take card 3.
- Item cards: Take card 1.
Rogue
- Class cards: Take cards 1 and 2. Take one of these cards: 3a, 3b, or 3c. Take either card 4a or 4b.
- Item cards: Take cards 2 and 5.
Wizard
- Class cards: Take cards 1 and 2. Take two of these cards: 3a, 3b, 3c, or 3d.
- Item cards: Take card 7.
4. Record Your Characters
Give each character a name and record their class cards and items in the character section of the campaign sheet.
Once you've created four characters, turn to page 2 of the Adventure Book to begin your first adventure (which will guide you through the rules)!
The remainder of this rulebook serves as reference; you don't need to read it to start playing.
Rules Reference
Actions
During combat, characters have 3 actions on each of their turns they can spend to attack, move, and use abilities and cards; the cost for these is represented by the following symbols:
- One action
- Two actions
- Three actions
For more information, see Combat on page 8.
Adventures and Encounters
Pathfinder Quest is a campaign composed of adventures, which are further composed of encounters.
At the beginning of each adventure, unless otherwise noted, Time (see page 15) resets back to 0, characters start with no damage, and all items and class cards available.
At the beginning of each encounter, read the entire encounter (but not any referenced Challenge Book entries), including the section that tells you when and how to proceed to the next encounter. Unless otherwise noted, the group can spend Time before moving to the next encounter (see Time on page 15).
Similarly, each adventure tells you what to do at its conclusion, and which adventure is next—sometimes you will choose from two available adventures.
Campaign Sheet
At the start of a campaign, record each character's name, class, and ancestry in the space provided.
At the end of each adventure, record the class cards and item cards gained by each character in the appropriate section.
During the campaign, you will sometimes be instructed to record (or refer back to) specific information on the campaign sheet. Your group's story will unfold differently depending on what you've recorded and when.
Challenges
There are two types of challenges in Pathfinder Quest: combat challenges and exploration challenges. For both, you'll usually roll a number of Quest Dice, and then use the result to determine which entry in the Challenge Book to read. Enemies can't attempt challenges.
1. Read the Challenge Entries
You can always read all the descriptions for any challenges present in an encounter (but not the Challenge Book entries corresponding to their results) before deciding what to do, whether they are combat or exploration challenges.
Do I Have To? Most challenges are optional; it's usually up to your group whether you want to resolve them all before moving on to the next encounter. Time is a resource, so spend it carefully!
2. Spend Time or Actions
Before attempting most exploration challenges, you must (as a group) spend 1 Time. This gives each character one turn, in any order you choose, to do one thing that requires Time—such as attempting an exploration challenge, following the steps below. A character can forgo attempting an exploration challenge on their turn and instead use an ability or item that requires Time (marked with the Time symbol), or simply pass.
Most combat challenges require spending one or more actions to attempt.
3. Choose a Challenge and a Character
Choose one challenge at a time and resolve each one before choosing and attempting the next.
To attempt a challenge, choose the character who will attempt it.
- If it's an exploration challenge, move that character to the space with the challenge.
- To attempt a combat challenge, a character must be in the same space as a challenge (and might have to take actions to move there, as normal during combat), and it must be that character's turn.
4. Resolve the Challenge
Most challenges involve making a choice and/or rolling Quest Dice to use a skill (such as Athletics or Medicine).
The number of dice you roll for a given challenge is equal to the number for that skill listed on your class level card (or the number for Other Skills if the specific skill is not listed), plus any other abilities or items that allow you to add dice to rolls using that skill.
After you roll, count the number of successes and use that result to determine which entry in the Challenge Book to read. Open the Challenge Book to that entry (being careful not to read anything else) and read the result out loud, following any instructions given. In Challenge Book entries, "you" refers to the character attempting the challenge.
If a challenge instructs you to remove the challenge token, do so; that challenge is then no longer available and cannot be attempted in the future. Otherwise, characters can continue to attempt that challenge (including a different character during that same Time), provided appropriate Time is spent.
Class Level Card
Your class level card contains important details for your character. You will learn how to use the various parts during the Introduction adventure.
- Level and Class: Your level will go up after most adventures, making you more powerful and giving you more choices.
- Hit Points: How much damage you can take before falling unconscious.
- Defense: How hard you are to hit with attacks.
- Attacks: How many dice you roll for your attacks in combat.
- A special action you can use once per turn in combat; this uses one action.
- A special action you can use when you attack and roll a star; see Spending Stars on page 15.
- Aid: Take a turn during exploration to help other characters.
- Recover: Take a turn during exploration to heal yourself.
- Skills: How many dice you roll for particular skills when facing challenges.
Class Cards
Class cards give you access to unique powerful abilities and spells. Things marked with one or more action icons can be used only in combat, while things marked with Time can be used only when the group spends 1 Time. If something has both, it can be used in either situation.
Some cards can be used only once per round, once per combat, once per encounter, or once per adventure. Flip these cards face down when you use them as a reminder (flipping them back over at the beginning of your next turn, the next encounter, or the next adventure, as appropriate). If a card has multiple uses before it is flipped face down, you can use reminder tokens to mark how many times you've used it.
- The name of the class card.
- Whether the class card is a spell or feat.
- How often you can use the card.
- Some class cards can be used during combat (those with one or more action symbols), some can be used during exploration (those with the Time symbol), and some can be used during both or are always in effect.
- Some class cards get more powerful as your level increases and include a chart.
Some cards refer to range; see Range on page 14.
Other Uses for Class Cards
Sometimes an adventure will include a bonus for a character that has a certain class card. Other times, you can use a class card for some benefit instead of its normal effect; this requires you to use the card as you normally would, on your turn, spending any actions required and losing access to it if it has a limited use, for example. In that case, you do not use the normal effects of the card.
Don't Split the Party
Adventurers in Darkmoon Vale know that however dangerous an encounter might be, it's far less dangerous when faced together. Player characters can move to the next encounter only as a group, and not individually.
Combat
As you play through a Pathfinder Quest campaign, you will regularly engage in combat with dangerous enemies.
Beginning Combat
Combat always begins by advancing the Time tracker by 1. An entire combat takes 1 Time, regardless of how many rounds it lasts. (This does not count as the group spending Time, so Time abilities can't be used.) A combat's setup text will tell you where to place characters, enemies, and challenge tokens.
Initiative
Next, shuffle the required initiative cards (1 for each character and 2 for enemies) and place them in a row, face up: this determines the turn order for that combat, with the leftmost character or enemy taking their turn first and proceeding to the right. Some abilities or setups might allow or require you to then adjust this order.
You can use the Quest token to track whose turn it is.
The two enemy initiative cards have letters on them that correspond to the letters on enemy pawns. To resolve an enemy initiative card, each enemy referenced on that card takes a turn. If there is only one enemy, do not include the enemy initiative card that lists enemies B, D, and F.
Rounds
Combat proceeds in rounds, in which each character and each enemy takes a turn. If, at the end of a round, there is at least one character conscious and one enemy still undefeated, a new round begins.
Taking Turns and Actions
During a character or enemy's turn on combat, they have three actions. You can use action tokens as a reminder, flipping them to the faded side as you use them.
Characters can spend actions in a number of ways. Any character can use actions to move (see Moving, page 9) or attack with a weapon (see Attacking, page 10). Each character can also spend actions to use their own unique abilities, feats, items, or spells. Finally, many combat challenges require characters to spend actions to attempt them (see Challenges, page 6).
Optional: Rule of Fun
If something in an adventure grants a bonus or an automatic success for a challenge or encounter if a character has a certain background, ancestry, ability, skill, or the like, and your group agrees that something not listed should count based on thematic/storytelling reasons, you can use that thing to gain the benefit instead! (Note that any given benefit should still apply only once, even if you agree that you could qualify for it multiple ways.)
Example: A character has the street urchin background, and a certain challenge about stealing something from a townsperson offers an extra die to a character with the pickpocket background. The group agrees that the street urchin background would also make a character pretty handy at liberating people from their possessions, so they get the extra die!
Moving
During combat, it takes one action to move from one space to an adjacent space as long as they share a light line. You can't move from one space to another if they are connected only at a corner.
You can do this multiple times on your turn, before and/or after you spend other actions.
Timing Is Everything
When two or more abilities happen at the same time (usually as the result of an attack roll) and the order in which to resolve them is unclear, you decide as a group in which order to resolve them.
For example, say a zombie hits an undamaged character with an attack that lets it use its skull ability, which deals damage to damaged characters. The group can decide that the skull ability happens first (causing it to deal no damage), and then the character takes damage from the attack.
Attacking
Much of combat revolves around attacking enemies (and them attacking you!). Each class level card lists the number of dice for your character's Weapon Attack and Spell Attack (if your character has one). There are three numbers listed for each; this is how many dice you'll roll for your first, second, and third attacks of that type in a turn, listed in that order.
The Weapon Attack number is used for attacks made with a weapon (such as the fighter's longsword or the wizard's staff), while the Spell Attack number is used for attacks made with a spell (such as the cleric's divine lance).
To attack, choose an enemy and spend the required number of actions according to the feat, spell, or weapon you're using (one action for the fighter's longsword or two actions for the cleric's divine lance, for example). Some attacks have a range; see Range on page 14 for more information.
Next, roll the number of dice for the attack shown on your class level card, depending on whether it's your first, second, or third attack that turn. If you can make more than three attacks in a turn, use the third number for any additional attacks.
Compare the number of successes in your roll to the weapon defense (if using a weapon) or spell defense (if using a spell) of the enemy you're attacking. If your result is equal to or greater than that number, you hit! Deal damage according to the feat, spell, or weapon that you used, using damage tokens to keep track of how much damage an enemy has taken. Feats that require you to roll a Weapon Attack deal the damage listed for that weapon.
If an enemy has taken damage equal to or greater than their Hit Points, they are defeated and removed from the map.
Enemy Card
- Enemy Level and Name
- Type: Sometimes an enemy's type matters.
- Hit Points: How much damage it takes to defeat the enemy.
- Defenses: How hard it is to hit the enemy.
- How many dice the enemy rolls for its attacks, how much damage it deals if it hits, and the type of damage, if any (see Damage on page 13).
- Spaces to track damage on different enemies of the same type.
- If there is a special ability or consideration for the enemy (such as taking less of a certain type of damage), it appears here.
- Action List: The actions the enemy tries to take on its turn.
- Skull Abilities: Special abilities that trigger when the enemy rolls a skull on an attack.
Quest Dice
Quest Dice have four faces with between 1 and 3 successes, and two faces with special symbols: star and skull. By default, the two special symbols do not count as successes.
Class abilities and some cards allow you to spend 1 or more star from a roll; this means they are removed from the roll and can't be spent for any other ability.
Some enemy abilities activate when their roll includes skull.
The star and skull symbols are also used in various challenges and encounters. These will be explained by the challenge or encounter.
Enemy Turns
Enemies take their turns in the order shown on the current enemy initiative card, corresponding to the letter on their pawn. If there is more than one enemy with the same letter, decide as a group which of those enemies takes its turn first.
For example, for the "Enemy A, C, E" initiative card, any enemies represented by a pawn marked "A" take their turns first, followed by C and then E.
Each enemy gets 3 actions on their turn.
To determine what an enemy does for each of its three actions, look at its action list.
Start at the topmost action: if it's possible, the enemy takes that action. If there are multiple equivalent possibilities for an enemy's action, the group chooses one.
If an enemy's action is to move toward the nearest character, and there are multiple characters equally nearby, the group chooses which of those characters the enemy moves toward.
If the topmost action is not possible (for example, if the first action is an attack but there's no character it can attack), the enemy takes the next action on the list. Continue in this way until an action is possible. Take this step for all 3 actions, always starting at the top of the list for each action. If an enemy can't use any of its actions, it ends its turn.
When determining an enemy's action, ignore unconscious characters. An enemy in a space with two characters, one of whom is unconscious, takes actions as if there were only one character in that space.
Attack
When an enemy attacks, roll a number of dice equal to the enemy's attack, depending on whether it's their first, second, or third attack that turn. If the number of successes rolled is equal to or greater than the attacked character's defense, deal the listed damage to that character. (See page 15 for more on damage.)
If an enemy can attack multiple characters and it has already attacked one of those characters during its turn, it must continue to attack that character (as long as that character is not unconscious).
Enemies have one or more abilities that happen if their attack roll includes one or more skull; these are explained on the enemy card. Each of an enemy's skull abilities can happen only once per turn, regardless of how many skull they roll. An enemy uses as many of their skull abilities as possible, starting with the topmost.
If a skull ability requires the attack roll to hit, and the attack doesn't hit, that skull ability is not used and is still available for any additional attacks.
Example (illustrated): This enemy's attack roll included 2 skulls, so it will use Spray Acid (and have no skulls remaining to use Armor-Rending Bite).
Special Abilities
Some enemies have special abilities. These are detailed on their enemy card.
Example Enemy Turn
- For its first action, the skeleton can't attack so it must move toward the nearest characters. There are two choices, so the group chooses for it to move down toward Merisiel and Valeros.
- For its second action, the skeleton can attack, but there are two targets. The group chooses for it to attack Valeros, the fighter, who has a higher defense.
- For its third action, the skeleton attacks again. Even though there are two targets, it must attack Valeros again since it already attacked him this turn. Next turn, if the situation is the same, the group can choose a new target for the skeleton.
Defeat
If all characters are ever unconscious at the same time, the adventure is lost. If this happens, record "Defeated 1." If you already have "Defeated" recorded, add 1 to the count. You can then replay the adventure from the beginning, returning any item cards gained during the adventure to the item deck.
Ending Combat
Combat ends immediately as soon as the last enemy is defeated (or all characters are unconscious).
Damage
Characters and enemies take damage during combat (usually from attacks and abilities) and from certain combat and exploration challenges. This is tracked with damage tokens.
When an enemy has taken damage equal to (or greater than) their Hit Points, it is defeated and removed from the map.
When a character has taken damage equal to (or greater than) their Hit Points, they are unconscious. Ignore any damage dealt to a character in excess of their Hit Points. An unconscious character can't take any actions or attempt any challenges. A character is no longer unconscious when they have less damage than their Hit Points. An unconscious character can still use Recover if the group spends Time and at least one character is not unconscious.
Some damage has a type (such as "cold damage"); this only matters if an ability or card refers to it (such as an enemy that takes 1 extra damage whenever it takes cold damage).
Enemy cards use shapes to indicate the type of damage they deal, as shown on the rulebook page (a circle means there is no special damage type). The types shown are Acid, Fire, and Cold.
Making Decisions
What a character does on their turn in combat is ultimately up to the player controlling that character. When it comes to group decisions, such as which character should be attacked in case of a tie, or which adventure to pursue or challenge to attempt, the group should come to a decision together. In case of a deadlock, flip a coin and let fate decide!
Optional: Rule of Ultimate Darkness
Looking for a challenge? When making decisions as a group, instead of choosing the best course of action, leave it up to fate and determine randomly! Not challenging enough? Then choose the worst course of action each time and see if you can persevere anyway!
Weapons and Armor
At the start of each adventure, each character chooses one weapon item card and up to one armor item card from those they started with or gained during previous adventures. Set aside any remaining weapon and armor item cards. When the game instructs you to take a weapon or armor item, you can set aside your current weapon or armor to use the new item instead. When the party spends 1 Time, each character can switch as many items as they want with those set aside. In combat, you can spend one action to switch out a weapon with one of those set aside. You can't switch armor during combat.
Dice
Quest Dice are used in many ways in Pathfinder Quest; for more information, see the sidebar on page 10.
Items
In the course of your campaign, you will find items ranging from mundane to magical. These are represented by numbered item cards—don't look at cards in the item card deck until instructed.
When instructed to take an item card, reveal it to the group and decide together which character receives it.
Items can be exchanged freely between characters at the start of an adventure or whenever the party spends Time.
In combat, a character must spend an action to give an item to (or take an item from) a character in the same space.
If an item has a limitation on its use (such as once per adventure), that limitation applies to the entire group and is not reset when given to another character.
Item Card
- The name of the item.
- The type of the item. This matters primarily for weapons and armor (see above).
- What the item does. Some can be used during combat (those with one or more action symbols), some can be used during exploration (those with the Time symbol), and some can be used during both or are always in effect.
Leveling Characters
As you progress through a Pathfinder Quest campaign, your characters grow in power, gaining Hit Points, class cards, and increases to skills and attacks. When instructed to level up your character, follow these steps.
- Find the class level card that corresponds with the next level of your class (this might be printed on the reverse of your current class level card). You will use this for the next adventure.
- Consult the table below, taking the class cards listed for your new level. Sometimes you will have a choice between multiple cards. In this case, you can draw and read all the cards before making your choice, returning the unchosen cards to your class card deck.
Cleric
| Level | Class cards |
|---|---|
| 2 | 5a or 5b |
| 3 | two of: 6a, 6b, 6c |
| 4 | 7a or 7b |
| 5 | two of: 8a, 8b, 8c |
| 6 | 9a or 9b |
| 7 | two of: 10a, 10b, 10c |
| 8 | 11a or 11b |
Fighter
| Level | Class cards |
|---|---|
| 2 | 4a or 4b |
| 3 | 5 and either 6a or 6b |
| 4 | 7a or 7b |
| 5 | 8 |
| 6 | 9a or 9b |
| 7 | 10 and 11 |
| 8 | 12a or 12b |
Oracle
| Level | Class cards |
|---|---|
| 2 | 4a or 4b |
| 3 | two of: 5a, 5b, 5c |
| 4 | 6a or 6b |
| 5 | two of: 7a, 7b, 7c |
| 6 | 8a or 8b |
| 7 | two of: 9a, 9b, 9c |
| 8 | 10a or 10b |
Ranger
| Level | Class cards |
|---|---|
| 2 | 4a or 4b |
| 3 | 5 and either 6a or 6b |
| 4 | 7a or 7b |
| 5 | 8 |
| 6 | 9a or 9b |
| 7 | 10 and 11 |
| 8 | 12a or 12b |
Rogue
| Level | Class cards |
|---|---|
| 2 | 5a or 5b |
| 3 | 6 and either 7a or 7b |
| 4 | 8a and 8b |
| 5 | 9 |
| 6 | 10a or 10b |
| 7 | 11 and 12 |
| 8 | 13a or 13b |
Wizard
| Level | Class cards |
|---|---|
| 2 | 4a or 4b |
| 3 | two of: 5a, 5b, 5c, 5d |
| 4 | 6a or 6b |
| 5 | two of: 7a, 7b, 7c |
| 6 | 8a or 8b |
| 7 | two of: 9a, 9b, 9c |
| 8 | 10a or 10b |
Movement
When not in combat, a character can move freely to any space with a challenge token as part of attempting that challenge, but no other character should move until that challenge is resolved.
During combat, a character can move from one space to an adjacent space—as long as they share a border divided by a light line—by spending one action. For additional information, see combat on page 8.
Range
Some abilities and cards use a range number to tell you which characters, enemies, or spaces can be chosen for that ability or card. For example, a card that says to choose an enemy in range 2 means you can choose an enemy that is up to 2 spaces away from you (including in the same space as you). When counting range, count as though you were moving through those spaces (ignoring any penalties to movement)—you must also be able to draw an imaginary straight line from your space to the target space without crossing any thick black lines or borders of map tiles.
Recover
When the group spends one Time, a character can spend their turn removing a number of damage tokens according to the Recover ability on their class level card.
For example, at level 1, the fighter can remove 2 damage tokens when they recover.
Skills
Characters in Pathfinder Quest have access to a variety of skills:
- Acrobatics represents your ability to perform tasks requiring coordination and grace.
- Arcana represents how much you know about arcane magic and creatures.
- Athletics represents your ability to perform deeds of physical prowess.
- Diplomacy represents your ability to influence others socially.
- Medicine represents your ability to patch up wounds and help people heal.
- Nature represents your command of the natural world.
- Perception represents your ability to seek, sense, and notice things in your surroundings.
- Religion represents your understanding of divine matters and magic.
- Stealth represents your ability to avoid detection and move silently.
- Thievery represents your ability to lighten others' loads (whether they want you to or not).
When rolling dice for a skill, if a specific skill is not listed on your class level card, roll the number of dice shown for "Other Skills" (adding any bonus dice from your background or items as normal).
Skilled
Throughout the game, you might gain advantages from being "skilled" in a skill. This means that skill is listed on your class level card, or that you can always roll extra dice for it (such as from your background or an item). Neither a background that gives you an extra success on a skill roll nor an item that gives you a one-time bonus for a skill roll makes you skilled in that skill.
Spaces
Each space on a tile is enclosed by light lines and/or the physical edge of a tile. Tokens, characters, and enemies can be placed anywhere in a given space; their exact position in the space is not important.
Spending Stars
Class level cards and many other cards have abilities that allow you to spend 1 or more star from a roll; this means they are removed from the roll and can't be spent for any other ability.
Time
Adventures in Pathfinder Quest use Time to track how long your group has spent overcoming challenges, fighting enemies, and recovering. In many adventures, events and outcomes can hinge on how much Time has elapsed (or how much Time is left).
Time resets to 0 at the beginning of each adventure. When you choose (as a group) to spend one Time, each character gets one turn, in any order you choose. You can use time tokens as a reminder, giving each character one and flipping it to the faded side after they take their turn.
During their turn, a character can do one thing that requires Time (these are marked with the Time symbol). The most common options are attempting an exploration challenge (page 6) and recovering after combat (page 14), though other cards can be used as well.
You can't spend Time during combat, and the automatic advancement of Time at the beginning of combat does not count as spending Time (so abilities and cards that require Time can't be used).
If you reach 15 on the Time tracker, you no longer advance the Time tracker, and you can no longer choose to spend Time.
Iconic Characters
You can use any 4 of the following characters for your first adventure, and then adjust them (or make entirely new characters) after you get a feel for the game. They each have their own matching ancestry card, portrait card, and pawn (or miniature in the Deluxe version of the game).
Ezren
- Class Level Card: Level 1 Wizard
- Wizard Class Cards: 1, 2, 3c, and 3d
- Item Card: 7
Harsk
- Class Level Card: Level 1 Ranger
- Ranger Class Cards: 1a, 2a, and 3
- Item Card: 1
Korakai
- Class Level Card: Level 1 Oracle
- Oracle Class Cards: 1, 2c, 3a, and 3c
- Item Card: 8
Kyra
- Class Level Card: Level 1 Cleric
- Cleric Class Cards: 1, 2a, 3, and 4b
- Item Cards: 3 and 6
Merisiel
- Class Level Card: Level 1 Rogue
- Rogue Class Cards: 1, 2, 3a, and 4a
- Item Cards: 2 and 5
Valeros
- Class Level Card: Level 1 Fighter
- Fighter Class Cards: 1, 2, and 3a
- Item Card: 4