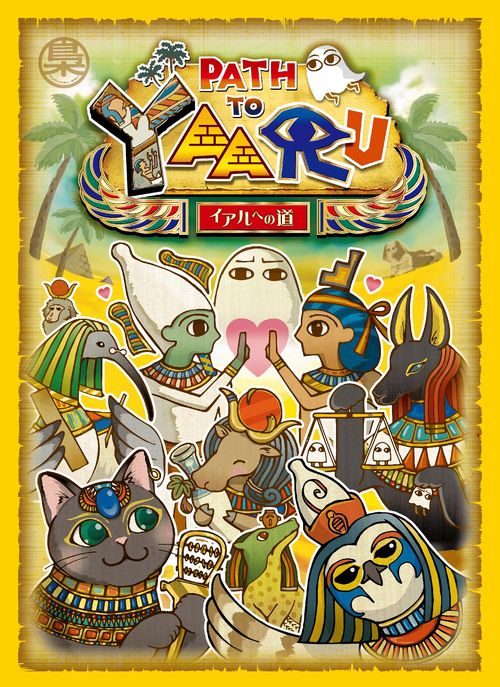
Path to Yaaru
Path to Yaaru Rulebook
Table of Contents
Table of Contents
- 2. Components
- 3. Game Overview
- 4. Setup
- 4-1. Setting up the Game Board and the Score Track
- 4-2. Placing resources on the board
- 4-3. Taking Player Pawns, Djed Pillar Cubes, and a Player Sheet
- 4-4. Determining the start player
- 4-5. Setting up God Cards Deck and Distributing Cards
- 4-6. Placing common resources (Wadjet Eye Cards and Shabti Figure Tokens)
- 5. Game Flow (Drafts, Rounds, Phases)
- 6. Details on Playing God Cards
- 7. Score Calculation
- 8. Advancing into the Next Level
- 9. End of a Game
- 10. Additional Rules
- 11. Game Hint
- 12. FAQ
- 13. Afterword
2. Components
(1) Card: 72
- God Cards: 66. The printed layout shows 20 cards each for the first three God Card faces and 6 cards for the fourth face. Front and back are shown.
- Wadjet Eye Cards: 5 cards of 1 type.
- Start Player Card: 1.
(2) Game Board: 1 board each of 3 types (each board has a different design on the front and the back).
(3) Player Sheet: 4.
(4) Score Track Sheet: 1.
(5) Player Pawn: 2 each of 4 colors.
(6) Djed Pillar Cube (for each player): 12 each of 4 colors. These are wooden cubes.
(7) Shabti Figure Token: 20. These are blue glass beads.
(8) Djed Pillar Cube (for the board): 3. These are clear plastic cubes.
(9) Card References: detailed descriptions of God Cards with special effects.
(10) Rulebook: this booklet.
3. Game Overview
In Path to Yaaru, you aim to advance to the Guardian's Quarter (the top row of the game board) of each level (1 level = 1 game board) while placing Djed Pillars, which represents your faith to the Egyptian gods. There is a total of 3 levels (3 game boards). Your actions generate Faith Points (Victory Points), and your goal is to score as many Faith Points as you can.
However, it is not a race of who can advance to the Guardian's Quarter first. You need to show your faith to the guardian of each level. When 1 player advances to the Guardian's Quarter, all players score Faith Points based on their position on the level and the placements of their Djed Pillars (You will do this 3 times throughout the game, once per each level).
Each Guardian has a different preference for the placement of Djed Pillars. Try to place Djed Pillar matching the preferences and advance to the Guardian's Quarter!
In the end, the player with the highest Faith Points wins the game and finds their Path to Yaaru (the paradise)!
4. Setup
Also refer to the setup diagram on page 4.
4-1. Setting up the Game Board and the Score Track
Place the 3 Game Boards on your play area. Arrange them so that the boards are connected to each other on its long edge, where the board with "X=3" marking is above the other two boards. Each board has a front and a back side. You may play either side in any combination you like. (For your first game, we recommend you to play the front sides.)
Finally, place the Score Track on either side of the board.
4-2. Placing resources on the board
Some △ spaces on the board have icons like the Djed Pillar Cube icon or the Shabti Figure Token icon. These icons indicate the resources you can gain when you end your turn in these spaces (more details can be found on Page 9, "Gaining resources from a space"). Place the corresponding resource tokens on top of the icons on the "X=1" board.
- Djed Pillar: clear plastic cubes.
- Shabti Figure: blue glass beads.
4-3. Taking Player Pawns, Djed Pillar Cubes, and a Player Sheet
Each player chooses a color and takes the two Player Pawns of their color. Each player then places one of their Player Pawns on the "1" space of the score track (each player starts with 1 Faith Point), and places the other Player Pawn on the bottom row of the "X=1" board.
You can tell which Player Pawn belongs to which player by looking at the Djed Pillar Cubes in front of them.
Each player also takes all 12 Djed Pillar Cubes of their color and places them within their reach.
Finally, each player takes 1 Player Sheet and places it in front of them.
4-4. Determining the start player
Randomly determine the start player. That player takes the Start Player Card and places it in front of them.
4-5. Setting up God Cards Deck and Distributing Cards
Take all God Cards with the I icon on the bottom left corner and create a deck. It is faster to sort by removing cards with II and III icons. Leave the God Cards with II and III icons to the side as they will be used later in the game.
Shuffle the created deck of God Cards and distribute 7 cards to each player face down (do not look at the cards yet!). Keep the remaining deck of cards as they will be used later in the game. Do not mix them with other cards.
4-6. Placing common resources (Wadjet Eye Cards and Shabti Figure Tokens)
Place all Wadjet Eye Cards and Shabti Figure Tokens in reach of all players.
The setup diagram on page 4 shows: the Game Board, each player's Player Sheet and Djed Pillar Cubes, the Player Pawns (at the "1" point mark on the Score Track and on the bottom row of the X=1 board), the Score Track Sheet, the Shabti Figure Tokens, the Wadjet Eye Cards, the remaining God Cards deck and discard pile, and the stack of cards with II and III icons set aside for later use.
5. Game Flow (Drafts, Rounds, Phases)
The game is divided into 3 phases as shown below. Players complete "1. Card Distribution Phase", then repeat "2. Card Collection Phase" and "3. Player Action Phase". Each repetition of phases 2 and 3 is called a Round.
At the end of a round, if either condition A or B below is met, then the players go back to "1. Card Distribution Phase". Each set of phases 1 through 3 is called a Draft. Proceed to the next draft starting with "1. Card Distribution Phase" if either condition A or B has been met. Proceed to the next round starting with "2. Card Collection Phase" if neither condition A nor B has been met.
- Condition A: Only 2 cards left in the Draft Cards.
- Condition B: Any player advances into the top row.
Players score Faith Points when one or more players have reached the top row of each Game Board. The game continues until one or more players have reached the top row of the "X=3" board.
5-0. Progression of a phase
There are two types of phases:
- All: all players perform the actions simultaneously.
- Each: each player performs the actions one after another.
The type is shown next to the phase name.
5-1. Card Distribution Phase (All)
Skip this phase during the first draft since you've already completed this in "4. Setup".
Distribute 7 cards to each player face down from the deck of God Cards. The set of cards distributed to each player is called Draft Cards. Keep the remaining deck of cards as they will be used later in the game.
5-2. Card Collection Phase (All)
Players collect a God Card they can use during Player Action Phase. There is one very important rule that all players must follow.
IMPORTANT! You may not change the order of draft cards. Don't shuffle and don't organize!
Without changing the order of the cards, players select one of the two cards at the both ends of the set. In other words, players choose either the left most card or the right most card in their set of Draft Cards. After selecting a card, take the chosen card and add it to your personal stash of cards. Keep this stash separate from the Draft Cards. You may look at the cards in your personal stash at any time.
Finally, pass the remaining Draft Cards face down to the player to your left. (Be careful not to mix up the cards when passing them.)
Example 1 (in the source): the diagram shows Player A's Draft Cards, the card Player A selected, and Player B's Draft Cards. You can choose one of the two cards outlined in red. If you took the right card, Player B can choose from the two cards outlined in red.
5-3. Player Action Phase (Each)
In this phase, each player takes their actions in order starting with the Start Player proceeding clockwise. Each player takes any or all of the following 2 actions in the order they choose.
- (1) Playing God Cards
- (2) Gaining Wadjet Eye Cards
The phase continues to the next player after the current player takes either or both of the 2 actions, or chooses to "PASS" by not taking either of the 2 actions.
(1) Playing God Cards
This section only explains the effects of playing the cards. For more details on how to play these cards, please refer to "6. Details on Playing God Cards" on Page 11.
The current player plays one or more God Cards from their personal stash of cards. Two things happen when a player plays these cards. Place the played cards in the order they were played in front of you. These cards will be referred to as "Played Cards".
- (i) Moving Player Pawn. Corresponds to "2. Gaining Attributes" and "4. Moving Player Pawn" below.
- (ii) Resolving Card Effects. There are two times when card effects are resolved: before and after you move your Player Pawn. Corresponds to "3. Resolving BEFORE Movement Effects", "5. Resolving AFTER Movement Effects" and "6. Gaining Resources" below.
Order of Resolutions When Playing God Cards
- Playing God Cards
- Gaining Attributes
- Resolving BEFORE Movement Effects
- Moving Player Pawn
- Resolving AFTER Movement Effects
- Gaining Resources
- End
You may only play your God Cards once during Player Action Phase. However, you may play multiple cards at once. The number of cards you can play at once changes as the game progresses. While your Player Pawn is on X=1 or X=2 boards, you may play up to 2 cards. Once your Player Pawn is on X=3 board, you may play up to 3 cards. (This is also written at the bottom of the Game Board.)
(i) Moving Your Player Pawn
The current player gains Attributes indicated on the played card(s), and uses them as a cost to move their Player Pawn on the Game Board. When you play this card, you gain 2 Red Attributes. You use them to move on the Game Board. When you play multiple cards, you sum the Attributes indicated on all played cards. In this case, you gain 2 Red and 1 Yellow Attributes.
Movement Rule 1: Direction
The Game Board consists of many △ spaces. Players move their pawn crossing one of the edges of △. (There are gaps on the edges of △ to indicate the directions your pawn can move.)
As shown in the diagram, you can move downwards too, but one of the goals of the game is to reach the top of the board. Try to plan your moves well so that you don't have to move downwards.
Special Spaces: The top and the bottom rows of each board are special spaces. They are connected to all △ spaces sharing an edge.
Movement Rule 2: Attribute Cost
Each △ space has one or more Attribute icons indicating the cost required to move into that space. The player must pay the cost by spending Attributes gained from the God Cards played during this phase in order to move into that space.
All unused Attributes are discarded at the end of the phase. (In other words, you cannot carry over unused Attributes.)
Spaces with multiple icons: Some spaces have more than 1 icon. In order to move into such a space the player must be able to pay all indicated costs during the phase. (In other words, you cannot partially pay the cost over multiple rounds.)
Example 2: Cost 1 Yellow and 1 Red. You played the cards on the left and gain 2 Red and 1 Yellow Attributes. You can spend 1 Red and 1 Yellow Attribute to move into the Yellow △ space in example 2. (You will have 1 Red Attribute remaining after the move.)
Black (Horus) icon: You can pay the cost for this icon by spending any 1 Attribute.
Example 3: Cost 1 Yellow and Any 1 Attribute. In example 3, you can pay the cost using any of the following combinations of Attributes (shown in the source diagram).
Remaining Attributes: The player may move their pawn so that there are some Attributes remaining after their move. However, the player may not end their movement if they have Attributes remaining and there are spaces they can move into. (In other words, you cannot choose not to move even though you can move.)
Example 4: You started in a Yellow space 1. You played the card on the left and gained 2 Blue Attributes. In this case, you may not end your movement on Blue space 2 since you have 1 remaining Blue Attribute and there is a Blue space 3 which you can move into. As a result, you may end up moving into a space you did not want to. Plan your movements well when playing cards with lots of Attributes.
(ii) Resolving Card Effects
The current player resolves the card effects indicated on the bottom of God Cards. There are 2 common effects. There are some cards with special effects not listed here. (Please refer to the enclosed "Card References" for cards with special effects.)
1. Gaining Resources. Gain 1 Shabti Figure Token. Take 1 Shabti Figure Token from the supply and place it in front of you.
- Shabti Figure Tokens are used to pay the cost when playing some God Cards. See "6. Details on Playing God Cards" for details.
- Shabti Figure Tokens are not limited in supply. Please use some other tokens if you run out.
The printed page also illustrates the Faith Point icon beside this effect: gain 1 Faith Point, and advance your Player Pawn one space on the Score Track.
2. Placing Djed Pillar Cubes. The icon shows a Djed Pillar Cube. The player places a Djed Pillar Cube following the 2 rules below.
- You may place it on the △ space of the board. You may not place it on the Starting Space (bottom row) or the Guardian's Space (top row). However, you may place it on the Guardian's Space of the "X=3" board.
- There may only be 1 Djed Pillar Cube of any player on a △ space. (If the space already has a cube of any player, you may not place there.)
The cards have both the Djed Pillar Cube effect and the Movement icon. The order these icons appear indicates when this effect is resolved. The Movement icon indicates movement, so the effect is resolved either BEFORE or AFTER the movement.
- The effect is resolved during "3. Resolving BEFORE Movement Effects", as previously shown on Page 6. In other words, the player places a Djed Pillar Cube at the current space first, then moves their pawn.
- The effect is resolved during "5. Resolving AFTER Movement Effects", as previously shown on Page 6. In other words, the player moves their pawn first, then places a Djed Pillar Cube at their new space.
Example 1: Player starts at Yellow Space 1.
- You choose to play the 2 cards on the left.
- You pay the cost to play (2 Shabti Figure Tokens). (Paying the cost is explained in detail on Page 13. Please ignore for now.)
- You gain 1 Blue and 1 Red Attribute.
- You resolve the BEFORE movement effect by placing a Djed Pillar Cube on space 1.
- You spend the Attributes by moving to spaces 2 and 3. You end your movement at space 3.
- You resolve the AFTER movement effect by placing a Djed Pillar Cube on space 3.
- You gain Resources (none in this example).
Movement into a special space: "Guardian's Quarter" (top of the board)
The Guardian's Quarter at the top of the board is treated differently than the △ spaces.
Level 1 and Level 2
-
Movement cost. The player must pay the cost indicated on the top right to advance into the space.
- Level 1: 2 Black (Horus) Attributes.
- Level 2: 3 Black (Horus) Attributes.
-
Entry requirement. Paying the movement cost is not enough to advance into the space. The player must also have a certain number of Djed Pillar Cubes placed on that board.
- Level 1: 2 or more Djed Pillar Cubes.
- Level 2: 3 or more Djed Pillar Cubes.
The requirement must be met when you advance into the Guardian's Quarter. In other words, you can place a Djed Pillar Cube BEFORE the movement to meet the requirement, and then advance into the space.
-
Movement directions (connections with other △ spaces) and movement cost. The space is connected to all △ spaces sharing an edge. Players may move across the gap in the edge just like △ spaces. Each board's Guardian's Quarter is connected to the next board's Start Space. If you move back into the Start Space, you must pay the movement cost.
- Example: the movement cost into the Level 2 Start Space is 2 Black (Horus) Attributes.
- The movement cost into the Level 1 Start Space is 1 Black (Horus) Attribute.
Level 3
The inverted-triangle shaped space shown on the board is the Guardian's Quarter for Level 3.
- Movement cost: 1 each of Red, Blue, and Yellow Attributes.
- Entry requirement: There is no entry requirement. The player may enter as long as the movement cost is paid.
- Movement directions (connections with other △ spaces): it is connected to △ spaces on both sides.
Gaining resources from a space
Some △ spaces on the board have icons showing a Shabti Figure Token or a Djed Pillar Cube. The player gains these resources when they end their movement in these spaces. There are two types of resources. Place these resources on the board at the start of each level.
- Shabti Figure Token: blue glass bead.
- Djed Pillar Cube: clear plastic cube.
Shabti Figure Token
All players with their Player Pawn on this space gain 1 Shabti Figure Token from the supply at the end of a Round. Return the Shabti Figure Token on the board back to the supply. Players ending their movement on this space in future rounds will not gain any token.
- If only one player has their pawn on this space at the end of a round, that player should simply take the token on the board.
- If there are multiple players, one player should take the token on the board and the rest should take them from the supply.
Djed Pillar Cube
The player that ends their movement on this space places one of their Djed Pillar Cubes on this space at the end of the Player Action Phase. Return the clear cube on the board back to the supply. Players ending their movement on this space in future rounds will not place a Djed Pillar Cube.
Unlike the Shabti Figure Token, only the first player that ended their movement on this space gets to place their Djed Pillar Cube.
(2) Gaining Wadjet Eye Cards
The current player may obtain a Wadjet Eye Card from the supply by discarding 2 God Cards from their personal stash of cards. Place the 2 discarded cards along with your other Played Cards in front of you.
In other words, treat the discarded cards as if they were played by you. This may sound weird since you are not "playing" the card, but think of your Played Cards as a personal discard pile.
When to use a Wadjet Eye Card: Any number of Wadjet Eye Cards can be used at any time during the Player Action Phase. A Wadjet Eye Card is not a God Card, so it does not count against your stash limit.
Wadjet Eye Card effect: When a Wadjet Eye Card is used, the player chooses one of the two effects below. (You cannot get both effects.)
- Gain any 1 Attribute, or
- Gain 1 Shabti Figure Token.
Hand limit of Wadjet Eye Cards: There is no limit to how many Wadjet Eye Cards a player may hold. Furthermore, Wadjet Eye Cards do not count against the God Cards stash limit explained below (it is not a God Card).
Wadjet Eye Card is a powerful card, but you must pay a big price for it (2 God Cards). Choose carefully about when to get one and when to use it.
End of Player Action Phase
When a player has taken actions or chosen to pass, the next player clockwise takes their Player Action Phase. Before the next player takes their actions, the current player checks if they have more God Cards than their stash limit. If they have more, then they discard the excess cards and place them along with the other Played Cards in front of them.
The stash limit changes as the game progresses. While your pawn is on the X=1 board, your limit is 2 cards. When your pawn advances to the X=2 or X=3 board, your limit increases to 3 cards.
The player checks their stash limit at the end of their Player Action Phase. Therefore, the player may possess more cards than their limit during the Player Action Phase.
Example: Current stash limit 2. You had 2 cards in your personal stash at the beginning of the round. During the Card Collection Phase, you gained 1 card so now you have 3 cards in your stash. Since you do not check your stash limit at this point, you do not need to discard any cards. If you end your Player Action Phase without using any card, then you must discard one card from your stash of 3 cards. Advice: in this example, it may be more beneficial to discard one additional card (total 2 cards) to gain a Wadjet Eye Card.
5-4. End of a Round and Condition Check
A round is over after all players have taken the Player Action Phase. Players repeat the rounds by going back to "2. Card Collection Phase" and continuing to "3. Player Action Phase."
If either of the two conditions below is satisfied, then players end the current Draft and go back to "1. Card Distribution Phase."
- (A) Only 2 cards left in the Draft Cards. As players repeat rounds, the number of cards in the Draft Cards will decrease. When there are only 2 cards left in the Draft Cards, discard the rest and continue to the next Draft starting with the Card Distribution Phase. (In other words, the last 2 cards are not used during this Draft.)
- (B) Any player advances into the top row (Guardian's Quarter). In this case, please see "8. Advancing into the Next Level" on page 15 for more details.
5-5. "1. Card Distribution Phase" (after a Draft)
There are two necessary steps before distributing cards after the completion of a previous Draft.
(1) Moving the Start Player Card. The player with the Start Player Card hands the card to the player to their left. In other words, the Start Player changes clockwise before the Card Distribution Phase.
(2) Removing cards with a Removal icon (only the Played Cards in front of each player). Some cards have a Removal icon on the card. There are cards in front of each player that were either "Played", "Discarded due to stash limit", or "Discarded to gain Wadjet Eye Card". Collect these cards and take all cards with Removal icons on them. These cards are no longer needed in this game, so return them to the box.
(Draft Cards that were discarded at the end of the round during "5-4. End of a Round and Condition Check" are not removed.)
Place all remaining cards in the discard pile along with the cards discarded during "5-4. End of a Round". (These are the cards in front of each player that did not have the Removal icon.)
Example 1: of the cards 1 to 5 shown, cards 1, 3 have no Removal icon and go to the discard pile; cards 2, 4, 5 have the Removal icon and are removed from the game.
At this point, God Cards should be in one of the 4 states below.
- Player's personal stash: cards collected during "5-2. Card Collection Phase" but not yet used during "5-3. Player Action Phase".
- Discard pile: Draft Cards that were discarded during "5-4. End of a Round" and cards discarded during step (2) above.
- Deck of God Cards: cards remaining in the deck that have not been distributed yet in the previous "5-1. Card Distribution Phase".
- Removed cards: cards that were removed and returned to the box during step (2) above.
After completing steps (1) and (2) above, distribute 7 God Cards to each player using the cards remaining in the Deck. If the deck is depleted, shuffle all cards in the discard pile, create a new Deck, and continue distributing cards.
6. Details on Playing God Cards
This section explains how to read a God Card and the necessary steps when playing the card.
6-0. Anatomy of the card
-
Attribute. This is the type and the amount of Attributes the player gains when played.
- Attribute type: gain the type indicated by the icon. Where the card shows a choice, the player chooses any 1 of the 3 Attributes and gains that type.
- Attribute amount: gain the amount indicated by the number. X changes as the game progresses (Level 1: X=1, Level 2: X=2, Level 3: X=3). This is also written on the bottom left corner of the Game Board. "-1" and "+1" modify the value of X. In Level 1 (X=1), "X-1" is a 0 (zero), so this means the player does not gain any Attribute. This is "X minus 1".
-
Cost. Some cards require the player to pay a cost when played. There are 2 types:
- Shabti Figure Token: spend 1 Shabti Figure Token for each icon. Return the spent token back to the supply.
- Faith Points: spend Faith Points equal to the number indicated in the icon. Move back that many spaces on the Score Track.
The card may not be played if the cost cannot be paid.
-
Removal icon. The card is discarded before the next "1. Card Distribution Phase" as explained in "5-5." previously.
-
Name. Name of the god illustrated on the card. This is just flavour and has nothing to do with the game mechanics.
-
Card Effect. Effect that is resolved when the card is played. Common effects are explained in "Resolving Card Effects" on Page 8. Please refer to the enclosed "Card References" for cards with special effects.
6-1. "Choosing the cards" and "Paying the costs"
There are a few necessary steps when playing God Cards, which were briefly explained on Page 6 "Player Action Phase: Playing God Cards". The steps are a bit complicated, so please also refer to the examples on the next page.
Order of resolutions when playing God Cards: 1. Playing God Cards, 2. Gaining Attributes, 3. Resolving BEFORE Movement Effects, 4. Moving Player Pawn, 5. Resolving AFTER Movement Effects, 6. Gaining Resources, 7. End.
Detailed steps of Playing God Cards: 1. Choosing the cards, 2. Paying the cost, then continue to 2. Gaining Attributes.
- Choosing the cards to play. Choose all God Cards to play during this phase from the personal stash of cards, and place them face up.
- Paying the costs. If any of the cards chosen in step 1 have costs indicated on the top right corner, then spend resources to pay all these costs. (In the source example the cost is 1 Shabti Figure Token.)
Note: When playing the cards (no matter how many cards you play) you must pay the entire cost at once. If you cannot pay the costs, then the card may not be played. In other words, you may not play some cards, resolve their effects to gain resources, and use the gained resources to pay the cost of other cards. (Please see the examples on the next page.)
Paying the costs, examples
Example 1: You have 0 Shabti Figure Tokens. You choose to play the two God Cards on the left. One of the cards has a cost of 1 Shabti Figure Token. Since you do not have any token, you cannot play these two cards.
Common mistakes: You cannot play the Yellow Card first, gain 1 Shabti Figure Token, then use the gained token to pay the cost of the Blue Card. When playing multiple cards, the total costs of all played cards must be paid first. You cannot do ① Play Yellow card → ② Play Blue Card.
Example 2: You have 1 Shabti Figure Token. Player pawn starts at Yellow Space 1.
- You choose to play the two God Cards on the left.
- Spend 1 Shabti Figure Token to pay the cost.
- Gain 1 Blue and 1 Red Attribute.
- Resolve BEFORE Movement effect: place a Djed Pillar Cube on space 1.
- Move the Player Pawn to 2 then to 3. End the movement at space 3.
- Resolve AFTER Movement effect: none.
- Gain Resources from the card effect: gain 1 Shabti Figure Token.
Common mistakes:
- First play the Blue card to move to Blue Space 2, then play the Red Card to resolve BEFORE Movement effect. Since the Player Pawn is in space 2, you place a Djed Pillar Cube on space 2. You cannot do this!
- All "BEFORE Movement Effects" must be resolved before "Moving Player Pawn". Then the pawn must be moved in its entirety and then all "AFTER Movement Effects" resolved. Therefore, you cannot break up the movement and resolve the effects, or change the order in which the effects are resolved.
7. Score Calculation
All players calculate their score at the end of the Player Action Phase when 1 or more players have advanced into the Guardian's Quarter. There are 3 steps to calculate the score. Move the Player Pawns on the Score Track Sheet after resolving steps "7-1", "7-2", and "7-3" in order.
If a Player's score becomes 0, place their Player Pawn on the top row of the Score Track Sheet. A player's score may never become below 0. (In other words, you may not spend Faith Points as a cost if your score will be in the negative.)
7-1. Advancement Bonus
All players that advanced into the Guardian's Quarter (top row of the board) score an advancement bonus. (As long as players advanced into the space during the same round, all those players receive the bonus.) Players score the bonus indicated below. The bonus score is also written inside the Guardian's Quarter on the Game Board.
- Level 1: 2 Faith Points + 1 Wadjet Eye Card.
- Level 2: 3 Faith Points.
- Level 3: 4 Faith Points.
7-2. Djed Pillar Bonus
(1) Moving the Djed Pillar Cubes onto the Player Sheet
Before calculating the Djed Pillar Bonus, each player moves their Djed Pillar Cubes on the Game Board to their Player Sheet. Look at the color of the △ space the cube is on, and move it to the corresponding space on the Player Sheet with its Attribute icon.
- Cubes on the black △ may move to any space on the Player Sheet.
- Look at the color of the △ space. Ignore the Attribute icons printed on the space.
Example (from the source diagram, on the Level 2 board):
- First move the cubes from the Red, Yellow, and Blue spaces.
- 2 is placed on the Red △ space.
- 3 and 4 are placed on the Yellow △ spaces.
- There are no cubes on the Blue △ space.
- Now determine where to move 1 placed on the Black △ space.
- Choose the space that will score you the most Faith Points.
- In this example, placing the cube on the Yellow space scores the most points.
This is just an example. There should already be some Djed Pillar Cubes placed on the Player Sheet since this is an example of the Level 2 board.
(2) Calculating the Djed Pillar Bonus
Players now calculate the Djed Pillar Bonus for the current level. Each level scores differently. Each player looks at the number of Djed Pillar Cubes placed on each Attribute space on the Player Sheet. The amount of points scored for each Attribute is written on the Player Sheet.
Djed Pillar Cubes moved in step (1) remain on the Player Sheet for the rest of the game. In other words, Djed Pillar Cubes used for scoring in Level 1 are used again for scoring in Level 2 and Level 3. Plan where to place the Djed Pillar Cubes well to score more points in the later levels.
Level 1: 1 Faith Point for each Djed Pillar Cube.
- Example 1: R 2, B 1, Y 0 → 3 total cubes = 3 total Faith Points.
Level 2: Score points based on the number of cubes on each Attribute.
Points per Attribute, by number of cubes of one Attribute:
| Cubes | 1 | 2 | 3 | 4 | 5 | 6 or more |
|---|---|---|---|---|---|---|
| Points | 0 | 1 | 3 | 6 | 10 | 10 |
- Example 2-1: R 3, B 2, Y 0 → R: 3 points, B: 1 point, Y: 0 points = 4 total Faith Points.
- Example 2-2: R 6, B 3, Y 1 → R: 10 points, B: 3 points, Y: 0 points = 13 total Faith Points.
The Level 2 points-per-Attribute chart is printed on Page 14 (1 to 5 cubes read 0, 1, 3, 6, 10); the value for 6 or more cubes (10) is stated in FAQ 16 below.
Level 3: 4 Faith Points for each set of cubes on Red, Blue, and Yellow Attributes.
- Example 3-1: R 4, B 3, Y 1 → 1 set = 4 total Faith Points.
- Example 3-2: R 4, B 3, Y 3 → 3 sets = 12 total Faith Points.
7-3. Movement penalty
Players who did not reach the Guardian's Quarter move their pawn to the Guardian's Quarter in exchange for a penalty indicated on the right. The top row is the number of spaces the pawn must move to reach the Guardian's Quarter (shortest route). The bottom row is the Faith Points that player must lose.
- If you reach the Guardian's Quarter: no penalty (score the bonus). For example, for Level 1, the bonus is 2 Faith Points and 1 Wadjet Eye Card.
- 1 space left to the Guardian's Quarter: no penalty.
- 2 spaces left to the Guardian's Quarter: lose 1 Faith Point.
- 3 spaces left to the Guardian's Quarter: lose 3 Faith Points.
Game Advice: Even if you cannot reach the Guardian's Quarter, try to get to a space that is only 2 spaces away (space 3 in the example above). This way you will only lose 1 Faith Point. You may be able to recover and score more points by placing Djed Pillar Cubes well.
8. Advancing into the Next Level
After scoring Faith Points in "7. Score Calculation", the game continues to the next level until players reach the Guardian's Quarter on Level 3. Move all Player Pawns to the Starting Space on the next level.
All God Cards in the player's personal stash, Wadjet Eye Cards, and Shabti Figure Tokens remain with the player. They are not lost between the levels. Players should keep this in mind and think about the next level when a player gets close to advancing into the Guardian's Quarter.
On the other hand, Draft Cards are discarded and new cards are distributed. Prior to distributing the cards, add the new God Cards as indicated below in "Adding new God Cards".
At this time the Start Player also moves clockwise and some cards are removed from the game. Please refer to "5-5. Card Distribution Phase (after a Draft)" for more details.
Adding new God Cards
Prior to distributing the new cards, players add the II and III God Cards that were separated during "4. Setup".
- At the start of Level 2: add cards with II on the bottom left.
- At the start of Level 3: add cards with III on the bottom left.
Add God Cards in the Deck, the new II or III cards added above, and cards in the discard pile to create a new deck. Shuffle the newly created deck and distribute cards for the next round.
New God Cards are added every time players advance into the next level.
Example layout during the game
On the Level 2 board, at the end of the 3rd round. The printed captions read:
- Common area: Score Track indicates Faith Points earned by each player in Level 1. Shabti Figure Tokens, Discard Pile, God Cards Deck, Supply of Wadjet Eye Cards, and Unused III cards (cards removed from the game, in the box).
- Blue player will gain a Shabti Figure Token at the end of this round. Afterwards return the token on the board back to the supply.
- Draft Cards: all players should have the same number of Draft Cards left. Since this is the 3rd round, there are 4 Draft Cards left (3 have been added to each player's personal stash).
- Played Cards: the number of played cards is different between players. This also depends on how many cards each player brought from Level 1.
- Red player has 2 Djed Pillar Cubes on his Player Sheet from Level 1. He wants to place additional cubes on Red spaces to score the most points in this level.
- Green player has 3 Djed Pillar Cubes on her Player Sheet from Level 1. She didn't play too many cards in Level 1, so she is playing many cards now to take a lead.
- Blue player is in the lead with 4 Djed Pillar Cubes from Level 1, but he has no cards in his stash and no Shabti Figure Tokens. He moved to the space with the Shabti Figure Token resource this round so that he can use it in the following rounds.
9. End of a Game
The game is over when 1 or more players advance into the Guardian's Quarter on Level 3. Calculate the score one last time following "7. Score Calculation". The player with the highest total Faith Points wins the game (and finds the Path to Yaaru).
If multiple players are tied for the highest total Faith Points, resolve the tie in the following order:
- The player with more Djed Pillar Cubes.
- The player with more Shabti Figure Tokens.
- If players are still tied after 1 and 2 above, then all tied players share the victory (and all of them find the Path to Yaaru!).
10. Additional Rules
There are several additional rules you may add to the game, depending on how well players understand the base game rules. Decide among the players which rules to play the game with.
Beginner Rules 1: Adding a starting resource. All players may begin the game with 1 Shabti Figure Token. This will ease the difficulties of resource management for beginner players. If both beginners and experienced players are playing, you may choose to apply this rule only to the beginners.
Beginner Rules 2: Allow remaining Attributes. You may ignore the rules about "Remaining Attributes" explained at the bottom of page 7. This will make the movement easier and the rules less complicated.
Additional Rule: Shuffling the Draft Cards. Each player may choose to shuffle their Draft Cards after they are dealt but before looking at them. (This doesn't really change anything. Cards are still random, but you may feel that you are more in control since you shuffled them.)
Advanced Rule: This rule is for advanced players who have previously played this game at least once. Please do not play with this rule on your first play. Play with this rule only if you are confident that you are a gamer and can enjoy challenging game play. (When playing with this rule, we recommend playing with 3 players.)
- Rearranging Draft Cards: during "5-1. Card Distribution Phase", after the cards are dealt to each player, they may look at the cards and rearrange them. After all players have finished rearranging the cards, pass the Draft Cards to the player to their left. (You do not take a card into your personal stash yet.) Then, proceed to drafting cards normally following the rules of "5-2. Card Collection Phase". Repeat this step every time Draft Cards are dealt.
The game will be much more challenging since players now control the Draft Cards. Guess which cards other players want and don't want. Rearrange the cards in a way so that other players cannot get the cards they want, but you can get the cards you want when the Draft Cards come back into your hand.
11. Game Hint
Spoiler alert: don't read this section if you wish to analyze the game yourself!
First things first
- It is important to advance into the Guardian's Quarter (top row of the board), but focus more on placing your Djed Pillar Cubes at the beginning of the game (especially in Level 1). Try placing them on the same Attribute (color) to maximize your score in Level 2.
- Don't forget about moving upwards! If you are too far away from the Guardian's Quarter when another player advances into it, you will lose many points. You should be at most 2 spaces away so that you only lose 1 point. It's critical to have a good balance of movement and placement!
- Placing your Djed Pillar Cube on a Black space is a strong play. However, those spaces are usually difficult to reach.
- Wadjet Eye Cards are convenient and strong. But be careful about obtaining too many, since each one costs you 2 God Cards.
Once you are familiar with the game rules (your mileage may vary depending on who is sitting next to you)
- If you have no cards left in your personal stash, then the player sitting on your right can easily guess and control your next moves. Try to have some cards left so that you can control your own fate!
- Be careful when using your last Shabti Figure Token. Your options will be limited without any tokens and, as in hint 5 above, other players can guess and control your next moves.
- There will be fewer cards that will give you Shabti Figure Tokens in the later half of the game. You should save some from the first half of the game. Try to end your movement on a space that gives you a Shabti Figure Token!
- The "X+1" card might seem useless at first, but it allows you to rapidly change the direction you are moving. You are losing out since you are moving "backward", so don't overuse it!
Final advice
- Try not to follow the player on your right. He or she can guess which card you want and control which card you can take. You will have a difficult time making good moves.
- Once you understand the game and can plan your moves well, try guessing which cards the player to your left wants and start controlling their moves by limiting their card choices.
- After all, there is no single right choice. Everything depends on the situation. Resources on the board are first come, first served, so sometimes you will make your moves not for the benefit of yourself but to hinder others. Be flexible and adapt to the changing situation!
12. FAQ
Each question below lists the rulebook section it refers to, as printed.
Movement and game board
- Q1: Can I play cards and place Djed Pillar Cubes or gain resources even if I cannot move? (Bottom of page 7, "Remaining Attributes") A1: Yes. However, if you can move then you must move.
- Q2: Can only 1 player gain a Shabti Figure Token on the board? (Bottom of page 9, "Gaining resources") A2: No, all players in the space at the end of the round gain a token.
- Q3: Can only 1 player gain a Djed Pillar Cube on the board? (Bottom of page 9, "Gaining resources") A3: Yes, the player in the space at the end of their Player Action Phase gains a cube.
- Q4: Do I gain the resources on the board (Shabti Figure Token, Djed Pillar Cube) if I move through the space? (Bottom of page 9, "Gaining resources") A4: No, you must end your movement on those spaces. See Q2 and Q3 above for details.
- Q5: Do I have to pay the Horus (Black) Attribute cost on the △ space using the Horus (Black) Attribute on the card? (Middle of page 7, "Black (Horus) icon") A5: No, you may pay the cost using any 1 Attribute.
- Q6: After moving out of the Starting Space (bottom of the board), can I go back to the Starting Space? (Middle of page 9, "3. Movement direction") A6: Yes, you may by paying the movement cost. The cost is equal to the movement cost into the Guardian's Quarter of the previous level.
Playing a card and card effects
- Q7: When do I discard cards when I have more cards in my personal stash than the limit? (Middle of page 10, "End of Player Action Phase") A7: Discard at the end of your Player Action Phase. Place the discarded cards along with your Played Cards in the order they were discarded. (Cards with a Removal icon will be removed from the game as explained on page 11.)
- Q8: Can I use the resources gained from the cards I played to pay the cost of other cards I played this round? (Bottom of page 12, "6-1. Choosing the cards and Paying the costs") A8: No, you must pay the cost of all cards you played first. Then you resolve each card, which may give you one or more resources.
- Q9: Do you count Wadjet Eye Cards towards your stash limit? (Top of page 10, "Hand limit of Wadjet Eye Card") A9: No, you only count your God Cards.
- Q10: What happens if you run out of Shabti Figure Tokens in the supply? (Top of page 8, "1. Gaining Resources") A10: There is no limit to the number of Shabti Figure Tokens. Please use some other markers as a substitute.
- Q11: What happens if you run out of Djed Pillar Cubes in your supply? A11: You may take a cube on your Player Sheet and place it on the game board. You should move cubes so that you can score the most amount of points. (For example, on Level 3 you can only ever score 4 sets, so having 5 or more cubes in one Attribute is a waste.)
- Q12: In Level 1 (X=1), if you use an "X-1" card, do you gain 0 Attributes? A12: Yes, you gain no Attributes in this case.
Phases, scores and end of a game
- Q16: How many Faith Points will I score in Level 2 if I have 6 or more cubes of one Attribute? (Bottom of page 14, "7-2. Calculating the Djed Pillar Bonus") A16: Score 10 Faith Points. (In other words, the maximum is 10 Faith Points per Attribute.)
- Q17: Do I move the Start Player Card when starting a new Level? (Bottom of page 15, "8. Advancing into the Next Level") A17: Yes, pass the Start Player Card to the player to your left. He or she is the new Start Player. Also remember to discard all Draft Cards, create a new deck of God Cards, and distribute a new hand of Draft Cards (see page 15).
- Q18: Who wins the game if multiple players are tied? (Top of page 17, "9. End of a Game") A18: Compare the number of resources each player has (Djed Pillar Cubes, Shabti Figure Tokens).
13. Afterword
A message from the designer.
In this game I tried looking at the "drafting mechanism" from a different angle. I also tried to resolve some of the issues I think this mechanism inherently has. I can't say that I was able to accomplish all my goals, but I believe the game turned out well and is something a little different than others.
I would like to ask one favor from the veteran players. Please don't tell the new players what to do (you should help them without giving orders).
I've always felt that understanding a game's mechanics and figuring out how to play well is a big part of the fun.
Wishing you the best gaming experiences!
Good Luck and Have Fun!!