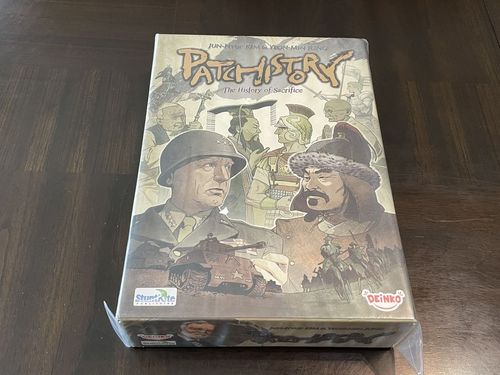
Patchistory
Patchistory Rulebook
Table of Contents
Table of Contents
- Objective
- Components
- Descriptions
- Initial Set Up
- Overview
- Playing the Game
- Additional Rules for 2-Player Games
- Wonders & Heroes
Objective
Through three Eras, players will compete to build the most impressive civilization. The strength of your culture is represented through Victory Points. At the end of the third Era, the player with the most Victory Points (Culture) is the winner.
Each Era comprises 5 Rounds. In each Round, there are 5 (and occasionally 7) Phases. As you bid for and Patch new tiles to your territory, your civilization will grow stronger and its cultural output will increase.
Develop Trade Routes with your neighbors, bolster your Military strength, Campaign in anticipation of the upcoming Voting session, Construct new Buildings, declare (or avoid!) War, Honor your Heroes and Wonders, and be mindful of your infrastructure.... these are all aspects of the game you will need to manage and balance to be successful at Patchistory.
Components
- 4 Capital Tiles
- 4 Player Screens
- 4 Reference Boards
- Timeline Board
- 90 Tiles (25 Terrain Tiles per era, and 15 Prosperity Cards)
- 14 General Trade Routes, 4 Allied Trade Routes
- 32 Status Markers (4 per each: Food, Resources, Coin, Politics, Culture, Military, Defense, and Transport)
- First Player Marker
- 32 Worker Pawns (8 per player: Red, Green, Blue, Yellow)
- 120 Wooden Cubes
- 20 value-1 Food cubes, 20 value-3 Food cubes
- 20 value-1 Resource cubes, 20 value-3 Resource cubes
- 20 value-1 Vote cubes, 20 value-3 Vote cubes
- 36 Building Tiles
- 50 Coin Tokens
- 75 Culture (Victory Point) Tokens
- 2 Auction/War Declaration Tokens
- Round Cube
- Phase Cube
Descriptions
Key: L = Liberty, E = Equality
Capital Tiles
These tiles represent the beginning of your civilization. Each player will begin with one. Each Capital Tile has two sides - Liberty (L), and Equality (E).
The Equality side of each Capital Tile is exactly the same, giving each player identical starting strengths. While the Liberty side of each Capital Tile is different, conferring unique strengths to each player. Before the game, agree as a group whether you will all use the Liberty or Equality sides of the Capital Tiles.
Icons
Coin - (Green Marker) Coin is used during the Auctions to bid on Terrain Tiles.
Culture - (Blue Marker) Your Victory Points are represented by Culture. The player with the most Culture at the end of the game wins.
Food - (Yellow Marker) Food is used to Birth new Workers, place Workers on Trade Routes, feed Workers at the end of a Round, Honor Heroes, and to maintain Heroes at the end of each Era.
Resources - (Black Marker) Resources are used to Construct Buildings and Trade Routes, Reclaim, give bonuses during War, Honor Wonders, and to maintain Wonders at the end of each Era.
Politics - (Purple Marker) You will have a fixed amount of Political Points each Round to spend on actions during your Diplomacy and Management Phase.
Transport - (Orange Marker) Your Transport value shows how many spaces each Worker may move each Round. It also controls your efficiency when using Exchange.
Military - (Red Marker) Your Military Strength is important when you are going to War or when you Threaten another player.
Defense - (White Marker) Your Defense is the sum of your Military Strength and your Defensive bonus (Shields). Your Defense score is only relevant when you are the Defender in a War or when you are being Threatened.
Status Markers
There are 8 Status Markers: Coin (green), Culture (blue), Food (yellow), Resources (black), Politics (purple), Transport (orange), Military (red), and Defense (white).
Player Screens
Your Player Screen is used to hide all Culture, Coin, Food, Resources, and Votes you obtain during the game. Additionally, it acts as a player aid, showing you all actions available to you during your Diplomacy and Management phases. It also gives a reminder of the costs and rewards of War, and the costs for maintaining your Heroes and Wonders.
Reference Boards
Each player will have their own Reference Board in front of their Player Screen. Your Reference Board reflects the current state of your Terrain Tiles.
It is divided into three sections, each representing a different aspect of your civilization.
The columns on the left are your Descendant Track, where all your available, un-Birthed Workers are kept.
The middle section is where you keep track of your static abilities - Political Points, Transport, Military Strength, and Defense.
The last section (the cogs) represent your production of Goods - Coin, Food, Resources, and Culture.
Note that you ARE allowed to go above 20 on any status.
Terrain Tiles
Terrain Tiles are double-sided. On each side of each Tile is an icon indicating both the Era in which it belongs and the card type - Black or White. White sides have General Buildings. Black sides have Special Buildings, Wonders, and Heroes.
Era icons: 1st era icon (I), 2nd era icon (II), 3rd era icon (III).
White side (General Buildings): POL building, TRA building, ECON building, IND building, MIL building, CUL building.
These are General Buildings found on the White side of a Tile. They will grant you a bonus each Round and can have a Worker assigned to them to grant you an additional bonus (the icon or text in the gold box).
Black side (Special Buildings, Heroes, and Wonders): On the Black side, you will find Special Buildings, Heroes, and Wonders.
Trade Routes
General Trade Route and Allied Trade Route.
Trade Routes have multiple functions in Patchistory. First, having a Trade Route with a player is the only way to interact with them (Aid, Threaten). Secondly, they allow you to gain Goods by assigning Workers to them. Finally, they are your only avenue for declaring War on your neighbors.
Prosperity Cards
Prosperity Cards are used at the end of each Era during the Vote. They each correspond with a particular aspect of the game - most Heroes, highest Food production, most number of Trade Routes, etc. During the Vote, players may gain or lose Culture according to their rank in a particular status, as determined by the number of Votes on the card.
First Player Marker
Indicates the player who will act first each Round in Auctions and during Diplomacy. Pass it left at the end of each Round.
Workers
8 Worker Pawns in each color. These are used to gain Goods and benefits from Trade Routes and gold-boxed spaces.
Wooden Cubes
These three Goods are represented by wooden cubes: Vote, Food, Resource. Small cubes = 1 unit. Large cubes = 3 units.
Round Cube & Phase Cube
These are used on the Timeline Board to indicate which Round you are in and which Phase within that Round.
Building Tiles
These are used when you take the Construction - Reclamation or Construction - Building actions.
Coin Tokens
Coin tokens represent your "cash on hand." Coin is used during the Auctions.
Culture Tokens
A civilization's greatness is measured by how much Culture it has produced. Culture can be obtained from Heroes, Wonders, General Buildings, Allied Trade Routes, winning Wars, and giving Aid.
Auction/War Declaration Tokens (Genghis Khan & General Patton)
These tokens are used during the Auction in a Two-player game and during War Declaration in all games.
Timeline Board
The Timeline Board is used with the Round and Phase Tokens to indicate which Round you are in and which Phase within that Round. There are 5 Rounds per Era, and 3 Eras per game.
Initial Set Up
-
Decide whether your group will use the Liberty or Equality side and then deal each player a Capital Tile.
-
Each player chooses a color and takes the Reference Board, Player Screen, and Workers of that color. Place the Reference Board in front of your Player Screen so it's visible to all players.
-
Place your 8 Workers in the allotted spaces on your Descendant Track.
-
Take one each of the 8 different Status Markers and place them on your Reference Board such that they reflect the status of your Capital Tile.
[For example, if your Capital Tile shows 2 Coin, 1 Politics, 1 Transport, and 2 Food icons, place the appropriate Status Markers on those values. All other Status Markers (Military, Defense, Resource, Culture) will stay at zero. Important - Do not count any icons within the gold-bordered boxes. Those are only active while a Worker is assigned there.]
-
Each player takes 4 Food, 3 Coin, 4 random Building Tiles, and 20 Culture, and places it all behind their Player Screen.
-
Shuffle the Prosperity Cards and deal three to each player.
-
If there are 3 or 4 players, place one Trade Route between each player such that the START space is to each player's left. Each player should have one Trade Route starting on their left and one ending on their right.
-
Leave all Building Tiles face down (Wasteland side up).
-
Separate all Terrain Tiles by Era into three stacks. Shuffle the Era 1 stack.
-
Create a Public Storage within reach of all players with the Coin, Resources, Food, Votes, and Culture tokens.
-
Select a starting player in any way you wish.
Each player should have the following
- Capital Tile
- General Trade Route
- 8 Descendants (Workers)
- 8 Status Markers
- Reference Board
- Player Screen
- 3 Coin
- 4 Building Tiles
- 4 Food
- 20 Culture
ex) Place your 8 Workers on your Descendant Track. Set your Status Markers to reflect the icons shown on your Capital Tile. Place your Coin, Food, Culture and Building Tiles behind your Player Screen. If there are 3 or 4 players, place a Trade Route to your left, with the START space nearest you.
Overview
Patchistory is played over 3 Eras. Each Era comprises 5 Rounds. Each Round comprises the following Phases -
- Auction & Patching Terrain Tiles
- Diplomacy & Management
- Movement
- Negotiation & War
- Production & Worker Maintenance
Additionally, the 5th Round of each Era will end with the following Phases -
- Heroes & Wonders Maintenance
- Voting
- The End of an Era
Things to keep in mind
- Your Reference Board shows your current output of Goods, your Military Strength, and overall capabilities. Be sure that it accurately reflects the status of your Terrain Tiles at all times. Your statuses will mainly change during the "Patching Terrain Tiles" and "Movement" phases. It's important to make sure that other players can look at your Reference Board and trust its accuracy at all times.
- Your Culture (Victory Points) cannot go below 0. If an effect would cause you to go below 0 Culture (for example losing to a Great Victory while you have only 5 VP) pay what you can until you have 0.
- If a card or game rule instructs you to "Forfeit" something, simply return it to the general supply.
- "Goods" are - Food, Resources, Culture, and Coin.
- All Goods (Resources, Food, Coin, Culture) and Votes acquired during the game should be placed behind your Player Screen.
- This game uses hidden information. Additionally, players will often take the bulk of their actions (the Management phase) simultaneously. Be mindful when paying for actions or Exchanging Goods. It is very easy to accidentally cheat, and it's often difficult to 'reset' your turn. Be careful!
- If an ability on a Terrain Tile contradicts a game rule, the Terrain Tile takes precedence.
- Many Tiles have squares with gold boxes on them. These gold boxes require Workers to generate their effect or benefit. A space with any symbol or text outside of a gold box will generate that effect naturally.
- A Worker may occupy any space, but they are only useful on spaces with a gold box, or on Trade Routes. There may only be one Worker per space, and only one Worker per General Trade Route.
Playing the Game
1. Auction & Patching Terrain Tiles
(instructions for a 3- or 4-player game)
The following are instructions for a 3- or 4-player game. For instructions on a 2-player Auction, see page 15. Additionally, the first Auction of each game is performed slightly differently. See page 9 for instructions.
Arrange an Auction
- Give the Terrain Tiles of the appropriate Era a quick shuffle, then draw one Terrain Tile and place it on the table. If you placed it White side up, place the next Tile Black side up, and so on, alternating until you have placed as many Tiles as there are players.
In a 3-player game, keep track of how many of each color-side you place in a Round and reveal the opposite in the subsequent Round. Example -
ex) 3-player game: White Side – Black Side – White Side / Black Side – White Side – Black Side
4-player game: White Side – Black Side – White Side – Black Side / Black Side – White Side – Black Side – White Side
Auction
The Auction begins with the Start Player and continues clockwise.
- The minimum bid for any Tile is 1 Coin. When it is your turn to bid, you may bid on any unclaimed Tile by placing any amount of Coin from your supply on it, or you may beat the bid of a claimed Tile by placing at least 1 more Coin than the highest bid on that Tile. You may only be bidding on one Tile at a time.
- Bidding passes clockwise until all Tiles have exactly one bid on them. Bidding ends immediately when all Tiles have a bid on them. Each player Forfeits the Coin they committed to the Auction and takes the Tile they won.
- During your turn, if your bid has been beaten, you have three options - One, add enough Coin to beat the highest bid on your current Tile. Two, move your current bid to another Tile where you would now have the highest bid. Three, move your bid to another Tile and add Coin to make your bid the highest for that Tile.
- On your turn, if your bid is not being beaten, you may not add Coin to nor move your bid. You may only act if your current bid is being beaten.
- Once Coin has been added to the Auction, it may not be removed. For example, you may not lower your bid of 5 Coin on one Tile to 1 Coin and place it on an unclaimed Tile. All Coin committed to an Auction is there for good.
- All players must participate in the Auction. If you have no Coin to bid, you must Forfeit 3 Culture to gain 1 Coin. You may only do this once per Auction and only if you have no Coin at the beginning of the Auction.
ex) The Auction flows in this order - Gandhi – Alexander – Yi Sun-sin – Bismarck.
- Gandhi bids 3 Coin on Terrain Tile A.
- Alexander bids 1 Coin on Terrain Tile B, Yi Sun-sin bids 1 Coin on Terrain Tile C.
- Bismarck desires Tile A, so he bids 4 Coin on Tile A, beating Gandhi's bid of 3 Coin.
- Gandhi, never one to back down from a fight, adds 2 Coin to his bid on Tile A, making his bid 5 Coin.
- Bismarck decides going up to 6 Coin for Tile A is too much and moves his bid of 4 Coin to Tile B.
- Alexander has no more Coin to add and moves his bid to Tile D. Now that there is one bid on each Tile, the Auction is over. Each player Forfeits their bid and takes their Tiles.
Patching Terrain Tiles
When you obtain Terrain Tiles in an Auction, you may then patch them onto your existing Terrain Tiles. You are not obligated to patch newly acquired Tiles. If you win a Tile in an Auction and cannot or do not wish to patch it, simply forfeit it.
When you Patch a Terrain Tile, you must follow these rules -
- At least one square of your new Terrain Tile must be above or under at least one square of your existing Empire. You may Patch over or under more than one square, but it must always be 1 for 1, 2 for 2, etc.
- Text and images on Terrain Tiles must always face you.
- If there is a Worker on a square you Patch over, leave the Worker where it is. It is now considered to be working that space, if it has a gold box on it.
- You may not half-way cover a Hero, Wonder or Special Building. You must cover it completely or not at all.
- Seas (the water spaces) can be Patched over any non-Sea square, but cannot be Patched under any squares.
- A Sea cannot be Patched over or under. No square may be placed above or below it. Additionally, no two Sea spaces may be adjacent to each other at any time.
- You may not Patch a Tile between a Building and the Tile it is on constructed on. When a Building is constructed, it is considered part of that Tile for all purposes.
ex) Vasco's civilization was generating 1 Culture, 1 Food, 1 Coin, and granting him 1 Military Strength, 1 Transport, and 1 Politics before the Auction. He wins the Tile below and Patches it over his Industry - Food space. He is now generating 1 Culture, 1 Coin, 1 Resource, and has 2 Politics, 1 Military Strength, and 1 Transport. He adjusts his Reference Board to reflect the changes.
Important - The maximum size of your civilization is limited by these patching limits - 5×5 in the 1st Era, 6×6 in the 2nd Era, and 7×7 in the 3rd Era.
Remember to adjust the Status Markers on your Reference Board to accurately reflect your Terrain Tiles after you patch a new Tile.
Auction during the 1st era, 1st round
(instruction for a 3- and 4-player game)
Since each player begins the game with the same amount of Coin, this alternate Auction is used in the 1st round of the 1st Era for fairness.
- Place one Terrain Tile on the table. The Start Player may bid on it or pass.
- Place a second Terrain Tile on the table. The second player may bid on either Terrain Tile or pass.
- Place a third Terrain Tile on the table. The third player may bid on any of the three tiles or pass. (If it is a 3-player game, skip this step).
- The final player must bid on one of the Terrain Tiles and then the Auction continues as normal.
Important
After the first Auction of any game, each player will be allowed to assign Workers to their Terrain Tiles.
If you are playing with the Equality side, each player takes 1 Worker from their Descendant Track and places it onto any space in their territory.
If you are playing with the Liberty side, each player takes 2 Workers from their Descendant Track and places them onto any two spaces in their territory.
If you place your Worker onto a space with a gold box, be sure to adjust your Reference Board.
Remember, there can only be one Worker assigned to a space.
2. Diplomacy & Management
Diplomacy and Management are two separate steps within the same Phase. It is during this Phase that players will spend their Political Points on actions.
-
Begin with the Diplomacy step. In turn order, each player decides which, if any, Diplomacy actions they will take. When a player decides to take no more Diplomacy actions, they pass the turn.
-
After all players have no more Diplomacy actions, move to the Management step. In general, all players may execute their Management step simultaneously. If/when it becomes important to know what a player does during their Management step, any player may ask all players to execute their Management steps in turn order, just like Diplomacy is always done.
-
You may execute any Diplomacy or Management action as many times as you wish, unless noted otherwise, as long as you have the Political Points and Goods required to carry out that action.
-
Some Terrain Tiles lower the Political Points required to carry out an action. The Political cost of any ability may never go below 1 Political Point.
-
The purple Status Marker on your Reference Board indicates how many Political Points you have to spend each Round.
-
Each number written in brackets indicates the Goods requirement for each era. (First/Second/Third)
-
The violet dot before each action indicates the amount of Political Points you must spend to carry out that action.
Diplomacy Actions
Aid (2 Political Points) - Offer three total units in any combination of Food, Coin, and Resources to a player that you are connected to by any Trade Route. If that player accepts your Aid, they gain the Goods you offered, and you gain 5 Culture from the Public Storage. If that player refuses the Aid, you keep your Goods and gain 2 Culture from the Public Storage.
A player who accepts Aid may not offer Aid in the same Round.
Threaten (3 Political Points) - You may Threaten any player that you are connected to by a General Trade Route. You may not Threaten a player with whom you have an Allied Trade Route.
- If your Military Strength is higher than their Military Strength + Defense, you successfully Threaten.
- You may request either 2 Culture or 3 Coin. If your Military Strength is greater than their Military Strength + Defense by 5 or more, the values go up to 4 Culture and 5 Coin.
- If the Threatened player does not have enough of the Good you requested, they must pay as much as they can.
Break Alliance (All Political Points for the Round)
- Taking Break Alliance costs you all of your Political Points for the Round, and you must spend the entirety of your Political Points to take this action. On a Round in which you Break Alliance, you may take no other Diplomacy actions before this one.
- Forfeit one of your Allied Trade Routes. This cancels your Alliance with that player, allowing both of you to Threaten and declare War on each other. "If there are Workers on that Trade Route, their owners return them to any space they wish in their territory."
- Gain one Vote for each Political Point you spent.
Management (Domestic Politics)
General Actions
Trade (1 Political Point) - You may move one of your Workers from your Terrain Tiles to the Start space of a General or Allied Trade Route by paying (2/3/4) Food according to the Era. A General Trade Route may only have one Worker on it at a time. An Allied Trade Route may have two Workers on it at a time, one from each of the allied civilizations.
Exchange (1 Political Point) - You may Exchange one type of Good into other types of Goods. When Exchanging, 1 Resource = 2 Food = 2 Coin, and 1 Food = 1 Coin. Each activation of Exchange lets you convert one type to another type(s) a number of times equal to your Transport value.
ex) By spending 1 Political Point and having 3 Transport value, you may Exchange up to 3 Resources into 6 Food. Or into 2 Coin and 4 Food. Or into 5 Coin and 1 Food. Or up to 3 Food into 1 Resource and 1 Coin, etc. Having only 1 Transport value would restrict those exchanges to 1 Resource into 2 Food. Or 1 Food into 1 Coin, and so on. Your Transport value controls how many of the original Good you may Exchange. The conversion values control how much and what you get from that Exchange.
Birth (2 Political Points) - Forfeit (4/5/6) Food according to the Era to Birth a new Worker. Move that Worker from your Descendant Track (left to right, top to bottom) to any unoccupied space on your Terrain Tiles. If you place the Worker on a square with a gold box, adjust your Reference Board to reflect the new status. Remember, only one Worker can occupy a space no matter how large it is.
Honor Actions
Honor Heroes (2 Political Points) - Forfeit (1/2/3) Food according to the Era to gain 1 Culture for each Hero in your civilization.
Honor Wonders (2 Political Points) - Forfeit (0/1/2) Resources according to the Era to gain 1 Culture for every Wonder in your civilization.
Construction Actions
Construction - Trade Route (2 Political Points) - Forfeit 2 Resources to place a General Trade Route between you and any other player, with the Start space closest to you.
- You may only build one Trade Route per Round.
- You may have any number of Trade Routes between you and another player.
- You are not allowed to construct an Allied Trade Route.
- The number of General and Allied Trade Routes that can be constructed is finite (14 General, 4 Allied).
Reclamation (2 Political Points) - Forfeit 1 Resource to Reclaim one 1x1 square on one of your Terrain Tiles. You can Reclaim any square, even a Sea, but you may not Reclaim any square larger than 1x1. Cover the space with the Wasteland side of one of your Building tiles, and then draw a new Building Tile.
Construction - Building (3 Political Points) - Forfeit 2 or 3 Resources according to the cost, to Construct a Building on any 1x1 non-Sea square, and then draw a new Building Tile.
Notes on Reclamation and Constructing - Building.
- Always use one of the 4 Building Tiles behind your Player Screen when you Reclaim or Construct a Building. When you Reclaim or Construct, replace the tile you used with a new one from the supply. The Building tile supply is finite.
- If you patch over a Reclaimed space or a Building, remove that tile from the game. (So your Terrain Tiles lay flat)
Campaign
Once per Round you may spend any number of Political Points to gain that many Votes (white cubes).
ex) Gwanggaeto begins the Diplomacy/Management Phase with 6 Political Points. During Diplomacy, he uses 3 of them to Threaten Aristotle. He now has 3 Political Points to use during Management. First, he uses 2 of them to Construct a Trade Route. He uses his last Political Point to take the Campaign action, gaining 1 Vote cube from the supply. He has no more Political Points and ends his Management Phase.
3. Movement
During Movement, you may move each of your Workers a number of spaces equal to your Transport value. The Movement step can be completed simultaneously by all players unless a War is about to resolve, or if a player requests that players take their Movement step in turn order. Move all Workers within your territory before moving your Workers on Trade Routes.
Movement within your territory
- Each Terrain Tile contains one or more spaces. At the end of Movement, if a Worker occupies a space with a gold box on it, that space is considered 'worked', and you will gain the additional benefits of that space.
- Each Worker may move a number of spaces equal to your Transport value. All Special Buildings, Wonders, and Heroes are considered as one space during Movement. All movement must be orthogonal, no diagonal movement is allowed.
- At the end of Movement, be sure that there is only one Worker per space. Only during Movement may you have more than one Worker on a space.
- Note you may move through or end a Worker's movement on a Sea space.
Movement on a General Trade Route
- A Worker on a Trade Route must move at least one space, and may move as many spaces as your Transport value allows. Workers on Trade Routes always move 'forward.'
- When your Worker lands on the Return/Preparation space it must stop. During Negotiation/War you and the player this Trade Route is connected to will perform Negotiation. The outcome will decide if this Worker will stay on the Return/Preparation space, or be sent back to your territory.
- Instead of moving a Worker forward on a Trade Route you may move it to the Rest/Return space. At the end of your NEXT Movement phase, this Worker will move back to your territory to any space you choose. You may not move a Worker on the Return/Preparation space in this way.
- If you have no Transport value at the beginning of the Movement phase, move all Workers you control on all Trade Routes to their respective Rest/Return spaces. At the end of your NEXT Movement phase, these Workers will move back to your territory to any spaces you choose.
Movement on an Allied Trade Route
- A Worker on a Trade Route must move at least one space, and may move as many spaces as your Transport value allows. Workers on Trade Routes always move 'forward.'
- When your Worker lands on the opposite side's Start/Return space, immediately return the Worker to any space you choose in your territory.
- Remember, unlike General Trade Routes, there may be multiple Workers on an Allied Trade Route. But each player may still only have one Worker on the Trade Route (General or Allied).
The General Trade Route runs: Start → (goods spaces) → Rest / Return → Negotiation → Return/Preparation → War/Return.
The Allied Trade Route runs bidirectionally: Start/Return → (goods spaces) → Rest → Return ← Rest ← (goods spaces) ← Start/Return, with a Start on each end.
4. Negotiation & War Phase
After each player completes their Movement Phase, check to see if there are any Workers on the Return/Preparation and/or the War/Return spaces of any Trade Route. If there are, continue on with the Negotiation and War Phase. If not, skip this phase and continue on to Production and Worker Maintenance.
Resolve the Negotiation and War Phase in turn order. First resolving all Negotiations and then all Wars. If a player is involved in two Wars when it is their turn, they may choose which War to resolve first.
Negotiation
Negotiation happens when a Worker is on the Return/Preparation space of a Trade Route. During Negotiation, the two players will decide whether they are going to War, will form an Alliance, or do nothing at all. To resolve a Negotiation, give one player the Patton token and the other player the Genghis Khan token.
- Each player secretly chooses a side, red (1) or blue (2) and reveals it. Red indicates "Aggression." Blue indicates "Defender" or "Alliance."
When both players choose the blue side
- The two players will not go to War. Additionally, they may form an Alliance. Both players must agree to form an Alliance. No player is obligated to agree to an Alliance.
- If both players agree to an Alliance, place an Allied Trade Route between them. The players whose Worker is on the Return/Preparation space chooses the direction of the Allied Trade Route.
- Players in an Alliance cannot Threaten or declare War on each other.
- Regardless of the outcome, Alliance or no, return the Worker to its territory to any space its controller chooses.
- Forming an Alliance is the only way an Allied Trade Route can be constructed. Just like General Trade Routes, Allied Trade Routes are finite. If there are no more available, no Alliance can be formed.
When one or two both players choose the red side
-
A War is declared. The War will resolve NEXT Round when the Worker moves to the War/Return space.
-
Each player who chose the red side is considered an Aggressor. (Both players can be Aggressors in a War.) Each Aggressor forfeits their War Preparation Cost (0/1/2) Resources according to the Era.
-
Any player who chose the blue side is considered a Defender, and will be able to add their Defensive Strength to their Military Strength during the War.
-
Leave the Worker on the Return/Preparation space. Next Round it will move to the War/Return space and the War will resolve.
Resolving a War
- Aggressors announce their Military Strength (sword icons). Defenders announce the sum of their Military Strength (sword icons) + Defense (shield icons).
- Each player may forfeit any amount of Resources to bolster their overall Strength for this War. Secretly choose the amount you wish to forfeit. Each 1 Resource you forfeit gives you 1 Strength for this War.
- The player with the highest total is the winner. Defender wins in case of a tie. If there is a tie and no player is a Defender (both players were Aggressors), then both players are considered defeated.
- If an Aggressor wins the War they gain (5/10/15) Culture from the Public Storage, according to the Era.
- If the Defender wins the War they gain (3/6/9) Culture from the Public Storage, according to the Era.
- If any player defeats the other player by 5 or more, they gain 7 Culture from that player in addition to their gain from the Public Storage.
- Regardless of the outcome, return the Worker to its territory to any space its controller chooses. (It will generate its bonus this turn if you put it on a space with a gold box.)
5. Production & Worker Maintenance
Production
During this phase you will gain Goods from Terrain Tiles and Workers on Trade Routes.
- Make sure the Status Markers on your Reference Board accurately reflect the outputs of your Terrain Tiles. The important ones for this phase are the Status Markers on the "Cog" section of your Reference Board.
- Gain Goods (Culture, Resources, Food, Coin) from the Public Storage according to your output. (All Goods are infinite. In the highly unlikely event you run out of a particular Good, use another method to record the gain, such as paper.)
- Gain Goods from Workers on Trade Routes.
Remember, General Buildings generate their normal bonus each Round naturally. But to gain the bonus found in the gold box, you must have a Worker assigned to that Building.
ex) The Building on the left is generating 1 Coin each Round. The Building on the Right is generating 2 total Coin each Round due to the Worker assigned to it.
- Special Buildings, Heroes, and Wonders generally do not have spaces for Workers to 'work.' Workers are allowed to stay on these spaces, but you will gain no additional benefit from them.
- Place all gained Goods in front of your Player Screen before putting them behind it. This way, each player can clearly see what you produced this Round.
- Do not change your Reference Board to reflect what you are gaining from Trade Routes. Your Reference Board only shows the output of your Terrain Tiles.
ex) You first gain 2 Food, 1 Resource (from the Worker on the gold box for Resources), 2 Coin, and 2 Culture from your Terrain Tiles. Then you gain 2 Coin from your Worker on the Trade Route.
Worker Maintenance
During this step you will forfeit the Food required to keep your Workers fed.
- Forfeit Food equal to the highest value shown on your Descendant Track.
- You must forfeit the entire amount if you are able. If you are unable to pay, forfeit as much Food as you are able and then forfeit 3 Culture for every Food you are short.
ex) The Worker Maintenance cost for this civilization is 5 Food.
At the end of each Round, move the Start Player marker to the left. Also move the Round Token to the next Round and the Phase Token back to Auction/Patching Terrain Tiles.
Rounds 1-4 of each Era are all played as described above. The last Round of each Era, Round 5, will have the additional following three phases.
6. Heroes & Wonders Maintenance
- Each player forfeits 2 Food for each Hero, and 1 Resource for each Wonder they control.
- You must forfeit the entire amount due, if able. If you are unable to pay, forfeit as much Food and Resources as you are able and then forfeit 3 Culture for every Food, and 6 Culture for every Resource you are short.
7. Vote
The Voting phase is a time when players can gain additional Culture for doing well in certain aspects of the game (highest Military, most Food production, so on).
- Each player chooses one of their Prosperity Cards and places it face-down in the center of the playing area.
- After each player has added their Prosperity Cards, shuffle them and reveal them all one at a time.
- Check to see where each person ranks in the aspect of the game each Prosperity Card cares about.
- The voting begins with the first Prosperity Card revealed. Each player simultaneously and secretly chooses any amount of their Votes (the white cubes) to assign to the Prosperity Card. Once all players have chosen their amount, they all reveal and those Votes are placed on the Prosperity Card. Do this for each Prosperity Card revealed.
- After all Prosperity Cards have been voted on, discard the Card with the fewest number of Votes. This Card will not be counted. Each player now gains Culture according to the Votes on the Cards and their respective rank in that aspect of the game. See "Calculating Vote Points" below and the example to the right.
- All players forfeit any unused Votes. Return all Votes on Cards to the supply and discard the used Prosperity Cards.
- In a 3- or 4-player game, if two or more Prosperity Cards are all tied for the fewest number of Votes, discard all those cards. They will not be scored. Score all other Cards as normal.
- In a 2-player game, do not discard the Prosperity Card with the lowest amount of Votes. Both Cards will be scored.
Calculating Vote Points
2-Player Game - The Prosperity Card with the most Votes on it grants 1 Culture per Vote to the player winning that category, and 0 Culture to the other player. The Prosperity Card with the fewest Votes on it grants Culture equal to half the Votes (round down) on it to the player winning that category, and 0 Culture to the other player. If both Prosperity Cards have equal Votes on them, grant the full value of each Card to the winner of those categories.
3-Player Game - Each Prosperity Card grants 1 Culture per Vote to the player winning the category, and half that amount (rounded down) to the player coming in second in that category. The third place player gains no Culture.
4-Player Game - Each Prosperity Card grants 1 Culture per Vote to the player winning the category, and half that amount (rounded down) to the player coming in second in that category. The third place player gains no Culture. The fourth place player forfeits Culture equal to half the number of Votes on the Card (rounded down).
When players are tied for a ranking, they are lowered in rank according to how many players are tied. See below -
ex) A Prosperity Card has 7 votes = 1st place gains 7 Culture, 2nd place gains 3 Culture, 3rd place gains 0 Culture, and 4th place forfeits 3 Culture.
If there is a tie between two players, both players' rank is lowered by one. (ex: Two 2nd place winners → both are now considered 3rd place winners)
If there is a tie between three players, all three players' rank is lowered by two. (ex: Three 2nd place winners → all are now considered 4th place winners)
Full Example of Voting
During a 4-player game, Gandhi, Napoleon, Homer, and Elizabeth each choose a Prosperity Card and place it facedown in the center of the playing area. Gandhi shuffles the cards and reveals them one by one.
The Prosperity Cards are revealed in the order of - Military Strength - Food production – Culture production – Wastelands. Now each player checks their status in those aspects.
For highest Military Strength, Napoleon comes in 1st, Elizabeth is 2nd, Gandhi is 3rd, and Homer is 4th.
For highest Food production, Homer comes in 1st, Elizabeth and Gandhi are tied for 3rd, and Napoleon is 4th.
For highest Culture production, Napoleon is 1st, Elizabeth, Gandhi, and Homer all tie for 4th.
For most Wastelands, Elizabeth is 1st, Napoleon, Gandhi, and Homer all tie for 4th.
Voting begins with the first Prosperity Card revealed.
Napoleon, with the highest Military Strength, assigns all 10 of his Votes to the card. The other players also hold their Votes in their hands, and reveal them simultaneously. 15 total Votes are assigned to the Military Prosperity Card. All those Votes are placed on the Card.
10 Votes total are assigned to the Food production card.
1 Vote is assigned to the Culture production card.
11 Votes are assigned to the Wastelands card.
The Culture card received the fewest Votes and is now discarded.
Napoleon gains 15 Culture from the Public Storage for being 1st in Military Strength. Elizabeth comes in 2nd and gains 7 Culture, and Gandhi gains 0 Culture for 3rd place. Homer, who comes in last, forfeits 7 Culture.
Homer is producing the most Food and gains 10 Culture from the Public Storage. Elizabeth and Gandhi are both tied for 2nd, so they both fall down to 3rd place and gain 0 Culture. Napoleon is 4th and must forfeit 5 Culture.
Finally, Elizabeth comes in 1st on the most Wastelands card. She gains 11 Culture. Napoleon, Gandhi, and Homer all tie for 2nd, so they are all considered to be in 4th place. They each forfeit 5 Culture.
8. The End of an Era
At the end of each Era, perform the following actions -
- Players gain or forfeit Culture from Heroes and Wonders, if applicable. (such as from the Pyramids of Giza, or the Ziggurat of Ur)
- Move the Round Token back to the 1st Round space.
- Set aside all unused Terrain Tiles from the previous Era and shuffle the Terrain Tiles for the new Era.
The game ends at the end of the 3rd Era. Unused Food, Resources, Votes, Coin, etc. are worth no Culture. The player with the highest Culture total is the winner!
Additional Rules for 2-Player Games
Auction
- Set out two Terrain Tiles and assign each of them a number, 1 and 2.
- Each player looks at both sides of both Tiles. When a player wins a Tile they may patch either side.
- To bid, each player takes one of the Auction Tiles (Genghis Khan and Patton). Secretly choose an amount of Coin and the side of the token that matches the Tile you want to bid on (side #1 for Tile #1, side #2 for Tile #2).
- Each player reveals their chosen Tile number and Coin. If two players choose the same Tile, the player who bid the most wins, and the other player gains the other Tile. If both players choose the same Tile and have bid the same amount of Coin, the Start Player chooses their Tile first.
ex) Both players bid on Tile #1. The player with the Patton token bid 3 Coin, so they take Tile #1 and patches either side. The player with Genghis Khan takes the other Tile and patches either side.
2-Player Patching
Unlike a 3- or 4-player game where players can patch their acquired Tiles simultaneously, in a 2-player game it is suggested that players patch their tiles in turn order.
Wonders & Heroes
1st Era
Wonders
The Great Wall of China – You gain +1 Defense for every Worker you control in your territory or on a Trade Route.
Hanging Gardens of Babylon – The returned Worker may come from your Terrain Tiles or from a Trade Route.
Petra – You gain +1 Coin for every General Trade Route that begins in your territory, and every Allied Trade Route you share.
Heroes
Constantine the Great – You may construct an Allied Trade Route for free between you and any player. They may not decline. If you would go to War with that person this turn, instead return the Worker to any space its controller chooses in their territory.
Cyrus the Great – You gain +1 Culture each time you gain Food, Resources, Coin, or Culture from a Worker on a Trade Route.
Moses – You immediately move a Worker from your Descendant Track to any space on your Terrain Tiles.
2nd Era
Wonders
Angkor Wat - This ability does not let you violate the patching rules in regards to Sea spaces. It simply lets things that count Wastelands consider Seas in the same way.
Chichen-Itza – Before Voting, you may return any number of Workers to your Descendant Track. You gain 5 Culture for each returned Worker.
Kremlin – The returned Worker may come from your Terrain Tiles or from a Trade Route.
Heroes
Genghis Khan – Your Trade cost is set to 1 Food and cannot be raised or lowered. You gain +1 Military Strength for every General Trade Route that begins in your territory, and every Allied Trade Route you share.
Jeanne d'Arc – You may forfeit both Resources and Votes during a War.
Vasco Da Gama – Before the Auction begins, take one of the available Terrain Tiles. You do not participate in that Auction.
3rd Era
Wonders
Apollo 11 – You gain +1 Culture for every General Trade Route that begins in your territory, and every Allied Trade Route you share.
Schwerer Gustav – You may forfeit a General Trade Route you control or an Allied Trade Route you share. Return any Workers on that Trade Route to any space its controller chooses in their territory. If you forfeit an Allied Trade Route this way, you are no longer Allies with that player.
Statue of Liberty – You may not patch over the Statue of Liberty. The ability to ignore the patching limit does not begin until you have patched the Statue. You gain Culture only from Wastelands you Reclaimed, not Wastelands occurring naturally on Terrain Tiles.
Stealth Aircraft – You may use one of your Building Tiles to Reclaim, for free, one of the defeated player's 1x1 spaces. Replace the Building Tile you used with another from the Public Storage.
Wall Street – Wall Street checks only Coin on hand at the end of the game, not your production.
Heroes
Che Guevara – Your Political Points is set to 6 and cannot be raised or lowered. Ignore the POL symbols on your Terrain Tiles.
Karl Heinrich Marx – Your Worker Maintenance cost is 5 regardless of the highest number showing on your Descendant Track.
Mahatma Gandhi – When you Threaten a player, their Military Strength is considered 0. This represents you asking for aid and them not being able to refuse.
Otto von Bismarck – The 5 bonus Culture you gain comes from the Public Storage. You gain it whether you Threaten for Coin or Culture.