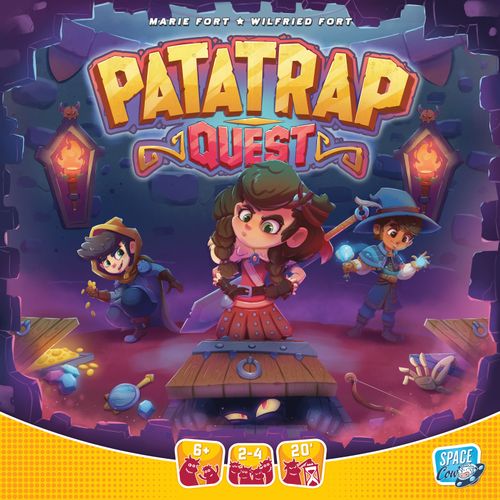
Patatrap Quest
Patatrap Quest Rulebook
Table of Contents
Table of Contents
Goal of the Game
The first player to defeat the Big Bad wins the game.
Contents and Setup
- A. 5 adventures. Choose one adventure from those in this booklet and on the two Adventure cards (double-sided). For a first game, we recommend the first adventure, "Sheuloub the Spider" (see the section "My First Adventure").
- B. 1 game board. Place it on the bottom of the box.
- C. 24 trapdoors. Take the 12 trapdoors that match the chosen adventure. Each adventure has its own symbol, which is printed on the tabs of its trapdoors. Some trapdoors are used in several adventures. Shuffle the 12 trapdoors face down and place them at random on the spaces of the board. Return unused trapdoors to the box.
- D. 1 Tower of the 1000 Mirrors. After the 12 mirrors have been glued to its sides, place it on its space in the centre of the board. The access staircase can be placed in front of any trapdoor.
- E. 48 round Big Bad cards. Take the Big Bad cards of the chosen adventure, shuffle them, and place them in the slot at the top of the Tower with the Big Bad side visible (as printed in the source; see the note in "The Final Confrontation" below).
- F. 4 Character pawns. Each player chooses one and places it on one of the spaces in front of the castle entrance.
- G. 4 Character boards. Each player takes the board matching their Character pawn and places it in front of them.
- H. 4 Familiar tokens. Each character has its own Familiar. Place the Familiar token on the square space of the Character board, Awake side visible.
- I. 2 dice and 82 Object tokens. Place them beside the board. The Object tokens form a common supply available to everyone. If the Cat Object tokens are used in an adventure, place them in the supply, Cat side visible.
The first player is the player who last saw a spider. In case of a tie, the youngest player is the first player.
Cocow, our space mascot, will accompany you while you read this booklet. Cocow will give you advice and instructions so you get the most out of the game!
My First Adventure
As noted in the setup, here is the adventure that is ideal for your first games.
How an Adventure Is Built
- A. The name of the adventure and of the Big Bad to face.
- B. A Big Bad card with its symbol, and the objects the player must possess C for the final confrontation. In the example, a sword and/or a bow will be needed to chase Sheuloub from the 1000-Mirror Tower.
- D. The trapdoors used in the adventure and how many of each. There are always 12 trapdoors in an adventure, no more and no less. Some may appear several times in the same adventure and/or be used in different adventures. In the example, place the 12 trapdoors indicated face down on the board's designated spaces. You will need 2 Sword trapdoors, 2 Bow trapdoors, and so on.
- E. The effects of the trapdoors when a Character pawn opens them by landing on their space.
- F. The symbol of the Big Bad and of the adventure it belongs to.
Cocow's tip: Keep the adventure with you during your first games. It is a valuable guide for all players.
For now there are five different adventures that can be replayed. Each adventure introduces a new creature that has settled on top of the 1000-Mirror Tower, its weak points, and all the trapdoors you will meet on this new quest. The rules of the game stay the same, but the effects of the trapdoors make each adventure feel quite different!
Adventure 1: Sheuloub the Spider
This super-hairy spider has woven her web and built her cosy nest in the 1000-Mirror Tower. Sword and bow will be very useful for chasing this big beast!
The trapdoors and their effects:
- Sword (×2). Take a Sword token and place it on an available space of your Character board.
- Bow (×2). Take a Bow token and place it on an available space of your Character board.
- "As you wish!" (×1). Choose an Object token from the supply and place it on an available space of your Character board.
- Thief (×1). Choose an Object token from your Character board and return it to the supply.
- Jester (×2). Swap the 2 closest trapdoors on either side of the Jester, without looking at them.
- Gargoyle Tower (×1). Place your Character pawn on the Gargoyle Tower or on the Raven Tower, as indicated by the trapdoor. During your next turn, you resume your path from this tower.
- Raven Tower (×1). Same effect as the Gargoyle Tower: place your Character pawn on the tower indicated by the trapdoor. During your next turn, you resume your path from this tower.
- Ghost (×1). The Ghost says Boo! Move your Character pawn to the next available trapdoor lit by the torch, and apply its effect.
- Secret Passage (×1). Place your Character pawn on top of the 1000-Mirror Tower and face the Big Bad! See the section "The Final Confrontation" below.
Turn Order
On your turn, you must move your Character pawn across the trapdoors of the board, in clockwise order.
To do so, roll both dice and choose either:
- the result of one of the two dice, or
- the sum of the two dice.
The final result gives the number of free trapdoors your pawn may move across.
Warning: while moving, the player must not open the trapdoors they pass over. Occupied trapdoors are never counted when moving.
- Roll the dice and choose the result of one die or the sum of the two.
- Move your Character pawn and apply the effect of the arrival trapdoor.
The arrival trapdoor of the pawn is then opened, which triggers its effect for the player whose turn it is.
If it is impossible to apply the effect produced by the trapdoor (for example, it sends you to a trapdoor occupied by another player), nothing happens.
If a player must take an Object that is no longer available in the supply, they must instead take it from the opponent of their choice.
Cocow's instruction: If your Character board is full, you cannot add a new Object token to it.
Example from the booklet: the blue pawn moves 3 trapdoors without opening those it passes, and without counting the trapdoor occupied by the red pawn.
Cocow's tip: Depending on where you sit around the board, you may not be able to see a trapdoor's effect directly. In that case, use the mirrors!
Once your pawn has moved and the effect of the trapdoor has been applied, your turn ends. Play passes to the next player, clockwise.
Familiars
Each character has a small companion, ready to lend a hand!
At any time during their turn, if a player is not satisfied with the result of a dice roll and their Familiar is Awake, they may ask it for help. The player re-rolls the die or dice they have just rolled and uses the new result. The Familiar is then turned to its Asleep side to regain its strength.
When the Familiar is asleep, a player cannot re-roll the dice.
How to wake your Familiar? It is simple: obtain the bell face on the yellow die during a dice roll (movement, Treasure trapdoor, etc.) to turn your Familiar back to its Awake side.
Cocow's instruction: When you use the die showing the bell face to wake your Familiar, you must use the result of the other die to move your Character pawn. If, while applying the effect of the Treasure trapdoor, the yellow die shows the bell face, you may wake your Familiar but do not receive the Gold coins token.
The Final Confrontation
The first player to defeat the Big Bad wins the game.
To do so, you must:
- Reach the space at the top of the tower, either through the effect of the Secret Passage trapdoor or by the staircase on one side of the tower (see the example in the source booklet). Place your Character pawn on the space, ready to begin the confrontation.
- Draw the first Big Bad card from the stack without showing it to the other players. It indicates an Object that the player must possess on their Character board to win this first round.
- If the player has that Object, they return it to the supply and place the Big Bad card, face up, to the right of their Character board. They continue the confrontation by reading the next card (even if they have no token matching the Objects needed to defeat the creature).
- The first player to place a third Big Bad card to the right of their Character board wins the game by chasing the Big Bad from the 1000-Mirror Tower!
- If the player does not have the Object requested, they are immediately thrown out of the castle by the Big Bad! Their Character pawn is placed on one of the spaces at the castle entrance. However, the Big Bad cards they have already won stay in place to the right of their Character board. When they return to the top of the tower, the player continues the confrontation to finish the job. The unresolved Big Bad card is returned to the top of the stack, face down, without the other players seeing it. The game continues, and it is the next player's turn, clockwise.
Example from the booklet: the Character pawn needs at least a result of 2 to reach the top of the tower (a result higher than 2 also allows it). The Big Bad card shown in the example indicates a sword! That is convenient, since the adventurer has two. Return one of the two Sword tokens to the supply, place the Big Bad card to the right of the Character board, and continue the confrontation!
Note: the booklet says the Big Bad cards are placed "with the Big Bad side visible" in setup. The confrontation rules require the first card to be drawn without being shown to the other players, so the stack must be kept face down; the setup wording is transcribed as printed.
Grande Aventure Mode
For a longer adventure, play the Grande Aventure mode, in which you chain the five adventures together in any order you like.
At the end of each adventure, set aside:
- the Big Bad cards you have won, proving your bravery;
- the Object tokens representing silver or gold coins. This is your treasure!
Once the fifth and last adventure is completed, count the points:
- 1 Silver coins token = 1 point
- 1 Gold coins token = 2 points
- 1 Big Bad card Sheuloub / Elvys / Babakazoo = 2 points
- 1 Big Bad card Michel / Smok = 3 points
The player with the most points wins the Grande Aventure mode. In case of a tie, all tied players win.