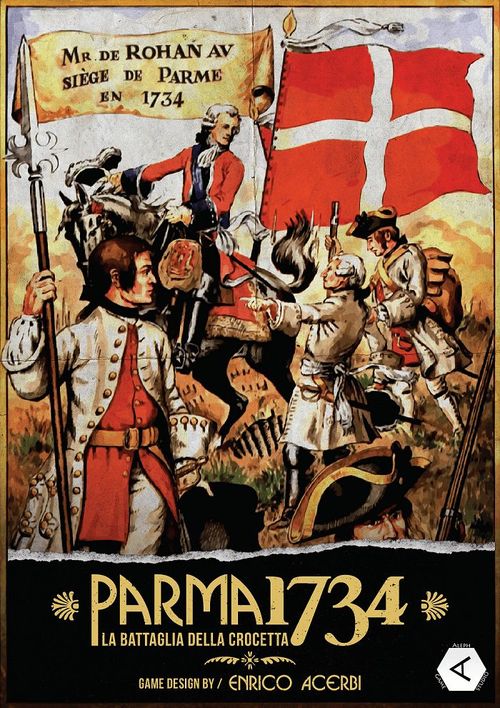
Parma 1734
Parma 1734 Rulebook
Table of Contents
Table of Contents
- 2.0 Components
- 3.0 Game Setup
- 4.0 Sequence of Play
- 5.0 Facing and Control Zones
- 6.0 Terrains
- 7.0 Stacking
- 8.0 Command
- 9.0 Initiative and Activations
- 10.0 Movement
- 11.0 Formations
- 12.0 Discipline and Morale
- 13.0 Unit Recovery
- 14.0 Combat
- 15.0 Cavalry
- 16.0 Victory Conditions
- 17.0 Scenarios
- Bibliography
- Historical Notes
2.0 Components
Inside the box you will find:
- 1 55x80 cm game map
- 351 17 mm counters, 3 sheets
- 2 Player aids
- 6 Scenario Cards
- 1 10-sided die
- 1 Rulebook
2.1 Game Map and Scale
Each hex on the map, from side to side, is approximately 75 meters. Each hex is numbered with a 4-digit code used to place each sides' units before the game (see Scenario Cards).
An infantry counter represents a battalion or 5 grenadier companies (3 combat steps per battalion, where one step represents 200-250 men). A cavalry counter (including dragoons, a kind of mounted infantry) represents 2-3 squadrons (1 combat step per squadron of 130-140 men). An artillery counter usually has 2 Combat steps, each representing 3 guns.
2.2 Game Tracks
Three game tracks are printed on the map, which players will use and consult during the game.
2.2.1 Turn Record Track (TRC). This track is used to keep track of the number of rounds played and when the game will end. Each turn represents 1 hour of real time and the full battle is played over 12 turns.
2.2.2 Wing Priority Tracks. These tracks, present on the two opposite sides of the map, serve to indicate the priority that the player will give to the activation of the Wings of his own deployment (see 8.3).
2.2.3 Army Morale Track. These tracks, on the two opposite sides of the map, keep track of the overall morale of the two armies (see 12.1).
2.3 Counters
The game counters are divided into 4 types:
- Infantry and Cavalry (combat units)
- Artillery batteries
- Leaders
- Markers
The image indicates the branch of the army they belong to (infantry, cavalry, artillery or command). Many units have a full strength side and a reduced strength side, indicated with a gray / white band and a Discipline value written in red.
At the top of each unit there is a band to indicate the front of the unit.
In addition, some units have symbols to help better identify their type.
2.3.1 Infantry and Cavalry. These counters represent the military units of the two sides; their nationality is identified by the background colors of each piece:
- Austria: pale yellow
- Piedmont: blue
- France: gray
On them, in addition to the unit type, 4 numbers are represented, which represent a unit's Discipline, Movement Capacity, Shock Combat Bonus and Regimental Breaking Point:
- Discipline
- Shock Combat Bonus
- Regimental Breaking Point
- Movement Allowance
- Unit ID
Their enemies, the Imperial Austrians (called Kaiserlich), had large battalions of 730-800 men and many had two companies of 50-man Grenadiers. The Austrian cavalry squadrons had 150 men (horses).
All three armies usually detached Grenadiers in special units for use in the First Lines.
The Cavalry is divided into types shown by the symbol it presents on the counter, while the Infantry counters highlight the Grenadiers as a particular unit type:
- Heavy Cavalry (cavalry)
- Cuirassiers (cavalry)
- Dragoon (cavalry/infantry)
- Hussars (light cavalry)
- Grenadiers (infantry)
2.3.2 Artillery batteries. Field artillery is represented by battery counters. Each unit has two Combat steps and can fire at an effective range of 5 hexes. The Discipline Rating of the batteries indicates, above all, the level of training of the gunners and is important to allow the second shot per turn through the Fire Check (see 14.1.5).
Historical note. In 1734 a French battalion numbered about 500-600 men. Until 1740 they would deploy in four ranks or rows of units (like all the other armies in this game). From 1693 the French battalions had a company of Grenadiers (45 soldiers) and a variable number of fusilier companies (initially 12 each with 40 men). From each of these they took some soldiers to create a "picket" company, with reconnaissance duties (they become a permanent company during the Seven Years War (1756-1763) with the name of Compagnie des Chasseurs). The French cavalry squadrons had 140 horses.
A Piedmontese (Savoy) battalion was slightly larger (about 640 men). In 1747 the regular regiments all had two battalions. Each battalion had 9 fusilier companies and 1 grenadier company. The Piedmontese cavalry squadrons numbered 120-140 men (horses).
2.3.3 Leader. A Leader is represented on the counter by his name, Command designation, Command Proficiency, and Command Range. Each commander has a background color that represents his nationality. Leaders are of two types:
- Commanders
- Subordinates
Commanders can lead Wings while Subordinates have minor duties within their designated Wing. On the reverse the Leaders have their Staff symbol (this indicates that a particular Commander is out of the game or "unsuitable for Leadership"). On the reverse, the Subordinates counters have the flag of their nation and their designated Wing.
Subordinates are useful leaders for:
- extending the Chain of Command;
- rallying the troops of their Wing.
Subordinates are also important for Morale (see 12.1.2) and affect the victory conditions in some scenarios.
2.3.4 Markers. Markers are placed on units on the map to indicate what state they are in. In these rules, markers are shown with the paragraphs for their use.
Indicators, on the other hand, represent some of the values on a unit's counter and, when positioned above them, change the value in the corresponding position on the unit.
The armies of the period fought in several lines. Behind the First Line (the most advanced) there were often 2nd, 3rd and 4th lines serving as a support or Reserve. Within these Lines the responsibility for discipline in battle was assigned to the Regiments and relied on the charisma of their Colonels.
In Parma 1734 all the infantry, cavalry and artillery units are grouped into these "divisions" (Wings), each under the same command, identified by the color of their upper band. Generally there were: a Central Wing, a Right Wing and a Left Wing and often a Reserve.
In the game, this subdivision is identified with a color of the upper band of each combat unit. This identification is the same for both sides:
- Centre: red
- Right Wing: light blue
- Left Wing: yellow
- Reserve: purple
Each Wing operates under a Commander and related Subordinate.
2.4 Important Game Concepts
2.4.1 Combat losses. Following combat losses or desertions, units may lose combat steps. This is represented by the following procedure:
- the first step lost is indicated by flipping the counter to its reverse side (where there is a white band and the Discipline value is written in red);
- the second step lost is indicated by placing a Disorganization marker on the counter.
2.4.2 Regimental Breaking Point. In Parma 1734 each regiment has a Regimental Breaking Point (number top right). This value is indicated on the counter and indicates the cohesion of the troops of the Regiment and the skill of their Colonel. The higher the value, the better trained the troops and the more skilled their Colonel. At certain moments in the game, players will have to Check the Breaking Point to avoid panic and routing of units.
Note: this emergency check is different from the Discipline Check that occurs during the maneuvering phases.
2.5 Command Wings
In 1734 armies moved and fought in large organized units called Wings. Before the battle, the Wings were deployed on the front line (facing the enemy), the most advanced being called the 1st Line. They would have a 2nd line etc. behind them. (There were also often 3rd and 4th lines serving as a support or Reserve.)
3.0 Game Setup
To prepare for a game of Parma 1734, follow the following procedure:
- Place the map in the center of the table;
- put the Turn marker on the relevant Track on the map on the space indicated by the Scenario you have chosen to play;
- place take the relevant Scenario Cards for the chosen Scenario next to the game map;
- prepare all the units as indicated in the Scenario Cards;
- place the Initial Set-up units on the relevant hexes of the map, identified by the 4-digit code; place the Reinforcements on the Scenario Card: they will come into play in the turn and on the hex indicated;
- distribute the Command Priority counters to the players and place the Army Morale counters, if required by the scenario;
- start playing.
4.0 Sequence of Play
In the Parma 1734 game sequence players alternate play by activating their Wings. The game develops over several Game Rounds. Each Game Turn consists of sequenced phases. During some Phases a player will gain Initiative, becoming the Initiative Player, while his opponent will be the Reactive Player.
The Scenario rules indicate at what point in the Sequence of Play the game begins and how victory is determined.
1. Command Phase. During this phase the players organize their army. Both players:
- simultaneously assign their Priorities of Order to the Army for the current turn;
- check the status of the Troop Command;
- place reinforcements as indicated in the Scenario Cards.
2. Opening Artillery Fire Phase. In this phase the players use their artillery batteries. Players take turns firing one battery at a time. The rules of the Scenario usually indicate who is the first player of the phase, otherwise each side rolls a die and whoever gets the highest result will be the first. In the event of a tie, both players roll the die until one of the two gets a higher result than the other. The winner will become the Active player and will activate his first artillery battery.
3. Initiative Phase. In this phase is the players determine who will be the Initiative Player. The players each roll a dice, the player with highest result die roll is the Initiative Player for the current turn, while the other will be the Reactive Player. In the event of a tie, both players roll the die until one of the two gets a higher result than the other.
4. Wing Impulse Phase. In this phase, players take turns activating their Wings, based on how they distributed the Order Priorities during Phase 1.
This is the sequence that is carried out within this phase:
a) Impulse of the Initiative Player (1st action): the Initiative Player reveals and activates his own Priority Wing in this sequence:
- Movement of units
- Activated units Fire Combat
- Activated units Shock Combat
- Mandatory moves caused by Shock Combat
b) Reactive Player Impulse (1st action): the Reactive Player reveals and activates their Priority Wing in this sequence:
- Movement of units
- Activated units Fire Combat
- Activated units Shock Combat
- Mandatory moves caused by Shock Combat
c) Other impulses: repeat the same sequence as the previous impulses for the other Wings, in order of priority assigned:
- Initiative Player's Impulse (2nd flanking action)
- Reactive Player Impulse (2nd flanking action)
- Initiative Player's Impulse (3rd flanking action)
- Reactive Player Impulse (3rd flanking action)
- Impulse of the Initiative Player (support)
- Reactive Player Impulse (support)
5. End of Turn Phase. During this phase, end of turn checks are performed. In particular, this sequence must be respected, starting with the Initiative player:
- Check the Army morale (see 12.0);
- Rally of units (see 13.0);
- Remove 1st Shoot/1st Volley/Fired markers.
Finally, the Game Turn Marker is advanced.
5.0 Facing and Control Zones
In Parma 1734 combat units have a Zone of Control for Fire (FZoC).
5.1 Fire Zones
5.1.1 Fire ZoC (FZoC). All units have TWO frontal hexes which they control with the musket. These areas do not stop any movement but they do determine the possibility of conducting fire or shock attacks. Units may fire and attack only through their FZoC hexes regardless of the front of the unit being attacked.
5.1.2 Extended FZoC. Artillery and Line infantry units (see 14.1.6 and 14.2.6) may have more than 1 FZoC hex. This extension is called the Arc of Fire and its range depends on the unit's weapons and formation.
5.1.3 Movement and FZoC. Movement of a unit is not inhibited by the presence of enemy units. There is no restriction by FZoC on movements.
5.1.4 Retreats. A unit that is forced to retreat into an enemy FZoC must check its Discipline in order not to suffer an additional hit, in addition to those resulting from combat.
5.1.5 Command Range. Command range can pass through enemy FZoCs.
5.1.6 Special FZoC. Routed units have no FZoC. A Staff unit has no FZoC or flank or rear.
5.2 Facing
5.2.1 Towards the vertex. A unit is set up with its front towards a vertex of a hex. The two hexes touched by the front are referred to as the unit's "frontal hexes" (see also FZoC). The two hexes opposite the front of the unit are referred to as "rear hexes". The two remaining hexes, placed on the sides of the unit, are called "flank hexes".
5.2.2 Total facing. Some units may have a full facing regardless of the direction the unit is facing in the hex it occupies:
- routed units have no FZoC and each of the 6 surrounding hexes is defined as "rear";
- Staff do not have FZoCs or flanks or rears.
5.2.3 Enfilade Fire. A unit that suffers fire through one of its "flank hexes" or through one of its "rear hexes" is subject to Enfilade Fire (see 14.2.3).
6.0 Terrains
The terrain types printed on the map represent the physical features of the battlefield such as farm houses, roads, streams, woods, and so on. These terrain features have several effects on the movement and combat capability of units which are detailed in the following cases.
6.1 Terrain Effects
Terrain effects arise from the type of terrain present in the hex and also the various factors along the hexside.
6.1.1 Terrain and hexsides. The terrain type is indicated on each hex (open, cultivated, wood, orchard, vineyard, and farmhouse). The factors along the sides of the hex never define the hexes' terrain, but they do modify some aspects of unit movement and combat.
6.1.2 Hexsides. There are 3 distinct types of hexsides characterized by different graphic symbols:
- soft obstacles such as steams/canals and sandy banks;
- hard obstacles such as stone walls;
- impassable obstacles such as city walls.
6.1.3 Movement. A unit must spend additional movement points to cross obstacles on a hexside. This cost is added to the movement point cost required to enter the terrain hex after crossing the hexside.
Regardless of the formation, no unit can cross an impassable hex such as the walls of the Citadel of Parma.
Movement that takes place during any Phase other than the Action Phase (for example retreats) does not require the expenditure of movement points and is therefore exempt from the additional movement point penalties imposed by the terrain.
6.2 Special Terrain
6.2.1 Parma City Walls. The Citadel of Parma is not considered for the purposes of the game as it is not possible to cross its walls.
6.2.2 Farmhouses. The unfortified agricultural farmhouses (in Italian "Cascine") are not obstacles to movement. They also allow Line formations.
6.2.3 Woods, Orchards and Vineyards. The Cornocchio woods are sparse patches while the orchards and vineyards represent cultivated areas. They are not obstacles but do not allow Line Formations.
6.2.4 Streams/Canals. A unit can cross a watercourse hexside with a road movement (bridge) or with a ford movement. Watercourse hexsides that are not crossed by a road (bridge) are considered to be hexsides with light obstacles.
Wading a stream with sandy banks requires a higher expenditure of Movement Points.
The artillery cannot wade the waterways, with or without sandy banks with the exception of the two bridges between 2711-2712 and 4214-4215.
6.3 Terrain and Loss of Formation
A unit can lose its Formation if it enters certain terrains such as orchards, vineyards, cultivated fields and woods, as indicated in the Terrain Effects Chart on the Help Sheet.
6.4 Terrains and Line of Sight (LoS)
A unit's ability to see another unit on the map depends on the type of terrain that is between the hex occupied by the sighting unit and the hex occupied by the unit you are attempting to observe. To determine if a unit can observe another unit, Players must carefully follow the entire procedure described below.
6.4.1 Procedure. To determine Line of Sight, follow these steps in order:
a) Determine the Line of Sight between the sighting unit and the unit you are trying to observe. This is achieved by tracing a perfectly straight line drawn from the center of the hex occupied by the sighting unit to the center of the hex occupied by the unit being observed.
b) Determine if the Line of Sight is blocked (preventing observation) or free (allowing observation). Once Line of Sight is established between the two units, the Player must determine whether any hex crossed by this Line of Sight contains blocking terrain. Terrain bearing the symbol shown alongside on the Terrain Effects Table interrupts any Line of Sight (LoS) that is drawn across the hex. When tracing a LoS, terrain present in the hex of the sighting unit and the hex of the observed unit are never considered.
Blocking terrain include woods, farmhouses, orchards and vineyards; cultivated fields. Single trees along roads, and streams never block a LoS. Single trees found along roads and waterways are simply graphic objects that do not block a LoS.
6.4.2 Doubts. When in doubt, players must agree on the most logical alternative. If this is impossible, you choose by rolling a die.
6.4.3 Hexsides. In a case where a LoS passes directly along a hexside between a hex that blocks the LoS and a hex that does not block it, the LoS is considered blocked.
Example (traceable LoS): the line drawn from the center of the artillery hex to the center of the infantry hex does not meet any obstacles and therefore the artillery can see the infantry and then fire at them.
Example (blocked LoS): the line traced from the center of the artillery unit's hex to the center of the target hex goes through the hex with the farmhouse (2015) and therefore the artillery unit cannot see the infantry unit.
Example: the line traced between the centers of the hexes runs along the side of hex 2219, an orchard which blocks a LoS. Although Hex 2319 would not block a LoS, it is considered however that the artillery unit does not see the infantry unit due to the LoS being blocked.
6.5 Terrain and Combat
6.5.1 Ranged combat. A unit can never fire at a target unit it cannot observe. A unit is always able to fire at adjacent targets.
For the purposes of Ranged Combat, all Hard and Soft Obstacle hexes can protect a target unit located beyond the hexside.
If a unit can be considered under both Soft and Hard Cover, it is simply considered to be under Hard Cover.
6.5.2 Shock Combat. Melee combat can never be performed across an impassable hexside.
6.5.3 Cavalry Charge. A cavalry unit that cannot observe enemy troops within its Charge Zone (see 15.2) cannot charge those units.
7.0 Stacking
Placing more than one unit in a single hex is called "stacking".
7.1 Stacking Limits
7.1.1 Units. The total number of combat units that can be stacked in a single hex at any given time is limited based on unit types. The maximum stacking limits are prescribed as follows:
a) each hex may be occupied by a maximum of one infantry battalion; in addition it is possible to have a cavalry squadron or an artillery battery; b) two units of Grenadiers are considered to be one infantry battalion; c) Mounted Dragoons dismounting are still considered a cavalry squadron due to stacking limits and therefore can occupy the same hex as an infantry battalion; d) leaders never count in the stacking limits; e) all the pieces in the same hex must be in the same formation and have the same facing.
7.1.2 Overstacking. A unit may never end its movement in a hex in violation of the Stacking limit.
7.1.3 Leaders and stacking. Commanders, Subordinates and Staff never count towards the stacking limit. An unlimited number of leaders can be stacked in a given hex.
7.1.4 Markers. Markers that do not represent combat units do not count towards the stacking limit.
7.2 Formations and Stacking
7.2.1 Grenadiers. Grenadiers stacked in the same hex are not considered a Line Formation.
7.2.2 Dismounted Dragoons. These always act as an unformed unit.
7.3 Stacking and Ranged Combat
7.3.1 Unit on top. Only the top combat unit in a hex can engage in ranged combat. Units stacked under another combat unit may never fire.
7.3.2 Taking hits. Adverse results from infantry or artillery fire are inflicted FIRST to the top combat unit in the target hex.
7.3.3 Leader. If a Leader is at the top of a hex, the topmost combat unit stacked under the Leader can fire and take hits from the result of the ranged combat in that hex. Leaders never inhibit the outcome of ranged combat in the hex.
7.4 Stacking and Shock Combat. Units grouped in the same hex defend themselves in Shock Combat as a single indivisible group.
8.0 Command
Armies have Commanders and Subordinates, more generically referred to as Leaders. Each leader has a command range, printed on his marker, which represents the number of hexes (not Movement Points) he can trace command to his Wing's combat units.
8.0.1 Unit Command status. A combat unit will always be in one of two states:
- In Command, or
- Out of Command.
8.0.2 Command Range. When tracing a leader's command range, the hex the leader is in is never counted, while the hex occupied by the combat unit is counted. A leader's combat units are In Command if they occupy a hex within that leader's range.
Example: In the following image we see that Mercy has a command range of 6 hexes. This means that the infantry unit in 3619 is In Command as it is only 3 hexes from the leader. The unit of Grenadiers in 3614, on the other hand, is Out of Command since its distance from Mercy is 7 hexes, which is greater than his command range.
8.0.3 Leaders. A leader can only issue orders for those units that are subordinate to him, that is, that belong to his own Wing.
8.0.4 Out of Command Units. An Out of Command unit will NOT drastically reduce its combat and move abilities, provided it activates after a successful Discipline Check. The command status of a unit remains effective until the next Command Phase. Therefore, a unit can be In Command or Out of Command for an entire game turn.
8.1 Commanders and Subordinates
8.1.1 Commanders. The Commanders of the Wings are always In Command. They exercise FZoC but cannot act as attackers.
Example: taken from the previous example, the presence of the Subordinate in hex 3717 now puts the Grenadiers unit in 3614 In Command. The unit is located within the 4 hexes of the Subordinate's command range, which in turn is within the 6 hexes of the Commander's command range.
8.1.2 Subordinates. Subordinates are In Command, regardless of their rank, if they are within the command range of their respective Wing Commander. They do not exercise FZoC and cannot act as attackers.
Subordinates also have their own command range, which is used to extend the Commander's chain of command to combat units or a Formation's Main Unit.
Subordinates carry the national flag of the Wing, which counts towards victory. Units stacked with a subordinate from their side are automatically In Command if the leader is In Command.
Subordinate leaders may operate out of command but only to rally troops (see 13.0).
8.1.3 Leaders out of play. Wounded, captured, or eliminated leaders maintain minimal leadership ability by flipping their counter to their Staff (reverse) side, which generally has lower values.
8.1.4 Leader Loss. Whenever a stacked unit with a leader suffers an adverse combat result (hit or retreat) the player who rolled the hit rolls another die. If a 0 is rolled, the leader leaves the scene and is replaced by his Staff. If the leader is a Subordinate, the result of 0 indicates the capture of the flag.
8.2 Chain of Command
8.2.1 Wing Commanders. Wing Commanders extend their command range to Subordinates, who extend their command range to units. They can also directly command any unit / formation in range.
All units that are part of an unbroken Line are considered In Command if at least one regiment of the Line is within a leader's Chain of Command.
8.2.3 Columns. A Column with a leader stacked with it is considered to be In Command. Out of Command Columns can always march towards their Wing Commander, as if they had received orders to do so, without having to perform any Discipline Check (see 8.0.4).
8.2.4 Impassable hexes. A chain of Command cannot be traced through impassable terrain or enemy combat units.
8.2.5 Enemy FZoC. A chain of Command can be traced through enemy Fire Zones and through any other type of terrain.
8.2.6 Units In Command. Units In Command can be activated normally for movement and combat. Artillery units are always In Command.
8.2.7 Units Out of Command. A unit Out of Command suffers the following effects as long as it maintains this state:
a) cannot be moved jointly; it must pass a Discipline Check taken when its Wing activates; b) if the Discipline Check is successful, the unit can move using all its movement capacity, execute defensive fire and perform shock combat, but cannot attack with ranged fire; c) if the Discipline Check fails, the unit can move 1 hex, it can carry out defensive fire, but it cannot engage enemy units (ie it cannot enter an FZoC) or perform ranged fire; d) if attacked, the unit takes an automatic HIT before the combat is resolved; e) a reduced unit Out of Command, if attacked, become Disorganized.
8.3 Command Priority
Each player, at the start of the turn, must prioritize their Wings for future actions. They must assign the Main attack to one Wing (which activates first), then the flank supports (2nd and 3rd Priority) and the Reserve or secondary actions (the 4th in the chosen order). To do this, place the four Wings tokens on the Track at the side of the map with the wording "Priority" facing up in order to hide the order of priority from the opponent.
This order will be followed during the Action Phase, so each Wing is activated in the chosen sequence as 1st, 2nd, 3rd and 4th activation.
9.0 Initiative and Activations
During the Initiative Phase the players roll a die. The player who rolls the highest number wins (in case of a tie, both roll). The player with the initiative will move first during the next Action Phase with their 1st Priority Wing, followed by the 1st Priority Wing of the reactive player (the one who lost the initiative roll).
9.0.1 Units Out of Command. Upon activation of the Wing, the Out of Command Units of that Wing must perform a Discipline Check (see 8.2.7) to be able to move and shoot with some limitations.
10.0 Movement
The various combat units, artillery units and leaders have a MP (movement point) allowance value on their counter. Each terrain type has an MP cost to enter and each obstacle hexside has an MP cost to cross. The number of MPs that a unit can spend during a movement can never exceed its total movement capacity.
A unit does not have to expend its full movement allowance.
Units always move into frontal hexes and may, by expending MP, change their facing to thereby change their direction of movement.
10.0.1 Terrain Effects Chart. This chart lists each terrain type and hexside obstacles, along with their cost in MP, movement, training and LoS restrictions. Various types of units may have different restrictions depending on terrain type or hexside.
10.0.2 Minimum movement. A unit can always move one hex during its movement phase even if the cost to enter the hex exceeds its movement allowance. It is never allowed to cross hex sides or enter impassable terrain.
10.0.3 Enemy Units. A unit may never enter a hex occupied by an enemy unit during its movement, with the exception of cavalry charges (see 15.2).
10.0.4 Allied units. A unit can always enter a hex occupied by a unit of its own side without any additional MP cost. It can stop in the hex if it respects the Stacking limits (see 7.1).
10.0.5 Enemy FZoCs. Movement of a unit is never inhibited by FZoCs of enemy units. There is no restriction by FZoCs on movement.
10.1 Free Movement (Eclaireurs)
Single units may move in free movement when activated. They are considered unformed units and move using MP costs provided by land. A unit that exits from a Line formation will move in this way until it decides to move in Column or to return to form a Line.
10.1.1 Command. Both In Command and out of command units can use free movement.
10.1.2 Arc of Fire. Units out of Formation may only fire into FZoC frontal hexes.
10.1.3 Artillery. Artillery batteries that move using their MPs do not fire during their activation.
10.1.4 Movement allowance. Free-moving units have their normal MP movement allowance.
10.1.5 Enter in free movement. When a unit stops being in Line or Column it is automatically considered to be in free movement.
During the activation of units, they act in free movement if they meet the following criteria:
a) the unit must not be in a Rout; b) the unit must not exceed the Stacking Limits (see 7.1) per hex in each hex it enters during movement, in combination with other units that already occupy the hex.
10.1.6 Facing. Units using free movement do not spend additional MP to change facing.
10.2 Column Movement
Column movement occurs along roads and paths and is represented by a continuous chain of adjacent units with a maximum of one unit per hex. Units that enter hexes along a road pay the normal cost of the terrain type of the hex plus any hexside cost. In column movement, you can use the roads and paths to move using fewer MP.
10.2.1 Leader. If there is a leader in the first hex of a column, all the units forming the column are considered to be In Command range as long as the column continuity condition exists when checking the Command status of the units. An Out of Command column must make a movement towards a leader of its Wing as if it had been ordered to do so, in order to reconstitute the adjacency of the column and then return to command. If the column In Command were to change formation, the part out of command still has the obligation to move towards the leader in order to re-enter command.
10.2.2 Fire. Only the first unit in the column can fire. If a column is attacked on its flank or rear, it must first arrange itself in Line Formation to be able to fire too.
Note: According to Clausewitz, the most suitable time to attack the enemy was when he passed, very slowly, from column to line. No game can simulate this because you are either in line or in column. This rule is an attempt to simulate this difficulty.
10.2.3 Limbered artillery. Limbered artillery can never fire, it must first stop moving in the column.
10.2.4 Movement allowance. Units and leaders have a +2MP movement allowance.
10.2.5 Requirements. A unit or a stack of units can enter column movement when activated. To be eligible, the unit (or the stack) must meet the following criteria:
a) the unit must not be Disorganized or Routed; b) the unit begins and ends the movement along a road and during all its movement it moves along that road; c) the unit does not violate the stacking limits (see 7.1) for each hex it moves into, in combination with the other units that are already occupying the hex.
10.2.6 Column orientation. A unit moving in column does not spend MP to change its facing. The unit always moves in the frontal hexes.
10.2.7 Reinforcements. Reinforcements always enter the map in column movement.
10.3 Line Maneuvering Movement
Regular Infantry units and Cavalry may be deployed in Lines. Units placed in Lines (see 11.1.1) may only make one Maneuver move when activated. Although the Lines will be detailed in paragraph 11.0, the following are the general rules for this type of Training.
10.3.1 Command. Activated units placed in Line must be In Command to maneuver or have passed the Discipline check if Out of Command.
10.3.2 Fire arc. In Line units can fire within a fire arc of 2 hexes.
10.3.3 Movement allowance. Lines can maneuver with a movement allowance of 2 hexes (not MP) moving forward or 1 hex (not MP) moving backward, without changing facing. The hexes that the formation units enter must allow the Line, otherwise all the units lose their Formation and become units out of Formation therefore their movement stops. During the movement, if an unit of the Line formation crosses a soft or hard obstacle, the movement of the Line is limited to only 1 hex.
Some movements, such as the line pivot, do not require the expense of additional MP, but this movement must be done in place of the regular movement. A unit cannot either pivot or move forward or backward in the same activation.
10.3.5 Entering Line Formation. When all the units of a regiment are in adjacent hexes and arranged, the player who controls them places the Line marker on the two end units of the Line (the first and last in the row).
When units are activated, they may form a Line if they meet the following criteria:
a) no unit may be Routed or Disorganized; b) the units must not exceed the Stacking Limits (see 7.1) per hex in each hex they enters during movement, in combination with other units that already occupy the hex; c) to be able to Fire at the end of the movement the Formation must not be Disorganized.
10.3.6 Orientation. A Line can only change facing if it uses a Line Pin (see 11.1.5).
10.4 Combat Movements
Pas de Charge, Cavalry Charges, retreats and routes are combat movements and are described in subsequent paragraphs.
11.0 Formations
In the time of the game Parma 1734 the most widespread formation used at the time was the Line. Column movements and free movements are only movement modes and not a real tactical formation.
11.0.1 Units out of Formation. All units are either in Formation (Line or Column) or out of Formation. Staff, deployed artillery, infantry and cavalry in urban or wooded areas, and routed units are all considered out of Formation and always use free movement and special combat rules.
11.1 Infantry Formations
In general, to change from a Line formation to a Column formation or vice versa, the player simply declares which formation the unit is in at the time of its activation, placing the appropriate indicator above it. A unit with no formation markers is in free movement (see 10.1).
11.1.1 Line Formation. Infantry Lines are regimental formations and are formed by units of the same regiment (at least two).
To form part of a Line, a unit must meet the following criteria:
- cannot be Disorganized or Routed;
- must be adjacent to another unit of the same regiment (the units must therefore be arranged on each other's sides, not in the rear).
Reduced battalions, if they meet the above criteria, can be placed in Line.
11.1.2 Composition. Two or more regiments arranged with one free hex interposed between them form a so-called Line.
To be in a Line, the formations that compose it must have ONE free hex between each regiment.
Lines can fire with an arc of fire extended to 2 hexes.
A minimum of 2 regiments, for a total of up to 6 units, can form a single Line. All units forming a Line must belong to the same Wing.
11.1.3 Parallel lines. A Line facing enemy units is referred to as the 1st Line. A player can place other lines behind this line. This is important to support 1st Line losses during battle. You can then have a 2nd Line behind the first, a 3rd Line behind the second and so on.
Between the various lines there must be at least two free hexes.
11.1.4 Formation and Command. Units can change their tactical formation at no MP cost when they are moving. Units may begin their move in free movement and deploy into Line formation in the same action impulse. As soon as the Line is formed the units cannot move anymore. The two different types of movement (free and line) cannot be combined.
If, during the movement, units in Line enter certain terrain they automatically lose the Line formation – see the terrain chart for details.
For a Line to be In Command, at least one of its units must be in command range of a leader. The player designates a main unit from among all the units in command of the Line, to be the one that transfers the command to the entire line, even if some units would not be in command range of the leader.
The main unit of a Line formation has the following characteristics:
- is the first unit to take a hit if the Line suffers a ranged attack (including artillery);
- is the reference unit when a Discipline check or Regimental Breaking Point check is required;
- it will be the pivot unit for changing the orientation of the line.
Only units In Command may enter and act in Line formation.
11.1.5 Pivoting the Line. Since the units forming a Line must have other units in their flank hexes, no single component of the line can change their facing, without risking losing their formation with all other units.
A player can make the entire line change facing, by rotating all the units that comprise it and thus preserving the restriction of the units present in each other's flank hexes. Similarly, a player can spin an entire line by reversing the front with the back (turning the counter 180 °). However, because the pivot procedure can be a risky maneuver, the following conditions must be met:
- the Line must have its main unit In Command;
- hexes in which units will move to change facing the Line must be free of units, both allied and enemy.
Over-stacking is not permitted during a pivot maneuver.
Reversing the entire line is instead always possible, since the units do not move but remain in place.
The pivot unit of a line must always be a unit that has a side free from other units. This is also the unit that performs the Discipline check whether the pivot maneuver is successful or not.
For the reverse instead, the unit that makes the check is the main unit of the Line (see 11.1.4). The check is not performed on Discipline but on the Regimental Breaking Point.
Example: The Line shown in the following image wants to attempt a Line Pin clockwise using the circled unit as a "pivot unit". The unit's Discipline value is 3. The player rolls the die and rolls a 2, enough to successfully perform the maneuver. The final configuration of the Line is shown in the following image.
11.1.6 Failing the check. If the unit that performs the pivot or reversal maneuver fails the check, the following occurs:
- Pivoting: the unit that failed the check changes facing as if the maneuver was successful, but all other units do not change their facing. Some units may lose formation due to the forced change of orientation of the main unit.
- Reverse: the main unit that failed the check reverses its orientation and, if it was at reduced strength, becomes Disorganized, thus suffering an automatic hit (the player must mark it on the Army Morale track). The rest of the Line remains in place. Some units may lose formation due to the forced change of orientation of the main unit.
11.1.7 Emergency Change of orientation. A unit or a Line that receives fire from enemy units, instead of carrying out Defensive Fire, can make a Line Pivot, especially if they want to avoid further attacks on their flanks or rear. This maneuver can also be made by Out of Command lines. To do this maneuver, a Regimental Breaking Point check must be passed with the single unit or with the main unit of the Line.
Example: Let's consider the following game situation. The Grenadiers Line just fired at the French Infantry Line without causing any damage. Knowing that the unit in 1407 has yet to fire and is able to carry out an enfilade fire, the French player forgoes Defensive Fire and attempts an emergency change of orientation to avoid an unfavorable situation and then perhaps be able to counterattack the Grenadiers Line on the flank.
The unit in 1307 is defined as the main and pivot unit and therefore makes the Regimental Breaking Point check. The player rolls a 4 and is thus able to successfully perform the maneuver, thus resulting in the following situation:
11.1.8 Terrain. Please note that the Line formation is automatically lost if a unit enters certain terrain. Some units may also lose formation due to the forced change of orientation of the main unit.
11.1.9 Call for Change. Line changes, like retreats, are a result of combat and not a voluntary choice. In this case the Line suffering this result is replaced by the Line behind it. This movement is mandatory and has no MP cost.
To do this maneuver, however, the main unit of first Line must pass a Discipline check. If the unit fails the check or if there is no second line behind the affected line then the Line(s) remain in position.
11.2 Cavalry Formations
Lines of cavalry follow the same rules as those for infantry (see 11.1) with the exception that cavalry do not fire. They can move, maneuver, pivot like infantry, but they only attack through a charge.
Exception: Dragoons can fire but only if they are dismounted and are not carrying out a Cavalry Charge.
11.2.1 Types of cavalry. Cavalry in Parma 1734 are divided into 4 types, based on the icon on their counter:
- Heavy cavalry
- Cuiraissers
- Dragoons
- Ussars
All cavalry without a formation can move in free movement, and they can always attack in melee but never fire.
Dragoons, never attack while mounted, but can fire and engage in shock combat if they are dismounted.
11.2.2 Dismounted dragoons. Place the appropriate counter on the dismounted unit. Dismounted dragoons cannot form Lines.
11.3 Artillery Formations
Limbered artillery batteries are always in Column while positioned batteries are without Formation. A deployed battery may either move 1 hex (not into or through impassable terrain) or fire.
12.0 Discipline and Morale
In Parma 1734 two key principles of the period are reflected by the game mechanics: Discipline and Morale.
While Discipline is the value used for specific unit checks, Morale is associated with the entire army and indicates when, once a certain limit is reached, the army is first demoralized and then retreats, losing the battle.
In addition to these two values, the Regimental Breaking Point shown on each unit counter indicates the competence of the officers of that regiment and is used for some checks.
12.1 Army Morale Track
The army morale track on the game map indicates the total army morale which will fall as units are killed or routed.
Each scenario provides the starting Morale values of the Armies, along with their:
- Demoralization value: if morale falls to 50% of the initial morale value, various negative effects occur on the units of your army;
- Withdrawal Value: if morale falls to 10% of the initial morale value, then that army withdraws with a general order and loses the battle.
Counters are provided to indicate these two values for each army and are placed near their respective morale tracks, as a reminder.
12.1.1 Demoralization of the Army. When demoralized an army suffers the following penalties:
- each unit sees its movement capacity halved (by default); movement allowances that use hexes do not suffer this malus;
- leaders lose 1 point of command range;
- all Discipline checks suffer a +2 modifier to the die roll result.
12.1.2 Morale Losses. The conditions causing loss of army morale are summarized in the following table:
Morale Losses
| Condition | Morale Loss |
|---|---|
| For every hit taken | -1* |
| For every eliminated leader | -5 |
| For every lost flag | -7 |
| First Routed unit (once per player) | -10 |
* can be recovered (see 13.0)
12.2 Discipline Check
Discipline checks are made using a (1d10) die. The player rolls the die and modifies the result according to the bonuses and penalties shown below:
Discipline Check Modifiers
| Modifiers | Condition |
|---|---|
| -1 | If the unit is not in the 1st Line |
| +1 | Piedmontese combat unit |
| +2 | If the Army is Demoralized |
The check is passed if the modified result is less than or equal to the Discipline value of the unit.
12.2.1 When to make a Discipline check: all units if they want to activate and are out of Command;
- the main external unit of a Line during a pivot movement;
- artillery batteries and infantry units that want to fire a second time in their turn;
- units retreating into an FZoC that want to avoid stopping in the hex;
- when retreating units would violate the stacking limit in a hex, a check is made to whether they stop in the hex or continue their retreat;
- when a retreating unit wants to be able to retreat normally;
- when a unit in Line wants to make a successful Line Change (see 14.2.8);
- when a 2nd line (or other line behind) must change with the line in front;
- to avoid a reroll on the Fire Table;
- to avoid retreating as a result from the Shock Combat Table.
12.3 Regimental Breaking Point Check
Each regiment has its own Regimental Breaking Point value, which indicates the competence of the regimental officers and the training capacity of the experience of its Colonel. The higher this value, the better the troops are trained and the better the ability of the Colonel. At certain moments in the game the players will be asked to perform a Regimental Breaking Point check to avoid panic and rout.
Regimental Breaking Point checks are performed using a (1d10) die. The check is passed if the die roll result is less than or equal to the unit's Regimental Breaking Point.
12.2.1 When to make a Regimental Breaking Point check (numbered 12.2.1 in the printed rulebook):
- In an attempt to recover the unit to remove a disorganization marker;
- to avoid a rout by disorganized units that have avoided over-stacking;
- when the main unit of a Line wants to make an emergency change of orientation after being shot through a flank or rear;
- when the main unit of a Line is checked so as to change the Line by 180°;
- when light cavalry want to avoid combat before a melee.
13.0 Unit Recovery
During the End of Turn Phase, players may attempt to Recover (remove disorganization markers) their units.
13.1 Recovery by Officers
All Commanders and Subordinates can recover units as long as they are within the leader's command range.
Units with leaders in the same hex automatically remove their Disorganized status.
During the Rally Phase, Disorganized units that are In Command may remove recover as long as they pass a Regimental Breakpoint check, with a roll modifier equal to the leader's Command Proficiency.
13.2 Recovery Procedure
During the Rally Phase, players can remove Disorganization markers from any unit that is not in the FZoC of an enemy unit.
If the marker is removed following a successful recovery check, the orientation of the unit can be changed at will by the player.
If the check fails, the unit keeps the Disorganized marker and cannot change its orientation.
13.3 Disorganized Units
A Disorganized unit remains a functioning unit.
A unit becomes Disorganized when it:
- receives a second hit. The first hit turns the unit to the reduced side, the second hit Disorganizes it;
- violates the stacking limit in the hex into which it withdraws;
- is Routed and stopped by friendly fire.
Note: Dismounted Dragoons act as an infantry battalion. Any hits received in this way are retained even when the dragoons mount their horses again. If they are Disorganized, they remain Disorganized.
Disorganized units cannot:
- carry out offensive fire;
- move differently from free movement;
- enter a Line or Column;
- attempt a pin (if they are already part of a Line when they become Disorganized). They can perform Defensive Fire with a -2 penalty on the die roll.
13.3.1 Never Disorganized. Leaders and artillery batteries never become Disorganized.
13.4 Routed Units
Units can rout, fleeing the clash. Routed formations must move during the movement impulse of the Wing to which they belong, retreating 4 hexes away from the first Line without paying the MP cost of the terrain. Such units can only make the retreat move. The shortest path from their position towards their map edge (the short side of the game map) must be chosen as the retreat path. Units may deviate 1 hex from the retreat path if needed to make contact with a friendly Line and then attempt the Discipline check to remove the Rout marker. Alternatively, if caught in an adjacent hex by friendly cavalry, they can immediately attempt a Regimental Breakpoint check to remove the marker.
If this is not possible, then the retreating units must take a Discipline check: if they pass they remain in contact with the Line that stopped them and become Disorganized, if they fail, they pass through and continue their retreat move.
Routed units may never fire (not even in Defensive Fire) or perform Shock Combat. If they are attacked, they surrender and are eliminated from the game.
13.4.1 Never Rout. Leaders and artillery batteries never become Disorganized. A leader on the stack with a Routing unit never follows it.
13.4.2 Fugitives. Routed units, if they leave the map, are lost and can never be recovered again, but Morale is not decreased in this case.
13.4.3 Stopping a Rout. If a routed unit passes through an FZoC of an allied unit of the same Wing, the allied unit can fire at it to stop it. To do so it must be activated to fire when the Routed allied unit enters one of its FZoC hexes.
If the die result of the roll isn't a hit, the Routed unit stops and becomes Disorganized.
14.0 Combat
Units that are activated during their impulse action can perform Offensive Fire and Shock Combat.
Units that are not In Command of the Wing doing the action impulse can only perform Defensive Fire if they fail their Discipline check, otherwise, if successful, they can also perform Shock Combat. Out of Command units never conduct Offensive Fire.
The artillery batteries are always In Command.
14.0.1 Pas de Charge. Infantry that moving in a Pas de Charge movement can advance and engage in Shock Combat.
This type of movement must be done during the wing activation impulse.
14.1 Artillery Fire
Artillery batteries move and fire mainly in two modes:
- if the battery is limbered, it does not fire and only moves in column with a movement capacity of 3 MP;
- if the battery is in position, it can either move 1 MP or fire, not both.
14.1.1 Command. An artillery battery is always In Command and ignores command rules since it always acts independently.
14.1.2 Bombardment. Positioned artillery batteries can fire twice in the same turn.
They fire:
- during the Artillery Fire Phase;
- during the activation impulse of the Wing to which they belong, in offensive or defensive fire.
All artillery batteries that fire in the Artillery Phase receive a "1st Shot" indicator to remind the players that they have already fired.
During the Artillery Phase, the positioned batteries can fire without the need to activate the Wing. In this phase, players will take turns firing one battery at a time until both players pass.
14.1.3 Second Bombardment. During each turn, each positioned artillery battery can fire a second time during the activation impulse of its own Wing (offensive fire) or during that of an opponent's Wing (defensive fire). This second bombardment, if offensive, must be performed within the limits of the Wing's Priority. A Fire Check is required (see 14.1.5).
14.1.4 Defensive Fire. If an opposing unit moves adjacent to the positioned artillery battery and it has not yet fired the second shot in the turn, the artillery is forced to fire at that unit. This Fire does not require a Fire Check.
Note: If a battery moves adjacent to an enemy unit during the impulse of its Wing, defensive fire is not performed, since this type of action is a Reactive action during an opponent's impulse only.
14.1.5 Fire Test. This check is required when the placed artillery battery wants to fire a second time. The player rolls a Discipline check. If it succeeds, the artillery will fire, otherwise the artillery will not fire and will no longer be able to fire a second shot during the current turn. In both cases, a "Fired" marker is placed on the unit. If the target is adjacent to the artillery or the second fire is performed during the Artillery Phase, the check is automatically successful.
14.1.6 Range and arc of fire. The maximum range of artillery is 5 hexes. After determining if the LoS is clear, a battery bombard a target within its arc of fire.
The following image shows the maximum arc of fire of an artillery battery.
14.1.7 Bombardment procedure:
a) the player selects the battery that fires; b) if this is the battery's second bombardment during the activation of the Wing, the player makes a Fire check (see 14.1.5) if required; c) the player checks the Artillery Fire table, looking at the intersection of the row corresponding to the Artillery Discipline and the column corresponding to the distance to the target; d) in the box at this intersection of row and column, the player checks the limit value for inflicting a hit on the target; e) the player rolls a die and modifies the result if the target is under light or heavy; if the modified result is less than or equal to the limit value, the artillery inflicts a hit on the target; f) the target taking the hit then takes a Discipline check; if it fails, the unit loses one step.
Note: if the target of the fire is a stack, remember that only the unit on top is affected by the shot.
14.1.8 Step and status. Artillery Batteries always have two steps: one at full strength and one at reduced strength. They never become Disorganized and never Rout.
14.2 Infantry Fire
Infantry units can move and fire in the same action impulse.
There are some action limitations based on the state the unit is in and the type of unit:
a) Disorganized and Out of Command units can only make Defensive Fire; b) Routed units never fire or fight; c) Non-combat units, leaders and limbered artillery batteries never fire.
Out of Command infantry can be activated by passing a Discipline check but can only perform Shock Combat and Defensive Fire.
In the target hex all the effects are always applied to the unit at the top of the target stack. If this top unit is a leader, the effects apply to the first combat unit below it.
Note: A leader at the top of a stack never prevents Fire effects from being applied to the stack.
14.2.1 Loss of leaders. Whenever a stacked unit with a leader suffers a hit or retreat, the player rolls a die. If the result is 0, the leader is eliminated and replaced by his staff. The player flips the leader's counter to indicate this change.
14.2.2 Volley Fire. An infantry unit can fire twice in its turn. For example, it can fire in Defensive Fire and then fire again in its impulse or even fire again in Defensive Fire an action impulse.
Units that fired only once are indicated with the "1st Volley" marker, while those that fired the second time use the "Fired" marker.
The presence of enemy units in an infantry unit's FZoC never forces it to fire. Other Units, allied or opposing, never block LoS.
Note: Units covered by others were hit through gaps left by those ahead. At the time, it was not accuracy but firepower and cadence that mattered.
14.2.3 Enfilade Fire. If a unit is shot through one of its flank or rear hexes, it is considered to have received Enfilade Fire which is always considered to be in open terrain without obstacles, even if there are hex sides and terrain that guarantee some coverage.
Enfilade Fire gives the following bonuses:
- +1 to the die roll if crossing a flank hex;
- +2 to the die roll if you fire across a rear hex, and in addition the unit fired upon cannot reduce the table result it suffers by making a Discipline check, even if the result of the table shows this is possible.
14.2.4 Offensive Fire. Occurs only during a unit's action impulse. The following modifiers apply:
- -1 if the target is behind a soft obstacle;
- -3 if the target is behind a hard obstacle;
- -2 if the target is inside woods, villages, houses, walls;
- -2 if the unit in Defensive Fire is Disrupted;
- +1 if the target is at a lower level than the attacker.
14.2.5 Defensive Fire. Only occurs after an enemy Volley. Defensive Fire does not require activation. Modifiers to Defensive Fire are the same as for Offensive Fire (see 14.2.4).
14.2.6 Range and arc of fire. Normally an infantry can only fire into the two frontal FZoC hexes. However, if it belongs to a Line, then the radius becomes 2 hexes if the LoS is obviously free.
The following image shows the line arc of fire.
14.2.7 Hits. Infantry and cavalry have 3 combat steps. The first shot flips the counter, the second makes the unit Disorganized while the third eliminates the unit. In addition, infantry units may rout.
In the Infantry Fire table, the Real Fire Effectiveness (REF) is indicated. The REF of a Line is equal to the Discipline of the main unit plus the number of units in the line.
Example: An Austrian regiment of 3 battalions is in line. The main unit has Discipline 4. The Real Fire Effectiveness is equal to 4 (Discipline) + 3 (unit in the Line) = 7.
The target unit may be in free movement or in Line. In this second case, any withdrawal result will be applied to the main unit and it will be necessary to verify the loss or not of the Line.
If the target is at 2 hexes you lose 2 columns on the chart (on the left).
14.2.8 Firing procedure. The following procedure is used to resolve all Fire regardless of when they occur. Always refer to the Infantry Fire Chart.
a) Determine Line of Sight (LoS). Infantry and Dismounted cavalry have an effective range of 1 hex. Some hexside obstacles block a LoS, such as Crests. If the units firing are in a Line, hexes with obstructing terrain must be evaluated. Units always fire through their own front hexes (FZoC), never through flank or rear hexes.
b) Determine the type of unit that fires. Determine if a single unit or a Line is firing. Determine the Real Effectiveness of Fire and consult the Fire Table to identify which column to use. Each firing unit must have at least a REF value of 0. If the REF value is lower than 0, due to combat modifiers, then the unit cannot fire.
c) Choose the target. Declare what the target is (single unit or Line). The opponent, in the case of a Line, will say if there is a main unit.
d) Roll the die. The attacker rolls the die, applies any DRMs and with the modified result obtained identifies the row of the Fire Table. The intersecting row and column box shows the result which is immediately inflicted on the target unit.
e) Defensive fire. After applying all effects, opposing units may conduct Defensive Fire if still available.
FIRE CHART RESULTS
| Result | Effect |
|---|---|
| S | SURRENDER: The defender surrenders and is eliminated. |
| R | ROUT: The target routs and retreats 4 hexes. |
| NE | No effect. |
| DCRe | RETREAT DISCIPLINE CHECK: If the check fails, the target unit retreats 1 hex, otherwise it stays where it is. |
| 1DCRe | As above, but 1 Hit is also dealt. |
| 1RBC | 1 Hit inflicted plus a Regimental Breaking Check; if it fails the regiment retreats 2 hexes. |
| 1CC | CALL FOR CHANGE: 1 Hit inflicted. If the target is a single unit, it retreats without changing facing. If the target is a Line, the main unit must pass a Discipline check otherwise it will swap position with the 2nd Line. Enemy units may fire at the advancing Line that is replacing the retreating one. |
14.3 Shock Combat
Shock Combat represents the physical and psychological confrontation that occurs when opposing units face each other at melee combat distance. A variant of the Shock Combat is represented by the Cavalry Charge (see 15.2).
Dead or prisoners? The Parma 1734 system considers losses as part of the disorganization of military discipline, focusing more on eliminating units by taking prisoners (by surrender). However, leaders and units can also be physically eliminated from the game.
Important: a unit adjacent to an opposing unit is never forced to attack it during the action impulse. Attack is always a voluntary option exercised by the player and never dictated by the game situation (exception: Pas de Charge, see 14.4).
14.3.1 Shock Combat. A single unit can only perform Shock Combat against an adjacent opposing unit occupying one of its two facing hexes and it cannot be made across impassable hexsides.
If the target is a stack, however, it must be assaulted as if it were a single unit, even though only the top unit is considered for the calculation of the Melee Effectiveness and for the lost steps; the stack as a whole still suffers any Retreat, Disorganization or Routs. If there is a stack in the attacking hex, the player decides whether one, some or all of the units attack.
Exception: Cavalry charges are shock fights that are resolved in the defender's hex (see 15.2).
Although a unit can only carry out one Shock Combat attack during the same impulse, it may still receive several such attacks in the same impulse. Suffering attacks from the flank or from the rear has no penalty for Shock Combat (unlike Ranged Combat).
14.3.2 Assault prohibited. The following units may never initiate a Shock Combat as attackers:
- Out of Command Units that have failed the Discipline check to activate;
- Disorganized Units;
- Routed units.
14.3.3 Defending Units. Units that receiving Shock Combat must defend themselves. No retreat before combat during a Shock Combat impulse is possible.
14.3.4 Procedure. Shock Combat is an extremely chaotic melee, with only a few units trained for this type of combat. The experience and training of the troops often means that the initiative is taken from the attacking side, thus reversing the roles of attacker and defender. In this type of combat it is easy to tell who goes first but, conversely, it is difficult to understand who will lead the fray.
Follow this procedure - in sequence - to resolve Shock. See also, the Shock Combat reference table on the help sheet.
a) Calculation of Close Combat Effectiveness (CCE). Each combat unit counter has a melee bonus number in the upper left corner. This bonus is the modifier to be added to the Discipline value to obtain Close Combat Effectiveness (CCE). Sum up the Discipline of all the units in the stack, but only use the melee bonus of the top unit. The attacking player could not use all the units in the stack while the defending player has to use all the units in the stack.
CCE bonus: If the unit is performing a Pas de Charge, add +2 to CCE value; double the Discipline if the unit is a Cavalry performing a Charge against an Infantry or an Artillery.
This procedure is carried out for both the attacking unit and the defending unit.
b) Disorganized and reduced units. Disorganized or reduced units in a hex cannot initiate Shock Combat, but they can always be the defender. In this case, subtract 4 from the CCE calculated in the previous point.
Note: Charging Line Cavalry cannot have Disorganized squadrons in their formation.
Note: Routed units immediately surrender if attacked.
c) Leading the melee. Compare the CCE of the attacker with that of the defender. Whoever has the highest CCE will be the side that leads the melee and rolls the die. In the event of a tie, the attacking unit leads the melee.
d) Roll the die and apply the modifiers. The side leading the melee rolls the die and applies the modifiers then consults the Shock Combat table and applies the result.
SHOCK COMBAT MODIFIERS
| Condition | DRM |
|---|---|
| Leader in the attacking stack | +1 |
| Leader in the defending stack | -1 |
| Attacking an opponent across a bridge, a stream or a sandy bank | -1 |
| Attack through a stone wall | -2 |
| Attacking an opponent in the woods or on a farmhouse | -2 |
Example: The French player wants to attack using a battalion with Discipline equal to 4. The Melee bonus is equal to +2, so the CCE is equal to 4 + 2 = 6.
The target of the attack is a single adjacent unit, an Austrian battalion with Discipline 4 and a +3 melee bonus. The CCE of the Austrian unit is equal to 4 + 3 = 7. Even though the French unit was the attacker, the Austrian unit leads the melee.
The Austrian player rolls a 5, and then consults the Shock Combat table by identifying the column corresponding to the CCE of the unit leading the melee (7). The intersection box shows a "1" so the French unit suffers 1 hit. The French unit is flipped, but remains in the hex since the melee combat result did not indicate a Rout or a Retreat.
14.3.5 Shock Combat Results. The possible results for Shock Combat are as follows:
SHOCK COMBAT RESULTS
| Result | Effect |
|---|---|
| Re | The unit/stack leading the melee retreats 1 hex. |
| DCRe | RETREAT DISCIPLINE CHECK: If the check fails, the target unit retreats 1 hex, otherwise it stays where it is. |
| 1-2 | Number of Hits taken. |
| 1CC | CALL FOR CHANGE: 1 Hit inflicted. If the target is a single unit, it retreats without changing facing. If the target is a Line, the main unit must pass a Discipline check otherwise it will swap position with the 2nd Line. Enemy units may fire at the advancing Line that is replacing the retreating one. |
| R | ROUT: The target routs and retreats 4 hexes. |
| S | SURRENDER: The defender surrenders and is eliminated. |
If there is a leader in a stack that suffers an adverse result from a Shock Combat (hit, S, R or must retreat), the player must roll a die and if he rolls a 0 the leader is eliminated and replaced by his Staff (the counter is flipped).
14.4 Pas de Charge Attack
Lines of infantry that have not yet moved or fired during their action impulse can make a Pas de Charge attack, a kind of fast running movement.
14.4.1 Movement in Pas de Charge. Infantry Lines can move 2 hexes (not MP) if they are clear of impassable hexsides or impassable hexes.
The units of the Line must end the movement adjacent to each other or at most there can be an empty hex on the flank between one unit and the next, for the whole Line.
If the Infantry Line enters an FZoC, the entire movement stops. A Line of infantry cannot make a Pas de Charge attack if none of its units ends their movement in an enemy FZoC.
The goal of a Pas de Charge attack is to inflict Shock Combat on the opposing units at the end of the movement.
14.4.2 Modifiers to a Pas de Charge. Each single unit that attacks at the end of a Pas de Charge gets a +2 bonus on the Shock Combat roll. At least a single unit in charge (battalion or group of grenadiers or dragoons) must attack at least one other single enemy unit (not necessarily the entire Line).
14.4.3 Units in an FZoC. Units already in an FZoC can make a Pas de Charge attack but do not receive the +2 bonus.
14.5 Retreat
Sometimes units are forced to retreat as a result of a Shock Combat or as a result of a Rout. Retreats are always performed by the player who controls the retreating unit. If the retreating unit is in a stack, the entire stack must retreat together. A retreating stack can therefore never split during a retreat.
14.5.1 Path of retreat. Retreating units cannot:
- retreat into a hex occupied by enemy units;
- retreat into an impassable hex or across an impassable hexside;
- retreat into a hex occupied by allied units if another path of retreat is possible.
If a unit(s) can only retreat into a hex with allied units they cannot over-stack; however, if over-stacking cannot be avoided, rule 14.5.2 applies. Units that cannot retreat because they have no retreat path available will surrender and are eliminated from the game.
14.5.2 Withdrawal in over-stacking. If the retreating unit ends its movement in a hex violating the stacking limits (see 7.1) it must make a Discipline check:
- if it passes, it stops in the hex before entering over-stacking and becomes Disorganized; if it was already Disrupted, it must pass a Regimental Breaking Point check in order not to rout;
- if it fails the check, the unit crosses the hex and continues its retreat.
If as a result of an over-stacking retreat, Routs and / or Hits are taken by the units, the resulting reduction in the Army's Morale level must be recorded (see 12.1).
Each time the unit retreats into an over-stacked hex, this procedure must be repeated, even if the retreat into the hex was caused by previous application of this procedure.
Retreating units can bypass hexside terrain effects and hexes occupied by other units (allied or opposing) but can never retrace their steps or stay at the same distance from the opponent who caused the retreat, not even to avoid an off-map retreat.
Finally, always keep in mind the following situations:
- units must retreat away from 1st Line where possible;
- units that retreat off the map are eliminated;
- units that are forced to retreat into an enemy FZoC must pass a Discipline check or suffer an additional hit.
Example: The Grenadiers unit just imposed a DCRe result following unit fire against the Anjou unit in hex 1306. The Anjou unit must pass a Discipline check to avoid retreating 1 hex, failing. The unit must retreat 1 hex, but in doing so would end up in over-stacking on one of the two units behind it in 1206 or 1307. Since the unit is not Disorganized it must take a Discipline check to assess whether it remains in place and becomes Disorganized or if it retreats beyond the Line behind it. The French player rolls the die and gets a 7 so the unit retreats over the Line, as shown in the following image, without any other change in status.
14.5.3 Enemy FZoC. A unit that is forced to retreat into an enemy FZoC must check its Discipline in order not to suffer an additional hit.
14.3.6 Artillery in Melee. An artillery that participates in a shock combat always uses its Discipline halved (rounded down).
15.0 Cavalry
In Parma 1734 the cavalry represented an important part of the army of the time.
15.1 Light and Heavy Cavalry, Dragoons
The cavalry was divided into Light (Hussars and Chevaulégers) and Heavy (especially Cuirassiers). The Dragoons act as light cavalry but were in fact a kind of mounted infantry. Cavalry can move in Column like infantry (see 10.1).
15.1.1 Cavalry Lines. Lines of cavalry have the same rules as Lines of infantry, but do not fire. Cavalry can move, maneuver and pivot like infantry, but they only attack through a charge.
15.1.2 Dismounted Dragoons. The corresponding pawn Dismounted Dragoons act as an infantry battalion (for example they can fire). A "dismounted" marker is placed on top of the unit. Dismounted Dragoons cannot form Lines together with other Dragoons or infantry.
15.1.3 Stacking. A cavalry formation may never stack in the same hex with other cavalry or artillery formations (see 7.1.1).
15.1.4 Terrain. Some terrain does not allow the maneuvering of line formations:
- cultivated
- orchards
- vineyards
- woods
- hard obstacle hexsides (stone walls)
If a charge encounters any of this terrain type, it stops.
Note: A charge that starts or passes through houses or farmsteads does not stop.
15.2 Cavalry Charge
The charge is the only movement that allows a unit to enter the hex of another unit.
A charge gives cavalry a considerable impact. When a cavalry unit is designated for a charge, it immediately projects a Charge Zone across its front hexes for a range of 4 hexes, except in certain terrain and across prohibited hexsides. The projection is identical to that of a fire arc projected by a positioned artillery (see 14.1.6).
A cavalry charge is always carried out by a single unit, even if it is part of a Line and the entire formation carries out the movement.
15.2.1 Charge movement. If the cavalry is not in an enemy FZoC and has enough MP, it may be eligible to charge; no Discipline check is required. The charge stops when it reaches the target unit's hex and a mandatory Shock Combat ensues.
A cavalry unit can only charge a target that it is able to see within its Charge Zone at the start of its charge.
15.2.2 Disorganized Cavalry. A disorganized cavalry unit cannot charge.
15.2.3 Eligible Unit. During the Wing's action impulse, a player can initiate a charge by selecting a Cavalry unit in Line as the main unit. The unit must meet the following prerequisites:
- must be In Command;
- have not yet moved in the impulse;
- must not be Disorganized or Routed;
- must be able to see the target hex occupied by at least one enemy unit and the target hex must be within the unit's Charge Zone.
Other cavalry in the same Line as the unit charging can charge different targets (thus becoming themselves the main units of a separate charge) but cannot charge the same target as the first main unit.
A player can initiate as many Charges as desired in the impulse of a Wing, but any given unit can be charged at a maximum of once per impulse by a single cavalry.
15.2.4 Charge marker. When a cavalry units starts a charge, the player controlling the unit immediately places a Charge marker on the counter.
Note: Charges are declared after the movement of units and are carried out during Shock Combat.
15.2.5 Charge path. For each hex in which the charging cavalry enters its Charge Zone, the unit can change facing at no cost by turning only one hex angle (60 °). Any hex or hexside of prohibited terrain stops the charge. In this case the cavalry unit ends its movement and checks its orientation. Cavalry can only charge through hexes whose cost to enter is a maximum of 1 MP.
Note: Cavalry can charge across a bridge.
15.2.6 Terrain where charges are prohibited. It is not possible to make a charge in the following terrain:
- woods: a charge may enter, but not pass through, a woods hex.
- across both hard (stone walls) and soft obstacles (streams, sandy banks)
- cultivated land, orchards, vineyards
15.2.7 Shock combat. A cavalry charge automatically results in Shock Combat in the target hex of its movement. This melee follows the normal rules (see 14.3) with the exception that against infantry or artillery the Cavalry Discipline value is doubled.
Example: In the following image, the French Line cavalry wants to make a charge, so it first checks its Charge Zone.
The Austrian unit is inside the charge zone.
Some peculiarities of this charge zone:
- it is not possible to cross the 3 red colored hexes as charging through them is prohibited;
- it is not possible to see the two hexes beyond the house (3207 and 3208) therefore it is not possible to charge any unit present in them;
- the house itself is beyond hexes that cannot be crossed by the charge move.
15.3 Light Cavalry
15.3.1 Raid movement. Light cavalry (Hussars) may also Raid. They cannot charge but if activated they move and attack enemy units in their frontal hexes, immediately resolving a Shock Combat during the movement of their units.
15.3.2 Retreat before combat. If attacked by non-cavalry units, Light Cavalry units can always retreat 1 or 2 hexes before combat, if they successfully pass a Regimental Breaking Point check.
This movement can be made to escape from a Charge Zone as soon as the enemy unit is selected or to move out of range of a Shock Combat.
Example: In the following situation, the Austrian infantry wants to initiate Shock combat with the French light cavalry. The French player exercises the Retreat option before the fight, but to do so the unit must pass a Regimental Breaking Point check. The French player rolls a 6, thus succeeding in the maneuver, as shown in the following image.
16.0 Victory Conditions
Victory Points are awarded by inflicting casualties on the opponent (for each hit inflicted and the first time an enemy unit routs), capturing or eliminating enemy leaders and capturing wing flags. In some scenarios they are also assigned for control of certain map hexes.
Victory Points are not awarded, but rather they are recorded on the Army Morale tracks. The purpose of the battle is to force the opponent to issue a General Withdrawal Order (see 12.1).
The first army whose morale falls to 10% of its initial value, rounded down, must issue a General Retreat Order. The opponent wins if he has a Morale at least 10 points higher than the player who gave the order. If the Morale differs by less than 10 points, the result is a tie.
Scenarios other than the full battle (see 17.2) may have different and more specific victory conditions.
17.0 Scenarios
17.1 Tutorial: Clash of the Vanguards (8-10 AM)
On 29 June 1734, 52 companies of French infantry, led by de Broglie, moved towards Parma. They stopped at 7 in the morning in Crocetta, to the west and under the city walls. Here the army formed 4 lines, 3 French and one Piedmontese.
Count Mercy d'Argenteau (the Austrian Commander) crossed the Taro at the head of the vanguard and at about 10 in the morning he fired at the French advanced positions, which withdrew.
At this point Mercy ordered an immediate attack without delay. Prince Württemberg objected that first it was necessary for more troops to cross the Taro and take their position. At that point Mercy said "Je vous laisse faire et je ferai la chose à ma mode" (translated "Do what you want, I'll do it my way") and led the attack himself.
At 1 pm the French were pushed back, but Mercy was killed, creating much confusion among the Austrian ranks.
17.1.1 Game Turns. The scenario is played over 5 turns (from 8 to 12 in the morning).
17.1.2 Commands. In this scenario each Army has 1 Commander and a subordinate with a flag. There are only 2 Wings, one per Army, so it is not necessary to use Priorities. All units in an army activate when its Wing is activated.
17.1.3 Initiative. The Austrians have the first initiative for both Phase 2 and Phase 4 (see 4.0).
17.1.4 Facing. The French units on the map must be oriented towards the Austrian units (south) or towards the southwest along the banks of the waterways.
17.1.5 Reinforcements. The reinforcement units enter the movement impulse in the Column. Treat each group of incoming units as a single force for its activation.
17.1.6 Glacis Battery. The Piedmontese battery present on the French Left Wing is in a fixed position and cannot move during this scenario. However, it can change its orientation.
17.1.7 Victory Conditions. This introductory scenario does not use Army Morale, but simpler rules.
The French player wins if they:
- eliminate the enemy commander, or
- capture the enemy flag
The Austrian player wins if they:
- capture the enemy flag, or
- are able to form Lines with at least 4 units beyond the Beveratora stream, on its right bank, towards the walls of Parma
17.1.8 Scenario 1 setup (Official errata 1.1). The Scenario 1 setup is printed on the Scenario Cards, which are not part of the rulebook text. The official "Scenario 1 1.1 errata" sheet (SCENARIO 1 – VANGUARDS CLASH, © 2020 Aleph Game Studio) supplies the following placements. Each counter is listed with the values printed on it, read in the order top-left / top-right / bottom-left / bottom-right, with - for a corner that prints no value; the sheet does not label these positions, so see 2.3 for what each position means. The hex code is the 4-digit code printed beneath the counter on the sheet; where the sheet prints no hex code beneath a counter, none is given here.
Austria setup (initial):
| Counter | Printed values | Hex |
|---|---|---|
| Column | - / - / - / +2 | none printed |
| Grenadiers | +3 / 7 / 4 / 4 | 4215 |
| Carabinieri | +3 / 7 / 5 / 5 | 4214 |
| Column | - / - / - / +2 | none printed |
| Grenadiers | +3 / 7 / 4 / 4 | 4213 |
| Carabinieri | +3 / 7 / 5 / 5 | 4212 |
| Column | - / - / - / +2 | 4112 |
| Grenadiers | +3 / 7 / 5 / 5 | none printed |
Austria, Turn 1:
| Counter | Printed values | Hex |
|---|---|---|
| Column | - / - / - / +2 | 4514 |
| Grenadiers | +3 / 7 / 4 / 4 | none printed |
| Jung-Daun 1 | +2 / 6 / 3 / 4 | none printed |
| Jung-Daun 2 | +2 / 6 / 3 / 4 | none printed |
| Jung-Daun 3 | +2 / 6 / 2 / 4 | none printed |
| Ligneville 1 | +2 / 8 / 3 / 4 | none printed |
| Ligneville 2 | +2 / 8 / 3 / 4 | none printed |
Austria, Turn 2:
| Counter | Printed values | Hex |
|---|---|---|
| Column | - / - / - / +2 | 4001 |
| Württemberg 1 | +3 / 8 / 3 / 5 | none printed |
| Württemberg 2 | +3 / 8 / 3 / 5 | none printed |
| Württemberg 3 | +3 / 8 / 2 / 5 | none printed |
| Mercy 1 | +3 / 8 / 3 / 5 | none printed |
| Mercy 2 | +3 / 8 / 3 / 5 | none printed |
| Mercy 3 | +3 / 8 / 3 / 5 | none printed |
Austria, Turn 3:
| Counter | Printed values | Hex |
|---|---|---|
| Column | - / - / - / +2 | 4001 |
| Lichtenstein 1 | +2 / 7 / 2 / 6 | none printed |
| Lichtenstein 2 | +2 / 7 / 2 / 6 | none printed |
| Lichtenstein 3 | +2 / 7 / 2 / 6 | none printed |
The errata sheet gives no French setup. The French placements are on the French Scenario Card, which is not in the rulebook text.
17.2 The Battle of Crocetta, 29 Giugno 1734
This scenario represents the complete battle.
17.2.1 Game Turns. The scenario is played over 13 turns (from 8 in the morning to 8 in the evening).
17.2.2 Facing. The French units on the map must be oriented towards the Austrian units (south) or towards the southwest along the banks of the waterways.
17.2.3 Reinforcements. The reinforcement units enter the movement impulse in the Column. Treat each group of incoming units as a single force for its activation.
17.2.4 Glacis Battery. The Piedmontese battery present on the French Left Wing is in a fixed position and cannot move during this scenario. However, it can change its orientation.
17.2.5 Garrison units. The Vichy Carabinieri and the Piedmontese Grenadiers at the Mill cannot be moved until a unit of the same branch (respectively French carabinieri or Piedmontese grenadiers) has moved into an adjacent hex.
17.2.6 Army morale. Place the army morale indicators next to their respective tracks, as a reminder of the values shown below:
French Army
- Initial value: 88
- Demoralization: 44
- Withdrawal: 8
Austrian Army
- Initial value: 96
- Demoralization: 48
- Withdrawal: 9
Bibliography
- Chanson sur la bataille de Parme, Bibliothèque nationale de France, 1734.
- Colin, Jean Lambert Alphonse, L'Infanterie Au XVIIIe Siècle: La Tactique, Berger Levrault, Paris 1907.
- Corsi Carlo, Sommario di storia militare, vol. 2, Cassone, Torino 1869.
- Delbruck, Hans, Geschichte der Kriegskunst im Rahmen der politischen Geschichte, vol. 4 Neuzeit, Stilke, Berlin 1920.
- De Beaurepaire E., Le Marquis de l'Isle, Documents sur la Campagne d'Italie en 1733-1734, Delesques, Caen 1897.
- Duffy, Christopher, The Military Experience in the Age of Reason, Routledge & Kegan Paul Inc., New York 1987.
- Espié, Félix-François d', Mémoires de la guerre d'Italie, depuis l'année 1733 jusqu'en 1736 / par un ancien militaire qui s'est trouvé à toutes les actions de ces trois fameuses campagnes, 1777.
- Generals=Reglement, Wien 1769.
- Gerba, Raimondo trad., Guerre per la Successione di Polonia – campagne 1733-1734, trad. Torino 1901.
- Feldzüge des Prinzen Eugen von Savoyen, Herausgegeben von der Kriegsgeschichtlichen Abtheilung des k. und k. Kriegs-Archivs, vol. XIX, Wien 1891, Verlag des K.u.K. Generalstabes.
- Instructions Militaires, Briasson, Paris 1753.
- Lacombe, Hilaire de (1831-1908), La dernière campagne du maréchal de Villars, Colas, Orleans, 1872.
- Mercure Suisse ou Recueil de nouvelles historique, politiques, literaire et curieuses, ed. Juillet 1734.
- Saluces de, Alexandre, comte, Histoire Militaire du Piemont, vol. 4, Torino 1818.
- Schels J.B. "Die Feldzüge des Ostreicher in Ober Italien in der Jahren 1733-1735", in Österreichische Militärische Zeitschrift, vol. 2, Wien 1824.
Historical Notes
The Battle of San Pietro or Battle of the Crocetta or Battle of Parma was a battle fought on 29 June 1734, between the Franco-Piedmontese and the Austrians, as part of the War of the Polish Succession, in the locality of Crocetta di Valera, a short distance from the city of Parma in Northern Italy.
The Franco-Piedmontese marched on Milan in 1733 and occupied Lombardy without significant losses. After the conquest of Tortona in February 1734, poor weather slowed all military operations and the army set up camp for the winter.
When Eighty-one-year-old Marshal Claude Louis Hector de Villars died on June 17, 1734, command of the French troops in Italy was taken over by generals de Broglie and Coigny, who were promoted to marshals. The Piedmontese troops were commanded by King Carlo Emanuele III of Savoy.
The Austrians were under the command of another duo, Marshal Claudio Florimondo di Mercy and Federico Luigi of Württemberg-Winnental. Preparations for the battle were very slow, due to differences of opinion between these two commanders. The Austrians finally moved towards Parma, crossing the Po river on May 2 with two makeshift bridges at Portole and Monte di San Benedetto. The French took up positions at Sacca di Colorno, north of Parma. On 25 May the Austrians tried to break this line in the Battle of Colorno, managing to temporarily conquer the country on 3 June, only to be driven back by the Franco-Piedmontese armies only two days later.
Shortly thereafter, at the age of 68, Marshal de Mercy suffered a stroke, which deprived him of sight and speech for some time. He temporarily transferred command to the Prince of Wurttemberg and operations stopped. May and June passed only with occasional forays from both sides.
On June 29, fifty-two French infantry companies, led by de Broglie, moved towards Parma. They stopped at 7 am in the locality of Crocetta, just to the west and under the city walls, a short distance from Porta Santa Croce. Here the army formed four lines: three French and one Piedmontese.
The Marshal de Mercy crossed the River Taro at the head of the Austrian military vanguard at around 10 am, opening fire on the retreating French troops. At this juncture de Mercy ordered the Prince of Wurttemberg to attack without delay. The prince objected that he had to cross the river with more troops and position them. De Mercy replied: "Do what you want, I'll do it my way", and he led the attack himself.
At 1pm the French were driven back, but de Mercy was killed, creating great confusion among the Austrians. The fighting, very hard on both sides, was particularly fierce from midday until 7pm, and then faded decidedly between 7pm and 9pm. At that point the Austrians withdrew, leaving many wounded behind them. The battle was considered to have ended at midnight.
The Austrians took refuge in today's province of Reggio nell'Emilia. The prince of Wurttemberg found shelter in the castle of Montechiarugolo, where he wrote a report of the battle for the Austrian Emperor, accusing Marshal de Mercy of failure, due to what he considered recklessness on the part of the late commander.
The battle was witnessed by the Venetian playwright Carlo Goldoni, who was on his way to join his mother in Modena, and happened to be in Parma during the day of the battle. In his Mémoires he wrote:
Arrived in Parma on June 28, 1733, St. Peter's Eve, a memorable day for this city, I went to lodge at the Gallo hotel. In the morning a terrifying noise wakes me up. I jump out of bed, open the window of my room, and see the square full of people: some running on one side, some on the other; some collide, others cry, some scream, some are in desolation; women are carrying their children in their arms, others are dragging them on the ground. Here one sees people loaded with shopping bags, baskets, trunks and bundles; there one sees old people who fall, sick people in shirts, upside-down carts, horses on the run. What is this, I said to myself: is it the end of the world? I put a jacket on over my shirt, go down in a flash, go into the kitchen, ask questions, make enquiries, and no one answers me. The innkeeper piles up the silverware and his wife, all disheveled, holds a small chest and other things in her apron in her hand; I want to talk, she locks the door in my face and starts running. What is this? What is this? I ask everyone I meet. In a while I see a man at the entrance to the stable, I recognize him as my coachman and I approach him: he was able to satisfy my curiosity. - Well, sir, he said, a whole city is in fear, and not without reason: the Austrians are at the gates, and if they come in, looting is inevitable. Everyone is sheltering in the churches: each brings his capital under the custody of God. - But the soldiers, I replied, will in such cases give rise to reflection? Aren't all Germans Catholic? - While I'm talking like this with my coachman, the scene changes: shouts of joy are heard, bells are rung, firecrackers are thrown. All leave the church, all bring back their possessions: those who seek, those who meet, those who embrace. And what was the reason for this change? Here it is for the whole story. A double agent, in the pay of the allies as well as the Germans, had been the night before at the camp of the first in the village of San Pietro, one league from the city, and had reported that a detachment of German troops had to forage around Parma, with the intention of making a surprise attack upon the city. Marshal de Coigny, who commanded the army, detached two regiments, Picardy and Champagne, and sent them to reconnoiter; but since this good general never lacked caution and vigilance, he immediately arrested the spy, whom he distrusted, and then had the whole camp armed. He was not wrong; when the two regiments arrived in sight of the fortifications of the city, they discovered the German army, composed of forty thousand men led by the Marshal de Mercy with ten pieces of field artillery. As the French marched along the main road, surrounded by large pits, they could not retreat: they therefore advanced bravely, but were almost all routed by the enemy artillery. This was the first surprise for the French commander. The spy was hanged in the act, and the army set out, doubling the pace. The road was narrow and the cavalry could not advance; the infantry, however, charged the enemy so vigorously that they forced him to retreat: and here is the moment when the fear of the Parmesans turned into jubilation. Everyone was running then on the city walls, and I too ran there. A battle could not be seen more closely; although the smoke prevented us from clearly distinguishing objects, it was nevertheless a very rare view, which very few can boast of having enjoyed. The continuous fire lasted nine hours without interruption, and finally the night separated the two armies: the Germans dispersed in the mountains of Reggio, and the allies remained masters of the battlefield. The next day I saw the body of the Marshal de Mercy, killed in the heat of the battle, being taken to Parma on a litter. He was embalmed and sent to Germany, and so it was done to the Prince of Wurttemberg, who had met the same fate. The following day, however, at noon, a far more horrible and disgusting sight was presented to my eyes. It was the corpses: which had been stripped in the night and were raised to twenty-five thousand, all naked and piled up. Legs, arms, skulls and blood were everywhere. What a massacre! Given the difficulty of burying all these slain bodies, the Parmesians feared an air infection; but the Republic of Venice, which is almost adjacent to the Parmesian dominions, and therefore interested in guaranteeing the health of the air, sent mortar in great abundance, in order to clear all the corpses from the surface of the earth.
The Austrians counted 6172 dead and wounded, including Marshal de Mercy and six generals; there was also a large number of deserters. The French had 1141 dead and 2305 wounded soldiers, as well as 104 dead and 452 wounded officers. The Piedmontese, according to a document from the Royal Library of Turin, had 75 dead and 324 wounded, including 12 dead officers and 41 wounded.
The Austrians left the battlefield. The Franco-Piedmontese allies controlled the territory as far as the Secchia river, including the cities of Guastalla, Reggio and Modena, from which the Duke of Modena Rinaldo d'Este was forced to flee to take refuge in Bologna. Nevertheless, the battle is not considered a great victory for the allied armies, which reunited again on 19 September 1734, for another clash with the Austrians in the Battle of Guastalla.
In 1737, three years after these events, the Scottish nobleman Alexander Dick noted in his diary:
We left Parma at 11 in the evening and left the door where the great battle in which so many men fell three years ago was fought. The Imperials occupied the field on the left, the French on the right. [...] It was extraordinary to see the trees and hedges on each side of the road, all its length cracked in the branches and bark by musket shots: as are the numerous and very evident cannonball holes on the farms.
The actions of the Sardinian grenadiers stood out particularly during the battle: in 1954 a plaque was placed at the site of the battle to remember the sacrifice of these men.