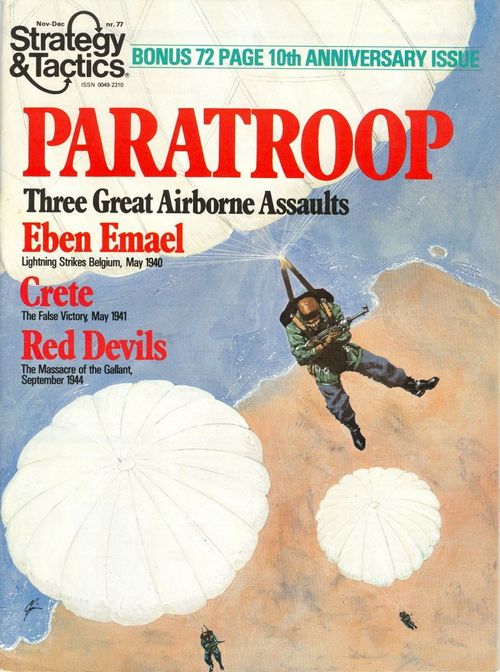
Paratroop
Paratroop Rulebook
Table of Contents
Table of Contents
- Eben Emael
- [1.0] Introduction
- [2.0] Game Equipment
- [3.0] Basic Procedure
- [4.0] Movement of Units
- [4.1] A unit may never exceed its Movement Allowance.
- [4.2] Units must spend more than one Movement Point to traverse some terrain types.
- [4.3] A unit may never enter nor pass through a hex containing an Enemy unit.
- [4.4] A unit may never end its Movement Phase in the same hex as another Friendly unit.
- [4.5] Units may not leave the map.
- [4.6] Units that move more than one hex during their Movement Phase are using bold movement.
- [4.7] Pinned units may not expend any Movement Points.
- [4.8] German units may not enter undestroyed Belgian fortifications.
- [4.9] Terrain Effects on Movement Chart
- [5.0] Fire Combat
- [5.1] A unit's range is always two; a fortification's range unlimited.
- [5.2] A unit is never forced to attack.
- [5.3] Only one Enemy unit may be the object of a given attack.
- [5.4] No unit may attack more than once per Phase. A unit may be attacked any number of times per fire Phase.
- [5.5] No more than one unit may participate in a given attack.
- [5.6] The terrain in the hex occupied by the target unit may affect the fire combat die-roll.
- [5.7] Pinned units may not move or fire.
- [5.8] Fortifications may never be the target of a fire attack. They may only be attacked by demolition attacks (see Section 8.0).
- [5.9] Fire Combat Results Table
- [6.0] Sighting
- [6.1] If a unit can sight an Enemy unit, then it can also be sighted by the Enemy unit. Thus, if A can sight B, then B can sight A.
- [6.2] A line of sight may not be traced through obstructing terrain.
- [6.3] A unit in a hilltop hex is obstructed only by cliff hexsides.
- [6.4] As long as at least one active, undestroyed Belgian fortification contains an observation cupola, a Belgian fortification is never obstructed by terrain.
- [6.5] Only a cliff hexside obstructs sighting of an adjacent unit or fortification.
- [7.0] Close Assault
- [7.1] A unit is never forced to conduct close assault attacks.
- [7.2] Only one Enemy unit may be the object of a close assault attack.
- [7.3] No unit may participate in more than one close assault attack during a Close Assault Phase.
- [7.4] No unit may be the object of more than one close assault during a Close Assault Phase.
- [7.5] The abbreviations on the Close Assault Table indicate which units (if any) are eliminated.
- [7.6] When a defender's hex is vacated as a result of close assault, the attacking Player may advance one of the victorious units into the vacated hexes.
- [7.7] A German unit may either conduct a close assault or a demolition attack during an Assault Phase. It may not do both.
- [7.8] The defending unit's terrain may affect the die-roll of a close assault attack.
- [8.0] Demolition
- [8.1] All German units are assigned a Demolition Rating of 3.
- [8.2] All demolition attacks must be announced in advance before any are executed.
- [8.3] A German unit may attack one adjacent fortification during the Assault Phase.
- [8.4] A fortification may be attacked any number of times during an Assault Phase.
- [8.5] Any unit that conducts a demolition attack through a ridge or slope hexside must add one to its demolition die-roll.
- [8.6] Belgian units are never affected by a demolition attack.
- [9.0] Belgian Fortifications
- [9.1] The strength of a Belgian non-cupola fortification is printed inside the fortification symbol on the map.
- [9.2] Each Belgian fortification may fire once per Fire Phase. Cupolas have a field of fire of 360 degrees, and can fire through any adjacent hexside.
- [9.3] Belgian non-cupola fortifications are restricted in the direction in which they can fire.
- [9.4] At the start of the game, all Belgian fortifications are inactive.
- [9.5] Two cupolas must be designated as dummies.
- [10.0] Reinforcements
- [10.1] When reinforcements arrive on the map, they behave identically to units already on the map.
- [10.2] Belgian reinforcements may be brought in along any mapedges.
- [10.3] Some Belgian units appear during their Game-Turn of arrival on any undestroyed Belgian fortification hex.
- [10.4] The entry of reinforcements may be delayed for as long as the Player wishes.
- [10.5] Belgian reinforcements may enter on Friendly-occupied fortification hexes, but there must be only one unit in the hex at the end of the Movement Phase.
- [11.0] Mines
- [11.1] A unit may be attacked once by a given minefield in a single Movement Phase.
- [11.2] A minefield attack is executed after a unit using bold movement enters or exits such a hex.
- [11.3] Any unit not affected by a minefield attack may continue its movement.
- [11.4] A unit that begins its Movement Phase in a minefield hex may use bold movement to exit that minefield hex, without being attacked by the minefield.
- [11.5] Terrain in a minefield hex does not affect a minefield attack.
- [11.6] The Belgian Player may not designate fortification hexes as minefield hexes.
- [11.7] Minefields are never exhausted.
- [11.8] Belgian units may never enter a minefield hex by bold movement.
- [12.0] How to Play Eben Emael
- Crete
- [1.0] How To Start
- [2.0] Equipment
- [2.1] The game maps represent the terrain on which the battle was fought.
- [2.2] The two Transit Tracks are used to move from one map to another.
- [2.3] The Terrain Effects Chart summarizes how the features on the maps affect the movement and combat of the playing pieces.
- [2.4] The two Combat Results Tables are the means for resolving combat.
- [2.5] The Scatter Table is used to determine the accuracy of an air drop.
- Red Devils
- [1.0] How to Start
- [2.0] Game Equipment
- [2.1] The game map represents the terrain on which the battle was fought.
- [2.2] The charts and tables are used to summarize and resolve certain game functions.
- [2.3] The playing pieces represent the actual military units that took part in the historical battle.
- [2.4] Combat strength is the basic power of a unit when attacking, defending, or taking part in opportunity fire.
Eben Emael
Lightning Strikes Belgium, May 1940
[1.0] Introduction
Eben Emael is a tactical level simulation of the German airborne drop on the Belgian fortress Eben Emael in 1940, which paved the way for the German advance through Belgium. The Germans used glider troops to assault the fort, which totally surprised the Belgians. A German secret weapon, the hollow charge, was used for the first time, enabling the German sappers to penetrate the Belgian steel turrets that dotted the top of the underground fort.
[2.0] Game Equipment
The game contains a 17" x 11" map of the battlefield, various charts and tables, and playing pieces (counters) representing both actual military units and informational markers.
[2.1] The playing pieces represent the actual military units that took part in the historical battle.
There are two armies portrayed in Eben Emael: the German and Belgian. Combat units are used to portray actual military units. Markers are used to indicate changes in the status of units and fortifications.
Sample Units
Unit designations have no effect on play, but are included for historical interest. Designations are read in the following manner: squad commander's name/squad number. Thus, Haug/5 is squad commander Haug/5 squad.
(Counter illustrations: the Combat Unit front shows a Designation and a Unit Type symbol; its back reads "Pinned". The Fortification Marker front reads "Fort Inact" (Inactive); its back reads "Fort Dstryd" (Destroyed). A "Bold Move" (Bold Movement) marker has a front and a blank back.)
[2.2] The game map represents the actual terrain on which the battle was fought.
A hexgrid is superimposed on the map to regulate movement and combat.
[3.0] Basic Procedure
The Sequence of Play
The Players take turns moving their units and making attacks. The order in which they take these actions is described in this Sequence of Play outline. One completion of the Sequence of Play is called a Game-Turn. Each Game-Turn consists of two Player-Turns. Each German Player-Turn consists of six Phases. Each Belgian Player-Turn consists of five Phases.
GERMAN PLAYER-TURN
Step One: Belgian Activation Phase The Belgian Player may attempt to activate his inactive fortifications by rolling a die for each inactive fortification and applying any result immediately before proceeding to the next attempt.
Step Two: German Fire Phase The German Player may fire with as many of his units as he wishes at any Belgian units within range of the firing unit(s). He may resolve fire of individual units in any order he wishes, applying the result immediately after each attack.
Step Three: German Movement Phase The German Player may move as many or as few of his unpinned units as he wishes.
Step Four: Belgian Defensive Fire Phase The Belgian Player may fire with as many of his units and active fortifications as any German units within range of the firing unit(s) or fortification(s). He may resolve the fire of individual units and active fortifications in any order he wishes, applying the results immediately after each attack.
Step Five: German Assault Phase The German Player may conduct close assault against adjacent Friendly units, and may conduct demolition attacks against Enemy fortifications adjacent to German units.
Step Six: German Reorganization Phase Any pinned German units may be flipped over to indicate that they are now unpinned and any Bold Movement markers on German units are now removed.
BELGIAN PLAYER-TURN
Step Seven: Belgian Fire Phase The Belgian Player may fire with his units and active fortifications.
Step Eight: Belgian Movement Phase The Belgian Player may move his units.
Step Nine: German Defense Phase The German Player may fire with his units.
Step Ten: Belgian Assault Phase The Belgian Player may conduct close assault attacks against Enemy units with adjacent Friendly units.
Step Eleven: Belgian Reorganization Phase The Belgian Player may flip over pinned units to show they are unpinned and may remove any Bold Movement markers.
These eleven Steps are repeated ten times. The game is then over and the Players determine the victor according to the victory conditions at the end of the scenario rules.
[4.0] Movement of Units
GENERAL RULE: Each unpinned unit has a Movement Allowance which represents the basic number of hexes it may move in a single Movement Phase. Each Player moves only his own units during the Movement Phase of his Player-Turn. The Movement Allowance for all units is four.
PROCEDURE: The owning Player may move units one at a time, hex by hex, in any direction or combination of directions he desires, until he has moved all the units he wishes to.
CASES:
[4.1] A unit may never exceed its Movement Allowance.
During its Movement Phase each unit may move as far as its Movement Allowance permits. Basically, each unit spends one Movement Point of its total Allowance for each hex that it enters. Individual units may move less than their Movement Allowance. Units are never forced to move during their Movement Phase. Units may not, however, lend or accumulate unused Movement Points.
[4.2] Units must spend more than one Movement Point to traverse some terrain types.
The cost to enter a clear terrain hex is one Movement Point. The entry cost to enter some terrain hexes, however, is higher. These costs are specified in the Terrain Effects Chart. If a unit does not have sufficient Movement Points to enter a given hex, it may not do so.
A hex containing more than one type of terrain is entered at the higher of the two costs. When a hexside has a "plus" cost attached to it, that cost is in addition to the Movement Point cost for entering the hex.
Units may never cross cliff hexsides or enter canal hexes.
[4.3] A unit may never enter nor pass through a hex containing an Enemy unit.
[4.4] A unit may never end its Movement Phase in the same hex as another Friendly unit.
One or more units may move through a hex containing another Friendly unit, but the moving units may never end the Movement Phase in the same hex as another unit. If this should happen, any excess units are eliminated by the owning Player.
[4.5] Units may not leave the map.
[4.6] Units that move more than one hex during their Movement Phase are using bold movement.
When a unit is moved more than one hex, the moving Player places a Bold Movement marker on that unit. If a unit using bold movement is the target of fire, the firing Player subtracts two from that die-roll (see Section 5.0).
[4.7] Pinned units may not expend any Movement Points.
[4.8] German units may not enter undestroyed Belgian fortifications.
[4.9] Terrain Effects on Movement Chart
(see charts and tables)
[5.0] Fire Combat
GENERAL RULE: A Player may conduct one fire attack with each of his units during each of his Fire Phases. An Enemy unit may be fired on only if it is in range of and sighted by the firing Friendly unit.
PROCEDURE: When a Friendly unit can fire at an Enemy unit, the firing Player refers to the Combat Results Table (CRT). He finds the row corresponding to the nationality of the firing unit or fortification along the top of the chart, and then rolls a die, adding and subtracting all applicable die-roll modifiers. He cross-indexes the adjusted die-roll with the firing unit or fortification's row to yield a result. If this result is a number, it is added to a second die-roll and compared to the Effectiveness Rating of the target unit. If the adjusted die-roll is higher than the Effectiveness Rating of the target unit, the target unit is immediately flipped over to indicate that it is pinned. If the adjusted die-roll is four greater than the Effectiveness Rating of the target unit, the target unit is eliminated (removed from play). An adjusted die-roll less than the Effectiveness Rating of the target unit does not effect the target. A "-" result has no effect on the target unit; there is no second die-roll.
CASES:
[5.1] A unit's range is always two; a fortification's range unlimited.
A unit may fire at any Enemy unit one or two hexes away, unless prohibited by the sighting rules (see Section 6.0).
[5.2] A unit is never forced to attack.
Attacking is a voluntary action. In a given Combat phase, the owning Player may choose not to fire with some of his eligible units. He must announce all fire attacks before any are executed.
[5.3] Only one Enemy unit may be the object of a given attack.
Even though more than one Enemy unit may be within range, a Friendly unit may only conduct an attack against one unit in its Combat Phase.
[5.4] No unit may attack more than once per Phase. A unit may be attacked any number of times per fire Phase.
[5.5] No more than one unit may participate in a given attack.
[5.6] The terrain in the hex occupied by the target unit may affect the fire combat die-roll.
The effects of such terrain are:
Woods and building hexes: add one to fire combat die-roll.
Destroyed or undestroyed fortification hexes: add two to fire combat die-roll.
[5.7] Pinned units may not move or fire.
A pinned unit that suffers another pinned result is not affected by the second result.
[5.8] Fortifications may never be the target of a fire attack. They may only be attacked by demolition attacks (see Section 8.0).
[5.9] Fire Combat Results Table
(see charts and tables)
[6.0] Sighting
GENERAL RULE: No unit may fire at another unit unless it has sighted that unit.
PROCEDURE: Lay a straight edge (representing the line of sight) from the center of the firing unit's hex to the center of the target hex. If any of the hexes or hexsides the straight edge passes through contains any obstructing terrain, the line of sight (LOS) is blocked, and the units cannot sight each other.
CASES:
[6.1] If a unit can sight an Enemy unit, then it can also be sighted by the Enemy unit. Thus, if A can sight B, then B can sight A.
[6.2] A line of sight may not be traced through obstructing terrain.
LOS may be traced into, but not through, such a hex. LOS may not be traced along an obstructing hexside.
[6.3] A unit in a hilltop hex is obstructed only by cliff hexsides.
[6.4] As long as at least one active, undestroyed Belgian fortification contains an observation cupola, a Belgian fortification is never obstructed by terrain.
[6.5] Only a cliff hexside obstructs sighting of an adjacent unit or fortification.
In all other cases, the line of sight is obstructed by woods and hilltop hexes, wall, ridge, slope, and cliff hexsides.
[7.0] Close Assault
GENERAL RULE: During a Player's Assault Phase, he may conduct close assault attacks with his units.
PROCEDURE: The Phasing Player announces which of his unpinned units will be conducting close assault attacks against adjacent Enemy units. The close assault attacks are resolved, one by one, until all announced attacks are completed. The Phasing Player totals the number of units he has conducting a close assault attack against an Enemy hex, and subtracts one from this total (the defending unit). A differential is arrived at, which will range from 0 to +5. This differential is then found at the top of the Close Assault Table (CAT). A die is rolled on the CAT for each attack; apply the result immediately before proceeding to the next close assault.
CASES:
[7.1] A unit is never forced to conduct close assault attacks.
Close Assault is a voluntary action. In a given Assault Phase a Player may close assault with all, some, or none of his units that are eligible to conduct close assault attacks. All close assault attacks must be announced before any are resolved.
[7.2] Only one Enemy unit may be the object of a close assault attack.
Even though a close assaulting unit may be adjacent to more than one Enemy unit, it may conduct a close assault attack against only one such unit during the Assault Phase.
[7.3] No unit may participate in more than one close assault attack during a Close Assault Phase.
[7.4] No unit may be the object of more than one close assault during a Close Assault Phase.
[7.5] The abbreviations on the Close Assault Table indicate which units (if any) are eliminated.
AE: One of the Attacking units is eliminated. DE: The Defending unit is eliminated. -: No effect.
The attacking Player always chooses which of his units is to be eliminated.
[7.6] When a defender's hex is vacated as a result of close assault, the attacking Player may advance one of the victorious units into the vacated hexes.
Such an option must be exercised immediately, before the next close assault attack is resolved. A unit is never forced to advance after a close assault. Movement during the Assault Phase does not require the expenditure of Movement Points. The German Player may not advance a unit into an undestroyed fortification hex.
[7.7] A German unit may either conduct a close assault or a demolition attack during an Assault Phase. It may not do both.
[7.8] The defending unit's terrain may affect the die-roll of a close assault attack.
The terrain effects for a close assault are:
Woods and buildings: Add one to the die-roll.
Fortification: No effect.
Slope, ridge, and stream hexsides: Add one to the die-roll (only if all close assaulting units are close assaulting across such hexsides).
Close assaults may not be made across cliff hexsides. Fortifications may never be close assaulted, although units in their hex may be.
[7.9] Close Assault Combat Results Table
(see charts and tables)
[8.0] Demolition
GENERAL RULE: During the German Assault Phase, the German Player may attempt to destroy any Belgian fortifications with adjacent unpinned Friendly units.
PROCEDURE: The German Player examines any units that are adjacent to Belgian fortifications. He notes the Demolition Rating for each unit attempting to destroy Belgian fortifications. The German Player then rolls a die, and the Belgian fortification is destroyed if the die-roll is equal to or less than the Demolition Rating of the unit attempting the demolition.
CASES:
[8.1] All German units are assigned a Demolition Rating of 3.
All German units may also make one attack with a Demolition Rating of 5 to simulate the 110 lb. charge carried by each German unit.
[8.2] All demolition attacks must be announced in advance before any are executed.
The German Player must announce which German units are using their 110 lb. charge. If two units attack a fortification, and the first unit destroys the fortification, the second unit has wasted its attack (and perhaps its 110 lb. charge).
[8.3] A German unit may attack one adjacent fortification during the Assault Phase.
No unit may participate in more than one demolition attack in an Assault Phase (see also 7.7).
[8.4] A fortification may be attacked any number of times during an Assault Phase.
[8.5] Any unit that conducts a demolition attack through a ridge or slope hexside must add one to its demolition die-roll.
[8.6] Belgian units are never affected by a demolition attack.
[9.0] Belgian Fortifications
GENERAL RULE: Belgian fortifications are printed on the map. Fortifications may not be moved and may be destroyed only by demolition attacks. They fire as do other units, using the row on the CRT under the strength or type of the fortification.
CASES:
[9.1] The strength of a Belgian non-cupola fortification is printed inside the fortification symbol on the map.
[9.2] Each Belgian fortification may fire once per Fire Phase. Cupolas have a field of fire of 360 degrees, and can fire through any adjacent hexside.
[9.3] Belgian non-cupola fortifications are restricted in the direction in which they can fire.
The following diagram indicates the hexes into which a fortification may fire. The number of arrows projecting from a fortification symbol determines the field of fire.
(Two hex-grid diagrams, with shaded hexes showing the field of fire for a fortification symbol: one for a fortification with a single arrow and one for a fortification with two arrows. The shaded areas cannot be reproduced in text; consult the original diagrams.)
(Third diagram: shaded hexes show the field of fire for a casemate with a wider arrow pattern.)
Note: Several casemates have arrows pointing to non-adjacent hexsides. These casemates have more than one field of fire, although they may still only make one fire attack per phase (e.g.: 1409, 1607, 1616).
[9.4] At the start of the game, all Belgian fortifications are inactive.
Each Belgian fortification must have an Inactive marker placed on it before the beginning of the game. During the Belgian Activation Phase, the Belgian Player rolls a die for each inactive fortification on the map. A die roll of 1 through 4 activates the fortification, and the Inactive marker is removed from it. An active fortification may perform fire; an inactive fortification may not.
[9.5] Two cupolas must be designated as dummies.
Two cupolas must be designated by the Belgian Player as dummies. The cupola in hex 1420 may not be a dummy. Before the game begins, the Belgian Player secretly notes on a piece of scrap paper which cupolas are dummies. He does not inform the German Player that a cupola is a dummy unless it is destroyed by a demolition attack. Dummy cupolas may not conduct fire attacks.
[10.0] Reinforcements
How Additional Units Enter the Game
GENERAL RULE: The Belgian Player receives additional units during the Movement Phases of specified Game-Turns (see the schedule of reinforcements on the Game-Turn Record Track).
PROCEDURE: At any time during the Belgian Movement Phase, reinforcing units may enter the map. A 3 indicates that 3 Belgian units arrive on the mapedge. A 2F indicates that 2 Belgian units arrive as reinforcements from the fort garrison (see case 10.3).
CASES:
[10.1] When reinforcements arrive on the map, they behave identically to units already on the map.
The arrival (into a proper hex) costs the reinforcing units the appropriate expenditure of Movement Points for that terrain type. The units may move and participate in combat in the Player-Turn of arrival.
[10.2] Belgian reinforcements may be brought in along any mapedges.
Units entering the map on the same Game-Turn need not enter on the same mapedge, or in the same hex.
[10.3] Some Belgian units appear during their Game-Turn of arrival on any undestroyed Belgian fortification hex.
These units are designated with an "F" on the reinforcement track. Only one unit may be placed per fortification hex per Game-Turn. If the Belgian Player does not have enough undestroyed fortifications, he must withhold the excess units until he can bring them on. These reinforcements may not enter through dummy fortifications (see case 9.4). Such units may move normally.
[10.4] The entry of reinforcements may be delayed for as long as the Player wishes.
A Player may hold back all or part of the reinforcements due him in any given Game-Turn. He should keep a record of any such delayed reinforcements. Such units may be brought in during any of his subsequent Movement Phases.
[10.5] Belgian reinforcements may enter on Friendly-occupied fortification hexes, but there must be only one unit in the hex at the end of the Movement Phase.
[11.0] Mines
GENERAL RULE: In Scenario 12.2, the Belgian Player may secretly designate some hexes as minefield hexes. A German unit that uses bold movement into such a hex is immediately attacked by the minefield hex.
PROCEDURE: The Belgian Player must interrupt the movement of German units to execute minefield attacks. A minefield attack is executed against a unit in a minefield hex on the Belgian "3" fortification row on the CRT, subtracting two from the die-roll.
CASES:
[11.1] A unit may be attacked once by a given minefield in a single Movement Phase.
[11.2] A minefield attack is executed after a unit using bold movement enters or exits such a hex.
If the first hex a unit enters is a minefield hex and the unit is subsequently moved out of that hex, the unit's movement is interrupted in the minefield hex. If a German unit's only movement is into a minefield hex, the German Player is informed that there is a minefield in that hex.
[11.3] Any unit not affected by a minefield attack may continue its movement.
A unit that is pinned as a result of a minefield attack remains in the minefield hex.
[11.4] A unit that begins its Movement Phase in a minefield hex may use bold movement to exit that minefield hex, without being attacked by the minefield.
[11.5] Terrain in a minefield hex does not affect a minefield attack.
[11.6] The Belgian Player may not designate fortification hexes as minefield hexes.
[11.7] Minefields are never exhausted.
They make an unlimited number of attacks per Game-Turn, as long as units enter them by bold movement.
[11.8] Belgian units may never enter a minefield hex by bold movement.
[12.0] How to Play Eben Emael
GENERAL RULE: There are two scenarios for Eben Emael. There is a historical scenario, and a hypothetical scenario.
CASES:
[12.1] Historical Scenario
On the morning of 10 May 1940, German gliders dropped out of the sky onto fort Eben Emael. The Belgian command system was poor, the Belgian anti-aircraft gunners didn't fire on the gliders because they couldn't identify the nationality markings. Most of the Belgian fortifications were undermanned. In two hours, the Germans secured the fortification's guns, preventing them from firing on the German troops advancing through Belgium toward France.
Scenario Set-Up
GERMAN SET-UP
| Unit | Hex |
|---|---|
| Heinemann | 1405 |
| Harlos | 1506 |
| Wenzel | 1408 |
| Huebel | 1313 |
| Neuhaus | 1111 |
| Unger | 1314 |
| Haug | 1118 |
| Neidermeier | 0815 |
| Arendt | 0712 |
BELGIAN SET-UP
| Unit | Hex |
|---|---|
| Bel/1 | 0703 |
| Bel/2 | 0902 |
| Bel/3 | 1115 |
| Bel/4 | 1121 |
All Belgian fortifications have Inactive markers placed on them at the beginning of this scenario.
Reinforcements: See Reinforcement Track on the map.
Victory Conditions: The German Player wins if, at the end of the game, he has destroyed all fortifications in the following hexes: 0413, 0611, 0708, 0715, 1009, 1113, 1406, 1409, 1412, 1416, and 1505. Failure to destroy all of the above fortifications results in a Belgian victory.
Note: This scenario is quite one-sided. Historically the Belgians reacted very slowly, thereby allowing the Germans to accomplish their missions. This scenario is suitable for solitaire play.
[12.2] Belgian preparedness Scenario
This scenario postulates that there was someone in the Belgian army with some clout who was on the ball. The Belgians knew that the Germans had attack gliders, and knew their capabilities. If a Belgian officer had noticed the peril of the fort, he could have had mines placed around the fort, and machinegun emplacements around the fortifications.
Scenario Set-Up
GERMAN SET-UP
German units may be placed in any clear terrain hex that the German Player wishes. No German units may be stacked together.
BELGIAN SET-UP Same as 12.1. All Belgian Fortifications have Inactive markers placed on them at the beginning of the game.
Special Rules: The Belgian Player may choose any 15 hexes on the map as minefield hexes (see Section 11.0). Any German units initially placed in minefield hexes are attacked by those minefield hexes before the start of the game.
All Belgian fortifications may fire twice per Fire Phase. Any fortification that fires twice must conduct both of its fire attacks consecutively. The first fire attack it conducts must be with its regular strength. The second attack is conducted with a strength of 1, to simulate a machinegun emplacement around the fortification. This second attack may not take advantage of observation cupolas. This second attack is also limited by the field of fire of the fortification (6.4).
Optional Rule: Two German squads did not take part in the battle. The Players may wish to include the squads. They are: Witzig/11 and Maier/2.
Victory Conditions: Identical to 12.1, except the German Player need not demolish the fortification in hex 0708.
Crete
The False Victory, May 1941
[1.0] How To Start
COMMENTARY: Crete is a battalion level simulation of the battle between the German airborne forces of General Kurt Student and the multinational Commonwealth forces defending the island of Crete.
PROCEDURE: The components should be spread out on a large table with the two players sitting on either side. The counters should be carefully punched out and kept segregated as to nationality: Commonwealth and German. The Players should skim through the rules reading only the bold sentence-headlines in the various rules sections. The Players should then review the Sequence of Play and begin a trial game, referring to the rules when questions arise. To begin the game the German Player writes down on a piece of paper how many of each type of airborne unit will land on each of the three maps on Game-Turn One. After the German Player has written down his air drops, the Commonwealth Player places all of the Commonwealth units on the maps as he chooses. The game is then ready to be played and the Sequence of Play is started for Game-Turn One.
[1.1] The German Player must land at least 7 airborne units on Game-Turn One.
He may land all 13 if he chooses. The units which do not land on Game-Turn One may be landed on subsequent Game-Turns.
[1.2] The 43 Commonwealth units are placed on any combination of maps.
All, some, or none of the Commonwealth units may be placed on each of the three maps, but all of the Commonwealth units must be placed. There are no Commonwealth reinforcements.
[2.0] Equipment
GENERAL RULE: The game equipment consists of the rules, charts, maps and playing pieces. Players will need a six-sided die in order to play the game.
CASES:
[2.1] The game maps represent the terrain on which the battle was fought.
A hexagonal grid is superimposed on the terrain of each map to regulate movement and positioning of the playing pieces. To make the map lie flat, one should backfold it against its folds.
[2.2] The two Transit Tracks are used to move from one map to another.
A Transit Track is considered off map for purposes of airdrop and scatter, and may only be entered through its connecting road hex.
[2.3] The Terrain Effects Chart summarizes how the features on the maps affect the movement and combat of the playing pieces.
[2.4] The two Combat Results Tables are the means for resolving combat.
[2.5] The Scatter Table is used to determine the accuracy of an air drop.
[2.6] The playing pieces represent the actual military units which took part in the historic battle.
There are four items of information on the face of each ground unit and two on the face of each air unit. The Player is told what type of unit it is (infantry, mountain infantry, airborne infantry, or aircraft) and what its "name" or military designation is. Additionally, the Player is told the Combat Strength and the Movement Allowance of each unit.
[2.7] The Combat Strength of a unit is its printed number of Combat Strength Points.
A unit's Combat Strength is its basic power to attack and defend. The Terrain Effects Chart will detail how a defender's Combat Strength may be affected by terrain.
[2.8] A unit's Movement Allowance is the basic number of hexes the unit could move in one Movement Phase.
This ability is expressed in Movement Points. Differing amounts of Movement Points are expended to enter different types of terrain.
[2.9] A unit's size, designation, and aircraft type are included for historical interest only.
The game scale is one Game-Turn represents one day of real time and one hex represents one mile from side to side.
(Counter illustrations: a Ground Unit, front only, shows Designation, Unit Type, Combat Strength and Movement Allowance, e.g. "1/1, 6-5". An Air Unit, front only, shows Aircraft Type and Combat Strength, e.g. "Ju-88 3". A German Airborne Infantry unit has a front, e.g. "1/2, 6-5", and a blank back.)
(Further counter illustrations: German Mountain Infantry, e.g. "141/2, 6-6"; British Infantry, e.g. "N. Hus, 4-4"; Australian Infantry, e.g. "2/3, 3-4"; New Zealand Infantry, e.g. "Maori, 4-4"; Greek Infantry, e.g. "2, 4-3"; Air Unit, e.g. "Me-109 1"; Victory Point Marker "x10". Each has a blank back.)
[3.0] Basic Procedure
The Sequence of Play
The Players take turns moving their units and making attacks. The order in which they take these actions is described in this Sequence of Play outline. One completion of the Sequence of Play is called a Game-Turn. Each Game-Turn consists of two Player-Turns. The German Player-Turn consists of three Phases and the Commonwealth Player-Turn consists of two Phases.
The German Player-Turn
Step One: German Air Landing Phase The German Player may drop his airborne units and land his mountain units. He may drop and land as many or as few units as he wishes, one after another, within the limits of the airdrop and air landing rules.
Step Two: German Movement Phase The German Player may move his units. He may move as many or as few as he wishes, one after another.
Step Three: German Combat Phase German units may attack adjacent Commonwealth Units. The German Player may perform these attacks in any order he wishes, applying the results immediately as each attack is made.
The Commonwealth Player-Turn
Step Four: Commonwealth Movement Phase The Commonwealth Player may move his units.
Step Five: Commonwealth Combat Phase The Commonwealth Player may attack adjacent German units.
These five Steps are repeated 10 times. The game is then over and the Players determine who has won according to the Victory Conditions (12.0).
[4.0] Movement of Units
GENERAL RULE: Each unit has a Movement Allowance number printed on it which represents the basic number of hexes it may move in a single Movement Phase. Each Player moves only his own units during the Movement Phase of his Player-Turn (as outlined in the Sequence of Play).
PROCEDURE: Units move one at a time, hex-by-hex, in any direction or combination of directions that the owning Player desires. The Movement Phase ends when the Player announces that he has moved all of his units that he chooses to.
CASES:
[4.1] A unit may never exceed its Movement Allowance.
During its Movement Phase, each unit may move as far as its Movement Allowance permits. Basically, each unit spends one Movement Point of its total Allowance for each hex entered. Individual units may move less than their Movement Allowance. Units are never forced to move during their Movement Phase. Units may not, however, lend or accumulate unused Movement Points.
[4.2] Units must spend more (or less) than one Movement Point to traverse some terrain types.
The cost to enter a clear terrain hex is one Movement Point. The cost to enter a rough terrain hex is two Movement Points. These costs are specified in the Terrain Effects Chart. If a unit does not have sufficient Movement Points to expend to enter a given hex, it may not do so.
A hex containing more than one type of terrain is entered at the higher of the two costs.
When a unit enters a hex through a road hexside, it pays only 1/3 of a Movement Point for moving one hex along the road regardless of the type of terrain entered. Conversely, a road has absolutely no effect on movement if it is entered through a non-road hexside.
[4.3] A unit may never enter nor pass through a hex containing an Enemy unit.
[4.4] As many as three Friendly units may end the Movement Phase in the same hex.
Units are still moved individually even though they may begin and end their Movement Phase stacked with some other Friendly unit.
[4.5] A unit must stop upon entering a hex that is in the Zone of Control of an Enemy Unit.
Whenever a unit enters a hex that is directly adjacent to any of the Enemy Player's units, the moving unit must stop and move no further that Phase. Note that there are six hexes adjacent to most hexes on the map. The six hexes adjacent to an Enemy unit are called the Zone of Control of that unit.
[4.6] A unit which begins its Movement Phase in an Enemy Zone of Control may move out of that Zone of Control.
A unit which starts the Movement Phase adjacent to an Enemy unit may move so long as the first hex it enters is not in an Enemy Zone of Control. If the only hexes adjacent to the unit are Enemy occupied or in an Enemy Zone of Control, that unit may not move. Note: The presence of Friendly units does not negate Enemy Zones of Control for purposes of movement.
[4.7] A unit which is forced to retreat off the map as a result of combat is eliminated.
A unit may not retreat off the map and into a transit track. Units may only exit a map by movement into a transit track (see 7.0).
[4.8] Terrain Effects Chart (see map)
[5.0] German Airdrop
GENERAL RULE: The German Player starts the game with 13 airborne infantry units. They enter the map during the German Player's Air Landing Phase. An air dropped unit may not move or attack on the turn it enters the map. However, if such a unit scatters onto an enemy occupied hex, it must immediately attack the unit.
PROCEDURE: The German Player chooses a target hex in which to land the unit. The German Player then locates the terrain type of the hex on the Scatter Table. He rolls a die and cross indexes the die number with the terrain column and reads the result. The result will be either Accurate or Scatter. If Accurate, the unit has successfully landed in its target hex and is placed on the hex. If Scatter, the German Player rolls a die and consults the scatter diagram printed on the map. The number rolled corresponds to a direction arrow on the Scatter Diagram. The unit lands one hex away from its target hex, in the direction indicated by the scatter die roll. This procedure is used for each individual air dropping unit and must be completed for one unit before going on to the next.
CASES:
[5.1] A Commonwealth occupied or all-sea hex may not be chosen as a target hex.
A hex in a Commonwealth Zone of Control may be chosen as a target hex.
[5.2] A unit which scatters into a Commonwealth occupied hex must immediately attack the Commonwealth unit using the All Out Attack Combat Results Table.
If the German attack results in a counterattack, the Commonwealth unit may retreat or counterattack (using the All Out Table). If the Commonwealth unit counterattacks, the German unit does not receive the defensive benefit of the terrain in the hex. If the Commonwealth counterattack results in a counterattack, the German unit may not retreat but must immediately counterattack on the All Out Table. This exchange of counterattacks continues until either the German unit is eliminated, the Commonwealth unit is eliminated, or the Commonwealth unit retreats.
[5.3] A unit which scatters off map or into an all-sea hex is eliminated.
[5.4] A unit which lands in a hex already occupied by three German units is eliminated.
A unit may land in a hex occupied by less than three German units.
[5.5] A unit may not move during the German Movement Phase of the Game-Turn in which it lands.
It may move normally during the German Movement Phase of the Game-Turn following the Game-Turn in which it landed. The unit may retreat normally if attacked by Commonwealth units.
[5.6] A unit may not attack during the Combat Phase of the Game-Turn in which it lands.
The unit may be forced to attack during the German Air Movement Phase if the unit scatters into a Commonwealth occupied hex. The unit defends normally against Commonwealth attacks.
[5.7] A unit may only make one airdrop per game.
Once an airborne unit has landed on the map it may not use airborne movement again (regardless of whether or not the Germans capture an airfield).
[5.8] A transit track may never be chosen as a target hex for an airdrop.
A unit which scatters off map is destroyed, not placed in a transit track.
[5.9] Scatter Table (see map)
[6.0] Landing The German Mountain Troops
GENERAL RULE: The German Player has 12 mountain infantry units available for use in the game. To enter play these units must be landed on a captured airfield during a German Air Landing Phase. Three mountain infantry units may land per airfield.
PROCEDURE: Landing mountain units are placed in an airfield hex during the German Air Landing Phase. The units may then move and attack normally during the German Movement and Combat Phases of that Game-Turn and all subsequent Game-Turns.
CASES:
[6.1] For mountain units to land on an airfield hex, the hex must be unoccupied by Allied units.
Mountain units may land on an airfield which is in an Allied Zone of Control as long as the airfield hex is either German occupied or vacant.
[6.2] If an airfield hex is occupied by German units, the mountain units may not land in violation of three units per airfield, ground units plus landing units.
Thus, if an airfield hex contained one German unit, only two mountain units could land on that airfield. If the airfield hex contained three German units, no mountain units could land there at all.
[6.3] A mountain unit may move and attack normally on the Game-Turn in which it lands.
If the mountain unit lands in a Commonwealth Zone of Control it may still be able to move that Game-Turn.
[6.4] A mountain unit is never subject to scatter.
[6.5] A mountain unit may only land once per game.
Once a mountain unit has landed on an airfield it may never use air movement again (regardless of whether or not the Germans control an airfield).
[7.0] Movement From Map To Map
GENERAL RULE: There are three different maps in Crete. Movement from one map to another is possible through the use of transit tracks that connect the three maps.
PROCEDURE: A unit may exit a map by entering one of the transit tracks connected to the map by a road. A transit track may only be entered if the unit exits the map by the road which connects the transit track to the map. The unit enters the transit track at a cost of one Movement Point and ends its movement for that Game-Turn. The unit which entered the transit track must enter the connecting map during the owning Player's next Movement Phase.
CASES:
[7.1] Once a unit has entered a transit track it must enter the next adjacent map on the next Game-Turn.
A unit which enters a transit track may not "turn back" and re-enter the map from the point where it entered the transit track. It must complete the transit to the adjacent map.
[7.2] Friendly and Enemy units may occupy a transit track at the same time.
Friendly and enemy units occupying the same transit track may not attack each other or impede each other's movement.
[7.3] The first hex entered when entering a map from a transit track may not be in an Enemy Zone of Control.
[7.4] A unit must exit a transit track and enter a map on the road hex which connects the map to the transit track.
If the road hex is Enemy occupied or in an Enemy Zone of Control, the unit may enter the map in the closest non-Enemy occupied or controlled hex.
[7.5] A unit pays the Movement Point cost of the terrain in the hex it enters when entering a new map from a transit track.
Thus, a unit entering a map on the road hex that is connected to that transit track would pay only 1/3 Movement Point to enter the hex.
[7.6] A unit pays one Movement Point to enter a transit track even though the track is connected to the map by a road.
[7.7] A unit which begins its Movement Phase in a transit track must enter the next map and may not re-enter the transit track that Game-Turn.
[8.0] Combat Pre-Conditions
Eligibility Requirements for Attacking Units
GENERAL RULE: Each unit has a Combat Strength number printed on it which represents its ability to attack during its Combat Phase and to defend during the Enemy Combat Phase. Units that are adjacent to Enemy units may attack during their Combat Phase. The attacking Player may resolve his attacks in any order he wishes.
CASES:
[8.1] A unit that is in an Enemy Zone of Control may attack.
Attack is voluntary, unless an airborne unit scatters into an Allied occupied hex (see 5.0). If there are several combinations of Enemy and Friendly units in each other's Zones of Control, the attacking Player may choose which of his units will attack which Enemy unit(s).
[8.2] No unit may initiate more than one attack per Combat Phase.
A counterattack result on the Combat Results Table may allow a unit to attack more than once in a given combat. A given Enemy unit may be the object of only one combat, although the unit itself may attack or be attacked more than once as a result of counterattack, in a single Combat Phase.
[8.3] More than one unit may participate in a given attack.
As many units as can be brought to bear can participate in the same attack.
[8.4] More than one Enemy unit can be the object of the same attack.
Each attacking unit must be adjacent to each and every defending unit for the attack to be resolved as one combat.
[8.5] A unit's Combat Strength is indivisible.
Units may not use part of their strength in one attack and part in another, nor may they reserve or withhold part of their strength in attack or defense.
[8.6] All the units stacked in the same hex must be attacked as a single combined Combat Strength.
The Combat Strength of all the units that are the object of a given attack are added together to form a combined Combat Strength even if the units being attacked occupy different hexes.
[8.7] All the units stacked together in a hex need not attack the same Enemy unit, or at all.
One unit could attack one Enemy unit and the other unit could attack another Enemy unit or not at all.
[9.0] Combat Resolution
How Attacks are Evaluated and Resolved
GENERAL RULE: An "Attack" is defined as the comparison of the strength of a specific attacking force with that of a defending force resolved by the throw of a die in connection with one of the Two Combat Results Tables. The results may affect either, or both, the attacker and the defender.
PROCEDURE: The attacking player totals the Combat Strength of all of his units that are involved in a given attack and compares the total with the total Combat Strength of the Enemy unit or units being attacked. The Player locates the column heading on the Combat Results Table that corresponds to the Combat Ratio. He rolls the die and cross-indexes the die number with the Combat Ratio column and reads the result. The indicated result is applied immediately, before going on to any other attacks. When he has made all of his attacks, the Player announces the end of his Combat Phase.
CASES:
[9.1] The attacking Player must announce which of his units are involved in a given attack and which of the two Combat Results Tables he will use, before the attack is resolved.
The Combat Results Table is always chosen by the Player conducting the attack or counterattack except when the Player is obligated to use the All Out Attack Table due to an airdropping unit scattering onto an Enemy occupied hex (see 5.2).
[9.2] The calculated Combat Ratio is always rounded off in favor of the defender.
Thus, if 11 Combat Strength Points attack 4, the Combat Ratio is rounded to "2 to 1."
[9.3] The Combat Ratio may not be lowered.
[9.4] If the Combat Ratio is higher than 7 to 1 it is treated as 7 to 1 and attacks at Ratios of less than 1 to 3 are not allowed.
An airborne unit which scatters into an Enemy occupied hex is eliminated if it cannot attack with at least a 1 to 3 ratio.
[9.5] All Out Attack Combat Results Table (see map)
[9.6] Limited Attack Combat Results Table (see map)
[10.0] The Results of Combat
GENERAL RULE: The abbreviations on the Combat Results Tables will indicate how the attacking and defending units are affected by that attack. A unit will be either unaffected, eliminated, or given the option to retreat or counterattack, as a result of an attack.
CASES:
[10.1] Ae = Attacker eliminated; all units involved in the attack are eliminated.
Defending units have the option to advance after combat.
[10.2] De = Defender eliminated; all the defending units are eliminated.
The attacking units may advance after combat.
[10.3] Ee = Equal elimination; the defending units are eliminated and the attacking force must lose a number of Combat Strength Points at least equal to the printed value of the defending force.
If any attacking units survive, they may advance after combat.
[10.4] Ne = No effect; no attacking or defending units are affected by the attack.
[10.5] Ca = Counterattack; the defending force must either retreat one hex or counterattack all the Enemy units in one of the hexes from which he was attacked.
The counterattack must be resolved before the original attacker may resolve any of his other attacks. Should the counterattacking defender obtain a "Ca" result, the original attacker must roll his original attack again, less the air power, or retreat one hex.
Should a unit be eliminated or retreat instead of counterattacking, the victorious units may advance after combat. A unit which is unable to retreat and cannot counterattack with at least a 1 to 3 Combat Ratio is eliminated.
The exchanging of counterattacks must continue until one side retreats or a "De," "Ae," "Ee," or "Ne" result occurs.
The choice of Combat Results Tables is up to the counterattacking Player (Exception: see Case 5.2).
[10.6] Units may be retreated (by their owners) only into "safe" hexes.
A safe hex is defined as a traversable hex, not in an Enemy Zone of Control, or, a traversable hex in an Enemy Zone of Control that is occupied by less than three Friendly units. A "traversable hex" is one that the unit could legitimately enter during a Movement Phase.
[10.7] When a hex is vacated as a result of combat, one or more victorious participating units may advance into that hex.
Such an advance as a result of combat is an option which must be exercised immediately before going on to resolve any further combat in that Phase. A unit is never forced to advance after combat. A unit may advance into an Enemy controlled hex (even when advancing directly from an Enemy controlled hex).
[10.8] Advance after combat and retreat does not require the expenditure of Movement Points.
[11.0] Luftwaffe (The German Air Force)
GENERAL RULE: The influence of the German air force is represented in the game by the seven Luftwaffe air units. These units are used to assist attacking German ground units during the German Combat Phase.
PROCEDURE: At the moment of combat the German Player may commit up to three air units in an attack. The air units that are assisting in the attack are placed on top of the Enemy unit being attacked. The number printed on the face of the air units are added to the Combat Strengths of the attacking ground units to arrive at a total Combat Strength for that particular combat.
CASES:
[11.1] Air units may only be used to aid an attack.
Air units may never be used on defense.
[11.2] Air units may not attack by themselves.
Their Combat Strength may only be used to increase the total Combat Strength of a German Ground attack.
[11.3] Air units are never subject to results on the Combat Results Table.
Air units are never destroyed, retreated, or affected by any combat result.
[11.4] An air unit may be used only once per Game-Turn.
Once an air unit has been used in an attack, it is considered expended for that Game-Turn. All air units are available each Game-Turn, regardless of whether or not they were used in a previous Game-Turn.
[11.5] An air unit may not be used in an attack caused by German airborne unit landing, as a result of scatter, on a Commonwealth occupied hex.
Air units are not used on Game-Turn One.
[11.6] Air units may be placed on any hex on the map.
The air units do not move as ground units do and therefore are not subject to movement restrictions. They are simply placed on top of an Enemy unit being attacked.
[12.0] How To Win
GENERAL RULE: Victory in Crete is calculated in terms of Victory Points. The Player with the most Victory Points at the end of the game may win. There are three "levels" of victory that are possible—Marginal, Substantial, and Decisive—the level depending on the size of the difference in Victory Points attained. The game ends at the conclusion of Game-Turn 10.
PROCEDURE: After the game has ended, total the Victory Points earned by each Player and subtract the smaller number from the larger. Compare the difference to the schedule listed in 12.3 to determine the level of victory.
CASES:
[12.1] One Victory Point is awarded for each Enemy Strength Point eliminated.
The Victory Point Track is located on the map and is used to record the current Victory Point Totals for both sides. The Victory Point markers are advanced when an Enemy unit is eliminated.
[12.2] Victory Points are scored for occupying each of the three air fields and the town of Suda at the conclusion of the game.
To receive the Victory Points, the hex must be occupied by a Friendly unit at the end of the game.
Each air field hex is worth 5 Victory Points.
The town of Suda is worth 10 Victory Points.
[12.3] The quality of victory is measured in Victory Point superiority.
| Victory Point Superiority | Level of Victory |
|---|---|
| 0 | Draw |
| 1 to 20 | Marginal Victory |
| 21 to 40 | Substantive Victory |
| 41 or more | Decisive Victory |
Red Devils
The Massacre of the Gallant, September 1944
[1.0] How to Start
COMMENT: Red Devils is a battalion level simulation of the battle between the British First Airborne Division and the German formations around the Dutch town of Arnhem in September, 1944. The Red Devils (as British paratroopers were called) found themselves trapped 100 kilometers behind enemy lines fighting desperately to hold their objective, the bridge across the Neder Rijn (Lower Rhine) at Arnhem.
The game scale is 600 meters per hex. Each Game-Turn represents 12 hours of real time.
PROCEDURE: The die-cut counters should be punched out and kept segregated by national group: British (including Polish) and German. Then the pieces with only a four-digit number on their backs should be placed in the hexes with matching numbers.
[1.1] Four German units are placed on the map at the start of play.
These units are placed before the British Player sets up his units.
[1.2] Fourteen British units marked "Game-Turn 1" are placed on the map at the start of play.
Three of these units have two hex numbers printed on them; they may be placed in either of the two hexes by the British Player. Once play begins the British Player will distribute these units to the surrounding hexes by using the Airlanding Procedure, as described in Section 9.0.
[1.3] The remaining units will enter play as the game proceeds.
These units should be placed on the space of the Turn Record Track that matches the Game-Turn number on their backs.
[2.0] Game Equipment
GENERAL RULE: The game equipment consists of the rules, charts, map, and playing pieces.
CASES:
[2.1] The game map represents the terrain on which the battle was fought.
A hexagonal grid is superimposed on the terrain of the map to regulate movement and positioning of the playing pieces. Players will note that each hexagon (hereafter called "hex") on the map has its own four digit identity number. The map also displays the Terrain Key and the Turn Record Track.
[2.2] The charts and tables are used to summarize and resolve certain game functions.
The Terrain Effects Chart summarizes how the features on the map affect the movement of the playing pieces. The Combat Results Table is the primary means for resolving combat and opportunity fire. The Airlanding Table is used when the British units enter play. One six-sided die is needed in order to play the game.
[2.3] The playing pieces represent the actual military units that took part in the historical battle.
There are four items of information on the front face of each unit and one or two on the back. On the front is the type of unit (infantry, armor, artillery, etc.) and its "name" or military designation. Additionally, the combat strength and the range of each unit is given. On the back is the hex the unit starts in or what game-turn the unit enters the game as a reinforcement and where it enters.
Unit Designations: Units may be identified by a single number or by a two- or three-part designation. In two- or three-part designations, the number to the right is the unit's superior formation, usually a division. In three-part designations, the middle number is either the regiment or brigade to which the unit is attached. Unit designations have no effect; they are included for historical interest.
(Counter illustrations: the Combat Unit front shows Designation, Unit Type, Combat Strength and Range, e.g. "2/21/10SS, 5-2". The back shows the Game-Turn of Entry and the Entry Hex, e.g. "9, 0110". Sample unit types shown, with example backs: Armor; Armored Reconnaissance; Armored Infantry; Motorized Infantry (see Case 4.8); Airborne Reconnaissance; Infantry; Parachute Infantry; Glider Infantry; Anti-Tank; Airborne Anti-Tank; Flak; Machinegun Infantry.)
[2.4] Combat strength is the basic power of a unit when attacking, defending, or taking part in opportunity fire.
[2.5] Range is the maximum number of hexes the unit may be from an enemy unit it is attacking or conducting opportunity fire against.
A unit without a printed range is considered to have a range of one.
[2.6] Each unit has a Movement Allowance of ten.
This is the unit's basic ability to move in one Movement Phase and is expressed in terms of movement points.
[2.7] The type of unit is indicated by the symbol on the front of the playing piece.
Unit Size: Each unit represents a battalion, or its equivalent.
(Further counter illustrations: Artillery; Airborne Artillery; Rocket Artillery.)
[3.0] Sequence of Play
The Players take turns moving their units and making attacks. The order in which they take these actions is described in this Sequence of Play outline. One completion of the Sequence of Play is called a Game-Turn. Each Game-Turn consists of two Player-Turns. Each Player-Turn consists of three Phases. The Player whose Player-Turn is in progress is often referred to as the Phasing Player, the other Player as the non-Phasing Player.
The British Player-Turn
Step One: British Movement Phase The British Player may move his units. He may move as many or as few as he wishes, one after another. Whenever he moves a unit within range of a German unit, that unit's movement may be interrupted while the German Player conducts opportunity fire against the unit.
Step Two: German Disruption Removal Phase The German Player flips over all his units that are currently disrupted; they are no longer disrupted.
Step Three: British Combat Phase The British Player may attack adjacent enemy units. He may perform these attacks in any order he wishes, applying the results immediately as each attack is made. British units that are not adjacent to enemy units may participate in an attack if they are within range of the unit being attacked.
The German Player-Turn
Step Four: German Movement Phase The German Player may move his units and is subject to British opportunity fire when he does so.
Step Five: British Disruption Removal Phase The British Player flips over his disrupted units, within the limits of his command points.
Step Six: German Combat Phase The German Player may attack adjacent enemy units.
These six Steps are repeated ten times. The game is then over and the Players determine the victor. Certain Game-Turns may be preceded by a special Air Landing Phase, during which the British Player places units on the map in accordance with the Air Landing Procedure (see Section 9.0).
[4.0] Movement of Units
GENERAL RULE: Each unit has a Movement Allowance of ten, which is the basic number of hexes it may move in a single Movement Phase. Each Player moves only his own units during the Movement Phase of his Player-Turn (as outlined in the Sequence of Play).
PROCEDURE: Units move one at a time, hex-by-hex, in any direction or combination of directions that the Player desires. The Movement Phase ends when the Player announces that he has moved all of his units that he chooses to (or as of the time that he begins to make any attacks). Disrupted units may not move.
CASES:
[4.1] A unit may never exceed its Movement Allowance.
Individual units may move less than their Movement Allowance. Units are never forced to move during their Movement Phase. Units may not lend or accumulate unused Movement Points.
[4.2] Units must spend more (or less) than one Movement Point to traverse some terrain types.
The basic cost to enter a hex is one Movement Point. The entry cost to enter some terrain hexes, however, is higher (or lower) while other terrain hexes may not be entered at all by certain units. These costs and prohibitions are specified in the Terrain Effects Chart. If a unit does not have sufficient Movement Points to enter a given hex, it may not do so.
A hex containing more than one type of traversable terrain is entered at the higher of the two costs. When a hexside (such as a river) has a "plus" cost attached to it, that cost is in addition to the Movement Point cost for entering the hex.
When a unit enters a hex through a major or minor road hexside, it pays only the cost for moving one hex along the road regardless of the type of terrain entered. Conversely, a road has absolutely no effect on movement if the hex is entered through a non-road hexside. A road hex often costs less than one Movement Point to enter. Players should take care to keep track of fractions of Movement Points while traversing a road.
[4.3] A unit may never enter or pass through a hex containing an Enemy unit.
One or more units may move through a hex containing another Friendly unit, but the moving units may never end the Movement Phase in the same hex as another unit. Exception: The German flak unit (in hex 2214) does not count as a unit for purposes of stacking; another German unit may occupy the hex with this unit.
[4.4] A unit must stop upon entering a hex adjacent to an undisrupted Enemy unit.
The six hexes adjacent to a unit are called the Zone of Control of that unit. Exception: Units never exert a Zone of Control across the Neder Rijn River.
If a unit begins the Movement Phase of its turn in an Enemy Zone of Control, it may leave that hex and move normally as long as it expends three Movement Points in addition to the terrain cost of the hex it is entering and that hex is not also in an Enemy Zone of Control. If it subsequently re-enters an Enemy Zone of Control, it must stop immediately.
Zones of Control exerted by Enemy disrupted units also inhibit movement. However, if a unit moves into a hex controlled only by disrupted Enemy units, it need not stop moving if it can expend three additional Movement Points to exit the Zone of Control and does not move directly into another Enemy controlled hex.
[4.5] British units may not leave the map.
German units may move off the map during their Movement Phase, but only from a German entry hex (see Case 10.2). A unit must expend one Movement Point to move off the map. A German unit exited from the map in this manner may re-enter the game from any German entry hex labeled with the same letter as the one from which it exited, after at least a one Game-Turn delay. Example: On Game-Turn Four a German unit moves off the map from hex 0113. On any Game-Turn, beginning with Game-Turn Six, it may re-enter the map from any entry hex marked "A."
[4.6] Mechanized and most non-mechanized units may never move across an unbridged hexside of the Neder Rijn River.
Any infantry unit (only) may cross an unbridged hexside of the Neder Rijn if it has not been moved at all during its Movement Phase. The movement requires the expenditure of all the unit's Movement Points. The move may not be made if the unit is entering or exiting an Enemy Zone of Control. If the unit undergoes opportunity fire (see Section 5.0) while making the move, it receives no terrain benefits, and if it becomes disrupted, it is eliminated instead. A Player may only attempt to move one unit in this manner per Player-Turn.
[4.7] The ferry across the Neder Rijn may only be used by the German Player.
He may only use it if hexes 1112 and 1113 are not Enemy controlled. Only one German unit may use the ferry per Game-Turn.
[4.8] Special German movement restrictions and abilities
All German motorized infantry units may be moved as mechanized or non-mechanized units. When the German Player begins to move such a unit, he simply declares which type of movement the unit will use for the duration of the Movement Phase. If a motorized infantry unit begins a Movement Phase already in a hex prohibited to mechanized units, it must be moved as a non-mechanized unit, if at all.
The German static flak unit (in hex 2214) may never be moved. If the unit receives a "D" result in combat (see Case 7.6) it may not retreat, it must become disrupted. The German armor unit 1/9/9SS (starts in hex 2708) may not move on Game-Turn One.
[4.9] Terrain Effects Chart
(see charts and tables)
[5.0] Opportunity Fire
GENERAL RULE: During the Movement Phase, if the Phasing Player moves any unit into a hex that is within range of any undisrupted non-artillery Enemy unit, the movement of that unit may be interrupted by the non-Phasing Player while he conducts opportunity fire against the moving unit. After the opportunity fire is resolved, the unit may continue moving, assuming it has any Movement Points remaining and has not become disrupted or eliminated as a result of that fire.
PROCEDURE: Opportunity fire is resolved in a manner similar to combat (see Section 7.0). The non-Phasing Player determines the differential by subtracting the combat strength of the moving unit from the strength of the unit conducting opportunity fire. He then locates this differential on the proper column of the Combat Results Table and rolls the die to yield a result. The moving unit is considered the defender in opportunity fire and suffers any results received on the Combat Results Table. A unit conducting opportunity fire is never affected by an adverse result it may receive on the CRT.
CASES:
[5.1] Opportunity fire may only be conducted against a unit that is moved into a hex within range of an eligible Enemy unit.
However, if a unit begins its Movement Phase in a hex adjacent to an Enemy unit and the Phasing Player wishes to move that unit, the non-Phasing Player may conduct opportunity fire with all such adjacent units before the unit is actually moved. The fire is resolved in that hex. If the unit attempting to move is disrupted by fire, it is disrupted in that hex.
[5.2] Each unit belonging to the non-Phasing Player may conduct opportunity fire once against each and every unit that is moved within its range.
If more than one unit is eligible to conduct opportunity fire on a moving unit, the fires are resolved separately. If the differential in an opportunity fire is less than "-3", the fire is resolved on the "-3" column.
[5.3] If a unit undergoing opportunity fire incurs a "D" result, it must become disrupted; it may not retreat.
If a unit becomes disrupted by opportunity fire, no more opportunity fires may be conducted against that unit in that Movement Phase, even if other Enemy units are eligible to fire. If a unit becomes disrupted as a result of opportunity fire while stacked with another unit (permissible during movement, see Case 4.3), it is eliminated instead.
[5.4] Terrain in the hex a unit moves into may affect opportunity fire conducted against that unit.
A unit undergoing opportunity fire receives the benefits of terrain in the hex it occupies as described on the Combat Results Table. Opportunity fire may not be conducted against a unit that is moved into a city hex, unless the unit is actually adjacent to the Enemy unit conducting the fire. Furthermore, opportunity fire may not be conducted from a range of two hexes if a city hex or a hexside that is part of a city hex lies between the firing unit and the target unit.
[6.0] Combat Pre-conditions
GENERAL RULE: During its Combat Phase each unit may participate in an attack against an Enemy occupied hex to which it is adjacent or that is within its range.
PROCEDURE: Undisrupted units that are adjacent to (immediately next to) or are within range of Enemy units are eligible to conduct attacks during that Combat Phase. Attacks are conducted using the Combat Results Table and the procedures detailed in the section on Combat Resolution (Section 7.0). Disrupted units may not conduct attacks.
CASES:
[6.1] A unit is never forced to attack.
In a given Combat Phase, some of the eligible units may attack and others may not.
[6.2] Only one Enemy occupied hex may be the object of a given attack.
Even though an attacking unit may be adjacent to more than one Enemy occupied hex, it may only conduct an attack against one such hex in its Combat Phase.
[6.3] No unit may participate in more than one attack per Combat Phase.
[6.4] No unit may be the object of more than one attack per Combat Phase.
Regardless of how many attacking units are adjacent to it, a given Enemy unit may only be subjected to one attack per Combat Phase.
[6.5] More than one adjacent unit may participate in a given attack.
[6.6] One or two units with a range greater than one may participate in an attack from non-adjacent hexes.
If an Enemy unit under attack is within range of a Friendly unit that is not adjacent to it, the Friendly unit may contribute its full combat strength to the attack within the restrictions of Cases 6.7 and 6.8. However, only one artillery unit (any unit with a range greater than two) and one ranged non-artillery unit (any unit with a range of two) may participate in an attack from non-adjacent hexes.
[6.7] A unit that is in an Enemy controlled hex may not participate in an attack against a non-adjacent unit.
[6.8] At least one Friendly unit participating in an attack must be adjacent to the Enemy unit under attack.
[6.9] No terrain prohibits combat.
Terrain (including cities and rivers) does not prohibit units from participating in an attack from adjacent or non-adjacent hexes. Terrain will, however, affect the resolution of combat (see Case 7.3).
[7.0] Combat Resolution
GENERAL RULE: An "attack" is defined as the comparison of the strength of a specific attacking force with that of a specific defending force resolved by the throw of the die in connection with the Combat Results Table. The results may affect either or both the attacker and Defender.
PROCEDURE: The attacking Player totals up the combat strength of all his units that are involved in a given attack and subtracts from that total the combat strength of the Enemy unit being attacked. The resulting number is called the combat differential. The Player locates the column heading on the Combat Results Table that corresponds to the combat differential. He rolls the die and cross-indexes the die number with the Combat Differential Column and reads the result. This result is applied immediately, before going on to any other attacks. When he has made all of his attacks, the Player announces the end of his Combat Phase.
CASES:
[7.1] The attacking Player must announce which of his units are involved in a given attack against a specific defending unit.
He must calculate and announce the combat differential, specifying which of his units are participating in the attack from adjacent and non-adjacent hexes, before it is resolved. He may resolve attacks in any order he chooses.
[7.2] The calculated combat differential is always determined to represent a specific column of results on the Combat Results Table.
If the combat differential in an attack is higher (or lower) than the highest (or lowest) column shown on the CRT, it is simply treated as the highest (or lowest) column. Any applicable column shifts are then taken into account.
[7.3] The terrain in the hex the defending unit occupies may alter the differential referred to on the Combat Results Table.
If a unit under attack is in a hex containing any type of terrain other than clear or broken, or is separated from all adjacent attacking units by a river hexside, the differential column used to resolve the combat will be one or more columns to the left of the determined differential.
[7.4] If an anti-tank unit is involved in a combat, the differential referred to on the Combat Results Table may be altered.
If an anti-tank unit, or a unit within range of a Friendly non-disrupted anti-tank unit is attacked, and any of the adjacent attacking units are armor, armored infantry or reconnaissance types, the combat is resolved one column to the left of the normal differential.
[7.5] If a unit under attack is totally surrounded by Enemy units or their Zones of Control, the combat is resolved one column to the right of the normal differential.
Units friendly to the defending unit do not negate Enemy Zones of Control for this purpose. This shift is not applied if the defending unit is in a city hex.
[7.6] The abbreviations on the Combat Results Table will indicate that units are either disrupted, retreated or destroyed.
Ae = Attacker eliminated; all Attacking units in hexes adjacent to the defending unit are destroyed. Units attacking from non-adjacent hexes are not affected. Defending unit has the option to advance after combat.
Ad = Attacker retreats; all Attacking units in hexes adjacent to the defending unit are forced to move two hexes away from the defender, or they all must become disrupted. Units attacking from non-adjacent hexes are not affected. The defending unit has the option to advance after combat, if the attacking units retreated.
- = No Effect; all Attacking and Defending units remain in place.
Dd = Defender retreats; the Defending unit is forced to move two hexes away from the attacking unit(s) or become disrupted. If the defending unit is already disrupted it must retreat (see Case 8.2). One of the adjacent attacking units may advance after combat, if the defending unit retreated.
De = Defender eliminated; the Defending unit is destroyed. One of the adjacent attacking units may advance after combat.
De* = If the Defending unit is in a city hex, treat as Dd, otherwise as De
[7.7] Units may only be retreated (by their owners) into "safe" hexes.
A "safe" hex is defined as a vacant, traversable hex, not in enemy Zone of Control. If there is no safe hex available, or a Player does not wish to retreat a unit, the unit is disrupted instead. A "traversable hex" is one that the unit could legitimately enter during a Movement Phase. Units may not retreat off the map or across an unbridged hexside of the Neder Rijn.
A unit that retreats must move two hexes away from the hex it occupied at the instant of combat. Friendly units may not be moved to make room for a retreating unit, nor may the retreating unit move over a Friendly unit.
[7.8] When an Enemy unit is retreated or eliminated as a result of combat, a single adjacent participating unit may advance.
The unit may advance one hex into the hex the retreated unit occupied at the instant of combat, or two hexes into the hex the Enemy unit retreated through. Such an advance as a result of combat is an option which must be exercised immediately before going on to resolve any further combat in that phase. Units may advance into Enemy controlled hexes (even when advancing directly from an Enemy controlled hex). If a unit is eliminated, an adjacent participating unit may only advance into the hex formerly occupied by the destroyed unit.
[7.9] Advance or retreat during the Combat Phase does not expend Movement Points.
[8.0] Disruption
GENERAL RULE: During the course of play, units may become disrupted as a result of opportunity fire, combat or, if a British unit, as a result of the airlanding procedure.
PROCEDURE: When a unit must become disrupted, it is flipped over so that its combat strength is face down. During the German Player's Disruption Removal Phase, he may flip over all his currently disrupted units; they are no longer disrupted. The British Player may flip over as many disrupted units as allowed by his Command Point Limit during his Disruption Removal Phase.
[8.1] A disrupted unit may not move, conduct opportunity fire, or attack.
[8.2] A disrupted unit defends normally.
If an already disrupted unit receives a disruption result when attacked it must retreat. If no safe retreat route is available (see Case 7.7) the unit is eliminated instead. An already disrupted unit in a city hex is not affected by a disruption result. Exception: see Case 9.3.
[8.3] Disrupted units exert Zones of Control
[8.4] A Player may undisrupt (flip over) a disrupted unit regardless of that unit's location.
The presence of Enemy Zones of Control does not prohibit undisrupting a unit, even if the unit is totally surrounded.
[8.5] The British Player may only undisrupt as many British units per Game-Turn as he has Command Points.
The Turn Record Track lists the number of Command Points the British Player may expend per British Disruption Removal Phase. The expenditure of one Command Point allows him to flip over one disrupted British unit. He may not exceed the limit of his Command Points, nor may he accumulate unused Command Points.
[9.0] British Reinforcements
GENERAL RULE: British units enter play by using the Airlanding Procedure at the beginning of the British Movement Phase, before any units have been moved. Each British unit has a Game-Turn of entry and one or more hex numbers on the back; the latter represents the unit's "drop zone." When a unit is scheduled to enter play the British Player places it on any unoccupied clear or broken hex within three hexes of or directly on its drop zone hex(es). After all units scheduled to enter in one Game-Turn have been placed on the map, the British Player refers to the Air Landing Table (9.9), rolling the die once for each newly placed unit to see how it is affected by the drop. Units may become disrupted or, in some cases, eliminated as a result of the Airlanding Procedure.
[9.1] Airlanding units may only be placed in clear or broken terrain hexes, and may not be placed in a hex adjacent to a city hex.
[9.2] Airlanding units may not be placed in a hex occupied by any other unit.
This includes Friendly units airlanding in the same Game-Turn.
[9.3] German units within range of an airlanding unit may conduct opportunity fire against that unit at double their printed combat strength, if normally eligible to do so.
This fire is resolved before the British Player uses the Airlanding Table. If a British unit is disrupted by opportunity fire as it is airlanding, and is disrupted again by a result of the Airlanding Table, it is eliminated (exception to Case 8.2).
[9.4] The type of terrain in a hex an airlanding unit is placed in or is adjacent to may modify the die roll result, as noted on the Airlanding Table.
[9.5] Undisrupted units may move on the Game-Turn they land.
[9.6] Artillery units may not take part in combat during the Player-Turn they airland.
[9.7] The British Player secretly chooses two drop zone hexes for his Polish units before starting play.
Any two hexes on the map are chosen and noted on scrap paper. The two drop zone hexes must have at least four valid air landing hexes (see Case 9.1) within three hexes of each of them. At the start of his Movement Phase on Game-Turn Nine the British Player reveals the two hexes. The four Polish units must immediately airland in one of the two chosen drop zones, undergoing the normal airlanding procedure. Once in play, Polish units are treated as British units for all game purposes.
[9.8] The arrival of airlanding units may not be delayed.
[9.9] Air Landing Table
(see charts and tables)
[10.0] German Reinforcements
GENERAL RULE: In addition to the German units that start the game on the map, the German Player receives units during the Movement Phases of specified Game-Turns. The back of each German reinforcement unit states the Game-Turn on which it is first eligible to enter play.
PROCEDURE: At any time during the specified Movement Phase, newly arriving units may enter the map in the hexes indicated. If the German Player wishes, reinforcement units may be withheld for entry during a subsequent Game-Turn.
[10.1] On the Game-Turn when a reinforcement unit is first scheduled to arrive, it may only enter in the specified hex.
If this hex is enemy occupied, the unit may not enter play; it would be delayed at least one Game-Turn (see Case 10.2). Note that if the entry hex were Enemy controlled, only one unit could enter there (and would stop in that hex, unless the controlling Enemy unit were disrupted).
[10.2] If a reinforcement unit is delayed, it may enter play in any hex labeled with the same letter as the hex on which it was originally scheduled to enter during any subsequent Game-Turn.
For example, if a unit were scheduled to enter play on Game-Turn Two in hex 0110 (an "A" entry hex) and was delayed (either by Enemy presence or German choice), it could be brought into play in any entry hex marked "A" on Game-Turn Three or any Game-Turn thereafter.
[10.3] Two German reinforcement are marked "A"; these units may enter play in any "A" entry hex on the Game-Turn they are first scheduled to arrive.
[10.4] When reinforcements arrive on the map, they behave identically to units already on the map.
The arrival (into the proper hex) costs the reinforcing units the appropriate expenditure of Movement Points for that terrain type. If entering on a road, it is assumed that they are entering the map through the road hexside.
[11.0] Destruction of the Oosterbeek Railway Bridge (German Player Only)
GENERAL RULE: The German Player may attempt to destroy the bridge connecting hexes 1512 and 1513 once during the game. The first time (only) a British unit moves into either of the above named hexes the German Player may roll a die. On a die roll result of 1 through 5, the bridge is considered destroyed. On a result of 6, the bridge is intact. The destruction attempt may interrupt the movement of a British unit. If the bridge is destroyed, the 1512/1513 hexside is treated as an unbridged major river hexside for the duration of the game. No other bridge on the map may be destroyed.
[12.0] How the Game Is Won
GENERAL RULE: At the end of the Tenth Game-Turn, play stops. The winner is determined by the number of Victory Points the British Player has accumulated by the end of the game.
[12.1] The British Player earns Victory Points (VP's) for controlling Victory Point hexes, destroying German units and preventing the destruction of British units.
- He earns one VP for each VP hex occupied or controlled by a British unit.
- He earns two VP's for each specially marked VP hex occupied or controlled by a British unit.
- He earns one VP for each eliminated German unit.
- He earns one VP for each British unit over nine on the map at the end of play. For example, if eleven British units were still in play, he would receive two VP's.
[12.2] The British Player controls a VP hex if a British unit can trace a Line of Communications to it.
A Line of Communications is defined as a path of connected hexes traced from a unit to a VP hex. This path may not be traced through an unbridged major river hexside (the ferry is not considered a bridge) or through an Enemy occupied or controlled hex. Friendly units negate Enemy Zones of Control in the hex they occupy for this purpose. If both the British and German Player can trace a Line of Communications to a given hex, the British Player earns the VP's only if he can trace a shorter line (in hexes) to that hex than the German Player can.
[12.3] If the British Player controls both hexes 2214 and 2314, he receives a total of eight VP's for the two hexes instead of four.
[12.4] If the Oosterbeek Railway Bridge is destroyed (see Section 11.0), hexes 1513 and 1514 are worth no VP's.
[12.5] Polish units are considered British units for all victory purposes.
[12.6] The British VP total is compared to the Levels of Victory to determine the winner and the Level of Victory he has achieved.
- 5 or less VP's: German Decisive Victory
- 6 to 15 VP's: German Median Victory
- 16 to 20 VP's: German Marginal Victory
- 21 to 26 VP's: British Marginal Victory
- 27 to 32 VP's: British Median Victory
- 33 or more VP's: British Decisive Victory.
Red Devils - Charts and Tables
[7.6] Combat Results Table
Differential columns are given as column headings; each row is a die roll.
| Die | -3 or -4 | -1 or -2 | 0 | 1 | 2 or 3 | 4 thru 6 | 7 thru 9 | 10 thru 13 | 14 or more |
|---|---|---|---|---|---|---|---|---|---|
| 1 | Dd | Dd | Dd | Dd | De* | De | De | De | De |
| 2 | - | - | Dd | Dd | Dd | De* | De | De | De |
| 3 |
*See Case 7.6 for an explanation of results.
Modifiers for Combat and Opportunity Fire:
If defending unit is in a city or rough terrain hex, shift two columns to the left.
If defending unit is in a town or forest hex, shift one column to the left.
The following modifiers apply to combat only and not to opportunity fire:
If a unit is attacked solely through minor river hexsides (not including units attacking from non-adjacent hexes), shift one column to the left.
If a unit is attacked solely through major river hexsides, shift two columns to the left (regardless of the presence of a bridge).
See Cases 7.4 and 7.5 for other combat modifiers.
All column shifts are cumulative.
[4.9] Terrain Effects Chart
All units have a Movement Allowance of ten.
| Terrain Type | Movement Point Cost: Mechanized Unit | Movement Point Cost: Non-Mechanized Unit |
|---|---|---|
| Clear | 1/2 | 1 |
| Broken | 3 | 2 |
| Rough | P | 4 |
| Woods | P | 3 |
| Town | 1 | 1 |
| City | 2 | 1 |
| Major River | P | P* |
| Minor River | P | +1 |
| Major Road |
*See Case 4.6. P: Prohibited. NE: No Effect; negates cost of river.
Although normally considered mechanized units, artillery units move as non-mechanized units on roads.
[9.9] Airlanding Table
| Die | Result |
|---|---|
| -1 | E |
| 0 | E |
| 1 | D |
| 2 | D |
| 3 | D |
| 4 | - |
| 5 | - |
| 6 | - |
See Section 9.0 for explanation of use.
Die Result Modifiers
Subtract one from the die roll if the unit has airlanded in a broken terrain hex.
Subtract one from the die roll of the unit has airlanded in a hex adjacent to a woods, town, rough and/or river hex or hexside.
Die-roll subtractions are cumulative.
Eben Emael - Charts and Tables
(The printed heading reads "Eban Emael - Charts and Tables".)
[5.9] Fire Combat Results Table
The columns Cupola, 1, 2 and 3 are under the heading "Fortifications"; the columns German and Belgian are units.
| Die | Cupola | 1 | 2 | 3 | German | Belgian |
|---|---|---|---|---|---|---|
| -1 | 2 | 2 | 3 | 3 | 2 | 2 |
| 0 | 2 | 2 | 3 | 3 | 2 | 2 |
| 1 | 2 | 2 | 2 | 2 | 2 | 2 |
| 2 | 1 | 1 | 1 |
Results:
0, 1, 2, 3 = Owning Player of Target unit must roll one die adding indicated number to the roll, and compares the result to the efficiency rating of the target unit.
- = No effect. Target unit is unaffected. No second roll is necessary.
Terrain Effects:
Add two to the die-roll when target unit is in a fortification hex, whether the fortification in the hex is destroyed or not.
Add one to the die-roll when the target unit is in a woods hex or a building hex.
Subtract two from the die-roll when firing at a unit that has a Bold Movement marker on it.
[4.9] Terrain Effects On Movement Chart
| Hex Terrain Type | Movement Point Cost to Enter or Cross |
|---|---|
| Woods | 2 |
| Hilltop and/or Fortification | 1 |
| Clear | 1 |
| Building | 1 |
| Ridge Hexside | +1 Additional to Cross |
| Wall Hexside | +1 Additional to Cross |
| Slope Hexside | +1 Additional to Cross (moving upslope only) |
| Stream Hexside | +1 Additional to Cross |
| Canal | P |
| Cliff Hexside | P |
P: Prohibited from crossing. All terrain effects are cumulative.
[7.9] Close Assault Combat Results Table
Combat Differential (Attacker minus Defender)
| Die | 0 | +1 | +2 | +3 | +4 | +5 |
|---|---|---|---|---|---|---|
| 1 | De | De | De | De | De | De |
| 2 | De | De | De | De | De | De |
| 3 | - | De | De | De | De | De |
| 4 | Ae | - | - |
Ae = One of the attacking units is eliminated (owning Player's choice). De = The Defending unit is eliminated. One of the attacking units may advance into the vacated hex. - = No result.
Terrain Effects Add one to die roll if:
- defender is in woods hex, or
- all attacking units are attacking across a ridge or stream or up a slope
All terrain effects are cumulative.
Paratroop Addenda
Eben Emael Map
The slope hexsides surrounding the hilltop in hex 0715 were inadvertently omitted. Each hexside of hex 0715 should be a slope hexside.
Red Devils Unit Summary
Armor, armored reconnaissance, armored infantry, motorized infantry and airborne reconnaissance units are considered mechanized units for purposes of movement. Artillery, airborne artillery and rocket artillery units are also considered mechanized units (however, see the note on the Terrain Effects Chart). All other types of units are considered non-mechanized units.
Crete - Charts and Tables (printed on the map sheet)
[5.9] Scatter Table
Terrain Type in the Target hex
| Die | Clear | Rough/Town |
|---|---|---|
| 1 | Sc | Sc |
| 2 | Sc | Sc |
| 3 | Ac | Sc |
| 4 | Ac | Sc |
| 5 | Ac | Ac |
| 6 | Ac | Ac |
Explanation of results: Sc = air landing unit scatters; roll a die and consult the Scatter Diagram on the map. Ac = air landing unit lands accurately and is placed on target hex.
Notes: The presence of a village, road, airfield, or coastline terrain features has no additional effect on the determination of Scatter. An all-sea hex may not be a target hex nor may a transit track. If a unit scatters off the map or into an all-sea hex, it is eliminated.
[9.5] All Out Attack Combat Results Table
Combat Ratios (Attacker's Strength to Defender's Strength)
| Die | 1-3 | 1-2 | 1-1 | 2-1 | 3-1 | 4-1 | 5-1 | 6-1 | 7-1 |
|---|---|---|---|---|---|---|---|---|---|
| 1 | Ee | Ee | Ee | De | De | De | De | De | De |
| 2 | Ca | Ee | Ee | Ca | De | De | De | De | De |
| 3 | Ca |
[9.6] Limited Attack Combat Results Table
Attacker's Strength to Defender's Strength
| Die | 1-3 | 1-2 | 1-1 | 2-1 | 3-1 | 4-1 | 5-1 | 6-1 | 7-1 |
|---|---|---|---|---|---|---|---|---|---|
| 1 | Ca | Ee | Ca | Ca | Ca | De | De | De | De |
| 2 | Ca | Ca | Ca | Ca | Ca | Ca | De | De | De |
| 3 | Ee |
Attacks executed at more than 7-1 are treated as 7-1; attacks at less than 1-3 are not allowed.
[4.8] Terrain Effects Chart
| Terrain | Movement Point Cost to Enter | Effect on Defender's Combat Strength |
|---|---|---|
| Clear | 1 | no effect |
| Rough | 2 | doubled |
| Town | 1 | doubled |
| Road* | 1/3 | no effect |
| Air Field | 1 | no effect |
| All Sea hexside | may not cross | combat prohibited |
| Village | no effect | no effect |
* = A unit expends 1/3 of a Movement Point to enter a road only if such a hex is entered through a road hexside (see Case 4.2).
Game-Turn Record Tracks (printed on the maps)
Eben Emael - Reinforcements by Game-Turn
All reinforcements are Belgian; "F" denotes reinforcements from fort garrison (10.3).
| Game-Turn | 1 | 2 | 3 | 4 | 5 | 6 | 7 | 8 | 9 | 10 |
|---|---|---|---|---|---|---|---|---|---|---|
| Scen. 12.1 | - | - | - | 2 | - | 2 | - | - | - | - |
| Scen. 12.2 | 2 | - | 2, 3F | 2F | - | 2 | - | - | - |
Red Devils - Reinforcements and British Command Points by Game-Turn
B = British reinforcements; G = German reinforcements; Brit Com = British Command Points.
| Game-Turn | Reinf | Brit Com |
|---|---|---|
| 1 | B | 5 |
| 2 | G | 2 |
| 3 | B, G | 4 |
| 4 | G | 3 |
| 5 | G | 3 |
| 6 | - | 3 |
| 7 | - | 3 |
| 8 | - | 3 |
| 9 | B, G | 5 |