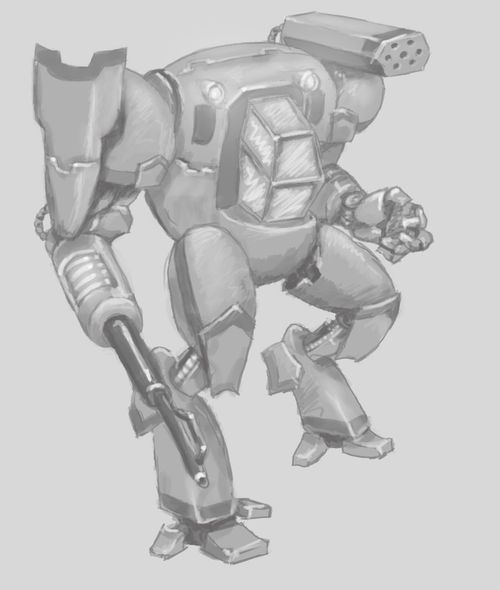
Paper 'Mech
Paper 'Mech Rulebook
Table of Contents
Table of Contents
Story
The time is now. Our enemy have been attacking us for weeks and we cannot hold out much longer. Our scouts report that a large force is en route to our location. We would have liked for you to have more time to train but we must use the 'Mech now, before it is too late. They do not yet know that we have salvaged this technology, so the element of surprise is with us. Rest assured that as soon as you make yourself known, they will throw everything at you. Hold them back, cover our escape, and luck be with you... You will need:- The A4 Paper 'Mech playsheet, a pencil, an eraser 6 enemy draw tokens (one each marked B, H, F, J, R and T) – folded pieces of paper will work fine 12 cubes, 3 each of 4 different colours a few six sided dice (6 is a good number) Throughout these rules, the first time an important game term is introduced it will appear in bold letters.
Setting up
Place the play sheet in front of you. For your first few of games it is recommended that you use the standard set of equipment on the playsheet. This configuration takes your 'mech up to its maximum weight and provides a good balance between power, speed and defence. Once you have a couple of games under your belt you can choose any configuration you wish (see the section on 'customisation' at the end of these rules). Choose one of the coloured sets of cubes to be your colour. The other colours will represent your enemies. Place your first cube on the active space of the time track. This is referred to as the time cube throughout these rules. Place your next cube on the stand space (above the torso box of your mech) – this is referred to as the stance cube. Place your final cube in the torso box itself, this is referred to as the action cube. Note that this is the only time the action cube is ever placed in the torso box and is merely a place holder until you choose your first action. Place all the other cubes to one side, ready to use once you encounter an enemy. You are now ready to play.
Generating a Wave of Enemies
During a game of Paper 'Mech you will encounter four waves of enemies, increasing in strength and difficulty with each successive wave. To win the game you must destroy all enemies in all 4 waves before they destroy you. You will not know exactly which enemies you will face until you encounter them. At the start of the game create an enemy draw pile by adding the B, H and F enemy draw tokens face down in a pile or draw cup (or folded if you are using paper). Set the remaining tokens aside for later use.
Wave 1 – Scouting Units
Randomly draw one enemy token to determine your first enemy. If you drew the ‘B’ token you must draw an additional token. Take one of the sets of coloured cubes and perform the following setup steps:-
- First check if the enemy has an attack capable of Long Range. If so place one of these coloured cubes in the enemy’s action box which is in range that has the highest P value.
- Otherwise, place one of these coloured cubes in the enemy’s action box which has the lowest T value.
- Look at the time value for the selected attack (the number which follows the letter T on the box for the selected attack) and place another cube of the same colour on the numbered space of the time track which matches this value.
- Roll a D6 and place the final coloured cube on the radar space which corresponds to the number rolled on the dice. This is the starting position for that enemy.
- Repeat this procedure using a different coloured set of cubes if you drew the ‘B’ token. You will face two enemy during this scout wave instead of one.
Example, I am facing a firethrower. I look at the playsheet and see that is has no long range attack so I choose the action with the lowest T value which is the flame gun attack. I place the first cube in the box next to flame gun in the entry for firethrower. This attack is listed as T2, so its time cube goes on the “2” space on the time track. I will have 2 units of time before the firethrower will act. I roll a D6 and score a “3” so place the final cube on the radar space numbered 3 (long range at my 10 o’clock position).
Wave 2 – Rapid Response Units
Replace the previously drawn token or tokens to the draw pile and this time add the ‘J’ and ‘R’ tokens. In Wave 2 you will always face at least two enemy. Draw two tokens but like in the first wave you must draw an additional token if either of these are the ‘B’ token. Place the coloured cubes for each enemy as described in Wave 1.
Wave 3 – Search and Destroy Units
Return all previously drawn tokens except the ‘B’ token to the draw pile, it will no longer be used during the remainder of the game (optional rule:- you can keep the ‘B’ token in if you want to add more of a challenge using the same ‘draw again’ rule but you will require a further set of different coloured cubes in the event it is drawn). The first enemy you will face in this wave will always be the Tank (T token) so there is no need to add it to the draw pile. Instead, place the first set of cubes on the PPC attack in the Tank box on the playsheet. Draw two tokens from the draw pile placing the coloured cubes for each drawn enemy as described above.
Wave 4 – Main Assault Force
Return all tokens to the draw pile and add in the ‘T’ token – it is possible that you may face the Tank again during this wave! The first enemy you will face in this wave will always be the Mech so there is no need to add an ‘M’ token to the draw pile. Instead, place the first set of cubes on the Missiles attack in the Mech box on the playsheet. Draw two tokens from the draw pile placing the coloured cubes for each drawn enemy as described above. Once all enemy cubes have been placed, you must choose your first action for this wave by placing your action cube in the relevant box on the play sheet. (See Choosing Actions, on page 3 of the rules)
Playing the Game
The Time Track
Paper 'Mech does not use game turns in the traditional sense. Instead, the game is based around the time track, where the time cubes of you and your enemy show the sequence in which actions will be resolved. Every action in the game has a corresponding time (T) value, all of which are listed on the play sheet for ease of reference. Whenever you choose an action, your time cube is placed on the numbered space of the time track which matches the T value of that action. Enemy time cubes are placed on the time track in the same way whenever you roll for their actions. After an action has been resolved, if there are no time cubes on the active space, ALL time cubes are moved down the track by the same amount until at least one cube hits the active space. If you are facing a slow enemy, it is sometimes possible to act twice or even three times in between each of their actions. Whenever a cube hits the active space on the time track, the owner of that cube (be it an enemy or your ‘mech) will activate, resolving their chosen action.
Note:- if your time cube hits the active space at the same time as an enemy’s time cube, all enemy actions resolve BEFORE yours. (Exception: If this occurs and your selected action has the Reflex keyword then your action will trigger first – see rules for the Reflex keyword on Page 5). If two enemy time cubes are on the same space you may choose the order in which they resolve.
Example. I have decided to fire a full salvo from my missile launcher, which has a T value of 4 and so I move my time cube from the active space to number “4”. I am facing a helo whose time cube occupies the “2” space on the time track, and a tank which sits on the “5” space of the time track. Now that the active space is empty, all time cubes are moved down 2 spaces until the helos time cube sits on the active space. My time cube will have moved to the number 2, and the tanks cube will be at 3.The helo will now activate.
Choosing Actions
There are two types of action that you can choose:- move actions or attack actions. Move actions are all the options listed in the legs box on your play sheet. Attack actions are all the options available in each of the four weapon mounts on the play sheet – note that if one of your weapons is a shield, its available actions are still referred to as attack actions even though most of them are purely defensive. Choosing an action is simply a matter of taking your action cube and placing it in the box adjacent to the action you wish to perform, and then moving your time cube accordingly. You may at any time change your action and choose a different one. If you do this, you must replace your time cube as if you had just performed an action. In other words, if you take an action with a T value of 4, and decide to change it after 2 units of time have passed, those 2 time units do NOT count towards your new action.
Move Actions
At the top left of the play sheet, a radar continually tracks the position of all enemy in relation to your ‘mech. Whenever you make a move action, the radar is always centred on your 'mech, so you actually move all the enemy which surround you. You can choose one of four actions which relate to movement. The list below is in a different order to that shown on the play sheet – this is intentional. It is ordered below for the sake of simplicity in explaining the rules.
- Walk forwards
- Walk backwards
- Turn OR Change Stance
- Turn and Squat
Note that you cannot choose an action if it has been damaged (damage is explained in detail later in these rules, pages 4 and 5). You cannot haste any movement action. (Haste is specifically for attack actions and is explained later, see page 7).
Walk Forwards
To walk forwards, take each enemy cube on the radar and move it one space in the direction of the arrows shown on the radar lines. If any enemy is already at long range in one of the shaded spaces behind your ‘mech, they cannot be moved any further.
Walk Backwards
When you walk backwards, move each enemy cube one space in the OPPOSITE direction to the arrows on the radar lines. If any enemy is on the “3” or “4” numbered spaces at long range, they cannot be moved any further. Note that some spaces have a reversed dotted arrow showing how an enemy will move on the radar when you are moving backwards. These only apply to backwards movement.
Turn or Change Stance
When you have this action selected, you can either turn OR change stance when your time cube reaches the active space. You must choose one or the other and may not do both. You do not have to decide which option to take until your action cube reaches the active space. To turn, either move all enemy on the radar one space clockwise or all enemy on the radar one space anticlockwise. To change stance move your stance cube from the stand space to the squat space, or vice versa. Squatting will improve the defensive capabilities of your ‘mech but your move actions will be limited (see Standing or Squatting, on page 7 of the rules).
Turn and Squat
You cannot perform this action if you are already in a squat stance. This allows you to combine turning and changing into a squat stance as a single action. Perform one turn as described above then move your stance cube from the stand space to the squat space. After you have completed any of the above move actions, you must advance the game by choosing your next action be it another move or an attack action. Place your action cube in the box next to the action you wish to perform next then move your time cube to the numbered space on the time track which matches the T value of the chosen action. You cannot choose an action if all the damage circles next to that action are filled in. Next you must move all time cubes down the time track by the same number of spaces until the next time cube hits the active space.
Attack Actions
When your time cube hits the active space on the time track, attack actions are performed following this sequence:-
- Resolve your chosen attack
- Perform a free move if you wish
- Choose your next action
Resolve Attack
First, choose a target that is in range and in the firing arc of the chosen weapon. These differ for each weapon and are shown on the playsheet. If there are no legal targets, the attack is wasted and you move on to the next step. Roll a number of D6 equal to the power (P) value of your chosen action. Each dice that is higher than the armour value of your target will score ONE point of damage. Use a pencil to fill in the damage circles of your target, starting from the top and working down. Most enemies have more than one attack type, each with a number of damage circles adjacent to it. When all the circles for an enemy attack are filled in, that attack is disabled and can no longer be used. When all of the enemy’s attacks are disabled, the enemy is destroyed – remove that enemy’s cubes from the radar and time tracks. If an enemy has an attack selected that becomes disabled, it will instantly select a new attack. For most enemies there will only be one other attack available but the ‘mech has three different attacks, so you may still need to determine randomly which is selected.
Special Keyword Abilities – Some weapons and enemies have a keyword that provides a special ability when using that weapon or that enemy activates. These special keyword abilities are the main thing that set particular weapons apart, and strategic use of these abilities can often swing the battle in your favour, but be aware that some enemies have the same bonuses and abilities. The keywords listed on the playsheet are explained below:
Reflex (Wing Shield)
This keyword gives you the unique ability to act first when you and your enemies’ time cube are both on the active space at the same time. The keyword will trigger when the following applies:-
- The attacking enemy is in the ‘firing arc’ of your wing shield
- Your selected attack is an undamaged ‘Defend’ slot If these are true then Reflex triggers and you hunch your ‘mech into a defensive stance with the wing shield presented towards the enemy. That enemy attack MUST be resolved against the Wing Shield (using its higher armour value). Note: the Wing Shield has no range because it has no attack power, but it can defend against enemy attacks made from any range.
Recoil (Missiles)
Whenever you or an enemy is hit by a weapon with Recoil and that attack causes at least one point of damage, the time cube belonging to the target of that attack is moved one space to the right (to a maximum of 7).
Accurate (Lasers)
After an attack roll is made from a weapon with Accurate, choose one die that did not cause damage and re-roll it once.
Combo (Fist)
If your previous attack was also with the fist, you may increase the P value of this attack by 1.
Flight Path (Enemy – Attack Jet)
The Attack Jet has a special movement rule called Flight Path. Each time it activates it will move one space closer to your ‘mech using normal movement rules. If it is in close range at the start of its activation it will release its bombs for potentially massive damage. Immediately after this attack it will move through the centre of the radar to the diametrically opposite close range space. Each subsequent activation it will move directly AWAY from your ‘mech until it leaves the radar. After this has happened, place its time cube on the number 3 space of the time track. When this cube hits the active space the Jet will re-enter the radar with a fresh load of bombs. Roll to see which space on the radar it reappears. Once destroyed, the Jet will not return during the remainder of this wave. Its high armour value reflects the difficulty in targeting a fast moving flying object.
Free Movement
After you have resolved your attack, you are allowed to make one special free move action. This is entirely optional and you can decide not to take it, and it does not cost any extra units of time. This free move is only available specifically after an attack action, never after a move action. Only certain forms of movement are available as a free move and you can only choose one of:-
- Walk forwards
- Turn or Change Stance You cannot walk backwards or use the combined turn and squat move actions as a free move. Also note that you cannot perform any move action that is showing as damaged on the play sheet.
Choose Your Next Action
After you have taken your free move (or chosen not to) you must choose your next action. Place your action cube in the box next to the action you wish to perform next, and move your time cube to the numbered space on the time track which matches the T value of the chosen attack. Remember, you cannot choose an action if all the damage circles next to that action are filled in. The final step is to move all time cubes down the time track by the same number of spaces until the next time cube hits the active space.
Resolving Enemy Actions
When an enemy’s time cube hits the active space on the time track, they will activate and follow this sequence:-
- Resolve their chosen attack if it is in range.
- Perform one move
- Choose their next action If more than one enemy cube hits the active space at the same time, you may choose the order in which they resolve.
Resolve Enemy Attack
When an enemy attacks you, it assumed that they ALWAYS have you in their firing arc. If their chosen attack is out of range, they do not attack and will just go to the next step, performing their one move. If the chosen attack is in range, they will always target one of your undestroyed weapons that is visible to them and that has currently suffered the most damage. If this is a tie roll a D6 and refer to the targeting diagram on the play sheet to determine the hit location. If the attack originates from either of the side arcs, use the second diagram (showing a side profile of your 'mech), otherwise use the first. Do not mirror the numbers if the attack is behind you – this is not necessary, so a dice roll of a 2 will hit your left shoulder mount regardless of whether that attack came from the front or behind.
Note the enemy will only ever target your Torso or Legs by chance when using this random method, and the most common way for them to suffer damage is through spill over damage. Once you have determined the hit location, refer to that location for the armour value and roll a number of dice equal to the power (P) of the chosen enemy attack. If an enemy attacks you from any of the shaded spaces behind your 'mech, all your armour values are reduced by 1 or 2 as indicated on the playsheet for the duration of that attack.
Note that some enemy and attacks also have keywords. These follow the same rules as your own (see page 5). Each die that scores higher than the armour value of the hit location will cause one point of damage to that location. If the hit location is the torso or legs, fill in damage circles starting from the top and working downwards. If any of these circles have already been filled in, start from the first unfilled circle. The damage circles for your weapon mounts are numbered from 1-6 starting from the top. When one of these locations is hit you must randomly determine where the damage is allocated within that hit location. Take all die that caused a hit and reroll them then fill in the numbered circle that matches the result of the die. If that circle has already been filled in, fill in the first available circle below it, wrapping around and starting from the top of the list if necessary. If all the damage circles are completely filled on the a location and there is damage still left to apply you must roll a die to see where the spill over damage must be assigned (following the numbered tracks on the sheet) and fill in damage circles in the new location until every point of damage has been allocated. Note that the armour value of adjacent locations is ignored when assigning this spill-over damage! If the new location is a weapon mount, fill in a circle for each point of spill over damage from the topmost available and work down. Do not re-roll to see which circles are affected.
Example 1: I am attacked by enemy artillery in front of me at long range. All my weapons are undamaged so I roll a die for hit location which results in a 4, I look at the targeting diagram for attacks from front/rear and this tells me my laser is hit on my left arm. The P value of the artillery attack is 5 so I roll 5 dice and score 2,2,4,5,6. The armour value is 3, so the artillery has scored 3 points of damage, since three of the attack dice scored higher than 3. I re-roll the 3 dice that hit and score 2, 4 and 5. I go to fill in the damage circles corresponding to the dice results. Unfortunately, circles 4 and 5 have already been damaged so I have to start from circle 6. The damage wraps around and I also have to fill in circles number 1 and 2. Now my laser only has one point of damage left and I can only select the ‘laser blast’ attack until it is repaired.
Example 2: If I take another 3 points of damage to the same location, I would fill in the number 3 circle, then roll a die to see where the other two points of damage go. I score a 5 and following the track on the sheet, this tells me it spills over to the wing shield. Sadly, the extra armour of this location is ignored and I have to fill in 2 damage circles here
Enemy Movement
After the enemy attacks, they will move ONCE according to the following guidelines:
- If the selected enemy attack was out of range, the enemy will move one space directly towards your 'mech.
- If the selected enemy attack was in range, but the enemy has another attack that has a higher P value, it will move one space directly away or towards your ‘mech to attempt to reach that range.
- If the enemy is already in range of its attack with the highest P value it will stay in the same range band but move one space clockwise or anticlockwise, whichever will move it closer to the rear of your 'mech.
- If the highest P value Enemy attack was already in range and that enemy is already in a ‘-2 armour’ shaded zone behind your 'mech, it will stay in its current location.
Choose Next Enemy Attack
First check if the enemy has an attack that is in currently range and place that enemy’s action cube in the box which correspond to that attack. If it has more than one attack currently in range it will select the one of those with the highest P value. If it has more than one available attack that matches the highest P value, choose the one with the lower T value. Look up the T value on the selected attack and place that enemy’s time cube on the matching numbered space on the time track. The final step is to move all time cubes down the time track by the same number of spaces until the next time cube hits the active space.
Repairs
When you have defeated all enemies in a single wave, you get the chance to perform repairs before the next wave appears. You may choose to repair up to 7 points of damage and can even choose to repair none at all if you prefer to get the jump on the next enemy wave. You may repair one point of damage off any of your systems (use an eraser to remove the pencil mark). It is entirely your choice which circles to repair, and it is perfectly acceptable to remove just one point of damage from an action to enable it for the next wave. Note however that repairs take time and the more you undertake, the slower your reaction time to face the next wave. After you have repaired any damage place your time cube on the time track which corresponds to the number of damage points repaired. e.g. I repair 4 points of damage, choosing to leave 3 points unrepaired. I place my time cube on the number 4 space. Once the next wave begins I will need to wait 4 units of time until I can choose my first action. Once you have allocated all your repairs, continue the game by generating the next wave of enemies.
Winning and Losing
Play continues until your ‘mech is destroyed in which case you lose, or you have destroyed all enemies from all 4 waves, in which case you win. After a win, count up the total number of unfilled damage circles on your ‘mech, including legs and torso – this is your final score. Note that you do not get a chance to repair after the fourth wave. The torso of your 'mech houses the cockpit where you sit and is a particularly vulnerable area. When your torso reaches 2 points of damage, every action you choose will take one extra unit of time until it is repaired. If it receives 3 points of damage, every subsequent action you choose will take 3 extra units of time until repaired. If your torso ever reaches 4 points of damage, your ‘mech is destroyed and you instantly lose the game. It is therefore important to keep this area repaired, or employ the use of defensive weapons at key moments. The standard equipment set outlined at the start of these rules mitigates this by adding 2 points of armour to the torso, so it can only be damaged on 6's. This should keep you alive for a while, but keep in mind there is always the chance of a lucky hit, especially from attacks to your rear or flanks.
Other rules
Standing or Squatting
Your stance cube is used to track whether your 'mech is standing upright, or squatting in a defensive position. You may change stance as your free move after taking an attack action. While squatting, you present a smaller target profile to your enemies and become harder to hit. Any attacks against you whilst in a squatting stance are performed with 1 less dice (to a minimum of 1), and your legs cannot be targeted at all (re-roll any hit location rolls that result in a 6). The downside is that whilst in a squat stance you cannot perform ANY free move actions after an attack action, and you cannot walk backwards at all. You can still walk forwards, change stance or turn, but you must choose to do so as a move action and pay the appropriate T cost.
Haste attacks
Sometimes the situation calls for you to rush an attack in order to try and destroy an enemy before they hit you. At any time you may decide to resolve your next attack action even if your cube is not in the active space. However, you must subtract the number underneath your time cube from EVERY dice involved in that attack roll.
Note that you cannot haste an attack immediately after you have chosen it. At least one unit of time must have passed before you can use haste. It is acceptable to just move all time cubes down one space in order to satisfy this condition. You cannot use haste on any move actions.
Example, You choose to fire a full charge from your laser but decide to resolve it while your time cube is at “2” in order to try and cripple the firethrower in front of you, which only has two hit points remaining. You roll 4 dice and score 2,2,4,6. You must subtract 2 from each of these results so only one of them actually beats the 3 armour on the firethrower. Your gamble has failed….
Optional Rules
Note that the Customisation rules are temporarily omitted
Player Skills
It is possible for the player to attain skills through battlefield experience by encountering or achieving certain situations a number of times. Once unlocked, each skill will give you a permanent bonus or ability that you may use for the remainder of the game.
Evasion
To earn this skill you must be in the ‘Stand’ stance. Whenever you are subjected to an enemy attack that causes no damage, you may fill in one circle in the Evasion skill line. Once all three circles are filled this skill is permanently unlocked and is available to use for the remainder of the game. This skill gives you the ability to choose one of the enemy attack dice after they are rolled to and apply a -1 modifer to the result.
Marksman
This skill is earned by demonstrating exceptional feats of marksmanship. Whenever you roll at least 3 attack dice and they ALL cause damage you may fill in one circle in the Marksmanship skill line. Once all three circles are filled this skill is permanently unlocked and is available to use for the remainder of the game. This skill gives you the ability to choose one of your own attack dice after they are rolled and apply a +1 modifer to the result.
Engineer
This skill is earned by performing extensive repairs during the game. Whenever you repair at least 4 damage points you may fill in the circle in the Repair skill line and instantly unlock the Engineer skill. The skill gives you the ability to make one free repair after each wave. This free repair does not count toward your total repair time taken when you are determining where to place your time cube.
Rules Summary
Setting up
- Choose starting equipment (optional)
- Place your 3 coloured cubes on the playsheet - active space, stand space, torso box.
- Generate first wave of enemies and place their cubes.
- Choose your first action and place your time cube.
Gameplay
- Move all time cubes down the time track until a cube hits the active space.
- Resolve actions for the owner of each time cube in the active space (enemies first).
- Repeat until you or all enemy are dead!
Resolving Enemy Actions
- Execute chosen attack (if the chosen attack is out of range skip to step 2) a. Determine hit location and refer to armour value. If the attack originates from within any shaded arc reduce all your amour values by the value shown on the playsheet for the duration of the attack. b. If you are in a squat stance, your legs cannot be targeted. Re-roll if necessary. c. Roll a number of dice equal to P of chosen attack. If you are in a squat stance, reduce P of the enemy attack by 1 to a minimum of 1. d. 1 point of damage for each dice that scores higher than armour value of hit location e. For damage to weapons, roll a die to determine which circle to fill in. If that circle is already filled, fill in the first available circle below it, wrapping around to the first circle if necessary f. For damage to torso or legs, fill in circles starting from the topmost unfilled and work downwards. g. Any spill over damage must be applied to an adjacent location – roll a die to determine which. h. If your torso reaches 4 damage it is game over.
- Enemy Move a. If attack was in range, enemy moves one space clockwise or anticlockwise towards the rear arc of your ‘mech (does not move if already in rear arc). b. If attack was out of range, enemy moves one space to try and get its highest P value attack into range
- Choose next attack a. Select the attack in range with the highest P value, (lowest T value of these if more than one with the same P value). Place enemy’s action and time cubes in the relevant spaces.
Resolving Your Actions
- Move Actions a. Walk forwards – move all enemy along arrows on radar b. Walk backwards – move all enemy in opposite direction to arrows on radar c. Turn – move all enemy one space clockwise or anticlockwise d. Change stance – move stance cube from stand to squat or vice versa e. Turn and squat – perform one turn then move stance cube to squat.
- Attack Actions a. Choose a target in range and in firing arc of selected attack b. Check special ability keyword of weapon c. Roll a number of dice equal to P of chosen attack. If you are using haste, reduce the number on all dice by the number underneath your time cube on the time track. d. 1 point of damage for each dice that scores higher than armour value of target e. Fill in damage circles of target enemy, starting from top and working down. f. If all damage circles for all that enemy’s weapons are filled in, the enemy is destroyed. g. Make one free move (walk forwards, turn or change stance only).
- Choose Next Action a. Place your action cube in the relevant action box on the playsheet – you cannot choose any action which has both damage circles filled in. b. Place your time cube on the relevant space on the time track. End of Wave
- Erase all pencil marks from filled in damage circles of all enemy.
- Perform Repairs then place your time cube on the time track which corresponds to the number of damage points repaired.
- Decide whether you want to start the next wave in a stand or squat stance.
- Generate the next wave.