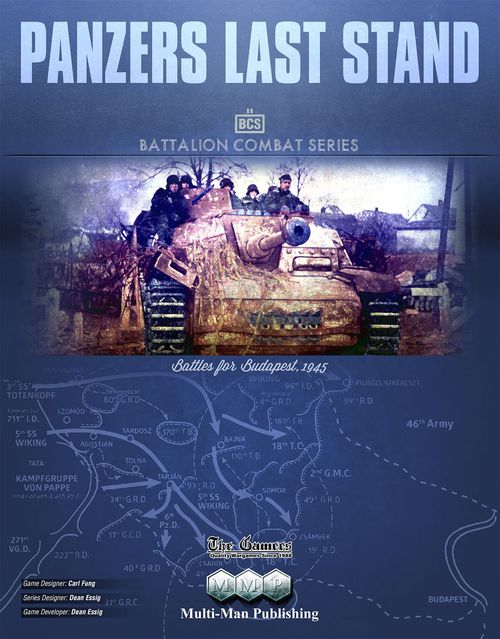
Panzers Last Stand: Battles for Budapest, 1945
Panzers Last Stand: Battles for Budapest, 1945 Rulebook
Table of Contents
Table of Contents
- BCS Series Rules
- Introduction
- Unit Key (Counter Reference)
- 1.0 Basics
- 1.1 Units
- 1.2 Core Concepts & Description
- 1.2b The Core Rules
- 1.3 Formations
- 1.4 Command Radius (CR)
- 1.5 Support
- 1.6 Fire Events
- 1.7 Prepared Defense (Prep Def or PD)
- 1.8 Fatigue
- 1.9 Safe Paths
- 1.10 Fog of War
- 2.0 Game-Turn Sequence
- 2.1 Reinforcements
- 2.2 Replacements (Repls)
- 2.3 Assignment
- 2.4 [Optional] Orders
- 2.5 Activations
- 3.0 Formation Activation Sequence
- 3.1 Main Supply Routes (MSR)
- 3.2 SNAFU
- 3.2g–3.2k Additional SNAFU DRMs and Results
- 3.3 Objectives (OBJs)
- 3.4 Activities
- 3.5 Clean Up
- 3.6 Isolation
- 3.7 Fatigue Recovery & Failure Flip
- 4.0 Movement
- 4.1 Terrain Effects
- 4.2 Stacking
- 4.3 Zones of Control (ZOCs)
- 4.4 Stopping Engagements
- 4.5 Engagement Zones
- 4.6 Screening
- 4.7 HQs & Combat Trains
- 4.8 Voluntary Retreats
- 4.9 [Optional] Realistic Movement
- 5.0 Combat
- 5.1 Regular and Shock Attacks
- 5.2 Engagements
- 5.3 Attack by Fire
- 5.4 Barrage
- 5.5 Retreats
- 5.6 Advance After Combat
- 6.0 Odd Situations
- 6.1 Urban Warfare
- 6.2 Formation Destruction
- 6.3 Attacks From Off-Map
- 6.4 [Optional] Planned Fatigue
- 6.5 [Optional] Stand Off AV vs. Red Support
- Glossary
- AV Types (Examples)
- Unit Capabilities Chart
- Game-Specific Rules
- Introduction
- 1.0 Common Special Rules
- 2.0 Axis Special Rules
- 3.0 Soviet Special Rules
- 4.0 Victory
- Lessons Learned
- 5.0 Scenarios
- 5.1 The Taking of Budapest 123: The Full Campaign
- 5.2 Operation Konrad I & II (Medium)
- 5.3 Operation Konrad I (Medium)
- 5.4 Operation Konrad II (Small)
- 5.5 Battle for Zámoly (Small)
- 5.6 Operation Konrad III (Big)
- 5.7 Battle for Komárom (Medium)
- 5.8 Days of Battle: Opening Blows to Komárom (Small)
- 5.9 Operation Southwind (Small)
- 5.10 Operation Spring Awakening (Big)
- Spring Awakening Scenario Historical Notes
- Glossary
- Designer Notes
- Historical Notes
- The Fiddly Bits
- Order of Battle Notes
- Recommended Reading
- Selected Bibliography
BCS Series Rules
The following is the Battalion Combat Series (BCS) v2.0 Series Rules booklet, written by series designer Dean Essig and published by Multi-Man Publishing, LLC (©2021). These rules are shared by every game in the Battalion Combat Series — including Panzers Last Stand — and are reproduced here in full so this entry is complete and self-contained. Where the Game Rules below (the Panzers Last Stand-specific rules that follow this section) disagree with the Series Rules, the Game Rules take precedence.
Introduction
The Battalion Combat Series (BCS) is a simulation of grand tactical warfare from the advent of mechanized armies in the late portion of World War I to the present.
It was created to show that warfare at this level has its own distinct nature and behaviors. A level wedged between tactical and operational warfare. It is neither a large scale version of one, nor a small scale version of the other.
BCS attempts to find the best balance between simulation accuracy and playability and not compromise either unduly.
Doug Fitch's Primer article and Lynn Brower's Read this First article in the Support Book are great ways to start.
Enjoy & thank you for your gaming!
Dean
Game Design: Dean Essig
Testers: Jerry Axel, John Best, John Bowen, Lynn Brower, Jim Daniels, Dave Demko, William Durant, Ric van Dyke, John Essig, Joe Essig, Andrew Fischer, Christophe Foley, Carl Fung, Mike Galandiuk, Chris Gammon, Brent Gilbertson, Tim Gritten, Brian Jarvis, Tom Kassel, Hans Kishel, John Kisner, Mitchell Land, Jan Latussek, Joe Linder, Don Macintosh, John Malaska, Rod Miller, Rick Paponetti, Jim Pyle, Ken Schreiner, John Rainey, Mike Solli, Jim Stravers, Max Workman
Pre-v2.0 Editing: Lynn Brower, Jim Wise
v2.0 Editing: Herman Wu
v2.0 Initial Organization: Lionel Martinez
Series Index: Dean Essig, Chris Gammon, Carl Gruber
Pre-v2.0 Informational Graphic Tables: Gary Wright
Unit Key (Counter Reference)
The rules below refer constantly to counter features. This key summarizes what each printed value and symbol means; refer to your game's actual counters, which use these same conventions.
HQs. An HQ counter shows a Formation ID, its Command Radius, its Activation Roll, and (on its Used side) its intrinsic Arty Points and MA (Truck type). A Formation Color Code Bar (added to BCS games after Baptism by Fire) identifies the owning Formation.
AV Units. An Armor Value (AV) unit counter shows its Lower Unit ID, Formation ID, Steps Available, Armor Value (Red AV), Action Rating, MA (Tactical type), and Range (assumed to be 1 hex if not printed). A yellow-background symbol denotes a Hard unit.
Dual Units. Show an Assault Arrow, Armor Value, Action Rating, and MA, with a Not-Hard (white) symbol.
Infantry Units. Show an Assault Arrow (Deployed side) or none (Move side, bare Unprepared), Action Rating, and MA (Leg type).
Combat Trains. Shown as Regular (normal) or Ghost (disrupted) side.
AV Types (background color of the AV number): Red AV, Limited AV, Stand Off AV, Light AV.
Movement Classes (color of the MA number): Tactical (TAC) MA, Leg MA, Truck MA.
Unit Sizes: I = Company, II = Battalion, KG = Kampfgruppe, TF = Task Force, Tm = Team, Grp = Group, III = Regiment, X = Brigade, XX = Division, XXX = Corps, (-) = portion of the larger command, (+) = reinforced unit.
Other symbols: Support Only; Breakthrough AV; No Rebuild Unit; Static Unit.
Unit Symbols include (among others): Infantry, Motorized Infantry, Arm Inf or PG, Abn Infantry or FJ, Mtn Infantry, Marine, Glider Inf, Amphibious, Commando, Ski Troops, Voraus, Bicycle, Machine-Gun, Police, Ost, Ersatz, Ad Hoc Unit, Armor or Pz, Tiger, Josef Stalin Hvy Tank, Josef Stalin AG, Light Tank, Tank Destroyer, Soviet SP Gun, Jagdpanzer, Jagdtiger, Marder, StuG, Sturmtiger, Brummbär, FKL Tiger, Flame Throwing Tank, Matilda, Valentine, PzJg I, Tankette, AT, AA Weapons in Ground Mode, Arm AA, Cavalry, Arm Recon, Motorcycle Infantry, Motorcycle Recon, Arm Car, Engineer, Abn Engineer, Arm Engineer, Pioneer, and ammunition/gun labels such as 102mm Guns, 90mm Guns, 88mm Guns.
Markers include: Prepared Defense, Objective (OBJ), Double OBJ, Red Support, Limited Support, Stand Off Support, Dropped Support, Temporary Dropped Support, Fresh Fatigue, Fatigue Level, MSR Blocked Level, Step Loss, Coordination, 2 Arty Asset Points, 2 Air Points, Screen (Recon Screen), Leader, Locked Formation, Game Turn, Activation Marker, Weather, Formation Activation Marker (Higher Formation, for historical information), Urban Hex Control Marker, March OBJ, Naval Bombardment, Fort, Mines, Minefield Breach, Wire Breach, Traffic, Blown Bridge, Bridge OK (tried and did not blow), Bridge Not Open.
Not all unit and marker types are used in every BCS game; specific games may require additional specialty items.
1.0 Basics
1.0a Scale. Most units are Battalions. A hex ranges from 1 km to slightly over 1 mile, depending on the needs of the game. One game turn represents one day of actual activities. Game Rules will state that game's exact ground and unit scales. Note that there is no concept of "Morning" and "Afternoon" associated with "Initial" and "Second" Activations.
1.0b The Series Rules. Each BCS game contains both Series and Game rulebooks. The Series Rules contains rules applicable to all series games. The Rules booklet concentrates all the series rules in a format that follows the Sequence of Play as much as possible. It also includes the master Series Index. Two special characters are used:
- The Diamond (◊) is a bullet point list, but not a list of specific requirements or restrictions as is the case with the Check.
- The Check (✔) indicates a list of requirements or restrictions.
1.0c The Game Rules. The Game Rules give the details needed for a specific game, including special rules, scenarios, and set-up information. Where the Game Rules and the Series Rules disagree, the Game Rules including Scenario and Set Up instructions take precedence.
1.0d The Support Booklet. The Support booklet includes the main Designer's Notes, the larger examples of play, and the more extensive commentary originally included in the main rulebook as well as the Charts and Tables that are only needed on less common occasions.
1.0e Map. Every fifth hex row is numbered, but hex numbers count all the hexes. So, B21.32 is the 21st hex column, two hexes above the .30 hex row on Map B. Only hexes with half a hex or more showing are playable. Units cannot conduct Off-Map movement. Retreating Off-Map is allowed (5.5h). The player can retain Reinforcements Off-Map until he chooses to have them enter.
1.0f Setup Notes. The Game rulebook contains setup information for the various scenarios presented. Except as amended in the Game rulebook, always apply the following:
- "w/i X" always means at or within X hexes.
- Units can set-up anywhere within a zone specified to include its boundary lines, provided no unit starts in a hex they could not enter during movement.
- Units can set-up on either counter side, as restricted by terrain.
- If a number is shown in brackets, such as [3], it is the unit's current available Steps. If no value is given, the unit starts at full-strength.
- If a unit is listed as 'in Support' you can place it near the HQ or Off-Map as desired and give the HQ the appropriate Support marker. Units only start in Support if listed as such in the set-up.
1.0g The First Turn. Modify the first phases of every scenario:
- The scenario specifies the First Player for the first turn and might list other times where the First Player is designated. On all other turns, make the normal dice roll to determine the First Player.
- The Weather may be pre-determined.
- Roll for Weather and Air Points normally if not pre-determined by the scenario.
- Do not roll for Replacement Points.
- There is no Assignment Phase.
- Orders (optional) can be freely assigned on the first turn, except that any Formation listed in the set up in Prepared Defense must remain that way at least until Turn Two.
- A Formation listed as "Done" in the set-up may not Activate during the first turn. Set its Formation Activation marker aside for the next turn.
- A Formation listed as "Used" in the set-up must attempt a Second Activation during the first turn.
1.1 Units
Units are any counter in play that is not any type of game marker (e.g. Arty or Air Point markers). HQs, Combat Trains, and Support units are considered units, even though they have special requirements and representations that are different from, say, a run-of-the-mill Infantry unit.
Important: The Unit Capabilities Chart provides a list of each unit type's available functions.
1.1a Unit Values.
- Assault Arrow: This symbol is used to identify units as Attack-Capable. Only Attack-Capable units can be the "Attack unit" in a regular Attack.
- Movement Allowance: A unit's Movement Allowance or MA is the maximum available number of Movement Points (MPs) available.
- Movement Class (MA Class): The number's color shows the unit's MA Class on that counter side. A Red MA is Tactical, a Black MA is Truck, and a White MA is Leg.
Design Note: These are the same as their OCS predecessors, except 'Tactical' has replaced 'Tracked' as Armored Cars are included.
- Armor Value & Range: Rated by vehicle and gun. Vehicles have only one number. Range is assumed to be one hex, if no value is printed.
- Action Rating: A rating from 0 to 5 (best) representing a unit's leadership, training, morale, and the unit's other soft qualities.
1.1b Steps. "Steps" measure unit resilience; they are the number of losses a unit can absorb and remain effective. Units are rated for their size and organization.
- The printed Step value on a unit is its full-strength. A unit can never obtain more steps than this number. Any unit without a Step Loss marker is assumed to be at full-strength.
- Place a Step Loss marker under a unit that has suffered losses, set with the number facing the same way as the unit indicating its remaining steps.
- Rotate and/or flip the marker as needed to show the current steps available when losses or rebuilds occur.
- When a unit's steps available becomes less than 1, send it to the Dead Pile.
- There are no other step loss effects beyond the unit's eventual removal.
1.1c Unit Counter Sides. Most unit counters have two printed sides. The distinguishing feature between them is the Movement Allowance. The side with the lower MA is called Deployed or Deployed-side. The side with the higher MA is called Move or Move-side.
If a unit has only one printed side, it is assumed to be showing its Move-side. The side printed on the physical counter's front will be the side most used.
Important: The side currently showing defines that unit's capabilities using the Unit Capabilities Chart.
Design Note: Many will note the similarity between the 'sides' concept here and the 'Modes' as shown in the Operational Combat Series. What I've done here is a bit looser than the OCS Mode structure and I wanted what the side shows to be different depending on the unit type involved, some of which aren't really a 'mode' in any event. So, dealing with the 'side showing' gets the job done without any fuss.
1.1d Unprepared Units. An Unprepared unit is one that is neither Attack-Capable nor has an AV showing at the moment. An Unprepared unit:
- Has no ZOC.
- Cannot Attack or Assist.
- Cannot use Prepared Defense effects.
- Cannot use Support.
- Cannot Jump HQs or Combat Trains.
- Cannot enter an enemy Screen Zone or an enemy controlled Victory Hex.
- Can spot for Barrages.
- Counts as a defender's second unit.
1.1e Unit Types.
Intrinsic Units. These are units with a "Formation Affiliation" on the right of their Unit Symbol and (in all the games except Last Blitzkrieg and Baptism by Fire) have a colored bar on their counters. They only belong to that Formation.
Independent Units. These units do not have a designation to the right of their symbol, nor any colored bar. They can be:
- Assigned to any Formation (where they will act like its Intrinsic units).
- Left Unassigned to any Formation.
- Taken from one Formation and assigned to another as the player might wish.
Headquarters (HQs). Headquarters represent a Formation's command and control hub.
Combat Trains. Combat Trains are a Formation's forward logistical establishment.
Artillery. Artillery is not explicitly represented in the game, but has been abstracted into "Arty Points." Arty Points can be Intrinsic (those printed on the HQ's counter) or shown via separate Arty Point markers that can be assigned to the HQs as desired.
Infantry. Any unit that has no printed Armor Value (AV) number is "Infantry" for terrain DRM purposes on the Combat Table.
Dual Units. A unit that is Attack-Capable and has an Armor Value.
AV Units. An AV unit is one with an Armor Value.
Variations on AV or Dual units:
- Support. These are AV units dispersed into small groups among the Formation's non-AV units to bolster them. Support units are not "Real" units as they have no specific location on the game map.
- Red AV Units. A unit with a Red AV showing. These units are more capable of offensive action than the other varieties of AV units. They can give a DRM on the Combat Table to the attack or defense of other units when in Support.
- Limited AV Units. A unit with an "Outline" AV showing. These units are more defensive in nature than Red AV units. They suffer a penalty on the Engagement Table as a Firer. They can give a DRM on the Combat Table to the defense (but not the attack) of other units when in Support.
- Stand Off AV Units. A unit with a Black AV showing. These units are more defensive (like Limited AV), but have uniquely long ranges and ability to be concealed. They can give a DRM on the Combat Table to the defense (but not the attack) of other units when in Support, but also have a Target DRM on the Engagement Table. They are more difficult to hit on the Barrage Table. Unlike other Support units, Stand Off units in Support require Stopping Engagements when enemy AV units enter their Host's ZOCs.
- Light AV Units. A unit with a White AV showing. These units are more defensive in nature than Red AV units and equipped with low caliber weapons (e.g. MGs) on vehicle mounts. They cannot initiate Engagements as the Firer. When in Support, Light AV units function exactly like Limited AV.
- Hard Units. These have a Yellow background to their unit symbol based on the vehicles involved. Open-top armor or WW2 mech infantry would not be shown as Hard units.
- Breakthrough AV Units. These have a 'Breakthrough Armor designation' on their unit symbol. They use heavily armored vehicles to penetrate strong defensive positions. These units are always qualified to conduct Shock Attacks.
1.1f Recon. Any unit with a Cavalry-slash in its symbol or listed as "Recon" in the Game Specific Rules can make use of the special abilities given Recon units in 3.3f, 3.3g, and 4.6.
1.1g Non-Rebuildable Units. Any unit with a Yellow Dot printed behind its Action Rating cannot accept Replacement Points. If destroyed, a non-rebuildable unit cannot return to play.
1.1h Static Units. These units defend their location and have ZOCs, but that is all. Normal rules apply to Static units based on their counter values. If Independent they cannot be Assigned, so they cannot make use of Support or Spot a Barrage.
1.2 Core Concepts & Description
1.2a Play of the Game. In the most general form, BCS game-turns play as follows. (This description assumes "given other rules" of which it does not supersede.)
a) Reinforcements. One player (it does not matter which) rolls for the Weather, and each player rolls to determine the available Air and Replacement (Repl) Points they will get. Both players simultaneously collect any Reinforcements called for by the Order of Arrival. These are placed for arrival in this turn depending on where they are to enter and the type of unit they are.
Repls are used to rebuild losses. This might be on the map (a unit having lost some of its steps), upcoming Reinforcements on the OOA, or in the Dead Pile (a unit which has lost all of its steps). Each Repl can rebuild one step—a unit in the Dead Pile that has rebuilt a step "comes back to life" and returns to the map where it could continue to repair its lost steps.
The Air Points the player obtains are kept in a pool to use for the entire turn (each one able to be used once). Any leftover Air Points will be wasted. He can use them in any Activation of the turn as desired.
b) Assignments. Independent units and Arty Points can be Assigned or Unassigned during the Assignment Phase. He can also re-assign Arty Points already assigned, by un-assigning them this turn and assigning them elsewhere next turn, as desired.
Critically, the Assignment Phase is when the player can decide to commit units to the Formation's Support or to release units currently in Support to be "real" again.
c) Orders. If being used, Orders are issued to the Formations regarding the Turn's planned movements of their HQs, to establish Prepared Defense, and recover Fatigue.
d) First Player Determination. Determine the First Player this turn if listed in the scenario (for Turn 1 only), or by a dice roll between the sides (on all other turns). This will determine which player will get to go first. That player will select one Formation to conduct an 'Activation.' Each Formation usually gets to run one Activation per turn. This is when it will get to do all the things the player wants the Formation to do. This might allow that Formation to run a "Second Activation" and do even more. Note that a Formation that runs both its Initial and Second 'Activations' does so under the rubric of the one Activation that Formation gets to do. The players alternate Activations until all the Formations in play have Activated (or attempted to do so and failed).
e) Activations. Each time the player's turn in the alternation occurs, he can select any of his available Formations to try to Activate. There may be a time at the end of the Game-turn where one side's Formations are "Done" and the other must keep going alone to use up its remaining Formations. Each turn, all Formations available to Activate must do so.
The "Alternating Activations" are the heart of the system of play.
The Activation routine is straightforward: Determine SNAFU (how "good" of an Activation this one will be), place OBJ markers (where the Formation intends to fight), move and fight with the Formation's units, check to see if Fatigue increases, and finally roll to see if the Formation gets a Second Activation.
If it does, repeat the above (starting with SNAFU), the Formation's units move and fight again, and it will check to see if Fatigue increases again. The Formation will be "Done" at this point and play passes to the enemy for their next Activation.
If you fail to obtain your Second Activation, none of the activities in the above paragraph occur, but instead you mark your HQ as "Done" and play merely passes to the enemy.
During an Activation, use the tools in your tool box to damage the enemy and try to achieve whatever objectives you need to win with your side. Some units can do certain things that others cannot (see the Unit Capabilities Chart to determine which). At the same time, while a given unit could do regular Attacks, Shock Attacks, Assists, Engagements, Attack by Fires, or spot for Barrages… only some of these might be the most effective and best use for the unit at that moment (see the Play Note regarding Combat-Type Integration for more details). Knowing the right tool to use in various situations comes with experience.
f) Game-turn Ends. When all Activations have been completed, flip or orient all HQs to their Unused sides. Advance the Turn marker and begin a new turn.
1.2b The Core Rules
The following basic BCS rules must be known and understood to be able to make play function at any time in the game-turn. They defy easy placement in any single major rules section as their understanding is needed at many times during the turn sequence.
These are given greater explanation (and full internal rules) in sections 1.3 through 1.9. Those can be read for the details when you are ready. Below is a description of what each rule does to establish a fundamental understanding.
- 1.2c Command Radius (CR). Command Radius is a limit on how far away from the Formation's HQ its units can move and where some functions can be accomplished. (1.4)
- 1.2d Support. Support is the distribution of small numbers of AV weapons among the Formation's plain infantry to bolster their attack or defense. Support allows for DRMs on several tables and may inhibit some actions of AV units. (1.5)
- 1.2e Fire Events. Fire Events restrict the use of certain actions by a unit in an Activity Phase. (1.6)
- 1.2f Prepared Defense (Prep Def or PD). Prepared Defense shows a Formation's improved defensive works and pre-planned Fire Support posture. Prepared Defense applies some DRMs, affects retreats, decreases Barrage losses, and may reduce a Formation's overall SNAFU result. (1.7)
- 1.2g Fatigue. Fatigue is a measure of the relative Formation exhaustion/disrepair and the effect of combat operations upon them. (1.8)
- 1.2h Safe Paths. Safe Paths allow freedom of movement (below the game's scale) between a unit and its HQ. A unit without a Safe Path might not be able to do certain game functions and might be cut off from its HQ. (1.9)
- 1.2i STOPPED and FINISHED. Units that STOP are generally unable to move further. Units that FINISH have completed their part of their Formation's Activation and can still do only a couple of actions (and are STOPPED as well). These are levels of completion for a unit during an Activation. Each means certain actions are no longer possible, while the unit can still do specific others. See the STOPPED/FINISHED Chart for a complete summary of their effects as well as 3.4e and after.
1.3 Formations
"Formations" are military commands containing specific (aka intrinsic) units, and its own HQ and Combat Trains.
Formations are the functional block of units in the game. The main Sequence of Play revolves around the activities of one Formation at a time, alternating between the two sides.
A Formation's units share (given other requirements) its common Support units, Fatigue Level, Main Supply Route, SNAFU result effects, total Artillery Points, Prepared Defense status, Orders, OBJ markers, and HQ Command Radius.
1.3a Formation Sizes. Formations vary in size from game to game. Formations might be Divisions in one game or Brigades in another. Specific Task Forces or Kampfgruppen (KGs) of various sizes can exist in either of these formats.
1.3b Intrinsic vs. Assigned units. Intrinsic units are those with a printed affiliation to the right of their unit symbol. Formations can never assign Intrinsic units to another Formation. Independent units and Arty Point markers can be reassigned between Formations as the player sees fit according to the Assignment Rules.
Other than the possibility of later reassignment, an Assigned Independent unit or Arty Point is treated exactly like any Intrinsic part of its current Formation.
1.3c Blobs. A Formation has a defined area of operations termed a "Blob" which could be violated by other friendly Formations, causing reduced efficiency to it when two or more Formations become "Mixed." (3.2d)
A Formation's Blob is a smooth map shape as outlined by its outermost units. Ignore Combat Trains, Out of Command units, Unassigned units, Reinforcements, and Buddies when determining a Blob.
1.4 Command Radius (CR)
"Command Radius" is an abstraction that keeps a Formation's units from wandering too far from their Formation HQ, to allow the Formation to be effectively under the HQ's command and control.
1.4a Each HQ's Command Radius is printed on its counter. Command Radius is the maximum distance from the Formation's HQ its units can function normally. Beyond this distance, penalties and restrictions apply.
Important: The placement of OBJ markers is unaffected by Command Radius.
1.4b Command Radius is measured in hexes (not MPs) from the HQ to the unit's hex. Literally, just count hexes, while ignoring terrain, EZOCs, Engagement Zones and even enemy units.
Use the Formation HQ's current position to determine the extent of its Command Radius. A Formation's unit is "Out of Command" if the unit's distance to the HQ exceeds Command Radius.
1.4c Unassigned Independent units are unaffected by Command Radius. Once assigned, Independent units obey their assigned Formation's Command Radius.
1.4d Out of Command Effects. Out of Command units function normally except where explicitly mentioned below:
- Out of Command units are subject to Isolation losses.
- Out of Command units CAN make Regular or Shock Attacks. Barrages can be made Out of Command, but require proper OBJ Zones and Spotter units.
- Units that begin the phase Out of Command cannot Spot for Barrages, Jump enemy HQs or Combat Trains. It also cannot end Movement or Retreat in a hex to block an enemy MSR, when that enemy Formation has no available alternative MSR.
For the last point, a unit that is already blocking an enemy MSR when found to be Out of Command may continue to do so (both physically and/or with its EZOC).
1.4e Staying in Command Radius. Units (except Combat Trains) must end Activations within Command Radius. If this is not possible, the unit must either move or Attack in a way that will help it do so without foot-dragging OR it can stay in its original hex and not move.
Command Radius does not restrict Advance after Combat.
1.5 Support
"Support" is the distribution of packets of armor and anti-armor weapons to the (mostly infantry) units of a Formation. Depending on the type of Support unit allocated, these weapons help the other units in the Formation attack or defend more effectively. Defeating enemy Support will also allow your Support to be more effective in helping your units.
Any unit with a printed AV rating can be assigned to Support. Game specific rules and unit assignment rules may also restrict this.
1.5a A Formation's Support is available to all its non-Dual Attack-Capable units (including assigned Independents); such units are called "Hosts." A Support unit's ability is unaffected by the number of possible Hosts nor the Support's available Steps.
1.5b "Support Only" Units. If a unit has "Support" printed on its counter, it must be in Support when that side is showing. If a unit has only one printed counter side and it is labeled "Support," the unit must always be in Support.
1.5c Entering or Exiting Support. Units can only enter (or exit) Support in the Assignment Phase. See the Assignment Procedure Chart and 2.3.
No unit can both enter and exit Support in the same turn.
Entering Support. Units that are assigned to a new Formation can instantly enter Support at the same time. A unit must be capable of being in Support to enter Support.
Exiting Support. Support-Only units cannot exit Support to become a Real unit. They must be re-assigned Off-Map.
1.5d Multiple Support Units. Multiple units in Support can help defend against Engagements via a DRM. Follow 5.2b regarding which Support you must use if more than one is available.
1.5e Place each available Support unit near the HQ on its Support side (if any) or apply a Support marker of the right type to it. The Support's counter should show its greater printed AV or Range rating or its counter-side displaying the word "Support," if any.
Mark each stack with the type of Support available: Red, Limited, or Stand Off.
In Support, Light AV and Limited AV are identical; mark both as "Limited."
1.5f Support Unit Handling. A unit in Support never:
- Counts for stacking.
- Moves under its own power.
- Affects any of their Formation's "real" unit movements.
- Takes losses from Barrage, Attack by Fire, Regular Attacks or Shock Attacks.
- Counts as the "second unit" in any defense.
1.5g Effects of Having Support. Hosts obtain:
- A Support AV ZOC.
- Possible Combat and Engagement Table DRMs.
- An AV to use for enemy Engagements (and any loss from the Engagement Table applies to the Support, not its Host).
- Protection from Shock Attacks and Attacks by Fire.
1.5h Units which cannot Access Support. The following cannot access Support:
- Dual units.
- Units that are not Attack-Capable (to include all Unprepared units).
- A unit which is in a hex not allowing Tac MA movement.
- Units currently "Dropped Support."
- Units from a Formation with no Support assigned.
- Those falling under any Game Specific Restrictions.
1.5i Dropped Support. "Dropping" is the act of a Host unit losing whatever Support it might have had available. This could be from a lack of available assigned Support, terrain, or enemy action. Depending on the reason for the Drop, the Host will not be able to make use of any Support until either the situation changes or the current Activation (friendly or enemy) ends.
i) Placement. Place a Dropped Support marker when:
- A Host unit moves or retreats into/across terrain that is Prohibited for Tac MA.
- A Formation lacking Support has Support assigned, but the Support "cannot get to the unit" if there is no Support Establishment Safe Path (1.9c).
Note that units retain any Support they might have had when a Support Establishment Safe Path is blocked. The disruption of that Safe Path only matters when the Support is Dropped for some other reason and the lack of a Support Establishment Safe Path precludes the Host's recovery of Support afterwards.
Place a Temporary Dropped Support marker, a KT-X marker, or rely on memory, if Support is Dropped because of an Engagement Table result against the Host's hex.
Instantly replace any Temporary Dropped Support marker with a Dropped Support marker if the Host no longer has a Support Establishment Safe Path.
ii) Removal. Remove a Dropped Support marker any time both of the following are true (even during enemy Activations):
- The Formation has units assigned to Support.
- The unit has a "Support Establishment" Safe Path.
Dropped Support lasts indefinitely until these conditions are rectified.
Remove a Temporary Dropped Support marker (or its status marking substitutes) automatically when the current Activation (friendly or enemy) ends.
1.6 Fire Events
"Fire Events" limit certain actions a unit might attempt. Only the actions listed below cost Fire Events.
1.6a A unit can only initiate up to two Fire Events per Activation. A unit STOPs upon expending its last available Fire Event.
Units from a Formation with either a Full or a Partial SNAFU result still have both Fire Events. A Formation with a Fail SNAFU result has none at all.
All unit types have Fire Events, but the requirements of the activities in 1.6b might preclude a given unit from using them.
Design Note: It is simply for the purpose of standardization that "all" units have Fire Events as many cannot actually do anything with them. Rather than make a list of units that have Fire Events and those that do not, I gave Fire Events to all units. What those units can do determines if there is any point to their Fire Events or not.
While a Tac MA Attack-Capable unit (Mechanized Infantry) can make a Shock Attack, consider that a plain Leg Infantry Battalion has two Fire Events, but what can it use them for? The Leg Infantry cannot:
- Conduct an Engagement (as it is not an AV unit).
- Conduct an Attack by Fire (for the same reason).
- Conduct a Shock Attack (it does not have a Tac MA).
- Conduct a Recon (as it is not a Recon unit).
Therefore while it has Fire Events, it cannot use them to do anything.
1.6b Each of these expends one Fire Event when performed:
- Engagement.
- Attack by Fire.
- Shock Attack.
- Conduct a Recon.
1.6c An over-stacked unit cannot use Fire Events.
1.6d A Fire Event is expended when announced, regardless of the result obtained.
1.6e Units in a regular Attack (the Attack unit or Assist) do not require or expend Fire Events, but doing so FINISHES the involved unit(s) and wastes any Fire Events they have remaining.
1.6f When a unit activates, it must either "use or lose" both of its Fire Events before another unit can activate.
1.7 Prepared Defense (Prep Def or PD)
A "Prepared Defense" is a Formation status which trades some freedom of action for a better, yet positional, defense. Obviously, the player must consider the cost and benefits of Prepared Defense in relation to the mission a Formation must fulfill on the map.
1.7a Entry. A Formation can enter Prepared Defense if it meets all these conditions:
- It has at least one Artillery Point (Intrinsic or assigned, before SNAFU is applied).
- It has no MSR Blocked Level marker.
- It is an Initial, not Second, Activation.
If a Formation is in or enters Prepared Defense, mark the Formation with a Prepared Defense marker near its HQ.
Design Note: To a large extent, Prepared Defenses represent the preparation of artillery FPFs (Final Protective Fires) and Artillery/Mortar firing points and not—as one might think—just digging holes in the ground.
1.7b Exiting. Remove a Formation's Prepared Defense marker instantly if:
- The player decides to do so anytime before or after his SNAFU roll (as long as the Orders option is not being used).
- The HQ moves or is Jumped.
- It obtains an MSR Blocked marker.
- It no longer has an Arty Point after Assignment.
If the player chooses to remove Prepared Defense after the SNAFU roll, the SNAFU result remains (at best) a Partial. It does not "upgrade" to the Full it might have had without the Prepared Defense.
1.7c Prepared Defense Effects. A Formation with Prepared Defense:
- Is restricted to "no better than a Partial SNAFU result," regardless of how well it rolls.
- Can create or maintain Prepared Defense regardless of SNAFU result (including Fail).
- Can Move normally, given the SNAFU requirement.
- Can place units into Screen.
- Makes use of Combat and Engagement DRMs.
- Has units that can only be Engagement Targets if the Firer is adjacent to their hex.
- Might apply a different line on the Barrage Table.
- Can recover Fatigue.
- Can conduct a Second Activation, but Prepared Defense cannot be created in a Second Activation.
1.7d Eligibility. A unit can use its Formation's Prepared Defense, provided:
- Its counter is on its Deployed-side (and not its Move-side).
- It is in Command Radius.
- The Formation has its Prepared Defense marker at that moment.
1.8 Fatigue
A Formation's Fatigue measures how rested or exhausted the Formation has become. Obviously, a seriously Fatigued Formation will not perform as well as one that is well rested.
Managing your Formations' Fatigue level is needed to ensure they are not caught flat-footed when you need them. Do this by controlling both how you use those Formations and when they recover.
Many of these rules are altered when using the optional Planned Fatigue rules, 6.4.
1.8a Fatigue Levels. A Formation tracks its "Fatigue Level" with a Fatigue marker. Fatigue level progresses from Fresh through Fatigue Levels 0, 1, 2, 3 and 4. Fat-0 is normal (Fresh is 'better' than normal) while Fat-4 is exhausted. Fatigue never increases beyond Fat-4. Fatigue levels affect SNAFU rolls as a negative DRM equal to its level (Fat-2 is a -2 DRM). Fresh Fatigue gives a +1 (good) DRM, instead.
Keep the appropriate Fatigue level marker with the HQ to track its Formation's Fatigue.
1.8b Fatigue Increase. Roll for Fatigue Increase every Activation in which any of the reasons listed on the Fatigue Increase Table occurs.
Do not roll, however, if none of the listed reasons occur OR the Activation's SNAFU result was Fail.
The maximum increase to a Fatigue Level is two levels per turn (one each from both the Initial and Second Activations). If a Formation has only one Activation in a turn (for any reason), the maximum increase is one level.
Fatigue Level increases based on a die roll on the Fatigue Increase Table. Roll for the worst applicable situation (i.e., the one most likely to give a Fatigue increase) that occurred during the current Activity Phase (no matter how many times it did):
- Placing any Combat OBJ marker.
- Conducting any Engagements or Attacks by Fire, or by executing a Second Activation with a Full or Partial SNAFU.
- Conducting the Attack Sequence.
Design Note: Many players get confused as to what a "Second Activation" really means or why "doing nothing but marching" would garner a Fatigue increase, but did not in the previous rules versions. In a nutshell, the mistaken impression seems to be that a "2nd Act" is somehow a division of the game's time scale. This would describe the Turn scale as "two turns per day" and the Second Activation is merely the normal "afternoon" turn. That is not correct. There is no set aside time for a Second Activation. In many activities (such as combat), the Formation's efficiency generated a higher tempo which allowed it to do more during the day or move on to take advantage of the situation the earlier actions generated before the enemy "even knew they were there."
But in the case of Marching all day for "free," it isn't that the Formation walked so much faster than normal (a higher tempo), but rather that it pushed on into the night to gain more ground. By definition these actions will generate more Fatigue (along with twice the normal march distance).
Running a bunch of "clean up" activities (such as flipping units and Combat Trains) also means someone is doing all the normal things they must do overnight as well as all the next day's activities. Expecting them to do all this without a Fatigue Increase is simply incorrect.
1.8c Other Fatigue Effects.
- Fat-4 Formations cannot perform Second Activations.
- Fresh Formations obtain a +1 SNAFU DRM and a +1 to their Second Activation roll.
- HQs that conduct a Voluntary Retreat increase their Fatigue Level by one.
1.9 Safe Paths
A "Safe Path" means a given unit of a Formation has a "safe" way to maintain connection with its own HQ. Within a Formation, having an adequate connection with the HQ is of paramount importance for every unit. Losing this connection (aka "no Safe Path") means that the unit may no longer be under command and control, might not get needed Support, might not be able to evacuate casualties, and might not get ammunition and fuel re-supplies. At this level, having no Safe Path is actually worse than having the Formation's Main Supply Route (MSR) cut by the enemy.
1.9a Safe Paths are traced from each unit separately to its HQ (inclusive of both ending hexes). By definition, a unit in or adjacent to its HQ automatically has a Safe Path.
1.9b Safe Path Length. A Safe Path cannot be longer than the Formation's Command Radius + 5 hexes. Trace a path of contiguous hexes noting that Terrain and EZOCs matter as per the below.
1.9c Movement Type Required. A Safe Path must be traversable by the unit's Movement Class or the Movement Class required according to the following purposes:
- To flip a Leg MA unit to its Tac/Truck MA side: Tac/Truck MA, as appropriate.
- Support Establishment: Tac MA.
- To use AV Repls: Tac MA.
- To use Non-AV Repls: Leg MA.
1.9d When Needed. A Safe Path is needed to:
- Flip from the unit's Leg MA to its Truck/Tac MA side.
- Remove a Dropped Support marker.
- Accept Replacement Points.
- Avoid Isolation Losses.
- Successfully Retreat a Leg or Truck MA unit.
Safe Path does not affect Voluntary Retreats and Tac MA unit Retreats.
1.9e EZOCs. EZOCs block Safe Path according to the needed Movement Class:
- All EZOCs block Safe Paths calling for a Leg or Truck MA.
- Only Real AV EZOCs (not Support AV EZOCs) block Safe Paths calling for a Tac MA.
However, friendly units negate EZOCs for Safe Path purposes.
1.9f No Effect on Safe Paths.
- STOP Terrain has no effect on Safe Paths.
- Support has no effect on Safe Paths.
- Enemy Engagement Zones, enemy Screen units, and Screen Zones have no effect on Safe Paths.
1.9g A unit that is an unassigned Independent or on the Map Edge always has a Safe Path.
1.10 Fog of War
You are free to look at an enemy stack's top Combat Unit and its values (to include its markers, such as Step Losses), but this freedom does not extend to units deeper in its stack. Each Formation openly displays its available Support units, Arty Points, and its Prepared Defense marker. Place these near the owning HQ so as to avoid confusion.
Remaining Air Points are kept secret. Make all die rolls openly, after announcing their purpose and applicable DRMs.
2.0 Game-Turn Sequence
The following phases in order constitute the structure of a Game-turn.
a) Reinforcement.
- One player rolls for the turn's Weather.
Then, both players:
- Roll for new Air Points.
- Roll for and apply new Replacement Points.
- Place Reinforcements as listed on the Order of Arrival Charts (OOAs) into the listed entry locations.
b) Assignments. Both players can:
- Assign or un-assign Arty Points.
- Assign or un-assign Independent Units.
- Units enter or exit Support.
c) Orders. [OPTIONAL] Both players record on a piece of paper each Formation's Order status.
d) First Player Determination. Determine who conducts the new turn's first Activation with a two-die roll for each side. The greater roll wins and must go first. Re-roll any ties.
e) Activations. Alternate Activating Formations until all Formations are Done.
f) Game-turn End. Flip or orient all HQs to their Unused sides. Advance the Turn marker and begin the new turn at the Turn Sequence's beginning.
2.1 Reinforcements
2.1a The Order of Arrival lists any Reinforcements entering play each turn.
2.1b Entry Area Arrivals. Place arriving HQs and Combat Trains (with the player's choice of arriving units) in actual Entry Area hex(es) during the Reinforcement Phase. See also 2.1h regarding the freedom accorded to Combat Trains.
All remaining arriving units (not selected above) can remain Off-Map and enter via movement in the Formation's Activation.
2.1c Arrivals at Specific Hexes or at their HQ. Place these at the start of their Formation's Activation OR in the Reinforcement Phase, as the player desires.
If a specified hex is enemy occupied and no option exists, the unit never arrives.
Units arriving at their HQ can enter in or adjacent to the HQ, terrain-effects permitting.
Place reinforcing Support units with their HQ and these can enter Support (or not) in the ensuing Assignment Phase.
Reinforcements can only arrive at an HQ if it has a Complete MSR. If this is not the case, delay the Reinforcements until the first Reinforcement Phase in which the Formation has a Complete MSR.
2.1d Entry Areas. Most reinforcements enter play by moving from designated Entry Area hexes during their Formation's Activation to link up with their Formations. An Entry Area can consist of one or more hexes. If more than one Entry Hex can be used, Combat Units can choose the exact hexes during the Formation's first Activation. The HQ and Combat Trains must choose the exact hex during the Reinforcement Phase. That decision cannot be changed once made.
i) Place arriving HQs and Combat Trains in their On-Map Entry Area hex in the Reinforcement Phase. HQs and Combat Trains cannot wait Off-Map like regular units.
ii) The player can choose to keep an Entry Area Hex from being over-stacked by placing excess units Off-Map next to it.
Design Note: This mechanic exists to keep the hex from ending up Over-Stacked and vulnerable on entry if the Formation botches a Reactivation or SNAFU roll.
iii) These units can sit Off-Map near their Entry Areas before entering as long as you wish, even into later turns, but can only enter the map during their own Formation's Activation.
iv) Off-Map units cannot be Barraged, Engaged, or Attacked. Those in the On-Map Entry hex can be hit normally.
v) On entering, count the unit's MPs as if it started its move in the Entry Area hex.
2.1e Effects of Enemy Units. EZOCs have no effect on Entry Area hex use.
If an enemy unit occupies the Entry Area hex, entering units could do any of the following:
- Enter via any other hexes of the same Entry Area.
- Use "Attack from Off-Map" to enter. (6.3)
- Nothing, they simply wait Off-Map.
2.1f Retreat Returns. Units removed by Retreat results automatically return in the next Reinforcement Phase. They return at or adjacent to their HQ, but do not require a Complete MSR to do so. See 5.5e.
2.1g Counter-side Showing. A unit can arrive showing either counter-side. Combat Trains always arrive on their Regular, not Ghost, sides. Eligible arriving units can be in Support as desired.
2.1h Combat Trains Arrival. Combat Trains, regardless of their Formation's listed Entry location, can arrive in any Legal Hex that allows a Complete MSR.
2.2 Replacements (Repls)
Replacements are used to rebuild step losses.
2.2a Repls. Repls come in two flavors: AV and non-AV. Units with an AV (on either counter side) must use AV Repls. One with no AV on either counter side must use non-AV Repls. Otherwise given the rules below, you use your available Repls as desired.
2.2b The First Turn. Repls are not available on the first turn of any scenario.
2.2c Repl Use.
i) Each Repl rebuilds one step on one unit. Repls must be used when they become available and cannot be saved for later. Unused Repls are wasted.
ii) No unit can accept more than one Repl per Reinforcement Phase.
iii) Units can never accept more steps than their full-strength step number. Reinforcing units arriving with less than their full-strength steps can be given Repls before they arrive.
2.2d On-Map Rebuild. Units that have lost steps, but are not in the Dead Pile, can rebuild their lost steps.
To use a Repl, an On-Map unit must:
- Have a Complete MSR.
- Not be Non-Rebuildable.
- Have a Safe Path traversable by either…
- Leg MA for non-AV Repls.
- Tac MA for AV Repls.
2.2e Rebuild from Dead Pile. If a dead unit receives a Repl and its Formation has a Complete MSR, place it in, or adjacent to, its HQ's hex. EZOCs do not affect placement.
If a Dead unit's Formation does not have a Complete MSR, it can rebuild its step loss but cannot transfer to the map until the Formation has a Complete MSR.
2.3 Assignment
2.3a In the Assignment Phase, you can do the following with Independent units and Arty Points:
- Assign them to any desired Formation (given the Assignment Procedure Chart) and they will function as part of it.
- Unassign them so they can be assigned elsewhere.
- Units just assigned, those already assigned, and Intrinsic units can enter or exit Support.
Independent units and Arty Points must already be unassigned when the Assignment Phase begins in order to be assigned. You cannot "unassign and re-assign" in a single game-turn.
Reinforcing or rebuilt Independent units, and Arty Points can be freely assigned the turn they arrive.
Intrinsic units and Intrinsic Arty Points cannot be assigned to another Formation.
2.3b Use the Assignment Procedure Chart to determine the requirements and procedures for the change you wish to perform. This includes Assignment and Unassignment as well as Exiting and Entering Support.
2.3c Air Points are never assigned to a Formation. They are available to any friendly Formation.
2.3d On-Map unassigned Independent units never activate at all, nor suffer any Isolation effects. If on-map, they merely sit in place until assigned. Independent units may be pulled Off-Map in the Assignment Phase to await assignment as the player wishes.
2.3e Independent Static units cannot be Assigned to any Formation. (1.1h)
2.4 [Optional] Orders
2.4a Each Formation must be given one Order: HQ Move, No Orders, Prepared Defense, or Fatigue Recovery. Exception: a Formation can be given Prepared Defense and Fatigue Recovery at one time.
Be sure to give arriving Formations orders the turn they will enter play. If the player truly screws up his orders, he will get another chance next turn.
2.4b HQ Move Order. This is an order giving the movement path the HQ must follow. It should list any waypoints needed to clarify the route and the end point location. No other details are needed. No information as to what the units of the Formation are to do is needed; just lay out the movement route of the HQ.
i) If changing circumstances render your Move Order invalid, the HQ can "slow step" (or just not move), but you cannot decide to head in 'some other direction' on the fly (see also 2.4f).
Example: If your HQ's route runs right through an enemy position you planned to clear, but failed to do so, the HQ can stop anywhere along its route (before the planned ending hex presumably) as needed.
ii) When a Formation Activates, place a March OBJ in its end point hex. The HQ then follows the assigned path at any speed it can manage and the player wishes. It cannot deviate from the assigned pathway. If the player underestimates how far the HQ might go, it will stop in the March OBJ's hex until given new HQ Move Orders, regardless of remaining MA.
iii) The Formation's units operate completely as desired as long as they obey Command Radius and other rules, regardless of the HQ Move Order. (See also 2.4h)
2.4c 'No Orders' Order. Such a Formation cannot move its HQ, aside from having it conduct a Voluntary Retreat. This does not affect the Formation's units at all—only the HQ. A Formation not given any other Order is assumed to have a 'No Orders' Order.
2.4d Prepared Defense Order. A Formation with such orders must create or maintain a Prepared Defense when it Activates. This is easily confused. The player must designate that he wants a given Formation to enter Prepared Defense during the Orders Phase, but he cannot execute those Orders until the Formation Activates (and cannot then decide to not do so).
Formations that begin a scenario in Prepared Defense cannot intentionally leave that status until turn two. A Formation which loses its Prepared Defense defaults to No Orders. A Formation with Prepared Defense Orders cannot intentionally remove its Prepared Defense marker (even to do a Voluntary Retreat).
2.4e Fatigue Recovery Order. The Formation commits to conducting a Fatigue Recovery when it Activates. Failure Flip (3.7d) is not possible when using the Order rules.
A Formation can be given both Prepared Defense and Fatigue Recovery Orders at the same time. Simply apply the restrictions of both. If such a Formation defaults to No Orders (via 2.4d), the Fatigue Recovery Order disappears as well provided it has not already been executed.
2.4f Orders can be changed only in the Orders Phase. Existing Orders can remain active for as long as the player wishes. Changing Orders is free, merely jot down the new Order and the Formation will do just that. Exception: You may substitute a new HQ Move Order (only) for one it may have any time the Formation's MSR is blocked during the current game-turn.
2.4g March OBJs. March OBJs control HQ movement to conform to its Orders. The HQ must move directly toward this marker as best it can manage following the route notations in the Order. The March OBJ marker can be placed in any road hex (regardless of enemy units).
- March OBJs do not create OBJ Zones.
- Recon units cannot create March OBJs.
- March OBJs, themselves, do not trigger checking for Fatigue increase.
2.4h March Routing. Apply this rule when an Order places a March OBJ beyond the HQ's at start Command Radius.
i) There is a route of travel for the HQ because of the Order. Regardless of the HQ's direction of travel (advancing or retreating), the route is the path from the March OBJ marker to the HQ's starting hex (remember the HQ must end its movement in a road hex each Activity Phase, 4.7a). Add an extension from the Combat Trains to whichever of these points is closer to the Combat Trains.
ii) This route should be simple and direct. If multiple routes are possible, note the correct one. Enemy units, EZOCs, and other friendly Formations have no effect on route selection.
iii) The Formation's units can only move into a hex that is w/i 2 of any hex of the designated route unless exempted via part iv below.
iv) Units can move freely if:
- They are currently within the HQ's at start Command Radius.
- They follow the route, reach the March OBJ marker's hex, and then proceed farther.
- Executing a Retreat or an Advance after Combat.
- They are Reinforcements trying to rejoin the Formation.
Design Note: This is a concept I tried mightily to find a simple solution for in the design process. Easy enough on the face, I could not find an adequate wording that didn't instantly find players violating the intended spirit by weaving paths to avoid being hindered by its restrictions. Others very much appreciated the added depth it gave the simulation. I present its final testing form here for your enjoyment…but if you think you might 'play' the path to 'pick up units', just do me a favor and don't use it. If you have an understanding of what an Axis of Advance would look like in real life and want that added dimension in your play—enjoy the swim!
A nice by-product of this rule is the need to assemble a dispersed Formation to do such a movement and to move the troops out in deployment once they get to where you want them. This takes time. As such, you can't instantly change posture from widely dispersed to a deep movement (or vice versa). Those are good things. Nicely, "posture" comes from "capability" (as opposed to the other way around). This is a better representation of real life.
Obviously, the restrictions here give you even more reason to avoid HQ micro-movements!
2.5 Activations
In the Activation Phase, Formations from both sides alternate Activating. The 'Active player' conducts the current Activation while the other player is the 'Inactive player.' The Active Player makes all dice rolls, moves units, attacks, and anything else he desires and the rules allow. The Inactive player is limited to taking Step Losses, Retreats, removing Dropped Support in certain situations (1.5i), and exiting Screen (4.6).
When one Formation is completed, the players switch roles and the new Active player selects a new Formation to activate.
2.5a You must Activate (or attempt to Activate) a Formation every time play passes to you. You cannot decline to Activate. There is no ability to "pass."
2.5b Only one Formation Activates at a time. Exception: In group-games, multiple Activations (even from both sides) can be run simultaneously, provided the Active Formations do not interact with each other.
2.5c Each Formation must Activate at least once in a game-turn. Formations that set up "Done" cannot Activate on the first game-turn. One that sets up "Used" must attempt a Second Activation (the set up has removed its Initial Activation, so this is an exception to 2.5e). Both types of Formations return to normal on succeeding game-turns.
Play Note—Done HQs: Normally, an HQ's 'Done' status is shown by orienting the HQ's counter opposite the way of its units (with its banded 'Used' side showing). However, since all Second Activations must occur immediately after the Formation's Initial Activation, the designation can be ignored on most game turns. The exception is in some scenarios, where Formations might begin already 'Used' but still need to attempt to Activate. In that case, it is important to know who is 'just' Used and who is actually Done. At other times, just flipping to Used is enough of a marking to know who is also Done.
2.5d Initial Activations require no die roll; Second Activations only occur after a successful Activation die roll.
2.5e A Second Activation, if any, must be attempted immediately after a Formation's Initial Activation. You can forego doing one, but no matter how you choose, you cannot later change your mind. It can be important to avoid the risk of a Second Activation when units might suffer Isolation twice or increase the Formation's MSR Blocked Level more rapidly. A Second Activation with a Partial or Full SNAFU result always rolls for Fatigue Increase. Do not roll if they get a Fail or do not obtain a Second Activation (whether they fail the roll or the player chooses to not try for one).
2.5f Second Activation Restrictions. Formations cannot conduct Second Activations if they have:
- Fatigue Level-4.
- Conducted a Recovery Activation.
All others can do so (including Formations in Prepared Defense).
2.5g Prepared Defense cannot be created, or Fatigue Recovery done, in any Second Activation.
2.5h To conduct a Second Activation, roll one die. Add one to the roll if the Formation is Fresh. If the modified roll is greater than or equal to the Activation Roll on the HQ's counter, the Formation successfully activates. Otherwise it does not.
2.5i Whether you choose to skip a given Second Activation attempt or if you fail to get it, the Formation cannot be activated again that turn. Rotate the HQ's counter to show its "Done" status (usually opposite the normal unit orientation on your map).
2.5j The current game-turn is done once all HQs are Done. A side is completed when all its HQs are Done. The other side continues until all its HQs are Done as well. The Activation Phase ends at that point.
To be clear, a turn does not end when only one side runs out of Formations to Activate; it does so when they both run out.
2.5k [Optional] Formation Activation markers. Each Formation has a 'Formation Activation' marker. These can be used to keep track of Formations that still need to Activate. When a Formation is done, remove its marker from those available. It will return the next turn. These are termed "chits" in the remaining rules in this section, except 2.5n).
2.5l [Optional] Random Selection. Place the available chits in a cup and randomly draw them to determine the next Activating Formation.
2.5m [Optional] Modified Random Selection. Have the available chits from both sides in a common cup. Randomly draw three chits. The side owning the majority of those drawn selects the Formation to Activate from the drawn chits. The remaining chits go back into the cup. Set aside the used chit for next turn. If the player wins the cup draw multiple times, he could Activate multiple times in a row. If only one or two chits remain in the cup, select only one chit and that chit is the Formation to Activate.
2.5n [Optional] Activation Smoothing. Contributed by Björn Högberg.
i) Most times, one side has more Formations to Activate than the other. Normally all these "extra" Formations Activate after the side with fewer Formations is finished. This rule ensures "extra" Activations happen at random times within the turn and not at the end as a group.
ii) Call the two sides: 'Large' and 'Small' because of the number of Formations each has available. At the start of each turn, put numeric chits into a cup equal to the number of Small's Formations. Number these chits 1 or 2. Only use a number of 2-chits equal to the difference in number of Formations between the two sides. The rest will be 1-chits. Say if Large has 8 formations and Small has 5 formations, 5 chits will be put in the cup. Three of them will be 2-chits and the last two will be 1-chits.
iii) Each time Large becomes the Active Player, he draws one chit. If it is a 1-chit, Large Activates one Formation followed by Small's next Activation. If it is a 2-chit, Large Activates two Formations in a row before Small does one. Small does not draw any chits. Note that the Chit draw does not override the normal means of determining who goes first.
iv) Do not count any Formations that begin the Scenario "Done" in the number used to determine the chits above for the first turn.
3.0 Formation Activation Sequence
Follow this phase order to conduct any Formation's Activation Phase. "If allowed," "as needed," and "if desired" assumed in all cases. If a specific function "must" be conducted, the preceding does not override that requirement.
a) HQ Initialization. Identify the Formation to activate. Flip the HQ to its "Used" side (the one with the white stripe). If the Formation HQ started the turn on its "Used" Side, skip to step (i) below.
b) Preparation. The Active player will conduct strictly in order:
- Add or increase the Active Formation's MSR Blocked marker if the Formation's Combat Trains are Off-Map.
- Remove the Active Formation's Combat Trains if the Formation does not have a Complete MSR.
- Remove the Active Formation's MSR Blocked marker if the Formation has a Complete MSR.
- Create, maintain, or remove the Active Formation's Prepared Defense marker. Prepared Defenses can only be created in Initial Activations.
- If the Active Formation is Mixed, apply Coordination markers.
Skip to step (c) if not doing a Recovery Activation, otherwise conduct the items in this shaded box.
If you wish to declare a Recovery Activation (3.7), do only the following sequential actions, if allowed or required by other rules:
- Remove any Coordination marker, if the Formation is not currently Mixed.
- Flip the Combat Trains out of Ghost.
- Remove any Dropped Support markers.
- Reduce Fatigue by one level.
- Apply Isolation effects.
- Set its Formation Activation marker aside for next turn.
- Continue play starting with step (j).
c) SNAFU. The Active player:
- Makes a modified dice roll on the SNAFU Table to determine the Formation's SNAFU Result.
- If the Active Formation is not currently Mixed, remove its Coordination marker after the roll.
- Decides if the Formation is to do a "Failure Flip" Activation as per 3.7d.
d) OBJ Placement. The Active player places available OBJ markers.
e) Activities. The Active player will:
- Conduct the Formation's unit Activities. Non-FINISHED units conduct their choice of Movements, Engagements, Regular Attacks, Shock Attacks, Barrages, and Attacks by Fire.
- If the Combat Trains are at Optimal Distance and did not move in any way, flip them away from their Ghost side. If they did move in any way OR are not Optimal, flip them to their Ghost side.
- "Move" Combat Trains from Off-Map (as Ghost) if it creates a Complete MSR.
- Intentionally remove the Active Formation's Prepared Defense, if desired, when not using the Orders rules.
f) Clean Up. The Active player will:
- Remove all OBJ, Traffic, and Temporary Dropped Support markers.
- Flip Combat Trains which are not at Optimal Distance to their Ghost side.
g) Fatigue. If Fatigue Increase is possible, the Active Player rolls to see if it occurs to the Active Formation.
h) Isolation. The Active Player applies any Isolation Losses to the Active Formation's units.
i) Second Activation. The Active player will:
- Orient his Active Formation's HQ as "Done."
- If intentionally skipping a Second Activation, Fat-4, OR a Recovery Activation, go to step (j).
- Roll to attempt a Second Activation. (+1 if Fresh) If roll succeeds, go to step (b). If the roll fails, go to step (j).
j) Other Player's Turn. The new Active player follows the above sequence again for his Activation.
Continue this cycle until both sides have run out of Formations to Activate. Then move to step (f) in the main turn sequence in 2.0.
3.1 Main Supply Routes (MSR)
A Formation has a "Complete MSR" if there is a contiguous series of Legal hexes (3.1a) that connect all three of the following (in order) from the HQ through its Combat Trains, and then to a Supply Source.
i) To be perfectly clear, each hex of a Complete MSR must be independently Legal according to the requirements in 3.1a.
ii) An HQ can only use its own Combat Trains to establish a Complete MSR. It cannot do so if its Combat Trains are Off-Map.
iii) Once established, the HQ-to-Trains trace path may not change until:
- The HQ or Trains move.
- The enemy disrupts the trace.
- The HQ/Trains are Jumped and must relocate.
Determine specific MSRs at the beginning of the scenario. Use the simplest and most obvious routing for each so that the scenario start is not done in a vacuum.
iv) Check the Formation's MSR during each Preparation Phase. If there is no Complete MSR, the Combat Trains must be removed from the map. Off-map Combat Trains cause a -3 DRM on the ensuing SNAFU roll.
If the Combat Trains are already Off-Map, the Formation suffers an MSR Blocked marker with an additional SNAFU DRM, which might increase in severity up to a peak of "MSR Blocked Level 2."
3.1a Legal Hexes. A Legal Hex:
- Contains a Primary or Secondary Road OR a Track. Tracks can only be used if the hex is between the HQ and Combat Trains (inclusive).
- Is connected to a Supply Source using contiguous Legal hexes or is a Supply Source itself.
- Does not block an existing enemy MSR if that enemy Formation has no other readily available MSR option(s).
A Legal hex cannot contain:
- EZOCs. Note: Another friendly unit can negate EZOCs for an HQ to make its hex Legal (and for no other purpose.)
- Enemy Units.
Apply the "Uses Tracks" SNAFU DRM (of the value appropriate to the Trafficability), regardless of the number of Track hexes involved.
Play Note—Legal Hexes: Stand Alone: The key here is to evaluate each hex as Legal or not based on its own circumstances. The only real change here (aside from cleaning up the organization) is that you can legally place the Combat Trains in a Track hex. But, keep in mind that all the other hexes of the MSR still need to be evaluated. So, it is OK if the Combat Trains are in a Track hex, the hex next to it (outside the link between the HQ and the Combat Trains), cannot be and remain Legal.
Play Note—Legal Hexes: Connection: While the usual (and preferred) arrangement for any MSR is Complete, with Legal hexes all the way from the HQ through the Combat Trains and then to the Supply Source, this isn't always the case. If your MSR has gotten cut by your choices, terrain, or the enemy, keep in mind that the second requirement of 3.1a does not require a Complete MSR to be Legal. It just requires the hex (itself) to be connected to (or in) a Supply Source. When Combat Trains move, they must move to a hex that creates a Complete MSR. The sequencing involved when Trains are sent off map and when MSR Blocked markers are issued is important and introduces a small time delay from the origin of your Formation's problem and the end effect on your SNAFU rolls. Keep that mechanically rigorous so you do not confuse yourself.
3.1b When Needed. Legal Hexes are required for a Complete MSR. HQs must retreat to a Legal Hex (unless 4.7f is in effect). Otherwise, units and even HQs move freely without concern about Legal Hexes (beyond the need to have an MSR to get a decent SNAFU result).
3.1c MSR Blocked. If marked MSR Blocked, a Formation cannot keep or build any Prepared Defense. Apply the appropriate Combat and SNAFU Table DRMs. There is no Isolation effect for being merely MSR Blocked.
Only place MSR Blocked markers in the Preparation Phase if the Formation's Combat Trains are already Off-Map. If the Formation has no existing marker, add an MSR Blocked Level-1 marker. If it is already marked MSR Blocked Level-1, increase it to Level-2.
If a Formation has a Complete MSR in the Activation's Preparation Phase, remove any MSR Blocked marker (either Level) it might have.
3.2 SNAFU
The SNAFU Table reflects supply and other logistical concerns (including transportation, routing, march traffic control, and simple friction). A dice roll on the SNAFU Table plus the application of a number of DRMs listed below generates one of three SNAFU results (Full, Partial, or Fail). These define what can and cannot be done during the Activation as per the SNAFU Results Effects Chart.
3.2a Each Formation's Activation requires a SNAFU roll. A separate SNAFU roll is made for the Second Activation.
3.2b SNAFU Table Rolls. A SNAFU roll uses two dice and an assortment of DRMs on the SNAFU Table. Game Specific rules also list additional SNAFU DRMs.
3.2c Coordination. This DRM applies if the Formation has a Coordination marker. A Formation cannot have more than one Coordination marker, but a single Formation can inflict Coordination on multiple other Formations. Formations marked with a Coordination marker must "pay" for it by applying a DRM on the SNAFU Table. Remove the marker after the roll if the Formation is not Mixed (see 3.2d in that case).
3.2d Mixed Formations. Formations are Mixed if any Active unit begins within or enters (even momentarily) during movement any hex inside an Inactive Formation's "Blob."
Design Note: The Blob outline should be a simple observation by eyeball. The Formations are either using the same area or not. Don't overthink it, just look at what is going on. Yes, if a unit Retreated to a bad location, you might now be Mixed and you need to Activate to fix the mess.
i) This also applies during Advance after Combat, Retreat ending hexes, or Reinforcement placement. Mixed status varies depending on the order of activations.
ii) Mixed Formations do not apply to or from:
- Combat Trains.
- Out of Command Radius units.
- Unassigned Independent units.
- Buddies.
iii) If the Formation is currently Mixed:
- Apply a Coordination marker to each Formation involved.
- Apply the Mixed Formations DRM for SNAFU as well.
- If the Formation is currently Mixed and has a Coordination marker, it will use a -2 DRM for SNAFU and (in theory) will remove the marker, but since it is still Mixed, it will obtain a new one instantly. In that case, apply the DRM, but do not remove the marker.
3.2e Fatigue. Fatigue Level is a negative SNAFU DRM, e.g. Fat-1 would be a -1 DRM. Fresh Fatigue is a +1 DRM.
3.2f Optimal Distance. The MSR distance from an HQ to its Combat Trains must be between 5 and 15 hexes (inclusive, counting along each road hex used) to gain the DRM. Optimal Distance also applies if Combat Trains are in an Entry Hex and the HQ is not more than 15 hexes away. The DRM cannot be applied if the Combat Trains are forward of the HQ. They are "forward" if the MSR from the HQ to the Combat Trains and the MSR from the Combat Trains to the Supply Source share any hexes (excluding the Combat Trains hex itself).
3.2g–3.2k Additional SNAFU DRMs and Results
3.2g Ghost. If the Formation's Combat Trains are currently on their Ghost side, apply this DRM.
3.2h Crossing the Streams. This DRM applies if the path between the HQ and Combat Trains uses any hex used by another Formation's HQ and its Combat Trains (inclusive). There is no additional effect based on the number of Formations involved at once.
3.2i MSR uses Tracks. The Track DRM applies if any MSR hex uses Track instead of better road types. The number of such hexes used has no effect. Track hexes are Legal only between the Combat Trains to the HQ, inclusive. (3.1a). There are two values for this DRM; use the one associated with the current Turn's Trafficability (due to Weather Effects).
3.2j MSR Blocked. MSR Blocked markers have a negative DRM equal to their MSR's Blocked Level. Use this in addition to the DRM for having its Combat Trains Off-Map.
3.2k Results. SNAFU results can be Full, Partial, or Fail. The SNAFU Result Effects Chart lists their effects. Once a result is determined, it remains in effect for the entire current Activation; a new SNAFU result will be determined for each later Activation, to include the current Formation's Second Activation, if any.
A Formation with a Prepared Defense reduces its SNAFU result of Full to a Partial.
See also Failure Flips in 3.7d.
3.3 Objectives (OBJs)
i) You typically need OBJ markers to attack, barrage, and to take control of Victory hexes. Place them during Activations to identify where the Formation will execute active operations. There are OBJ markers allowed by the SNAFU result, those created by the Formation's Recon units, and the one designating the HQ's March OBJ.
ii) Of these, all but March OBJs are "Combat OBJs" which generate OBJ Zone hexes needed to conduct almost all attacks and barrages, as well as to take control of Victory Point hexes.
iii) The one exception is that Engagement Table fires do not need an OBJ Zone at all.
iv) March OBJ markers are used to identify the Formation HQ's ending location for the Orders rules. This location restricts the HQ's movement based on the location chosen. (2.4b)
v) March OBJ markers do not create OBJ Zones allowing any form of combat.
3.3a OBJ Zones. Each OBJ marker creates a 2-hex radius OBJ Zone. An OBJ Zone hex is required to make any:
- Regular Attacks.
- Shock Attacks.
- Attacks by Fire.
- Barrages.
- Move into an uncontrolled VP hex. In the case of VP hex entry, the OBJ marker must be in the VP hex itself.
Engagements, however, do not require OBJ Zones, but could apply the DRM for a Double OBJ Zone if the target lies within it. While Double OBJ Zones have access to DRMs, there are no additional effects for multiple OBJ Zones within one hex.
3.3b Double OBJ Zones. These are created by two co-located SNAFU OBJ markers. The target of any Engagement or Attack in a Double OBJ Zone applies a DRM.
3.3c OBJ Marker Availability. The SNAFU Result Effects Chart gives the number of OBJ markers a Formation can place. OBJs created by Recon (3.3f) and March OBJs (if used) do not count against the number allowed.
OBJ markers cannot be saved for future Activations, given to other Formations, or saved for the Formation's Second Activation. Remove them in the Activation's Clean Up Phase.
3.3d OBJ Marker Placement. You can place all, some, or none of your available OBJ markers anywhere you like at any distance from the HQ. OBJ markers must be in a hex containing an enemy non-Support unit and/or a Victory Hex designation. (See 2.4g regarding March OBJs.) Once placed, the marker cannot be moved or removed until the Clean Up Phase. OBJ markers have an arrow on their counter to off-set the marker if desired.
Design Note: Obviously, having to place Combat OBJ markers literally on top of enemy units is an abstraction. Anyone who has ever looked at a real OBJ knows they are best selected by geography. This was allowed in earlier system versions, but players were doing all manner of obscene things with OBJ markers in an attempt to maximize their usefulness in hitting multiple targets or catching units that retreat. OBJs started showing up in back of enemy units and even on top of friendly ones. The time expended here was criminal. This simplification reduces the crazed planner effect.
3.3e OBJ Marker Removal. In every Clean Up Phase, remove all OBJ markers from the map.
3.3f Recon Created OBJs. Recon units can place Recon OBJs after the Activities Phase begins.
Recon OBJs are not constrained by the number of SNAFU OBJs allowed.
To conduct a Recon, the Recon unit must:
- Be identified both with Recon capability in the Unit Capabilities Chart and in the game specific rules.
- Have at least one Fire Event to expend.
- Not be STOPPED** nor overstacked.
- Not attempt to Recon a hex already containing an OBJ; Recon units can never create a Double OBJ.
** You can waive a STOP created by AV EZOCs by winning Stopping Engagements. It does not matter if a Stopping Engagement is required or not. A Recon unit must eliminate the STOP to do a Recon.
3.3g Recon OBJ Placement Procedure. The Recon unit expends one Fire Event, rolls one die, and compares the result to the Recon unit's Action Rating.
If the roll is less than, or equal to, the Recon unit's Action Rating, place one OBJ marker on any enemy unit (or VP hex) w/i 2 of the Recon unit.
If the roll is greater than the Action Rating, the attempt fails. Place no OBJ marker. If the Recon unit has another Fire Event, it can attempt to recon that, or another, hex again. If another Recon unit is available, it can attempt to Recon a hex which was tried earlier but failed.
Once created, a new OBJ marker and its OBJ Zone exists for all the active Formation's units (including the Recon unit itself).
3.4 Activities
3.4a Only the currently Active Formation's units can perform Activities during the current Activation. If units of multiple Formations stack, only those belonging to the currently Active Formation functions.
3.4b In general, you are free to use your Formation's units and artillery in any order you like, but you must finish moving one unit before starting another. No unit or Artillery/Air Point can be used more than once in an Activation. After its chance to move and use Fire Events, a unit can only Attack, Assist, or spot for Barrages. You cannot go back to an earlier unit for other purposes, even if MPs or Fire Events remain.
3.4c Make any desired Barrages before, during, and/or after any unit's movement.
3.4d Units move individually, not as Stacks. One unit must end its movement for the phase before another can start. You cannot go back to a unit after starting the movement of another, except for the handful of actions listed in 3.4f.
3.4e Units STOP and/or FINISH during the course of the Activation. See the STOPPED/FINISHED Chart for a full listing of the causes and effects of each.
3.4f A unit that is not yet FINISHED, but is done moving and the player has started moving some other unit cannot use any remaining:
- Fire Events.
- MPs.
But can…
- Attack or Assist.
- Spot for a Barrage.
3.4g A unit FINISHES when it:
- Conducts or Assists a Regular Attack.
- Executes a Voluntary Retreat.
3.4h A FINISHED unit cannot:
- Move (regardless of remaining MA).
- Execute any remaining Fire Events.
- Attack or Assist.
- Enter Screen.
But, a FINISHED unit can spot a Barrage.
3.4i A STOP does not preclude executing remaining Fire Events and/or FINISHING by other means.
Play Note—Movement Sequencing Options: You can, for example, move unit A, move unit B, fire a Barrage, move unit C, attack a hex using A with B as Assist (A enters the hex after winning), fire another Barrage (using A as a spotter from its new hex), move unit D through the hex cleared by the attack, use D to initiate Engagements against some deeper enemy hex, move unit E through the same hole in the enemy line, attack with stack C with an assist from E… and so on.
What you can't do, for example, is move unit A some MPs, fire a Barrage, move unit B… and then go back to finish unit A's remaining MA, etc.
You also cannot move unit A, then move unit B, and then go back to unit A to conduct Engagements, Shock Attacks, or Attacks by Fire. Those must be done before starting a new unit.
You can, however, move unit A some, do an Engagement, Shock Attack, or Attack by Fire, move unit A some more and do another Engagement, Shock Attack, or Attack by Fire and then call a Barrage. Then move unit B so that A and B can make a regular Attack together (as Attack and Assist).
3.5 Clean Up
Do the following in every Clean Up Phase:
- Remove all OBJ, all Traffic, and any Temporary Dropped Support markers which have not converted into Dropped Support markers.
- Flip Combat Trains not within Optimal Distance to Ghost, if not already.
3.6 Isolation
Units that are cut off from their HQs suffer losses from Isolation every time they Activate. This is a more debilitating situation than when the units and HQ are "isolated" together by a Blocked MSR.
3.6a Identify Active stacks that have no Safe Path and/or are Out of Command Radius (even if from Advance after Combat). Check to see if the Formation has an MSR Blocked marker. Find these conditions for each unit using the Isolation Chart and apply any loss listed in the appropriate line.
3.6b Reinforcements. Reinforcements catching up to their Formation HQ do not apply Isolation until they start an Activation inside Command Radius.
3.7 Fatigue Recovery & Failure Flip
Fatigue Recovery enables a Formation to reduce their Fatigue level, even to Fat-0.
3.7a Limitations. No more than one Fatigue Level can be recovered in any one Game-turn. No Formation can recover to Fresh during the game. Recovering Formations cannot execute a Second Activation nor can Recovery be executed during one.
Formations in Prepared Defense can recover Fatigue.
3.7b Requirements. A Recovering Formation must have a Complete MSR.
3.7c Procedure. Announce that the Formation will do a Recovery Activation during its Activation's Preparation Phase. Make no SNAFU roll. A Recovery Activation allows only those actions listed for a Recovery Activation in the Sequence of Play and in the order presented.
3.7d Failure Flip. If you obtain a Fail SNAFU result, you can convert it into a Recovery Activation in an action called a "Failure Flip."
i) Failure Flip can only be done in Initial Activations. A Failure Flip cannot be done in any Second Activation.
ii) Apply anything done in the Activation before the SNAFU Roll, but continue by executing only those functions in 3.7c as if you decided earlier to conduct a Recovery Activation, to include giving up any chance at a Second Activation.
iii) You can also choose to accept the Fail SNAFU result instead and continue to play normally. Failure Flips do not apply when Orders or Planned Fatigue options are used.
4.0 Movement
A player can move all, some, or none of his Activated Formation's units given other rules; the Inactive player cannot move any of his units, except when needing to retreat.
4.0a General.
i) Units move individually, but a unit can move as many or as few hexes as desired, subject to MA, SNAFU results, Traffic, enemy units, EZOCs, and terrain.
ii) Units move in any direction or series of directions, but must follow a contiguous path of hexes through the hex grid.
iii) Each unit tracks its remaining MA individually and expends MPs for each hex/hexside entered/crossed according to the Terrain Effects Chart. Units cannot transfer unused MPs to each other, nor save them for later use.
iv) Units can never enter hexes containing any kind of enemy unit, except to 'Jump' HQs or Combat Trains. Exception: See 4.6a, regarding Deployed-side Leg MA units and enemy Screen units.
4.0b Switching Counter Sides. Most units have two counter sides showing the unit in different postures. Flipping does not cost MPs. Units can only flip before beginning any Activities and no unit can flip more than once per Activation. A unit can only flip with the appropriate Safe Path (see 1.9). A Unit functions based on the values showing; its face-down side has no effect at all.
4.0c Halved Movement Allowance. An MA might be halved for a number of reasons. Regardless of the applicable number of reasons, halve the MA only once. Always keep fractional MA; do not round them in any way.
4.0d Traffic. Place Traffic markers in the Defender's or Firer's hex, based on Combat or Engagement Table results respectively. Traffic markers inflict a STOP on all units within or entering their hex. Traffic markers inflict their STOP but have no actual MP cost. If a Traffic marker exists in a hex that is already fully or over stacked, additional units cannot enter that hex even momentarily.
Design Note: In BCS games before Panzers Last Stand, Traffic markers said "Stopped" on them (short for "Traffic Stopped"). This was clarified in PLS.
4.0e [Optional] Unit Traffic. Unit Traffic has no marker. Unit Traffic exists in any hex containing any Unit except Deployed-side Active Units.
Exceptions: HQs always create Unit Traffic, but Combat Trains, Unassigned units, a unit in an Entry Hex, and any unit currently Screening are ignored entirely.
Screen Zone hexes, friendly or enemy, have no effect on Unit Traffic, or vice versa.
Units entering a Unit Traffic hex do not benefit from any roads in or entering hex. They must pay the hex's "other terrain" MP cost (hex and hexside) instead. If the "other terrain" hex and/or hexside is Prohibited to the unit, it cannot enter the hex. "Other terrain" only applies to entering the Unit Traffic hex, and never to exiting one.
Design Note: 'Unit Traffic' was a part of plain Traffic and the system standard for a long time. It was always a time consuming matter and provided only modest returns. Some players loved it, others hated it. I'd suggest playing without Unit Traffic at first only adding it later if you prefer greater detail. It does work very well, but it is also a lot of work & time as players will carefully orchestrate their moves.
4.1 Terrain Effects
Each hex and hexside feature costs a specific number of Movement Points as listed on the Terrain Effects Chart. This cost varies depending on the unit's Movement Class: Tactical, Leg, or Truck. Units have independent MAs and the MP expenditures of one unit do not affect any other. Add any hexside MPs to the hex's cost. The moving unit must pay the entire MP cost before entry. Exception: One-hex Movement (4.1f).
4.1a Multiple Terrain Types. A hex might have more than one hex terrain symbol. The symbol's quantity does not matter. Use the type most costly for movement if not moving on roads.
4.1b Reciprocal Moves. A unit can only move from hex A to hex B if it could also move from hex B to hex A.
4.1c Roads. A unit can pay road movement costs and ignore the normal hex and hexside MP costs, if the unit follows a continuous road path and the road is not negated by Unit Traffic. Roads within a hex are assumed to intersect, even if no intersection is literally shown.
4.1d Prohibited Terrain. Units cannot enter or cross Prohibited hexes or hexsides, unless using a bridge or road.
4.1e STOP Terrain. Units must STOP upon entering any STOP Terrain hex, regardless of their remaining MA. STOP terrain hexes cost 4 MPs.
4.1f One-hex Movement. If otherwise eligible to move and not yet moved in this phase, a unit without enough MPs can always move one hex. Units can never use this rule to:
- Conduct a Shock Attack.
- Move across or into Prohibited terrain.
- Violate Failed SNAFU effects.
- Violate EZOC effects.
- Move with a printed MA of Zero.
4.2 Stacking
Normal stacking is two Combat Units. HQs, Support, Combat Trains, and all game markers do not count for stacking.
Over-Stacking is allowed (with exceptions listed in 4.2b) but brings with it DRMs on the Combat Table and multiple rolls on the Barrage Table.
4.2a A stack's top Combat Unit must be the one with the longest printed Range (use greatest AV rating in ties). Otherwise, you can freely determine stacking order at any point during your Activation.
4.2b Over-Stacking is not allowed at the moment when:
- Using any Fire Event.
- Being selected as an Attack or Assist unit.
- Entering a hex with a Traffic marker.
4.2c Defending an Over-Stacked Hex. Over-Stacked hexes defend normally in most cases, but with the addition of the Combat Table's Over-Stacking DRM.
Naturally, the Barrage and Attack by Fire systems will make over-stacked hexes death traps. But, sometimes you have reasons.
4.3 Zones of Control (ZOCs)
4.3a With the explicit exceptions in 4.3b, Combat Units have ZOCs in the hexes adjacent to them. ZOCs come in two varieties: normal ZOCs (generated by all but the units listed in 4.3b) and AV ZOCs (which are only generated by AV units).
4.3b HQs, Combat Trains, Screen units, and Unprepared units do not have ZOCs.
4.3c Restrictions on ZOCs. Terrain does not restrict ZOCs. Friendly units only negate EZOCs for Safe Paths and the movement of HQs (4.3d).
4.3d EZOC Effects. EZOCs affect movement depending on the moving unit's MA Class and/or type. No unit can move directly from one EZOC to another that affects it. Units can freely exit any EZOC it began its movement within (provided it does not move directly into another EZOC that affects it).
i) Leg MA and Truck MA units must STOP if they enter any EZOC.
ii) Tac MA units must STOP on entering an AV EZOC (Real or Support) hex. This may require a Stopping Engagement. But, only Real AV EZOCs apply to Tac MA units for Safe Path determination. (1.9d)
iii) HQs can never enter an EZOC unless the EZOC is negated by a friendly unit.
4.3e EZOCs and Retreats. Appropriate EZOCs in a Retreat's ending hex can inflict step losses on the retreating units. EZOCs that eliminate the Safe Path of Leg or Truck MA units might cause them to be unable to retreat and take a Step Loss instead. EZOCs have no effect at all on retreating Tac MA units.
4.3f AV ZOCs. AV ZOCs affect the movement of enemy Tac MA units, whereas normal ZOCs do not. AV ZOCs are generated by Real AV units or by Support. These are Real AV ZOCs or Support AV ZOCs, respectively. AV ZOCs are limited to hexes adjacent to it, regardless of the unit's Range. Support AV ZOCs are available to any currently Supported unit.
4.4 Stopping Engagements
While moving into AV EZOCs requires your moving unit to STOP, winning a Stopping Engagement could allow it to "break free" ("waive the STOP") so it can keep moving.
Stopping Engagements never occur in any non-AV unit movement, Advance after Combat, or Retreat.
Some Stopping Engagements are required (meaning you must fire at least once even if you don't intend to keep moving), while others are not (you can decide to not fire at all and merely STOP in place).
Each Stopping Engagement "shot" costs one Fire Event like any other Engagement.
4.4a Required or Not Required? A Moving unit is required to make at least one Stopping Engagement if the AV EZOC entered is generated by either a:
- Real AV unit or
- Host with Stand Off Support.
A Stopping Engagement is not required if the AV EZOC is exclusively from Hosts with non-Stand Off Support. The player is free to fire, anyway, in order to waive the STOP.
Exception: Light AV and all AV-armed Screening units cannot execute a required Stopping Engagement. They become FINISHED instead. If the Stopping Engagement is not required, they STOP normally.
4.4b Waiving a STOP. The STOP requirement is waived if no AV EZOC remains in the firing unit's hex. An AV EZOC disappears if the unit providing it:
- Is Destroyed.
- Retreats.
- Is a Host and it Drops Support.
The moving unit "wins" if the hex's STOP is waived. It loses if it does not. If a unit 'loses' a required Stopping Engagement it remains STOPPED.
Regardless of the failure of any earlier Stopping Engagement, the unit can expend its remaining Fire Event as an Engagement that might open up that EZOC hex to the movement of his other units.
Even if a unit eventually wins the Stopping Engagement, it STOPs if it expends its last Fire Event, and you cannot 'pause' one unit to help it out with another before it continues.
i) In each Stopping Engagement, the active player's moving AV unit is the Firer. The inactive player selects the Target unit he desires.
The target unit chosen must:
- Contribute an AV EZOC into the moving unit's hex.
- Follow the normal Engagement Target selection requirements in 5.2b part ii).
ii) A STOP must be waived before making any Recon attempt.
4.5 Engagement Zones
4.5a Engagement Zones are generated by AV units out to the extent of their range and give the following effects:
- Truck MA units must STOP on entering an Engagement Zone.
- HQs cannot move into or end a Retreat within an Engagement Zone hex.
Other than these two points, Engagement Zones have no effect at all other than where they might be able to initiate an Engagement. Unlike EZOCs, friendly units do not negate Engagement Zones for HQ movement. Only Terrain and Weather affect Engagement Zones.
4.5b Only Real (i.e. not in Support) AV units (which are not Light AV or Screening) generate Engagement Zones. Engagement Zones extend into all hexes of the AV unit's range, possibly restricted by Terrain and Weather.
4.5c Blocking Terrain ("Line of Sight"). Terrain has no effect on an Engagement Zone into adjacent hexes, but greater ranges require no Blocking terrain on the line between the endpoint hexes. Use the line connecting their center-points.
Ignore terrain in both end-point hexes entirely. Ignore all hexside features, units of both sides, and all game markers in or between the end-point hexes.
Use the listing on the Terrain Effects Chart to determine if an intervening hex blocks or not. Count entire hexes as blocking; the specific location of the symbol is irrelevant.
If the line between the firer's hex and the target hex runs on a hexside between a blocking and a non-blocking hex, the Engagement Zone is not blocked.
Play Note—Stopping Engagements: Here the II/16 (116 Pz) has just moved into the hex adjacent to TF Harper. A Stopping Engagement is required as Harper has a Real AV ZOC. There are no additional DRMs in this case so it is the German unit's effective 7 vs the US unit's effective 6 for a +1 overall. The first roll is a 4 with the +1 gives a 5 and a Firer Loss & Traffic. The German player takes that loss and places a Traffic Stopped marker in the Panzer Bn's hex and could try again. The Pz Bn is not Attack-capable, so it could not literally 'Attack' Harper using the Combat Table. Shock Attack would not be possible both because of the STOP and the fact that Harper is an AV. There is another Fire Event, so it fires again, same +1, and this time rolls an 8 for a net 9. Harper takes one loss and has a Retreat result to satisfy. The Stopping Engagement has been 'won' but having used its last Fire Event, the Pz Bn cannot continue to move.
In each Stopping Engagement, the active player's moving AV unit is the Firer. The inactive player selects the Target unit he desires.
i) In each Stopping Engagement, the active player's moving AV unit is the Firer. The inactive player selects the Target unit he desires. The target unit chosen must contribute an AV EZOC into the moving unit's hex and follow the normal Engagement Target selection requirements in 5.2b part ii).
ii) A STOP must be waived before making any Recon attempt.
Play Note—Stand Off Support: Here the 88mm unit is with the HQ in Command Radius of the two FJ units, both of which have their Support.
TF Rose moves up from the south and wishes to attack one of these two FJ units in the hope of cutting through to the river and blocking off further advances by the FJ.
However, once it enters the hex adjacent to both FJ units, it must deal with the Stopping Engagements created by the Stand Off Support from both of these units.
In this, TF Rose is in a good spot. As there is a Required Stopping Engagement in that hex, even though it is coming from two enemy hexes, only ONE Stopping Engagement is literally required (Rose can "accept" the other as 'just a STOP' and isn't forced to Engage it).
The Stopping Engagement shot on one FJ unit is a 5 to 8, or a net -3. A roll of a 9 manages to Drop Support on this unit. As the second (identical) shot is really an unneeded risk to Rose (who will attack the other FJ unit with a regular Attack shortly), Rose can make use of its other Fire Event to make an Attack by Fire on that unit in the hopes of killing a step before the combat.
TF Rose will then be out of Fire Events and locked in the unwaived AV EZOC of the other FJ unit. Both of these add up to a single STOP. It is expected that Rose will attack the first FJ unit (which does not have Support and might be down to 5 steps). With luck this will result in that unit scurrying off and Rose will advance into the vacated hex. If Rose gets a Second Activation, it will then deal with the other FJ unit.
4.6 Screening
Screening allows Recon units to slow enemy movement without undue risk to themselves. A Recon unit currently on its Move-side can be marked as Screen before starting its Activity Phase. SNAFU results do not affect Screens.
You can add a Screen marker to Recon units at any time in an Initial Activation (even in a Fail SNAFU), but never in a Second Activation.
Screen markers can be removed at any time (even in an enemy Activation), instantly releasing the unit.
4.6a Screen Zone Units. A unit marked Screen:
- Has no ZOC.
- Can move, Recon, and spot for Barrages.
- Cannot end movement or retreat stacked with any other unit. Should this happen, remove all Screen markers from the involved units.
- Cannot Attack, Assist, Attack by Fire, or Initiate Engagements. They are FINISHED upon entering any AV EZOC hex and cannot enter a hex that requires a Stopping Engagement.
- Cannot Jump HQs or Combat Trains.
i) Enemy Tac or Truck MA units cannot enter the hex occupied by the Screen unit itself.
ii) Enemy Deployed Leg MA units can enter the hex occupied by a Screen unit and cause the Screen unit to retreat 3 hexes.
iii) Retreating does not affect the unit's Screen marking or cause a counter flip to occur.
4.6b Screen Zone Unit Combat. Screen units are not subject to the Combat or Barrage Tables.
Screen units can be fired upon using the Engagement Table (but cannot be the Firer in an Engagement). However, convert each "Both Loss" result into a "No Losses, Target Retreats 3 hexes" result.
4.6c Screen Zones. Screen units have no ZOC, just their Screen Zone. A Screen Zone includes all hexes around the Screen unit out to a number of hexes away from the unit (inclusive). Screen Zones exist to a radius of 3 hexes (in all BCS games, a change to Last Blitzkrieg). Ignore enemy units and terrain for Screen Zone purposes.
4.6d Screen Zone Effects. Move-side Enemy units pay +1 MP per Screen Zone hex entered. Screen Zones do not affect Deployed-side enemy units. Unprepared units cannot enter an enemy Screen Zone hex.
Screen Zones (including the Screen unit itself) have no effect on:
- Hex Legality for MSRs.
- Unit Traffic.
- Safe Paths (friendly or enemy).
- Engagement Zones (and vice versa).
4.7 HQs & Combat Trains
HQs and Combat Trains cannot be destroyed or captured. They can be temporarily disrupted by enemy 'Jumping' (enemy units moving into their hex), and have their own movement requirements.
4.7a HQ Movement. HQs move during the Activities Phase using their own MA like any unit, except they will lose any Prepared Defense markers they have if they move. When using the Orders rules, HQ movement is strictly controlled by the orders they are given. However, an HQ under Prepared Defense Orders (2.4d) cannot do a Voluntary Retreat.
Regardless of its Movement Class, HQs cannot cross or enter terrain prohibited to Truck MA.
Important: HQs must always end their movement or retreat in a non-RR road hex which, if possible, is at the end of a Complete MSR. (3.1)
4.7b Combat Train Movement. Combat Trains (which are currently Legal or Off-Map) 'move' by simply placing them in any desired Legal Hex (3.1a) that also creates a Complete MSR. They cannot move to any 'Illegal' hex or even a 'Legal Hex' which doesn't generate a Complete MSR.
If the Formation does not have a Complete MSR in the Activation's Preparation Phase, remove the Combat Trains and place them Off-Map.
Combat Trains that are Off-Map can return to any Legal hex On-Map if doing so creates a Complete MSR during the Activities Phase. Such Combat Trains have "moved" and re-enter as Ghost.
Combat Trains which…
- Move or
- End an Activities Phase outside Optimal Distance from their HQ (between 5 and 15 hexes) (3.2f)
…must flip to their Ghost side.
4.7c Combat Train Recovery from Ghost. Ghost Combat Trains can recover to normal if:
- Legal and part of a Complete MSR.
- Within Optimal Distance.
- Stationary for the preceding Activity Phase.
4.7d Jumping HQs & Combat Trains. Table Retreat results do not directly affect HQs & Combat Trains, but if an enemy unit ever enters their hex, they are 'Jumped' and must retreat (HQs in 4.7e and Combat Trains in 4.7h). The enemy unit executing a Jump can be moving in regular movement or an Advance after Combat.
Unprepared units, retreating units, Screen units, units starting the phase Out of Command Radius, HQs, and Combat Trains cannot Jump enemy HQs and Combat Trains.
4.7e HQ Retreats. Do these things to retreat an HQ following a Jump:
- Retreat the HQ at least 3 hexes to any Legal Hex (3.1a) that is free of any Engagement Zone. Just pick up and place the HQ in the desired hex, with no EZOC or Safe Path concerns along the way. Exception: See 4.7f.
- Flip its Combat Trains to Ghost.
- Remove the HQ's Prepared Defense marker, if any.
- Apply a Coordination marker to the HQ.
- Retreat does not change an HQ's Activation Status (Available, Used or Done).
4.7f HQ Escape into a Pocket. An HQ can ignore the need for a Complete MSR and the minimal retreat distance requirements of 3.1a & 4.7e, as well as the concerns of the Directional Retreat Guidelines (5.5b), but it must end in a hex containing one of its own units.
Other than needing a Complete MSR, ALL other Legal hex requirements apply.
4.7g HQ Voluntary Retreat. An Active Formation's HQ can Voluntarily Retreat following the procedure in 4.8, except:
- HQs never lose a step.
- HQs can do so even in a Fail SNAFU.
An HQ Voluntary Retreat applies 4.7e & 4.7f normally. HQ's under Optional Prepared Defense Orders (2.4d) cannot execute a Voluntary Retreat. If an HQ does a Voluntary Retreat it must increase its Fatigue Level by one.
4.7h Combat Trains Retreat. Jumped Combat Trains retreat by just being picked up and placed in a Legal Hex creating a Complete MSR, then flipping to Ghost. That hex must be at least 10 hexes following a road down its MSR from where it started. The resulting hex need not be 10 hexes straight-line distance from where it started. If no such hex is possible, the Combat Trains are sent Off-Map.
4.7i [Optional] Soft Jumps. If an HQ or Combat Trains is Jumped, roll one die for the hex (regardless of the numbers of HQs and/or Combat Trains in it). Make this roll before resolving any Combat Unit Retreats.
i) On a 1-4 it is a Soft Jump and follows part iii below.
ii) On a 5-6, it is a Hard Jump and applies the process in 4.7e, 4.7f, and 4.7h.
iii) On a Soft Jump, the owner moves both the Jumped HQ and its Combat Trains (regardless of which gets Jumped) as desired. Retain (but do not add) any Prepared Defense or Coordination markers. The Combat Trains retain their existing Ghost status (or not) and need not become Ghost as a result.
iv) There is no path involved; the idea is that it was there the whole time. The player can shift any desired number of hexes.
v) The chosen hexes must:
- Be appropriate terrain.
- Not contain an enemy unit, Engagement Zone, or EZOC.
- Not block an enemy MSR.
vi) However, the hexes need not be Legal at the moment.
Design Note: A Soft Jump might look odd at first. It is not a movement of any sort. Rather, it is an attempt to add limits to the enemy's perfect "eye-in-the-sky" intel. His units roll into a location he was certain was correct, only to find nothing there. The "new" location is actually where the HQ was this whole time (or so it seems). The enemy's 'perfect' situation map was simply wrong, again.
4.8 Voluntary Retreats
In lieu of normal Movement, Active units can self-inflict Voluntary Retreats to get out of locations they couldn't exit normally. Safe Paths, EZOCs, Engagement Zones, Terrain and enemy units themselves do not restrict Voluntary Retreats.
4.8a The retreat ending hex must be 3 hexes away. Inflict one step loss and flip the unit to its Move-side. This FINISHES the unit. If the ending hex contains an EZOC, inflict the normal additional Step loss as well. (5.5g)
4.8b HQs do the same (see also 4.7g) but can extend their retreat to fulfill the conditions of a Jumped HQ in 4.7e & f. HQs do not take any step loss. HQ Retreats must be toward their Combat Trains and see 5.5b.
4.8c HQs can Voluntary Retreat under a Fail SNAFU result. All other units require at least a Partial SNAFU result. See 4.7g for more details.
4.8d HQs under actual Prepared Defense Orders (2.4d)—as opposed to an HQ that just happens to have a Prepared Defense marker—cannot execute a Voluntary Retreat.
4.9 [Optional] Realistic Movement
Players ponder, control, redo, and rework moves to squeeze out ever-greater optimization. Their opponents must do the same to compete. The result, after a great time investment, is a level of precision that has nothing to do with reality. This rule makes cardboard units move like the real thing.
4.9a Unit Movement. Units move as the real elements. If a counter moves along the grid into a hex, it really did so. No redos, if you go down the wrong track and need to back-pedal, do so literally using your MA.
4.9b Honest Mistakes. However, if you screw up (count MPs wrong, forget a rule, or what not), let your opponent know what you did and figure out where the unit should be. Changing what you'd "like to do" doesn't count.
5.0 Combat
Combat occurs in multiple ways, including Engagements, Attacks, Shock Attacks, Attack by Fire, and Barrage. Unit types restrict the kinds of combat a unit can conduct and be subjected to. (See the Unit Capabilities Chart.) Only the Active player can initiate any form of Combat.
Play Note—Combat Type Integration: Learning to play the game requires understanding what types of combat to use versus the kinds of targets and the capabilities of your own units.
Becoming a great player is a matter of not only knowing these things, but arranging your forces so that you have the tools available to obtain your goals as rapidly and efficiently as possible. Importantly, an expert player will know what tools to leave in the toolbox given the situation he is presented and which ones will do the needed job and how well they will do it.
Regular Attacks are set piece actions coordinated between assaulting and supporting units & fires to push the enemy out of a position on the ground. Resolve these on the Combat Table.
Shock Attacks are rapid assaults by mechanized units exploiting their protection and mobility to decisively attack an enemy location. Shock Attacks allow the attacking unit to continue movement afterwards. Resolve these on the Combat Table.
Engagements are fire exchanges between weapons platforms using AV strengths. Engagements are used to generate losses, to suppress Support, and to free friendly units for movement. Unlike Attacks, they do not represent an effort to seize terrain. Resolve these on the Engagement Table.
Attacks by Fire use AV weapons against non-AV targets. Resolve these on the Barrage Table.
Barrages use Artillery and/or Aircraft to generate Suppression effects or to inflict step losses on enemy locations. Destruction Barrages use the Barrage Table to create losses. Suppression Barrages allow the player to apply DRMs on the Combat Table, but do not inflict any step losses.
5.0a "Terrain" (as in a unit "has Terrain") are specific terrain features that affect Combat and Barrage of listed types on the Terrain Effects Chart. Both hex and hexside features could apply "Terrain" effects. Hexside Terrain applies to the Combat Table, but has no effect on any Engagements, Attacks by Fire, or Barrages.
5.0b HQs and Combat Trains cannot be Engaged, Attacked, or Barraged. They do not absorb step losses at any time or for any reason.
5.0c Screen Units cannot be Attacked or Barraged, but could be Engaged by enemy AV units.
5.1 Regular and Shock Attacks
Both Regular and Shock Attacks use the Combat Table to represent assaults into enemy occupied hexes. Shock Attacks have a number of exceptions and special requirements, which do not apply to Regular Attacks.
5.1a All Attacks. Execute Attacks at any time and order during the Activities Phase. Attacks are never required. Each Attack involves only one "defending hex" which must contain an enemy unit which can be attacked. The defending hex must be within an OBJ Zone, but Attacks are not restricted by Command Radius.
5.1b Attack Sequence
- Attacker declares the Attack and identifies the defending hex.
- Defender announces if he can apply Prepared Defense.
- Defender identifies his Action Rating unit.
- Attacker identifies the Attack and any Assist units.
- Attacker executes any Barrage.
- Determine the net Combat Table DRM.
- Roll on the Combat Table.
- Apply the results (Losses, Retreats, Advances).
5.1c Attack Unit Requirements. All Attack units must:
- Provide the Attack's Action Rating.
- Be adjacent to the defending hex.
- Be able to enter the defender's hex in regular movement.
- Not be FINISHED.
- Not be Over-Stacked.
- Be used to determine Attacking DRMs.
- Have an MA greater than 0.
5.1d Barrages in an Attack. The attacker can select one of two kinds of Barrage using available Arty/Air Points to support his Attack. The Formation HQ's Command Radius does not restrict Barrage. A Suppression Barrage generates a +2 DRM in a Regular Attack, or +1 DRM in a Shock Attack. In neither case does the Suppression Barrage cause any step losses. A Destruction Barrage can cause step losses from the Barrage Table, but gives no Suppression DRM. If a Destruction Barrage destroys the defending stack, execute Advance after Combat and the attack ends without rolling on the Combat Table (but still FINISHES all involved units). For Fatigue roll purposes, the Attack did occur.
5.1e Combat Table DRMs. Each side determines its Net Action Rating by adding the applicable Combat Table DRMs to their chosen unit's AR. Subtract the defender's Net Action Rating from the attacker's Net Action Rating to find the final DRM. Use the terrain in the defender's hex and any hexside terrain the Attack unit is crossing to make the attack. For the Defender to use his Second Unit DRM, he must have exactly two Combat units in his hex.
5.1f Combat Table Results. Roll two dice, add the final DRM, and read the result on the Combat Table. Results include Losses, Retreats, and Traffic. Only the Attack unit can absorb Attacker losses. If it cannot absorb all of them, ignore the excess. Losses cannot be applied to Support or Assist units. The defender must inflict the first loss on his AR unit and then distribute remaining losses to other real units within his hex, as desired. Place any resulting Traffic marker in the defender's hex if his stack either retreats or is destroyed (otherwise ignore it). Retreat results affect all the units in the defending hex.
5.1g Regular Attacks Only. A hex can only be targeted by a single Regular Attack in a single phase. But if the enemy units retreat to a new hex, they could be attacked again (by different Attacking units).
5.1h Regular Attack Criteria. The Attack Unit must apply the "All Attack Units" list in 5.1c and must be Attack-Capable. An Attack Unit could be STOPPED.
5.1i "Assist" Units. You can assign an "Assist" for your Attack, if you wish. An Assist gives that Attack a DRM. The Unit Capabilities Chart shows which unit types can Assist. You may select no more than one unit as an Assist.
An Assist must:
- Be Attack-Capable or have an AV showing.
- Be adjacent to the defender's hex.
- Be adjacent to, or stacked with, the Attack unit.
- Not be over-stacked.
- Not be FINISHED, but can be STOPPED.
An Assist unit can Advance after Combat only if stacked with the Attack unit, and not from other locations. It can only Advance after Combat if it is capable of entering the defender's hex in normal Movement.
5.1j Ending a Regular Attack. Regardless of any Advance After Combat, units that Attack or Assist are FINISHED.
5.1k Shock Attack Only. You can Shock Attack a hex as many times in an Activity Phase as you can manage (even with the same unit) in addition to other Attack or Barrage types—and in any desired order.
5.1m Shock Attack Criteria.
i) A Shock Attack defending hex must:
- Not contain any AV rating (real or Support).
- Cost 3 MPs or less for Tac MA (road MP rates can be used to reduce the hex's terrain costs).
ii) The defender's hex could contain a STOP (if using a road rate to pass the 3 MP test). That STOP applies after the unit successfully advances into that hex. No, the unit need not pay this amount. The hex merely needs to cost that much or less.
iii) A Shock Attack unit must:
- Follow the "All Attacks" list in 5.1c.
- Be a single unit.
- Have at least one MP & one Fire Event remaining.
- Not be under a STOP.
- Have a Tac MA and be "Shock Attack-Capable" on the Unit Capabilities Chart.
- Show one or more of the following:
- Attack-Capability.
- Red AV.
- Light AV.
- Breakthrough Armor.
5.1n Other Shock Attack Special Rules.
i) Shock Attacks cannot use Assists.
ii) A Shock Attack costs one Fire Event.
iii) Shock Attacks do not FINISH the attacking unit.
iv) Shock Attacks can never use more than one Arty or Air Point for barrage.
v) To obtain the "Attack by Fire DRM," the Attack by Fire must come from the Attack unit itself and leave another Fire Event available for the Shock Attack. The Attack by Fire accrues the DRM even if it generates no loss.
5.1o Ending a Shock Attack. The Attack unit can continue to move using its remaining MA if not STOPPED (for any reason, including running out of Fire Events by doing the attack).
i) Continue movement, if any, from the unit's current hex (be it with or without the "free" move of an Advance after Combat). Once beginning to move again, EZOCs and Stopping Engagements apply normally.
ii) If the attack fails to dislodge the Defender and the Attacker still has MA and a Fire Event remaining—it can move or even try another Shock Attack against the same hex again.
iii) Regardless, all the DRMs involved in the earlier attack are reset to zero. A new Shock Attack, even against the same target, must provide its own DRMs.
Design Note: Yes, this all means that a unit could make a successful Shock Attack against a hex, Advance after Combat into it, and thereby 'move into the hex for free.' Remember, they are hustling at the time and the world is not as black and white as a unit's MA might indicate.
5.2 Engagements
Engagements represent AV armed units exchanging fires. Only the Active player initiates Engagements. Resolve them on the Engagement Table.
Engagements can only be initiated against enemy AV units or Support. If an AV unit wishes to fire on a stack without any AV, use Attack by Fire instead.
5.2a Engagement Firers.
i) A qualified Active AV unit, which is not in Support, can execute an Engagement by firing on a single enemy AV unit target in its Range.
The limitations on this range (the range's maximum value, the effect of terrain in 5.2b part iv), visibility and Blocking Terrain) restricts how far away a target can be Engaged.
The Firer's Range affects:
- If the Target can be Engaged at all.
The Target's Range affects:
- If the Firer can take losses at all. (5.2d part iv)
- If the Target can use the Multiple Support DRM. (5.2d part iii)
If the Target is a Support unit, measure the Target's Range on the Support's counter from the Host back to the Firer.
ii) Engagements require the expenditure of one Fire Event each, but do not cost MPs. If a unit no longer has a Fire Event available, it cannot initiate an Engagement.
iii) A unit can initiate an Engagement at any point in movement (including before it moves), and is free to move afterwards if this wasn't its last Fire Event.
iv) EZOCs do not affect a unit's ability to Engage.
v) There is no need for the Firer to be able to enter the Target's hex in any way nor is there ever an Advance After Combat after any Engagement, no matter what the results.
5.2b Engagement Targets.
i) Engagements do not require the target to be in an OBJ Zone, but the Target must be inside a Double OBJ Zone to apply the Double OBJ DRM.
ii) The Inactive player selects the unit in the Target hex to be the Target of the Firer's Engagement into that hex.
Choose the Target unit with the greatest AV and/or Range, in the following priority order:
- Real AV Unit.
- Support AV using a Host from a Formation with multiple Support units.
- Support AV using a Host from a Formation with only one Support unit.
iii) A given target unit can be Engaged any number of times in a phase.
iv) If the Target's hex contains "Terrain" or the Target itself is in Prepared Defense, the maximum Engagement range is reduced to 1 hex.
5.2c Special Cases.
i) Light AV and Screen units cannot be Engagement Firers, but can be Engagement Targets.
ii) Support can only be Engagement Targets.
iii) If the Target is a Screen unit, convert a "Both Loss" result into "No Losses, Target Retreats 3 hexes" against it.
5.2d Engagement Table & Results. Resolve Engagements by rolling two dice on the Engagement Table, adding any applicable modifiers.
i) There are two sections in the Engagement Table: Use the top one if the Target is Real AV and the bottom one if the Target is Support. The numbers shown are the modified two dice rolls. Use the result in the same column above the modified roll made.
ii) Support uses the Host's Action Rating to compute the Target's Base Differential modifier (Support AV + Host unit's AR). Real AV units use their own Action Rating.
iii) The "Multiple Support" DRM applies only in a shot against Support when the Targeted Formation (not hex) has more than one Support unit and the range of each reaches into Firer's hex.
iv) Apply the result to the side or sides indicated. However, ignore all Firer results if the Firer is outside the Target's range.
v) Place any resulting Traffic marker in the Firer's hex.
5.2e Engagement Results and Support units.
i) Never apply losses to a Support Host, only to the Support unit itself.
ii) A Target Drop result Drops Support from every unit in the stack, even if its own Support didn't participate.
5.2f [Optional] In any Engagement at a range greater than 1 hex, convert any "Both Loss" result into "No Effect."
Play Note: For those used to earlier editions of these rules, how Stand Off Support ("88s") is used may be confusing. When deployed as a Real AV unit (meaning not in Support), the 88s have the same two Fire Events, an Engagement Zone to Engage as a Firer out to their Range, ability to Attack by Fire, and an AV ZOC. In Support, they lose these things except the ability to be Engaged as a Target and the AV ZOC for their Hosts. They also apply a Required Stopping Engagement to any enemy AV units that enter those AV ZOCs.
5.3 Attack by Fire
Attack by Fire allows AV units to attack non-AV units. Effectively, the AV unit is shelling the enemy with HE rounds. Attack by Fire is resolved using the Barrage Table, and counts as one Fire Event.
Design Note: AV units fire on other AV units using the Engagement Table, but they fire on non-AV units using the Barrage Table in the form of Attacks by Fire. The difference here comes from how the combat is being fought. Obviously, AV vs. AV is a contest of machines while AV vs. non-AV represents something more akin to shelling (like a Barrage) the target unit's position.
5.3a Any number of Attacks by Fire can be made against a given hex. Attack by Fires can be made in any sequence, before or after any Attacks.
5.3b Attack by Fire Requirements.
- The Firer is adjacent to the target.
- The Target contains no AV (Real or Support).
- The Target is in an OBJ Zone.
- The Firer could be STOPPED but is not FINISHED.
5.3c Firing Unit Requirements.
- Each Attack by Fire is made by a single unit.
- Only unit types listed on the Unit Capabilities Chart can conduct Attacks by Fire.
- The firing unit must win any required Stopping Engagement before making an Attack by Fire.
5.3d Procedure. Resolve Attacks by Fire exactly like a one Arty/Air Point Barrage, using the Attack by Fire column on the Barrage Table. Every Attack by Fire is resolved individually; they are never combined, nor can they ever be combined with Arty/Air Points to create larger Barrages.
5.3e Attack by Fire as Suppression. Attacks by Fire never qualify as a Suppression barrage for a Regular Attack, but could apply as a similar DRM to a Shock Attack by that same unit immediately following its Attack by Fire. Such an Attack by Fire "Suppression" can only affect that one Shock Attack, but could be in addition to the actual Suppression DRM (+1) from Arty/Air Points.
5.4 Barrage
Barrages come in two basic forms: Destruction and Suppression.
Destruction Barrages are designed to inflict losses on the enemy. They do so using the Barrage Table and can use up to three Arty or Air Points in a single Barrage. Roll one die for each Point expended per target unit (not per stack) to determine losses.
Suppression Barrages inflict no loss, but improve your combats by allowing a positive DRM. Effectively, they force the enemy's head down and allow your assault forces to advance to very close range before the defense can regroup.
5.4a A Formation's associated Arty Points can be used at any point during that Formation's Activation to execute a Barrage, but each Arty Point can only be used once per phase. The Formation's total is refreshed in each Activity Phase, including in a Formation's Second Activation if any. Unused Arty Points cannot be saved for later use. SNAFU results can affect the number of Arty Points a Formation might have available.
5.4b An HQ can be assigned any number of Arty Points in addition to its printed "intrinsic" Arty Points. While the printed intrinsic Arty Points never change, the player can assign or unassign the other Arty Points as desired in the Assignment Phase. Once assigned, only that Formation can use them until they are re-assigned elsewhere. Use of an assigned Arty Point does not remove it. It is refreshed each Activity Phase just like Intrinsic Arty Points are.
5.4c You could also be issued Air Points representing available aircraft strikes. Air Points follow the same handling rules as Arty Points, except you do not assign Air Points to specific HQs; they are kept in a pool available for their side. They can be used in any friendly Activation. Each Air Point can only be used once in a given turn and are not "refreshed" like Arty Points. Unused Air Points cannot be saved and used later. SNAFU results do not affect Air Points.
5.4d A hex can be subject to only one Destruction Barrage OR Suppression Barrage per Activation. Attacks by Fire are not restricted by this rule. You must declare the number of Arty/Air Points to be used before rolling.
5.4e Make any desired Barrages before, during, and/or after any unit's movement, provided:
- There is a qualified Spotter (1.4d & 5.4f) of the active Formation available.
- The target hex must be in an OBJ Zone.
- If the Barrage is not part of an Attack Sequence, the Spotter must STOP.
5.4f Spotting. All Barrages (of either type) must be Spotted by a unit that began the Activity Phase in Command Radius and which is:
- No more than 4 hexes away (or the game specific Visibility, whichever is less) from the target.
- It is assigned to the Active Formation, including its HQ and Combat Trains. Combat Trains are exempt from the Command Radius requirement above.
- On a line to the target with no Blocking Terrain for Line of Sight. (4.5c)
- In any status: Unused, STOPPED or even FINISHED.
5.4g Suppression Barrages. A Suppression Barrage made during a regular Attack automatically earns a +2 DRM. Suppression barrages only use one Arty/Air Point and never generate a loss roll. Shock Attack Suppression only obtains a +1 DRM using an Arty or Air Point. No Barrage made outside an Attack (either type) applies any Suppression effect.
5.4h Destruction Barrages. Resolve Destruction barrages on the Barrage Table using its Arty column. For each Arty/Air Point expended, roll one die for each unit in the targeted hex. Do not roll for Support. (1.5f)
For example, if you fire three Arty Points at a hex with a stack of two units, you will make a total of six die rolls, with three rolls against each of the units in the target hex.
i) Use the row designated by terrain and/or target type (using the lowest casualty rate row that applies). The results for each roll will be either no effect or a Step Loss (losses come from the unit being rolled against at that moment).
ii) The number of Arty/Air Points that can be used in a Destruction barrage varies according to the situation:
- Up to three Points as part of a Regular Attack.
- One Point as part of a Shock Attack.
- One Point when not part of any Attack.
iii) Destruction barrages never apply a DRM to any Attack.
5.5 Retreats
Both the Combat and Engagement Tables produce Retreat results. There are a few types of "Retreat." Only the Combat Table produces "Situational Retreats" (5.5d) which may allow the units to stand fast at a cost in Step Losses, and "Automatic Retreats" (5.5e) involving units regrouping back at the HQ now or in the next turn. All Engagement Table Retreat results (unless modified by another rule) and some Combat Table Retreat results merely require a Stack to retreat 3 hexes and flip to its Move-Side.
To determine the manner and type of a Retreat a unit must execute, follow the Retreat Execution Chart to apply the needed conditions.
Retreats are unaffected by Engagement and Screen Zones. Exceptions: HQ requirement 4.5a and the changes in the result against Screen Zone units 4.6b.
Retreats are generally unaffected by Terrain, enemy units, or EZOCs, except in the retreat's ending hex and if No Safe Path applies (5.5c). The retreat itself has no "Path" and the unit will arrive at the ending hex via routes and abilities below the level of the game—remember, the game's perfect arrangement of units on a grid does not imply such perfection also exists in real life.
5.5a Retreat to the Rear. The owner retreats his units "locally to the rear." Simply pick up the stack and place it in the new hex. Apply these guidelines to help determine the retreating stack's final location. They are arranged in priority order. If more than one hex is roughly as qualified, the owner decides.
5.5b Retreat Direction Guidelines. Try to end a retreat in a hex based on the following guidelines (in order of importance):
- Away from the local enemy units (esp. the Attack or Firer units).
- Free from EZOCs.
- Containing a permissible terrain type.
- Better suited for defense.
- Closer to the unit's HQ.
- Not Blocking enemy Safe Paths or MSRs.
- Closer to the Combat Trains.
- Closer to the Formation's last Supply Source (if the Formation does not have a Complete MSR).
Your retreat should try to fulfill as many of these guidelines as possible.
HQs and Combat Trains retreat according to the guidelines above and 4.7e & 4.7h only when an enemy unit enters their hex (4.7d)—such as in an Advance after Combat (5.6d) after the other units in their hex must execute a Retreat Result or are destroyed.
5.5c No Safe Path. Always apply any listed Step Loss result first and then the following if No Safe Path exists.
- If there is no Retreat result, you are done.
- If there is a Retreat result and the units are Leg or Truck MA, each unit suffers one additional Step Loss and ignores the actual Retreat result.
- Tac MA units and units conducting Voluntary Retreats are unaffected by No Safe Path concerns.
5.5d Situational Retreats. Given that 5.5c does not apply, units with this Combat Table result will Retreat 3 hexes and flip to their Move-side, or (if in Key Terrain or Prepared Defense) make no Retreat but each unit in the Defender's stack must take one Step Loss.
If the Attack unit is killed in the Combat result, ignore any Situational Retreat result completely, regardless of how it 'would' have been executed.
5.5e Automatic Retreats. Given that 5.5c does not apply, Leg and Truck MA units with this Combat Table result must Retreat to its HQ if it qualifies as an "HQ Refuge" and flip to their Move-sides.
To have an HQ Refuge, the HQ must have a location where units can end their Retreat in or adjacent to their HQ's hex, and this ending hex must be 3 hexes (or more) from the Retreat's starting hex.
If its HQ Refuge is unavailable, remove the retreating units from play. They return in the next turn's Reinforcement Phase to any hex in or adjacent to their HQ (regardless of the MSR being Complete or not). Return them on their Move-side.
Automatic Retreat results for Tac MA and unassigned Independent units are always 3 hexes and a flip to Move-side, but never require sending the unit to its HQ or removal from the map.
5.5f Retreat the Whole Stack. Retreats involve all the Combat Units in a hex. Combat Units typically retreat together to a common hex (see Play Note). If a hex contains both AV and non-AV units, the applicable Engagement Table or Combat Table result determines the retreat applicable to the entire stack, but evaluate each unit's Safe Path effect separately based on its own MA. If a hex contains both units and HQs/Combat Trains, retreat the units first, and then apply the HQs/Combat Trains rules separately (4.7d, 4.7e & 4.7h).
Play Note: A hex containing both Leg MA and Tac MA units could get an Automatic Retreat result. The Leg MA units would go to (or adjacent to) their HQ while the Tac MA units merely Retreat 3 hexes. As a result, there might be two ending hexes, because of the two applicable sets of Retreat instructions.
A similar type of situation can occur when Safe Path or Situational Retreats apply to the units in a hex differently. Apply the above to each unit's specific requirements.
5.5g The Ending Hex. A retreat's ending hex cannot contain an enemy unit or be terrain the Move-side retreating stack could not enter during movement. If this causes a stack to be unable to retreat, the stack takes an extra step loss per unit and stays in the hex instead.
Each applicable unit takes one Step Loss if their retreat's ending hex contains an EZOC that applies to the retreating unit's MA Type:
- All EZOCs affect Leg and Truck MA units.
- Only Real AV EZOCs affect Tac MA units.
Tac MA units ignore all Support AV EZOCs and non-AV EZOCs.
5.5h The Map Edge. Units may freely retreat off the map edge. Such units come back as reinforcements the next turn in any friendly "controlled" Entry Area (owner's choice) along that same map edge.
A player "controls" an Entry Area hex if his units occupy or were the last to move through that hex or can reasonably be assumed to have done so before play began.
5.5i Units without an MA. A unit with no printed MA which is forced to retreat, is destroyed instead.
Play Note—Retreat Example: Here fires from Spitze have forced the 32 Cav to Retreat. Because this is from the Engagement Table, the Retreat is automatically 3 hexes and a flip to Move-side. The flip does not occur as the unit is already on its Move-side.
A and B are both bad because they are in AV EZOCs. C and D are not locally away from the enemy and are not closer to the HQ. E and G are not unreasonable, but are not as useful to the player as F. H is a possibility, but risks blocking an enemy MSR on the nearby Secondary Road and would be ruled out if that was the case.
The most logical retreat point is to Hex F. It is away from the local enemy, in terrain, toward the HQ, and is on a road leading to the HQ the enemy could use. Furthermore, the lack of a Safe Path does not matter as the unit is Tac MA.
5.6 Advance After Combat
5.6a If the defending stack in a Regular or Shock Attack retreats or is destroyed, the Attack unit must advance into the defender's hex. This "Advance after Combat" does not cost MPs, ignores Command Radius, EZOCs, and does not incur Stopping Engagements. A unit can create Mixed Formations as the result of an Advance After Combat.
5.6b Assist Units. Assists can Advance after Combat if they were stacked with the Attack unit. Assist units in other locations cannot advance. Even if an advance is allowed, it is an option to an Assist. It is never mandatory as is the case with the Attack unit.
5.6c Command Radius. While Command Radius does not restrict any Advance after Combat, exiting Command Radius will still subject a unit to Isolation effects.
5.6d HQs & Combat Trains. Advance After Combat could cause enemy HQs and/or Combat Trains to be Jumped when the advancing enemy unit(s) enters their hex. (4.7d)
6.0 Odd Situations
6.1 Urban Warfare
Urban fighting is a slow, exhausting, process where the two sides expend themselves clearing the enemy out of city blocks room-by-room and floor-by-floor. Urban warfare requires special treatment.
Design Note: In a nutshell, Urban Warfare revolves around wresting Control of enemy hexes and increasing the Control of your own. If you just sit passively and absorb attacks, the enemy will win; you must be actively trying to reclaim any territory he takes. The Control marker system exists to make clearing Urban terrain take more time than the usual open field fighting. But, just because it moves slowly, doesn't mean you can avoid participating in the back and forth.
These rules only apply to Urban hexes and never to the more common City hexes. Panzers Last Stand is the first BCS game to feature actual Urban hexes.
6.1a How Urban Warfare Works. Losses change a hex's "Control" status until forcing a Withdrawal, leaving the hex unoccupied. The first side entering an empty hex will then Control it. Control moves back and forth depending on both side's results over time.
Only occupied Urban hexes are Controlled. Neither player controls any empty Urban hex, regardless of where this hex is located or what units "used" to be there.
Control is on a continuum and can change in either direction. Hexes can be either "Fully" or "Partially" Controlled. A "Control marker" designates Partially Controlled hexes as listed below.
A hex can only obtain a "None" Control when its units have exited or are destroyed.
If a Withdrawal vacates a hex, remove its Control marker. The first Active unit to move into such a hex will establish Total Friendly Control of it. In contrast, for an empty hex from unit destruction, see 6.1c part iv).
| Urban Control? | How Marked? |
|---|---|
| None | Nothing, no marker, no units from either side. |
| Total Friendly | Friendly units, no marker. |
| Partial Friendly | Friendly units, Friendly Partial Control marker. |
| Partial Enemy | Friendly units, Enemy Partial Control marker. |
| Withdrawal | Friendly units Withdraw, Remove the Control marker, No Advance After Combat. |
6.1b Standard Rules Exceptions. Normal BCS rules apply to Urban hexes, except for the following:
i) Retreats. Apply all Retreat Results as "No Retreat" (regardless of retreat Type or Table) if the unit involved is in an Urban hex.
ii) No Advance after Combat. Units never Advance after Combat into or out of an Urban hex, regardless if the defending unit(s) are destroyed or Withdraw. See also 6.1c part iv).
iii) Barrages per hex. Instead of only one Barrage per hex per Activation, any Urban hex can be subject to up to one Destruction plus any number of Suppression Barrages.
iv) Attacks per hex. An Urban hex can be Attacked on the Combat Table any number of times in an Activation.
v) Singletons. If a single unit (regardless of its number of Steps) defends an Urban hex, its Attacker applies an additional +2 DRM.
6.1c Hex Control Special Cases.
i) It is possible for both the Attacking and Defending hexes in a combat to have Control markers in their respective Urban hexes, but a single hex can never contain more than one.
ii) If Active units abandon a hex containing a Control marker, the marker remains until play moves on to a new Formation. If your units re-enter the orphaned marker's hex before then, they inherit the marker.
Design Note: The timing here matters. Otherwise it would be possible to exit a hex, remove its Control marker, then move that unit or some other back into the hex. And that movement could happen in a later Second Activation as well. If the enemy gets an Activation before you can do this, then at least they had a chance to occupy the hex before your little trick was finished and possibly you gave him that hex for free. Don't say you wouldn't do it, because you know you or someone playing against you would do exactly that.
iii) If no enemy AV or Attack-Capable unit remains adjacent to a Control marker's hex, remove it immediately.
iv) If Inactive units are destroyed leaving a hex vacant, the Active units adjacent to it enter and "claim the hex" (even if no attack was being made). The newly acquired hex will have its Control level shifted by 1 in the Active player's favor as per the following example. The Active player must advance at least one adjacent unit into the hex, but can advance more than one if he prefers.
Example: An Attack by Fire generates a Step Loss, killing a Soviet unit and leaving the hex empty. The Axis player selects his choice of Active units (in any status) adjacent to this hex to advance into it, provided he advances at least one of them.
The new Axis hex gets a Control marker based on whichever of the following was true for the original Soviet unit:
| Original Situation | Result |
|---|---|
| No Control marker | Partial Soviet Control |
| Partial Sov. Control | Partial Axis Control |
| Partial Axis Control | Full Axis Control (No marker) |
6.1d Hex Control Changes. In addition to normal Step Losses, each Step Loss in an Activation, regardless of how inflicted, causes one Control level change to a hex. Loss results giving more than one Step Loss (e.g. a Barrage that causes two step losses) apply one Control change level for each Step Loss inflicted. Apply all Control Changes after all parts of an Attack on a hex have been completed.
Losses to the Attacker have no effect on Control Level change.
For example, if a hex absorbs two losses from a pre-attack Barrage, and the attack's Combat Table result gives a defender loss, three levels of Control Change occur (but are constrained by the maximum of three available changes that can apply to one hex).
This could be either from Total Friendly Control to Partial Friendly Control to Partial Enemy Control, or Partial Friendly Control to Partial Enemy Control to Withdrawal as the case might be.
If all three levels of Control change cannot be used on the one hex, any excess is lost.
6.1e Control Change Decisions. The Active player determines which hex applies a Control Change separately for each Loss. The hex selected must be either the hex that took the Loss result OR the hex containing the Attack unit or Firer. The stack containing an Assist (unless it also contains the Attack unit) cannot apply any Control Change. Execute these at the moment Loss results occur.
The player can change Control over his own Urban hex by applying a Control change for a loss that stack inflicted on an enemy occupied hex (even one that is not itself Urban).
6.1f Withdrawal. When a hex's Control moves from enemy Partial Control to Withdrawal, execute the following. Withdrawing units must:
- Move one hex into a hex free of any enemy units. If no such hex exists, destroy the Withdrawing units.
- Flip to their Move-side(s).
EZOCs have no effect on Urban Withdrawal, only enemy-occupied hexes do.
6.2 Formation Destruction
6.2a When Formation Destruction Applies. If a Formation loses its last non-Support unit 'in play' (counting both intrinsic and assigned units), the Formation itself is Destroyed.
Units returning from retreat results and any units reinforcing the Formation on the OOA are 'in play' and may affect Formation Destruction (see 6.2c).
6.2b Handling the Formation's Units. Pull the following from play (after noting the effect of "Reinforcements Arriving at the HQ" in 6.2d):
- HQ.
- Support units, regardless if they could be Real or not, intrinsic or assigned.
- Combat Trains.
- The Formation's Dead units retain any "Partial Rebuilding" that has occurred in case 6.2c applies later.
- Assigned Arty Points become unassigned and are available for a new assignment in the next Assignment Phase.
6.2c Will They Return to Play? The removed Formation and its units return to play (in their original states, except Fatigue, see below) if non-Support-only units belonging to the Formation arrive later via the Order of Arrival or because of Retreat result execution. If this occurs, follow 6.2d when the first such unit arrives. If no units arrive later, the Formation is eliminated permanently.
6.2d Return to Play with Reinforcements. The HQ returns as Fat-2, regardless of what it had when removed. Dead units return to the Dead Pile in their original states (but with any partial Rebuilds intact). Support units come back with their remaining steps intact.
The HQ, the Combat Trains, and the arriving Dead and Support units return with the Reinforcements with the following exception:
If the Reinforcements are listed as "arriving at the HQ" the HQ, Support and Combat Trains stay on the map rather than getting pulled off as in 6.2b. While in that status, the Formation must still activate normally.
6.3 Attacks From Off-Map
If enemy units occupy a friendly Entry Area hex, your units can still try to enter using an "Attack from Off-Map." For purposes of this rule, you are assumed to be the player attempting entry. If you are defending from such an attack, remember to change the references from "your units" to "his units" and so on.
Design Note: Obviously, the 'problem' with map edge hexes is that players use them as literally the end of the world. The above rule allows the entering units to take advantage of the fact that not only does the world NOT end right there, but there are lots of units as well as space to operate that is outside the normal scope of play. So, if you don't want to deal with the dragons just off map, then back up to allow the normal use of the Entry Hex. Basically, 'Attacks from Off Map' temporarily extend the map one additional hex out from the map edge and gives a couple of benefits (Full SNAFU and the +2 DRM) to help the reinforcements get into normal play. And, no, the enemy player cannot also try to occupy that off-map hex!
6.3a You are considered to have a virtual Off-Map 'hex' adjacent to his unit occupying your Entry Area hex. This 'hex' is assumed to contain the same type of roads as the Entry Area hex itself. Both your Attack unit and Assist units (if any) are assumed to be in this 'hex.' Your units can Attack from that 'hex,' but the enemy cannot attack or barrage your units while they are in it. There is no hexside feature between your hex and the map.
6.3b The units needing to make the above attack are assumed to have a Full SNAFU result. There is no need to roll for it. If the rest of their Formation is On-Map, handle their SNAFU normally, but the Off-Map units still have their assumed Full SNAFU.
6.3c Only Regular Attacks are allowed from Off-Map. Off-Map Attacks obtain a +2 DRM on the Combat Table.
Shock Attacks, Engagements, Attack by Fires, and non-Attack Barrages are not allowed from Off-Map.
Exception: The player can make use of a Barrage as part of his Regular Attack.
6.3d Once the units are back on the map, all normal rules again apply. If the attack fails and the units do not enter the map, they remain off-map as per 2.1d part iii and can try again in their next Activation.
6.4 [Optional] Planned Fatigue
This is a series of interrelated concepts first proposed by Jim Stravers. You should use the entire package, if used at all, and only after you feel fully grounded in the standard system.
6.4a Fatigue SNAFU DRMs. Only use:
- Fresh: +1
- Fat-4: -1
- The others are all +0.
6.4b Fatigue Increase. Do not use the Fatigue Increase Table or make any die roll. Instead, you 'pay' Fatigue to purchase the following:
| Fatigue Increase | Action |
|---|---|
| 1 | Place an extra non-Recon OBJ.* |
| 1 | Place any OBJ more than 15 hexes from the HQ.* |
| 1 | Remove one Traffic marker.** |
| 2 | Conduct a Forced March. |
| 1 | Use a Second Activation DRM of +2. |
* OBJs can only be created in the usual time in the sequence. If you create an extra non-Recon OBJ that is also more than 15 hexes away from the HQ, the Fatigue cost for both is only 1 Level.
Both the OBJ cost (*) and Traffic marker removal (**) can be done more than once in an Activation; pay separately each time (e.g. removing two Traffic markers will generate a cost of 2).
Traffic marker removal at the end of the Activity Phase is free.
6.4c Fatigue Level-4. Fat-4 effects apply instantly when a Formation obtains a Fat-4 marker (even during the current activation). Fatigue Recovery is required if the Formation is Fat-4 when an Initial Activation begins.
Fat-4 Formations cannot 'pay Fatigue' for anything.
6.4d SNAFU Results. Full SNAFU results give only one "free" OBJ. Partial and Fail SNAFU results give no "free" OBJs.
6.4e Forced March. After applying SNAFU results, multiply each unit's MA by 3. The Formation can only do this once in a game-turn and only in an Initial Activation. It requires purchase in 6.4b. No combat operations are allowed. No OBJs are placed, no Fire Events used, no bridges tested, and no units exited for victory purposes. No Second Activation is allowed.
6.4f Fatigue Recovery. Handle Fatigue Recovery normally.
6.5 [Optional] Stand Off AV vs. Red Support
Players may wish more fidelity in the actions of Stand Off AV units (Deployed or as Support) when defending against Attacks by units with Red AV Support. The additional workload and rare occurrence makes this rule strictly Optional.
It can be confusing given that a Defending Stand Off unit or Host with Stand Off in Support becomes the Firer for a very brief Engagement before the original Attack is Resolved. Don't confuse Attacker and Firer.
The Engagement happens the instant after announcing an Attack, but before determining the Combat Table DRMs. The Stand Off AV Fires on the Attack's Support using the "Target is Support" section of the Engagement Table.
The Engagement might Drop Red AV Support at the moment so the Attacker will not get his Support DRM. Apply any Step Loss (to the Firer or Target) normally, except a Firer Step Loss will not Drop any Defender Support (unless the Firer is destroyed after taking the Step Loss). The Attacker's Support reappears the moment the Attack is completed.
There is no ability to Engage in this way if the Attack unit itself is Dual.
Glossary
(+) or (-) Unit Sizes. These additional symbols in a scenario listing or on the counter show a unit's historical status as either being augmented or reduced by detachments. They are only for historical information.
Activation. A Single Formation's activities applying the Activation Sequence of Play (3.0). The current Formation must complete both its Initial and Second Activations (if any) before play can pass to the next enemy Formation. (2.5)
Assembly Hex. The location units exiting Support or newly assigned to a Formation use to "get back onto the map."
Assigned/Unassigned. Independent units and Arty Points attached (or not attached) to a specific Formation. (2.3)
Attack by Fire. The effect of AV unit fires on non-AV units. While Attacks by Fire use the Barrage Table for resolution, they are not "Barrages" nor restricted by the "one Barrage per target hex" rule. (5.3)
Attack-Capable. Any unit currently showing an 'Assault Arrow' on its side. Only Attack-Capable units can Attack on the Combat Table or (provided they have no AV rating) make use of Support. A unit must be Attack-Capable and on its Deployed-side to use its Formation's Prepared Defense.
AV ZOC. A type of ZOC generated by AV units. They come in two flavors: Real or Support, depending on the AV unit creating it. AV ZOCs affect enemy Tac MA units more than regular ZOCs. (4.3a, 4.3f)
Blob. A Blob is a Formation's Area of Operations (1.3c)
Blocking Terrain. Terrain that blocks the minimal 'line of sight' needed to make Engagements or spot Artillery Fires at ranges greater than 1 hex. (4.5c)
Buddies. Buddies are Formations used to freely working together and avoiding many typical problems. These are identified in the Game Specific Rules. Formations listed as "Buddies" do not apply Coordination, Mixed Formations, or Crossing the Streams to each other. (3.2)
Command Radius (CR). Command Radius is the maximum distance from the HQ a unit can function normally. (1.4)
Combat OBJs. (OBJ) OBJs identify a Formation's active combat operations area(s). They define OBJ Zones, as defined below. (3.3)
Combat Trains. These are the field logistics establishment of a Formation. They have a regular side and a "Ghost" side of the counter to indicate the status of the Combat Trains.
Combat Unit. A 'Combat Unit' is a unit that is not an HQ, Combat Trains, or in Support. No game marker is a Combat Unit.
Complete MSR. A Complete MSR exists if there is a contiguous series of Legal hexes (3.1a) connecting all three of the following (in order) from the HQ through its Combat Trains, and then a friendly Supply Source. (3.1)
Control. The act of wresting an Urban hex's ownership from the enemy. (6.1a)
Coordination. An effectiveness reduction when coordinating matters with other Formations in their area or allowing coordination between Formations to slip. (3.2c)
Crossing the Streams. A condition when the path between HQ and Combat Trains from more than one Formation must share one or more common hexes. (3.2h)
Deployed-side. If a unit has an MA on each counter side, the Deployed-side has the smaller MA of the two. (1.1c)
Destruction Barrages. Arty or Air Point fires to destroy enemy steps using the Barrage Table. (5.4h)
DRM. Die (or Dice) Roll Modifier. If an event is subject to more than one modifier, the DRMs are cumulative. Exception: If DRMs are presented as an either/or situation, then you can apply only one of the presented options.
Done. A Formation after completing its Activations for the turn. A Formation that is Done can no longer Activate at all. A Formation that sets up Done can do nothing at all on the First Turn.
Double OBJ Zone (aka 'Double Tap'). The OBJ Zone created by using two OBJ markers in the same hex. This generates a DRM on the Engagement and Combat Tables. (3.3b)
Drop Support (Drop). The removal of a stack's access to dedicated Support weapons. (1.5i)
Hosts. A "Host" is any unit able to make use of its Formation's Support. (1.5a & 1.5g)
HQ Refuge. The location needed by Automatic Retreats. A hex with or adjacent to the HQ, and at least 3 hexes away from the Retreat's starting hex. (5.5e)
Independent Unit. These are without any permanent Formation printed on the right side of its unit symbol. These units only function when assigned to some Formation. (1.1e)
Jumps. These occur when a unit moves into an enemy HQ and/or Combat Trains hex during movement or Advance after Combat. Jumps can be "Hard" or "Soft," if the optional rule is used. The two are different in the quality of the intelligence regarding the target's location. (4.7d)
Key Terrain. Key Terrain requires units to "stand fast" in Combat Table Situational Retreat results, but at the cost of an additional step loss. Terrain is identified as "Key Terrain" (or not) on the Terrain Effects Chart. Note that merely containing a VP symbol does not make a hex Key Terrain. (5.5d)
Main Supply Route (MSR). The contiguous hex path from a Formation HQ through the Formation's Combat Trains to a Supply Source that keeps the Formation continuously supplied. To be useable, an MSR must be a "Complete MSR." (3.1)
March OBJs. March OBJs control HQ movement. (2.4b)
Mixed Formations. A Formation is Mixed if units from other Formation(s) start within or enter its Blob. (3.2d)
Move-side. If a unit has a different MA on each counter side, the side with the greater MA of the two is the Move-side. A unit with only one non-Support printed side is automatically considered to be on its Move-side. (1.1c)
Movement Allowance (MA). The maximum number of Movement Points the unit can expend in a single Activation. (1.1c & 4.0a)
Movement Points (MPs). Movement Points are used to track the expenses applied to a unit's MA by terrain according to the Terrain Effects Chart (TEC) as it moves. (4.0a)
OBJ Zone. The 2-hex radius around a Combat OBJ marker in which Attacks and Barrages can be conducted. OBJ Zones do not restrict Engagements. (3.3a)
Prepared Defense (Prep Def or PD). A Formation's posture that trades reduced flexibility for increased defenses. (1.7)
Real AV. Any unit with an Armored Value (AV) printed on its counter which is not assigned to Support. It can be on either its Deployed or Move counter side, but not in Support at the moment.
Recovery. An Activation used to reduce a Formation's Fatigue level. (3.7)
Regular Attack. An Attack conducted by Attack-Capable (or Dual) units using the Combat Table, but not identified as a Shock Attack. (5.1 & 5.1h)
Reinforcements. New arrivals entering play following the Order of Arrival (OOA). (2.1)
Replacement Points (Repls). These are used to replace step losses and can rebuild destroyed units. (2.2)
Roads. The word "road(s)" (no capital) designates all road types, including Tracks and Railroads. If a specific type of road is being referred to, it will be both capitalized and explicit (e.g., Secondary Road). If a road-type does apply a rule, it will be specifically mentioned (for example: "non-RR roads" would include all roads other than Railroads). (4.1c)
Safe Path. The line of communication between a unit and its HQ. (1.9)
Screening (Screen). Units executing a mission to slow enemy movement without undue risk to themselves. (4.6)
Shock Attack. Rapid attacks while moving by mechanized forces. (5.1m)
SNAFU. SNAFU represents the effect of friction, supply and other logistical matters (including transportation, routing, march traffic control, and planning) on a Formation's operations. (3.2)
SNAFU Roll. A dice roll on the SNAFU Table to determine a Formation's capabilities for the current Activation. (3.2)
Stack. One or more units occupying a single hex. A single unit can be a 'stack' unto itself. (4.2)
Static Unit. A small garrison force incapable of being assigned to any Formation. (1.1h)
Steps. Unit track their losses using Steps which show a unit's size and resiliency. Step Losses have no direct effect on unit strength, other than their eventual removal (as dead) when they have no Steps remaining. (1.1b)
STOP. A STOP can be inflicted for a number of reasons, and precludes additional movement as well as other functions. (3.4e, 4.1e and the STOPPED/FINISHED Chart)
Stopping Engagement. The exchange occurring when one AV unit enters another's EZOC. This could be in the form of just a STOP, or might require actual Engagement(s). (4.4)
Support. Weapon or vehicle units sent in small numbers to a Formation's non-AV units to provide them additional firepower or protection. (1.5)
Suppression Barrages. A short barrage sharp enough so as to force the enemy's heads down at the moment of attack. While they provide a DRM on the Combat Table, they do not generate appreciable enemy losses. (5.4g)
Terrain. Shorthand for land features identified on the Terrain Effects Chart as adding protection for defenders (or targets) while others do not. A unit "in Terrain" might suffer fewer losses.
Traffic. A condition where combat leaves an area too congested & confused to be rapidly traversed. (4.0d & 5.1f)
Trafficability. Conditions of Weather which determine the status of Terrain Effects on Movement and the DRM when a Track is used in the Formation's MSR for SNAFU purposes. There is 'Poor Trafficability' in any of the earlier games where the weather conditions halved Truck MA.
Unassigned Units. An Independent unit not assigned to any Formation. (2.3d)
Unit. A 'unit' represents historical combat units, HQs, and their Combat Trains. Markers (of all types) are not considered "units." (1.1)
Unit Traffic. Unit Traffic occurs when the available roads are clogged with other friendly units. (4.0e)
Unprepared. A unit not currently arrayed for combat. (1.1d)
Urban Warfare. Combat where the defender occupies an Urban terrain hex (first seen in Panzers Last Stand). (6.1)
Used. A Formation whose Initial Activation has been completed and only has its Second Activation remaining. If it sets up that way, it must attempt a Second Activation.
Withdrawal. A change in a hex's Control in Urban Warfare such that a side's forces must leave a hex to the enemy. (6.1f)
Zones of Control. Hexes adjacent to a unit, where that unit affects enemy activities in several ways. (4.3)
AV Types (Examples)
The following examples, drawn from across the Battalion Combat Series (using abbreviations LB = Last Blitzkrieg, BbF = Baptism by Fire, BC = Brazen Chariots, PLS = Panzers Last Stand), illustrate how historical vehicles map onto the Series' AV categories: deployed-side AV, Range at 1 km/hex scale, deployed/move Movement Allowance, the game(s) featuring the type, and a brief note on the model, gun, or comment.
Light AV: Mark VIb — 0 Light AV, Range 1, 16 MA (BC as Tkt) — .50 cal MG, designated as Light Tank but defined as Tkt in BCS. L3/35 — 0 Light AV, Range 1, 16 MA (BC) — 2x 8mm MG Tankette. Marmon-Herrington — 0 Light AV, Range 1, 16 MA (BC) — 1-2x 7.62 MG Armored Car. Sd.Kfz. 221/222/231/232 — 0 Light AV, Range 1, 16 MA (BC) — 1x 7.62mm (Sd.Kfz. 221) or 20mm L/55.
Breakthrough Light AV: Flammpanzer III — 3 Hard Light AV, Range 1, 4/14 MA (PLS) — Flamethrower in place of main gun.
Hard Red AV: Panzer III (short): 2 AV, Range 1, 4/14 MA (BC) — Ausf. G, H, and J with 50mm L/42. Panzer III (long): 3 AV, Range 1, 4/14 MA (BbF) — Ausf. J/1, L, and M with 50mm L/60. Panzer IV (long): 4 AV, Range 2, 4/14 MA (LB, PLS) — Ausf. F/2 and G (75mm L/43) and Ausf. H and J (75mm L/48). Panzer V Panther: 5 AV, Range 3, 4/16 MA (LB, PLS) — 75mm L/70 Breakthrough. M3 and M5 Stuart: 2 AV, Range 1, 6/16 MA (BC, LB as LT with armor oval) — 37mm L/53.5 Light AV. M3 Grant/Lee: 3 AV, Range 1, 4/14 MA (BbF) — 75mm L/40 and 37mm L/53.5 Light AV. M4/75 Sherman: 3 AV, Range 2, 5/14 MA (BbF, LB, PLS) — Typical US Medium Tank Battalion with majority 75mm L/40. M4/76 Sherman: 4 AV, Range 2, 5/14 MA (LB, PLS) — Majority Red 76mm L/50 M4 tanks. Sherman Firefly: 4 AV, Range 2, 5/14 MA (LB) — 1:4 ratio 17 pdr to 75mm Shermans in British Armor Units. Cruiser Mk I, II, IV (A9, A10, A13): 2 AV, Range 1, 3/12 MA (BC) — Cruiser type Mix (some fast, some slow, all poor) (2 pdr). Crusader I (A15): 2 AV, Range 1, 4/14 MA (BC) — 2 pdr. Matilda II (A12): 3 AV, Range 1, 2/10 MA (BC as Mat with armor oval) — Not Breakthrough (poor gun (2 pdr) and doctrine). Valentine II: 3 AV, Range 1, 3/10 MA (BC as Val with armor oval) — Not Breakthrough (poor gun (2 pdr) and doctrine). Churchill (A22): 4 AV, Range 2, 2/10 MA (BbF) — Marks III and IV with 6pdr and Marks VI and VII with 75mm L/36.5. Not Breakthrough (poor gun (6 pdr) and doctrine). M13/40 and M14/41: 2 AV, Range 1, 2/12 MA (M13/40 in BC, M14/41 in BbF) — 47mm L/32. T-34/76: 3 AV, Range 1, 6/16 MA (PLS) — 76mm L/42. T-34/85: 4 AV, Range 2, 5/16 MA (PLS) — 85mm L/52.
Non-Hard Red AV: Humber IV/Daimler I/Staghound: 1 Non-hard Red AV, Range 1, 16 MA (LB) — 2 pdr (Daimler) or 37mm L/53.5. M8 Greyhound: 1 Non-hard Red AV, Range 1, 16 MA (BbF, LB) — 37mm L/53.5 as Dual Armored Cavalry. Sd.Kfz. 231/232/234/1: 1 Non-hard Red AV, Range 1, 16 MA (BbF, LB, PLS) — 20mm L/55 or heavier as Dual Panzer Recon.
Breakthrough Hard Red AV: Panzer VIe Tiger I: 5 Breakthrough Hard Red AV, Range 3, 4/14 MA (BbF, LB, PLS as TGR with armor oval) — 88mm L/56. Panzer VIb Tiger II: 7 Breakthrough Hard Red AV, Range 3, 2/12 MA (LB, PLS as TGR with armor oval) — 88mm L/71. IS-2: 6 Breakthrough Hard Red AV, Range 2, 4/14 MA (PLS as IS with armor oval) — 122mm L/43. Brummbär — 4 Breakthrough Hard Red/2 Limited AV, Range 1, 2/12 MA (LB, PLS as Brm with armor oval) — 150mm L/12. SturmTiger — 6 Breakthrough Hard Red/4 Limited AV, Range 1, 1/12 MA (LB as STgr with armor oval) — 380mm L/5.4. ISU-152 — 6 Breakthrough Hard Red/4 Limited AV, Range 1, 3/12 MA (PLS as ISU with armor oval) — 152mm L/28.
Limited AV: Marder II/III — 3 Red/2 Limited AV, Range 2, 3/14 MA (BbF, PLS as Mdr with armor oval) — 75mm L/48 or 76.2mm L/51. StuG III (long) — 3 Hard Red/2 Limited AV, Range 2, 2/14 MA (LB, PLS as StG with armor oval) — Ausf. F with 75mm L/43, Ausf. F/8 and G with 75mm L/48. Hetzer — 3 Hard Red/2 Limited AV, Range 2, 2/14 MA (LB, PLS as Hetz with armor oval) — 75mm L/48. JagdPanzer IV/48 — 4 Hard Red/3 Limited AV, Range 2, 3/14 MA (LB, PLS as JgPz with armor oval) — 75mm L/48. JagdPanzer IV/70 — 5 Hard Red/4 Limited AV, Range 3, 2/14 MA (LB, PLS as JgPz with armor oval) — 75mm L/70. JagdPanther — 6 Hard Red/5 Limited AV, Range 3, 3/16 MA (LB, PLS) — 88mm L/71. M3 GMC — 2 Limited AV, Range 1, 2/16 MA (BbF) — 75mm L/36. M10 — 3 Limited AV, Range 2, Support only (LB) — 76mm L/53. M18 Hellcat — 3 Limited AV, Range 3, Support only (LB) — 76mm L/55 — range increased to represent speediness. M36 Jackson — 4 Limited AV, Range 3, Support only (LB) — 90mm L/52. SU-76M — 2 Red/1 Limited AV, Range 1, 5/16 MA (PLS as SU with armor oval) — 76.2mm L/52. SU-85 — 4 Hard Limited AV, Range 2, 5/16 MA (PLS as SU with armor oval) — 85mm L/52. SU-100 — 5 Hard Limited AV, Range 2, 4/16 MA (PLS as SU with armor oval) — 100mm L/54. ISU-122 — 5 Hard Red/4 Limited AV, Range 2, 3/12 MA (PLS as ISU with armor oval) — 122mm L/48.5. JagdTiger — 8 Hard Standoff/7 Limited AV, Range 3, 1/10 MA (LB) — 128mm L/55.
Stand Off AV: 88mm L/56 — 4 Standoff AV, Range 3 (BC, BbF). 88mm L/70 — 5 Standoff AV, Range 3 (LB, PLS). 90mm L/53 — 4 Standoff AV, Range 3 (BbF) — Italian Anti-Aircraft gun. 102mm L/35 — 4 Standoff AV, Range 3 (BC) — Naval gun mounted on truck bed.
Unit Capabilities Chart
This chart shows which actions each Unit Type can perform. A check mark (✔) indicates the action is available to that unit type; blank means it is not.
| Unit Type (1.1e) | Regular Attack | Assist | Support Attack | Shock Attack (5.1k, Tac MA Only) | Attack by Fire (5.3) | Engage (5.2) | Recon (3.3) | 2nd Unit in Defense | Support Defense | Spot Barrage (5.4) |
|---|---|---|---|---|---|---|---|---|---|---|
| Attack-Capable | ✔ | ✔ | ✔ | ✔ | ✔ | ✔ | ||||
| Red AV | ✔ | ✔ | ✔ | ✔ | ✔ |
** If the unit is also Breakthrough Armor, add Shock Attack to its abilities. See also the Unit Skills and Vulnerabilities Chart.
Only Allowed in OBJ Zones (3.3a); Fire Event Use Required (max 2, 1.6a) columns apply to Shock Attack, Attack by Fire, Engage, and Recon above.
Advance after Combat (5.6). If the Defender retreats (or is eliminated), the Attacker's Attack unit must advance into the defender's hex. If the Assist is stacked with the Attack unit, it may advance as well.
Other units cannot advance at all. Command Radius does not restrict Advance after Combat. There is no Advance after Combat in Urban combat.
Combat Trains (3.1).
Legal Hexes: A Legal Hex must be connected by appropriate road hexes to both the HQ and Supply Source via hexes free of enemy units or EZOCs, making up a Complete MSR.
Movement: Simply place it in a Legal Hex that creates a Complete MSR and flip to Ghost. Carefully follow the sequence of events in 3.0 step b if no Complete MSR can exist. The order of events controls how rapidly an MSR Blocked marker is applied.
Jumping HQ/Combat Trains & Retreat (4.7d).
HQs (4.7e): Retreat to a non-RR road hex 3 hexes or more hexes away without an enemy ZOC or Engagement Zone in it OR which blocks a sole existing enemy MSR. Remove any Prepared Defense and flip the Formation's Combat Trains to Ghost. Apply a Coordination marker.
Combat Trains (4.7h): Displace the Combat Trains at least 10 hexes to a Legal hex which creates a Complete MSR. Flip them to Ghost. If they are unable to do so, send them off-map.
See also Soft Jumps [optional], 4.7i.
Game-Specific Rules
The following is the game-specific rules booklet for Panzers Last Stand (BCS #4), to be used alongside the BCS Series Rules above.
Introduction
Panzers Last Stand is a Battalion Combat Series (BCS) game that simulates the operations around Budapest from January to March 1945: Konrad I, II, III, Südwind (Southwind), and Frühlingserwachen (Spring Awakening).
There is no traditional "Campaign Game" (where play starts at the beginning of January and runs all the way through March). Instead, it is split into independent actions as these armies could not manage three months of solid activity.
1.0 Common Special Rules
1.1 Weather
Determine the Weather Conditions each turn during the Reinforcement Phase. Roll one die on the Weather Table (located on the Turn Record Track) based on the current game turn date and use the resulting column.
The possible Weather conditions and their effects are:
- Good: Visibility is 4 hexes. Trafficability is Good.
- Normal: Visibility is 2 hexes. Trafficability is Poor.
- Poor: Visibility is 1 hex. Trafficability is Poor.
Historical Weather. If you want to use the historical conditions, rather than rolling, use those below:
January 1945
| Date | Weather |
|---|---|
| 2-4 | Good |
| 5-6 | Normal |
| 7 | Poor |
| 8 | Normal |
| 9-12 | Poor |
| 13-14 | Normal |
| 15 | Poor |
| 16-19 | Normal |
| 20-21 | Poor |
| 22-23 | Normal |
| 24+ | Poor |
February 1945
| Date | Weather |
|---|---|
| 17-20 | Poor |
| 21-23 | Normal |
| 24 | Poor |
March 1945
| Date | Weather |
|---|---|
| 6-8 | Poor |
| 9 | Normal |
| 10-12 | Poor |
| 13+ | Normal |
1.2 Supply
Supply Source hexes are marked on the map and can only be used by the indicated side.
1.3 Replacement Steps
Both sides obtain Replacement Steps from their Repl Tables (BCS 2.2). Roll once to obtain the results for each side's two Repl types.
Soviet AV Repls given in parenthesis are in addition to those given without parenthesis, but can only be used to replace steps in Soviet Mech Brigade units.
Soviet "Support Only" AT-symbol units cannot use Repls, see 3.2.
Heavy Tank units cannot use Repls, see 1.9.
Repls can be used to replenish the units that exited play so as to prepare for Konrad III. (2.2)
1.4 Buddies
Formations listed together below do not apply Mixed Formations (BCS 3.2d) to each other. See also 1.11 Maskirovka.
Axis: Peiper KG and all Axis Formations Soviets: None
1.5 Recon Unit Types
Arm Cav and Motorcycle units have Recon Capabilities (BCS 1.1f). No "Pure Cavalry" unit on either side is Recon Capable.
1.6 The Danube
The only Massive River is the Danube (Duna). Rivers with a black edging qualify, even if they are not literally named "Danube." Other 'Larger' rivers without a black edging are just Rivers, not Massive Rivers.
EZOCs and Engagement Zones only extend across the Danube where a non-Blown Bridge exists and only into the hex directly across the Bridge's hexside. Use of Assist units is unaffected by the Danube. Exception for all Danube Effects: See 2.1b.
1.7 Counter Ownership
The Axis player controls all Wehrmacht (Gray), SS (Black), Luftwaffe (Sky Blue), and Hungarian (Blue) units. There are SS units of Hungarian origin that have a Hungarian Blue Band on them. The Soviet player controls all Soviet (Brown), Soviet Guard (Red), and Romanian (Light Green) units.
There are no nationality restrictions on either side.
For all Set Ups and Reinforcements, Soviet entries are all Soviet units and Axis entries are all German units, unless noted otherwise.
1.8 Activations
Unlike other BCS games, not all Formations in Panzers Last Stand can Activate every turn. Each player is given an assortment of "Allotments." Some must be Pre-Designated before the turn begins. Enemy Spoiling Attacks might affect others. Still others can take advantage of their location or situation to Activate. Control the available Allotments and resulting Activation types using Formation markers on the player's own Activation Display.
Fog of War (BCS 1.10) applies; you may never examine your opponent's Activation Display.
Any Formations that do not Activate in a turn are exempt from BCS 2.5a. On a given turn, they might get a "free pass" on MSR Blockage and Isolation, and might be able to Recover Fatigue, see 1.8f.
Otherwise play proceeds in the normal alternating fashion.
1.8a Allotments. The player is given several types of "Allotments" which he expends to Activate his Formations. Each Allotment can Activate one chosen Formation, and the Allotment's type lists any special rules that might apply as well as the SNAFU DRM to use.
All Allotments available are refreshed each turn as given in the scenario or on your Activations Chart, plus any applicable from your Surge Chart.
Note that you will use your own Surge Chart for both your own Surge plus your Response to the enemy's Surge operations. During your Surge, you will get Surge Activations to use, and the enemy may get "Response" Activations to use against you. The opposite occurs when an enemy Surge is going on.
Unused Allotments cannot be saved from turn to turn. Once a player expends his available Allotments of a given type in a turn, he can no longer Activate any Formation in that type. When both players have expended all types of Activations available, the Activity Phase ends.
1.8b Activation Types. There are several types of Allotments, each allowing only one type of Activation. See the Activation Types Chart for details of any special rules or restrictions for each type. Some require expending an Allotment while other "free" ones depend on enemy Spoiling Attacks, location, or situation. The Box dedicated to each Activation Type on your Activation Display also lists the key special rules and lists the SNAFU DRM to use.
1.8c Pre-Designation and How to Play. In the Reinforcement Phase each turn, each player sets up his Allotments Available Track on his Activation Display by transferring the available Allotment numbers by type for that date from the player's own Activations and Surge Charts.
There can be up to 4 types of Allotments: Primary, Secondary, Surge, and Response. Mark these, by type, on the Track with the provided markers. Move the Track markers to keep a running total of your remaining Allotments as they are expended.
Move Formation markers (in play or arriving this turn) to the Available Formations Box on the Activation Display. Place any newly arriving Reinforcements into the box provided.
During the Orders Phase (even if the Orders rules are not used), pre-designate specific Formations to use all available Primary and Surge Allotments. Move the selected Formation markers from the Available Formations Box to the Tier 1 Box matching the designated Allotment's type.
None of the other Allotment types need to be pre-designated. They are not designated until the moment of Activation.
Players alternate Activations until all have been spent. Within the player's current Tier, he is free to perform different Activation types in any order desired. All of a player's Tier 1 Activations must be done before using any of his Tier 2 Activations. Players independently transition from Tier 1 to Tier 2 as available Activations are expended, so one side can still be in Tier 1 while the other has moved on to Tier 2.
After a Tier 1 Activation, move the Formation marker to its Activation Type's Done Box.
For a Tier 2 Activation, move the Formation marker from the Available Box to the desired Activation Type's Done Box. For each Secondary or Response Activation, you must have and expend one Allotment of that type. Make that choice (and expenditure) at the moment of Activation (it is not pre-designated).
Continue with Tier 2 Activations until at least all Allotments have been expended and all Unused Spoiled Formations have Activated. You can choose to not perform a Reinforcement or Budapest Activation if you do not wish to do so.
1.8d Special Activation Types.
A) Budapest. (Soviet Only)
These are available to any Soviet Formation if its HQ is at or within 6 hexes of any Budapest Urban hex (straight-line distance). The Soviet player can choose to not use any available Budapest Activation (he can replace it with another Allotment type or simply not Activate at all). Use the SNAFU DRM based on the HQ's current location with respect to the Danube. If the HQ moves beyond 6 hexes or switches its river side during the Activation, use the same Budapest SNAFU DRM for any Second Activations.
B) Reinforcements.
Any Formation whose HQ arrives into play via the OOA can make use of a Reinforcement Activation to get into the play area without using another Allotment type. You are free to ignore or replace any Reinforcement Activation (including the arrivals via 1.11), if desired. Importantly, this Activation is only available on the turn the HQ itself arrives into play. If the HQ is already in play, the Formation cannot use a Reinforcement Activation.
1.8e Spoiling Attacks. A Spoiling Attack is not an Activation type; it is the result of your units damaging enemy Formations which have not yet Activated. It is a way of pinning them down by diverting their attention, time, and resources. See the Spoiling Attack Box in the Activation Display's upper left side for details. It is your way to affect enemy planning and operations by the actions of your forces.
Spoiling Attacks can move enemy Formations which have not yet Activated to either the Tier 1 or Tier 2 Spoiled Box.
- When Spoiled, Tier 1 Formations go to the Tier 1 Spoiled Box; all others go to the Tier 2 Spoiled Box.
- Spoiling Attacks have no effect on Formations that have already Activated or which are already in a Spoiled Box.
- All Spoiled Formations must be Activated before the player is finished for the Turn (even if they are created after that side was apparently finished).
1.8f Inactive Formation Fatigue Recovery. All Formations that:
- Have not Activated at all in this turn. (Failing a SNAFU counts as being Activated.)
- Have a Fatigue level of Fat-2 or more.
- Have a Complete MSR.
Reduce their Fatigue Level by one in the Game Turn End Phase.
1.9 Heavy Tanks
"Heavy Tanks" are those Axis units with TGR in their unit symbol (Tiger I or Tiger IIb tanks) and Soviet units with IS or ISU in their unit symbols (tanks using the Stalin tank chassis).
Both Soviet and Axis Heavy Tanks have a White Circle behind their Action Rating. Such units cannot rebuild Step Losses using Repls.
1.9a Dead Heavy Tanks. If a Heavy Tank unit is destroyed, roll one die. The roll's result is the number of turns in the future the unit returns to play. The unit returns that turn as a Reinforcement with one step remaining.
1.10 At Start Command Radii
Some units set up outside Command Radius intentionally. All out of Command Radius effects apply normally when these units Activate, including Isolation.
1.11 Maskirovka
This mechanic shows surprise Surge offensives in the January scenarios (it is not used in February or March). Each side has forces that can enter play using this rule.
Place each arriving Formation in any hex(es) w/i 1 hex of one friendly HQ, which currently has both a Complete MSR and does not have Ghost Combat Trains. Each hex chosen must not contain an EZOC. Arriving Combat Trains apply BCS 2.1h instead.
If more than one Formation arrives in one turn, each can arrive at the same or different HQs, as desired, which fit the requirements above. A given Formation cannot be split among multiple HQs.
Units can arrive on either counter-side. Arriving units cannot be placed in any hex that cuts off their own or any enemy unit's Safe Path (evaluate using Truck MA, regardless of unit MA type).
The arriving Formation(s) are "Buddies with everyone" for the turn of entry (and only that turn).
See 2.2 and 3.4 for arriving Formations and any special requirements.
1.12 Komárom Bridge Capture
If Soviet units occupy A21.05 and/or A20.05 (the Danube crossing at Komárom) at the moment of any Axis SNAFU die roll, apply an additional -3 SNAFU DRM if the Formation HQ is south of the Danube Surge Line. The situation or status (even future survival) of the Soviet unit or units used above have no effect at all. If it is alive at the moment, it counts.
Note that the RR Bridge at A20.03 has no effect on this rule. Only the Primary Road hexes, A21.05 and A20.05, matter.
2.0 Axis Special Rules
2.1 Konrad I
2.1a The Initial Offensive's Timing. The main (what would be thought of as 'primary') Formations of Konrad I were the two SS Panzer Divisions, but both are still in the process of arriving on 2 Jan when Konrad I began. They were not ready for full operations and are relegated to "Secondary" status.
However, the 96 Inf Division began crossing the Danube shortly before midnight (still January 1st), and was fully operational on the campaign's first day.
The one Axis Primary Allotment given on the Axis Activations Chart for 2 Jan must be used for the 96 Inf Division.
2.1b The 96 Inf Division's Rubber Boats. German 96 Inf Division units ignore all Danube-edged River hexsides for every purpose (play each hexside as if the Danube doesn't exist at all). Only the Division's Intrinsic units (not Assigned Independents) can do this. This ability expires at the end of 6 Jan 45.
Just to be clear, while the 96 Inf Division's ZOCs extend unhindered across the Danube until 6 Jan 45, Soviet ZOCs apply the 1.6 restrictions at all times in return.
Exception: Apply 2.1b in Scenario 5.9 Operation Southwind as well.
2.2 Konrad III Surge
The Axis player can choose to initiate his Surge (starting with the Exit below) before rolling for the Weather on any turn on or after 12 Jan 45. Konrad III can only be used in January scenarios.
Konrad III comprises two phases (Exit and Entry). Each is separately announced, executed only once, and done on any turn, given their requirements.
On the Entry Turn only, the Axis is automatically the First Player with no dice roll. However, if Entry occurs the turn the Soviets start their 6th Gds Tank Army offensive (3.4), neither player automatically gets First Player. Instead, roll for First Player normally.
The Entry Turn marks the beginning of the Surge (not the Exit process). The Surge lasts 10 turns. Use the Axis Surge End marker on the Turn Record Track as a reminder. Note that the Surge "length" does not include the Entry Turn itself. At the earliest, the Exit turn can happen on 12 Jan 45, the Entry Turn two turns later (14 Jan 45), and the Surge 'itself' runs the 10 turns from 15 Jan 45 through 24 Jan 45.
2.2a Exit. Upon announcement, remove the units shown on the map's Konrad III Surge Box, regardless of situation, make any changes and adjustments there or noted below, and place them in the proper display locations.
Each Formation retains any step losses, assigned units, and Arty Points. All must be removed the same turn.
See the unit details on the Konrad III Surge Box on the map. To make them easier to see, the Surge Box background colors are slightly different than the real counters.
Notes on Handling the Exit and Entry Units:
i) Note that the Recon unit Step Sizes making up the "new" KG Pape are smaller than the originals. Be sure to dock the original number of step losses from the replacement unit to get the correct starting point for the new unit version.
ii) Should KG Pape suffer Formation Destruction (BCS 6.2) before exiting, the re-Entry of KG Pape is unaffected (the Formation HQ and Combat Trains re-enter with the rest of the "new" Pape).
iii) The 6 Pz Division units arrive at their HQ, retaining only the Steps they had when removed, given any Repl use. I/26 Pz Bn only arrives above if it hasn't already been removed by the OOA on 15 Jan 45.
iv) When removed, units retain any Step Losses (or Dead Pile status) they might have had at that moment (applying the size changes in part i). While awaiting re-entry, these units can freely apply any Repls the player might obtain—in fact, he can apply any available number of Repls to a single unit at one time (they are not restricted to only one per turn). This rule does not change the limits on Heavy Tank replacements 1.9. If a unit is removed from the Dead Pile and no Repl was applied to it; it will return to play by going straight back into the Dead Pile.
v) When removed, the player can keep any assigned independent units or Arty Points with the Formation, have them become unassigned (so they can be assigned elsewhere the next turn), or add to those assigned at any time while still "off map." Assigned independent units and Arty Points return to play with their Formation on the Entry Turn.
2.2b Entry. On any turn at least two turns after the removal above, but before rolling for the Weather, the Axis player can announce that his Surge forces will begin entering play and that Konrad III will occur North or South of the Danube Surge Line. On that turn, the forces shown on the map's Surge Display must arrive.
Example: The player pulls the unit on 12 Jan (the earliest turn possible). The earliest Entry would be on (or after) 14 Jan.
Each entering Formation applies 1.11 independently, given the announced side of the Danube Surge Line. All the involved units must return in that turn's Reinforcement Phase, even if merely returning to the Dead Pile.
Entry need not be designated in advance, nor are you ever required to bring them back into play at all, if you don't want to (for unknown reasons).
The Axis Surge Activations and the corresponding Soviet Response Allotments obtained from Konrad III can only be used for Formations with HQs on the designated side of the Danube Surge Line.
2.3 Festung Budapest
A printed "X" background symbol identifies all Axis units that belong to Festung Budapest. These units operate as Independents assigned to the Festung HQ on the same side of the Danube as themselves.
While there is no literal Assignment, the "side of the river" counts as Assignment to that HQ (e.g. for access to Support and PD). Festung units can switch this Assignment at will by crossing to the other side of the river to start their next Activation with the other HQ. Yes, they might manage to Activate with both Festungs in one turn—I'm sure the results will be impressive!
Each HQ can only place OBJs on its own side of the river. The OBJ Zone is normal and can freely extend across the Danube.
Festung HQs, themselves, cannot move.
Safe Path concerns affect these Festung units normally, but a unit's Safe Path must go to the HQ on its own side of the river.
If a Soviet unit ever enters either Festung HQ's hex, destroy that HQ. A Festung HQ's destruction precludes the ability of units on its side of the river to Activate, but this also means that units on that side of the river are free of Isolation effects.
No unit can be Assigned into (or out of) Festung Budapest unless an MSR exists to an Axis Supply Source hex outside Budapest.
The two Festung HQs share a common Garrison Combat Trains which can freely switch between the city's two Supply Sources. However, if the Combat Trains must switch, but the other Supply Source is unavailable for any reason, it is destroyed. See also 2.4.
Festung Combat Trains sitting atop its Supply Source always has Optimal Distance for both Festung Garrison HQs (regardless of the actual hex distances). They cannot go anywhere else.
The Festung Supply Source and Combat Trains are a Complete MSR and prevent MSR Blockage marking.
However, these Supply Sources do not allow the Festung Combat Trains to generate a Complete MSR for Repls, Reinforcements, or Independent unit assignments. Those functions require a Complete MSR to an Axis Supply Source hex outside the city.
2.4 Budapest Bridges
When the Axis player chooses, he can blow all the Danube bridges in Budapest. This can be done at any moment in the Turn Sequence. There is no die roll. All the bridges must be blown at once (you cannot pick and choose). Once executed, this action cannot be changed or "repeated."
Use the Budapest Bridge marker to identify the current Bridge status. The marker has "All Up" on one side and "All Blown" on the other. Keep the marker visible for both sides. When the bridges are blown, only the Festung Supply source containing the Festung Combat Trains remains, the other ceases to exist.
3.0 Soviet Special Rules
3.1 Soviet Logistics
The Soviets can use any sort of Road, Track, or RR as Legal hexes for their HQs, Combat Trains, and MSRs.
Apply the -1 SNAFU DRM for using "tracks" if any part of the MSR uses either Track OR RR hexes.
3.2 Support AT Return
3.2a Only units with a counter-side with "Support" printed on it can enter Support for a Soviet Formation.
3.2b Soviet AT units (those only capable of being in Support and have a literal "AT" unit type symbol) automatically return to play with one Step when destroyed. They cannot use Repls. Roll one die and they return to their Formation that many turns in the future as a Reinforcement with one Step remaining.
A returning AT unit must retain any Formation assignment, and is exempt from the Complete MSR requirement in BCS 2.1c.
Returning AT units are not considered to be "in play" for BCS 6.2a. If the Formation has otherwise been destroyed, remove it completely, to include the supposedly returning AT units.
3.3 Bridges
The Soviet player may be able to blow bridges. This is done differently than the case with the Axis rule regarding the Budapest Bridges in 2.4. Only locations with a "Plunger" printed on the map can be blown.
Blowing Bridges. The Soviet player must roll to blow any bridge marked with a 'Plunger' (this does not include the Bridges in Budapest, 2.4). Do this the first time an Axis unit enters a hex which contains the bridge's hexside, and the bridge is not already marked with a Bridge Blown or Bridge OK marker. If the marker has been placed, bridge blowing has already been attempted (successfully or as a failure) and it cannot be attempted again.
If that hex is made up of multiple hexsides containing bridges, each hexside requires a separate roll (even if the hexside shows more than one bridge, make only one roll for it).
Roll one die per hexside only the first time an Axis unit moves adjacent to it. There are no DRMs.
- 1-2: Bridge blowing fails. Mark the hexside with a Bridge OK marker.
- 3-6: Bridge blowing succeeds. Mark the hexside with a Bridge Blown marker.
3.4 Surge Offensive: 6 Gds Tank Army
The Soviet player can choose to initiate his Surge before the Weather roll on any turn on or after 6 Jan 45. This Surge can only be used in January.
Unlike the Axis Surge, the Soviet Surge has only an Entry Turn and units are not removed from play. The Soviet player is automatically First Player on this turn with no dice roll. However, if the Soviet Surge is announced the same turn as the Axis Konrad III Entry Turn, neither player automatically gets First Player. Instead, roll for First Player normally. If the Soviet Surge overlaps with any Exit or Entry Turn of the Axis Konrad III Surge, the Soviet Player must place his own Surge Reinforcements on the map before the Axis player commits to Exit or Entry of his own Surge forces.
The Entry Turn marks the beginning of the Soviet Surge. The Surge itself lasts 10 turns. Place the Soviet Surge End marker on the Turn Record Track as a reminder. Note that the Surge "length" does not count the Entry Turn itself. At the earliest, the Entry Turn can happen on 6 Jan 45, and the Surge itself would run from 7 Jan 45 through 16 Jan 45.
Entry. On the Entry Turn, the forces shown on the map's 6 Gds Tank Army Surge Box arrive in the Reinforcement Phase. Others listed there will arrive in the turn after the Entry Turn. Note that the 1.11 freedom from Mixed Formations does not apply to these follow-on units. Each Formation applies 1.11 independently.
Important: Unlike the Axis Surge, the Soviet Surge Reinforcements and Activation Allotments (both the Soviet Surge and Axis Response Activations) can only be placed in hexes or used by Formations with HQs North of the Danube Surge Line.
See unit details on the 6 Gds Tank Army Surge Box on the map. The Surge Box background colors are slightly different from the real counters to make them easier to see.
3.5 Formation Rebuilds
The Soviets (only) can rebuild Formations that have previously been removed from play by BCS 6.2.
Rebuild the Formation using Repls normally. The HQ and Combat Trains must enter via any East Map Edge Entry Hexes that allow for a Complete MSR.
Regardless of the Formation's Fatigue level when it was removed, it returns as Fat-3. Support AT removed with the Formation's destruction by 3.2 return with the HQ with one Step available (at no cost in Repls). Likewise, if the Formation has any non-Support capable AV units, each returns with the HQ with one Step available (at no cost in Repls).
4.0 Victory
Determine Victory using the conditions below (plus additional information specified in the scenario being used).
4.1 Sudden Death
If the Axis Player establishes a Complete MSR to either Festung HQ via the Festung Combat Trains from a Supply Source at Entry Areas C, D, or E at the end of any Soviet Activation, he wins a Sudden Death Victory.
4.2 VP Hex Control
Only the Axis has marked Victory Point hexes and they are marked with a white circle and German Cross.
A side "controls a VP hex" if it occupies, or was the last to occupy, the hex with an Attack Capable unit which is in Command Radius and has a Complete MSR.
The Soviet Player controls all VP hexes at the start of each scenario.
Important: Remember that enemy controlled Victory hexes need an OBJ to be taken (BCS rule 3.3).
Axis Victory Point Hexes
- Tatabánya (A40.24)
- Csabdi (A44.35)
- Zámoly (B3.24)
- Esztergom Road Junction (C22.07)
- Felsőörspuszta (C39.06)
Lessons Learned
by Dean Essig
What follows are some insights from testing. They are not meant to stereotype your play. Finding them the hard way after a hundred hours of play can be unsatisfying, so I've included just a few notes about matters that might escape notice. They are generally applicable to one or the other player, but are available for both sides to consider.
1) While you can make use of an Assist unit on the other side of the Danube (1.6), the restrictions on EZOCs and Engagement Zones across the river is important. Otherwise, the key primary road—an irreplaceable MSR route for the Axis advance—can be cut with dramatic ease.
2) Take a very careful look at the potential Soviet MSRs west of Budapest. There are very few routes that can be used there that don't go through the occupied city (and hence nowhere). If the Axis enters this area, they can create a wedge that splits the Soviet forces using the limited northern route or far down to the south. The impossible boundary zone between them will be right where the Soviets need to defend. In effect, if you aren't aware of the available routes, the resulting MSRs will cause your frontline to split like the parting of the Red Sea straight into Budapest.
3) Be smart in the Quiet Zones. You might get the urge to start some "Offensive to Nowhere" and waste Steps. Don't. The MSR tangle in those areas needs attention. You don't have the road net needed to do it all, so send "excess" Formations somewhere more useful to reduce the load. The Axis temptation is to use those Panzer Divisions in the south to smash a couple of the Rifle Divisions in front of them. Sounds great, but look in back of them. Those Mech Corps have more steps than a Panzer Division does and while they might be behind the curve in attrition rates, the Axis player will be forced to redirect valuable Repls from the spearhead. Unless you want a tangled mess of MSRs for Formations slowly wasting away, running "because I can" offensives to gain a few hexes and inflict Step losses, you are missing my point here.
4) Trading Tanks. Except for the Soviet Mech AV units, both sides have equivalent AV Repl Rates. However, the Soviets start with a large edge in available AV Steps and an uphill quality battle. The result can be seductive. The Soviets use their initial advantage in AV Steps to absorb loss rates they cannot sustain. In the meantime, the smaller Axis AV units alternate between being in action or awaiting rebuilding. Eventually, the Soviet initial Step buffer is expended, and given the relative loss rates, the Soviets then find themselves on the wrong side of the attrition-Replacement curve. The key is to avoid unnecessary losses and work to minimize "Both Loss" results as possible. The Soviets will still burn down their advantage in sheer numbers, but your goal is to keep them from "running out" during the game!
5) Konrad I gives the SS a delicate dilemma to solve. They must move fast to gain ground before the Soviets re-position their army to bring their numbers to bear. That said, it isn't 1940 any more. If you try to just use speed to protect your Formation, Soviet strength will rapidly cripple your spearheads. Looking to get the Konrad III rebuilds to save your behind before you have to rename them "SS Motorized Infantry Brigades" on 6 Jan is not a plan. So, you have to have a better balance between speed and force protection. You can't sacrifice the entire offensive's speed at the start line grinding some dead-ender Soviet Infantry into the ground. Those guys aren't worth your stopping to deal with them. (Not in the sense that your SS is going to sit there and attack them until they are all gone—but don't be afraid to attack the left behind Formations themselves, so they are forced to Activate (as Spoiled) and suffer Isolation Effects. Your "rapid" advance will grind to a halt from tank losses and stiff Soviet resistance—so be prepared to start slogging forward when it does. Don't be afraid to lose steps. Again, it isn't 1940 anymore, and if you are only able to operate while singing "Spring Time for Hitler" (or you won't attack at all), you will lose the game. Go fast, but don't be afraid to get in there and get dirty.
6) Don't underestimate the power of the Soviet 6 Gds Tank Army Surge. The forces are relatively meager. There are only two MSR routes available. And it is a long haul. Still both sides should end up near Komárom in a razorblade fight for the bridges. The Soviets need to go fast, and far, with limited numbers of troops and tanks. Like the Axis in point 5, they can't afford to get bogged down in pointless slogging fights with dead-enders—that's a job for the Guards Infantry Divisions. Meanwhile, the Axis needs to control the balance of their forces being dedicated north of the Danube: If they over-react, they strip needed Formations away from their own main effort (meaning the Soviet counter-offensive's goal of diversion has succeeded)…but if they don't give it enough attention they can lose the game by dint of the potential SNAFU DRM. The resulting balance is a hard slugfest with both sides hitting as hard as they can to either take or defend Komárom.
7) Don't focus too early on Konrad III. When the going gets sluggish, the temptation is to look toward pulling the SS as a sort of "restart"—affecting the Axis player's thinking (well before the 12 Jan minimum). As a result, the SS pulls back, their offensive stops dead, and the player starts to worry more about conducting a passage of lines and how the Axis Infantry should be deployed. The Soviets welcome the respite to regroup and redeploy. Sure, Konrad III will be coming, but the Soviets will be more ready for it. The early stop of the Axis offensive allows, of course, the launch of Korand III as early as legally possible. This will, however, preclude taking the time to replenish the SS Panzers. As I've tried to suggest, the most effective balance is the goal. But if you can't accept friendly losses in your operations, you won't be able to do enough.
8) Start the process of taking Urban hexes of Budapest as early as you can and keep at it. It is your insurance policy if your Frontline fails to keep the Axis relief effort away. If you take the city, they can't open the needed MSR. Every Axis Step in the city is gold. They won't get more of them. But even more critical are the Urban hexes themselves. The Axis simply must counterattack and push the Soviets out of hard won Urban hexes to generate more space. Steps are still gold, so the Axis can't waste them taking irrelevant hexes that do not contribute to the Soviet effort to cut into the city's "chewy center." The Axis can't just lay there and take it—they must choose their ground and take back these key hexes (the routes into the center).
5.0 Scenarios
5.1 The Taking of Budapest 123: The Full Campaign
Operations Konrad I, II, and III were successive offensives to relieve the Budapest siege. The spearhead was the IV SS Panzer Corps, sent south from Poland along with additional German and Hungarian forces. Given the dwindling supply situation, a full front effort was not possible; hence attacks were focused on one sector in each operation. The Soviets, initially unprepared and surprised by the offensive, recovered and launched their own attack north of the Danube, attempting to take the critical bridges at Komárom to relieve pressure. All the while, the Soviets besieging Budapest were taking the city block by block, with the city finally capitulating on 13 Feb 1945. In the end, the Germans would commit half of the total SS and Heer Panzer Divisions on the Eastern Front around Budapest without achieving their goal.
Playing Area: All maps First Turn: 2 Jan 45 Last Turn: 27 Jan 45 (The Axis player can choose to end the game on 11 Jan 45 and accept the Victory Conditions that apply at the end of that turn OR play until the 27 Jan 45 turn to try for a Sudden Death victory.) Game Length: 26 Turns First Player: Axis First Turn Weather: Good
Activations: Use each player's Activations and Surge Charts.
Air Points: Roll normally.
Axis Set Up:
Unassigned Independents:
- A20.05: Convlsct Hun Static Bn
- A20.06: 2/XVIII Alarm Bn
211 VG Div:
- A4.33: 211 VG HQ (Fat-0, PD), 211 Fus Bicycle Bn, 662 '88' Bn [1] (Assigned 211 VG, Support)
- C2.02: I/306 Inf Bn
- C4.01: II/306 Inf Bn
- C6.02: I/317 Inf Bn
- C9.03: II/317 Inf Bn
- C8.01: I/365 Inf Bn
- A8.33: II/365 Inf Bn
- A2.32: 211 Pio Bn
- A1.31: 211 VG Combat Trains
S. Laszlo Hun Inf Div:
- C14.01: S. Laszlo HQ (Fat-1, PD), 20 Hun Hetz Bn [1], 721 PJ Bn (Assigned S. Laszlo, Support)
- C17.03: S. Laszlo Hun Bicycle Bn
- C15.04: 1 Para Hun Abn Bn
- C13.03: 2 Gren Hun Inf Bn
- A12.33: 3 AF Hun Inf Bn
- A16.33: Bernlk Hun Hetz Bn [1], 53 Hun Pio Bn
- C16.05: II/93 Inf Bn (Assigned S. Laszlo)
- C17.06: Sachsen MG Bn (Assigned S. Laszlo)
- A11.30: S. Laszlo Combat Trains
96 Inf Div:
- A19.23: 96 Inf HQ (Fresh), I/283 Inf Bn
- A19.24: II/283 Inf Bn
- A19.28: I/287 Inf Bn
- A19.29: II/287 Inf Bn
- A13.23: 96 Inf Combat Trains
3 SS Pz Div:
- A22.04: 3 SS HQ (Fresh), 3 SS StG Bn [4] (Support)
- A23.14: 3 SS Pz Recon Bn
- A23.10: 9/3 TGR Co
- A23.08: I/3 SS Pz Bn [3]
- A23.06: II/3 SS Pz Bn [4]
- A25.15: II/5 SS Inf Bn
- A23.07: I/6 SS Inf Bn
- A23.09: II/6 SS Inf Bn
- A22.05: III/6 SS Inf Bn
- A24.00: 3 SS Combat Trains
5 SS Pz Div:
- A26.11: 5 SS HQ (Fresh, 2 Arty Points), 5 SS JgPz Bn (Support), I/5 SS Pz Bn, II/9 SS Inf Bn
- A31.18: 5 SS Pz Recon Bn
- A27.12: II/5 SS Pz Bn [3], III/9 SS PG Bn
- A26.10: I/9 SS Inf Bn
- A25.10: I/23 SS Inf Bn
- A25.09: 5 Pz Pio Bn
- A24.07: 5 SS Combat Trains
Pape Pz KG:
- A39.18: Pape HQ (Fat-0), 13 JgPz Bn (Assigned Pape, Support)
- A37.21: I/26 Pz Bn [1], I/98 PG Bn
- A38.20: I/11 Pz Bn [2], II/114 PG Bn
- A34.19: I/130 Pz Bn [2]
- Dead Pile: I/10 Pz Bn
- A34.17: Pape Combat Trains
Bieber Inf Div (-):
- A44.12: Bieber HQ (Fat-0, PD), 102 Hun '88' Bn (Assigned Bieber, Support)
- A41.19: I/979 Inf Bn
- A44.17: II/979 Inf Bn
- A42.17: 271 Fus Inf Bn
- A45.15: Mark MG Bn
- A47.13: I/1 Hun Inf Bn
- A50.12: II/1 Hun Inf Bn
- A42.14: 208 Pz Bn (Assigned Bieber)
- A38.11: Bieber Combat Trains
4 Kav Bde:
- A57.09: 4 Kav HQ (Fat-0, PD), I/28 '88' Bn (Assigned 4 Kav, Support)
- A54.12: 4 s Pz Recon Bn
- A62.12: 70 PJ StG Bn
- A52.12: I/5 Cav Bn
- A57.11: II/5 Cav Bn
- A60.11: I/41 Cav Bn
- B1.14: II/41 Cav Bn
- A54.06: 503 F TGR Bn [1] (Assigned 4 Kav)
- A52.04: 4 Kav Combat Trains
3 Pz Div:
- B4.10: 3 Pz HQ (Fat-0, PD)
- B5.17: I/6 Pz Bn [3]
- B3.16: II/6 Pz Bn [3]
- B5.19: I/3 PG Bn
- B3.04: 3 Pz Combat Trains
23 Pz Div:
- B11.11: 23 Pz HQ (Fat-0, PD, 1 Arty Point), 128 JgPz Bn [2] (Support)
- B16.12: 23 Pz Recon Bn
- B6.15: Rebntsh Pz KG
- B7.16: Schulz Pz KG
- B13.17: I/126 Inf Bn
- B15.15: II/126 Inf Bn
- B7.19: I/128 Inf Bn
- B9.19: II/128 Inf Bn
- B11.18: 51 Pz Pio Bn
- B15.12: 85 LW Inf Bn
- B20.04: 23 Pz Combat Trains
1 Pz Div:
- B25.03: 1 Pz HQ (Fat-0, PD, 1 Arty Point), 1335 Hetz Bn [1] (Assigned 1 Pz, Support)
- B18.10: 1 Pz Recon Bn
- B25.08: Elias Pz KG (1 Pz), I/113 PG Bn
- B25.07: Rank Pz KG
- B18.09: 37 Mdr Bn [2]
- B20.10: I/1 Inf Bn
- B21.09: II/1 Inf Bn
- B23.08: II/113 Inf Bn
- B19.09: 37 Pz Pio Bn
- B20.07: 73 Pz Erz Bn
- B16.10: Holczer Hun Inf Bn
- B28.09: Lausitz MG Bn (Assigned 1 Pz)
- B26.00: 1 Pz Combat Trains
25 Hun Inf Div:
- B33.07: 25 Hun HQ (Fat-0, PD), 25 Bicycle Bn
- B30.07: III/1 Hun Inf Bn
- B30.10: I/25 Hun Inf Bn
- B35.10: II/25 Hun Inf Bn
- B32.11: III/25 Hun Inf Bn
- B27.02: 25 Hun Combat Trains
Buda Garrison Festung:
- C44.27: Buda HQ (Fat-0, PD), 8 SS Hetz Bn (Support), 147 LW '88' Bn (Support), Budapest Combat Trains
- C40.26: 8 SS Pz Recon Bn, Obuda Hun Inf Bn
- C40.27: 15 Kav SS Inf Rgt
- C44.25: 16 Kav SS Inf Rgt
- C47.27: 18 Kav SS Inf Rgt
- C45.26: Portugall SS Inf KG
- C42.25: Europa Alarm Bn, I/40 LW '88' Bn
- C43.25: Vannay Hun Alarm Bn, Zilahi Hun Inf Bn
- C47.28: Kundgr Inf KG, Galantai Hun Inf Bn
- C41.26: I Univ Hun Inf Bn, Svabhegy Hun Inf Bn
- C47.29: Versvry Hun Inf Bn, Viharos Hun Inf Bn
- C46.26: Berend Hun Inf Bn, Deri Hun Inf Bn
- C46.28: Belváros Hun Inf Bn
Pest Garrison Festung:
- C45.29: Pest HQ (Fat-0, PD), FHH StG Bn (Support), 22 SS Hetz Bn (Support), II Univ Hun Inf Bn
- C44.30: I/4 Pz Bn
- C38.29: 632 LW '88' Bn
- C51.32: 573 LW '88' Bn
- C45.33: 13 Pz Recon Bn
- C44.33: I/66 Inf Bn
- C45.34: II/66 Inf Bn
- C40.32: I/93 Inf Bn
- C37.30: I/FHH Inf Bn, Ujpest Hun Inf Bn
- C38.30: I/Gren Inf Bn
- C38.31: II/Gren Inf Bn, Székely Hun Inf Bn
- C39.32: 4/1 Hus Hun Inf Rgt
- C39.31: Sodro Hun Pio Bde
- C47.34: Billnitzer StG KG
- C48.33: II/241 LW '88' Bn, 1/1 Arm Hun Inf Rgt
- C43.33: III/6 Hun Inf Bn
- C42.32: III/8 Hun Inf Bn
- C41.33: I/18 Hun Inf Bn, Besztc Hun Inf Bn
- C46.34: III/38 Hun Inf Bn, Zg-Kb Hun Inf Bn
- C44.32: Morlin Hun Inf Bn
- C51.33: 22 Aufk SS Inf Bn
- C50.33: 17 Kav SS Inf Rgt
- C52.32: 52 Kav SS Inf Rgt
- C51.31: 53 Kav SS Inf Rgt
- C49.34: Dorner SS Pol KG
- C54.32: Pecsi Hun Inf Bn
- C52.29: Budapest Hun Sec Bn
Formation Activation Markers in Play: 3 SS Pz, 5 SS Pz, 1 Pz Div, 3 Pz Div, 23 Pz Div, Pape KG, 4 Kav Bde, 96 Inf Div, 211 VG Div, Bieber Div (-), Buda Garrison Festung, Pest Garrison Festung, S. Laszlo Hun Div, 25 Hun Inf Div (-)
Soviet Set Up:
24 Gds Corps:
- C5.04: 24 Gds HQ (Fat-1, PD), AT Gds AT Bn (+) (Support)
- C7.03: I/6 Gds Abn Inf Rgt
- C4.02: II/6 Gds Abn Inf Rgt
- C6.03: III/6 Gds Abn Inf Rgt
- C1.03: I/243 Inf Rgt
- C2.03: II/243 Inf Rgt
- C3.03: III/243 Inf Rgt
- C1.04: 24 Gds Combat Trains
25 Gds Corps:
- C12.07: 25 Gds HQ (Fat-1, PD), AT AT Bn (+) (Support), 27 Gds Tk Bde [2] (Assigned 25 Gds)
- C13.06: I/53 Inf Rgt
- C15.07: II/53 Inf Rgt
- C14.06: III/53 Inf Rgt
- C11.04: I/409 Inf Rgt
- C12.04: II/409 Inf Rgt
- C9.04: III/409 Inf Rgt
- C7.09: 25 Gds Combat Trains
18 Tk Corps:
- C42.04: 18 Tk HQ (Fat-0, 4 Arty Points)
- C40.08: 78 Motorcycle Bn, 181 Tk Bde [5]
- C47.03: 110 Tk Bde [4], 363 Gds ISU Rgt
- A23.17: 170 Tk Bde [3] *Out of CR
- A22.19: 1438 SU Rgt *Out of CR
- A24.17: 1000 AT Rgt [1] *Out of CR
- C44.01: 32 Inf Bde
- C36.10: 18 Tk Combat Trains
4 Gds Div:
- A26.31: 4 Gds HQ (Fat-1, 2 Arty Points), 2/8 Gds Inf Bn, 26 Lt Arty Bde (Assigned 4 Gds, Support)
- A21.29: 9 Gds AT Bn
- A23.25: 1/3 Gds Inf Bn
- A20.26: 2/3 Gds Inf Bn
- C20.02: 1/8 Gds Inf Bn
- A20.33: 1/11 Gds Inf Bn
- A19.31: 2/11 Gds Inf Bn
- C36.04: 4 Gds Combat Trains
80 Gds Div:
- A29.21: 80 Gds HQ (Fat-1, PD), 85 Gds SU Bn (Support), Tng Gds Inf Bn, 1962/42 AT Rgt (Assigned 80 Gds, Support)
- A26.16: 1/217 Gds Inf Bn
- A27.19: 2/217 Gds Inf Bn
- A29.18: 1/230 Gds Inf Bn
- A30.18: 2/230 Gds Inf Bn
- A31.19: 1/232 Gds Inf Bn
- A32.18: 2/232 Gds Inf Bn
- A35.29: 80 Gds Combat Trains
34 Gds Div:
- A40.24: 34 Gds HQ (Fat-1, PD), 3/103 Gds Inf Bn, 38 Gds AT Bn (Support), 1961/42 AT Rgt (Assigned 34 Gds, Support)
- A39.22: 1/103 Gds Inf Bn
- A40.22: 2/103 Gds Inf Bn
- A34.21: 1/105 Gds Inf Bn
- A35.22: 2/105 Gds Inf Bn
- A37.23: 1/107 Gds Inf Bn
- A38.22: 2/107 Gds Inf Bn
- A47.33: 34 Gds Combat Trains
223 Rfl Div:
- A48.22: 223 Rfl HQ (Fat-2, PD, 1 Arty Point), 332 AT Bn (Support)
- A47.19: 1/1037 Inf Bn
- A48.18: 2/1037 Inf Bn
- A42.22: 1/1039 Inf Bn
- A42.20: 2/1039 Inf Bn
- A44.19: 1/1041 Inf Bn
- A45.19: 2/1041 Inf Bn
- A48.30: 223 Rfl Combat Trains
52 Rfl Div:
- A51.18: 52 Rfl HQ (Fat-2, PD, 2 Arty Points), 521 AT Rgt (Assigned 52 Rfl, Support)
- A46.17: 1/429 Inf Bn
- A47.16: 2/429 Inf Bn
- A49.15: 1/431 Inf Bn
- A51.14: 2/431 Inf Bn
- A53.14: 1/439 Inf Bn
- A54.13: 2/439 Inf Bn, 405 AT Bn
- A56.23: 52 Rfl Combat Trains
93 Rfl Div:
- A57.27: 93 Rfl HQ (Fat-0, 1 Arty Point), 144 AT Bn (Support), 1/51 Inf Bn
- A56.26: 2/51 Inf Bn
- A55.26: 1/129 Inf Bn
- A55.25: 2/129 Inf Bn
- A54.24: 1/266 Inf Bn
- A54.23: 2/266 Inf Bn
- A53.31: 93 Rfl Combat Trains
5 Gds Cav Corps:
- A57.24: 5 Cav HQ (Fat-0, 1 Arty Point), 150 AT Rgt, 43/12 Gds Cav Rgt, 7 AT Bde (Assigned 5 Cav, Support)
- A58.24: 54/12 Tk Rgt [1], 45/12 Gds Cav Rgt
- A58.25: 1896 SU Rgt [1], 47/12 Gds Cav Rgt
- A58.26: 71/11 Tk Rgt [1], 37/11 Gds Cav Rgt
- A59.26: 39/11 Gds Cav Rgt
- A60.25: 5 AT Bn, 41/11 Gds Cav Rgt
- A57.22: 60/63 Tk Rgt [1], 214/63 Cav Rgt
- A58.22: 220/63 Cav Rgt
- A57.23: 223/63 Cav Rgt
- A56.28: 5 Cav Combat Trains
40 Gds Div:
- A62.23: 40 Gds HQ (Fat-0, 1 Arty Point), 41 Gds AT Bn (Support), 1/111 Gds Inf Bn
- A62.22: 2/111 Gds Inf Bn
- A62.21: 1/116 Gds Inf Bn
- A61.21: 2/116 Gds Inf Bn
- A60.20: 1/119 Gds Inf Bn
- A60.19: 2/119 Gds Inf Bn
- A57.28: 40 Gds Combat Trains
7 Gds Abn Div:
- A59.17: 7 Gds HQ (Fat-2, PD, 4 Arty Points), 8 Gds SU Bn (Support)
- A57.13: 1/18 Gds Abn Inf Bn
- A59.14: 2/18 Gds Abn Inf Bn
- A60.14: 1/21 Gds Abn Inf Bn
- A61.15: 2/21 Gds Abn Inf Bn
- A62.15: 1/29 Gds Abn Inf Bn
- A62.16: 2/29 Gds Abn Inf Bn
- A62.20: 7 Gds Combat Trains
7 Mech Corps:
- B3.24: 7 Mech HQ (Fat-0, 1 Arty Point), 94 Motorcycle Bn, 1440 SU Rgt [1]
- B3.18: 41 Gds Tk Bde [2]
- B9.27: 16 Mech Bde, 109 AT Rgt
- B2.17: 63 Mech Bde
- B11.25: 64 Mech Bde
- B7.29: 78 Gds IS Rgt [1], 1289 SU Rgt
- B8.24: 7 Mech Combat Trains
5 Gds Abn Div:
- B6.23: 5 Abn HQ (Fat-2, PD, 4 Arty Points), 13 Gds SU Bn (Support), Tng Gds Abn Inf Bn, 366 Gds ISU Rgt [1] (Assigned 5 Abn), 1963/42 AT Rgt (Assigned 5 Abn, Support)
- B5.21: 1/1 Gds Abn Inf Bn
- B6.20: 2/1 Gds Abn Inf Bn
- B3.20: 1/11 Gds Abn Inf Bn
- B4.20: 2/11 Gds Abn Inf Bn
- B8.20: 1/16 Gds Abn Inf Bn
- B10.20: 2/16 Gds Abn Inf Bn, 251 AT Bn (Assigned 5 Abn)
- B9.21: 3/16 Gds Abn Inf Bn
- B10.24: 5 Abn Combat Trains
84 Rfl Div:
- B14.21: 84 Rfl HQ (Fat-1, PD), 122 SU Bn (Support), 338/9 AT Rgt (Assigned 84 Rfl, Support)
- B14.18: 1/41 Inf Bn
- B14.19: 2/41 Inf Bn
- B11.20: 1/201 Inf Bn
- B12.19: 2/201 Inf Bn
- B13.19: 1/382 Inf Bn, 2/382 Inf Bn
- B15.27: 84 Rfl Combat Trains
252 Rfl Div:
- B18.16: 252 Rfl HQ (Fat-1, PD, 1 Arty Point), 310 SU Bn (Support), 762/9 AT Rgt (Assigned 252 Rfl, Support)
- B15.18: 1/924 Inf Bn
- B15.17: 2/924 Inf Bn
- B16.15: 1/928 Inf Bn
- B17.14: 2/928 Inf Bn
- B18.12: 1/932 Inf Bn
- B20.11: 2/932 Inf Bn
- B18.24: 252 Rfl Combat Trains
69 Gds Div:
- B22.14: 69 Gds HQ (Fat-1, PD, 2 Arty Points), 75 Gds SU Bn (Support)
- B23.11: 1/204 Gds Inf Bn
- B25.11: 2/204 Gds Inf Bn
- B21.11: 1/206 Gds Inf Bn
- B22.11: 2/206 Gds Inf Bn
- B27.12: 1/208 Gds Inf Bn
- B28.12: 2/208 Gds Inf Bn
- B20.20: 69 Gds Combat Trains
1 Gds UR Bde:
- B31.15: 1 UR HQ (Fat-1, PD, 3 Arty Points), AT Gds AT Bn (Support), 11 MG Bn
- B35.11: 2 MG Bn
- B30.12: 8 MG Bn
- B34.13: 9 MG Bn
- B32.13: 10 MG Bn
- B30.18: 1 UR Combat Trains
41 Gds Div:
- B13.28: 41 Gds HQ (Fat-0, 2 Arty Points), 44 Gds SU Bn (Support), 1/122 Gds Inf Bn
- B13.27: 2/122 Gds Inf Bn
- B14.26: 1/124 Gds Inf Bn
- B15.26: 2/124 Gds Inf Bn
- B15.25: 1/126 Gds Inf Bn
- B15.24: 2/126 Gds Inf Bn
- B16.27: 41 Gds Combat Trains
62 Gds Div:
- B23.23: 62 Gds HQ (Fat-0, 2 Arty Points), 69 Gds SU Bn (Support), 1/182 Gds Inf Bn, 1312 AT Rgt (Assigned 62 Gds, Support)
- B24.22: 2/182 Gds Inf Bn
- B24.21: 1/184 Gds Inf Bn
- B25.21: 2/184 Gds Inf Bn
- B26.20: 1/186 Gds Inf Bn
- B27.20: 2/186 Gds Inf Bn
- B28.19: 62 Gds Combat Trains
1 Gds Mech Corps:
- D24.01: 1 Mech HQ (Fat-0), 9 Gds Tk Bde
- D31.05: 11 Gds Motorcycle Bn
- B24.34: 1 Gds Mech Bde, 1453 SU Rgt
- D27.09: 2 Gds Mech Bde, 1821 SU Rgt
- B32.32: 3 Gds Mech Bde, 382 Gds SU Rgt
- D29.13: 1 Mech Combat Trains
10 Gds Corps:
- C24.08: 10 Gds HQ (Fat-0), AT Gds AT Bn (+) (Support), 12 AT Bde (Assigned 10 Gds, Support)
- C23.08: I/86 Gds Inf Rgt
- C16.08: II/86 Gds Inf Rgt
- C21.04: III/86 Gds Inf Rgt
- C30.12: I/99 Inf Rgt, II/99 Inf Rgt
- C31.13: III/99 Inf Rgt
- C22.05: 2 Eng Bde
- C31.14: 10 Gds Combat Trains
2 Gds Mech Corps:
- C33.19: 2 Mech HQ (Fat-2), 4 Gds Mech Bde, 30 Gds IS Tk Rgt
- C34.18: 99 Motorcycle Bn, 37 Gds Tk Bde
- C32.14: 5 Gds Mech Bde
- C28.17: 6 Gds Mech Bde, 251 Gds SU Rgt [1]
- C27.29: 2 Mech Combat Trains
23 Rfl Corps:
- C37.25: 23 Rfl HQ (Fat-1, 1 Arty Point), AT AT Bn (+) (Support), I/49 Gds Inf Rgt
- C37.26: II/49 Gds Inf Rgt
- C38.26: III/49 Gds Inf Rgt
- C39.23: I/19 Inf Rgt
- C40.22: II/19 Inf Rgt
- C41.23: III/19 Inf Rgt
- C34.21: 23 Rfl Combat Trains
75 Rfl Corps:
- C37.28: 75 Rfl HQ (Fat-4, 4 Arty Points), AT AT Bn (+) (Support), 1897 SU Rgt (Assigned 75 Rfl, Support)
- C39.26: I/109 Gds Inf Rgt
- C39.27: II/109 Gds Inf Rgt
- C39.28: III/109 Gds Inf Rgt
- C40.25: I/180 Inf Rgt
- C41.25: II/180 Inf Rgt, III/180 Inf Rgt
- C32.27: 75 Rfl Combat Trains
37 Rfl Corps:
- C49.26: 37 Rfl HQ (Fat-4, 4 Arty Points), AT AT Bn (+) (Support), 1505 SU Rgt (Assigned 37 Rfl, Support), 437 AT Rgt (Assigned 37 Rfl, Support)
- C48.29: 83 Marine Inf Bde
- C44.24: I/59 Gds Inf Rgt
- C45.25: II/59 Gds Inf Rgt
- C46.25: III/59 Gds Inf Rgt
- C42.24: I/108 Gds Inf Rgt
- C43.24: II/108 Gds Inf Rgt, III/108 Gds Inf Rgt
- C48.27: I/316 Inf Rgt, 432 SU Bn
- C54.28: II/316 Inf Rgt
- C48.28: III/316 Inf Rgt
- C48.26: I/320 Inf Rgt
- C47.26: II/320 Inf Rgt, III/320 Inf Rgt
- C54.24: 37 Rfl Combat Trains
30 Rfl Corps:
- C35.34: 30 Rfl HQ (Fat-3, 2 Arty Points), AT AT Bn (+) (Support), 3/23 Arm Bn (Assigned 30 Rfl, Support)
- C37.32: I/68 Gds Inf Rgt
- C38.32: II/68 Gds Inf Rgt, 72 Gds SU Bn
- C39.33: III/68 Gds Inf Rgt
- C36.29: I/155 Inf Rgt
- C36.30: II/155 Inf Rgt
- C37.31: III/155 Inf Rgt
- C35.35: 30 Rfl Combat Trains
7 Rom Corps:
- C44.35: 7 Rom HQ (Fat-3, 1 Arty Point), 1/36 Rom AT Bn (Support), 7 Rom Combat Trains, 114 AT Rgt (Assigned 7 Rom, Support)
- C40.33: I/2 Rom Inf Rgt
- C41.34: II/2 Rom Inf Rgt, III/2 Rom Inf Rgt
- C42.33: I/19 Rom Inf Rgt
- C43.34: II/19 Rom Inf Rgt, III/19 Romanian Inf Rgt
- C44.34: I/9 Cav Rom Inf Rgt
- C45.35: II/9 Cav Rom Inf Rgt, III/9 Cav Rom Inf Rgt
18 Gds Corps:
- C49.35: 18 Gds HQ (Fat-3, 2 Arty Points), AT Gds AT Bn (+) (Support), 39/23 Arm Bn (Assigned 18 Gds, Support)
- C46.35: I/25 Gds Inf Rgt
- C47.35: II/25 Gds Inf Rgt, III/25 Gds Inf Rgt
- C48.34: I/297 Inf Rgt
- C49.35: II/297 Inf Rgt, III/297 Inf Rgt
- C50.34: I/317 Inf Rgt, II/317 Inf Rgt
- C51.34: III/317 Inf Rgt
- C50.35: 18 Gds Combat Trains
104 Rfl Corps:
- C52.35: 104 Rfl HQ (Fat-3, 2 Arty Points), AT AT Bn (+) (Support), 104 Rfl Combat Trains
- C54.33: I/66 Gds Inf Rgt
- C55.33: II/66 Gds Inf Rgt, III/66 Gds Inf Rgt
- C52.33: I/151 Inf Rgt, II/151 Inf Rgt
- C53.33: III/151 Inf Rgt
Formation Activation Markers in Play: 1 Gds Mech Corps, 2 Gds Mech Corps, 18 Tk Corps, 7 Mech Corps, 5 Gds Cav Corps, 5 Gds Abn Div, 7 Gds Abn Div, 4 Gds Div, 34 Gds Div, 40 Gds Div, 41 Gds Div, 62 Gds Div, 69 Gds Div, 80 Gds Div, 1 Gds UR Bde, 52 Rfl Div, 84 Rfl Div, 93 Rfl Div, 223 Rfl Div, 252 Rfl Div, 10 Gds Corps, 18 Gds Corps, 24 Gds Corps, 25 Gds Corps, 23 Rfl Corps, 30 Rfl Corps, 37 Rfl Corps, 75 Rfl Corps, 104 Rfl Corps, 7 Rom Corps
Victory Conditions:
Determine Victory using 4.0.
Axis Major Victory: If the Axis player achieves the Sudden Death Victory (see 4.1), the game ends instantly.
Axis Minor Victory: The Axis player controls 4 of the VP hexes (listed in 4.2) by the end of the 11 Jan 45 turn and the Axis player decides to end the game at that point. Alternatively, the Axis player can choose to continue the game until the 27 Jan 45 turn and attempt to achieve a Sudden Death victory.
Soviet Minor Victory: The Soviet player prevents Axis control of 4 VP hexes by the end of the 11 Jan 45 turn and the Axis player ends the game on that turn.
Soviet Major Victory: The Axis player continues the game but fails to achieve a Sudden Death Victory before the game ends.
If the Axis player continues the game past the 11 Jan 45 turn, the Minor Victory he may have won at that point is lost. If the game continues to the 27 Jan 45 turn, the Axis can only win via Sudden Death, and the Soviets win a Major Victory by default if they keep them from accomplishing a Sudden Death.
5.2 Operation Konrad I & II (Medium)
Operation Konrad I was launched in the late evening of 1 Jan 1945 with enemy contact around midnight. The operation made initial progress by the two SS Panzer Divisions and 96 Infantry Division before the Soviet defenses hardened by pulling formations from across the front. Stalemated after a few days, the Germans launched Operation Konrad II effectively as a continuation of their offensive from the progress already made towards Budapest. Both operations failed.
Playing Area: Maps A and C. All Urban hexes of Budapest are not playable (see Special Rules). First Turn: 2 Jan 45 Last Turn: 11 Jan 45 Game Length: 10 Turns First Player: Axis First Turn Weather: Good
Special Rules:
- The Axis player cannot initiate Surge Offensive: Konrad III (2.2).
- The Soviet player cannot initiate Surge Offensive: 6 Gds Tank Army (3.4).
- Treat the Soviet 7 Mech Corps units as independent in this scenario. This is to show the historical assignments of these units even if it is out of the players' control to do so in the rules.
- The Budapest Urban hexes are not playable. Axis units can move into an Urban hex (as if exiting off the map edge) for Sudden Death victory purposes. Soviet units cannot move into or have MSR traced through these hexes.
Activations: Use each player's Activations Chart.
Air Points: Roll for and use the entire result normally.
Replacement Points: Roll for and use the entire result normally.
Supply Sources/Entry Areas: Use the ones in the playing area.
Axis Set Up:
96 Inf Div:
- A19.23: 96 Inf HQ (Fresh), I/283 Inf Bn
- A19.24: II/283 Inf Bn
- A19.28: I/287 Inf Bn
- A19.29: II/287 Inf Bn
- A13.23: 96 Inf Combat Trains
3 SS Pz Div:
- A22.04: 3 SS HQ (Fresh), 3 SS StG Bn [4] (Support)
- A22.05: III/6 SS Inf Bn
- A23.14: 3 SS Pz Recon Bn
- A23.08: I/3 SS Pz Bn [3]
- A23.06: II/3 SS Pz Bn [4]
- A25.15: II/5 SS Inf Bn
- A23.07: I/6 SS Inf Bn
- A23.09: II/6 SS Inf Bn
- A23.10: 9/3 TGR Co
- A24.00: 3 SS Combat Trains
5 SS Pz Div:
- A26.11: 5 SS HQ (Fresh, 2 Arty Points), 5 SS JgPz Bn (5 SS, Support), I/5 SS Pz Bn, II/9 SS Inf Bn
- A31.18: 5 SS Pz Recon Bn
- A27.12: II/5 SS Pz Bn [3], III/9 SS PG Bn
- A26.10: I/9 SS Inf Bn
- A25.10: I/23 SS Inf Bn
- A25.09: 5 Pz Pio Bn
- A24.07: 5 SS Combat Trains
Pape Pz KG:
- A39.18: Pape HQ (Fat-0), 13 JgPz Bn (Assigned Pape, Support)
- A37.21: I/26 Pz Bn [1], I/98 PG Bn
- A38.20: I/11 Pz Bn [2], II/114 PG Bn
- A34.19: I/130 Pz Bn [2]
- Dead Pile: I/10 Pz Bn
- A34.17: Pape Combat Trains
Bieber Inf Div (-):
- A44.12: Bieber HQ (Fat-0, PD), 102 Hun '88' Bn (Assigned Bieber, Support)
- A41.19: I/979 Inf Bn
- A44.17: II/979 Inf Bn
- A42.17: 271 Fus Inf Bn
- A45.15: Mark MG Bn
- A47.13: I/1 Hun Inf Bn
- A50.12: II/1 Hun Inf Bn
- A42.14: 208 Pz Bn (Assigned Bieber)
- A38.11: Bieber Combat Trains
4 Kav Bde:
- A57.09: 4 Kav HQ (Fat-0, PD), I/28 '88' Bn (Assigned 4 Kav, Support)
- A54.12: 4 s Pz Recon Bn
- A62.12: 70 PJ StG Bn
- A52.12: I/5 Cav Bn
- A57.11: II/5 Cav Bn
- A60.11: I/41 Cav Bn
- A63.14: II/41 Cav Bn
- A54.06: 503 F TGR Bn [1] (Assigned 4 Kav)
- A52.04: 4 Kav Combat Trains
Formation Activation Markers in Play: 3 SS Pz, 5 SS Pz, Pape KG, 4 Kav Bde, 96 Inf Div, Bieber Div (-)
Axis Reinforcements:
Do not use the Axis Order of Arrival. Use the below instead:
3 Jan 45
- At 96 Inf HQ: 96 Inf Div (196 PJ Mdr Bn, 96 Fus Bicycle Bn, I/284, II/284 Inf Bn, 196 Pio Bn)
- w/i 2 A22.05: 3 SS Pz Div (I/5, III/5 SS Inf, 3 SS Pz Pio Bn), 6 Pz Div (6 Pz HQ (Fat-0), II/11 Pz Bn [1], 41 JgPz Bn [2], I/4, II/4, I/114 Inf Bn, 57 Pz Pio Bn)
- C: 6 Pz Div (6 Pz Combat Trains), 5 SS Pz Div (I/10, II/10, III/10, I/24 SS Inf Bn), 711 Inf Div (711 Inf HQ (Fresh), 1711 Fus Bicycle Bn, I/744, II/744, III/744 Inf Bn, 711 Inf Combat Trains)
4 Jan 45
- At 3 SS Pz HQ: I/Ney Inf Bn (Assigned 3 SS)
- At 5 SS Pz HQ: II/Ney Inf Bn (Assigned 5 SS)
- At 711 Inf HQ: 711 Inf Div (711 PJ Hetz Bn, I/731, II/731, III/731 Inf Bn)
5 Jan 45
- At 711 Inf HQ: 711 Inf Div (711 Pio Bn)
- D: 23 Hun Inf Div (-) (23 Hun HQ (Fat-0), 13 Hun Bicycle Bn, I/54, II/54, III/54 Hun Inf Bn, 23 Hun Combat Trains)
6 Jan 45
- Remove: Pape Pz KG (I/10, I/130, Pz Bn, I/98 PG Bn)
- 96 Inf Div Rubber Boat Rule (2.1b) ends.
7 Jan 45
- At HQ assigned: Philipp Pz KG
- D: 1 Hun Hus Div (1 Hus HQ (Fat-0), 15 Hun Bicycle Bn, I, I/2, II/2, I/4 Hun Cav Bn, 3 Hun Cav Rgt, 42 Hun Inf Rgt, 1 Hus Combat Trains), 2 Hun Arm Div (2 Arm HQ (Fat-0), 2 Hun Arm Cav Bn, I/3 [1], II/3 [1] Hun Arm Bn, 4/3, 5/3, 6/3 Hun Inf Bn, 52 Hun Flak Bn, 2 Hun Arm Pio Bn, 2 Arm Combat Trains)
- Reduce 3 SS and 5 SS Fatigue Level by 2 (to no better than Fat-0).
10 Jan 45
- At 5 SS HQ: 5 SS Pz Div (I/1 Stj, II/1 Stj Assault Bn)
- At HQ assigned: 239 StG Bde [2]
11 Jan 45
- At HQ assigned: III/Ney SS Inf Bn
- C or D: 3 Kav Bde (3 Kav HQ (Fat-0), 3 s Pz Recon Bn, 69 PJ StG Bn, 69 Kos, I/31, II/31, I/32, II/32 Cav Bn, 3 Kav Combat Trains)
Soviet Set Up:
18 Tk Corps:
- C42.04: 18 Tk HQ (Fat-0, 4 Arty Points)
- C40.08: 78 Motorcycle Bn, 181 Tk Bde [5]
- C47.03: 110 Tk Bde [4], 363 Gds ISU Rgt
- A23.17: 170 Tk Bde [3] *Out of CR
- A24.17: 1000 AT Rgt [1] *Out of CR
- A22.19: 1438 SU Rgt *Out of CR
- C44.01: 32 Inf Bde
- C36.10: 18 Tk Combat Trains
4 Gds Div:
- A26.31: 4 Gds HQ (Fat-1, 2 Arty Points), 2/8 Gds Inf Bn, 26 Lt Arty Bde (Assigned 80 Gds, Support)
- A21.29: 9 Gds AT Bn
- A23.25: 1/3 Gds Inf Bn
- A20.26: 2/3 Gds Inf Bn
- C20.02: 1/8 Gds Inf Bn
- A20.33: 1/11 Gds Inf Bn
- A19.31: 2/11 Gds Inf Bn
- C36.04: 4 Gds Combat Trains
80 Gds Div:
- A29.21: 80 Gds HQ (Fat-1, PD), 85 Gds SU Bn (Support), Tng Gds Inf Bn, 1962/42 AT Rgt (Assigned 80 Gds, Support)
- A26.16: 1/217 Gds Inf Bn
- A27.19: 2/217 Gds Inf Bn
- A29.18: 1/230 Gds Inf Bn
- A30.18: 2/230 Gds Inf Bn
- A31.19: 1/232 Gds Inf Bn
- A32.18: 2/232 Gds Inf Bn
- A35.29: 80 Gds Combat Trains
34 Gds Div:
- A40.24: 34 Gds HQ (Fat-1, PD), 3/103 Gds Inf Bn, 38 Gds AT Bn (34 Gds, Support), 1961/42 AT Rgt (Assigned 34 Gds, Support)
- A39.22: 1/103 Gds Inf Bn
- A40.22: 2/103 Gds Inf Bn
- A34.21: 1/105 Gds Inf Bn
- A35.22: 2/105 Gds Inf Bn
- A37.23: 1/107 Gds Inf Bn
- A38.22: 2/107 Gds Inf Bn
- A47.33: 34 Gds Combat Trains
223 Rfl Div:
- A48.22: 223 Rfl HQ (Fat-2, PD, 1 Arty Point), 332 AT Bn (223 Rfl, Support)
- A47.19: 1/1037 Inf Bn
- A48.18: 2/1037 Inf Bn
- A42.22: 1/1039 Inf Bn
- A42.20: 2/1039 Inf Bn
- A44.19: 1/1041 Inf Bn
- A45.19: 2/1041 Inf Bn
- A48.30: 223 Rfl Combat Trains
52 Rfl Div:
- A51.18: 52 Rfl HQ (Fat-2, PD, 2 Arty Points), 521 AT Rgt (Assigned 52 Rfl, Support)
- A46.17: 1/429 Inf Bn
- A47.16: 2/429 Inf Bn
- A49.15: 1/431 Inf Bn
- A51.14: 2/431 Inf Bn
- A53.14: 1/439 Inf Bn
- A54.13: 2/439 Inf Bn, 405 AT Bn
- A56.23: 52 Rfl Combat Trains
93 Rfl Div:
- A57.27: 93 Rfl HQ (Fat-0, 1 Arty Point), 144 AT Bn (93 Rfl, Support), 1/51 Inf Bn
- A56.26: 2/51 Inf Bn
- A55.26: 1/129 Inf Bn
- A55.25: 2/129 Inf Bn
- A54.24: 1/266 Inf Bn
- A54.23: 2/266 Inf Bn
- A53.31: 93 Rfl Combat Trains
5 Gds Cav Corps:
- A57.24: 5 Gds Cav HQ (Fat-0, 1 Arty Point), 150 AT Rgt, 43/12 Gds Cav Rgt, 7 AT Bde (Assigned 5 Cav, Support)
- A58.24: 54/12 Tk Rgt [1], 45/12 Gds Cav Rgt
- A58.25: 1896 SU Rgt [1], 47/12 Gds Cav Rgt
- A58.26: 71/11 Tk Rgt [1], 37/11 Gds Cav Rgt
- A59.26: 39/11 Gds Cav Rgt
- A60.25: 5 AT Bn, 41/11 Gds Cav Rgt
- A57.22: 60/63 Tk Rgt [1], 214/63 Cav Rgt
- A58.22: 220/63 Cav Rgt
- A57.23: 223/63 Cav Rgt
- A56.28: 5 Cav Gds Combat Trains
40 Gds Div:
- A62.23: 40 Gds HQ (Fat-0, 1 Arty Point), 41 Gds AT Bn (40 Gds, Support), 1/111 Gds Inf Bn
- A62.22: 2/111 Gds Inf Bn
- A62.21: 1/116 Gds Inf Bn
- A61.21: 2/116 Gds Inf Bn
- A60.20: 1/119 Gds Inf Bn
- A60.19: 2/119 Gds Inf Bn
- A57.28: 40 Gds Combat Trains
7 Gds Abn Div:
- A59.17: 7 Abn HQ (Fat-2, PD, 4 Arty Points), 8 Gds SU Bn (Support)
- A57.13: 1/18 Gds Abn Inf Bn
- A59.14: 2/18 Gds Abn Inf Bn
- A60.14: 1/21 Gds Abn Inf Bn
- A61.15: 2/21 Gds Abn Inf Bn
- A62.15: 1/29 Gds Abn Inf Bn
- A62.16: 2/29 Gds Abn Inf Bn
- A62.20: 7 Abn Combat Trains
10 Gds Corps:
- C24.08: 10 Gds HQ (Fat-0), AT Gds AT Bn (+) (Support), 12 AT Bde (Assigned 10 Gds, Support)
- C23.08: I/86 Gds Inf Rgt
- C16.08: II/86 Gds Inf Rgt
- C21.04: III/86 Gds Inf Rgt
- C30.12: I/99 Inf Rgt, II/99 Inf Rgt
- C31.13: III/99 Inf Rgt
- C22.05: 2 Eng Bde
- C31.14: 10 Gds Combat Trains
2 Gds Mech Corps:
- C33.19: 2 Gds HQ (Fat-2), 4 Gds Mech Bde, 30 Gds IS Tk Rgt
- C34.18: 99 Motorcycle Bn, 37 Gds Tk Bde
- C32.14: 5 Gds Mech Bde
- C28.17: 6 Gds Mech Bde, 251 Gds SU Rgt [1]
- C27.29: 2 Gds Combat Trains
23 Rfl Corps:
- C37.25: 23 Rfl HQ (Fat-1, 1 Arty Point), AT AT Bn (+) (Support), I/49 Gds Inf Rgt
- C37.26: II/49 Gds Inf Rgt
- C38.26: III/49 Gds Inf Rgt
- C39.23: I/19 Inf Rgt
- C40.22: II/19 Inf Rgt
- C41.23: III/19 Inf Rgt
- C34.21: 23 Rfl Combat Trains
Formation Activation Markers in Play: 2 Gds Mech Corps, 18 Tk Corps, 5 Gds Cav Corps, 7 Gds Abn Div, 4 Gds Div, 34 Gds Div, 40 Gds Div, 80 Gds Div, 52 Rfl Div, 93 Rfl Div, 223 Rfl Div, 10 Gds Corps, 23 Rfl Corps
Soviet Reinforcements:
Do not use the Soviet Order of Arrival. Use the below instead:
3 Jan 45
- Add: 3 Arty Points
- At HQ assigned: 438, 595 AT Rgt
- A63.34: 41 Gds Div (HQ (Fat-0), 44 Gds SU Bn, 1/122, 2/122, 1/124, 2/124, 1/126, 2/126 Gds Inf Bn, Combat Trains)
4 Jan 45
- At Any HQ: 7 Mech Corps (78 Gds IS Rgt [1], 16 Mech Bde, 1289 SU Rgt) – treat as independent units. See Special Rule.
- A63.34: 62 Gds Div (HQ (Fat-0), 69 Gds SU Bn, 1/182, 2/182, 1/184, 2/184, 1/186, 2/186 Gds Inf Bn, Combat Trains), 1312 AT Rgt (Assigned 62 Gds)
- C63.09: 1 Gds Mech Corps (HQ (Fat-0), 11 Gds Motorcycle Bn, 9 Gds Tk Bde, 1, 2, 3 Gds Mech Bde, 382 Gds SU Rgt, 1453, 1821 SU Rgt, Combat Trains)
5 Jan 45
- At HQ assigned: 1172/9 AT Rgt, 24 AT Bde
Victory Conditions:
Determine Victory using 4.0.
Axis Major Victory: If the Axis player achieves the Sudden Death Victory (see 4.1), the game ends instantly.
Axis Minor Victory: The Axis player controls 4 of the VP hexes (listed in 4.2) by the end of the game.
Soviet Victory: The Soviet player prevents Axis control of 4 VP hexes and avoids a Sudden Death by the end of the game.
5.3 Operation Konrad I (Medium)
This scenario just focuses on Operation Konrad I.
Playing Area: Maps A and C. All Urban hexes of Budapest are not playable (see Special Rules). First Turn: 2 Jan 45 Last Turn: 6 Jan 45 Game Length: 5 Turns First Player: Axis First Turn Weather: Good
Special Rules:
- The Axis player cannot initiate Surge Offensive: Konrad III (2.2).
- The Soviet player cannot initiate Surge Offensive: 6 Gds Tank Army (3.4).
- Treat the Soviet 7 Mech Corps units as independent in this scenario. This is to show the historical assignments of these units even if it is out of the players' control to do so.
- The Budapest Urban hexes are not playable. Axis units can move into an Urban hex (as if exiting off the map edge) for Sudden Death victory purposes. Soviet units cannot move into or have MSR traced through these hexes.
Activations: Use each player's Activations Chart.
Air Points: Roll for and use the entire result normally.
Replacement Points: Roll for and use the entire result normally.
Supply Sources/Entry Areas: Use the ones in the playing area.
Axis Set Up & Reinforcements: Use those in 5.2.
Formation Activation Markers in Play: 3 SS Pz, 5 SS Pz, Pape KG, 4 Kav Bde, 96 Inf Div, Bieber Div (-)
Soviet Set Up & Reinforcements: Use those in 5.2.
Formation Activation Markers in Play: 2 Gds Mech Corps, 18 Tk Corps, 5 Gds Cav Corps, 7 Gds Abn Div, 4 Gds Div, 34 Gds Div, 40 Gds Div, 80 Gds Div, 52 Rfl Div, 93 Rfl Div, 223 Rfl Div, 10 Gds Corps, 23 Rfl Corps
Victory Conditions:
Determine Victory using the below modification of 4.0.
Axis Major Victory: The Axis player achieves the Sudden Death Condition if 4 Axis units from the same formation exit into an Urban hex. At the instant the last Axis unit exits into an Urban hex, the game ends.
Axis Minor Victory: The Axis player controls 4 of the VP hexes (listed in 4.2) by the end of the game.
Soviet Victory: The Soviet player prevents both Axis control of 4 VP hexes and avoids a Sudden Death until the end of the game.
5.4 Operation Konrad II (Small)
This scenario starts at the end of tail end of Operation Konrad I launching right into Operation Konrad II.
Playing Area: Map C. All Urban hexes of Budapest are not playable (see Special Rules). First Turn: 7 Jan 45 Last Turn: 11 Jan 45 Game Length: 5 Turns First Player: Axis First Turn Weather: Poor
Special Rules:
- The Axis player cannot initiate Surge Offensive: Konrad III (2.2).
- Surge Offensive: 6 Gds Tank Army (3.4) is off-map. No surge allotment is applied.
- Three 1 Gds Mech Corps units are assigned to 18 Tk Corps and one 7 Mech Corps unit is assigned to 62 Gds Div in this scenario. These units function as part of that formation and cannot be reassigned (unlike independent units). This is to show the historical composition of formations even if it is out of the players' control to do so in the rules.
- Do not consider the 96 Inf Div and 711 Inf Div as mixed at the start of this scenario.
- The Budapest Urban hexes are not playable. Axis units can move into an Urban hex (as if exiting off the map edge) for Sudden Death victory purposes. Soviet units cannot move into or have MSR traced through these hexes.
Activations: Use the following per turn:
Axis Allotments: 2 Primary, 2 Secondary Soviet Allotments: 1 Primary, 2 Secondary
Air Points: Divide the Table result by two (round fractions down).
Replacement Points: Divide the Table result by two (round fractions down).
Supply Sources/Entry Areas: Axis: C20.00, C30.00, and C42.00 Soviet: Use the ones in the playing area.
Axis Set Up:
711 Inf Div:
- C18.08: 711 Inf HQ (Fat-0), 711 PJ Hetz Bn (Support), 711 Pio Bn
- C17.09: 1711 Fus Bicycle Bn
- C19.10: I/731 Inf Bn [4], II/731 Inf Bn
- C18.09: III/731 Inf Bn
- C20.08: I/744 Inf Bn
- C19.09: II/744 Inf Bn
- C19.08: III/744 Inf Bn
- C20.05: 711 Inf Combat Trains
96 Inf Div:
- C22.05: 96 Inf HQ (Fat-1), 196 PJ Mdr Bn (Support), 196 Pio Bn [3]
- C22.09: 96 Fus Bicycle Bn [5]
- C22.07: I/283 Inf Bn [5]
- C23.07: II/283 Inf Bn [5]
- C15.09: I/284 Inf Bn [3]
- C14.08: II/284 Inf Bn [3]
- C26.06: I/287 Inf Bn [3]
- C27.07: II/287 Inf Bn [3]
- C19.06: Philipp Pz KG (Assigned 96 Inf)
- C20.01: 96 Inf Combat Trains
3 SS Pz Div:
- C34.02: 3 SS HQ (Fat-0), 3 SS StG Bn [3] (Support)
- C30.07: 3 SS Pz Recon Bn [5]
- C40.07: III/6 SS Inf Bn [5]
- C40.06: I/3 SS Pz Bn [1], II/3 SS Pz Bn [2]
- C41.07: 9/3 SS TGR Co [1], II/6 SS Inf Bn [5]
- C32.07: I/5 SS Inf Bn
- C35.06: II/5 SS Inf Bn [5]
- C29.07: III/5 SS Inf Bn [4]
- C38.06: I/6 SS Inf Bn [5]
- C40.05: 3 SS Pz Pio Bn
- C30.00: 3 SS Combat Trains
5 SS Pz Div:
- C42.00: 5 SS HQ (Fat-0, 2 Arty Points), 5 SS JgPz Bn [2] (Support), 5 SS Combat Trains
- C44.00: 5 SS Pz Recon Bn [5]
- C44.03: I/5 SS Pz Bn [1], III/9 SS PG Bn
- C43.04: II/5 SS Pz Bn [1], I/23 SS Inf Bn [5]
- C43.02: I/9 SS Inf Bn [5]
- C43.01: II/9 SS Inf Bn
- C36.01: I/10 SS Inf Bn, II/10 SS Inf Bn [5]
- C35.01: III/10 SS Inf Bn
- C43.03: I/24 SS Inf Bn
- C42.03: 5 SS Pz Pio Bn
Formation Activation Markers in Play: 3 SS Pz, 5 SS Pz, 96 Inf Div, 711 Inf Div
Axis Reinforcements:
Do not use the Axis Order of Arrival. Use the below instead:
10 Jan 45
- At 5 SS HQ: 5 SS Pz Div (I/1 Stj, II/1 Stj Assault Bn)
Soviet Set Up:
10 Gds Corps:
- C21.13: 10 Gds HQ (Fat-1, Coordinated, 2 Arty Points), AT AT Bn (+) (Support), 12 AT Bde [4] (Assigned 10 Gds, Support)
- C27.08: I/86 Inf Rgt [5]
- C26.07: II/86 Inf Rgt [5]
- C25.08: III/86 Inf Rgt [5]
- C23.12: I/99 Inf Rgt [4]
- C13.12: II/99 Inf Rgt [4], 2 Eng Bde [5]
- C19.11: III/99 Inf Rgt [4]
- C25.18: 10 Gds Combat Trains
2 Gds Mech Corps:
- C29.12: 2 Mech HQ (Fat-2, Coordinated, 2 Arty Points)
- C24.08: 99 Motorcycle Bn
- C22.10: 37 Gds Tk Bde
- C29.08: 4 Gds Mech Bde
- C34.08: 5 Gds Mech Bde
- C31.09: 6 Gds Mech Bde [5], 251 Gds SU Rgt [1]
- C23.08: 30 Gds IS Tk Rgt
- C32.15: 2 Mech Combat Trains
23 Rfl Corps:
- C41.11: 23 Rfl HQ (Fat-1), AT AT Bn (+) (Support), 24 AT Bde (Assigned 23 Rfl, Support)
- C38.07: I/49 Gds Inf Rgt [5]
- C36.07: II/49 Gds Inf Rgt [5]
- C37.08: III/49 Gds Inf Rgt [5]
- C47.15: I/19 Inf Rgt
- C44.14: II/19 Inf Rgt
- C40.14: III/19 Inf Rgt
- C48.15: 23 Rfl Combat Trains
18 Tk Corps:
- C43.09: 18 Tk HQ (Fat-1, 4 Arty Points), 78 Motorcycle Bn [2], 595 AT Rgt (Assigned 18 Tk, Support)
- C41.08: 110 Tk Bde [2], 363 Gds ISU Rgt [1]
- C41.06: 170 Tk Bde [2], 1438 SU Rgt [1]
- C42.07: 181 Tk Bde [4]
- C42.06: 32 Inf Bde [4], 1000 AT Rgt [1]
- C40.08: 382 Gds SU Rgt (1 Mech, Assigned 18 Tk - See Special Rule), 1821 SU Rgt (1 Mech, Assigned 18 Tk - See Special Rule)
- C41.09: 1453 SU Rgt (1 Mech, Assigned 18 Tk - See Special Rule)
- C47.11: 18 Tk Combat Trains
62 Gds Div:
- C47.03: 62 Gds HQ (Fat-0, 2 Arty Points), 69 Gds SU Bn (Support), 1312 AT Rgt (Assigned 62 Gds, Support)
- C44.04: 1/182 Gds Inf Bn
- C45.04: 2/182 Gds Inf Bn
- C44.02: 1/184 Gds Inf Bn
- C45.03: 2/184 Gds Inf Bn
- C42.04: 1/186 Gds Inf Bn
- C43.05: 2/186 Gds Inf Bn
- C44.01: 16 Mech Bde (7 Mech, Assigned 62 Gds - See Special Rule)
- C46.07: 62 Gds Combat Trains
Formation Activation Markers in Play: 2 Gds Mech Corps, 18 Tk Corps, 62 Gds Div, 10 Gds Corps, 23 Rfl Corps
Soviet Reinforcements: None
Victory Conditions:
Determine Victory using the below modifications of 4.0. The Axis player controls the Esztergom Road Junction (C16.08) at the start of the scenario.
Axis Major Victory: The Axis player achieves the Sudden Death Condition if four (4) Axis units from the same Formation exit into Budapest Urban hexes. At the instant the last Axis unit exits into such a hex, the game ends.
Axis Minor Victory: The Axis player controls the following locations by the end of the game: Bicske (C47.03), Zsámbék (C40.08), and C16.08.
Soviet Victory: The Soviet player both prevents an Axis Minor Victory and avoids a Sudden Death until the game ends.
5.5 Battle for Zámoly (Small)
The fighting around Zámoly was an extension of Operation Konrad II to attack a weakened sector. The III Panzer Corps was to drive straight to cut off Soviet forces around Vértes Mountains sent to confront the IV SS Panzer Corps.
Playing Area: Map B north of B10.xx inclusive First Turn: 7 Jan 45 Last Turn: 11 Jan 45 Game Length: 5 Turns First Player: Axis First Turn Weather: Poor
Special Rules:
- The Axis player cannot initiate Surge Offensive: Konrad III (2.2).
- Surge Offensive: 6 Gds Tank Army (3.4) is off-map. No surge allotment is applied.
- Rank Pz KG (1 Pz) is assigned to 23 Pz in this scenario. This unit functions as part of 23 Pz and cannot be reassigned (unlike independent units). This is to show the historical composition of formations even if it is out of the players' control to do so in the rules.
- Do not consider 5 Gds Abn Div and 7 Mech Corps as mixed at the start of this scenario.
Activations: Use the following per turn:
Axis Allotments: 2 Primary, 1 Secondary Soviet Allotments: 1 Primary, 2 Secondary
Air Points: Divide the Table result by two (round fractions down).
Replacement Points: Divide the Table result by two (round fractions down).
Supply Sources/Entry Areas: Axis: Entry Area E as well as B1.13 and B10.12 Soviet: B1.24, B1.34, B10.21, B10.24, B10.30
Axis Set Up:
3 Pz Div: (not all units are used in scenario)
- B2.14: 3 Pz HQ (Fat-0, 3 Arty Points), 543 JgPz Bn [1] (Support)
- B2.15: 3 Pz Recon Bn [5]
- B4.16: I/6 Pz Bn [2], I/3 PG Bn [4]
- B3.16: II/6 Pz Bn [2], II/3 Inf Bn [4]
- B1.13: 3 Pz Combat Trains
4 Kav Bde:
- B5.16: 4 Kav HQ (Fat-0, 4 Arty Points), 1335 Hetz Bn (Assigned 4 Kav, Support)
- B6.18: 4 s Pz Recon Bn, 70 StG Bn
- B5.18: I/5 Cav Bn, II/5 Cav Bn
- B5.19: I/41 Cav Bn, II/41 Cav Bn [4]
- B3.09: 4 Kav Combat Trains
23 Pz Div: (not all units are used in scenario)
- B7.19: 23 Pz HQ (Fat-0, 3 Arty Points), I/126 Inf Bn [5], 219 Brm Bn (Assigned 23 Pz, Support), Rank Pz KG (from 1 Pz, Assigned 23 Pz – see Special Rule)
- B6.19: Rebntsh Pz KG, 503 F TGR Bn [1] (Assigned 23 Pz)
- B7.16: Schulz Pz KG
- B8.18: II/126 Inf Bn [5]
- B9.19: I/128 Inf Bn [4], 128 JgPz Bn [2]
- B10.19: II/128 Inf Bn
- B10.12: 23 Pz Combat Trains
Formation Activation Markers in Play: 3 Pz Div, 23 Pz Div, 4 Kav Bde
Axis Reinforcements: None
Soviet Set Up:
5 Gds Abn Div:
- B3.24: 5 Abn HQ (Fat-0, 2 Arty Points, PD), 13 Gds SU Bn (Support), 2/1 Gds Abn Inf Bn, 1963/42 AT Rgt (Assigned 5 Abn, Support)
- B2.23: 1/1 Gds Abn Inf Bn
- B3.18: 1/11 Gds Abn Inf Bn
- B4.20: 2/11 Gds Abn Inf Bn
- B6.21: 1/16 Gds Abn Inf Bn
- B9.21: 2/16 Gds Abn Inf Bn, 251 AT Bn (Assigned 5 Abn)
- B7.22: 3/16 Gds Abn Inf Bn
- B1.20: Tng Gds Abn Inf Bn
- B3.22: 366 ISU Rgt [1] (Assigned 5 Abn)
- B1.24: 5 Abn Combat Trains
7 Mech Corps (not all units are used in scenario):
- B2.23: 7 Mech HQ (Fat-0, 1 Arty Point), 41 Gds Tk Bde
- B5.24: 63 Mech Bde
- B9.25: 64 Mech Bde, 109 AT Rgt
- B5.25: 1440 SU Rgt [1]
- B10.24: 7 Mech Combat Trains
Formation Activation Markers in Play: 7 Mech Corps, 5 Gds Abn Div
Soviet Reinforcements:
Do not use the Soviet Order of Arrival. Use the below instead:
7 Jan 45
- Add: 7 Arty Point
- At HQ assigned: 438 AT Rgt, 762/9 AT Rgt, 1172/9 AT Rgt
- B1.22, B1.24, or B1.34: 5 Gds Cav Corps (HQ (Fat-0), 214/63, 220/63, 223/63 Cav Rgt, Combat Trains), 93 Rfl Div (HQ (Fat-1), 144 AT Bn, 1/51 Inf Bn, 2/51 Inf Bn, 1/129 Inf Bn, 2/129 Inf Bn, 1/266 Inf Bn, 2/266 Inf Bn, Combat Trains)
8 Jan 45
- B1.22, B1.24, or B1.34: 1 Gds Mech Corps (HQ (Fat-0), 11 Gds Motorcycle Bn, 9 Gds Tk Bde, 1 Gds Mech Bde, Combat Trains)
9 Jan 45
- At 1 Gds Mech Corps HQ: 1 Gds Mech Corps (1821 SU Rgt)
10 Jan 45
- At 1 Gds Mech Corps HQ: 1 Gds Mech Corps (382 Gds SU Rgt, 2 Gds Mech Bde)
11 Jan 45
- At 5 Gds Cav Corps HQ: 5 Gds Cav Corps (54/12 [1], 60/63 [1], 71/11 [1] Tk Rgt, 1896 SU Rgt [1])
Victory Conditions:
Determine Victory using a modification of VP Hex Control in 4.2.
Axis Victory: The Axis player controls the VP hex of Zamoly (B3.24) at the end of play.
Soviet Victory: The Soviet player avoids an Axis Victory.
5.6 Operation Konrad III (Big)
Operation Konrad III was originally planned as Operation Paula when weighing the northern or southern approach to relieve Budapest. With Operations Konrad I and II failing, the offensive swung south after a lull in the fighting. The Germans pulled off a secret redeployment of the Totenkopf and Wiking SS Panzer Divisions (akin to Soviet Maskirovka) to the southern sector by Lake Balaton, where the terrain was much more open. After initial success, the attack bogged down on the turn north towards Budapest. For the remaining garrison in Budapest, time was running out, with the retreating Axis blowing the last bridges in the city over the Danube on 18 Jan 1945.
Playing Area: Maps B and D First Turn: 18 Jan 45 Last Turn: 27 Jan 45 Game Length: 10 Turns First Player: Axis First Turn Weather: Normal
Special Rules:
- Surge Offensive: Konrad III (2.2) has been used and is beginning on this scenario's first turn. Therefore "Buddies with everyone" (1.11) is in effect for turn one. 3 SS Pz Div and 5 SS Pz Div have already been placed. The surge lasts the entire scenario.
- Surge Offensive: 6 Gds Tank Army (3.4) has finished and has no effects.
Activations: Use each player's Activations Chart plus the Konrad III Allotments on each player's Surge Chart. Note that there are "excess" Allotments on two turns. This is OK.
Air Points: Roll for and use the entire result normally.
Replacement Points: Roll for and use the entire result normally.
Bridge Blown/OK Markers: All available.
Supply Sources/Entry Areas: Axis: Those in the play area and B1.13. Soviet: Those in the play area and all roads (including tracks and RR) along 1.xx from B1.28 and eastwards.
Axis Set Up:
2 Hun Armored Div (-):
- B2.18: 2 Arm HQ (Fat-1, 1 Arty Point), 2 Hun Arm Pio Bn
- B1.22: 2 Hun Arm Cav Bn
- B1.20: I/3 Hun Arm Bn [1]
- B3.22: II/3 Hun Arm Bn [1]
- B1.24: 4/3 Hun Inf Bn
- B2.24: 5/3 Hun Inf Bn [3]
- B3.24: 6/3 Hun Inf Bn [3]
- B3.23: 52 Hun Flak Bn
- B2.14: 2 Arm Combat Trains
4 Kav Bde:
- B6.21: 4 Kav HQ (Fat-1, 2 Arty Points), 70 StG Bn [2], I/28 '88' Bn (Assigned 4 Kav, Support)
- B6.24: 4 s Pz Recon Bn
- B4.24: I/5 Cav Bn [4]
- B5.24: II/5 Cav Bn [4]
- B7.24: I/41 Cav Bn [4]
- B8.23: II/41 Cav Bn [4]
- B6.17: 4 Kav Combat Trains
23 Pz Div:
- B8.17: 23 Pz HQ (Fat-0, 3 Arty Points), 128 JgPz Bn [2] (Support)
- B14.17: Kujcnski Pz KG
- B13.17: Schulz Pz KG
- B10.20: I/126 Inf Bn [4]
- B11.20: II/126 Inf Bn [4]
- B12.18: I/128 Inf Bn [4]
- B13.18: II/128 Inf Bn [4]
- B10.22: 51 Pz Pio Bn [3]
- B15.15: 85 LW Inf Bn
- B14.16: 503 F TGR Bn [1] (Assigned 23 Pz)
- B11.19: 351 Flm Pz Co (Assigned 23 Pz), Taifun Assault Pio Co (Assigned 23 Pz)
- B4.14: 23 Pz Combat Trains
1 Pz Div:
- B20.04: 1 Pz HQ (Fat-0, 1 Arty Point), 73 Pz Erz Bn [2], 1335 Hetz Bn [1] (Assigned 1 Pz, Support), 100 LW '88' Bn (Assigned 1 Pz, Support)
- B23.08: Elias Pz KG
- B21.09: Rank Pz KG
- B20.10: I/24 Pz Bn, 37 Pz Pio Bn [2]
- B20.09: 37 Mdr Bn [2]
- B17.12: I/1 Inf Bn [3]
- B18.11: II/1 Inf Bn [3]
- B22.08: I/113 PG Bn [3]
- B19.11: II/113 Inf Bn [3]
- B25.08: Holczer Hun Inf Bn
- B16.13: I/Ney SS Inf Bn (Assigned 1 Pz)
- B16.14: II/Ney SS Inf Bn (Assigned 1 Pz)
- B23.01: 1 Pz Combat Trains
3 SS Pz Div:
- B25.04: 3 SS HQ (Fresh, 4 Arty Points), 3 SS StG Bn [2] (Support), III/5 SS Inf Bn [4]
- B26.06: 3 SS Pz Recon Bn [4]
- B28.08: 9/3 TGR Co [1], I/3 SS Pz Bn [1]
- B29.09: II/3 SS Pz Bn [2], 509 TGR Bn (Assigned 3 SS)
- B26.07: I/5 SS Inf Bn
- B27.08: II/5 SS Inf Bn [4], 3 Pz Pio Bn [3]
- B30.09: I/6 SS Inf Bn [5]
- B30.08: II/6 SS Inf Bn [4]
- B29.08: III/6 SS Inf Bn [4]
- B26.00: 3 SS Combat Trains
5 SS Pz Div:
- B31.08: 5 SS HQ (Fresh, 4 Arty Points), 5 SS JgPz Bn [2] (Support), 5 SS Pz Recon Bn
- B32.09: I/5 SS Pz Bn [1], II/5 SS Pz Bn [2]
- B31.09: I/9 SS Inf Bn [3], 5 Pz Pio Bn [2]
- B32.10: II/9 SS Inf Bn [5], III/9 SS PG Bn
- B33.10: I/10 SS Inf Bn [3]
- B33.11: II/10 SS Inf Bn [3], III/10 SS Inf Bn [5]
- B31.10: I/23 SS Inf Bn [4], 303 StG Bde (Assigned 5 SS)
- B30.04: I/24 SS Inf Bn [3]
- B31.05: I/1 Stj Assault Bn [4]
- B32.05: II/1 Stj Assault Bn [4]
- B27.02: 5 SS Combat Trains
3 Pz Div:
- B33.07: 3 Pz HQ (Fat-0, 2 Arty Points), 219 Brm Bn (Assigned 3 Pz, Support)
- B35.11: I/6 Pz Bn [2], 39 Pz Pio Bn [3]
- B34.11: II/6 Pz Bn [3], I/3 PG Bn [4]
- B33.08: 543 JgPz Bn [2]
- B34.10: II/3 Inf Bn [3]
- B34.08: I/394 Inf Bn [3]
- B34.09: II/394 Inf Bn [3]
- B31.03: 3 Pz Combat Trains
Pape Pz KG:
- B35.10: Pape HQ (Fat-0, 1 Arty Point), 1 Pz Recon Bn, 3 Pz Recon Bn
- B35.09: 23 Pz Recon Bn
- B33.06: Pape Combat Trains
25 Hun Inf Div (-):
- B31.01: 25 Inf HQ (Fat-0), III/1 Hun Inf Bn
- B32.00: I/25 Hun Inf Bn, II/25 Hun Inf Bn
- B33.01: III/25 Hun Inf Bn, 25 Bicycle Bn
- B33.02: III/Ney SS Inf Bn [4] (Assigned 25 Inf)
- B34.00: 25 Inf Combat Trains
Formation Activation Markers in Play: 3 SS Pz, 5 SS Pz, 1 Pz Div, 3 Pz Div, 23 Pz Div, Pape KG, 4 Kav Bde, 2 Hun Arm Div (-), 25 Hun Inf Div (-)
Axis Reinforcements:
Do not use the Axis Order of Arrival. Use the below instead:
19 Jan 45
- F: 25 Hun Inf Div (-) (I/26, II/26, III/26 Hun Inf Bn)
25 Jan 45
- E: 356 Inf Div (HQ (Fresh), I/871, II/871 Inf Bn, Combat Trains)
26 Jan 45
- E: 356 Inf Div (356 PJ Bn, I/870, II/870 Inf Bn, 356 Pio Bn)
Soviet Set Up:
80 Gds Div:
- B2.27: 80 Gds HQ (Fat-1, PD, 2 Arty Points), 1/232 Gds Inf Bn [2], 762/9 AT Rgt (Assigned 80 Gds, Support)
- B1.25: 1/217 Gds Inf Bn [2]
- B2.25: 2/217 Gds Inf Bn [2], 85 Gds SU Bn [1]
- B2.26: 1/230 Gds Inf Bn [2]
- B3.27: 2/230 Gds Inf Bn [2]
- B3.28: 2/232 Gds Inf Bn [2]
- B1.28: Tng Gds Inf Bn [1], 80 Gds Combat Trains
5 Gds Abn Div:
- B6.28: 5 Abn HQ (Fat-1, PD, 2 Arty Points), Tng Gds Abn Inf Bn [1], 366 ISU Rgt [1] (Assigned 5 Abn), 1172/9 AT Rgt (Assigned 5 Abn)
- B5.27: 1/1 Gds Abn Inf Bn [2]
- B6.27: 2/1 Gds Abn Inf Bn [2]
- B4.26: 1/11 Gds Abn Inf Bn [2]
- B4.27: 2/11 Gds Abn Inf Bn [2]
- B5.26: 1/16 Gds Abn Inf Bn [2], 13 Gds SU Bn
- B6.25: 2/16 Gds Abn Inf Bn [2]
- B6.26: 3/16 Gds Abn Inf Bn [2]
- B9.31: 5 Abn Combat Trains, 41 Gds Combat Trains
41 Gds Div:
- B8.27: 41 Gds HQ (Fat-1, PD, 2 Arty Points), 2/126 Gds Inf Bn, 44 Gds SU Bn [1] (Support)
- B7.25: 1/122 Gds Inf Bn [2]
- B8.24: 2/122 Gds Inf Bn [2]
- B9.24: 1/124 Gds Inf Bn [2]
- B10.23: 2/124 Gds Inf Bn [2]
- B8.26: 1/126 Gds Inf Bn [2]
- See above: 41 Gds Combat Trains (see 5 Gds Abn Div set up)
93 Rfl Div:
- B11.30: 93 Rfl HQ (Fat-0, 3 Arty Points), 144 AT Bn (Support), 1/51 Inf Bn [2], 2/51 Inf Bn [2]
- B10.30: 1/129 Inf Bn [2], 2/129 Inf Bn [2]
- B12.29: 1/266 Inf Bn [2], 2/266 Inf Bn [2]
- B6.31: 93 Rfl Combat Trains
69 Gds Div:
- B13.25: 69 Gds HQ (Fat-1), 75 Gds SU Bn (Support), 2/206 Gds Inf Bn
- B11.25: 1/204 Gds Inf Bn [3]
- B12.24: 2/204 Gds Inf Bn
- B13.24: 1/206 Gds Inf Bn [3]
- B14.24: 1/208 Gds Inf Bn [3], 251 AT Bn (Assigned 69 Gds)
- B14.25: 2/208 Gds Inf Bn
- B14.26: 69 Gds Combat Trains
84 Rfl Div:
- B16.23: 84 Rfl HQ (Fat-0, PD, 2 Arty Points), 122 SU Bn (Support), 338/9 AT Rgt (Assigned 84 Rfl, Support)
- B14.21: 1/41 Inf Bn
- B14.23: 2/41 Inf Bn
- B11.23: 1/201 Inf Bn
- B12.21: 2/201 Inf Bn
- B14.19: 1/382 Inf Bn
- B16.18: 2/382 Inf Bn
- B15.28: 84 Rfl Combat Trains
252 Rfl Div:
- B22.14: 252 Rfl HQ (Fat-0, PD, 2 Arty Points), 1202 SU Rgt (Assigned 252 Rfl, Support), 1312 AT Rgt (Assigned 252 Rfl, Support)
- B22.11: 310 SU Bn
- B18.16: 1/924 Inf Bn
- B20.13: 2/924 Inf Bn
- B25.11: 1/928 Inf Bn
- B26.11: 2/928 Inf Bn
- B21.11: 1/932 Inf Bn
- B23.11: 2/932 Inf Bn
- B20.20: 252 Rfl Combat Trains
1 Gds UR Bde:
- B31.15: 1 UR HQ (Fat-0, PD, 1 Arty Point), AT Gds AT Bn, 438 AT Rgt (Assigned 1 UR, Support)
- B34.13: 2 MG Bn
- B36.11: 8 MG Bn
- B32.14: 9 MG Bn
- B30.13: 10 MG Bn
- B28.12: 11 MG Bn
- B29.18: 1 UR Combat Trains
7 Mech Corps:
- B23.23: 7 Mech HQ (Fat-0), 64 Mech Bde [4]
- B20.23: 94 Motorcycle Bn
- B21.22: 41 Gds Tk Bde [2]
- B21.18: 16 Mech Bde [4]
- B28.16: 63 Mech Bde [4]
- B25.24: 78 Gds IS Rgt [1]
- B24.21: 1289 SU Rgt [1]
- B23.20: 1440 SU Rgt [1]
- B27.25: 109 AT Rgt [1]
- B18.24: 7 Mech Combat Trains
133 Rfl Corps:
- D26.08: 133 Rfl Corps HQ (Fat-0), AT AT Bn (+) (Support), 10 AT Bde (Assigned 133 Rfl, Support)
- D29.13: I/21 Inf Rgt
- D30.13: II/21 Inf Rgt
- D30.14: III/21 Inf Rgt
- D21.11: I/104 Inf Rgt
- D21.12: II/104 Inf Rgt
- D21.13: III/104 Inf Rgt
- D24.01: I/122 Inf Rgt
- D24.02: II/122 Inf Rgt
- D24.03: III/122 Inf Rgt
- D22.15: 133 Rfl Combat Trains
Formation Activation Markers in Play: 7 Mech Corps, 5 Gds Abn Div, 41 Gds Div, 69 Gds Div, 80 Gds Div, 1 Gds UR Bde, 84 Rfl Div, 93 Rfl Div, 252 Rfl Div, 133 Rfl Corps
Soviet Reinforcements:
Do not use the Soviet Order of Arrival. Use the following:
18 Jan 45
- Add: 2 Arty Points
- D1.15: 18 Tk Corps (HQ (Fat-0), 78 Motorcycle Bn [2], 110, 170 [5], 181 Tk Bde [2], 32 Inf Bde [6], 363 Gds ISU Rgt, 1438 SU Rgt [1], 1000 AT Rgt [1], Combat Trains)
19 Jan 45
- B1.34 or D1.09: 1 Gds Mech Corps (HQ (Fat-0), 11 Gds Motorcycle Bn [2], 9 Gds Tk Bde [5], 1 [8], 2 [8], 3 [8] Gds Mech Bde, 382 Gds SU Rgt [1], 1453 [1], 1821 SU Rgt [1], Combat Trains)
- D1.15 or D1.19: 5 Gds Cav Corps (HQ (Fat-0), 5 AT Bn, 150 AT Rgt, 1896 SU Rgt [1], 71/11 [1], 54/12 [1], 60/63 [1] Tk Rgt, 37/11, 39/11, 41/11, 43/12, 45/12, 47/12 Gds Cav Rgt, 214/63, 220/63, 223/63 Cav Rgt, Combat Trains)
20 Jan 45
- At HQ assigned: 24 AT Bde
- D1.15 or D1.19: 113 Rfl Div (HQ (Fresh), 239 AT Bn, 1/1288, 2/1288, 1/1290, 2/1290, 1/1292, 2/1292 Inf Bn, Combat Trains)
- G or H: Viktorov Mech Grp (HQ (Fat-0), 53 Motorcycle Rgt, 3 Gds Motorcycle Rgt, 32 Gds Mech Bde, 249 Tk Rgt [1], 252 Amphibious Bn, 188 Res Inf Rgt, 65 Eng Bde, Combat Trains), 374 AT Rgt (Assigned Viktorov)
- D1.29: 30 Rfl Corps (HQ (Fat-0), AT AT Bn (+), 72 Gds SU Bn, I/36, II/36, III/36, I/68, II/68, III/68 Gds Inf Rgt, I/155, II/155, III/155 Inf Rgt, Combat Trains)
21 Jan 45
- Add: 5 Arty Points
- At HQ assigned: 1891 SU Rgt, 1962/42 AT Rgt [1], 12 AT Bde [3], 49 AT Bde
- At 30 Rfl HQ: 30 Rfl Corps (I/74, II/74, III/74 Inf Rgt)
- H: 135 Rfl Corps (135 Rfl Corps HQ (Fat-1), AT AT Bn (+), I/233, II/233, III/233, I/236, II/236, III/236 Inf Rgt, 135 Rfl Corps Combat Trains)
22 Jan 45
- Add: 1 Arty Point
23 Jan 45
- Add: 2 Arty Points
- At HQ assigned: 437 AT Rgt
- D1.15 or D1.19: 104 Rfl Corps (HQ (Fat-0), AT AT Bn (+), I/3, II/3, III/3 Gds Abn Inf Rgt, I/66 [5], II/66 [5], III/66 [5] Gds Inf Rgt, I/151 [4], II/151 [4], III/151 [4] Inf Rgt, Combat Trains)
25 Jan 45
- D1.15 or D1.19: 23 Tk Corps (HQ (Fat-0), 82 Motorcycle Bn, 3, 39, 135 Tk Bde, 56 Inf Bde, 1443 ISU Rgt, 1501 AT Rgt, Combat Trains)
Victory Conditions:
Axis Victory: if at any moment the Axis player has exited the following off the northern map edge east of D1.14 (inclusive):
3 SS Pz Div and 5 SS Pz Div each with:
- At least 6 Combat units that start the Activation of Exit in Command Radius.
- A successful MSR at that moment.
The divisions can exit on different turns, but the victory does not occur until the needed units and conditions are met. Units exiting that do not fulfill the requirements above do not count.
Soviet Victory: The Soviets avoid the Axis conditions.
5.7 Battle for Komárom (Medium)
After the shock and stabilizing of defenses from Operation Konrad I, the Soviets launched an offensive north of the Danube to relieve pressure by attempting to take the critical bridges at Komárom. The Soviets used their depleted but effective 6th Gds Tank Army to spearhead the attack. The Germans countered with emergency forces including two Panzer Divisions, but were unable to push the Soviets back behind the Garam River.
Playing Area: Map A and Map C west of Cxx.15 inclusive north of the Danube, including the area between the Danube (which exits at A20.01) and the Vág-Duna Rivers in the vicinity of A19.03. First Turn: 6 Jan 45 Last Turn: 22 Jan 45 Game Length: 17 Turns First Player: Soviet First Turn Weather: Normal
Special Rules:
- The Axis player cannot initiate Surge Offensive: Konrad III (2.2).
- Surge Offensive: 6 Gds Tank Army (3.4) has begun and is beginning on the scenario's first turn. Therefore "Buddies with everyone" (1.11) applies on turn 1. All Entry Turn Reinforcements have already been placed on the map. The surge effect lasts until 16 Jan 45.
Activations: Do not use the regular Allotment Charts. Instead, use each player's Surge Chart for the 6 Gds Tank Army Surge, plus the following:
Axis Allotments: 0 Primary, 1 Secondary Soviet Allotments: 0 Primary, 1 Secondary
Air Points: Divide the Table result by two (round fractions down).
Replacement Points: Divide the Table result by two (round fractions down).
Supply Sources/Entry Areas: Axis: Those in the play area and A21.05. Soviet: Those in the play area and C12.15.
Axis Set Up:
Unassigned Independents:
- A20.05: Convlsct Hun Static Bn
- A20.06: 2/XVIII Alarm Bn
211 VG Div:
- A4.33: 211 VG HQ (Fat-0, PD), 211 Fus Bicycle Bn [5], 662 '88' Bn [1] (Assigned 211 VG, Support)
- C2.02: I/306 Inf Bn [5]
- C4.01: II/306 Inf Bn
- C6.02: I/317 Inf Bn
- C9.03: II/317 Inf Bn [4]
- C8.01: I/365 Inf Bn
- A8.33: II/365 Inf Bn
- A2.32: 211 Pio Bn [3]
- A1.31: 211 VG Combat Trains
S. Laszlo Hun Inf Div:
- C14.01: S. Laszlo HQ (Fat-1, PD), 20 Hun Hetz Bn [1], 721 PJ Bn (Assigned S. Laszlo, Support)
- C17.03: S. Laszlo Hun Bicycle Bn
- C15.04: 1 Para Hun Abn Bn
- C13.03: 2 Gren Hun Inf Bn
- A12.33: 3 AF Hun Inf Bn
- A16.33: Bernlk Hun Hetz Bn [1], 53 Hun Pio Bn
- C16.05: II/93 Inf Bn (Assigned S. Laszlo)
- C17.06: Sachsen MG Bn (Assigned S. Laszlo)
- A11.30: S. Laszlo Combat Trains
Formation Activation Markers in Play: 211 VG Div, S. Laszlo Hun Div
Axis Reinforcements:
Do not use the Axis Order of Arrival. Use the below instead:
6 Jan 45
- A: 8 Pz Div (HQ (Fat-0), 8 Pz Recon Bn, II/10 Pz Bn [1], 43 JgPz Bn [2], I/28, II/28, II/98 Inf Bn, 59 Pz Pio Bn, Combat Trains)
7 Jan 45
- At 8 Pz HQ: 8 Pz Div (I/10 [1] Pz Bn, I/98 PG Bn)
- At HQ assigned: 13 JgPz Bn [2]
9 Jan 45
- At 211 VG HQ: 286 StG Bde [1], 211 VG Div (6 Pz Recon Bn)
10 Jan 45
- B: 20 Pz Div (HQ (Fresh), 20 Pz Recon Bn, I/21 Pz Bn, 92 JgPz Bn, I/59 PG Bn, Combat Trains)
- Roll one die, arrive on a 4 or more. Otherwise does not.
11 Jan 45
- B: 153 FA Div (HQ (Fat-0), 153 Fus, I/716, II/716, I/717, II/717 Inf Bn, 885 LS Sec Bn, 7/XVIII, 16/XVII Alarm Bn, 153 Pio Bn, Combat Trains), 20 Pz Div (II/21 Pz Bn, II/59, I/112, II/112 Inf Bn, 92 Pz Pio Bn)
- If 20 Pz Div above did arrive on 10 Jan 45, roll one die, these 20 Pz Div units arrive on a 4 or more, otherwise does not. If 20 Pz Div above did not arrive on 10 Jan 45, these 20 Pz Div units likewise do not arrive.
15 Jan 45
- At HQ assigned: 14/XVII Alarm Bn
19 Jan 45
- At HQ assigned: 6/XVIII Alarm Bn
- At 211 VG HQ: 211 VG Div (211 PJ Hetz Bn)
20 Jan 45
- Remove: 20 Pz Div (all), if in play.
Soviet Set Up:
24 Gds Corps:
- C5.04: 24 Gds HQ (Fat-0), AT Gds AT Bn (+) (Support)
- C8.03: I/6 Gds Abn Inf Rgt
- C7.03: II/6 Gds Abn Inf Rgt, III/6 Gds Abn Inf Rgt
- C6.03: I/72 Gds Inf Rgt, II/72 Gds Inf Rgt
- C7.04: III/72 Gds Inf Rgt
- C2.03: I/81 Gds Inf Rgt, II/81 Gds Inf Rgt
- C1.03: III/81 Gds Inf Rgt
- C3.03: I/243 Inf Rgt
- C4.03: II/243 Inf Rgt
- C5.03: III/243 Inf Rgt
- C1.04: 24 Gds Combat Trains
25 Gds Corps:
- C12.07: 25 Gds HQ (Fat-0), AT AT Bn (+) (Support), 27 Gds Tk Bde [2] (Assigned 25 Gds), 34 AT Bde (Assigned 25 Gds, Support)
- C14.05: I/53 Inf Rgt, III/53 Inf Rgt
- C16.07: II/53 Inf Rgt
- C11.04: I/375 Inf Rgt
- C12.04: II/375 Inf Rgt, III/375 Inf Rgt
- C9.04: I/409 Inf Rgt, III/409 Inf Rgt
- C10.04: II/409 Inf Rgt
- C7.09: 25 Gds Combat Trains
9 Gds Mech Corps:
- C13.06: 9 Mech HQ (Fresh, 2 Arty Points), 30 Gds Mech Bde, 31 Gds Mech Bde
- C14.06: 14 Motorcycle Bn, 697 SU Rgt
- C13.05: 46 Gds Tank Bde, 18 Gds Mech Bde
- C11.07: 9 Mech Combat Trains
5 Gds Tk Corps:
- C14.07: 5 Tk HQ (Fresh, 3 Arty Points), 22 Tank Bde, 22 Eng Bde
- C13.08: 4 Motorcycle Rgt, 15 Motorcycle Bn
- C15.07: 21 Tank Bde, 391 AT Rgt
- C13.07: 6 Inf Bde, 1458 SU Rgt
- C12.10: 5 Tk Combat Trains
Formation Activation Markers in Play: 5 Gds Tk Corps, 9 Gds Mech Corps, 24 Gds Rfl Corps, 25 Gds Rfl Corps
Soviet Reinforcements:
Do not use the Soviet Order of Arrival. Use the below instead:
7 Jan 45
- See Surge Offensive: 6 Gds Tank Army (3.4): 4 Gds Mech Corps (HQ (Fresh), 36 Gds Tk Bde, 14 Gds Mech Bde, 292 Gds SU Rgt, Combat Trains), 3 Arty Points
11 Jan 45
- At HQ assigned: 2, 11 AT Bde
Victory Conditions:
Determine victory by a modification of VP Hex Control in 4.2 as both sides have VP hexes.
At the end of each turn, record the number of Soviet VP hexes the Soviet player controls. At the end of the game, use the greatest single turn total on or after 15 Jan 45 as the Soviet score.
At the game's end, record the number of Axis VP Hexes the Axis player controls. Each listed hex counts as one VP.
If the Soviet maximum is greater than the Axis end of game total, then the Soviets win. If the opposite is true, the Axis wins. If the numbers are identical, the game is a draw.
Axis Victory Point Hexes
- Komárom (A20.05 and A20.06)
- Entry B (A1.09 and A1.12)
Soviet Victory Point Hexes
- Köbölkút (A10.28)
- Bátorkeszi (A13.23)
- Marcelkeszi (A17.15)
- Dunamocs (A20.22)
5.8 Days of Battle: Opening Blows to Komárom (Small)
This scenario just covers the opening offensive to Komárom before the attack stalled, and the Germans launched their own counteroffensive to retake ground and push the Soviets back across the Garam River.
Playing Area: Map A and Map C west of Cxx.15 inclusive north of the Danube, including the area between the Danube (which exits at A20.00) and the Vág-Duna Rivers in the vicinity of A19.03. First Turn: 6 Jan 45 Last Turn: 9 Jan 45 Game Length: 4 Turns First Player: Soviet First Turn Weather: Normal
Special Rules:
- The Axis player cannot initiate Surge Offensive: Konrad III (2.2).
- Surge Offensive: 6 Gds Tank Army (3.4) has been used and is beginning on the scenario's first turn. Therefore "Buddies with everyone" (1.11) applies on turn 1. All Entry Turn Reinforcements have already been placed on the map. The surge effect lasts the entire scenario.
Activations: Do not use the regular Allotment Charts. Instead, use each player's Surge Chart for the 6 Gds Tank Army Surge, plus the following:
Axis Allotments: 0 Primary, 1 Secondary Soviet Allotments: 0 Primary, 1 Secondary
Air Points: Divide the Table result by two (round fractions down).
Replacement Points: Divide the Table result by two (round fractions down).
Supply Sources/Entry Areas: Axis: Those in the play area and A21.05. Soviet: Those in the play area and C12.15.
Axis Set Up & Reinforcements: Use those in 5.7.
Soviet Set Up & Reinforcements: Use those in 5.7.
Victory Conditions:
Soviet Victory: The Soviet player occupies Komárom (A20.05 and A20.06) at the end of the game.
Axis Victory: if the Axis player avoids Soviet Victory.
5.9 Operation Southwind (Small)
Unternehmen Südwind was launched to eliminate the Soviet pocket west of the Garam River after the failed offensive to take Komárom in January. The I SS Panzer Corps, pulled from the Ardennes Offensive in the West, replenished (albeit poorly at this stage of the war) in Germany and transferred East in secret. Along with other forces in hand, the operation was methodical and successful, but stubbornly defended by the Soviets.
Playing Area: Map A and Map C North of 22.xx inclusive and West of xx.15 inclusive First Turn: 17 Feb 45 Last Turn: 24 Feb 45 Game Length: 8 Turns First Player: Axis First Turn Weather: Poor
Special Rules:
- Neither Surge Offensive (2.2 and 3.4) can be used in this scenario.
- The Párizsi Canal (Stream) is flooded. Treat the length of the Stream as River for all TEC purposes.
- 96 Inf Div can use the Rubber Boats Rule (PLS Rule 2.1b) until the end of 19 Feb 45 turn.
- Do not consider 24 Gds Corps and 4 Gds Mech Corps as mixed at the start of this scenario.
Activations: Use the following per turn:
Axis Allotments: 4 Primary, 3 Secondary Soviet Allotments: 2 Primary, 2 Secondary
Air Points: Divide the Table result by two (round fractions down).
Replacement Points: Divide the Table result by two (round fractions down).
Supply Sources/Entry Areas: Axis: Those in the play area and C22.02. Soviet: Those in the play area and C12.15.
Axis Set Up:
211 VG Div:
- A1.31: 211 VG HQ (Fat-1), 211 PJ Hetz Bn (Support), 211 VG Combat Trains
- A2.31: 211 Fus Bicycle Bn [3]
- A2.30: I/306 Inf Bn [3]
- A1.32: I/317 Inf Bn [2]
- A1.33: I/365 Inf Bn [2]
- A1.34: 211 Pio Bn [2]
46 Inf Div:
- A1.28: 46 Inf HQ (Fat-0), 52 PJ Bn (Support), 88 Pio Bn, 13 JgPz Bn [1] (Assigned 46 Inf, Support), 46 Inf Combat Trains
- A2.27: I/42 Inf Bn, 208 Pz Bn [3] (Assigned 46 Inf)
- A2.28: II/42 Inf Bn
- A2.25: I/72 Inf Bn
- A2.26: II/72 Inf Bn
- A2.29: I/97 Inf Bn
- A1.26: M/FHH Inf Bn
- A1.27: II/FHH Inf Bn
- A1.29: II/93 Inf Bn (Assigned 46 Inf)
44 HuD Inf Div:
- A2.21: 44 HuD HQ (Fat-0), 80 Pio Bn [3]
- A3.24: 46 PJ Hetz Bn, 44 Aufk Bicycle Bn [5]
- A5.22: I/131 Inf Bn [3]
- A6.21: II/131 Inf Bn [5]
- A2.24: I/132 Inf Bn [4], II/132 Inf Bn [4]
- A3.23: I/HuD Inf Bn [5]
- A4.22: II/HuD Inf Bn [4], 503 F TGR Bn [2] (Assigned 44 HuD)
- A1.22: 44 HuD Combat Trains
Staubwr Inf KG:
- A13.20: Staubwr HQ (Fat-0), Sachsen MG Bn (Assigned Staubwr)
- A19.23: I/945 Inf Bn
- A16.21: II/945 Inf Bn
- A11.21: II/946 Inf Bn
- A17.15: Staubwr Combat Trains
96 Inf Div:
- C20.02: 96 Inf HQ (Fat-0), 239 StG Bde [3] (Assigned 96 Inf)
- C19.04: I/284 Inf Bn [4], II/284 Inf Bn [4]
- C19.03: II/287 Inf Bn [4]
- C22.02: 96 Inf Combat Trains
Formation Activation Markers in Play: 44 HuD Div, 46 Inf Div, 96 Inf Div, 211 VG Div, Staubwr KG
Axis Reinforcements:
17 Feb 45
- A1.22: 12 SS Pz Div (HQ (Fat-0), 12 SS Pz Recon Bn, 2,4/II and 7,8/II [4] SS Pz Bn (-), 560 JgPz Bn [2], 12 SS JgPz Bn [3], III/26 SS PG Bn, I/25, II/25, III/25, I/26, II/26 SS Inf Bn, 12 SS Pz Pio Bn, Combat Trains)
- A1.28: Peiper SS Pz KG (HQ (Fat-0), 1,2/I [3], 6,7/I [3] SS Pz Bn (-), 501 SS Pz Bn [2], III/2 SS PG Bn, Combat Trains)
18 Feb 45
- A1.28: Hansen SS PG KG (Hansen HQ (Fat-0), 1 SS Pz Recon Bn, 1 SS JgPz Bn, I/1, II/1, III/1, I/2, II/2 Inf Bn, 1 SS Pz Pio Bn, Combat Trains)
19 Feb 45
- 96 Inf Division's Rubber Boats Rule Ends
21 Feb 45
- Remove: 96 Inf Div (all)
Soviet Set Up:
24 Gds Corps:
- A8.31: 24 Gds HQ (Fat-0, PD, 1 Arty Point), 2 AT Bde (Assigned 24 Gds, Support)
- A5.28: AT Gds AT Bn (+)
- A6.24: I/6 Gds Abn Inf Rgt [5]
- A4.25: II/6 Gds Abn Inf Rgt [5]
- A4.26: III/6 Gds Abn Inf Rgt [5]
- A3.31: I/72 Gds Inf Rgt [5]
- A4.28: II/72 Gds Inf Rgt [5]
- A3.30: III/72 Gds Inf Rgt [5]
- A3.32: I/81 Gds Inf Rgt [5]
- A2.33: II/81 Gds Inf Rgt [5]
- A2.32: III/81 Gds Inf Rgt [5]
- A2.34: I/243 Inf Rgt [5]
- C1.02: II/243 Inf Rgt [5]
- C2.01: III/243 Inf Rgt [5]
- C9.02: 24 Gds Combat Trains
25 Gds Corps:
- A11.30: 25 Gds HQ (Fat-0, PD, 1 Arty Point), 11 AT Bde (Assigned 25 Gds, Support)
- A16.24: I/53 Inf Rgt
- A18.25: II/53 Inf Rgt
- A15.25: III/53 Inf Rgt
- A13.23: I/375 Inf Rgt
- A11.23: II/375 Inf Rgt
- A14.23: III/375 Inf Rgt
- A9.23: I/409 Inf Rgt
- A7.24: II/409 Inf Rgt, AT AT Bn (+)
- A8.25: III/409 Inf Rgt
- A17.25: 27 Gds Tk Bde [1] (Assigned 25 Gds)
- A14.33: 25 Gds Combat Trains
4 Gds Mech Corps:
- A9.31: 4 Mech Corps HQ (Fat-0, 1 Arty Point)
- A3.33: 36 Tk Bde [2]
- A4.27: 14 Mech Bde [4]
- A6.27: 292 SU Rgt
- A8.01: 4 Mech Combat Trains
93 Gds Div:
- C15.04: 93 Gds HQ (Fat-0, 1 Arty Point), 114 AT Rgt (Assigned 93 Gds, Support)
- A16.33: 101 AT Bn
- C12.08: 1/278 Inf Bn
- C17.06: 2/278 Inf Bn
- C15.07: 3/278 Inf Bn
- A17.33: 1/281 Inf Bn
- C17.03: 2/281 Inf Bn
- A14.34: 2/285 Inf Bn
- A13.34: 3/285 Inf Bn
- C12.07: 93 Gds Combat Trains
Formation Activation Markers in Play: 4 Gds Mech Corps, 93 Gds Div, 24 Gds Corps, 25 Gds Corps
Soviet Reinforcements: None
Victory Conditions:
Axis Victory: if there are no Soviet HQ's west of the Garam River at the end of the game.
Soviet Victory: Avoid Axis Victory.
5.10 Operation Spring Awakening (Big)
Unternehmen Frühlingserwachen would be by many measures, the last major German offensive of the war. Its objective was to aim south by Lake Balaton towards the Sió River, cross it, and move towards the last major oil fields controlled by Germany in Southern Hungary (off the south edge of the map). To do so, the Sixth Panzer Army that had been committed to the Ardennes Offensive was pulled and sent East, including the I SS and II SS Panzer Corps along with forces fighting since January 1945. The Soviets anticipated the attack and had planned defenses in depth as best they could. The offensive bogged down due to poor ground conditions and stubborn Soviet forces.
Playing Area: Maps B and D First Turn: 6 Mar 45 Last Turn: 15 Mar 45 Game Length: 10 Turns First Player: Axis First Turn Weather: Poor
Special Rules:
- Neither Surge Offensive (2.2 and 3.4) can be used in this scenario.
- The following units are assigned to different parent formations for the duration of the scenario. These units function as part of their assigned formation and cannot be reassigned (unlike independent units). This is to show the historical composition of formations at the time of the scenario. a) I/74, II/74, III/74 Inf Rgt (30 Rfl) is assigned to 135 Rfl Corps b) I/3, II/3, III/3 Gds Abn Rgt (104 Rfl) is assigned to 35 Gds Corps c) I/21, II/21, III/21 Inf Rgt (133 Rfl) is assigned to 30 Rfl Corps
- Treat the 20 Hun Hetz Bn (S. Laszlo), I/24 German Pz Bn (1 Pz), and 249 Soviet Arm Rgt (Viktorov) as independent units in this scenario to show how these units were used in the operation.
Activations: Use the following per turn:
Axis Allotments: 6 Primary, 3 Secondary Soviet Allotments: 3 Primary, 3 Secondary
Air Points: Roll normally.
Replacement Points: Roll normally.
Bridge Blown/OK Markers: No markers available. All bridges are available and cannot be blown.
Supply Sources/Entry Areas: Axis: Those in the play area and B1.13. Soviet: Those in the play area and all roads (including tracks and RR) along 1.xx from B1.22 and eastwards.
Axis Set Up:
2 Hun Armored Div (-):
- B2.14: 2 Arm HQ (Fat-2, PD), 2 Hun Arm Pio Bn [2]
- B1.15: 2 Hun Arm Cav Bn [3]
- B2.17: I/3 Hun Arm Bn [1]
- B2.16: II/3 Hun Arm Bn [1]
- B1.18: 4/3 Hun Inf Bn [3]
- B2.18: 5/3 Hun Inf Bn [3]
- B3.18: 6/3 Hun Inf Bn [3]
- B1.17: 52 Hun Flak Bn [2]
- B1.13: 2 Arm Combat Trains
3 SS Pz Div:
- B8.17: 3 SS HQ (Fat-2, PD, 1 Arty Point)
- B5.17: 3 SS Pz Recon Bn
- B8.18: I/3 SS Pz Bn [2]
- B7.17: II/3 SS Pz Bn [1]
- B9.19: 9/3 TGR Co [1]
- B4.16: 3 SS StG Bn [2]
- B5.19: I/5 SS Inf Bn [5]
- B4.20: II/5 SS Inf Bn
- B3.14: III/5 SS Inf Bn [5], 3 SS Combat Trains
- B10.20: I/6 SS Inf Bn [5]
- B5.22: II/6 SS Inf Bn [5]
- B7.22: III/6 SS Inf Bn [5]
- B9.21: 3 Pz Pio Bn [3]
- B10.21: I/Ney Inf Bn [5] (Assigned 3 SS)
5 SS Pz Div:
- B14.21: 5 SS HQ (Fat-2, PD, 1 Arty Point), 5 Pz Pio Bn [3]
- B15.15: 5 SS Pz Recon Bn [5], II/9 SS Inf Bn [5], 5 SS Combat Trains
- B14.20: I/5 SS Pz Bn [1]
- B12.22: II/5 SS Pz Bn [1]
- B14.19: 5 SS JgPz Bn [2]
- B11.23: I/9 SS Inf Bn [5]
- B13.24: III/9 SS PG Bn
- B17.27: I/10 SS Inf Bn
- B18.28: II/10 SS Inf Bn [5]
- B18.29: III/10 SS Inf Bn [5]
- B17.26: I/23 SS Inf Bn [2]
- B16.25: I/24 SS Inf Bn [5]
- B14.24: I/1 Stj Assault Bn [3]
- B15.25: II/1 Stj Assault Bn [3]
3 Pz Div:
- B26.20: 3 Pz HQ (Fat-0, 2 Arty Points), 543 JgPz Bn [2] (Support), I/394 Inf Bn [5]
- B30.17: 3 Pz Recon Bn
- B29.19: I/6 Pz Bn [3]
- B29.18: II/6 Pz Bn [2]
- B28.19: I/3 PG Bn
- B27.20: II/3 Inf Bn [5]
- B29.17: 39 Pz Pio Bn [3]
- B30.16: 3 Pz Combat Trains
356 Inf Div (-):
- B19.31: 356 Inf HQ (Fat-0, 1 Arty Point), 356 PJ Bn [1] (Support), 356 Pio Bn [2]
- B18.31: I/870 Inf Bn
- B18.32: II/870 Inf Bn [3]
- B19.32: I/871 Inf Bn [3]
- B20.32: II/871 Inf Bn [3]
- B24.28: 356 Inf Combat Trains, 1 Pz Combat Trains
1 Pz Div:
- B21.32: 1 Pz HQ (Fat-0, 2 Arty Points), II/113 Inf Bn
- B21.30: 1 Pz Recon Bn [5]
- B22.32: Elias Pz KG, I/113 PG Bn
- B21.31: I/1 Inf Bn
- B23.32: II/1 Inf Bn
- B22.30: 37 Pz Pio Bn [2]
- See above: 1 Pz Combat Trains (see 356 Inf Div (-) set up)
44 HuD Inf Div:
- B25.30: 44 HuD HQ (Fat-0, 1 Arty Point), 46 PJ Hetz Bn [1] (Support), 80 Pio Bn [3]
- B24.30: 44 Aufk Bicycle Bn [5]
- B24.31: I/131 Inf Bn [3]
- B24.32: II/131 Inf Bn [4]
- B25.31: I/132 Inf Bn [4]
- B25.32: II/132 Inf Bn [4]
- B26.30: I/HuD Inf Bn [4]
- B26.31: II/HuD Inf Bn [4]
- B21.27: 44 HuD Combat Trains, 23 Pz Combat Trains
23 Pz Div:
- B27.30: 23 Pz HQ (Fat-1, 1 Arty Point), 128 JgPz Bn (Support), 51 Pz Pio Bn [3]
- B31.29: 23 Pz Recon Bn [4]
- B28.30: Kujcnski Pz KG
- B28.31: I/126 Inf Bn [4]
- B29.31: II/126 Inf Bn [4]
- B30.30: I/128 Inf Bn [4]
- B31.30: II/128 Inf Bn [4]
- See above: 23 Pz Combat Trains (see 44 HuD Div (-) set up)
9 SS Pz Div:
- B23.23: 9 SS Div HQ (Fat-1, 1 Arty Point), I/19 SS Inf Bn
- B18.24: 9 SS Pz Recon Bn, II/9 SS Pz Bn
- B19.24: I/9 SS Pz Bn [3], 9/9 PG Bn
- B22.22: II/19 SS Inf Bn, III/19 SS Inf Bn
- B21.23: I/20 SS Inf Bn
- B20.23: II/20 SS Inf Bn, III/20 SS Inf Bn
- B17.25: 9 SS Combat Trains (Ghost)
2 SS Pz Div:
- B23.20: 2 SS Div HQ (Fat-1, 2 Arty Points), 2 SS StG Bn (Support), II/4 SS Inf Bn
- B20.17: 2 SS Pz Recon Bn
- B21.18: I/2 SS Pz Bn [2]
- B22.18: II/2 SS Pz Bn [5]
- B25.27: I/3 SS Inf Bn
- B25.26: III/3 SS Inf Bn
- B23.19: III/4 SS PG Bn
- B20.16: 2 SS Pz Pio Bn
- B22.13: 2 SS Combat Trains (Ghost)
Peiper Pz KG:
- B31.26: Peiper HQ (Fat-0, 1 Arty Point), 1,2/I Pz Bn [3], 6,7/I [3] SS Pz Bn
- B30.25: 501 SS Pz Bn [1], III/2 SS PG Bn
- B26.23: Peiper Combat Trains, Hansen Combat Trains
Hansen SS PG KG:
- B32.26: Hansen HQ (Fat-0, 1 Arty Point), I/1 SS Inf Bn, 1 SS JgPz Bn [2] (Support)
- B36.23: 1 SS Pz Recon Bn
- B32.25: II/1 SS Inf Bn [4]
- B33.25: III/1 SS Inf Bn [4]
- B34.24: I/2 SS Inf Bn [5]
- B35.24: II/2 SS Inf Bn [4]
- B32.24: 1 SS Pz Pio Bn [3]
- See above: Hansen Combat Trains (See Peiper set up)
12 SS Pz Div:
- B36.22: 12 SS HQ (Fat-0, 2 Arty Points), 12 SS JgPz Bn [3] (Support)
- B37.22: 12 SS Pz Recon Bn
- B38.22: 2,4/II SS Pz Bn (-) [1], 7,8/II SS Pz Bn (-) [2]
- B38.21: 560 JgPz Bn [2], III/26 SS PG Bn [5]
- B40.19: I/25 SS Inf Bn [4]
- B40.20: II/25 SS Inf Bn [4]
- B40.21: III/25 SS Inf Bn [4]
- B39.23: I/26 SS Inf Bn [4]
- B39.22: II/26 SS Inf Bn [4]
- B38.23: 12 SS Pz Pio Bn [3]
- B31.19: 12 SS Combat Trains
25 Hun Inf Div (-):
- B36.15: 25 Inf HQ (Fat-2), 25 Bicycle Bn [3]
- B34.15: III/1 Hun Inf Bn [4]
- B34.14: I/25 Hun Inf Bn [4]
- B35.15: II/25 Hun Inf Bn [4]
- B35.14: III/25 Hun Inf Bn [4]
- B36.14: I/26 Hun Inf Bn [4]
- B36.13: II/26 Hun Inf Bn [4]
- B35.13: III/26 Hun Inf Bn [4]
- B35.12: 25 Inf Combat Trains
3 Kav Bde:
- B39.18: 3 Kav Bde HQ (Fat-0, 1 Arty Point), 20 Hun Hetz Bn (S. Laszlo, Support, Assigned 3 Kav – see Special Rule #2)
- B40.18: 69 Kos Cav Bn [5]
- B40.14: I/31 Cav Bn [5]
- B40.15: II/31 Cav Bn [5]
- B40.16: I/32 Cav Bn [5]
- B40.17: II/32 Cav Bn [5]
- B37.15: 3 Kav Bde Combat Trains
4 Kav Bde:
- B37.11: 4 Kav HQ (Fat-0, 1 Arty Point)
- B40.12: I/5 Cav Bn
- B40.13: II/5 Cav Bn [4]
- B40.10: I/41 Cav Bn [4]
- B40.11: II/41 Cav Bn [4]
- B34.08: 4 Kav Combat Trains
Axis Reinforcements:
7 Mar 45
- Add: 13 Arty Points
- At 1 Pz HQ: 509 TGR Bn [4], 219 Brm Bn, 351 Flm Pz Co [1]
- At 3 Pz HQ: 1 Pz Div (I/24 Pz Bn [3]) – treat as independent unit. See Special Rule #2.
- At 4 Kav HQ: 4 Kav Bde (70 PJ StG Bn [2], 4 s Pz Recon Bn)
- At 356 Inf Div HQ: 303 StG Bde [4]
8 Mar 45
- At 3 Kav HQ: 3 Kav Bde (3 s Pz Recon Bn, 69 PJ StG Bn)
10 Mar 45
- Add: 4 Arty Points
- B1.13: 6 Pz Div (HQ (Fat-0), I/11 [2], II/11 [1], 41 JgPz Bn [2], II/114 PG Bn, I/4, II/4, I/114 Inf Bn, 57 Pz Pio Bn, Combat Trains)
15 Mar 45
- At 2 SS HQ: 2 SS Pz Div (II/3, I/4 Inf Bn)
- Roll one die, arrive on a 5 or more. Otherwise they do not.
Formation Activation Markers in Play: Hansen SS KG, Peiper SS KG, 2 SS Pz, 3 SS Pz, 5 SS Pz, 9 SS Pz, 12 SS Pz, 1 Pz Div, 3 Pz Div, 23 Pz Div, 3 Kav Bde, 4 Kav Bde, 44 HuD Div, 356 Inf Div (-), 2 Hun Arm Div (-), 25 Hun Inf Div (-)
Soviet Set Up:
7 Gds Abn Div:
- B1.22: 7 Abn HQ (Fat-2, PD, 1 Arty Point), 8 Gds SU Bn (Support), 1961/42 AT Rgt (Assigned 7 Abn, Support), 7 Abn Combat Trains
- B1.20: 1/18 Gds Abn Inf Bn
- B1.21: 2/18 Gds Abn Inf Bn
- B2.20: 1/21 Gds Abn Inf Bn
- B2.21: 2/21 Gds Abn Inf Bn
- B3.22: 1/29 Gds Abn Inf Bn
- B3.23: 2/29 Gds Abn Inf Bn
5 Gds Abn Div:
- B5.25: 5 Abn HQ (Fat-2, PD, 2 Arty Points), 13 Gds SU Bn (Support), Tng Gds Abn Inf Bn, 1172/9 AT Rgt (Assigned 5 Abn, Support)
- B3.24: 1/1 Gds Abn Inf Bn
- B4.24: 2/1 Gds Abn Inf Bn
- B5.24: 1/11 Gds Abn Inf Bn
- B6.24: 2/11 Gds Abn Inf Bn
- B7.24: 1/16 Gds Abn Inf Bn
- B8.23: 2/16 Gds Abn Inf Bn
- B8.24: 3/16 Gds Abn Inf Bn
- B1.24: 5 Abn Combat Trains
80 Gds Div:
- B1.31: 80 Gds HQ (Fat-2, PD, 2 Arty Points), 85 Gds SU Bn (Support), Tng Gds Inf Bn, 80 Gds Combat Trains
- B1.28: 1/217 Gds Inf Bn
- B2.27: 2/217 Gds Inf Bn
- B4.27: 1/230 Gds Inf Bn
- B5.28: 2/230 Gds Inf Bn
- B6.28: 1/232 Gds Inf Bn
- B7.29: 2/232 Gds Inf Bn
23 Tk Corps:
- B3.33: 23 Tk HQ (Fat-0), 82 Motorcycle Bn [2], 366 Gds ISU Rgt (Assigned 23 Tk)
- B5.34: 3 Tk Bde [2]
- B4.33: 39 Tk Bde [1], 1443 ISU Rgt [1]
- B2.33: 56 Inf Bde [4], 1501 AT Rgt [1]
- B1.34: 23 Tk Combat Trains, 62 Gds Combat Trains
62 Gds Div:
- B6.31: 62 Gds HQ (Fat-2, PD, 2 Arty Points), 69 Gds SU Bn (Support)
- B7.30: 1/182 Gds Inf Bn
- B8.31: 2/182 Gds Inf Bn
- B9.32: 1/184 Gds Inf Bn
- B10.32: 2/184 Gds Inf Bn
- B11.34: 1/186 Gds Inf Bn
- B12.34: 2/186 Gds Inf Bn
- See above: 62 Gds Combat Trains (see 23 Tk Corps set up)
40 Gds Div:
- D2.04: 40 Gds HQ (Fat-2, PD), 41 Gds AT Bn (Support)
- D1.02: 1/111 Gds Inf Bn
- D2.02: 2/111 Gds Inf Bn
- D3.03: 1/116 Gds Inf Bn
- D3.04: 2/116 Gds Inf Bn
- D4.04: 1/119 Gds Inf Bn
- D4.05: 2/119 Gds Inf Bn
- D3.08: 40 Gds Combat Trains
34 Gds Div:
- D6.06: 34 Gds HQ (Fat-2, PD), 38 Gds AT Bn (Support), 3/103 Gds Inf Bn
- D5.05: 1/103 Gds Inf Bn
- D6.05: 2/103 Gds Inf Bn
- D7.06: 1/105 Gds Inf Bn
- D8.06: 2/105 Gds Inf Bn
- D9.07: 1/107 Gds Inf Bn
- D9.08: 2/107 Gds Inf Bn
- D8.09: 34 Gds Combat Trains
4 Gds Div:
- D2.13: 4 Gds HQ (Fat-2, PD), 9 Gds AT Bn (Support)
- D1.09: 1/3 Gds Inf Bn [3]
- D2.09: 2/3 Gds Inf Bn
- D3.10: 1/8 Gds Inf Bn [3]
- D4.10: 2/8 Gds Inf Bn
- D5.11: 1/11 Gds Inf Bn [3]
- D6.11: 2/11 Gds Inf Bn, 438 AT Rgt (Assigned 4 Gds)
- D1.15: 4 Gds Combat Trains
41 Gds Div:
- B9.27: 41 Gds HQ (Fat-1, PD, 2 Arty Points), 44 Gds SU Bn (Support), 7 AT Bde [4] (Assigned 41 Gds, Support)
- B9.23: 1/122 Gds Inf Bn
- B10.23: 2/122 Gds Inf Bn
- B11.24: 1/124 Gds Inf Bn
- B12.24: 2/124 Gds Inf Bn, 251 AT Bn (Assigned 41 Gds)
- B13.25: 1/126 Gds Inf Bn
- B14.25: 2/126 Gds Inf Bn
- B9.31: 41 Gds Combat Trains
69 Gds Div:
- B15.29: 69 Gds HQ (Fat-1, PD, 2 Arty Points), 75 Gds SU Bn (Support), 1891 SU Rgt [1] (Assigned 69 Gds, Support)
- B15.26: 1/204 Gds Inf Bn
- B16.26: 2/204 Gds Inf Bn, 762/9 AT Rgt (Assigned 69 Gds)
- B17.28: 1/206 Gds Inf Bn
- B17.29: 2/206 Gds Inf Bn
- B17.31: 1/208 Gds Inf Bn
- B17.32: 2/208 Gds Inf Bn
- B13.33: 69 Gds Combat Trains
1 Gds UR Bde:
- D18.02: 1 UR HQ (Fat-0, PD, 3 Arty Points), 24 AT Bde [4] (Assigned 1 UR, Support)
- B19.33: 2 MG Bn
- B21.34: 8 MG Bn
- B18.33: 9 MG Bn
- B23.34: 10 MG Bn
- B24.34: 11 MG Bn, AT Gds AT Bn
- D20.01: 1963/42 AT Rgt (Assigned 1 UR)
- B14.04: 1 UR Combat Trains
30 Rfl Corps:
- B33.33: 30 Rfl HQ (Fat-0, PD, 2 Arty Points), 1202 SU Rgt [1] (Assigned 30 Rfl, Support), 49 AT Bde [4] (Assigned 30 Rfl, Support)
- B41.30: 72 Gds SU Bn
- B35.28: AT AT Bn (+)
- B35.34: I/36 Gds Inf Rgt
- B32.32: II/36 Gds Inf Rgt, 43 AT Bde [4] (Assigned 30 Rfl)
- B34.30: III/36 Gds Inf Rgt
- B34.27: I/68 Gds Inf Rgt
- B35.26: II/68 Gds Inf Rgt
- B37.27: III/68 Gds Inf Rgt
- B25.34: I/155 Inf Rgt, 1962/42 AT Rgt (Assigned 30 Rfl)
- B29.33: II/155 Inf Rgt
- B27.34: III/155 Inf Rgt
- D37.05: I/21 Inf Rgt [5] (133 Rfl, Assigned 30 Rfl – see special rule)
- D40.03: II/21 Inf Rgt [5] (133 Rfl, Assigned 30 Rfl – see special rule)
- D41.02: III/21 Inf Rgt [5] (133 Rfl, Assigned 30 Rfl – see special rule)
- D48.04: 30 Rfl Combat Trains
135 Rfl Corps:
- B46.24: 135 Rfl Corps HQ (Fat-0, PD, 2 Arty Points), 10 AT Bde [4] (Assigned 135 Rfl, Support)
- B38.25: I/233 Inf Rgt [5]
- B40.24: II/233 Inf Rgt [5]
- B41.23: III/233 Inf Rgt [4], AT AT Bn (+)
- B50.25: I/236 Inf Rgt [5]
- B46.32: II/236 Inf Rgt [5]
- B50.27: III/236 Inf Rgt [5]
- B42.21: I/74 Inf Rgt (30 Rfl, Assigned 135 Rfl – see special rule #2)
- B42.18: II/74 Inf Rgt (30 Rfl, Assigned 135 Rfl – see special rule #2)
- B42.20: III/74 Inf Rgt (30 Rfl, Assigned 135 Rfl – see special rule #2)
- B55.30: 135 Rfl Combat Trains
93 Rfl Div:
- B45.12: 93 Rfl HQ (Fat-0, PD, 1 Arty Point), 2/129 Inf Bn, 595 AT Rgt (Assigned 93 Rfl, Support)
- B42.13: 1/51 Inf Bn [3]
- B42.15: 2/51 Inf Bn
- B43.15: 1/129 Inf Bn [3], 144 AT Bn
- B42.09: 1/266 Inf Bn [3]
- B42.11: 2/266 Inf Bn
- B48.08: 93 Rfl Combat Trains
104 Rfl Corps:
- B53.15: 104 Rfl HQ (Fat-0, PD, 1 Arty Point), AT AT Bn (+) (Support), II/151 Inf Rgt [4]
- B55.18: I/66 Gds Inf Rgt
- B53.21: II/66 Gds Inf Rgt
- B54.18: III/66 Gds Inf Rgt
- B49.09: I/151 Inf Rgt
- B52.10: III/151 Inf Rgt [4]
- B57.09: 104 Rfl Combat Trains
5 Gds Cav Corps:
- B62.34: 5 Cav HQ (Fat-0), 71/11 Arm Rgt [1], 37/11 Gds Cav Rgt, 26 Lt Arty Bde (Assigned 5 Cav, Support)
- B62.32: 39/11 Gds Cav Rgt, 5 Cav Combat Trains
- D62.02: 41/11 Gds Cav Rgt
- B62.25: 43/12 Gds Cav Rgt, 1896 SU Rgt [1]
- B62.27: 45/12 Gds Cav Rgt, 150 AT Rgt
- B62.29: 47/12 Gds Cav Rgt, 54/12 Tk Rgt [1]
- D59.05: 214/63 Cav Rgt, 5 AT Bn
- D56.08: 220/63 Cav Rgt
- D58.07: 223/63 Cav Rgt
18 Tk Corps:
- D28.07: 18 Tk Corps HQ (Fat-0, 1 Arty Point), 181 Tk Bde [2], 521 AT Rgt (Assigned 18 Tk, Support)
- D32.06: 78 Motorcycle Bn [2]
- D31.06: 110 Tk Bde [5]
- D25.07: 170 Tk Bde [1]
- D27.07: 32 Inf Bde [6]
- D30.06: 363 Gds ISU Rgt
- D29.07: 1438 SU Rgt [1]
- D26.06: 1000 AT Rgt [1]
- D22.10: 208 SU Bde (Assigned 18 Tk)
- D28.10: 18 Tk Combat Trains
35 Gds Corps:
- D15.12: 35 Gds HQ (Fat-0, PD, 2 Arty Points), 1312 AT Rgt (Assigned 35 Gds, Support)
- D12.05: I/78 Inf Rgt, 338/9 AT Rgt (Assigned 35 Gds)
- D15.07: II/78 Inf Rgt
- D18.08: III/78 Inf Rgt
- D21.12: I/163 Inf Rgt, AT AT Bn (+)
- D20.10: II/163 Inf Rgt
- D23.13: III/163 Inf Rgt
- D7.13: I/3 Gds Abn Rgt [5] (104 Rfl, Assigned 35 Gds – See Special Rule #2)
- D10.14: II/3 Gds Abn Rgt [5] (104 Rfl, Assigned 35 Gds – See Special Rule #2)
- D13.16: III/3 Gds Abn Rgt [5] (104 Rfl, Assigned 35 Gds – See Special Rule #2)
- D20.17: 35 Gds Combat Trains
37 Rfl Corps:
- D31.21: 37 Rfl HQ (Fat-0, PD, 2 Arty Points), 432 SU Bn (Support), 12 AT Bde (Assigned 37 Rfl, Support)
- D39.18: I/108 Gds Inf Rgt [5]
- D39.21: II/108 Gds Inf Rgt [5]
- D37.23: III/108 Gds Inf Rgt [5]
- D35.16: I/316 Inf Rgt [5]
- D33.15: II/316 Inf Rgt [5]
- D37.17: III/316 Inf Rgt [5]
- D28.16: I/320 Inf Rgt [4]
- D30.14: II/320 Inf Rgt [4], AT AT Bn (+)
- D26.17: III/320 Inf Rgt [4]
- D26.19: 37 Rfl Combat Trains
1 Gds Mech Corps:
- D47.18: 1 Mech HQ (Fat-0, 1 Arty Point), 2 Gds Mech Bde [3]
- D50.20: 11 Gds Motorcycle Bn
- D48.18: 9 Gds Tk Bde [3]
- D45.16: 1 Gds Mech Bde [6]
- D42.14: 3 Gds Mech Bde [6]
- D48.19: 382 Gds SU Rgt [1]
- D49.20: 1821 SU Rgt [1]
- D51.21: 1 Mech Combat Trains
84 Rfl Div:
- D54.22: 84 Rfl HQ (Fat-0, PD, 2 Arty Points), 122 SU Bn (Support)
- D53.22: 1/41 Inf Bn
- D54.21: 2/41 Inf Bn
- D55.22: 1/201 Inf Bn
- D56.22: 2/201 Inf Bn
- D56.23: 1/382 Inf Bn
- D56.24: 2/382 Inf Bn
- D55.28: 84 Rfl Combat Trains
33 Rfl Corps:
- D7.28: 33 Rfl HQ (Fat-0, 2 Arty Points), AT AT Bn (+) (Support), II/337 Inf Rgt [5]
- D13.27: I/202 Inf Rgt
- D14.26: II/202 Inf Rgt
- D15.27: III/202 Inf Rgt
- D1.24: I/206 Inf Rgt
- D2.23: II/206 Inf Rgt
- D3.24: III/206 Inf Rgt
- D6.27: I/337 Inf Rgt [5]
- D8.27: III/337 Inf Rgt [5]
- D1.29: 33 Rfl Combat Trains
Formation Activation Markers in Play: 1 Gds Mech Corps, 18 Tank Corps, 23 Tk Corps, 5 Gds Cav Corps, 5 Gds Abn Div, 7 Gds Abn Div, 4 Gds Div, 34 Gds Div, 40 Gds Div, 41 Gds Div, 62 Gds Div, 69 Gds Div, 80 Gds Div, 1 Gds UR Bde, 84 Rfl Div, 93 Rfl Div, 35 Gds Corps, 30 Rfl Corps, 33 Rfl Corps, 37 Rfl Corps, 104 Rfl Corps, 135 Rfl Corps
Soviet Reinforcements:
7 Mar 45
- Add: 9 Arty Points
- At HQ Assigned: Viktorov Mech Grp (249 Arm Rgt) – treat as independent unit. See Special Rule #2.
9 Mar 45
- Add: 3 Arty Points
- At HQ Assigned: 207, 209 SU Bde
Victory Conditions:
Determine Victory by a modification of VP Hex Control in 4.2 as both sides have VP hexes.
At the very end of play, record the number of Axis and Soviet VP Hexes each player controls.
The player with the greater number of Victory Points wins. If the numbers are identical, the game is a draw.
Axis Victory Point Hexes
- Szabadhídvég (B55.18)
- Simontornya (B61.35)
- Sárbogárd (D48.04)
- Dunaföldvár (D54.22 only)
- Dunapentele (D37.23)
Soviet Victory Point Hexes
- Dég (B50.27)
- Sárkeresztúr (B35.34)
- Zichyújfalu (D22.06)
- Sárosd (D31.05)
- Cece (D59.05)
Spring Awakening Scenario Historical Notes
German:
-
3 Cav and 4 Cav Bdes were renamed as Divisions but had the same composition as before.
-
Due to heavy losses and difficulty in replacements at this stage of the war, a number of units were disbanded or sent away to be replenished. Therefore some formations set up with units missing and there is no Dead Pile to rebuild them. This includes: a) 1 Pz Div: KG Rank – disbanded; I/24 Pz Bn – Assigned different formations; 37 Mdr Bn – In Germany reforming; 73 Pz Erz Bn – Reverted back to a replacement unit, Holczer Hun Inf Bn – Reverted back to Hun command. b) 3 Pz Div: II/394 Inf Bn – Disbanded in February and remnants absorbed into I/394 Inf Bn. c) 6 Pz Div: I/26 Pz Bn - reassigned d) 23 Pz Div: KG Schulz – disbanded; 85 LW Inf Bn – No information on the unit past January, assumed it was subsumed into the Panzergrenadier units. Rebntsch Pz KG is removed via the campaign OOA and replaced with Kujcnski Pz KG in January.
Soviet:
-
The 249 Arm Rgt is really the 22 Tk Rgt in this scenario. It was formed from a training unit using repaired tanks and assault guns.
-
Due to heavy losses and difficulty in replacements at this stage of the war, a number of units were disbanded or sent away to be replenished. Therefore some formations set up with units missing and there is no Dead Pile to rebuild them. This includes: a) 23 Tk Corps: 135 Tk Bde – Did not contain any tanks throughout the battle and the other two Tank Brigades were sufficiently depleted to be replenished first. b) 1 Gds Mech Corps: 1453 SU Rgt – Same as above, no armor throughout this battle. c) 5 Gds Cav Corps: 60/63 Tk Rgt – Same as above, no armor throughout this battle. g) 133 Rfl Corps: only the 21 Rfl Div was present, while the 104 and 122 Rfl Divs were with the 57th Army.
Glossary
| Abbreviation | Meaning |
|---|---|
| 88 | 88mm Anti-tank gun |
| Abn | Airborne |
| AF | Air Force |
| Arm | Armor/Armored |
| Art/Arty | Artillery |
| AT | Anti-Tank |
| Aufk | Aufklarung ("Reconnaissance") |
| Bde | Brigade |
| Bernlk | Bernolak |
| Besztc | Besztercei |
| Bn | Battalion |
| Brm | Brummbär |
Designer Notes
First off, why Budapest in 1945? I wanted to do an East Front game, but my first idea didn't pan out. I looked again and since I prefer the late World War II period, the situation in Hungary in 1945 looked promising. I was already familiar with the fighting there having done the research for SCS The Mighty Endeavor's East Front expansion. It ticked off all my personal boxes: late-war Soviet armor (IS-2, ISU-152), a good mix of tank and infantry units, a fluid battle, and a familiar topic.
What would be the last big German offensive in the East grabbed my interest and the battle area fit well. At a 1 mile/hex, I could squeeze the battlefield onto two maps, but using a scale closer to 1 km/hex allowed for more discrete maneuver. However at 1 km/hex, I could only include the fighting south of the Danube. I wanted to include the important area to the north, as the Soviets conducted their counter-offensive there. Using a scale of 1.2 km/hex allowed this, but did not sacrifice either detail or maneuver room.
My plan was to cover the fighting from 1 Jan to 27 Jan 1945 (Operations Konrad I, II, and III), the Soviet counter-offensive north of the Danube, as well as the siege of Budapest itself. This scope remained for a long time until Dean completed the first draft counter artwork. It was just over three counter-sheets, leaving a fourth sheet containing merely a handful of lonely Romanians. Filling in the rest of the counter-sheet with additional markers didn't make sense. Dean asked if there was anything of more value to add. This was a good opportunity to squeeze more scenarios into the game. I included the additional Formations needed for Southwind (February) and Spring Awakening (March 1945) since they were fought in the existing map area. The added scenarios increased the game's scope and value; I feel these are always good things.
As I'm usually the research guy looking up Orders of Battle and map things, it was a learning experience to make sure the game fit well with the series rules without too many weird and wacky game-specific rules. Ensuring historical flavor and recreating unique situations is one thing; having excessive chrome is very different matter. I saw many correlations with Last Blitzkrieg with the terrain, season, and equipment (leaving aside the same SS Panzer Divisions that show up in both games). The initial design included similar Weather, Tiger roll, Rubber Boat, and Bridge Blowing leveraged from Last Blitzkrieg. Those rules evolved during Dean's development through playtesting and uniqueness to the Hungarian battlefield and situation in January, 1945. The weather was streamlined from having separate ground, atmosphere, and visibility rolls to one roll for good, normal, and poor covering the typical snow and mud periods from the few sunny and dry days. The Tiger roll evolved from mechanical quirks to using a method of AV replacement (applicable to both sides) showing their out-sized role even if only a handful were available.
Yet in spite of the porting from Last Blitzkrieg, this unique Eastern Front 1945 situation needed its own game-specific rules: The massive Danube River, the German ability to clandestinely pull the two SS Panzer Divisions for redeployment. Norbert Számvéber described this move using the Soviet deception term of Maskirovka, and the name stuck.
I debated including the Battle for Budapest itself or not. Excluding it would avoid modeling urban combat, but would shortchange the city's importance as the overall relief operation goal. A slight parallel to Brazen Chariots with the Tobruk garrison being besieged and trying to break out while Commonwealth forces outside the fortress tried to break in. The parallels stop with the Soviets attacking inward preventing any concerted effort to breakout. The Germans and Hungarians in the city were hard pressed, with daily losses to men and equipment. The wavering loyalty among Hungarian soldiers caused desertion to be rife. There would be no breakout attempt until February, when it was more of an escape than an organized breakout.
The fighting in Budapest itself presented a challenge. The initial design attempted to show urban warfare using the existing combat rules. Playtesting showed limitations of the standard combat model when applied to urban terrain. Modern militaries recognize the unique combat nature of MOUT (Military Operations in Urban Terrain) where one isn't fighting for areas, but rather attacking the building across the street. Dean developed the Urban Warfare rules to capture the unique and slow nature of fighting in dense built-up terrain. This rule was adopted as a BCS v2.0 series rule, rather than being a 'mere' game-specific rule.
An additional unique aspect to these operations was having different tempos in various sectors on the battlefield. Given the multiple higher commands and the supply situation, each sector would behave differently. For example, north of the Danube had remained quiet at the start of Konrad. Even south of the Danube, limited supply could allow only portions of the front to be active at any one time. It was simply incorrect to assume that a quiet sector slowly ground the enemy into dust while waiting for a lucky SNAFU roll that would allow them an ad hoc full-strength offensive. Various rules were tried: Command Points, SNAFU "Zones," and finally Activation allotments which designated the number of Primary, Secondary, and Response Formations per turn. This was supplemented by the two Surge Offensives (one on each side) which had powerful forces assembled for surprise attacks—and the enemy responses to them. What these rules do is create a very dynamic situation and show how the historical battle played out.
I would be remiss if I didn't mention Stéphane Acquaviva and his OCS Hungarian Rhapsody given our common topic. He reached out to me to review his Order of Battle early in his design, before I even thought of designing Panzers Last Stand. Yet having someone work on a similar game helped and we exchanged numerous e-mails. We compared notes as I began Panzers Last Stand. His game has a different scope (all of Hungary from December to Southwind), but being able to talk with someone involved in similar research and actually lives in Budapest was very helpful. Stéphane is a great guy and anyone who plays Panzers Last Stand should also play Hungarian Rhapsody. We took different approaches, but feel we both came out on top for our respective designs.
The design was a challenge and a learning experience, but was enjoyable as well. As BCS has four games in at this point, it has matured and this East Front situation shows the flexibility and legs of the series. The game could not have been pulled off without Dean, who is a wonder to see work in unpacking and streamlining the game as developer as well as dealing with the quibbles and fixations from the designer, and to all the playtesters who put up with multiple rules iterations on a weekly basis to continue playing through to make sure the game isn't broken, but remains challenging and enjoyable at the same time. It takes a village, and thanks to everyone listed in the playtest credits and others, like Joel Maynard and Carl Gruber, who helped with research and translation.
Historical Notes
By Carl Fung
In prior BCS games, I could assume there was general topic familiarity. I could use the historical notes for myth busting and explain why things were done a given way. Here, I figure there might be less understanding about how Budapest fit into the vast Eastern Front. I'm providing more background material on this campaign.
What follows is a very brief campaign overview. For more detailed accounts see the listed book recommendations, and the Weapons and Warfare blog entries below:
"https://weaponsandwarfare.com/2016/05/06/budapest-relief-attempts-1945-part-i/"
"https://weaponsandwarfare.com/2016/05/06/budapest-relief-attempts-1945-part-ii/"
By 1 January 1945, Budapest was surrounded. The depleted Axis forces inside the pocket would hold out until February, but limited resupply and inter-command issues in the city made the situation dire. The Germans devised a plan to relieve Budapest by secretly shifting the IV SS Panzer Corps from Poland with additional reinforcements. The limited supply situation restricted the attack to only a single corps axis. The Germans chose a northern approach through the mountainous regions south of the Danube.
Konrad I started very late in the evening on 1 Jan 1945 (making contact with the Soviets around midnight) even as trains were still off-loading more units of the two SS Panzer Divisions. The attack was conducted on the run, with only a brief preliminary artillery barrage. The 4th Guards Army was surprised, as they had only recently moved forward to occupy the quiet line running south from Komárom down to Lake Balaton. The Germans (the 3rd and 5th SS Panzer Divisions along with a Panzer Kampfgruppe and an Infantry Division) initially made good progress into the woods and mountainous terrain. The Soviets reacted by sending in reserves and rearranging the frontline units to create a defensive line. By 6 Jan 45, the attacks started to stall, with the Soviets using five Tank, Mech, and Cavalry Corps, fresh Rifle Divisions, and initial frontline remnants. The line ran from Tatabánya (A40.24) to right before Bicske (C47.03), Zsámbék (C40.08), along the foothills of the Pilis range to recently captured Esztergom.
The Germans decided to press their gains as well as launch an envelopment attack by the I Cavalry Corps (one full and two partial Panzer Divisions and a Cavalry Brigade) towards Zámoly (B3.24). This became Konrad II. Initial progress was promising, and reinforced by the 96th and 711th Infantry Divisions' drive from Esztergom to Pilisszentkereszt (C25.18), but by 11 Jan, the attacks petered out. This was the closest that the Germans would get to Budapest. The fighting around Zámoly was fierce, but inconclusive.
Meanwhile, north of the Danube, the Soviet 2nd Ukrainian Front launched its depleted 6th Guards Tank Army into a surprise counter-offensive across the Garam River. The plan was to take the Komárom Danube crossings to relieve pressure south of the river. The Soviets made good progress with only one Tank and two Mechanized Corps supported by two Guards Rifle Corps against weak frontline German and Hungarian units. They came close to taking Komárom, but were stopped by the recent arrivals of the 8th Panzer and 20th Panzer Divisions. The fighting lasted until 22 January when it stagnated and the 20th Panzer Division was withdrawn.
From 12 through 17 January, a lull settled in south of the Danube, as both sides licked their wounds and reorganized their forces. The Germans secretly shifted the 3rd SS and 5th SS Panzer Divisions again. They were placed at the tip of Lake Balaton to lead another operation toward Budapest, but this time along the open southern plains. While more open compared to the mountainous northern approaches, the southern flank bounded by the Sió River had several canals to be crossed.
Konrad III was launched on 18 January 1945 with additional reinforcements such as artillery and nebelwerfer brigades, a Tiger II battalion, a StuG brigade, Flamethrower Panzers, and specialized pioneers. The new surprise attack went very well against a thinned Soviet front, with movement rapidly to the Sárvíz-Malom Canal. Important bridges were blown there, and the Soviets again responded with reinforcements that threatened to stall the offensive. To the south, Kampfgruppe Pape with Panzer Recon and Hungarian units screened along the Sió River to prevent Soviet forces from attacking behind the armored spearheads. The 3rd Panzer Division made excellent progress and ran ahead to Dunapentele (D37.23), where the Soviets prematurely destroyed their supply pontoon bridge there to prevent its capture. The two SS Panzer Divisions were able to forge across the canals and moved along Lake Velence's southern shore, while the 1st Panzer Division tried taking Székesfehérvár. By 22 January, the frontline ran from the eastern edge of Lake Velence to Felsőbesnyő (D15.12) then north of Adony (D22.18). From there, a series of German jabs (along that front and a flank move to Pázmánd (D5.05)) all failed. On 27 January, the offensive was called off.
That concluded the main campaign in Panzers Last Stand. Yet the German attacks' end did not stop the fighting. Soon thereafter, the Soviets launched an offensive and retook the lost ground south of the Danube. This would lead to subsequent operations as Hitler obsessed over the region, even though Budapest fell by 13 February.
North of the Danube, the Soviets still held a bridgehead west of the Garam River. Hitler pulled the battered 6th Panzer Army from the Ardennes and redeployed to Budapest. The I SS Panzer Corps (1st and 12th SS) along with in situ German forces were tasked to eliminate this bridgehead. The Soviets had time to prepare their defenses with more infantry and anti-tank forces. Southwind (Südwind) began on 17 February 1945 and the attack proceeded well, but with starts and stops due to weather and need to realign friendly forces as they pushed south. The depleted 4th Guard Mech Corps offered armored resistance against two SS Panzer Divisions, the partially rebuilt "Feldherrnhalle" Panzer Division and several Infantry Divisions. Southwind was completed on 24 February, with all Soviet forces destroyed or withdrawn across the Garam River.
The I SS Panzer Corps (1st SS and 12th SS Panzer Divisions) were then shifted south across the Danube to conduct the last major German offensive, Spring Awakening (Frühlingserwachen). Starting roughly along the same lines as Konrad III, the goal this time was to attack south and east across the Sió River, with the ambitious goal of meeting up with German forces coming north across the Drava River and east from the south end of Lake Balaton to trap the Soviets and protect the Nagykanizsa oil fields. The attack began on 6 March 1945 with wavering success. By this time the Soviets had been able to prepare defenses as well as form layers of troops. Through difficult weather and resistance, the Germans made progress to reach the Sió River and points east. Yet with the sluggish progress over 10 days, the momentum was gone and the operation was terminated. The Soviets counterattacked eventually leading them into Austria by April. The war was quickly coming to a close.
The Fiddly Bits
By Carl Fung
Why does the campaign start on Jan Second instead of Jan First?
Konrad I began on 1 Jan 45, but late in the evening as the two SS Panzer Divisions were still being unloaded from trains in Komárom through the day and subsequent days. Konrad I was launched at 1930 hours, following a brief 10-minute artillery barrage. The 3rd SS spearhead finally started moving through Szőny (A23.08) at around 2300 hours. It only made contact with the Soviets at Dunaalmás (A23.18) at midnight. Likewise, the 5th SS started at 2030 (making contact around 2300), and conducted mine-clearing operations for the next hour. A whole turn representing the last hour of 1 Jan 45 didn't make any sense. Accounting for the last hour of 1 Jan 45 into 2 Jan 45 caused the turn to be originally labeled as "1-2 Jan 45." This was confusing, so the extra hour is embedded into the 2 Jan 45 turn.
What's with Danube bridges?
Other than those in Budapest, there were only a handful of bridges over the Danube. The bridges at Esztergom and Dunaföldvár were blown during the Axis retreat before January 1945. The Soviets had created ferries and pontoon bridges at numerous locations, but prematurely blew the one at Dunapentele (D37.23) when the Germans approached during Konrad III. Limited bridging over the Danube was the reason why the bridges at Komárom were so vital to the Axis.
The bridges in Budapest were blown progressively as the Soviets advanced in from the Pest side and all the bridges except four main spans felled before January 1945. These four remaining spans were blown by 18 January 1945. The Margit Bridge had a three-way span connecting Buda, Pest, and Margit Island. The span across to Pest was blown in November 1944, but the island's remaining span wasn't destroyed until late January.
Why do the SS Panzer Divisions reduce Fatigue on 7 Jan?
Operation Konrad II was launched on 7 Jan 45 (sources differ) as an extension of Operation Konrad I. Its purpose was to continue the offensive towards Budapest from the gains already made. Historically, additional drives were conducted around the Pilis Mountains and a new drive towards Zámoly. The two SS Panzer Divisions pressed forward from their positions in front of Csabdi (C44.01) and Felsőörspuszta (C39.06). As the SS Divisions had been the primary force during Konrad I, they would be heavily fatigued. In order to account for the SS's resurgence to continue the offensive, their Fatigue was reduced by 2 on the start date of Operation Konrad II.
What's with Soviet AT units have Support and Deployed Leg-MA Sides?
Typically BCS AT units are either Support-only or have a Move-side and Deployed-side, but this game does it differently for Soviet infantry formations to show doctrine. AT in support usually supports the entire Formation. The Deployed-side represents doctrine the Red Army developed during the war. To make up for their obsolete AT weapons, "Anti-Tank Strongpoints" were created with the guns backed up with obstacles like AT ditches, mines, and roadblocks to funnel enemy tanks into kill zones for flanking shots. Thus an Infantry Formation's AT units increase from Limited 2 AV in Support to Limited 3 AV when deployed (and automatically assumed to be an "AT Strongpoint"). Independent AT Regiments and Brigades keep their Limited 3 AV as these were predominantly armed with 76mm guns with a number of 57mm AT guns. The Leg MA, as opposed to other armies' AT units with Truck MA, shows their nimbleness to move around once deployed.
Why can't all Soviet AV units go into Support?
The basic answer is: the ones that can do it are marked. There are many independent assault gun and AT units that have this ability. Rifle Division and Corps' inherent SU and AT units can enter Support. Also, the 23rd Tank Corps detached two tank battalions to the infantry besieging Budapest.
AV that cannot enter Support are found in Tank, Mechanized, and Cavalry Corps, as well as independent ISU Regiments and SU-100 Brigades. The Tank and Mech Corps' Tank and Mechanized Brigades have tank-infantry ratios earning them a Dual rating. The Tank, SU, and AT Regiments did not have much Support doled out aside from the Tank Corps' Motorized Brigades and a handful of non-AV units (Engineers, etc.). Even then, the elements maneuvered separately without either penny-packets of Support or full-sized ad hoc units comparable to American Task Forces or British Battle Groups. Being used only as complete units applies to both Cavalry Corps and the independent ISU Regiments and SU-100 Brigades as well.
AV units capable of Support have "Support" printed on the counter. These are predominantly Anti-Tank units and the independent SU-76M Regiments.
What this means is that there are two flavors of AT and SU-76M units in the Soviet Order of Battle depending on their Formation organization. Those in infantry Formations or which are independent have a Support-side and a Deployed-side to their counter. Those found in Tank, Mechanized, and Cavalry Corps have Move- and Deployed-sides, but cannot go into Support.
Why do two Panzer Divisions seem to appear out of thin air?
The 3rd and 6th Panzer Divisions were north of the Danube when Konrad I began, but each had a Panzer-heavy Kampfgruppe south of the river at the same time. Orders were given for the rest of each division to first join the lead elements in the Konrad offensive and then transition the defense to the 211th VG Division and the Hungarian Szent Laszlo Division. This occurred in the first few days of January with the two Panzer Divisions arriving south of the Danube on their respective order of arrival dates.
Originally both divisions set up in defense north of the Danube, but playtesters would not send them south. To prevent too much idleness (the Germans should be on the offensive!) or odd dance between these divisions and reinforcements meant to take their place in the line, it was best to have the panzer divisions appear south of the Danube at the time they historically crossed over. The 3rd Panzer Division reinforcements join the existing HQ (representing its Panzer Kampfgruppe), while the 6th Panzer Division (less units already with Kampfgruppe Pape) arrives around Komárom, both south of the Danube.
Why are Soviet Formations set up the way they are?
The Red Army arrayed part of its forces investing Budapest, while the rest held a defensive line to the west. Infantry forces with parts of the 18th Tank and 7th Mech Corps (which kept their Tank, Mech, and Cavalry units in reserve) held this new line. The Soviet response to Konrad I was to send mobile forces to stop the advance with a supporting number of Rifle Formations. These Rifle formations were the 93rd, 40th Guards, 41st Guards, and 62nd Guards Divisions (in the order they were sent north). The original set up had the formations in their 1 Jan 1945 locations along the frontline (the 41st Guards was in Székesfehérvár as reserve). What had happened behind the scenes was the 62nd Guards replaced the 41st Guards in reserve when the latter moved north, but then moved up later itself. In all cases the neighboring divisions filled in the frontlines.
Why are there so many Cavalry Units in 1945?
This campaign includes most of the remaining horse-mounted units in WWII. The Soviets continued to operate Cavalry Corps (generally one per Front) until the war's end, but increased the number of tank and anti-tank weapons to make them pseudo-mechanized outfits. They filled a similar role, if not as heavy, as the Tank and Mechanized Corps. The Germans actually created the two Cavalry Brigades here in 1944 (as faster security units that required less motorized transport). Two SS Cavalry Divisions fought in Budapest as infantry. The Hungarian Cavalry Division formed during the war from pre-war units was considered elite. But by 1945, this and other Hungarian Formations were severely depleted by massive defections and low morale as their country was invaded. Lastly, the Romanians had a dismounted Cavalry Division at Budapest.
Why are the SS Panzer Divisions rated poorly?
Poorly, of course, is a relative quantifier. The 3rd and 5th SS Panzer Divisions were still considered two of the most effective divisions on the Eastern Front at this time, but had received a large number of replacements (mostly from the Luftwaffe) and had a shortage of experienced NCOs and equipment. Despite the shortfalls, they performed well in the spearhead for most of January 1945, but in my evaluation, they could not all be rated with an Action Rating of 5.
The SS Panzer Divisions that were pulled out of the Western Front and sent East (1st, 2nd, 9th, 10th, 12th SS) were replenished in Germany before being sent to Hungary or elsewhere. By 1945, the Germans were scraping the bottom of the barrel. Replacement quality became noticeably worse. Reality did nothing to prevent Hitler from committing them to the spearheads of Southwind and Spring Awakening. My research shows that the 1st SS looks to have fared a little better with replacements than the others and retained higher overall Action Ratings.
Why are locations in Slovakia written in Hungarian?
Most of southern Slovakia was annexed by Hungary following the First Vienna Award in November 1938. Further increasing tension between the two future German allies led to the obscure nine-day Slovak-Hungarian War in March 1939. As the game's primary sources, Norbert Számvéber's books, use Hungarian names, this was consistent with what was considered part of Hungary during the war. Depending on the source map, one location would have multiple names, for example: Komárom in Hungarian is Komárno in Slovak and Komorn in German. Likewise, Székesfehérvár in Hungarian is called Stuhlweißenburg in German.
Why do StuG and SU Brigades have Red non-Support AV Move-sides?
Sturmgeschütz units (like the 286th, 3rd SS, and Cavalry Brigade StuG units) have Red AV Support on its Deployed-side to show its ability to provide attacking Support for their infantry. By themselves, the StuGs are limited and vulnerable, as indicated by their Move-sides. The StuGs could not be concentrated to form "Pocket Panzer Divisions." Of course, there are organizational exceptions as well. The independent 239th and 303rd StuG Bdes each had an organic Begleit Batterie (Escort Infantry Company). Likewise, the SU-100 Self-Propelled Artillery Brigades (207th, 208th, and 209th) had a Sub-machine gun company in each of its three regiments.
Why are Axis Budapest Garrison units independent?
In Budapest, there were multiple intermixed Formations of Hungarian and German troops, all with the common goal to defend against the Soviets and Romanians in ad hoc combinations as needed at the moment. Hence each unit is treated as independent under either the Buda or Pest commands based on their side of the river. Units freely shift between them as needed, particularly when one side of the city falls.
What is with the 20th Panzer Division's arrival and removal?
The 20th Panzer Division was recovering in East Prussia after heavy losses. It was replenished to nearly full strength (a rarity this late in the war), but still without a full complement of tanks. It was to be sent south to plug a gap near Léva (north of the map) when the Soviets struck. The 20th Panzer Division was the only fresh Panzer division in reserve on the Eastern Front, so its commitment in the game was not guaranteed—it could be sent elsewhere.
Also, the Soviet player dictates when (and if) the 6th Guards Tank Army surge offensive occurs. The Division's piecemeal commitment in battle is shown in the two groupings on the Order of Arrival. The 20th Panzer Division's participation around Komárom was brief, as the Soviets launched the massive Vistula-Oder offensive and the division was diverted north to counter it. The division served as a fire brigade and was later committed to Silesia.
The withdrawal to go north was phased over several days starting on 18 Jan 45, but given the conditionality of its arrival, it was cleaner to withdraw them at once on 20 Jan, when the majority of the division historically withdrew.
Why do Soviet Mech Brigades have Truck MA Move-sides?
Soviet Mech Brigades at this point are a curious mixture. They lack the armored personnel carriers needed so their infantry could fight in a combined arms manner with armored vehicles. The amount of tanks supplied to each Brigade is much more numerous than needed to be considered Red Support. As a result, they are Truck mobile on their Move-side, but have a slow Tac MA when Deployed (the dismounted infantry walks alongside the tanks). The AV ratings on both sides reflect the hobbled nature of their tanks.
Order of Battle Notes
The Soviets
As the Red Army is still fairly mysterious and generalized (hordes of men and tanks attacking, with massive artillery barrages), I'd like to describe them a bit more than other armies that have been portrayed thus far in BCS. This is in lieu of including a blurb on every formation, which would be daunting. With all due respect to the Red Army, there's a lot of them! Not only that, but while basic histories are available for every division and corps in Russian and English, they aren't as detailed as German, American, or British divisional histories and don't do each unit justice. That said, the mobile formations (Tank, Mech, Cavalry Corps) are recorded in more volume and detail given their important roles in the Soviet drive to Berlin and Vienna.
First, I find this an interesting tidbit. The army's official name was the "Workers' and Peasants' Red Army" - Raboche-krest'yanskaya Krasnaya Armiya or RKKA) or 'Red Army' for short. It was only termed the 'Soviet Army' after the war. Possibly just a bit of semantics, but I'll be using 'Red Army' here, but any references to Soviet Army should be assumed to refer to the Red Army.
One imagines the Red Army of 1945 as a large and powerful force paying back for the invasion of the Motherland in 1941. Indeed, the Red Army had become a skilled veteran force capable of mobile and combined arms warfare from the tactical to strategic levels. Yet, it had also been bloodied in 4 years of war that it was struggling to find replacements. By 1945, Rifle Divisions had been severely reduced through manpower losses and no new divisions were formed. The shrinking manpower pool had not allowed for the large replacements needed. Instead, the Tank and Mechanized formations received priority for replacements. In the Budapest area, there was nary a full-strength formation, given the constant active combat operations and inability to take units off the front line (except for lucky Tank and Mechanized Corps) to rest and refit. The result was veteran formations who had been bled white gaining experience, but whose remaining shells performed unevenly. Being at the forefront of any attack or mobile defense, the Tank, Mechanized, and Cavalry Corps were almost universally veteran and effective formations. This created a quality disparity between the mobile formations and leg infantry. One would be replenished with men and equipment, while the other continued to be ground down until VE-Day.
The quality distinction between Guard and non-Guard formations, particularly among these mobile formations, was less a distinction by 1945 than it had been in 1941-1943. The reason for this is that the brave actions that had earned formations the privilege of carrying that "Guards" title occurred in that earlier period. Since then, both would fight side-by-side and gain the same level of experience and suffer equally, despite the few benefits Guards formations had (pay, extra weapons, but on the whole not vastly different) and no new Guards titles being offered.
Soviet Mobile Formations
Soviet Tank and Mechanized Corps were interesting organizations. A "Corps" was really a division-sized formation with Tank and Mechanized Brigades (in 3:1 and 1:3 ratios, respectively) as the formation's main maneuver elements. In Tank Corps, the Infantry component was Motorized, not Mechanized, the difference really being that the Motorized Brigade did not have an inherent tank battalion. In the Motorized and Mechanized Brigades, with three battalions apiece, transportation was via trucks. The Soviets did not develop any sort of armored personnel carrier until after the war (the BTR-152 and later the BMP). While Lend-Lease did provide M3 Scout Cars and handful of US halftracks, these were found in "Motorcycle" units. The motorcycle units were reconnaissance units and organized as such, unlike the German use of Motorcycle Troops (Kradschützen) as motorized infantry until merged with the reconnaissance battalions. These motorcycle recon units, although equipped with a company of tanks by 1944-45, would dismount and conduct recon on foot, much like their infantry scout counterparts via infiltration tactics. Hence, they were not used as 'Mechanized Recon by Fire' like the Germans.
Tank Brigades operated with three small tank battalions (21 tanks each, at full strength) and an infantry battalion. The Infantry would include SMG and Rifle companies as well as a dedicated Tank Rider Company armed with SMGs (the ones you see bouncing around atop tanks in video clips) using desant for close combined arms tactics. A Tank Brigade (65 total tanks) was basically the same size as a Western Combined Arms Reinforced Tank Battalion. Smaller regimental combat units had no consistency. By 1944/45, it would consist of a combination of Self-Propelled (SP) Artillery Regiment (the SU vehicles from SU-76M, SU-85, SU-100), Heavy SP Arty Rgt (ISU-122), Towed Anti-Tank Artillery Regiment (76mm), or a Heavy Tank Regiment (IS-2), usually 3 in total. The Tank and Mechanized Corps were well balanced tank-infantry formations, but could run from full strength to depleted as replenished throughout the war. They were the Red Army's mainstays for offensives and counterattacks.
5th Guards Tank Corps: The Tank Corps existed as the 4th Tank Corps until 14 Feb 43 when it was honored with the Guards title for "courage and heroism." It fought in many famous campaigns including Kursk, Dnieper, Korsun Pocket, Debrecen, eventually to Vienna, and ending the war against the Japanese in Manchuria. When it conducted the offensive north of the Danube to take Komárom, it was very depleted with its 20th Tank Brigade containing no tanks at one point and only 32 men operating M-17 Lend-Lease Anti-Aircraft Halftracks. The 4th Motorcycle Regiment was an independent 6th Guards Tank Army asset, but operated near the Tank Corps along the Danube and was included in the formation for activation purposes.
1st Guards Mechanized Corps: The only full-strength Tank or Mechanized Corps during the campaign. It was rested and situated south of Lake Velence. On reports of the German offensive, it moved north and blocked the approaches to Budapest. It was formed in late-October 1942 from the 1st Guards Rifle Division and participated in Operation Saturn, Kursk, Third and Fourth Kharkov, Dnieper, and then to Budapest. It operated Lend-Lease M4A2 Shermans. It also uniquely contained three SU-100 Regiments.
2nd Guards Mechanized Corps: Formed from the 22nd Guards Rifle Division, the Corps was formed on 15 October 1942. It began the campaign northwest of Budapest in reserve, and moved forward to stop the SS. It contained one regiment of the excellent IS-2 tank, the only Soviet tank capable of competing toe-to-toe against the German Tigers (particularly the King Tiger). Yet there were only a handful of these tanks running at a given time. The Corps fought in Stalingrad, Odessa, Budapest, and eventually to Vienna.
4th Guards Mechanized Corps: Starting as the 13th Tank Corps and fighting at Stalingrad, it was converted to a Mechanized Corps and fought in Uranus where it earned its Guards status on 9 January 1943 (with a Stalingrad honorific soon after). It arrived severely depleted in the Hungarian annexed parts of Slovakia with the 6th Guards Tank Army in January 1945, with only one functioning Tank Brigade, Mechanized Brigade, and an SU-76M Regiment. It followed behind the 5th Guards Tank and 9th Guards Mechanized Corps in the attack north of the Danube, then helped defend against the 1st and 12th SS Panzer Divisions in Southwind.
9th Guards Mechanized Corps: Formed as the 22nd Tank Corps in Spring of 1942 and reformed as the 5th Mechanized Corps after heavy losses in September 1942, the corps achieved Guards status on 12 September 1944, the last Mechanized Corps to be honored. It had fought at Kalach outside of Stalingrad, 2nd Battle of Smolensk, the Korsun Pocket, and later against the Japanese in the East. The 389th Guards SP Arty Rgt (SU-100) did not have any vehicles during the campaign and the 697th SP Arty Rgt was only replenished in mid-January. The Corps in 1944-45 had been using M4A2 Shermans and possibly British Valentine Mk. IX tanks.
18th Tank Corps: Created in June 1942, the corps had fought in a large number of battles before 1945 including Voronezh, Operations Uranus & Little Saturn, Kursk, Dnieper, Kirovograd, Korsun, Jassy-Kishinev, Debrecen, and eventually Vienna. For all its battles, it had not been honored with a Guards designation but had received numerous awards and titles including the titles "Znamensky" and "Budapest" and the Orders of the Red Banner, Suvorov, and Kutuzov by the war's end. There was a Guards unit, the 363rd Guards SP Arty Rgt equipped with ISU-122. The 170th Tank Bde distinguished itself by infiltrating back to friendly lines across mountains and forests after SS Panzer Divisions flanked it on both sides after defending Dunaalmás (A23.17).
23rd Tank Corps: Formed in 1942 with experience fighting at Stalingrad, Donbass, Odessa, Jassy-Kishinev, and Debrecen, the Corps arrived later in Konrad III as a reinforcement. It also fought in Spring Awakening where it was severely depleted. It only had two support regiments (ISU-122 and towed AT) instead of three.
7th Mechanized Corps: The Mech Corps shared a similar battle record as the 18th Tank Corps following its formation in September 1943. It contained the 78th Heavy Tank Regiment equipped with IS-2 tanks, with 9 to 13 operational tanks throughout January out of its full-strength complement of 21 tanks. Its 16th Mechanized Brigade received high praise for stemming the German drive when it was sent north during Konrad I.
Viktorov Group: This was an ad hoc formation formed from different independent units from the 57th Army positioned south of Lake Balaton. When the Germans broke out during Konrad III towards the Sió River, the group was quickly sent north to defend the river until additional forces could be sent. It consisted of two Motorcycle Regiments, an independent Tank Regiment, an independent Mechanized Brigade, a Reserve Rifle Regiment, a Motorized Engineer Brigade, artillery units, and a curious 'Amphibious' Battalion. The battalion was the 252nd Motorized Special Purpose Battalion with two motorized companies, mortar company, and sapper company—all transported in 100 Lend-Lease "Seeps": Ford GPA Amphibious Jeeps.
5th Guards Cavalry Corps: The Red Army was the only army to continue using cavalry in large numbers by the war's end. There was typically one Cavalry Corps for each Front. By 1944, the Corps were all Guards designated, the others disbanded or converted into Guards. They consisted of three Cavalry Divisions (by nature smaller than infantry divisions) and well supported with a tank regiment in each division and anti-tank and self-propelled artillery at Corps level. Its mobility and mechanized elements made for an effective mobile force supplementing the Tank and Mechanized Corps. Much like other armies retaining cavalry units, the horses were used more for transportation than mounted attack, but still effective in smaller scale raids. Following the war, the Cavalry units were converted into Mechanized (later Motor Rifle) Divisions.
Consisting of two Guards and one regular Cavalry Division, the 5th Guards Cavalry Corps was supplemented by an Anti-Tank Battalion, Anti-Tank Regiment, and SU-76M Regiment. A Cavalry Division's Tank Regiments had an array of different tanks, including the ubiquitous T-34, presumably Valentine Mk. IX, and possibly M3 Stuarts and/or Grants. The Corps was Johnny-on-the-Spot throughout the campaigns from January to March 1945 and had been attached numerous independent assets from Anti-Tank to Artillery units, with the 113rd Rifle Division also nominally subordinated to it in January. It was formed in November 1942 and fought at Korsun, Jassy-Kishinev, and Debrecen.
Soviet Infantry
Rifle Corps: Rifle Corps had existed pre-war with similar function as their Western counterparts. Barbarossa devastated the Red Army, leaving a vacuum of experienced higher-level commanders which compounded Stalin's already purged officer ranks. Rifle Corps were all but eliminated between late 1941 and late 1942, when they were slowly re-introduced. The Rifle Corps disappearance coincided with the introduction of the independent Rifle Brigades, a stopgap measure to put infantry units in the field faster while not having enough seasoned commanders at division level. Until the Rifle Corps came back, Rifle Divisions reported directly to Army commands, likely causing span of control difficulties. By 1943 as the rebuilt Red Army generated more experienced higher-level commanders, the Rifle Corps HQ came back to control varying numbers of Rifle Divisions and independent assets. There were Guards and non-Guards Rifle Corps. Generally Guard Rifle Corps contained more Guards Rifle Divisions than non-Guards Rifle Corps, but this wasn't universal. The 7th Guards Army's 24th and 25th Guards Rifle Corps only contained a handful of Guards Rifle Divisions among regular Rifle Divisions.
The augmented Anti-Tank Battalion consolidated the divisional AT battalions. The same applies to the Corps HQ's artillery points aggregating each division's available artillery.
In the Soviet (and Romanian) Rifle Corps formations, the unit counters use I, II, and III before the division number, instead of their actual numeric designation. This was due to unwieldy regiment number and division number literally not fitting on the counter. With 4 digit regiment numbers and division designations with three digits, having eight characters (with the slash) was too long and compressing the numbers would make it difficult to read. While occasional designations might have worked, the decision was to consistently use Roman numerals.
For those interested, here are the Divisional regiment designations in the Rifle Corps:
10th Gds Rifle Corps: 86th Gds Rifle Div: 260, 263, 265. 99th Rifle Div: 1, 197, 206.
18th Gds Rifle Corps: 25th Gds Rifle Div: 73, 78, 81. 297th Rifle Div: 1055, 1057, 1059. 317th Rifle Div: 571, 606, 761.
24th Gds Rifle Corps: 6th Gds Abn Div: 14, 17, 20. 72nd Gds Rifle Div: 222, 224, 229. 81st Gds Rifle Div: 233, 235, 238. 243rd Rifle Div: 906, 910, 912.
25th Gds Rifle Corps: 53rd Rifle Div: 12, 223, 475. 375th Rifle Div: 1241, 1243, 1245. 409th Rifle Div: 675, 677, 684.
35th Gds Rifle Corps: 38th Rifle Div: 29, 48, 343. 78th Rifle Div: 453, 458, 464. 163rd Rifle Div: 529, 759, 1318.
23rd Rifle Corps: 49th Gds Rifle Div: 144, 147, 149. 19th Rifle Div: 32, 315, 1310.
30th Rifle Corps: 36th Gds Rifle Div: 104, 106, 108. 68th Gds Rifle Div: 72, 198, 200. 74th Rifle Div: 78, 109, 360. 155th Rifle Div: 436, 659, 786.
33rd Rifle Corps: 202nd Rifle Div: 645, 682, 1317. 206th Rifle Div: 722, 737, 748. 337th Rifle Div: 1127, 1129, 1131.
37th Rifle Corps: 59th Gds Rifle Div: 176, 179, 183. 108th Gds Rifle Div: 305, 308, 311. 316th Rifle Div: 1073, 1075, 1077. 320th Rifle Div: 476, 478, 481.
75th Rifle Corps: 109th Gds Rifle Div: 306, 309, 312. 180th Rifle Div: 21, 42, 86.
104th Rifle Corps: 3rd Gds Abn Div: 2, 8, 10. 66th Gds Rifle Div: 145, 195, 197. 151st Rifle Div: 581, 626, 683.
133rd Rifle Corps: 21st Rifle Div: 94, 116, 326. 104th Rifle Div: 217, 242, 273. 122nd Rifle Div: 420, 596, 715.
135th Rifle Corps: 233rd Rifle Div: 703, 724, 734. 236th Rifle Div: 509, 814, 818.
7th Romanian Infantry Corps: 2nd Romanian Inf Div: 1, 26, 31. 19th Romanian Inf Div: 94, 95, 96. 9th Romanian Cavalry Div: 3, 5, 13.
Guards Airborne Divisions: The Soviets were early practitioners of Airborne warfare (remember the videos of paratroopers sliding off of transport plane wings!), but could not execute well in practice. Soviet Airborne operations at Vyazma and Dnepr were clumsy. Early in the war, the Soviet Airborne was organized as Brigades in Corps. The Corps evolved into Guards Airborne Divisions in December 1942, but given the limited large-scale Airborne insertion ability, the divisions were used as ground combat units, much like the German Fallschirmjäger Divisions after Crete. Attempts to restart a dedicated parachute force did not succeed, and by 1944 the Guards Airborne Divisions were structured exactly like Guards Rifle Divisions, so much so that the 5th and 7th Guards Airborne Divisions had SU-76Ms for tracked gun support. They operated this way until after the war. At that point, the Airborne became an independent branch separate from the Army and re-emphasized airborne delivery.
Rifle Divisions: Soviet Rifle Divisions, as mentioned earlier, were virtually all depleted in frontline Armies. When Konrad I began, the 2nd and 3rd Ukrainian Fronts' Rifle Divisions averaged 4,880 men. A Soviet Rifle Division's full strength in the July 1943 TO&E (shtat in Russian) was 9,380 men. There was a December 1944 TO&E that increased the total to 11,706 men but most if not all did not adapt the latest structure by January 1945. On paper, the Rifle Division wasn't dissimilar to many Western Divisions, having 3 regiments each of 3 battalions with Artillery, Anti-Tank, Pioneer and other administrative units. Virtually no Divisions were at full strength. Front commanders started designating new structures for the available manpower for their Rifle Divisions. Stephen Zaloga's example in The Red Army Handbook for the 1st Baltic Front in July 1944 illustrates the revised Red Army organizations. Reduced TO&Es were established at 7,189, 6,245, 5,327, and 4,400 personnel. Each modified the Infantry Regiment and lower components structure.
At the 7,189-manpower level, each Rifle Platoon was reduced by one squad in addition to other reductions across the division. At the 6,245-manpower level, the Rifle Companies were reduced to only two Platoons each of Three Squads. At the 5,327-manpower level, there was a more dramatic change. The Regiments disbanded a battalion each while reverting the Rifle Companies back to 3x Platoons (and each squad reduced by one man). The lowest configuration, at 4,400-manpower level, retained the two-battalion regiment while having only 2x Rifle Companies per battalion and each of those with only 2x Platoons each with 3x Squads. Note that the reduction to two battalions per regiment matches what the German Army had already been doing officially in 1944, but had already been doing in the field by late 1942 (like the ones in Stalingrad) given the manpower crunch. The restructuring by reduced manpower shows that the commanders knew they would not be getting replacements to replenish their divisions fully. This restructuring does not look to be set in stone as occasional regiments retained third battalions even while depleted.
Each Division had a training battalion that would be used to send replacements to frontline units. Not unlike the German Divisional Ersatz Battalions, these were used as combat units only as the need arrived. Only those instances where there was explicit use of these training battalions as combat units were included in the countermix. These were in the 5th Guards Airborne and 80th Guards Rifle Divisions.
The Anti-Tank battalion still used the obsolete 45mm towed gun, in service from the war's beginning. A number of Rifle Divisions (usually Guards) had an SU-76M battalion in lieu of a towed AT Battalion. The Divisional Artillery contained 20x 76mm Guns (the ubiquitous ZiS-3) and 12x 122mm Howitzers. The former's shell weight along with its dual-purpose role to back up the obsolete 45mm gun, lessened how much high explosives the divisional artillery could rain down. This was, of course, overshadowed by the plethora of heavier Corps and Army level artillery.
1st Guards UR Brigade: A unique formation deserving its own entry, this was the only Guards designated UR (Ukreplyonny Raion) when it was honored in July 1943 from the 76th Fortified Region. The correct designation is Fortified Region, but written as UR Bde for ease and the formation size was roughly between a regiment and brigade (see OCS). The intent of these Formations, as their name implies, was to defend Soviet Union's border regions. They were defensive in nature, consisting of five Machine Gun-Artillery Battalions. Given their limited mobility, many were disbanded when the Soviets took to the offensive in 1943 and started pushing out from their borders, as they were not much in need. Yet the 1st Guards UR Bde soldiered on to 1945 where it defended the 4th Guards Army's extreme left flank at the tip of Lake Balaton in January 1945. It would remain there until the start of Konrad III where its 9 MG-Arty Bn held on stubbornly and was praised for its resistance. It was supplemented by inherent AT guns (the dual-purpose 76mm gun) and was beefed up with independent AT units.
Independent Assets: The Soviets operated a large array of independent units to attach to individual corps and divisions. The Red Army operated many Independent Tank Regiments but only one fought in the game scope: the 249th that fought under the ad hoc Viktorov Group. Other Tank Regiments (battalion-sized units of 30 tanks) were organic to Mechanized Brigades or Cavalry Divisions. There were also Independent Tank Battalions (also around 30 tanks), but these were disbanded or converted to Tank Regiments by 1944.
There were also a large number of SU (Samokhodnaya Ustanovka) Regiments. Most Non-Guard SU Regiments operated the SU-76M but a number had SU-85 (none of them in the game). These regiments provided support for the assaulting troops in the Budapest siege as well as frontline units. As SU-100s replaced SU-85s, the regiments containing the former were put into brigades. In January 1945, three such brigades were formed, each containing three SU-100 Regiments. They joined the 3rd Ukrainian Front by March and participated in Spring Awakening.
The 366th Guards Heavy Self-Propelled Artillery Regiment was converted from the 1830th SP Arty Rgt in July 1944 when it traded its SU-152s for the more reliable and more heavily armored ISU-122s and ISU-152s.
The bulk of the independent units were Anti-Tank forces, ranging from a few AT Battalions, many Independent AT Regiments, and a number of large AT Brigades. They operated either 57mm or 76mm guns, with the latter as the majority. Anti-Tank Brigades were composed of three regiments each with 72 guns total, making for a very large and dense support unit. Two Brigades had their AT Regiments assigned to different formations, and are portrayed as such in the game. Given the 76mm Divisional Gun's (the ZiS-3 model) dual-purpose ability to fire indirectly or directly, Light Artillery Brigades would be used as Anti-Tank platforms to supplement the dedicated Anti-Tank units.
7th Romanian Infantry Corps: After the coup of Ion Antonescu by King Michael, Romania quickly fell and became allied to the Soviets. The 7th Romanian Corps was in the center of the Soviet assault on Pest. The Corps consisted of two infantry divisions and a cavalry division fighting as infantry. Soviet command felt the Romanian troops' quality and fighting spirit was uncertain. Given the historically cold relationship between Hungary and Romania, the latter's insertion into the lines may have been intentional. With Pest collapsing by mid-January, the Romanians were withdrawn supposedly to give all the glory of capturing Budapest to the Soviets.
Overall, the Red Army formations' (Corps equivalent to Western Army Divisions) smaller size is reflected in wargames by portraying Soviet units at a higher level than their enemy counterparts (Divisions vs. Regiments, Regiments vs. Battalions, etc.). In this game's initial research, I had wanted to avoid this stereotype (at least for the Rifle Corps). But given the number of men in the Rifle Corps and sheer number of Rifle Divisions that would be activated, I took a hybrid approach. Rifle Divisions that had started on the frontline south of the Danube or operated outside of a Rifle Corps were on average stronger than those fighting in Budapest or north of the Danube (5,300 vs. 4,600). These larger divisions were kept as Divisions while the rest were made into Corps Formations. This worked as the tighter frontages in Budapest itself would be unwieldy had they been battalion units stacked in the urban hexes. As Corps were administrative HQs that could contain varying divisions at any given time, a little voodoo gave the best single fit and representation of each Corps' composition for most of the campaign.
Doomed Garrison: Festung Budapest
Festung Budapest was under the command of Karl Pfeffer-Wildenbruch, commander of the IX SS Mountain Corps. Nominally, he also commanded the Hungarians in the city, but the structure was awkward and uncoordinated. Much of this was due to Pfeffer-Wildenbruch's prickly personality, never leaving his HQ until captured, and the tension extended to the sub-commanders under him. This effectively caused the local German and Hungarian commanders to coordinate defensive efforts. They held out until February 1945, when some survivors tried to break out of the encirclement and those remaining in the city surrendered.
The garrison at the start of January 1945 consisted of remnants of divisions that had retreated into the city in December along with Hungarian Gendarme (Galántai, Zilahi, Székelyudvarhelyi, Besztercei, Pécsi), locally raised paramilitary and alarm forces (two University "Assault" battalions, Berend, Déri, Morlin, Vannay, Veresvary, Viharos), firefighting and construction troops (Sodro), Security units, and Arrow Cross Party militia groups (named after neighborhoods in Budapest) along with a large contingent of 88mm Flak units. Overall there was a myriad of ad hoc, depleted, and consolidated units in the garrison where no two sources agreed 100%. The Festung Budapest represents the best picture of the defenders within the game's timeframe.
The Hungarian Assault Gun group under General Billnitzer consisted of parts of seven Assault Gun battalions (1st, 7th, 10th, 13th, 16th, 24th, and 25th) which included German-made StuG III and Hungarian Turans and Zrínyis, with many crews and support staff fighting as infantry to be dual unit capable.
The following is the list of higher formations and the units that belonged to them at the campaign's start:
8th SS Cavalry Division: 8 SS Hetz Bn, 8 SS Pz Recon Bn, Portugall Inf KG, 15 Kav, 16 Kav, 18 Kav SS Inf Rgt - The "Florian Geyer" division was formed in 1942 based on the SS Cavalry Brigade and contained a large portion of Southeast European Volksdeutsche (ethnic Germans). It spent its time until 1944 fighting partisans until the Soviets entered Hungary. KG Portugall was based on flak troops fighting as infantry under the divisional Flak Battalion's 1st Battery commander. The division fought on the Buda side of the river along with an Alarm battalion designated "Europa."
22nd SS Cavalry Division: 22 SS Hetz Bn, 22 Aufk Inf Bn, 17 Kav, 52 Kav, 53 Kav SS Inf Rgt - Formed in late 1943 from the 8th SS Cavalry Division, the "Maria Theresia" division contained Hungarian Volksdeutsche. Having considerably less experience than its progenitor, its 53rd Regiment was only partially formed when it was committed against the Soviets. The Recon battalion lost all its vehicles and was fighting as infantry during the battle. The unreliable 1st SS Police Regiment organized as a Kampfgruppe under Dörner fought alongside the division.
Feldherrnhalle Panzer Division: FHH StG Bn, I/FHH, I/Gren, II/Gren Inf Bn - Formed in 1943 from the 60th Motorized Division that was destroyed in Stalingrad, it was honorarily named after the Field Marshals' Hall in Munich as many original volunteers came from the Sturmabteilung (SA). In November 1944 it was redesignated as a Panzer Division and soon after involved in the fighting at Budapest. Parts of the division were trapped outside the city. These fought as independent units in the Konrad Offensives. Following the fall of Budapest, Feldherrnhalle was rebuilt as a Panzer Corps with surviving divisional units and scant replacement units along with renaming the 503rd Tiger Battalion as Feldherrnhalle.
13th Panzer Division: I/4 Pz Bn, 13 Pz Recon Bn, I/66, II/66, I/93 Inf Bn - While a Motorized Infantry Division in Poland and France, it converted into a Panzer Division for Barbarossa. It would fight exclusively on the Eastern Front. Its commander, Gerhard Schmidhuber, was designated the overall commander of Axis forces on the Pest side of the city and would die attempting to breakout in February 1945. The II/93 Inf Bn was outside the siege, and like the FHH units, fought with formations trying to relieve the city.
271st Volksgrenadier Division (elements): Kündiger Inf KG – Centered on two battalions of the division (I/977 and II/978) along with other scattered elements, this Kampfgruppe was named after its commander, Herbert Kündiger, a battalion commander. The main part of the division will be described later as part of Divisionsgruppe Bieber.
1st Hungarian Armored Division: 1/1 Arm Inf Rgt - Used as a cadre formation to fill the 2nd Armored Division, the 1st Armored Division was committed to combat when the Soviets invaded Hungary. The division remnants from the 1st Armored Regiment fought as infantry with only a handful of armored vehicles (Toldi Hungarian tanks and AA Nimróds) and a few guns.
1st Hungarian Hussar Division: 4/1 Hus Hungarian Inf Rgt - Most of the division was outside the city, but the 4th Cavalry Regiment and the 1st Independent Hussar Battalion along with remnants of divisional assets were in Budapest.
10th Hungarian Infantry Division: III/6, III/8, I/18 Hungarian Inf Bn - Starting the war as a brigade then a Light Division, it became a full Infantry Division in August 1943. The division only had three functional battalions at the start of January 1945 and was completely destroyed when the city fell.
12th Hungarian Infantry Division: III/38 Inf Bn - Changed from a Brigade to a Regular Infantry Division since 1939, the division consolidated its remaining strength into a single battalion when Konrad I was launched.
Running Out of Time: The Germans
Say what one will about struggling German military capability in the war's last months, but they were still seeking offensive opportunities. The Germans were still heavily reliant on their Panzers leading offensives. In order to launch Konrad I and subsequent operations, they shifted a great number of Panzer units to the Budapest area. When Spring Awakening concluded in March 1945, all but one of the seven SS Panzer Divisions and half of the Heer Panzer Divisions on the Eastern Front (a full third of the total number of Panzer Divisions) are included in the game. This created a tank heavy imbalance vs. infantry divisions, and complaints of not enough infantry to cover the advance of the Panzers persisted over the planning. Yet all the Panzer Divisions were depleted to varying degrees, and constantly struggled to maintain viable numbers of running tanks.
1st SS Panzer Division: The "Liebstandarte Adolf Hitler" Division fought as a Panzer and Infantry Group: Kampfgruppen Peiper and Hansen, respectively. KG Peiper was organized similarly as it had been in the Ardennes—a mixed Panther/Panzer IV Battalion, the 501st Heavy Panzer Battalion acting as the 1st SS Panzer Regiment's second battalion, the 2nd SS Panzergrenadier Regiment's halftrack battalion, and an artillery battalion along with a company of pioneers. In this game, the KG is simplified without the infantry breakdowns given Peiper's less outsized and independent role in Southwind and Spring Awakening. He was still aggressive but with less motivated and veteran troops than he had in December 1944. KG Hansen contained the rest of the division's forces including the Jagdpanzer battalion, pioneers, and the two SS Panzergrenadier Regiments' truck-borne Infantry.
2nd SS Panzer Division: The "Das Reich" Division originated as the SS-Verfügungstruppe (Dispositional Troops) at the beginning of the war. It had fought in both the Eastern and Western Theaters and on its final trip back to the East, had lost most of its edge. The Panzerjäger Battalion had switched from Jagdpanzers to StuG IIIs and the Panzer Regiment's 2nd Battalion was odd with each of its companies having exclusively Pz IV, StuG III, Panzer IV/70 (Panzerjäger), or Jagdpanthers. The II/3 and I/4 Panzergrenadier Battalions were delayed from joining the division at the start of Spring Awakening by limited training and transportation. The II/2 Pz Bn and III/4 Halftracked PG Bn spearheaded the division's attack and hence given higher ARs.
3rd SS Panzer Division: The "Totenkopf" Division, along with the 5th SS Panzer Division, was transferred from Poland, with elements arriving by rail at Komárom on New Year's Day, 1945. The full division would not arrive until days later but its combat units were in place or moving into the start line. The formation was unique in that it still retained an inherent Tiger Company, the 9th Company in its Panzer Regiment. The other SS Panzer Divisions had given up their Tigers to be consolidated into Corps level independent Heavy Panzer Battalions by early 1944. They still retained the older Tiger I (Pz VIe) and through the battles around Budapest had 11 on hand, but were only able to keep between 4 and 9 of these running at one time. The Panzer Regiment's II Bn contained one company of StuG IIIs with the other three having the typical Pz IVs.
5th SS Panzer Division: The "Wiking" Division, as its name implies, was based on volunteers from Northern Europe (not necessarily Scandinavian). It had fought exclusively on the Eastern Front (a KG fought in the west and the remnants surrendered to the Americans by VE-Day) and by the war's last years, along with the 3rd SS Panzer Division, was a fixture in the IV SS Panzer Corps. Like Totenkopf, it was shipped in pieces to Hungary. Reinforcing the division was a battalion each from the 23rd ("Norge" as listed in Hungarian Rhapsody) and 24th ("Danmark") PG Rgts from the 11th SS Panzergrenadier Division. These were rebuilt and instead of being sent to their parent division, were assigned to the 5th SS Panzer Division. In addition, a Hungarian SS unit, the 1st SS Sturmjäger Regiment that was based on the 25th and 26th SS Grenadier Division's ski battalions and redesignated as "Assault", was attached to the division at the start of Konrad III. While this regiment was not permanently assigned to the division throughout the Konrad offensives, it had only spent a brief time away from it. Unlike typical Panzer Divisions, the Panthers were found in II Battalion, and the I Battalion was composed of an even split of Pz IV and StuG III companies.
9th SS Panzer Division: The "Hohenstaufen" Division's fame culminated in Market Garden. It had not performed poorly in the Ardennes, but its actions were overshadowed by others. While refurbishing in Germany, it was in a fairly poor state and reorganized. The Panzerjäger Battalion was disbanded. In its place, a provisional Panzergrenadier Battalion was formed under the Panzer Regiment and allocated with halftracks from the Pioneer battalion and III/20 PG Bn. The I Bn had three companies of Panthers with the last company containing JagdPanthers. The II Bn had a split of two Pz IV companies and two StuG III companies with a newly added 9th Company from the Panzerjäger Battalion's remains (armed with Pz IV/70 Jagdpanzers).
12th SS Panzer Division: Given the extreme difficulty in replacing tanks during Fall 1944 in the West, a number of Panzer Divisions disbanded one Panzer Battalion and the remaining battalion contained both Panther and Pz IVs. The 1st and 12th SS Panzer Divisions both had this done to them. The II Battalion for the "Hitler Jugend" Panzer Regiment was sent to Germany to train new crews. Before being sent to Hungary to take part in Southwind and Spring Wind, the Panzer Regiment had swapped its Panzer Battalions so the II Battalion (2, 4, 7, and 8 Companies replacing the 1, 3, 5, and 6 that fought in the Ardennes) was with the division while the I Bn remained at the training base. The Heer 560 Jagdpanzer Battalion was used as the Panzer Regiment's de facto second Battalion. The division's remainder was organized as it was when it fought in the Bulge, but the edge had been ground down and it was refurbished with poor replacements.
Kampfgruppe Pape: Pape was the Feldherrnhalle Division's commander, but was evacuated out of the Budapest siege. He was used to command an ad hoc Panzer-heavy Kampfgruppe from nearby Panzer Divisions during Konrad I. After failing to penetrate further than Tatabánya and Felsőgalla, it was disbanded only to reform for Konrad III. In its latter configuration, it controlled the Panzer Recon Battalions from three Panzer Divisions screening the offensive's southern flank against Soviet forces coming north from the Sió River.
1st Panzer Division: One of the original Panzer Divisions formed in 1935, it had fought in Poland, France, and the Eastern Front with a few quiet stints in France before D-Day. In January 1945, it was depleted and holding the line during Konrad I and II, sending a Panzer Kampfgruppe in the latter, and fully participating in Konrad III and Spring Awakening. Its Panzer Regiment was split into two mixed-force Kampfgruppen. KG Elias had the 4th Company, 1 Pz Rgt (early Jan with 10 Panthers) and 10th Pioneer Company/113 PG Rgt. KG Rank had a mix of 3rd and 7th Companies (Panthers), 6th Company (Pz IV), and 2/37 Pio Bn. The I Bn/24 Pz Rgt, nominally under the Panzer Division with the same number, was assigned to the division ahead of its commitment in Konrad III. Its Panzerjäger Battalion was interesting in that it contained Nashorns, StuG IIIs, and Marders rather than the more common Pz IV/70s as it never had an opportunity to re-equip. It also had a Hungarian Battalion from the decimated 23 Inf Div attached at least in January. Its Panzergrenadier Regiments operated as KG Huppert and Marks for the 1st and 113th, respectively. It had also operated, in at least one instance, with its Feldersatz (Training and Replacement) Battalion as a whole combat unit.
3rd Panzer Division: After participating in Poland and France, the 3rd Panzer Division fought exclusively on the Eastern Front, having never been stationed in France for rest and refit like many of its fellow Panzer divisions. At the start of January 1945, it found itself split fighting on both sides of the Danube. Kampfgruppe Weymann contained the 6th Panzer Regiment and the half-tracked I/3 PG Bn and was located between the 4th Cavalry Brigade and 23rd Panzer Division in front of Zámoly. Instead of having only Panzer IVs, II/6 Panzer Battalion had one company of Pz IV/70, another of StuG IIIs, with the other two using Pz IVs. The division's remainder was defending north of the river when it was sent south to join Weymann soon after Konrad I began. The whole division participated in Konrad I and II.
6th Panzer Division: The division was the first Panzer Division formed after the invasion of Poland from the converted 1st Leichte (Light) Division. Like the 3rd Panzer Division, a portion of it was fighting south of the Danube until the rest joined up. Its Panzer Kampfgruppe (I/11 Pz Bn and II/114 PG Bn) was with Kampfgruppe Pape until 7 January 1945 when it was broken up and its components returned to their parent formations. In addition, the 26th Panzer Division's I/26 Pz Bn was detached and upgraded to Panthers. The unit was bounced around attached to different divisions and never returned to the 26th Panzer Division. First attached to KG Pape then to the 6th Panzer Division, the I/26 Pz Bn was withdrawn on 15 January 1945. The 6th Panzer Division held the area around Tatabánya where Pape was and continued to hold the area throughout the rest of January. Overall the division started depleted and never had the chance to regain its full strength. Its 6th Panzer Recon Battalion was detached and assigned to the 211th Volksgrenadier Division throughout January.
8th Panzer Division: The 8th Panzer Division was another division with its Panzer Kampfgruppe initially assigned to KG Pape, while the remainder of the division moved in behind the 211th Volksgrenadier and Szent Laszlo Divisions right when the Soviets launched their counteroffensive to take Komárom. The detached Kampfgruppe rejoined the division to fight as a full division against the Soviets north of the Danube. It counterattacked along the penetration's northern flank and pushed the Soviet forces back. Like most Panzer Divisions, it was far from full strength. For example, its II/10 Panzer Battalion contained only three companies instead of the standard four with no running Pz IVs on New Year's Day, 1945.
20th Panzer Division: In reaction to the Soviet attack north of the Danube, the 20th Panzer Division was sent as a reinforcement all the way from East Prussia. By far it was the most complete Panzer Division to take part in the fighting around Budapest. Having successfully counterattacked along with the 8th Panzer Division and other forces, it was withdrawn in pieces starting 18 January 1945 to other threatened areas. This shows the use of Panzer Divisions as Fire Brigades putting out fires all over the front. The 21st Panzer Regiment was unique in that its II Battalion contained its Panthers, unlike many others that had them in their I Bn and both having only three companies each instead of four.
23rd Panzer Division: This division was formed in late 1942 in France based on a Panzer Brigade using captured tanks. It evolved into a full and proper Panzer Division and spent its combat history on the Eastern Front. In January 1945 it was defending a stretch of land to the west of Székesfehérvár. Like the 1st Panzer Division, it formed its depleted Panzer Regiment into smaller kampfgruppe called KG Rebentisch consisting of 19 tanks, along with a Panzergrenadier and Pioneer company of the 126th PG Rgt. When Rebentisch was wounded right before Konrad III began, the KG was replaced by KG Kujacinski containing 10 Panthers and Panzer IVs along with some attached Tiger IIs from the 503rd Felherrnhalle Heavy Panzer Battalion. There was also a Kampfgruppe Schulz which was based on the 23rd Panzer Regiment's 8th Company (with between 8 and 16 running tanks, mostly Panthers) throughout January. In early January, it was assigned an ill-trained Luftwaffe Infantry Battalion.
3rd Kavallerie Brigade: Formed in early 1944 together with the 4th Kav Brigade, these formations were legitimate cavalry and the last major German Army Cavalry formations once the 1st Cavalry Division had converted to the 24th Panzer Division in late 1941. It consisted of two Cavalry Regiments and an independent "Cossack" Battalion. Cavalry units tended to be smaller than their infantry unit counterparts, and each regiment comprised of two battalions each with five company-sized "squadrons." The Brigade was supplemented with a PJ Battalion containing a mixture of Jagdpanzer IV, StuG III, StuH 42, and StuG IVs. Its Panzer Reconnaissance Battalion was similar to the early war Panzer Division Recon Battalions, made up of a motorized infantry company, a halftrack recon company (SdKfz 250/9), and instead of a heavy weapons company, an anti-aircraft company.
4th Kavallerie Brigade: Created a few months after the 3rd Kav Brigade, 4 Kav Brigade operated alongside its counterpart in the newly formed I Cavalry Corps, but while lacking the independent cavalry battalion, the two were similarly organized. Its PJ Bn contained StuG IIIs, one Panzerjäger IV/70, and eight towed 75mm AT Guns. The 4th schwere (Heavy) Battalion was its reconnaissance unit and was using Panzer IIs and/or Luchs in addition to light and medium Halftracks (SdKfz 250 and SdKfz 251, respectively). It was positioned around Mór and fought in Konrad II around Zámoly. In February 1945, both the 3rd and 4th Kav Brigades were renamed as "divisions" without any real organizational change. As such, there was no need to change either formation when used in the Spring Awakening scenario.
44th Hoch und Deutschmeister Division: The division's progenitor was destroyed at Stalingrad and was rebuilt in mid-1943 with unique honorary title: "Reichsgrenadier-Division Hoch und Deutschmeister" by Hitler's personal order. Its 134th Infantry Regiment was likewise renamed as the Reichsgrenadier-Regiment Hoch-und-Deutschmeister. The rebuilt division first served in Italy where it fought very well. The division was ordered East in November 1944. It fought on the southern shore of Lake Balaton and from there high command debated whether to send it north of the Danube to help against the Soviet counterattack there or south to be part of Konrad III. In the end, it was sent late to the fight south of the Danube but would participate fully in Southwind and Spring Awakening in February and March on both sides of the river. Its Reconnaissance Battalion, in all likelihood, was a battalion structured the same as a Fusilier Battalion, but mounted on bicycles.
46th Infantry Division: The last of the 1938 pre-war 1st Wave divisions, the 46th Division remained on the Eastern Front after Poland and France. In January 1945 it was stationed north off the map, but was committed to the attack in Southwind. The division was depleted in February 1945 and the combat value rating lists one less battalion than full complement. It was not possible to determine which battalion this was, and if the battalion was disbanded or merely detached. The II/97 Inf Bn was chosen at random. The division contained a Marsch (March) Battalion and the II/FHH Panzergrenadier (Motorized) Battalion from the Feldherrnhalle Panzer Division which was slowly being rebuilt. The division was renamed a Volksgrenadier Division immediately without being rebuilt.
96th Infantry Division: Formed in the 5th Wave as the fighting in Poland was going on, the division was in southern Poland in late 1944 when it was sent south to participate in Konrad I. It was given a special mission to cross the Danube River behind Soviet lines to harass and cut off the main road leading from Komárom to Esztergom. The veteran division again conducted a crossing back to the northern bank over the Danube during Southwind. This was done by a Kampfgruppe Hupe, consisting of 284th Grenadier Regiment, the II/287 Inf Bn, and supported by the 239th StuG Bde firing across the river. The division's Panzerjäger Battalion was a mix of Marders and StuG III or StuG IVs.
153rd Feldausbildung Division: The 153rd was only a Field Training division, but like many others was pressed into active combat service. Sent forward to blunt the Soviet attack north of the Danube, the division contained a hodge-podge of units. Its inherent divisional units included the Fusilier Battalion, Pioneer Battalion, and two of its normal three regiments (there is no mention of the activity of the 715th Regiment). In addition, it had the 885th Landesschützen (Home Guard) Battalion which the official records say was disbanded in Romania in October 1944, but sources continue to list it with the division in January 1945, as well as two "Gneisenau" Alarm Battalions.
211th Volksgrenadier Division: Converted from a regular Infantry Division in November-December 1944, the 211th VG was immediately sent to replace Panzer Divisions holding the line immediately north of the Danube River. Despite being a newly reformed division with many replacements, its division commander was excellent and the division fought well. Its Hetzer Battalion would only join the division late in January, but the division was augmented by assignment of the 6th Panzer Division's Panzer Reconnaissance Battalion.
Divisionsgruppe Bieber: This division fought against the Western Allies and was destroyed in Normandy. It was rebuilt as a VG Div and sent East. Martin Bieber commanded it as the 271st Volksgrenadier Division. Much of the 271st VG Division was again shattered (and parts of it trapped inside Budapest—such as KG Kündiger). The remnants fought as a small division group under Bieber's command. It controlled two battalions of the 1st Hungarian Infantry Regiment (25th Hungarian Division) along with a German MG Battalion.
356th Infantry Division: The 356th Inf Div was a recent arrival from the Italian Front, showing up at the very end of Konrad III. Its Fusilier Battalion, 869th Grenadier Regiment, pioneers, and artillery were transported from Germany after being replenished. Its other forces were still depleted from Italy. The 356 Inf Div was inexperienced on the Eastern Front and showed poor results when deployed into Spring Awakening.
Kampfgruppe Staubwasser: Kampfgruppe Staubwasser detached from the 357th Infantry Division to hold the western frontline against the Garam bridgehead when Southwind began. It was formed from two battalions of the 945th Grenadier Regiment, a battalion of the 946th, and a Machine Gun Battalion.
711th Infantry Division: The division was a Coastal Static Division and fought against the British in Normandy by Cabourg. After retreating across France, it was reformed in the Netherlands in December 1944 and sent East. Despite originating as a static division and largely uncommitted in the battles around Caen, it fought well advancing the extreme northern flank of the IV SS Panzer Corps during Konrad II.
Independents: As one might expect, there is an interesting mix of Independent units involved here for the Axis.
First, there are three units from Kampfgruppe Ney, a Brigade-sized unit that grew from two battalions to three during the campaign. It was formed by Karoly Ney, a strong supporter for the pro-German faction in the Hungarian Parliament. He organized a paramilitary unit that became part of the SS. The Kampfgruppe's first action would be in Konrad I, but its constituent battalions (with the III Bn only being ready on 11 Jan 1945) had not actually fought together. Hence the battalions are shown as independents.
Two Army Heavy Panzer Battalions fought by Budapest; both being equipped with the Tiger II. The 503rd Heavy Panzer Battalion had recently been renamed "Feldherrnhalle" to be assigned to the Feldherrnhalle Panzer Corps, but many still referred to it by its numerical designation. The 509th Battalion was rare in that it had on hand its full 45 Tiger II complement, but keeping them all in running order was difficult.
Other armor units included the unique 208th Panzer Battalion (three companies of Pz IV and one company of Pz IV/70) as Germany did not operate many independent non-Heavy Panzer units. The 219th Sturmpanzer Battalion was equipped with Brummbärs and together with the 217th fought in the Ardennes, but it was always a struggle to keep vehicles in running order. The 1335th Battalion was named a "Sturmgeschütz" Battalion (in spite of being equipped with Hetzers) and was orphaned when its parent 335th Infantry Division was destroyed in August 1944. In addition there were the typical Sturmgeschütz Brigades, and towed Panzerjäger Battalions using the ubiquitous 75mm or the long 88mm (L/71), with the latter in the dedicated anti-tank carriage, not the more familiar anti-aircraft platform. There were, of course, a number of Luftwaffe 88mm Flak Battalions used as anti-tank units particularly in Budapest itself.
Kampfgruppe Philipp was built from scattered Panzers, StuGs, and Panzergrenadiers from the Feldherrnhalle Division under the 1st Panzer Division's Panzer Regiment commander and participated in Konrad II. Along with the 13th Panzerjäger Battalion and II/93 Panzergrenadier (Motorized) Battalions from the 13th Panzer Division, these units were separated from their parent divisions trapped inside Budapest. They would be used to form the basis of new "Feldherrnhalle Divisions" with more emphasis on honorific names than any real strengths.
Two curious units joined by the time of Konrad III: one Flamethrower Panzer Company and another a "Typhoon" Assault Pioneer Company that used a special gas mixture to demolish fortified positions. Sorry, no special rule for them given the game scale and extra rules applying a single company. Besides, the pioneers' exploits, if any, were not mentioned in reports of the fighting.
There were a number of Alarm Battalions created during the "Gneisenau" call up. These mobilizations involved Himmler's Replacement Army ("Ersatzheer") to form emergency units. The code names were named after significant Germanic history or heroic lore; "Gneisenau" was a famous Prussian Field Marshall during the Napoleonic Wars. Others were named "Walküre" (Valkyrie) in September 1944 after the German collapse in France, and "Westgoten" (Visigoths) and "Ostgoten" (Ostrogoths) in March 1945 for the final call up for the Western and Eastern Fronts, respectively.
Fighting to the Last: The Hungarians
Hungary would remain Germany's ally to the bitter end. This was helped by the country's German occupation with Operation Margarethe in March 1944 and later Operation Panzerfaust in October 1944 to ensure the government continued fighting the Soviets as they crossed through Hungary. While the Hungarian Army would continue to fight, its condition was brittle. Many units were depleted by combat and desertions. What replacements could be gathered were quickly trained to rapidly reform divisions. Overall, the Hungarian Army's performance was uneven overall and especially limited in offensive operations.
2nd Armored Division: The 2nd Hun Pz Div was formed first in late 1941, but not committed until early 1944. Having fought and retreated across its home country, it was pulled back to replenish slightly before being committed again around Zámoly. Its severely depleted Armored Regiment contained only 16 running Panzer IVs and its Motorized Infantry was less than full strength. It had a strong Armored Reconnaissance Battalion with four companies but only three Csaba (home grown armored cars). Its Anti-Aircraft Battalion used a handful of very rare self-propelled armored "Nimróds" mounting 40mm Bofors guns, along with infantry.
1st Hussar Division: Formed in 1942, but uncommitted until June 1944, the Hussars were considered a good fighting formation despite the turmoil surrounding the Hungarian Armed Forces late in the war. A portion of the division was trapped in Budapest, while the rest pulled back to rebuild. Operational maps show the division on the frontline on 1 Jan 45, but the divisional history and Számvéber indicate it only returned to the frontline by 7 Jan 45. Its 3rd Cavalry Regiment was depleted and its II/4 Cav Bn was in Budapest lacking its inherent tanks. The 23rd Division's depleted 42nd Infantry Regiment was attached as well as the independent 1st Cavalry Battalion. On returning to the frontline, it remained in defense until March around Mór.
Szent László Infantry Division: Formed in late 1944, the "Saint Ladislaus" Division was training in December when it was committed north of the Danube. The division was considered elite, comprising a regiment each of Paratroopers, Grenadiers, and "Flying Rifleman" (out of work Air Force personnel). By the start of January 1945, it had already been worn out from fighting with its regiments worn down to battalion strength and Air Force replacements only receiving 2 weeks of training. In addition to its inherent 20th Assault Gun Battalion, it also had an ad hoc Assault Gun battalion named after its commander, comprising the 16th and 24th Assault Gun Battalion remnants. It also had a number of German units attached to it to buttress its defenses along the northern bank of the Danube. It fought well considering its depleted state.
23rd Infantry (Reserve) Division: The division was effectively destroyed ahead of the Konrad offensives and would return only as a reinforced regiment centered around its 54th Regiment. As noted above, its 42nd Regiment was detached and operating with the 1st Hussar Division. Its depleted battalions mustered a little over 500 men each. Its replacements were second-rate even considering the Hungarian Army's state at this point in the war. It was used to defend the line.
25th Infantry Division: The only fully real Hungarian division to have fought around Budapest. Two battalions of the 1st Regiment were detached north and ostensibly attached to Bieber. Other parts of the division were defending the western shore of Lake Balaton to prevent any Soviet crossing. These forces were brought forward and the division (less the battalions with Bieber) fought in Konrad III and Spring Awakening operating south to the Sió River. Even while being "whole," its fighting quality was questionable yet it fought alongside the Germans well.
Late War Armor
I had become enamored with late-war Soviet armor after seeing the units in Panzer Blitz. The plethora of oddball Assault Guns and Tank Destroyers like the SU-76M, SU-85, SU-100, ISU-122, and ISU-152 are equally unique counterparts to the German Marders, Nashorn, Elefants, and Hetzers. Given that Panzer Blitz included late war vehicles, I didn't get much of a sense for earlier war material roaming around the battlefield before they were stalwartly replaced by T-34 tanks. I gravitated more to late war WWII, coupled with my interest in the fighting from D-Day to VE-Day. This was sealed when I worked on The Mighty Endeavor expansion and got to learn more about the final campaigns that eventually captured Berlin.
When it came down to defining the armor characteristics for Panzers Last Stand, it was interesting to see how each compared and contrasted with one another and where and how they were used. As they were all prepended with either SU or ISU and the number reflecting their mounted gun caliber, one could just casually see them as just being upgrades of each other. This wasn't the case. The SU-76 (the M model was the main production line) was designed in the same vein as its German counterpart, the StuG III, as a self-propelled infantry support armored vehicle. It was based on the T-70 Light Tank chassis and major production started in early 1943. They were assigned to independent self-propelled artillery units, Tank and Mechanized Corps, and then eventually to replace a number of Rifle Division towed AT guns. It was a "jack-of-all-trades, master-of-none" vehicle—used as direct fire assault support, anti-tank, and impromptu indirect support with its limitation being the High Explosive and Anti-Tank effectiveness of its 76mm gun. It would serve to the war's end, much liked by the rifle units it was supporting, who affectionately or frustratingly nicknamed it "b*tch" (suka). Its ability to support infantry on the attack earned it a Red AV or Support Red AV on its Deployed-side.
On the other hand, the SU-85 was purposely designed as a self-propelled tank destroyer. The SU series sequential numbering led me to assume that it was designed before the higher numbered SU vehicles, but rather, it began production in mid-1943 while the SU-122 started in late 1942. As with T-34, it was armed with the 76mm, a gun increasingly unable to penetrate the latest German Panzers (Tigers and Panthers). It had only reached frontline units after Kursk, and only a few months before the T-34 mounting the same 85mm gun began rolling off the assembly lines. Hence the SU-85's usefulness was relatively short-lived given the advantages of a tank mounting the same main gun, yet three SP Arty Regiments in the game continue to use it in 1945. The SU-85 was therefore effectively upgraded to the SU-100, mounting a more powerful gun that could more easily defeat German Tigers and Panthers. Given its main use as an anti-tank platform, it is kept as limited AV on Move- and Deployed-sides unlike German tank destroyers that were pressed into an assault gun mode to support infantry in an attack. The SU-100 reached frontline units only by October 1944, and by January 1945, had only equipped the 1st Guards Mech Corps. By March 1945, three dedicated Self-Propelled Artillery Brigades with three small battalions exclusively using the SU-100 were created and participated in Spring Awakening, able to compete against the Tiger II, Panthers, and Jagdpanthers to a decent degree. With their dedicated SMG-armed infantry, these SU-100 Brigades earned Red AV on their Deployed-sides.
The real "Beast Killers" were the ISU-122 and ISU-152, mounting howitzers meant for direct and indirect fire support but able to decapitate German heavy tanks. These two hence were true multi-role Armored Fighting Vehicles, with the ISU-152's added benefit of Breakthrough ability given its large caliber gun. Both types replaced the SU-122 and SU-152, based on the T-34 and KV-1 chassis respectively. With the Iosef Stalin Heavy Tank hull's introduction, the decision was made to base a new Self-Propelled gun off this new chassis for easier maintenance than the phased out KV chassis, and better armor. The ISU-152 was designed first, and due to more tank hulls being built faster than the ML-20S 152mm gun, the ISU-122 was created using the A-19 122mm gun. The ISU-122 was more a tank destroyer than the ISU-152, but no slouch in the assault gun ability affording it a Red AV deployed. The ISU-122 was found in two Self-Propelled Artillery Regiments in the 18th and 23rd Tank Corps. The ISU-152 was only found in the Independent 366th Guards Heavy Self-Propelled Artillery Regiment. The regiment nominally contained only ISU-152s, but a number of ISU-122s were with the unit in January 1945 likely to supplement for losses.
Which units used SUs and ISUs? Refer to the Examples of different types of AV in the Series Rules to see the values for each type to determine which units used what. In a nutshell, the SU-76s were found nearly everywhere, independent units, Rifle Divisions, Tank, Mech, and Cavalry Corps. The SU-85 and SU-100s were in the Tank and Mech Corps, with the latter formed into independent Brigades in the Spring Awakening scenario. The ISU-122s were in Tank Corps with ISU-152s and ISU-122s as independent units.
Before moving to tanks, it's important to describe the Red Army's Anti-Tank weaponry. The Soviet Union was notorious for not adapting a man-portable anti-tank weapon, lest one counts the cumbersome Anti-Tank Rifle. It made up for it post-war in spades with the RPG series, but during the war it tried, but didn't adapt, Lend-Lease Bazookas. While stories are replete of brave soldiers assaulting panzers with Molotov Cocktails and mines as well as Mine Dogs and other obscure measures, the reality was that the Red Army infantry adopted other means to defeat enemy tank forces. The Soviets relied on a layered anti-tank defense to wear down German Panzer Divisions. The well known Anti-Tank Defenses of Kursk consisted of mines, trenches, barbed wire, anti-tank strongpoints, and tank reserves multiplied several times across many parallel defensive lines. There were no super weapons that defeated the bigger German Panzers and Jagdpanzers, but a gradual wearing down using all the weapons at hand. This depth of anti-tank defenses was not possible at the start of Konrad I as the Red Army had only recently occupied the positions, whereas Kursk had months to prepare. There was also a lack of depth as nearly all available formations were needed to hold the frontline or committed to taking Budapest. Even in Spring Awakening, when there was time to have greater defensive depth, the defenses were not as extensive as those in July 1943 and were penetrated by the Germans before weather and Soviet stubbornness halted them.
From the beginning, Soviet Rifle Divisions used the 45mm AT Gun, which despite its caliber size, had similar characteristics to the German 37mm AT Gun. In 1945, the Soviets were still using the 45mm gun in the Rifle Divisions, even though contemporary armies had upgraded their anti-tank guns and their tanks to use at least a 75mm gun with overall better armor penetration. The Soviets never realized their plans to upgrade to the 57mm. Rifle Divisions that had not received the SU-76M to replace their towed Anti-Tank Battalion were still relegated to use the obsolete 45mm guns in their frontline Anti-Tank defenses. The Independent Anti-Tank Battalions, Regiments, and Brigades used the 57mm AT Gun and the popular 76mm dual-purpose gun (the ZiS-3 model). The 76mm was also found in the divisional artillery, but could be deployed as supplemental anti-tank guns. The ZiS-3 had decent armor penetration against common mid-war tanks, but was outclassed by heavier late war tanks. The Rifle Division and Corps Anti-Tank Battalions with the Limited AV of 2 reflects the 76mm more than the 45mm alone (which by itself would only be a 1 Limited AV). Hence the Soviets were quite behind in their towed and personal anti-tank weaponry, and had to supplement them with earthworks, mines, homemade devices, plus tank and Self-Propelled Artillery Armor reserves to blunt the German Panzers.
Late war Soviet tanks were more standardized than the earlier hodgepodge of BT, T-26, T-28, T-60, T-35, and KV-1. The T-34 and IS-2 were the main tanks and chassis used for all Soviet produced armor plus the T-70 used as the basis for the common SU-76M. The T-34s included both the older 76mm models (slight variations in model types and manufacture) and the newer replacement 85mm models. Only by mid-1944 were there a sufficient number of T-34/85s to outnumber the T-34/76s. By early 1945, there was still a good mix of both in the Red Army. Strength reports did not breakdown the number of 76mm vs. 85mm models, making it impossible to determine the by unit percentages of each type. Instead, Tank Brigades were given the benefit of the doubt and given T-34/85 AV numbers and Mechanized Brigades given reduced T-34/76 values. This was done less to assume that Tank Brigades would have more T-34/85s on hand, but more to portray them as more dedicated tank units than the infantry-heavy Mechanized Brigades, as both are dual units considering both types' combined nature of tank and infantry operating together, with the Tank Brigades also being hard targets. The IS-2 was a formidable heavy tank and really the only other tank in the world at the time to compete toe-to-toe against the Tiger II. With decent mobility, good armor protection, and mounting a gun based on the same used in the ISU-122, the Iosef Stalin tank was limited by lack of large numbers (only two depleted Heavy Tank Regiments were used around Budapest) and trouble maintaining them (like all Heavy Tanks at the time).
Even with the Soviet produced T-34 and IS-2s, there were numerous Lend-Lease tanks in use. The most numerous was the American Sherman, almost all being the M4A2 diesel model, nicknamed the "Emcha" which was a Russian transliteration of "M4." A large number of Shermans were shipped to the Soviets, split almost equally between 75mm and 76mm versions. The 1st and 9th Guards Mech Corps used them throughout the war. There is conflicting evidence if the Soviet tankers actually liked their Shermans, but certainly the American tank's mechanical reliability and crew comfort (compared to the awkward and cramped T-34) must have been appreciated. While not entirely confirmed, the 5th Guards Cavalry Corps was mentioned to have used Lend-Lease Tanks along with T-34s, but unsure of which exact models. In one chart, Számvéber lists M3 Lees and M3 Stuarts as replacements along with a handful of T-34s. Likewise, the 12th Cavalry Division's 54th Tank Regiment received the British Valentine IX in April 1944, a mid-war upgrade to a 6-pdr gun and American diesel engine. Oddly enough, Soviet tankers liked the British Infantry Tank for similar reasons as the Sherman with the added benefit of having a low silhouette. And despite its slow speed, many Soviet Motorcycle Recon units used Valentines (while none are found in the Tank and Mech Corps around Budapest). While older tanks like the Lees, early Stuarts, and Valentines were phased out by 1945 in the West, a number would still be in Soviet service as long as they could run.
For the Germans, practically all the AFV types used in Panzers Last Stand with few exceptions are identical to those used in Last Blitzkrieg (Panzer IV, Panther, Tiger I, Tiger II, StuG III, Hetzer, JagdPanther, JgPz IV/48, Pz IV/70, and even Brummbär). These exceptions are the Marder (likely variants of the Marder III) in the 1st Panzer and 96th Infantry Divisions as well as Nashorns in the former, basically armor past their prime, but still in use. The independent Panzer-Flamm-Kompanie 351 was created in November 1944 with the surviving 10 to 15 (of 100 built) Flamethrower version of the Panzer III. The main gun was replaced by a flamethrower covered by a barrel sleeve to appear as a normal tank gun. This was the first unique use of the Light AV type that wasn't a Machine-Gun only Tankette or Armored Car. Classifying it as a Light AV is perfect as it has enough armor to defend itself (better than a tankette), but unable to engage other tanks. Instead its benefit is in Shock Attack qualifying as Breakthrough Armor given its flamethrower.
Panzer Divisions nominally had a battalion of Panzer IV (Ausf. H or J) and another of Panthers. Given the difficulty in producing and maintaining enough tanks to have only one type per battalion, many panzer companies were assigned Sturmgeschütz or Jagdpanzers to compensate. The individual formation descriptions describe these modified units, with the general note that if the typical Panzer IV battalion contained StuG III or Jagdpanzers (typically the Pz IV/70), its deployed MA is lowered to 3 Tracked MA. A quick note that the Panzer IV/70 was indeed a Jagdpanzer, an upgunned Jagdpanzer IV which originally mounted the 75mm L/48 with the Panther's 75mm L/70. For a reason it was called the Panzer IV/70 instead of Jagdpanzer IV/70, blame Hitler. His direct orders designated the vehicle as such. There were two versions of the Pz IV/70, one produced by Alkett, and the other by Vomag. An (A) or (V) followed the designation respectively, and they looked different from each other with the latter produced in greater numbers, but otherwise same in AV numbers.
Virtually all panzer battalions here started depleted. With the standard number of vehicles per step being 12, many German battalions barely had enough for 1 or 2 steps. During playtesting as the turns increased and losses mounted, these fragile panzer battalions found themselves in the Dead Pile and either stay there or be replenished for a turn only to find themselves back in the pile, despite their general better AR and AV against their Red counterparts. Historically, the Germans would continue to run offensives even though battalions operated less a step's worth of armor. Therefore, it was needed to adjust the number of vehicles per step for the Germans, lowering it from 12 to 8-10 per step. This gave a number of Panzer and Panzerjäger units an extra step (not much more) and away from that dangerous 1 step minimum. Doing so got the Germans to operate those minimum numbers of armor the way they did throughout all of January 1945, with nothing to do with any perceived German bias. It worked without needing to adjust the AV Replacement Tables which would just keep bringing back dead units and lose the flow of German progress through the campaign.
Hungarian tanks by January 1945 were far and few between. The rebuilt but depleted 2nd Armored Division was using Panzer IVs, and the scattered Assault Gun units were using either a handful of homegrown Zrínyi IIs mounting a 105mm or the German StuG III or Hetzer. Only Billnitzer's consolidated group of Assault Gun battalions had Zrínyis but also StuG IIIs. It was easier to designate the unit as a "StG" than having one unit with a unique armor designation. The other two Hungarian Assault Gun Battalions used Hetzers. There are images of a destroyed Turán II tank near Budapest, but given the depleted state of the 1st Armored Division trapped in Budapest, there were no battalion-sized units operating the Hungarian built tank.
Recommended Reading
Számvéber, Norbert. The Sword Behind the Shield: A Combat History of the German Efforts to Relieve Budapest 1945 – Operation 'Konrad' I, II, III.
Számvéber's three books listed were the primary sources used for the fighting outside of Budapest itself. While highly recommended, the text is fairly dry but thoroughly researched. This book covers the three Konrad offensives south of the Danube and the Soviet counterattacks to recover ground to February 1945.
Számvéber, Norbert. Days of Battle: Armoured Operations North of the River Danube, Hungary 1944-45.
This volume covers the fighting north of the Danube River in Hungarian annexed Slovakia from December 1944 to February 1945, covering the Soviet offensive to take Komárom and Southwind.
Számvéber, Norbert. Last Panzer Battles in Hungary: Spring 1945.
This recent release covered a gap in my research on Spring Awakening with Számvéber's detailed research. The book covers the German offensive in one chapter and the portion of the Soviet Vienna Offensive that took place in Hungary from March to early April 1945.
Ungváry, Krisztián. Battle for Budapest: 100 Days in World War II.
Until Nevenkin's massive two volume tome was available, Ungváry's book was the primary research for the fighting in Hungary's capital. This isn't to say Ungváry isn't comprehensive, it's that at 1500+ pages, Nevenkin's work is more difficult to digest for a more casual understanding of the siege. Battle for Budapest weaves very well different aspects of the fateful siege, from the complex relationship between Hungarian and German commands, to the mixed personalities in command, to the uneven Hungarian Army and paramilitary forces raised to defend the city. Try to look for the edition entitled Battle for Budapest as the bibliophilic Doug Dery notes, "The Battle for Budapest is the better translation of Krisztian Ungvary's Die Schlact um Budapest for hard military narration and information. The Siege of Budapest has more detail on the Hungarian political situation and personalities at the expense of precision in its military narrative."
Hinze, Rolf. With the Courage of Desperation: Germany's Defence of the Southern Sector of the Eastern Front 1944-45.
This book is written heavily from the German perspective, so that there is scant description of the Budapest siege itself. Hence, it is offered strictly as one of the few single volume treatments of the topic.
Selected Bibliography
The seeming imbalance between German and Soviet research material isn't due to the number of sources. There are certainly more German titles available in English than the Soviet Armed Forces, but the number of Soviet sources in English and the tremendous information from Pamyat-Naroda equals in information to the scattered and narrowly focused (SS, Tigers, and Panzer Divisions) references on the German Army. As many German records were lost or unavailable, they are compensated by personal and unit memoirs. The Soviets had their original material and only recently made it available to the public.
In relative order of importance and usefulness:
- Nevenkin, Kamen. Fortress Budapest: The Siege of the Hungarian Capital, 1944-45.
- Nevenkin, Kamen. Fire Brigades: The Panzer Divisions 1943-1945.
- "Memory of the People". https://pamyat-naroda.ru.
- Soviet General Staff. The Budapest Operation 1945: An Operational-Strategic Study.
- Isaev, Aleksei, and Kolomiets, Maksim. Tomb of the Panzerwaffe: The Defeat of the Sixth SS Panzer Army in Hungary 1945.
- Tankfront: 1939-1945. http://www.tankfront.ru.
- "Documents of the Operational Department of the Headquarters of the 6th Army: Operational Documents, Case 'C', Volume 46 of 01/01/1945 – 01/18/1945". German-Russian Project for Digitizating German Documents in Archives of the Russian Federation. https://germandocsinrussia.org/.
- Maier, Georg. Drama Between Budapest and Vienna: The Final Battles of the 6. Panzer-Armee in the East – 1945.
- Hungarian formations of the Waffen SS and Sondertruppen der Reichsführung-SS. http://hunyadi.co.uk.
- 1 Guards Fortified Region. https://01nkur.wixsite.com/1nkur.
- Zaloga, Steven. The Red Army Handbook: 1939-1945.
- Glantz, David. "An Overview of Operations in Hungary: 1 January – 16 March 1945". 1986 Art of War Symposium: From the Vistula to the Oder: The Soviet Offensive Operations – October 1944–March 1945. 19-23 May 1986.