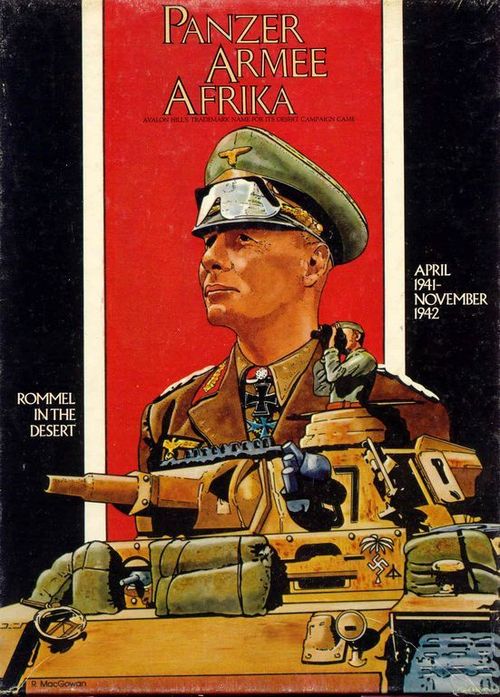
PanzerArmee Afrika: Rommel in the Desert, April 1941 - November 1942
PanzerArmee Afrika: Rommel in the Desert, April 1941 - November 1942 Rulebook
Table of Contents
Table of Contents
- 2. General Course of Play
- 3. Game Equipment
- 4. Sequence of Play
- 5. Movement
- 6. Zones of Control
- 7. Stacking
- 8. Combat
- 9. Overrun Attacks
- 10. Supply
- 11. Truck Units — Transport
- 12. Command Control
- 13. Forts
- 14. Replacements
- 15. Cadres
- 16. Removal of Allied Units
- 17. Reinforcements
- 18. Victory Conditions
- 19. Optional Reinforcement Variations
- 20. Designer's Notes
2. General Course of Play
PanzerArmee Afrika is basically a two-player game. It is played in sequenced turns called Game-Turns, during which Players move units on the map, have combat, and attempt to achieve certain objectives. Victory is based upon comparative strength levels at the end of the game and the capture of Enemy bases.
2.1 Game Length
Each complete Game-Turn represents one month of real time. The entire game lasts 20 Game-Turns.
2.2 Game Scale
Each hex on the map represents 12 miles of land. Each Battalion-sized unit represents 600-1000 men. Each Brigade-sized unit represents 2000-4000 men. Each Regiment-sized unit represents 1100-3200 men.
3. Game Equipment
3.1 The Game Map
The 22" x 34" mapsheet portrays the Western Desert area of Egypt and Libya in which the Axis and Allies fought in 1941 and 1942.
3.2 The Playing Pieces
Two differently colored sets of playing pieces (henceforth known as units or markers) are provided. They represent the various units of the opposing armies. The playing pieces are distinguished by type, strength, and mobility, as represented by various numbers and symbols printed on their faces.
3.21 Sample Unit
Each unit shows a Unit Designation, Unit Size, and Unit Type Symbol across its top, a Combat Strength in the lower left, and a Movement Allowance in the lower right (e.g., a unit marked "3-60" has a Combat Strength of 3 and a Movement Allowance of 60).
3.22 Summary of Unit Types
Combat units: Armored Infantry, Infantry, Armor, Parachute Infantry, Reconnaissance, Glider Infantry.
Mobile Non-Combat Units: Trucks.
Non-Mobile, Non-Combat Unit: Supply. (NOTE: Players may use blank counters to create additional Truck and Supply units for use in the game.)
Markers: Unsupplied, Grounded.
Replacements-Accumulated Markers: German Infantry, German Armor, Italian Infantry, Italian Armor, Allied Infantry, Allied Armor.
Organizational Size Symbols: X = Brigade; III = Regiment; II = Battalion.
Unit Abbreviations
Allied Units: Ind = Indian; IM = Indian Motor; Aus = Australian; NZ = New Zealand; SA = South African; GK = Greek; FF = Free French; Pol = Polish; Bel = Belgian; Gur = Gurkha (Indian); G = Guards (British); SG = Support Group (British); AT = Army Tank (British). All other Allied units are British regulars.
Axis Units: Bers = Bersagliere; GGFF = Giovane Fascisti (Young Fascists). All other Axis units are German or Italian regulars.
3.23 Definition of Terms
Combat Strength is the basic attacking and defending power of a unit quantified in Combat Strength Points.
Movement Allowance is the basic movement ability of a unit quantified in Movement Points. In most cases a unit expends one or more Movement Points of its total Movement Allowance for each hex entered.
3.3 Game Charts (see map)
Various visual aids are provided for the Players to simplify and illustrate certain game functions. These are the Combat Results Table, the Terrain Effects Chart, the Supply Effects Chart, the Turn Record/Reinforcement Chart, and a Cadre box and Replacement Point Tracks. Each of these is fully explained where presented.
3.4 Game Equipment Inventory
A complete game of PanzerArmee Afrika should include the following parts:
one Rules Folder one Set Die-Cut Counters one Mapsheet one Die (not included in unboxed copies)
4. Sequence of Play
4.1 The Game-Turn
Each of the 20 Game-Turns is split into two Player-Turns. Each Player-Turn is divided into Phases. All actions must be taken in proper sequence. Any action taken out of sequence is a violation of the rules. The Player whose Player-Turn is in progress is termed the Phasing Player. Each Game-Turn proceeds as follows:
4.2 Sequence Outline
A. First Player-Turn (Allied Player-Turn)
- Supply Determination Phase. The Phasing Player determines which of his units are in supply as outlined in the Supply rules.
1b. Allied Command Control Phase (Allied Player only).
-
Movement Phase. The Phasing Player may move any or all of his units in any direction up to the limit of their Movement Allowance within the restrictions outlined in the Movement rules.
-
Combat Phase.
3a. Attack Supply Judgment Segment (see 10.0).
3b. Attack Execution Segment. The Phasing Player may attack Enemy units adjacent to Friendly units at his option; combat is resolved as outlined in the Combat rules.
- Replacements and Reinforcements Phase. The Phasing Player's Reinforcements are placed on the map and units are built up with replacements as indicated in the Reinforcements and Replacements rules.
B. Second Player-Turn (German Player-Turn). Repeat Phases 1 through 4 for the German Player, who becomes the Phasing Player, and moves his own units.
C. Game-Turn Indication. The Game-Turn marker is advanced on the Game-Turn track, signaling the start of a new Game-Turn.
4.3 Set-up and First Turn
4.31 How to Set Up the Game
The starting positions for the units that begin the game in play are indicated on the map and in the Cadre Box. Simply place the units where indicated. Then start the game.
4.32 Special First Game-Turn Rules
The Allied Player may not attack during the first Game-turn. The German Player can capture Allied supply units during this Game-Turn (only) with a die roll of one, two, three or four (see 10.8). The Allied Player may not voluntarily destroy any of his Supply units on the first Game-Turn.
5. Movement
General Rule: During the Movement Phase, the Phasing Player may move as many or as few of his "supplied" units as he wishes (see Supply, rule 10.0). During any Friendly Movement Phase, each unit may be moved as many or as few hexes as the Phasing Player desires, as long as its per-turn Movement Allowance is not exceeded. Unused Movement Points may not be accumulated from Phase to Phase nor transferred from unit to unit.
Procedure: Move each unit or stack of units (see 7.0), tracing the path of movement through the hexagonal grid. Once a unit has been moved and the Player's hand withdrawn, the unit may not be moved again, nor may the path of movement be retraced and/or changed during that Movement Phase.
Cases:
5.1 How to Move Units
5.11 During the Movement Phase only the Phasing Player's units are moved; all, some, or none of his units may be moved. No Enemy movement, and no combat, may occur during a Movement Phase (exception: 9.7).
5.12 Movement is calculated in terms of Movement Points. Units expend Movement Points from their Movement Allowance in moving through the hexagonal grid. Units may move in any direction or combination of directions.
5.2 Movement Inhibitions and Prohibitions
5.21 Units may never enter hexes containing Enemy Combat units except to execute an "Overrun" attack (see 9.0).
5.22 Units may never enter all-sea hexes or move through all-sea hexsides (see Terrain Effects Chart).
5.23 Truck units may only move along roads or tracks (see Truck Units, rule 11.0).
5.24 Units may freely enter or move through hexes containing other Friendly units. There are no stacking restrictions during Movement. There is no additional Movement Point penalty for Stacking or Unstacking with Friendly units.
5.25 Unsupplied units may not move at all.
5.3 Terrain Effects on Movement
The number of Movement Points that a unit must expend to enter a given hex varies with the type of terrain in the hex and the type of terrain of the hexside that is crossed (i.e. moved through).
5.31 Terrain Effects Chart
| Terrain Type | Movement Point (MP) Entry Cost | Combat Effect |
|---|---|---|
| Open (clear) | 3 MP, no Truck units allowed | Normal |
| Road | 1 MP if through Road hexside | Other terrain in hex |
| Track | 2 MP if through Track hexside; 8 MP for truck units | Other terrain in hex |
| Railroad | 1 MP if through railroad hexside (1) | Other terrain in hex |
| Rough / Swamp | 10 MP, no truck units allowed | Defense doubled (Allied units not doubled in Swamp) |
| Escarpment Hexside | 10 MP additional to cross | Attack across halved |
| Town | Other terrain in hex | Other terrain in hex |
| Bardia Fort | Other terrain in hex (2) | Defense doubled |
| Tobruk Fort | Other terrain in hex | Defense quintupled |
| Fort Controlled Hex | Other terrain in hex | Any Friendly unit in hex must attack any Enemy unit in Fort |
(1) Allied Supply units may move anywhere along the Matruh Railroad (see Rail Movement). (2) Only two Combat units may stack in Bardia.
5.4 Sea Movement
General Rule: Units may be moved by sea from port hex to port hex. Port hexes are: Tobruk, Bardia, and Alexandria.
Procedure: The unit to be moved by sea must begin its Movement Phase in the port hex. The unit may be moved by sea to any other Friendly-controlled port hex, but no farther, during that Movement Phase. During any subsequent Friendly Movement Phase the unit may move normally overland.
Cases:
5.41 Alexandria and Tobruk each have a maximum outgoing "Port Capability" of two combat units and one supply unit per Friendly Movement Phase. They also each have a maximum incoming Port Capability of two combat units and one supply unit per Friendly Movement Phase. Bardia has a maximum Port Capability of one combat (or supply) unit per Friendly Movement Phase, either outgoing or incoming (but not both).
5.42 A port is considered controlled by a Player if his forces were the last to enter the port hex. Tobruk, Bardia, and Alexandria are all considered controlled by the Allied Player at the start of the game.
5.43 The Axis Player may only operate Tobruk and Bardia as ports if there are no supplied Allied units within 20 hexes of the port to be used.
5.44 Truck units may not use Sea Movement.
5.45 A unit may use Sea Movement and engage in Combat in the same Game-Turn.
5.5 Rail Movement
5.51 Allied Supply units (only) may move anywhere along the railroad from Alexandria to Matruh without any expenditure of Movement Points, at any time during the Allied Movement Phase.
5.52 Allied Supply units may only move by rail along these railroad hexes east of the easternmost Axis-controlled rail hex. Allied units may regain control and full use of this rail line once the Axis units' Zone of Control is removed. Friendly units occupying a rail hex do negate enemy Zones of Control for purposes of rail movement.
5.53 Axis units cannot use this special rail movement.
6. Zones of Control
General Rule: The six hexagons immediately surrounding a hex constitute the Zone of Control of any units in that hex. Hexes upon which a unit exerts a Zone of Control are called controlled hexes, and inhibit the movement of Enemy units. All units exert a Zone of Control (except as noted in the cases below).
Cases:
6.1 Units with No Zone of Control
Supply and Truck units have no Zone of Control.
6.2 Combat Effect
Zones of Control do not affect combat; attacking is completely voluntary and the presence of a unit's Zone of Control in a Friendly occupied hex does NOT force combat (Exception: see Forts, rule 13.0).
6.3 Movement Effect
Units entering an Enemy controlled hex must stop and may not move any further in that Movement Phase. Units which begin their Movement Phase in an Enemy controlled hex may leave that hex, but they may not move directly into another Enemy controlled hex. Friendly units do NOT negate Enemy Zones of Control for Movement purposes.
6.4 Supply Effects
Supply lines may not be traced through Enemy controlled hexes, unless the hex is occupied by a Friendly unit. Thus for Supply purposes, Friendly units do negate Enemy controlled hexes.
6.5 Fortifications
Zones of Control do extend into and out of Forts. The land and part land hexes directly adjacent to each fort constitute that Fort's Controlled Hexes. Any Enemy unit(s) in any of these hexes must attack all Friendly units in the Fort. The forts have no other effect on Zones of Control. The special fort Zones of Control are tinted for easy recognition.
7. Stacking
(more than one unit per hex)
General Rule: A maximum of three Combat units may be in any one hex at the end of any Movement Phase.
7.1 Effect on Movement
7.11 The stacking limit applies only at the end of the Movement Phase.
7.12 A stack of units may move as a stack as long as the Movement Allowances of the slowest unit in the stack is not exceeded. Units may split from such a stack and continue to move (up to the limit of their individual Allowances).
7.13 Only two Combat units may stack in Bardia.
7.2 Effect on Combat
7.21 All units in a stack in a single hex, must be attacked as one entire group and all their Combat Strengths are totalled when attacked.
7.22 Friendly units in the same hex may attack into different hexes (See Combat, case 8.23).
7.3 Stacking and Unit Types
7.31 Truck and Supply units do not count towards the stacking limit.
7.32 No more than one supply unit is allowed per hex.
8. Combat
General Rule: Combat occurs between adjacent opposing units at the Phasing Player's discretion. The Phasing Player is considered to be the Attacker, the non-Phasing Player the Defender, regardless of their overall strategic position. PanzerArmee Afrika makes use of an unusual Combat Results system which calculates the aggregate superiority of the Attacker over the Defender rather than the ratio of the Attacker to the Defender and includes a counter-attack procedure for the Defender. The Combat Strength of the Attacker and Defender are modified by terrain and supply considerations, at the moment of combat.
Procedure: Total the modified Combat Strengths of all attacking units involved in a specific attack. Total the modified Combat Strengths of all units in the hex(es) under attack. Subtract the total of the defending units from the total of the attacking units. The result is the attack superiority expressed in points. Roll the die and consult the Combat Results Table under the appropriate attack superiority column. Apply any combat results immediately to the defending units. The surviving defending units immediately counterattack all attacking units (see Counterattack, case 8.6).
Cases:
8.1 Which Units May Attack
8.11 During the Combat Phase of his Player-Turn, the Phasing Player may attack any and all Enemy units adjacent to Friendly units. Only those Friendly units directly adjacent to a given Enemy unit may participate in an attack upon that unit (see Supply, case 10.3). Unsupplied units may not attack.
8.12 Attacking is completely voluntary; units are never compelled to attack, and not every unit adjacent to an Enemy unit need participate in any attack (exception: Fort Controlled Hexes). Friendly units in a stack that are not participating in a given attack are never affected by the results of the attack.
8.13 An Enemy occupied hex may be attacked by as many units as can be brought to bear in the six adjacent hexes.
8.14 No unit may attack more than once per Combat Phase, and no Enemy unit may be attacked more than once per Combat Phase.
8.2 Multiple Unit and Multi-Hex Combat
8.21 All units defending in a given hex must be involved in the combat, and they must all be attacked as a single Strength. The defender may not voluntarily withhold any units in a hex under attack. The attacker must attack all the units as a whole, i.e., the Strengths of all the units in the hex are totalled, and this total Strength is attacked. Different units in a given hex may not, therefore, be attacked separately.
8.22 Units in a hex that contains an attacking unit need not participate in that same attack nor any attack. Thus when one unit in a stack of three is attacking a given hex, one of the other units could attack a different hex, and the third could be directed to not attack at all. Exception: Fort Controlled hexes.
8.23 If a unit (or units) is adjacent to more than one Enemy-occupied hex, it could attack all of them in a single combat. Thus, units in a single hex can attack more than one other hex. The only requirement is that all attacking units must be adjacent to all defending units (see also case 8.13).
8.3 Effects on Combat Strength
8.31 Combat Strengths of units may be affected by terrain and supply considerations (see the Terrain Effects Chart and the Supply rules). Such effects are always cumulative.
8.32 If a unit's Strength is halved, fractions are rounded up. When more than one unit in a given hex are being halved, halve the total Strength of all units and then round up any fraction.
8.4 Advance After Combat
Attacking Units may advance after Combat only if they eliminate all combat units in the hex under attack. They may then advance into the attacked hex attempting to seize any supply unit present. Such an advance does not expend any Movement Points. The advance may be made even if moving from one Enemy controlled hex to another.
8.5 Attack Prohibitions
8.51 Unsupplied units may not attack.
8.52 Attacks may not be executed at less than zero attack superiority. Units may only attack if their total modified Combat Strength is equal to or greater than the total modified Combat Strength of the defending units.
8.6 Counterattacks
After each attack has been executed, the Defender immediately counterattacks the attacking units with any and all surviving defending units (exceptions: 8.65, 9.7).
8.61 Terrain (including Fort) and supply effects are ignored in computing the relative Combat Strengths involved in a counterattack.
8.62 The face value of counterattacking German units is multiplied by four, and counterattacking Italian and Allied units are multiplied by two, when computing the total Strength of the counterattacking units.
8.63 Total the face value Strength of the original Attacker's units and subtract this total from the enhanced total strength of the counterattacking (original Defender's) units. This result is the attack superiority of the counterattacking units. Roll the die, consult the appropriate column of the Combat Results Table, and apply results to the Attacker's (original attacking) units.
8.64 The counterattacking units must attack all of the attacking units.
8.65 In many situations the defending units are totally eliminated or so reduced by the original attack that even at their enhanced counterattacking Strength they do not have an attack superiority when called upon to counterattack. In such cases they must still automatically counterattack using the zero attack superiority column of the Combat Results Table.
8.66 Counterattacking units may never advance after combat.
8.7 Combat Results Table (CRT)
8.71 The results of attacks and counterattacks are expressed in terms of a loss of face-value Strength Points to the unit(s) being (attacked or counterattacked) assaulted. This loss is an all or nothing proposition. Either the loss equals or exceeds the face value of the defending unit and therefore eliminates it or the loss has no effect and the defending unit is unaffected by the attack or counterattack.
8.72 When there is more than one defending unit, losses must be reflected by eliminating as many units as possible which most closely equal but not exceed the given loss. The losing Player decides which specific units will be lost.
Examples:
(1) A German infantry regiment with a strength of "four" combined with an Italian armored regiment with a strength of "three" are attacked. The result calls for a loss of two Strength Points. The result is not sufficient to wholly eliminate either of the attacked units; therefore there is no effect.
(2) An Allied armored regiment with a strength of "three" combined with an Allied infantry regiment with a strength of "two" are attacked. The result calls for a loss of four Strength Points. The Allied armored unit is eliminated since this loss would most closely equal the result called for. The Allied infantry regiment is unaffected by the attack.
8.73 Eliminated units are immediately placed in their respective cadre boxes for possible later reactivation according to the Cadre and Replacement Rules.
8.74 If an attack is not completely successful, i.e., no or only partial loss is inflicted on the defending units the attacking units themselves suffer no adverse effect except that which may be inflicted by counterattack. There can be no advance after combat unless the defending units are completely eliminated.
Combat Results Table
Attack Superiority (Attacker minus Defender)
| die | 0 | 1 | 2 | 3 | 4 | 5 | 6 | 7 | 8 | 9 | 10 | die |
|---|---|---|---|---|---|---|---|---|---|---|---|---|
| 1 | 2 | 2 | 3 | 4 | 4 | 6 | 6 | 6 | 8 | 10 | 10 | 1 |
| 2 | • | 2 | 3 | 3 | 4 | 4 | 6 | 6 | 8 | 8 | 10 | 2 |
| 3 | • | • | 2 | 3 | 3 | 4 | 4 | 6 | 6 | 8 | 8 | 3 |
| 4 | • | • | 2 | 2 | 3 | 3 | 4 | 6 | 6 | 8 | 8 | 4 |
| 5 | • | • | • | 2 | 3 | 3 | 4 | 6 | 6 | 6 | 8 | 5 |
| 6 | • | • | • | 2 | 3 | 3 | 4 | 4 | 6 | 6 | 6 | 6 |
• = no effect. The number in the table is the maximum number of the Defender's face-value Strength Points lost.
9. Overrun Attacks
General Rule: During the Movement Phase, while moving his combat units, the Phasing Player may Overrun hexes containing Enemy units. In order to overrun a hex the attacking Player must have sufficient attack superiority over the defending units in the hex being overrun to guarantee their automatic elimination if the die were to be rolled in a normal combat situation.
Procedure: During his Movement Phase the Phasing Player moves one or more units (a stack) adjacent to an Enemy unit(s). He ignores the Zone of Control rules requiring him to stop upon entering an Enemy Zone of Control and proceeds to enter the hex containing the Enemy units. He removes the Enemy units (they are eliminated). He may now exit that overrun hex subject to all normal movement restrictions. Units beginning the Movement Phase on different hexes may not be combined into a stack in order to execute an overrun.
Cases:
9.1 Movement Cost
The overrunning units must expend ten Movement Points in addition to the normal cost of entering the overrun hex.
9.2 Overrun Restrictions
9.21 Only one unit or stack of units may execute an overrun against a given Enemy occupied hex. The Phasing Player may not combine the strengths of his units on adjacent hexes in order to achieve an overrun.
9.22 The overrunning units ignore the Zone of Control of units being overrun, but they may not ignore the Zone of Control of other non-involved Enemy units, and if such a Zone of Control is present, the overruning units must stop upon entering it.
9.3 Multiple Overruns
A unit or stack of units may execute as many overruns as it has Movement Points for.
9.4 Status of a Hex After an Overrun
Only the overrunning units are required to expend the ten additional Movement Points. Other Friendly units which subsequently move through the overrun hex pay only the normal terrain costs.
9.5 Overrun Prohibitions
Enemy occupied Fort hexes may not be overrun.
9.6 Overrun and Combat
Units may overrun during their Movement Phase and then attack during their Combat Phase.
9.7 Counterattacking Against Overruns
The Non-Phasing Player is allowed to Counterattack immediately after his units have been overrun. Of course he rolls on the zero column of the Combat Results Table.
9.8 Supply States and Terrain Effects
The supply state of overrunning units is calculated from the (adjacent) hex they are overrunning from at the instant before the overrun, just as though the overrunning units were engaging in normal combat. A Friendly supply unit may not, however, be expended to create Maximum Attack Supply (see 10.3). The Supply State of the units being overrun is calculated on the basis of their Supply State at the beginning of the Movement Phase. All normal terrain modifications of Combat Strength apply to all involved units. When overrunning units enter the defending hex through an Escarpment hexside, their Combat Strength is halved.
9.9 Effect of Overruns on Supply Units
9.91 An overrun attack does not automatically eliminate a supply unit even though the combat units attacked with it are destroyed. Overrun supply units are either captured or destroyed (see 10.5).
9.92 Any combat unit may overrun an Enemy supply unit which is alone in a hex. In such an overrun, the overrunning units do not expend the usual ten Movement Points. The supply unit does not counterattack.
10. Supply
General Rule: There are four conditions or "states" of Supply: (1) Maximum Attack Supplied; (2) Attack Supplied; (3) Generally Supplied; and (4) Unsupplied. The Supply States of units are determined through the ability to trace a supply path through the hexagons to a Supply Source. The Supply State of a unit affects that unit's Movement and Combat abilities.
Procedure: The Generally Supplied or Unsupplied condition of all Friendly units is determined at the Supply Determination Phase of the Friendly Player-Turn, and applies through the rest of that Player-Turn. Unsupplied units may neither move or engage in Combat during the Player-Turn. Whenever a unit is Unsupplied, place an Unsupplied marker on it. A Generally Supplied unit can have enhanced offensive ability by being in Attack Supply or Maximum Attack Supply. The Attack Supplied or Maximum Attack Supplied state of a unit is determined in the Attack Supply Segment of the Friendly Combat Phase. Enemy units attacked during the Friendly Player-Turn have their supply condition determined at the instant of Combat. (See 9.8 for the calculation of Supply States during an Overrun).
10.1 Supply Sources
10.11 Axis units draw General Supply from supply units.
10.12 Allied units draw General Supply from supply units, the Alexandria base, Tobruk, and to a limited extent from Bardia.
10.13 Supply units are only valid as a supply source if they are part of a network of Supply Units, each member of which is within 20 Movement Points (unblocked, see 10.2) of another Supply unit of the network and having at least one Supply unit of the network within 20 Movement Points of a Friendly Supply Terminus. The Tobruk hex and the Alexandria and El Agheila Home bases are the only Supply Termini.
10.14 The Axis Player may use Tobruk as a Supply Terminus on the Game-Turn in which he captures it. Note that he may not trace his supply directly to Tobruk from a combat or truck unit but must trace it to a Supply unit which in turn traces to Tobruk (or El Agheila).
10.15 The Allied Player may use the Tobruk hex and the Alexandria Home base as both a Supply Source and a Supply Terminus.
10.2 Tracing the Supply Path
For purposes of supply, any supply source can supply any number of combat units which are able to trace a supply path to the supply source. The Supply Path is traced along a line of continuous hexes from the unit to the supply source. The maximum hex-length of the supply path can vary with the terrain it crosses and terrain Movement Point cost. A Supply Path can be no more than 20 Movement Points "long." Whenever distance of a supply path is being calculated count the number of Movement Points as though a combat unit (even when calculating a Truck's supply path) were moving through the hexes the supply path is being traced through. The path may not be traced through Enemy occupied hexes or controlled hexes, though it may be traced through a Friendly unit in an Enemy Zone of Control.
10.3 Supply States
10.31 Units are Unsupplied when they are unable to trace a 20 Movement Point (or less) Supply Path.
10.32 Units are in General Supply when they are able to trace a 20 Movement Point (or less) Supply path.
10.33 Units are in Attack Supply when they are able to trace an eight Movement Point (or less) Supply Path to a Supply unit that has not moved in that Player-Turn.
10.34 Units are in Maximum Attack Supply when they are able to trace an eight Movement Point (or less) Supply Path to an unmoved Supply unit and the Supply unit in question is expended (see below).
10.4 The Supply States and Effects Chart (see mapsheet)
| Supply State | Maximum Range from Supply Unit | Movement Allowance | Combat Strength — Attack | Combat Strength — Defense |
|---|---|---|---|---|
| Unsupplied | more than 20 MP | zero | zero | halved |
| Generally Supplied | 20 MP or less | full | halved | full |
| Attack Supplied | 8 MP or less | • | full | • |
| Maximum Attack Supplied | 8 MP or less and supply unit expended | • | doubled | • |
(• = no change)
10.5 Maximum Attack Supply
At the beginning of the Combat Phase during the Attack Supply segment the Attacking Player may voluntarily create Maximum Attack Supply for one, some, or all of his attacking units. He does so by tracing an eight Movement Point Supply Path from his attacking units to a supply unit which has not been moved in that Player-Turn, and then expending that Supply unit (removing it from the board). The Supply unit so expended may have been used to create General Supply in that Player-Turn.
Attacking units in Maximum Attack Supply double their Combat Strength. Supply units used to create Attack Supply and Maximum Attack Supply may not have been moved in that Player-Turn. Maximum Attack Supply may not be used in an Overrun.
10.6 Special Allied Supply Sources
10.61 Bardia
Bardia itself may provide General Supply to any Allied unit(s) directly in that hex.
10.62 Alexandria and Tobruk
The Alexandria base and Tobruk (if Allied units occupy or were the last to occupy it) can provide General Supply to an unlimited number of Allied units within 20 Movement Points distance.
10.7 Supply Units
Supply units represent supply depots. They have no integral Movement Allowance and are immobile. They may be transported by a Truck (see 11.0) or the Matruh railroad (see Rail Movement, case 5.5) or may be moved according to the Sea Movement rules, (see case 5.4).
10.8 Destruction and Capture of Supply Units
Friendly supply units are destroyed by Enemy action or voluntarily expended by the creation of Maximum Attack Supply. Supply units may be destroyed or captured by Enemy units. Whenever a hex containing a supply unit is overrun the overrunning Player rolls the die. A roll of "one" or "two" and the supply unit is captured (replace the unit with a supply unit of the overrunning Player). "Three, four, five," or "six" and the overrun supply unit is destroyed (removed from the map). Supply units may be destroyed voluntarily by the owning Player in anticipation of an Enemy threat. This voluntary destruction can only take place in the Attack Supply Segment of the owning Player's Combat Phase (in effect, the owning Player is creating Maximum Attack Supply and not using it). Captured Supply units may be used to create Maximum or Attack supply by their captors in the turn in which they are captured. Supply units are not eliminated when the Combat units and/or Truck units with which they are stacked are eliminated. The Attacker may advance onto the Supply unit and roll for capture as in an Overrun.
10.9 Supply Prohibitions on Combat Units
10.91 The Allied Player may never voluntarily place his combat units in an unsupplied condition except when creating additional Truck units (see case 11.5). He may not move them out of supply nor may he voluntarily expend or destroy a supply unit if the effect of such an event is to place unit(s) in an unsupplied situation.
10.92 The Axis Player may voluntarily place his units in an Unsupplied condition.
10.93 Units are not lost simply by being Unsupplied. They may remain Unsupplied indefinitely.
11. Truck Units — Transport
General Rule: Each Player has one Truck unit. The sole function of the Truck unit is to transport Supply units. The Truck unit has a transport capacity of one Supply unit. The Truck unit is moved in the same Phase as combat units, though it is prohibited from entering certain terrain. The Truck has a limited self-Defense Strength. A Truck unit may be eliminated by overrun or combat.
Cases:
11.1 Transporting Supply
11.11 A Truck unit may load and unload a Supply unit at any time during its Movement Phase. There is no additional Movement Point cost to loading, unloading or transporting a Supply unit. The Truck simply moves onto the Supply unit to load, moves across the map with the Supply unit underneath, and moves off the Supply unit to unload it.
11.12 Any number of Supply units may be transported by the Truck in a Movement Phase so long as they are transported one at a time.
11.2 Movement Prohibition
Trucks may only move along roads and tracks. They may not move through non-road (clear or rough) terrain. Trucks may not use Sea Movement (see: Terrain effects).
11.3 Combat
A Truck unit may not attack. It has a Self-Defense Strength of one point if attacked by itself and may counterattack using the zero column. When stacked with other (combat) units it does not contribute this Strength Point to the defense of the stack. It is eliminated if all of the combat units in the stack are eliminated.
11.4 Automatic Return
Whenever a Truck unit is eliminated it is returned as a reinforcement two Game-Turns later. For example: a truck eliminated on Game-Turn Two is returned on Game-Turn Four.
11.5 Creating Additional Truck Units
11.51 Players may create additional Truck units by stripping the organic transport from several combat units whose total Combat Strength equals or exceeds ten points. The Combat units must lie adjacent to one another along a road or track and may stack within normal limits. The Truck unit is created during the Friendly Reinforcement Phase, and is placed adjacent to the grounded units. Grounded Markers are placed on the grounded units. The Truck unit may be dissolved, returning the organic transport by reversing the above procedure during any subsequent Reinforcement Phase.
11.52 Grounded units are treated as Unsupplied units even if they rest adjacent to or on top of a Supply unit or base hex.
12. Command Control
General Rule: The Allied Player is burdened with Command Control problems. During his Command Control Phase of his Game-Turn he must roll the die and consult the Command Control Chart. Any Allied Combat units which lie on hexes whose last number corresponds to the numbers cross-referenced to the die roll may not be moved during that Game-Turn. They may not attack during the Game-Turn. Loss of Command Control is indicated by flipping affected units face-down. Turn units face-up again at the end of the Allied Player-Turn.
Allied Truck units are not affected by loss of Command Control. Unaffected Allied units may pass through affected units freely, may stack with affected units and attack out of an affected hex as long as stacking limitations are applied. The affected units do not participate in the attack. The Command Control condition of a unit has no effect upon stacking.
12.1 Command Control Chart
| die roll | hexes affected (last digit) |
|---|---|
| 1 | 1, 7, 3 |
| 2 | 2, 8, 4 |
| 3 | 3, 5, 9 |
| 4 | 4, 6, 0 |
| 5 | 5, 1, 7 |
| 6 | 6, 2, 0 |
13. Forts
General Rule: The Tobruk hex and the Bardia hex are Fort hexes. The Combat Strengths of units in a Fort hex are multiplied when attacked. The supply situations of Allied units in a fort are modified. Units in a Fort hex have a modified Zone of Control.
Cases:
13.1 Combat
The Combat Strengths of units in Tobruk are multiplied by five when they are attacked. Units in Bardia are multiplied by two. The fort multiple is not applied to units counterattacking out of a fort hex. The normal counterattack multiple is applied.
13.2 Fort Zone of Control
The hexes adjacent to a Fort are Fort-Controlled hexes. All Enemy units entering the Fort-Controlled Hexes must immediately stop. They must attack any Friendly units within the Fort, every combat Phase they remain in the Fort-Controlled hex. Enemy units may leave a Fort-Controlled hex normally. Exception: an Enemy unit advancing after Combat into a Fort-Controlled hex must attack the Fort at least once before leaving. Note that units in the Fort are under no compulsion to attack.
If units adjacent to a Fort are below Zero Attack Superiority or are Unsupplied, they are considered to be making ineffectual attack on the Fort which has no result. The units in the Fort may counterattack.
13.3 Supply
Allied units within a Fort hex are automatically considered to be in General Supply. The Fort of Tobruk is also a port which can function as the terminus of a supply network. Axis units within the Tobruk or Bardia hexes are not automatically in General Supply. They must be able to draw on a supply unit which in turn draws on the port of Tobruk.
13.4 Stacking Limitations
Only two combat units may be stacked within the Bardia hex.
14. Replacements
General Rule: Each Player in PanzerArmee Afrika receives replacements as indicated on the Replacements/Reinforcements Turn-Record Track.
Procedure: Replacements are distinguished by type (Armor or Infantry) and whether they are German, Italian, or Allied. Replacements are not actual units. They are Strength Points which may be used to reactivate cadres or in some cases may be added to existing units to increase their Strength. The current amount of Replacement Points available is indicated by the position of the appropriate marker on the Replacement Points Available Tracks.
14.1 Receiving and Recording Replacement Points
On the game map will be found the Replacement/Reinforcement Turn Record Track. For each Game-Turn on this track there is an indication of how many Replacement Points (of a given type) will be received by the Players for use in that Player-Turn (or to be accumulated for later use). If the Replacement Points are not used immediately, the Player records their accumulation on the Replacement Points Available Track by advancing the appropriate markers on the track. No more than ten Replacement Points, of a given type, may be so accumulated. Unuseable Replacement Points in excess of ten are lost.
14.2 Using Replacement Points to Revive Cadres
Cadres (i.e., previously destroyed units, see 15.0) may be "revived" and returned to the game by expending a number of same-type Replacement Points equal to the unit's face-value Combat Strength. The revived Cadre is placed on the owning Player's Base hex during his Replacement/Reinforcement Phase.
14.3 Using Replacement Points to Augment an Existing Unit
Existing Allied units may be augmented (i.e., have their Combat Strength increased) by adding Replacement Points to the unit and exchanging the counter for an appropriately stronger one of a similar type. In order to do this, the unit must be in Alexandria during the Allied Reinforcement/Replacement Phase and sufficient Replacement Points of the appropriate type must be available to add to the unit. Also, the new Strength of the unit may not exceed the Augmentation Ceiling for that Game-Turn. The Augmentation Ceiling is simply a maximum Strength level to which any unit may be increased. This Ceiling changes during the game and is indicated on the Reinforcement/Replacement Turn-Record Track. Axis units may never be augmented.
14.4 Nationality and Unit Type Limitations
Armored Replacement Points may only be used to revive or augment Armored, Armored Infantry, or Armored Reconnaissance units; Infantry Replacement Points may only be used to augment or revive Infantry units. German Replacement Points may only be used with German units; Italian Replacement Points with Italians; and Allied Replacement Points with Allied.
15. Cadres
General Rule: Cadres represent the Brigade Headquarters and other key personnel of a fighting unit. These are frequently relatively intact after the Brigade has ceased to exist as an effective fighting unit. With these as a skeleton the new troops and equipment can be used to re-form the Brigades. This is a considerably easier process than creating entirely new units.
15.1 How Cadres Are Formed
Whenever a combat unit is destroyed in combat or by being overrun, it is placed in the Cadre Box.
15.2 How Cadres Are Revived
Cadres are revived (i.e., returned to the game) by the expenditure of Replacement Points as described in 14.2.
15.3 Duration of Cadre Status
Units may remain in the Cadre Box as long as the Player desires. Their revival is contingent upon available Replacement Points and the wishes of the owning Player. Once a Cadre is revived, it is in all respects a full-fledged unit (and may once again become a cadre via combat). Units may not voluntarily become Cadres; they can only become such through combat.
16. Removal of Allied Units
General Rule: On certain Game-Turns the Allied Player is required to remove units from the game. This simulates the dispatch of forces to other theaters. The Turn Record/Reinforcement Track indicates units and cadres to be withdrawn by color coding them in blue.
Procedure: During the Reinforcement and Replacement Phase of his Game-Turn the Allied Player will remove units from the Game as called for by the Chart.
Cases:
16.1 Units may only be removed from Alexandria and (when called for) from the Cadre Box. If the Allied Player has failed to provide for unit removal by stationing sufficient units in Alexandria to remove, the Axis Player may choose the necessary Allied Units to be removed (which is a quick way for the Allied Player to lose a Tobruk garrison).
16.2 Reinforcements are landed at Alexandria and Replacements are taken before units are removed. Thus the Allied Player may use his Reinforcing units to meet his Removal obligations. In effect they go in and out in the same Phase.
16.3 In the unlikely event that the Allied Player does not have Cadres in the Cadre Box to meet a removal obligation for Cadres he must remove full-strength units.
17. Reinforcements
Comment: Unit designations are given on the Turn Record/Reinforcement Chart and are not always strictly accurate with respect to their historical arrival times (i.e. Game-Turn). In many cases, all of the component parts of a given unit did not arrive together. They sometimes arrived weeks or months apart; while component parts of different units arrived at the same time. The time given for a specific unit represents when the majority of the component parts of that unit arrived. The actual designations on the counters are not, therefore, necessary for the play of the game. On the other hand, the Combat Strengths arriving on specific Game-Turns are accurate representations of Combat Strength in terms of men and equipment, that did arrive at the time indicated, and therefore must be strictly adhered to. Another factor to be considered is that Reinforcements arrive at the end of a Player-Turn and therefore cannot move or attack until the next Game-Turn. This factor sometimes necessitated one-Game-Turn adjustments of the arrival schedule.
General Rule: Each Player receives reinforcements periodically throughout the game. These are placed on the map during the Replacements and Reinforcements Phase of each Player-Turn.
Cases:
17.1 Where Reinforcements Arrive
17.11 All Axis Reinforcements arrive at El Agheila (exception see 17.14).
17.12 All Allied units arrive at Alexandria.
17.13 Reinforcements must be taken when they are scheduled or they are lost.
17.14 Axis may land Reinforcements and Supply units at Tobruk when he has had units in the Fort hex of Tobruk for one complete Game-Turn, and the nearest Supplied Allied unit is not within 20 hexes of the Tobruk fort hex. The Axis Player may not take such Reinforcements in violation of the Stacking limitations.
17.15 Note that both Alexandria and El Agheila are more than one hex. Reinforcements may be placed in any hex of either base as long as stacking limits are not violated. If a reinforcement cannot be placed without violating the stacking limit, it is lost.
17.16 Axis Parachute and Glider units may (optionally) enter the game on any Road or Track hex which is in General Supply.
18. Victory Conditions
Victory (winning the game) can be attained in one of three degrees by one of the Players provided that he fulfills certain conditions.
Allied Marginal Victory: Possession of Alexandria plus a total supplied, on-map strength (in Combat Points) greater than twice that of the Axis.
Allied Substantive Victory: Possession of Alexandria plus a total supplied, on-map strength greater than three times that of the Axis.
Allied Decisive Victory: Possession of Alexandria plus a total supplied, on-map strength greater than five times that of the Axis.
Axis Marginal Victory: Possession of El Agheila or Alexandria and a supplied, on-map strength of at least half that of the Allies.
Axis Substantive Victory: Possession of El Agheila or Alexandria and a supplied, on-map strength at least equal to that of the Allies.
Axis Decisive Victory: Possession of Alexandria and El Agheila and a supplied, on-map strength at least equal to that of the Allies.
A draw can result if neither Player fulfills a Victory condition. The Allied Player can upgrade a Marginal Victory to a Substantive, and a Substantive Victory to a Decisive by capturing El Agheila in addition to fulfilling the ordinary Victory Conditions.
18.1 Ending the Game
The game ends after the completion of the 20th Game-Turn. It ends sooner if the Axis captures Alexandria: at the end of the Axis Player-Turn in which Alexandria is captured, the game ends and victory is calculated. The capture of El Agheila by the Allies does not automatically end the game. In such a case, Axis reinforcements and replacements may land at Tobruk (within the conditions of case 17.14). If the Axis cannot land reinforcements/replacements at Tobruk or El Agheila, they are lost.
18.2 Capture of Main Bases
The capture of an Enemy Base (Alexandria or El Agheila) is defined as occupying or being the last to pass through the central hex of that base city.
19. Optional Reinforcement Variations
19.1 Axis Options
Comment: In June 1942 the Axis High Command made a crucial strategic decision: to let Rommel pursue the defeated Eighth Army and attempt to overrun Egypt. When they did so they cancelled Operation Hercules, the planned airborne-amphibious assault on Malta. Rommel was stopped at Alamein and Malta survived to slash his supply lines. The Axis Player may make this same decision. A successful assault means the Axis Player gains additional reinforcements for the remainder of the Game. Failure causes him to lose reinforcements he otherwise would have received.
19.11 On Game-Turn fifteen, before beginning his Movement Phase, the Axis Player must announce whether or not he is assaulting Malta. If he decides to attempt the invasion, he immediately rolls a die. The die rolls that indicate success depend on whether or not there are any Supplied Allied units on the Libyan portion of the map. If there are Supplied Allied units in Libya, a roll of "1" or "2" and the invasion succeeds. If there are no Supplied Allied units in Libya then a roll of "1, 2, 3" or "4" and the invasion succeeds.
19.12 If the invasion is attempted (whether or not it succeeds) the Axis Player may not move any units from Libya into Egypt on Game-Turn 15 (only). Units already in Egypt may remain there and function normally.
19.13 The specific units that could have been available for the campaign are listed on the Variable Reinforcements Table. The units available to the Axis Player are given below:
Malta Invasion
| Not attempted | Succeeds | Fails | |
|---|---|---|---|
| Which of Variable Reinforcements are available | F or G, and one of: H, J, K, L | All except L | one of: F, G, K |
If invasion succeeds, the four parachute units indicated on the Turn Record/Reinforcement Chart as arriving Game-Turns 16 and 17 now arrive Game-Turn 18. If the invasion fails, these units do not arrive at all. If the invasion was not attempted, the units arrive normally. If the invasion fails, the Axis does not receive the normal Supply unit reinforcements on Game-Turns 15 or 16.
19.14 These additional Reinforcements arrive Game-Turn 16 or thereafter. No more than two lettered options can arrive per Game-Turn.
19.2 Allied Options
Comment: The Allies too, had additional units which could have been used in the Western Desert Campaign. In some cases however, military or political considerations would have required the removal of some units that were already there as these additional units were brought in.
19.21 The optional units available to the Allies can arrive at several different times which are given with each specific option. Note that certain lettered options are mutually exclusive with certain other options.
19.22 Certain lettered options call for the removal of units. These units must be of the type indicated, but they may be Cadres.
19.3 Effects on Victory Conditions
Subtract one and one-half times the Strength Points (fractions rounded up) from the Strength Point total of the appropriate side before figuring degree of victory described in 18.0. Example: The Axis Player takes option L (five Strength Points); he therefore must subtract eight Strength Points from his end-game total.
20. Designer's Notes
PanzerArmee Afrika is a dangerous game. Dangerous because it is a new game system. Any new game system contains elements which can only be fully explored through thousands of playings. Here at SPI, our usual play test program only gets a game played a hundred-plus times. All too often this is not sufficient for a new game system. By increasing the "quality" of the playtest games, however, we feel that we have solved many of the problems which usually beset a game with a novel game system.
The situation in North Africa was unique. It was not repeated anywhere else throughout the war. This alone merited a novel game system. The forces involved, compared to what went on in other theaters, were quite small: an "army" of (usually) no more than a dozen divisions on each side. In this campaign, more than any other, logistics was the key. The battle line ebbed and flowed according to the supply status of each side. There were additional problems affecting the design of a game on this campaign. The campaign was a long one. Some twenty months (not including the earlier "Italian" phase and the later "Tunisian" phase). Not only was the campaign long, but there were periods of as long as six months during the campaign when literally nothing happened. In addition, the campaign was also characterized by short periods of very intense activity. Enormous territorial gains were made in periods of less than a month. All of this required a very special game system.
Historically, the campaign is a simple one to describe. The British, after soundly beating the Italians in early 1941, strip the area of forces in order to aid Greece. This gave Rommel his first opportunity and he took full advantage of it. He threw the British back to Tobruk and almost took that fortress. But he was operating on a logistical shoestring and was not able to sieze the fortified port of Tobruk and thus ease his supply problems. This caused a stalemate. The British had greater resources in the area and eventually launched an offensive which threw the Germans back to their starting positions. At this point it was the British who were operating at the end of an insufficient logistical supply line. Soon the Germans built themselves up to strength and threw the British back once more. This time the Germans were able to take Tobruk and defeated the British again in the bargain. The British were then pursued all the way to Alamein. At this point another lull occurred after which the Battle of El Alamein was fought. The Germans were decisively beaten and the campaign was over. Always outnumbered, the German/Italian forces benefitted greatly from the shortcomings of the British forces. Many of these British liabilities were material and tactical and thus could be built into the units themselves. But at the highest levels there were also decisive problems for the British. We sum this up in a British "command control" rule. Otherwise there is no easy way to re-create the problems the British had in using their numerically superior army.
Being new, the PanzerArmee Afrika game system will take a little getting used to. It is basically simple. But let's face it, there are no other games around which give units 40-60 Movement Points per Phase. In addition there are a host of other unique rules which, taken together, will cause even the most experienced gamer to start from scratch and learn a whole new "game."
The war in North Africa was unique. And we feel that it requires a unique game to re-create the situation. A unique game and a simple one so that players may concentrate on the tactical and strategic possibilities of the situation. We feel we have succeeded in producing a novel and easy-to-play game on this campaign. We hope you agree ... and enjoy the game.