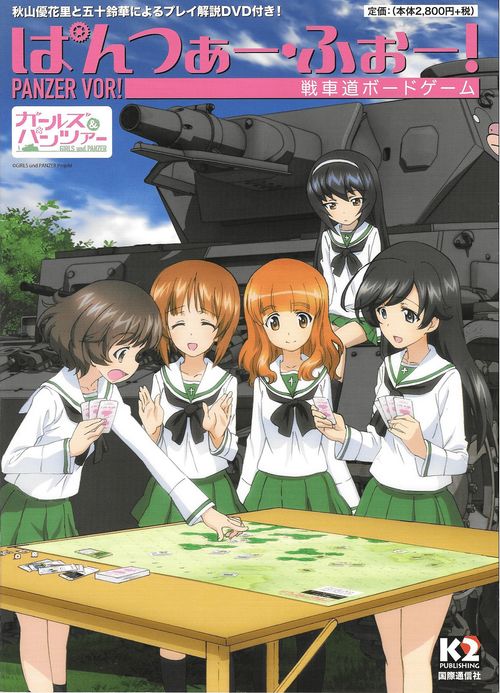
Panzer Vor!
Panzer Vor! Rulebook
Table of Contents
Table of Contents
- Getting Started
- Sensha-dō: An Introduction
- An Introduction to Sensha-dō
- Sequence of Play
- Turn Phases
- Ending the Game and Victory Conditions
- Moving
- Firing
- Reactions
- Enforcement Cards
- Characters
- Optional Rules
- Part 2 - Scenarios
- Scenarios: From Practice to the Nationals
- Test Your Luck!
- A Mock Battle!
- Exhibition!
- St. Gloriana Girls College vs. Ōarai Girls Academy
- Saunders University High School vs. Ōarai Girls Academy
- Anzio High School vs. Ōarai Girls Academy (Revised)
- Anzio High School vs. Ōarai Girls Academy (Original)
- Pravda High School vs. Ōarai Girls Academy
- Kuromorimine Girls Academy vs. Ōarai Girls Academy (Multi-part Scenario)
- The National Tournament
Getting Started
Besides this book, the following items are included in the Panzer Vor! box.
- 2 Cardboard Counter Sheets
- 3 Map Sheets
- 6 Card Sheets
- 1 Explanatory DVD
The DVD is attached to the cover of this book. First of all, make sure that all of the pieces are present.
Watch the DVD!
First, let's watch the DVD on either a DVD player or your PC. The DVD will explain the basic rules of the game and the flow of play. To start with, just watch the video and try to get a general feel for things. After you do, reading and understanding the rulebook should be simple.
Remove the Counters and Cards
Separate the cards and counters from their sheets. They should be easy to remove by hand, but if you encounter resistance, do not force them; gently use a cutter to remove them instead. It can be convenient to divide the counters into separate groups based on whether they are characters, tanks, or others, and then place them into sealable plastic bags. You can also divide the cards into two groups based on their borders.
Read the Rulebook!
Don't try to understand all of the rules the first time you read them; just read them all of the way through. The rules are organized so that the necessary parts are easy to find, and grouped into related sections. If you try to setup and play a game as you read them, you will probably run into trouble pretty quick. Instead, use the practice scenario that has been included for that purpose. If there are any points that are unclear, you may direct them to the official website at http://kokusaig.co.jp/panzer-vor
Sensha-dō: An Introduction
Panzer Vor! is a board game that allows you to recreate Sensha-dō matches. A Sensha-dō match is just like a real tank battle, and so this game uses the same structure as war simulation games designed to recreate historical battles.
The book you are reading right now is an introduction to those games - a rulebook. The core of these rules focuses on piloting a tank (how to move it). Once you've mastered piloting a tank, learning the rules for using characters or simulating different conditions will be easy. But first, let's get used to handling our tank. Because special rules will vary depending on the match and are collected together in each scenario, it'll be okay to only read them when it becomes necessary.
An Introduction to Sensha-dō
Game Setup
Each match in Panzer Vor! is played out by two players. The details of each match are collected in the form of a Scenario. In addition to the matches between Ōarai Girls Academy and the other schools that occurred in the anime, there are also scenarios for Practice Matches, Training, and the National Tournament (see Scenario section for more details).
First, choose which Scenario you are going to play, and place the counters (tanks and characters) on the map according to the details of the scenario. The front side of a tank may face any of the sides of the hex in which it is placed (not the corners!). Only one tank may be placed in any one hex.
Next, separate out the Scenario Cards from the rest of the cards (you should be left with 78 cards in total), shuffle them thoroughly, and deal to each player their "Starting Hand" (the cards they begin the game with). Starting hand size varies according to the scenario. Place the remaining cards face down nearby. If any of the cards in your starting hand are Enforcement Cards, set them aside and draw as many cards from the deck as you need to replace them. Repeat this process until your hand contains no Enforcement Cards. Then return all of the Enforcement Cards to the deck and shuffle it again. Depending on the scenario, you may start the game with Scenario Cards. Follow the rules for these cards as explained in each scenario.
Finally, you will need two six-sided dice (if you do not have any dice, you can also use a smartphone application). A ruler may also be helpful (or a piece of string).
Glossary
- Turn: The equivalent of making a single move in chess. The game progresses back and forth from Player A's turn to Player B's turn. A single turn is made up of several "phases."
- Phase: Each player's turn is made up of four steps, the Draw Phase, the Action Phase, the Event Phase, and the End Phase. Once a player has completed all of their phases in their turn, their turn is over, and it becomes the opponent's turn.
- Game Counter: There are three types of counters: "Tanks," which have pictures of tanks on them; "Characters," who are the operators or teams that pilot the tanks; and "Markers," which represent various information.
- Card: There are 96 cards which are used for moving your tanks and making attacks. They are divided into five types - Action, Event, Reaction, Enforcement, and Scenario cards. Where the rules mention cards, they are referring to these.
- Map: These maps represent cities or other battlefields.
- Hex: The maps are printed with six-sided spaces called hexes that are used primarily for moving and attacking. The boundaries of a hex are called "hex-sides" (one hex has six hex-sides).
- Deck: The deck consists of all of the cards that have not yet been used. There is only a single deck. Make sure all of the cards are facing the same way, and placed face-down.
- Hand: Your hand consists of all of the cards that you are holding. Make sure to keep it secret from your opponent. At the end of each player's turn, that player's hand may not have more than five cards in it.
- Discard: When you use a card during the Action or Event Phases, and when you remove cards from your hand during the End Phase in order to satisfy the hand size limit, it is called "discarding." Cards that are discarded are placed face-up in a single pile.
Counter Types
- Tanks: These counters may also include things that are not tanks (such as assault guns), but they are all referred to as "tanks" for the sake of the rules (however, there are special rules for how they are used).
- Characters: "Characters" may represent an individual, such as Miho Nishizumi, or an entire crew, such "Turtle Team". Except when specified, only a single character counter may be placed on a single tank (e.g. all of Goosefish Team can be placed on a vehicle. There may also be scenarios that call for multiple characters to form a single tank crew).
- Markers: These are things like the Flag Marker used to represent a flag tank, or a smokescreen. Use them when they are called for.
Tank Counter
- Front side: shows the tank's Movement score, Target Size modifier, Range, Firepower, Armor Ratings and Turret Rotation.
- Reverse side (Wreckage): when the ground underneath it is gray and there is a white flag present, the tank has been defeated.
- Assault Gun/Jagdpanzer: shows a Firing Arc (front).
- Multiple-gun Tank: shows Main/Secondary Gun Range and Main/Secondary Gun Firepower.
Character Counter
Character and Team counters have a polka-dot pattern on the reverse side.
Major School Affiliations
These are the major Schools shown in the anime series, which are represented in this game.
Minor School Affiliations
Minor Schools are described in the manga and movies. They may be played using other tanks provided in the game.
- BC Freedom Academy
- Blue Division High School
- Bonple High School
- Chi-Ha-Tan Academy
- Jatkosota High School
- Koala Forest Academy
- Maginot Girls Academy
- Maple High School
- Viking Fisheries High School
- Waffle Academy
- Yogurt Academy
Markers
(Marker illustrations; each is explained where used.)
Card Types
- Action Cards
- Attack Cards have an icon of a firing tank in the upper right hand corner. They are used to fire on an enemy tank.
- Movement Cards have an icon of a moving tank in the upper right hand corner. They are used to move your own tanks.
- Cards with both icons are Move and Attack Cards. They allow you to move and attack, or to do one or the other.
- A card with only a picture of a tank is still an Action Card, but is neither an Attack Card or a Movement Card (some of the Scenario cards have this icon).
- Event Cards
- Event Cards have an icon of a pair of binoculars in the upper right-hand corner. Playing these cards causes Events to happen that either aid you or hinder your opponent.
- Reaction Cards
- Reaction Cards have an icon of a gunsight in the upper right-hand corner. These cards are used to resist your opponent's Actions, and can only be used on your opponent's turn. Only one Reaction Card may be used in response to any one Action Card.
- Enforcement Cards
- Enforcement Cards have an icon of an explosion in the upper right hand corner. When an Enforcement Card is drawn from the deck, it must be played immediately, applying the effect written on the card. However, if an Enforcement Card is drawn at a time other than the Draw Phase (e.g. as a result of the Morale Boost Event Card) it is discarded without taking effect. Enforcement Cards are also used for determining the end of a match.
- Scenario Cards
Sequence of Play
The game progresses in the following order:
- Draw Phase: Draw a card from the deck.
- Action Phase: Use an Action Card in your hand to take an Action. If you do not wish to take an action, you may pass for that Action phase. When taking an action, first reveal the card, then declare which tank(s) will perform the action. Each player may only play one Action Card during each of their turns (using the Combat Awareness Character ability is an exception to this).
- Event Phase: You may play an Event Card from your hand. If you have no Event Cards or do not wish to play one, you may pass. Each player may only play one Event Card during each of their turns.
- End Phase: If you have more than five cards in your hand, choose and discard from them until your hand consists of only five cards.
These four steps constitute a single player's turn, and the game progresses as players alternate turns. With the exception of Reaction Cards, described below, only the player whose turn it is may act during their turn.
Example: Once the player controlling Ōarai Girls Academy finishes their turn, the player controlling Pravda High School takes their turn.
The Flow of Play
Player A's Turn (Draw Phase, Action Phase, Event Phase, End Phase) -> Player B's Turn (Draw Phase, Action Phase, Event Phase, End Phase) -> Player A's Turn (repeat).
Turn Phases
Draw Phase
At the beginning of your turn, you must draw a card from the deck. Your hand may contain more than five cards, but any excess beyond five at the end of the turn will be discarded at that point. If you draw an Enforcement Card, immediately resolve it and then discard it and proceed to the Action Phase.
Action Phase
By playing an Action Card, you may move, attack, or do both.
- You may only play one Action Card per turn (unless using Combat Awareness).
- For rules on how to Move and Attack, see their respective sections.
- You may not play a Move Card and an Attack Card at the same time.
A tank or player that is considered Inoperative may neither Move nor Attack. A tank that is considered Immobile may not use Move Cards.
Event Phase
After the Action Phase has ended, if you have any Event Cards in your hand, you may choose to play one. However, you may only play one Event Card per turn. Most of the Event cards are self-explanatory, but some are described in more detail below:
- Morale Boost: When you play this card, you immediately draw three cards from the deck. If this results in you having more cards in your hand than the maximum hand size, you will have to reduce your hand size down to the maximum during the End Phase. If any of the three cards you draw as a result of using Morale Boost are Enforcement Cards, immediately discard them and ignore their effects (do not redraw any cards to replace them). However, they may result in a Forced End to the game (see the Scenario section for more details).
- Repairs/Maintenance: When you play this card, you may choose to either use Repairs or Maintenance:
- Repairs - you may select a tank that has an Immobile marker on it and remove that marker from that tank, so it may move again.
- Maintenance - you may choose one card from the discard pile (not counting Enforcement Cards) and place it in your hand.
- Recovery: When you play this card, you may have a character who has been removed from the map or who has been turned face-down recover. If you choose to recover a character who is still on the map, turn their counter face-up. If you choose to recover a character who has been removed from the map, place that character's counter on a tank of your choice (it does not have to be the same tank that they started the game on). Characters with a reverse side are placed face-down. Characters with only a single side are placed face-up. Recovery cards are not used during Training scenarios. Remove them from the deck before playing and set them aside.
End Phase
If you have six or more cards in your hand, choose and discard cards until you have only five. After making sure your hand is not over the maximum hand size, your turn is over. Declare to your opponent that your turn has ended, and your opponent may start their turn.
Ending the Game and Victory Conditions
The conditions for ending a game and winning a match vary depending on the type of scenario that you have chosen to play.
In an Annihilation Battle, you win when you have destroyed all of the enemy school's tanks. In a Flag Battle, you win when you have destroyed your opponent's Flag Tank.
If the match is becoming drawn out or stagnating, it is possible that a Forced End may occur. See the Scenario section (page 26) for more details.
Moving
When you play a Movement Card, you may move one or multiple tanks. You may also choose to move a tank when you play the Move/Fire card. There are also cards such as Mobile Fire and Commander! that allow you to fire a tank after moving it.
Movement
Each tank counter has a movement score listed on it (above its name in the bottom left corner). This value represents the amount of Movement Points (MP) it may expend in a single move.
All tanks may move forward one hex by spending one Movement Point. However, it may be necessary to spend more Movement Points depending on the terrain. On those types of terrain (hills etc.) the amount of additional movement points necessary and any other special rules will be listed in the scenario.
It is not necessary to spend all of a unit's movement points in a single move - however, unspent movement points may not be transferred to another tank or carried over to the next turn.
Example: A Tiger I has a movement score of 3, which means it can move forward three hexes by playing a Move card. If it only moves two hexes, treat the last remaining movement point as if it had been expended.
Movement Direction
A tank is always placed facing the edge of a hex. A tank may only move one hex forwards or backwards per Movement Point.
Turning
When a tank spends movement points to move forward, it may also turn one hex-side (60°) at no MP cost - the tank may turn before or after moving into a hex. However, it costs 1 MP to turn two hex-sides (120°) or more.
If you want to turn without moving, you must spend 1 MP regardless of the number of hex-sides you turn. (Example in diagram: this would cost 4 movement points; the last rotation of 1 hexside in place costs 1 MP.)
In other words, it costs 1 movement point to turn except when making a 60° turn after moving one hex. You can have several free turns if you advance 1 square before making each turn (move + turn 60°, move + turn 60°, move + turn 60° = 3 MP).
Obstructing Movement
A tank may not enter a hex that contains another tank or which it is otherwise prohibited from moving through. A tank may also not move through a hex occupied by another tank (see the Advanced Rules section for alternative options).
A tank may not enter or move through a hex that is designated as a forest on the map. Other restrictions on movement may be listed in the scenario.
Reverse Movement
A tank may move backwards regardless of its facing. This is called reverse movement. In order to move in reverse, you must spend 2 MP per hex. In other words, it costs twice as much to move backwards as it does forwards.
When moving in reverse, it costs as much to turn as it does when moving forward. This means that turning 60 degrees costs nothing, and turning 120 degrees or more costs 1 movement point.
Movement Bonuses
Cards such as Full Speed Ahead! can temporarily increase your movement score, as can bonuses from character abilities (see the Character section for more details). All of these movement bonuses are cumulative.
Example: The Ōarai Girls Academy player uses Full Speed Ahead! (which gives +2 MP) on a Panzer IV with a Movement score of 3, along with Mako's Movement Bonus 2. As a result, the Panzer IV's movement score becomes 7 for this turn.
Firing
When you play an Attack Card, you may make one attack with a single tank. Some cards, such as Volley Fire and Covering Fire, allow you to make attacks with multiple tanks.
Line of Sight
When making at attack, the firing tank must be able to see the target. When you are able to see the target, it is called having Line of Sight.
To determine line of sight, extend a line from the center of the firing tank's hex to the center of the target tank's hex. If there are no obstructions along the line, then the firing tank has line of sight.
Whether something is considered an obstruction is determined by the scenario - generally, forests will always block line of sight. The presence of another tank, whether friendly or enemy, does not block line of sight (with the exception of wreckage).
If, after playing an Attack Card, it is determined that you do not have line of sight to the target, you may change targets. If there are no valid targets, you may also take back your attack (however, you will have shown your Attack Card to your opponent).
Situations With Line of Sight:
- You have line of sight because the firing line does not pass through any obstructing hexes (clear hexes and one with a tank).
- The firing line passes through the hex-side of an obstructing hex.
- The firing line passes through the corner of an obstructing hex.
- The firing line passes through the hex-sides of multiple separated obstructing hexes.
Situations Without Line of Sight:
- The firing line passes through an obstructing hex.
- The firing line passes through a shared hex-side of two adjacent obstructing hexes.
Attack Roll
After assuring that you have line of sight to the target, you actually fire. Firing is split into two steps; first, you make an Attack Roll to determine whether or not you hit the target - if you do, then you make a Damage roll to determine whether or not the target is destroyed.
In order to make an Attack Roll, count the number of hexes between the attacker and the target. Include the hex that the target is in, but not the attacker's hex. If the distance to the target is less than the attacker's Range, you may fire at the target.
Example: A Panzer IV Ausf. D has a Range of 7. It cannot make an attack against a tank that is eight hexes or more away.
Once you have calculated the distance to the target, roll two dice to make the Attack Roll.
Example: When making an attack against a tank that is seven hexes away, it will hit on a roll of 7 or greater.
Attack Modifiers
There are several modifiers that can be applied to an attack roll. The following are the different kinds of attack modifiers.
- Target Size Modifier
- Card Modifier
- Character Modifier
Target Size Modifier: The Target Size Modifier is the number in the top right corner of the tank counter, and is a representation of the size of the target. Add the Target Size modifier to the result of the attack roll against that tank. Smaller tanks with lower profiles are harder to hit (negative modifiers), while larger tanks are easier to hit (positive modifiers). Thus, a modifier of -1 or -2 is subtracted from the Attack Roll result, making it harder to hit. On the other hand, a +1 modifier increases the result, making the target easier to hit.
Card Modifier: Cards such as Aimed Shot and Mobile Fire apply modifiers to the attack roll. When a card lists a positive or negative attack modifier, add that modifier to the result of the Attack Roll.
When using cards such as Mobile Fire and Commander! that allow you to make an attack after moving, you still apply the attack modifier even if you do not move or turn. If your opponent plays a Reaction Card, any modifier from that card is also added to the result.
Example: The Ōarai player uses Mobile Fire 2 and makes an attack after moving. The target is a Tiger II. First, apply the Tiger II's Target Size Modifier of +1. However, the Card Modifier is -2, so the total modifier is -1. The distance to the target is 7 hexes. Usually only a 7 or better would be necessary to hit the Tiger II, but the total modifier of -1 will be subtracted from the total rolled on the dice - so the Ōarai player will need to roll an 8 or better on two dice in order to hit.
Character Modifiers: See the Characters section for details.
If the modified Attack Roll result is equal to or greater than the distance to the target, the Attack hits.
If the Attack hits, move on to the Damage Roll. If the Attack misses, your Action Phase ends and you move on to the Event Phase.
Extreme Range
It is possible to hit a target that is thirteen or more hexes away through the addition of attack modifiers. However, without using a card or a character that applies an attack modifier, the attack will automatically miss.
Example: An IS-2 commanded by Nonna has a max range of 15, and is firing at a target that is 14 hexes away. The Pravda player is using Aimed Shot 2 for the attack, which gives a +2 modifier to the Attack Roll. If the result rolled on the dice is a 12, the attack will hit, but the player rolls an 11! Usually this would miss, but the player uses Nonna's +1 attack modifier. As a result, the total is 14 (11 + 2 + 1), so the attack hits the target.
Damage Roll
If an attack hits its target, you must then resolve a Damage Roll. Roll two dice and add the result to the firing tank's Firepower.
As a reminder, the Armor Ratings are on the right side of the tank counter.
The following modifiers are applied to the Damage Roll:
- Card Modifier
- Range Modifier
- 1 Hex: +2
- 2 Hexes: +1
- 3+ Hexes: None
- Character Modifier
These modifiers are cumulative.
Card Modifier: Some cards (Deadly Shot and Solid Hit) apply modifiers to the Damage Roll.
Range Modifier: If the distance between the attacker and the target is one hex (in other words, if they are adjacent), apply a +2 modifier to the damage. If the distance to the target is two hexes, apply a +1 modifier to the damage.
Example: In the previous example, if the Panzer IV Ausf. D and the T34/76 were in adjacent hexes, the +2 range modifier would have been enough to destroy the target.
Character Modifiers: See the Characters section for details.
If the modified Damage Roll total is equal to or greater than the target's Armor Rating, the target is Destroyed.
Example: A Panzer IV Ausf. D with a firepower of 3 hits a T34/76 on its front. The total rolled on the two dice is 10. The T34/76 has a front armor rating of 14. The final damage dealt by the Panzer IV is 13, which is less than the target's armor rating, and so the target is not destroyed.
A tank that is destroyed is removed from the map (unless using the Wreckage Optional Rule).
If the target is not destroyed then the attack had no significant effect (it glanced off armor), and the tank remains on the board without any further consequences from the attack.
Firing Arcs
Usually, a tank's armor is thickest on the front, and comparatively thinner on the sides and back. In order to represent this, you use the Armor Rating for the arc from which the attack came.
Which Armor Rating you use depends on the position of the attacker relative to the target. Use the front Armor Rating for attacks that come from the front arc, the side Armor Rating for attacks that come from either side arc, and the rear Armor Rating for attacks that come from the rear arc.
Note: If this rule adds too much complication, you may simply use the Side Armor Rating for all attacks.
Example: In the diagram, the Panzer IV is firing from its rear arc into the side arc of the T34, so the damage roll would use the T34's side Armor Rating of 14.
Assault Guns and Jagdpanzers
Typically a tank is equipped with a turret that allows it to fire anywhere in a 360 degree arc. Consequently, any tank with a turret is able to fire at any target that is within its range during a match (the Optional Rules include rules for Turret Rotation if you want to account for this more realistically).
However, tanks known as Assault Guns and Jagdpanzers do not have turrets - their guns are set in a fixed position on their bodies. This allows them to be equipped with guns that are a larger caliber than normal. However, in exchange for their heavier weapons, their guns are fixed and have restricted arcs of fire.
To represent this, Assault Guns and Jagdpanzers may only fire into their front arcs. Tanks like these are noted with a white arc in their illustrations, designating their restricted firing arc.
In order to fire into a hex not currently in their front arc, they must first use a Move Card to change their orientation.
They may also use cards like Mobile Fire to fire after using their Move to turn (but with the card's negative attack modifier).
Multiple-gun Tanks
Some tanks - like the M3 Lee and the Char B1 - have multiple guns. These tanks have both a main gun with a restricted field of fire and a smaller caliber gun mounted in a turret.
In order to represent this, the Firepower and Range for these tanks are listed in an X/Y format. The first number is that of the main gun, the second that of the secondary gun.
The main gun is fixed and may only fire into the forward arc. The secondary gun may fire in any direction (the Optional Rules for Turret Rotation would apply to this gun).
When making an attack with a multiple-gun tank, you must choose whether you are firing the main gun or the secondary gun - you must declare which gun you are using before rolling the dice. If you fire without declaring, it is always assumed that you are using the secondary gun. You may not use one Attack Card to combine the firepower ratings of both the main and secondary gun, or to attack two different targets!
Reactions
When you act in response to your opponent's action, this is known as a Reaction. If you wish to play a Reaction Card, declare so using the timing described on the card.
Example: You must declare that you are using Emergency Stop before your opponent makes their attack roll. If your opponent has already made their attack roll, you may not use Emergency Stop.
You may only use one Reaction Card in response any one action made by your opponent. The effects of cards such as Mobile Fire that allow a player to move and fire are considered one action, and you may only use one Reaction Card in response to them.
Example: The Ōarai player has used the card Commander! The Kuromorimine player uses the Quick Shot Reaction card in order to fire before the Ōarai player does. However, the Kuromorimine player's attack misses, so the Ōarai player gets to continue with their attack (the effect of the Commander! card). The Kuromorimine player cannot use other Reaction Cards such as Emergency Stop, Poor Visibility or Ricochet in response to this attack, because they have already played a Reaction Card.
You may not play a Reaction Card of your own in response to your opponent playing a Reaction Card (with the sole exception of Eavesdropping).
Example: The Kuromorimine player uses Mobile Fire 2. In response, the Ōarai player uses the Quick Shot Reaction Card in order to make an attack before the Kuromorimine player does. Even if the Kuromorimine player has cards such as Emergency Braking or Ricochet, they cannot play them in response to the Ōarai player's Reaction.
When your opponent uses cards like Coordinated Move to move multiple tanks at once and you want to play a Reaction Card (such as Quick Shot) in response, you must declare that you are doing so immediately after the tank you wish to target has finished its move. You can only target the last tank to have moved before your declaration (i.e. you cannot wait to see all of the tanks' moves before deciding which one you wish to target).
- Ricochet: Ricochet cannot be used to prevent the effects of Crack Shot, because Crack Shot does not require an Attack Roll.
- Eavesdropping: Unlike other Reaction cards, this Scenario Card may be used in response to another Reaction Card.
Enforcement Cards
During the Draw Phase, if you draw an Enforcement Card, you must immediately follow what is written on the card. You may then continue with the rest of your turn (subject to any restrictions from the Enforcement Card).
If you draw an Enforcement Card at any time other than the Draw Phase, ignore what is written on the card (simply discard it). However, if there are other rules in effect that depend on the drawing of an Enforcement Card (such as the Stagnant Battle rule or a scenario-specific rule), those rules still apply.
- Desperate Situation!: The player that draws this card may not take any Actions (Movement or Firing) during the rest of their turn, but they may still play an Event Card.
- Thrown Tread: This card tells you to "choose a tank at random." Temporarily assign numbers to all of your tanks on the map and roll a die to determine which one the card affects. For example, if you have four tanks on the map, assign each a number from 1 through 4, and then roll a die. If the result is 1 through 4, that tank becomes the target of the card's effect. If the result is a 5 or a 6, re-roll until the result is between 1 and 4.
- Engine Trouble: You cannot play any cards that have a Move icon on them, or perform any Action that involves movement. This means you may only select the Fire option on a Move/Fire card, and Commander! and Mobile Fire cards cannot be used at all.
Characters
In this game, Characters (remember, this includes Teams!) are just as or more important than the tanks they pilot. Each Character has a special ability. Most of these special abilities correspond to a tank's parameters. Their effects are described below.
- A modifier applied to Attack Rolls.
- A modifier applied to Damage Rolls.
- Added to a tank's movement for this Action.
- A modifier applied to the Attack Roll when the tank is the target of an attack.
- A modifier applied to the Damage Roll when the tank is the target of an attack.
Generally, the above abilities only have an effect on the tank that the Character is piloting, on the turn the ability is used. Place the Character's counter on top of or underneath the counter of their tank. You may choose to apply a character's abilities at any time. For example, when making an attack roll or a damage roll, you may look at the result of the roll first before declaring you are using an ability.
Example: A Panzer IV with Hana Isuzu aboard is firing at a target that is six hexes away. The result of the attack roll is 5, a miss. However, the Ōarai player declares that they are using Hana's +2 firing modifier. This is added to the result of the roll for a total of 7, so the attack hits!
When a character's counter has both a front and a back side, the scenario will tell you which one to use at the start of the match. When a character begins a match face-up, turn them face-down whenever they use any of their abilities. Some Characters have abilities on their face-down sides - if they use any of their abilities there, remove the Character from the map. When a Character's counter is removed from the map, this does not mean that they have left the battlefield - only that they have become exhausted. They may become usable again through cards or other effects. Characters with no abilities on their face-down side may be kept on the map with their tank counter.
In some scenarios a Character may be placed on the map after the match has begun - you will not be able to use the abilities of these Characters until they are actually placed on the map.
The following abilities may also be used during your own Event Phase:
- Combat Awareness: Most of the schools' commanders possess the Combat Awareness ability. When you declare that you are using Combat Awareness, you may play one additional Action Card. However, you may only use Combat Awareness once per turn (Miho Nishizumi and Maho have Combat Awareness on both the front and back of their counters, but they may still only use it once per turn).
- Recovery: When Saori Takebe or Katyusha use their Recovery ability, it has the same effect as the Recovery Event Card. You may restore a character who has been removed from the map or who has been turned face-down (see Recovery in the Event Phase section).
- Aide: This ability has the same effect as the Morale Boost Event Card, except that the number of cards drawn is equal to the number shown on the counter. Immediately draw that many cards into your hand (see Morale Boost in the Event Phase section).
Optional Rules
The following rules increase the complexity of the game, but they also make it more realistic. They can be used in all of the scenarios, but all players should agree before the match whether or not they will use them.
Wreckage
When a tank is destroyed, turn its counter upside down and leave it where it was on the map. From then on, the wreckage of the tank hinders movement and line of sight through that hex.
A tank can enter a hex with wreckage in it, but doing so requires one additional Movement Point. If you do not have enough movement points, you cannot enter the hex.
Example: A clear hex that has wreckage in it costs 2 movement points to move into.
When making an attack whose line of sight travels through a hex with wreckage in it, apply a -1 modifier to the Attack Roll (even if the line of sight travels through multiple hexes with wreckage in them, the modifier is only -1). Do not apply the modifier when firing at a target in a hex with wreckage in it - the modifier only applies when the line of sight travels through the hex.
Whenever you use a Repairs/Maintenance card, you may also remove a single tank wreckage counter from anywhere on the map.
Turret Rotation
When using this rule, a tank (with a turret) must rotate its turret in order to fire at a target outside of its front arc.
All tanks with turrets have a Turret Rotation parameter listed on their counter underneath their armor ratings (next to the rotating arrow symbol). A value of 1 means that the turret can be rotated one hex-side (60 degrees) in the player's turn, and a value of 2 means that it can be rotated two hex-sides (120 degrees) in the player's turn.
When you rotate a turret, use a turret marker to indicate which direction it is pointed in. From then on, when firing, use the direction of the turret marker to determine the forward field of fire of the tank (see Diagram 14).
You may rotate a turret according to the following rules:
- When you use a Movement Card, after moving.
- When you use a Movement Card, without moving.
- When you use an Attack Card, you may rotate the turret and then fire.
When you rotate a turret and fire in the same turn (example 3 above), apply a -2 modifier to the Attack Roll.
Example (see Diagram 14): A Panzer IV without a turret marker wants to fire at the tank to its upper right. In order to do so, the player places a turret marker and rotates it 60 degrees, applying a -2 modifier to the Attack Roll. On the next turn, if the Panzer IV wants to fire at the same tank, it can do so with no negative modifier. However, in order to fire at the other two tanks, it must rotate its turret again, and fire with a -2 modifier.
You may remove the turret marker from a tank when the turret is facing forward.
If you run out of turret markers during a match, you may substitute another marker or anything else to show the direction of the turret.
Cutting Through
In situations such as fighting on a city map where things become deadlocked, you may use this rule if both players agree to it.
By spending 1 additional Movement Point, a tank may move through a hex that is occupied by another tank.
While you may pass through the hex, you may not end your movement in a hex that is occupied by another tank. If you do not have enough movement points to move through the hex, you may not enter it.
It is recommended that when using this rule you also use the Turret Rotation Optional Rule described above.
Part 2 - Scenarios
Scenarios: From Practice to the Nationals
These scenarios include recreations of the inter-school matches that took place between Ōarai Girls Academy and the various schools in the anime, the Sensha-dō National High School Tournament, simple training matches to help you better understand the rules, and exhibition matches that allow you to form your own teams and fight.
WARNING: This section contains spoilers for the Girls und Panzer anime series!
Each scenario includes rules for force formation and placement, and special rules that are used only during that scenario. Where the general rules and the scenario rules contradict with each other, the scenario rules take precedent.
Unless specified by the scenario, you are free to choose the facing of a tank when you place it on the map. You may also place characters on any tank you wish, unless specified by the scenario.
Match Types and Stagnant Matches
There are two types of matches that appear in the anime - the first type are Annihilation Battles, and the second type are Flag Battles.
The victory condition for an Annihilation Battle is to destroy all of your opponent's tanks. The match ends the moment that this condition is met.
In a Flag Battle, you win when you destroy your opponent's Flag Tank. The match ends as soon as the Flag Tank is destroyed, regardless of how many other operational tanks a player has.
Unless specified in a scenario, once the fourth Enforcement Card has been drawn (not counting Scenario Cards), it is possible for a match to be considered Stagnant and to have a forced end.
Once the fourth Enforcement Card has been drawn and its instructions followed (if applicable), place that card back into the deck and reshuffle it (do not reshuffle the discarded cards). Continue the match, but as soon as the Enforcement Card is drawn, the match ends.
When a match ends in this manner, add up the point totals of the tanks that each side has destroyed, and the side with the highest total wins (the side with the lower total loses as a result of drawing out the match). If both sides have the same total, the match is a draw.
Note: It is a good idea to separate the Enforcement Card from the regular discard pile in order to keep track of them more easily.
Scenario Cards
Scenario Cards differ from the regular ones used during a match, and are only used when a scenario calls for them. These cards uses are described in each scenario.
During set up, place any Scenario cards allocated to your team face-up in front of you, separate from your hand. When you want to use one, declare that you are doing so, and apply the effect written on the card. Scenario Cards may only be used once per scenario - once they have been used, remove them from the game and do not return them to the regular discard pile.
Test Your Luck!
Training Match. Players: 1. Play Time: 15 minutes. Difficulty: 1 star.
This is a special scenario for a single player, designed to acclimate you to the rules for movement and firing. You control the Panzer IV, while the other tanks act according to the rules.
- Map: Ōarai City Map
- Acts First: Player
- Victory: Make it to the Ōarai Ocean Shrine and grab the ribbon (in order to enter the shrine, you must enter hex 1118 and spend one movement point).
Setup
- Player Tanks/Deployment/Starting Hand: Panzer IV Ausf. D [PzIV D] x 1, Ōarai Station (hex 0802), None (0 cards)
- Enemy Tank Deployment: Matilda [Matilda II] (0718), M4 (1215), T34/76 (0507)
Each enemy tank deploys facing the hex-side along which the hex number is written.
Play Order
Take your turn according to the normal rules - draw a card from the deck and use it as best as you can. If you draw an Enforcement Card, ignore its printed effect and consult the Panzer IV Upgrade section to see if it downgrades your tank, then discard the card. At the end of your turn, the enemy tanks take their actions.
The enemy tanks to not require cards to act (they do not draw any from the deck). Instead, roll a die to determine which tank will act (e.g. the Matilda on 1-2, the M4 3-4, and the T34/76 on 5-6).
Use the following guidelines to determine what action the enemy tank takes.
- If the tank can fire, it will.
- If the tank cannot fire, it moves.
When an enemy tank moves, it follows the shortest route (in terms of number of hexes, not movement points) to the Panzer IV. If there are multiple routes that are the same distance, roll a die to determine which one it takes.
Panzer IV Upgrade
By using a Recon or Recovery card, you can upgrade the Panzer IV. Each time you use one of these cards, you may increase the tank one step: [PzIV D] -> [PzIV F] -> [PzIV H]. Exchange its counter for the appropriate one (you are not forced to upgrade). If you draw an Enforcement Card from the deck, you must downgrade the tank one level - if you draw an Enforcement Card while using the Panzer IV Ausf. D, its type does not change.
Ending the Game
If the Panzer IV is destroyed or if the match ends after becoming stagnant, your result is automatically Terrible Luck. If you make it safely to the temple, roll a die and apply the following modifiers.
- Each enemy tank destroyed: -1
- The number of cards in the discard pile: 1-15: -1; 16-25: 0; 26-30: +1; 31-35: +2; 36+: +3
Use the final total to figure out your fortune.
| Total | Fortune |
|---|---|
| 2 or less | Great Luck (There's no doubt about it, you're great!) |
| 3 | Good Luck (Unpreparedness is one's greatest enemy) |
| 4 | A Little Luck (Don't get bogged down in the little things, and focus on what matters) |
| 5 | Fortunate (You might have a tough time) |
| 6 | Bad Luck (Stop aiming so high) |
| 7+ | Terrible Luck (Don't throw everything away for a fleeting chance) |
A Mock Battle!
Training Match. Players: 2. Play Time: 15 minutes. Difficulty: 1 star.
This is a mock battle to teach you how to play using characters. Normal game rules apply.
- Map: Ōarai City Map
- Match Type: Annihilation Battle
- Deployment: Team A deploys first
- Acts First: Team B
Team A
- Tank : Character
- Panzer IV Ausf. F2 [PzIV F] x 1 : Miho Nishizumi (Front)
- StuG III Ausf. F [Stg III] x 1 : Saori Takebe (Front)
- Deployment: Both tanks deploy anywhere within two hexes of hex 0806
- Starting Hand: None (Draw 5 cards in the player's first Draw Phase)
Team B
- Tank : Character
- M4 x 1 : Yukari Akiyama (Front)
- Firefly x 1 : Hana Isuzu (Front)
- Deployment: Both tanks deploy anywhere within two hexes of hex 1011
- Starting Hand: None (Draw 5 cards in the player's first Draw Phase)
Exhibition!
Exhibition Match. Players: 2. Time: 45 minutes. Difficulty: 1 star.
Exhibition matches do not use characters or Scenario Cards. In exchange, however, you are free to assemble your own forces and pit them against each other. This scenario is geared towards letting you master the basic rules of the game.
Purchasing Tanks
In an exhibition match, both players create their own forces by purchasing tanks. Each tank has its own point value, and the total value of your tanks cannot exceed 100. However, if both players agree, the upper limit can be increased. As long as you do not exceed the limit, you may use any number of tanks from any nationality.
Determining the Starting Player
After both players have prepared their forces, they compare the total point value of all of their tanks. The player with the lowest total chooses whether they act first or second (randomly decide if tied).
Choosing the Match Type
The player who acts first chooses whether the match will be an Annihilation Battle or a Flag Battle. If you are playing a Flag Battle, each player designates one of their tanks to be the Flag Tank. Use one of the school markers to designate which tank is the flag tank.
Terrain Setup
Exhibition matches are set up on a blank map. Each player rolls two dice to determine the number of obstacles they place on the map (each player should prepare their own obstacles). Starting with the player who acts first, the players alternate placing obstacles on the map until all of them have been placed. You may not place obstacles in more than two hexes in a row (placing obstacles in only two adjacent hexes is okay). Obstacles may not be placed in the deployment zones.
Tank Deployment
The tank deployment zones consist of the first row of hexes on either side of the map. The player who acts first places all of their tanks on the map in open hexes within their deployment zone (one tank per hex). Then, the player who acts second does the same. Once all of the tanks have been placed on the map, each player draws a hand of five cards from the deck, and play begins.
Notes
Exhibition matches do not use the Recovery card - remove it from the deck before play. Do not include any Scenario Cards in the deck.
Optional Rules
Characters: If you wish to use characters in an exhibition match, place all of the Character and Team counters in a bag or cup - each player picks two of them at random. You may place the chosen Characters (or Teams) on whichever tanks you wish (on their Front or Reverse side).
St. Gloriana Girls College vs. Ōarai Girls Academy
Inter-school Match. Players: 2. Time: 90 minutes. Difficulty: 2 stars.
The twenty one students from Ōarai Girls Academy, after completing a class in Sensha-dō and engaging in a mock battle, challenged the veteran team at St. Gloriana Girls College to a friendly competition. However, the Ōarai Team showed their inexperience when they lost one tank without any significant gain due to a damaged tread, and another when their crew fled the battlefield. Realizing that they were at a disadvantage, Miho unveiled Operation: Sneaky-Sneak, moving the battle to within the limits of Ōarai City itself. [Episode 4]
- Map: Ōarai City Map
- Match Type: Annihilation Battle
- Deployment: St. Gloriana deploys first
- Acts First: St. Gloriana
Ōarai Girls Academy
- Tanks : Characters
- Panzer IV Ausf. D [PzIV D] x 1 : Goosefish Team [Miho Nishizumi (Front) / Takebe, Isuzu, Akiyama, Reizei (All Reverse)] - All on the same tank.
- Type 89 [Type89] x 1 : Duck Team (Reverse)
- StuG III Ausf. F - Fuurinkazan [StgIII'] x 1 : Hippo Team (Reverse)
- Deployment: All tanks deploy within two hexes of hex 0206 (Ōarai Resort Outlet)
- Starting Hand: Repairs/Maintenance x 1 + 4 random cards from the deck
- Scenario Cards: Ambush
- Reinforcements: Gold 38(t) [38t'] x 1: Turtle Team (Reverse)
St. Gloriana Girls Academy
- Tanks : Characters
- Churchill Mk. VII [Churchill] x 1 : Darjeeling (Front), Orange Pekoe (Front)
- Matilda II [Matilda II] x 4
- Deployment: All tanks deploy in any hexes east of row XX16
- Starting Hand: Move All Tanks x 1 + 4 random cards from the deck
- Reinforcements: None
Scenario Rules
On the Ōarai City Map, players may not move or fire through any hex-side marked in white.
Example: The hex-side between hexes 0716 and 0817 is white. You may not move or fire through it.
Some hexes on the map are marked in red (e.g. hex 0610). Only the Ōarai tanks may enter these hexes (they represent alleys that only residents of the town are familiar with). Tanks in these alleys may only fire at adjacent hexes. At the same time, tanks in an alley hex may only be fired at from an adjacent hex.
Example: A tank in hex 0505 may fire at a target in hex 0605, but not at hex 0704. A tank in hex 0903 may fire at hex 0804, but not at hex 0704.
Reinforcements
Add the Reinforcements Scenario Card to the deck. When this card is drawn, the Gold 38 (t) appears on the Ōarai side as reinforcements. The tank may appear in any road hex that connects to the edge of the map and which does not contain an enemy tank. The Turtle Team (Reverse) is piloting the tank when it appears. When the tank appears, you may immediately move it anywhere within its normal movement range for free (without spending an action card).
Optional Rules
To reduced the difficulty for the Ōarai player, the following optional rules may be used:
Freshmen Don't Flee: With this optional rule, the Rabbit Team did not run away from the battle before it entered Ōarai City. When the Reinforcements Card is drawn from the deck, the Pink M3 Lee [M3 Lee'] : Rabbit Team (Reverse) appears at the same time as the Gold 38 (t). Place it on the map in the same manner as the Gold 38 (t) (they do not have to start in the same hex, and both tanks may be moved for free when placed).
Flag Battle: If both players agree, the type of match may be changed to a Flag Battle.
Saunders University High School vs. Ōarai Girls Academy
Inter-school Match. Players: 2. Time: 60 minutes. Difficulty: 2 stars.
Ōarai's first opponent in the National Tournament was the veteran Saunders University High School. With only five tanks compared to the ten of Saunders, and with their radio signals being intercepted, Ōarai was at a disadvantage. Once Miho realized that their transmissions were being overheard, she was able to turn the tables and use it to confuse her opponents. Meanwhile Duck Team, acting alone, encountered Alisa and the flag tank in the middle of the forest. [Episodes 5 and 6]
- Map: Saunders vs. Ōarai Map
- Match Type: Flag Battle
- Deployment: Saunders deploys first
- Acts First: Saunders
Ōarai Girls Academy
- Tanks : Characters
- Panzer IV Ausf. D [PzIV D] x 1 : Goosefish Team [Miho Nishizumi (Front) / Takebe, Isuzu, Akiyama, Reizei (All Reverse)] - All on the same tank.
- 38 (t) [38t] x 1 : Turtle Team (Reverse)
- Type 89 [Type89] x 1 : Duck Team (Reverse)
- StuG III Ausf. F [Stg III] x 1 : Hippo Team (Reverse)
- M3 Lee [M3 Lee] x 1 : Rabbit Team (Reverse)
- Deployment:
- Type 89: Hex 0803
- Other Tanks: Any other hexes marked with the Ōarai Girls Academy symbol (0813 - 1413)
- Flag Marker: Place the Ōarai Flag marker on a tank of your choice (in the anime the 38 (t) was the Flag Tank)
- Starting Hand: Quick Shot x 1, Move/Fire x 1, + 3 random cards from the deck
- Scenario Cards: Decoy - Note that this card can only be played after Eavesdropping or Fair Play Scenario Cards have been played.
Saunders University High School
- Tanks : Characters
- M4A1 x 1: Kay (Front)
- M4 (75) [M4] x 8
- Sherman Firefly [Firefly] x 1 : Naomi (Front)
- Deployment:
- M4A1: Hex 0701
- Other Tanks: Any other hexes marked with the Saunders University High School symbol
- Flag Marker: Place on the M4A1
- Starting Hand: Move All Tanks x 1, Move x 2, Move/Fire x 1, Eavesdropping x 1 (Scenario Card)
Scenario Rules
Scenario Card: Fair Play. Once the players have been dealt their starting hands but before the game begins, add the Fair Play Scenario Card to the deck. When this card is drawn (regardless of which player draws it), the Saunders player removes tanks from the map until they have the same number of tanks as the Ōarai player. Tanks removed in this way may not be used anymore during the match. The Saunders player may choose which tanks are removed. After Fair Play is resolved, remove it from the game, then continue to that player's Action Phase.
Hills: Moving from flat terrain into hills requires 2 MP. Moving between hill hexes, or from a hill onto flat terrain requires 1 MP. Hills block line of sight in the same manner as forests. It is possible to fire at a tank that is on top of a hill, but you may not fire at a tank that is on the other side of a hill when the firing line passes through it. A tank that is on a hill may fire at another tank that is also on a hill.
Angled Fire: When firing at a tank that is on a hill hex from a flat hex, apply a -1 Attack Roll modifier. This represents using the contours of the hills to hide part of the tank.
Anzio High School vs. Ōarai Girls Academy (Revised)
Inter-school Match. Players: 2. Time: 90 minutes. Difficulty: 2 stars.
Ōarai's opponent in their second match is Anzio High School, and in order to remedy their lack of firepower, Miho and the rest of the team conduct a second search of their ship. With the help of the larger gun and the new tank that they discover, Ōarai is able to achieve an impressive victory over Anzio and move on to the third round. [Episode 7 and Anzio OVA]
EDITOR'S NOTE: This is the Revised Anzio scenario that was released later in a magazine. The original Anzio scenario is included on page 38, but I would strongly recommend playing the Revised scenario rather than the Original!
- Map: Anzio vs. Ōarai
- Match Type: Flag Battle
- Deployment: Ōarai deploys first
- Acts First: Anzio
Ōarai Girls Academy
- Tanks : Characters
- Panzer IV Ausf. D [PzIV D] x 1 : Goosefish Team [Miho Nishizumi, Takebe, Isuzu, Akiyama, Reizei (All Front)] - All on the same tank.
- 38 (t) [38t] x 1 : Turtle Team (Front)
- Type 89 [Type89] x 1 : Duck Team (Front)
- StuG III Ausf. F [Stg III] x 1 : Hippo Team (Front)
- M3 Lee [M3 Lee] x 1 : Rabbit Team (Front)
- Deployment:
- All Tanks: Place on any Ōarai hexes
- Flag Marker: Place on the 38 (t)
- Starting Hand: Move All Tanks x 1, Coordinated Move x 1, + 3 random cards from the deck
Anzio High School
- Tanks : Characters
- P40 x 1 : Anchovy (Front)
- Semovente [SV M41] x 1 : Carpaccio (+1 FP, Front)
- Semovente [SV M41] x 2
- CV33 x 1 : Pepperoni (+2 MP, Front)
- CV33 x 5
- Deployment:
- All Tanks: Place on any Anzio hexes
- Flag Marker: Place on the P40
- Starting Hand: Ricochet x 1, Move All Tanks x 1, + 3 random cards from the deck
- Scenario Cards: Operation: Macaroni, Childhood Friend
Scenario Rules
Characters: There are two versions of Carpaccio and Pepperoni - use Carpaccio with +1 FP and Pepperoni with +2 MP on their Front sides for this Scenario (the other versions are used for the original Anzio scenario, which can be found on page 38).
Forest Paths: On the Anzio vs. Ōarai map, dark hexes (e.g. hex 1202) are Forest Paths. Tanks in a Forest Path can only fire upon adjacent hexes. Similarly, tanks may only shoot into a Forest Path from an adjacent hex. Also, tanks may not move or shoot beyond the white hexsides.
Example: Hex 0506 can only fire upon hexes 0505 and 0507. Hex 0506 can only be fired upon from 0505 and 0507, not 0605 or 0508.
Scenario Card: Childhood Friend: During the Anzio player's turn, the Childhood Friend Scenario Card may be played - if Carpaccio's Semovente and the Hippo Team's StuG III are within line of sight of each other, the Anzio player can remove both from the board. Both of these tanks and the characters on them will not return to the game (the Recovery ability/card does not apply to them).
Scenario Card: Operation: Macaroni: After an Ōarai tank shoots an Anzio tank (including opportunity shooting), the Anzio player can use the Operation: Macaroni card - relocate the target tank to an open hex within 5 hexes of its original location without making that shot's Attack Roll. However, it cannot be relocated to a hex adjacent to any Ōarai tanks.
EDITOR'S NOTE: In the original published scenario, Childhood Friend and Operation: Macaroni are not Scenario cards, but since they essentially behaved in the same way I added them as such to the TTS version. If you are not using TTS, just use the effects of the cards as described whenever they apply (i.e. use Childhood Friend when the two tanks are in line of sight of each other, and Operation: Macaroni when an Ōarai tank shoots at an Anzio tank).
Optional Rules
Reinforcements: Anzio can start with four CV33s instead of six, and the remaining two can be added later as reinforcements. This rule can be activated during the Action Phase of any Anzio turn after a CV33 is destroyed.
By discarding one Move card (this is not an Action), you can place the reinforcements adjacent to Anzio tanks (the new tanks appear there and do not move this turn). If two tanks have been destroyed, both can be placed at the same time - if one tank has been destroyed then only one tank can be placed (another Move card can be discarded later when another tank is destroyed to place the other reinforcement tank). These may be placed next to the same or different tanks. Reinforcements cannot appear adjacent to Ōarai tanks.
CV33: The CV33 is equipped with a machine gun which is less effective against tank armor. In order to reflect this, there is no Damage Roll bonus when the CV33 shoots from a within three hexes of a target.
Balance adjustments: If you feel that Ōarai is at a disadvantage, they can use the Volleyball Club Comeback! Scenario Card. If you feel that Anzio is at a disadvantage, during the Scenario Setup use the Reverse side of all Ōarai Teams except for the members of the Goosefish Team.
Anzio High School vs. Ōarai Girls Academy (Original)
Inter-school Match. Players: 2. Time: 60 minutes. Difficulty: 2 stars.
Ōarai's opponent in their second match is Anzio High School, and in order to remedy their lack of firepower, Miho and the rest of the team conduct a second search of their ship. With the help of the large gun and the new tank that they discover, Ōarai is able to achieve and impressive victory over Anzio and move on to the third round. [Episode 7 and Anzio OVA].
NOTE: This battle was not shown in the anime series and the scenario published with the game was probably based on the Anzio battle from the manga - it was later revised and published separately after the Anzio OVA was aired. The revised scenario is included here and should be used instead, but this original version is included for completion.
- Map: Blank Map
- Match Type: Flag Battle
- Deployment: Ōarai deploys first
- Acts First: Anzio
Setting Up the Map
This scenario uses a blank map that is set up in the same manner as in the Exhibition scenario. Place the forest (green) and hill (brown) obstacles using the diagram (not reproduced here).
Ōarai Girls Academy
- Tanks : Characters
- Panzer IV Ausf. F2 [PzIV F] x 1 : Goosefish Team [Miho Nishizumi, Takebe, Isuzu, Akiyama, Reizei (All Front)] - All on the same tank
- 38 (t) [38t] x 1 : Turtle Team (Front)
- Type 89 [Type89] x 1 : Duck Team (Front)
- StuG III Ausf. F [Stg III] x 1 : Hippo Team (Front)
- M3 Lee [M3 Lee] x 1 : Rabbit Team (Front)
- Char B1 bis [B1 bis] x 1 : (no Team)
- Deployment:
- All Tanks: See Diagram (Anzio at top, Ōarai at bottom)
- Flag Marker: Place on the StuG III
- NOTE: The indicated hexes on the map for each side show where tanks can be placed, but there are more setup hexes than tanks.
- Starting Hand: Move All Tanks x 1, + 4 random cards from the deck
- Scenario Cards: Volleyball Club Comeback!
Anzio High School
- Tanks : Characters
- P40 x 1 : Anchovy
- up to nine tanks totaling up to 80 points from the Anzio tanks - P40, SV M41, M13/40, or CV33 : Carpaccio (Front), Pepperoni (Front).
- NOTE: Use the original versions of Carpaccio and Pepperoni (without the +1 FP and +2 MP on the Front of the counters) for this version of the scenario. Carpaccio and Pepperoni must be placed in different tanks (not the same one as Anchovy).
- Deployment:
- All Tanks: See Diagram
- Flag Marker: Place on a P40.
- Starting Hand: Move All Tanks x 2, Coordinated Move x 1, + 2 random cards from the deck
- Scenario Cards: Trap
Scenario Rules
Scenario Card: Trap: You may use this card after the Anzio Team has lost at least one tank. When the Anzio player plays this card, the Ōarai player may not use character abilities. This effect lasts until the next Enforcement Card is drawn.
Hills and Angled Fire: Moving from flat terrain into hills requires 2 MP. Moving between hill hexes, or from a hill onto flat terrain requires 1 MP. Hills block line of sight in the same manner as forests. It is possible to fire at a tank that is on top of a hill, but you may not fire at a tank that is on the other side of a hill when the firing line passes through it. A tank that is on a hill may fire at another tank that is also on a hill. When firing at a tank that is on a hill hex from a flat hex, apply a -1 attack modifier.
NOTE: These are the same Hills rules as those described in the Saunders scenario.
Optional Rules
Team Adjustments: The Ōarai player may move Yukari Akiyama from the Goosefish Team to the B1 bis. The Anzio player may substitute the revised versions of Carpaccio (+1 FP) and Pepperoni (+2MP) for the original versions.
You may replace the Volleyball Club Comeback! Scenario card with the Self-Sacrifice Scenario card - if you do, replace the Duck Team with the Anteater Team (keep the Type 89 Tank though).
Pravda High School vs. Ōarai Girls Academy
Inter-school Match. Players: 2. Time: 90 minutes. Difficulty: 2 stars.
Ōarai's opponent in the third round was Pravda High School, the winners of the last tournament. Miho had planned to implement a more cautious strategy, but after hearing the opinions of her teammates who were growing ever more confident in their abilities, she decided on a more aggressive plan of attack. The Pravda Team caught wind of Miho's actions, set a trap, and lay in wait... (Episodes 8, 9, and 10)
- Map: Pravda vs. Ōarai Map
- Match Type: Flag Battle
- Deployment: Pravda deploys first
- Acts First: Pravda
Ōarai Girls Academy
- Tanks : Characters
- Panzer IV Ausf. F2 [PzIV F] x 1 : Goosefish Team [Miho Nishizumi, Takebe, Isuzu, Akiyama, Reizei (All Front)] - All on the same tank
- 38 (t) [38t] x 1 : Turtle Team (Front)
- Type 89 [Type89] x 1 : Duck Team (Front)
- StuG III Ausf. F [Stg III] x 1 : Hippo Team (Front)
- M3 Lee [M3 Lee] x 1 : Rabbit Team (Front)
- Char B1 bis [B1 bis] x 1 : Mallard Team (Reverse)
- Deployment:
- All Tanks: Any hexes marked with the Ōarai Girls Academy symbol
- Flag Marker: Place the Flag Marker on any tank of your choice (in the anime it was the Type 89)
- Starting Hand: Full Speed Ahead! x 1, + 4 random cards from the deck
- Scenario Cards: Ceasefire, Goosefish Dance
Pravda High School
- Tanks (No Characters): T-34/76 x 3, T-34/85 x 2
- Deployment:
- All Tanks: Any hexes marked with the Pravda High School symbol
- Flag Marker: Place the flag marker on one of the T-34/76s
- Starting Hand: Coordinated Move x 1, Recon x 1, + 3 random cards from the deck
- Reinforcements:
- Tanks: T-34/76 x 4, T-34/85 x 4, KV-2 x 1, IS-2 x 1
- Characters (on different Reinforcement tanks): Katyusha (Front), Nonna (Front)
Scenario Rules
Additional Scenario Cards: After the starting hands have been dealt, the Ōarai player chooses three of the following cards, adds them to the deck, and reshuffles it.
- The Snowy March
- Ambush
- Pinpoint Shot
- Panzer Vor!
- Volleyball Club Comeback!
All Scenario Cards are removed from the game when they are discarded. If any of these cards are drawn by the Pravda player, they may not use them, but they may keep them in their hands and discard them.
Church (Hex 1403): This hex may not be entered, and obstructs fire.
Scenario Card: Ceasefire: The Ōarai player may use this card if any of their tanks enter within two hexes of the Church hex (see above). First, remove all tanks from the map (but leave wreckage in place as is). The Pravda player redeploys all of their remaining tanks (including reinforcements) on the map to any non-adjacent hexes that are between six and nine hexes from the Church hex. The Ōarai player then redeploys all of their surviving tanks to any hex within two hexes of the Church hex. Mix the discard pile with the deck and reshuffle it, then each player draws enough cards so that their total hand size is five. The match restarts with the Ōarai player acting first.
EDITOR'S NOTE: In the published scenario, Ōarai redeploys their tanks after the Ceasefire before Pravda redeploys theirs - I've switched this order around here to make it closer to the anime (Pravda were already deployed around the Church and Ōarai had the advantage of knowing where the enemy tanks were before they broke out from there). Feel free to use the original order if you prefer that though.
Scenario Card: Goosefish Dance: The Goosefish Dance card may only be played after Ceasefire has been used. From now on, the Ōarai player adds a +1 modifier to all of their tanks' attack rolls.
Scenario Card: The Snowy March: The Snowy March Scenario Card requires that the player sings "Yuki no shingun" to use it - the full song is three minutes long though, but just singing the first few lines (reproduced below) should be enough!:
Yuki no shingun kori ko funde, / Marching in the snow, stepping on ice Dore ga kawa yarami chisae shirezu, / We can't even tell road from river Uma wa tareru sutete mo okezu, / The horses are beaten, but we can't leave them Kokowa izukozo mina teki no kuni; / Just what is this place? It's all enemy country Mama yo daitan ippuku yareba, / Oh well, if we breathe a little bravery Tanomi sukuna ya tabako ga nihon. / I'll only ask for little: two of your cigarettes
If you don't know the tune, this is what it sounds like (the history of the song is quite interesting too, if not rather bleak!): https://www.youtube.com/watch?v=tJA4-eK7o4s
Pravda Reinforcements: The Pravda player deploys one of their remaining tanks into the Pravda deployment zone each time they play a Movement Card (they do not need to play a card in order to deploy reinforcements, but instead may deploy them after moving a tank that is already on the map). The KV-2 and IS-2 may only be deployed after all of the T-34s have been deployed. The Pravda player may choose the order in which the T-34/76s and T34/85s - and the KV2-2 and the IS-2 - are deployed. If the Ceasefire Event Card is used before all the reinforcements have been placed on the map, deploy all of the remaining reinforcement tanks when the tanks are redeployed.
Kuromorimine Girls Academy vs. Ōarai Girls Academy (Multi-part Scenario)
Inter-school Match. Players: 2. Time: 120 minutes. Difficulty: 3 stars.
After defeating Pravda High School, Ōarai Girls Academy at last moved on to the finals. Their opponent was the previous year's runner-up, Kuromorimine Girls Academy, commanded by Maho Nishizumi, Miho's older sister. With the addition of two new teams and their final practice behind them, they faced the match with a flurry of emotions in their hearts. (Episodes 10, 11, and 12)
Stage 1
- Map: Kuromorimine vs. Ōarai Girls Academy First Stage
- Match Type: Flag Battle
- Deployment: Ōarai deploys first
- Acts First: Ōarai
Ōarai Girls Academy
- Tanks : Characters
- Panzer IV Ausf. H [PzIV H] x 1 : Goosefish Team [Miho Nishizumi, Takebe, Isuzu, Akiyama, Reizei (All Front)] - All on the same tank
- Hetzer [Hetzer] x 1 : Turtle Team (Front)
- Type 89 [Type89] x 1 : Duck Team (Front)
- StuG III Ausf. F [Stg III] x 1 : Hippo Team (Front)
- M3 Lee [M3 Lee] x 1 : Rabbit Team (Front)
- Char B1 bis [B1 bis] x 1 : Mallard Team (Reverse)
- Porsche Tiger [P Tiger] x 1 : Leopon Team (Reverse)
- Type 3 [Type3] x 1 : Anteater Team (Reverse)
- Deployment:
- All Tanks: Any hexes marked with the Ōarai Girls Academy symbol
- Flag Marker: Place on the Panzer IV Ausf. H
- Starting Hand: Move All Tanks x 1, Coordinated Move x 2, Move x 1 Emergency Stop x 1
- Scenario Cards: Self-Sacrifice, Volleyball Club Comeback!, Smokescreen (or Operation: Teasy-Tease)
Kuromorimine Girls Academy
- Tanks : Characters
- Tiger I [Tiger I] x 1 : Maho Nishizumi (Front)
- Tiger II [Tiger II] x 1 : Erika Itsumi (Front)
- Tiger II [Tiger II] x 1
- Panther [Panther] x 6
- Jagdpanther [Jagdpanther] x 1
- Jagdtiger [Jagdtiger] x 1
- Panzer IV/70 [Jagd PzIV] x 6
- Elefant [Elefant] x 1
- Deployment:
- All Tanks: Any hexes with the Kuromorimine Girls Academy symbol.
- Flag Marker: Place on the Tiger I
- Starting Hand: Fire x 2, + 3 random cards from the deck
Scenario Rules
Deck Adjustments: The Volley Fire Action Card is not used in this scenario - remove it from the deck before playing.
Scenario Format: This match uses two maps. The first stage uses the map with the hill on it, and the second stage uses the city map. If the match has not been decided in the first stage, proceed to the second stage.
Conditions for Ending the First Stage: The Ōarai tanks only may exit the map by entering Remagen Bridge (hex 1501) (remove a tank from the map as soon as it enters the Bridge hex). The first stage ends as soon as two Ōarai tanks have left the map via the Bridge. If either flag tank is destroyed before two tanks have left the map, the match ends as usual.
There Is No Fleeing in Nishizumi-ryu: During the first stage, all of the Kuromorimine tanks must move closer to the Ōarai Flag Tank. This restriction no longer applies once the flag tank has left the map.
Scenario Card: Smokescreen: This card may be used after the Kuromorimine player has played at least one Attack Card. When the Smokescreen card is used, the Ōarai player places a smoke marker on each of their tanks - apply a -2 Attack Roll modifier when firing into, out of, or through a hex with a smoke marker. As long as a tank has a smoke marker on it, its base movement becomes 3 (this actually makes the P Tiger, B1 Bis and Type 89 tanks faster!). The smoke counter stays on the tank as it moves. When a tank with a smoke marker enters or moves through a Barren hex (see below), remove the smoke marker from the map. The Ōarai player may also choose to remove a smoke marker from a tank at any time.
Ridge 207: The left side of the map contains a line of hill hexes (the four hexes with dashed white outlines and black triangle symbols - 0305, 0406, 0505 and 0605) known as Ridge 207. A Ridge hex may be entered like a hill hex, but Ridge hexes may not be fired through. Tanks in these Ridge hexes may be fired upon from other hexes. Apply the following modifiers to attacks against tanks in Ridge hexes:
- Attack Roll -2
- Damage Roll -2
Entering a Ridge hex requires 2 MP. Leaving a Ridge hex requires 1 MP.
Barren Hexes: Hexes 0205-0206, 0304-0306, 0404-0407, 0504-0506, 0604-0606 (the dark brown hexes in and around Ridge 207) are Barren hexes. Treat a barren hex as a clear hex - however, when a tank with a smoke marker enters a barren hex, the smoke marker is removed from the map.
Deployment in Forests: Kuromorimine's deployment hexes in the first stage are forest hexes. These forest hexes may only be entered or moved through at the start of the match. Once a tank has left one of these hexes, they may not re-enter them. Furthermore, lines of fire may not be made through these forest hexes. There are no attack modifiers for firing into or out of forest hexes though.
Rivers and Shallows: River hexes may not be entered. Entering a Shallows hex (hex 1002 only) requires 2 movement points. River hexes and Shallows hexes do not block line of sight.
Stage 2
- Map: Kuromorimine vs. Ōarai Girls Academy Second Stage
- Match Type: Flag Battle
- Deployment: Ōarai deploys first
- Acts First: Ōarai
Ōarai Girls Academy
- Tanks: All tanks that survived Stage 1
- Characters: All characters on tanks that survived Stage 1 (face-down characters remain face-down)
- Deployment:
- All Tanks: Start from hex 1019 (see the Scenario Rules below)
- Flag Marker: Panzer IV Ausf. H
- Starting Hand: All cards remaining in your hand at the end of Stage 1 + draw enough cards from the deck so that your total hand size is 5
- Scenario Cards: Any cards remaining from Stage 1 (do not replace used Scenario Cards), HS0017, Spirit of the Student Council, Super Strategy
Kuromorimine Girls Academy
- Tanks: Maus [Maus] x 1, Panzer III Ausf. J [PzIII J] x 1
- Deployment:
- Maus: Hex 0417
- Panzer III Ausf. J: Any hex within three hexes of the Maus
- Starting Hand: All cards remaining in your hand at the end of Stage 1 + draw enough cards from the deck so that your total hand size is 5
- Reinforcements:
- Tanks: All tanks that survived Stage 1 (see the Scenario Rules below)
- Characters: All characters on tanks that survived Stage 1 (face-down characters remain face-down)
Scenario Rules
Beginning the Second Stage: At the start of Stage 2, mix together the discard pile, the deck, and the Reinforcements Scenario Card and reshuffle them to create a new deck. Leave your hands the same as they were at the end of Stage 1, and draw enough cards from the newly formed deck so that your hand contains five cards. If you draw any Enforcement Cards or the Reinforcements Scenario Card, set them aside until after both players have drawn their hands, then return them to the deck and reshuffle it. At the start of Stage 2, the Ōarai player has their remaining tanks enter the map from hex 1019. Each tank carries out one Move action as if it had 4 movement points (these moves do not require any cards to be played).
City Map: You may not move through or fire through a white hex-side.
Wreckage: In this scenario, destroyed tanks are turned face-down and left where they are on the map. See the Wreckage section in the Optional Rules for more details.
Maus Movement Restrictions: Whenever the Maus spends two or more movement points in a single turn, you must make a tread failure check. After any move where the Maus spends two or more movement points, roll a die. On a result of 6, the Maus' treads are damaged, and it becomes Immobile. It may recover from Immobile status as normal by using a Repairs/Maintenance card.
Kuromorimine Reinforcements: During Stage 2, Kuromorimine reinforcements may appear after an Enforcement Card is drawn, the Reinforcements Card is drawn, or the Maus is destroyed. Once any of these conditions are met, starting on their next turn the Kuromorimine player may begin to deploy all of their remaining undestroyed tanks from Stage 1 in hexes 0108 and 0109. From this point, each time the Kuromorimine player plays a Movement Card, they may place one tank in each of those hexes - they may use the move listed on the card on the newly placed tanks or on another one elsewhere on the board. However, a new tank may not be deployed into either of these hexes while another tank is occupying it. The first time you deploy reinforcements, one of the tanks deployed must be the Flag Tank. If using the Move All Tanks card to deploy a reinforcement tank, you may also move all of your tanks currently on the board.
Scenario Card: Super Strategy: The Ōarai player may not use this card if the Ōarai tank would be unable to enter the hex behind the target tank (e.g. if it is on a map edge, or if the hex is occupied by another tank).
Scenario Card: HS0017: The Kuromorimine Flag Tank must be able to fire at the Ōarai flag tank to play this card (i.e. it must be within firing range and have line of sight, and have a card in hand that can be used to fire). When this card is used, place the Ōarai flag tank in hex 1402, and the Kuromorimine flag tank in hex 1006. Place another of Ōarai's tanks in hex 1007. For the rest of the match, no tanks from either side may enter hex 1007, and the tank in hex 1007 may not move or fire at the flag tank. If there are no Ōarai tanks that may be placed in hex 1007, this card may not be used. This card may also not be used if other tanks are already in the hexes in the complex beyond 1007.
The National Tournament
These rules allow you play a series of matches based on the 63rd National High School Sensha-dō Tournament. While it may take some time, there should be great satisfaction that comes from achieving victory through the series of matches. The following rules are divided into two different ways to play, Linked Scenarios and Tournament Play.
Linked Scenarios
This method of play recreates the 63rd National Tournament as it appeared in the anime. It is designed for two players, one taking the role of Ōarai Girls Academy, and the other playing the part of the other opposing schools.
Overview
Play the Inter-school Matches in order of Saunders, Anzio, Pravda, and Kuromorimine. The Ōarai player must win all of these scenarios in order to achieve victory. If they do not, the other player is the winner. While each scenario is played according to the basic rules described under each one, there are several changes made when playing a Linked Scenarios tournament.
Scenario Cards
Before the first match, the Ōarai player is given all of the Scenario Cards (except for Trap and Reinforcements). The Ōarai player may choose which cards they are going to use before each match. However, a card may still only be used when the restrictions listed on the card are met.
EXAMPLE: Spirit of the Student Council may only be used on the Kuromorimine City Map, because the Maus does not appear in any other scenario.
Ōarai Girls Academy Tanks
The Ōarai player may use the following tanks according to the following schedule.
Match 1: Saunders
- Panzer IV Ausf. D : Goosefish Team (all characters, Reverse)
- 38 (t) : Turtle Team (Reverse)
- M3 Lee : Rabbit Team (Reverse)
- StuG III Ausf. F : Hippo Team (Reverse)
- Type 89 : Duck Team (Reverse)
Match 2: Anzio - Choose whether to play the Revised scenario or the Original Scenario (the Revised Scenario is strongly recommended!). As above, plus the Char B1 bis (however, if you lost more than half your tanks during the Saunders match, this tank only becomes available starting with Match 3)
Match 3: Pravda - As above, plus the Porsche Tiger (however, if you lost two or more tanks during the Anzio match, this tank only becomes available starting with Match 4)
Match 4: Kuromorimine (Final Match) - As above, plus the Type 3 (however, if you lost more than half of your tanks during the Pravda match, this tank is not available)
Tank Upgrades
The Ōarai Panzer IV is upgraded every time it destroys an enemy tank. Whenever one or more enemy tanks are destroyed by the Panzer IV, increase its rank by 1 in the next match.
- Panzer IV Upgrade: Ausf. D -> Ausf. F2 -> Ausf. H
Even if it destroys multiple tanks in a single scenario, it cannot be upgraded more than one rank at a time. Similarly, when the 38 (t) destroys an enemy tank, it increases in rank to a Hetzer in the next match.
- 38 (t) Upgrade: 38 (t) -> Hetzer
Character Growth
Each of the Ōarai Girls Academy teams, and each member of the Goosefish Team, begin the first match face-down. Whenever any team besides the Goosefish Team destroys an enemy tank, they begin the next match face-up (make a note of which team or teams will be turned face-up). Whenever the tank piloted by the Goosefish Team destroys an enemy tank, you may choose any one member of the team to begin the next match face-up for each enemy tank destroyed (make a note of which characters will be turned face-up).
The counters for the Mallard, Anteater, and Leopon Teams have white backgrounds on their reverse sides instead of polka-dotted ones, and contain no abilities. Until now the Front sides have not been used, but they are treated differently using the Linked Scenario rules.
The Mallard Team may be used starting with Match 3, and the Anteater and Leopon Teams may be used starting with Match 4. As such, if the Mallard Team is successful in Match 3, they may be turned face-up starting with Match 4. In Match 4, the Anteater and Leopon Teams may be turned face-up during the match as soon as they destroy an enemy tank.
Optional Rules
Alternate Reality: The Ōarai player may instead choose which team is deployed piloting which tank. They may change who is assigned to which tank for each match, or even deviate from the anime and deploy the Anteater Team starting with the first match.
However, they may not deploy more teams than there are tanks listed in each scenario. Also, no more than one team may be deployed on each tank (the Characters from the Goosefish Team must all be placed on a single tank).
Tournament Play
This method of play allows you to recreate your own tournament, different from the events portrayed in the anime. Anywhere from two to six people can play, all aiming for victory. However, it requires even more time to play than when using the Linked Scenario method.
Overview
Each player participating in the game chooses one of the six Major Schools below:
- Ōarai Girls Academy
- St. Gloriana Girls College
- Saunders University High School
- Anzio High School
- Pravda Girls High School
- Kuromorimine Girls Academy
They then choose one of the Minor Schools below:
- Chi-Ha-Tan Academy
- Maginot Girls Academy
- Bonple High School
- Viking Fisheries High School
- Yogurt Academy
- Koala Forest Academy
- Maple High School
- Jatkosota High School
- Waffle Academy
- BC Freedom Academy
- Blue Division High School
The players may choose schools in whichever method they wish. They may rock-paper-scissors to decide the order, draw flag markers at random, or use any other method that they wish.
Next, create a tournament bracket using all sixteen schools using the image (not reproduced here) as a guide. Fill in each spot on the bracket by picking each of the schools' flag markers at random. Once the bracket has been created, play out each match in order.
Tournament Progression
Each match takes the form of the Exhibition scenario. When the two schools participating in a match are each controlled by one of the players, the controlling players play out the match against each other. The winner of the match may proceed to the next match in the tournament.
When the two schools participating in a match are both controlled by the same player, the controlling player chooses which school wins without playing a match.
When one of the schools participating in a match is controlled by one of the players and the other school is not, the school controlled by the player wins without playing a match.
When the two schools participating in a match are not controlled by any player, determine the victor by rolling a die, rather than by playing a match.
Continue through the matches, and the player whose school wins the tournament is the winner.
Creating Forces
Each player puts together their own force before each match (however, tanks over 40 points are not allowed). The total point value and number of tanks depends on which round of the match it is.
- 1st Round: 100 points (up to 10 tanks)
- 2nd Round: 100 points (up to 10 tanks)
- 3rd Round: 150 points (up to 15 tanks)
- 4th Round: 200 points (up to 20 tanks)
Your force may only contain tanks available to your own school. Each schools' tanks are designated with a specific color.
- Ōarai Girls Academy: Light Blue
- St. Gloriana Girls Academy: Light Brown
- Saunders University High School: Light Green
- Anzio High School: Yellow
- Pravda High School: Red
- Kuromorimine Girls Academy: Black
- Other schools: Gray
Using Characters
If both players agree, each may use up to two of their school's characters (they all start on their Reverse sides and gain experience as described in the Linked Scenarios section). They may choose which characters to use, or choose them randomly using the rules in the Exhibition Scenario.