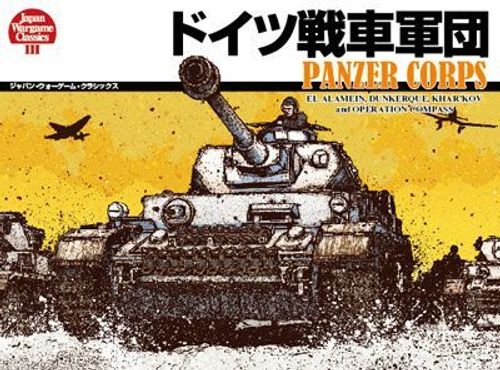
Panzer Corps
Panzer Corps Rulebook
Table of Contents
Table of Contents
El Alamein
North Africa, 1942
1.0 Introduction
"El Alamein" is a game of the Battle of Alam el Halfa that was Rommel's last chance of reaching Alexandria (as for historical outline, see Guidebook). This is the easiest game among the four games included in Panzer Corps and suitable for beginners. One person handles the German-Italian forces, the other the British Commonwealth forces.
2.0 Game Components
In "El Alamein", the following are used:
2.1 The Map
The map is described the battlefield of the Battle of Alam el Halfa. Hexagons covering the whole of the map are called "hexes". Each hex is equivalent to actual about three kilometers from side to side.
2.2 The Counters
There are two types of counters; "units" represent combat troops, "markers" show information. In this game, the "Game Turn Marker" is used.
(1) In "El Alamein", the units of German forces, Italian forces and British Commonwealth forces are used. Among them, only the units having a yellow military symbol are used.
| Nationality | Color | Number |
|---|---|---|
| German | Gray | 11 |
| Italian | Light Green | 8 |
| British Commonwealth | Light Brown | 20 |
(2) Information printed on the units is as follows; all the units have two values, Combat Strength at the lower left and Movement Allowance at the lower right; unit size is III (regiment), X (brigade) and XX (division).
2.3 Die
Please prepare one 6-sided die.
2.4 Rulebook
You can play the game only with this rulebook, but if you cannot understand the meaning of a rule, please refer to Primer Guidebook.
3.0 Game Setup
(1) First, pick out the map of "El Alamein" and spread it on the table.
(2) Second, please carefully cut off the counters of "El Alamein" from the sheet. It would be good to pack them in a zipper storage bag to avoid confusion with other games.
(3) Place each side's units on the map. See a small symbol in the upper part of each unit and put them on the hexes printed the same symbol.
(4) Put the Game Turn Marker on the box "1" (31 August AM) of the Game Turn Record Track. Thus, game setup ends.
4.0 Victory Conditions
4.1 German-Italian Victory Conditions
At the end of the British Commonwealth Combat Phase of a Game Turn, the German-Italian forces immediately win if a German-Italian unit is in the following hex:
(1) One or more hexes of El Alamein and the Road hexes extending from there to the east (for El Hamam).
(2) One or more hexes of the two hexes of British Commonwealth Battle Positions in Alam Halfa Ridge.
4.2 British Commonwealth Victory Conditions
(1) During a British Commonwealth Movement Phase, if a British Commonwealth unit "breaks" from the west map edge to off-map, then the British Commonwealth forces immediately win.
(2) If a British Commonwealth unit moved to the west map edge, it may break by paying one movement point, but if it is in an enemy Zone of Control (see 6.0), it may not break. With this exception, no unit may move to off-map.
(3) If a British Commonwealth unit is attacked by German-Italian units, forced to retreat from the west map edge to off-map and there is not any other retreat path, then it is not considered to break (treated as eliminated).
(4) At the end of Game Turn 4, neither condition of 4.1 nor 4.2 are satisfied, the British Commonwealth forces win.
5.0 Game Sequence
"El Alamein" repeats a Game Turn to progress. When all of four Game Turns were performed, the game ends. Each Game Turn is composed of the following Phases:
- German-Italian Movement Phase
- German-Italian Combat Phase
- British Commonwealth Movement Phase
- British Commonwealth Combat Phase
6.0 Zones of Control
Zone of Control (ZOC) is a rule abstractly representing the expanse of the troops and the sphere of their effect. All the units on the map have a ZOC in the adjacent six hexes. Friendly units' ZOCs do not affect friendly units. Enemy units' ZOCs (EZOCs) affect friendly units' movement and combat.
Even if multiple units' ZOCs extend into the same hex, their effect is equal to one unit's ZOC. And each side units' ZOCs may extend into the same hex simultaneously.
6.1 Effects of ZOCs on Movement
A unit that entered an EZOC during the movement must stop at the hex even if its movement points remain.
A unit starting movement in an EZOC must move first into the hex not in an EZOC (of course, it does not matter to move nowhere). The unit may enter again an EZOC later (and stops the movement at the hex). Moving from an EZOC directly into another EZOC is not allowed.
6.2 Effects of ZOCs on Combat
During a friendly Combat Phase, friendly units may attack enemy units in friendly ZOCs. In case of Retreats (see 9.5), entering an EZOC is not allowed. In case of Advance After Combat (see 9.6), ignoring an EZOC is allowed. In other words, moving from an EZOC directly into another EZOC is not allowed in the movement, but it is possible in Advance After Combat.
6.3 Loss of ZOCs
Units that retreated and were flipped to their back side lose their ZOCs during the back side. When they are flipped to their front side, their ZOCs are restored.
7.0 Stacking
"Stacking" is gathering multiple units in one hex. In this game, neither side may stack. Each hex may be put only one unit.
7.1 Time to Apply Stacking Limits
Stacking limits are applied at the end of each Movement Phase and the end of each combat. In short, if during the movement, units may temporarily enter a hex containing a friendly unit. And passing through a hex containing a friendly unit to retreat is also possible. When a unit cannot help retreating into the hex containing a friendly unit, the unit must retreat one more hex to move into the hex containing no other unit.
7.2 Stacking Together with Enemy Units
[Printed as "27.2" in the source; this is section 7.2.]
Entering a hex containing an enemy unit is not allowed.
8.0 Movement
During a friendly Movement Phase, the player may move friendly units. It does not matter whether to move all or some friendly units. Moving nothing is also possible.
8.1 General Rules of Movement
(1) Movement is conducted by the unit. After a unit's movement was completed, conduct the next unit's movement.
(2) When a player's finger gets off a unit during movement, the unit's movement is considered completed. Moving it over again or reopening movement is not allowed except for the opponent's permission.
(3) Friendly units may move in the friendly Movement Phase only, may not in the other Phases.
(4) After completing movement of all the units desired to move, the Movement Phase ends.
(5) Moving units to off-map is not allowed except breaking (see 4.2).
8.2 Movement of Units
(1) Each unit has a Movement Allowance (MA). MA is the maximum number of Movement Points (MPs) usable during one friendly Movement Phase.
(2) It is not necessary to use up all MPs, but unused MPs may neither be transferred to the other units nor be carried over to the next Movement Phase.
(3) Each unit moves from hex to hex, from the hex where it is now to the adjacent hex. In that case, it pays MP cost according to the terrain of the hex entered. When it cannot pay more MP, it must finish its movement.
(4) Units may turn around any number of times during the movement.
(5) Units that entered an EZOC during the movement must stop at the hex. And units starting movement in an EZOC may not move unless move first into the hex that is not in an EZOC (see 6.1). It is not necessary to pay additional MP cost for exiting or entering an EZOC.
8.3 Terrain Effects on Movement
Terrain effects are listed in the "Terrain Chart".
(1) Desert: Pay 1 MP to enter.
(2) Highlands: Pay 2 MPs to enter.
(3) Villages: Pay 1 MP to enter.
(4) British Battle Positions: Depending on the terrain where the Battle Position is.
(5) Coast: Pay 1 MP to enter.
(6) The Mediterranean Sea: May not enter.
(7) Roads: Depending on the terrain where the Road is.
8.4 Special Rule on Game Turn 1
In order to represent the delay in dealing with surprise attack, British Commonwealth each unit's MA is halved on Game Turn 1. It is back to normal from Game Turn 2.
9.0 Combat
Players may use friendly units to attack adjacent enemy units in the friendly Combat Phase.
9.1 General Rules of Combat
(1) A player conducting attacks during the friendly Combat Phase is called "attacker", the opponent "defender".
(2) Attacking is voluntary. Even if the attacker's unit is adjacent to the defender's unit, attacking is not forced. All or some friendly units adjacent to the defender's unit may attack. It does not matter to attack nothing.
(3) Each unit of the attacker may attack once per Combat Phase. And each unit of the defender may be attacked only once.
(4) The attacker's multiple units adjacent to the defender's one unit may attack it together, but the attacker's one unit may not attack the defender's adjacent multiple units simultaneously, namely, the combat between the attacker's one or more hex and the defender's one hex is allowed, but matching the attacker's one hex with the defender's multiple hexes is not.
(5) At the start of each Combat Phase, the attacker must declare all the combinations of the attack to be conducted in the Combat Phase. It does not matter to resolve combats in any order, but all the combinations declared first must be conducted and adding an attack later that was not declared is not possible.
9.2 Procedure of Resolving Combat
Each combat is resolved by using the following procedure per the combination of the attack. When the attacker has resolved all the attacks declared, the Combat Phase ends.
(1) Sum up the Combat Strength of all the attacker's units participating in the combat, divide it by the Combat Strength of the defender's unit and change it into an integral odds ratio of "n:1". This is called "Combat Strength Ratio". The fraction is rounded down in favor of the defender. For example, if the attacker's Combat Strength is 11 and the defender's Combat Strength is 4, then it would be 11:4, 2.75:1 and be 2:1 by rounding down fractional 0.75. In case Combat Strength Ratio exceeds 6:1, the combat is resolved on the 6:1 column.
(2) If the attacker's total Combat Strength is smaller than the defender's Combat Strength, then it would be an integral odds ratio of "1:n". The fraction is rounded up in favor of the defender. For example, if the attacker's Combat Strength is 2 and the defender's Combat Strength is 3, then it would be 2:3, 1:1.5 and be 1:2 by rounding up fractional 0.5. Combat at odds of 1:3 or less is not allowed.
(3) Combat Strength Ratio would be the column used in the Combat Results Table. The attacker rolls a die and the cell where the row of die roll and the column intersect would be the combat result. The combat result is applied immediately.
9.3 Terrain Effects on Combat
Terrain effects are listed in the "Terrain Chart". When the defender is in a Highland or a Village, the Combat Strength of the defender's unit is doubled.
(1) When British Commonwealth units defend at a British Battle Position, their Combat Strength are doubled. Even if German-Italian units are in a British Battle Position, their Combat Strength do not change.
(2) Even if German-Italian units enter a British Battle Position, the Battle Position is not destroyed. If British Commonwealth units enter the British Battle Position again, then its effect is applied.
(3) If there is a British Battle Position in a Highland, then only Highland's effect is applied.
9.4 Combat Results
Combat results of "El Alamein" are as follows:
(1) AE (Attacker Eliminated): Remove all attacking units from the map.
(2) AR (Attacker Retreat): Retreat all attacking units one hex.
(3) DR (Defender Retreat): Retreat all defending units the same hex as the number.
(4) DE (Defender Eliminated): Remove all defending units from the map.
9.5 Retreats
(1) Retreats due to the combat results are performed by the attacker. Even if the defender's units retreat, they are forced to retreat to the direction where the attacker desires.
(2) Retreating units must leave prescribed distance from the hex where the combat was performed. They may retreat to any directions, but must select the hex where no other unit is, if possible. Retreating into the hex containing the other friendly unit is allowed unless there is no other retreat path, but in that case, retreat one more hex.
(3) Retreating into an EZOC, a hex containing an enemy unit, off-map or the hex where the unit cannot move to (The Mediterranean Sea) is not allowed. Units that cannot retreat are considered eliminated.
(4) Retreated units become "disrupted"; flip them to their back side to represent it. See 9.7 about Disruption.
9.6 Advance After Combat
[Printed as "49.6" in the source; this is section 9.6.]
(1) When the defender's unit was eliminated or retreated, one of the attacker's units may advance into the hex where the defender's unit was. This is called "Advance After Combat".
(2) Even if the attacker's units were eliminated or retreated, the defender's units may not advance.
9.7 Disruption and Recovery
(1) Regardless of the attacker or the defender, units retreated by combat result become disrupted and are flipped to their back side.
(2) Disrupted units lose their ZOCs and may neither move in the friendly Movement Phase nor attack in the friendly Combat Phase.
(3) After the friendly Combat Phase, all disrupted friendly units are recovered and flipped to their front side. Therefore, in case the attacker's units retreated, they are recovered immediately after the same Combat Phase when they are disrupted, but their disruption may affect the defender's retreat because they lose their ZOCs during the Combat Phase.
(4) Disrupted units are never attacked caused by the procedure.
Dunkerque
France, 1940
1.0 Introduction
"Dunkerque" is a game of the German forces' Blitzkrieg in the West (as for historical outline, see Guidebook). One person handles the German forces, the other the Allied forces of France, United Kingdom and Belgium.
2.0 Game Components
In "Dunkerque", the following are used:
2.1 The Map
The map is described the battlefield of France and Belgium. Hexagons covering the whole of the map are called "hexes". Each hex is equivalent to actual about twelve kilometers from side to side.
2.2 The Counters
There are two types of counters; "units" represent combat troops, "markers" show information. In this game, the "Game Turn Marker" is used.
(1) In "Dunkerque", the units of German forces, French forces, United Kingdom forces and Belgian forces are used. Among them, only the units having a green military symbol are used.
| Nationality | Color | Number |
|---|---|---|
| German | Gray | 25 |
| French | Blue | 17 |
| United Kingdom | Light Brown | 5 |
| Belgian | Beige | 4 |
(2) Information printed on the units is as follows; all the units have two values, Combat Strength at the lower left and Movement Allowance at the lower right; unit size is XX (division) and XXX (corps).
2.3 Die
Please prepare one 6-sided die.
2.4 Rulebook
You can play the game only with this rulebook, but if you cannot understand the meaning of a rule, please refer to Primer Guidebook.
3.0 Game Setup
(1) First, pick out the map of "Dunkerque" and spread it on the table.
(2) Second, please carefully cut off the counters of "Dunkerque" from the sheet. It would be good to pack them in a zipper storage bag to avoid confusion with other games.
(3) Place each side's units on the map. See a small symbol in the upper part of each unit and put them on the hexes printed the same symbol.
(4) Allied seven units that are not indicated the location on the map (marked "R" at the upper left) enter later as reinforcements. Separate them from other units, flip to their back side, shuffle and put on the Turn Record Track as back side (one on "2", two on "3" to "5").
(5) Put the Game Turn Marker on the box "1" (14-15 May) of the Turn Record Track. Thus, game setup ends.
4.0 Victory Conditions
When Game Turn 6 ends, the game ends. If the German forces earn 35 points or more at that time, then the German forces win. If it is 34 points or less, then the Allied forces win. The German forces earn one point on each one Combat Strength of Allied units eliminated.
(1) Put Allied units eliminated on the "Eliminated Units" box. One point on each one Combat Strength.
(2) Put German units eliminated on the "Eliminated Units" box too. Minus two points on each one Combat Strength.
4.1 Cutting off Allied Connecting Lines
(1) At the end of the game, Allied units that cannot trace any "Connecting Lines" to the west or south map edge are considered eliminated. The German forces earn the points.
(2) Each Connecting Line is contiguous hexes from each Allied unit to the west or south map edge. Its distance is unlimited and no matter how it makes a detour, it does not matter, but it may pass through neither a hex containing a German unit, nor an EZOC (see 6.0), nor the Sea.
(3) A unit in an EZOC may trace its Connecting Line, but the west or south map edge of a Connecting Line may not be in an EZOC. Even if a friendly unit is in there, the EZOC cannot be negated.
(4) Note that disrupted units lose their ZOCs (see 9.7). German units disrupted during the Allied Combat Phase of Game Turn 6 lose their ZOCs.
4.2 Allied Evacuations
(1) If an Allied unit that could not trace its Connecting Line can trace its Connecting Line to a Port (Boulogne, Calais, Dunkerque, Ostende or Antwerpen), then it is considered to trace its Connecting Line.
(2) But each Port may trace Connecting Lines up to five Combat Strength. Excess Combat Strength is considered eliminated and add to the German points.
5.0 Game Sequence
"Dunkerque" repeats a Game Turn to progress. When all of six Game Turns were performed, the game ends. Each Game Turn is composed of the following Phases:
- German Movement Phase
- German Combat Phase
- Allied Movement Phase
- Allied Combat Phase
6.0 Zones of Control
Zone of Control (ZOC) is a rule abstractly representing the expanse of the troops and the sphere of their effect. All the units on the map have a ZOC in the adjacent six hexes. Friendly units' ZOCs do not affect friendly units. Enemy units' ZOCs (EZOCs) affect friendly units' movement and combat.
Even if multiple units' ZOCs extend into the same hex, their effect is equal to one unit's ZOC. And each side units' ZOCs may extend into the same hex simultaneously.
6.1 Effects of ZOCs on Movement
A unit that entered an EZOC during the movement must stop at the hex even if its movement points remain.
A unit starting movement in an EZOC must move first into the hex not in an EZOC (of course, it does not matter to move nowhere). The unit may enter again an EZOC later (and stops the movement at the hex). Moving from an EZOC directly into another EZOC is not allowed.
6.2 Effects of ZOCs on Combat
During a friendly Combat Phase, friendly units may attack enemy units in friendly ZOCs. In case of Retreats, entering an EZOC is not allowed. In case of Advance After Combat, ignoring an EZOC is allowed. Moving from an EZOC directly into another EZOC is not allowed in the movement, but it is possible in Advance After Combat.
6.3 Loss of ZOCs
Units that retreated and were flipped to their back side lose their ZOCs during the back side. When they are flipped to their front side, their ZOCs are restored.
7.0 Stacking
"Stacking" is gathering multiple units in one hex. In this game, neither side may stack. Each hex may be put only one unit.
7.1 Time to Apply Stacking Limits
Stacking limits are applied at the end of each Movement Phase and the end of each combat. In short, if during the movement, units may temporarily enter a hex containing a friendly unit. And passing through a hex containing a friendly unit to retreat is also possible. When a unit cannot help retreating into the hex containing a friendly unit, the unit must retreat one more hex to move into the hex containing no other unit.
7.2 Stacking Together with Enemy Units
Entering a hex containing an enemy unit is not allowed.
8.0 Movement
During a friendly Movement Phase, the player may move friendly units. It does not matter whether to move all or some friendly units. Moving nothing is also possible.
8.1 General Rules of Movement
(1) Movement is conducted by the unit. After a unit's movement was completed, conduct the next unit's movement.
(2) When a player's finger gets off a unit during movement, the unit's movement is considered completed. Moving it over again or reopening movement is not allowed except for the opponent's permission.
(3) Friendly units may move in the friendly Movement Phase only, may not in the other Phases.
(4) After completing movement of all the units desired to move, the Movement Phase ends.
(5) Moving units to off-map is not allowed.
8.2 Movement of Units
(1) Each unit has a Movement Allowance (MA). MA is the maximum number of Movement Points (MPs) usable during one friendly Movement Phase.
(2) It is not necessary to use up all MPs, but unused MPs may neither be transferred to the other units nor be carried over to the next Movement Phase.
(3) Each unit moves from hex to hex, from the hex where it is now to the adjacent hex. In that case, it pays MP cost according to the terrain of the hex entered. When it cannot pay more MP, it must finish its movement.
(4) Units may turn around any number of times during the movement.
(5) Units that entered an EZOC during the movement must stop at the hex. And units starting movement in an EZOC may not move unless move first into the hex that is not in an EZOC (see 6.1). It is not necessary to pay additional MP cost for exiting or entering an EZOC.
8.3 Terrain Effects on Movement
Terrain effects are listed in the "Terrain Chart".
(1) Clear, Cities, Coast and Ports: Pay 1 MP to enter.
(2) Forest, Marsh and Highlands: Pay 2 MPs to enter.
(3) Sea: May not enter.
(4) Rivers: Rivers flow between hexes. A unit that moves across a River pays additional 1 MP plus the MP cost of terrain to enter.
9.0 Combat
Players may use friendly units to attack adjacent enemy units in the friendly Combat Phase.
9.1 General Rules of Combat
(1) A player conducting attacks during the friendly Combat Phase is called "attacker", the opponent "defender".
(2) Attacking is voluntary. Even if the attacker's unit is adjacent to the defender's unit, attacking is not forced. All or some friendly units adjacent to the defender's unit may attack. It does not matter to attack nothing.
(3) Each unit of the attacker may attack once per Combat Phase. And each unit of the defender may be attacked only once.
(4) The attacker's multiple units adjacent to the defender's one unit may attack it together, but the attacker's one unit may not attack the defender's adjacent multiple units simultaneously, namely, the combat between the attacker's one or more hex and the defender's one hex is allowed, but matching the attacker's one hex with the defender's multiple hexes is not.
(5) At the start of each Combat Phase, the attacker must declare all the combinations of the attack to be conducted in the Combat Phase. It does not matter to resolve combats in any order, but all the combinations declared first must be conducted and adding an attack later that was not declared is not possible.
9.2 Procedure of Resolving Combat
Each combat is resolved by using the following procedure per the combination of the attack. When the attacker has resolved all the attacks declared, the Combat Phase ends.
(1) Sum up the Combat Strength of all the attacker's units participating in the combat, divide it by the Combat Strength of the defender's unit and change it into an integral odds ratio of "n:1". This is called "Combat Strength Ratio". The fraction is rounded down in favor of the defender. For example, if the attacker's Combat Strength is 11 and the defender's Combat Strength is 4, then it would be 11:4, 2.75:1 and be 2:1 by rounding down fractional 0.75. In case Combat Strength Ratio exceeds 6:1, the combat is resolved on the 6:1 column.
(2) If the attacker's total Combat Strength is smaller than the defender's Combat Strength, then it would be an integral odds ratio of "1:n". The fraction is rounded up in favor of the defender. For example, if the attacker's Combat Strength is 2 and the defender's Combat Strength is 3, then it would be 2:3, 1:1.5 and be 1:2 by rounding up fractional 0.5. Combat at odds of 1:3 or less is not allowed.
(3) Combat Strength Ratio would be the column used in the Combat Results Table. The attacker rolls a die and the cell where the row of die roll and the column intersect would be the combat result. The combat result is applied immediately.
9.3 Terrain Effects on Combat
Terrain effects are listed in the "Terrain Chart". When the defender is in a City or a Port, the Combat Strength of the defender's unit is doubled.
(1) When the attacker's all units attack the defender's unit across a River, the Combat Strength of the defender's unit is doubled. If at least one of the attacker's units attacks without crossing a River, then the defender's Combat Strength is not changed.
(2) In case of attacking a City or a Port across a River, the defender's Combat Strength is only doubled.
9.4 Combat Results
Combat results of "Dunkerque" are as follows:
(1) AE (Attacker Eliminated): Remove all attacking units from the map.
(2) AR (Attacker Retreat): Retreat all attacking units one hex.
(3) C (Contact): Neither side makes military gains, neither Retreat nor Elimination occurs.
(4) DR (Defender Retreat): Retreat all defending units the same hex as the number.
(5) DE (Defender Eliminated): Remove all defending units from the map.
9.5 Retreats
(1) Retreats due to the combat results are performed by the attacker. Even if the defender's units retreat, they are forced to retreat to the direction where the attacker desires.
(2) Retreating units must leave prescribed distance from the hex where the combat was performed. They may retreat to any directions, but must select the hex where no other unit is, if possible. Retreating into the hex containing the other friendly unit is allowed unless there is no other retreat path, but in that case, retreat one more hex.
(3) Retreating into an EZOC, a hex containing an enemy unit, off-map or the hex where the unit may not move to (Sea) is not allowed. Units that cannot retreat are considered eliminated.
(4) Retreated units become "disrupted"; flip them to their back side to represent it. See 9.7 about Disruption.
9.6 Advance After Combat
(1) When the defender's unit was eliminated or retreated, one of the attacker's units may advance into the hex where the defender's unit was. This is called "Advance After Combat".
(2) Even if the attacker's units were eliminated or retreated, the defender's units may not advance.
9.7 Disruption and Recovery
(1) Regardless of the attacker or the defender, units retreated by combat result become disrupted and are flipped to their back side.
(2) Disrupted units lose their ZOCs and may neither move in the friendly Movement Phase nor attack in the friendly Combat Phase.
(3) After the friendly Combat Phase, all disrupted friendly units are recovered and flipped to their front side. Therefore, in case the attacker's units retreated, they are recovered immediately after the same Combat Phase when they are disrupted, but their disruption may affect the defender's retreat because they lose their ZOCs during the Combat Phase.
(4) Disrupted units are never attacked caused by the procedure.
10.0 Reinforcements
In "Dunkerque", only Allied forces have its reinforcements, but to represent historical Allied HQ's disruption, nobody can know what is reinforcement unit until its entering.
(1) Allied forces' seven units enter on Game Turns 2 through 5 as reinforcements.
(2) At the start of the game, the Allied player flips all the units marked "R" to their back side and put on the specified boxes of the Turn Record Track randomly. At this time, seeing the front is not allowed.
(3) When reinforcements enter at the start of the friendly Movement Phase of the Game Turn, the Allied player places the reinforcement units in optional hexes along the south map edge as back side. And then flip them to their front side and move them.
(4) Reinforcement units are applied stacking limits when they are placed. They may enter an EZOC, but such a unit may not move in the Movement Phase. And entering a hex sandwiched between two German units is not allowed.
(5) Important: Reinforcements have already paid 1 MP when they were placed in the south map edge hexes. Their MA is reduced by one in the Movement Phase.
(6) After entering, the reinforcement units may conduct movement and combat just like the units that have been on the map from the beginning.
(7) The Allied player may delay entering of reinforcements voluntarily, but may not move it up.
Dunkerque Errata
In the first printing of Japan Wargame Classics edition (printed in 2013), a city mark is not printed in hex 0607 (Leuven). In the second printing (2014), this error is fixed.
Khar'kov
Russia, 1943
1.0 Introduction
"Khar'kov" is a game of the Soviet forces' offensive and the German forces' counterattack (as for historical outline, see Guidebook). One person handles the German forces, the other the Soviet forces.
2.0 Game Components
In "Khar'kov", the following are used:
2.1 The Map
The map is described the battlefield of southern Russia. Hexagons covering the whole of the map are called "hexes".
2.2 The Counters
There are two types of counters; "units" represent combat troops, "markers" show information. In this game, the "Game Turn Marker", "Control Markers" and "Victory Points (VPs) Markers" are used.
(1) In "Khar'kov", the units of German forces and Soviet forces are used. Among them, only the units having a translucent military symbol are used.
(2) Information printed on the units is as follows; all the units have two values, Combat Strength at the lower left and Movement Allowance at the lower right; unit size is III (regiment), XX (division) and XXX (corps).
2.3 Die
Please prepare one 6-sided die.
2.4 Rulebook
You can play the game only with this rulebook, but if you cannot understand the meaning of a rule, please refer to Primer Guidebook.
3.0 Game Setup
(1) First, pick out the map of "Khar'kov" and spread it on the table.
(2) Second, please carefully cut off the counters of "Khar'kov" from the sheet. It would be good to pack them in a zipper storage bag to avoid confusion with other games.
(3) Place German six units in the location indicated on the map.
(4) Select Soviet eighteen units that do not have entry Turn and are marked "6", "1GD" or "Ppv" at the upper right and place them in the map edge hexes indicated. At this time, observe stacking limits (see 7.0).
(5) The units that were not placed are reinforcements. Classify them by entry Turn and put on the Turn Record Track.
(6) Put the Game Turn Marker on the box "1" (19-25 January) of the Turn Record Track. Thus, game setup ends.
4.0 Victory Conditions
When Game Turn 8 ends, the game ends. Compare each side's Victory Points (VPs) and the player with the most VPs wins. In case of a tie, it is a draw. VPs are earned in the following ways. Put VPs Markers on the Victory Points Record Track to indicate each side's VPs earned.
4.1 Control of Cities
(1) At the end of the game, each side earns 2 VPs per friendly controlled City hex. Khar'kov extends over four hexes, and so if it is entirely controlled, then it becomes 8 VPs.
| Nationality | Color | Number |
|---|---|---|
| German | Black/Gray | 28/15 |
| Soviet | Red/Brown | 22/15 |
(2) In case a friendly unit is in or entered last a City, it is controlled.
(3) At the start of the game, all Cities are controlled by the German forces.
4.2 Charging into Cities
(1) Only the Soviet forces may earn 1 VP whenever it charges into a City hex for the first time that it has not entered yet. Put a "Charge & Control" Marker to indicate the City was charged into.
(2) Even if a City charged into is re-controlled by the German forces, the VP by the charge is not lost. And then even if the Soviet forces re-charge into after German re-control, it cannot earn the VP by the charge twice from the same hex.
(3) In case a City is re-controlled by the German forces after the charge, change the "Charge & Control" Marker into "Charged" (indicate that the Soviet forces cannot earn the VP of control).
4.3 Elimination of Enemy Units
Each side earns 1 VP per eliminated enemy unit, but the Soviet forces earn 2 VPs per German eliminated tank or mechanized infantry (black unit).
4.4 Cutting off Railroads
The Soviet forces earn 2 VPs by entering or passing through an orange colored Railroad hex during a friendly Movement Phase (in case of cutting off only a yellow colored Railroad = a branch line for Rostov, 1 VP only). The Soviet forces may earn these VPs on each Game Turn by satisfying the condition, but even if it cuts off Railroads in multiple hexes, the VPs that it may earn are only 2 VPs or 1 VP.
4.5 Soviet Forces' Sudden Death Victory
At any time, if the Soviet forces control Poltava (hex 0634) or Dnepro Petrovsk (hex 1732), then the game ends in a victory for the Soviet forces.
5.0 Game Sequence
"Khar'kov" repeats a Game Turn to progress. When all of eight Game Turns were performed, the game ends. Each Game Turn is composed of the following Phases:
- Soviet Reinforcement Phase
- Soviet Movement Phase
- Soviet Combat Phase
- German Reinforcement Phase
- German Movement Phase
- German Combat Phase
6.0 Zones of Control
Zone of Control (ZOC) is a rule abstractly representing the expanse of the troops and the sphere of their effect. All the units on the map have a ZOC in the adjacent six hexes. Friendly units' ZOCs do not affect friendly units. Enemy units' ZOCs (EZOCs) affect friendly units' movement and combat.
Even if multiple units' ZOCs extend into the same hex, their effect is equal to one unit's ZOC. And each side units' ZOCs may extend into the same hex simultaneously.
6.1 Effects of ZOCs on Movement
A unit that entered an EZOC during the movement must stop at the hex even if its movement points remain.
A unit starting movement in an EZOC must move first into the hex not in an EZOC (of course, it does not matter to move nowhere). The unit may enter again an EZOC later (and stops the movement at the hex). Moving from an EZOC directly into another EZOC is not allowed.
6.2 Effects of ZOCs on Combat
During a friendly Combat Phase, friendly units may attack enemy units in friendly ZOCs. In case of Retreats, entering an EZOC is not allowed. In case of Advance After Combat, ignoring an EZOC is allowed. Moving from an EZOC directly into another EZOC is not allowed in the movement, but it is possible in Advance After Combat. But if the first hex of the advance is in an EZOC, then advancing into the second hex is not allowed.
6.3 Loss of ZOCs
Units that retreated and were flipped to their back side lose their ZOCs during the back side. When they are flipped to their front side, their ZOCs are restored.
7.0 Stacking
"Stacking" is gathering multiple units in one hex. In this game, the German forces may stack up to three units, the Soviet forces up to two units.
7.1 Time to Apply Stacking Limits
Stacking limits are applied at the end of each Movement Phase and the end of each combat. In short, if during the movement, units may temporarily enter a hex fully stacked. And passing through a hex fully stacked to retreat is also possible. When a unit cannot help retreating into the hex fully stacked, the unit must retreat one more hex to move into the hex containing no other unit.
7.2 Stacking Together with Enemy Units
Entering a hex containing an enemy unit is not allowed.
7.3 Violations of Stacking Limits
In case of violating stacking limits, must remove the excess units to observe stacking limits. This remove is treated the same as elimination by combat.
8.0 Movement
During a friendly Movement Phase, the player may move friendly units. It does not matter whether to move all or some friendly units. Moving nothing is also possible.
8.1 General Rules of Movement
(1) Movement is conducted by the unit. After a unit's movement was completed, conduct the next unit's movement.
(2) When a player's finger gets off a unit during movement, the unit's movement is considered completed. Moving it over again or reopening movement is not allowed except for the opponent's permission.
(3) Friendly units may move in the friendly Movement Phase only, may not in the other Phases.
(4) After completing movement of all the units desired to move, the Movement Phase ends.
(5) Moving units to off-map is not allowed.
8.2 Movement of Units
(1) Each unit has a Movement Allowance (MA). MA is the maximum number of Movement Points (MPs) usable during one friendly Movement Phase.
(2) It is not necessary to use up all MPs, but unused MPs may neither be transferred to the other units nor be carried over to the next Movement Phase.
(3) Each unit moves from hex to hex, from the hex where it is now to the adjacent hex. In that case, it pays MP cost according to the terrain of the hex entered. When it cannot pay more MP, it must finish its movement.
(4) Units may turn around any number of times during the movement.
(5) Units that entered an EZOC during the movement must stop at the hex. And units starting movement in an EZOC may not move unless move first into the hex that is not in an EZOC (see 6.1). It is not necessary to pay additional MP cost for exiting or entering an EZOC.
8.3 Terrain Effects on Movement
Terrain effects are listed in the "Terrain Chart".
(1) Clear, Cities and Towns: Pay 1 MP to enter.
(2) Forest and Marsh: Pay 2 MPs to enter.
(3) Major Rivers: Pay additional 2 MPs to cross.
(4) Minor Rivers: Pay additional 1 MP to cross.
(5) Railroads: A unit that moves along a Railroad pay 1 MP regardless of the other terrain in the hex. Even if it crosses a River, it need not pay the additional MP cost.
9.0 Combat
Players may use friendly units to attack adjacent enemy units in the friendly Combat Phase.
9.1 General Rules of Combat
(1) A player conducting attacks during the friendly Combat Phase is called "attacker", the opponent "defender".
(2) Attacking is voluntary. Even if the attacker's unit is adjacent to the defender's unit, attacking is not forced. All or some friendly units adjacent to the defender's unit may attack. It does not matter to attack nothing.
(3) Each unit of the attacker may attack once per Combat Phase. And each unit of the defender may be attacked only once.
(4) The attacker's multiple units adjacent to the defender's one unit may attack it together, but the attacker's one unit may not attack the defender's adjacent multiple units simultaneously, namely, the combat between the attacker's one or more hex and the defender's one hex is allowed, but matching the attacker's one hex with the defender's multiple hexes is not.
(5) As to the attacker's stacking units, it does not matter whether they target the same adjacent hex or each unit targets a separate hex. And letting a part of units to refrain from attacking is also allowed, but the defender's stacking units must be attacked together.
(6) At the start of each Combat Phase, the attacker must declare all the combinations of the attack to be conducted in the Combat Phase. It does not matter to resolve the combats in any order, but all the combinations declared first must be conducted and adding an attack later that was not declared is not possible.
9.2 Procedure of Resolving Combat
Each combat is resolved by using the following procedure per the combination of the attack. When the attacker has resolved all the attacks declared, the Combat Phase ends.
(1) Sum up the Combat Strength of all the attacker's units participating in the combat, divide it by total Combat Strength of the defender's units and change it into an integral odds ratio of "n:1". This is called "Combat Strength Ratio". The fraction is rounded down in favor of the defender. For example, if the attacker's Combat Strength is 11 and the defender's Combat Strength is 4, then it would be 11:4, 2.75:1 and be 2:1 by rounding down fractional 0.75. In case Combat Strength Ratio exceeds 6:1, the combat is resolved on the 6:1 column.
(2) If the attacker's total Combat Strength is smaller than the defender's total Combat Strength, then it would be an integral odds ratio of "1:n". The fraction is rounded up in favor of the defender. For example, if the attacker's Combat Strength is 2 and the defender's Combat Strength is 3, then it would be 2:3, 1:1.5 and be 1:2 by rounding up fractional 0.5. Combat at odds of 1:3 or less is not allowed.
(3) Combat Strength Ratio would be the column used in the Combat Results Table. The attacker rolls a die and the cell where the row of die roll and the column intersect would be the combat result. The combat result is applied immediately.
9.3 Terrain Effects on Combat
Terrain effects are listed in the "Terrain Chart". When the defender is in a Forest or a City, the Combat Strength of the defender's unit is doubled.
(1) When the attacker's all units attack the defender's unit across a Major River, the Combat Strength of the defender's unit is doubled. If at least one of the attacker's units attacks without crossing a Major River, then the defender's Combat Strength is not changed.
(2) In case of attacking a Forest or a City across a Major River, the defender's Combat Strength is only doubled.
(3) Minor Rivers do not affect combat.
9.4 Combat Results
[Printed as "49.4" in the source; this is section 9.4.]
Combat results of "Khar'kov" are as follows:
(1) AE (Attacker Eliminated): Remove all attacking units from the map.
(2) AR (Attacker Retreat): Retreat all attacking units one hex.
(3) EX (Exchange): Each side selects one friendly unit that participated in the combat and remove it. Surviving units perform neither Retreat nor Advance.
(4) DR (Defender Retreat): Retreat all defending units the same hex as the number.
(5) DE (Defender Eliminated): Remove all defending units from the map.
9.5 Retreats
(1) Retreats due to the combat results are performed by the attacker. Even if the defender's units retreat, they are forced to retreat to the direction where the attacker desires.
(2) Retreating units must leave prescribed distance from the hex where the combat was performed. They may retreat to any directions, but must select the hex where no other unit is, if possible. Retreating into the hex fully stacked is allowed unless there is no other retreat path, but in that case, retreat one more hex to observe stacking limits.
(3) Retreating into an EZOC, a hex containing an enemy unit or off-map is not allowed. Units that cannot retreat are considered eliminated.
(4) In case stacking units retreat, it does not matter whether to retreat together or in all directions.
(5) Retreated units become "disrupted"; flip them to their back side to represent it. See 9.7 about Disruption.
9.6 Advance After Combat
(1) When the defender's units were eliminated or retreated, the attacker's units may advance into the hex where the defender's units were up to stacking limits. This is called "Advance After Combat". In case of "EX", advance does not occur.
(2) Even if the attacker's units were eliminated or retreated, the defender's units may not advance.
(3) If advancing units involve a tank (German black or Soviet red unit), then the tank may advance one more hex. Non-tank units may not advance into the second hex.
(4) If the first hex entered is in an EZOC, then the tank may not advance into the second hex either.
9.7 Disruption and Recovery
(1) Regardless of the attacker or the defender, units retreated by combat result become disrupted and are flipped to their back side.
(2) Disrupted units lose their ZOCs and may neither move in the friendly Movement Phase nor attack in the friendly Combat Phase.
(3) After the friendly Combat Phase, all disrupted friendly units are recovered and flipped to their front side. Therefore, in case the attacker's units retreated, they are recovered immediately after the same Combat Phase when they are disrupted, but their disruption may affect the defender's retreat because they lose their ZOCs during the Combat Phase.
(4) Disrupted units are never attacked caused by the procedure.
10.0 Reinforcements
(1) Each side receives reinforcements as printed on the Turn Record Track.
(2) Receive reinforcements of the Game Turn in the friendly Reinforcement Phase. Delaying entering is allowed.
(3) Each reinforcement's entry map edge is indicated. The Soviet forces enter from the map edge hexes printed the name of the troop, the German forces enter from the map edge hexes printed the same symbol (A-D) in the Turn Record Track.
(4) Reinforcement units are applied stacking limits when they are placed. They may enter an EZOC, but such a unit may not move in the upcoming Movement Phase. And entering a hex sandwiched between two enemy units is not allowed. Units that could not enter specified map edge hexes in the Reinforcement Phase are forced to be delayed the entering.
(5) Important: Reinforcements do not pay MP cost when they are placed on the map edge hexes. They may use the same MA as printed on the unit in the upcoming Movement Phase.
(6) After entering, the reinforcement units may conduct movement and combat just like the units that have been on the map from the beginning.
Operation Compass
North Africa, 1940
1.0 Introduction
"Operation Compass" is a game of the battle around Sidi Barrani from December 9th to the 11th that was the first half of the British forces' counterattack took action in December 1940. One person handles the British forces, the other the Italian forces.
2.0 Game Components
In "Operation Compass", the following are used:
2.1 The Map
The map is described the battlefield around Sidi Barrani. Hexagons covering the whole of the map are called "hexes".
2.2 The Counters
There are two types of counters; "units" represent combat troops, "markers" show information. In this game, the "Game Turn Marker" and "Victory Points (VPs) Markers" are used.
(1) In "Operation Compass", the units of British forces and Italian forces are used. Among them, only the units having a red military symbol are used.
| Nationality | Color | Number |
|---|---|---|
| British | Brown/Light Brown | 9/13 |
| Italian | Green/Light Green | 4/14 |
(2) Information printed on the units is as follows; all the units have two values, Combat Strength at the lower left and Movement Allowance at the lower right; unit size is II (battalion) and III (regiment).
2.3 Die
Please prepare one 6-sided die.
2.4 Rulebook
You can play the game only with this rulebook, but if you cannot understand the meaning of a rule, please refer to Primer Guidebook.
3.0 Game Setup
(1) First, pick out the map of "Operation Compass" and spread it on the table.
(2) Second, please carefully cut off the counters of "Operation Compass" from the sheet. It would be good to pack them in a zipper storage bag to avoid confusion with other games.
(3) Select Italian units indicated their locations on the map and put them on designated hexes. Four green units (tank battalions) marked "S" at the upper left are placed in Footholds, Towns or Battle Positions without stacking together with other Italian units.
(4) British units are placed in the Entry Hexes (see 3.2) after resolving Naval Bombardment (see 3.1).
3.1 British Naval Bombardment
(1) After Italian initial placement, the British player rolls a die. Select three (if the die roll is 1-3) or four (if the die roll is 4-6) Italian units and make them disrupted (see 9.7). This represents British Naval Bombardment.
(2) At this time, target only Italian units within two hexes of Coast hexes. In case of counting two hexes, do not include Coast hexes and include the hexes containing the Italian unit.
(3) The British player decides which Italian unit is disrupted.
3.2 British Units' Entry
(1) After Naval Bombardment, place British units in British six Entry Hexes freely. At this time, ignoring stacking limits (see 7.0) is allowed.
(2) Must place all British units at this time.
(3) Important: After the start of the game, Italian units may not enter British Entry Hexes. And Italian units' ZOCs (see 6.0) do not extend to the Entry Hexes.
4.0 Victory Conditions
When Game Turn 5 ends, the game ends. Compare each side's Victory Points (VPs) and the player with the most VPs wins. In case of a tie, the Italian forces win. VPs are earned in the following ways:
4.1 Control of Footholds
(1) At the end of the game, each side earns 1 or 2 VPs per friendly controlled Foothold hex.
Hex 1702, 0904 each 1VP. .....................
Hex 0107, 0115 each 2VPs. ...................
(2) In case a friendly unit is in or entered last a Foothold hex, it is controlled.
(3) At the start of the game, all Footholds are controlled by the Italian forces.
(4) In case a Connecting Line (see 4.3) cannot be traced, earning VPs from a Foothold hex is not allowed even if it is controlled.
4.2 Elimination of Enemy Units
Only Italian forces may earn VPs the same number as half of British units eliminated during the game (drop the fractions; one unit becomes 0 VP, three units 1 VP).
4.3 Connecting Lines
(1) In order to earn VPs from a controlled Foothold, must trace a "Connecting Line". At the end of the game, decide whether each Connecting Line is traced or not from the Foothold hex to a friendly "Supply Source".
(2) Supply Sources: British Supply Sources are hex 2905-2217 along the east map edge. Italian Supply Sources are hex 0105-0118 along the west map edge.
(3) Each Connecting Line is contiguous hexes from a Foothold hex to a Supply Source. Its distance is unlimited and no matter how it makes a detour, it does not matter, but it may pass through neither an enemy unit, nor an EZOC (see 6.0), nor the hex where units cannot move to (Cliff etc.). If a friendly unit is in an EZOC, then tracing a Connecting Line is allowed.
4.4 British Forces' Sudden Death Victory
At any time, if the British forces control four Footholds entirely, then regardless of Connecting Lines the game ends in a victory for the British forces.
5.0 Game Sequence
"Operation Compass" repeats a Game Turn to progress. When all of five Game Turns were performed, the game ends. Each Game Turn is composed of the following Phases:
- British Movement Phase
- British Combat Phase
- Italian Movement Phase
- Italian Combat Phase
6.0 Zones of Control
Zone of Control (ZOC) is a rule abstractly representing the expanse of the troops and the sphere of their effect. All the units on the map have a ZOC in the adjacent six hexes. Friendly units' ZOCs do not affect friendly units. Enemy units' ZOCs (EZOCs) affect friendly units' movement and combat.
Even if multiple units' ZOCs extend into the same hex, their effect is equal to one unit's ZOC. And each side units' ZOCs may extend into the same hex simultaneously.
6.1 Effects of ZOCs on Movement
A unit that entered an EZOC during the movement must stop at the hex even if its movement points remain.
A unit starting movement in an EZOC must move first into the hex not in an EZOC (of course, it does not matter to move nowhere). The unit may enter again an EZOC later (and stops the movement at the hex). Moving from an EZOC directly into another EZOC is not allowed.
6.2 Effects of ZOCs on Combat
During a friendly Combat Phase, friendly units may attack enemy units in friendly ZOCs. In case of Retreats, entering an EZOC is not allowed. In case of Advance After Combat, ignoring an EZOC is allowed. Moving from an EZOC directly into another EZOC is not allowed in the movement, but it is possible in Advance After Combat. But if the first hex of the advance is in an EZOC, then advancing into the second hex is not allowed.
6.3 Loss of ZOCs
Units that retreated and were flipped to their back side lose their ZOCs during the back side. When they are flipped to their front side, their ZOCs are restored.
6.4 Effects of Terrain
ZOCs do not extend across a Cliff.
7.0 Stacking
"Stacking" is gathering multiple units in one hex. In this game, each side may stack up to two units.
7.1 Time to Apply Stacking Limits
Stacking limits are applied at the end of each Movement Phase and the end of each combat. In short, if during the movement, units may temporarily enter a hex fully stacked. And passing through a hex fully stacked to retreat is also possible. When a unit cannot help retreating into the hex fully stacked, the unit must retreat one more hex to move into the hex containing no other unit.
7.2 Stacking Together with Enemy Units
Entering a hex containing an enemy unit is not allowed.
7.3 Violations of Stacking Limits
In case of violating stacking limits, must remove the excess units to observe stacking limits. This remove is treated the same as elimination by combat.
8.0 Movement
During a friendly Movement Phase, the player may move friendly units. It does not matter whether to move all or some friendly units. Moving nothing is also possible.
8.1 General Rules of Movement
(1) Movement is conducted by the unit. After a unit's movement was completed, conduct the next unit's movement.
(2) When a player's finger gets off a unit during movement, the unit's movement is considered completed. Moving it over again or reopening movement is not allowed except for the opponent's permission.
(3) Friendly units may move in the friendly Movement Phase only, may not in the other Phases.
(4) After completing movement of all the units desired to move, the Movement Phase ends.
(5) Moving units to off-map is not allowed.
8.2 Movement of Units
(1) Each unit has a Movement Allowance (MA). MA is the maximum number of Movement Points (MPs) usable during one friendly Movement Phase.
(2) It is not necessary to use up all MPs, but unused MPs may neither be transferred to the other units nor be carried over to the next Movement Phase.
(3) Each unit moves from hex to hex, from the hex where it is now to the adjacent hex. In that case, it pays MP cost according to the terrain of the hex entered. When it cannot pay more MP, it must finish its movement.
(4) Units may turn around any number of times during the movement.
(5) Units that entered an EZOC during the movement must stop at the hex. And units starting movement in an EZOC may not move unless move first into the hex that is not in an EZOC (see 6.1). It is not necessary to pay additional MP cost for exiting or entering an EZOC.
8.3 Terrain Effects on Movement
Terrain effects are listed in the "Terrain Chart".
(1) Clear, Coast, Roads, Lanes and Footholds: Pay 1 MP to enter.
(2) Hills: Pay 2 MPs to enter.
(3) Cliff: May not cross.
(4) Other Terrain: Not affect movement.
9.0 Combat
Players may use friendly units to attack adjacent enemy units in the friendly Combat Phase.
9.1 General Rules of Combat
(1) A player conducting attacks during the friendly Combat Phase is called "attacker", the opponent "defender".
(2) Attacking is voluntary. Even if the attacker's unit is adjacent to the defender's unit, attacking is not forced. All or some friendly units adjacent to the defender's unit may attack. It does not matter to attack nothing.
(3) Each unit of the attacker may attack once per Combat Phase. And each unit of the defender may be attacked only once.
(4) The attacker's multiple units adjacent to the defender's one unit may attack it together, but the attacker's one unit may not attack the defender's adjacent multiple units simultaneously, namely, the combat between the attacker's one or more hex and the defender's one hex is allowed, but matching the attacker's one hex with the defender's multiple hexes is not.
(5) As to the attacker's stacking units, it does not matter whether they target the same adjacent hex or each unit targets a separate hex. And letting a part of units to refrain from attacking is also allowed, but the defender's stacking units must be attacked together.
(6) At the start of each Combat Phase, the attacker must declare all the combinations of the attack to be conducted in the Combat Phase. It does not matter to resolve the combats in any order, but all the combinations declared first must be conducted and adding an attack later that was not declared is not possible.
9.2 Procedure of Resolving Combat
Each combat is resolved by using the following procedure per the combination of the attack. When the attacker has resolved all the attacks declared, the Combat Phase ends.
(1) Sum up the Combat Strength of all the attacker's units participating in the combat, divide it by total Combat Strength of the defender's units and change it into an integral odds ratio of "n:1". This is called "Combat Strength Ratio". The fraction is rounded down in favor of the defender. For example, if the attacker's Combat Strength is 11 and the defender's Combat Strength is 4, then it would be 11:4, 2.75:1 and be 2:1 by rounding down fractional 0.75. In case Combat Strength Ratio exceeds 6:1, the combat is resolved on the 6:1 column.
(2) If the attacker's total Combat Strength is smaller than the defender's total Combat Strength, then it would be an integral odds ratio of "1:n". The fraction is rounded up in favor of the defender. For example, if the attacker's Combat Strength is 2 and the defender's Combat Strength is 3, then it would be 2:3, 1:1.5 and be 1:2 by rounding up fractional 0.5. Combat at odds of 1:3 or less is not allowed.
(3) Combat Strength Ratio would be the column used in the Combat Results Table. The attacker rolls a die and the cell where the row of die roll and the column intersect would be the combat result. The combat result is applied immediately.
9.3 Terrain Effects on Combat
Terrain effects are listed in the "Terrain Chart". When the defender is in a Hill or a Battle Position, the Combat Strength of the defender's unit is doubled.
Attacking across a Cliff is not allowed.
9.4 Combat Results
[Printed as "49.4" in the source; this is section 9.4.]
Combat results of "Operation Compass" are as follows:
(1) AE (Attacker Eliminated): Remove all attacking units from the map.
(2) AR (Attacker Retreat): Retreat all attacking units one hex.
(3) C (Contact): Neither side makes military gains, neither Retreat nor Elimination occurs.
(4) EX (Exchange): Each side selects one friendly unit that participated in the combat and remove it. Surviving units perform neither Retreat nor Advance.
(5) DR (Defender Retreat): Retreat all defending units the same hex as the number.
(6) DE (Defender Eliminated): Remove all defending units from the map.
9.5 Retreats
(1) Retreats due to the combat results are performed by the attacker. Even if the defender's units retreat, they are forced to retreat to the direction where the attacker desires.
(2) Retreating units must leave prescribed distance from the hex where the combat was performed. They may retreat to any directions, but must select the hex where no other unit is, if possible. Retreating into the hex fully stacked is allowed unless there is no other retreat path, but in that case, retreat one more hex to observe stacking limits.
(3) Retreating into an EZOC, a hex containing an enemy unit or off-map is not allowed. Units that cannot retreat are considered eliminated.
(4) In case stacking units retreat, it does not matter whether to retreat together or in all directions.
(5) Retreated units become "disrupted"; flip them to their back side to represent it. See 9.7 about Disruption.
9.6 Advance After Combat
(1) When the defender's units were eliminated or retreated, the attacker's units may advance into the hex where the defender's units were up to stacking limits. This is called "Advance After Combat". In case of "EX", advance does not occur.
(2) Even if the attacker's units were eliminated or retreated, the defender's units may not advance.
(3) If advancing units involve a tank (British brown or Italian green unit), then the tank may advance one more hex. Non-tank units may not advance into the second hex.
(4) If the first hex entered is in an EZOC, then the tank may not advance into the second hex either.
9.7 Disruption and Recovery
(1) Regardless of the attacker or the defender, units retreated by combat result become disrupted and are flipped to their back side.
(2) Disrupted units lose their ZOCs and may neither move in the friendly Movement Phase nor attack in the friendly Combat Phase.
(3) After the friendly Combat Phase, all disrupted friendly units are recovered and flipped to their front side. Therefore, in case the attacker's units retreated, they are recovered immediately after the same Combat Phase when they are disrupted, but their disruption may affect the defender's retreat because they lose their ZOCs during the Combat Phase.
(4) In case a disrupted unit is attacked, the combat is resolved by using Combat Strength as usual.
Translator's Redundancy
The following rules are liable to be forgotten by mistake. Please be careful.
(1) In "El Alamein", British Commonwealth each unit's MA is halved only on Game Turn 1.
(2) Some terrain effects vary according to the game. As for Highlands, the defender's Combat Strength is doubled in "El Alamein", but not doubled in "Dunkerque". As for Forest, not doubled in "Dunkerque", but doubled in "Khar'kov". As for (Minor) Rivers, doubled in "Dunkerque", but not doubled in "Khar'kov".
(3) Reinforcement units need pay 1 MP to enter the map in "Dunkerque", but need not in "Khar'kov".
(4) In "Dunkerque", Connecting Lines cannot pass through an EZOC even if there is a friendly unit, but in "Operation Compass", Connecting Lines may pass through an EZOC if there is a friendly unit.
(5) In the general wargames, the defender's retreat path is selected by the defender, but in this game, it is selected by the attacker. Therefore, the defender is forced to be retreated to disadvantageous direction. Please keep strategic reserve.