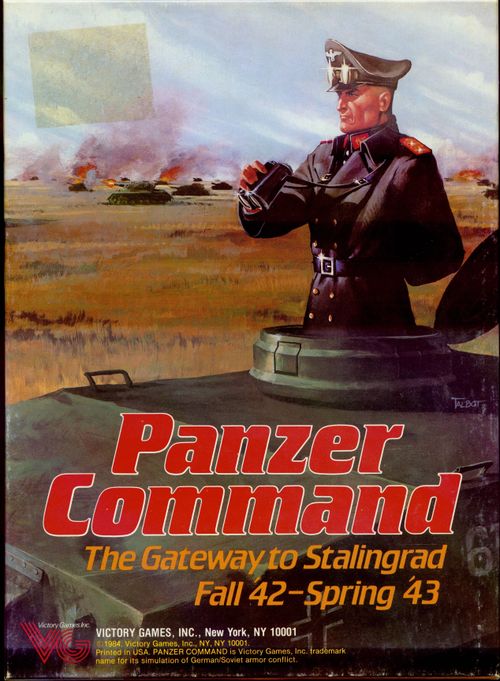
Panzer Command: The Gateway to Stalingrad
Panzer Command: The Gateway to Stalingrad Rulebook
Table of Contents
Table of Contents
- 1. Introduction
- 2. Components
- 3. Sequence of Play
- 4. Headquarters
- 5. Movement
- 6. Line of Sight and Fire Zones
- 7. The Direct Fire Action
- 8. Opportunity Fire
- 9. The Close Assault Action
- 10. The Concentrate Fire Action
- 11. Combat Results and Rally
- 12. Introductory Scenario
- Advanced Rules
- 13. Transport
- 14. Artillery
- 15. Reinforcements
- 16. Engineers
- 17. Minefields
- 18. Airpower
- 19. Improved Positions
- 20. Night
- 21. Advanced Scenarios
- 22. Limited Intelligence
- 23. Scenario Generation
- 24. Modern Tanks
- 25. Solitaire Guidelines
1. Introduction
Panzer Command is a tactical level game of armored warfare on the Eastern front during the fall of 1942 through the spring of 1943. Each player controls either a German Panzer Division or a Soviet Tank Corps. The units making up a division or corps represent companies of infantry and tanks and batteries of artillery.
The original, complete rules set was originally published by Victory Games, Inc., New York, New York, 1984. The designer was Eric Lee Smith. This abbreviated rules set includes only material relating to the rules themselves, omitting charts, tables, examples, and explanatory and most background paragraphs. The following, overall game description provides a framework within which the following rules can be studied.
Summary Game Description
Each player controls either a German Panzer Division or a Soviet Tank Corps. Each player's Division consist of from one to five Regiments, depending on the scenario. Each Regiment contains combat units representing companies of infantry and tanks and batteries of artillery.
Each player basically moves a Regiment at a time. The order in which each regiment is moved is determined by Regimental Action Chits pulled from a single cup containing all the eligible chits from both players. While a player's Regiment is moving, the opposing player may attempt opportunity fire on the moving units within range.
While, in general, the order in which Regiments are activated is random, players have a certain amount of control that allows them to occasionally modify this random draw sequence. Each player, as indicated in the scenario set up, gets a certain number of Dispatch Points at the beginning of the game. Before drawing chits from a cup, two Dispatch Points may be spent to immediately activate a Regiment by selecting from a set of available Regimental Action chits that have not been put into the cup. If a player does not wish to, or cannot, spend two points, he may choose to spend only one point and place a Regiment Action chit from those that he has available onto the game turn track for next turn. It will then be placed in the cup the next turn, thus allowing two activations for that regiment.
Each Regiment has two chits, with one always being placed into the cup. The second chit can be held back for later immediate activation at an increased cost of two Dispatch Points or, at the beginning of a turn, designated to be placed into the cup on the next game turn at a reduced cost of one Dispatch Point. The player's Dispatch Points are randomly replenished at the beginning of the turn, based on the quality of the player's Division's Initiative Rating. A player may get from zero to one additional Dispatch Point each game turn. Also, one side is always designated as having the Initiative. The Initiative player always has first choice in deciding whether or not to spend Dispatch Points, or draw from the cup.
In addition to Dispatch Points, players are also assigned a given number of Direct Command Points by the scenario. The use of these points is determined by a Direct Command chit, which, like the Regimental Action chits, is always placed in the cup. When drawn, it allows the owning player to activate individual units at the cost of one Direct Command point each. Only one Direct Command can be spent on any unit during a Segment, Regimental or Direct Command Segment. Direct Command Points can also be spent during a normal regimental activation for those units in a Regiment that are in command. Again, only a single Direct Command can be spent on any one unit in the Segment, and the designated action, e.g. move or fire, must be different from the chosen action during the segment. In other words, you can't move twice in a Segment. Thus, a single unit could conceivably be activated four times within one game turn: once by drawing a Regimental Activation Chit; once by spending Dispatch Points to select that regiment or by drawing a second Regiment chit placed on the game turn track in the previous turn; and once for each of these activations by spending a Direct Command Chit. The number of Direct Command Points received each turn is also randomly determined by the quality of a player's Division HQ Direct Command Rating.
The ability of units to perform certain actions, such as rally and opportunity fire, is determined by a Regiment's Troop Quality. Both the player's Division and Regimental qualities are determined by Headquarter markers that are placed in specific boxes on the player's Track Displays. Sometimes the specific boxes, or Ratings, are specified by the scenario and sometimes they are determined by die rolls.
2. Components
2.1. The Map
The map covers the Chir River area located approximately 50 miles southwest of Stalingrad, over which many tank battles were fought. Each hexagon represents 500 meters from hexside to hexside (i.e. 547 yards across). The effects of terrain identified on the Terrain Key on the map are summarized on the Terrain Effects Chart and Combat Modifiers Summary.
2.2. Charts, Tables, and Tracks
- Action Summary. This chart summarizes the attributes of each Action a unit may perform in the game.
- Airstrike Table. This table is used to determine the number and strength of a player's airstrikes.
- Air Interdiction Table. This table is used to determine whether or not a player successfully interdicts his opponent's movement on roads and tracks.
- Air Strength Tracks. Each player has one of these to record his available airpower.
- Combat Modifiers Summary. This chart summarizes the modifiers to a unit's Attack Strength and is used each time combat occurs.
- Combat Results Table. This table is used to determine the damage inflicted by a successful attack.
- Direct Commands Tracks. Each player has one of these to record his available Direct Commands.
- Dispatch Points Tracks. Each player has one of these to record his available Dispatch Points.
- Engineer Capabilities Summary. This chart summarizes the capabilities of each side's engineer units.
- Game Turn Track. This track is used to mark the passage of turns, to determine the arrival of reinforcements, and assigning Segments to regiments a turn in advance.
- Headquarters Tracks. Each player has two Headquarters Tracks, one for his Division HQ and one for his Regimental HQ's. HQ markers are used on the Tracks to indicate each player's HQ Ratings.
- Radio Contact Table. This table is used to determine whether or not radio contact between a spotting unit and an artillery unit using Indirect Fire has been established.
- Spotting Table. This table determines whether or not a spotting unit successfully spots for an artillery unit using Indirect Fire.
- Soviet Ad Hoc Ferry Table. This table is used to determine damage suffered by a unit performing the Ad Hoc Ferry Action.
- Terrain Effects Chart. This chart summarizes the effects of terrain on movement and line of sight.
2.3. Dice
Ten-sided dice are used. A result of "0" is treated as a "0," not as a "10." For the most part, a die roll of "0" is always a success, and a roll of "9" is always a failure, regardless of modifiers.
2.4. Playing Pieces
There are two basic types of playing pieces, units and markers. Units represent the companies and the batteries that are actually moved across the map; markers are placed on the map and on tracks, when called for, to indicate temporary game conditions.
2.5. Game Terms
UNIT INFORMATION
- Attack Strength. The attack strength is modified by the factors listed in the Combat Modifiers Chart to yield a unit's Final Attack Strength on the appropriate column of the Combat Results Table.
- Defense Rating. Armored units have Defense Rating of zero or less (negative numbers). Unarmored units have no rating – a dot – or a positive rating. These ratings modify the Attack Strength of the attacking unit.
- Movement Class. Tracked vehicles have their Movement Point Allowances surrounded by parentheses (or in white circles for the VASSAL game set). Motorized vehicles have Movement Point Allowances without parentheses. Leg infantry have a movement allowance of two with no parenthesis. Immobile units have a Movement Point Allowance of zero, indicated by a single dot.
- Range. Each unit capable of attacking has a Range printed on its counter. A unit's Fire Zone consists of all the hexes within this range to which it has a Line of Sight (6.5). Artillery units (other than mortars) have a Fire Zone of three hexes, although their printed Range is much greater. The Range in this case is used only in Indirect Fire (14.3).
- Regimental Color. Units are organized into groups called regiments. The regiment to which a unit belongs is indicated by the counter's color scheme and by the number in the Unit ID. Regimental organization is used to determine the order in which units perform Actions. Independent units are commanded by the Division HQ for game purposes, and other units are commanded by their Regimental HQ's (4.0).
- Steps. Each unit is composed of one or two steps, represented by the sides of its counter. When a two-step unit takes a step loss, flip the counter over to its reduced strength side. When a unit loses a second step, remove it from play. When playing a scenario, some units may begin at less than full strength (as indicated in the scenario set-up).
- Unit Identification. Each unit is assigned a unique ID number. The number refers to the regiment to which it belongs (numbered 1 through 5), and the letter identifies the unit itself within the regiment. Unit ID's are important for the assignment of Regimental HQ's (4.1) and for Limited Intelligence (22.0).
- Weapon Class. Units which are capable of attacking are divided into three classes: (D)ual Purpose; (S)mall Arms; and (H)igh Explosive. A unit has the first letter of its class printed on its counter. Units without a letter cannot attack (although they can be attacked). Mortar units (Hm) are High Explosive Class units that are limited in their ability to attack (14.2). When a unit makes a successful attack, its Weapon Class is located on the Combat Results Table to determine the damage it inflicts on the defender.
REGIMENTAL HQ INFORMATION
- Command Radius. Each regimental HQ has a Command Radius indicating the number of hexes a unit of its command can be from the HQ and still be issued Direct Commands (4.3).
- Troop Quality Rating. Each regimental headquarters (HQ) has a Troop Quality Rating that is used whenever a unit of its command attempts to Rally (11.2), determine the outcome of an S or S? combat result (11.1), increase its Attack Strength in combat (see Combat Modifiers Summary), initiate Opportunity Fire without expending a Direct Command (8.2), or attempts to establish radio contact for Indirect Fire (14.3).
DIVISION HQ INFORMATION
- Direct Commands Rating. Each division HQ has a Direct Commands Rating that is used with a die roll to determine the number of Direct Commands the player receives for the turn in progress (4.2).
- Initiative Rating. Each division HQ has an Initiative Rating that is used with a die roll to determine if the player receives a Dispatch Point for the turn in progress.
- Troop Quality Rating. Each Division HQ has a Troop Quality Rating that applies to all the player's independent regiment units, just as the Troop Quality Rating of a Regimental HQ applies to units of that regiment.
2.6. Game Scale
- Units. The units in Panzer Command represent companies of infantry and tanks, and batteries of artillery.
- Time. Each turn in Panzer Command represents between an hour and two hours, depending on the number of Segments in the turn.
- Map. Each hex represents 500 meters from hexside to hexside, while the elevation changes represent contours of 20 meters each.
3. Sequence of Play
3.1. The Sequence of Play
Start of Game Preparation
Mark the end of the scenario on the Game Turn Track using any appropriate marker. Place the HQ markers in the spaces on the Division and Regimental HQ Tracks, as indicated in the scenario. Place Regiment Action chits in the cup as directed by the scenario instructions. Place initial Dispatch Point and Direct Commands markers as directed by the scenario. Note which player is the Initiative player. Place Air Strength markers on the Air Strength Track.
Each player then assigns his Regimental HQ's to a specific unit belonging to each HQ's regiment by recording the identification letter of the unit to which the HQ is assigned (4.1). Independent regiments do not have assigned HQ's because they are always In Command.
1. Preparation Phase
- A. Reassign any regimental HQ's eliminated the previous turn by combat other than Close Assault to another unit of that regiment.
- B. Each player places in the container (an opaque cup) the chits that are to be drawn during the Action Phase of the current Game Turn. These chits include the following:
- One regiment Action chit for each regiment currently on the map or due to arrive as a reinforcement this turn.
- The Direct Command chits. Each player has one Direct Command chit.
- All Regiment Action chits on the Game Turn Track for this turn (placed there during the previous turn).
- C. Each player can expend Dispatch Points. For each Dispatch Point expended, the player can place one Regiment Action chit on the Game Turn Track for the following turn. The Reaction player spends his points before the Initiative player. Each player can expend all, some, or none of his Dispatch Points as he wishes.
- D. Each player attempts to increase his Dispatch Points available by rolling one die and comparing the result to his Division HQ's Initiative Rating. If the result is equal to or less than the Rating, the player receives one Dispatch Point, which is recorded on the owner's Dispatch Points Track.
2. Action Phase
- A. The Initiative player has the option to spend two Dispatch points to immediately select one of his available (not in the cup, and not having been drawn from the cup this turn, i.e. Unavailable) Regiment Action chits. Each player's available chits should have been placed in his Available Action Chits Box on his Track Display. If the regiment the player wishes to use has a chit available, he spends the Dispatch Points, and the units of that regiment perform Actions.
- B. If the Initiative player passes, by not spending the Dispatch Points, then the Reaction player has the option to spend two Dispatch Points to choose a Regiment Action chit available.
- C. If neither player pays for a Segment, then a chit is picked from the cup. The option to spend Dispatch Points occurs before each chit is picked from the cup. When a chit is picked out of the cup, place it in the Unavailable Action Chits Box on the Track Display to indicate that it has been used this turn and is no longer available.
- D. The player owning the chit that has been chosen performs Actions with his units depending on the type of Segment, either Regiment Action or Direct Command.
- a. When a Regiment Action Segment occurs, the owner performs Actions with the units of that regiment. Each unit can perform one Action as listed on the Action Summary, or pass. Furthermore, the owner can spend Direct Commands to perform additional Actions with units that are In Command. Each Direct Command spent allows one unit to perform one additional Action. A unit cannot perform the same Action twice in a Segment; furthermore, only one Direct Command can be spent on a unit per Segment (Exception: Opportunity Fire can be performed as often as the unit is eligible; 8.0).
- b. When a Direct Command marker is picked, the owner receives additional Direct Commands and can spend them to perform Actions for units on the map, due to enter as reinforcements this turn (15.0), and for airpower purposes. The player rolls one die, divides by two, rounding down, and adds the result to the player's Division HQ's Direct Command Rating. The player determines how many points he receives before spending them.
- c. The only Action a player's units can perform during an opponent's Segment is Opportunity Fire (8.0). A unit can perform Opportunity Fire, when eligible, by rolling against the unit's Troop Quality or by spending a Direct Command (if the unit is In Command; 4.4).
3. End of Turn Phase
Once all chits have been drawn from the container, the Action Phase is completed. The Game Turn marker is advanced one space on the Game Turn Track and the next turn is begun.
On the End of Turn Phase of the last Game Turn, the players check the Victory Conditions of the scenario they are playing to determine the winner.
3.2. Segments
Regiment Action Segments. When a Regiment Action Segment occurs, each unit in that regiment can perform one Action, a second, different action by spending a Direct Command if the unit is In Command, or pass. The expenditure of Direct Commands can be made at any time during the Segment; i.e., it is not necessary to use all Regiment Actions before you begin spending Commands. Only one Direct Command can be spent on a given unit (i.e. a unit can perform a maximum of two Actions per Segment). Use of Direct Commands is always optional. A regiment activated a second time by drawing, or selecting, a second chit for that regiment is considered a separate segment. Thus, a single unit could conceivably perform four actions by being activated in two separate regiment activations.
The units of a reinforcing regiment enter the map when their Regiment Action chit is drawn. Once on the map, a reinforcing unit can perform Actions like any other unit.
Direct Commands and Segments. Each player has a Direct Command Track where he records his available Direct Commands. Direct Commands can be saved from turn to turn, but a player can never have more than 19 Direct Commands at any one time (excess Commands are lost).
Each scenario begins with the players assigned a certain number of Direct Commands. Both players also receive additional Direct Commands each turn during the Preparation Phase by adding the halved results of a die roll, rounding down, to the Division HQ's Direct Command rating.
When a player picks his Direct Command chit from the cup, he determines the number of Commands he receives, and can then spend Commands. Each Command spent allows one unit to perform one Action, regardless of the unit's location on or off the map and whether or not it is in Command. The player can spend only one Command on a given unit, although he can spend all, some, or none of his Commands during the Segment as he sees fit, and in any order he wishes.
All Segments. During your opponent's segment, you will sometimes have the option to perform Opportunity Fire (8.0) against his units. This occurs when an enemy unit leaves a hex in the Fire Zone of one of your units. When it leaves, if your unit is In Command, you have the option of either rolling against your unit's Troop Quality Rating, or spending a Command, if you have one available. In addition, Opportunity Fire can occur during Close Assault (9.0).
4. Headquarters
4.1. Headquarters Set-Up
Each player has a headquarters for his division and one for each of his regiments. These HQ's do not appear on the map. Instead, HQ markers are placed on each player's HQ Tracks. Each space on the track has a different set of HQ Ratings, and the scenario set-ups list each HQ's starting space.
Note: When playing with the optional Limited Intelligence rules, these assignments are determined differently and recorded secretly (22.3).
After setting up his HQ Tracks, each player must assign his Regimental HQ's to a specific unit belonging to each HQ's regiment. To do so, record the identification letter of the unit to which the HQ is assigned on a piece of scrap paper to conceal the exact location of the HQ from your opponent. Alternately, players may lightly pencil in the ID letter of the unit on the back of the HQ. Division HQ's do not appear on the map, and thus are not assigned to units.
Note: Regimental HQ locations are kept secret in all two-player versions of the game, not simply when using the Limited Intelligence rules (22.0).
4.2. Division HQ's
Each player has an off-map Division HQ with three Ratings listed on the space it occupies on the owner's Division HQ Track:
-
Direct Commands Rating. When you pick your Direct Commands marker from the cup, you receive additional Commands. To determine the number received, roll one die and divide the result by 2 (rounding down), then add your Division HQ's Direct Commands rating to the result. Record the total on your Direct Commands Track.
Note: You can never have more than 19 Direct Commands at one time (excess Commands are lost).
-
Initiative Rating. During the Preparation Phase, both players roll one die and compare the result with their Division HQ's Initiative Rating. If equal to or less than the Rating, the player receives a Dispatch Point, which he records on his Dispatch Points Track.
Note: A player can never have more than 9 Dispatch Points at any one time (excess Points are lost).
-
Troop Quality Rating. A Division HQ's Troop Quality Rating applies to that division's independent units only. When performing any of several game functions, roll one die and compare the result with the Troop Quality; if the die roll is equal to or less than the Troop Quality, the unit's chance of successfully completing the function is enhanced. The game functions affected are Opportunity Fire (8.0), S and S? combat results (11.1), rally (11.2), a unit's Attack Strength (see Combat Modifiers Summary), and radio contact in Indirect Fire (14.3).
4.3. Regimental HQ's
Each player's units (other than independent units) are grouped into regiments. Each regiment has an HQ that is represented off-map on the Regimental HQ Track and is assigned to a unit of its regiment in play (4.1). Each regimental HQ has two Ratings that apply to its units.
- Troop Quality Rating. The Troop Quality Rating of a Regimental HQ applies to all the units of its regiment in the same manner as the Division HQ's Troop Quality Rating applies to independent units (4.2).
- Command Radius. The units of a regiment that are within the Command Radius of their Regimental HQ are In Command (4.4). This radius is traced from the hex occupied by the HQ to the unit in question, including the unit's hex, but excluding the HQ's hex. A Command radius can be traced into and through enemy-occupied hexes and across any type of terrain.
HQ Destruction
A Regimental HQ is assigned to a unit of that regiment and is thereby moved around the map with that unit. The HQ has no Attack Strength or other combat ability and is not considered a unit for stacking purposes (5.2). The HQ is not affected by combat against the unit to which it is assigned unless that unit is eliminated. If eliminated by any form of combat except Close Assault (9.0), the HQ is reassigned to another unit of that regiment during the Preparation Phase of the following turn (provided that a unit of that regiment remains in play). If eliminated at any time during a Close Assault Action (i.e. during Opportunity Fire, Assault Rounds, retreat, or advance), the HQ is permanently destroyed.
When an HQ is eliminated, the owner is not required to reveal this fact to his opponent. However, if the enemy player is watchful, he will be able to detect the HQ's destruction, since the units of that regiment will be Out of Command (4.4).
4.4. In Command
To receive a Direct Command at any time other than the Direct Command Segment, a unit must be In Command. During the Direct Command Segment, a player can spend Direct Commands on any of his units, regardless of whether they are In Command or not.
- Independent Units. Independent units are always In Command, regardless of their location on or off the map.
- Regimental Units. Units belonging to regiments are In Command only if they are within the Command Radius of their Regimental HQ at the moment the owning player wishes to issue a Direct Command to the unit. Out of Command units cannot receive Direct Commands except during the owning player's Direct Command Segment. Units that are off-map are In Command as long as their HQ is also off-map. Once the unit to which the HQ is assigned enters the map, off-map units are Out of Command.
5. Movement
5.1. Movement Procedure
A unit can perform the Move Action in its Segment or when the owner spends a Direct Command, as with any other Action. Some types of terrain may not be entered at all ("P" on the Terrain Effects Chart). When a hexside has a "+" cost, that cost is added to the cost of the terrain in the hex entered. When a unit enters a hex by crossing a road or track hexside, the unit pays the road or track cost instead of the cost of the terrain in the hex or along its hexside (Exception: a unit crossing a stream without a bridge across the hexside must pay the stream cost.)
A unit can move until it has spent its entire Movement Point Allowance, when the owner decides to stop moving it, or when enemy Opportunity Fire forces it to stop. A unit can never exceed its Movement Point Allowance, even to move only a single hex or enter an enemy-occupied hex.
A Suppressed unit cannot move until it Rallies (11.2). Immobile units can move only if transported by another unit (advanced rule, 13.0). Retreat is not considered movement and does not cost Movement Points (9.4).
5.2. Stacking
There is no limit to the number of units that can move through the same hex during a Segment. However, no more than 6 Steps of units can end a Segment in the same hex. Should over-stacking occur unavoidably, the owner of the units must unstack the units at his first opportunity. Markers have no effect on stacking and may stack "free." Trucks and SPW's are considered one-step units for purposes of stacking.
Units that begin a Segment stacked together can move together as a stack by performing the Move Action simultaneously. Each unit pays separate Movement Point costs depending on its type. The units must remain together as they move; however, one unit can stop moving while other units in the stack continue. When a moving stack triggers Opportunity Fire (8.3), the firing unit can attack any one unit in the stack. A stack, although it moves together, is treated as separate units for Action use purposes. In other words, you cannot use one Action to move an entire stack; one Action per unit is required.
Note: Unlike many armor games, there is no penalty when moving by road into a hex already occupied by another friendly unit. The Panzer Command time and distance scales are so large that such movement delays are negligible.
The Attack Strength of a unit is increased when it attacks a unit occupying a hex that contains a total of 3 or more steps, as indicated on the Combat Modifiers Chart.
Note: Stacking also affects Close Assault (9.3), Indirect Fire (14.3), and Transport (13.0).
5.3. Exiting the Map
A unit cannot voluntarily exit the map unless allowed to by specific instructions in the scenario being played. An exiting unit pays Movement Points as if it were entering another hex of the same type as its exit hex. The road or track cost is used if the unit exits via such a hexside.
6. Line of Sight and Fire Zones
6.1. Line of Sight Definition
To determine whether or not two units can see each other, and thus engage in combat, you must first determine if they have a Line of Sight to each other. Line of Sight (LOS) is used in combat and, in the advanced rules, for artillery spotting (14.3) and limited intelligence (22.0).
6.2. Tracing a Line of Sight
In order to engage in combat, the attacking unit must have a clear LOS to the defending unit. The two units must be within 8 hexes of each other (i.e., there can be no more than 7 intervening hexes). This LOS is determined by tracing a straight line from the center point of the attacking unit's hex to the center point of the defending unit's hex. You can use any straight edge to trace the line, such as a ruler, thread, or paper edge. If the LOS passes through a blocking terrain hex or hexside, other than the hexes occupied by the two units or adjacent hexsides, then the LOS is blocked. If the LOS exactly bisects two hexes, one of which contains blocking terrain, the LOS is not blocked. Blocking terrain in either the unit's hex or along its hexsides does not block LOS.
Line of Sight is reciprocal. That is if a unit A can see unit B, then unit B can also see unit A. (This is not necessarily the case when using limited intelligence rules, 22.0.)
6.3. Blocking Terrain
There are five types of blocking terrain: town hexes; woods hexes; crest hexsides; embankment hexsides; and elevation changes. Each of these is capable of blocking the LOS between two units, depending on their respective elevations.
When Both Units Occupy the Same Elevation
- Woods and Towns. A hex containing any town or woods terrain is considered a town or woods hex, regardless of other terrain in the hex. If both units occupy the same elevation level, a LOS can be traced into, but not through, a woods or town hex on the same elevation.
- Crest Hexsides. Crest hexsides have an elevation equal to the highest adjacent hex. Thus, if a crest borders two hexes of different elevations, it would be considered the higher of the two. The LOS between two units is blocked by a crest hexside that is not lower than both units, unless the crest hexside in question borders one of the hexes occupied by the two units. In other words, a LOS can be traced through adjacent crests, regardless of their elevation, but crests adjacent to neither unit block the LOS (unless the crest is lower than both units). A LOS traced exactly along a crest line blocks the LOS, unless it is lower than both units (which is unlikely).
- Embankment Hexsides. These hexsides do not block the LOS between two units on the same elevation, since by definition the embankment borders an elevation change. In effect the units see over the embankment and across the lower terrain between them, or another terrain feature, such as a hex higher than both units, will block the LOS first.
- Elevation Changes. Each hex on the map is considered to be at only one elevation. If two elevations are present in a hex, the hex is considered to be the higher of the two. The LOS traced through a hex that is higher than that of either unit blocks the LOS. If the hex is at the same or lower elevation, then it does not block LOS.
Note: Unlike some games, the elevation changes themselves do not block LOS outright. Thus, the dreaded "wedding cake" effect present in so many games is avoided.
When Both Units Occupy Different Elevations
Determining the LOS between units at different elevations is not as clear cut, but studying the examples along with the rules below should clarify the situation.
-
Woods and Towns. These terrain types do not block the LOS between the two units if the town or woods hexes are lower than both units. If at the same or higher elevation than one or both units, then the following rules apply:
- If higher than both units (unlikely), the LOS is blocked.
- If lower than one unit, but on the same elevation as the second, the LOS is blocked in the first hex between the town/woods and the lower unit. This is termed a blindspot for that town/woods hex. The other hexes beyond the blindspot are not blocked. Thus, trace the LOS from the higher unit to the lower, and if the lower unit is adjacent to a town or woods hex through which the LOS passes, the LOS is blocked.
-
Crest Hexsides. The crest LOS rule above applies the same way to units occupying different elevations. Basically, they can see each other over adjacent crests, but not over crests that are between them and are at the same or higher elevation than either unit.
-
Embankment Hexsides. When two units occupy different elevations and the LOS between them crosses an embankment hexside, the LOS is blocked if the lower unit is adjacent to the embankment hexside. This is another way of saying that there is a blindspot in the lower hex adjacent to the embankment. If the lower unit is not adjacent to the embankment hexside over which the LOS passes, the LOS is clear.
Note: Remember that the LOS between adjacent units is always clear.
-
Elevation Changes. When two units occupy different elevations, the LOS between them is blocked if it passes through a hex that is higher than both units. Otherwise, the elevation changes themselves do not block the LOS between units.
6.4. Non-Blocking Features
The following terrain never blocks Line of Sight:
- Rivers, streams, and bridges
- Roads, trails, and railroads
- Landmarks
- Point symbols
- Units and markers
6.5. Fire Zones
Each unit has a Range number printed on its counter which indicates the maximum range of its weapons. A unit's Fire Zone consists of all the hexes within this range. A unit can only attack a unit in its Fire Zone to which it has a Line of Sight.
A Suppressed unit has no Fire Zone and thus cannot attack an enemy unit. However, it can defend itself if Close Assaulted.
Note: In the advanced rules, you will find that artillery units have different Fire Zones and can attack units to which they do not have a Line of Sight.
A unit's Fire Zone is reduced to only adjacent hexes at the instant an enemy unit moves adjacent to it. The reduction lasts until the adjacent unit is Suppressed or eliminated. A unit with a range and thus Fire Zone of only one hex is not affected by this rule, but units with longer ranges are.
Note: This rule is critically important for Opportunity Fire because it allows one unit to "pin" a long-ranged enemy unit while other units move through hexes which were previously in the enemy unit's Fire Zone without triggering Opportunity Fire. Furthermore, an artillery unit with an un-Suppressed enemy unit adjacent to it cannot use Indirect Fire.
7. The Direct Fire Action
The Panzer Command combat system is unusual because it blends into a single procedure both combat success and damage. In most tactical games, you must first determine whether or not you have scored a "hit" before you resolve the results of the hit. In Panzer Command a hit automatically causes damage, without rolling a die a second time. If you examine the Combat Results Table, you will note that, since a unit's Attack Strength is used to determine attack success, it also determines damage. Thus, a strong unit is not only more likely to hit, it is more likely to inflict greater damage. You will get a vivid sense of this when you encounter a powerful unit capable of eliminating your unit while the best your unit can do is inflict a Cohesion Hit. You will also note that to inflict maximum damage, the best die roll you can make is one equal to your unit's Final Modified Attack Strength.
Traditional combat systems have used 6-sided dice, either one at a time or in pairs, and an odds-ratio table to resolve combat. Panzer Command uses 10-sided dice to allow for the use of many modifiers. Over the years, several incorrect modifiers have lodged themselves into games of this type. The most glaring inaccuracy is a positive modifier for being on a higher elevation than the defender. This may have had some benefit in Napoleonic and Civil War times, but not in World War II. Being on the reverse side of a crest line was very important, as it is in the game, but simply being higher is not. In fact, it was a disadvantage to be higher and on the forward slope of a hill. This deployment was avoided during the war and is not often useful in the game. Elevation difference is significant in Close Assault because being higher increases the "Target Servicing Time" you have against a unit assaulting from a lower elevation. With this exception, elevation alone does not modify combat.
Another armor game cliché is that tanks have an inherent superiority over infantry. This has been reinforced in the game by "overrun" rules, combat bonuses, and other absurd advantages given to armor units. The fact of the matter is that infantry actually have an advantage over tanks if the soldiers do not panic. In the early days of the war, infantry often panicked when "overrun" by tanks and simply disappeared as combat units. After a few months the infantry of both sides learned that tanks were not to be feared and that, if attacked at close range, armored units could be harvested. Thus, in the game when tanks attack infantry, there are no special modifiers, but when infantry Close Assault tanks, the infantry receive a benefit. The catch is that the infantry must first pass a Troop Quality roll. This represents the reluctance of poorly trained troops (or even good ones on bad days) to engage armor at close range. When the infantry attack, they receive the benefit, since they are able to swarm the tanks and get flank shots in individual vehicles. If the armor unit is stacked with infantry or engineers, then they protect the tanks and the assaulting infantry receive no benefit.
7.1. When Direct Fire May Occur
The Direct Fire Action is a form of combat that can be used by any unit with an Attack Strength (except mortar artillery units, 14.2). In order to Direct Fire, the target unit must be in the attacking unit's Fire Zone and there must be a clear Line of Sight between the two units.
Note: A Suppressed unit has no Fire Zone and, thus, cannot attack another unit.
7.2. Direct Fire Procedure
The following procedure is used each time the Direct Fire Action is performed. Direct Fires are resolved one at a time, and the results are applied individually, before going on to another Direct Fire. Units always Direct Fire individually and cannot combine their strength to attack a single target. However, a given target can be attacked by any number of units.
-
Determine the Target. The owner of the Direct Firing unit decides which enemy unit he will attack. The Direct Fire Action can be performed against any unit in his Fire Zone to which he has a clear LOS. If a hex contains more than one possible target, the attacking player must choose one of them.
-
Determine the Unit's Attack Strength. A unit's basic Attack Strength is printed on its counter. This strength is then modified for each of the factors which apply to this attack, to yield a Final Attack Strength.
Note: The Combat Modifiers are summarized on the Combat Modifiers Chart.
-
Roll One Die. The attacking player rolls one die. If the result is equal to or less than the attacking unit's Final Attack Strength, the attack is successful. If the result is greater than the attacking unit's Final Attack Strength, the attack is unsuccessful. A die roll of zero is always a successful attack, while a die roll of 9 is always an unsuccessful attack, regardless of the Final Attack Strength of the combat.
-
Determine Target Damage. If the attack was successful, locate the attack die roll results on the Combat Results Table to determine the damage the defending unit suffers. To do so, cross reference the attacking unit's Weapon Class with the defending unit's Target Class and locate the die roll on the resulting row of the Combat Results Table. Apply the indicated result immediately (Combat Results 11.1).
7.3. Direct Fire Modifiers
A unit's Final Attack Strength for a Direct Fire is adjusted for any of the following modifiers applicable to that particular attack. All modifiers are combined to yield one total modifier, which is then applied to the attacking unit's printed Attack Strength to yield a Final Attack Strength. Modified Attack Strengths of less than zero are treated as zero, and those greater than 8 are treated as 8.
- Cohesion Hits
- Concentrated Fire
- Defense Rating
- Range
- Stacking
- Terrain
- Troop Quality
Note: See the Combat Modifiers Summary to determine how these modifiers are applied to Direct Fire.
8. Opportunity Fire
Opportunity Fire is probably the most common form of combat in the game. It reflects the inherent advantages a unit has when it is stationary and an opposing unit is moving into position within its range and line of sight. The "defender" in this case often scores considerable damage on the approaching unit before it closes to short range. It also reflects the fact that combat occurs simultaneously in reality, not in "Phases" or "Segments." Opportunity Fire helps prevent the "Panzerbush" phenomenon whereby units move from cover hex to cover hex in the line of sight of enemy units without fear of being attacked.
Many operational and strategic level games have Zones of Control which inhibit the movement of enemy units and cause combat when units occupy each other's ZOC. In Panzer Command, a unit's Fire Zone acts as a kind of Zone of Control which will allow the unit to use Opportunity Fire when an enemy unit exits a hex in the unit's Fire Zone. Exiting a Fire Zone is used, rather than entering, to represent the fact that disengaging in the face of the enemy is much more difficult than engaging.
8.1. When Opportunity Fire Occurs
Opportunity Fire is a type of Direct Fire a unit can perform while an enemy unit is performing an Action. It is triggered by attempted movement of enemy units and enemy Close Assaults. Opportunity Fire can be performed each time a unit is eligible, unlike other Actions, which can be performed once per Segment.
During Enemy Movement
When an enemy unit attempts to exit a hex in the LOS (6.1) and Fire Zone (6.5) of one of your units, you have the option to initiate Opportunity Fire. Your opponent must announce when one of his units is leaving a hex in your Fire Zone to allow you to fire; he must also announce the hex he will enter. The effects of Opportunity Fire are determined before the moving unit actually leaves the Fire Zone hex. The unit must enter the announced hex unless it is Suppressed or destroyed by the Opportunity Fire.
A unit can attempt Opportunity Fire each time a unit exits a hex in its Fire Zone. If the unit is exiting a hex which is in the Fire Zone of more than one of your units, then each of your units whose Fire Zone the moving unit is exiting can attempt separate Opportunity Fires. In this case, each of your units performs the procedure separately. All attacks are resolved, even if the enemy unit is Suppressed by the first attack. If a stack of enemy units is moving, you must attack individual units in the stack, not the stack as a whole (although your unit's Attack Strength may be modified if the enemy stack consists of 3 or more Steps), and each unit using Opportunity Fire can make only one attack per stack (not one per unit in the stack).
During Close Assault
Opportunity Fire may also be triggered when an enemy unit attempts to Close Assault one of your units. Before the Close Assault is resolved, you have the option to perform an Opportunity Fire against the enemy unit. If the fire Suppresses or destroys the enemy unit, the Close Assault is not performed.
If your defending unit is Suppressed it cannot perform Opportunity Fire against the assaulting unit. (It can, however, defend itself in each subsequent Round of Close Assault Combat with an Attack Strength modifier of -2.) Opportunity Fire can also be performed against a unit that retreats or advances during Close Assault.
Note: See 9.2 for the Opportunity Fire procedure during Close Assault, and 16.6 during the Ferry Action.
8.2. Opportunity Fire Procedure
The following procedure is used to resolve Opportunity Fire during enemy movement.
- Enemy Player Announces His Move. Before the enemy player can move one of his units or stacks out of a hex in your Fire Zone and LOS, he must announce his intention and announce the hex the unit or stack will enter.
- Decide Whether to Spend a Command or Roll a Die. Declare which of your units will attempt Opportunity Fire against the enemy unit or stack and whether they will do so by rolling against their Troop Quality or by spending a Command. To perform Opportunity Fire, you must either spend one Command or make a successful roll against your unit's Troop Quality Rating. If your unit is In Command (4.4), you can spend the Command and perform the attack. If the unit is Out of Command or you decide not to spend a Command, roll one die and compare it with your unit's Troop Quality. If the result is equal to or less than the Rating, you can perform the attack; if the roll is greater than the Rating, you cannot perform the attack. You must decide whether to spend a Command before your roll against a unit's Troop Quality. If more than one unit is eligible to perform Opportunity Fire against the unit, the attacking player must announce his Fires first and then resolve them one after another in any order he chooses. However, once you have announced your units, you cannot add additional units and you must spend the Commands you have dedicated to the Opportunity Fire, even if the enemy unit is destroyed before a Command is actually used.
- Resolve the Opportunity Fire Attack. Opportunity Fire is resolved like a Direct Fire Action using the procedure in 7.2, the modifiers listed in the Combat Modifiers Summary, and the Combat Results in 11.1. If more than one unit is using Opportunity Fire against one target, then the Fires are resolved one after another and the results applied after all Fires have been made.
8.3. Stacking During Opportunity Fire
Attack Strength Modifiers
- During Movement. Opportunity Fire may be triggered when a moving unit leaves a hex containing more than one unit. In such a case, the number of Steps in the hex is used as a possible modifier for Fire. If a stack attempts to leave a hex, then the entire stack is used to determine the modifier, in addition to any other Steps in the hex it is attempting to leave.
- During Close Assault. When Opportunity Fire is triggered during Close Assault, only the actual number of assaulting Steps is used to determine the modifier for the defending unit when it fires against the assault's attacker.
Note: The number of Steps the assaulting player has in an assault may change as he suffers losses or withdraws units from the assault.
Stacking and Targets
If one unit triggers Opportunity Fire, by moving or attempting to assault, then only that unit can be attacked, regardless of the presence of other units in the hex. However, if more than one unit is moving or assaulting at the same time, the Opportunity Fire player has his choice of targets, although each firing unit can attack only one unit. If more than one unit is performing Opportunity Fire, each may attack a separate unit in the stack, each can attack the same unit, or a combination of the two (depending on the number of units Opportunity Firing).
8.4. Opportunity Fire Modifiers
A unit's Final Attack Strength for an Opportunity Fire is adjusted for any of the following modifiers which apply to that particular attack. All modifications are combined to yield one total modifier, which is then applied to the attacking unit's printed Attack Strength to yield the Final Attack Strength. Modified Attack Strengths of less than zero are treated as zero; modified Attack Strengths of greater than 8 are treated as 8.
Important: There is no modifier for Troop Quality during Opportunity Fire. This simulates the greater difficulty in hitting a moving target.
- Cohesion
- Concentrated Fire
- Defense Rating
- Stacking
- Terrain
- Ferrying
Note: See the Combat Modifiers Summary to determine how these modifiers are applied to Opportunity Fire.
9. The Close Assault Action
9.1. When Close Assault Occurs
Close Assault is a type of combat that can be initiated only if the attacking unit and defending units begin the Action adjacent to one another. Close Assault cannot be initiated by the following unit types:
- Suppressed units
- Trucks
- SPW's
- Units being transported
- Artillery units (regardless of Weapon Class)
- Units with a Movement Point Allowance of zero
These unit types must, however, defend when Close Assaulted.
Note: The advanced rules describe the effects of Close Assault on transport (13.0).
9.2. Close Assault Procedure
Close Assault is essentially three Rounds of combat between adjacent units. The following procedure is used each time the Close Assault Action is performed. Assaults are resolved one at a time, and the results are applied after each assault, before going on to another assault.
-
Announce Assaulting Unit(s) and Target. To Close Assault, a unit must first either have a Segment or be issued a command; then the assaulting player announces which unit(s) is making the attack and its intended target. The involved units must begin the Action adjacent to one another. More than one unit can Assault or be Assaulted if stacked (see 9.3 for further detail).
-
If Infantry or Engineer vs. Tanks, Make a Troop Quality Die Roll. An engineer or infantry unit must first pass a Troop Quality die roll before it can resolve Close Assault against a hex containing any tank units. Tank units, for purposes of this rule, are defined as D Class, tracked vehicles. If successful, proceed to Step 3; otherwise the Assault ends and the owner has wasted an Action. Roll separately for each unit making such a Troop Quality roll.
Note: A successful Troop Quality roll means that the unit's Attack Strength is increased by 1 for each subsequent Round of the Assault.
-
Defender Opportunity Fire. The defending player has the option of initiating Opportunity Fire (8.0) with all, some, or none of his units which occupy the target hex, if his unit(s) is capable of it. To do so, the defender must either spend a Command (if the defending unit is In Command) or roll against his unit's Troop Quality. The Fire is resolved against the Assaulting unit (defender's choice if more than one) using the procedure and modifiers in 8.0. Any unit in the hex to be assaulted that has an Attack Strength and which is not Suppressed is eligible to perform Opportunity Fire against the Assaulting unit (Exception: mortar units, 14.2).
Note: The defender's Troop Quality result is used for each subsequent round of Assault combat. Thus, if the check was successful, the unit's Attack Strength is increased by +1 during each round, but not during Opportunity Fire (there is no Troop Quality modifier for Opportunity Fire).
-
Simultaneous Combat. If the Assaulting unit is Suppressed or destroyed by the defender's Opportunity Fire, the Assault is over; otherwise simultaneous Assault Rounds begin. The assaulting and defending units each resolve one Direct Fire against each other using the procedure in 7.2 and the modifiers listed for the Close Assault on the Combat Modifiers Summary. The Troop Quality result obtained is used for this and all subsequent Rounds of the assault (unless already determined in Step 2 for assaulting infantry, or in Step 3 for Opportunity Firing defenders). If two or more units are assaulting or defending, each unit fires separately. Suppressed defending units may fire using a modifier of -2, while the following units may not fire:
- Units without a printed Attack Strength
- Artillery units incapable of direct fire (mortar units)
- Truck and SPW units and their passengers
9.3. Stacking and Close Assault
How Stacks Assault
All units in a hex can Close Assault the same hex at once, or they can assault the same hex one after another, or they can assault separate hexes individually. To assault, units must be stacked together and belong to the regiment whose Segment is in progress, or a Command must be spent on each unit during the owner's Direct Command Segment. Units occupying separate hexes cannot assault the same hex simultaneously, but can assault one after another. Regardless of the method, the Attack Strengths of the assaulting units are never combined. Each assaulting unit must attack a specific defending unit. More than one assaulting unit may assault the same defender or may assault different units, at the assaulting player's option. During each Round of combat, the assaulting player has his choice of targets in the defending hex, and can change targets from Round to Round as he sees fit. Assaulting units can stop their assault separately if the owner desires, but if the defender is eliminated or retreats, all assaulting units must advance (unless already Suppressed or destroyed).
How Stacks Defend When Assaulted
Each unit in the target hex can attempt one Opportunity Fire against one of the assaulting units using the standard Opportunity Fire procedure in 8.2. Each defending unit can Opportunity Fire against the same assaulting unit, or against different units (if being assaulted by a stack of units). Regardless of target, the defender must announce his Opportunity Fires before they are resolved (8.2).
After Opportunity Fire, the Assault is resolved in rounds with all assaulting units and units in the target hex attacking each Round. The units may attack the same assaulting unit or separate units (if more than one unit is assaulting) and targets may be changed from Round to Round. All units in a hex always defend, but their Defense Ratings are not added together.
Stacking Combat Modifiers
The number of defending Steps in the hex is used to determine the modifier, while the actual number of Assaulting Steps is used. That is, if the assaulting units' hex contains units that are not assaulting, the units that are not assaulting do not count when determining the number of Steps for the assault. It is possible that the modifier will change each round as units in one stack or the other are eliminated, retreat, or call off the Assault.
9.4. Defender Retreat During Close Assault
During Step 5 of the Close Assault procedure (9.2), the defending player has the option of attempting to retreat, if his unit has not been Suppressed and is not an immobile artillery unit. To do so, he compares the Movement Point Allowance of his unit to that of the assaulting unit (the "fastest" if more than one). If the defending unit's Movement Point Allowance is greater than the attacking unit's, the defender can retreat one or two hexes; if the defending unit's Movement Point Allowance is equal to or lower than the attacking unit's, the defender can retreat only one hex. If a unit ceases its Assault (for whatever reason), it is not considered when determining which unit is the "fastest" among the assaulting units.
Note: A unit without a printed Attack Strength must retreat when assaulted, unless unable to do so because of Suppression. This includes truck and SPW transport units and their passengers (13.2). Furthermore, a unit with a Movement Point Allowance of zero cannot retreat unless transported by another unit (13.0).
The owner of the retreating unit determines the path of retreat, but cannot enter a hex occupied by an enemy unit or a hex containing terrain from which the unit is prohibited (see Terrain Effects Chart). Retreat consumes no Movement Points. The retreating unit must attempt to retreat into a hex that is not adjacent to any enemy units. If this is not possible, the owner can choose which hex to enter. A unit that is unable to retreat must remain in its hex and fight Close Assault Rounds until the Assault ends. When a stack retreats, the units can enter different hexes or the same hex, as the owner sees fit.
A retreating unit that exits a hex in the Fire Zone of an enemy unit may trigger Opportunity Fire. All enemy units that have a Fire Zone into the hex can attempt Opportunity Fire against the retreating unit before the unit retreats (possibly including the Assaulting unit itself). As usual, the owner of the firing units must announce his Opportunity Fires first, and then either spend a Command for each unit (if In Command) or roll against their Troop Quality. Any resulting attacks are resolved before the retreating unit actually retreats. A unit that retreats two hexes can trigger Opportunity Fire each time it attempts to exit a hex in the Fire Zone of an enemy unit.
Note: If the retreating unit is Suppressed by Opportunity Fire, it does not exit the hex. Furthermore, all Opportunity Fires are resolved even though a fire can Suppress the unit before other units fire.
9.5. Attacker Advance After Assault
When all defending units in a hex retreat or are destroyed, the assaulting unit(s) must advance into the hex. However, assaulting units that were Suppressed (or eliminated) cannot advance. A unit cannot advance into a hex that it could not otherwise enter during movement. If more than one unit assaulted, all assaulting units must advance into the vacated hex, even if some stopped their Assault before others.
Advance After Combat does not cost Movement Points, but may trigger Opportunity Fire if the advancing unit exits a hex in the Fire Zone of an enemy unit other than the one which retreated. A unit which retreats cannot perform Opportunity Fire against an advancing unit.
Note: An advancing unit can be prevented from entering the vacated hex since enemy Opportunity Fire is resolved before the unit advances.
9.6. Close Assault Modifiers
Note: These modifiers apply to both assaulting and defending units during rounds of a Close Assault.
A unit's Final Attack Strength is adjusted for any of the following modifiers that apply to that particular Assault Round. All modifiers are combined to yield one total modifier, which is then applied to the unit's printed Attack Strength to yield a Final Attack Strength. Modified Attack Strengths of less than zero are treated as zero; modified Attack Strengths of greater than 8 are treated as 8. A unit's Final Attack Strength is determined each Round and is not affected by adverse combat results during that Round. Thus, if a unit suffered a Cohesion Hit in Round 2, the Hit would have no effect on the unit's Final Attack Strength until Round 3.
- Cohesion Hits
- Concentrated Fire
- Defense Rating
- Stacking
- Terrain
- Troop Quality
- Combined Arms
- Elevation
- Suppression
- Ferrying
Note: See the Combat Modifiers Summary to determine how these modifiers are applied to Close Assault.
10. The Concentrate Fire Action
Most tactical games have unit facing of one sort or another, and Panzer Command is no exception. The orientation of small units is very important due to their inability to cover large areas with their fields of fire. In this game, the facing rule is unusual – you assume a facing only if you decide to. This is done using the Concentrate Fire action, which allows you to increase a unit's Attack Strength by reducing its Fire Zone to a single hex. This unusual facing rule is designed to accommodate the time and distance scales of the game, which are nearly long and large enough to dispense with facing altogether – but not quite.
10.1. Which Units Can Concentrate Fire
The Concentrate Fire Action is used to increase a unit's Attack Strength when attacking the unit or units in a specific hex. The Concentrate Fire action is not in itself a form of combat; rather, it is a form of preparation that makes subsequent attacks more effective.
Any unit with a printed Attack Strength can perform this Action so long as it has a Line of Sight (6.0) to the target hex and the hex is within the unit's Fire Zone (6.5). The hex need not be occupied by an enemy unit in order to Concentrate Fire (in fact, the hex could even contain a friendly unit).
10.2. Concentration Procedure
A unit that can perform an Action, in its Segment or by Command expenditure, can Concentrate its fire. Place a Concentrated Fire marker on the concentration hex and a second marker, with the same letter, on the unit that is concentrating its fire. When using the Limited Intelligence rules (22.4), the presence of Concentrated Fire in a hex is recorded secretly on a reduced copy of the map and not revealed until the unit with the Concentration attacks a unit in that hex.
10.3. Concentration Effects and Limitations
A unit can Concentrate Fire against only one hex at a time. It is possible for more than one unit to have a Concentration against the same hex, because each unit Concentrates Fire separately.
A unit that has Concentrated its fire into a hex can initiate combat only against units in that hex. Furthermore, the unit loses its Fire Zone in every hex but the one in which it has Concentrated. Concentration has no effect on a unit's ability to defend itself. A unit's Concentration ends for the following reasons:
- The concentrating unit is attacked from a hex other than the one into which it has Concentrated. The Concentration is removed before the combat is resolved. If attacked from a unit in the hex into which it has Concentrated, the Concentration is not removed.
- The unit becomes Suppressed.
- The unit moves.
- The owner determines to cease the Concentration. To cease Concentration, the owner must have a Segment, even though it may not be for the Regiment to which the Concentrated unit belongs. Thus, you cannot voluntarily cease Concentration during the enemy player's Segment.
- If the unit has Concentrated against a hex to which it is not adjacent, the Concentration is immediately removed if an enemy unit moves adjacent to the Concentrating unit. This happens because a unit's Fire Zone is always reduced to one hex range when an unsuppressed enemy unit is adjacent to it (6.5).
11. Combat Results and Rally
The combat results in Panzer Command are unusual since Step losses and eliminations are difficult to achieve and very devastating. You will probably be surprised at the number of Cohesion Hits and Suppressions during combat. These results reflect the fact that most damage inflicted on enemy units is organization damage. A unit which is under intense fire suffers effectiveness losses due to disorganization, which is reflected in the game by the use of Cohesion Hits. The loss of a few vehicles does not affect the combat power of a unit significantly, while disorganization does. For example, in one remarkable battle the Germans inflicted 50 tank losses on the Soviets, yet "eliminated" the entire corps. Losing 50 tanks in an afternoon is an extraordinary loss, but inflicting all the Cohesion Hits on the other forces left the Soviet corps with no choice but to retreat in poor order, or be destroyed.
Three Cohesion Hits will cause a unit to take a loss. This represents accumulated disorganization and losses finally mounting to the point of partial destruction of the unit. Historically in such cases, many soldiers would simply drift to the rear, abandon their vehicles, or stop fighting to consider self-preservation first.
Suppression shows that units will often take cover to avoid losses. You can use a Troop Quality die roll for your unit to allow it to continue "regardless of cost" by taking a Cohesion Hit instead of being Suppressed. The war is full of examples of quality troops pressing on to the objective regardless of enemy fire and their own losses.
In the game, when a unit suffers a Step Loss, it has lost approximately 25 percent of its vehicles/soldiers. When completely eliminated, the unit has suffered between 50 and 75 percent losses, with many vehicles/soldiers getting away. Such units are "eliminated" in game terms, as they were in historical terms, but historically they could be reorganized over time (usually during the first few days following the battle, if not scattered too far).
The combat results in Panzer Command are meant to show that a division sized unit has tremendous resilience. It takes a great deal of time and effort to destroy the company sized components of such a unit. In the game, you will find the effectiveness of your units being whittled away due to Cohesion Hits and Suppressions. When you start suffering Step Losses, you should really get a feeling of loss. This system shows the necessity of preserving your units and pulling them out of the line to conserve their strength and reorganize. Yet, it also shows the importance of pressing an attack, regardless of losses, to further your objectives.
11.1. Combat Results
The Combat Results table is used to determine the damage inflicted on the defender in a successful attack. To determine damage, cross-reference the attacker's die roll and Weapon Class with the defender's Target Class. The results are:
-
1 The defending unit suffers a Step Loss. If the unit contains two Steps, flip the unit over to its reduced Strength side. If the unit contains only one Step, it is eliminated. A unit that suffers a Step Loss uses the values on the reduced Strength side of its counter for all game functions. Any Suppression or Cohesion Hits the unit had before the Step Loss remain with the unit.
-
E The defending unit is eliminated.
-
C The defending unit suffers a Cohesion Hit. Each unit can take a maximum of two Cohesion Hits, represented by the two sides of the marker, before the unit suffers a Step Loss. The third Cohesion Hit a unit suffers causes the unit to lose a Step. The Attack Strength of a unit is reduced by 1 for each Cohesion Hit it has suffered. Cohesion Hits have no other effect, and remain with the unit until it rallies (11.2), even if the unit later suffers a Step Loss.
-
S The defending unit is Suppressed. Place a Suppression marker on the unit unless it is already Suppressed, in which case the unit suffers a Cohesion Hit instead. If the unit already has 2 Cohesion Hits, the unit suffers a Step Loss. You have the option of attempting to take a Cohesion Hit instead of being Suppressed and must make the decision the instant the Suppression result occurs. To do so, you must make an immediate roll against the Troop Quality of the Suppressed unit. If you roll less than or equal to the unit's Troop Quality, it takes a Cohesion Hit instead; if greater, it is Suppressed. You can attempt to take a Cohesion Hit instead of a Suppression even if the Cohesion Hit will cause your unit to suffer a Step Loss. A Suppressed unit cannot perform any Action other than Rally (11.2). However, a Suppressed unit must defend when Close Assaulted (with an Attack Strength reduction of -2 and no Opportunity Fire; 9.2).
Note: The ability to take a Cohesion Hit instead of being Suppressed is very important since a Suppressed unit has no Fire Zone. Thus, it is a good tactic to Suppress an enemy target which is in your way and then bypass it once its Fire Zone is gone.
-
S? The defending unit may be Suppressed. The owner of the unit rolls one die and compares the result to the unit's Troop Quality Rating. If the result is greater than the Rating, the unit is Suppressed. If equal to or less than the Rating, the unit is not Suppressed. If a unit is Suppressed in this way, the result is treated exactly as the S result above. Thus, a unit which fails an S? Troop Quality roll could then make a second Troop Quality roll to take a Cohesion Hit instead of a Suppression.
11.2. The Rally Action
Rally Procedure
A unit must perform the Rally Action in order to remove a Suppression or a Cohesion Hit. A unit is never required to Rally. Cohesion Hits and Suppression remain on a unit until the unit has Rallied. To Rally, the owner of the unit rolls one die and compares the result to the unit's Troop Quality Rating. If the result is equal to or less than the Rating, the unit Rallies (remove the Suppression or Cohesion Hit); if greater than the Rating, the Rally attempt fails.
A unit can be Suppressed and have up to 2 Cohesion Hits simultaneously. Each Cohesion Hit and Suppression requires a separate successful Rally to be removed (beginning with the Suppression).
Cohesion Hit Effects
A unit with a Cohesion Hit can perform any Action as usual, but its Attack Strength is reduced by 1 for each Cohesion Hit it has suffered. A unit cannot attempt to Rally from a Cohesion Hit if it is Suppressed or occupies a hex in the Fire Zone of an enemy unit.
Suppression Results
A Suppressed unit can only perform the Rally Action until it successfully Rallies. A unit can Rally from Suppression in an enemy Fire Zone. While Suppressed, a unit suffers a -2 modifier when defending in Close Assault rounds (9.2).
12. Introductory Scenario
The Battle for Point 161 is included at this point in the published rules. The abbreviated compilation used as this transcription's source omits the scenario's text; it is not reproduced here.
Advanced Rules
13. Transport
The map in Panzer Command depicts one small section of the forward edge of an extended front of almost 1000 miles from the Arctic Circle to the Black Sea. There are no rear areas on the map – it is all subject to long range artillery fire and enemy occupation. This brings us to the unusual transport rule in this game. Unlike most other tactical games, when a unit being transported by a truck dismounts, the truck is removed from the game. This reflects the fact that trucks do not stay at the front line once they have off-loaded their passengers. The trucks either drive completely away from the forward edge of battle or take cover. Transport units take cover if transporting artillery for the simple reason that the artillery cannot move at all without them. However, for leg infantry the trucks off-load and withdraw completely.
The Panzer Command transport system reflects this off-loading doctrine and thereby avoids two highly objectionable uses to which transport units are subject in other games. Namely, that of being used as roadblocks and for lightning fast exploitation. In many games, trucks remain on the map once they off-load their passengers and can then be used as roadblocks to impede enemy movement. The best tactic for an empty truck is to drive it as close as possible to the enemy line and then sit on the nearest road junction. Another highly unrealistic use of transport is to remount passengers once a local advantage has been achieved and then drive through enemy lines to enlarge the breakthrough. This simply did not occur because the trucks did not remain in the front lines once they dismounted their passengers.
There are numerous accounts of both sides using tanks to carry infantry into battle. The Soviets especially used this tactic since they were so low on trucks and other transport (the US sent them thousands upon thousands of Dodge trucks through lend-lease). A system is included to allow armor units to transport infantry. Such transport does allow for the exploitation of a breakthrough without resort to the unrealistic use of trucks.
13.1. Transport General Rule
There are three types of transport units: trucks; armor units; and German SPW's. Each transport type can carry only certain units, as shown in the tables under 13.2 and 13.3.
There are two Actions associated with transport: Mount and Dismount. Before a unit can be transported, it must Mount its transport unit (unless it begins the game already mounted), and likewise must Dismount to move separately again.
The transported unit is always placed under the transporting unit. While being transported, the unit moves with the transporting unit using the transport's Movement Point Allowance and terrain costs. If attacked, the Defense Rating and Target Class depend on the type of transport used (as outlined in 13.2 and 13.3), but basically the transported unit is more vulnerable to enemy fire. The transported unit is not counted for stacking purposes when determining the number of Steps occupying a hex during movement. During combat, the number of transported Steps does not count except for tank transport (13.3).
Trucks and SPW's appear on the map only when actually transporting a unit. When the unit Dismounts, the truck or SPW is removed from play (see 13.2 for more details). Armor units can transport infantry and engineers and remain on the map after dismounting (see 13.3 for more details).
13.2. Trucks and SPW's
Trucks
Truck markers are generic and can be used by either side, when assigned by the scenario. Truck units belong to no regiment and may perform Actions only when the unit they are transporting is eligible. However, trucks use the Troop Quality Rating of the owner's Division HQ. Trucks appear on the map only when transporting a unit and may transport only Leg infantry and Immobile artillery units.
Mount. Leg infantry units which are assigned trucks at the start of a scenario must begin the game mounted, otherwise the truck unit is lost. The unit remains mounted until it dismounts (either voluntarily or involuntarily), at which time the truck is permanently removed from play.
Immobile artillery units can always mount and remount a truck, as long as they begin the scenario with a truck assigned to the unit. This can occur during a Segment by using the Mount Action.
Transport. Transported units cannot attack and lose their Fire Zone until they dismount. Once mounted, the unit and truck move together as one using the Movement Point Allowance and terrain costs of the truck. The truck can perform an Action only when the transported unit receives a Segment or Command.
Combat. A mounted unit cannot initiate combat, has no Fire Zone, and is nothing more than a passenger. When attacked, the unit defends as an unarmored unit with the Defense Rating of the truck, which is +2. The results of a successful attack are listed below, under "Combat Results Against Trucks and SPW's". The Attack and Opportunity Fire Actions are resolved normally when attacking the truck, but Close Assault is modified. A transported unit has no Fire Zone and thus cannot perform Opportunity Fire against the assaulting unit. Furthermore, it cannot engage in combat each Round of the Assault. The truck and passenger must attempt to retreat and may suffer possible Opportunity Fire from the assaulting unit when they leave its Fire Zone. As usual, if Suppressed, retreat is impossible.
Note: Passenger units are ignored for stacking purposes and each truck counts as a single Step unit, although it can transport a 2-Step unit.
Dismount. A truck can move up to half its Movement Point Allowance and then Dismount its passenger. The passenger cannot move after Dismounting. To Dismount, remove the truck from the map. A unit can Dismount in any hex, regardless of terrain or the presence of enemy Fire Zones. Dismounting is not considered Movement for purposes of Opportunity Fire. Involuntary dismount occurs when the truck is Suppressed, in which case it is removed from the map and the passenger is Suppressed in that hex. A removed truck can return to play if its passenger is an immobile artillery unit. When it does so, it returns without Cohesion Hits or Suppression results (i.e., simply place it on top of the unit again). A truck carrying Leg infantry is permanently removed when dismount occurs.
Note: The passenger unit retains its Cohesion Hits when it dismounts.
SPW's
The German player has several armored personnel carriers with which to transport mechanized infantry and mechanized engineer units (only).
Each full-strength mech infantry or armored engineer is assigned an SPW at the beginning of the game. This unit is assumed to be in the hex with its unit at all times. So long as the infantry or engineer is at full-strength, it can mount, dismount, or remount the SPW in any hex using the appropriate Action. SPW's are not permanently removed when dismounting occurs. When the unit loses a step, it also permanently loses its SPW unit, regardless of when and how the Step loss occurs. Subsequently the unit can be transported only by an armor unit (see 13.3).
Note: A full-strength mech infantry or mech engineer unit has a higher Attack Strength than regular infantry and engineer units due to the machineguns of the SPW's being factored into their strength. When they suffer a Step Loss, the SPW's are assumed to have been destroyed.
SPW's behave like trucks with the above exceptions and the fact that they are tracked, armored units and use the Troop Quality of the regiment to which they belong.
Combat Results Against Trucks and SPW's
-
Step Loss or Elimination. The transport unit is eliminated, and so is its passenger.
-
Suppression. You have the option of attempting to take a Cohesion Hit instead of a Suppression by rolling against the Troop Quality Rating of the transport unit. When Suppressed, the transport unit is immediately removed from play and its passenger is Suppressed in that hex. This is called involuntary dismount.
Note: The S? result is resolved using the Troop Quality of the transport unit (which is that of the Division HQ for trucks).
-
Cohesion Hit. The transport unit suffers a Cohesion Hit and so does its passenger. When the transport unit suffers its third Cohesion Hit, it is eliminated, as is its passenger. When dismounted, the passenger retains its Cohesion Hits while the truck is removed from the map and retains no Cohesion Hits.
13.3. Tank Transport
Each tracked non-SPW armor unit Step can transport one infantry or engineer Step. The units can belong to the same or different regiments.
Mount. Mounting and Dismounting are performed when the units occupy the same hex and the unit to be transported receives a Segment or Command. A unit can mount or dismount more than once, unlike trucks where dismounting causes permanent removal of the truck if the unit is non-artillery.
Transport. While mounted, the number of Steps in the passenger unit is ignored for movement stacking purposes. While being transported, the units move at the rate of the armor unit.
Attacking. An armor unit retains its Fire Zone while transporting another unit and can initiate combat of any type. The transported unit has no Fire Zone and can only defend. The transporting unit can engage in all types of combat normally, but the passenger cannot attack at all. If the armor unit initiates a Close Assault, the passenger unit can immediately dismount at no cost. If it dismounts, it cannot participate in that Close Assault. If it does not dismount, it participates in the Assault, but adds nothing to the strength of the assaulting armor unit, cannot attack by itself and can be attacked by the defender.
Defending. When you attack armor transport, the passenger unit and transport unit are attacked separately (unlike trucks and SPW's). Thus, the combat allows a single attacking unit to attack two targets in a single Action. When resolving the attack, determine the combat modifiers separately for the tank and passenger units and resolve the attack against the passenger first.
The passenger unit is considered to always occupy a clear terrain hex while being transported. Any successful attack against the passenger causes it to involuntarily dismount. On an S? result, dismount occurs if the unit fails its Troop Quality roll.
When the tank transport is attacked, the usual modifiers for terrain and other factors are included. However, the transported Steps count toward stacking. Any successful attack against the armor unit causes the immediate and involuntary dismount of the passenger unit. Dismount occurs at the conclusion of a successful attack and at the end of the Round during Close Assault.
Note: Transported Steps do count toward stacking when combat is resolved (for both transport and passenger). This is an important difference between tanks and other means of transport.
When defending against a Close Assault (9.0), only the armor unit can perform Opportunity Fire (8.0) against the attacking unit. Then the first simultaneous combat is resolved. At the conclusion of this combat, the two units have the option to retreat together, remaining mounted. If this option is not taken, the passenger automatically and involuntarily dismounts. As soon as it dismounts, the unit regains its Fire Zone (unless Suppressed) and can engage in combat in the subsequent rounds of the Assault.
Note: When assaulted by enemy infantry or engineers, there is no +2 modifier for the attacker, since the tank is "stacked" with friendly infantry or engineers.
Dismount. An armor unit can move up to half its Movement Point Allowance (rounded down) and then dismount its passenger. Neither unit can continue to move after the dismount. Dismounting can occur in any terrain type and is not considered movement for Opportunity Fire purposes. Involuntary Dismount occurs whenever a successful attack is made against either unit.
Results. Armor transport and passenger are attacked separately, unlike truck and SPW transport. Any successful attack against either unit causes the immediate, involuntary dismounting of the passenger at the conclusion of the combat.
14. Artillery
Artillery is often called the Queen of the Battlefield – and for good reason. During World War II, approximately 45 percent of all battlefield casualties were caused by field artillery, compared with less than 5 percent caused by tanks. These casualties came mainly from infantry, who are especially vulnerable, and from other "soft" targets, such as field artillery and truck convoys.
Many tactical games play down the role of artillery for fear that the players will not have a good time when they see their columns decimated by long range artillery fire. In Panzer Command, artillery is given its proper place. You will find that a few powerful batteries of artillery will cause your opponent to dismount early and at a good distance to avoid being caught by fire while being transported. Enemy artillery fire will probably cause a great deal of damage, as it should, unless silenced by your own artillery or airpower.
Artillery capable of indirect fire is extremely versatile. It can fire directly or attack targets it cannot see by having other units "spot" for the battery. When attacking non-armored targets, the artillery will be at its best, but it can cause considerable damage among armor units by Suppressing them and causing Cohesion Hits. The following artillery rules are fairly involved, but are simple in concept. A clear understanding of them is essential to the proper use of these potent weapons.
14.1. Artillery Types
There are three basic types of artillery units: guns; howitzers; and mortars. These weapons are identified as the D, H, and Hm Weapon Class units in the game. Artillery units with a Movement Point Allowance of zero are immobile and can move only if transported (13.0). Units with a Movement Point Allowance greater than zero are self-propelled artillery and can move without being transported.
14.2. Direct Fire Procedure
Artillery units, except mortars, can perform Direct Fire (7.0). In order to engage in Direct Fire, the unit must have a Line of Sight to an enemy unit in its Fire Zone. An artillery unit using Direct Fire can Concentrate its fire (10.0) and perform Opportunity Fire (8.0), but cannot initiate Close Assault (9.0). If Close Assaulted, the unit can perform Opportunity Fire as usual and can attack in each round (mortars cannot Opportunity Fire or Concentrate Fire since they are Indirect Fire weapons only).
Fire Zones
The range value printed on D Weapon Class artillery units is used as the unit's Fire Zone, as usual. However, H Class weapons have a Fire Zone of 3 instead of the range printed on their counters (which is used in Indirect Fire). Hm Class units are mortars, which have no Fire Zone at all and use only Indirect Fire.
Procedure
The procedure and modifiers in 7.2 are used to resolve Direct Fire between a D or H Class artillery unit and its target. When a successful attack is made, the die result is located on the Combat Results Table in the Direct Fire High Explosive row for H Class units or the Dual Purpose row for D Class units. Damage is applied as usual (11.1 and 13.0, if transport).
14.3. Indirect Fire Procedure
Indirect Fire is a form of combat which can be used only by H and Hm Class artillery units which are not adjacent to un-Suppressed enemy units. The Indirect Fire Action can be used only when the artillery unit has a Segment or Command – it can never be used as Opportunity Fire or Close Assault. A unit cannot Concentrate Indirect Fire.
To engage in Indirect Fire (14.4), the attacking H or Hm Class artillery unit must be able to Spot its target. A unit can attempt to Spot its target only if it has a clear Line of Sight to the unit. If the LOS is blocked, another friendly unit with a LOS to the target can Spot for the artillery unit. If both the attacking unit and another friendly unit have a clear LOS to the target, the owner has his choice as to which will Spot for the attack. However, only one unit can Spot and, if the attempt is unsuccessful, the Indirect Fire Action has been wasted (i.e., you cannot roll again for the other unit).
In order for another unit to spot for the artillery unit it must first achieve Radio Contact with the artillery unit by using the Radio Contact Table. Locate the Troop Quality of the Spotting unit under the appropriate nationality column and roll a die. If radio contact is made, the unit can attempt to spot for that artillery unit.
Spotting is not an Action. A unit can attempt to Spot for any number of units during the same turn at no cost in Actions, Movement Points, or anything else. However, for each attempted Indirect Fire, only one Spotting attempt can be made. Furthermore, each time a unit engages in Indirect Fire, a new Spotting attempt must be made. The attack can then be made if the Spotting attempt is successful and the target unit is within the range of the attacking artillery unit, as printed on the counter. Suppressed units cannot Spot.
Note: An H or Hm Class unit can attack any enemy unit within its Range that it has successfully Spotted, even one that is adjacent. The Range printed on the unit is not the unit's Fire Zone, and is only used for Indirect Fire.
Indirect Fire Procedure
- Spot. First the player must determine if his attack has successfully landed in the target hex by using the Spotting procedure:
-
Radio Contact. The player attempting Indirect Fire must first commit his artillery unit to the Action and then attempt to establish radio contact between his Spotting and artillery units. He rolls a die and locates the result using the Troop Quality of the Spotting unit on the Radio Contact Table. If the Contact attempt fails, the artillery unit's Action is wasted.
Note: A unit using Indirect Fire which has a LOS to the target hex need not use another unit to spot; thus, no radio contact roll is made.
-
Range. Determine the range between the Spotting unit and the target unit by counting the number of hexes from the Spotter (exclusive) to the target (inclusive).
-
Spotting Table. Locate the range on the Spotting Table and roll one die; if the result is an S, the target is Spotted; otherwise, it is not. If the Spotting attempt is successful, the attacking artillery unit's Attack Strength is determined and the combat is resolved. If unsuccessful, the attacking artillery unit has wasted its Indirect Fire on an ineffective attack, and no result is achieved against the target.
-
- Attack. If Spotting is successful, determine the modified Attack Strength of the artillery unit and roll one die. If the result is equal to or less than the modified Strength, the attack is successful; if higher, it fails.
- Damage. If the attack is successful, cross-reference the die result with the attacking unit's Weapon Class and defender's Target Class on the CRT and apply the result.
Indirect Fire Against Stacked Units
When Indirect Fire successfully lands in a hex containing more than one enemy unit, the unit that actually suffers damage is determined at random. The other units in the hex are unaffected by the fire.
When the hex contains a transport unit and passenger, the two are treated as one unit when determining if they are hit by the Indirect Fire.
14.4. The Counter-Battery Fire Action
An artillery unit capable of Indirect Fire can attempt to attack an enemy artillery unit capable of Indirect Fire by using Indirect Fire, even though unable to Spot the enemy unit. To do so, the enemy unit must be within Range and have performed at least one Indirect Fire attack from the hex it currently occupies in order to be Spotted. If it has fired Indirect Fire only once from its present location, it is Spotted on a die roll of 0. If it has fired twice, it is Spotted on a die roll of 0 or 1, and so forth up to a maximum of 0 through 3. A Spotting Roll of 4 or more is always a failure, regardless of the number of times the target unit has performed Indirect Fire from the same hex. The enemy unit must make a new Spotting attempt each and every time the unit is attacked and can make only one attempt per attacking unit. This procedure can be used even though other potential Spotting units have a Line of Sight to the intended target. If the Spotting attempt is successful, the artillery unit makes its Indirect Fire attack normally (14.4). If unsuccessful, it has wasted its Action.
Note: The number of times an artillery unit has fired from the same hex must be kept track of on a separate sheet of paper. When using the Limited Intelligence rules, the terrain occupied by the unit to be Spotted has no effect on the Counter-Battery Fire Spotting attempts.
14.5. Off-Map Artillery
Artillery units capable of Indirect Fire can do so even though they are not on the map. To do so the owner must use a unit on the map to Spot for the off-map unit. If the Spotting attempt is successful, the artillery unit can attack. Range for the attacking artillery unit is determined by counting from one hex along the owner's map edge, as chosen by the owner the first time the unit fires. Thereafter, that unit must always count range from that first hex.
An off-map artillery unit can be attacked by enemy artillery units using a modified form of Counter-Battery Fire. In order to be attacked, the off-map unit must have already made at least one Indirect Fire attack from off-map. His opponent can then attempt to attack the unit. This off-map unit is considered to occupy clear terrain. Range is determined by counting hexes to the first imaginary hex off-map adjacent to the hex the off-map unit is firing from. The Spotting procedure is altered and depends on the number of times the off-map unit has performed Indirect Fire. If it has fired Indirect Fire only once, his opponent must roll a 0 to successfully Spot the unit. If it has fired twice, a 0 or 1 is a successful Spotting attempt, and so forth up to a maximum of 0 through 3. A Spotting Roll of 4 or more is always a failure regardless of the number of times the off-map unit has performed Indirect Fire. The enemy unit must make a new Spotting attempt each and every time the off-map unit is attacked.
Note: The number of turns an artillery unit has fired from off-map must be noted on a separate piece of paper.
Other Actions for Off-Map Units
Off-map artillery units can use the Improve Position, Entrench, Mount, Dismount, and Move Actions, even though they do not enter the map. These Actions are performed as though the units are on-map, except, when moving, the unit can change its hex to another one adjacent to the same map edge. This allows the unit to remain off-map, but change the hex in which it is considered to be located for purposes of enemy Counter-Battery Fire and for tracing range. The new hex can be a maximum of only 4 hexes from the previous hex it occupied.
14.6. Pre-Plotted Barrages
In some scenarios, one side (and sometimes both) is allowed to pre-plot target hexes for their artillery units capable of Indirect Fire (i.e. H and Hm Class units). Each unit can have up to three pre-plotted target hexes listed for it on the owner's Artillery Record. A hex that is pre-plotted by a unit is always successfully Spotted by the unit. That is, when making an Indirect Fire attack against a unit in a plotted hex, no Spotting roll is made; the artillery simply attacks the unit in the target hex.
A hex remains plotted for the duration of the scenario as long as the artillery unit remains on its starting hex. If it moves, its pre-plotted hexes are permanently lost. Additional hexes cannot be added during the scenario, nor can hexes be replaced by other hexes.
The Final Attack Strength of an artillery unit firing Indirect Fire is adjusted for any of the following modifiers which apply to that particular attack. All modifiers are combined to yield one total modifier, which is then applied to the attacking unit's printed Attack Strength to yield a Final Attack Strength. Modified Attack Strengths of less than zero are treated as zero, and those greater than 8 are treated as 8.
- Cohesion Hits
- Defense Rating
- Stacking Terrain
- Troop Quality
Note: See the Combat Modifiers Summary to determine how these modifiers are applied to Indirect Fire.
14.7. Soviet Katyusha Unit
The Soviets have a single rocket-firing Katyusha unit, which is treated like a normal Hm unit except that it is truck mounted and can fire only 3 times. After its third attack, remove the unit from the game. It is not considered eliminated.
15. Reinforcements
15.1. Reinforcement Availability
The scenario will indicate who receives reinforcements, how many, and when and where they enter play. The reinforcing units are placed on the Game Turn Track for the turn they enter and cannot enter play beforehand. When the turn of entry arrives, the owner of the units has the option to enter all, some, or none of the units. Units that are delayed are placed on the following turn space.
15.2. Reinforcement Entry
When. Reinforcements can enter play beginning on the Game Turn in which the scenario set-up indicates they arrive and not before (although they can be voluntarily delayed). Reinforcements enter the map in one of three ways. First, when they receive an Action by having their Regiment Action chit picked from the cup. Second, when the owner picks his Direct Commands marker from the cup at the cost of one Command per unit (as usual). And third, when the owner spends a Command on a unit that is In Command. Independent units are always In Command, while off-map units belonging to regiments are In Command so long as their regimental HQ is also off-map. If the regimental HQ has already entered, units remaining off-map are Out of Command.
Note: An H or Hm Class artillery unit is capable of off-map Indirect Fire (14.6) beginning the turn it is eligible to enter as a reinforcement, and not before. Such units are not required to ever enter the map.
Where. Reinforcements enter specific hexes, or ranges of hexes, as described in the scenario set-up. If reinforcements are able to enter more than one hex, the owner can enter them in those hexes in any order he sees fit. However, if more than one unit enters the same hex, the following column procedure is used.
How. Units use the Move Action to enter the map and pay Movement Points according to the terrain in the hex entered. Units can enter stacked up to the six-Step limit. If a unit enters by a road or track hexside, it pays the road or track cost. Once it enters, the owner can move the unit without restriction. Reinforcements can enter a hex in an enemy Fire Zone, but not in an enemy-occupied hex. If the hex a unit is due to enter is blocked by an enemy unit, it enters in the nearest hex not occupied by an enemy unit or entry can be voluntarily delayed.
If more than six Steps of units enter the same hex as reinforcements during the same Segment, the second group of six Steps pays twice the Movement Point cost for the hex, the third group pays three times the cost, and so forth. Reinforcements in the column that have insufficient Movement Points to enter the map cannot enter. A player has the option to enter In Column even when assigned a range of hexes to enter.
Note: Units with transport that are capable of movement themselves can enter by transport or by moving on their own. Immobile units can enter only by transport.
16. Engineers
16.1. Engineers and Combat
Like any other S Weapon Class units, engineer units have an Attack Strength, Range, and Fire Zone, and can engage in all forms of combat normally, with the following exceptions:
-
The Combat Modifier for an engineer Close Assaulting a unit in a town hex or entrenchment is only -1. When attacking a unit entrenched in a town, the modifier is -2.
Note: Other modifiers are applied as usual.
-
A friendly unit stacked with a non-Suppressed engineer unit also receives the modifier benefit mentioned in 1 above when Close Assaulting an adjacent enemy unit.
Note: The two benefits above apply even when attacking another engineer or a unit stacked with another engineer.
16.2. The Blow Bridge Action
A non-Suppressed engineer unit that is adjacent to a bridge hexside, whether printed on the map or a bridge marker, can perform the Blow Bridge Action to destroy the bridge. The bridge is automatically destroyed, and its status is marked with a Blown Bridge marker.
Note: It is often easier to indicate intact bridges with Bridge markers, rather than indicate blown bridges with Blown Bridge markers, depending on how many bridges begin the game already blown.
16.3. The Bridge Action
A non-Suppressed engineer unit that is adjacent to a river or stream hexside can use the Bridge Action to create a bridge across the hexside, unless there is a non-Suppressed enemy unit also adjacent to the hexside. The unit must perform a number of separate Bridge Actions, depending on the type of hexside, the number of Steps in the unit, and whether or not the hexside already contains a destroyed bridge, as summarized on the following chart. Use a piece of paper to keep track of the number of Bridge Actions performed across a given hexside. These Actions can be performed consecutively. Furthermore, more than one engineer can work on the bridge at once. If the engineer unit moves away or is destroyed, the hexside remains partially completed and construction can be completed by another engineer later. A partially completed bridge can be destroyed using the Blow Bridge Action (16.2).
Note: A partially completed bridge can be completed by an enemy engineer as well as by a friendly one.
Steps/Actions Required to Bridge Hexside
| Hexside | Vacant Hexside | Hexside Containing Destroyed Bridge |
|---|---|---|
| River | 12 | 6 |
| Stream | 6 | 3 |
16.4. The Clear Mines Action
A minefield can be eliminated only by a non-Suppressed engineer unit. To do so, the engineer unit must occupy the minefield hex (undergoing attack when entering just like any other unit) and then perform the Clear Mines Action. Each Action reduces the Strength of the minefield by 1 for each Step in the engineer unit. The strength of the minefield is not revealed to the enemy, even though an engineer unit is in the process of clearing it. The engineer unit is not affected by the minefield when it performs the Action. The minefield is completely cleared, and this fact is announced, when it has been reduced to a Strength below zero. If more than one engineer occupies the mined hex, each can perform the Action to speed mine removal.
Note: While a minefield is being cleared, it still affects enemy units entering the hex. That is, attacks are still made, and Movement Points are increased, for units exiting the hex.
16.5. The Entrench Action
A non-Suppressed engineer unit occupying an Improved Position can perform the Entrench Action. When performed, replace or invert the Improved Position marker to its Entrenchment side. Once constructed, entrenchments remain on the map for the duration of the game and can be occupied by any one unit, friendly or enemy. An engineer can also perform this Action to Entrench another friendly unit occupying an Improved Position in the engineer's hex. The Entrench Action can be performed in any type of terrain.
Note: Entrenching is not considered Movement and does not trigger Opportunity Fire when in the Fire Zone of an enemy unit.
An entrenchment reduces the attacker's Attack Strength by 3, although this modifier is reduced when the attacker is an engineer or aided by an engineer (16.1). Furthermore, the Attack Strength of a unit occupying an entrenchment is increased by 2 for all forms of combat except Indirect Fire.
Note: Airpower (18.4) is more effective against units in entrenchments than simply attacking or Close Assault.
16.6. The Ferry Action
Engineer units with two Steps have the ability to cross unbridged rivers and aid other units in doing the same, by using the Ferry Action. A one-Step engineer unit has no Ferry Action ability (its assault boats are assumed lost). Engineers can ferry leg infantry units. If the German player ferries a mechanized infantry unit, the unit loses its SPW complement (it stays on the other side of the river). Note this fact on a piece of paper. Subsequently the unit can remount its SPW only when it re-crosses to the other side of the river.
Ferry Procedure
Each full strength, un-Suppressed engineer unit that begins its Action adjacent to a river hexside can Ferry up to two Steps of friendly units, which also begin the Action in that hex, across the river hexside. The ferried units are simply placed in the hex on the opposite side of the river. The ferried units are not considered to have used an Action to be ferried. The Ferry Action can be opposed by enemy units.
Opposed Ferry Actions
A Ferry Action is considered unopposed, and goes off without a hitch, unless:
- An enemy unit occupies the hex into which the units are being ferried.
- An enemy unit has a Fire Zone into the hex from which the units are being ferried.
Enemy Fire Zones. If the units being ferried begin the Action in an Enemy Fire Zone, they may trigger Opportunity Fire when using the Ferry Action. As usual, the owning player must announce his intention of leaving a hex in the enemy's Fire Zone. Then the enemy player can initiate Opportunity Fire, using the usual procedure (8.2). If the enemy initiates Opportunity Fire, there is a +2 modifier to the attacking unit's Attack Strength and the terrain in the ferrying unit's hex is considered clear. The attack must be made against the engineer unit. All attacks are made before the results of each are applied. The combat results are modified as follows:
- Suppression: Both the unit being ferried and the engineer are Suppressed and the Ferry Action is never completed. The Suppression can be avoided by taking a Cohesion Hit instead if both units pass a Troop Quality roll. Both units remain in the ferry hex.
- Cohesion: Both the engineer and the ferried unit suffer a Cohesion Hit and the Ferry Action is completed, unless the ferrying player calls off the Ferry Action. If the Cohesion Hit causes the engineer unit to take a Step Loss, the Ferry Action ends and the units remain in their original hex.
- Step Loss: Both the engineer and the ferried unit take a Step Loss. The owner has a choice of loss if two 1-Step units are being ferried. The Ferry Action is over and the units remain in their original hex.
- Elimination: Both the ferried unit and the engineer are eliminated.
Enemy Units. A Ferry Action can be performed into a hex containing an enemy unit(s). When doing so, the enemy Fire Zone rule above is applied when the Ferrying units initiate the Ferry Action. If they survive the Opportunity Fire (or none is made), the Close Assault procedure is modified:
- The Ferrying units are considered to occupy clear terrain and the defending unit receives a +2 Attack Strength modifier.
- During the first Assault Round, the ferrying units cannot attack at all.
- During the second Assault Round, the ferried units (but not the engineers) can attack, but at a -2 Attack Strength modifier, in addition to any other applicable modifiers.
- During the third Assault Round, the ferried units (but not the engineers) can attack, but at a -1 Attack Strength modifier, in addition to any other applicable modifiers.
- The combat result for the assault is applied to the ferrying units as in Enemy Fire Zone, above.
- If the defending units retreat, the ferried assault units do not Opportunity Fire on the retreating defenders.
- If the defending unit(s) retreat or are destroyed, the ferried unit(s) must occupy the hex (unless they are eliminated).
The Soviet Ad Hoc Ferry Action
A Soviet infantry, half strength engineer, or submachinegun unit can use the Ad Hoc Ferry Action to cross a river, even if there is no full strength engineer in their hex. They can only do so if the hex they occupy is not in a German Fire Zone, and they are ferrying into a hex containing no German units. When doing so, the Ferry Action is slightly modified. The Soviet unit must begin the Action adjacent to the river hexside. Then the Action is initiated and the Soviet player rolls for ad hoc transport; on an odd result, the Soviet has scrounged up the transport to get across the river; on an even result, they have failed and the Action is wasted. If successful, the Soviet player must then roll on the Soviet Ad Hoc Ferry Table to determine the results of the Action. Regardless of the result on the table, the ferrying unit crosses the river (unless it is eliminated).
Note: It was Soviet doctrine to use local transport to cross rivers when needed, even if such transport consisted of unsafe materials. These crossings were dangerous, especially in bad weather.
17. Minefields
17.1. Mine Placement
Minefields are placed at the beginning of the game, as indicated in the scenario set-up. Placement is recorded on paper or by using a copy of the reduced map and marking on it the location of the minefield and its strength. Do not let your opponent see the sheet. Minefields can be placed in hexes containing your own units. Such placement does not affect your units. Minefields can be placed in any hex regardless of terrain. Only one minefield can be placed in a given hex, regardless of its strength.
Once placed, a minefield remains on the map and effective until removed. A minefield is not eliminated, nor is its strength reduced, by the entry of enemy units or the effects of combat in the hex.
Note: Minefields are removed by engineer units using the Clear Mines Action.
17.2. Minefield Attacks
Each minefield is assigned an Attack Strength which is used to attack enemy units entering the mine hex, or to attack assaulting enemy units when the defender occupies a friendly minefield hex. Regardless of the cause of the attack, the following procedure is always used. The owner of the minefield rolls one die and compares the result to the Attack Strength of the minefield. If the roll is equal to or less than the Strength, the unit is Suppressed. If the roll is greater than the Strength, the unit is unaffected by the minefield attack. This Suppression is treated exactly as one received in other types of combat (11.1). There are no modifiers to the Attack Strength of a minefield. The Strength of the minefield is not revealed to the enemy player, even if the minefield attack is successful.
Note: Your minefields have no effect on your own units. You can enter and leave them at no cost and without undergoing attack.
Movement Attack. When a unit enters an enemy minefield hex by using the Move Action, or when advancing after Close Assault (9.5), it must immediately cease movement and undergo a minefield attack. If more than one enemy unit enters the minefield, each one must stop and be attacked separately. The unit can exit the minefield by using the Move Action later, at an increased cost in Movement Points (17.3).
Close Assault Attack. A unit also undergoes a minefield attack whenever it attempts to Close Assault an enemy unit occupying an enemy minefield hex. The enemy player can first attempt Opportunity Fire, and then a minefield attack is made against the Assaulting unit each Round of the Assault. The results of the attack are determined simultaneously with those of the attacker and defender during Step 6 of the Close Assault procedure. Furthermore, if the attacker advances into the defender's hex, it must also undergo a minefield attack.
Note: The presence of a minefield in your own hex when being assaulted need not be revealed until the simultaneous combat portion of the first Round. In this way, your opponent will be forced to undergo at least one minefield attack before he has the option to break off his assault.
17.3. Exiting a Minefield
To exit an enemy minefield hex, a unit must pay additional Movement Points. If the unit has insufficient Movement Points to exit the hex and enter another hex, it can move only one hex by spending all its Movement Points.
| Unit Type | Movement Points to Exit |
|---|---|
| Leg Infantry | +1 |
| Tracked Vehicles | +3 |
| Motorized Vehicles | +6 |
18. Airpower
18.1. Airpower Availability
The scenarios list each player's Air Strength, if any, which is recorded on each player's Air Strength Track. If only one player has Air Strength, he has Uncontested Control of the air for the game. If both players have Air Strength, the airspace is contested and control can change during each Direct Command Segment.
18.2. Airpower Procedure
The effects of airpower are determined when a player with Air Strength picks his Direct Command chit from the cup. Airpower determination and effects can be made at any point during the Segment that the player decides (i.e., a player can add or use Direct Commands before he uses his airpower).
Uncontested Control
When the player who has uncontested control of the air picks his Direct Commands marker from the cup, he determines what he will do with his available airpower. He has a choice to go for airstrikes against enemy units or interdiction to restrict the enemy use of roads. This decision must be made before the player determines the number of strikes he would receive in the Segment, and once the decision is made it cannot be retracted. If he decides to go for airstrikes, he uses the Airstrikes procedure in 18.4 to determine the number and strength of the airstrikes he receives in this Segment. If he receives any, they must be used now or be lost. If he decides to interdict the roads, he uses the procedure described in Air Interdiction (18.3).
Contested Control
If both players have an Air Strength, the airspace is determined as follows. When a player picks his Direct Commands marker from the cup, he decides whether or not he will use any airpower during the Segment. If he decides to use his airpower, he must announce this intent to his opponent. His opponent then has the option to initiate Air-to-Air combat. If he decides to initiate combat, each player rolls one die and compares the result to his Air Strength; if equal to or less than the strength, his opponent's Air Strength is reduced by one; if greater, no effect. Both players resolve the combats simultaneously and the results are then applied. Record Air Strength losses on the Air Strength Tracks.
Note: A player's Air Strength can never be reduced to less than zero.
The player whose Direct Command segment is in progress can use his Airpower unless he loses an Air Strength Point and his opponent does not, in which case the player cannot use his airpower this Segment. If allowed to use his airpower, the player must decide whether to initiate airstrikes (18.4) or interdiction (18.3). Once the decision is made, he uses the Contested Control row of the appropriate table to determine the outcome.
18.3. Air Interdiction
When a player has control of the air, either contested or uncontested, he can choose to either use his airpower to launch airstrikes against enemy units, or to use air interdiction. If he chooses interdiction, he rolls one die and locates the result under his Air Strength on the Contested or Uncontested row of the Air Interdiction Table. If successful, the Movement Point cost an enemy unit pays to move along roads and tracks is increased by 1 Movement Point per hex entered.
Important: Reinforcements due to arrive solely by a road hex using column entry are considered interdicted even when off map. Thus, the cost an off-map unit pays to enter an imaginary off-map road hex is increased as well.
If only one player has Air Strength, and therefore has uncontested control of the air, Interdiction lasts until that player picks his Direct Command marker again during the next turn. If both players have Air Strength and thus control is contested, then Interdiction lasts until the next Direct Command marker belonging to either player is picked. If the non-controlling player's Direct Command Segment is picked first, he can contest the airspace or choose not to, in which case control remains with the other player, and the Interdiction remains. If he contests control, the Interdiction ends, regardless of the Air-to-Air Combat result.
18.4. Airstrikes
When a player has control of the air, either contested or uncontested (18.2), he may choose to either use his airpower to launch airstrikes against enemy units or to use air interdiction. If he chooses airstrikes, he rolls one die and locates the result under his Air Strength on the Contested or Uncontested row of the Airstrike Table. The result is the number and strength of the airstrikes he can use. He can then execute his strikes at a cost of one Command per strike. He may execute all, some, or none of his strikes, depending on the number of strikes and Commands he has available.
Note: Remember that the airpower procedure can be done at any point in the Direct Command Segment, so you are allowed to determine the number of new Commands you receive before you find out how many strikes you receive.
Each airstrike has an Attack Strength assigned to it by the Airstrike Table. The player making the airstrike must spend one Direct Command per strike to initiate each strike. Once paid for, the airstrike attacks a single enemy unit anywhere on the map. First the strike owner determines the Attack Strength of the strike using the original strength determined by the Airstrike Table roll modified by the factors listed on the Combat Modifiers Summary. The strike owner rolls one die. If the result is equal to or less than the strike's Final Attack Strength, the strike is successful; if greater, the strike fails. The die roll result for a successful attack is cross-referenced on the Direct Fire H row of the Combat Results Table, using the defending unit's Target Class. The result is applied immediately (11.1).
A player can use all his airstrikes to attack a single target, attack separate targets, or a combination. However, airstrikes are always resolved sequentially with the results of one attack being determined before the resolution of the next strike. All airstrikes need not be performed immediately; you can spend Commands on other Actions between strikes. Airstrikes do not trigger Opportunity Fire by the defending unit.
Terrain Prohibitions
Airstrikes cannot be made against units occupying woods hexes, town hexes, and entrenchments, unless the enemy units occupying such hexes are adjacent to a hex occupied by a friendly un-Suppressed ground unit.
18.5. Airstrike Modifiers
An airstrike's Final Attack Strength is adjusted for any of the following modifiers that are applicable to the defending unit. All modifiers are combined to yield one total modifier that is combined with the strike's strength, as determined by the Airstrike Table, to yield a Final Attack Strength. As usual, modified Attack Strengths of less than zero are treated as zero, and greater than 8 are treated as 8.
- Defense Rating
- Stacking
- Terrain
Note: See the Combat Modifiers Summary to determine how these modifiers are applied to Airstrikes.
19. Improved Positions
The Improve Position Action
Any non-Suppressed unit, regardless of strength or type, can perform the Improve Position Action in any type of terrain hex. The Attack Strength of any unit attacking the unit in the Improved Position is reduced by 1 (as indicated on the marker). Furthermore, the Attack Strength of units occupying Improved Positions is increased by 1 when performing all types of combat except Indirect Fire. Units must perform the Improve Position Action separately, even if they occupy the same hex.
Note: The effects of Improved Positions on combat is summarized on the Combat Modifiers Summary.
A unit remains in its Improved Position until the unit moves or is destroyed, in which case the marker is immediately removed. If in the Fire Zone of an enemy unit, the Improved Position is removed the instant the owning player announces he is leaving the hex. Thus, if the other player uses Opportunity Fire, the Improved Position will have already been removed.
Note: A unit must already occupy an Improved Position in order to use the Entrench Action (16.5).
20. Night
20.1. Night Procedure
Game Turn 10 is the night turn. During Game Turn 10, the Sequence of Play is slightly modified. The Preparation and Action Phases are performed as usual, except for the limitations listed below under Night Restrictions (20.2). At the conclusion of the Action Phase, the Regiment Action chits that were picked from the cup (only) are put back into the cup. The players then go through a second Action Phase using these chits. At the conclusion of the second Action Phase, proceed to the End Phase.
20.2. Night Restrictions
The following modifications are made during night turns; they are added to any existing weather modifications:
- The Movement Point cost to enter all hexes is increased by one Movement Point. Hexside costs are unchanged.
- The Line of Sight, and thus all Fire Zones, are reduced to one hex range.
- A unit cannot move into an Enemy Fire Zone at night. If already in an Enemy Fire Zone, the unit can only enter a hex that is not in an enemy Fire Zone; it cannot move from Fire Zone to Fire Zone hex.
- There is an additional Attack Strength modifier of -2 applied to all forms of combat performed at night except minefield attacks.
- There is no Airpower at night.
- Spotting for Indirect Fire can be made only against units adjacent to the Spotting unit (although firing at pre-plotted hexes is unaffected; 14.6).
21. Advanced Scenarios
Four advanced scenarios are included in this section in the published rules. The abbreviated compilation used as this transcription's source omits their text; they are not reproduced here.
22. Limited Intelligence
Optional Rules
Abbreviated Rules Compiler's note (not Designer's Note): We normally play with all the Hidden options except Hidden Units. Naturally, this should only be done once you are totally familiar with the game.
For those cases where Hidden Units could be used, we found that no more than two units should be hidden. The reason is that with ongoing face-to-face play, it's not easy for the player with hidden units to continually check for visibility, and decide about the continual opportunity fire situations for a long list of units without considerably slowing play and without having to unintentionally reveal the location of the hidden units.
With only two units, we found that it's relatively easy to automatically retain all the fields of fire for the two units without having to continually pause the other player's movement. There is also less chance of errors when the hidden player's workload is reduced so that he can make immediate decisions as the other player moves without having to have the other player pause at each hex.
Also, the hidden options work best when each side has at least two players. This avoids inadvertent errors that inevitably occur by having a second set of eyes viewing the die rolls and counter placements.
22.1. Hidden Segment Determination
During the Preparation Phase, both players keep the placement of their segment markers in the cup and on the game Turn Track secret from each other. The number of Dispatch Points spent and received is also kept secret. There are two copies of all tracks in the game. Each player receives a copy and keeps his records on these tracks using the counters provided. Keep the tracks covered with a piece of paper, or use some other method, to prevent the enemy player from seeing your tracks.
Note: Use of this rule is highly recommended because it is simple and has very impressive effects on play.
22.2. Hidden Direct Command Totals
Both players keep their Direct Command Tracks and totals hidden from the enemy player. Furthermore, when a player picks his Direct Command Segment chit, he keeps his subsequent die roll a secret from his opponent.
Note: This is highly recommended for all versions of the game.
22.3. Hidden HQ Values
Each player has a set of two HQ Tracks, one for his Division HQ and one for his Regimental HQ's. In the scenario set-up, each player's HQ's are assigned to lettered spaces on these tracks. Each track is broken down into three levels: Elite, Veteran, and Green. Along the top of the HQ tracks are a 0 through 9 die roll range. When using this option, the player does not place his HQ markers in the spaces indicated in the scenario set-up, but rather rolls one die separately for each HQ and places the marker in the space indicated by the roll in the same level. The final placement of your HQ markers is kept secret from your opponent.
Note: Some die rolls will have to be re-rolled until a result in the correct range is rolled.
22.4. Hidden Concentrated Fire
Normally, Concentrated Fire markers are placed on the map when the Action is performed. Using this rule, the markers are placed only when a combat using the Concentration is undertaken. Each player records his Concentrations using the reduced copy of the map provided with the game or on a piece of paper, whichever you find easier. A simple arrow from the unit to the target hex is sufficient, or you can use two letters, or some other coding system so long as both players agree to its use before the game.
When fire has been Concentrated into a hex, no marker is placed immediately. However, the instant that the Concentration is used to modify an attack made by the Concentrated unit, reveal the Concentration and place the two markers on the map.
Note: Use of this rule really makes Concentration important and is highly recommended. However, players must keep a close watch on their units to make note of loss of concentration. This rule requires some extra bookkeeping, but increases the flavor of the game considerably.
22.5. Hidden Units
Whose Units Are Hidden
Panzer Command uses a single blind system where only one player, the reaction player, has hidden units. The initiative player's units are on the map at all times. Before the game begins, the reaction player deploys his units according to the scenario description by recording the location of each unit on a copy of the reduced map. Use the ID number of each unit to record its position. Then the initiative player deploys his units on the map. In some scenarios, the initiative player will deploy first.
How Hidden Units Are Revealed
If one of the initiative player's units has a clear Line of Sight to one of the reaction player's units, the sighted unit is immediately deployed on the map. However, the LOS rules are altered when using the hidden unit rules.
Line of Sight. In the standard game, a LOS can be traced 8 hexes into, if not through, any type of terrain in a hex. When using hidden units, an LOS can be traced only 1 hex (that is, into an adjacent hex) into the following terrain types:
- Improved Positions
- Entrenchments
- Woods
- Towns
If more than one hex from the above terrain types, the presence of a unit in such a hex is not revealed unless it engages in combat from the hex. Thus, a unit has no Fire Zone into such a hex unless the hex contains an enemy unit that has already been revealed and which occupies the hex concurrently. A unit occupying one of the above hex types can see out of the hex the usual 8 hexes; it is only when looking into such a hex that the range is reduced.
In addition, the presence of a hidden unit behind a crest hexside is not revealed until the enemy unit is within two hexes. That is, a unit is not revealed if the LOS to it crosses an adjacent crest hexside and the sighting unit is three or more hexes away. If the unit is in one of the hex types listed above, then its presence is not revealed until the enemy unit is adjacent.
Combat. When a hidden unit engages in combat, of any type, it is placed on the map.
Voluntary Revelation. A player always has the option of revealing the presence of a hidden unit at any time. This has possible use as a diversion.
Effects of Being Revealed
Once a hidden unit is revealed, it is placed on the map and remains on map until it is no longer in sight of an enemy unit. When seen in a particular hex, it remains sighted as long as any enemy unit has an LOS of 8 hexes or less into the hex. Thus, the unit can initially be spotted from only one or two hex range, but once revealed it remains on the map so long as any enemy unit within 8 hexes has a normal LOS to that hex. The unit cannot simply move out of a hex and then move back into it to return to hidden status.
Reconcealment
Once a hidden unit is revealed, it remains on map until it is again out of sight. In addition, one of the reaction player's units which begins on the map may be concealed when it moves out of sight (but, see Effects of Being Revealed, above). However, when a unit is sighted, it remains sighted in the hex it occupies regardless of whether it subsequently improves its position or entrenches.
Airpower Use Against Hidden Units
The initiative player will often have airpower for the scenario. His airpower can be used to attack hidden units using the following procedure.
- The initiative player picks his Direct Command chit.
- Control of the air is determined as usual, using the procedure outlined in Airpower Procedure.
- The initiative player declares whether he is going for interdiction or airstrikes. If interdiction, the procedure in Air Interdiction is used. If airstrikes, see the following.
- The initiative player determines the number and strength of his strikes using the Airstrike Table.
- If he wishes to attack on-map units, the usual procedure is followed (Airstrikes). If he wishes to attack a hidden unit, the reaction player announces the target class of units he has on-map. He reveals no further information.
- The initiative player resolves each strike by announcing its strength and Target Class to be attacked. If there is more than one hidden unit of the type, the exact unit of the class attacked is determined at random by the owner of the hidden unit. To do so, he rolls a die. After the unit is determined, the attack is resolved. The reaction player rolls the die. Any damage the unit suffers is recorded by the reaction player on his reduced copy of the map. The initial result is revealed to the initiative player, but not the final result if the reaction player turns a Suppression into a Cohesion Hit. The location and identity of the target unit is not revealed.
23. Scenario Generation
The published rules contain approximately 4½ pages, including charts and tables, that cover how to generate your own scenarios and make them balanced. The abbreviated compilation used as this transcription's source omits this material; it is not reproduced here.
24. Modern Tanks
Today's main battle tanks are much faster, better armed and armored than those of World War II. Two such tank companies are included – a Soviet T-72 and a West German Leopard II – to allow you to get a feeling for the power of modern armored forces. It is fun and instructive to use these counters versus their World War II counterparts.
The Panzer Command combat system uses a base 10 system and 10-sided dice in combat. This system works great with World War II weapons and tactics, but less well with today's forces. Designing a modern armored game using the Panzer Command system would require a reworking of the combat system to allow a greater variation in results. As it is, the following rules will help reflect the greater capabilities of modern tank companies.
24.1. The Move/Fire Action
The Move/Fire Action is a form of movement and combat which only modern tank companies can perform. The unit can either move and then attack, or attack and then move; but when it does either, its Movement Point Allowance is halved (round down) and it has an Attack Strength modifier of -4. The unit can use only the Direct Fire Action; it cannot move and then Close Assault.
Note: This rule demonstrates the vastly improved target acquisition systems in modern tanks, plus their ability to fire on the move.
24.2. Pursuit in Close Assault
When a modern tank unit initiates Close Assault, it can continue the assault up to three Rounds, as long as it is not eliminated or Suppressed. If the defending unit retreats, the assaulting unit can occupy each hex the retreating unit vacates, even if the retreating unit is "faster." Furthermore, the unit can continue to Assault as long as it remains adjacent to the retreated unit, up to the three round limit of the Assault.
Note: Again, this rule demonstrates the effects of greater mobility during combat and ease of target acquisition.
24.3. Split Fire
A modern tank unit using the Direct Fire Action or initiating or defending during Close Assault can split its Attack Strength in half (round fractions down) to attack two separate targets or the same target twice. Each attack is resolved separately using the modifiers applicable to its combat situation. Split Fire cannot be used with the Move/Fire Action, but can be used with Concentrated Fire, so long as both fires are made against units in the Concentration hex.
Note: This demonstrates the greater tactical flexibility of modern tank companies due to improved communications and target acquisition systems.
25. Solitaire Guidelines
One of the primary goals in designing Panzer Command has been to make it as much fun to play solitaire as when played with two players. This goal can be readily seen in the semi-random Sequence of Play and the wildly varying scenario generation system. There is no need for additional rules and systems to make for a good solitaire game.
Panzer Command works very well playing normal scenarios and doing the best you can for each side. However, playing the underdog against a powerful, but badly led foe adds extra tension. The following rules are guidelines to increase the number of surprises and heighten the tension when playing solitaire. This generally means playing the Germans against a Soviet onslaught. Hamstringing the Germans with No Retreat Hitler directives, and then ploughing through them with a Soviet spearhead, is another fun approach.
The published rules contain about another page with detailed guidelines on generating scenarios for solitaire play. The abbreviated compilation used as this transcription's source omits this material; it is not reproduced here.