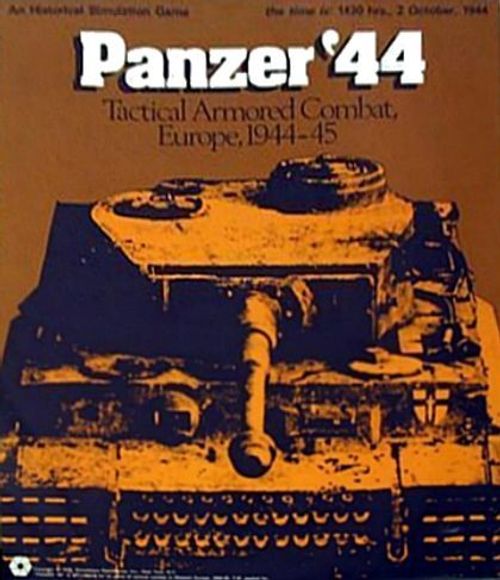
Panzer '44: Tactical Armored Combat, Europe, 1944-45
Panzer '44: Tactical Armored Combat, Europe, 1944-45 Rulebook
Table of Contents
Table of Contents
- [1.0] INTRODUCTION
- [2.0] GENERAL COURSE OF PLAY
- [3.0] GAME EQUIPMENT
- [4.0] SEQUENCE OF PLAY
- [5.0] PLOTTING
- [6.0] COMBAT
- [7.0] MOVEMENT
- [8.0] STACKING
- [9.0] TRANSPORTING
- [10.0] TERRAIN
- [11.0] SPOTTING
- [12.0] IMPROVED POSITIONS [ENTRENCHMENTS]
- [13.0] OVERRUNS
- [14.0] PANIC [Command Control]
- GENERAL RULE
- PROCEDURE
- [14.1] EFFECTS OF PANIC ON UNITS WHICH WERE PLOTTED TO MOVE
- [14.2] EFFECT OF PANIC ON TRANSPORTATION
- [14.3] EFFECT OF PANIC ON COMBAT
- [14.4] EFFECT OF PANIC ON INERT OR DISRUPTED UNITS
- [14.5] PERSISTENCE OF PANIC
- [14.6] PLAYER'S NOTES
- [14.7] DELAYED PANIC AS A RESULT OF COMBAT
- [14.8] EXTENT OF PANIC
- [15.0] OFF-BOARD ARTILLERY
- [16.0] CLOSE AIR SUPPORT
- [17.0] MINES
- [18.0] HOW TO SET-UP AND PLAY THE GAME
- [19.0] SCENARIOS - US 12th ARMY GROUP
- [19.1] BEHIND UTAH, June 6, 1944
- [19.2] SEDAN REVENGED, September 13, 1944
- [19.3] BRIDGEHEAD AT WALLENDORF, September 15, 1944
- [19.4] LUNEVILLE, September 15, 1944
- [19.5] ARRACOURT, September 19, 1944
- [19.6] HELL'S HIGHWAY, September 22, 1944
- [19.7] ASSAULT ON FORT DRIANT, October 3, 1944
- [19.8] ATTACK ON THE SIEGFRIED LINE, October 7, 1944
- [19.9] SARRE RIVER, November 24, 1944
- [20.0] SCENARIOS - BRITISH 21st ARMY GROUP
- [21.0] GAME NOTES
[1.0] INTRODUCTION
Panzer 44 is an historical simulation of tactical combat in Western Europe during 1944 and 1945. The game is played by scenario. Each scenario is based on an actual historical action involving the Germans versus one of the Western Allies (principally the USA or UK). Each hex represents 200 meters of terrain from side to side. Each Game-Turn represents from one to six minutes of actual elapsed time.
[2.0] GENERAL COURSE OF PLAY
This simulation is a two-Player game. It is played in a series of turns called Game-Turns. During a Game-Turn, both Players' playing pieces (called units) move and engage in combat in an attempt to achieve certain objectives. This activity takes place according to a rigid Sequence of Play. The game is played in Scenarios. Each Scenario lists the opposing forces and conditions under which they engage. Each Player attempts to win the Scenario according to the Victory Conditions set out for him in each Scenario.
[3.0] GAME EQUIPMENT
[3.1] THE GAME MAP
The mapsheet portrays an actual representative piece of terrain in Northwestern Europe. A hexagonal grid is superimposed on the map to regulate movement, position and firing range of the units. The hexes are numbered for identification when plotting orders for the units.
[3.2] THE PLAYING PIECES
Two contrastingly colored sets of die-cut counters are supplied. These counters are the playing pieces and are commonly referred to as units. They represent the various infantry platoons, artillery batteries, tank platoons, etc., that each Player will be assigned in a Scenario.
Printed on each unit counter is a silhouette or symbol which serves to generally identify it as to unit type. More important are the numeric and alphabetic inscriptions printed on each counter. These are arrayed in a standard fashion on each counter. By their numeric value and exact location on the counter they give the combat, movement, and other characteristics of each unit.
[3.21] Sample Units
Vehicle Unit (example: M4a 312, printed 9 M 10 / [7] 5)
- Type Abbreviation: M4a
- Unit ID No.: 312
- Silhouette
- Attack Strength: 9
- Weapons Class: M
- Range: 10
- Defense Strength (Hard Target): [7]
- Movement Allowance: 5
Non-Vehicle Unit (example: SMG 124, printed 8 R 2 / 5 1)
- Type Abbreviation: SMG
- Unit ID No.: 124
- Unit Symbol
- Attack Strength: 8
- Weapons Class: R
- Range: 2
- Defense Strength (Soft Target): 5
- Movement Allowance: 1
[3.22] Summary of Unit Types
Counter stats are given as: Attack Strength, Weapons Class, Range / Defense Strength (hard target in brackets where printed), Movement Allowance.
GERMAN
- Mortar Platoon (001-002): 2 H 10 / 3, 1. Six 82mm mortars, 66 men; one platoon per infantry battalion.
- Heavy Mortar Section (011-012): 1 H 20 / 2, 1. Two 120mm mortars, 20 men; two sections per infantry regiment.
- Lt. Inf. Howitzer Section (021-022): 1 H 15 / 1, 0. Two 75mm infantry howitzers, 36 men; three sections per regiment.
- Hvy. Inf. Howitzer Section (031-032): 2 H 15 / 1, 0. Two 150mm infantry howitzers, 39 men; one section per regiment.
- Lt. Anti-aircraft Section (041-043): 2 H 15 / 1, 0. Three quad-20mm AA guns or nine single mount 20mm AA guns; organic to armor battalions.
- Field Howitzer Battery (051-053): 5 H 60 / 2, 0. Six 105mm field howitzers, 107 men; two batteries normally in support of regiment.
- Anti-tank Battery (061-063): 9 M 10 / 2, 0. Four anti-tank guns, PAK 39, 45 men; three batteries per anti-tank battalion.
- Heavy Anti-tank Section (071-074): 9 M 20 / 2, 0. Two 88mm anti-aircraft guns serving in the anti-tank role, 25 men.
- Infantry Platoon (101-116): 6 R 3 / 5, 1. 59 men primarily armed with bolt action rifles, also 11 SMG and 6 MG; includes battalion support personnel.
- Submachine Gun Platoon (121-124): 8 R 2 / 5, 1. 52 men, 30 SMG, 4 MG; replaced the infantry platoon as the basic element of the Volks Gren. battalions.
- Engineer Platoon (131): 3 R 2 / 5, 1. 63 men, 10 SMG, 9 MG; one platoon per recon battalion.
U.S.A.
- Mortar Platoon (001): 2 H 10 / 3, 1. Six 81mm mortars, 60 men; one per infantry battalion.
- Light Anti-aircraft Detachment (011): 1 H 20 / 1, 0. Four 40mm or 37mm AA guns, 50 men; serving in a ground support role.
- Field Howitzer Battery (021-024): 5 H 60 / 2, 0. Six 105mm field howitzers, 100 men; standard divisional artillery.
- Anti-tank Platoon (031-033): 5 M 8 / 3, 0. Three 57mm or 6-lb. AT guns, 33 men; attached to HQ of infantry battalion.
- Infantry Platoon (101-113): 5 R 3 / 5, 1. 60 men, primarily armed with semi-automatic M1 rifles, also 4 MG (inc 3 BAR), and 1 60mm mortar.
- Mechanized Inf. Platoon (121-129): 6 R 3 / 6, 1. 70 men, 8 SMG, 8 MG, 1 60mm mortar; found in armored divisions.
- Machine Gun Platoon (131-133): 4 R 5 / 2, 1. Thirty-six men, 4 MG; part of battalion heavy weapons.
- Engineer Platoon (141-143): 3 R 2 / 4, 1. Fifty men, 3 MG plus flamethrowers, satchel charges, etc.
- Self-Prop. Lt. AA Section (201-202): 1 H 20 / [2], 5. Four M15, 37mm AA gun mounted on a halftrack chassis; assigned to light anti-aircraft battalions.
- Self-Prop. AAMG Section (211-212): 2 H 8 / [2], 5. Four M16 quad 50 cal. MG mounted on halftrack; both M15 and M16 units in ground support as needed.
- Assault Howitzer Detachment (221): 2 H 25 / [7], 5. Six 75mm or 105mm turreted howitzers mounted on Sherman chassis; assigned to armored cavalry bn.
BRITISH
- Anti-tank Gun Section (041-042): 11 M 10 / 2, 0. Four 17-lb. AT guns, 35 men; with divisional assets attached to infantry as needed.
- Infantry Platoons (151-162): 4 R 4 / 4, 1. Fifty to sixty men, 6 SMG, 4 MG, one or two mortars.
- Medium Tank Platoon (321-324): 11 M 10 / [7], 5. Four M4 Sherman VC Firefly tanks, 35 tons, 17-lb. AT gun.
- Cruiser Tank Platoon (361-367): 7 M 10 / [6], 8. Four Cromwell VII tanks, 28 tons, 75mm gun.
- Medium Tank Platoon (371-376): 10 M 10 / [8], 6. Four Comet I tanks, 33 tons, 77mm gun.
- Tank Destroyer Platoon (431-433): 11 M 10 / [6], 4. Four Archer Valentine III tank destroyers, 16 tons, 17-lb. AT gun.
- APC Detachment (621-623): 0 - 0 / [7], 5. One to ten Kangaroo, fully tracked, Grant chassis armored personnel carriers.
Markers
The following markers are printed on the rules sheet and used during play:
- Pin: Pinned Marker. Unit may not move for one Movement Phase.
- (P): Delayed Panic. Unit will automatically Panic on following Game-Turn (see 14.7).
- 0 Panic: Panic Chits. Two sets of 0 through 9 chits are provided.
- D-1: Disruption State One. A unit in any state of disruption may not move or fire.
- D-2: Disruption State Two.
- D-3: Disruption State Three.
- Improved Position (sunburst symbol): Field fortifications which aid the defense of units inside (see 12.0).
- Mined Hex (dot in circle): Both anti-vehicle and anti-personnel mines which "attack" units in hex (see 17.0).
- Wreck Marker: Eliminated vehicle units are replaced with wreck markers (see 6.82).
[3.3] GAME CHARTS AND TABLES
The game makes use of various charts and tables as a part of its play system and also to organize data into an easily retrievable form. The use of these graphic aids is explained in the appropriate rules sections. Players should examine the charts and tables as they appear or are referred to in the rules. Please note the separate chart sheet.
[3.4] DEFINITION OF TERMS
Movement is a basic game activity involving the physical displacement of a unit hex by hex across the mapboard.
Combat is a basic game process whereby one or more units pin, disrupt or destroy units belonging to the Opposing Player.
Weapons Class: The units portrayed in this game are small, platoon-sized organizations with 20 to 50 men and 3 to 10 vehicles. Each is organized around a particular main weapon system unique to its type of unit. Thus a mortar unit depends for its combat effectiveness on the high explosive shells lobbed by its mortars and any small arms carried by its men have no significant impact on its performance. Each unit then is classified according to the characteristics of its predominant weapons system.
"R" Class: Units organized around rifle and machine gun fire; typically an infantry platoon.
"M" Class: Units whose guns fire a mix of armor piercing and high explosive shell and are effective against both armored and unarmored targets; typically a tank or assault gun platoon.
"H" Class: Units whose main weapons fire high explosive shell; typically field gun or mortar units.
Target Type: Just as a unit is classified according to its weapons, so is it classified according to the vulnerability of its elements to fire, i.e., "what kind of target does it present?". Units are defined as either "soft" (unarmored) or "hard" (armored) targets. Soft targets rely for their protection on their ability to conceal themselves from fire and, for some, an ability to disperse their fighting elements. As an individual, the infantryman is an extremely vulnerable soft target, but the infantry platoon, while still a soft target, has a relatively high Defensive Strength, because it can take a lot of individual casualties before it ceases to be effective. Hard targets rely for their protection on armor. A tank, of course, is the architypical hard target and a tank platoon is virtually invulnerable, except against weapons specifically designed to defeat armor.
Hard target type units are identified by brackets around their numerical Defense Strength. Soft target type units have no brackets around their numerical Defense Strength.
Attack Strength is a numerical rating of the firepower that a unit possesses. It is expressed in Attack Strength Points. The ability of a unit to attack depends on both its Attack Strength and its Weapons Class.
Defense Strength is a numerical rating of the ability of a unit to preserve itself when attacked. It is expressed in Defensive Strength Points.
Range is the maximum range or distance which a unit may fire at a target. It is expressed in hexagons and is measured by counting the shortest path in hexagons from the Firing unit (exclusive) to the Target hex (inclusive).
[3.5] GAME EQUIPMENT INVENTORY
- One rules folder
- One set of counters (400)
- One game map
- One sheet of charts
- One die
- One plastic box assembly
[4.0] SEQUENCE OF PLAY
The game is played in Game-Turns. Each Game-Turn is structured in successive phases and sub-phases (called segments). This structure, or Sequence of Play, provides a systematic method to plan and then execute combat and movement. This sequence is repeated Game-Turn by Game-Turn until the termination of the Scenario being played.
During a Game-Turn, a Player is free to use his units as he sees fit. He may move some, all or none of his units. He may attack with some, all or none of his units. But he must execute this activity within the restrictions of the Sequence of Play. This Sequence of Play combines Simultaneous Play for Combat with Sequential Play for Movement.
[4.1] SEQUENCE OF PLAY OUTLINE
1. MUTUAL PLOT PHASE
Both Players secretly and simultaneously plot the intended actions of their units for that Game-Turn (see 5.0). Each Player notes which of his units are firing Direct Fire, which are firing Opportunity Fire, which are firing Indirect Fire and what the respective target hexes are. Then each Player notes which of his units shall move. They then allocate any Off-Board Artillery or Air Support.
2. PANIC DETERMINATION PHASE
Both Players execute the Panic Procedures (see 14.0) and determine which of their units are subject to Panic.
3. DIRECT FIRE PHASE
First one Player, and then the other, executes Direct Fire tasks as plotted. Pin, panic and disruption markers are then placed according to the results of both Players' fire.
4. MOVEMENT PHASE
The First Player moves all of his units for which movement is plotted. (The First Player is defined in each Scenario.) He may move these units as he sees fit (see 7.0) subject to the Movement Rules, interruption by the opposing Player's Opportunity Fire and the effect of Mined hexes. When the First Player is finished moving his units, the Second Player then may move all of his units subject to the same restrictions. Note that a Player may only move units he had plotted to move, and that he must move every unit that he had plotted to move, which is capable of moving.
5. PIN AND DISRUPTION REMOVAL PHASE
Each Player removes the Pin Markers from his units. Each Player attempts to remove the various Disruption Markers from his units.
6. INDIRECT FIRE PHASE
First one Player, then the other Player, executes and then applies the results of any Indirect Fire, Off-Board Artillery and Close Air Support (CAS) which has been plotted.
Note: The foregoing sequence must be followed rigidly. For example, it is essential that Disruption Removal precede Indirect Fire Application.
[5.0] PLOTTING
GENERAL RULE
During the Mutual Plot Phase both Players simultaneously plot the intended actions of their units for that Game-Turn.
PROCEDURE
The Plot is written on a piece of scratch paper, called the Plot Sheet. The detail required for each unit's plot varies, depending upon the action intended for the unit. Six different plots are possible.
Every unit has a unique Identity Number on it. Every hex on the map also has a unique Identity Number. To Plot, you simply note the Identity Number of your unit and the Task Code describing the action (Task) you intend for this unit.
If the action intended is a Combat Task, then the target hex of this activity must be identified by its hex number (exception: Counterbattery). That is, you must write down who is going to shoot at whom. If, on the other hand, the action intended is simply one of Movement, then you just identify which units are going to move. You do not need to plot a path or course of movement, or destination. Mounting, Dismounting and Overruns are specialized forms of Movement and are plotted as Movement. The Player need not indicate beforehand which of his moving units shall engage in these Tasks.
If you intend that a unit do nothing active during the Game-Turn, simply leave it off the Plot Sheet. Each unit may have only one Task Code plotted per Game-Turn.
CASES
[5.1] SIMULTANEITY OF COMBAT
All Fire (Combat) is considered simultaneous. Postpone the application of all Combat Results until all fire of every kind in the Phase is completed. Thus, a Friendly unit may fire at an Enemy unit and the result of that fire will not prevent the Enemy unit from firing in that Phase (assuming that it had been plotted to fire). Each unit may only plot one target hex per Game-Turn.
[5.2] MOVEMENT IN SEQUENCE
Movement must be planned in advance only to the extent that a Player identifies which of his units he intends to move. The execution of Movement is sequential. One Player moves all his units that he has plotted to move. Then the second Player moves his units. For game purposes, this movement is not considered to be simultaneous. The movement of the first Player's units is final and cannot be changed.
[5.3] PLANNING TASKS IN ADVANCE
A Task is defined as a specific, unique action which a unit may undertake during a Game-Turn. A given unit may perform one and only one Task during a given Game-Turn. Case 5.4 lists all the Tasks which may be performed in a Game-Turn and gives a simple code for each Task. All Tasks must be plotted in advance during the Mutual Plot Phase of the Game-Turn in which the Task is to be executed. No unit may perform a Task unless that unit was plotted to perform that Task.
[5.4] TASK SUMMARY
| Task Code | Description |
|---|---|
| MV | Movement: The act of physically moving a unit from one hex on the map to another hex. This term and code also cover Mounting, Dismounting, and Overrunning. |
| DF | Direct Fire: The act of firing along a direct line of sight, to a specific Enemy target. |
| IF | Indirect Fire: The act of firing at some hex to which the firing unit cannot trace a Line of Sight. |
| OF | Opportunity Fire: The act of laying down a line of fire in anticipation that some Enemy unit shall enter, and trigger that fire. |
| CA | Close Assault: A variation of Direct Fire. |
| CB | Counterbattery Fire: A variation of Opportunity Fire. |
[6.0] COMBAT
GENERAL RULE
Combat is the generic term used to describe the procedures whereby one unit attacks (fires at) another unit. Combat is never required. A given unit may attack an Enemy unit by using one of three modes of fire (either Direct Fire, Opportunity Fire, or Indirect Fire) or two variant modes (Close Assault is a specialized type of Direct Fire and Counterbattery is a variant of Opportunity Fire). Basically the resolution of Combat involves subtracting the Defense Strength of the Target unit (the Defender) from the Attack Strength of the firing unit (or Attacker), which yields a number called the Net Attack Superiority. This number, in turn, is crossreferenced with a die roll; the result is read from the Combat Results Table.
The mode of fire determines in which Phase a particular combat will take place (see Sequence of Play, 4.0). The exact procedure to be used in resolving a given combat depends on the Weapon's Class of the firing unit and the Target Type of the defending unit.
PROCEDURE
The outline below describes the procedure to be followed in executing an attack by a single unit against a single Enemy unit. Depending upon the class of the attacking and defending units, all of the steps in the outline may not be used. To determine which steps will be used, consult the Attack Procedures Chart.
- MODIFY ATTACK STRENGTH FOR RANGE ATTENUATION: Modify the Attack Strength of the firing unit for the effects of Range Attenuation (Attenuate for Range).
- SUBTRACT DEFENSE STRENGTH: Subtract the Defense Strength of the Target unit from the remaining Attack Strength of the Firing unit to yield the Net Attack Superiority. In the case of H Class Tight Pattern Fire against Hard Targets, the Defending Unit is always assigned a Defense Strength of four, and four is always subtracted from H Class Tight Pattern Attack Strengths when attacking Hard Targets.
- ROLL THE DIE
- MODIFY FOR TERRAIN: Reduce the die roll as per the Terrain Effects Chart to yield the modified die roll.
- CROSSREFERENCE & READ: Crossreference the modified die roll with the Net Attack Superiority and read the Result from the Combat Results Table.
CASES
[6.1] RESTRICTIONS AND LIMITATIONS
[6.11] Attacking is never mandatory. It is a voluntary action initiated by the Player during the Plot Phase. However, once a unit is plotted to fire, it must fire according to its plot.
[6.12] Defending is involuntary. If attacked, a unit may not refuse combat. However, defending is not a game Task per se; it is merely the reciprocal of being attacked. The act of defending is not plotted and a defending unit is not necessarily prevented from executing its own game Task by virtue of being fired upon.
[6.13] R and M Class units may fire at one and only one unit per target hex per Game-Turn. Thus, if there are two Enemy units in a target hex, the Firing unit may fire at only one of those two units.
[6.14] H Class units may fire at one and only one target hex per Game-Turn. However, due to the nature of H Class Fire (see 6.2), an H Class unit may attack more than one unit per Game-Turn. If it does, it does so individually, attacking each defending unit successively, one by one, using its undivided Attack Strength in each attack.
[6.15] A unit in a state of Panic or Disruption may not fire if that state was caused in some prior Phase or Game-Turn.
[6.16] In any given Game-Turn a Player may fire with all, some or none of his units, so long as each firing unit meets the preconditions, restrictions and limitations imposed on it. No unit may fire more than once per Game-Turn.
[6.17] A given Enemy unit may be fired on by as many Friendly units as can be brought to bear on it. However, each attack is resolved successively one by one in any order that the Firing Player wishes to impose (consistent with the sequence of play). The Attack Strengths of units attacking a common target are never combined. Nor are the Defense Strengths of units under attack in the same hex ever combined. Each attack is treated as a separate event.
[6.18] The results of combat are cumulative and progressive. For example: Friendly units A, B and C all fire at Enemy unit D. These are resolved as three separate attacks, but the results are cumulative. Three D1's would combine for a net effect of D3 on the target.
[6.2] H CLASS FIRE
[6.21] An H Class unit may fire either a Tight Pattern or a Loose Pattern attack. The difference is that a Tight Pattern attack affects defenders in the impact hex only. A Loose Pattern attack affects defenders in the impact hex and the surrounding six adjacent hexes (Impact Zone). All H Class fire must be designated as either Tight (T) or Loose (L) Pattern as part of the Fire Plot. In the absence of such a designation, the fire is assumed to be Tight Pattern.
[6.22] H Class Fire affects all units located in the impact hexes (Zone). Thus an H Class unit may attack more than one unit per Game-Turn though it may fire at only one impact hex per turn. When there are multiple units in the Impact Zone (hex) simply attack each one separately as though it were the only unit present. The Attack Strength of an H Class unit is not divided between multiple defenders. It attacks each one with its full strength (subject to the Resolution procedure).
[6.23] Naturally, a Loose Pattern attack represents a less dense bombardment of a given area than a Tight Pattern attack. For this reason, the procedures for resolving a Loose Pattern attack differ from a Tight Pattern.
[6.3] DIRECT FIRE
[6.31] In order to execute a Direct Fire task against an Enemy unit, the attacking unit must be able to spot the unit with a clear Line of Sight, according to the rules of Spotting (see 11.0).
[6.32] Any unit with an Attack Strength may use Direct Fire, except Disrupted or Panicked units, which may not engage in Direct Fire.
[6.33] Direct Fire is plotted in the Plot Phase, and executed in the Direct Fire Phase.
[6.34] A unit may fire at one and only one target hex per Game-Turn. This target hex must be identified by hex number on the Plot of the Firing unit, along with the Task Code "DF".
[6.35] If there are two units in a hex, the Firing Player need not plot which of the two units is the final target unit; only the target hex need be plotted.
[6.4] INDIRECT FIRE
(The printed page shows three unit symbols at this point: the Indirect Fire symbols referred to in 6.41.)
[6.41] Only the following units may use Indirect Fire: Wspe, M7, M21, and any mortar or artillery unit which displays one of the symbols shown above.
[6.42] A unit firing Indirect Fire may fire at one and only one target hex, which it (the Firing unit) cannot Spot (does not have a clear LOS to), but which some other Friendly unit does Spot.
[6.43] Indirect Fire is plotted during the Plot Phase. A target hex must be noted, along with the Task Code "IF", and the target must be Spotted by some Friendly unit at that point. Indirect Fire is resolved during the Indirect Fire Phase.
[6.44] Because Indirect Fire is resolved after the Movement Phase, the intended target units may have moved from the intended target hex and possibly other units may have moved into the target hex. This is permitted and even expected. The Indirect Fire impacts on and attacks any units which are present in the Impact Zone during the Indirect Fire Phase.
[6.45] The Friendly Spotting unit, which is a necessary precondition for Indirect Fire Plotting, may be Panicked or Disrupted, or it may move from its Spotting location during the Phases which intervene between the Plotting Phase and the Indirect Fire Phase without affecting the resolution of the Indirect Fire.
[6.46] If the unit firing Indirect Fire has been Panicked or Disrupted by Enemy Direct Fire, then the Indirect Fire Attack is cancelled.
[6.47] A unit which is capable of firing both Direct and Indirect Fire may do either at the Firing Player's option. If it can, it may fire either Direct or Indirect Fire at a given target. If he so desires, a Player may plot Indirect Fire at a vacant hex in hopes that an Enemy unit(s) will move into it. The Firing Player does not reveal the target hexes for Indirect Fire to his opponent until the Indirect Fire Phase.
[6.48] Indirect Fire is subject to Scatter. There is a 5/6ths chance that the actual impact hex will be different from the intended target hex for any Indirect Fire (either Tight or Loose Pattern). Roll the die. If the result is a "1" then the Indirect Fire impacts on the plotted target hex. Any other number means the Indirect Fire impacts on some hex adjacent to the original target hex. Roll the die again for direction of Scatter (see Scatter Diagram on map). Note that Loose Pattern Indirect Fire is always guaranteed to include the original target hex within its Impact Zone. But, of course, the effect is less severe on any defending units.
[6.49] Indirect Fire is not Opportunity Fire. Enemy units may move through the potential Impact Zone of Indirect Fire during the prior Movement Phase with impunity. Only those units actually in the Zone after the Movement Phase are affected.
[6.5] OPPORTUNITY FIRE
[6.51] Unlike Direct Fire, which is executed automatically, Opportunity Fire is a chance affair. If it happens, it is treated as though it were Direct Fire.
[6.52] Whereas in Direct Fire the target hex number listed on the Plot Sheet contains the target unit of the Direct Fire, in Opportunity Fire, you designate a target hex on the Plot Sheet for purposes of describing a Line of Opportunity Fire, which is defined as a theoretical line drawn between the center of the hex of the Firing unit and the center of the target hex (and thereby including the target hex).
[6.53] Opportunity Fire is not executed unless it is triggered by an Enemy unit. It is triggered when an Enemy unit enters a hex which is intersected by a Line of Opportunity Fire or when it crosses a hexside which coincides with a Line of Opportunity Fire.
[6.54] A Friendly Player may plot Opportunity Fire so that the Line of Opportunity Fire passes through hexes containing both other Friendly units and Enemy units without these units per se triggering the Opportunity Fire. It is only the movement of an Enemy unit which triggers Opportunity Fire.
[6.55] When an Enemy unit triggers Opportunity Fire (which by definition can only occur during the Enemy Player Movement Phase) the Friendly Player tells the Enemy Player to stop the movement of the triggering unit; then he immediately proceeds to resolve the Opportunity Fire Attack using the appropriate procedure and applying any result immediately. Then the Enemy Player resumes moving his units (including the triggering unit if it wasn't Disrupted or Pinned).
[6.56] The Friendly Player must announce the triggering of Opportunity Fire when it first occurs, meaning when the first Enemy unit first enters the Line of Opportunity Fire. He may not delay his announcement in hopes that the triggering unit will move closer to the Firing unit (down the line of Opportunity Fire) nor may he refuse to execute Opportunity Fire on the first triggering unit in hopes that some other (presumably more lucrative) target would move in later (unless the Scenario Instructions permit him to do so).
[6.57] When a unit triggers Opportunity Fire by crossing a hexside coincidental to the Line of Opportunity Fire, the Firing Player may choose to execute the Opportunity Fire on the triggering unit in either the hex that the unit left or the hex that the unit entered when it crossed the Line of Opportunity Fire.
[6.58] Since a Line of Opportunity Fire may be laid down to pass through hexes containing Enemy units and the Movement Rules allow the Enemy Player to freely move through a hex containing his units, it follows that occasionally Opportunity Fire will be triggered in a hex containing both a moving and a stationary Enemy unit. In that case, the Opportunity Fire may only be directed at the moving unit. Ignore the presence of the stationary unit (see Stacking for treatment of Casualties).
[6.59] If a unit which has been plotted to fire OF suffers a Disruption result as a consequence of being attacked in the immediately preceding Direct Fire Phase, it may not OF.
[6.6] CLOSE ASSAULT
[6.61] Close Assault is a variation of Direct Fire which only R Class units may execute. A Close Assault is an attack by an R Class unit against an adjacent Hard Target.
[6.62] R Class units may attack Hard Targets only by Close Assault, and in no other way; neither by Direct, Indirect nor Opportunity Fire. Only Hard Targets may be attacked by Close Assault.
[6.63] In order to plot Close Assault, write the Task Code (CA) and the hex number of the unit to be Close Assaulted.
[6.64] Close Assault attacks are executed during the Direct Fire Phase.
[6.65] Terrain has no effect upon the Close Assault process, except that a Close Assault is prohibited if an impassable river hexside separates the R Class unit from its Hard Target.
[6.66] If the Hard Target unit is scheduled to move in the Game-Turn in which it is Close Assaulted, subtract one from the die roll when executing the assault.
[6.7] COUNTER BATTERY
[6.71] A Player may assign any or all of his artillery and mortar units (only) to a Counterbattery task (CB). If and when an Enemy artillery or mortar unit (only) executes Indirect Fire the die is rolled. If it is a "one" then the Enemy unit is Spotted and the Friendly Player may automatically fire at this unit with one or more of the Counterbattery units within range. The Counterbattery Fire is, in effect, "triggered," otherwise the Firing unit remains concealed and there is no Counterbattery Fire.
[6.72] Counterbattery Fire is, by definition, a variant of Opportunity Fire and it is executed just as though it were Indirect Fire.
[6.73] The counterbattery unit(s) need only have a CB Plot written (showing Tight or Loose Pattern), in order to fire the Counterbattery.
[6.74] Counterbattery Fire is executed in the same Game-Turn that it is triggered.
[6.75] Several Enemy units may be triggering Counterbattery Fire on the same turn from several Friendly units. The Friendly Player can allocate his Counterbattery Fire among the several targets as he sees fit, so long as no unit attacks more than once per turn and all attacks are executed as separate events. If a Player is executing Counterbattery fire on more than one Enemy unit in a turn, he must allocate all of his fires before executing any given Counterbattery.
[6.76] By its nature, the act of Counterbattery can reveal the Counterbattery unit to the Enemy's Counterbattery units, who proceed to execute Counter-Counterbattery, so to speak. A Player may deliberately withhold a given unit from executing Counterbattery in hopes that some Counter-Counterbattery Enemy unit will reveal itself. All of this Indirect Fire, Counterbattery, Counter-Counterbattery, etc., takes place in the Game-Turn in which it is triggered.
[6.77] If an Indirect Firing unit draws Counterbattery Fire, other units in its immediate vicinity may be affected, depending on the type of Counterbattery pattern fired, and the extent and direction which the Counterbattery Fire scatters. The effect of Counterbattery Fire is no different from that of Indirect Fire.
[6.78] Once a unit has been Spotted (see 6.71) by Counterbattery it remains Spotted for all following Game-Turns (and can be fired on by normal Indirect Fire) so long as it remains in the same hex it was spotted in. This is true even if it was not immediately fired on by Counterbattery.
[6.79] ALTERNATE PROCEDURE: Every Game-Turn a unit fires from the same hex the chance of it revealing itself goes up by one-sixth (e.g., the second time a unit fires from a given position, a die roll of one or two Spots it). This is a very realistic optional rule, but it does involve considerable record-keeping.
[6.8] COMBAT RESULTS TABLE
[6.81] Combat Results Table (printed on the Charts and Tables sheet, p. 18):
Net Attack Superiority (as per Attack Procedure) runs across the top from -3 to +8; the Die Roll runs down the left and right sides.
| Die Roll | -3 | -2 | -1 | 0 | +1 | +2 | +3 | +4 | +5 | +6 | +7 | +8 | Die Roll |
|---|---|---|---|---|---|---|---|---|---|---|---|---|---|
| -3 | • | • | • | • | • | • | Pin | Pin | Pin | Pin | (P) | D-1 | -3 |
| -2 | • | • | • |
Attacks at Superiorities less than "-3" are prohibited; greater than "+8" are treated as "+8."
COMBAT RESULTS KEY: • = No effect. Pin = Target Pinned (may not move in its next Movement Phase). (P) = Delayed Panic (target Panics in the next Panic Determination Phase). D-1, D-2, D-3 = Target disrupted to the degree indicated. Disrupted units may not move or fire. D-4 = Target Destroyed. See 6.82 for a full explanation of these effects.
[6.82] Effect and Persistence of Various Combat Results
- PIN = Place a Pin Marker on the affected unit. The unit may not move in the following Movement Phase. Pin results never affect a unit's ability to fire. The Pin marker is removed on the next Pin and Disruption Removal Phase.
- (P) = DELAYED PANIC: Place a (P) (Panic Prime) marker on the affected unit. The unit is not affected until the following Game-Turn, when it suffers an automatic Panic (see 14.71).
- D1, D2, D3 = PROGRESSIVE STATES OF DISRUPTION: Place a corresponding Disruption Marker on the unit. A unit in any state of Disruption may not move or fire. Disruption lasts an indefinite period depending on the luck of the Player in removing the Disruption state.
- D4 = ELIMINATION: When a unit reaches a D4 Disruption state, it is considered destroyed. Soft Targets (except trucks) are removed from the map. Vehicle units (including trucks) are replaced with wreck markers.
[6.83] Removal of Pin and Disruption Markers
Pin Markers are removed automatically from all Pinned units during the Pin and Disruption Removal Phase of every Game-Turn. During that same Phase, each Player rolls the die for each of his units affected by a D1, D2 or D3 Disruption state. He does this unit by unit. If the die roll falls within the numbers shown on the Disruption Removal Table, he removes the marker from the unit and the unit is considered cured from the state of Disruption. If the die roll fails, then the Disruption marker remains on the unit until the next Game-Turn when the attempt is repeated.
| State of Disruption | Die roll necessary to remove |
|---|---|
| D1 | 1, 2 or 3 |
| D2 | 1 or 2 |
| D3 | 1 |
[6.84] Accumulation of Combat Results
Combat Results are progressive and cumulative. If a unit suffers a D1 result on Game-Turn One, fails to cure this Disruption and on a following turn suffers another D1 result, then its Disruption level is raised to D2. This process continues until the unit either reaches a D4 level (and destruction) or removes its Disruption state by a lucky die roll. D4 results are immediate and cannot be cured (unless you have an Angel Gabriel). Pin and (P) results are separate from Disruption results. It is possible for a unit to be attacked by more than one Enemy unit and suffer a (P) result and a D result. The D result could be removed prior to the next Game-Turn (with luck) but the (P) result would persist regardless of the removal of the Disruption state.
[6.85] Attack Procedure Chart (printed on the Charts and Tables sheet, p. 18)
PROCEDURE SEQUENCE: 1. Modify Attack Strength for Range Attenuation. 2. Subtract Defense Strength of Target. 3. Roll Die. 4. Reduce Die Roll for Terrain Effect(s). 5. Read Combat Result.
| Class of Attacking Unit versus Target Type | 1. Modify Attack Strength for Range Atten. | 2. Subtract Defense Strength of Target | 3. Roll Die | 4. Reduce Die Roll for Terrain Effect(s) | 5. Read Combat Result |
|---|---|---|---|---|---|
| M vs. All Types | Yes | Yes | Yes | Yes | Yes |
| R vs. Hard (Close Assault) | No | Yes | Yes | No | Yes |
| R vs. Soft | Yes | Yes | Yes | Yes | Yes |
| HT vs. Hard | No | Yes(4) | Yes | No |
[6.86] Notes on the Attack Procedure Chart: Read the appropriate line (based on the class of the attacking unit paired with the target type) following the indicated procedures from left to right on the chart.
Note that when H Class, Tight Pattern Fire (HT) is used against Hard Targets, the target is always considered to have a Defense Strength of "4", regardless of its actual printed strength. When a "No" indication occurs in the "Read Combat Result" column, this is simply another way of saying that that particular Weapon/Target combination is prohibited.
[6.9] RANGE AND RANGE ATTENUATION
[6.91] Range Attenuation Table (printed on the Charts and Tables sheet, p. 18)
| Range in Hexes | Attenuation effect on Attack Strength |
|---|---|
| 1 | Doubled |
| 2 or 3 | No Effect |
| 4 or 5 | Subtract 1 |
| 6, 7 or 8 | Subtract 2 |
| 9 or 10 | Subtract 3 |
| 11 or more | Subtract 6 |
[6.92] Every Combat unit has a maximum range printed on it. This is the greatest number of hexes it can fire at a target.
[6.93] All other things being equal, the ability of an individual unit to use its firepower varies with the range it fires over. The Attack Strengths of the various units were calculated on the basis of the units engaging targets at an average of 400 to 600 meters (2 to 3 hexes in game terms). As one might expect, the effective firepower of a unit declines with an increase in range beyond three hexes and increases (doubles, in fact) when firing at a range of one hex. This effect is called Range Attenuation and is numerically summarized on the Range Attenuation Table. H Class units are insensitive to Range Attenuation, which is reflected in H Class Combat Procedures.
[6.94] How to Use the Range Attenuation Table: Determine the distance in hexes between the firing unit and the target hex. Then find that distance in the Range column, and cross-reference the range on the Attenuation column, where you will find the modification of the Attack Strength: "x2" = multiply by 2; "-2" = subtract 2.
[7.0] MOVEMENT
GENERAL RULE
Movement is the general term used to define the process whereby the Players physically displace their units hex by hex over the surface of the map. Movement is executed sequentially. First one Player and then the other moves all of his units that he wishes to move in his Movement Phase, according to the Sequence of Play. The scenarios explain who is the First Player. The distance which a given unit can move in a Game-Turn is a function of the Movement Allowance of the unit versus the terrain that the unit passes through.
PROCEDURE
If you wish to move a unit, you must plot the Task Code (MV) next to the unit's Identity Number on the Plot Sheet during the Plot Phase. Then, during the Movement Phase, you may move that unit in any direction and path desired within the restrictions and limitations described below. You may move only one unit at a time (except when Transporting units) until you have moved all of the units that you had Plotted to move. When moving, you must trace the path of movement hexagon by hexagon.
CASES
[7.1] EXECUTION
[7.11] Movement is calculated in terms of hexagons. Each unit expends one or more Movement Points of its Movement Allowance to enter a given hex. See the Terrain Rules and Terrain Effects Chart (10.0) for a full list of these different "entry costs."
[7.12] If a unit has been plotted to move it must move at least one hex (see also 9.6). It can return to its original hex after moving one hex, but it must expose itself, however briefly, to the possibility of Enemy Opportunity Fire. If a unit finds itself hemmed in by Enemy units so that it cannot move in some direction without entering an Enemy occupied or impassable hex, it is not required to move.
[7.13] A Player may move a unit expending some or all of its Movement Allowance, so long as no one individual unit expends more Movement Points in a single Movement Phase than its Movement Allowance.
[7.14] Unexpended Movement Points may not be accumulated from turn to turn, nor loaned by one unit to another.
[7.2] RESTRICTIONS AND LIMITATIONS
[7.21] Friendly units may never enter a hex containing an Enemy unit (exception: Overrun, 13.0), nor may they enter a hex or cross a hexside which is impassable (see Terrain Effects Chart, 10.4).
[7.22] Friendly units may freely enter and pass through hexes containing other Friendly units so long as they do not terminate their Movement in violation of the Stacking limits (see 8.0).
[7.23] Units may never exit from the map, unless the Scenario Instructions so indicate. Units which do exit from the map may never return to play.
[7.3] ZONES OF CONTROL
Notice that there are no Zones of Control in this game.
[7.4] EFFECT OF MOVEMENT ON SOFT TARGET DEFENSE
When a Soft Target moves, it is a body of men walking or running upright. As such, it is much more exposed than a similar body of men hugging the ground in place, taking advantage of every fold in the earth, trees, boulders, etc. Therefore, when a Soft Target receives fire in a Game-Turn in which it was plotted to be moved, it loses all benefits from Terrain. This applies to its receiving fire either in the Direct Fire Phase, Movement Phase (when it actually would be moving), or Indirect Fire Phase.
[8.0] STACKING
GENERAL RULE
Players may not stack units. That is, they may not place more than one unit in a hex, except for the specific cases outlined below.
CASES
[8.1] STACKING IN IMPROVED POSITIONS
An infantry unit and an anti-tank gun unit may be stacked together in an Improved Position hex. Both, one or none of these units may be within the Improved Position or outside the Improved Position, at the Owning Player's option.
[8.2] STACKING IN TRANSPORTATION
When a vehicle unit transports a non-vehicle unit, the transporting situation is physically represented on the mapboard by the vehicle unit being placed on top of the non-vehicle unit. This is an allowable exception to the normal stacking prohibition, and is the only case whereby a vehicle unit is allowed to stack (see 9.0).
[8.3] WHEN STACKING LIMITATION APPLIES
[8.31] During the Movement Phase of a Game-Turn, Friendly units may be moved through other Friendly units with complete freedom. The Stacking limitation applies solely at the end of a Movement Phase.
[8.32] Friendly units may never enter a hex containing an Enemy unit, except in Overruns (see 13.0).
[8.33] Since it is possible that a moving unit could be attacked by Opportunity Fire (with a consequence of Pin or Disruption) while in a hex with a non-Moving unit, the Moving Player is allowed to cure the resulting illegal stack by moving the Pinned or Disrupted unit to an adjacent vacant hex.
[9.0] TRANSPORTING
GENERAL RULE
Half-tracks (APC's) and trucks may be used to carry non-vehicle units (such as infantry, mortar, artillery units, etc.). The act of a non-vehicle unit joining a truck or halftrack unit for purposes of transportation is called Mounting; the act of separation is called Dismounting.
PROCEDURE
To mount a unit, place the halftrack or truck unit on top of the non-vehicle unit. To dismount, remove the truck or halftrack unit from on top of the non-vehicle unit. So long as a truck or halftrack unit is on top of a non-vehicle unit, the truck or halftrack unit is presumed to be carrying the non-vehicle unit. The act of carrying consists of simply moving the truck or halftrack unit (with the non-vehicle unit underneath it) across the map.
CASES
[9.1] RESTRICTIONS AND LIMITATIONS
[9.11] The act of mounting consumes the entire Movement Allowance of both units involved; and the act of dismounting also consumes the entire Movement Allowance of both units. Units which are engaged in mounting or dismounting may perform no other task or activity during that Game-Turn.
[9.12] One truck or halftrack unit may carry one non-vehicle unit.
[9.13] The truck or halftrack unit which mounts must begin the Game-Turn in which it mounts in some hex adjacent to the non-vehicle unit on which it is to mount. Conversely, when a truck or halftrack unit dismounts, it must be placed in some hex adjacent to the non-vehicle unit it is dismounting from.
[9.14] You may not mount an infantry unit or anti-tank gun which is stacked in an Improved Position. The unit would have to move out of the Improved Position and mount in the following Game-Turn.
[9.2] STATUS OF NON-VEHICLE UNIT WHILE BEING CARRIED
[9.21] While it is in a mounted condition, a non-vehicle unit assumes the vulnerability of the truck or halftrack unit which is carrying it and suffers the same fate inflicted on the transporting unit by the rules of Panic or Combat Results. For purposes of Combat, the Enemy Player fires at the truck or halftrack unit only and the presence of the unit being carried is ignored, except that it suffers the same fate as the truck or halftrack unit.
[9.22] Assuming that a vehicle is Pinned, Disrupted or Panicked while transporting a non-vehicle unit, the combat effect applies to both units equally, and persists for both units equally. Only one marker is used to show the status of both units.
[9.3] STATUS OF UNITS ENGAGING IN MOUNTING OR DISMOUNTING
[9.31] Units which in a given Game-Turn are about to engage in mounting or dismounting, or which have just engaged in mounting or dismounting, are considered to be moving for purposes of plotting and of combat resolution.
[9.32] When a truck or halftrack (APC) unit is moved into or out of an adjacent hex, in the act of mounting or dismounting, it can trigger Opportunity Fire. If any Pin or Disrupted effects are assessed on the unit, it is placed in the initial hex, and the mounting or dismounting operation does not take place.
[9.33] Whether or not a unit is mounted or dismounted simply depends on whether or not the truck or halftrack unit is on top of the non-vehicle unit. Thus, if you have two unmounted units, truck and infantry, and they are fired on during the Direct Fire Phase which is prior to the Movement Phase, they would be unmounted; then, assuming they mount during the Movement Phase and then receive fire during the Indirect Fire Phase, they would be mounted for the Indirect Fire Phase.
[9.4] COMBAT WHILE MOUNTED
A mounted unit may not fire. While mounted, it has no role in the game except that of a passive passenger.
[9.5] USING OTHER VEHICLES FOR TRANSPORTATION
Only truck and halftrack (APC) units may be used to transport non-vehicle units.
[9.6] HOW TO PLOT MOUNTING AND DISMOUNTING
The acts of mounting, dismounting and transporting are all covered by the general Task Code MV. In other words, if a Player wishes his vehicle unit to mount a non-vehicle unit, he simply writes an MV Task for both units and then, during the Movement Phase, proceeds to execute the mounting process. Execution of mounting or dismounting is considered to meet the requirements of 7.12, which say that a unit plotted to move must move at least one hex.
[10.0] TERRAIN
GENERAL RULE
The terrain features printed on the map represent towns, roads and bridges, natural obstacles like rivers and streams, and wooded areas, and the very contour of the ground itself. All of this terrain affects the ability of a unit to move and fight to some degree. The exact effect of a given terrain feature on Movement and Combat is summarized on the Terrain Effects Chart.
Additionally, Terrain affects the ability of one unit to "see" another unit, which is treated in section 11.0 (Spotting).
[10.1] EFFECT ON MOVEMENT
[10.11] When a unit moves from hex to hex, it expends Movement Points from its Movement Allowance based on the Terrain "costs" of each hexside it crosses and each hex that it enters. These Terrain costs are summarized on the Terrain Effects Chart (10.4). These costs are cumulative and no unit may enter a hex if it lacks the Movement Points to pay both the cost of crossing the entry hexside and the hex itself.
[10.12] Most of the hexes and hexsides on the map are Clear Terrain, i.e., devoid of any terrain symbols, and cost one Movement Point to enter (two Points for trucks). A Clear Terrain hex has no effect on Movement since its crossing cost is zero. Hexsides which are covered by woods, hilltop, swamp or town symbols have no additional effect on Movement since the Movement cost has been built into the woods or hilltop hex itself. The only hexsides which affect Movement are stream, river and crest and slope hexsides.
[10.13] For Movement purposes all units are divided into three classes: trucks, other vehicles (including APC's), and foot mobile units (those with a Movement Allowance of one), with terrain affecting the Movement of each class separately, according to the Terrain Effects Chart.
[10.14] Roads and Towns provide a unique exception to rule 10.11. When a unit moves in a path which coincides with the path of a road (or from town hex to town hex) we assume that the unit is benefitting from the road. Thus, when a unit enters a hex by traversing a hexside which is crossed by a road, the unit expends only the Terrain cost for crossing a road hexside (½ Movement Point), ignoring any other terrain on the hexside being crossed or in the hex being entered.
[10.2] EFFECT ON COMBAT
[10.21] Terrain affects Combat by reducing the Combat Results die roll number by the amount shown on the Terrain Effects Chart.
[10.22] Terrain has no effect on H Class/Tight pattern Fire against Hard Targets. Crest hexsides never affect any type of H Class fire.
[10.23] Some Terrain features have no effect on Combat. Those which do are divided into affecting hexes (woods, town, hilltop) and affecting hexsides (slope and crest hexsides).
Affecting hexes benefit defending units because the terrain in them gives a solid increase in protection or shelter to the defending unit. Affecting hexsides, on the other hand, provide a partial defilade to defending units. Thus, we can say that affecting hexes provide a constant benefit to units defending in them, regardless of the direction of incoming fire, while affecting hexsides are directional and provide benefits only if the incoming fire intersects them.
[10.24] Crest hexsides benefit a defending unit which is on either side of the hexside, slope hexsides are uni-directional and only benefit a unit which is on the slope-splashed hex (see 10.3).
[10.25] Terrain benefits are not cumulative. If a defending unit is in a hex in which it could benefit from two or more terrain features, it simply benefits from whichever terrain feature has a greater effect on Combat. For example, a (Soft Target) unit is in a woods hex and is fired on through a common crest hexside by an M Class unit. The defending unit would benefit from either the crest hexside or the presence of the woods. However, if it were fired on by an H Class unit, it would benefit from the woods hex since the crest hexside doesn't help against H Fire.
[10.3] SLOPES AND CREST HEXSIDES
There are two types of slanting-ground hexsides extant in this game. They are the slope hexside and the crest hexside.
[10.31] The slope hexside is distinguished by a heavy tinted line running along the hexside itself with contour splashes on only one flank of the hexside. The hex containing the contour splashes lies below the slope hexside and only a unit which resides in that contoured splashed hex benefits from the slope-hexside for Combat purposes. If the unit moves up the slope crossing the slope hexside to enter the adjacent hex, it must pay the cost of crossing the slope hexside (in addition to the cost of the hex itself). By contrast, a unit which is adjacent to a slope hexside, but is in a hex devoid of contour splashes is considered to be above the slope. It does not benefit from the slope for Combat purposes NOR does it expend Movement Points to cross the slope hexside and move down into the adjacent hex.
[10.32] A crest hexside is distinguished by a heavy tinted line running along the hexside and by contour splashes in both flanking hexes. Both flanking hexes are considered to be below the crest hexside. A unit in either flanking hex benefits from the crest for Combat purposes and it must pay the cost for crossing the crest when it traverses the hexside.
[10.33] The contour splashes are a graphic aid to the Players. Their sole purpose is to illuminate the various slope and crest hexsides. There is, for example, no additional cost to move from one contour splashed hex to another, except if an intervening crest or slope is traversed. Nor is there any defensive advantage to a contour-splashed hex, except if the fire is received through a slope or crest hexside.
[10.34] The Players should note that all of the hill masses (one or more adjacent hilltop hexes) are defined on their perimeter by slope hexsides. Thus, any unit which enters a hill mass must pay for crossing a slope hexside and entering a hilltop hex.
[10.4] TERRAIN EFFECTS CHART
Printed on the Terrain Effects Chart sheet (p. 17). Movement Point cost is given for Hard Vehicle, Soft Vehicle and Foot Mobile units.
| Terrain Feature | Hard Vehicle | Soft Vehicle | Foot Mobile | Reduction of Combat Die Roll when Unit is in Hex or behind Hexside | Effect on Line of Sight |
|---|---|---|---|---|---|
| Clear Hex | 1 | 2 | 1 | no effect | no effect |
| Town Hex | ½ | ½ | ½ | -3 | Blocked |
| Woods Hex | 3 | 5 | 1 | -2 | Blocked |
| Hilltop Hex | 3 | 5 | 1 | -3 | Blocked |
TERRAIN KEY: Clear Hex; Town Hex; Woods Hex; Hilltop Hex; Road Hex; Swamp Hex; Bridge Hexside; Crest Hexside; Slope Hexside; Stream Hexside; Lake or River Hexside (symbols as printed on the chart sheet).
NOTES (printed on the Terrain Effects Chart sheet):
- Town hexes cost one Movement Point when entered through non-road hexsides. The die roll is reduced by four in attacks against units inside Improved Positions.
- Wreck Markers in a road hex negate the road benefit for units moving into or out of that hex; bridge hexsides are unaffected by Wreck Markers.
- Slope hexsides only affect movement when the unit is moving from a hex containing the slope splash symbol, through the slope hexside.
- Terrain Hexsides never affect H Class Fire.
[11.0] SPOTTING
GENERAL RULE
Spotting refers to the ability of one unit to see another unit. Whether or not a given unit spots another unit depends on whether or not the Line of Sight between the two units is blocked (obstructed). The Line of Sight is determined by drawing an imaginary straight line between the center of the sighting unit's hex and the center of the sighted unit's hex. The terms Line of Sight (LOS) and Line of Fire are synonomous. When a unit has a clear Line of Sight to a potential target unit, it can Spot the target unit and thus use the Line of Sight as a Line of Fire (note 11.5).
PROCEDURE: JUDGING THE LINE OF SIGHT
Lay a straight edge from the center of the sighting (firing) hex to the center of the target hex. The line so described is the Line of Sight (Line of Fire). If the LOS passes through a blocking hex or hexside which is not common to either the Firing unit's hex or the Target hex, then the LOS is blocked. Otherwise it is unblocked.
CASES
[11.1] BLOCKING HEXSIDES AND HEXES
[11.11] Any hexside which is covered in whole or in part by blocking terrain is considered a blocking hexside. Any hex which is wholly or partially filled by blocking terrain is a blocking hex.
The Terrain Effects Chart states which terrain features block Line of Sight and which do not block.
[11.12] Although the hilltop hexes portrayed on the map represent "high ground", units positioned on them have no intrinsic observation advantage. They do not see over blocking terrain which ostensibly is on low ground.
[11.13] Blocking terrain in the Spotting unit's hex and/or in the target hex, or on any hexside of either hex, does not block the Line of Sight (exception: 11.14).
(Diagram: a hex grid with a spotting unit on the left and two target hexes on the right. One dashed line is labeled CLEAR and passes unobstructed; the other is labeled BLOCKED and crosses blocking terrain.)
[11.14] As a rule, if Unit A can see Unit B, then Unit B can see Unit A. This relationship is called spotting reciprocity, and holds, except when a unit is in a town or woods hex. Such a unit can see out of the town or woods hex along an otherwise unblocked LOS, but it may not itself be spotted, except by some unit within three hexes of it (inclusive), or unless it fires (in which case it can be spotted at any distance). When spotted, a unit remains spotted until it moves out of the hex in which it was spotted.
[11.2] EFFECT ON COMBAT
[11.21] Spotting has a very fundamental effect on Combat. That is, if some Friendly unit can not see (spot) a target, it may not fire at it. It is thus a vital precondition to the entire Combat process. Implicit in the instructions for the Plotting Phase is the idea that the Players will carefully determine which of their units can spot Enemy units or target hexes prior to writing a Fire Plot.
A unit may not plot or execute fire (except Indirect Fire) on a target which it cannot see and any such plot is void.
[11.22] Only in Indirect Fire may a unit spot a Target for another unit. Spotting is determined unit by unit for each Combat plot.
[11.3] EFFECT OF UNITS IN SPOTTING
Playing pieces never obstruct the Line of Sight. A unit may see through any number of intervening units (both Friendly and Enemy) to some distant target hex, and a unit may fire through both Friendly and Enemy units to some distant target hex without affecting the units fired through.
[11.4] SPOTTING FOR INDIRECT FIRE
Any Friendly unit may spot a target hex for another Friendly unit which is capable of Indirect Fire. Unless assisted by a spotting unit, no unit may fire Indirect Fire (except when specifically allowed by the Scenario Instructions).
[11.5] PLAYER KNOWLEDGE vs. UNIT SPOTTING
During most of the play of the game, a Player will know far more about the Enemy Player's units than his own units can spot. There will always be units located in towns and woods or behind hills which he should not know about. While a Player is unable to fire at units which his units cannot see, he can plan ahead and maneuver his forces to eventually take advantage of his knowledge of his Enemy's dispositions. The alternative, if Players are willing to trust one another, is to introduce some elements of limited intelligence by playing with inverted counters. That is, units which cannot be seen by Enemy units will be inverted, hiding their class and strength from the Enemy Player. If blank inverted counters are also used, they add to the fog.
[12.0] IMPROVED POSITIONS [ENTRENCHMENTS]
GENERAL RULE
In some of the Scenarios a given Player's units may be in Improved Positions which represent field fortifications and aid the defense of a unit.
PROCEDURE
An Improved Position marker is used to represent a hex which has entrenchments (field fortifications). A unit is deemed to be inside the Improved Position if it rests underneath the Improved Position marker. It is outside of the Improved Position if it rests on top of the marker.
CASES
[12.1] BENEFITS
Only a unit inside an Improved Position receives the terrain benefit for the Improved Position. When such a unit is attacked, the die roll is reduced by four.
[12.2] PLACEMENT AND DESTRUCTION
[12.21] Improved Positions are placed on the map as part of the initial deployment. Once placed, they may not be moved to another hex.
[12.22] Improved Positions are destroyed (removed from the map) whenever they are unoccupied by a Friendly unit at the end of any Game-Turn. Thus, they may be destroyed either by voluntary evacuation or by the unreplaced destruction of their garrison. Friendly Improved Positions may never be garrisoned by Enemy units. If an Enemy unit moves into a Friendly Improved Position hex and survives there until the end of the turn, then by exclusion of a Friendly unit, the Improved Position marker is removed.
[12.23] Only one Improved Position marker may be placed per hex.
[12.3] EFFECT ON STACKING
One infantry unit and one AT gun unit may be stacked in an Improved Position hex. Both, one or neither unit benefits from the Improved Position, depending upon their respective positions under or on top of the Improved Position marker.
[12.4] EFFECT ON MOVEMENT
A unit considered inside an Improved Position may not freely move out of the Improved Position hex. It must consume its entire Movement Allowance to change from being inside to being outside of an Improved Position (from underneath to on top). There is no Movement Point cost for a unit to move into an Improved Position (from on top to underneath). Changing position within an Improved Position takes place during the Movement Phase.
[13.0] OVERRUNS
GENERAL RULE
Only AFV units which have a Hard Target type, an M Weapons Class, and Attack and Defense Strengths of five or more, may execute Overruns. An Overrun consists of moving through an Enemy non-vehicle during the AFV's Movement Phase. A non-vehicle unit is a unit with a Movement Allowance of zero or one. An Overrun is a hybrid form of Movement and Combat, combining elements of both, but plotted under the general Task Code of Movement (MV). It is a costly and rarely used method of taking an Enemy position.
PROCEDURE
During the Movement Phase, the AFV is moved through the hex containing the non-vehicle unit. This "overrun" costs one Movement Point in addition to normal Movement costs. As soon as the AFV has passed through the hex it attacks the target by comparing its printed Attack Strength to the Defense Strength. The die is rolled and the CRT consulted for a result. No adjustment is made for terrain. Then, if it is an R Class unit, the target counterattacks the overrunning unit, comparing its printed Attack Strength to the printed Defense Strength of the Overrunning unit. Then both results are applied immediately. The overrunning unit accepts its results in its exit hex.
CASES
[13.1] APPLICATION OF OVERRUN RESULTS
[13.11] The application of the results of the initial Overrun Attack and the automatic counterattack occurs immediately, so that the Player who is doing the overrunning could use the overrun to clear a hex of an Enemy unit, thereby allowing other following units to move through the hex.
[13.12] The counterattack is automatic (provided an R Class unit is involved) and is not affected by the results of the overrun, so that even if the Overrun results in the destruction of the target unit (D4 result) the target unit still makes its counterattack.
[13.13] By the same token, the results of the counterattack do not affect the results of the overrun.
[13.14] If the overrun unit is unaffected by the overrun, it may execute its plot for that Game-Turn normally.
[13.2] RESTRICTIONS AND LIMITATIONS
[13.21] Units within an Improved Position may be overrun, to the extent that the overrunning unit moves through the hex, but the defending units are never affected by the overrun, and each unit within the Improved Position counterattacks the overrunning unit twice. (This can be an expensive way to move through a hex.)
[13.22] An overrunning unit may continue its Movement after executing its overrun (assuming that the counterattack did not result in a D or P result), but any one unit may make only one overrun per Game-Turn.
[13.23] Overruns may not be executed into a woods or town hex, nor may they be executed through a woods hexside which is either the entrance or the exit hexside of the hex being overrun.
[13.24] The overrunning unit must enter the overrun hex from an adjacent vacant hex and it must exit into a vacant adjacent hex after overrunning. The path of the overrun need not be in a straight line. In fact, the overrunning unit could exit into the same hex it entered from.
[13.3] MULTIPLE OVERRUNS
A hex may be overrun by any number of units on the same Game-Turn. Each overrun is treated as a separate event and the overrunning unit in each case must perform within the restrictions and limitations of Case 13.2. [While it is theoretically possible for a Player to overrun a given hex with a dozen or more units, the operation of the counterattack provision tends to clog adjacent hexes with Pinned or Disrupted units, thereby shutting off access to the hex.]
[13.4] TERRAIN
The one Movement Point cost is in addition to all other terrain costs, including the terrain in the hex being overrun. A unit which is overrunning may not use the road Movement rate at any point in that Game-Turn. Thus, an overrunning unit ignores the presence of roads and calculates its entire Movement (up to, through, and subsequent to the overrun) as though they did not exist.
[13.5] EFFECT OF DISRUPTION ON COUNTERATTACKING
Even if a unit being overrun is Pinned, Panicked or in any state of Disruption, it always counterattacks using its printed Attack Strength.
[13.6] MINIMUM COUNTERATTACK
There will be many cases in which the comparison of the Attack Strength of the counterattacking unit to the Defense Strength of the overrunning unit would result in a minus 4 or worse Attack Superiority. Therefore, a counterattack may always be made at least -3 Attack Superiority, even if the true comparison is worse. (This is an exception to the normal Combat Rules.)
[13.7] HOW TO PLOT OVERRUNS
There is no specific Task Code for overruns. Any AFV which meets the requirements and has been plotted to move (Code MV) is permitted to execute an overrun as part of its movement execution. In other words, an overrun is an extemporaneous act, which the Moving Player decides upon at any point during his Movement Phase.
[13.8] OPPORTUNITY FIRE AGAINST OVERRUNNING UNITS
If a Line of Opportunity Fire is triggered in the hex in which the triggering unit is executing an overrun, the triggering unit may execute the overrun, and accepts the Opportunity Fire results in its exit hex.
[14.0] PANIC [Command Control]
GENERAL RULE
On every Game-Turn the units in a Player's force are exposed to Panic. That is, the Player may lose the ability to control a percentage of his units on every Game-Turn. The effects of Panic are meant to simulate the real effects on the battlefield, of communications problems, misunderstood orders, human error and, sometimes, just plain physical fear, which result in units not doing what the command (the Player) has ordered (plotted). Panic is assessed randomly during the Panic Determination Phase, so that a Player does not know either how many, nor exactly which, of his units will Panic when he has to plot his Game-Turn activities.
(Printed example: two Panic chits, one showing "3 Panic" and one showing "6 Panic".)
PROCEDURE
Each Player is given a Panic Level in each Scenario. This Panic Level is given as a percentage. The counter mix contains ten markers labeled 0 through 9, which are known as Panic Chits. During the Panic Determination Phase of the Game-Turn, each Player will pick a number of chits which corresponds to his Panic Level percentage. [If a Player has a 30% Panic Level, he would pick 3 chits, 20%, 2 chits, etc.] Each Player will then cross reference the numbers on the chits that he picked, with the last number of the hexes on the map. These hexes are Panicked hexes and any of the Player's units which are located on a Panicked hex suffer the effects of Panic, and are known as Panicked units.
[14.1] EFFECTS OF PANIC ON UNITS WHICH WERE PLOTTED TO MOVE
[14.11] If a unit has been plotted to move and it is found to be a Panicked unit, the Owning Player is prohibited from moving it voluntarily. Instead, he must move it according to the Panic Movement Procedure (also known as Scatter). This procedure, which is followed separately for each individual Panicked unit, takes the following form: First the Player rolls the die and compares the die roll number with the number on the Scatter Diagram printed on the map. This gives him the direction which the Panicked unit must move. Then he rolls the die a second time: this gives him the number of Movement Points [the Panic Movement Allowance] which the unit must expend in the previously determined direction. He then proceeds to move the unit accordingly.
[14.12] Movement of Panicked units is executed during the Player's Movement Phase in any combination with normal unPanicked Movement. The Panicked Movement Procedure for each Panicked unit may not be interrupted, once begun. A Player can not, therefore, go through the die rolling to find out where his Panicked units are moving, and then move other units, before physically moving the Panicked units.
[14.13] A Panicked unit cannot acquire through the Panicked Movement Procedure more Movement Points than it normally possesses. For example, an infantry platoon would only scatter one Movement Point, no matter what.
[14.14] In executing its Panicked Movement, the Scattering unit will expend its Movement in the scatter direction, paying all normal costs for terrain traversed.
[14.15] A Panicked unit may not Overrun, even if the Movement costs are within the Panicked Movement Allowance and the potential target lies within the scatter path. The Panicked unit ceases Movement in the hex adjacent to any Enemy units. Panicked units may move through Friendly units, but must adhere to the Stacking limitations, ending their movement before stacking illegally.
[14.2] EFFECT OF PANIC ON TRANSPORTATION
[14.21] A vehicle unit, while Panicked, may not Mount a non-vehicle unit as a passenger. Instead, the vehicle unit is subject to Scatter.
[14.22] A non-vehicle unit, while Panicked, may not Mount. It is subject to Scatter.
[14.23] If a vehicle unit Panics while bearing a passenger unit, it Scatters, carrying the passenger unit with it (assuming it was plotted to move).
[14.3] EFFECT OF PANIC ON COMBAT
[14.31] A Panicked unit may not fire. A unit which was plotted a Fire Task and which is determined to be Panicked, has its Fire Task canceled and, in effect, loses its ability to attack (fire) for the Game-Turn.
[14.32] Panic does not affect a unit's Defense Strength or its inherent capability to counterattack an Overrun.
[14.4] EFFECT OF PANIC ON INERT OR DISRUPTED UNITS
[14.41] If a unit was not plotted to perform any Task during a Game-Turn (remain inert), then Panic has no effect on that unit.
[14.42] Panic does not affect a Disrupted unit.
[14.5] PERSISTENCE OF PANIC
[14.51] The extent and application of Panic is determined afresh on each and every Game-Turn, so that a unit which Panics on one Game-Turn may or may not Panic on other Game-Turns.
[14.52] On any Game-Turn, it is theoretically possible for all, some or none of a Player's units to Panic. The fact that a Player has a Panic Level of, say, 20% does not mean that on every Game-Turn 20% of the Player's units will Panic. It does mean that over an extended series of Game-Turns the total number of units which Panic will tend to average out at 20%.
[14.6] PLAYER'S NOTES
[14.61] Obviously, the whole application of the Panic Procedure depends on an honest, blind random picking of the Panic Chits, so that no Player can manipulate the Chit pick to his own ends. In Playtesting, we found that a coffee mug was an adequate receptacle from which to pick, and allowed the chits to be shaken up between picks.
[14.62] Panic markers are provided which Player's may use to identify those units which are Panicked. Their use is not mandatory. Some Players find them an aid and others do not.
[14.7] DELAYED PANIC AS A RESULT OF COMBAT
[14.71] Frequently the Combat Results Table requires that a unit suffer Delayed Panic (P) as a consequence of being attacked. This means that on the Game-Turn immediately following the turn in which the (P) result was assessed against the unit concerned, the unit will automatically Panic just as though it were on a Panicked hex.
[14.72] When a unit suffers a (P) result a Delayed Panic marker should be placed on that unit so that on the following Game-Turn the Players will be reminded that that unit must suffer an automatic Panic.
[14.73] If, by coincidence, a (P) unit happens to be exposed to the application of normal random Panic (i.e., be located on a Panicked hex) there is no added effect.
[14.74] The Owning Player may, if he wishes, write a Movement Plot for a (P) unit. The unit will, of course, automatically Scatter under those circumstances, but there may be some benefit in its movement.
[14.8] EXTENT OF PANIC
[14.81] Determination of which units Panic occurs during the Panic Determination Phase of the Game-Turn and applies to only those units which lie on Panicked hexes as of that moment. Thereafter, during the Movement Phase of the Game-Turn, units may move into and through the erstwhile Panicked hexes without being affected by Panic.
[14.82] As a General Rule, the application of the Panic Rules are always postponed in any Scenario until the shooting starts. That is, the Panic Rules will not be employed and no unit will Panic, until the Game-Turn following the Game-Turn in which at least one unit (either Player's) has executed Fire (be it Direct, Opportunity or Indirect).
[15.0] OFF-BOARD ARTILLERY
GENERAL RULE
Occasionally, a Scenario will give a Player an Off-Board Artillery capability, which simulates the availability of artillery or rocket or mortar batteries located someplace other than the map, to fire at the Enemy targets located on the map.
PROCEDURE
Off-Board Artillery is available in terms of "concentrations" of H Attack Strength Points. The Scenario Order of Battle will state that a Player has, for example, "3 concentrations of 7 H Points each" [abbreviated to read: OFBDA- 3(7H)].
CASES
[15.1] USE OF OFF-BOARD ARTILLERY
[15.11] Off-Board Artillery Fire is always Indirect Fire. It is H Class Fire, and the Firing Player should indicate Tight or Loose Pattern. H is susceptible, as such, to Scatter (see 6.48).
[15.12] Having a concentration of 7 H Points is not quite the same as having a unit with an Attack Strength of 7 H Points. Each concentration may only be used once, whereas a unit may fire turn after turn. Once it is used, a concentration is consumed.
[15.13] Off-Board Artillery can reach any target on the map (unlimited range), but it may not be fired at an Unspotted target hex, unless specifically permitted in the Scenario Instructions.
[15.14] Off-Board Artillery Fire is plotted during the Plot Phase of the Game-Turn, and impacts (after target-hex Scatter) during the Indirect Fire Phase of the same Game-Turn. The Plot should read "OFBDA- hex #1234-7H," for example.
[15.2] OFF-BOARD ARTILLERY RESTRICTIONS
[15.21] The Points in a "concentration" may not be apportioned against several targets, just as the fire of an individual unit may not be apportioned against several targets in a single Game-Turn.
[15.22] Assuming a Player has more than one "concentration" available, he may fire several "concentrations" at the same target hex or different target hexes on the same Game-Turn, but each concentration is treated as a separate attack.
[15.23] Off-Board Artillery may not be used for counterbattery fire.
[15.24] Off-Board Artillery may not be fired at.
[16.0] CLOSE AIR SUPPORT
GENERAL RULE
Either Player is sometimes given Close Air Support. This is given in terms of "strikes". Each strike is a certain weight of H Attack Strength Points. Each "strike" is applied just as though it were an Off-Board Artillery concentration, except for a different Scatter pattern.
PROCEDURE
During the Plot Phase, the appropriate Player allocates a Close Air Support Strike to a target hex. During the Indirect Fire Phase the Close Air Support Scatter will be implemented, the actual impact hexes of each strike determined, and the strike executed just as though it were an Indirect Fire Attack.
CASES
[16.1] CLOSE AIR SUPPORT SCATTER
A Close Air Support Strike scatters in the following fashion: Roll the die. If the roll is a one or two, the strike impacts on the target hex. If the roll is a three, four, five or six, the strike scatters, in which case the die is rolled once more to determine the direction of Scatter (see 6.48). The strike, if it scatters, scatters one hex.
[16.2] APPLICATION OF CLOSE AIR SUPPORT
[16.21] A Close Air Support Strike is always a Tight Pattern H Attack affecting only the hex it impacts on.
[16.22] Each strike must be used as single unitary value. A single Strike may not be apportioned against several target hexes.
[16.23] The weight of each Close Air Support Strike will be given in the Order of Battle. For example, CAS- 3(5H) means Close Air Support available is three strikes each of 5 H Attack Strength Points.
[17.0] MINES
GENERAL RULE
In certain Scenarios one Player or the other is allowed to deploy mines in order to impede the movement of units and to inflict damage on units. When a Player has deployed mines in a hex, it is called a mined hex. A mined hex is presumed to contain both anti-vehicular mines and anti-personnel mines. There are three types of mined hexes: hasty, preventive, and defensive, corresponding to a rising density of mines within the hex and an increasing probability of inflicting damage.
PROCEDURE
The Scenario will state which Player has mines to deploy in terms of a number of mined hexes and the type of mined hexes. This Player, while both Players are deploying and setting-up their regular units, shall select which hexes on the map he deems to be mined. He shall secretly note the numbers of the mined hexes and type of mined hexes. Thereafter, whenever a unit (from either side) enters or leaves a mined hex, an immediate Mine Attack shall be executed against that unit, any result applied immediately, and a Mined Hex Marker is placed in that hex.
CASES
[17.1] MINE ATTACKS
[17.11] A Mine Attack is executed against any unit, no matter what its Defense Strength or Target Type, just as though the unit were fired upon by a weapon. Mines have a certain Net Attack Superiority on the Combat Results Table, according to the type of Minefield, regardless of the Type of unit in the hex.
- Hasty Mined Hex: Attacks a unit at -2 Net Attack Superiority.
- Preventative Mined Hex: Attacks at +1 Net Attack Superiority.
- Defensive Mined Hex: Attacks at +7 Net Attack Superiority.
Printed discrepancy: the rule text above gives the Hasty Mined Hex as -2, while the "Net Attack Superiority of Mined Hexes" box on the Charts and Tables sheet (p. 18) gives Hasty Mine as -1 (Preventative Mine +1, Defensive Mine +7 agree). Both values are transcribed as printed; the rule text is the figure used here and players should confirm against the chart.
The Preventative and Defensive Minefield types are not called for in the Scenarios, but Players may make use of them in creating their own scenarios.
[17.12] All considerations of Terrain, Defense Strength and Target Type are ignored when executing a Mine Attack. The Player whose mined hex it is simply announces that a unit is attempting to enter or attempting to leave a mined hex, rolls the die, and reads the result from the appropriate column of the Combat Results Table. This means that the strongest and weakest units are equally vulnerable to mines.
[17.13] Whenever a unit enters a mined hex, it must immediately cease all further movement in that Game-Turn, regardless of whether the Mine Attack successfully Pins or Disrupts it. It must cease movement within the mined hex. (Exception: see 17.15 for treatment of Overruns.)
[17.14] Whenever a Player desires a unit to leave a mined hex, he announces this fact and a Mine Attack is executed on the unit. No matter what the result of the attack, the unit is permitted to exit the mined hex. Any Pin or Disruption Results are assessed in a hex adjacent to the mined hex, which the Owning Player moves the unit to.
[17.15] If a unit overruns through a mined hex, it suffers two successive Mine Attacks in one turn and is placed in its exit hex.
[17.16] Mines attack Friend and Foe alike. In his initial deployment, a Player may elect to place Friendly units in mined hexes. If and when he chooses to move those units out of the mined hexes, they must suffer Mine Attacks.
[18.0] HOW TO SET-UP AND PLAY THE GAME
[18.1] SCENARIOS
As stated in the Introduction, the game is played by Scenarios. Each Scenario is from six to twenty Game-Turns in length and the number of units per side varies with the Scenario. A Scenario is a game in itself and the term Scenario and game are used interchangeably. Each Scenario listing contains a historical note which relates the Scenario to the actual event which is being simulated, an Order of Battle for each Player, and other instructions relating to the length of the Scenario, initial deployment of forces and later reinforcements, Victory Conditions and special rules pertaining to that Scenario.
[18.2] SETTING UP
The Players must first decide between themselves who is going to play which side. Then they must decide what Scenario to play. Once they have decided which Scenario to play, that Scenario becomes the game. (Note that Scenarios do not link together.) Next they must spread out the map and seat themselves around the map, and select their respective forces from the counter mix according to the Scenario Instructions, deploying these forces on (or about to enter) the map in accordance with the Scenario Instructions. After this, they may begin the first Game-Turn.
[18.3] ORDERS OF BATTLE
Each Player is given an Order of Battle under the listing of the side he has chosen. This Order of Battle lists each playing piece by unit code and the number of that type unit. 3(I) means three infantry platoons, 5(PZV) means five PZV platoons (Panther tanks). This Order of Battle is further broken down (when necessary) into initial starting forces and reinforcements, which are also broken down (when necessary) if the forces are deployed in different areas of the map or if they arrive at different times or entry points.
[18.4] DEPLOYMENT
A Player's initial forces (those units he begins the first Game-Turn with) are placed according to the Instructions in the Scenario being played. Usually these forces are either placed physically on the map surface itself (Initial Deployment on Map) or are adjacent to the map surface for entry onto the map on the first or succeeding Game-Turns.
[18.41] Initial Deployment on the Map
When a Player is instructed to deploy certain units (collectively described as a "force") on the map, he is normally told to deploy them within a certain area (deployment area) which is bounded by one or more mapedges and lines drawn (hypothetically) between hexes on the hex grid or along hex rows. (Note the compass rose on the map, indicating North, East, etc.) Thus, if a force is required to deploy "South of the line hex 0119 through hex 3134, inclusive" it means that the Owning Player would deploy the units anywhere in the Southwestern corner of the map, including and below (south of) the line of hexes 0119, 0219, 0320, 0420, 0521...2832, 2933, 3033, 3134. Occasionally, a deployment area will correspond to a complete terrain feature. The Owning Player has freedom to place his units as he sees fit, within the deployment area, subject to the normal Terrain and Stacking Restrictions.
[18.42] Initial Deployment Off the Map
When the Deployment Instructions state that a force is to enter the map on Game-Turn One, they mean that the force is positioned adjacent to the map so that it might enter the map on the Movement Phase of the first Game-Turn. The Deployment Instructions will indicate whether or not the force is to enter the map in a column formation (one unit behind the other, each entering successively into the same hex, see 18.61) or whether the force can enter in a free formation (each unit entering onto one hex of a row of hexes or of an entire map edge, see 18.66). In either case, the units composing the entering force must be prepositioned in the order of formation in which they will enter the map.
[18.43] Secret Deployment
When using restricted Player knowledge and inverted counters (see 11.5), the Players always place their units face-down. The First Player always deploys first (unless stated otherwise) and his Player-Turn is always the first in each Game-Turn. The First Player is defined in each Scenario.
[18.5] VICTORY CONDITIONS
These are used to determine the winner at the end of the game. They usually state either a geographical objective, or explain how to gain Victory Points. When Victory Points are itemized in the Victory Conditions, the Player with the greater number of Victory Points at the end of the game wins. When the Victory Conditions refer to "combat units" they mean any unit with an Attack Strength (not trucks or APC's). When the Victory Conditions mention a town, they refer to all of the town hexes composing the town. When a unit is exited off the map in fulfillment of Victory Conditions, it must pay the Movement Point cost for the hypothetical hex it is presumed to be entering upon leaving the map. The terrain in the hypothetical hex is arbitrarily identical to that in the exit hex. Victory is evaluated at the conclusion of the final Game-Turn in the Scenario.
[18.6] REINFORCEMENTS
Scenario Instructions may state that units enter the map "in column" or "in free formation".
[18.61] Entry in column is accomplished as follows: The units are deployed off map, one behind the other, with the lead unit poised adjacent to the map entry hex listed. If the entry hex is a road hex, a hypothetical road may be presumed to stretch off the map, away from the entry hex.
[18.62] As each unit enters the map, it will pay the cost for entering the entry hex plus the additional cost for any hypothetical clear terrain hexes that it would have to traverse to reach the entry hex. If units are entering on a road hex, they are considered to be moving through hypothetical road hexes until they reach the map. Example: The lead unit in the column would pay ½ Movement Point to enter the map, the second would pay 1 Movement Point to enter the map, the third 1½ Movement Points, etc., etc.
[18.63] Once the Players have composed their columns, they may not alter the positions of units in the columns to change the order in which units reach the map.
[18.64] Given the number of units in some Scenarios, often it will not be possible to enter all units onto the map during the first Game-Turn that they are available. Units which cannot enter the first Game-Turn of availability simply enter on the second Game-Turn in column order. Units which are off map are out of play for all game purposes except, of course, to be moved along in sequence, in order to eventually reach the map.
[18.65] Once a unit enters the map, it may be moved freely with no restrictions as to formation.
[18.66] When the Scenario states that units may be brought on in free formation, the units may be brought on to the map in any formation the Player wishes; in one column, multiple columns, one unit per entry hex, or any combination. The Player may use as many entry hexes as he wishes; however, if more than one unit enters the map through the same hex, then the units which do so are presumed to have entered in column and must follow the procedure for entry in column, above.
[18.67] Reinforcements may be brought on to the map in Mounted condition, at the Player's option, when vehicles are provided.
[18.68] If a unit's assigned entry hex is occupied by an Enemy unit, it must enter on the nearest non-Enemy hex.
[19.0] SCENARIOS - US 12th ARMY GROUP
[19.1] BEHIND UTAH, June 6, 1944
INITIAL FORCES
US Player: 13(Inf), 3(MG), 1(81m), 3(Eng)
German Player: 9(Inf), 3(20/4), 1(75a), 2(82m); 1(T)
DEPLOYMENT
The German Player deploys first (although he is not the First Player). He may deploy his units any place he sees fit east of hexrow 3700, inclusive. The map area west of 3700 is out of play and no units may enter this area.
The American Player then places his infantry platoons face down on the map in any hexes he wishes. These are the planned drop hexes. The units will actually deploy in some other hexes, determined as follows:
For each unit, roll the die once for a scatter direction (see Scatter Diagram on the map). Then roll the die again for the number of hexes (equal to the die roll) distant from the planned drop hex that the unit is actually placed, in the proper scatter direction. Units which scatter off the map or into the map area out of play are eliminated. Units which scatter onto German units are placed, by the German Player, in an adjacent vacant hex. Units which scatter into the same hex must unstack by the end of the first Game-Turn. As they scatter, the units are turned face-up. Once the American Player has completed the drop deployment, the Game begins.
REINFORCEMENTS
German Player only: 1(STG 3), 5(Inf), 3(SPW), 2(T) on Game-Turn Seven in free formation on the north edge of the map.
1(PzIV) on Game-Turn Fifteen anywhere on the north edge of the map. (This unit is the trigger for the Victory Conditions.)
RULES OF ENGAGEMENT
- The American Player is the First Player.
- Play is confined to the map area east of hexrow 3700.
- Neither Player may use Direct Fire on Game-Turn One. Opportunity Fire and Indirect Fire are allowed.
PANIC LEVELS
Panic Levels are initially high for both Players, decreasing as the Game progresses. They are the same for both Players.
- Game-Turn 1: 50%
- Game-Turn 2: 40%
- Game-Turn 3: 30%
- Game-Turn 4: 20%
- Game-Turn 5: 10%
- Game-Turns 6-20: no panic.
GAME LENGTH
20 Game-Turns.
VICTORY CONDITIONS
The German Player wins by exiting the PzIV unit off the South map edge by the end of the game. The American Player wins by preventing a German victory.
HISTORICAL NOTES
Early on the morning of June 6, 1944, three Allied Airborne Divisions dropped into the fields behind the Normandy beaches. Their main objective was to isolate the beaches by seizing towns and villages guarding the approach roads to the seashore. Despite being dispersed by the night drop, by and large, the airborne divisions were able to accomplish their mission.
[19.2] SEDAN REVENGED, September 13, 1944
INITIAL FORCES
French Player: 6(M4), 3(M10), 6(M1), 6(M3), 2(M7) at Arracourt. 3(M4), 3(M4a), 3(M18), 3(M1), 3(M3) at Bures. CAS - 4(10H).
German Player: 10(PzV), 3(Inf), 3(SMG), 1(75a), 1(Wspe), 7(SPW).
DEPLOYMENT
The French Forces deploy in or adjacent to their respective deployment locales. German units deploy within the quadrilateral area bounded by hexes 1316, 1718, 2215 and 1813, inclusive. All units for both Players must be mounted.
RULES OF ENGAGEMENT
- The French Player is the First Player.
- The German Player may not use Direct, Opportunity or Indirect fire on Game-Turn One.
- The French Player may only use one Close Air Support (CAS) strike per Game-Turn.
PANIC LEVELS
French Player: 10%
German Player: 30%
GAME LENGTH
8 Game-Turns.
VICTORY CONDITIONS
Each Player receives one Victory Point for each enemy Attack Strength Point eliminated.
PLAYER'S NOTES
This scenario definitely favors the French Player. To balance play, drop the German Panic Level to 10%.
HISTORICAL NOTES
The 112th Panzer Brigade was a recently formed unit which was allocated to the German Army Group G. After reading his situation maps, Hitler decided that a counterattack against the southern flank of U.S. 3rd Army would relieve Nancy, prevent the juncture of the 3rd and 7th Armies and, who knows, it might be the start of something big. So the 112th was ordered to advance, no reconnaissance, no coordination with other units, right into the supposed flank of the Allies.
The Brigade advanced in two columns, leaving Epinal on September 12th. The first day there was no opposition and the right hand column bivouacked near the village of Dompaire. Unbeknownst to the Germans, CCL of the French 2nd Armored Division had camped on the other side of the village. Informed by peasants and scouts of the presence of the Boche, CCL's commander ordered an enveloping attack the next morning. Aided by American fighter-bombers, the French obliterated the Germans, destroying 34 out of 48 Panther tanks and almost all other vehicles.
[19.3] BRIDGEHEAD AT WALLENDORF, September 15, 1944
INITIAL FORCES
American Player: 9(M1), 1(57a), 1(M21), 12(M3), 6(M4), 3(M4a), 3(M5).
German Player: 2(Inf), 4(SMG), 1(82m), 1(150i).
DEPLOYMENT
The American Player deploys south of the Rhine-Meuse Canal. The German Player deploys north of, but not adjacent to, the Canal.
REINFORCEMENTS
American Player: 2(M7), 2(M15), 2(M16) on Game-Turn 1 at hex 0534 in column.
German Player: 2(Inf), 2(SPW), 2(PzIV) on Game-Turn One at hex 4534 in column. 5(Inf) on Game-Turn Two anywhere between hexes 6101-6125, inclusive. 4(88a), 4(SPW), 3(JIV), 2(105f), 3(Inf), 9(T) on Game-Turn Five anywhere on the north edge of the map.
RULES OF ENGAGEMENT
- The American Player is the First Player.
PANIC LEVELS
American: 10%
German: 20%
GAME LENGTH
15 Game-Turns.
VICTORY CONDITIONS
The American Player receives 5 Victory Points the instant that the first undisrupted, dismounted mech infantry unit (M1) occupies any hex in Coincourt; similarly, for Moncourt and Ley. In addition, he receives 5 Victory Points for each of the three towns in which any American combat unit, in any state, occupies any one hex throughout the entire final Game-Turn. Thus, by fulfilling all of the above conditions, the American Player could receive a maximum of thirty Victory Points.
The German Player receives 10 Victory Points for each of Xerses, Parroy, and Moncourt, in which any German combat unit occupies any one hex throughout the entire final Game-Turn.
Each Player also receives one Victory Point for each Enemy Attack Strength Point eliminated.
PLAYER'S NOTES
It is possible and not improbable that both Players will receive points for having a unit in Moncourt at the conclusion. While the American Player has strength and initiative going for him in the early turns, he must keep in mind the German reinforcements which appear from all directions.
Despite the American strength, the German Player by his initial deployment can often dictate the course of play. He can seek to hold Xerses and Parroy, thereby precipitating actions on the shoulders of the American salient, or he can garrison Moncourt, hoping to keep the American out of both Moncourt and Ley.
HISTORICAL NOTES
On September 15th, the Allied High Command was electrified to learn that a reconnaissance-in-force, spearheaded by CCR of the 5th Armored Division, had crossed the Our River, penetrated the Siegfried Line and had achieved the first serious incursion on German Territory. For the next several days, the salient was expanded as reinforcements were fed in. Eventually, however, German counterattacks and a worsening logistics situation forced the Americans to decide either to heavily reinforce the lodgement to the detriment of other operations or withdraw back over the Our. The decision was taken to withdraw.
While it lasted, the operation scared the hell out of the Germans, who threw bits and pieces of the Panzer Lehr, 108th Panzer Brigade, 19th VG Division and assorted training and flak battalions at the incursion.
[19.4] LUNEVILLE, September 15, 1944
INITIAL FORCES
American Player: 3(M1), 3(MG), 1(AH), 7(M8), 6(M3), 3(M5).
German Player: 3(Inf), 1(Eng), 2(82m), 1(Puma), 3(324/1), 1(234/4), 6(SPW)m 1(Stg3).
DEPLOYMENT
American units enter in column formation from the South edge of the map at hex 0534 on Game-Turn One. Non-vehicle units are to be mounted.
German units enter in column formation from the West edge of the map at hex 0110 on Game-Turn One, also in mounted condition.
RULES OF ENGAGEMENT
- The American Player is the First Player.
PANIC LEVELS
American: 10%
German: 10%
GAME LENGTH
12 Game-Turns.
VICTORY CONDITIONS
Each Player receives 4 Victory Points for each undisrupted, dismounted Friendly combat unit in Coincourt, and 1 Victory Point for each such disrupted unit.
Each Player also receives 1 Victory Point for each vehicle unit (except M3 and SPW) which remains within two hexes of any Coincourt town hex throughout the entire final Game-Turn.
HISTORICAL NOTES
After crossing the Moselle River, advance elements of the American XII Corps penetrated around and behind the strategic city of Nancy in an attempt to pocket the German 553rd VG Division. This advance ran into German reserve units which were in transit, in preparation for a projected counterattack.
This scenario simulates the action between the U.S. 42nd Armored Cavalry Squadron and the Reconnaissance Battalion of the 15th Panzer Grenadier Division, which took place in and around the town of Luneville, southeast of Nancy.
The German recon unit had arrived in Luneville as the lead element of the Division; it immediately clashed with the 42nd Cavalry which was screening the advance of the U.S. 4th Armored Division. During the first day of the action, the 42nd Cavalry tried to eject the Germans from the Lunville position, but failed.
On the following two days (not simulated), with the aid of detachments from the 4th Armored Division, the 42nd was able to clear Luneville.
This action demonstrated the differences between the reconnaissance arms of the opposing armies. By 1944, the German Reconnaissance Battalions were organized as mixed combat teams expected to fight stand-up actions, not only for information, but also as line combat units. The American Cavalry were expected to perform within a more traditional role, of screen, probe and pursuit and were armed and organized accordingly.
[19.5] ARRACOURT, September 19, 1944
INITIAL FORCES
US Player: 2(M4), 1(M4a), 2(M5) at Bezange. 1(M5) at Moncourt. 4(M7) at Bois de Benamont. 1(M18), 1(M8) at Arracourt. 4(Eng), 2(MG), 3(T) at Haut de Roules.
German Player: 8(PzV), 9(Inf), 9(SPW), 2(120m), 1(82m), 3(T).
DEPLOYMENT
The German Player deploys in or adjacent to Ley. He may deploy mounted.
The US Player deploys his forces in or adjacent to their respective deployment locales. He may not deploy mounted.
REINFORCEMENTS
US Player: 2(Eng), 2(T), 1(M18), 1(M8) on Game-Turn One, in column, on hex 0110. 2(M4), 1(M4a), 6(M1), 6(T) on Game-Turn Four, in column, on hex 1101. 2(M4), 1(M4a) on Game-Turn Six, in column, on hex 0129.
German Player: 5(PzIV), 3(Inf), 3(T), 2(88a), 2(SPW) on Game-Turn Six, in column, between hexes 3934 and 6134, inclusive.
RULES OF ENGAGEMENT
- The German Player is the First Player.
PANIC LEVELS
German Player: 20%
US Player: 10%
GAME LENGTH
20 Game-Turns.
VICTORY CONDITIONS
The German Player receives 5 Victory Points for each combat unit in an Arracourt town hex at the end of the game.
The American Player receives 5 Victory Points for each combat unit in a Ley town hex.
Each Player also receives one Victory Point for each Enemy Attack Strength Point eliminated.
The German Player must achieve at least 30 Victory Points or he loses, regardless of the American Point total.
HISTORICAL NOTES
On September 19, 1944, the German 48th Panzer Corps began a counterattack driving west along the Northern flank of the Marne-Rhine Canal, with the ostensible purpose of relieving elements of the 553rd Volksgrenadier Division which had been partially surrounded in the Nancy area. The German drive was spearheaded by 113th Panzer Grenadier Regiment. With no reconnaissance and in a piecemeal fashion the Germans barreled into CCA of the American 4th Armored Division. In a series of mobile battles, the Germans were stopped and forced back despite receiving reinforcements from the 111th Panzer Brigade.
[19.6] HELL'S HIGHWAY, September 22, 1944
INITIAL FORCES
German Player: 9(Inf), 3(SMG), 1(82m), 1(120m), 1(105f), 1(150i), 1(75a), 1(PzV), 3(SPW), 2(T).
American Player: 9(Inf), 1(MG), 1(57a), 1(81m), 1(40), 2(T).
DEPLOYMENT
The German units deploy anywhere on or adjacent to the Haut Des Roules.
American units deploy anywhere North of hexrow 0012, inclusive.
REINFORCEMENTS
American Player only: 4(Inf), 1(57a), 5(T), 3(M4), 1(M4a) on Game-Turn Five, anyplace along North edge of the map, free formation.
RULES OF ENGAGEMENT
- The German Player is the First Player.
- The American Player may not overrun units on the Tenth (final) Game-Turn.
- The German Player may not use Indirect Fire until Game-Turn Three.
PANIC LEVELS
German: 30%
American: 10%
GAME LENGTH
10 Game-Turns.
VICTORY CONDITIONS
The German Player wins if he has at least one undisrupted, dismounted infantry (Inf or SMG) unit on any road hex between hex #1109 and 2612, inclusive, at the end of the game.
The American Player wins by preventing a German Victory.
HISTORICAL NOTES
While the British 1st Airborne was struggling to hold on in the ruins of Arnhem, the American 101st and 82nd Airborne were attempting to keep the narrow one-road corridor open for Horrocks XXX Armored Corps to drive through and reach the Rhine. The Germans continually attempted to cut the corridor while the American paratroopers raced from one threatened point to another. The corridor was soon nick-named "Hell's Highway". Though the Germans were able to cut it several times, they never were able to interdict it permanently. This scenario portrays the attack of Kampfgruppe Huber (one of several scratch forces thrown against the corridor) which cut the road on September 22, and the subsequent counterattack by elements of the 501st Airborne, which restored the road.
[19.7] ASSAULT ON FORT DRIANT, October 3, 1944
INITIAL FORCES
American Player: 9(Inf), 3(Eng), 3(M4), 1(M36), OFBDA-3(10H), CAS-1(9H).
German Player: 3(Inf), 1(SMG), 2(75a), 1(75i), 1(150i).
DEPLOYMENT
The German Player deploys his units on or within one hex of hexes 3419 and 3420. All units must be deployed within Improved Positions.
The American Player then deploys his units as he sees fit, so long as no American unit is adjacent to a German unit.
RULES OF ENGAGEMENT
- The American Player is the First Player.
- Improved Positions are not destroyed when vacated, and may be used by either Player.
PANIC LEVELS
American: 10%
German: 10%
GAME LENGTH
6 Game-Turns.
VICTORY CONDITIONS
The American Player wins if Friendly units, disrupted or undisrupted, occupy at least half of the Improved Positions at the end of the game.
The German Player wins by preventing an American Victory.
PLAYER'S NOTES
This scenario is primarily a slugfest. The German Player rarely has any reason to move, while the American Player need not move far. Practically speaking the US units are impotent (except for the M36) unless they are adjacent to the German defenders.
While it may seem wise for the German Player to construct 8 Improved Positions (thereby occupying 8 of the 10 possible deployment hexes) and in so doing, force the Americans to reduce more positions, that tightly packed a formation practically guarantees that the US off-board artillery and Close Air Support will hit something even if it scatters.
HISTORICAL NOTES
When logistical bottlenecks and revived German defenses brought an end to the Third Army's blitzkrieg in early October, 1944, the fortress of Metz was still in German hands, solidly dug in around a ring of modernized detached forts. The defense of Metz rested on division number 462, a hastily assembled unit composed primarily of recruits who were attending the NCO schools, located in Metz. Ever since September 27th, troops from the American 5th Division supported by heavy artillery and air bombardment had been attacking Fort Driant, lynchpin of the southern Metz defenses. The climactic assault took place from October 3rd to 9th and involved at one time or other several battalions of the 10th and 11th Infantry Regiments. While the Americans were successful in seizing several of the casemates on the fort's surface, the Germans held out underground and were able to feed reinforcements via a covered access road. Eventually, the U.S. command decided to terminate the attack as the attempt was costing upwards of a battalion a day. Fort Driant was finally taken en passant in November.
[19.8] ATTACK ON THE SIEGFRIED LINE, October 7, 1944
INITIAL FORCES
American Player: 9(Inf), 1(MG), 1(81m), 6(M4), 3(M4a), 4(105f).
German Player: 2(Inf), 4(SMG), 2(82m), 2(75a), 2(75i), 5 Hasty Mined Hexes.
DEPLOYMENT
The American Player deploys to the west of hexrow 4400, inclusive.
The German Player then deploys his units and the mines any place east of hexrow 4400, exclusive. (He should note the Victory Conditions in deploying). He may deploy in Improved Positions.
REINFORCEMENTS
German Player only: 4(StG3) on east map edge on Game-Turn Four, in free formation.
RULES OF ENGAGEMENT
- The American Player is the First Player.
- Rule 12.22 (re: destruction of Improved Positions) is in full effect (unlike Scenario 19.7).
PANIC LEVELS
American: 10%
German: 50% First Game-Turn; 10% thereafter.
GAME LENGTH
11 Game-Turns.
VICTORY CONDITIONS
The American Player wins by destroying all the Improved Positions in the quadrilateral area bounded by hexes 4726-4731-4930-4925, inclusive.
The German Player wins by preventing an American Victory.
PLAYER'S NOTES
Obviously, if the German Player fails to deploy any Improved Positions within the quadrilateral area mentioned, he is conceding an American Victory before the Game begins. The American is under no obligation to attack German positions outside this area except out of tactical necessity.
HISTORICAL NOTES
In early October, 1944, the U.S. First Army launched an operation designed to penetrate the German WestWall positions north of the Aachen salient with the eventual objective of pinching out Aachen itself. The initial penetration was to be made by elements of the 30th Infantry Division, with the assistance of the 2nd Armored Division, which was also to exploit any breakthrough. The sector attacked was held by the newly reorganized 183rd VolksGrenadier Division. The attack led to a clean breakthrough, which the 183rd VG, reinforced by units of the 107th Panzer Brigade, was unable to reduce.
[19.9] SARRE RIVER, November 24, 1944
INITIAL FORCES
American Player: 3(M4), 3(M4a), 3(M36), 2(M7), 5(M3), 2(T), 3(M1), 1(M21), 1(57a), 2(MG), 1(40).
German Player: 5(PzIV), 5(PzV), 4(SPW), 3(T), 3(Inf), 1(82m), 2(105f), 1(75a).
DEPLOYMENT
American units enter any place on the west edge of the map on Game-Turn One. German units enter any place on the east edge of the map on Game-Turn One.
RULES OF ENGAGEMENT
- The American Player is the First Player.
- Movement Point costs for vehicles moving off-road in clear terrain hexes are doubled; i.e., trucks pay four Movement Points, other vehicles pay two Movement Points to enter a clear terrain hex. Other terrain costs remain the same.
PANIC LEVELS
American: 10%
German: 20%
GAME LENGTH
15 Game-Turns.
VICTORY CONDITIONS
The American Player receives Victory Points for exiting units off the Eastern map edge. The German Player receives Victory Points for exiting units off the Western map edge.
Total the Attack Strength, Defense Strength and Movement Allowance of an exited unit; this is the number of Victory Points received for exiting that unit. No Victory Points are received for exiting a halftrack or truck unit, unless it transports a non-vehicle unit off the map, in which case Points are received for the vehicle unit and the non-vehicle unit. Example: If the German Player succeeds in exiting a Panther (PzV) unit off the West edge, he receives 26 Victory Points (10+10+6).
In the case of a tie, the American Player wins.
HISTORICAL NOTES
After the fall of Metz in November, the advance of the American XII Corps threatened to unhinge the German position in the Vosages. The situation became so critical that Hitler released the Panzer Lehr Division from reserve (for the Bulge Offensive) so that it might counterattack the flank of the American advance along the Sarre River. Initially, the Panzer Lehr was able to drive back scattered elements of the 45 Infantry Division, but on November 24th, it ran into the 4th Armored Division, which fortuitously had been redeploying in the area. This scenario simulates the meeting engagement between the western column of the Panzer Lehr and CCB of the 4th Armored. The historical result of this confrontation was a blunting and containment of the German drive with the Panzer Lehr eventually being driven back to its start line and suffering heavy losses which were not made good before the American offensive.
Heavy rains during November resulted in soggy terrain which limited off-road tank movement.
[20.0] SCENARIOS - BRITISH 21st ARMY GROUP
[20.1] VILLERS BOCAGE, June 13, 1944
INITIAL FORCES
British Player: 6(Crm), 2(M4), 1(Fir), 2(Inf), 2(M3) mounted on road between hex 2912 and hex 3520, inclusive. 1(Crm), 1(M4), 1(Fir), 1(Inf), 1(M3) in Juvrecourt. 3(Inf), 2(57a), 5(M3) in Bezange. 4(105f) in Arracourt. 2(M5) in Parroy.
German Player: 2(PzVIa) in hexes 2511 and 2512. 2(PzIV) in Coincourt. 6(Inf) in and adjacent to hex 3118. 1(82m), 1(120m), 2(75a), 2(SPW) in Bures.
DEPLOYMENT
The Players deploy their units in or adjacent to their respective deployment locales.
RULES OF ENGAGEMENT
- The German Player is the First Player.
PANIC LEVELS
German: 10%
British: 60% on Game-Turn One; 20% on all succeeding Game-Turns.
GAME LENGTH
11 Game-Turns.
VICTORY CONDITIONS
The Player with the most combat units (any disruption state) in Rechicourt and Haut de Cognumont at the end of the game wins.
HISTORICAL NOTES
A regimental group of the 4th County of London Yeomanry (Sharpshooters) with a mixture of Cromwell and Sherman tanks, and "A" Company of the 1st Battalion of the Rifle Brigade, captured the town of Villers Bocage in Normandy with little opposition on the morning of June 13, 1944, as part of the operations to expand the Normandy bridgehead. Units were despatched to hold nearby Hill 213 and the Stuart tanks and scout cars were despatched on a reconnaissance mission, while most of the unit stayed in Villers Bocage.
Unbeknownst to the British, the Germans had infiltrated near to both Villers Bocage and Hill 213 with kampfgruppen of the Panzer Lehr and 12th SS Panzer Divisions. They attacked both the town and the hill. In the town, the British tanks were caught in the narrow streets by the near-invulnerable Tiger tanks and suffered heavy losses. The Germans then moved on to Hill 213, where the British were mopped up. The Germans then reorganized their forces and attacked Villers Bocage again. The British had, however, reorganized and had been reinforced by "B" Company and the AT Platoon of the 1st/7th Battalion, the Queen's Royal (West Surrey) Regiment. The Germans lost several Tigers and other tanks to point-blank fire in the streets of the town; the surviving Fireflies did particularly good work. Discouraged, the Germans withdrew, but the British position was untenable and they, too, had to retreat. The Yeomanry had suffered heavy losses and the Rifle Brigade had one platoon totally wiped out, and many casualties in the others.
[20.2] OPERATION EPSOM, June 27, 1944
INITIAL FORCES
British Player: 7(Inf), 1(MG), 1(81m), 2(57a), 2(M3), 6(M4), 3(M4a), 3(Fir), 3(105f).
German Player: 8(PzV), 9(Inf), 2(82m), 2(120m), 1(StuH), 3(SPW), 1(105f).
DEPLOYMENT
Play is confined to the map area west of hexrow 2300.
The British Player sets up on or south of hexrow 0017.
The German Player sets up on or north of hexrow 0015.
RULES OF ENGAGEMENT
- Play is confined to the map area west of hexrow 2300, exclusive. No unit may set up or enter the area east of hexrow 2300.
- The German Player is the First Player.
PANIC LEVELS
German: 10%
British: 10%
GAME LENGTH
10 Game-Turns.
VICTORY CONDITIONS
The German Player wins if any undisrupted Friendly combat unit has clear line of sight to any town hex of Bathelmont at the end of the Game.
The British Player wins by preventing a German Victory.
HISTORICAL NOTES
Operation Epsom was one of several aimed at expanding the Allied bridgehead in Normandy. Its objective included the important heights south of the River Orne, one of which was Hill 112.
The British attacked on a fairly dense frontage, employing armored units in the initial attack to conserve infantry losses. The units attacking towards Hill 112 included the 23rd Hussars, 2nd Fife & Forfar Yeomanry, 3rd Royal Tank Regiment, and 8th Battalion, the Rifle Brigade, all of the 29th Armored Brigade, 11th Armored Division. They were supported by 11th Armored Divisional Artillery. Their advance took them through dense bocage country between the Orne and Hill 112, where a kampfgruppe of the 2nd Panzer Division offered bitter resistance. British tanks suffered substantial losses, but numbers prevailed and the Germans were mopped up. Hill 112 was occupied soon afterwards. Shortly, a Kampfgruppe of the 2nd SS Panzer Division made a counterattack. This was repulsed, however, by supporting artillery and the 17lb. guns of the British Firefly tanks, which could pierce the front armor of a PzV. As a result, the British maintained their position and helped to expand the bridgehead.
[20.3] COUNTERATTACK AT WOENSDRECHT, October 13, 1944
INITIAL FORCES
Canadian Player: 6(Inf), 1(Eng), 1(81m), 1(17a), 2(M3), 2(105f).
German Player: 6(Inf), 4(PzIV), 1(StuH).
DEPLOYMENT
The Canadian Player sets up west of hexrow 2300, inclusive.
The German Player sets up east of hexrow 2500, inclusive.
REINFORCEMENTS
German Player: 3(Inf), 1(82m), 2(120m), 6(Spw), 2(StG3) on Game-Turn Two at hex 3308 in column.
Canadian Player: 3(M4), 1(Fir), 3(Inf), 3(Kgr), 1(17a), 1(M3) on Game-Turn Three at hex 0110 in column.
RULES OF ENGAGEMENT
- Play is confined to the area west of hexrow 3300 and north of hexrow 0015.
- The German Player is the First Player.
- Clear Terrain hexes are flooded and vehicles are prohibited from entering them except along a road (non-vehicles unaffected).
- As a special rule, vehicles are permitted to enter hexes containing contour splashes (i.e., those with flanking crest hexsides) even though these hexes are normally, for the most part, clear terrain hexes. Vehicles pay a uniform rate of three Movement Points to enter such a hex.
- A wreck normally negates a road for movement purposes. However, in this scenario a vehicle may move along a road through a wreck, paying 3 Movement Points to enter the wreck hex.
PANIC LEVELS
German: 20%
Canadian: 10%
GAME LENGTH
10 Game-Turns.
VICTORY CONDITIONS
The Canadian Player wins if any undisrupted Friendly combat unit has a clear line of sight to hex 2515 at the end of the Game.
The German Player wins by preventing a Canadian Victory.
HISTORICAL NOTES
As part of the defenses of the Antwerp approaches, the Germans had flooded much ground around the River Scheldt, which led to that strategic port. Units of the 2nd Canadian Division were among those that had to fight over this cold, wet area, in which any ground above water level had great importance.
Some days before, two companies of the Black Watch of Canada had turned the German position and had occupied some high ground. When the Germans began a counterattack with elements of "Division Chill", a scratch formation, the Canadians brought up the rest of the Black Watch and the Governor General's Footguards 21st Canadian Armored Regiment, which had suffered heavily in earlier fighting. Supported by 2nd Division artillery, the Black Watch held the Germans at bay long enough for the tanks to come forward. But the flooded condition of the area and the blocking of the roads by German fire brought their advance to a standstill.
[20.4] ACTION AT MENZELEN, March 6, 1945
INITIAL FORCES
British Player: 4(M4), 4(M4a), 4(Fir), 12(Inf), 2(MG), 2(17a), 12(M3), 2(M7), 3(Arc).
German Player: 4(PzV), 4(PzIV), 1(FpIV), 6(Inf), 1(SMG), 1(Wspe), 2(120m), 2(75a), 2(88a), 4(SPW), 8(T).
DEPLOYMENT
British deploy anywhere west of hexrow 2400 and south of hexrow 0024.
The Germans deploy anywhere east of hexrow 2400 and north of hexrow 0016.
RULES OF ENGAGEMENT
- The British Player is the First Player.
- German units may not deploy in or ever enter Ley.
- British units may not enter Ley until the final Game-Turn.
PANIC LEVELS
British: 10%
German: 10%
GAME LENGTH
20 Game-Turns.
VICTORY CONDITIONS
The British Player must move four combat units into any Ley town hexes on the final Game-Turn in order to win.
The German Player wins by preventing a British Victory.
HISTORICAL NOTES
As part of Operation "Grenade," the British advance into the Rhineland, British forces began to "roll back" German units on the British flanks. The British forces included the Guards Armored Division, whose Battle Group "None" of the 2nd (armor) Battalion, the Grenadier Guards and the 1st (motor) Battalion, the Grenadier Guards, along with attached units, encountered elements of the Panzer Lehr Division at Menzelen. Although the Germans offered extremely strong resistance, they were eventually overcome and the Guards broke through.
[20.5] LAST DITCH ACTION AT IBBENBUREN, March 31, 1945
INITIAL FORCES
British Player: 6(Crm), 2(M5), 8(Inf), 2(MG), 10(M3).
German Player: 4(Inf), 4(SMG), 2(82m), 2(120m), 3(75a), 1(88a), 5(T), 1(SPW).
DEPLOYMENT
British units deploy in and around Parroy south of hexrow 0028 and west of hexrow 4300.
German units may deploy anywhere outside of the British deployment area. The German Player may deploy a maximum of four Improved Positions and five Hasty Mined Hexes. He may deploy only one unit in Moncourt (though he may move other units in after play begins). He may not place mines in town hexes.
RULES OF ENGAGEMENT
- Play is confined to the corridor between hexrows 3500 and 5200, inclusive.
- The British Player is the First Player.
PANIC LEVELS
German: 20%
British (Special Rule): Begin the game with zero Panic Level. Thereafter, the British Panic Level rises 10% for every British Combat unit which is destroyed.
GAME LENGTH
15 Game-Turns
VICTORY CONDITIONS
The British Player must have an undisrupted, dismounted infantry unit (Inf) or (MG) in Moncourt at the end of the game in order to win.
The German Player wins by preventing a British Victory.
HISTORICAL NOTES
The Allied advance into Germany in the last days of the war was not always smooth. This was seen when the 2nd Fife and Forfar Yeomanry, newly re-equipped with Comet tanks, and the 3rd Battalion, the Monmouthshire Regiment, both of the 11th Armored Division, were attempting to advance on the city of Osnabruck. Near the town of Ibbenburen, they encountered stiff resistance from German forces, including the faculty and students of the Hanover NCO training school. The Monmouths, supported by the fire of the tanks, attacked towards the German position. Although some progress was made, the British were eventually driven back by heavy German infantry and anti-tank fire, and were forced to withdraw.
[21.0] GAME NOTES
What follows is a discussion of some rules applications (both obvious and not so obvious) and some design intent behind the rules.
PLOTTING & SIMOVE: The whole idea behind making the Players go through the plotting exercise is to introduce an element of uncertainty into the play of the game which otherwise would be impossible to create. The first prototypes of this game required the Players to plot movement hex by hex, a very laborious task. And one which was soon eliminated. It was sufficient to require a simple move notation without detailed plot. Playtesting revealed that most movement was obvious and that a sequential execution rarely affected the course of play. Fire, on the other hand, had to be kept simultaneous and fairly detailed. When a sequential execution of Direct Fire was tried (simply plotting DF without specifying a target) it was found to give the Second Player too much advantage. He would know by process of elimination which of the First Player's units could move and decide on that basis how to allocate his fire.
DIRECT FIRE, OPPORTUNITY FIRE & INDIRECT FIRE: You will note that it is impossible even at a +8 differential to guarantee a kill with just one attack. In most scenarios it is better to concentrate fire on one or two targets per turn, seeking to insure a kill, than it is to spread fire. Opportunity fire calls for some thinking. The Player must consider what potential targets are liable to trigger his Opportunity Fire and at what range. Also remember the Enemy can use his less valuable units to probe avenues of approach seeking to trigger OF prematurely. [Rule 6.56 is not sacrosanct. Players who trust one another and have a modicum of common sense can modify it as they see fit.] Generally, it is more profitable to use Direct Fire than Opportunity Fire. A bird in the hand, etc. Indirect Fire comes after the Disruption Removal Phase; thus its effects, if any, persist into the following Game-Turn. It can be used with Direct Fire as a one-two combination, particularly if the target is a softy.
H FIRE: H Class units are divided into those that can deliver Indirect Fire and those which cannot. The ones that can (mortars and field artillery) should be hidden away where only counterbattery can reach them. One or two mortar platoons firing Indirect loose pattern H can almost single-handedly stop several dismounted infantry platoons from advancing. The flat trajectory H weapons, on the other hand, can be surprisingly useful for Opportunity Fire at long range. They do not suffer Range Attenuation and even the lightest unit has a chance of affecting a tank platoon with a tight pattern OF at ten or fifteen hexes.
DEFENSIVE PLACEMENT: Where possible, units should occupy woods or town hexes. This benefits the unit in two ways: it nullifies Spotting in many cases and always directly affects the combat die roll. Mortars and artillery should never be placed within two hexes of another unit which can be Spotted, even if they themselves are hidden. The Enemy Player could then fire at the Spotted unit with an Indirect loose pattern and hope to scatter and overlap onto the vulnerable mortar unit. This same principal holds true for most positioning. Don't bunch up.
MOUNTED versus DISMOUNTED ASSAULTS: If APC's are available, infantry should remain mounted, and move to within two hexes of the infantry defender before dismounting. This minimizes H and R fire on their movement. If the defender is a non-infantry unit, they might just as well move adjacent before dismounting. If no APC's are available, an attempted infantry movement of more than three hexes in the face of an undisrupted defender is virtual suicide. If at all possible, dismounted infantry should not bunch up on adjacent hexes (loose pattern H Fire will hit them).
FINAL PROTECTIVE FIRE: Nothing prevents a Player from bringing in loose pattern H Fire on his own positions. This is especially valuable when his defending unit is in a fortified hex and is menaced by dismounted infantry in adjacent hexes. With any luck his own unit will survive while the attacking units are disrupted or panicked.
PANIC: Panic will strike and affect a critical unit at the most inopportune time. A Player has only one defense against panic and that is overkill. If it is absolutely necessary to fire at a unit at a given point make sure you assign two, three or four units to execute the fire. If it is absolutely necessary to move and occupy a hex, make sure you have two, three or four units which can do so. A winning Player is one who assumes that a single unit will always foul up at the most inconvenient time, and plans accordingly.
DESIGN NOTES: One of the more controversial aspects to this game is the Combat Results system. On its face the concept of successive disruption steps seems unrealistic. Take the case of a pair of 88's firing on a platoon of Shermans at, say, 800 meters. Assuming the visibility is good and the 88's achieve surprise, the result, in reality, would be the destruction of one, two, three or more of the Shermans before the platoon could react. In other words, within the minute or so represented by the Game-Turn, part of the platoon would be permanently destroyed and part would remain effective. This is not what happens in the game; the platoon would probably suffer a D1 or D2 result. The disruption result puts the entire unit into a temporary "never never land" from which it will either return with its original effectiveness intact, or not, depending on a random die roll and future Enemy actions. The justification for this situation is that over a series of Game-Turns, within a limited scenario, the disruption system does represent and reflect combat attrition and does so without recourse to extensive record keeping and step-down step-up unit replacement. For example, assuming a six turn time period, a unit which suffers a D1 will not be able to fire (on the average) two of the six turns or 33% of the time. For that six turn period the unit will have suffered a 33% attrition in utility. And in most of the scenarios there are few combat situations which are sustained more than six turns. The pin and delayed panic results express the disorganization and confusion caused by incoming fire rather than actual attrition, but the net reduction of effectiveness is equivalent.