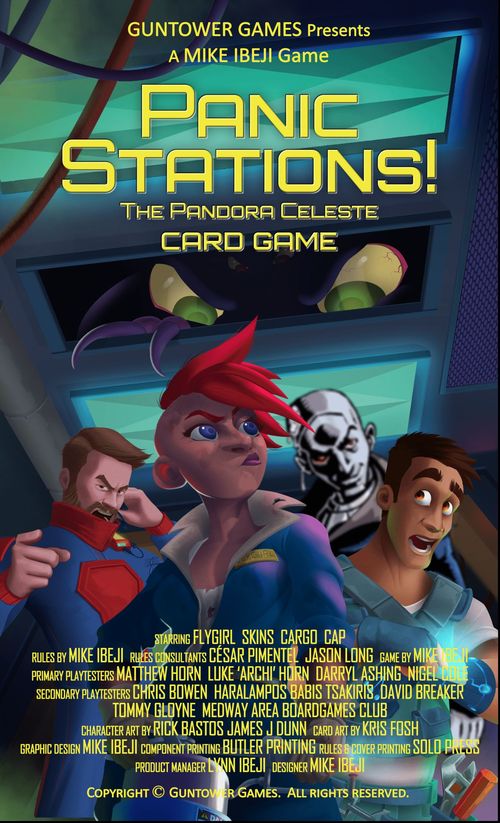
Panic Stations! The Pandora Celeste Card Game
Panic Stations! The Pandora Celeste Card Game Rulebook
Table of Contents
Table of Contents
The Crew
The Crew of the CSS Pandora are all classic character-types from this kind of sci-fi monster movie:
FLYGIRL is your kick-ass heroine. She can sneak, she can fight, and when it all hits the fan, she knows how to take off in a hurry!
SKINS is the Company Android - so nobody trusts him! He can absorb more damage than most and can also BYPASS the Ship's security.
CARGO is the Ship's Shuttle Pilot and resident techno-geek. He can use the Ship's Tools better than any other Crewmember on board.
CAP is the Ship's Captain, skilled in all areas and able to grant extra actions to his crew. However, his bad leg can slow him down - unless he really needs to move quickly!
Don't worry, you're not restricted to only these four Crew. If you own PANDORA CELESTE or its Expansion you can also import any Crewmember from them into this game by simply choosing 7 cards from their Deck to use here.
I'd recommend not choosing CLIMB, as the Vents aren't a feature of the Card Game.
Convert any '+# DMG' listed on the card into '+# CBT'. Also, GRENADES and Marina's GATLING LASER will flip a Combat Card and add the CBT value revealed on the Combat Card to their score.
Setting Up the Game
Follow the SETUP instructions given on the separate A4 insert provided in the box.
This illustrates how to seed the SHIPDeck with Nasties and lay out the plan of the Ship on the playing area.
Basic Outline of Play
Each Player takes it in turn to be the ACTIVE PLAYER and chooses a card to play from their Hand and Take an Action (see p.5). Players Move around the Ship from Room Card to Room Card and interact with the cards they encounter in each Room (see p.6).
If they enter a face-down Room, they turn over the Room Card. If they do not turn over a Room Card at any point in their turn, draw a card from the ShipDeck and place it face-up in the Room they are in at the end of their turn (see p.9).
Players continue taking turns until play is interrupted by a Nasty Action Round (see p.12). When this is triggered, some of the monsters that have been revealed (collectively known as 'Nasties') take an Action. This will usually (but not always) involve Attacking the Crew (see p.15).
Play continues until someone Abandons Ship (see p.18) - or everybody dies!
Active Player
The Active Player is the player who is currently taking their turn. They receive the Active Player Marker and play 1 or more cards to Take Actions. Once their turn is fully resolved, pass the Marker to the player on their left, who becomes the new Active Player.
You do not draw cards back into you Hand until you choose to Pass (see p.12).
Taking an Action
To Take an Action, choose a card from your Hand and place it face-up onto your Discard Pile. You can then activate the icons or text on the card:
- If the Icons are in separate boxes, you can play only 1 of them, not both.
- If the Icons are combined into 1 box, you can do both in any order you like, and you don't have to do all the Actions.
- Dual Icons in a pair of boxes give you the option to play either set of dual actions, but not both.
- The Batteries Icon allows you to draw a number of cards from your Discards equal to the batteries on the card and immediately play 1.
All of the icons available to players are described in the Symbols Quick Ref, which can be found on the separate Quick Reference Sheet that comes with the game.
If you do not have the Icon available to do what you want, you can always discard 2 cards face-down to take any Action on the Symbols Quick Ref and place a Spare Noise Card that matches the colour-coding of the Action you have chosen on top of them.
You cannot do this in Combat.
Spare Noise cards are removed from your Discard pile when you Pass (see p.12).
Follow-On Action
After completing their initial Action, a player can take a Follow-On Action by playing any card face-down into their Discard pile. This allows them to Take a second Action by playing 1 (or 2) card(s) from their Hand.
This is a great way to do multiple Actions on separate cards which need to be done quickly, but at the cost of an extra card.
Remember that you can always play a card to do nothing and not activate any of the icons on the card. It may feel like a 'waste' of a card - but sometimes that's better than Passing and triggering a Nasty Action Round!
Rooms and Moving
Each card laid out on the table during Setup forms a Room on the Ship. Players Move from Room to Room by playing Move Actions:
- A Single Arrow lets you Move 1 Room, from 1 card to a neighbouring card.
- A Double Arrow lets you Move 2 Rooms, passing through 1 card to get to the one beyond it.
- A Triple Arrow lets you Move 3 Rooms, travelling between 3 cards.
- A Grey Dotted Arrow lets you Creep 1 Room without alerting anything Nasty in the Room you are leaving.
You can move between rooms through any card's narrow end, as long as at least one end is narrow.
The back of every SHIPDeck card that can be used as a Room bears a grey movement arrow as a reminder.
In the example shown here, Movement along the yellow arrows is possible, but Movement along the red arrow is not.
What to do when Entering a Room
If the Room Card is face-down, turn it face-up:
- If it bears the Tool Symbol, it is a Tool Card. You can play a Pick Up Action later to take it into your Hand (see Empty Slot Rule & Tools pp.8 & 9).
- If it bears the Nasty Symbols, it is a Nasty. We do not recommend trying to pick this up! Nasties ignore you when you enter a Room.
That's the way these movies work - you spot the Nasty at the other end of the Room, invariably focussed on something else. So you try to creep past it - until you bump into something and it notices you!
Empty Slot Rule
Whenever a Room Slot on the table is emptied for any reason, immediately draw a new card from the ShipDeck and place it face-down on the empty spot. Only turn the new card over if you end your turn on it.
What to do when Leaving a Room
If the Room contains a Tool, Location or face-down card: you can freely Move out of the Room with no penalty.
If the Room contains a Nasty: The Nasty will Attack you as you leave the Room, unless you play a Creep Action to leave stealthily without being noticed.
Doors
There are 2 types of Door on the Ship:
- The Red Security Door to the Computer Room requires an Unlock Action to open. When you do this, place the Token on top of the Safe Cards in the Room - the Room stays open, but you still need to Unlock the Safe (see p.10).
- The Blue Airlocks to the Bridge and Cargo Shuttle can only be opened by Fulfilling your Agenda and playing an Engineering or Bypass Action to flip them over: it now takes a Move 2 to cross the Airlock.
The Crowbar can only open an Airlock if you have Fulfilled your Agenda.
Big Nasties can break through locked doors, but end their turn immediately if they do (before Combat).
Ending your Turn
Once you have done all the Actions you can do, your turn ends and you give the Active Player Marker to the player on your left. You do not replenish your Hand!
If you have not yet turned over ANY card during your turn, your final action is to draw the top card from the ShipDeck and place it face-up in the Room you currently occupy - unless you are on the Bridge or Cargo Shuttle, where instead you draw a Combat Card and place the ShipDeck Card you drew face-up into the Room named on the card, rather than into the Room you're in.
(Small print on the Bridge and Cargo Shuttle Room Cards: "If you draw a card at the end of your turn, flip a Combat Card and place the drawn card in the Room it names.")
Tool Cards
Any card containing the Tool Icon in its top left corner is a Tool Card. After it has been revealed, you can Pick it Up and take it into your Hand by playing a Pick Up Action during your turn.
If this leaves the Room Spot empty, draw a card from the ShipDeck and place it face-down in the empty Room Spot to replace the card you have just Picked Up. This does not count as 'turning over' the card - you only do that at the end of your turn if you do not leave the Room.
A Picked Up Tool becomes part of your Deck and can be played from your Hand into your Discard Pile to do what it says on the card.
Some weapon Tools have Range. You can play them to Attack targets that many cards away from you, and if you lose the Fight, you do not take Wounds.
Cargo has a 'Use Tool' card, which allows him to play a Tool card without discarding it, both in general play and Combat. This is unique to Cargo (though others can play 2 cards face-down to Use Tool, see p.5.)
The Ship's Safe
This is found in the Computer Room and contains 3 Safe Cards labelled CS1-3. To get these cards, you must first Unlock the Safe, then play a Pick Up Action to choose one of the 3 cards to take into your Hand. This can be done over multiple turns. You can then choose to place the Door Lock Token back on the cards, forcing anyone else who wants to access the Safe to Unlock it, or discard the token to leave the Safe door open for other Crew.
Agendas and McGuffins
At the start of the game, each Player is dealt an Agenda - Skins is dealt 2 and chooses 1, but must choose a Company Agenda if dealt one (which is why nobody ever trusts Skins).
Each Agenda names a choice of McGuffins - ShipDeck or Safe cards which you need to find and take into your Hand in order to Fulfil the Agenda. They usually bear the Hand Clogger symbol which means that once you have Picked them Up, they clog your Hand and cannot be dropped until you Pick Up a different Hand Clogger.
Hand Cloggers
You can carry more than 1 Hand Clogger if desired and can voluntarily drop any Hand Clogger in excess of 1 as a free action at any time.
The Smoking Gun
Lying around the Ship is Smoking Gun evidence of Company wrongdoing. Crew with a Company Agenda want to hide this. Other Crew want to expose the Company's activities. So if 2 Crew who have Fulfilled conflicting Agendas escape in the same Vehicle, they cancel each other out and neither can claim victory.
Skins manages to DESTROY THE EVIDENCE but Flygirl has Picked up another SMOKING GUN which will expose the Company.
They have both Fulfilled their Agenda, but if they escape on the same craft they cancel each other out. The evidence has got off the Ship, but it's trapped in a floating tin can with a Company Agent who doesn't want it revealed.
However, if Flygirl escapes on the BRIDGE while Skins escapes in the CARGO SHUTTLE, they both 'win'.
If Cap managed to escape with them, but had not Fulfilled his Agenda, he would 'survive' but not 'win'.
Discord is Sown
If you Pick Up a Smoking Gun, you must declare it. This immediately sows Discord amongst the Crew. From now on, Crew can Attack one another - and if you Wound another Crewmember, you can Steal a Tool or McGuffin of your choice from their Hand or Discard Pile.
The Nasty Action Round
During the Nasty Action Round, the Nasties on board the Ship can be activated to move and attack the Crew (and each other). This can be triggered in one of 3 ways:
1. Passing
Instead of playing a card, a Player can Pass to draw any cards they like from their Discard pile back to a Hand size of 7. Then turn their remaining Discards face-down and trigger a Nasty Action Round.
Remember that any Hand Cloggers you are carrying count towards your Hand size of 7!
2. 'You First!'
When you play a 'You First' Action against any Player, their communicator issues a loud BEEEP which makes them the First Target in the Nasty Action Round this triggers at the end of your turn.
3. Big Nasty Cards
Three Big Nasty cards are seeded into the ShipDeck at the start of the game. When one of these appears at the top of the Deck, it triggers a Nasty Action Round at the end of that turn.
Reveal the Big Nasty and flip a Combat Card: place the Big Nasty card in the Room named on the card.
If at any time you have to draw a ShipDeck card and the Big Nasty is at the top of the deck, spawn the Big Nasty using the above procedure, then draw the next card in the ShipDeck.
IMPORTANT! Do NOT trigger a Nasty Action Round on 2 consecutive turns. If the Nasties are triggered on the turn after they've moved, ignore that Nasty Action Round.
Feel free to ignore this rule if you want a more deadly game - but don't expect me to clean up the mess!
Nasty Action Sequence
When a Nasty Action Round is triggered, the Nasties will move at the end of the Active Player's turn:
- A) Determine who is First Target
- B) Decide the Nasty Movement Order
- C) Activate 1 Nasty per Player in the order decided by B) and play out any Combat initiated by that Nasty before activating another one.
Solo Players activate 2 Nasties, see p.14.
A) First Target
To determine the First Target, each Player looks at the Noise bars on all the face-up cards in their Discard pile. Whoever has the most cards making Red Noise becomes the First Target that all the Nasties zero in on:
If Red Noise is equal, compare Amber; if Amber is equal, compare Yellow then Green; if Noise is still equal, the Active Player becomes the First Target.
Don't forget that if 'You First!' is played on you, you're automatically First Target!
B) Nasty Movement Order
At the start of the game, set the Active Player Marker to its Little Nasty side. This flips at the end of each Nasty Action Round, changing the Order based on the symbol shown:
- Little Nasty symbol (small insect): Nasties activate from smallest to biggest, with 1-Hit Nasties moving before 2-Hit Nasties etc. Solo Players Activate 2 Nasties!
- Big Nasty symbol (large monster): Nasties activate from biggest to smallest, with 8-Hit Nasties moving before 7-Hit Nasties etc. Solo Players Activate the 2 closest Big Nasty(s) to them: if you run out of Big Nasties, activate the biggest Little Nasty.
Break ties in favour of closest to the First Target.
When activating, ALL Yellow ScuttleBugs count as a single Little Nasty, activating as a 1-Hit swarm and moving towards the First Target. But each one fights separately.
The Bug Pods do not count for activation, and always spawn 1 ScuttleBug from the Pod Deck at the end of every Nasty Action Round if possible.
C) Activating Nasties
Unless playing Solo, each Nasty Action Round only activates 1 Nasty per Player in the game. How each Nasty behaves is described on p.20. The Nasty moves a number of Rooms towards its target equal to the Arrowheads on the bottom of its card. It ignores everyone but its target in the Room where it started.
If it encounters an enemy on the way, it stops and Attacks that enemy (the Military Android & Trophy Hunter ignore all enemies en route). Otherwise it continues until it runs out of Movement or reaches its target.
All Bugs count anything with 'Bug' in its name as friendly. All other Nasties are enemies.
Combat
Combat takes place when a Nasty launches an Attack or if a Crewmember Attacks an opponent.
Any Crew who wants to start a fight must play a Fight Card containing a Fist Icon, or a Weapon Tool. This also counts as the first card that adds its CBT to the Attack (see Crew v Crew p.17).
After that, regardless of who or what started the fight, follow the Combat Procedure below:
Combat Procedure
-
If you have a Stun Weapon, you may use it now (see p.18). If you MISS, continue the Combat.
-
Choose whether to Fight or Flight, then play any number of cards to generate a Combat Strength (CBT). ALL of the relevant symbols on the card(s) generate CBT for each symbol in ALL the card's boxes:
- Fight: Fist Icon +3 CBT; Figure Icon +1 CBT.
- Flight: Flight (running figure) Icon and Triple Arrow +3 CBT; Double Arrow +2 CBT; Single Arrow and Grey Dotted Arrow +1 CBT.
- Add +1 CBT for each card played into the Flight regardless of the icons on the card.
- Add the +CBT contributed by any 1 single Weapon.
In both cases, you can also play a Batteries Action to draw cards from your Discards back into your Hand & immediately play any or all of them for their CBT.
There's a summary of each card's FIGHT/FLIGHT stats in its bottom right corner.
- If the total is EQUAL TO your CBT, nothing happens and you both stay in the Room.
- If the total is GREATER THAN your CBT, you Lose 1 Wound per CBT the Nasty beats you by. Ranged Attacks & ScuttleBugs work differently (see p.9 & 20).
- If the total is LESS THAN your CBT, the result is determined by the stance you took:
- If you chose Fight, the Nasty flees:
- A Little Nasty: is placed at the bottom of the ShipDeck (ScuttleBugs go into the Pod Deck).
- A Big Nasty: flips a Combat Card and flees to the Room named on the card.
- If you chose Fight, the Nasty flees:
Yes, this does mean that the Nasties are technically unkillable. Crew, we are lea-ving!
- If you chose Flight, you flee into an adjacent Room without taking any Wounds. Turn over any face-down card in the Room, but do not activate any Nasty it reveals till the next Nasty Action Round.
- At the end of each Combat take back a number of Discards into your Hand from the BOTTOM of your Discard Pile equal to the Pick Up # on the Combat Card you drew.
If a moving Nasty has left any Room Slots empty: place a card from the ShipDeck face-down into the empty Room.
Wounds
Your cards are your Wounds. Choose 1 card from your Hand or Discard to place out of play for every Wound you take. Be aware that you can only Heal back cards of your own colour into your Hand with a Medikit or in the Sick Bay (Skins the Android can also Heal back Tool cards).
You cannot Lose Hand Cloggers as Wounds. They do not count as 'cards' for this calculation.
If you have no cards left in your Hand or Discard, you die! From now on, when it's your turn, Activate 1 Nasty and nominate a Target for it to Attack. This does not have to be the First Target, but the Military Android & Trophy Hunter must pursue their priorities (see p.20).
Crew vs Crew Combat
When one Crewmember Attacks another, the Attacker automatically opts to Fight. The Defender now chooses whether to Fight or Flight, and both players play up to 2 cards from their Hand face-down. Then the Attacker and Defender each flip a Combat Card and add it to their revealed score - highest score wins.
If the winner's stance was Fight, they can also steal 1 card of their choice from the loser's Hand or Discard (NB: you can also do this to steal a Smoking Gun from the Military Android).
Nasty vs Nasty Combat
If 2 Nasties fight each other, each one flips a Combat Card (Biggest first) and adds it to their CBT. The one with the lowest combined CBT flees.
Stun Weapons
If you have the Stun Gun or Taser in your Hand, you can play it to stun your opponent before the Combat begins. Flip a Combat Card and follow the instructions on the Stunner.
If you HIT: the target is stunned in place and the Combat ends immediately. If you MISS: continue the Combat.
Stun Weapons can also perma-kill the Military Android. Declare that you are using the stunner to Fight the Android and use the stunner as a +CBT Weapon. If you win by the weapon's +CBT or more, it kills the Android.
Abandon Ship!
To win this game, you have to survive - and to do that you must Abandon Ship! You need to get onto either the Bridge or the Cargo Shuttle, Power it up and Decouple. Up to 2 Crew can escape in each vehicle.
To get onto the Bridge or Shuttle, someone must play an Engineering or Bypass Action at the Airlock after Fulfilling their Agenda, which provides the Security Codes they need.
This flips the Airlock Token, turning it into a Door that requires a Move 2 Action for anyone - or anything - to pass through (though if the mover can only Move 1, they may still pass through, but do nothing else).
Once on board, you have to Power Up the vehicle by playing the Icons pictured on its Control Chairs. Each Crewmember can only Power Up 1 Control Chair per turn, even if using Follow-On Actions, unless they play Emergency Takeoff, Shuttle Pilot or Bypass (which can Power Up more than 1 chair).
When both chairs are Powered Up, the vehicle Decouples at the END of the turn, ending the game UNLESS...
A Nasty is on board the Escape Vehicle...
You can attempt to Flush it out the Airlock by playing an Unlock Action to flush all Nasties from the vehicle:
Flip a Combat Card: 1-3 = Flushed; 0 & 4 = failed to Flush.
If you cannot Flush the Nasty, you must Fight one Final Showdown vs each Nasty on board (Flight is not an option). ALL Crew on board can play any cards (except Hand Cloggers) to gain +1 Fight CBT per card played + the usual CBT from the card's icons.
If you win: you manage to force the Nasty out of the Airlock and survive. If you lose: game over, Hombre!
Xeno-Data Log
- Bug Pods: Can only be destroyed by Flamethrower: Spawns 1 Yellow ScuttleBug from the Pod Deck when triggered by Movement or at the end of every Nasty Action Round (limited to 2 ScuttleBugs).
- ScuttleBug: 1 CBT: Move 1 towards First Target & Attack to Burrow: If HIT, the victim does not calculate damage, but takes this card as a Hand Clogger and loses 1 Wound/turn until the Scuttler is surgically removed in the Sick Bay. Does not Burrow into Androids but inflicts 1 Wound instead.
- Bug: 2 CBT: Move 2 towards First Target and Attack the first non-Bug it encounters.
- SpiderBug: 4 CBT: Move 2 towards First Target and Attack to Bind the first non-Bug it encounters, forcing its victim to Discard the cards lost instead of Losing them to Wounds (Nasties miss their next move).
- MonsterBug: 8 CBT & subtract 1 CBT from Target: Move 5 towards First Target and Attack the first non-Bug it encounters. Reduce MonsterBug's CBT by 2 per Room it passes through to reach the Target.
- Military Android: 7 CBT & Immune to Flamethrower but can be perma-killed by Stun Weapons (see p.18): Move 2 to Pick Up the nearest revealed Smoking Gun (SG) or the Cargo Manifest from the Safe and Attack ALL creatures in the Room it ends its Move in. Ignores all creatures en route. If it Wounds the carrier of a SG, it steals their SG. Once it has a SG, Move 2 on its turn to the Bridge, then spend 2 Nasty Action Rounds Powering Up before taking off (on the next Nasty Action Round) & slagging the Ship with the Bridge's engines, killing all aboard.