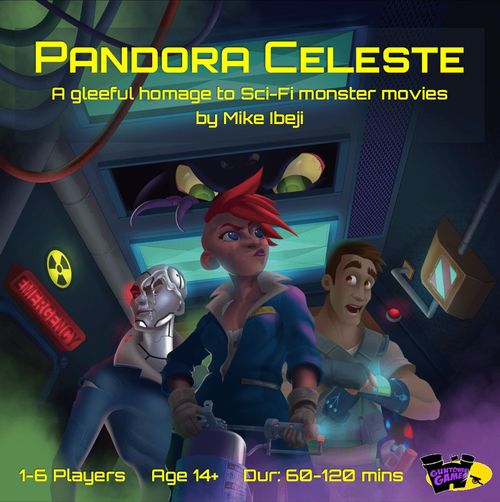
Pandora Celeste
Pandora Celeste Rulebook
Table of Contents
Table of Contents
Welcome to the Pandora
You are that hapless crew, trapped on board a ship infested by a host of Nasties from the sci-fi universe.
This is a gleeful homage to sci-fi monster movies, which mixes elements of hand management, push-your-luck and card-driven narrative to create a challenge that you have to survive.
If you are an experienced gamer, feel free to read the rules and get stuck in – we recommend you try out Learning Scenario 3 to get a handle on the key concepts of the game. Then move on to the Full Game outlined on p.34 at the end of this Rulebook.
If you'd rather dive straight in without reading the entire rules, we've designed a programmed campaign that introduces you to the key concepts as you play along – put these rules down now and pick up the Learn to Play Booklet instead.
So pick a crewmember, any crewmember – and do try not to get too much blood on the control panel when you die...
Scenario 1: 'A Bit of a Bug Problem'
This Rules section is linked to Scenario 1 of the Learn to Play Booklet.
These rules have been arranged so that they mirror the Teaching Scenarios in the Learn to Play Booklet. There's also a Contents at the back to help find what you need quickly.
And remember the Movie Rule: If in doubt, ask yourself: "What would happen in the movies?" and interpret the rules that way.
First Choose Your Crew
The Crew of the Pandora is made up of archetypal Sci-Fi characters, each with their own personalised Action Deck. Simply choose the one you like the sound of best:
- 'Cargo' is the Ship's Cargo Officer and resident techno geek – there's not a tool on this ship that he cannot use, which is much more useful than it sounds.
- 'Cap' is the Ship's Captain – a good all-rounder who can do a bit of everything, he can also give his Crew extra Actions. But he's got a dodgy leg, so is slower than most Crew.
- 'Flygirl' is the Ship's Pilot – and she can kick ass! She's also an Engineer and pretty nifty in later scenarios when the Vents come online.
- 'Skins' is the Ship's Android – capable of absorbing a fair amount of damage and able to Bypass some of the Ship's Security Protocols. But nobody trusts the Android – and there's a reason for that...
These are the 4 characters provided in the Base Game. Also in the Deluxe Game are:
- 'Greaseball' the Ship's Engineer – big and muscular, he's good in a fight, and nifty with Engineering spanners (of course).
- 'The Kid' is a stowaway – good at hiding and sneaking around in the Vents, this little bratling can squeeze into the tiniest of spaces.
- There are also 2 Add-On characters: Keni and Marina, who are described in more detail on p.37.
In Scenario 1, Cap, Flygirl and The Kid can only use their 'Climb into/out of Vents' cards as 'Move' cards. The Vents play no part in Scenario 1. Similarly, Skins can only use the System Bypass card as a Move card.
Setting Up the Ship
The individual setup for each Teaching Scenario is given in the 'Learn to Play' Booklet. You will find the setup instructions for Scenario 3 on p.24 of that booklet.
Setup instructions for the Full Game are provided on p.34 of this Rulebook.
True Solo Variant
When playing True Solo with just one Crewmember, your Hand Size is increased to 6 and you start with a random Memory Card in hand (ie. 5 Crew Action Cards + 1 Memory Card).
If you are playing The Kid Solo, the Kid's Security Hack Action Card also doubles as an Engineering Action Card.
If you are playing Greaseball Solo, you can play his personal Engineering Cards as Unlock Actions on any cards (and doors) required to complete an Objective only. If using it to complete an Objective, you cannot use the Move portion of the card.
You can of course opt to play a solo or co-op game where you control more than one Crewmember. If you do, we do not recommend adding these True Solo modifications.
Play Definitions
It is important to know what certain terms mean because they will be referred to on the cards you Pick Up around the Ship.
- An Action is made by a single player when s/he plays out the Action(s) on the card s/he has chosen. This forms an individual Player Turn.
- A Crew Round is a series of Actions played out by each player in turn until they Pass, followed by a Noise Count before you take the Actions of the Nasties.
- The Nasty Action Round is when the Nasties infesting this Ship zero in on you.
Once this is over, move the Countdown Markers down 1 spot on the Turn Cycle Tracker, to mark that the current Cycle is over – a 'Cycle' is basically a full Game Turn.
Line of Sight (LoS)
A creature is in LoS if it is in the same or an adjacent room to you. You can see through doorways that are open, but you cannot see through coloured doors that are closed.
You can also see all the way along the Crew Corridor in the centre of the Ship. However, you can only turn Tokens over when you enter an area (its contents are obscured until you get close) – so you will only turn over the Token in the Crew Corridor when you enter that section.
(EG: The Changing Room is in LoS of the Crew Quarters because it is an adjacent room with an open door. It is not in LoS of the Crew Corridor, because the Crew Quarters is between them. But to turn over the Tokens in the Crew Quarters, you have to enter the Room).
Emergency Protocols
The Ship's Computer will trigger at least 1 Emergency Protocol at the start of every game. These are designed to neutralise the danger posed to Company property on board.
All Company Crew dread the Emergency Protocols. They're there to protect the Ship and its cargo – they're not designed to protect the Crew!
If you don't shut down the Protocols before their timers run out, they will most likely kill you – or worse!
How the Timers Work
Each Emergency Protocol tells you where to place a coloured Countdown Marker on the Turn Cycle Tracker – then you place a Marker of the same colour on the Emergency Protocol Card. There may be multiple Countdown Markers on the track. If there are, the one with the highest number also acts as a Counter that triggers Nasties etc on the Timeline.
Eg: in Learning Scenario 2, the Vacuum Protocol starts at 4 and the Aircon Protocol starts at 6. The Aircon Protocol counter is the one that triggers Nasties etc.
At the end of each full Game Turn Cycle, all Countdown Markers tick down 1 step. When the Countdown reaches 0, its Emergency Protocol goes off and you lose the game.
To prevent this from happening, a Crewmember must do the Action described on the bottom of the Protocol card in the Location specified. This Overrides the Protocol and switches it off – discard the Emergency Protocol card. In later Scenarios and the Full Game, this also spawns a Big Nasty! (See p.23 for more detail – you do not need to know this in Scenario 1 or 2).
Crew can sometimes delay the countdown by fulfilling Actions listed above the Override procedure.
E.g. in the case of the Vacuum Protocol, taking an Engineering Action in CC Fore or Aft next to the Airlocks to the Bridge or Cargo Control can delay the countdown up to 2 times in the game – 1 for the Bridge and 1 for Cargo Control: Increase the Protocol's timer by 1 Turn Cycle each time you do this.
Playing out a Turn Cycle
Each full Cycle of the game is made up of:
- The Crew Round
- The Noise & Doors Round
- The Nasty Action Round
- End of Cycle
1. The Crew Round
Starting with the First Player and going clockwise round the table, players take it in turn to play 1 Action Card (see p.5). This is known as a Player Turn.
Players keep taking turns to play a card until one of them Passes. Then every other Player has the option to play 2 cards in a row before Passing.
If you don't have the card you need, you can opt to play 2 cards face down to take 1 Action from the Symbols Quick Ref Card, except Active Defences (see p.14). This counts as a single Action.
If you choose to play 2 cards like this, discard them face down and place a Spare Noise card which matches the Noise of the Action you are taking face up on top of them (see Noise p.10). Most Actions have a Noise colour, which highlights their title on the Symbols Quick Ref.
Each Movement Arrow on the card you play allows you to Move 1 Room (see p.7).
When you enter a new Room turn over all the Tokens in the Room:
Are you a winner or a dinner? Flip over all tokens to find out.
- If the Token shows a Nasty, find its matching numbered card in the Ship Deck and place it in the Active Nasty Area (see p.9).
- If it shows an Action or an Item, you can opt to play a Pick Up Action to take the matching card directly into your Hand (see p.10 for Memories; see p.17 for Tools).
2. Noise & Doors Round
When all Players have Passed, Red Security Doors close and you calculate Noise. The Noisiest Crewmember becomes First Target (see p.9).
Then every Player can discard any cards they don't want, turn all their discards face down, and draw cards from their Deck into their Hand up to a Hand Size of 5.
The maximum Hand size you can draw is 5 (6 for True Solo) – but you do not have to discard down to 5 if you have more than 5 cards in your Hand at the end of the Round.
When your Deck runs out, reshuffle your Discard Pile and turn it into your new Deck.
3. The Nasty Action Round
Now it's the turn of the Nasties – how they operate is explained on Rules p.10. Note that the Turn Cycle Tracker tells you which Nasties will move at the end of each Cycle.
At times there will be multiple Countdown Markers linked to different Emergency Protocols. The one with the highest number is used to track which Nasties move each Cycle.
4. End of Cycle
Move the Countdown Marker(s) down 1 space. The First Target becomes First Player.
- A) Fire Spreads: place new Fire Tokens (see p.19).
- B) If the Countdown says Check Aircon AND the First Target is in a Room next to a Blue Vent Node, draw the top card of the Vents Deck: if this is a Nasty, place it in the Active Nasty Area (see p.21).
- C) If there is only one Grey Token face down in any section of the Ship, turn it face up.
- D) Carry out any End/Start of Cycle actions listed on the Emergency Protocols.
Taking an Action
Each Action Card bears a symbol or set of symbols in the top left corner. You can choose ONE of the available sets of Actions to take when you reveal this card. If the card has 2 linked Actions in same gold box you can do EITHER or BOTH of the Actions in any order you like, and you can opt to do only part of any Action.
- If the Icons are in separate hexes, you can play only 1 of them.
- If the Icons are combined into 1 box, you can do both in any order you like.
- Dual Icons in a pair of boxes give you the option to play either set of dual actions, but not both.
Anatomy of an Action Card
- Action Title
- Action icons
- Character's name or Card Identifier – every character and every type of card (Ship Cards, Memory Cards & Vents) is marked by a different coloured border.
- Play as a standard Action – you can play and discard this card to use the Action icons above.
- Or Special Condition – circumstances under which this card can be played in a certain way.
- Noise – the amount of Noise you will make when you do this.
- Prologue Card – if there is a P in this corner, this card is used in the Prologue of the Learning Campaign. Skins' X card is also removed in the Prologue.
Each Action has a specific Icon and a Noise colour. These are explained on the players' double-sided Symbols Quick Reference Cards.
Note: you can only play cards from your Hand (unless activating a Tool, see p.17).
New Memories gained by playing a Pick Up Action are taken straight into your Hand.
Tools are placed either into your Ready Tool Slot or face down on your Discards (see p.9).
Once you have completed your Action, place the card you have played face up on your Discard Pile. Place any Active Defence you play into your Active Defence Slot instead.
All Actions you play make Noise.
- If a card is face up in your Discards, it has made Noise.
- If it's placed face down, it doesn't make Noise.
NRG Pills
Every Crewmember has an NRG/Recharge card. This allows you to recover cards from your Discard pile.
When you play the card as an Action, you can select any 1 card from your Discard pile for every battery icon on the NRG Action played and draw it back into your Hand. Then you must immediately play 1 of the cards you drew as your Action for the turn.
Skins can draw back 3 cards; everyone else can only draw back 2. Note that you cannot draw back NRG/Recharge, even if you're Skins.
Unlock Red Door & Move/Pick-Up
This card allows you to either Unlock a Red security door then Move through it, OR Unlock the Red door of a Locker or Safe and Pick Up any one item within it.
You can also Move into the Ship's Locker & shelter there if needed. You may play this card to do just ONE of the Actions listed on it (eg: Pick Up without Unlocking a door).
Losing a Card
If you are instructed to 'Use & Lose' a card, you must discard it permanently from the game.
If you 'Lose a card to Wounds', you must place it into your Wound Tracker (see p.17).
They say that in space, no-one can hear you .. shout loudly. But we Nasties hear EVERYTHING!
All Actions make Noise. You'll find out what this means later.
Moving Around the Ship
(Board key: Vents System (not accessible in Scenario 1); Room & Corridor Section Divider; Blue Airlock Doors; Green boltable Doors; Doorways; Red Security Doors & Safes; Rooms.)
The ship is divided into a series of Rooms, outlined by thick grey lines. These are accessed by doors that are marked by yellow arrows.
The central corridor is made up of 3 room sections, divided by yellow arrows, labelled Crew Corridor, CC Fore & CC Aft.
The clear plastic insert that covers the board is the Vents system. How this works will be explained in a later scenario – for now all you need to know is that it does not block movement through the ship in any way, though it does usually follow the line of the walls.
Your Action Cards have Movement Icons:
- If you choose to activate this symbol, it allows you to Move 1 room.
- If there is a double-arrow in the box, it allows you to Move up to 2 rooms. You can move only 1 room if you choose.
- A triple-arrow allows you to Move up to 3 rooms.
- A grey dotted arrow allows you to Creep 1 room silently without attracting the attention of the Nasties.
To Move, simply move your Crew Figure from the room it is in to any adjacent room it can access through a doorway. You can move through Rooms containing Nasties and other Crewmembers, but any Nasty in a room you are leaving will automatically attack you as you leave, unless you are Creeping.
Take Care! Any Nasty in a room will automatically attack you as you leave, unless you are Creeping. A Nasty will also strike back if you Attack and MISS, unless you're using a Flamethrower or a Ranged Weapon.
Doors
There are 4 types of doorway in the Ship, each marked by coloured arrows. You can freely move through any doorway in the direction of the arrow, but if the arrow does not point in the direction you are moving, there may be some restrictions:
- Open Doorways marked by yellow arrows are accessible to anyone and anything, and do not block movement in any way.
- Green Doorways are boltable Doors: Any Crew can pass through and choose to bolt the door behind them as a free Action (unbolting the door is also free).
- Nasties can only enter a bolted door by breaking it down (see below). NB: the door to the Iso-Ward is jammed open in the Learning Scenarios.
- Red Doorways are Security Doors: You may only enter through them if you play an Unlock Action. You can freely exit it in the direction of the arrow (since security doors are designed to keep people out of a room, not in it).
- Nasties must attack the locked door to knock it down (see below).
- Blue Doorways are Airlock Doors: In Scenarios 1-3 all Airlocks are Locked Down & cannot be Bypassed. When released, they cost 1 Move Arrow per blue door arrow to pass through – and you must be able to do this in 1 Action (ie. An Airlock with 2 arrows on it requires a Move 2 Action to get through).
- Nasties can attack the Airlock to rip it off its hinges, destroying it for the rest of the game (see below). Note that the doors into the Airlocks at either end of the Crew Corridor are that require 2 hits of damage to break open, and 2 Move Arrows to move through.
Here's a handy tip: You can always move freely through a door in the direction of its arrow(s). You only need to unlock a door if you are going against the arrow.
Breaking Down a Door
Little Nasties must Attack & Hit a locked door to break it open – ScuttleBugs cannot break open a double-Airlock door.
Big Nasties will automatically break any door down.
When it breaks down a door, a Nasty enters the Room but cannot attack its occupants on that turn, as it has used up all its energy breaking through the door.
With the exception of Greaseball's Barge Action, Crew can only break down a door by attacking it with a weapon Tool and scoring 1 damage to break it open. The airlock doors at each end of the corridor require 2 damage to break open.
Bypassing Doors
Some Action Cards & Tools allow you to Bypass a door that has been Locked-Down by the Ship. This unlocks the door and keeps it open for the remainder of the Round. The door will shut (and will lock if it is a red door) at the end of the Crew Action round, when Red Doors Close. But it is no longer Locked-Down by the Ship and can be opened again in later turns.
Peek-a-boo!
You can't see what's in a room until you enter it. As you enter the room, turn all its tokens face up (and hope they're not Nasty). You can only Pick Up the token by playing a Pick Up Action – you do not get it automatically.
What Happens When You Enter a Room
Whenever you move into a new Room, you turn over ALL the tokens in it.
- If the token has a Nasty symbol, leave it face-up on the board to mark where the Nasty is in the Ship and place its matching card in the Active Nasty Area (see opposite). The Nasty will act on its next Action Round.
- If the token contains any other symbol, it is linked to an Action Card in one of the Ship's Decks. You can play a Pick Up Action to pick up the token and replace it with the card that matches its number. The token is discarded.
- You can choose which token to pick up, and you may choose not to pick up a token.
- If it looks like this, it's a Memory: you take the card directly into your Hand.
- If it looks like this, it is a Tool: you can opt to put it into your Ready Tool Slot immediately (see p.17) or place it face down in your Discards.
Certain Scenario Cards have their own Pick Up Rules printed on the card.
Last Bug Standing: When there is ONLY ONE token of a particular colour left on the board, turn it face up immediately.
Drawing & Placing Nasties
Every time you reveal a new Nasty token, place its matching card in the Active Nasty Area by the side of the board.
All of the monsters you encounter on this Ship are covered by the generic term Nasties and come in 3 forms:
- Little Nasties have this symbol at the bottom of their card.
- Big Nasties have this symbol at the bottom of their card.
- Static Nasties have this symbol at the bottom of their card.
Whenever you turn over a Room Token depicting a Nasty, look in the Ship Deck, find the card that matches the number and picture on the token and place it face up in the Active Nasty Area. That Nasty is now active in that Room and will move in the next Nasty Action Round. Leave the token face up on the board – it marks where the Nasty is on the ship.
The Active Nasty Area
The Active Nasty Area is a space beside the board where all Active Nasty cards are kept face up. While its card is here, the Nasty may move during the Nasty Action Round.
Note that not all Nasties move in every Nasty Action Round – they only take a turn when the Cycle Tracker says Little/Big/All Nasties Move:
- Little Nasties are nippy little creatures that move every Cycle.
- Big Nasties generally move 2 Cycles out of every 3, but get more active near the endgame as the action ramps up to a climactic finale. They do not appear in Scenario 1 and are explained on p.23.
- Static Nasties rarely move from the Room they started in, though the pieces they spawn can spread through the Ship (note that the ScuttleBug card activated by Card PC101 activates ALL Yellow ScuttleBugs spawned by the Bug Pods in Scenario 1, which all move as a swarm using the same card).
If you kill a Nasty, remove its card from this area.
You can't get rid of us that easy! If at the end of the Round there are no Nasties on the board, draw the top card from the Vents Deck. If it reveals a Nasty, place it in the same Room as the First Target, even if that Room is technically inaccessible.
You've all seen the films, where the Nasty folds out of the shadows of the ceiling in classic sci-fi style… In Scenario 1, spawn a Yellow ScuttleBug in the Iso-Ward instead of drawing from the Vents Deck.
Listen up, guys—I'm gonna save your life here! 'Cos if you're the First Target, life's gonna get REAL interesting and probably REALLY short!
First Target & Noise
All Nasties on the Ship are attracted by Noise.
Most Cards in your Deck has a Noise Volume shown bottom left, which looks like this and comes in 4 types:
- LOUD!!
- Noisy
- Persistent
- .. and quiet...
This is the amount of Noise you make when you take that Action. As you play each card from your Hand, you place it face up into your Discard Pile.
If you Use a Tool, the Tool's Noise replaces the Noise of the card you activated it with. Play the card you used to activate it face down into your discard pile. Similarly, if you play 2 cards to do an Action on the Symbols Quick Ref, play them face down into your Discard Pile. Then take a Spare Noise Card showing the noise of the Action you took: not of the cards played.
Cards used to Exchange Tools make no Noise & are played face down.
Always remember: If it discards FACE UP, it makes Noise. If it discards FACE DOWN, it doesn't.
Noise Count
NRG/Recharge cards make Amber Persistent Noise. This is counted in place of the cards you took back from your Discard Pile with this Action, so that you do not need to remember how Noisy those cards were.
At the end of the Crew Round, look at the Noise each of your face up Discards, Active Defences & Tools made: Then turn your used discards face down (and remove Spare Noise Cards).
Remember! Face Up discards make Noise. Face Down discards don't. This means you simply have to check through your face-up discards to see how much Noise you made.
Noise is ranked as follows:
- Red Noise trumps all other Noise.
- If Red is tied, the tied Crewmember who made the most Amber Noise is noisiest.
- If still tied, count up Yellow Noise then Green Noise.
- After that, the last Crewmember to make the most Noise that Round is noisiest.
Whoever made the most Noise becomes the First Target and takes the First Player Marker. This overrules the Noise calculation at the end of the Crew Round.
Wanna make someone else take the heat? Play the 'You First' Action on another Crewmember. Their PDA will make a hideous squawking sound – and cos it's them who are making that noise, not you – they instantly turn into the First Target!
All active Nasties that Follow Instincts in the Nasty Action Round will zero in on the First Target, and Nasties always attack the First Target before anyone else.
After you have calculated Noise, all players can discard any cards they don't want from their Hand and draw back up to 5.
If your Deck runs out, simply reshuffle your Discard Pile and turn it into your new Deck.
Moving Nasties
Not all Nasties will move in the Nasty Action Round. To see which Nasties move, refer to the Turn Cycle Tracker, which tells you which Nasties Activate on each Cycle.
When Activated, Nasties move in the order they were placed into the Active Nasty Area.
Each Active Big & Little Nasty draws 1 card from the Nasty Action Deck in turn.
- If the Nasty is a Big Nasty, refer to the top half of the card.
- If the Nasty is a Little Nasty, refer to the bottom half of the card.
- Reshuffle the Nasty Action Deck after all Nasties have taken their turn (symbol: the reshuffle icon).
Note that Static Nasties never draw cards – they simply do what it says on their page in the Xeno Data Log. This is also true for some Big Nasties like the Trophy Hunter – in fact you should check the Xeno-Data Log for every single Big Nasty, because each Big Nasty acts differently to every other Big Nasty.
Nasty Action Cards
The card tells you what the Nasty will do:
- FOLLOW INSTINCTS: The Nasty ignores all creatures in the room it currently occupies except the First Target and obeys the directions written under 'Observations on INSTINCTS' in its Xeno-Data Log. This is also summarized at the bottom of the Nasty's card (eg. A Bug Moves 3 towards the First Target and Attacks the first non-Bug it encounters en-route for 2 damage). If it cannot detect any Noise, the Nasty Pauses.
- MOVE TOWARDS [THE BRIDGE/ENGINEERING]: The Nasty moves in the direction indicated and attacks the first creature or closed door that it encounters en-route. It ignores any creature(s) in the room it started from! The Bridge is at the front of the Ship; Engineering is at the back. If the back of the Ship is not in the game, move the Nasty off the board – it will come back onto the map next Cycle.
C'mon guys, you've all seen the movies. Nasties have the attention span of a gnat – it just takes one little noise elsewhere for us to ignore you and go haring after—ooh look, a spacecat!
- ATTACK THE NOISIEST CREATURE IN THIS ROOM: The Nasty zeroes in on the target that made most Noise in the room it currently occupies. Ties are broken in anti-clockwise order from the First Target (Crew are always attacked before Nasties). If there is no target in the room, it runs around in circles looking confused.
- MOVE TO ATTACK THE NEAREST CREATURE…: The Nasty moves towards the target that requires the least Movement Points to reach. Ties are broken in anti-clockwise order from the First Target. If the target is already in the same room, it stays there and attacks it.
- PAUSE & DO NOTHING: The Nasty pauses, confused. It neither moves nor Attacks this Round.
We're all related—at least all the bugs are. So a ScuttleBug will not fight a Bug, and they all love the MonsterBug when it eventually appears. Bugs will attack other Nasties but won't tackle anything with the word "Bug" in its name.
How a Nasty Moves
Each Active Nasty Card has a corresponding Token which tells you where that Nasty is on the Ship.
The Xeno Data Log tells you how far the Token can move when it activates. This is also marked by the arrow(s) on the bottom of the Nasty's Action Card (eg. A Bug can Move 3, a ScuttleBug can only Move 1).
Moving from 1 Room to another costs a Nasty 1 Movement Point (MP).
A Nasty will continue moving until:
- It encounters a creature it can Attack (unless the First Target is in the same room, the Nasty will usually ignore all creatures in the room it starts from).
- It hits an obstacle it cannot pass through or meets a door it has to break down to reach its target.
- It runs out of MPs.
Unless you are told otherwise, a Nasty will always head towards the First Target.
It will take the shortest route available, including the Vents when they come online if it's able to – ScuttleBugs will always choose the Vents rather than breaking down doors.
If the Nasty has a choice between 2 equal routes in MPs, the First Target decides which route it takes.
We Nasties love a good scrap! We'll stop and Attack the first creature we're allowed to fight on our way to beating up the First Target. We're not fussy eaters …
Fighting Nasties
Nasties vs Crewmembers
Here's the good news: Nasties do not automatically Attack you – they will only Attack during your player turn if you attempt to Move out of their Room without Creeping, or if you Attack them and MISS!
Here's the even better news: you can survive a handful of Hits from a Little Nasty.
And now the Bad News: anything else will most likely kill you in a couple of blows.
When they move, Nasties will automatically stop and Attack the first target they come across as they move through the Ship. This is usually you, though it might be another Nasty (remember: Bugs do not attack other Bugs). If they have a choice, they will go for the First Target: if the First Target is not in the Room, count anti-clockwise from the First Target until you encounter a Crewmember in the Room.
When a Nasty Attacks, flip 1 card from the Nasty Action Deck and refer to the Hit Boxes at the top and bottom of the card:
- Big Nasties are more likely to hit you than Little Nasties (surprise, surprise!)
- The Hit Box at the top is triggered by Big Nasties. If the box is red, the Nasty hits you.
- The Hit Box at the bottom is triggered by Little Nasties. If the box is blue, the Nasty misses you.
- = Reshuffle the Nasty Action Deck immediately after you draw this card.
Pushing your Luck: When They Hit
If the Bug HITs, you can opt to Push your Luck by flipping an extra Nasty Action Card and referring to the relevant Hit Box again:
- If it MISSES, you ride the blow: subtract 1 from the damage you took and you can Push your Luck again.
- If it HITs, you blunder into the blow take an extra Hit and must stop Pushing your Luck.
- If you flip a Reshuffle icon you must immediately reshuffle the deck and stop Pushing your Luck.
You cannot Push Your Luck vs a ScuttleBug.
Dodges & Defences
If you play a Dodge card or any other defensive manoeuvre into the Active Defence slot of your Player Mat, this triggers before you calculate Wounds.
- Dodge will completely avoid the first Attack that hits you this Round. The Attack fails to land any Hits on you and you discard the Dodge card face up into your discard pile.
- Hide makes you invisible to all enemies for the rest of the Cycle—but you can only play Hide in a Room that does not contain any enemies.
- Immunity works against every Attack made against you for the rest of the Cycle. Then it is discarded at the end of the Cycle.
ALL Active Defences are discarded face down at the end of the Cycle in which they are played, after all Nasty Actions are resolved.
Taking a Hit from a Nasty
In simple terms, a Nasty will do 1 dmg per spike on the fist depicted on its card (in this case 3); but some Nasties do more complex damage which cannot be depicted so easily.
So when a Nasty hits you, refer to the Xeno Data Log to see what damage it inflicts.
dmg = Damage/Wounds: each dmg inflicted by a Nasty forces you to lose an Action Card as a Wound – in essence, your Action Cards are your Hit Points.
You can choose where to lose the dmg from in one of 3 ways:
- Choose a Card to lose from your Hand: This is your choice and you can decide which card to lose. You may not lose a Hand Clogger (see p.17).
- Lose the top card from your Deck: You must lose the top card – you cannot choose a lower card in the stack.
- Lose the top card from your Discard Pile: You must lose the top card.
Slide the card you lose under the next available space of the Wound Tracker along the top of your Player Mat. If it is a card of your colour, you may be able to heal it back later. If it is any other colour, you have lost it for good.
Be Careful—you can get TOO MANY Wounds! After you have covered the 7th space on your Wound Tracker, the next wound you take will kill you! The Kid can only take 5 Wounds before s/he is killed.
How to Survive a ScuttleBug
ScuttleBugs are nasty little critters. Instead of inflicting damage, they burrow inside you – place their card on your Player Mat. At the end of every PLAYER turn you take from then on, take 1 dmg as the ScuttleBug consumes you from the inside. You cannot Push Your Luck to reduce this.
If it kills you, the ScuttleBug emerges from your dried-up husk of a body as a MonsterBug. This not a good thing… (see p.23).
To surgically remove the ScuttleBug from your body, play any Action card in the Sick Bay to activate the AutoMed.
AutoMed card text: Cannot be destroyed by Fire. Play any card to: Either: Heal back 2 Cards of your own colour into your Hand. Or: Surgically remove any Nasty from a Crewmember & Heal your Hand back to 5. Max. 1 use per Turn.
This removes and kills the ScuttleBug, and allows you to Heal and replenish your Hand back up to 5 by choosing cards of your own colour from your Wound Tracker (see below, p.17). If you already have 5 cards in your Hand, you may choose 1 from your Wound Tracker.
Crewmembers can still Move and perform Actions with the ScuttleBug inside them.
Hey – do a dying guy a favour! With your Move action, you can drag anyone with a ScuttleBug inside them towards the Sick Bay to get help.
Any Crewmember in the same room may use a Move Action to carry the ScuttleBug's victim with them as they go. Crewmembers can only drag other Crew if they have a ScuttleBug inside them and can only drag them towards the Sick Bay. This isn't a way of getting a free move for everyone.
You can have more than 1 ScuttleBug eating you from the inside out.
In Scenario 1, if the players manage to destroy the Bug Pods on the same turn that a ScuttleBug would finally consume a Crewmember, the team is deemed to have got to the Crewmember to the AutoMed in the nick of time and the Crewmember survives.
Crewmembers vs Nasties
The Nasties…? You can't handle the Nasties! Most Crew are damn near helpless against most Nasties. But if you wannabe a hero, please read on…
Only certain Crewmembers like 'Flygirl' & 'Greaseball' have the chops to go toe-to-toe with a Nasty from the get-go.
But assuming you've got your heart set on heroic suicide, here's how you do it.
First things first: if you're planning on fighting a Little Nasty, make sure you do it right. Don't even think about fighting a Big Nasty unless you've got a VERY BIG WEAPON and even then, it's gonna hurt! There's a reason why most of these movies end with only one heroic survivor.
First, you need a Fight Card: You can only attack a Nasty if you have played a Fight Card containing this symbol (unless you're using a Tool). This lets you attack something. If you don't have a Fight card, you'll probably need a Weapon (see Using Tools as weapons p.16).
Second, you need to be in the right place at the right time: Most Fight Cards require you to be in the same room as your target when you trigger them. This usually means that you have to Move into that Room then play the Fight Card. This requires planning and coordination.
So, you consider yourself a fighter, eh? Flip a card and see if you're right. Tools are more likely to hit than your fists (go figure!) but they will only do what they say on the Tool card.
When you Attack a Nasty, flip 1 card from the Nasty Action Deck and refer to the Hit Boxes at the top & bottom of the card:
- If the box is red, you hit the Nasty.
- If the box is blue, you miss the Nasty.
- The Hit Box at the top is triggered by Weapons.
- The Hit Box at the bottom is triggered by your fists.
- = Reshuffle the Nasty Action Deck after you've referred to the card.
Pushing your Luck; When you Hit
If you HIT, you can opt to Push your Luck by flipping an extra Nasty Action Card & referring to the relevant Hit Box again:
- If you HIT, the attack drives home: inflict 1 extra dmg & you can Push your Luck again.
- If you MISS, it's a glancing blow: subtract 1 from the damage you inflicted and stop.
- If you flip a Reshuffle icon, you must immediately reshuffle the deck and stop Pushing your Luck.
If YOU HIT THE NASTY: place 1 Wound Marker on its card for every dmg the card you activated inflicts—your fists only do 1 dmg.
Place the Wound Marker on the Nasty's card to keep track of the number of Hits it has taken.
The number of Hits a Nasty has is given in the Xeno Data Log and on the top left corner of the Nasty's Card.
- eg: A ScuttleBug can only take 1 Hit – so if you hit it, you squash it. It's dead! Phew!
- A Bug has 2 Hits. Since most basic Fight Cards only inflict 1 Hit, you are going to have to push your luck or hit it twice to kill it.
IF YOU MISS THE NASTY: It bites back! unless you're using certain weapons.
Whoa! Keep those flames away from me! The Flamethrower & Ranged Weapons are too far away to trigger Nasty retaliation when they MISS.
You might want to think about picking up a weapon, like the Multitool in the Kitchen Stores, which can inflict more than 1 Hit. Once you've picked it up, go to p.17 to find out how Tools work.
Wounds & Healing
Any Crewmember who takes 8 Wounds is killed. The Kid is killed on 6.
A Crewmember can use a Medikit to Heal cards back into their hand that they have lost to Wounds.
Wounds can also be healed by the AutoMed in the Sick Bay. Each Crewmember can use the AutoMed once per Round and activates it by playing any Action card face down. When activated, it can either Heal 2 Wounds or Perform Surgery, which both removes a ScuttleBug and Heals your Hand back up to 5 (if you have 5 cards in Hand, it only Heals 1). The AutoMed cannot be removed from the Sick Bay.
When you Heal a Wound, you can choose any lost card of your Crewmember's colour from the Wound Tracker to put back into your Hand. You can never Heal back cards of other colours, so pick your wounds wisely if you wish to recover from them.
All Med facilities work equally well on Androids, who can also Heal back any silver Item/Tool card placed onto the Wound Tracker due to their synthetic nature.
Resting back Wounds
You can miss your turn and swap 1 card from your Hand with any lost card of your colour. This allows you to bring a lost card back into your Hand (but at the cost of a different card).
Hand Clogging Cards
Cards with this symbol are Hand Cloggers. This means that if you pick them up, they will stay in your Hand and cannot be discarded until you fulfil the conditions required to lose them, or Pick Up another Hand Clogger – you only have to keep 1 Clogger in your Hand. You can drop the others, but cannot discard them.
HAND CLOGGERS CAN NEVER BE LOST TO WOUNDS.
Tools
Cards bearing this symbol are Tools. They are the Grey Tokens lying face down in the Ship and they work differently to other cards.
When you Pick Up a Tool, you have 2 choices:
- Either: Place the Tool Card face down into your Discard Pile
- Or: Place the Tool Card face up onto the Ready Tool slot on your Player Mat.
You can only ever have 1 Tool Card Ready to Use (unless the Tool card says otherwise). Place any Tool you are replacing face down onto your Discard Pile as a free Action.
Most Tools have multiple functions, as described on their card:
- The number on the card matches the number on this Tool's token.
- The Tool Icon means you can play it from your Hand to take a Use Tool Action.
- The drop-down menu tells you what the Tool can do.
- It makes this amount of Noise.
If you have a Tool Ready, it can be Used by playing any card containing a symbol in the drop-down menu on the top left corner of the card. When you play a card containing these symbols, you state that you are Using the Tool. Place the card you played to Use the Tool face down on the Tool, to show that it is making the Noise of the Tool.
The beauty of Tools is they aren't one-use Actions – you can use them multiple times per Cycle as long as you have the cards to activate them.
When you Use a Tool, you follow what it says on the Tool Card instead of using the activating card's Action.
Every Tool has the Tool Symbol next to its Token Number. This means that you can play any Tool card from your Hand to Use the Tool card that's in your Ready Tool slot.
You may use a Tool by playing it direct from your Hand, but if you do so, you must place it face up in your Discard Pile and it will not be available to use on later turns in the Cycle.
Swapping Tools
You may swap one Tool with another by placing a Tool from your Hand onto your Ready Tool slot – put the replaced Tool face down into your Discard Pile. This is a free Action and the new Tool can be used immediately.
You can also drop a Tool, placing its token in the Room where you dropped it. This is also a free Action.
Are you packing? Tools, that is?! The more Tool Cards you have in your Deck, the more you will be able to activate most Tools, since they all bear the Use Tools icon. Some Crewmembers are better suited to certain Tools. Look at the icons in your Hand to see which tools can be easily activated by you.
Exchanging Tools with Fellow Crewmembers
You can exchange a Tool with another Crewmember in the same room as you by playing any Action Card and using it to give or take a Tool card from either a Crewmember's Hand, Ready Slot or Discard Pile.
The Crewmember must give you permission to take the Tool. Alternatively, you may immediately take a Tool from any Crewmember that you Stun (see p.25). Either way, you can opt to make the Tool Ready to Use. Taking a Tool from a Crewmember makes no Noise—stunning them does.
Scenario 2: 'Cleaning Up the Mess'
This scenario will introduce you to Fire Fighting and The Vents System.
Setting up Scenario 2
Follow the instructions for setting up Scenario 2 on p.19 of the 'Learn to Play' Booklet.
Fire!
A Fire Token is placed face down into any Room which is set on fire. At the end of the Cycle in which it was placed, the token is turned flame-up and the Fire Spreads (see below).
Any Crewmember or Nasty which ends their turn in an area with a flame-up Fire token automatically takes 1 Hit in Wounds – unless the Fire token was placed face down this Cycle.
Nasties facing Fire will always choose a route that does not enter Fire if they have the option – this includes climbing into the Vents, even if the route is longer. If it has no other option, the Nasty will run into the fire unless doing so would kill it, when it stops in front of the fire.
This does mean that if a ScuttleBug is presented with the option of running into Fire or climbing into the Vents to avoid the fire, it will climb into the Vents.
Keep those flames away from me, Man!
Spreading the Fire
At the end of every Cycle, Fire will spread into all adjacent rooms linked by yellow doors. Place a flame-up Fire token into each room where the fire has spread.
Fire is delayed by Red Security and Green boltable doors. When a fire spreads to these doors, replace the door token with a fire token standing in the doorway: it will only spread into the adjoining room at the end of next Cycle.
In the Learning Scenarios, the Iso-Ward door is jammed open by the burning Pods, so the Fire is not delayed by the door.
Fire cannot spread through closed Blue Airlock doors nor catch in the Vents (the Vents' auto-dampers kick in and suppress it).
At the end of each Cycle, fire will destroy all tokens in each room it has spread from. It does not destroy tokens in rooms it has just spread to.
Fighting the Fire
You can Pick Up a UET (Universal Emergency Tool) from the Secure Lockers in the Ship's Stores, or from the lockers in Cargo Control & Engineering.
Use the UET as a Tool to move into an adjacent room and Extinguish 1 Fire Token + any token burning a door out of that room. Turn the tokens face down: for the rest of this Scenario fire cannot spread into that room again (but it can be reignited in that room by other means).
Once all Fire tokens have been extinguished, the fire is out.
If you don't have a UET, you can attempt to beat out the flames. Flip 1 card from the Nasty Action Deck and refer to the bottom Hit Box on the card: if the box is blue, remove the fire marker from the board; if it is red, leave the marker and take 1 Hit. Fire can spread back into an area that has been beaten out.
You can pause the Vacuum Protocol by putting out the Fire, but the Count will restart if Fire is re-ignited in the Ship before the Protocol is shut.
If you fail to fight the Fire…
If Fire Tokens end any Cycle in 12 Rooms of the Ship (not doors), the fire is out of control. In addition, when the Cycle Tracker reaches 0, if there are more than 10 Fire Tokens on the Ship, the fire is deemed unstoppable:
- In Scenario 2, this means you immediately lose the game.
- In all other scenarios, the Ship triggers its Fireproofing Protocol, opening all airlocks in this section of the ship (Front or Rear) and snuffing out the fire. All unprotected Crew in the section are killed (see EVA Suits p.TBA). Nasties can survive in a vacuum unless their Xeno Data Log says otherwise.
(Note: the source text reads "p.TBA" for the EVA Suits reference, as printed.)
The Vents System
The clear acrylic insert laid over the Ship is its Ventilation & Maintenance Ducting System, known as 'The Vents'.
Ohh .. the Vents! My playground!
To find out how to set up the Vents, refer to the instructions at the back of the Learn to Play Booklet.
The Vents are made up of Vents Nodes connected by the raised lines of the insert, which do not block movement through the Ship in any way.
- Blue Nodes can be entered from the Ship's Rooms with a Climb Action.
- Grey Nodes cannot be climbed into – they just act as links between the vents.
- Green Nodes are sealable vents which can be closed off by the Ship's Protocols in an emergency, making the system above the airlocks airtight. When unsealed, you can climb into these Nodes through the green valve at the end of the Node. They are accessed from the Rooms or Corridors adjacent to the Airlock, not from the Airlock itself.
If the Lockdown Protocol is in play, the Ship seals the vents above any Airlock that has been locked down, so it is not possible to get into different sections of the Ship until the Lockdown Protocol is deactivated (which is not possible in Scenarios 1&2).
Moving Through the Vents
To enter or exit the Vents, you must play a Climb card. Place your Crewmember onto the blue or green Vents Node above the room where you are entering the Vents (you cannot enter the Vents via a Grey Node). If a creature is on a Node, it is in the Vents rather than in the room below.
Creatures can use the Vents to move through the Ship, ignoring walls & doors. Instead, they move from Vent Node to Vent Node following the lines of the insert. This does mean that Nasties can bypass Red Security doors, Fire and Airlocks by moving over them through the Vents.
To Move through the Vents, play any Creep, Move or Run card as usual. However, only The Kid is small enough to Run through the Vents – all other Crew can only Move 1, even if they play a Move 2 or Run 3 card.
Whenever you enter a new Vent Node, draw a card from the Vents Deck:
- If it is a Nasty, place the Card in the Active Nasty Area and place the Nasty's Token on the Vents Node you have moved onto.
- If it is an Action card, you may either take it directly into your Hand or place it at the bottom of the Vents Deck.
- If it is any other card, follow the instructions on the card.
You do not draw a Vents card when you Climb out of the Vents.
Nasties in the Vents
- Little Nasties can easily scuttle through the Vents.
- Big Nasties can only move through the Vents if the Xeno Data Log says they can.
When a Nasty is revealed by a Vents Card, find the blue token matching its card and place this on the Vent Node where it appeared.
It costs a Nasty 1 Movement Point to climb into or out of the Vents and it can move its full movement allowance through the ducts regardless of how big it is. It will choose to enter the Vents if this is the quickest way to get to its target, and it moves from Vents Node to Vents Node – do not remove it from the board.
Given a choice between the Vents and knocking down a door, Little Nasties like me will opt to take the Vents.
Checking the Vents
When instructed to Check Vents by the Cycle Tracker, draw 1 card from the Vents Deck at the end of the Cycle – if it exposes a Nasty Card, place that card in the Active Nasty Area, and place its Bug marker in the room containing the First Target. If it is any other card, place it at the bottom of the Vents Deck.
DO NOT check the Vents if there is no Vents Node in the First Target's room.
Killing the SpyBot
The SpyBot appears like a Little Nasty in the Vents – but follows its own set of (non-aggressive) instincts given on its card.
If you kill the SpyBot, you can take it into your Hand as a Smoking Gun (this is not relevant in Scenario 2) – reshuffle the Vents deck whenever the 'Hear That' card is revealed from now on.
Scenario 3: 'Just When You Thought It Was Safe to Go Back into Cryo-Sleep'
This scenario will introduce you to Agendas and Big Nasties!
Setting up Scenario 3
Follow the instructions for Scenario 3 on p.22 of the Learn to Play Booklet.
You didn't think this was an accident, did you? Each of you is on this ship for a reason—and the crew's safety is NOT everyone's top priority.
Hidden Agendas
At the start of the game, every Crewmember is given 2 Hidden Agendas and must choose 1. As the Company Android, Skins must choose a 'Company' Agenda if s/he has one – everyone else gets a free choice. Discard the other Agenda from the game unseen.
This gives you the Name of the Agenda and tells you your motivation. The figure in the top right is the minimum number of players required for this Agenda to be in play.
Most Agendas will transmit you the access codes that allow you to Decouple the escape vehicles when you Fulfil the Agenda (see below p.26).
This section tells you how to Fulfil the Agenda and gives you some hints on where to look.
This section gives you the circumstances under which your Agenda fails even if you have Fulfilled it.
In most cases, regardless of whether you have fulfilled your Agenda or not, you can only Power Up & Decouple the escape vehicles when the Ship's Computer instructs you to 'Abandon Ship'. The escape vehicles will remain powered down until then.
Example Agenda: 'The Smoking Gun'
You cannot let the Company get away with this!
You fulfil your Agenda & can Decouple solo if: You have a Smoking Gun in your Hand to prove that the Company was behind this.
The most likely place to find a Smoking Gun is in the Safe in the Computer Room or the Safe in the Company Rep's Office.
Your Agenda fails if: Any Crewmember in the same escape craft as you has fulfilled their 'Company' Agenda.
You can only Power Up & Decouple the escape craft when instructed to 'Abandon Ship'.
Fulfilling your Agenda
When you achieve the thing that lets you Fulfil your Agenda, you must declare to the whole table: "I have Fulfilled my Agenda."
Most (but not all) Agendas require you to recover a card from somewhere on the Ship. These objective cards are collectively known as McGuffins.
You can recover your McGuffin any time you like, but once it is in your Hand it will remain there as a Hand or Ready Slot Clogger until you replace it with another Hand Clogger you can carry. So while you might want to locate and identify your McGuffin as soon as possible, it's sometimes a good idea to delay picking it up till later.
You may carry any number of McGuffins & Hand Cloggers as you like. But I wouldn't recommend it!
Decouple Codes
When you Fulfil your Agenda, you are transmitted the Decouple Codes that allow you to get off the Ship without waiting for the rest of the Crew. Even if you have these codes, you must still wait for the Ship to initiate the Abandon Ship Protocol before you can use them. The Abandon Ship Protocol can be triggered by shutting down the final Emergency Protocol in the game.
Safes & Lockers
There are 2 safes on board the Ship: the Ship's Safe is in the Computer Room, and the Company Safe is in the Company Rep's Office. These contain many of the McGuffins needed to complete the Agendas.
To open a safe and take something out, you must play an Unlock Red Door and a Pick Up Action. This allows you to open the safe, look at the cards inside and select ONE to take into your Hand. The other cards remain in the safe.
Like other Red doors, the safe door will remain open till the end of the Crew Round. You will find Cards CS1-3 in the Company Safe and Cards SS1-2 in the Ship's Safe. These are stored at the bottom of the Ship Deck.
You can Pick Up a McGuffin that is not your Agenda. If you do, it clogs your Hand as usual and can only be dropped when you Pick Up another Hand Clogger.
Big Nasties
Ah, we see you've found the BIG NASTY. Good luck with that!
BIG NASTIES are Big! BIG NASTIES are Nasty! BIG NASTIES are very, very dangerous!
The best thing you can do against a Big Nasty is RUN AWAY (or Hide)!
MonsterBug's my favourite. I wanna be like him when I grow up!
When a Big Nasty appears, place its standee in the room it spawned in and its card in the Active Nasty Area. Then turn to the relevant entry in the Xeno Data Log to find out what it can do.
If you have just triggered the Big Nasty in Scenario 3, spawn it in Cargo Control.
In the Full Game, draw a Nasty Action Card and spawn the Big Nasty in the Room which matches its gold number. It will spawn here even if the Room is locked with no access to the Vents.
Come on, guys! You've all seen the movies where it unfolds impossibly from the shadows. It's be-hind you!
A Big Nasty doesn't activate every Turn. It will only activate when Big Nasties or All Nasties Move on the Turn Tracker, if you Move out of its Room without Creeping or you Attack it and MISS with anything other than a Ranged Weapon or a Flamethrower.
Watch out for those Big Nasties—check the Xeno Data Log. Some Big Nasties, like the Trophy Hunter, don't draw cards at all and operate by their own specific set of rules. And EVERY Big Nasty is different!
Fighting the Big Bad
When a Big Nasty Attacks, draw a card from the Nasty Action Deck and look at the UPPER Hit Box. This has a much bigger chance of hitting than Little Nasties do.
When a Big Nasty activates, draw a card from the Nasty Action Deck and look at the TOP half of the card (printed as "TOP AI" on the source page). This is invariably much more aggressive than Little Nasties.
The Xeno Data Log gives the detailed information about how each Big Nasty operates.
EG: the MonsterBug has 8 Hits and when it takes damage, it automatically subtracts 1 from the number of Hits it takes – this does mean that it is immune to damage from Crewmembers' fists. If you're determined to take it on, you'll need a weapon – and preferably a big one!
- When it Follows Its Instincts, it moves towards the First Target and attacks the first non-Bug it encounters.
- If it hits its target, it does 5 dmg minus 1 for every Movement Point it expended getting to its target (if this would = 0, the MonsterBug does not attack, it simply looks menacing).
"It's in the air Vents!"
Observations on Instincts (MonsterBug, as printed on its Xeno Data Log card):
- When Big & All Nasties Move: Move 5 towards the First Target and Attack the first non-Bug it encounters.
- The Attack inflicts 5 dmg minus 1 for each MP spent to reach the Target.
- Can Move through the Vents.
Discord
No Crewmember can attack another Crewmember until Discord is Sown, though you can 'call somebody out!'
Ohh, I never trusted him. He looked like a baddie from the start!
When a card appears that says 'Discord is Sown', Crew may now attack one another BUT you may still only Attack a Crewmember if you have good reason.
Calling Somebody Out
If you are certain that another Crewmember is pursuing a Company Agenda, you may discard a Card to Call Them Out.
Discard the Card face down, point at the Crewmember you are accusing and declare: "I'm Calling You Out! You're working for the Company!"
If you are correct, the accused Crewmember must immediately admit that they have a Company Agenda – but they do not have to tell you exactly what it says. Discord is Sown amongst the Crew.
If you are wrong, you immediately Pass and all Timers on the Turn Cycle Tracker tick down an extra notch. So be certain you're right before Calling Someone Out.
Attacking another Crewmember
When Discord is Sown, Crewmembers can now Attack each other. But you still can't Attack someone for no good reason. Your target must either have Attacked you, or be holding a McGuffin or a Tool that you can take, or must have been "Called Out" and exposed as a Company agent ('Called Out' Crew can also Attack other Crew).
When you Attack, declare If you are 'Attacking to Stun' or 'Attacking to Wound.'
- If you 'Attack to Wound', you can deal dmg to your target in the normal way.
- If you successfully 'Attack to Stun', you do not inflict any damage, but you can immediately steal a Tool or McGuffin from the Target's Hand, Discard Pile or Ready Slot and push them into an adjacent room if desired.
Alternatively, you can Stun a Crewmember and immediately declare that you are 'Fulfilling your Agenda' if it requires you to be out of Line of Sight of any Crew and and they are the only Crew who can see you.
A Stunned Crewmember will miss their next turn, but will then recover enough to take an Action when their turn comes round again.
You may not steal an item from a Crewmember you have not Stunned.
Abandon Ship
You cannot escape the Pandora until the 'Abandon Ship' Protocol has been triggered by shutting down the last Emergency Protocol. This releases the Escape Vehicles and allows you to get off the Ship.
What? You want to get off this deathtrap? And we were having so much fun! But if you really want to leave us, first you have to Power Up your escape vehicle. Then once you've done that, you have to Decouple it.
"Take me with you. I can see…"
The Escape Vehicles
The Pandora's Bridge is a detachable Landing Module which can be Decoupled from the Ship and carries up to 4 Crew in mini Cryo-Pods.
The Ship's Cargo Shuttle has Pods for 2 Crew, but its Airlock will only unlock if the Bridge is Powering Up; if you have gained its access codes by Fulfilling your Agenda or if you use a Bypass Action to access the Shuttle.
The Escape Pod allows 1 Crew to eject from Engineering, but to do so you have to Use & Lose a Widget hidden somewhere in the back of the Ship to open the Pod, then Power it Up.
Powering Up
To Power Up the Bridge, a Crewmember must sit in one of the 3 Bridge Stations, and play cards which match the icons on that Station (the three icon pairs shown on the Bridge diagram). Both icons must be played, but you do not have to play them on a single turn. Place your Crewmember onto the control chair (this does not require a Move Action) and put a Marker onto the Station when its icon has been Powered Up. Cards with multiple icons on them can be used to Power Up a single Station in the same turn, and certain Crew's personal 'Use & Lose' cards (eg. Flygirl's 'Emergency Take-Off' or Greaseball's 'Use a Big-Ga Spanna') allow you to Power Up multiple icons across more than one Station at a time. You can also use a Bypass Action to Power Up an entire single station in one turn.
To Power Up the Cargo Shuttle, follow the same procedure as the Bridge, but you only need the two Shuttle icons (one of which is a gear-and-hand icon). Cargo's 'Shuttle Pilot' card lets him both Bypass & pass thru the Shuttle's Airlock and Power Up 2 of its Icons in one turn – and he may Power Up an Icon on each chair if desired.
To eject the Escape Pod, you must first Use & Lose a Widget to get into the pod. Once inside, you must play the icon to Power it Up.
No Crewmember can Power Up more than 1 Station per player turn unless they have played a 'Use & Lose' card that permits this! So you'll need to work together if you want to get off this rustbucket fast!
Decoupling
Once the vehicle is Powered Up, it can Decouple:
- If there are too many Crew for its Cryo-Pods (4 for the Bridge, 2 for the Shuttle, 1 for the Escape Pod), a friendly female voice announces: "Viable Crew survival capacity has been exceeded. Decouple procedure aborted." And it refuses to Decouple until the number of live Crew on board has been reduced to its 'viable capacity'. Skins, as an Android, does not count towards the 'viable capacity' limit as s/he can power-down and need not occupy a Cryo-Pod.
Once it is at 'viable capacity' the escape vehicle will Decouple if:
- If it contains any Crewmember who has Fulfilled their Agenda – it automatically Decouples at the end of that Crew Round.
- If no-one on board has Fulfilled their Agenda, but all surviving Crew are on board any escape vehicle – it will Decouple at the end of the Nasty Action Round.
Also, when the Objective Timer reaches zero, the Bridge will automatically Decouple, regardless of who (or what) is on board.
When the escape vehicle Decouples, anyone or anything in its Airlock or the Bridge's Vent Nodes is placed inside the escape vehicle! This does count towards 'viable capacity'.
Decoupling an Escape Vehicle ends the game! Hurrah! We got away! Hang on a minute… What's that banging noise…?
Everyone on board the vehicle has escaped – as long as there is no Nasty on board! (see below). Anyone left on the ship – or an un-Decoupled vehicle – loses.
If a Nasty is in your Escape Vehicle
If a Nasty is in the Escape Vehicle when it Decouples, time is suspended and the vehicle's occupants must take part in the Final Showdown that ends the movie.
This Final Showdown is played out in alternate turns, with all Crew attacking the Nasty(s) on board with any cards they have in their Hand (not just combat cards), then all surviving Nasties on board Attacking the First Target on the vehicle.
On your turn, you can choose either to play an Attack card and mount a Normal Attack or to play any number of cards from your Hand in a Desperation Attack.
You can also try to Flush it out the Airlock!
- If you mount a Normal Attack: you HIT & MISS and can opt to Push Your Luck in the usual fashion. Then draw a card from your Deck.
- If you mount a Desperation Attack: you can discard any number of cards. These do not have to be Combat Cards. Then flip 1 Nasty Action Card for each card you discarded one at a time: look at the Bottom Hit Boxes if you're using your fists; look at the Top Hit Boxes if you have a weapon in your Ready Slot (ie. any Tool that does dmg). If you HIT, you do 1 dmg & can flip another card. If you MISS, you must stop flipping cards immediately and Pass! You can only flip a number of cards equal to the amount of cards you discarded. The total damage you inflicted is combined into 1 Hit—so the MonsterBug only subtracts 1 dmg from the total.
And yes, you DO have to flip 2 cards for each discard vs the Time Jumper! It's been nice knowing you…
"Flush it out the Airlock!"
Any Crewmember who took a Power Up Action in a control chair can play an Unlock Action to open the vehicle's Airlock and attempt to flush the Nasty(s) out into space.
If s/he does so, reshuffle the Nasty Action Deck: each Nasty and every other occupant of the vehicle who did NOT play the Flush Action must flip 1 Nasty Action Card:
- If they took a Power Up Action and are sitting in a control chair, look at the top Hit Box;
- If they are not in a control chair, look at the bottom Hit Box.
If they draw a HIT, they manage to grab onto something and remain on the Bridge when the emergency seals engage; if they draw a MISS, they are dragged out of the airlock into the cold, hard vacuum of space.
If they are Stunned, they are automatically flushed out of the Airlock.
Crew wearing an EVA Suit cannot be flushed — but the Trophy Hunter can be flushed!
The Crew can attempt to flush the Airlock ONCE ONLY during the Final Showdown, after which its emergency seals kick in and block it with foam – so pick your time wisely! You cannot flush the Airlock if its doors are broken – the emergency seals have already blocked it.
Surviving's Just a Way of Keeping Score
Once the Final Showdown is over the survivors reveal their Agendas and take stock:
- Any Crewmember on board an escape vehicle can count themselves a SURVIVOR.
- A Crewmember who both survives and Fulfils their Agenda is a WINNER.
- A Company Crewmember who survives but does not fulfil their Agenda is fired by the Company – but hey, that's better than dying, right? Only problem is: the Company controls all legit jobs on the Colony Worlds, so good luck with your new life of crime…
- A Crewmember who Fulfils their Agenda but does not survive: LOSES – unless their Agenda did not require them to survive (ie. The Guardian Angel can WIN even if s/he dies, as long as half the crew isn't killed by the Nasties).
- Any Player whose Crewmember dies without achieving their Agenda LOSES – unless the NASTIES win (see Killing's Just a Way of Keeping Score p.29).
- True Solo Players can only WIN by Fulfilling their Agenda.
The Iso-Ward
The Iso-Ward is (usually) a secure quarantine area where Nasty Things can be isolated from the rest of the Ship. Nasties & Fire cannot break open the Iso-Ward door from the outside. So any Crewmember locked inside the Iso-Ward is safe from anything outside. If its door is closed, Fire cannot spread into or out of the Ward.
Crew can always open the Iso-Ward door.
In the Learning Scenarios, the Iso-Ward door has been broken by the Bug Pods, so cannot be shut and locked.
Any Nasty trapped inside the Iso-Ward flips a card from the Nasty Action Deck on its turn – if this says Reshuffle, the Nasty has managed to smash the Iso-Ward's observation window and can move out of the Iso-Ward on its next turn – place a Broken Door marker on the Room. Otherwise, it remains trapped in the Ward.
Trapping a Nasty in a Cryo-Pod
If you are in a room containing a Cryo-Pod, you can attempt to trap a Nasty in it. To do this, you must play any Battery Symbol as an Active Defence before the Nasty Attacks you: flip 1 Nasty Action Card for every Battery icon played and look at the Hit Boxes for that Nasty. If any one of these cards is a MISS, the Nasty falls into the Cryo-Pod and is trapped & frozen there, otherwise it HITs you! This does, of course, mean that there is one less Pod available for the Crew – but do you want to be the one who lets the Big Nasty out?
If you do, it takes an Action to do so.
You may opt not to trigger this Trap Defence if Hit by a Nasty other than your target.
Iced him! Oooh, .. That's cold!
What Happens When a Crewmember Dies
When a Crewmember dies, its Player removes all Crew Cards from their Player Mat and places the tokens for any Tools or Items s/he was carrying in the room where s/he died (if it does not have a token, use a spare Scenario Token).
Now the dead character's Player can choose either to wake up as a spare Crewmember or to come back as a Nasty!
Waking up the Crew
Simply choose a spare Crewmember who is not yet in the game, shuffle their Deck, deal yourself a Hand of 4 and place their token in the Cryo-Chamber. You are now that Crewmember, who has just woken up to discover that all Hell is breaking loose on board this Ship. Then your PDA starts beeping… Draw 2 Hidden Agendas, choose 1 and rejoin the game.
Becoming a Nasty
Simply choose any colour of Little Nasty that is currently free and active in the game and take control of ALL Nasties in that colour for the rest of the game, OR take control of one Big Nasty. Place their Nasty card(s) onto your Player Mat.
Now the Player's Action Deck becomes a Player-Nasty Action Deck. Draw 5 cards as usual, but the cards work slightly differently.
- Regardless of the number and configuration of its icons, each card will only allow the Nasty to take 2 Actions on its turn:
- Any Move icon on the card allows the Nasty to Move 1.
- All other icons allow the Nasty to Attack OR Move an extra 1.
On their Player Turn, the Player chooses 1 Nasty that they control and plays a card to activate it, using the following priorities:
- If it doesn't have a Trophy, the Trophy Hunter must release its Drones, which instantly Move 5 in any direction its player desires, to Lock On to a Trophy. The Hunter then takes its turn and if its Trophy is in LoS, it must target the Trophy over anything else.
- Unless they are Bugs, Player-Nasties cannot coexist in the same Room. They must Attack each other if in the same Room.
- If in the same Room as the First Target, the Nasty must target them. Otherwise, it can choose its target.
- Player-controlled ScuttleBugs can only Move 1 Room per entire Cycle, but can decide when to Move.
- The MonsterBug places a spare Scenario Token on its Player Mat for every Room it moves through. Subtract these from its Damage when it Attacks & discard them.
- Player-Nasties do not move during the Nasty Action Round.
If a Crewmember Moves out of a Player-Nasty's Room, the Nasty can play a Fight Action to Attack them as they leave the Room. They do not get the usual free attack, nor do they Retaliate when an opponent MISSES them.
If there are no active Nasties on the board, place a random Big Nasty at the farthest end of the Ship and put it under the Player's Control.
Killing's Just a Way of Keeping Score
Any time a Player-Nasty kills a Crewmember, take the dead Crewmember's standee and place it on the Nasty Player's Mat. Once all Crew are either dead or have escaped, the game ends and the Nasty with most dead Crew on its mat is the Biggest Badass Nasty!
If a Player-Nasty is killed, place its token face down on its Player's mat. The Player can choose another Nasty to take over but loses 1 Kill Point for every face-down Little Nasty on their mat & 2 Kill Points for Big Nasties.
Pandora Celeste: the game where death can be a positive career move.
Hull Breach
If the Ship's hull is breached for any reason, place a Hull Breach marker in the Room.
All creatures in a newly Hull Breached room that are not wearing EVA Suits flip a Nasty Action Card and look at the Bottom Hit Box:
- If the Box is Blue, they are sucked out into the cold, hard vacuum of space and removed from the game.
- If the Box is Red, they have managed to grab onto something and remain in the room.
- The Trophy Hunter is deemed to be wearing its own personal EVA Suit and ignores Hull Breaches (but it can still be flushed out the Airlock of an escape vehicle).
Any Crewmember who ends their turn in a Hull Breached room without wearing an EVA Suit takes 1 dmg due to the lack of Oxygen.
Nasties and Androids do not take damage. They are equipped and adapted to survive in vacuum.
You will find rules for EVA Suits in the Ship Stern section on p.32.
Spreading the Hull Breach
At the end of each Cycle, Hull Breaches spread.
Place a Hull Breach marker into every Room adjacent to all current Hull Breaches.
Hull Breaches cannot spread through an Airlock door. Nor can they spread into the Vents – all Vent Nodes linking to a Hull Breached room Lock Down: place a No Entry marker onto them and they become impassable.
Closing the Hull Breach
The Crew can seal off a Hull Breach by emptying a UET into the hole through which the Hull Breach entered the room. It extrudes an expanding foam which fills & blocks the gap: remove the UET from play.
If the filled hole was the original point of the Hull Breach, remove all Hull Breach markers linked to this breach from the board and the breach is sealed.
If the hole filled is a doorway through which the breach expanded, place a No Entry marker across the doorway and remove any Hull Breach markers that are on the sealed side of the door only. The sealed door has 2 Hits and can be broken open with a Tool or Nasty Attack.
Catastrophic Hull Breach
The Ship is divided by Airlocks into 5 Sections: The Bridge, Living Quarters, Cargo Control, the Cargo Bays and Engineering.
If more than 8 Hull Breach markers are ever placed on the board: the Section of the Ship containing the most Hull Breach markers loses its structural integrity and collapses into space, taking all the occupants of that Section with it. Remove the Hull Breach markers from the section to be used elsewhere.
All players should then agree whether to continue playing with 2 (or more) completely separate Sections of the Ship, or whether to deem the Section containing the fewest Crew as destroyed and removed from the game.
If the players cannot come to a consensus, the section is not destroyed: place a Wound marker in every Hull Breached Room – they have been destroyed and no longer exist in the game; but the rest of that Section remains 'playable'.
Scenario 4: 'Backing into Dark Corners...'
This Scenario will introduce you to The ShipStern and Cargo Bays.
Setting up Scenario 4
Follow the instructions for setting up Scenario 4 on p.27 of the 'Learn to Play' Booklet.
The ShipStern
The back of the Ship is known as the Stern. This contains the Cargo Bays and Engineering surrounded by a warren of dark corridors with Nasties lurking in the shadows...
Be afraid! Be very afraid… The dark corridors of the ShipStern contain much nastier Nastiness than the bright rooms in the front...
The SternDeck
The SternDeck acts as the ShipDeck for the back of the Ship and has its own dedicated set of Stern-Deck Tokens which are placed face down onto the spanner spaces in the back of the Ship during Setup.
SternDeck Cards 31 & 32 are placed face-up in the Engineering Locker.
You also place 1 Memory Token face down on the lightbulb in Engine Room 2.
The Cargo Bays
The Ship has 6 Cargo Bays, each containing a Cargo Card. At the start of the game, you shuffle the Cargo Deck and deal 1 card face down onto each of the 6 slots in the Cargo Manifest by the side of the board. The number on the Cargo Manifest links to the Cargo Bay number on the Ship.
To see what's in the Cargo Bay, you must Unlock the Cargo Bay door. This allows you to flip over the corresponding Cargo Card on the Cargo Manifest to reveal what's inside the Bay. To retrieve something from the Bay, you must enter it.
Once a Cargo Bay has been opened, its door cannot be closed again.
Cargo Categories
There are 3 types of Cargo that can be found in the Bays:
- Agri Cargo is made up of pesticides and the genetically modified seed crops that help feed the Colony Worlds.
- Military Cargo is made up of military uniforms, medical supplies and heavy weaponry for the Colonial Defence Forces.
- Tech Cargo is made up of the scientific instruments, chips and Widgets that help keep the Colonies running.
Using the Ship's Manifest
The Ship's Manifest gives you limited control over what's inside the Cargo Bays. At the start of the game, any Cargo Cards that are not dealt onto the Cargo Manifest are placed to one side. When someone places the Ship's Manifest in their Ready Tool Slot they place the spare Cargo Cards beneath it and can look at them in secret.
If a Crewmember has the Ship's Manifest in their Ready Tool Slot, they can use it whenever they open a Cargo Bay for the first time to replace the Card in the Bay with one from the Ship's Manifest. Reveal the Cargo Card in the Bay: if it is not a Cargo Bay Nasty or XWT Control, you can opt to replace the card with any card beneath the Ship's Manifest. This is only possible if you are carrying the Ship's Manifest in your Ready Tool Slot when you enter a new Bay.
Cargo Bay Nasties
A Cargo Bay Nasty is denoted by a Nasty Icon like this in its top left corner.
When this card is revealed, place its Cargo Nasty Token on the board in the Bay where it appeared.
The Stern Target
When playing with the ShipStern, there are 2 First Targets in the game:
- The First Target is the Crewmember who made most Noise in the front of the Ship or Cargo Control.
- The Stern Target is the Crewmember who made most Noise in the back of the Ship or Cargo Control.
This does mean that if you are in the Cargo Control section (Cargo Control, Docking Bay Port, the Shuttle and connecting airlocks), it is possible for you to be First Target of all the Nasties in both the front and the back of the Ship!
At the start of the Cycle, the First Player is the holder of the First Target Token.
Darkness
All rooms and corridors in the ShipStern start the game in darkness, except for Engineering, which is the sole pool of light in the back of the Ship.
Any Crew who start the Cycle in darkness without an independent light source must discard one card.
An independent light source can be provided by a Torch, the Welding Torch or the suit lights of the Cargo Rig or an EVA Suit.
Turning the Lights On/Off
Hidden somewhere in the dark at the back of the Ship is a Junction Box. When its Token is revealed, leave it on the board and place the Junction Box Card into the Active Nasty Area.
From now on, anyone in the same Room as the Junction Box can play a Use Tool or Engineering Action to switch the lights on or off.
- If the lights are On, place a yellow token onto the Junction Box card to record this.
- If the lights are Off, take the token off the Junction Box card.
The Engine Rooms, Cargo Bays and all corridors in the ShipStern are plunged into darkness.
The Junction Box does not affect lighting in the front of the Ship, Cargo Control or Engineering.
EVA Suits
There are EVA Suit Lockers in Cargo Control and Engineering. These both contain enough EVA Suits for all the Crew.
To put on an EVA Suit, play a Pick Up Action and place an EVA Suit Token onto your Player Mat. While this token remains on your Mat, you are deemed to be in the EVA Suit. It is a free Action to take the suit off.
Anyone wearing an EVA Suit must subtract 1 from their Movement, but can play a Use Tool Action to Move 1. This means that Move 2 in an EVA Suit = Move 1 and Move 3 = Move 2.
On the plus side, the EVA Suit protects its wearer from vacuum, so Hull Breaches don't cause Wounds and its magnetic boots prevent you from being sucked out of the breach. It also acts as armour, subtracting 1 from all dmg inflicted on the wearer.
However, an EVA Suit does NOT protect its wearer from a ScuttleBug (you've all seen the films).
The Escape Pod
Engineering contains a single-person Escape Pod, installed by the Company under the Safety in the Workplace (Extraterrestrial Vehicles) Amendment to the Board of Trade: Loss of Life in Space Act as a token gesture towards the poor saps in Engineering.
But unlike the other Escape Vehicles, the Pod will only activate if a Widget is installed into its Deadlock Mechanism.
"The Company calls this an 'enhanced security measure'. What they mean is they don't trust us thieving scumbags in Engineering not to steal anything that's not nailed down." That's what Greaseball says.
So, before you can Power Up the Escape Pod using a Pick Up & Engineering Action, you have to Disable the Deadlock by Using & Losing a Widget from your Hand to open the Pod.
The Escape Pod will only Decouple if you have Fulfilled your Agenda, but can be ejected before the Abandon Ship Protocol is triggered.
When the Escape Pod ejects, players can agree either to end the game at that point, counting the escapee as the winner, or to continue playing. If they continue playing, the escapee draws a card from the Big Nasty Deck and spawns it in the usual way as a Player Nasty in the back of the Ship.
The Widget
Lying around somewhere in the back of the Ship is a Widget. The Widget is a special McGuffin that enables you to activate the Escape Pod and eject it before the Abandon Ship Protocol has triggered (see The Escape Pod above).
There are 2 possible places where you can find a Widget: Token 23 is hidden amongst the ShipStern Tokens spread around the back of the Ship.
Alternatively, one of the Tech Cargo Bays contains a consignment of Widgets. Each Crewmember can take a Widget from this consignment, placing a Scenario Token onto their Player Mat to denote this, but when they do it automatically triggers the Abandon Ship Protocol and spawns all remaining Big Nasties on the Ship.
Where to Spawn Big Nasties
When a Big Nasty is spawned, its spawn point is determined by the action that spawned it.
- If the Protocol that spawned it was shut down in the front of the Ship, draw a Nasty Action Card: the Big Nasty spawns in the Room with the matching gold number in the front of the Ship.
- If it was spawned by a Protocol or action in the back of the Ship, use the gold number in the Rooms of the ShipStern.
- If the Protocol was shut down in Cargo Control or Docking Bay Starboard, the Big Nasty Spawns in the Room where it was shut down.
The Full Game
Now you know the rules, you can play the Full Game of Pandora Celeste.
This uses the Emergency Protocols, the Agendas and the Big Nasty Deck to create random scenarios of variable difficulty which add replay value to the game.
If you have played through the Learning Campaign, you can ignore this next section and jump straight on to The Big Nasty Deck.
If you haven't played the Learning Campaign, here are a few things you need to know before launching into this game:
- This is an Emergency Protocol. You will set up 1-3 of these face up at the start of the game.
- Each one is attached to a Big Nasty drawn face down from the Big Nasty Deck.
Big Nasties are basically Boss Monsters, which will spawn as you shut down the Protocols. But you cannot Abandon Ship until you have shut down ALL the Protocols.
These are Ship Tokens. They come in 3 types: Grey, Dark Grey & Cream.
- Grey & Dark Grey Tokens are linked to the ShipDeck (front) & SternDeck (back) and can be Tools which are useful or Little Nasties, which aren't.
- Ivory Tokens are Memories, which are always useful to you.
You will seed these Tokens through the Ship at the start of the game and can use a Pick Up Action to add them to your Hand & Deck when you encounter them.
- If the rules mention a Scenario Token, it looks like this, with a number on it.
The Big Nasty Deck
The Big Nasty Deck contains all the Big Nasties that have been unlocked for this game. During the Full Game, you randomly draw one or more of these Big Nasties from the Big Nasty Deck and link them to the Emergency Protocols. In this way, the Crew never knows exactly what awaits them in the dark corners of the Pandora Celeste…
First: Choose Your Difficulty
You can set the duration & difficulty of your game by choosing how many Emergency Protocols (EP) & Big Nasties (BN) will appear in the game.
- For an Easy game: draw 1 EP & 1 BN. This should take about an hour to play.
- For a Standard game: draw 2 EPs & 2 BNs. Dur: c.90+ mins.
- For a Long Standard game: draw 3 EPs & 2 BNs. Dur: c.120 mins.
- For a Veteran game: draw 3 EPs & 3 BNs. Dur: c.120+ mins.
If none of the Emergency Protocols drawn have a time limit attached to them, set the Turn Cycle Tracker to 9.
Place the BNs face down in a stack on the slot labelled Scenario Deck, with the red Abandon Ship Protocol at the bottom of this stack – it will be triggered by the last Emergency Protocol that is revealed. Place the EPs face up side by side next to the Scenario Deck Slot.
To be honest, you can choose any number of EPs & BNs you want to face – and can even decide what they should be if you wish - but each EP will add about 20 minutes to your playing time, and each BN above 1 will add at least 30 minutes and reduce your chances of survival.
It's been nice knowing you…
Contamination Alert
If you drew the Contamination Alert Protocol: Place Scenario Tokens S3-5 into the Cryo-Chamber, Secure Locker 1 & Computer Room, and a Yellow ScuttleBug & the Bug Pods Token in the Iso-Ward. Then place Scenario Cards SC101, 102, 103, 104 & 105 face up in the Active Nasty Area. You will build the Flamethrower during the game.
Setting Up the Full Game
-
Find the ShipDeck (Cards 1-11 + CS1-3 & SS1-2) & 13 Light Grey Tokens that are linked to it. Do not shuffle this Deck. Place it face up in the ShipDeck Slot.
Shuffle the Grey Tokens face down:
- Take the 4 tokens with the initials for Kitchen Stores, Company Locker and Secure Locker 1 & 2 and place them face-up in the Rooms that match their labels.
- Shuffle the remaining tokens and place 1 face down into each Room in the front of the Ship marked by a spanner.
-
Find the Memory Deck (Cards 12-20). Do not shuffle this Deck: place it in the Memories Slot. Shuffle the 9 Ivory Tokens and Place 2 face down in the 3 rooms marked (Memory icon) in the front of the Ship.
-
If you did not draw the Contamination Alert Protocol, place the Flamethrower Token into Secure Locker 1 & place the from Locker 1 into .
Where the Crew will Start
There are 3 possible starting locations:
-
On Wake-Up: Place your Standee in the Cryo-Chamber. You must immediately choose a card to discard as you are still groggy from the wake-up procedure, but you start close to all the Memories in the Changing Rooms & Crew Quarters.
-
At Breakfast: Place your Standee in the Refectory. Optional Rule: For an easier game, any Crew in the Refectory can randomly take one Memory from the board into their Hand.
-
At their Workstation: Place Flygirl on the Bridge, Skins in the Company Rep's Office…. PTO
-
Cargo in Cargo Control, Cap in the Captain's Cabin and Greaseball in Engineering (or the Cryo-Chamber if only using the front of the Ship).
-
The Kid starts the game in any Vent Node on the Ship and does not lose or Pick Up a card.
Protocol Bans
Certain Emergency Protocols will restrict where the Crew can start:
- If the Jettison Protocol is active, Cargo must start in the Cryo-Chamber.
- If the Vacuum or Don't Call Me Dave Protocols are active, Cap must start in the Cryo-Chamber and no-one can start in the Refectory.
- If the Lockdown Protocol is active, all Crewmembers must start in the Cryo-Chamber.
- If any Protocol Ban is active, The Kid must start in the Secure Vent Node above CC Fore.
Full Game Setup Diagram
The diagram on this page shows where each component is placed:
- Place Memory Deck here (Ship Front, Living Quarters).
- Place ShipDeck here (top right, beside the board).
- ShipDeck & Memory Deck tokens are placed in the rooms of the Ship Front.
- Discard pile slot and Deck slot beside the Player Mat x number of players.
- Place protocol timers here (the Turn Cycle Tracker, left of the board).
- Shuffle & place Vents Deck here.
- Place Big Nasty Deck & Abandon Ship Protocol here.
- Place Emergency Protocols here.
- Shuffle & place Nasty Action Deck here (beside Cargo Control).
- ShipStern (Cargo Bays) & SternDeck Tokens in the back of the Ship.
- ShipStern (Engineering) (Engine Rooms).
- Cargo Manifest: shuffle & place 6 Cargo Cards.
Spawning a Big Nasty
When an Emergency Protocol is shut down, turn over the top card in the Big Nasty Deck to reveal which Big Nasty spawns. Then flip a Nasty Action Card and place its standee in the same room as the number drawn. If you are also playing the back of the Ship, see Where to Spawn Big Nasties on p.33.
Only one Big Nasty can be revealed with each Protocol (feel free to ignore this rule if you want, but don't ask me to clean up the mess).
Abandon Ship
When the last Emergency Protocol is shut down, trigger the Abandon Ship Protocol. Discord is Sown amongst the Crew and all Crew do the Act III Reveal by declaring if they have a Company Agenda (but not what it is). You can now Abandon Ship.
Fenn
The Full Game also includes Fenn the CyberDog – an experimental Battlefield Retriever Droid with stability issues...
At the start of the game, add the Fenn Token to the Grey Ship Tokens randomly laid in the front of the Ship and add his FN(K9) card to the ShipDeck. When revealed, you can Pick Up this token to add FN(K9) to your Ready Tool Slot. If you do not Pick him Up, place his card in the Active Nasty Area: when Little Nasties Move, he will Move 2 towards the First Target like a Little Nasty.
If Fenn is in your Ready Slot, you can use a free Action to send Fenn into an adjacent Room to Pick Up any Grey Token there for you. However, if there is a Nasty in his room, it will attack Fenn as he leaves.
When Fenn gets Hit, he does not take damage. Instead, flip a Nasty Action Card: if its gold number is greater than or equal to the current Cycle #, Fenn transforms into FN(R1R) the CyberHound and goes on the rampage. From now on, FN(R1R) acts as a Big Nasty which Moves towards the First Target and Attacks everything in the Room it ends its Move in for 3 damage!
Keni & Marina
These are 2 optional Crew available as Add-Ons:
- Science Officer Keni starts in the Sick Bay and acts as a support character, enabling the Crew to increase their dmg against the Nasties and draw specific cards they need from their Deck. She also has the ability to survive a fatal blow once per game.
- Marina is a Colonial Marine hitching a lift to her next posting on the Colony Worlds. She starts in the Cryo-Chamber and has access to a Pulse Gatling and Pulse Grenade designed for in-Ship combat without causing a Hull Breach, as part of her Deck. She is also trained in deadly Unarmed Combat.
Marina's Kit: Marina comes with a Cargo Bay full of Military Kit which she is taking to her next posting. At the start of the game, draw 5 Cargo Cards instead of 6, then shuffle Marina's Kit Bay in with these to create the Cargo Manifest. When this Bay is revealed, anyone can take a Pick Up Action inside the Bay to take 1 piece of Marina's Kit and add it to their arsenal.
However, since she is not a proper member of the Crew, Marina's Unlock Card is only able to Unlock Military Cargo Bays – it cannot Unlock any other Red Door on the Ship (she has to discard 2 cards face down to unlock these).
Game Variants
If you want to add some extra layers of difficulty, confrontation or length to the game, feel free to add in any or all of these optional variants.
Revelation Variant
Discord is immediately Sown amongst the Crew when any Smoking Gun is revealed. At this point the Crew realise that the Company is up to something and that one of their number is probably a Company Agent. Just because you're paranoid, doesn't mean they're not unleashing alien bioweapons against you…
Long Game Variant
For a longer game, keep playing until ALL surviving Crew have abandoned ship.
Any Crew who escape in the first vehicle(s) can opt to take control of a Nasty for the rest of the game (see p.29). Be aware that this will make for a much longer and more deadly game!
The Extra Nasty Variant
OK, so you're suckers for punishment – the game as it stands simply isn't tough enough for you. So try adding the Nasty Cards from the Learning Scenarios into the game.
Place Scenario Cards 101, 102, 202 & 203 to one side (they are used in the ShipStern & Vents); shuffle the remaining Scenario Nasty Cards and place them next to the board to create a Scenario Nasty Deck. Take the Scenario Tokens & place 1 face down into any Room(s) you like.
When you enter the Room, flip the token face up: if its number is less than or equal to the current Countdown, place the bottom card of the Scenario Nasty Deck into the Active Nasty Area and place its corresponding token into that Room.
Have a nice day!