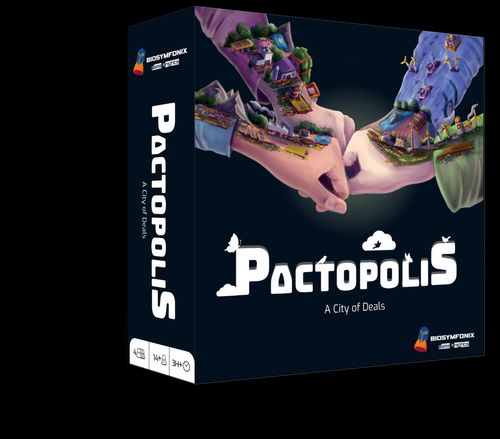
Pactopolis
Pactopolis Rulebook
Table of Contents
Table of Contents
Design Philosophy Behind the Game
This game was designed to challenge traditional competitive structures and explore a different kind of tension: one where players must balance self-interest with shared responsibility.
Negotiation as the Core Mechanic
At its heart, this is a game about negotiation. Conversation is not flavor — it is the engine that drives play. Deals, treaties, compromises, and promises are fundamental tools. The game rewards persuasion, trust-building, and long-term thinking.
Asymmetry to Create Perspective
Every player operates with different information, abilities, and incentives. No two players experience the game the same way; no two games are the same. The asymmetry forces players to communicate, reveal selectively, and understand perspectives beyond their own.
Shared Fate, Individual Ambition
Pactopolis is a shared system. Its success or failure affects everyone. However, each player has personal goals which can only be achieved if the other players succeed in their goals. The most interesting decisions emerge from this tension.
Actions have Consequences
Promises matter. Reputation matters. The world remembers.
Players who break deals, exploit others, or act recklessly will face mechanistic and social consequences. Trust is a resource, and once lost, it is difficult to rebuild.
No Zero-Sum Thinking
This is not a game where one player's loss is another player's gain. There are no victory conditions that rely on the destruction of others. The system actively discourages predatory play and rewards collaborative problem-solving. The only zero-sum mechanism in the game is auction — but this is also there for players to see if you can balance long-term thinking with your current economic situation.
A Living World
The environment is not a static board. It reacts to player behavior. Neglect, over-exploitation) will reshape the game and introduce new challenges for everyone.
Adaptability vs. Control
In contrast to the traditional games where control is the key, this game will test your adaptability. The faster you can adapt to the situation, find novel solutions together with your competitors to overcome any obstacles, find and create value, the better you will do at the game (and perhaps also in real life).
Goals
Players are 4 sectors (Agriculture, Energy, Real Estate, and Manufacturing) called upon by the Government to develop a land area into a sustainable urban landscape.
As a player, your major goals are:
-
Grow your sector a. Take advantage of the terrain beneficial for your sector and steer clear of disadvantageous terrain. b. You need resources from other sectors, so they need to grow too to be able to provide you with the resources you need. You also need to follow Government directives and adapt to any change in policies.
-
Negotiate a win-win with other sectors. Earn the most negotiation points and money. Both convert to Victory points, albeit with different weightage.
-
Become the most prosperous city – Check the health of the city at the end of the game to find out how holistic and sustainable your victory is!
Component List
- 6 Piece board + 12 piece frame with coordinates
- Board Option – 1 Game Mat: If you have chosen a game mat as an add-on, then you get one large map that would fit a large table.
- 1 Public tray to contain all the common components
- 4 Player trays: The player sets are provided in separate player trays with lids. Each tray contains: 25 Player markers, 14 Sector Development tiles – 7 tiles for the two types of developments, 10 Collaboration markers
- 4 Player screens
- 1 Auction Marker
- 100 Player Markers – 25 per sector
- Collaboration Markers – 10 per sector
- 56 Main Building tiles – 14 per sector
- 36 Collaboration tiles – 9 per sector
- 36 Frames for 36 Large tiles – 9 per sector
- 4 Collaboration tile organizers
- 14 Terrain modification tiles
- 10 Water body recreation tiles
- 10 Replanted forest tiles
- 10 Terraced mountain tiles
- 42 Highway tiles
- 3 Drawstring bags: 1 each for small coordinate tiles, 1 for 40 large Highway tiles.
- 168 x1.5 cm coordinate tiles for Wide table format & 1 cm coordinate tiles for long-table format
- 1 Round marking standee
- Cards: 40 Government cards, 12 Impact cards, 4 Round cards
- 4 sets of calculation sheets: 1 per sector in their color
- 80 Negotiation Points: 1, 2, 5 and 10 points
Component Details
Board / Map
Map Construction: apart from one piece of the board (Section 1 – top left) that will always be constant, the other 5 pieces can be arranged in different ways. Designed primarily so that the game can be played on different sized tables.
The board is shown in two layouts in the source: a Wide Table Format (columns A–N, rows 1–12) and a Long Table Format (columns A–U, rows 1–8).
The Map: The map shows natural land with different terrains. Certain developments are allowed on certain terrains and prohibited on others.
On their player screen, each sector can find information about where their developments can be built or are restricted.
Players are allowed to modify the terrain at a cost.
Terrain examples (the terrain art labels are printed in French in the source; they are translated here): Large sea (Large), Sea (Mer), Coastal sea (Mer côtière), Coastal land (Terre côtière), Pond (Étang), Plain (Plaine), Flowering zone (Zone fleurie), Mountains (Montagnes), Forest (Forêt), Lake (Lac).
Player Markers
These octagons are used by players to mark the land plots that they own.
Once players have constructed on their plots, they remove these markers and place them back in stock of their markers.
Tiles
a. Main Development Tiles: There are two types of Main developments that each player can build. There are 7 copies of each type. One is cheaper to build ($) and the other is more expensive ($$). Each has their own construction restrictions or allowances.
- Agriculture can build Crop Farms and Fish Farms.
- Energy can build Solar Farms or Wind Farms.
- Real Estate can build Residential or Commercial Developments.
- Manufacturing industry can build Light or Heavy Industries.
These tiles also show which sector they are allowed to build adjacent to. Players refer to their own player screens for information on their Main developments.
Adjacency as shown on the tiles:
- Crop Farm (Less Expensive, $) and Fish Farm (More expensive, $$), Agriculture: can be constructed adjacent to Energy.
- Solar Farm ($) and Wind Farm ($$), Energy: Can be constructed adjacent to Industry and Agriculture.
- Residence ($) and Commercial ($$), Real Estate: The tile side with no colour indicates that this cannot be built adjacent to any other sector.
- Light Industry ($) and Heavy Industry ($$), Industry: Can be constructed adjacent to Energy.
b. Reclaimed Land tiles: These tiles show cleared land. You place this tile on a forest or water plot to indicate that the forest is cut or land is reclaimed from water.
c. Terraced mountain tiles: These tiles show terracing on the mountains. Place this tile on a mountain plot to indicate terracing of the mountains.
d. Recreated water body tile: These tiles show a plot with water on it. Place this tile on one of your own plots to indicate that you have recreated a water body.
e. Replanted forest tile: These tiles show a plot with new forest growth. Place this tile on one of your own plots to indicate that you have replanted a forest.
f. Collaboration tiles and frames: Each player has a set of 9 special constructions that they can use as leverage for negotiations. These tiles are constructed not for yourself but for the other sector. They give the other sector extra building and thereby extra income and possibly also resources. What you get in return are negotiation points and anything else that you manage to negotiate that the other party gives you in return. Once you construct these, you place the accompanying frame on top of the construction to show that this now belongs to the other sector.
Here is an example of a collaboration development built by Agriculture for Real Estate and Manufacturing:
Collaboration Buildings – How to use your building with others to co-create a Sustainable Environment AND gain Negotiation Points (NP).
Example: The negotiations with other sector(s) lead to an agreement on building a Biodiverse Park on YOUR plot adjacent to 2 Commercial Buildings and a Light Industry.
- You earn 5 NP for the Biodiverse Park (Real Estate + Industry).
- You pay the cost and Resources to build it.
- You can't build it on water.
- Real Estate earns 2 NP for Commercial Buildings next to the Biodiverse Park.
- Industry earns 1 NP for 1 Crop Farm next to the Biodiverse Park.
- Real Estate or Industry place a Red-Grey frame on the Biodiverse Park indicating that this building now belongs to them.
g. Highway tiles + Start and End tiles: The start and End tiles are placed in the common pool area. Highway tiles stay inside the black bag. These tiles come into play when the government declares an action related to a highway. These tiles are drawn randomly from the black bag and an action performed as indicated in the Government card.
h. Small tiles A: These are placed in the green bag and represent the coordinates for a standard design map.
i. Small tiles B: These are placed in the brown bag and represent the coordinates for a long-table design map.
(The source photographs label the two bags "Wide Table" (blue) and "Long Table" (green).)
Collaboration Markers: Each sector has their own set of 10 collaboration markers. The player screens describe the conditions when and how these markers can be used. Each of these markers on the board earn you Negotiation points at the end of the game.
Resources
Each sector starts the game with 5 of their own resources and 1 each of the other resource. Agriculture produces food, Energy produces clean energy, Real Estate produces Human Resource and Manufacturing produces commodities. Each sector starts producing their resources once their construction is complete.
Conversely, Resources are essential for construction – not only does a sector need one of their own resource, they need one resource each from other sectors as well to be able to construct on up to 4 plots.
Example: Energy starts the game with 5 Energy + 1 Human resource + 1 Food + 1 commodity. In the first round they build 4 cheaper constructions. They pay 1M per construction and a set of resources (1 energy, 1 HR, 1 Food and 1 Commodity). They are left with 4 Energy.
Manufacturing starts the game with 5 Commodities + 1 Energy + 1 human resource + 1 food. In the first round they build only 2 of their expensive buildings. They will pay 2M per construction and a set of resources (1 energy, 1 HR, 1 Food and 1 Commodity). They are left with 4 Commodities.
Negotiation Points
Negotiation Points are the major points in the game. These are earned by negotiating the construction of Collaboration buildings for other sectors, or for fulfilling other special conditions described on your player screen.
Negotiation Points come in denominations of 1, 2, 5 and 10.
Government Markers
Guardian angel shaped protection markers are placed by the Government when it decides to protect a certain natural terrain. Once a plot is protected by the Government, nothing can be constructed there.
Auction Marker
Also the first player marker. It rotates between the players clockwise each round. The player holding this marker also runs the auction and places this marker on the plot being auctioned for everyone to see clearly.
Round Marking Standee and Stand
This is to allow all players to see what round they are on and the important points that round.
Player Screens
These are used not only for hiding your resources, money and negotiation points, they are also a source of information, including secret information, specific to your sector. They also have the iconography for the game that you can always refer to easily.
Government Cards
These are actions that the government takes at the end of each round.
Impact Cards
These are penalty cards that one gets if they grow extensively causing environmental and social impacts. You will collect one or two of these cards if your cluster grows beyond 4 tiles.
Round Card
This reminds you of phases in each round.
Round Phases:
- Allotment
- Auction
- Negotiation
- Modify + Build
- Income – Resources
- Income – Money
- Government Action
Player Aid
This reminds you of the costs of construction + earnings in each round.
Terrain modification costs (fixed):
| Action | Cost |
|---|---|
| Cut Forest Plot | 3M |
| Reclaim Water Plot | 3M |
| Terrace Mountain Plot | 5M |
| Replant Forest Plot | 8M |
| Recreate Water Plot | 8M |
Building cost:
| Round | Building Cost ($) | Building Cost ($$) |
|---|---|---|
| 1 | 1M | 2M |
| 2 | 2M | 4M |
| 3 | 3M | 6M |
| 4 | 4M | 8M |
| 5 | 5M | 10M |
- 1 resource set needed to build 1-to-4 tiles.
Income from different sized building clusters (+ number of Socio-Environmental impact cards to collect per cluster):
| Cluster | Money | Resource | Impact Cards / Cluster |
|---|---|---|---|
| 1 tile | 4M | 1 (round 1), 0 (rounds 2–5) | 0 |
| 2 tile | 10M | 1 | 0 |
| 3 tile | 15M | 2 | 0 |
| 4 tile | 40M | 2 | 0 |
| 5 tile | 45M | 3 | 1 |
| 6 tile | 100M | 3 | 2 |
D12 Dice
It is used whenever a Government card demands it.
Paper Money
Pactarii is the currency in the game that you can use to obtain land in auctions, construct your sector, and negotiate with other sectors.
Calculation Sheets (A4)
Allows you to calculate your total money and resource earnings each round.
Board Setup
At the Game Start
Set up the board according to your preference if using the 6 pieces cardboard board. In this case arrange the board as shown below.
If choosing the standard layout, then select Bag 2 (Wide-table coordinates). If you choose the long layout, then select Bag 3 (Long-table Coordinates). If you use game mat, place it in the middle of the table and select Bag 2 for the game play. The bag you did not choose (bag 2 or 3) goes back into the box.
There are 8 Government cards specific to rounds 1–4. Sort the cards according to the round, draw one card for each round and make a deck organized by round numbers – first round at the top and last round at the bottom.
Players choose the sectors they want to start with. Agriculture (Purple) is always the first player as they start with the least amount of money. Give the Auction marker to this player. Auction marker also acts as the first player marker. The first player moves clockwise every round.
Give 1 player screen corresponding to the chosen sector to each player. Players use 2 curved stands each to give stability to their screens. Players hide their money, the resources in hand, and the negotiation points they win behind their screens.
To each player, hand out 14 Main Building tiles + Player markers of their colour + Collaboration Markers for that sector.
Set the public tray containing the public/common items in an easy to reach area.
Each player takes 5 resources that their sector produces and 1 each of the resources produced by other sectors.
Hand out appropriate amounts of money to each player. Agriculture: 10M, Energy: 12M, Real Estate: 14M, Manufacturing industry: 22M.
Keep the selected drawstring bag (Bag 2 or 3) with appropriate coordinate tiles and Bag 1 with highway tiles in the common supply pool area.
Agriculture is the start player and will go first. Hand the auction marker to this player.
Set up the round marking stand on the wooden standee and place the marker frame on Round 1.
Only at the Start of the Second Round
- Each player takes the plastic folder with their own collaboration tiles along with the frames and places it in front of them/behind the screen. You will also be reminded of this on the round marking standee/round card.
Board Setup Diagram
The source shows a labelled photograph of a typical setup. Its labels are:
- Global Round marker stand
- Bag of Grid markers (Land Allocation tiles)
- Red protection markers
- Yellow Energy Adoption markers
- Biodiversity markers (Butterflies for agriculture)
- Industry (Grey) protection markers
- Player Aid Sheet
- Common Land Modification Tiles
- Round Cards
- Player Screens (1 per player colour); the source strikes through "Player Information sheet (Asymmetric information)" on this label
- Player Area Marker (per player colour cylinders)
- Game Currency (Pactarii; the diagram label reads "PactaPii", corrected here)
- Negotiation Points (NPs)
- 12-sided dice
- Govt. officers (Protection marker)
- Govt. Action Card
- Road – Start and End markers (to be used with road tiles action only)
- Bag of Road tiles
- Set of 9 collaboration building tiles – 1 set per player colour (4 sets)
- Resources – per player colour
- Player Buildings – specific to player colour
- Game Map
Game Flow
The game plays over 5 rounds. Each round follows several phases:
1. Allotment of Land Plots
The Government allots random plots to the various sectors – FREE OF COST.
Action: Starting with the first player, each player draws coordinate tiles from Bag 2/Bag 3. The number of tiles to be drawn is mentioned on the round marking standee. Each player then places their player tokens on the coordinates they drew.
Keep the tiles that you draw from the coordinate bag with you. Do NOT put them back in the bag for the duration of the game. This will help in case a player token moves on the board by mistake or to sort out any confusion about ownership of a plot.
2. Auction
Specific number of plots are auctioned by the Government. Check the Round marking standee for the exact number of plots that will be auctioned each round.
Action: The first player holding the auction marker runs the auction. They draw a coordinate tile from Bag 2/3 and place the Auction marker on the plot represented by the coordinate tile. They then run the auction. Players then start bidding on the plot.
- Round 1 auction starts with 1M and players can bid minimum 1M more than the last bid.
- Round 2 auction starts with 2M and players can bid minimum 2M more than the last bid.
- Round 3 auction starts with 3M and players can bid minimum 3M more than the last bid.
- Round 4 auction starts with 4M and players can bid minimum 4M more than the last bid.
- Round 5 auction starts with 5M and players can bid minimum 5M more than the last bid.
Players can "Pass" if they do not want to bid. They are then out of auction for that round. Players keep bidding until no one outbids the highest player (keep a 3 sec rule for announcing who wins the bid).
If no one bids anything – the coordinate tile is then taken and kept on the map to indicate that this area will never come back in play. The player winning the auction keeps the coordinate tile with them.
3. Negotiation
Negotiations begin. Negotiations are open-ended though time bound. Players must enforce the time mentioned on the round marking standee. Players may negotiate with one or more players simultaneously.
Deals may include:
- Negotiations on land plots: Some plots that another player owns may be more interesting for you or vice versa. You need to find out what the other player needs or values in exchange for the plot that is interesting for you. You need to obtain best value, but this is not a dog-eat-dog world – you want to create value for others. One mans trash can be other mans gold. Find out what you can afford easily to give that which is of value to the other party in exchange for what you greatly desire.
- Trading resources or money. Note: Negotiation points cannot be traded or given away.
- Jointly funding development projects (construction tiles).
- Make alliances or promises – you can make temporary alliances or fake promises, but you will feel the impact of this in the game.
- Giving or taking loans.
- Any other creative but non-trivial negotiation that is grounded to reality.
NOTE:
A. Negotiation is open and simultaneous. No turn order is enforced. Players may accept, counter, or reject offers at will.
Usually all the actions after Allotment and Auction are performed by all players simultaneously. In case of a conflict – (for example, player X has a plot next to player Y but their building types cannot be built next to each other, and both want to build) – the first player gets to build first.
B. Players are generally used to turn by turn negotiations – however, in this game all negotiations happen at the same time – otherwise the allotted time for negotiations will not be enough. A Player (Sector Z) can inform a party (Sector X) of their interest in negotiating with them and then continue their negotiations with a different party (Sector Y). This way, Sector X can ask Sector Z about their interest and offer as well if time permits.
C. When 2 players negotiate the construction of a collaboration building in round 2, both parties earn the 4 Bonus Negotiation points. Similarly, in Round 3, both parties earn 2 Bonus Negotiation Points.
4. Pre-construction Land Modification
Depending on the restrictions on a specific construction, land plots with forests, water bodies or mountains may need modification before you can construct your buildings. For example, you can cut down forests, reclaim land from water bodies and terrace the mountains. Land modification has its cost and every time you modify terrain you need to compensate by creating a forest or a water body. You can't of course create mountains – hence the cost of flattening the mountains is higher (5M Pactarii).
For example, cutting a forest has a cost (3M) and players are required to replant forests on a plot they themselves own which costs a lot more (8M). Inability to replant leads to increasingly heavy penalties in subsequent rounds (See Round Marking Standee). If a forest is not replanted by the 4th round, you are penalized extra in form of Negotiation points, the 5th round costs even more in negotiation points.
Note: Replanted forests and recreated ponds cannot be modified at any time, nor can anything be constructed on them. They are considered protected!
Terrain Modifications Needed for Building:
- Forest can be cut (must be replanted). Lake/Pond/Coastal Water can be reclaimed (must be recreated). Mountain can be terraced.
- If you cut a forest, OR reclaim water plot, place the Reclaimed land tile on the plot.
- If you reclaim water, collect this tile and RECREATE it on one of YOUR plots.
- Water icon: Can't reclaim. Protected.
Terrain Modifications Costs:
- Cut the Forests: 3M + REPLANT: 8M
- Reclaim Water: 3M + RECREATE 8M
- Terrace the Mountains: 3M
- If you terrace a mountain, place the Terraced Mountain tile on the plot.
- If you cut a forest, collect this tile and REPLANT it on one of YOUR plots.
- Forest icon: Can't cut. Protected.
5. Construction of Developments
Players can construct their developments by paying the required cost. Construction costs go up with each round. Construction has a cost in both money and resources. Every development has different restrictions in terms of terrain and adjacency.
If you have negotiated the construction of a collaboration development for another sector, you can also build these developments now (refer image on pg. 15).
How to Build to Generate Best Income and Resources
To build up to 4 buildings – you need to pay the cost and a set of resources (one each of the four resource icons: energy, human resource, food, commodity).
For cost, income, resources each round, check the Player Aid Grid.
Build Pure clusters of 1 to 6 Crop OR Fish farm. Mixed clusters produce lower income and/or resources each round.
Example: This is a mixed cluster and will produce income and resources for a 2 Crop Farm cluster and a 1 Fish Farm cluster.
Collaboration Buildings – These come into play from round 2 onwards.
Important note for Collaboration Buildings:
- You must own the land that you want to build for another sector on. This land plot must be adjacent to the already developed plot of that sector.
- You are meant to pay the cost and resources of this building, so you better get something tangible back for this "assistance" as you are giving up your own land, your money, your resources – to build for someone else instead of building for yourself. The Negotiation Points that you earn for this action are a secondary bonus. Get the primary bonus by asking for the right things! This can be money, land, resources, a percentage of the other party's income, or anything else you can think of.
Collaboration Buildings – How to use your building with others to co-create a Sustainable Environment AND gain Negotiation Points (NP).
Example: The negotiations with other sector(s) lead to an agreement on building a Biodiverse Park on YOUR plot adjacent to 2 Commercial Buildings and a Light Industry.
- You earn 5 NP for the Biodiverse Park (Real Estate + Industry); you pay the cost and resources to build.
- You can't build it on water.
- Real Estate earns 2 NP for Commercial Buildings next to the Biodiverse Park.
- Industry earns 1 NP for 1 Crop Farm next to the Biodiverse Park.
- Real Estate or Industry place a Red-Grey frame on the Biodiverse Park indicating that this building now belongs to them.
Value for Environment: See backside of the Biodiverse Park tile for value creation. Biodiverse parks are sustainability initiatives that can enhance corporate image and community engagement and help environmental regulation compliance. They also help industry promote employee well-being.
Value for You:
- Opportunity to enhance business development and environmental sustainability through collaboration with other sectors.
- You gain NP number mentioned on the tile.
- You may gain any related bonuses.
Value for other sector(s):
- Gain a new building that brings them extra income and/or resources.
- They gain NP number equal to the number of their own buildings connected to your collaboration building.
- They may gain any related bonuses.
6. Resource Production
Once the development is built, it starts producing resources for your sector. Larger clusters produce more resources than smaller clusters. Collaboration buildings built for you count towards that cluster and aid resource production and thereby also income. See Player Aid card to check how many resources different sized clusters produce.
7. Income
Developments start giving you income. Larger clusters give more income. See round/cost/income card to check how much income different sized clusters give.
8. Government Action
At the end of each round there is a Government action. This can incentivize or penalize the players. The current first player turns over the Government card and reads it and the required action is performed.
Phases 1–8 repeat every round, however with small changes to certain parameters. Costs go up every round. Number of tiles drawn for allotment or auction may change. Penalties for not being able to replant a forest or recreate a water body increase each round. Auction parameters change each round. These parameters are summarized on the Round Marking Standee. Modification of land is not allowed in round 5. There is no government action in this round either.
Game End and Scoring
Game end counting of points: End of Round 5 triggers end-game. Tally your Negotiation points, money and resources.
- Every Negotiation Point = 1 Victory point.
- Every 25M Pactarii = 1 Victory Point.
- Every 5 of your own resources = 1 Victory Point.
General Strategies and Tips
- Discover opportunities that enhance your bonus and maximize profit:
- Obtain plots to build on terrains that give you bonus.
- Find key collaborators to co-create value.
- Negotiate to get the plots that are important for you.
- Negotiate to obtain plots that are minimum one plot away from the sectors you are restricted from building adjacent to.
- Simple swaps are detrimental in the long run. Values of things change as situations change. So, make sure you understand how you can get some leverage.
- Resources can make or break the game – keep an eye out on resource production.
- Produce too many of your own resources – you lose value in the market place. Produce too little of your own resources – you may increase its value but kill the system.
- Trust is easy to break slower to rebuild.
- Collaborate too early and you risk making yourself weak. Collaborate too late and you miss out on bonuses. Try and strike the right balance.
- Be creative in your deal-making. Deals can be made with more than just money on the table.
- Sometimes, paying off someone's bonus could be an interesting way to get what you want while they get what they want too.
- There is no bank in the game and you cannot loan money from the government in case you run out of money. So, keep reserves or think about interest rate deals that you can set yourself.
- Winning the bids on auctions can be a way to get extra land and extra leverage. But be careful that you don't have too much land of no value to others.
- Forests & lakes can be blocks or can be opportunities. Find out which. Don't box yourself too early into a zone. Be flexible with your growth options.
- Replanting forests or lakes early means you can avoid early penalties. But do a cost-benefit analysis of not replanting too early if it means you limit your options. Replant too late can be costly – but too early can limit your own growth too… so, !
Transcriber Notes on the Source
The source is a work-in-progress draft (Version 3). The following points are printed inconsistently in the source and are transcribed as printed; they are flagged here rather than silently corrected.
- Mountain terracing cost: the Terrain Modifications Costs graphic and the Player Aid print "Terrace the Mountains: 3M" and "Terrace Mountain Plot: 5M" respectively. The Negotiation text on the Pre-construction Land Modification page says flattening (terracing) mountains costs "5M Pactarii" and the Player Aid lists 5M, while the graphic lists 3M.
- Phase count: the Round Card lists seven phases (Allotment, Auction, Negotiation, Modify + Build, Income – Resources, Income – Money, Government Action), while the Game Flow text lists eight numbered phases and says "Phases 1–8 repeat every round".
- Stray punctuation: the Design Philosophy line "Neglect, over-exploitation)" carries an unmatched closing parenthesis in the source and is printed as it appears.