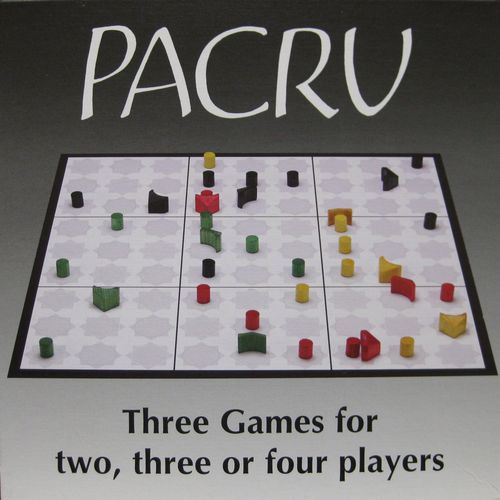
Pacru
Pacru Rulebook
Table of Contents
Table of Contents
- Contents
- Terminology
- Starting the Game {R1}
- Taking Turns {R2}
- Moving {R3}
- Six Special Actions
- Borderland Change {R4}
- Power of Movement {R5}
- Long Move {R6}
- What Is Forbidden in Pacru {R7}
- Connection Change {R8}
- Connection Jump {R9}
- Borderland Transformation {R10}
- Pincer {R11}
- Meeting {R12}
- One Move Involving More Than One Special Action {R13}
- Reorientation {R14}
- Losing the Game {R15}
- Winning the Game {R16}
- Starting Positions
Contents
- 1 Pacru gameboard.
- 16 chevron-shaped pieces: 4 of each colour.
- 200 markers (small columns): 50 of each colour.
- 1 booklet.
- 1 box of each colour for the chevrons and markers.
Terminology
This section is just for reference if a word or phrase in the rules is puzzling or ambiguous. You can skip it and go straight to the rules of Pacru.
The whole board is divided into nine borderlands by the black borders. Each borderland contains nine fields. A field is shaped as an eight-pointed star containing a circle. There is no difference in play between the fields with a light circle and the fields with a dark circle; the variation just makes the diagonals more obvious.
When a marker is placed on a field it should be located in the centre of the field (inside the circle). When a chevron is placed on a field its outer edges should be lined up with one of the points of the star to make it clear which direction it is facing.
A field with no markers in it is called a neutral field. At the start of each game all the fields are neutral fields. A field with, for example, a red marker on it is called a red field. So "change the fields to your colour" simply means remove markers of any other colour (if there are any) on the fields and put down markers of your colour. A field with no chevron on it (whether there is a marker on it or not) is called an unoccupied field. A field with a chevron on it is called an occupied field.
Sometimes players refer to fields as "squares", "stars" or "positions", call markers "columns" or "tiles", refer to chevrons as "pieces" or "arrows" or call borderlands "areas". All of these uses are perfectly acceptable.
Starting the Game {R1}
Each player is represented by a colour and uses the chevrons and markers of that colour. The order of play between the different colours is a matter of choice. You can decide which player is using which colour, and the order of play, by any reasonable means.
Setting Up the Opening Position
If there are three or four players, each player starts with three chevrons. For the two player game, each has four. Follow the diagrams on the back page of this guide (see Starting Positions below).
Counting Markers
With two players make sure you have forty two markers in front of you and visible to the other player. With three players each has twenty eight markers and with four players, twenty four markers. Put the remaining markers out of sight. You can use the lid of the small box of your colour to keep your markers for use during the game.
Taking Turns {R2}
Take it in turns to move one chevron at a time. As an alternative you can reorient one chevron (explained later). You cannot pass on a turn.
Moving {R3}
You move a chevron in one of three possible directions. Move it straight ahead, or forwards forty five degrees to the right or left of the direction the chevron is pointing. After a move, leave the chevron pointing in the direction it has travelled. This is the only way that chevrons move from field to field.
You always have just three potential directions in which you can move your chevron, whether it points out of a corner or a side.
Six Special Actions
Although there is only one kind of chevron in Pacru, and this can only move in three directions, there are six special actions the chevron can perform when it moves: borderland change, connection change, connection jump, borderland transformation, pincer and meeting.
Borderland Change {R4}
When you move a chevron across one or more borders, and set your chevron down in a different borderland (a border crossing) you place one of your markers on one of the neutral fields in this new borderland.
When you cross a border you must place a marker of your colour on any unoccupied neutral field in the borderland. You can place a marker on the field onto which you are moving your chevron.
Power of Movement {R5}
Each of your chevrons has a particular power of movement which depends on the borderland in which it starts its move. Count the fields of your colour in the borderland and that number is the power of movement of the chevron. If there are none of your markers, the power of movement is one. A chevron can move any number of fields between one and its power of movement.
The outline red chevron symbols in the booklet's example show all the possible moves for a chevron on a given turn: the red chevron in the corner borderland has a power of movement of three because there are three red fields in that borderland, so the chevron can move up to three fields in each of the three directions.
Long Move {R6}
When you move your chevron more than one field (a long move), you cannot change direction in the middle of the move. You must move in a straight line (directly forwards, or forwards and 45 degrees to left or right). Set down the chevron pointing in the direction it has travelled.
What Is Forbidden in Pacru {R7}
Except for a connection jump*:
- You may not jump over any chevron.
Except for a pincer*:
- You may not move onto a field occupied by a chevron.
- You may not move onto a field that is another player's colour.
- You may not change a field that is occupied by a chevron.
The booklet's example shows that the same red chevron now has fewer possible moves. The red chevron in the central borderland cannot be jumped, so the chevron with a power of movement of three in the corner borderland can only move one field in that direction. The chevron cannot finish up on either of the yellow fields directly ahead. It can, however, move two fields directly ahead, as crossing over opposition fields is allowed.
Connection Change {R8}
When you make a long move from one field of your colour to another field of your colour you are making a connection. If you are not jumping any chevrons, you must change all the intervening fields to your colour (whether they are neutral or of another colour). If this connection is also a border crossing you must choose either to gain fields from the connection change or from the results of the border crossing: you cannot claim both benefits.
The booklet's example shows a red chevron with two possible moves which would be connections: starting on a red field and finishing on a red field.
- The connection jump and pincer are explained later in this guide.
Connection Jump {R9}
When you move from one field of your colour to another field of your colour, you are allowed to jump any intervening chevrons. However when you make a connection jump, you do not make a connection change and so no intervening fields are changed.
Any chevron can be jumped if the move is a connection, but with the jump, fields in between are not changed by the connection. If the chevron ends up in a different borderland, the move still counts as a border crossing, so you may still get a marker from that.
Borderland Transformation {R10}
When you set your chevron down having crossed a border, if there are no neutral fields (whether occupied by a chevron or not) left in the new borderland, you change any field within the borderland to your own colour.
Pincer {R11}
When a chevron has a power of movement which would enable it to reach a field occupied by an opposition chevron, and there are no intervening chevrons, it is said to be attacking that chevron.
You can make a pincer when two or more of your chevrons are already attacking an opponent's chevron at the start of your turn. In the pincer you remove the opposing chevron from the board, change the field it was on to your colour, and move one of the attacking chevrons onto the field. You can pincer even when the opponent's chevron is occupying a field of their colour.
The booklet's example shows two red chevrons that can both reach the field the yellow chevron is on. On red's turn either of the two can move onto the field and remove the yellow chevron.
Meeting {R12}
When moving a chevron results in two of your chevrons each occupying a field of your colour and directly facing the other on adjacent fields you have achieved a meeting. When this happens you change an unoccupied field anywhere on the board to your own colour.
When you achieve a meeting you can choose any unoccupied field to change to your colour, including a field belonging to an opponent.
One Move Involving More Than One Special Action {R13}
When you make a move involving any one of the six special actions, the move may also involve another at the same time (a pincer may also be a borderland change). You get the benefits of each action, except for moves which are both border crossings and connections where you have to choose between the field benefit for the crossing and that of any connection change.
Reorientation {R14}
You can use your turn in a different way and instead of moving one chevron, you can reorient one chevron.
When you reorient a chevron by forty five degrees, you must choose two of your own fields and change them back to neutral by removing the markers from the board. When you reorient by ninety degrees, you must choose four of your fields to change back to neutral.
The booklet's example shows a red chevron that cannot move in the "before" position; the two "after" positions show the result of red using the turn to do 1. a minor reorientation (45 degrees) or 2. a major reorientation (90 degrees).
Using Your Turn for Reorientation
You can only use a turn to reorient if you have one or more chevrons you could move if you chose to: if none of your chevrons can make a move from one field to another you are out of the game.
Losing the Game {R15}
- A player is out of the game if they lose their last remaining chevron.
- A player is out of the game if, on their turn, none of their remaining chevrons can move from field to field (this is called a blocked turn). In this case all their chevrons are removed from the board.
- When a player is out of the game, their markers remain on the board.
The booklet's example shows red's turn in a position where none of the red chevrons can make a move, so red is out of the game.
Winning the Game {R16}
You can win the game in any of these ways:
- You are the only player with at least one chevron left on the board. You can become the only player with chevrons left on the board either by eliminating the last chevron belonging to the (last remaining) other player, or by your (last remaining) opponent becoming blocked.
- You reach the target number of fields (depending on how many players started the game):
- Two players: forty two fields.
- Three players: twenty eight fields.
- Four players: twenty four fields.
You reach the target number of fields when your move means you can put down your forty second (or twenty eighth, or twenty fourth as appropriate) marker. You don't have to meet this target exactly (you may be entitled to change seven fields as part of a connection change, but if you only have one marker left to put down on the board you have won).
Starting Positions
The back page of the booklet gives the starting positions for Pacru, Shacru and Azacru as diagrams for four, three and two players. The chevron counts for each player number are:
| Players | Chevrons per player |
|---|---|
| Four | Three |
| Three | Three |
| Two | Four |
The diagrams showing where each colour's chevrons start on the board for each player count are not reproduced in text; refer to the back page of the booklet.