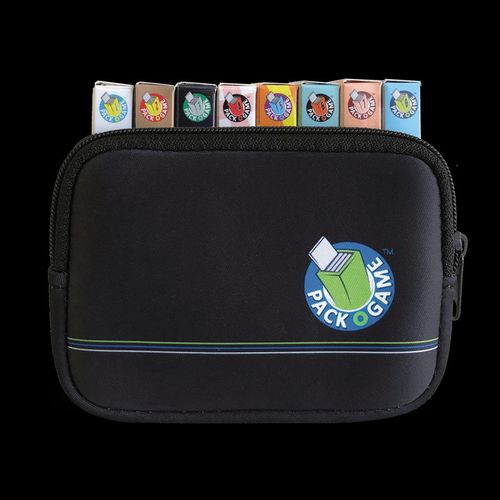
Pack O Game: Set 1
Pack O Game: Set 1 Rulebook
Table of Contents
HUE
Players try to score the most points by strategically placing cards and choosing the most valuable "Score Card."
The Object
Players try to score the most points by strategically placing cards and choosing the most valuable "Score Card."
30 Cards:
- 20 Standard Cards: 10 Solid, 10 Striped.
- 5 Starting Cards: marked with a cross-in-circle "+" icon on the back.
- 5 Poison Cards: marked with a skull and crossbones icon on the back.
Setup
- Choose a dealer to perform the remaining SETUP steps.
- Shuffle the 5 Poison Cards (skull and crossbones icon) face down and deal 1 to each player face down.
- Shuffle the 5 Starting Cards (cross-in-circle "+" icon) face down. Draw 3 Starting Cards and randomly lay them diagonally, next to one another. (See SAMPLE SETUP.)
- Shuffle the 20 Standard Cards together face down and deal to each player:
- 2-4 players: Deal 5 to each player (6 cards total with Poison).
- 5 players: Deal 4 to each player (5 cards total with Poison).
- Set aside any unused Poison, Starting or Standard Cards without revealing them. They will not be used in the game.
- Players take the Poison Card and dealt cards into their hands. The oldest player is the Start Player and takes the first turn.
Playing the Game
5 colors appear on the cards. Each card contains exactly 3 SQUARE sections, separated by a white line or the card's edge. (See FULL SQUARE examples below.) On a player's turn, he must play exactly 1 card from his hand and place it in the playing area. A card must be placed so that one of its SQUARE sides touches at least one side of a full SQUARE on another card in the playing area. However, it is NOT mandatory to match colors when placing cards. (See SQUARE SIDE examples: A and B below.) In the end, each player will earn a score based on the value of only 3 of the 5 colors.
A player MAY choose (not mandatory) to play a card so that it covers a portion of a previously played card in the playing area. When covering a card, a player MUST cover exactly one third (full SQUARE) of any previously played card. (See EXAMPLE C below.) Once a card is played, it may never be moved. Play continues clockwise with each player playing a single card until all players have exactly 1 card left in their hands. The card remaining in a player's hand is his/her "Score Card." (Further detail in GAME END section.)
Poison Cards
Poison Cards are played (or kept as "Score Cards") just like other cards in the game. However, if a Poison Card is played in a way that its middle SOLID SQUARE (skull and crossbones) is touching any section of matching color, the whole contiguous color area is worth '0'. Poison Cards may be covered by other cards, just like Standard and Starting Cards.
Samples of Full Squares, Square Sides and Cover Placements
- FULL SQUARE: a complete square section of a card.
- EXAMPLE A (2 SQUARE SIDES): a card placed touching a full square with two of its square sides.
- EXAMPLE B (1 SQUARE SIDE): a card placed touching a full square with one of its square sides.
- EXAMPLE C (Cover Placement): a card covering exactly one third (one full SQUARE) of a previously played card. The covered SQUARE is then a "covered SQUARE."
Game End
The game ends when all players have exactly 1 card left in their hand. The last (unplayed) card in players' hands will be used as their "Score Card." The 3 colors on this Score Card will determine the players' combined total score for the game. Additionally, the center color on each player's Score Card (middle SOLID SQUARE or MIDDLE STRIPE) will be worth double that color's value in the playing area.
Players may choose ANY card in their hand as their Score Card. During the game, players may switch their Score Card since this information is secret and isn't determined until they have a single card left in their hand at the end of the game. If a player selects a Poison Card as his Score Card, he scores it as if it were any other card (scoring double the middle value, ignoring the skull and crossbones).
Calculating Color Values
Each color's point value is based on its largest contiguously connected area. There may be several sections of a certain color, but only a color's largest contiguous area will generate its value. (See SCORING EXAMPLES below.)
- Each SOLID SQUARE counts as 3 points in the contiguous area.
- Each SMALL RECTANGLE counts as 1 point in the contiguous area.
Key:
- SOLID SQUARE: worth 3 POINTS.
- SMALL RECTANGLE: worth 1 POINT.
In the case of a tie, the Start Player wins. If the Start Player is not involved in the tie, the closest player to the Start Player sitting clockwise, is the winner.
Scoring Examples
In this 3-player game example, Player 1 wins with 28 points!
- Player 1: Total 28. Score Card scored as 4 (blue) + 2x9 (green, middle section doubled to 18) + 6 (purple).
- Player 2: Total 25. Score Card scored as 6 (purple) + 2x7 (red, middle section doubled to 14) + 5 (yellow).
- Player 3: Total 23. Score Card scored as 5 (yellow) + 2x7 (red, Poison middle section, skull and crossbones, doubled) + 4 (blue).
REMEMBER: The middle section of a Score Card counts as DOUBLE its value!
Point Values (on the sample final playing area):
- Purple: 6
- Green: 9
- Blue: 4
- Yellow: 5
- Red: 7
- Poisoned Purple Area: 0
TKO
In this boxing game, players will try to outmaneuver their opponent and score the most points over 2-3 rounds.
The Object
In this boxing game, players will try to outmaneuver their opponent and score the most points over 2-3 rounds.
30 Cards:
- 2 Action Selection Cards.
- 1 Power Arrow (for Intermediate Play).
- 1 TKO Champ Belt.
- 8 Point Markers (2 sets of 4: Uppercut, Head Block, Body Blow, Body Block).
- 8 Boxers, each consisting of a HEAD card and a BODY card (16 cards total).
- 2 Round Winner Cards (Round 1 and Round 2).
Each Boxer Begins With a Point Advantage
The starting point advantage of each boxer (number of icons shown per action):
| Boxer | Uppercut (Head Punch) | Head Block | Body Blow (Body Punch) | Body Block |
|---|---|---|---|---|
| Pablo Bruz | 2 | 2 | 0 | 0 |
| Mello Mar | 1 | 1 | 1 | 1 |
| Barry Punch | 0 | 2 | 2 | 0 |
| Yor Lightsout | 2 | 1 | 1 | 0 |
| Oran Crusher | 1 | 1 | 2 | 0 |
Setup
- Both players select a boxer and place the boxer's corresponding "HEAD" and "BODY" Cards in front of themselves. Set aside the 6 unused boxers for this game.
- Each player takes an Action Selection Card.
- Next, each player places a set of 4 Point Markers horizontally on the corresponding rows next to their boxer cards.
- Adjust the Point Markers so that each arrow points to the lowest number on its matching "Point Bar" line. Boxers begin each round with advantage points, so the lowest number on each Point Bar line may vary. (See SAMPLE PLAYER SETUP.)
- Place the TKO Champ Belt and the Round Winner Cards near by.
Playing the Game
Players earn points during a match to win a round. The player who wins the most rounds is rewarded the TKO Champ Belt and wins the game. Player turns are simultaneous: both players select an action from their Action Selection Card at the same time, then reveal their chosen action at the same time.
To begin, players simultaneously choose an action by holding the action selection card VERTICALLY in one hand, hiding it (under the table or with their other hand) and pinching the card in one of the four corresponding action spots. (Note: The order on the Action Selection Card matches the Point Marker order in a player's setup.) When both players are ready, they reveal at the same time where they are pinching their Action Selection Card, thus showing which action they will perform. Several outcomes may result in their action choices. After the outcome is resolved, players continue making selections for the remainder of the round. (See EARNING POINTS.)
Earning Points
A player may earn points in two ways.
- If Player A chooses a punch action and Player B does not block it, Player A earns 1 point. (Each UNBLOCKED PUNCH earns 1 point.)
- If Player A chooses a punch action and Player B chooses the corresponding block, Player B earns 1 point. (Each SUCCESSFUL BLOCK earns 1 point.)
Earned points are recorded by moving the matching Point Marker one step on its Point Bar. For example, if Player A chooses UPPERCUT and Player B does not block, Player A earns 1 point on the "Uppercut" Point Bar (from '2' to '3'). If Player A chooses UPPERCUT and Player B chooses HEAD BLOCK, Player B earns 1 point on the "Head Block" Point Bar (from '1' to '2').
TIE: No points are scored if both players choose the same action or both players choose a block (same or different).
Sample Scoring Outcomes
The sheet's outcome diagram lists the possible results for each pair of choices:
- No Points.
- B: 1 Point.
- Both: 1 Point.
- A: 1 Point.
- B: 1 Point.
- No Points.
Winning the Round
Once a player has ANY Point Marker Card pointing at the "5" mark, he wins the round immediately and takes the corresponding Round Winner Card. If BOTH players earn a round-winning point at the same time, they continue playing (possibly tying for several selections) until only one player earns a point and wins the round. Both players reset their Point Markers back to the lowest numbers on each Point Bar and begin a new round.
Winning the Game
After a round in which the winner already has a Round Winner Card, he takes the TKO Champ Belt instead and may relish his victory!
Intermediate Play
Place the Power Arrow Card between both players, pointing at neither player. The Power Arrow indicates that a player has momentum and allows him to allocate points to ANY Point Bar.
- POSITION: After a turn in which only one player earns a point, that player points the Power Arrow at himself (or rotates it to a neutral position if it was pointing at the opponent.)
- TIE: If both players score a point or neither player scores a point, the Power Arrow must rotate back to a neutral position.
- REWARD: When a player earns a point while the Power Arrow is already pointing at himself, this point may be allocated to any other Point Bar. Note: This is NOT AN EXTRA POINT, simply a choice to add the freshly earned point to ANY POINT BAR.
GEM
Players bid on jewels by leveraging assets to become the jeweler with the largest, most valuable collection.
The Object
Players bid on jewels by leveraging assets to become the jeweler with the largest, most valuable collection.
30 Cards:
- 12 Coin Cards (3 sets of 4): Coin 1, Coin 2 and Coin 3.
- 18 Gem Cards, containing 6 of each color gem: Sapphire (blue), Ruby (red), Emerald (green), Amethyst (purple), Topaz (orange), and 3 Diamonds (white).
Setup
- Choose a dealer to perform the remaining SETUP steps.
- Separate the Coin Cards from the Gem Cards. All players take a 1, 2, and 3 Coin Card and place them in their playing area, coin-side up, with the INVESTED (green "?") side up.
- Shuffle the Gem Cards. Deal out 6 stacks of cards face down from left to right according to the number of players.
- 2 OR 4 players: Deal out stacks of 4, 3, 3, 3, 3, and 2 cards.
- 3 players: Deal out 6 stacks of 3 cards.
- The player to the left of the dealer is the starting player and bids first.
Sample setup for 4 players: 4 cards (Round 1), 3 cards (Round 2), 3 cards (Round 3), 3 cards (Round 4), 3 cards (Round 5), 2 cards (Round 6).
Playing the Game
Gem is a set-collecting game in which players must bid successfully in order to accumulate gems. Each round, players will participate in several, single-bid (once around) auctions to choose from the Gem Cards. The player who accumulates the most points is the winner. Gems are worth 1 point each at the end of the game. Players with a majority of a gem type will receive additional points.
Round Sequence of Play
"INVESTED" side up: the "Invested" value is shown on the top of the card. "LEVERAGED" value is shown at the bottom of a card when it is leveraged (red "?" side up).
Auction Phase
- Take the furthest pile on the left and turn the cards face up in the center of the playing area. Align the face up Gem Cards so that all INVESTED values are on the same side.
- The opening bidder makes a bid, "0" or higher, without indicating his Gem Card of interest. In a bidding round, players may only make a single, one-time bid in clockwise order. The bid must be higher than the previous player's bid and must be paid for with available assets. Bids may not exceed what a player is able to pay. A player may "pass" in a single auction and still participate in the next auction within a round.
- The highest bidder pays the amount bid by rotating Coin and/or Gem Cards he possesses. Only cards with the INVESTED (green "?") side up may be used for this purpose. The sum of the INVESTED values on the cards just rotated, must equal or exceed the amount bid. There is no change given when a player's payment exceeds the amount bid. Then, the player selects one Gem Card from those available (face up) and places it in front of himself with the LEVERAGED (red "?") side up. It is possible for a bid of "0" to win the auction if all other players "pass." In the final Auction Phase in Round 6, Gem Cards are acquired with the INVESTED (green "?") side up, and may be leveraged immediately.
- The next player after the highest bidder (in clockwise order) becomes the opening bidder for the remaining Gem Card(s) and Steps 2 and 3 are repeated until all Gem Cards from the round have been acquired.
Reinvestment Phase
- Beginning with the player who won the last Gem Card in the auction phase, players MAY use any available (green "?" side up) Coin and/or Gem Cards to reinvest (rotate) in any Gem Cards that are LEVERAGED (red "?" side up). To pay for this reinvestment, payment cards are rotated to their LEVERAGED (red "?" side up) creating a sum equal or higher than the reinvestment value. This total amount may be split any way, in order to reinvest in any number of cards this amount will allow. No change is given in the event of overpayment. During this phase each Gem Card may either be used for reinvesting, OR be invested in, but NOT both. The next player in clockwise order may now reinvest, and each player after, continuing clockwise.
Sample reinvestment: cards used for reinvesting are rotated to LEVERAGED, and the total value needed to be reinvested is 5.
- After each player has had an opportunity to reinvest in their collection, all players rotate all Coin Cards to their INVESTED position (green "?" side up) thus making them available for the next Round. Repeat the full SEQUENCE OF PLAY (Auction/Reinvestment Phases) through Round 6. Likely, some Gem Cards will be LEVERAGED (red "?" side up) at the end of the game. LEVERAGED cards are removed from the game and are NOT included in scoring.
Game End
The game ends after the Reinvestment Phase of Round 6.
Scoring
Each player calculates their score as follows:
- 1 point for each gem on a card that is INVESTED (green "?" side up).
- 2 points for each player that shares a majority of a gem type.
- 3 points for a player that holds an exclusive majority of a gem type.
The player with the most points is the winner. In the case of a tie, the winner is the player with the most gems in play (not LEVERAGED.)
Sample Scoring
Player A:
- Gem Total (1 point each): 13
- Sapphire (blue): Shared Majority: 2
- Emerald (green): Exclusive Majority: 3
- Amethyst (purple): Exclusive Majority: 3
- Total: 21 points
Player B:
- Gem Total (1 point each): 14
- Sapphire (blue): Shared Majority: 2
- Ruby (red): Exclusive Majority: 3
- Topaz (orange): Exclusive Majority: 3
- Diamond (white): Exclusive Majority: 3
- Total: 25 points
The sample Player B has one Gem Card leveraged out of play, which is not counted.
FLY
Players try to score the most points by dropping the Swatter Card onto flies and collecting sets of symbols and colors.
The Object
Players try to score the most points by dropping the Swatter Card onto flies and collecting sets of symbols and colors.
30 Cards:
- 27 Table Cards.
- 2 Swatter Cards (1 is a spare).
- 1 Sky Card.
Setup
- Select a flat playing area that is visible to all players.
- Choose a dealer to perform the remaining SETUP steps.
- Shuffle all 27 Table Cards face down to form a deck.
- Next, create the "Table" by placing the Table Cards next to one another in a 9 x 3 grid. Place 1 Table Card face up vertically, then place another card to the right of it so that the red-checkered pattern continues across both cards. Continue placing Table Cards next to one another in a horizontal row until there are exactly 9 cards. Create Row 2 by placing a card vertically, directly below the first card in Row 1. Continue placing cards next to one another until 9 cards have been placed in Row 2. Finally, create Row 3 by placing a card under the first card in Row 2 and continue placing the remaining cards from the deck.
- Close the lid on the FLY Pack O Game Box and place it standing up vertically, close to the first card in Row 1. Next, tuck the bottom of the Sky Card slightly in the box where the tongue of the box tucks into the back. The Box should be able to hold the card up and stay standing. You may need to stabilize the Box with another object or by placing a coin inside the box.
- The youngest player takes a Swatter (Card) and begins the game.
(Sample setup diagram: DROP HEIGHT MINIMUM marked by the Sky Card; FIRST CARD IN ROW 1; ROW 1 with 9 cards placed horizontally; BOX PLACED NEXT TO FIRST ROW; 3 rows.)
Playing the Game
There are 25 total flies. Each has a symbol and a color on its back. The goal is to collect Table Cards by dropping the Swatter onto the "Table" to completely cover flies. Players will also attempt to collect flies sharing a common symbol or color in order to make their flies worth points. In the end, the player with the most points wins the game.
On a player's turn, he must drop the Swatter Card once from a minimum height established by the top of the Sky Card. A player must hold and drop the Swatter with only one hand and his hand must be above the "Drop Height Minimum." Any flies that are COMPLETELY covered by the Swatter will allow the swatting player to remove those specific cards that contained the covered flies. If the Swatter does not completely cover any flies, the swatting player collects no cards. Whatever the outcome of a player's Swatter drop, he immediately passes the Swatter to the player to his left. Play continues with each player dropping the Swatter once per turn until all but the two blank Table Cards are collected.
Turn example: (A) Player A completely covers 2 flies and the Table Cards must be collected and removed. (B) Player A slides cards toward the box. Then, cards from Row 3 are added to the end of Row 1 and 2. (C) Player A places the swatted fly cards in front of himself. The "Table," after the card shift, Player B may now take her turn.
Collecting cards from successful Swatter drops creates voids (empty spaces) that must be filled before a player may take his turn.
Table Consolidation
Collecting cards from the "Table" creates a void. It is necessary to move Table Cards in order to fill in voids and maintain rows of 9 cards.
When one or more cards are collected, fill in the void:
- Slide cards from the same row toward the box.
- Move cards from the end (right side) of the lowest Row, upward. Rows 1 and 2 must have 9 cards in them until Row 3 is gone. Then Row 2 will supply Row 1 with 9 cards until it is depleted as well. Card voids are only allowed at the end of the lowest Row.
Game End
The game ends when the two blank Table Cards (no flies) are the only remaining cards, as these cards cannot be collected.
Calculating Scores
A player earns 1 point for a fly if he has at least 3 or more flies with the matching color OR symbol. Although each fly has two characteristics, its maximum value is 1 point. The player with the highest score wins! In the case of a tie, the player with the most flies (regardless of color/symbol) is the winner.
- A third STAR fly makes all your STAR flies worth 1 point. (Fewer than 3 star flies: 0 points each.)
- A third BLUE fly makes all your BLUE flies worth 1 point. (Fewer than 3 blue flies: 0 points each.)
- A YELLOW CIRCLE makes the other 2 YELLOW flies count AND the other 2 CIRCLE flies count. The YELLOW CIRCLE is scored once (1 point.)
In this example, the player earns 5 points.
Scoring Examples
- Player A: 0 points (five flies, none with a third matching color or symbol).
- Player B: 6 points (six flies each worth 1 point, one fly worth 0).
- Player C: 4 points.
- Player D: 9 points.
TAJ
Players are ancient rug collectors vying to display their collection in the Taj Mahal and earn the most points.
The Object
Players are ancient rug collectors vying to display their collection in the Taj Mahal and earn the most points.
30 Cards:
- 10 Rugs.
- 10 Secret Goals.
- 8 Voting Cards (4 Yea/Nay, 4 All/Nix).
- 1 Taj Mahal (Taj): on front "+1" on right; on back "+1" on left.
- 1 Reference Card.
Setup
- Choose a dealer to perform the remaining SETUP steps.
- All players take a Voting Card of each type into their hands.
- Place the Taj Mahal Card (Taj) in the playing area with the "+1" on the right side. Shuffle all 10 Rug Cards, then lay them out vertically in a row under the Taj to create the "Display." Arrange the Rugs so that the "Curator's Eye" symbol (eye icon) is away from the Taj. There should be 3 Rugs under the Taj with 3 Rugs on the left side, and 4 Rugs on the right side. (See SAMPLE SETUP below.)
- Shuffle all 10 Secret Goal Cards face down and deal 1 to each player. Players take their Secret Goal Cards into their hands, keeping them hidden throughout the game. Set aside unused Secret Goal Cards face down.
Sample Rug values: GREEN: 1 point; ORANGE: 2 points; PINK: 3 points. A point is added to the value of the 3 colors directly under the "+1." ONLY the 3 Rugs under the Taj Card will contribute to a color's value. The "Curator's Eye" symbol is marked on the Rug cards. Point Value Symbols are shown on each Rug.
Playing the Game
Each of the 5 colors will have a total value at the end of the game based on their prominence on the 3 Rugs under the "Taj" Card. Each Rug is made up of 3 portions, each with its own color. The outer section adds a value of "1" to its corresponding color. The middle section adds a value of "2" and the center section adds a value of "3." The Rug directly under the "+1" earns an extra point for each of its colors' values. (See Sample Rug Value above.) At the end of the game, a player will earn a score based on his Secret Goal Card colors (and modifiers: 2, +1, -1) MULTIPLIED by the total value of those colors on the Rugs under the Taj Card.
Sample scoring (SAMPLE SCORING table, columns: Color and modifier / Symbols under Taj / +1 for this Rug): modifier 2 x value = 6; modifier 1 x value = 5; modifier -1 x value = -4. TOTAL = 7.
GAME TURN: The player to the left of the dealer becomes the first "Proposer" and takes the first turn. On a player's turn, he must make a proposal to have 2 Rugs switch places in the Display (row of Rugs). Then, a vote is taken. A player makes a proposal by choosing ANY 2 Rugs and slightly pushes them downward, away from the Taj. (See SAMPLE Below.) A vote is taken immediately by all players (including the Proposer), each using a Voting Card.
A SAMPLE PROPOSAL: 2 Rugs pushed downward from "Taj." ANY Rugs may be proposed.
VOTING: The Yea/Nay Voting Card may be used repeatedly throughout the game. The All/Nix Voting Card may be used ONCE. To vote, a player chooses a Voting Card and places it face down in front of him, such that when it is revealed to all players, the text is legibly facing the voter. A vote of, "Yea" (yes) declares favor of the proposal, whereas a vote of, "Nay" (no) declares opposition of the proposal. (See SAMPLE.)
VOTE OUTCOME: Once all players have placed a Voting Card face down in front of themselves, they reveal them at the same time. If the majority of players voted "Yea," then the proposal is successful and the Rugs are swapped. If the majority of players voted "Nay," then the proposal is unsuccessful and the "Proposer" must remove the Rug that is furthest from the Taj in the Display (not necessarily a Rug that was used in the proposal). If 2 Rugs are the same distance away from the Taj, the Proposer chooses which one to remove. Rugs that are removed from the Display are out of the game. If the vote is tied, no action is taken.
Curator's Eye: After all proposals (successful, unsuccessful or tied), the 2 proposed Rugs are turned so the "Curator's Eye" is close to the Taj. Thematically, this indicates that the Taj Mahal Curator has seen the proposed Rugs. Rugs with the "Curator's Eye" up MAY be used in new proposals. In addition, the "Curator's Eye" may contribute to the game's end.
Unanimous Outcomes: When an outcome consists of all "Yea" votes or all "Nay" votes, it is unanimous and requires an additional adjustment to the Display. If the vote is unanimous (either all "Yea" or all "Nay"), the Proposer MUST either flip the Taj over or shift the Taj horizontally 1 Rug space to the right or left. The Taj may only shift in a direction where there is at least 1 Rug. (See SAMPLE to right.) Taj adjustment: shift 1 space left or right, or flip the Taj.
All/Nix Cards: All/Nix Cards force a unanimous vote and may be used ONCE by each player, instead of a Yea/Nay Card. A vote of "All" insures that the vote outcome is a "Unanimous Yea." A vote of "Nix" insures that the vote outcome is a "Unanimous Nay." A Player MAY NOT use an All/Nix Card on his turn as the Proposer. The "All/Nix" voter earns the right to choose which Rug to discard (if necessary) then either flips or shifts the Taj. If several All/Nix Cards are played, only the first All/Nix Card (in turn order from Proposer) takes effect. All/Nix Cards that are played during a proposal are removed from game.
Voting Outcomes
- Majority "Yea": Swap both Rugs.
- TIE vote: Don't swap.
- Majority "Nay": Don't swap. Remove furthest Rug from Taj.
- Additional Action (All): If Unanimous "Yea" Vote OR All Vote Card: Proposer OR "All" Voter must flip/shift Taj.
- Additional Action (Nix): If Unanimous "Nay" Vote OR Nix Vote Card: Proposer OR "Nix" Voter must flip/shift Taj.
A Rug is turned with Curator's Eye UP in ALL outcomes.
Continuing the Game
The next player in clockwise turn order must make the next proposal. Play continues with each player making a proposal until one of the end-game conditions is met.
Game End
The game ends immediately after a turn in which either:
- a) All Rugs have been turned with the "Curator's Eye" up.
- b) There are exactly 5 Rugs remaining in the Display.
Scoring
Determine the value of the top color on the Secret Goal Card by adding its symbols that appear on the Rugs under the Taj, then multiply the sum of the symbols with the color's modifier (2). Repeat this step, for the 2 remaining colors on the Secret Goal Card (+1, -1). The sum of all 3 color values is a player's total score. The player with the most points is the winner.
End Game Display: Add 1 point to the value of each color within the Rug under the "+1." Only the 3 Rugs under Taj contribute to the Final Color Values.
Final color values shown in the sample:
- (2) x 4 points for ORANGE = 8.
- (1) x 1 point for BLUE = 1.
- (-1) x 5 points for GREEN = -5.
- Player A Score: 4.
Though not used to calculate Player A's score, YELLOW is worth 5 points and PINK is worth 6 points.
LIE
Be the last player with one or more cards remaining through clever bidding and bluffing.
The Object
Be the last player with one or more cards remaining through clever bidding and bluffing.
30 Cards: each card has a die face on the top, with a different die face on the bottom. There are exactly 10 of each die face in the game (1, 2, 3, 4, 5 and 6 dice, 10x each). Note: the "1 Die" pip is orange to aid in playing the variant game.
Setup
- Shuffle all 30 cards and put them face down in the center of the playing area.
- The game is now ready to begin, starting with the oldest player.
Playing the Game
LIE is a game of speculation in which players are forced to rely on intuition, bluffing, and player signals in order to win. The game is played over the course of many rounds. Each round, players simultaneously draw cards then decide which dice to use for bidding. Then, a sequence of player bids occurs in clockwise order until a bid is challenged and resolved.
Game Round
-
MIX: In the center of the playing area, create a mass pile (not stacked) by shuffling all cards face down, making sure to mix them thoroughly. (Sample round setup.)
-
DRAW/CHOOSE DICE: Each player draws cards (5 in the first round) into their hands simultaneously, keeping them hidden. NOTE: There may be cards left over in the pile. Then, players secretly choose which dice they will use in the round of bidding. Players may choose several dice of the same value or choose a diverse hand of different values. A player makes this choice for each card he holds and signifies this by rotating each card so that the chosen die is on top (as he looks at it vertically). Once all players have chosen, the bidding starts and the orientation of the cards may not be changed.
Sample "Set" hand: In this example, the player drew five cards into his hand. Then, he rotated them so that he will use 2 "Fours" and 3 "Twos" for the round of bidding. The fifth card is NOT USED this round.
- BID/CHALLENGE: Players may find it helpful to verbally confirm that their hand is set, to ensure that all players have their hands ready prior to the opening bid. The oldest player makes the first opening bid. For all other rounds, the winner of the previous round makes the opening bid. The opening bidder begins the round by announcing the initial bid. Once the opening bid is made, players take turns in clockwise order. When it is a player's turn to bid, he MUST either make a new bid OR challenge the previous bid. In order for a player to take the appropriate action on his turn, he must try to determine whether or not the previous bid (amount of dice) exists AMONG ALL PLAYERS' HANDS, COLLECTIVELY. If the active player feels that the previous bid is unlikely to be proven, he may choose to challenge the previous player's bid. However, if the active player feels that the previous bid is likely to be shown among all players' hands, then he may want to make a higher bid instead.
The Bid
A proper bid is a QUANTITY, and then a DIE number.
Sample bids: 3 "Threes"; 3 "Fives"; 4 "Twos"; 5 "Twos"; 5 "Sixes"; 6 "Ones". Each bid is higher than the previous bid.
Make a Higher Bid or Challenge
On a player's turn, he MUST do one of two Actions:
- The player may bid a higher quantity of any die number, OR the same quantity of a higher die number.
- The player may challenge the previous bid by announcing, "Lie!"
If the active player chooses ACTION 1 (bid), he announces a higher bid. Then, the next player in clockwise order takes a turn.
If the active player chooses ACTION 2 (challenge), he challenges the previous player's bid and ALL players show their hands. Players count only the die numbers on top of the cards (the ones that players chose to use for the round).
Challenge Outcomes
In a bid challenge, the outcome will result in a winner and a loser.
- A. If the total amount of dice among ALL players is less than the bid that was challenged, then the challenger wins the round.
- B. If the total amount among ALL players is equal to or greater than the bid that was challenged, then the challenger loses the round!
The winner will gain the right to start the next round of bidding. The loser draws 1 less card at the beginning of the next round.
Players take turns in clockwise order until a challenge is made, with the possibility of players taking several turns in a round. After a CHALLENGE is resolved, all cards are returned to the center of the playing area and another full Game Round occurs and players follow the same steps described in the Game Round section. Play continues until there is one remaining player in the game.
Winning the Game
The last remaining player is the player that may draw at least one card during the next round when no other players are able to do so, making that player the winner!
Examples
Player A starts the round and play continues until Player C challenges Player B.
- A. 3 "Threes" (Three "Threes").
- B. 3 "Fives" (Three "Fives").
- C. 4 "Ones" (Four "Ones").
- A. 5 "Ones" (Five "Ones").
- B. 5 "Fives" (Five "Fives").
- C. "Lie!" (Challenge).
Player C challenges Player B. The total amount of dice among all players is 5. Player C loses the challenge and draws one less card in the next round. Player B starts the bidding.
Player B starts the next round and play continues until Player C challenges Player B.
- B. 1 "Four" (One "Four").
- C. 3 "Twos" (Three "Twos").
- A. 4 "Twos" (Four "Twos").
- B. 6 "Twos" (Six "Twos").
- C. "Lie!" (Challenge).
Player C challenges Player B. The total amount of dice among all players is 5. Player C wins the challenge and starts the bidding, while Player B draws one less card in the next round.
Variants
The following extra rules may be added individually, or in any combination, to the main rule set for variations on LIE.
- WILD dice: The orange-pipped "1 Die" cards are treated as "wild" dice, and are included in the total needed to prove the validity of a bid challenge. HOWEVER, the wild dice ARE NOT wild in a round in which the starting bid contains "1" dice. Note: The "1 Die" pips are orange to aid in playing with this variant.
- WHICH WAY: When a player starts a new round of bidding, he must announce which direction the bidding turn sequence will continue. He may choose in CLOCKWISE direction (to his left), or in COUNTER CLOCKWISE direction (to his right).
- SHORTER GAME: For games with 4-6 players: Once a single person is no longer able to draw cards, the player with the most cards wins immediately. In the case of a tie, only the tied players play the remaining rounds. If a player loses a challenge, he is immediately out of the game, regardless of how many cards he would have drawn in the next round. The last remaining player wins the game.
SHH
Each player contributes a letter, one card at a time, to organically and cooperatively create words as a single team with the goal of ridding their hands of all cards to earn a score of 26.
The Object
Each player contributes a letter, one card at a time, to organically and cooperatively create words as a single team with the goal of ridding their hands of all cards to earn a score of 26.
30 Cards:
- 5 Vowel Cards (A, E, I, O, U).
- 21 Consonant Cards.
- 4 Pass Cards.
Setup
- Choose a dealer to perform the remaining SETUP steps.
- Separate the Vowel and Pass Cards from the Consonant Cards.
- Create the VOWEL ROW by placing the Vowels (+1 side down) in alphabetical order near the center of the playing area.
- Place Pass Cards equal to the number of players, in the VOWEL ROW after the "U". The Pass Cards should be placed with their "Available" side up (white text). (See SAMPLE SETUP below.)
- Finally, shuffle the Consonant Cards face down and deal 1 at a time to each player until all the cards have been dealt. Players keep their cards secret. Note: Total cards in each player's hand may vary.
Sample setup for 3 players: the CONSONANT ROW (empty) is placed above; the VOWEL ROW has A, E, I, O, U and 3 Pass Cards (1 per player); the ACTIVE WORD row is empty below.
Playing the Game
SHH is a challenging, cooperative game in which players compete against the game itself, to achieve the highest score possible. The main challenge of the game is that players may NEVER discuss which letters they have in their hand, or the potential words that could be spelled throughout the game.
Game Turn
On a player's turn, he must perform 1 of 3 Actions:
- A. Add a letter by placing it at the end (right side) of the Active Word.
- B. Start a new Active Word after initiating a vote to score the previous Active Word.
- C. Pass by flipping over a Pass Card to its "Used" side up (red text).
The youngest player starts the first Active Word by putting a letter in the play area below the VOWEL ROW (See SAMPLE SETUP above); remaining players take turns in clockwise order. Once the Active Word is formed, the next player may add a letter to extend the word, pass, or start a new Active Word (see next paragraph). Cards may be added from either a player's hand (Consonant Cards) OR from the available Vowel Cards from the VOWEL ROW.
If a player chooses to start a new Active Word, he must first attempt to score the current Active Word by initiating a silent vote. First, he must give a 'Thumbs Up' or 'Thumbs Down' hand gesture. A 'Thumbs Up' gesture indicates that he believes the current Active Word is valid. A 'Thumbs Down' gesture indicates that the current Active Word should be checked for validity before continuing with the new word. Once the active player makes a gesture, a vote must occur and all other players immediately give a 'Thumbs Up' or 'Thumbs Down' gesture.
- If ALL players give a 'Thumbs Up' gesture, the word is scored.
- If ANY player gives a 'Thumbs Down' gesture, the validity of the current Active Word must be checked against the VALID WORD rules.
- If the word is INVALID, the game ends. (See GAME END below.)
- If the word is VALID, it is scored. (See below.)
The active player starts a new Active Word using a Vowel or Consonant Card and play continues in clockwise direction.
There may only be 1 Active Word at a time. Consonant and Vowel Cards must always follow the previously played letter and may not be played in the middle or any other part of the word. Consonants in the CONSONANTS ROW are only for reference and scoring; they may not be used again. Vowel Cards flipped to the "+1" side may be used again to create new words and retain the '+1' value for the remainder of the game.
Scoring a Word
All Consonant Cards are placed in the CONSONANT ROW. All Vowel Cards are placed in the VOWEL ROW. If the scored word is AT LEAST 5 LETTERS in length, flip the Vowel Cards that were used to the "+1" SIDE UP. After scoring, play continues.
Valid Words
A valid word must have a length of at least 3 letters. It must be found in a dictionary and may not be an abbreviation or a proper noun (place name, person's name, company name, or brand). In most cases, it will be obvious that a word is valid. If at least 1 player votes 'Thumbs Down' during a validity vote, reference a dictionary.
Game End
The game ends immediately if after a vote:
- A validity check determines that the completed word is INVALID.
- All Consonant Cards have been played in VALID words.
The team calculates their score. (See FINAL SCORING below.)
Final Scoring
The team calculates their score as follows:
- 1 point: for each Consonant Card in the CONSONANT ROW.
- 1 point: for each Vowel Card flipped to its "+1" side.
Pass Cards are not included in calculating scores.
Performance Rating
- 0-10: Poor (1 star)
- 11-20: Proficient (2 stars)
- 21-25: Phenomenal (3 stars)
- 26: Perfect (4 stars)
Tips
- Be honest when voting. There is no penalty for discovering that a word is valid after checking a dictionary.
- Knowing when to use a Pass Card is essential. The number of cards in each player's hand will vary and become unbalanced. This is a part of the game's challenge and will require players to play or pass in an appropriate rhythm in order to earn more points.
- It's helpful to keep the CONSONANT and VOWEL ROWS in alphabetical order to reference which consonants have been used, and which vowels are available to use. No words with double consonants or double vowels are possible.
- Cooperative games are difficult in nature, so embrace the challenge and try to improve your score over many games!
Example
Rex wants to start a new Active Word so he initiates a vote, which determines that all players are confident that "EXIT" is a Valid Word. He will finish his turn by moving the "E" and the "I" back to the VOWEL ROW and the "X" and the "T" to the CONSONANT ROW, then sliding the "O" Card down to start a new Active Word. He could have chosen to start a new word using a Consonant from his hand. Or, he could have chosen to extend the Active Word by playing his "S" Card after the "T", which would have spelled, "EXITS" and provided a Bonus (+1) point for the "E" and "I" Vowels.
(Sample diagram: CONSONANT ROW; VOWEL ROW, where the "O" was used in a 5 letter word and has been flipped to its "+1" side; ACTIVE WORD "EXIT"; 1 Unused Pass Card remaining.)
Challenging Play
Increase the difficulty of play by using any combination of these gameplay variants:
- Reduce the number of Pass Cards to 1 less than the number of players. Or, remove the Pass Cards and Pass Action entirely.
- Increase the minimum valid word length to 4 or 5 letters.
- When scoring an Active Word, place the used Consonant Cards face down in the CONSONANT ROW.
BUS
Players control a city bus, picking up and dropping off passengers in order to earn the most points and win the game.
The Object
Players control a city bus, picking up and dropping off passengers in order to earn the most points and win the game.
30 Cards:
- 3 Bus Cards (2-sided: "Construction Site Used" symbol on back).
- 15 Passenger Cards (2 passengers per card; point values 1-5).
- 12 Street Cards.
Setup
- Shuffle the 12 Street Cards and create a shared "City Grid" (4 squares) by randomly placing cards to create the game board. (See SAMPLE SETUP.)
- Shuffle the 15 Passenger Cards and place them in a stack in the playing area, then flip 2 Cards face up. (See SAMPLE SETUP.)
- All players take a Bus Card and choose a side of the City Grid for their own "Progress Area."
Sample random setup for 2 players: Passenger Cards (2 passengers per card) are placed face up; Passenger Destinations are shown on the City Grid; the Progress Area for each player is placed on the side of the grid, with the sides labeled Picked Up Side and Dropped Off Side.
Playing the Game
On the Street Cards, there are 6 Passenger Destinations (1 in each of the 6 Passenger Colors), 3 Bus Stops, and 1 Construction Site. Each player controls a Bus to pick up passengers and drop them off while using a side of the City Grid as their own "Progress Area" to track their progress and earn points. (See above.)
Game Start
Choose a Start Player. He must place his Bus "Construction Site Used" side down on any Street Card with a Bus Stop then choose a face up Passenger Card OR the top card from the deck and place it on the "Picked Up" side in his Progress Area. During the GAME START and throughout the game, Passenger Cards are replaced immediately so that there are exactly 2 Passenger Cards face up to choose from at any time. The next player(s) in clockwise direction performs the same action. Buses may occupy the same Street Card during this step and throughout the game.
Game Turn
Players continue taking turns in clockwise order. On a player's turn, he must move his Bus on Street Cards, the number of spaces (or less) that equal his Speed Limit. During his movement sequence, he may drop off passengers to earn points. He MAY pick up new Passenger Cards (Bus Stop) or use the Construction Site (Construction Site symbol) if he ENDS his movement on a Card with the corresponding image.
Icons used on the sheet:
- Passengers.
- Speed Limit number shown on Passenger Cards (the "?" icon).
- Bus Stop for picking up Passenger Cards.
- Bus Arrow for maintaining movement direction.
- Construction Site for rearranging Street Cards.
Movement / Speed Limit
Buses move on Street Cards throughout the City Grid. The Arrow on a Bus indicates the forward direction the Bus must move, and it may never make a U-turn. A player's "Speed Limit" is the maximum number of Street Cards he may move his Bus on a single turn, and is established by the lowest speed (the "?" icon) shown among all his Passenger Cards in progress. A player may move less than his Speed Limit. If a player has no Passenger Cards in progress, then he has no Speed Limit to restrict movement. A Bus may not end its movement sequence on the same Street Card in which it began.
Picking Up Passengers
When a player ENDS his movement sequence on a Bus Stop (Bus Stop symbol), he MAY choose a face up Passenger Card OR draw one from the deck. Then, he must place it on the "Picked Up" (left) side in his Progress Area. The maximum Passenger Cards a player may have IN PROGRESS is 3. Once the deck and face up Passenger Cards become exhausted, players may not acquire new Cards.
Progress Area
Each Passenger Card has 2 passengers, which players track separately by placing the card on the correct side in their Progress Area. A player's Progress Area is divided into 2 sides, under the 2 Street Cards on their side of the City Grid. Passengers placed under the Left Street Card are "Picked Up," while passengers under the Right Street Card are "Dropped Off." Players may have 1 passenger "Picked Up" and 1 passenger "Dropped Off" by placing the card between the 2 sides of their Progress Area. (See below.)
Players reflect this progress in the opposite order that passengers are shown by placing the card upside down. Passenger Cards are scored at the end of the game IF both passengers on the card have been dropped off (Passenger Card is complete).
Sample player progress area: this player has 3 Passenger Cards in progress showing speeds of 5, 4, and 3. The lowest of all these speeds is 3, which is this player's current Speed Limit.
Sample progress steps:
- A: The Red and Blue Passengers are picked up.
- B: The Orange Passenger is picked up and the Yellow Passenger is dropped off.
- C: The Red Passenger is picked up and the Yellow Passenger is dropped off.
(The sheet labels each card's Point Value (3) and Speed Limit (3).)
Dropping Off Passengers
To drop off a "Picked Up" passenger and earn points, a player's Bus must travel through (or end its movement sequence on) a Passenger Destination of the same color. The passenger is automatically dropped off and the Passenger Card(s) can be moved to the "Dropped Off" side in his Progress Area. Once both passengers have been moved to the "Dropped Off" side, the card is complete and flipped FACE DOWN. The speed on completed Passenger Cards no longer applies and the Speed Limit on a player's next turn will be the lowest speed on his Passenger Cards in progress. A player's Speed Limit does not change during a turn.
Construction Site
A player may land on the Construction Site Street Card at any time. ONCE during the game, he may END his movement sequence on the site to swap 2 Street Cards that are unoccupied by a Bus. Then, he flips his Bus over with the arrow facing in the same direction, showing he may not use the site again. (Construction Site Used symbol.)
Ending the Game
After a turn in which a player has 5 or more Passenger Cards completed, that player triggers the end of the game. Then, each player gets one more turn (including the player who triggered the end game). Players flip over their completed (dropped off) Passenger Cards and total their point values. Incomplete Passenger Cards have no value. The player with the most points wins. In the case of a tie, the player with the most completed Passenger Cards is the winner!
End Game Example
On the last turn of the game, Roy (Brown Bus with a Speed Limit of "2") moves his Bus 2 Street Cards (from A to B to C) and drops off his Yellow Passenger during this movement sequence (step B as shown below).
- Sue earned 14 points.
- Roy earned 12 points.
- Completed Passenger Cards are flipped face up for end game scoring.
- The Yellow Passenger is dropped off during movement.
- C. Roy ends his movement sequence.
Challenging Play
All rules apply, except a player's Bus must be on the same side of the street as the Bus Stop, Passenger Destination or Construction Site to take the corresponding Action. Additionally, a player taking the Construction Site Action may choose to rotate a single Street Card that is unoccupied by a Bus instead of swapping 2 Street Cards. In either choice, the orientation (as determined by the side of the Street Card a Symbol is on) may be altered during this Action.