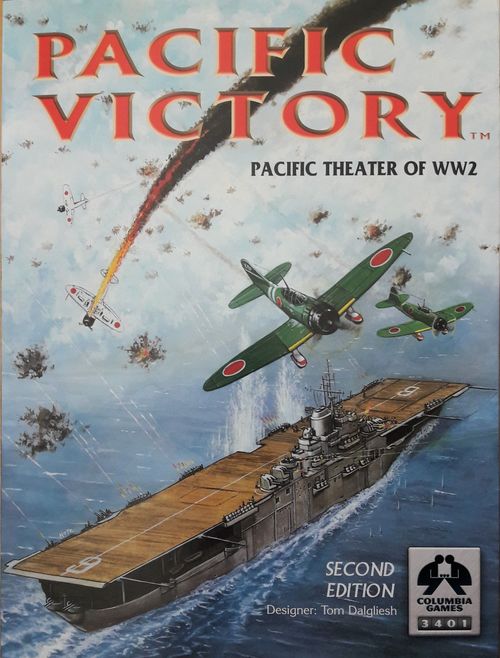
Pacific Victory: Pacific Theater of WW2 – Second Edition
Pacific Victory: Pacific Theater of WW2 – Second Edition Rulebook
Table of Contents
Table of Contents
Introduction
Scenarios & Victory
There are three scenarios: 1941, 1942, or 1943. Historical locations and unit strengths are given for each game-year, although these can be adjusted with a Free Deployment option.
Each scenario has the same victory conditions. The game is played until one side wins a Decisive Victory, or until the Jun/45 turn is played when Victory Points determine a winner.
Game Turns
Pacific Victory is played in Game Turns that simulate three (3) months of war. To start each Game Turn, an initiative dice roll is made. The winner can choose to play first or second. Player 1 moves any/all blocks, then Player 2 does the same, except units that have been attacked are pinned and may not be able to move.
Units that enter an enemy-controlled hex are attacking. Combat is resolved in a unique interactive system.
Supply & Production
After all battles have been resolved, units check supply and reinforcements are added in a Logistics Phase. Replacements do not arrive on a rigid historical schedule; players can, within limits, build as they wish.
Rulebook Organization
This rulebook is formatted so that the sidebar (right column) contains definitions, examples, design notes, and suggestions to help you understand and enjoy Pacific Victory. The sidebars also contain a number of Optional Rules, each identified with a checkbox symbol. It is best to ignore all optional rules until you are familiar with the game.
Game Scale
Ground units are Corps (Allies) or Armies (Japan), but each step for both is roughly a Division. Air units are Airforces (Allies) or Air Divisions (Japan), each step representing 50-100 planes. Naval units are Divisions, each step representing one capital ship or two to four light ships. All surface ships are assumed to have an escort of about four destroyers per step. Map scale is 600 miles per hex. Game turns are 3 months long.
Fog of War
Fog of War is one of the most exciting aspects of Pacific Victory. Except when fighting a battle, the blocks stand upright, their label facing the owner. This promotes bluff and innovative strategies because players are never certain of the strength or identity of an enemy unit. Just like all successful generals and admirals, you must be bold and decisive in an atmosphere of doubt and deception.
Initiative
Because initiative is randomly determined your opponent may get two turns in a row. That is, the player moving second in a Game Turn may move first in the next Game Turn. You can never be assured that an opponent will patiently await your attack; he may attack first, or move away and frustrate your plans.
Allied Code Breaking
The Allies had superior code-breaking techniques to the Japanese. To reflect this, the Allied player wins ties for Initiative, a significant advantage.
Label Colors
The USA have blue (navy) and green (army) labels; both go on blue blocks. British, Indian, and ANZAC labels go on the brown blocks. Yellow labels (Chinese) go on the yellow blocks.
1.0 Game Turns
Each Game Turn has five Phases.
1.1 Initiative
Both players roll two (2) dice. The player with the higher total wins the initiative and has the option to play First or Second. Allied player wins ties.
1.2 Player-1 Move
Player 1 moves any/all friendly units. There are two possible types of movement: Strategic and Operational. They may be played in any desired order.
1.3 Player-2 Move
Player 2 repeats 1.2. Units can make any legal move such as reinforcing a battle started by Player 1, or starting a new battle. In battle hexes, some defending units (equal to the number of attacking units) are pinned and cannot move; excess units can move out of a battle hex. See 4.5.
IMPORTANT: When Player 2 reinforces a battle, these units are not available to fight or take hits for the first combat round. Should the Attacker win the battle in the first combat round, control of the hex changes, and the reinforcing units arrive as attacking units, not defending units. Strategic Movement can never be used to reinforce a battle.
1.4 Combat Phase
Battles occur when either player moves units into an enemy-controlled hex. Battles are resolved, one by one, in any sequence desired by Player 1.
1.5 Logistics Phase
Both players, simultaneously:
(A) Check supply status of units. Unsupplied units cannot receive replacements and take supply attrition. IMPORTANT: unsupplied naval units do not cut supply lines.
(B) Determine available Production Points (PP) and build new units or add steps to existing units.
A new Game Turn now begins with an Initiative dice-roll.
2.0 The Map
The map has a hexagonal grid (hexes) to regulate movement and location of units. Terrain features in hexes affect stacking, movement, and combat.
Hexsides often have different terrain to that of a hex, which may affect movement into combat. Two types of terrain may appear in the same hex or hexside, but one type dominates; if ambiguous assume the most restrictive terrain.
2.1 Terrain Types
- Clear: Hexside 2.
- Desert: Hexside 1.
- Jungle: Defense D2. Hexside 1. One jungle hex in southern New Guinea is impassable to Ground units.
- Mountain: Defense D2. Hexside 1. Alpine hexsides (white) are impassable to ground units.
- River: Hexside 1.
- Coastal: Stacking limit of four (4) naval units for coastal and island hexes. Air stacking is one (1) unit. Ground stacking depends on base size.
- Sea: Open sea hexes have naval stacking of four (4) units, plus Air Stacking of one (1) unit (which must land at a friendly base at the end of the combat phase). Infantry units can not occupy sea hexes. Marines occupy sea hexes as a naval unit.
2.2 Bases
All settlements on the map are bases, color-coded for original ownership:
- Orange: Japanese
- Yellow: Chinese (Allies)
- Blue: American (Allies)
- Red: British/Anzac/India (Allies)
- Green: Dutch (British controlled)
Allied bases are friendly to all Allied units.
2.21 Major Bases
Bases with hexagonal symbols.
2.22 Minor Bases
Bases with a round symbol.
IMPORTANT: Base size has a crucial effect on game-play. Major bases provide stacking of two (2) and double defense to ground units, and are essential to form supply chains.
2.22 Economic Centers
Major or minor bases containing a number. These indicate significant production facilities or war resources such as nickel, oil, rice, rubber, timber, and tin. The total value of all centers on the map is 60pp.
2.23 Home Bases
Home bases are Major bases in the home country. New units must be built in Home bases. They are also supply sources for each country.
- Japan: Kure, Tokyo, Hakodate.
- USA: Seattle, San Francisco, San Diego, Panama.
- Britain Empire: South Africa.
- China: All Chinese major and minor bases.
NOTE: Reference points like French Frigate Shoals or Broome (Australia) are neutral hexes, not bases. Air/Ground units cannot end a Game Turn in these hexes; Naval units can.
2.3 Map Boxes
The Allies have two Map Boxes, Panama and South Africa, that are off-board areas. They are Economic Centers and Home Bases which cannot be attacked or blockaded by Japanese units. Map boxes have unlimited stacking. Moves to/from Map Boxes require Strategic Movement (4.12).
Panama represents the eastern USA and is one of four Home bases for American units. New American Naval units must be built at Panama.
South Africa is the Home base for all British units, including ANZAC and Indian units.
NOTE: USA units may trace supply to South Africa, and British Empire units may trace supply to Panama. However, units dependent on this "cross-supply" cost double to build (7.15).
2.4 Rail Lines
Rail lines are shown in red on the map. They are used for strategic movement (4.12) and supply lines (7.1).
Map Notes (sidebar)
Japan: The three hexes that compose Japan are considered to be adjacent land hexes. Ground units may move between them, with a hexside limit of 1 for attacks.
China & Manchuria Front: The Japanese invaded China in 1937 and controlled Peking, Shanghai, and Canton hexes until 1945. They previously occupied Formosa and Korea in 1895, and Manchuria (Manchuko) in 1931. Also see 8.14.
Hainan: Hanoi and the island of Hainan are located in the same coastal hex.
Siam Coasts: The Siam hex has two coasts, west and south, which are not directly connected. Naval units located in this hex are deemed to be on the south (Bangkok) coast unless otherwise stated. All naval activity such as Sea Invasions, and Shore Bombardments, against the west coast may ignore defending naval units on the south coast. Only naval units on the south coast may blockade the hex. Supply lines for naval units cannot be traced across the land portion of the Siam hex.
New Guinea: The New Guinea hex marked Impassable applies to Ground operations. Naval units can occupy or pass through this hex. Air units may fly over, but not land.
New Caledonia: A wealthy French colony that expelled its Vichy French government in 1940 and joined the Free French. It became the major base for US forces in the South Pacific. The island had 25% of the world's nickel reserves during the war, a critical component of some steels.
Alpine Hexes: Mountain hexes and hexsides, colored white, such as in Tibet and in New Guinea, are unplayable.
China, Japan, Korea: These areas are within the command areas of both MacArthur and Nimitz. MacArthur commands Army and Air units; Nimitz commands marines and naval units.
Islands: Islands are treated as coastal hexes. Ground movement between islands in the same hex and to the mainland in the same hex is allowed. This means, for example, that a ground unit on Dutch Harbor (island) can move by land to Anchorage because it occupies the mainland part of the hex as well. Hexside limit 1 because of the mountains.
Out of Play Areas: The following areas are out of play:
- Mexico (1 hex)
- Mongolia (1 hex)
- Tibet (2 hexes)
- USSR (all hexes except Attu)
3.0 Unit Types
Military units are represented by blocks which provide game mechanics for Fog of War and Step Reduction (see sidebar). Units have one to four strength levels. Current strength is shown by the number of pips on the top edge when a block is standing upright facing the owning player.
3.1 Air Units
Air units assume a mix of fighters and bombers. Each step is 50-100 aircraft. Air units can attack any/all target groups.
3.11 Naval Air (NA)
Japanese land-based Naval aircraft. NA move one (1) hex and have A2, N3, G1 firepowers.
3.12 Army Air (AF)
Land-based Army aircraft. AF move one (1) hex and have A2, N2, G2 firepowers.
3.2 Naval Units
Each type of naval unit (except submarines) include an escort of about four destroyers per step.
3.21 Carrier (CV)
Each step is 1 fleet carrier, or 2-3 light carriers. They move 2 hexes and have variable firepowers against enemy units in the same hex. See 5.4 for targeting.
3.22 Submarine (SS)
Each step represents 8 submarines. They move 2 hexes and only have naval firepower. SS have the ability to move, retreat, and trace supply through enemy controlled hexes and units.
3.23 Battleship (BB)
Each step is one battleship. BBs move 2, and fire A1 (flak), N3 (naval) or G2 (shore bombard).
3.24 Cruiser (CA)
Cruisers move two (2) hexes and fire A1 (flak), N2 (naval) or G1 (shore bombard).
3.3 Ground Units
Each ground unit represents a Japanese Army or an Allied Corps, but in both cases each step is a division. Ground units outrank Air and Naval units for hex control of land and coastal hexes.
3.31 Headquarters (SHQ)
The Japanese have two SHQs, Japanese Army (IJA) and Imperial Japanese Navy (IJN). The Allies have four SHQs: Wavell (British), Chiang-Kai-shek (China), Nimitz (USA-CPAC), and MacArthur (USA-SWPA).
SHQs command strategic movement (4.12). They do not count for stacking. They cannot attack or reinforce, but defend normally.
IMPORTANT: SHQs at strength 1 cannot activate for strategic movement, but can move and fight normally. Eliminated SHQs are rebuilt in any friendly and supplied major base.
3.32 Infantry (IN)
Infantry have an operation move of one (1) hex, control bases they occupy, but cannot end the turn on a sea hex. They can cross a sea hexside only with strategic movment.
The Japanese have one Armor unit. They also have infantry Garrisons (GA) that have two steps and higher naval firepower (shore batteries). Garrisons can never attack or reinforce, only defend.
3.33 Marines (MA)
Marines move 2 hexes at sea, but only 1 hex on land. They conduct Sea Invasions under command of the IJN for the Japanese, and the theater SHQ for the Allies. Cost is 2pp per step.
US Marines have higher firepowers reflecting Marine Air attached to their divisions. See 5.43.
Japanese marines, more properly called Special Naval Landing Forces, have a maximum strength of 2.
3.34 Major Base (MB)
Used to upgrade a minor to a major base with all effects of a MB. Cost is 5pp. They have no firepower and take no hits, but do control a hex. They are always face-up. They are destroyed immediately the hex is enemy-occupied.
Unit Data Chart (sidebar)
Firepowers are listed Air–Naval–Ground.
| Unit | Move | A–N–G | Cost |
|---|---|---|---|
| Naval Air | 1 | 2–3–1 | 3pp |
| Army Air | 1 | 2–2–2 | 2pp |
| Carriers (1) | 2 | 2–3–1 | 4pp |
| Submarines (2) | 2 | 0–2–0 | 2pp |
| Battleships (3) | 2 | 1–3–2 | 3pp |
| Cruisers | 2 | 1–2–1 | 1pp |
| SHQ | 1 |
- Elite CV have higher firepowers, but cost is the same. Check the unit and building year.
- Allied submarines have firepower 0-1-0 until Sep43.
- Elite BBs have higher firepower. Cost is unchanged.
- Marines move 1 hex on land. Japanese Marines have 1-1-2 firepower.
- Japanese Infantry Garrisons are 1-2-1.
Combat Turn, Unit Type and Firepower (sidebar)
Each unit is marked with a Combat Turn letter (A to E) on its label, a unit type, and firepowers Air–Naval–Ground. Examples: Naval Air NA 2-3-1 (turn A); Carrier CV 2-3-1 (turn B); Battleship BB 1-3-2 (turn C); Cruiser CA 1-2-1 (turn D); Infantry IN 1-1-2 and Marines MA 2-1-3 (turn E).
Strength (S): Units fire by rolling dice equal to their current strength, meaning a 3-step block fires 3 dice. The current strength of a unit is the number on the top edge of the label from the owner's point of view.
Step Reduction: The maximum strength of a block can be 2, 3, or 4. For each hit taken in combat, strength is reduced by turning the block 90 degrees counter-clockwise. The diagram in the rulebook shows the same BB unit at strength 4, 3, and 2.
4.0 Movement
Players can move any/all friendly units. Half-hexes are fully playable. There are two (2) types of movement. Each unit can move only once per turn.
4.11 Operation Movement
Each unit can move one or two hexes per turn depending on unit type. See: Unit Data Chart. Units may attack subject to stacking and hexside limits.
Rebase: Units can instead make a double "rebase" move to a friendly base. That is, naval units move four (4) hexes, and air and ground units move two (2) hexes. All hexes traversed must be friendly or neutral.
Rebase Movement (sidebar): Rebase movement is a non-combat move. Because of their Central Position, rebasing favors the Japanese player.
4.12 Strategic Movement (SM)
Strategic Moves require activation of an appropriate SHQ. Allied SHQs command units currently located in their theater. Japanese IJA commands all AR, GA, IN and AF units; the IJN commands all NA, MA, and naval units.
The number of SMs received is equal to the current SHQ strength meaning an active SHQ3 has 3SM. Each SM allows one (1) unit to move up to ten (10) hexes to a friendly base, by sea or rail, which may be combined. Each unit can make two consecutive strategic moves for 2SM. An active SHQ may not strat-move.
Hexes traversed must be friendly or neutral. SMs are needed to enter/leave Panama or South Africa.
After movement the SHQ is reduced one (1) step and turned upright. SHQ steps are replaced during the Logistics Phase (2pp per step). SHQs can only be activated once per Movement Phase.
Strategic Movement (sidebar): Strategic moves are handy to move units outward from home bases, or to change theaters, and are mandatory for Allied units to enter or leave Panama or South Africa.
4.2 Stacking Limits
Stacking is the maximum number of blocks you may have in a hex (their actual strength is ignored). Stacking limits are shown on the back cover.
Stacking applies after all movement is completed; you may overstack during movement. In battle hexes stacking limits apply to each player.
Stacking Limits (sidebar):
- Minor Base: 1 Air, 4 Naval, 1 Ground.
- Major Base: 1 Air, 4 Naval, 2 Ground.
- Sea Hex: 4 Naval.
- NOTE: Marines are naval units at sea.
4.3 Hexside Limits
Hexside Limit is the maximum number of ground units that may cross a hexside into a battle. The limit is ignored for non-combat movement.
Hexside limit is two (2) units per Clear hexside, and one (1) unit for all other terrain, except Alpine (white) hexsides are impassable.
Air/Naval units ignore hexside limits, as do ground units conducting a Sea Invasion (5.8).
4.4 Hex Control
Each hex is either Friendly, Neutral, or Enemy controlled. All units control the hex they occupy. Hex control changes take effect immediately.
NEUTRAL HEXES: Hexes without a base and open Sea hexes are neutral. Air and Ground units cannot end their Game Turn in neutral hexes.
4.41 Base Control
Bases are friendly to any occupying unit. Captured enemy bases revert to enemy control if vacated.
IMPORTANT: Only armor, infantry, and marines can change hex control. Air and naval units cannot change control, but can maintain control of a captured base. Garrisons and SHQs cannot change hex control because they cannot attack.
4.42 Hex Control Priority
Air units cannot change control of hexes and cannot land on vacant enemy controlled bases. Air units can maintain control of a captured base, but must retreat from an attacking enemy Ground unit after a battle.
Naval units cannot change control of hexes, but can maintain control of a captured base. They must retreat from an attacking Ground unit after a battle. Naval units may Blockade (5.7) if no enemy naval units are present.
Ground units control Coastal or Land hexes. After a battle, they force enemy Air to retreat, and enemy Naval to Retreat or Blockade.
Hex Control (sidebar): Hex control affects Strategic Movement, Production, Supply, and Victory. Each hex is either Friendly, Neutral, or Enemy controlled. Captured bases revert to enemy control if you vacate that hex. In short, enemy bases must always be garrisoned with at least one unit (any type) to remain under your control. Naval units can Blockade (5.7) a Ground/Air unit if there are no enemy Naval units present.
Zones of Control (ZOCs): Many games allow units to control adjacent hexes; ZOCs do not exist in this game.
Vacant Bases: Vacant bases are not neutral; they are friendly to their original owner. A sea invasion (5.8) is required to capture a vacant enemy base. Blockades of vacant enemy bases make the sea friendly, allowing sea supply and naval movement into or through that hex by the blockading player.
4.5 Pinning
Attacking units prevent an equal number of defending units (all types) from moving. This is called Pinning. The defending player chooses which units are pinned. Unpinned units may move operationally, including attacks, but not strategically. Pinned SHQs cannot activate for SM, but defend normally in combat.
Pinning Example (sidebar): Two units attack five. At least two defenders are pinned, but up to three (defender choice) may move. Unpinned units can move strategically and can, with an Operation Move, attack another hex. Unpinned units that leave a battle hex, can be replaced with other units moving Operationally.
4.6 Air Operations
4.61 Air Movement
Air units fly one (1) hex to engage in combat, but must then land in a friendly base. Air units ignore impassable ground terrain and hexside limits.
4.62 Air Stacking
Each base, whether major or minor, can hold one (1) Air unit. Stacking for Air Combat is also one (1) unit. Air units must land immediately after their battle is resolved. They may land at any friendly base in the same or adjacent hexes, even a base captured this turn.
4.63 Combat Air Patrol (CAP)
Air units may move to adjacent friendly or neutral hexes (stacking 1 unit) on Combat Air Patrol (CAP) where they can defend against enemy attack and interfere with the movement/retreat of enemy units. CAP units that are not involved with combat, land as per 4.62 at the end of the Combat Phase.
4.7 Naval Operations
4.71 Naval Movement
Naval units move two (2) hexes. They must stop when they enter a vacant enemy base, or any enemy-occupied hex. They may not traverse an enemy blockade, but may enter or traverse a friendly blockade.
Coastal or island hexes without a base can be friendly-occupied by naval units.
SUBMARINES: These units may move, retreat, and trace supply through enemy controlled hexes and units.
4.72 Naval Stacking
Naval Stacking is four (4) units in any coastal, island, or sea hex.
4.8 Ground Operations
4.81 Ground Movement
Armor, Garrisons, Infantry, and SHQs are all ground units. None of them can cross a sea hexside, or stop in sea hexes, except Infantry can make a Sea Invasion (See 5.8). Ground units must always end their turn in a base. Ground unit stacking is one (1) unit in a minor base, and two (2) units in a major base.
4.82 Marine Movement
Marines are naval units at sea, but ground units ashore. At sea they are subject to naval stacking, and to ground stacking when ashore. They move two (2) hexes at sea, but only one (1) hex ashore. Japanese Marines conduct a Sea Invasion (5.8) under command of the IJN SHQ. U.S. Marines are commanded by their current Allied theater SHQ.
Movement Example (sidebar)
The example in the rulebook shows a USA amphibious attack against Saipan where four Japanese units are defending. The Allied player wins the initiative and decides to move first:
Player 1 (US) moves four units (CV3, BB4, CA4, and MA3) from Wake to Saipan, held by four (NA2, SS2, CA3, IN3) Japanese units.
Player 2 (Japan) elects to add two more units to the battle, a NA3 from Iwo Jima and a BB3 from Tokyo. These two units will not participate in Combat Round 1.
This Battle of Saipan, unlike the historical battle fought in Jun44, is unlikely to be a "Turkey Shoot" for the American forces. When enemy forces are nearby, and cannot be pinned, it may be wiser to play second to avoid battle reinforcements.
5.0 Combat
Both players must complete their respective Movement Phases before starting the Combat Phase.
5.1 Battle Hexes
Battles occur when either player moves units into an enemy-controlled hex. Battles in several hexes are resolved in a sequence chosen by Player 1. Combat in one battle must be resolved before proceeding to the next. Units are not revealed until their battle is fought.
5.11 Combat Stacking
In battle hexes stacking limits apply to each player. Both players in a coastal major base battle could have 1 Air, 4 Naval, and 2 Ground.
NOTE: Carriers count towards naval stacking. Marine units and Infantry conducting Sea Invasions count as naval units until they land, then they count toward ground stacking.
5.2 Combat Rounds
Battles are fought for a maximum of three (3) combat rounds. A Combat Round involves firing or retreating each unit in a battle hex in their Combat Sequence. After each unit has fired once, repeat the Combat Sequence for the 2nd and 3rd rounds as necessary. If the attacking units do not defeat the defending forces by the end of the 3rd round, they must retreat, except naval units can Blockade (5.7).
5.21 Combat Turns
Per combat round, each unit has a battle turn in A, B, C, D, E order with Defender going first if the same letter. Each unit may fire or retreat. See sidebar for example of combat turns.
Battle Stacking (sidebar): In battles both players can have the maximum stacking for that hex. Resolve large battles offmap as needed, but mark the location of the battle hex.
Player-2 Battles (sidebar): When Player-2 adds new units to a battle, these reinforcements do not fire or take hits in Combat Round 1. Reinforcements arrive as defenders unless hex control of the battle changes in round 1. When a vacant base is invaded by Player-1, hex control will automatically change in round 1. Player-2 reinforcements to this hex will arrive in Round 2. If these reinforcements are naval units, the ground unit that just landed may find itself blockaded. When Player-2 starts a new battle, a normal three (3) round battle is fought.
Battle Defender (sidebar): The defender in any battle is normally the player who controlled the hex at the beginning of the Battle. However, hex control changes if all defenders retreat or are eliminated in the first combat round, or a vacant enemy base is invaded. Player-2 battle reinforcements (if any) arrive on round 2 as attackers. If the Attacker is conducting a Sea Invasion, enemy naval reinforcements that arrive round 2 could prevent a landing unless already done.
5.3 Firing Units
To fire a unit, roll dice equal to its current strength (3-step unit rolls 3 dice). A hit is scored for each die roll equal to or lower than the unit's Firepower.
Fire Example (sidebar): To fire an Infantry 3, roll 3 dice. If the target is enemy "Ground", Infantry rated G2 score hits on rolls of "1" or "2". Other numbers are misses.
5.31 Combat Strength
The current strength of a unit is the number of pips on the top edge of the label from the owner's point of view.
5.32 Firepower
Units can be rated for "A" (Air), "N" (Naval), and "G" (Ground) firepowers:
- A1/N1/G1: 1's are hits
- A2/N2/G2: 1's & 2's are hits
- A3/N3/G3: 1's, 2's & 3's are hits
Excess Hits (sidebar): Because excess hits on a target group are wasted, units should be fired individually.
5.4 Target Groups
Enemy units cannot be targeted individually. Firing is done at a declared target group. There are three target groups: Air, Naval, or Ground units. A single unit can never divide its fire between two or more target groups.
5.41 Target Declarations
Most units can fire at different target groups each round. Hence, Naval Air can fire at Air units (A2), or at Naval units (N3), or at Ground units (G1).
Units must declare their target group before firing, and this can change from unit to unit and round to round. If no declaration is made, the target group is assumed to be their own type, meaning an Air unit targets enemy Air units (if present) unless it declares otherwise.
5.42 Air to Surface combat
Air units use their "G" firepower to attack Ground units, or their "N" firepower to attack Naval units. Air to Surface combat may occur even when enemy Air units are present.
5.43 Surface to Air (Flak)
Naval and Ground units use their Air Firepower to "flak" air units, but only if their target group has been attacked from the air in that combat round. That is, if enemy air fires on naval targets, then naval flak is allowed - otherwise not.
EXCEPTION: U.S. Marines and Carriers have attached aircraft, not just AA guns. They can fire on any target type even if not attacked by that type.
5.44 Shore Bombardment
Naval units use their "G" firepower (if any) to attack Ground units in the same battle hex. Shore Bombardment cannot be done if enemy naval units are present at the instant of fire.
Shore bombardment during a battle risks "friendly fire". Each "6" rolled during shore bombardment is a hit on friendly ground units, distributed normally.
Ground units may only fire at naval units if they have been shelled by naval units in that combat round.
5.45 Hit Allocation
Hits are distributed among all units of the target group, strongest units first. That is, when firing against Naval units, hits are distributed among all enemy Naval units. When two or more target units share the highest strength, the owner chooses which to reduce. Excess hits on a target group are wasted.
Infantry and Marine units cannot be eliminated by Air or Naval fire. They can be reduced to Step-1, but are immune to further loss except from Ground units.
EXCEPTION: Infantry and Marines in a pending invasion are naval targets and can be eliminated by Air or Naval fire.
5.46 Double Defense (D2)
Ground units have D2 defending Jungle or Mountain terrain, or any major base. Units with D2 lose one step for every two (2) hits from attacking forces. Record one hit with a one eighth rotation, but firepower is not affected until the second hit is taken. A unit with a "half-hit" must take the next hit received by that target type. Half-hits are recovered when a battle ends, but completed if the affected unit retreats.
Combat Example (sidebar)
In the Guadalcanal hex, three American units are defending: CV2, CA3, and MA1. Four Japanese units are invading from Rabaul: NA2, CV2, CA2, and IN3.
The diagram in the rulebook shows unit strengths at the start of the battle, with the units shown with their current strengths oriented towards the enemy units. Combat turns: Japanese NA (A); American CV Enterprise (B) and Japanese CV Akagi (B); American CA Quincy (D) and Japanese CA Mogami (D); American USMC (E) and Japanese IN (E).
Round 1: Japanese NA2 fires at naval targets and scores one hit which must be applied to the CA3 (largest naval unit) reducing it to CA2. American CV2 now fires (N3) and scores one hit, taken on the IN3 (highest strength unit) which is a naval unit until it lands. The Japanese Carrier fires and scores a hit which can be taken on the CV2 or CA2, most likely the latter. American CA1 fires at naval targets but misses. Japanese CA2 fires, reducing American CV2 to CV1. US Marine cannot fire (no target) since neither Japanese air or naval have attacked the ground. Japanese Infantry cannot land since enemy naval units are present.
Round 2: Japanese NA2 fires and scores one hit, eliminating the CA1. The American CV1 chooses to retreat from the hex. Japanese CV2 and CA1 cannot fire on Marine at Step-1. Japanese Infantry can now land. American MA1 fires (G3) but misses. Japanese IN2 fires (G2) and scores one hit which is applied as a half-hit to the marine.
Round 3: Japanese Air/Naval cannot fire. American MA1 fires and scores a hit, taken on the IN2. Japanese IN1 fires but misses. This ends the battle. American Marine survives with a half-hit; Japanese IN1 must retreat and returns to Rabaul. NA2 and CV2 also retreat to Rabaul. Japanese CA1 remains on blockade (face-up) in the Guadalcanal hex. Marine half-hit is restored to MA1. Although unsupplied, the MA1 last step is immune to supply attrition, but it cannot be built-up because of the blockade.
5.5 Retreats
Units can retreat (instead of firing) in any Combat Round. Hexside Limits apply to each Combat Round which allows a gradual retreat. After the 3rd Combat Round, the battle ends with the following procedure:
- Attacking Ground units Retreat from Defending Ground units.
- Attacking Air units Retreat from any Defending units.
- Attacking Naval units Retreat from enemy Naval units, but may Blockade (5.7) defending Air or Ground units.
Retreating units must obey Stacking and Hexside Limits. Units that cannot retreat when required are eliminated.
5.51 Retreat Hexes
Units can retreat up to their normal Operation range.
Air/Ground units must retreat to friendly bases.
Naval units (and Marines at sea) may retreat to friendly or neutral hexes, including friendly Blockade hexes. See 5.8 for Invasion retreats.
5.6 Regrouping
When a battle ends, the Victor may Regroup, meaning (at the instant of victory) move any/all units from the victory hex to a friendly or neutral hex within Operation range. All move and stacking limits apply.
5.7 Blockades
Attacking naval units can declare a naval Blockade of an enemy base (instead of retreating) provided no enemy Naval units are present to contest the hex. Vacant enemy bases can be blockaded. One blockading unit must remain face-up.
5.71 A Blockaded player controls the land area of a hex. Blockaded ground units can enter or leave the hex by ground movement, and enemy air units can land in a blockaded hex.
5.72 Blockading units have Sea Control. This means that enemy sea movement and Sea Supply into or through that hex are prohibited. Conversely, friendly naval movement and supply into or through a blockaded hex is allowed. Unsupplied units cannot initiate or maintain a Blockade.
5.73 Units dependent on a base for supply become unsupplied if that base is blockaded. The effect can be deadly! Blockaded units avoid supply attrition if they have a Rail Supply line.
5.74 Production and Victory Points in a blockaded base require Rail Supply to be counted.
5.75 Air and Ground units can Move, Retreat, or Regroup to a friendly base under enemy blockade.
5.76 Naval units can Move, Retreat, or Regroup to a hex blockaded by their own units. They cannot Retreat or Regroup to an enemy blockade hex.
5.77 Combat is not mandatory in Blockade Hexes, unless the blockaded player moves a naval unit into the hex. Every Combat Phase either player may initiate normal combat with the units present and/or with new units added. Blockading units pin an equal number of defending units. Blockading units are always the defender for naval battles, but are attacking units for air and ground combat.
5.78 Blockades can be maintained but not established during Monsoon, North Pacific winter, or Typhoon hexes.
5.79 The blockading player can end a blockade simply by moving his units away during the movement phase. If supply is cut to blockading units, they take a one (1) step loss in the Logistics Phase as normal, but must then immediately retreat to a friendly or neutral adjacent hex.
Blockades (sidebar): Blockade hexes are unique; one player controls the land, one the water. The player controlling the land has ultimate control of the hex, but the blockading player interdicts all enemy Sea Movement and Sea Supply. Since control of the land does not change with a blockade, the blockaded player can land aircraft in such hexes. However, these Air units, unless they have Rail Supply, will be unsupplied and subject to supply attrition. Blockades can be deadly because they may isolate a major base and thereby collapse a Supply Chain. An entire fleet may find itself unsupplied because one enemy cruiser blockades a major base some distance away. An unsupplied naval unit cannot initiate or maintain a blockade. Submarines are particularly deadly on blockade because they can move and trace supply through an enemy controlled hex.
5.8 Sea Invasions
Sea Invasions are attacks by Marines or Infantry into an enemy base via a sea hexside. They cost two (2) Strategic Moves (2sm) per ground unit if a base is defended, or 1 strategic move (1sm) if vacant. Invasion Range is two (2) hexes. Two units may invade if 4 strategic moves are spent to attack, or 2 strategic moves are spent to invade a vacant base. Invasions are declared by turning one (1) invading unit face-down.
Invading Infantry retreat to any friendly base within two (2) hexes, subject to stacking. Units that cannot retreat are eliminated.
Invading Marine and Naval units can also retreat to any friendly or vacant sea, island, or coastal hex.
Invading units cannot land until all enemy Naval units in the battle hex have retreated or been eliminated. Invading units may then move ashore in a landing phase which occurs before any Ground units fire. Invading units may postpone a landing until the landing phase of rounds 2 or 3.
Invading units fire in the same round they land; defending ground units with the same Combat Turn fire first.
IMPORTANT: Marines and Infantry conducting Sea Invasions count toward stacking as naval units until they land, then they count toward Ground stacking.
Invasion Timing (sidebar): Units invading a vacant enemy base are still creating a battle. They cannot land and take control of the base until the Combat Phase. Therefore, players cannot move units strategically to this base until the following turn. If Player-2 responds to an invasion battle, the reinforcement does not arrive until round 2 as normal. An invading unit that lands in round 1 can be blockaded by a Player-2 reinforcement if naval control changes during rounds 2 or 3. The invader might prefer to retreat in round 1 instead of landing and being blockaded. Invading ground units land between the last naval unit to fire, and the first ground unit to fire. The invading player may delay a landing until the 2nd or 3rd Combat Round. Once a landing is made, ground combat proceeds normally.
5.9 Raids
Raids cost 1SM per unit.
A raiding unit moves up to double range, then fires first on any target unit of choice. The target returns fire (if it survives) and the raider then retreats immediately. Raids are resolved in the Combat Phase normally.
Raids cannot be used by either player to support or reinforce a battle. Raiding units cannot move over or through enemy units or vacant enemy bases, except for submarines.
A Raid cannot be a Sea Invasion. Raiding units retreat to their starting hex. If that hex is now enemy controlled, move raiding units directly to the nearest friendly base with a 1-Step loss. Regrouping after a Raid is prohibited.
Raids (sidebar): Raids can be used to mount a four (4) hex carrier or submarine attack, or a two (2) hex air or infantry attack. Hence, an Air Raid could be used to bomb Japan from Saipan, or mount a Japanese Carrier Raid on Ceylon.
6.0 Weather
6.1 Monsoons
Monsoon weather affects the JUN turn in all hexes with Jungle terrain. Operation movement is not affected, but ground combat lasts only one (1) combat round. Sea Invasions allowed (one round) but Raids and Strategic Movement in/out of Monsoon hexes are prohibited.
6.2 North Pacific
The region north of the blue dashed line is notorious for storms in winter and dense fogs in late spring. In DEC and MAR turns, units can enter, leave, or move normally within the zone, but cannot engage in combat. Raids, Sea Invasions, and Strategic Movement in/out of the zone are prohibited. Major bases cannot be built in this zone.
6.3 Typhoons
There are six typhoon hexes marked on the map. During each SEP game turn Player-2 rolls one die. The number rolled indicates the center of a particularly destructive typhoon. All units in that hex and in each adjacent hex, are affected by the storm. Units cannot move into, through, or leave the zone. In the Logistics Phase, units in a typhoon zone cannot receive replacements.
Typhoons (sidebar): Named from the Chinese tai-fung, meaning "great wind", typhoons are the Pacific equivalent of hurricanes. Wind speeds can exceed 150 knots. There are typically 12-18 typhoons every season, some worse than others, but all bad for local shipping. A major storm 300 miles east of the Philippines sank three US destroyers in Dec/44, and another in Oct/45 caused great damage to the US fleet moored in Okinawa (where the planned invasion of Japan in Nov/45 would have been assembling had the war not ended in Aug/45).
7.0 Logistics
Each Game Turn ends with a Logistics Phase during which Supply and Replacements are determined.
7.1 Supply
The supply of all units is determined during the Logistics Phase. Unsupplied units cannot build steps this phase and are subject to one (1) step loss, except all ground units at step-1 are immune to supply attrition.
IMPORTANT: Unsupplied naval units do not cut enemy supply lines.
7.11 Supply Lines
Units are supplied when they can trace 1 or 2 friendly or neutral Sea or Rail hexes to a supplied MAJOR base. That base must then trace to a Home base (see: 2.23) via a Supply Line.
A Supply Line is a chain of friendly major bases, each no more than three (3) hexes apart, via friendly or neutral hexes, and terminating in a friendly Home Base.
Supply lines can be Rail and Sea hexes and these may be combined.
IMPORTANT: Supply can be traced through vacant or occupied enemy bases that are friendly blockaded.
7.12 China Supply
Chinese units are always in supply in all bases within China. They need a sea or rail supply line to any Chinese major base when located outside China.
7.13 British Supply
British, ANZAC, and Indian units trace supply to South Africa via Bombay, Columbo, Batavia, Perth, or Melbourne.
7.14 American Supply
American units trace supply to any U.S. Home Base, including Panama via Hawaii, Samoa, or Tahiti.
7.15 Allied Cross-Supply
Allied bases and units can trace supply to either Panama or South Africa. British units can trace to Panama to avoid attrition, but rebuilding costs are doubled. The same applies to USA units tracing to South Africa.
Supply Chains (sidebar): A major base must be supplied to function as a Supply Source for units, meaning the base can trace an unbroken chain of friendly major bases to a Home base. Each link in the supply chain can be no more than three hexes apart (except for the last link to a map box (see 7.12). Example Allied supply chains are given.
- [1] FIJI – Tahiti – Panama.
- [2] FIJI – Samoa – Panama.
- [3] FIJI – Auckland – Melbourne – Perth – South Africa.
- [4] SAIPAN – Kwajalein – Hawaii – San Diego.
- [5] MANILA – Darwin – New Caledonia – Samoa – Panama.
- [6] MANILA – Batavia – South Africa.
EXAMPLE 1: if Samoa is occupied by the Japanese, and Tahiti is also occupied (or Blockaded) then supply chains [1] and [2] are cut. Fiji would still be in supply provided it has a supply link to South Africa such as [3].
EXAMPLE 2: Supply chain [4] requires that Saipan and Kwajalein, being Japanese bases, remain occupied by Allied units. This means both land and sea control. A Blockade is not sufficient to establish a supply link, although it is sufficient to break an enemy one.
EXAMPLE 3: Supply Chains to Panama [5] and South Africa [6] are shown. If the Panama link is cut, the Manila 1pp cannot be counted by the Allies, and American units dependent on Panama for supply cannot be built.
7.2 Replacements
After the supply and attrition of units is determined, players simultaneously deploy replacements. Unsupplied units cannot receive replacements.
7.21 Production Points (PP)
Both players have a number of Production Points (PPs) that vary with control of economic centers on the map. Players expend their PPs to build new units or add steps to existing units.
7.22 Economic Centers
The Japanese begin the game (Dec 41) with economic centers worth 14pp while the Allies have 46pp. Captured bases do count toward PP totals but they must be garrisoned or control reverts back to the original owner (Dutch PPs are British).
American PPs are spent on American units, except 1pp can go to China if Dhaka is Allied. British PPs are spent on any British Empire units, except 1pp can go to China if Rangoon is Allied. Japanese PPs captured by the Allies are added to the controlling USA or British totals.
Economic Centers must be in supply to provide PPs. They must be able to trace one or two hexes to a supplied major base and then have a valid Supply Line (7.11) back to a Home base (cross-supply 7.15 OK). Blockaded bases provide no PPs unless they have Rail Supply.
7.24 Replacement Pool
Units not deployed on the map are built with available PPs during the Logistics Phase. Keep offboard units upright to maintain fog of war for your build choices.
NOTE: some units have a year printed in their upper right. These units cannot be built until the appropriate year.
7.25 Unit Costs
Each unit has a cost per step as noted on the Unit Data Table. Units can only be built-up at friendly bases. Base size limits the number of steps that can be built:
- Panama: 4 steps
- South Africa: 3 steps
- Major Base: 2 steps
- Minor Base: 1 step.
A maximum of two (2) steps can be added to any one unit. Unspent PPs are forfeit.
New U.S. units must be built in Home bases, except new naval units must be built in Panama. British air and naval units must be built in South Africa. See 7.26 and 7.27 for Infantry.
7.26 Indian Forces
Indian forces are five infantry corps. New units must be built at a friendly major base in India (including Ceylon). Steps can be added to supplied units elsewhere.
7.27 Anzac Forces
Anzac forces are four (4) infantry corps, one Royal Australian Air Force (RAAF) and one Royal Australian Navy (RAN) cruiser. New ANZAC infantry are built at a friendly major base in Australia or New Zealand. The RAN and RAAF units are built in South Africa. Steps can be added to supplied units elsewhere.
7.28 Chinese Forces
Chinese PPs must be spent on their own units. New units must be built at a friendly base in China. Steps can be added to supplied units elsewhere.
7.29 Garrison Detachments
The Japanese player may detach a Garrison from an Infantry located in a Major Base, subject to stacking. Reduce the Infantry by 1 step and deploy a GA1 in the same hex. Merging units is prohibited.
Optional Rules
[ ] First Air Strike: First air strike against naval units can be determined randomly, modified by Air strength. Both players roll two dice (2d6) and add 1 for each AIR step in the battle hex, including Carriers, but do not include Air or Carrier steps that are battle reinforcements. For example, a player with AF3 and CV2 in a battle rolls 2d6+5. The player with the highest total discovers the enemy fleet first, and gains the advantage of first strike for all units having the same combat turn for the entire battle. That is, if the Attacker wins the Search Roll, attacking "B" units fire before defending "B" units. NOTE: Air Search does not affect the status of Defender in the hex.
[ ] Anti-Submarine Warfare (ASW): Submarines become their own target group. They can be attacked only by Anti-Submarine Warfare (ASW) combat. Allied naval units (except CV) have ASW firepower of N2 and the Japanese have N1. The firepowers of Air units, Carriers, and Submarines are unchanged.
[ ] Banzai: During Ground combat the Japanese player may choose to make a Banzai attack with individual Infantry or Marine units. The unit acquires G3 firepower for one fire against a designated target unit, but is then eliminated unless it eliminates the target unit.
[ ] Fanatic Defense: Japanese Infantry and Marines have D2 defending any terrain, but cannot retreat.
[ ] Combat Round 4: A fourth Combat Round is played which functions as a pursuit round. In this round the Defender can fire, but the Attacker must retreat in the normal combat sequence.
[ ] Overruns: Players have the option to move units Operationally through pinned enemy units. Example: American units occupy Midway, Wake, and Kwajalein. Japanese units occupy Saipan and have two units in the Sea hex between Saipan and Kwajalein. The Allied player moves one naval unit from Midway, and one Air unit from Wake to engage the two Japanese units in the Sea hex. Four naval units may now move from Kwajalein through the Sea hex to attack Saipan.
8.0 Scenarios
Players have the option to play one of three scenarios (times are for experienced players):
- 1941: Rising Sun (4 hours)
- 1942: High Noon (3 hours)
- 1943: Setting Sun (2 hours)
Each game has the same victory conditions, but starts later in the war.
8.1 Victory Levels
Pacific Victory is played until one player gains a Decisive Victory, or until completion of the Jun/45 Turn. At this time, the Japanese player totals Victory Points (VPs) and consults the table below:
| JVPs | Victory Level | TPs |
|---|---|---|
| 25+ | Japanese Decisive | 3 |
| 16–24 | Japanese Victory ('45) | 2 |
| 13-15 | Stalemate ('45) | 1/1 |
| 6-12 | Allied Victory ('45) | 2 |
| 0-5 | Allied Decisive | 3 |
Victory Points are equal to supplied Production Points. Tourney Points (TPs) can be used to compare game results.
8.11 Decisive Victory
The game ends immediately if a player holds a Decisive Victory after any Game Turn.
8.12 Indian Surrender
India surrenders if all major bases (Bombay, Columbo, and Calcutta) are Japanese occupied (not just blockaded). All surviving Allied units within India (including US units) are eliminated. Indian infantry cannot be rebuilt until a major base in India is liberated or vacated. Other Allied units that surrender can be built normally. All Indian bases must still be garrisoned by the Japanese or they revert to Allied control.
8.13 ANZAC Surrender
Australia surrenders if all major bases (Darwin, Perth, Brisbane, Sydney, and Melbourne) are Japanese occupied (not just blockaded). Any surviving Allied units within Australia (including US units) are eliminated. Anzac forces (Air, Naval, and Ground) cannot be rebuilt until a major base in Australia or New Zealand is liberated or vacated. Other Allied units that surrender can be rebuilt normally. All Australian bases must still be garrisoned by the Japanese or they revert to Allied control.
8.14 China Surrender
China surrenders if all major bases (Peking, Shanghai, Canton, Lanchow, and Chungking) are Japanese occupied (not just blockaded). Any surviving China units (including Allied units) are eliminated. Chinese units cannot be rebuilt until a major base in China is liberated or vacated. Other Allied units that surrender can be rebuilt normally.
8.2 Deploying Units
Each scenario gives the strength and location of starting forces. Place units in the hexes indicated, standing upright at their noted strength. Hence, BB3 is a Battleship at strength 3 and NA2 is a Naval Air at strength 2.
8.21 Free Deployment
Free deployment allows players to devise their own unique war-opening strategies and better reflects the fog of war of initial enemy deployments.
- Deploy units per scenario.
- Switch units as desired from base to base, but keep all units at their current strength, and maintain the same total number of units at each deployment location.
EXCEPTIONS: In the 1941 scenario, the Allied player cannot adjust Hawaii forces because anything deployed there would have been sunk or damaged in the Pearl Harbor raid. Similarly, the Japanese Air Fleet in Truk cannot be changed.
Example: Japanese Builds
The Japanese player has 18pp and elects to build two new (*) units at home, and adds six steps to five existing units:
| Steps | Location | Cost |
|---|---|---|
| *AF2 | Kure (New Unit) | 4pp |
| CA2 | Singapore | 2pp |
| IN1 | Bangkok | 1pp |
| SS2 | Rabaul | 4pp |
| CV1 | Truk | 4pp |
| BB1 | Truk | 3pp |
| TOTAL | 18pp |
Example: Allied Builds
The Allied player with American 24pp and British 12pp makes the following builds:
| Steps | Location | Cost |
|---|---|---|
| *CV2 | Panama (New) | 8pp |
| *CA2 | Panama (New) | 2pp |
| *AF2 | Seattle (New) | 4pp |
| SHQ1 | Hawaii | 2pp |
| IN1 | Hawaii | 1pp |
| IN2 | Fiji | 2pp |
| AF2 | New Caledonia | 4pp |
| China | via Dhaka | 1pp |
| USA TOTAL |
Victory in Europe
Victory in Europe and Pacific Victory can be played simultaneously. The following links between the two games may arise.
- Japanese Victory: Japan attacks Soviet Union on the next available Game Turn. The effect is to reduce Soviet units by a total of 12 steps, and reduce Soviets by 6pp each Production turn.
- Stalemate: No effects.
- Allied Victory: Soviets gain 6pp each Production turn.
NOTE: transfer of actual units between the two games is not practical. Ground units in VE are armies, but in PV they are corps. One step in VE represents approximately three steps in PV.
DEC/41: Rising Sun (1941 Scenario)
Japan: 14pp
- Tokyo (4): IJA4, IN3, AF1, BB3 Ise.
- Kure (6): IJN 3, IN2, MA2, NA2, BB3 Nagato, BB1 Yamato.
- Hakodate (2): IN1, MA1.
- Seoul (1) IN2.
- Harbin (2) GA2, AF1.
- Peking (2) IN3, IN3.
- Shanghai (3) IN4, AR3, AF3.
- Canton (3) IN4, IN3, AF2.
- Okinawa (1): GA1.
- Formosa (6): IN2, IN1, AF2, SS2, CA2.
- Hanoi (2): IN3, CA3, NA3.
- Saigon (5): IN2, NA3, BB2 Fuso, CA3.
- Bankok: IN2, AF2.
- Palau (4): GA1, MA1, CV1 Soryu, CA2.
- Truk (5): IN2, BB2 Kongo, CV3 Akagi, CV3 Shokaku, CA3, See: Airfleet note below.
- Saipan (2): GA2, SS3.
- Kwajalein (5): GA1, MA2, NA2, SS3, CA2.
Allies: 46pp
United States: 25pp
- Dutch Harbor (1): CA2.
- Anchorage (2): IN1, AF1.
- Seattle (1): AF2.
- San Francisco (2): IN2, AF1.
- San Diego (3): IN1, SS1, CV1 Lexington.
- Panama (2): MA1, BB3 New Mexico, CA2.
- Hawaii (5): SHQ1 Nimitz, IN2, BB1 Tennessee, AF2, CA3.
- Midway (2): AF1, SS2.
- Johnston Is. (2): CV2 Enterprise, CA4.
- Samoa (1): CA1.
- Manila (4): SHQ1 MacArthur, IN1, AF2, SS2.
- Davao (1): CA1.
- Borneo (1): SS1.
British Empire: 17pp
- South Africa (1): CV1 Illustrious.
- Bombay (1): IN1.
- Columbo (2): IN1, CA2.
- Calcutta (2): SHQ1 Wavell, IN2.
- Rangoon (1): IN1.
- Singapore (3): IN2, RAF1, BB2 King George V.
- Sydney (2): IN2 (anz), RAAF1.
- Brisbane (2): IN1 anz, CA2 ran.
- Darwin (1): IN1 (anz).
- Port Moresby (1): IN1 (anz).
China: 4pp*
- Lanchow (2) PRA3, PRA2
- Chungking (4) SHQ2, IN4, IN4, AF3.
- Kunming (2) IN3, AF2 (Tigers).
* British may transfer 1pp to China if Rangoon is Allied. USA may transfer 1pp to China if Dhaka is under Allied control.
NOTE: Ship names are classes, not individual ships. Cruiser classes are not given starting locations.
Force Totals (units/steps): 1941
| Type | Japan | Allies |
|---|---|---|
| SHQ | 2/7s | 4/9s |
| NA | 4/10s | - |
| AF | 6/14s | 10/16s |
| CV | 3/7s | 3/4s |
| SS | 3/8s | 4/6s |
| BB | 5/11s | 3/6s |
| CA | 6/15s | 8/17s |
| AR | 1/3s | - |
| MA | 4/6s |
Special Rules (1941)
Air Fleet: The game starts assuming the Japanese airstrike on Pearl Harbor has occurred. The Air Fleet (red type) that made that attack is deployed in Truk, but cannot move in the opening turn.
Philippine Army: The IN1 in Manila represents the American-Philippine Army. It cannot be withdrawn from this hex; other units can flee the islands once the war starts. If eliminated, the infantry may be rebuilt in a USA Home base as an American Infantry. SHQ MacArthur if eliminated is rebuilt at step-1 in any friendly major base in Australia for a cost of 2pp.
Surprise Attack: The Japanese player is always Player-1 in the first turn, and the Allies do NOT have Double Defense for combat round 1 anywhere except China.
[ ] Pearl Harbor Airstrike (optional): Pearl Harbor is a difficult event to simulate in a grand strategic game. It can be replayed before the game begins as a surprise RAID (5.9) by two Japanese carriers against a defending Pearl Harbor force of AF3, SS2, BB4, BB4, CA3, and IN2:
- Japanese carriers (CV3, CV3) fire first at N3 with double dice (12) to reflect surprise. Losses are applied to targeted BBs.
- Surviving US BBs are the only Allied units that can fire, doing so with their "Air" firepower. Hits are applied only to Japanese CVs (representing lost aircraft).
- There is only one combat round. The Japanese Air Fleet then retires to Truk and cannot move on Dec/41 turn.
[ ] Star-Spangled Singapore (optional): During Lend-Lease negotiations in 1940 Churchill offered Singapore as a base to the US Pacific Fleet. The offer was intended to discourage Japanese aggression or, if that failed, to ensure America would be directly involved in the war. The offer, although attractive, was rejected because it might embroil America in colonial politics. However, on the assumption that the offer is accepted, the American player may deploy up to three naval units at Singapore. One of these can be BB4 Tennessee from Hawaii since it and other BBs would have escaped the Pearl Harbor attack.
JUN/42: High Noon (1942 Scenario)
Japan: 21pp
- Tokyo (6): IJA4, IN3, AF2, BB3 Ise, BB3 Nagato, CA3.
- Kure (5): IJN 4, IN2, CV3 Akagi, BB2 Kongo, BB1 Yamato.
- Hakodate (1): IN1.
- Seoul (1) GA2.
- Harbin (2) GA2, AF2.
- Peking (2) IN3, IN3.
- Shanghai (3) IN4, AR3, AF3.
- Canton (3) IN4, IN3, AF2.
- Kuriles (3): MA1, CV1 Hiyo, CA2.
- Formosa (1): IN2.
- Manila (2): IN2, AF2.
- Davao (2): CV1 Soryu, CA2.
- Palau (1): GA1.
- Hanoi (1): IN3.
- Bangkok (2): AF3.
- Rangoon (1): IN2.
- Andamans (1): GA1.
- Singapore (3): IN2, BB2 Fuso, SS3.
- Palembang (1): GA1.
- Batavia (1): GA2.
- Borneo (1): CA3.
- Timor (1): NA2.
- Manokwari (1): GA1.
- Hollandia (1): IN1.
- Lae (1): IN1.
- Rabaul (5): MA1, NA2, SS2, CA3, Major Base.
- Saipan (2): GA1, SS3.
- Guam (1): MA1.
Allies: 35pp
United States: 24pp
- Anchorage (2): IN2, AF2.
- Dutch Harbor (1): CA2.
- Seattle (3): BB2 Tennessee, CA2, AF1.
- San Francisco (1): IN1
- San Diego (2): CV2 Lexington, CA2.
- Panama: MA1, BB2 South Dakota.
- Hawaii: SHQ4 Nimitz, IN3, AF3, CA3, CV3 Enterprise, BB3 New Mexico.
- Midway: AF1, SS3.
- Samoa: IN1.
- Fiji (2): MA1, CA2.
- New Hebrides (1): AF1 (us).
- New Caledonia: IN1, CA3.
- Brisbane (2): SHQ2 MacArthur, IN2 (us), SS1 (us).
- Townsville (1): AF1 (us).
British Empire: 11pp
- South Africa (2): CV1 Illustrious, BB2 King George V.
- Bombay (1): IN2.
- Columbo (2): IN2, CA2 Swiftsure
- Madras (2): IN1, RAF2.
- Calcutta (2): SHQ2 Wavell, IN3.
- Dhaka (2): IN2.
- Perth (2): SS2 (us).
- Darwin (1): IN1 (anz).
- Brisbane (1): ??
- Sydney (3): IN2 (anz), RAAF1, CA1 (ran).
- Port Moresby (1): IN1 (anz).
China: 4pp*
- Lanchow (2): PRA3, PRA2
- Chungking (4) SHQ2, IN3, IN3, AF3.
- Kunming (2): IN3, AF2 (Tigers).
- Chengdu (2): IN2.
* British may not transfer 1pp to China since Rangoon is currently under Japanese control. USA may transfer 1pp to China if Dhaka is under Allied control.
Force Totals (units/steps): 1942
| Type | Japan | Allies |
|---|---|---|
| SHQ | 2/8s | 4/10s |
| NA | 4/8s | - |
| AF | 6/15s | 10/18s |
| CV | 4/7s | 3/6s |
| SS | 4/11s | 3/6s |
| BB | 5/11s | 4/9s |
| CA | 6/15s | 8/17s |
| AR | 1/3s | - |
| MA | 4/6s |
Special Rules (1942)
Elite Naval Units: The Allied CV Essex, BB Iowa units, and two CA's cannot be built until the March/43 turn. Japanese have CVs built in '42 and '44.
Allied Commands: The Pacific is divided into two commands: CPAC (Central Pacific Area) commanded by Admiral Nimitz, and SWPA (Southwest Pacific Area) commanded by General MacArthur. Britain's General Wavell commanded SEAC (South East Asia Command) covering India, Burma, Siam, and Malaya. Mountbatten replaced Wavell in October 1943.
Allied SHQs command all units in their theater. Hence, if naval units move into SWPA from CPAC, they are commanded by MacArthur.
[ ] MacArthur's War (optional): The USA must spend at least one third of their PPs in each of CPAC and SWPA. The remaining third can be spent as desired. This usually makes for some interesting table politics if the two commands are handled by separate players.
JUN/43: Setting Sun (1943 Scenario)
Japan: 21pp
- Tokyo (5): IJA3, AF2, IN3, BB2 Yamato, CA2.
- Hakodate (1): GA1.
- Kure (6): IJN2, GA2, CV2 Hiyo, BB3 Ise, BB1 Nagato, CA3.
- Seoul (1) GA2.
- Harbin (2) GA2, AF2.
- Peking (2) IN3, IN3.
- Shanghai (3) IN3, AR2, AF3.
- Canton (3) IN3, IN3, AF2.
- Hanoi (1): IN3.
- Kuriles (1): GA1.
- Okinawa (1): GA1.
- Formosa (1): IN2.
- Manila (1): IN2.
- Davao (1): IN1.
- Rangoon (1): IN3.
- Bangkok (1): AF2.
- Singapore (4): IN2, CV2 Soryu, BB2 Fuso, CA2.
- Andamans (1): GA1.
- Palembang (1): GA1.
- Batavia (1): GA2.
- Borneo (1): GA1.
- Timor (1): NA2.
- Manokwari (1): IN2.
- Hollandia (1): AF2.
- Lae (1): IN3.
- Rabaul (5): IN4, NA3, SS2, CA2, Major Base.
- Guam (1): MA1.
- Saipan (1): SS1.
- Wake (2): MA1, SS2.
Allies: 35pp
United States: 23pp
- Anchorage (1): AF2.
- Dutch Harbor (1): CA2.
- Attu (2): IN2, CA2.
- Seattle (2): AF2, BB3 Tennessee.
- San Francisco (1): IN2.
- San Diego (2): CV2 Lexington, CA2.
- Panama (4): CV2 Essex, CV1 Hornet, BB1 Iowa, CA3.
- Hawaii (7): HQ4 Nimitz, IN3, AF2, CV2 Enterprise, BB2 New Mexico, CA3, SS3.
- Midway (1): SS3.
- Samoa (1): MA2.
- Fiji (1): MA2.
- New Hebrides (1): AF3.
- New Caledonia (3): IN1, CA3, BB2 South Dakota.
- Guadalcanal (1): IN2.
- Brisbane (2): IN2 (ANZ), SS2.
- Port Moresby (4): HQ3 MacArthur, IN3 (ANZ), IN2, AF3.
British Empire: 12pp
- South Africa (3): CV2 Illustrious, BB3 King George V, CA3.
- Bombay (1): IN1.
- Columbo (2): IN1, RAF2.
- Madras (1): IN2.
- Calcutta (2): HQ2 Wavell, IN3.
- Dhaka (1): IN3
- Darwin (2): IN1 (ANZ), RAAF2.
- Perth (1): SS3 (us).
- Sydney (1): CA1 (ran).
China: 4pp*
- Lanchow (2): PRA3, PRA2
- Chungking (4) HQ2, IN3, IN3, AF2.
- Kunming (2): IN3, AF2 (Tigers).
- Chengdu (2): IN2.
* British may not transfer 1pp to China since Rangoon is currently under Japanese control. USA may transfer 1pp to China if Dhaka is under Allied control.
Force Totals (units/steps): 1943
| Type | Japan | Allies |
|---|---|---|
| SHQ | 2/5s | 4/11s |
| NA | 4/10s | - |
| AF | 6/14s | 9/20s |
| CV | 3/6s | 5/9s |
| SS | 4/7s | 4/11s |
| BB | 5/9s | 5/11s |
| CA | 6/13s | 8/19s |
| AR | 1/2s | - |
| MA | 4/5s |
Special Rules (1943)
Allied Submarines: Beginning in SEP/43, all Allied submarines have N2 firepower to reflect their improved torpedoes.
Kamikaze: Starting this scenario the Japanese player has the option to declare, at the start of any battle, that one or more Naval Air unit(s) in this battle will be Kamikaze. Each Kamikaze has N4 firepower and targets one (1) Allied naval unit, fires, then self destructs. All hits apply to the target unit. The decision to become Kamikaze cannot be changed. Kamikaze units can never be rebuilt.
Play Charts
Sequence of Play
- Initiative: Determine Initiative with 2d6 roll. Highest total has the option to play first or second. Allies win ties.
- Player 1 Move: Make Operation (4.11), or Strategic (4.12) moves as desired. Strategic moves require activation of an SHQ.
- Player 2 Move: Repeat step 2 except pinned units cannot move. Moves that reinforce a pending battle arrive in Combat Round 2.
- Resolve Combat: Resolve all battles in sequence determined by Player 1. See Combat Sequence. Landing Phase: invader may land if there are no opposing naval units.
- Logistics (Simultaneous):
- Determine Supply. Unsupplied units lose 1 step, except ground units at Step-1 are immune to supply attrition.
- Determine Production (PPs). American and British PPs are counted and spent separately.
- New units are built in Home Bases. Steps can only be added to existing units in supplied bases. Maximum of 1 step per minor base, and 2 steps (same or different units) per major base.
Combat Sequence
(The Combat Sequence chart is a graphic in the source PDF and is not reproduced here.)
Stacking Chart
| Base | Air | Naval | Ground |
|---|---|---|---|
| Minor | 1 (1) | 4 | 1 (2) |
| Major | 1 (1) | 4 | 2 |
| Sea | 1 (1) | 4 | 0 (3) |
- Air unit flying CAP or attacking.
- SHQs do not count for stacking.
- Marine and infantry units making a Sea Invasion count for naval stacking and take hits as naval units until they land. Marines can remain at sea indefinitely.
Unit Data
| Unit | Move | Combat A–N–G | Step Cost |
|---|---|---|---|
| NA Naval Air | 1 | 2-3-1 | 3pp |
| AF Army Air | 1 | 2-2-2 | 2pp |
| CV Carrier | 2 | 2-3-1 | 4pp |
| SS Submarine | 2 | 0-2-0 | 2pp |
| BB Battleship | 2 | 1-3-2 | 3pp |
| CA Cruiser | 2 | 1-2-1 | 1pp |
| MA US Marines |
NOTE: Firepowers vary for some units from the values listed above. Check the unit when firing.