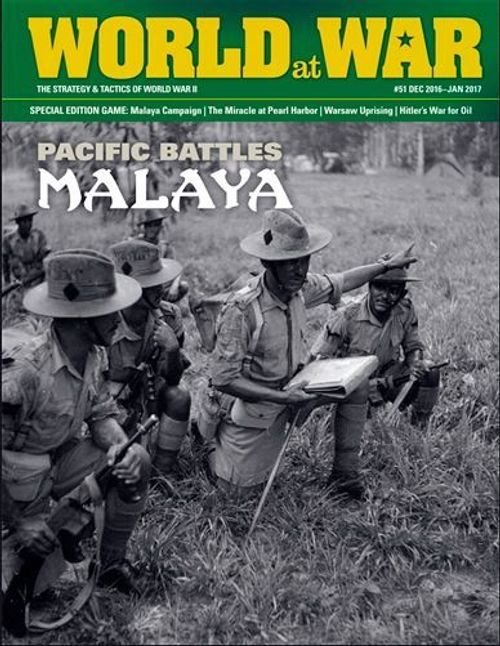
Pacific Battles: Malaya 1941
Pacific Battles: Malaya 1941 Rulebook
Table of Contents
Table of Contents
- 1.0 Introduction
- 2.0 Game Components
- 3.0 How to Set Up the Game
- 4.0 Sequence of Play
- 5.0 Command Markers
- 6.0 Reinforcements
- 6.1 Receiving Reinforcements
- 6.11 Routine Reinforcements
- 6.12 Scheduled Reinforcements
- 6.13 Campaign Marker Reinforcements
- 6.14 Optional Reinforcements
- 6.2 Placing Reinforcements
- 6.21 Placement Strictures
- 6.22 Placement Requisite
- 6.23 Overstacking During Placement
- 6.24 Interdiction
- 6.25 The Lost Battalion
- 7.0 Logistics
- 8.0 Suppression
- 9.0 Reorganization
- 10.0 Headquarters
- 11.0 Movement
- 12.0 Ground Unit Stacking
- 13.0 Zones of Control
- 14.0 Land Combat
- 14.1 Attacking & Defending
- 14.11 Mandatory ZOC Combat
- 14.12 Zero Attack-Factor Units
- 14.13 Attacker's Prerogative
- 14.14 One Battle per Unit per Combat Phase
- 14.2 Declaring All Battles First
- 14.21 Multiple Unit & Multi-Hex Battles
- 14.22 Combining Units in a Battle
- 14.23 Adjacency
- 14.24 Diversionary Attacks
- 14.25 Combat Strength Unity
- 15.0 Implementation of Combat Results
- 16.0 Air Operations
- 17.0 Naval Bombardment
- 18.0 Fog o' War
- 19.0 Headquarters (HQs)
- 20.0 Engineer Units
- 21.0 Fortifications
- 22.0 Amphibious Movement
- 23.0 Evacuation
- 24.0 Victory Conditions
- 25.0 Malaya Campaign Scenario
- 26.0 Scenario Special Rules
- Malaya Scenario Charts (printed on pages R14-R16)
- Source Gaps
1.0 Introduction
Pacific Battles is a wargame series of several campaigns in the Pacific theater of operations in World War II. The system emphasizes the operational level of these campaigns, and deals with land and air operations. This is a two-player game. One player controls the Japanese, the other the Allies.
Malaya is the fourth game in the series. It covers the entire land-air campaign for the strategic city of Singapore in February 1941.
2.0 Game Components
2.1 Game Equipment
A complete set of Pacific Battles should include the following components: one game map, one set of game rules, 228 die-cut counters, one set of game charts (printed on the map or in the rules).
Players will also need one six-sided die.
Players will need two opaque containers in which randomized markers will be placed.
2.2 Game Map
The game map shows the area in which the original battle or campaign was fought. A hexagonal grid has been superimposed on the mapsheet to regularize movement of units, and to delineate terrain types.
Errata: the map's terrain key mistakenly lists Mountain terrain as "rough". The terrain effects chart is correct (Mountain).
Air Operations Display: This is placed on the map. It is used to organize players' air units for various air operations.
2.3 The Counters
There are three basic types of counters in the game:
- Land Units, which represent military forces.
- Air Units, which represent the impact of air sorties.
- Markers, which are used to record various game functions and other information.
Errata: one of the two Allied infantry brigades with unit ID "55th" should be "46th."
2.31 Ground Units
Certain combat units are backprinted.
- Combat Units: the front side is the unit's combat effective status. The reverse side is its Fog of War side.
- Headquarters: the front side is the activated side. The reverse side is the non-activated side. A headquarters which is activated can provide support to units within its radius.
- Supply Units: these are used like "change," with each supply unit representing "x" number of supply points.
The printed sample counters (Sample Combat Unit, Sample Headquarters Unit, Sample Supply Unit) are diagrams on the rules sheet; their labels are explained in the paragraphs below.
Unit size (printed symbols): XXXXX = army group HQ; XXXX = army HQ; XXX = corps HQ; XX = division HQ; X = brigade or brigade HQ; III = regiment or group; II = battalion or squadron; I = company; * = breakdown unit (see 9.0).
Unit abbreviations: See the Scenario.
Allied Controlled Units (Malaya): Tan = British.
Japanese Controlled Units: Brown = Japanese.
Breakdown units have a different tinted unit box.
Land Unit Types (printed on the counters): Infantry, Amtrac, Marines, Light Tank, Engineers, Halftrack, Special Forces, Anti-tank, Airborne, Airfield, Headquarters, Supply.
Attack Strength: The basic offensive strength of a unit. This is based on the effectiveness of the unit's firepower, training and leadership.
Defense Strength: The basic strength of a unit when it is defending.
Movement Factor: The basic number of hexes a unit may move in a turn.
Support Factor: The number of combat shifts a HQ may apply to friendly units within radius.
Command Radius: The number of hexes within which a HQ may support friendly units.
Unit Designation: The unit's historical identification, number or name.
Air Strike Types
Note: Air units represent the effectiveness of airpower, and may represent anything from 12 to 60 aircraft depending on the quality of the air force.
2.32 Unit Classes
Units are divided into two classes, Mechanized and Non-mechanized. Mechanized units are denoted by having the armor "oval" printed on them. All other units are non-mechanized.
Note: Mechanized and Non-Mechanized units pay different Movement Point costs to move on the map according to their class.
2.33 Game Markers
Game Markers are used for various game functions. Certain markers are backprinted with other types of markers. Players use whichever side they need for the current game function. The number of markers in the game is not a design limit; should players need more, they may improvise more.
- Command Level: Indicates the current number of Command markers the player can pick each turn.
- Fortified: Indicates a unit that has dug in.
- Suppressed: Indicates a unit that has suffered a Suppressed result.
- Turn: Used to indicate which turn (week) is in progress.
2.34 Game Charts & Tables
These are used to conduct certain game functions, and to simplify certain game procedures. These include:
- Air Superiority Table: This chart is provided to resolve air combat. Errata: The chart mistakenly lists two "6" columns. The second 6 column should be listed as the "7" column (the results are otherwise correct).
- Malaya Reinforcement Interdiction Table: This chart is used for all interdiction missions.
- Air Units Available/Mission Completed: Used to organize air units/fleets in play.
- Bombardment Table: Used to resolve naval and air to ground attacks.
- Combat Results Tables (CRTs): Used to resolve Land Combat; there are two CRTs, Raid and Assault.
- Action Markers: These are used to generate various random events as well as special actions. They are drawn from a player's Pool.
- Victory Points Markers: Used to indicate the current number of Military and Political Points each player has.
- Terrain Effects Chart: Used to show the effects of various terrain types on movement.
- Turn Record/Reinforcement Chart: Used to indicate the current game turn and phase. Each player has one such chart because they also place their reinforcements on it.
2.35 Other Equipment
You will need a six-sided die, pen and paper.
2.36 Definition of Terms
A number of critical rules are contained within these definitions.
- Activated Airfield: An airfield that is capable of basing aircraft. Note: airfield and airbase are used interchangeably.
- Activated HQ: A HQ which is on its front side and can provide support to other units. The reverse side (without a support value) is its Un-activated side.
- Column Shift: The changing of a column on a Combat Results Table. A rightward shift is in favor of the attacker; a leftward shift is in favor of the defender.
- Combat Effective: A combat unit that is cohesive, represented by the front side of the unit.
- Combat Unit: All land units other than HQs and Supply units.
- Command Control Level: The number of Command markers a player picks each turn.
- Control: A player controls a hex if one of his units occupies that hex.
- Die Roll Modifier: Certain game charts require a die roll modifier. A positive modifier is added to the result rolled on a die (e.g., a die roll modifier of +1 added to a rolled result of 3 would give a final outcome of 4). A negative die roll modifier is subtracted from the result rolled (e.g., a die roll modifier of -1 subtracted from a rolled result of 6 would give a final outcome of 5). Note this is distinct from column shifts.
- Enemy: Units belonging to the side opposing the player.
- Map: The hexagon portion of the playing surface.
- Non-phasing Player: The player who is not the Phasing Player (see below).
3.0 How to Set Up the Game
The game is played as scenarios. Each scenario shows one major battle or campaign.
3.1 Choosing Sides
Players choose which sides they will play. They then place the units for their side as listed under initial deployment, in the order listed. Other units which are received later in the scenario (reinforcements) are set aside (players may place them on the appropriate space on the Turn Record Track as a reminder).
Play starts with the first turn and continues on until the final turn, until one side gets a Sudden Death Victory, or until one player concedes. Use the Sequence of Play to determine which actions will be taking place at any point in the turn.
Units may be set up anywhere in the designated areas. They may not be set up in the same hex as enemy units, or enemy controlled bases and cities. Units may set up in enemy Zones of Control.
Each player simultaneously and secretly allocates all air missions for the turn.
3.2 Placing Turn Markers
Each player places their respective Turn marker on the first turn of the scenario.
3.3 Old Hands Note
Players perform all phases of the Sequence of Play on turn 1, including campaign marker picks and receiving routine reinforcements.
4.0 Sequence of Play
The game is played in turns called Game Turns. Each Game Turn is divided into two Player Turns (First and Second; these will be determined by the scenario). Each Player Turn is composed of several distinct segments called Phases. All actions take place in a prescribed order of phases, called the Sequence of Play.
4.1 Sequence of Play
PLANNING PHASE
- Initiative Determination Phase. The player who has the higher number of Victory Points (24.0) becomes the first player for the remainder of this turn; the other player is the second player. In the event of a tie, roll a die to determine who has the Initiative.
- Command Marker Phase (5.0). The First Player picks the number of Command markers designated by his command control level. The Second player picks the number of Command markers designated by his command control level.
- Air Mission Allocation Phase (16.0). Return any air units in mission boxes to the Reserve box. Each player simultaneously and secretly allocates all air missions for the turn.
- Air Superiority Phase (rule 16.0). Each player reveals all Air Missions. Execute all Air Superiority firing simultaneously.
- Reinforcement Phase (6.0). The First Player checks for any Reinforcement delay due to Interdiction and then places any reinforcements which will appear this turn. The Second player checks for any Reinforcement delay due to Interdiction and then places any reinforcements which will appear this turn. Note: Perform Interdiction missions at this time.
LOGISTICS PHASE (7.0)
- The First player: 1. Removes all suppression markers from his units. 2. Breaks down/combines units. 3. Expends supply units to Refit eliminated units, to Activate HQs, and to perform other designated logistical functions.
- The Second player: 1. Removes all suppression markers from his units. 2. Breaks down/combines units. 3. Expends supply units to Refit eliminated units, to Activate HQs, and to perform other designated logistical functions.
FIRST PLAYER INITIAL IMPULSE
- Movement Phase (rule 11.0). The First player moves some, none or all of his land units.
- Air/Naval Strike Phase (16.0 & 17.0). The First player executes any Air and Naval bombardments and air recon missions.
- Land Combat Phase (14.0). The First player conducts Land Combat.
SECOND PLAYER INITIAL IMPULSE
- Movement Phase. The Second player moves some, none or all of his land units.
- Air Strike Phase. The Second player executes any Air and Naval bombardments and air recon missions.
- Land Combat Phase. The Second player conducts Land Combat.
FIRST PLAYER FOLLOW-ON IMPULSE
- Movement Phase. The First player moves some, none or all of his land units that are within activated HQ radius.
- Air Strike Phase. The First player executes any Air and Naval bombardments and air recon missions.
- Land Combat Phase. The First player conducts Land Combat.
SECOND PLAYER FOLLOW-ON IMPULSE
- Movement Phase. The Second player moves some, none or all his land units that are within activated HQ command radius.
- Air Strike Phase. The Second player executes any Air and Naval bombardments and air recon missions.
- Land Combat Phase. The Second player conducts Land Combat.
END OF TURN PHASE
- Victory Points Phase (24.0). Players check for Victory Points gained at the end of the turn. If one player has achieved their Sudden Death Victory condition, the game ends.
- Game Turn Advance Phase. If this is the last turn of a scenario, the game ends. Otherwise, move the Turn marker forward one space.
Note: Players must follow the above sequence of play rigidly!
5.0 Command Markers
5.1 Picking Command Markers
During each Events Phase, the player picks a number of Command markers as per his own Command Control level at the start of the phase (per the amount listed on the map for each side). Markers are drawn at random from the Pool, one at a time. As each chit is picked, check the Command Marker Explanation Table and apply the result.
5.2 Command Control Level
In this particular game (Malaya), the Command Control level does not change for either side. They remain constant during the game.
5.3 Campaign Chit Outcomes
These are explained on the Chart, but to sum it up, certain markers must be played immediately. Other markers can be held and played later in the game. Certain markers are removed from the game once played, others are returned to the pool or remain in effect for the rest of the scenario.
5.4 Hold 'em If You Got 'em
A player may hold any number of Command markers.
6.0 Reinforcements
Reinforcements are additional units received in the course of the game. Reinforcements are placed in the friendly Reinforcement Phase.
6.1 Receiving Reinforcements
A player receives reinforcements as listed for the Scenario. Reinforcements are listed as Groups. Each Group will have one or more units in it.
6.11 Routine Reinforcements
Certain reinforcements (air and/or supply units) are listed as "Routine". These are received each and every turn. Other units are received only once per scenario.
6.12 Scheduled Reinforcements
These appear on a specific turn.
6.13 Campaign Marker Reinforcements
These appear only if a designated Campaign marker has been picked.
6.14 Optional Reinforcements
These are received only under the conditions listed.
6.2 Placing Reinforcements
6.21 Placement Strictures
Units are placed on the hexes indicated by the scenario during the Reinforcement Phase. They may not be placed in an enemy occupied hex or prohibited terrain. They may be placed in a hex containing an enemy ZOC. Players may voluntarily delay the introduction of reinforcements until a later turn.
6.22 Placement Requisite
If all placement hexes are unavailable, then the unit must be placed on the first available Reinforcement Phase. Reinforcements may move and fight normally in the turn they are brought into play. Placing them on the map does not count against their movement for the turn.
6.23 Overstacking During Placement
Reinforcements may be placed overstacked.
6.24 Interdiction
The Interdiction rule 16.6 may cause reinforcements to be involuntarily delayed or eliminated.
6.25 The Lost Battalion
If a reinforcement would enter the game after the last turn, then it is not received.
6.3 Replacements
A unit that has been eliminated in combat may be brought back into play as a replacement: see the Refit rule 7.5.
7.0 Logistics
7.1 Expending Supply Units
Logistics in the game is a function of expending supply units. All supply functions are conducted during the Logistics Phase. Supply is expended to conduct the following game functions:
- Activate an HQ.
- Refit eliminated HQ and Combat units.
- Repair damaged aircraft units.
- Build fortifications.
- Other functions as indicated.
7.2 Supply Radius
Each supply unit can provide supply to any units in its own or adjacent hexes. The presence of terrain and/or enemy ZOC does not affect a supply radius.
7.3 HQ Activation
Expend one Supply unit. One friendly HQ within supply radius is Activated. Flip that HQ to its Active side (or keep it there if it had been activated during the last turn).
An HQ that has been activated:
- Provides Support to units within its Support radius. This is explained below.
- Allows units within its Support Radius to move during the Follow-On movement phase.
Note: Enemy ZOCs do not interfere with the HQ activation of units.
7.4 Inactivation
A player must flip to its inactive side any and all HQs for which he did not expend a supply unit during a Logistics Phase.
7.5 Refitting Eliminated Units
Refit occurs during the Logistics Phase. Only units in the Replaceable Units/ Damaged Aircraft box may be replaced. Costs are as follows:
- Replace an HQ: Expend a number of supply points equal to its Support Value. If its Support Value is "0," the cost is 1 supply point.
- Replace a combat unit: One supply unit will replace up to three battalion equivalents.
- Replace an air unit: One supply unit will replace up to three air units.
7.51 Refit Replacement
Refit ground units are replaced immediately in the hex (or off-map base) in which the supply unit was expended. This may also be done in an off-map base.
7.6 Repairing Damaged Aircraft
Each supply point expended causes up to three air units in the damaged box to be shifted to the Ready box. For example, to repair four to six damaged aircraft you would have to expend two supply points.
7.61 Air Unit Repair
Generally, a supply unit expended to repair an air unit must be in an off-map base. See scenarios for special cases.
7.62 Irreparable Air Units
Air units in the permanently eliminated box may not be repaired (or, simply return permanently eliminated air units to the mix of available air units.)
7.7 Fortifications
See Fortification (21.0).
7.8 Supply Units
Supply units are treated as land units, with the following special rules:
- The number in the upper right on the counter is the number of Supply Points. These can be used as "change," breaking them down or building them up as necessary.
- They are expended to provide logistical functions.
- Supply units do not count for stacking. They have no ZOC.
- Supply units are affected by combat results. Each supply point is equal to one Battalion Equivalent.
- Supply units that receive a Retreat or Rout result are instead eliminated.
- Eliminated supply units are returned to the counter mix and may be used again.
7.9 Logistics Phase
All supply expenditure is during the Logistics Phase. You do not expend supply at any other point in the turn, unless stated. Units do not otherwise need to trace a line of supply as in many other wargames.
8.0 Suppression
Combat units are in one of two states.
- Combat Effective: This is the normal state of a unit.
- Suppressed: This is indicated by placing a Suppressed marker on it.
8.1 Combat Effective Units
Combat effective units function normally.
8.2 Suppressed Units
Suppressed units are affected as follows.
- They lose their ZOCs.
- They have their movement factors halved. Any fractions are retained.
- If any suppressed units are involved in an attack, then shift the combat column one to the left.
- If any suppressed units are involved in a defense, then shift the combat column one to the right.
8.3 Bombardment Disruption
Combat effective units can become Disrupted due to Bombardment results.
8.4 Secondary Suppressions
The effect of more than one Suppressed result on a unit is ignored.
9.0 Reorganization
Players may substitute certain brigade or regiment sized units with battalions, and vice versa, at certain points in the game (in some games, brigades may be replaced with regiments). The smaller sized units (brigade or in some cases, regiments) are called "subordinate units." Replacing a brigade or regiment with a subordinate unit is called "breakdown;" replacing subordinate units with brigades or regiments is called "combining." These may occur only in the designated parts of the game turn. The types of units that may reorganize are stated in the scenario.
Subordinate units are indicated with an asterisk or different color unit box.
9.1 Breakdown
Breakdown occurs only in the Logistics Phase, and sometimes due to a combat result. To break down a brigade or regiment, remove the unit from the map and replace it with subordinate units of the type designated by the scenario.
9.2 Combine
Combining occurs only in the Logistics Phase. To combine, remove the designated number of subordinate units from the map and replace them with an equivalent regiment or brigade. The subordinate units must all be in the same hex.
9.3 Other
Certain combat results and Events may cause regiments or brigades to break down.
9.4 Restrictions
The following restrictions are in effect when breaking down and combining units.
9.41 Nationality Requisite
Units which break down and combine must be of the same nationality. See scenario instructions for details. You do not have to recombine subordinate units into the same brigade or regiment from which they broke down.
9.42 Suppression
Suppressed units may not combine.
9.43 Initial Deployment
Players may not break down or combine units during initial deployment, unless stated in the scenario.
9.5 Other
Players should examine the Retreat rule and various combat results for the advantages for units that can break down.
10.0 Headquarters
10.1 Support Points
Headquarters have a parenthetic attack factor numeral, representing their Support Points. They may not attack by themselves. An Activated HQ instead provides its Support Points value as combat shifts to friendly units within its Support Radius. It also allows units within its Support Radius to move during the second Follow On Movement Phase.
Designer's Note: HQ Support represents the effects of artillery, combat engineers, and additional logistical support.
10.2 Follow-On Movement
All units which start within the radius of a friendly activated HQ may move during the Follow-On (second) Movement Phase. This is checked at the start of the Follow-On Movement Phase.
10.3 Combat
During the friendly Combat Phase, each HQ may provide its Support Value as a combat shift to the right for all attacking units within its Support Radius. During the enemy Combat Phase, each HQ may provide its Support Value as a combat shift to the left for all defending units within its Support Radius. This is checked at the instant that the combat starts (not at the start of the Combat Phase).
10.31 Singular Command
Each unit may only be supported by one HQ. If more than one HQ is within radius, then a player may, on a combat-by-combat basis, choose a single HQ to support it. Within that stricture, a given HQ may support all friendly units within radius.
10.32 Radius Requisite
To provide support, at least one friendly unit in that combat must be within radius.
Note: You do not need to use an Activated HQ to engage in combat in a follow-on impulse, but obviously this will assist any combats you do engage in greatly. Indeed, you must engage in combat if your units are adjacent to the enemy.
10.4 Support Radius
Support radius may be traced into and through EZOC, any types of terrain, and even hexes containing enemy units. Headquarters are never affected by the outcomes of attacks they support. They defend normally if attacked. An Activated HQ may apply its shifts to its own defense and follow-on movement.
10.5 Limits
HQs support all friendly units regardless of unit identifications (unless otherwise specified by a scenario).
10.6 HQ Presence
HQs have ZOC, and do count for stacking. They are considered equivalent to regiments when stacked.
11.0 Movement
A player may move all, some or none of his units during a friendly Movement Phase. Each unit may be moved as many or few hexes as the player wants, as long as its Movement allowance factor is not exceeded. Unused movement points may not be accumulated or transferred from unit to unit.
11.1 Movement Phases
Each player has two movement phases in each turn. In the Initial Movement Phase, all units may move. In the Follow-On movement phase, only units within Support Radius of a friendly Activated HQ may move.
11.2 Moving a Unit
Move each unit individually from one hex to another. Once a unit has been moved, and the player's hand is withdrawn, the unit may not be moved again. During a player's movement phase, only friendly units may be moved. No enemy movement may occur during a friendly Impulse.
11.3 Movement Costs
11.31 Movement Points
Each hex entered costs a certain number of movement points (MPs) to enter, depending on whether the unit is a Mechanized or a Non-Mechanized unit.
11.32 Old Hands Note
Motorized infantry is not considered "mechanized" in the game.
11.4 Minimum Move
A unit may always move a minimum of ONE hex per turn, provided it is not moving into prohibited terrain, a hex containing an enemy combat unit, or moving directly from one enemy zone of control to another.
11.5 Prohibited Movement
A unit may never enter a hex containing enemy combat units of any kind, or terrain that it is not allowed to be entered according to the Terrain Effects Chart.
11.6 Enemy Zones of Control
Units must STOP when they enter an enemy ZOC. There is no extra movement point cost to enter or exit enemy zones of control. Units may not normally move through enemy zones of control. But, see Retreat, Pursuit and Infiltration rules for exceptions.
11.7 Special Terrain Movement
11.71 Roads & Railroads
When moving along roads and railroads (from one such hex to another through a connected hexside) units pay only the movement cost listed for the road or railroad (1/2). This is regardless of other terrain in the hex.
11.72 Hexsides
Certain terrain runs along hexsides, such as rivers. A unit must pay an additional movement cost to cross these types of hexsides. Bridges negate the extra cost for moving across a river hexside.
11.8 Infiltration
This is explained under Zones of Control, below (see 13.0).
12.0 Ground Unit Stacking
Stacking is having more than one friendly unit in the same hex.
12.1 Stacking Limit
The standard stacking limit is two regiments (three battalions per regiment, or a total of up to six battalions), unless specified differently by the scenario.
12.2 Supply Free Stacking
Supply units do not count for stacking.
12.3 Air/Naval Exception
Stacking applies only to land units. Air and naval gunfire units do not count for stacking. Also, markers do not count against stacking.
12.4 Stacking Limit Enforcement
The stacking limit applies only at the END of a particular phase (enemy or friendly), i.e., a player can move, retreat, and advance through a hex in excess of the stacking limit as long as the situation is restored by the end of the phase.
12.5 Overstacking
A player may violate stacking limits (intentionally or unintentionally). At the end of any phase in which one of the following overstacking situations exists:
- HQs automatically become inactivated.
- Supply units may not provide supply functions.
- In an overstacked hex, the overstacked player may employ only units up to the normal stacking limit for combat, attacking or defending. If defending, then all defending units are subject to combat results, even though the overstacked units do not contribute combat strength points.
Note: A bombardment of a hex will affect overstacked units as well, so it is a good idea to not overstack.
12.6 Opposing Units Stacking Prohibition
Friendly and enemy ground units may never be stacked in the same hex.
12.7 Bombardment Exception
Air units may be placed in enemy hexes to execute missions.
12.8 Initial Deployment
Units must be deployed within stacking limits during initial scenario deployment.
13.0 Zones of Control
Land Units and HQs have Zones of Control (ZOCs). ZOCs represent the area a unit can influence through its firepower and patrols. All combat effective ground combat units have ZOCs. However, supply units, suppressed units and markers have no ZOCs.
13.1 ZOC Extension
A ZOC extends into all hexes and across all hexsides (except across all-water hexsides, or jungle per 26.13), unless otherwise stated in the Terrain Effects chart of a scenario rules.
13.2 Blocking ZOCs
The presence of a unit (friendly or enemy) has no effect on ZOCs.
13.3 Movement Effects
Units must STOP when they enter any enemy ZOC.
13.4 Disengagement
Units may leave an enemy ZOC. However, the first hex they enter must not contain an enemy ZOC. They can enter an enemy ZOC later in the movement phase.
13.5 Infiltration
Moving directly from one enemy ZOC to another ZOC is called Infiltration. Infiltrating units must start a movement phase in an enemy ZOC. They then move a maximum of one hex into another enemy ZOC, and this ends their movement. Only the following units may conduct infiltration: all Japanese infantry; Allied commando and raider units. Other units as specified by a scenario.
13.6 Combat Effects
During a combat phase, all friendly units in an enemy ZOC must attack. Exception: Supply units.
13.7 Pursuit
Units may Pursue through enemy ZOCs at no penalty.
13.8 Retreat
Units which retreat into an enemy ZOC are eliminated. See also rule 15.3.
13.9 Support Effects
ZOCs do not ever block Support Radius, or the ability of supply units to provide their logistics functions for units in adjacent hexes.
14.0 Land Combat
Land Combat occurs between adjacent opposing land units during the Combat Phase. The phasing player is the attacker, the non-phasing player is the defender, regardless of overall strategic posture. Land Combat is resolved using the Combat Results Tables (CRTs). There are two CRTs: Raid and Assault.
14.1 Attacking & Defending
14.11 Mandatory ZOC Combat
All combat units must attack all enemy units within whose ZOC they occupy. All non-phasing units in an attacking unit's Zone of Control must be attacked. This is so for both Combat Phases. Mandatory ZOC combat does not apply, however, where ZOC does not exist (such as across all-water hexsides or jungles).
Remember! HQs, supply units, and suppressed units have no ZOC, units do not have to attack them.
Old Hands Note! Units must attack in the Second Combat Phase whether within the radius of an activated HQ or not. This means that given the double impulse turn structure, units can often be placed in positions where they will have to attack at unfavorable odds. This was the case historically.
14.12 Zero Attack-Factor Units
If zero attack factor units are adjacent to enemy units, then they must attack. If attacking by themselves, then they automatically use the lowest column on the CRT (24%-). HQs adjacent to enemy units attack with a zero strength, but they receive any shift for support values.
Example: A HQ with a support value of "1" is in the ZOC of an enemy unit. It attacks on the 25-49% column since this is the lowest column shifted one to the right.
14.13 Attacker's Prerogative
The Phasing Player determines which attacking units will attack which defending units, in any combination he desires, as long as all friendly units in an enemy ZOC participate in an attack, and all enemy units which exert a ZOC are, themselves, attacked.
14.14 One Battle per Unit per Combat Phase
No unit may attack more than once per Friendly Combat Phase, and no enemy unit may be attacked more than once per Friendly Combat Phase.
14.2 Declaring All Battles First
The Phasing Player must declare which friendly units will be attacking which adjacent defending units at the beginning of each Combat Phase (to ensure that all adjacent units are attacked) before conducting any individual battles.
14.21 Multiple Unit & Multi-Hex Battles
If a phasing unit is in the ZOC of more than one enemy unit, it must attack all of those enemy units that are not assigned to battle with some other attacking unit. For example, a lone unit adjacent to enemy units in two or more hexes would have to attack all those hexes as one combined attack.
14.22 Combining Units in a Battle
Attacking units in two or more hexes may combine their Combat Strengths and conduct a single battle together provided that all of the attacking units are adjacent to all of the defending units. Battles may involve any number of attacking or defending units.
14.23 Adjacency
For an attack to be resolved as a single battle, all of the attacking units must be adjacent to all of the defending units.
14.24 Diversionary Attacks
When organizing a series of battles, a player may allocate his attacking units in such a way that some attacks are sacrificially made at poor differentials so that other adjacent attacks may be made at more advantageous differentials.
Old Hands Note! Diversionary attacks are what used to be called "Soak-Off Attacks".
14.25 Combat Strength Unity
A given unit's Combat Strength is always unitary; it may not be divided among different battles during a single phase, either for attack or defense.
14.26 Defending
All units defending in a single hex must defend together, and their combat strengths must be added together to form a single combined total. The defender may not withhold units from the defense.
14.27 Attack Limitation
A defending hex may be attacked only once in a single combat phase.
14.28 Attack Resolution
Attacks are resolved one at a time.
14.3 For Each Ground Combat
-
The attacker states which attacking units will be attacking which defending units.
-
The attacker chooses which CRT the combat will use (Raid or Assault), except per 14.31.
-
Determine the combat percentile: a) Total the combat strengths of all attacking units. b) Total the combat strengths of all defending units (make any provisions for terrain). c) Divide the attacker's total combat strength by the defender's total combat strength and multiply by 100%.
-
Determine the final Column shift: a) Determine the support status of all attacking units (i.e., the number of shifts to the right for friendly HQ support). b) Determine the support status of all defending units (i.e., the number of shifts to the left for enemy HQ support). c) If any attacking units are Suppressed shift one column to the left. d) If any defending units are Suppressed shift one column to the right. e) Determine the number of defensive shifts for terrain. f) Subtract the defender's shifts from the attacker's to get the final shift.
-
Find the matching percentile column on the selected Combat Results Table (CRT).
-
Roll one die, and cross-index the result.
-
Immediately apply the combat result.
-
Execute any retreats.
-
Execute any advances after combat.
-
Go on to the next combat, if any.
14.31 Column Shifts
Column shifts for the attacker always adjust to the right; for defender always adjust to the left. Use the net difference of multiple right and left shifts. The maximum columns on the CRT is the base line for any shifts above or below the maximum or minimum odds.
14.32 HQ Support
If more than one HQ can provide a column shift, only use one, but use the single best one. Each HQ may support any number of combats within its own radius.
14.33 Terrain
This applies to the defender only. If more than one terrain modifier applies, use the single best one.
14.4 Choice of Combat Results Tables
There are two combat results tables in the game: the Raid CRT and the Assault CRT.
14.41 Who Determines Which CRT Will Be Used
Generally, the attacker determines which CRT will be used. However, certain campaign chits will give the defender the choice; see the scenario Campaign chit explanations.
In a situation where the defender chooses the CRT, the defender still remains the defender; he does not switch roles with the attacker. For example, a Japanese force (with 9 combat factors) is attacking an Allied force (with 3 combat factors). The Allied player plays an Intelligence marker and can choose the CRT. He decides that the combat will be resolved on the Assault CRT. The Japanese player executes the attack on the Assault CRT.
14.5 Combat Results
Combat Results are the outcomes of combat. They are explained on page R15.
14.51 Advance & Retreat after Combat
These are a form of specialized movement that occur as the result of certain Combat results. They are explained below (see 15.3).
14.52 Attacking Into Prohibited Terrain
Units may attack into terrain types they could not normally enter. Units can attack across borders at all times, though they may be restricted from advancing/retreating across them. Also, even though a unit may not necessarily be able to exert a ZOC into a certain terrain type, it could still attack into it, but a unit is not required to attack a hex where it does not exert ZOC.
Combat Results Explanations (printed on page R15)
The printed Combat Results Tables (14.5) use the following result codes. Each entry is printed on page R15 of the rules.
Assault CRT results
- AE: Attacker Eliminated
- Eliminate all attacking units that have no battalion breakdowns.
- Replace all attacking units that have breakdowns with the equivalent subordinate units; one survives and the remainder are eliminated.
- Surviving attacking units retreat two hexes.
- Defending units may pursue one hex.
- AS: Attacker Shattered
- Eliminate units equal to 50% of attacking combat factors.
- Surviving attacking units retreat one hex.
- Defending units may pursue one hex.
- AZ: Attacker Annihilated
- Eliminate all attacking units and place them in the permanent deadpile.
- Defending units may pursue one hex.
- BB: Bloodbath
- Eliminate defending units equal to 50% of attacking combat factors.
- Eliminate attacking units equal to 50% of attacking combat factors.
- No retreat.
- If one side is completely eliminated, then the other side may pursue one hex.
- DE: Defender Eliminated
Raid CRT results
- AA: Attacker Attrition
- Attacker does one of the following: a) breaks down one regiment or brigade; or b) eliminates one unit.
- No retreat or pursuit.
- AM: Attacker Outmaneuvered
- Eliminate units equal to 50% of attacking combat factors.
- Surviving attacking units Rout.
- Defending units may pursue one hex.
- CT: Contact
- No effect.
- DA: Defender Attrition
- Defender does one of the following: a) breaks down one regiment or brigade; or b) eliminates one unit.
- No retreat or pursuit.
- DM: Defender Outmaneuvered
- Eliminate units equal to 50% of defending combat factors.
- Surviving defending units Rout.
- Defending units may pursue two hexes.
15.0 Implementation of Combat Results
15.1 Order of Results
Combat results are to be implemented in the order listed for that result.
15.11 Combat Results Limitation
Only land units that participated in a given combat are affected by its results.
15.12 Non-adjacent HQs
If an HQ provided support, it is not affected by the combat unless it was also defending in a hex that was actually attacked, or if it conducted an attack against an adjacent enemy unit.
15.2 Elimination
Eliminated units are removed from the map. If there is a choice of units to be eliminated, the player owning the units may choose which ones will be removed.
15.21 Surrounded Eliminations
If a unit is entirely surrounded by enemy units, ZOC, or prohibited terrain at the instant of combat, they are placed in the Permanently Eliminated box, and may never be replaced. Otherwise, they are placed in the Replacement Units box (and may be replaced).
Certain special results may also cause the permanent elimination of units.
15.22 Breakdowns
Units may be broken down during combat to extract losses. For example, an attrition type of result will allow a player to breakdown a regiment into three battalions. One of those battalions would then be eliminated to fulfill the combat result.
15.23 Percentage Losses
Certain combat results will cause a force to lose 50% of its combat factors (such as: BB). That percentage is determined by counting up the total attack factors if attacking, or defense factors if defending. If any zero attack strength units are attacking, then they are eliminated in addition to other friendly units. Round up any fractions.
15.24 Breaking Down to Fulfill Casualties
A unit may be broken down to extract 50% losses. Use the total attack or defense strength of the breakdown units to determine the losses. Round up any fractions.
15.3 Retreat
When a combat result requires a player's units to be retreated, the player designated by the result must immediately move those units the indicated number of hexes away from their own combat position. If the combat result doesn't specifically designate one player to conduct a retreat, the owning player conducts it. Retreat is not normal movement; it's counted in terms of hexes, not movement points, and units may always retreat the number of hexes indicated regardless of their printed movement allowances.
15.31 Length
A retreat will be specified as one or two hexes or a Rout.
15.32 Routs
The affected player rolls one die for each unit, and then retreats it that number of hexes.
15.33 Retreat Restrictions
Retreat results are subject to the following restrictions. If a unit is unable to retreat within these restrictions it's eliminated instead.
-
Each unit is retreated separately.
-
Units may never retreat into hexes containing enemy units.
-
Normally, units that retreat into any enemy ZOC are eliminated. But, units that can break down into battalions may do so and then one (only one) of those battalions is eliminated.
-
Units may not retreat off of the map or into terrain or across hexsides that can't normally be entered.
-
Units may retreat into and through hexes containing friendly units, but that doesn't negate a unit's retreat obligation. Remember, though, any retreating units must be within stacking restrictions at the end of the Combat Phase; see 8.0.
-
A retreating unit must terminate its retreat the indicated number of hexagons away from its former position. If it can't, and can retreat only a portion of the number of the hexagons called for, it's eliminated in the last hex into which it was able to retreat.
-
In no case may a unit be retreated into a hex that would cause it to be eliminated or over-stacked if other retreat paths are available.
-
Zero movement factor units are eliminated if forced to retreat (unless otherwise indicated).
-
Supply units are eliminated if forced to retreat.
15.34 Cities
Units defending in a city hex may (at the player's option) ignore retreat results. Any unit that retreats into a city hex must retreat normally.
15.35 Defending After Retreating
Units that retreat into a hex that's attacked later that same phase (which may happen if retreating into a fortified unit) defend normally and contribute their defense strength normally. If, however, the retreated units cause their new hex to be over-stacked they contribute nothing to the defense of that hex, though they would be subject to any combat results inflicted therein.
15.4 Pursuit
15.41 Pursuit Defined
"Pursuit" is a special form of movement that may occur after combat. Pursuit is what's termed in other wargames as an "advance after combat."
15.42 Pursuit Movement Procedure
If a combat result calls for a player to conduct pursuit, he may immediately move the number of hexes indicated with one, some, or all of his eligible units (involved in that attack). Generally, pursuit is only one hex. Scenarios will specify exceptions.
A combat result must specify "pursuit" for pursuit to occur. For example, if a Defender Attrition result causes all units to become eliminated from a hex, surviving attackers could not enter there since no pursuit was specified by the result.
15.43 Zero Attack-Factor Pursuit Prohibition
Units with a "0" movement factor may never pursue.
15.44 No MP Cost
Pursuit movement doesn't ever expend any movement points. It may be made only into hexes the pursuing units could normally enter. Pursuing units may ignore enemy ZOC, but they may not enter hexes containing enemy units or prohibited terrain. If a total pursuit is longer than one hex, some units may stop in the first hex, others in the second hex.
When pursuits are more than one hex, the pursuing unit is not required to pursue via the same exact result route as the enemy unit.
15.45 No Pursuit
If the enemy hex is not cleared of enemy units, then no pursuit may be conducted there.
15.5 Banzai!
The Japanese Campaign marker Banzai changes certain combat results. This marker must be played prior to the dice being rolled. See the Campaign Marker Explanation table.
16.0 Air Operations
Each player has Air Units that perform Missions.
16.1 Air Units
Air units represent one or more air unit "points", depending upon the number of symbols printed on the counter. They may be used like "change," with the player breaking them down or Combining them at any time in the game, included during combat.
Example: A player could exchange one "3" air unit for three "1" air units.
16.2 Sorties
Each air point may perform one mission per complete game turn. They may perform missions in either friendly Bombardment Phase, but if a particular air point conducts a mission in the first phase it could not do so in the second.
16.21 Air Command
Air units are always In Command.
16.3 Air Missions
Air units are not based on the map (even if there are airfields on a scenario's maps). They are placed on the Air Mission chart. They may be placed on the map to execute missions, but then are returned to the Air Mission chart (or to the dead-pile).
16.31 Mission Chart
During each Air Mission Phase, the player places his Air units in one of the missions listed on the Air Missions Chart:
- Reserve
- Recon
- Air Superiority
- Strike
- Interdiction
- Air Supply
Additionally, air units may be placed in the Damaged box as the result of combat, or be eliminated from play. Then, during the Air Missions Phase, move them accordingly.
Note: Air unit reinforcements are received after the Air Mission Allocation Phase, so air units received during a turn may not be used until the following turn.
16.32 Air Unit Outcomes
Each air unit is utilized at different points in the game turn, depending upon the mission. When the mission is completed, place the air unit performing it in one of the following:
- Eliminated: remove it from play.
- Damaged: if it received a Damage result.
- Reserve: if it otherwise survived.
Therefore, at the end of the player turn, all friendly air units will be in one of the three above statuses.
16.33 Repeated Sorties
Air units may be reused from turn to turn. They are not expended simply by being used.
16.34 Air Units & Combat
Air units are not affected by ground units; they are affected by enemy Air Superiority missions, and by AA results on the Strike table.
16.35 Off-Map Basing
Air units are placed on the map only when executing missions. They are not placed on airfields. Air units do not stop or block ground unit movement, retreat or advance, nor do they have zones of control. Air units (usually) require no supply. However, activating an on-map airfield may require the expenditure of supply that is then used to increase the number of air units available.
Designer's Note: The air units represent the impact of sorties, not specific air squadrons, groups, etc., per se.
16.4 Reserve
Air units in the Reserve box do not fly missions. They are not affected by enemy Air Superiority or AA fire.
16.5 Air Superiority
Air Superiority is resolved in the Air Superiority Phase.
16.51 Air Superiority Procedure
Units assigned to air superiority "fire" at enemy air units. All such fire is simultaneous. Each player does the following.
- Totals their Air Superiority strength points.
- Cross indexes this with the column on the Air Superiority Table.
- Rolls one die.
- Applies the outcome. All losses are extracted simultaneously.
- Return all Air Superiority missions to the Reserve box.
16.52 Selection of Targets
- If a player has committed a number of air points to Air Superiority equal to or less than the total number of enemy Air Superiority air points, then the player must use all of his Air Superiority points to attack enemy Air Superiority air points. Only enemy air units flying Air Superiority missions are affected by combat results.
- If a player has committed more air points to Air Superiority than the enemy, then the player may (but does not have to) commit any excess to attacking any and all other enemy missions. In this case, the Air Points committed to attacking non-Air Superiority missions are fired as one combined combat, and the player can select from which enemy missions losses will be extracted.
- In both cases above, any excess eliminations/damages may not be applied against enemy air points flying missions which were not targeted.
Example: The Japanese player commits six Air Points to Air Superiority; the Allied player commits four. The Allied player would have to use all four of his Air Points to attack the Japanese Air Superiority points. The Japanese player could commit all six of his Air Points to attacking the Allied Air Superiority air units; or he could commit four or five to attacking Allied Air Superiority, and using (respectively) two or one Air Points to attack other missions. Let's say the Japanese player committed two; he rolls a "5," causing one elimination and one damage. He chooses to eliminate one Allied air point committed to (say) Interdiction and another to Strike.
Example: Continuing with the above example, supposing the Japanese player committed six air points to Air Superiority and rolled a "6;" this would cause three Allied eliminations and three damages. This would eliminate three Allied air units committed to Air Superiority, and damage one more, thereby wiping out the Allied Air Superiority mission force of four air units. The additional two damages could not be applied against other Allied missions.
16.6 Interdiction
Certain scenarios will allow an Interdiction Mission. Interdiction is flown by air units against enemy land units and supply appearing as reinforcements (and usually when this involves a reinforcement across all-sea hexes). Interdiction may cause enemy reinforcements to be subject to delay or destruction.
Note: When conducting an interdiction mission, use the Malaya Reinforcement Interdiction Table (not the Air Interdiction Table, which is provided for an optional future variant).
16.61 Restrictions
Interdiction is performed during the Reinforcement Phase only. It may not be performed against any units that are making an amphibious move on the map (i.e., from coastal hex to coastal hex). Interdiction may not be performed against reinforcements being placed in an off-map base, or against units that are entering the map from an off-map base during the movement phase.
Interdiction Procedure
- Declare the number of air units committed to Interdiction, as per the Malaya Reinforcement Interdiction Table.
- Roll one die for each reinforcement unit to be attacked, applying the air units as a modifier (as listed on the Malaya Reinforcement Interdiction Table) to the die roll.
- Cross-index the result with the Malaya Reinforcement Interdiction Table. Immediately apply that result.
16.62 Targeting
Each and every unit and supply point moving onto the map as a reinforcement would be attacked by all interdicting air units, and each targeted unit would be interdicted by a separate die roll. For example, a player could commit two air units to Interdiction. The enemy places two reinforcement regiments and four supply points. Roll once for each of the two enemy regiments and four supply points.
16.63 Results
- Enters Later Turn. Place the delayed units on the Turn Record Track that number of turns later. They are then automatically received on that turn. (They cannot be Interdicted again during that turn).
- Elimination. If the unit can break down, it loses one battalion, and the rest of the battalions are delayed two turns. Otherwise, the unit is eliminated and placed in the Replacement box. Supply and Deception units are placed back in the counter mix.
16.64 Interdiction Effects
Interdiction affects land combat units, HQ units, Deception markers, and supply units. Interdiction does not affect the appearance of enemy air or naval reinforcements, nor does it affect enemy units already on the map. Attacks against supply units are made against individual points.
16.7 Air Recon
Recon takes place during the friendly Movement Phase. Place Air unit(s) in any hex(es) on the map and declare them as Air Recon. This may be done at any point in either movement phase.
16.71 Air Recon Procedure
Air Recon units do not attack anything, nor do they suffer AA fire. For each Air Recon unit, you may examine all enemy units in its hex and adjacent hexes. Additionally, any clear, dunes, cultivated, mud flat, marsh or coral terrain hexes within two hexes may also be examined.
You may use a maximum of one air unit per air recon per hex (and there is obviously no point in using more, since one is always sufficient).
16.8 Air or Naval Bombardment
Bombardment missions take place during the friendly Bombardment Phase. Place Air unit(s) in any hex(es) on the map containing enemy ground units (or place any naval unit(s) in any coastal hex(es) on the map containing enemy ground units). A player must place all Air units before conducting strikes. He then resolves them one at a time.
16.81 Procedure
For a hex to be bombarded, the following procedure is implemented.
- Total the number of air points.
- If the TEC calls for a defensive bonus, shift the column to the left the number indicated. The column may never go below zero, however.
- Roll one die on the Bombardment Table.
- Apply the results*.
- Return all surviving Strike missions to the Recovery box.
*Note that "AA" results are ignored if the attack is a naval bombardment (treat as a "no effect" instead), except per 26.20.
16.82 Overkill
A player may utilize any number of air units against a single hex, per the scenario's rules.
16.83 Hex Targets
Strike missions are flown against hexes, not individual units. If there is more than one defending unit in a hex, then they may all be affected by the outcome. See the results on the Bombardment Table.
Example: If the Allied player is using three air units to attack a hex containing a Japanese combat unit and two supply units. He rolls once on the "3" column and gets an "S" result. This causes the combat unit to be suppressed and one supply unit eliminated.
16.84 Antiaircraft
In the Malaya game, an AA result indicates that a bombarding aircraft is placed into the Damaged box. However, in addition to the leftward shift for conducting a bombardment in or adjacent to an AA unit's hex, any AA result that occurs while bombarding a hex that is occupied by or adjacent to an AA unit causes one bombarding aircraft to become eliminated instead.
16.85 Bombardment Revelation Restriction
A player does not reveal any units in a hex being attacked by bombardment. They are to be attacked anyway, with results being applied only when they occur.
16.9 Air Supply
This is a special mission if the flying player has air supply units in the scenario. Air Supply markers act as air units, but the only mission they can perform is Air Supply. They may be lost due to Air Superiority fire.
16.91 Procedure
Air Supply takes place during the Logistics Phase; place the Air Supply unit on the hex to which the mission is being flown. Then remove it and place one supply unit in the hex for each point of Air Supply. Place the Air Supply unit itself in the Ready box. A player does not have to remove any air supply points from the map to do this (air supply is in addition to normal supply). You may reuse an Air Supply marker any number of times.
16.10 Air Losses
Damage: Air units that receive a Damage result (owing to air superiority or AA fire, or a specific Campaign marker event) are placed in this box. They may not fly missions, nor are they affected by enemy air superiority fire.
Elimination: An air unit that is permanently eliminated may not be repaired.
16.11 Repair
A player may repair damaged air units by expending supply units during the Refit Phase. One supply point can repair three air units (or a fraction thereof) in the Damaged box. Place repaired air units in the Ready box. See the scenario for specifics.
17.0 Naval Bombardment
Some command markers provide an opportunity to conduct bombardment via the Bombardment Table, which is explained under 16.8 exactly like air bombardment.
18.0 Fog o' War
Players are limited as to when they can examine enemy units. Generally, you can examine enemy stacks only under certain conditions.
18.1 Examining Units
A player may examine enemy units at the start of the friendly Combat Phase if he has friendly units adjacent to any such units.
Old Hand's Note: Often, it is useful to make Raid attacks to determine the contents of an enemy stack without having to risk too much. Do this in the initial Combat Phase and then determine what strength you will need to attack the hex in the Follow-On movement phase, assuming the enemy does not move.
18.2 Air Recon
A player may examine enemy ground units via Air Recon (see 16.7). Also, when conducting bombardment against a hex, the player determines outcomes against enemy units normally, but they are not flipped over.
18.3 Air Ops
A player must show the number of air units being used to execute a mission as it is being executed.
18.4 ZOC Announcement
A player must always inform the enemy whether or not units in a stack have ZOCs at the instant a friendly unit moves adjacent (though not necessarily the identity of the units in the stack).
18.5 Terrain Examination
A player may always examine the terrain in a hex under a stack of units. Also, the player must inform the enemy of the presence of any fortifications.
18.6 Reinforcements
A player may never examine enemy units presently on their turn record/reinforcement track.
18.7 Command Markers
Certain command markers will allow the player to examine enemy stacks or units on the reinforcement track.
18.8 Optional Fog of War Rules
See the optional Fog O' War rule for more complications (online).
19.0 Headquarters (HQs)
Headquarters function as other land units, with the exceptions summarized here.
19.1 Follow-On Movement
An Activated HQ will allow all friendly units within Support radius to use Follow-On movement.
19.2 Support Points
An Activated HQ may use its Support Points value to provide combat shifts to friendly units within its Support Radius.
19.3 Suppression
Anything that causes an HQ to become suppressed causes it to instead become un-Activated. If already un-activated, then there is no further effect.
Designer's Note: HQs represent the command control for artillery, combat engineers, and logistics units that are spread out through an area of operations. Consequently, they represent a center of mass for support operations rather than a specific individual unit.
20.0 Engineer Units
Engineer units in the game represent major concentrations of Engineering personnel and construction equipment. Combat effective engineer units provide the following functions in the game:
- Airbase Operation. Certain scenarios will have printed airbases on the map. A player must have an Engineer unit in that airbase to "operate" it. This will result in the player receiving additional air units.
- Bridging. If an engineer unit starts its movement adjacent to a stream and/or a river hexsides, then the movement cost for all other friendly units to cross that stream/river is zero; other terrain costs would still be paid normally, however.
- Building Fortifications. An engineer unit may build fortifications in a friendly Logistics Phase. It must be combat effective and in the same hex as or adjacent to a Supply unit. Expend the supply unit and place fortification markers in the engineer's hex, and in any adjacent hexes occupied by friendly units. If more than one engineer unit is adjacent to the same supply unit, they may all build fortifications. See 21.0.
- Mobility Enhancement. An engineer unit which starts its movement phase in the same hex as a supply unit may "pick up" one supply point and transport it, using the movement factor of the engineer. At the end of that move, the supply unit must be dropped off.
- Other: As specified by the scenario.
21.0 Fortifications
Fortification markers enhance defense in the following ways.
21.1 Defensive Shift
If any defending unit is in a fortification, that entire combat receives one additional column shift for defense. This is in addition to any normal terrain shifts.
Note: Japanese gain a two-column shift while the Allies gain a one column-shift.
21.2 Ignoring Retreats/Routs
Any unit defending in or attacking out of a fortification may ignore one-hex retreat results, and convert rout results into one-hex retreats.
21.3 Fortification Permanence
Once placed on the map, a fortification marker remains in play as long as there is at least one friendly unit in it. The instant that all friendly units have vacated the fortification's hex (via movement or via combat or whatever), the fortification is removed from play. Players may not capture and use enemy fortifications.
22.0 Amphibious Movement
Amphibious moves are movements from coastal hexes to coastal hexes (of any kind). This requires a combat effective amphibious unit (or a scenario special rule). Any type of land unit is eligible to make an amphibious move.
22.1 Procedure
Amphibious movement takes place during the movement phase. The player must have an amphibious unit in a coastal hex. The moving player then moves it to any coastal hex on the map that the unit could otherwise enter. This consumes the unit's entire movement. The unit functions normally, otherwise.
22.2 Transport
Each Amphibious unit may transport one stack, (equivalent to the destination hex's stacking limit), of friendly combat units, or three supply points (but never both).
22.3 Disembarkation Restriction
A unit making an amphibious move may not end its movement on an enemy unit, although it may land in an enemy ZOC, and may engage in combat normally from there. A unit making an amphibious move may not end its movement in any all-sea hex, but otherwise terrain does not restrict any such move.
22.4 Amphibious Assault
Any land units using an amphibious invasion may attempt to land in hexes containing enemy units. The units conduct the invasion from an adjacent all-sea hex. In this case, they don't land in the movement phase, but only if they successfully clear the hex after that combat. The combat is conducted normally; if the attacker gains a result allowing the units to Pursue, then they may land in the invaded hex. But if they fail to gain a result allowing them to Pursue, then they are eliminated instead. Amphibious assaulting units may be combined with units attacking from land as part of the same attack.
The defense value of an amphibious unit is only applicable when it is attacked once already on land. Amphibious units cannot be attacked while technically still at sea.
22.5 Reinforcements
Certain scenarios call for reinforcements to enter the map via amphibious movement. These reinforcements do not require amphibious units (and remember, reinforcement placement only takes place in the Reinforcement phase, not the movement phase).
23.0 Evacuation
Certain scenarios will allow for Evacuation. This removes units from the map. Evacuation takes place during the friendly Reinforcement phase. Units to be evacuated must be on a coastal hex. Simply pick them up and remove them from the map. But once evacuated, a unit may never be returned to play.
23.1 Which Units may be Evacuated
Scenarios will specify which units may be evacuated. In some cases, players may receive Victory Points for evacuating units.
24.0 Victory Conditions
Players win the game by accumulating Victory Points (VP). Throughout the course of the game, each side scores VPs (separately). These are recorded using pen and paper.
24.1 Scoring VPs
- Immediate: Certain events will cause VPs to be scored immediately. For example, eliminating enemy units.
- End of turn: Certain events will cause VPs to be scored during the Victory Phase. For example, holding a particular objective hex.
- Campaign Victory: Each scenario will list the specific Victory Points and the Victory Conditions for the game.
24.2 Campaign Victory Conditions
At the end of the scenario, check the number of VPs gained by both players. Subtract the lower amount from the higher. This will give the level of Victory.
- Draw: 0-15
- Marginal Victory: 16-30
- Major Victory: 31-45
- Decisive Victory (highest): 45 or more.
24.3 Sudden Death Victory
If during any victory determination phase (at the end of the turn), one side attains their Sudden Victory Condition, the game comes to an end and they win.
24.4 Eliminating Units
VPs may be scored for eliminating units. This includes units that are replaceable or not.
24.5 Evacuating Units
VPs may be scored for evacuating units.
24.6 Objective Hexes
Certain, specific hexes are indicated as being Objective Hexes. Players gain additional VPs for occupying them, depending on the scenario.
25.0 Malaya Campaign Scenario
25.1 Game Length
December I 1941 to February II 1942.
25.2 Initiative
Japan controls the initiative on turn 1.
25.3 Victory
Starting Victory Points: Japanese = 0; Allied = 0
- Japanese Sudden Death Victory: If during any Victory Check phase the Japanese occupy all objective hexes.
- Allied Sudden Death Victory: If during any Victory Check phase the Japanese have no infantry regiments or battalions in Malaya.
25.4 Allied (set up first)
a) Land Units
- In Singapore naval base: Singapore coastal defense brigade.
- On Singapore island: 1M, 2M infantry brigades; 1H, 2H, 3H, 1L, 3L antiaircraft; 3 x supply points.
- In Penang: 11 coastal defense unit; 2L antiaircraft.
- On airfields in Malaya: 8 x airfield battalions, one per hex.
- Anywhere in Malaya (but must be closer to any Thai border hex than to the city of Johore Baru): 3 Ind Corps HQ, 100 armor squadron, MC engineer, MC amphib, 9 Ind HQ; 8 Ind, 22 Ind, 11 Ind HQ; 6 Ind, 15 Ind, 3 Ind armored recon, 12, 28 Ind, 8 A HQ; 22A, 27A, KC armored recon regiment, DF infantry regiment, 3 x supply points.
- In the Allied off-map base: None.
b) Air units: Reserve: 5 x air units.
c) Starting Command Level: "start scenario."
d) Command Markers: Force Z; place remainder in the Pool.
e) Command Marker Picks: See the Allied Command Marker table (page R16). On turn 1, the Allies pick no Command markers.
25.5 Japanese (set up second)
a) Land Units
No Japanese units begin the game on the map.
Japanese off-map base: 25 Army HQ, Imperial Guard (IG) HQ, 5 HQ, 18 HQ; 3 IG, 4 IG, 5 IG infantry regiments, 11/5, 21/5, 41/5, 42/5, 55/18, 56/18, 114/18, 124/18 infantry regiments; IG, 5, 18 armored recon; 1, 6, 14 armor battalions; 1/9, 2/9 amphib; 1/17, 2/17, 3/17, 4/17, 20, 32 antiaircraft; 4, 14, 15, 23, 1/2, 2/2 engineers; 5, 6, 7, 8, 48 airfield units; 4 x supply.
b) Air units: Reserve; 10 x air units.
c) Starting Command Level: "start scenario".
d) Command Markers: 2 x Staff Planning; place remainder in the Pool.
e) Command Marker picks: See the Japanese Command Marker table (page R16).
25.6 Allied Reinforcements
a) Air units: Place in the Reserve box.
b) Land units: Place in the off map base or on any port hex not occupied by the Japanese. See the Allied Reinforcement Chart for units and turns of arrival. Certain Reinforcement groups are received via the pick of a Reinforcement Group campaign marker. Units are received on the turn indicated, subject to delays and destruction caused by the Interdiction table.
c) Allied Naval Gunfire markers: Once picked, these markers may be used every turn. They are not returned to the pool.
d) Evacuation: The Allied player may not evacuate units.
e) Optional Allied reinforcements: The Allied player may choose to receive these units by paying 4 VP per unit. This is done on a unit by unit basis; the player may choose some, none or all of these units.
25.7 Japanese Reinforcements
a) Air units: place in the Reserve box.
b) Land units: Enter the map via amphibious movement, or on the north map edge (in Thailand). See the Japanese Reinforcement Chart for units and turns of arrival. Certain Reinforcement groups are received via the pick of a Reinforcement Group campaign marker. Units are received on the turn indicated, subject to delays and destruction caused by the Interdiction table.
c) Japanese Naval Gunfire markers: Once picked, these markers may be used every turn. They are not returned to the pool.
d) Evacuation: the Japanese may not evacuate units.
e) Optional Japanese reinforcements: The Japanese player may choose to receive these units by paying 4 VP per unit. This is done on a unit by unit basis; the player may choose some, none or all of these units.
26.0 Scenario Special Rules
26.1 Air Operations
26.11 Range
Air missions may be placed anywhere on the map. Naval gunfire may be placed on or within one hex of a coastal hex.
26.12 Airfields
Japanese: The Japanese player can base up to ten air units off map. He receives additional air units for each airbase he occupies on the map with a combat effective engineer unit. See the Reinforcement Table.
Allied: The number of Air points that the Allied player can commit to missions may not exceed the number of airfield hexes occupied by combat effective Allied airbase units. This is checked every Air Mission Commitment phase. Should that number drop, then any excess air points may not be used in that turn. They must remain in Reserve (or damaged).
Note: If the Allies occupy more airfields than they have available air points. They gain no additional air point reinforcements.
If the Allied player occupies no airfields on the map, then he may not conduct any air missions in that turn.
26.13 Airstrike limit per hex (16.6)
- Japanese: 6
- Allied: 3
26.14 Interdiction
The Japanese player may conduct interdiction against all Allied reinforcements entering the map. The Allied player may conduct Interdiction only against Japanese units entering the map via amphibious movement.
26.15 Air Suppression
Certain Japanese air units on Air Superiority missions may attack Allied air units in the Allied Reserve box. (This was because all Allied airbases were within range of Japanese airpower.) Allied air units may not do the same against Japanese.
26.16 Attacks on Force Z
If the Japanese player has committed any air units to Strike, and if the Allied player has committed the Force Z naval command marker to any mission, then the Japanese player may allocate some, none or all of his Strike air units to attack Force Z. This is conducted in the same manner as a Bombardment attack, with the results as follows:
- AA: Japanese lose one air unit.
- S: Force Z damaged. Remove the marker from play. Japanese gain 10 VP.
- D: Force Z sunk. Remove the marker from play. Japanese gain 20 VP.
- -: No effect, and the Japanese player may not conduct any amphibious movement during the current turn.
26.2 Home Bases (off map)
The Japanese and Allied home bases are represented by off map boxes. Reinforcement units may be placed in the off-map base instead of on the map.
Japanese: The Japanese player may move units in the off map base onto the map via Amphibious movement during the reinforcement or movement phase. They may land on any coastal hexes, or make amphibious assaults. The Japanese player may also move units in the off-map base onto the map via a friendly map edge during a movement phase. The units are assumed to be one hex off the map, and may use road movement if a road leads off the map. Once on the map, units may not move off map.
Allied: The Allied player may move units in the off map base onto the map via Amphibious movement during the reinforcement or movement phase. They may land on any coastal hexes. Allied units may not make amphibious assaults against defended enemy hexes.
26.3 Friendly Map Edges
The Allied have no friendly map edge. All units enter via amphibious landing. The Japanese friendly map edge is the north map edge.
26.4 Out of Range
A player's units may neither attack nor enter the enemy Base. (With the exception noted for Japanese Air Superiority attacks on Allied units in Reserve.)
26.5 Logistics
One supply unit in an off map base may activate all HQs in it.
26.6 Repairing Damaged Aircraft
Home Bases: The Japanese player can expend one supply unit in the friendly off-map base to repair up to three friendly aircraft in the Damaged box. The Allied player can use only supply units on the map to repair air units.
26.7 Breakdown Units
Japanese
- 6-6-8 = 2 x 2-2-8, 1 x 1-2-8
- 6-6-6 = 2 x 2-2-6, 1 x 1-2-6
- 6-5-6 = 1 x 2-2-6, 2 x 1-2-6
- 5-5-6 = 3 x 1-2-6
Other units may not break down.
Allied
- 4-6-6 = 3 x 1-2-6
- 3-4-5 = 3 x 0-1-5
- 10-5-8 = 2 x 4-2-9, 1 x 1-2-8
Other units may not break down.
26.8 Stacking
Each player may stack nine battalion equivalents per hex. Each battalion, HQ and British regiment is worth one battalion equivalent; each brigade and Japanese regiment is worth three battalion equivalents. Coastal defense units, supply, and companies stack free.
26.9 Airfield Engineers
These units operate air bases. Other types of airfield engineers may not.
26.10 Amphibious Units and Ports
Allied amphibious units may transport units only from port to port. Japanese amphibious units may transport units from any coastal hex or off-map base to any coastal hexes.
26.11 Amphibious Supply
An unlimited number of Supply unit reinforcements may be landed on friendly occupied ports. Otherwise, only one supply point reinforcement per turn may be landed on a coastal hex.
26.12 Railroads
Allied units pay ½ movement point to move through railroad hexes. Japanese units simply treat railroads as roads, except that, if they begin in the same railroad hex as an engineer unit, a Japanese unit pays ½ movement point as long as it stays on the railroad during the entirety of its movement.
26.13 Allied Zones of Control
Allied unit ZOCs do not extend into jungle hexes. This is so even if there is a road or trail connecting the hex.
Jungle Trained Units Exception: As an exception, all Allied infantry brigades and battalions with a movement factor of "10" are not affected by this rule; their ZOCs do extend into jungle hexes. These are indicated with a green shaded unit box.
Note that all Japanese units have ZOCs that extend normally into jungle hexes.
26.14 Zero Support Value HQs
A HQ with a support value of zero provides no combat shifts within its radius. It may perform other command functions (such as initiating second impulse movement).
26.15 Allied Defenses
If a hex contains an Allied coastal defense unit, then any Japanese naval bombardment against that hex is shifted two columns to the left. Additionally, while an "AA" result on the Bombardment table is normally regarded as no effect when conducting naval bombardment, in this case an AA eliminates the bombarding naval gunfire command marker (permanently).
Also, any Japanese unit that is making an amphibious attack against a hex that contains an Allied coastal defense unit is shifted two columns to the left. These shifts are cumulative with other normal shifts, but they are not combined with the two leftward naval bombardment shifts mentioned in the paragraph above (two leftward shifts is the max), and also don't apply if the attack is in conjunction with a simultaneous overland attack.
26.16 Game Scale
Each hex is about 15 kilometers across. Each turn is one half month of operations.
Malaya Scenario Charts (printed on pages R14-R16)
The following tables are printed as text on the rules pages. The Combat Results Tables, Air Superiority Table, Bombardment Table, Malaya Reinforcement Interdiction Table and Terrain Effects Chart are printed as grids on the game map and charts and are not reproduced here.
Japanese Reinforcement Group
| Group | Turn of Arrival | Units |
|---|---|---|
| Air | December I – end of game | 1 air unit per on-map airfield occupied by a combat effective Japanese airbase unit. |
| Routine Supply | December I – end of game | 3 points per turn. |
| Southern Operation | Turn Southern Operation Reinforcement chit picked. | Roll one die. 1-3 = Japanese receive the 2nd Armored Regiment and one supply point; 4-6 = Japanese must withdraw one armored or armored cavalry regiment and eliminate one supply unit. |
| Optional Reinforcements | Any turns starting with December II | 56 HQ; 21 infantry brigade; 113, 146, 148 infantry regiments; 56 recon. --Japanese must pay 4 VP for each unit. |
| Command markers | See explanations |
Allied Reinforcement Group
| Group | Turn of Arrival | Units |
|---|---|---|
| Routine Air | - | None. |
| Routine Supply | December I – end of game | 2 point per turn if Allied units occupy Singapore naval base; 1 point per turn otherwise. |
| ABDA campaign marker | Turn the marker is picked. | Roll one die. 1-3 = Allies receive 2 air unit and one supply point; 4-6 the Allies withdraw one air unit and must eliminate one supply point. |
| Air Reinforcement campaign marker | Turn the marker is picked. | Roll one die and receive that number of air points. |
| Replacements campaign marker | Turn the marker is picked. | 2/4 MG A infantry battalion; 3 x supply points. |
| Indian Army Reinforcements campaign marker | Turn the marker is picked. | 17 HQ; 44, 45, 46 infantry brigades. Roll one die for each unit. On a 1-3 the unit is received; on a 4-6 it is not. |
| Middle East Reinforcements campaign marker |
Japanese Victory Points Table
| Event | VP |
|---|---|
| Gained immediately | |
| Each Allied HQ unit eliminated | 2 |
| Each Allied brigade eliminated | 3 |
| Each other Allied ground unit eliminated | 1 |
| Each Allied air unit eliminated | 1 |
| Each Allied supply unit eliminated | 0 |
| Force Z damaged | 10 |
| Force Z sunk | 20 |
| Gained during each Victory Check phase | |
| Each Objective hex on Singapore Island occupied by Japanese land units | 3 |
| Each other Objective hex occupied by Japanese land units | 1 |
Allied Victory Points Table
| Event | VP |
|---|---|
| Gained immediately | |
| Each Japanese HQ unit eliminated | 4 |
| Each Japanese regiment eliminated | 3 |
| Each other Japanese ground unit eliminated | 1 |
| Each Japanese air unit eliminated | 2 |
| Each Japanese supply unit eliminated | 0 |
| Gained during each Victory Check phase | |
| Each Objective hex occupied by Allied land units | 1 |
| End of February II for each Objective hex occupied on Singapore island | 10 |
Malaya Campaign Markers
Allied Markers
| Marker | When Played | Effect | Disposition |
|---|---|---|---|
| ABDA | Immediately | Roll one die. 1-3 = Allies receive 2 air unit and one supply point; 4-6 the Allies withdraw one air unit and must eliminate one supply point. | Remove from play. |
| Air Reinforcements | Immediately | Roll one die and receive that number of air points. | Remove from play. |
| Indian Army Reinforcements | Immediately | Allies receive: 17 HQ; 44, 45, 46 infantry brigades. Roll one die for each unit. On a 1-3 the unit is received; on a 4-6 it is not. | Remove from play. |
| Middle East Reinforcements | Immediately | Allies receive: 18 HQ; 53, 54, 55 infantry brigades; 9MG battalion; 18 armored recon; 6H, 37L antiaircraft. | Remove from play. |
| Replacements Rushed to Singapore | Immediately | Allies receive: 2/4MG A infantry battalion; 3 x supply points. | Remove from play. |
Japanese Markers
| Marker | When Played | Effect | Disposition |
|---|---|---|---|
| Naval Gunfire (Naval CA) | Air/Naval Strike Phase | Bombardment strength = 3. | Keep and use each turn (see 25.7). |
| Naval Gunfire (Naval DD) | Air/Naval Strike Phase | Bombardment strength = 2. | Keep and use each turn (see 25.7). |
| Southern Operation | Immediately. | Roll one die. 1-3 = Japanese receive the 2nd Armored Regiment and one supply point; 4-6 = Japanese must withdraw one armored or armored cavalry regiment and eliminate one supply unit. --If this event is picked on turn 1, pick a substitute and return this to the Pool. | Remove from play. |
| Amphibious Move | This turn. | Japanese may conduct one additional Amphibious Move or Assault in either movement phase. | Return to pool on use. |
| Banzai! | Combat Phase | Play prior to any one land battle. Apply all of following to this battle: --1) Japanese receive a one column shift in their favor, attacking or defending. --2) Japanese units ignore all rout and retreat results. 3) Eliminated units (whether attacker or defender) end up in the permanently eliminated deadpile. |
Source Gaps
- The Combat Results Tables, Air Superiority Table, Bombardment Table, Malaya Reinforcement Interdiction Table, Terrain Effects Chart, and the map's terrain key are printed as grids on the map and charts and are not in this document's text. Nothing has been reconstructed for them.
- The rules as printed repeat several scenario special-rule numbers (26.11 to 26.16 appear twice, in the Air Operations block and again in the home-base block). They are transcribed under the numbers printed.
- Printed wording kept as printed: 6.22 ("placed on the first available Reinforcement Phase"), 16.11 ("Refit Phase"), 5.1 ("Events Phase"), and the Allied Thailand marker text ("without a expending").
- Minor typographic corrections: "to not interfere" is rendered "do not interfere" (7.3); "will replace up the three air units" is rendered "up to three" (7.5); "contianing" is rendered "containing" (16.8). These are the only word-level changes.
- The printed sample counter diagrams are not reproduced; the counter labels that the text explains are transcribed in section 2.31.
- The optional rules are not in this document (they are published separately on worldatwarmagazine.com), so no optional rules are transcribed.
- Colour convention: the printed rules set errata and exceptions in red and examples in blue. Errata are marked in italics with an "Errata:" label, and examples are in italics with an "Example:" label.