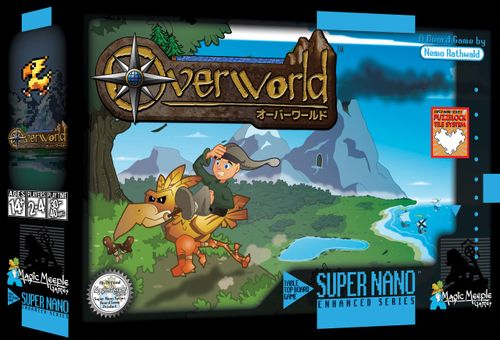
Overworld
Overworld Rulebook
Table of Contents
Table of Contents
Set Up The Basic Game
Each player chooses a color: black, white, red, or yellow. Give every player a supply of all the seven Birds and seven Ships in their color, the three Dungeon Doors of their color, and the rules-reference card in their color.
There are small tiles called Coast tiles, depicting beaches. In the middle of the table, place one Coast tile, chosen randomly. At the start of the game, this is the only tile in play. The rest of the Map will grow from it as new tiles are placed. Coast tiles never have wooden pieces on them.
Off to the side, make a pile of all the remaining Coast tiles.
A Travel tile is three squares, arranged in an elbow shape like a capital letter L. On one side, each square is either Forests or Mountains. On the flip side, each square is either Whirlpools or Reefs. There are eight types of Travel tiles, one for each possible arrangement of squares.
Put all the Travel tiles in the bag.
Choose a starting player at random. Players will take turns in clockwise order around the table.
Components (for reference): 8 Coast tiles (4 different patterns); 32 Travel tiles (8 different patterns); 28 Ships (7 per color); 28 Birds (7 per color); 12 Dungeon Doors (3 per color); 1 bag; 4 reference cards.
How To Take A Turn
Each turn has three steps: draw a tile, grow the Map, and add Explorers, followed by a Dungeon Check.
1. Draw A Tile
At the start of your turn, draw a Travel tile from the bag. Look at both sides. One side will show land. The other will show water.
But sometimes it looks like this: a Travel tile with a LAND HO illustration. It allows you to choose a Coast tile instead of a Travel tile. You may optionally return the LAND HO Travel tile to the bag and take a Coast tile instead.
2. Grow The Map
Connect at least one edge of one of your tile's squares to the edge of at least one square on a tile already in play.
If you play a Travel tile water-side-up, it may only connect to tiles that are water-side-up. If you play it land-side-up, it may only connect to tiles that are land-side-up. (It is legal for land to touch water at a corner, but not along an edge.)
Coast tiles are the only tiles which have edges for connecting both water and land.
Match teeth to teeth. If the teeth fit together, it's legal. It's OK if Mountains touch Forests, or Reefs touch Whirlpools.
Warning: Connecting a Travel tile with a LAND HO illustration face-up, while permissible, is a bad idea! The LAND HO illustration has zero squares, instead of the normal three. It has been cursed, and cannot have Birds or Ships on it!
3. Add Explorers
Each Travel tile has three positions, called "squares".
Add three Explorers from your supply to the Travel tile you added, one in each square. If you played the tile water-side-up, you must add Ships. If you played the tile land-side-up, you must add Birds.
If you have fewer than three of the appropriate type of Explorer in your supply, you may choose which squares to fill on the tile you placed.
If you returned a LAND HO Travel tile to the bag and played a Coast tile instead, add either a Bird or a Ship to any two empty squares on Travel tiles that are already added to the Map.
4. Dungeon Check
If you form a gap, you have discovered a Dungeon Door.
A gap is:
- a bare area on the table,
- which is surrounded by tiles,
- into which no Travel tile could ever fit.
A gap is not complete unless it is fully enclosed by tiles. Also, a gap is not complete if it is still possible to fit a Travel tile into it.
Now to resolve who will place their Dungeon Door into the completed gap. (If you formed more than one gap at a time, the player who just placed a tile chooses the order they are resolved.)
A contiguous group of squares of the same type (Mountains, Forests, Whirlpools, or Reefs) that connect through their edges (not corners) is called a "region".
Look at the regions of contiguous Mountains, or Forests, or Whirlpools, or Reefs, that share an edge with the gap which was just formed.
All the Explorers (Birds and Ships) in those regions are involved in the competition to claim the gap.
Whichever player has the highest total sum of Explorers involved in the competition places a Dungeon Door into the gap.
All of that player's Explorers from those regions which claimed the gap leave the Map and return to their player's supply. Other players' Explorers remain in place, and do not return.
Q: What if there is a tie for which player puts their Dungeon Door into the gap? A: The player who placed the tile chooses which tied player must place a Dungeon Door.
Q: What if I don't want to put my Dungeon Door in the gap? A: If your Birds or Ships were in the majority in the regions connected to the gap (or the current player chose you to break a tie), you do not get a choice. You must place a Dungeon Door!
Q: What if I already placed all three of my Dungeon Doors? A: You must choose a Dungeon Door that you've already placed, and use that one here.
Examples (illustrated in the rulebook): No Travel tile could fit here, but it is not yet enclosed. This is L-shaped, but Travel tiles do not have teeth that connect to both water and land in this gap. A gap may be surrounded by both water and land. This is enclosed by tiles, but a Travel tile could fit. Each jigsaw edge must be enclosed, but the corner need not be.
Exhausted Explorers (Advanced Variant): This is for a more aggressive game, best recommended if you have played at least once before. When moving a Door, you must replace it in its previous location with one of your Birds or Ships, on the Map or from your hand. It is an "exhausted Explorer". An exhausted Explorer does not count as a Dungeon Door. You have lost it permanently. It reduces your final score by two points.
In this example, Ships compete for a gap if they could enter it without stepping on another terrain type, and without making diagonal steps.
A yellow Ship on a Whirlpool may take one step right, then one step up into the gap, without leaving Whirlpools, so it may compete for the gap. Two white Ships on Whirlpools may not step off of their Whirlpools and enter Reefs, and they may not squeeze through the corner, so they may not compete for the gap.
Example: Totals: White: 1, Yellow: 2, Red: 3. Red removes all 3 red Ships and places a red Dungeon Door in the gap.
Example: The black player placed this Dungeon Door, using six Ships, where the checkmarks are. Therefore, all six of those Ships have left the Map and returned to the black player.
End of Game
At the end of the turn when the last Travel tile or the last Coast tile is connected to the Map, the game is over.
Your score comes from:
- the regions controlled by your Explorers.
- the distance between your Dungeon Doors.
Ties are broken in favor of the tied player with the largest score from Dungeon Door distance. (See pages 12 and 13.)
Further ties are broken in favor of the tied player in control of (or tied for control of) the most regions. (See page 11.)
Players who are still tied rejoice in their shared victory... or play again!
Scoring Regions
At the end of the game, each region is worth 2 points to whichever player has the most Explorers in it.
A tie for a region is worth two points to each player tied in that region.
To simplify counting, determine the majority in each region one at a time, and remove all surplus Explorers so that each region contains only one. Then, as you count up your region score, tip over each Explorer as you count it, to make sure you don't accidentally double-count any.
Examples (illustrated in the rulebook): White outnumbers red to win 2 points for this Mountain region. The size of the region does not matter. Even a region with only one square is worth 2 points.
Scoring Exhausted Explorers (Advanced Variant): This is for a more aggressive game, best recommended if you have played at least once before. Each Bird or Ship tipped on its side in a gap, which you exhausted in order to move a Dungeon Door which had already been placed, deducts two points from your score.
Scoring Dungeon Doors
Dungeon Doors score points by being far apart from each other. Your dungeon score is the distance you travel to visit all three of your Dungeon Doors and return to the one you started from.
Countable steps exist even where physical tiles do not.
If you have a Dungeon Door in a gap which is larger than a single square, you may move it to whichever square you wish within its gap, before scoring it.
Choose one of the Dungeon Doors you placed, and tip it on its side. Choose another one of your Dungeon Doors, and count the number of steps (each step is one square) to travel from one Dungeon Door to the next by the shortest possible path.
Now count and add the number of steps from the second Dungeon Door to the third Dungeon Door.
Finally, count and add the number of steps from the third Dungeon Door back to the Door you started from.
Hint: All three Dungeon Doors can always be measured as a single rectangle. So the simplest way to score distance is to add the number of rows (not counting the starting row) to the number of columns (not counting the starting column), then double it.
Solo Quest Mode
Included with base game.
This is a way to play Overworld with only one player! If any rule is not addressed in this section, it is the same as in the multiplayer game.
In Solo Mode, the Explorers you place are drawn from bags randomly in different colors.
Another difference is that you are located on the Map, represented by one game token called a Hero. Use a coin, a die, a bead, or a token from another game. Or use the Hero tokens sold separately (see page 26).
You will use the Hero to "Step" your way around the Map between turns (following rules discussed in this section), then place your tile where you end your "Stepping" movement.
Birds and Ships are called "Creatures" in Solo mode, instead of "Explorers", but all rules concerning "Explorers" apply to "Creatures".
Objectives
At the start of the game, you adjust your difficulty setting by selecting a moral alignment for each of the four colors of Birds, Ships, and Dungeon Doors. Each color is either Good, Evil, or Neutral. You must always select at least one Good color and at least one Evil color.
Challenge Levels (number of colors of each alignment; the fourth column is Unused Colors):
| Challenge Level | Good Colors | Neutral Colors | Evil Colors | Unused Colors |
|---|---|---|---|---|
| Beginner | 2 | 0 | 1 | 1 |
| Normal | 2 | 1 | 1 | 0 |
| Hard | 1 | 1 | 1 | 1 |
| Very Hard | 2 | 0 | 2 | 0 |
| Extreme | 1 | 2 | 1 | 0 |
At the end of the game, when all Travel tiles are placed, all four colors are scored as if they were four players in the multiplayer game. You win if the sum of the scores of Good colors is greater than the sum of the scores of Evil colors. Ignore the scores of Neutral or Unused colors.
The game ends early in defeat if one of these conditions occur before you have placed all the Coast tiles or Travel tiles:
- "The Kingdom Burns": All 7 Birds in the same Evil color are on the Map at the same time.
- "The Sea Tyrant Conquers": All 7 Ships in the same Evil color are on the Map at the same time.
- "The Hero Is Vanquished": You have no legal tile placement.
Setup
- Previous to your first turn, select a Travel tile and a Coast tile, and connect them to form the starting Map. Take the Hero and add it to the Travel tile.
- Put the Travel tiles in the cloth bag, and place all 8 Coast tiles in a pile, as normal.
- Put all the Birds into one of the opaque plastic bags, and all the Ships into the other.
- Designate a location on the table to be a Creature discard pile. This is where Creatures go when they leave the Map.
Sequence Of A Turn
Repeat these steps in this order until the game ends:
- Travel
- Draw A Tile
- Grow The Map, Or Perform Geomancy
- Place Creatures
- Check For Dungeons
1. Travel
A "Step" is moving your Hero from a square onto an adjacent Square. You may Step as often as you wish (even by moving back along your own path, if desired). You may complete your Travel phase by stopping, or by stepping off a tile onto the table. Where you end your Travel phase is where you must place your next tile.
There are no effects, requirements, or penalties to Step over Good Creatures. But in order to Step over Neutral or Evil Creatures, you must remove one Good Creature of the same shape from a square on the Map, and return it permanently to the game box. If you do, discard the Neutral or Evil Creature to the Creature discard pile.
You may not Step from Forests into Mountains or vice-versa; or from Whirlpools into Reefs or vice-versa.
You may Step into or out of a Coast tile, so long as you continue on to the Travel tile on the opposite edge.
Example: Callie is located on a Forest square, so Mountains are blocking her travels. She Steps through Forest squares to a Coast tile which is half Forest and half Whirlpool. From here, she may Step into Whirlpools and is blocked by Reefs. Callie Steps along Whirlpool squares until she reaches another Coast tile, which is half Whirlpool and half Mountain. From here, she may Step into Mountains, and is blocked by Forests.
You may Step onto a gap square occupied by a Door, to Step out from a different Door of the same color, onto any terrain type. This does not work in all the squares of a multi-square gap – you must be adjacent to the exact square occupied by a Door meeple.
You may end your Travel phase by stepping off a tile's edge onto the table.
Alternately, you may perform Geomancy by stopping on a Forest or Mountain square. You must be able to stack a Travel tile on that square and two other Forest and Mountain squares of the same height – at least one of which must be on a different Travel tile.
2. Draw A Tile
This phase is the same as in the normal game.
3. Grow The Map, Or Perform Geomancy
Draw a Travel tile from the bag. If you stepped off the edge of a tile, pick up the Hero and connect your tile to the tile edge which the Hero just stepped off of. Place the Hero back there.
Remember, you cannot Step into another terrain type. Therefore you must connect the new tile in such a way as to put the correct terrain type under the Hero.
If the tile you drew does not have a square of that terrain type, "bounce" back to the previous adjacent square you traveled through.
If you stepped off the edge and the tile you drew was a LAND HO tile, and you put it back in the bag and connected a Coast tile, stand your Hero on the Coast tile.
If you ended your Travel phase on a Forest or Mountain square, you are performing Geomancy. Stack your tile on top of your Hero's square, and on top of two other squares on Travel tiles on the Map. All three squares must be on the same height (the same level of stacking). At least one square must be on a different tile.
In other words, you may not stack all three squares of the new tile on top of all three squares of one tile. Nor may you overhang any of the new tile over the bare table.
Pick up your Hero and add it to its same location on the stacked tile. If the other stacked squares contain Birds, pick them up and add them in the same places on the new tile. In this way, it is possible for the Hero and Birds to change from Forests to Mountains or vice-versa.
If you have connected the last Travel tile or the last Coast tile, this is the last turn before scoring.
4. Add Creatures
For each empty square on the new tile, draw a random Creature from the bag containing the correct shape – Birds on Land, or Ships on Water. Choose which Creatures go on which empty squares.
You need not fill a square containing a Hero. If you performed Geomancy, you need not fill squares which already contain Creatures.
If the bag of the required Creature shape is empty, put all the Creatures of that shape from the Creature discard pile into the bag, and continue drawing until you have filled the empty squares on the tile.
If all seven Birds in an Evil color, or all seven Ships in an Evil color, are standing on tiles on the Map, the game instantly ends, and you lose.
5. Check For Dungeons
Checking for a dungeon works the same as in the multiplayer game: Creatures compete to place a Dungeon Door in their color. However, when Creatures place a Door and leave the Map, they are set aside in the Creature discard pile. They do not return to their bag until you draw from it and find it empty.
Ortho And Dia Gon'all Variant
The "Summoners" five-player expansion product (see page 26) also includes tokens representing The Father And Mother Of Geomancy. However, they are not used with the Summoners expansion – they only come on the same punchboard with it. They may be used as the Hero token in Solo Quest mode, using only one of them with the normal rules, or both of them as follows.
To set up, add both Heroes to the starting Travel tile. Add Ortho to the square next to the Coast tile, and add Dia in the square next to that.
In your Travel phase, move whichever Hero you did not move last turn. They may move through each other, but may not end the Travel phase in the same square.
Expansion product included separately: "Dia Gon'all" Hero token (1) and "Ortho Gon'all" Hero token (1).
Dia may Step between different terrain types, and possesses the ability to make diagonal Steps through the corner of squares. But she lacks the normal ability to make orthogonal Steps through the edges of squares. When she ends her Travel by stepping off a tile onto a table, you may not attach your tile by only a corner. She must step off a tile onto a location where you can connect at least one jigsaw tooth as normal.
Provisions Expansion
Included with base game.
Provisions reward the creation of large gaps, and provide even more paths to victory. It includes 24 cardboard Provisions tokens, and a Shop card. A Provisions token depicts an item which is useful to any Explorer embarking on a quest of discovery: torch, map, key, potion, or chicken leg. Players will attempt to place these at the entrances to the dungeons they discover.
At the start of the game, place the Shop card on the table, and sort all of the Provisions tokens onto it, front-side up. (The back side depicts a cloud.)
How To Place Provisions
When you place your dungeon Door into a gap which is more than one square in size, also take Provisions of your choice from the Shop card, and place one into each square in the gap, except for the square occupied by your dungeon Door.
When you move one of your dungeon Doors out of a gap with Provisions, into a new gap, the "exhausted Explorer" with which you replace the Door (see page 8) will continue to give you ownership of the Provisions.
Objective And Scoring
You want sets of different Provisions. At the end of the game, count the number of different items of Provisions in gaps which contain your dungeon Doors – not the number of Provisions, but the number of Provisions that are different from each other. Multiply this number by itself. For example, if your gaps contain a potion, a key, and a torch: 3 different items of Provisions times 3 equals 9 points.
If your gaps contain multiple copies of the same Provisions item, use them to start new sets.
A set of Provisions does not have to all be in the same gap. If it helps you to take score, take all the Provisions out of the gaps containing your dungeon Doors and your exhausted Explorers; place all of them in front of you on the table; and then arrange them into sets. Each set of Provisions contains only items that are different from each other. Each duplicate would start a new set.
| Types | Points |
|---|---|
| 1 | 1 |
| 2 | 4 |
| 3 | 9 |
| 4 | 16 |
| 5 | 25 |
Examples (illustrated in the rulebook; Explorers are removed from the diagram to focus on the Provisions): Nuri has a key, a potion, and a chicken leg. He adds 9 points (3 x 3) to his score from dungeon distance, and his score from controlling regions. Ke-Yi has a map, a torch, a chicken leg, and a key, for 16 points (4 x 4). She also has another map and another key, so that set is worth 4 points (2 x 2). She adds these 20 points to her score from dungeon distance, and her score from controlling regions.
When using the Provisions expansion, you may no longer add a Coast tile within a completed gap, because it would cover a Provision.
Towns Expansion
The Towns expansion has eight Travel tiles which introduce a new terrain type on their land side: Towns. It includes two Coast tiles, showing Towns. It also includes six Sidequest tokens which are one square in size and are bordered with paving stones. You can identify all components in the Towns expansion by the paving stone texture.
Sidequest tokens must be added to Towns in place of Explorers. Each Sidequest token rewards players with bonus points for having Explorers in specific terrain types at the end of the game. The citizens of a Town love the terrain types depicted on their Sidequest tokens, and they want players to go out into the world and occupy these terrain types.
A Sidequest token is one square in size, but it has no Puzzelock teeth. A Sidequest token is double-sided. On each side, it depicts a terrain type (Reef, Whirlpool, Mountain, or Forest). Explorers may not stand on top of Sidequests.
Setup
When adding the Travel tiles to the bag, include the Town Travel tiles.
Include the Town Coast tiles in the Coast pile.
Mix up the Sidequest tiles, randomizing which sides are face-up. The face-down sides remain secret, until a player claims a tile and inspects it.
Instructions
The Land side of the Travel tile you draw in your "Draw A Tile" phase might depict the Town terrain type. The other side is a LAND HO illustration, so the player may return the tile to the bag and connect a Coast tile instead.
Your "Add Explorers" phase is different if you connected a Travel tile or Coast tile with the Town terrain type. You must fill this Town square with one Sidequest from the pile, instead of one of your Explorers.
To add a Sidequest, select one from the Sidequest pile. Inspect the terrain type on its concealed side. You may add the Sidequest with the concealed side face-up, or leave the concealed side face-down without revealing it to your opponents. The Sidequest will only offer bonus points for the terrain type which is face-up.
Once the Sidequests have run out, further Towns do not contain anything – Explorers may never occupy Town squares.
An Explorer may never stand on top of a Sidequest – the Sidequest is the only thing that may occupy a Town square. Coast tiles may never contain Explorers, but a Coast tile with a Town will contain a Sidequest.
Sidequest tokens are not Explorers, and never leave the Map when resolving gaps.
Game End And Scoring
At the end of the game, each Sidequest token provides bonus points. To score a Sidequest token, count the number of your Explorers adjacent to the Sidequest token (sharing an edge, not a corner). Then multiply this times the number of your Explorers in your color everywhere on the Map. (See the scoring example on the next page.)
To word it another way: Each Explorer you have on the terrain type shown on a Sidequest earns you one point per Explorer you have adjacent to that Sidequest token (north, south, east, and west).
For example, if you have one Explorer next to a Mountain Sidequest token, and next to a second Mountain Sidequest token you have three Explorers, each of your Explorers on Mountains throughout the Map would score four points. So if you have five Explorers on Mountains, they are worth a total of twenty points.
This is in addition to any other points those Explorers might otherwise score, such as for winning regions.
Example (illustrated on page 22): Red has 1 Explorer next to this Reef Sidequest, and 1 Explorer next to this Reef Sidequest, which award 2 points for each Red Explorer on Reefs, for a total of 4 points for Reef Sidequests. Red has 1 Explorer next to this Mountain Sidequest, which awards 1 point for each Red Explorer on Mountains, for a total of 3 points for Mountain Sidequests. This Red Explorer next to a Whirlpool Sidequest awards 3 points, because Red has 3 Explorers on Whirlpools.
Fire Of Eidolon Promo Card
Included in your copy of Overworld is a special edition promotional card for our previous title, Fire of Eidolon. You may use this card, as well as borrow one Yellow Umbird and two Yellow Door Meeples from Overworld to add the 13th Hero Character to your Fire of Eidolon roster!
BEAUKOH the UMBIRD – 3 AP per turn | Focus: Strength
NOBLE STEED (Basic skill – 0 AP – PASSIVE): Just as the Umbirds help our Faction's Explorers map the Overworld, so shall they help you explore the perilous Dungeon. Another player's Hero standing at your Current Location when you start your turn may be carried with you whenever you Move for the duration of your turn. You may only carry one Hero at a time and only one per turn. The Move actions do not have to be consecutive – in other words, you may Move, Attack, and Move again, carrying the same Hero with you for both Move Actions.
DOOR DISCOVERY (Master skill – 3 AP – Once per game): Umbirds have been particularly useful for discovering the entrances to Dungeons throughout the Overworld. They seem to know much more about them than we realize; they understand how they all connect. Place one of your two Dungeon Door meeples over an unconnected doorway at your Current Location, and place the other over a different unconnected Doorway on any other Basic Chamber Tile you wish. These two Chamber Tiles are considered Adjacent and Connected, and any Heroes may move between them freely with Move Actions. If either of these Chambers leaves play, both Door Meeples are removed from play.
The rest of the rules you'll need to know to use this Hero Card can be found in the Fire of Eidolon rulebook.
Airship Expansion
The Airship is a single L-shaped tile. This vessel of myth and legend was thought to be lost to the ages, until valiant Explorers uncovered it.
The Airship tile stacks on top of the Map, over land or water, and picks up the Explorers there. It may contain Birds and Ships and transport them anywhere. Imagine airlifting some of your Ships to team up with your Birds to help you score a Dungeon on the land!
Warning: Players may use the Airship to move their opponents' Explorers, not just their own!
Setup
Before the game, connect one random Travel tile to the beginning Coast tile. Instead of adding Explorers to it, stack the Airship on it.
Give each player an Airship Fuel token. Stack the rest of them in a pile.
When there is a competition to put a Dungeon Door in a gap, all players who have Explorers competing for that gap receive an Airship Fuel token from the pile, if they do not win the gap.
Face-down Provisions tokens are Airship fuel.
How To Use The Airship
Before or after any phase of your turn, you may return any number of Airship Fuel tokens to the game box. For each token you return, launch the Airship and land it elsewhere.
To launch the Airship, pick it up from the Map. You may leave behind one or more Explorers on the same square that Explorer was stacked on – but only if the Explorer is of the correct shape for that terrain (Birds on Land or Ships on Water).
To land the Airship, select a series of three squares on Travel tiles on the Map, on which to land. The three squares may be on two or three Travel tiles, so long as they are in the L-shaped pattern on which the Airship can fit.
If any of those three squares contain an Explorer, pick it up and add it to the Airship so that this Explorer remains stacked over its same location. However, you may not land the Airship in a location if an Explorer you are landing on would "collide" in the same square with an Explorer currently riding the Airship. Explorers riding the Airship may not move into an empty square of the Airship to make room.
If you spent the last Airship Fuel token in the game, the Airship has crashed. In that case, connect the Airship's Puzzelock teeth to the Map. You may flip over the Airship so that it connects to either land or water. Leave the Explorers on it.
The Airship is one region made of three squares of Sky Terrain. When squares are covered up by the Airship, they have temporarily transformed into that region. So when the Airship lands, it can split up existing regions, but when it launches, that effect goes away, and the squares it was covering are restored to the regions they would otherwise have been part of.
Interacting With The Towns Expansion
If an Airship lands on a Town containing a Sidequest, pick up the Sidequest token and add it to the Airship as if it were an Explorer. When the Airship launches, it must leave behind the Sidequest on the Town. Sidequests may not be moved – not even by an Airship.
An Explorer may never stand on a Sidequest token, so the Airship may not land on a Town if it would cause an Explorer to share a square with a Sidequest. Explorers may not occupy the Town terrain type, so the Airship may not leave behind an Explorer on a Town, even if the Town contains no Sidequest.
If the game ends with the Sidequest token on the Airship, the Sidequest will still be scored as normal for the Explorers in the four positions adjacent to it (north, south, east, and west).
Overworld: Summoners (Five Player Expansion)
Sold separately. The "Overworld: Summoners" expansion (sold separately) accommodates a fifth player in a blue color. The additional Travel tiles provide each player in a five-player game with an average of eight total tiles each time you play, so that they may take a satisfying number of turns. Summoning allows (and sometimes requires) players to be involved on more turns than just their own, and decreases downtime between turns by providing opportunities for negotiation.
The expansion includes 8 Travel tiles, 2 more Coast tiles, 7 blue Birds, 7 blue Ships, 3 blue Doors, 2 more Sidequest tokens, and Provisions for use with five players.
This expansion adds approximately fifteen minutes to the length of the game.
The Summoning gameplay mechanic and the new tile set is not recommended for two players.
See page 17 for how to play Solo Quest mode using Hero tokens representing the Father & Mother of Geomancy, Ortho & Dia Gon'all.
Setup
Give each player one Explorer in a random shape in each of the colors of their opponents! They hold the rest of their own color of Explorers as normal.
Put the expansion Travel tiles in the bag with the other Travel tiles, and the expansion Coast tiles in the pile with the other Coast tiles. If there are fewer than five players, randomly remove 4 Travel tiles and 2 Coast tiles from the game in a 4-player game, or 6 Travel tiles and 3 Coast tiles in a 2-or-3-player game.
Summoning
The Summoners expansion changes the "Add Explorers" phase of your turn.
You may strike a deal with any or all of your opponents to place any number of their pieces in place of your own. You must place pieces of the appropriate shape for the terrain type they are added to. For each Explorer you Summoned from an opponent, give that opponent one of your own Explorers (in either shape); your opponent will hold your Explorer in their own supply.
In order to Summon, you must have an Explorer to exchange (except in the case of Deserts and Icebergs, as discussed in the next section).
A player who begins the "Add Explorers" phase holding Explorers of their opponents must add those Explorers of the appropriate shape, before they add Explorers of their own color.
Desert And Iceberg Terrains
Deserts and Icebergs form separate regions just like any other terrain types.
Deserts and Icebergs may have either shape of Explorers. This is the only way to play Ships on Land, or Birds on Water.
You may think of Ships in the Desert as sand-Ships, and Birds which waddle around on Icebergs are, um, Birds.
During your "Add Explorers" phase, you may not add your own Explorers to Desert or Iceberg squares on the Travel tile you connected. Summoning is not optional on Deserts or Icebergs. You must Summon Explorers held by your opponents, in either shape, and add them on those terrain types. You may not select an opponent who holds no Explorers. If no one volunteers to be Summoned to Deserts or Icebergs, you may choose an opponent. If someone volunteers, you must accept their offer. If there are multiple volunteers, you may choose between them.
In exchange, you must give an Explorer in your color, of either shape, to the player whose Explorer you placed, to hold in their own supply, just as in any other Summoning. If you have run out of both shapes of Explorers in your supply, place your opponent's Explorer without giving one of yours in return.
Negotiation
At any time, players may initiate offers to the current player, and the current player may initiate offers to other players, for control of decisions the current player has not yet made. A specific decision in the current turn is exchanged for a promise of control of another player's specific decision in a future turn. A player who received control of a future decision may choose when to redeem this promise, and the promise must be kept.
Specific decisions which can be offered include:
- Connect a LAND HO tile to the Map, or return it to the bag to connect a Coast.
- Choose a location to connect a tile to; or choose a rotation for a tile being connected; or both.
- Select an opponent to Summon.
- Break a tie for who places a Dungeon Door in a gap.
- Select the order in which simultaneous gaps are resolved.
Decisions related to Overworld may not be exchanged for decisions unrelated to Overworld, such as "choose a pizza topping for the game party's dinner".
Never return to a previous phase of a turn to make an earlier decision differently. Once you start playing a new phase of your turn, it is too late to negotiate earlier phases.
Also, do not stop and wait for each silent person to verbally confirm their decision to not make an offer. Silence means "no deal", so impose time pressure, and move along at a normal speed.
Negotiation Example
In Roger's "Grow The Map" phase, he connected the teeth of a Travel tile to the Map. No one interrupted to ask him to rotate or locate it in a way of their own choosing, so he has moved on to the "Add Explorers" phase.
Roger's tile has an Iceberg on it. Roger counts down from three, but no one volunteers to be Summoned to the Iceberg, so Roger says he will Summon Nuri.
Nuri interrupts to ask Roger to select Beth instead. Roger asks Nuri for the privilege of breaking a tie for a Dungeon Door on one of Nuri's future turns. This is too much for Nuri, who counter-offers to allow Roger to choose a square of the Map to which to connect one of Nuri's future Travel tiles, but not choose the rotation.
Simon really wanted to be Summoned, in order to get two points for the Iceberg. But first he wanted to see what someone else would offer. So Simon interrupts and counter-offers to allow Roger to Summon him, if Simon may choose both the location and rotation of one of Roger's future tiles. Roger accepts Simon's offer, takes his Bird, and adds it to the Iceberg. This is legal because Icebergs may contain Birds or Ships. Roger gives Simon one of his Ships to hold.
Having exchanged an Explorer and physically touched an Explorer to the Iceberg, it is too late to interrupt and renegotiate this decision.
On Simon's turn, since he holds Roger's Ship, he must add it to a Reef or Whirlpool before adding any of his own Ships.