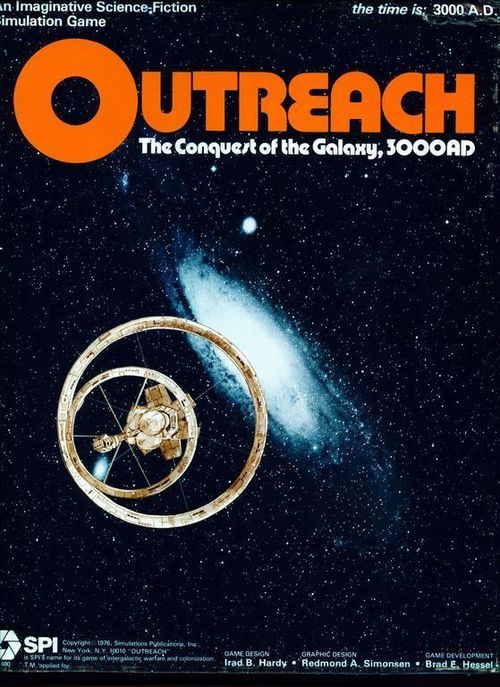
Outreach: The Conquest of the Galaxy, 3000AD
Outreach: The Conquest of the Galaxy, 3000AD Rulebook
Table of Contents
Table of Contents
- 1.0 Introduction
- 2.0 Basic Terms
- 3.0 Game Equipment
- 4.0 Sequence of Play
- 5.0 Stellar Shifting
- 6.0 Exploration
- 7.0 Contact
- 8.0 Interaction
- 8.1 How to Use the Interaction Displays
- 8.1.1 Choosing Interaction Options
- 8.1.2 Options for AFs
- 8.1.3 Showing Player Options on the Interaction Display
- 8.1.4 Showing AF Options
- 8.1.5 Altering Interaction Options
- 8.1.6 Contact Requirement to Alter Options
- 8.1.7 Removal of Counters From Interaction Display
- 8.1.8 AFs Contact
- 8.1.9 Altering AF Interaction
- 8.2 Interaction Options
- 8.1 How to Use the Interaction Displays
- 9.0 Conflict
- 10.0 Reduction
- 11.0 Fate
- 12.0 Civilization Level
- 13.0 Autonomous Units
- 14.0 Resource Allocation
- 15.0 Beacon Stars
- 16.0 Interstellar Dust
- 17.0 The Galactic Nucleus and Wisdom Chits
- 18.0 Scenarios
- 19.0 Player's Notes
- 20.0 Designer's Notes
- Sequence of Play and Explanation of Fate Table Results
1.0 Introduction
A. Outreach is a simulation of intra-Galactic exploration and conflict. Extrapolating some of the trends depicted in SPI's Starforce game, Outreach posits large-scale, telesthetically-guided interstellar travel by a variety of species. The game centers around a period of relatively rapid expansion by ambitious, dynamic civilizations striving to increase the range, and perfect the utilization of their access to the resources and experiences of the Universe.
B. The game is divided into Game-Turns (turns), during which each side has the opportunity to explore unfamiliar reaches of the galaxy, to contact any sentient beings with similar capacity for telesthetic interstellar travel, to interact with any that are contacted, and to allocate resources to such tasks as the settlement of explored areas, the production and maintenance of space-faring forces, and the increase of the level of one's own civilization. The object of the game is to locate and explore star systems, obtaining resources from them while attempting to Neutralize similar efforts by other players.
C. Outreach may be played by one to four players.
2.0 Basic Terms
2.1 Glossary
For the convenience of the players, the most significant terms referred to in the rules are defined below:
2.1.1 Autonomous Force
Units belonging to an imaginary directing will, representing the forces of beings with telesthetic transport capacity which are not owned by any of the actual players in the game. Units of an Autonomous Force (AF) arrive according to special rules, and their actions are regulated by those rules. Autonomous units are controlled by a Caretaker.
2.1.2 Caretaker
The side controlling a given AF. The side discovering that force becomes its Caretaker.
2.1.3 Contact
The method by which forces of different players within the same hex determine whether they have actually met and can thereby initiate interaction.
2.1.4 Interaction
The process which determines the relationship – friendly, neutral or hostile – between different forces that have effected Contact.
2.1.5 Force
A StarFleet, or group of StarFleets, owned or directed by the same player beginning the Movement Phase in the same hex.
2.1.6 Friendly
The status of one force or Stargate vis-à-vis another. A force is Friendly to a second force only if both are owned or controlled by the same player or directing will.
2.1.7 StarFleet
A. A StarFleet (SF) is the basic unit of strength in the game. Each SF represents, in addition to actual space-faring ships, an allocation of such resources as time, energy, personnel, and equipment. The shift of an SF into a hex may therefore represent not solely a redisposition of forces in the military sense, but also, or, alternatively, an economic decision to apply resources to the development of that hex.
B. There are three types of SFs: Regular, Explorer, and Dreadnought.
2.1.8 Shift
A. The instantaneous movement of SFs from point to point in space, or in game terms, from one hex to another. All game movement is in terms of shifting.
B. Unlike most games, movement in Outreach is not traced through contiguous hexes between the points of origin and destination; rather it is a transfer from the point of origin directly to the destination without any actual movement through the intervening space.
2.1.9 StarGate
A StarGate (SG) is permanent self-sufficient settlement or collection of settlements in a hex which enhances the ability of friendly and allied SFs to shift into the hex and which, when augmented, produces Resource Points (RPs), which may then in turn be expended for the raising and maintenance of SFs. Each SG starts the game with a zero value; the value may be increased by allotting Resources to it (14.1.3, 14.1.4).
2.2 Abbreviations
| Abbr | Explanation | Abbr | Explanation |
|---|---|---|---|
| AF | Autonomous Force | RIOT | Random Interaction Option Table |
| CLR | Civilization Level Range | RP | Resource Point |
| DRM | Die Roll Modifier | SF | StarFleet |
| LOS | Line of Sight | SG | StarGate |
| PV | Potential Value | SP | System Point |
3.0 Game Equipment
3.1 The Map
A. In producing a map of the galaxy for Outreach, we were somewhat handicapped by the fact that no one has ever really seen the whole thing! This problem is compounded by the presence of thick, obscuring clouds of interstellar dust, which at various distances, and with variable success, block our view along the plane of the Galaxy in almost every direction. The map is therefore based on the best guesses of experts, which in turn are based upon observations of the portion of the Galaxy which can be seen (parts of several spiral features are clearly discernable) and extrapolations based on the appearance of other galaxies with presumably similar features. At any rate, all the individual stars listed by name on the map are correctly situated relative to each other in the plane of the Galaxy.
B. The 22" x 34" mapsheet depicts an area some 28,000 by 50,000 light years, including approximately one-third of the Galaxy.
C. Each hex is some 1200 light years in diameter, and represents a portion of space some 1500 light years thick.
D. The map contains several different features:
- Spiral Axis (green): These hexes lie in the central realm of the Galactic spiral features and contain the thickest concentrations of planet-rich stars.
- Spiral Fringe (gray): These are situated along the edges of the spirals and contain relatively fewer Stars than the Spiral Axis Hexes.
- Inter-Spiral (black): These are the hexes defining the spaces between the spiral arms comprising the Galaxy. Few stars exist in these regions.
- Galactic Nucleus (red): The center of the Galaxy, closely packed with older stars which are unlikely to possess many planets.
- Galactic Core Hexes (with W): These three hexes indicate the very center of the Galaxy. No one has any idea what is there.
- Beacon Stars (red dot with name or location): Hexes containing essentially the largest and most radiant stars visible from Earth. Each star has its official designation or name printed in its hex. Names have no bearing on play and are included in the interest of scientific accuracy.
- Inter-Stellar Dust Clouds (red hexsides): Much of the Galaxy is obscured from Earth because of the presence of these thick, obscuring clouds. They seem to be concentrated in the area of the spiral arms. All of the ones we know of are included on the map as well as many we don't know of.
3.2 Playing Pieces
There are four colored sets of player pieces, four sets of AF counters, and 100 other markers. Players should punch these pieces out of the countersheet and sort them by color and type into the compartmentalized plastic tray.
3.2.1 Unit Counter Manifest
3.2.1.1 Player-Owned SF Counters
A. Each counter may represent any number and/or combination of types of SFs, each with a fleet designation on the front and a C marked on the back.
B. The C side is used to indicate Contact (7.0). Each side records the composition of the total Force that each of SF counter represents on a sheet of paper or in another suitable format.
3.2.1.2 Player-Owned SG Counters
A. Each counter represents one SG of any System Point (SP) Value (14.1).
B. Players record the current SP Value of each Friendly SG on a sheet of paper or in another suitable format.
3.2.1.3 AF SF Counters
Unlike the player-owned counters, each of these always represents one AF SF. The type of SF (Dreadnought or regular) is determined by the back-printed symbol on each counter, which is only revealed when necessary for Conflict or Reduction resolutions (9.0, 10.0).
3.2.1.4 AF SG Counters
Each counter represents one AF SG. Unlike the player-owned SG counters, the SP Value of these SGs is non-changeable and printed on the back of each counter.
3.2.1.5 Wisdom Chits
There are ten of these; all have a W printed on the front. Nine are blank on the reverse side, while one has an X on the reverse side.
3.2.1.6 Beacon Stars
These counters represent new stars discovered during the game (15.0).
3.2.1.7 Potential Value Chits
A. Each Potential Value (PV) chit determines the Potential SP Value of a particular hex on the map (6.0). There are three values on the chit. The value in the upper left corner is operative if the applicable hex is Spiral Axis; the one in the center is applicable if the hex is Spiral Fringe; and the one in the bottom right corner applies to Inter-Spiral hexes.
B. Thus, using the chit pictured, if the hex it were chosen for were Inter-Spiral, its potential SP Value would be 2; if it were Spiral Fringe, its Potential SP Value would be 1; if it were Spiral Axis, the hex would have a Potential SP Value of 5.
3.2.2 Counter Sheet Errata
Due to a printer's error, twenty of the SF counters do not have a C back-printed on them as they should. These are counters 406-425.
3.3 Setup
A. Determine how many people will be playing and select an appropriate scenario (18.0).
B. Sit around the map so that it is clear who is sitting to the left of whom (4.2).
C. Each player receives a set of counters and deploys them according to the instructions in the scenario setup.
3.3.1 Wisdom Chits
A. Place all the Wisdom Chits on the table (not the map) with the W-side up. Then, without revealing the reverse sides, place one Wisdom Chit, selected at random, in each Galactic Core hex (a total of three).
B. Each time a Wisdom Chit is returned to those deployed off board, mix all Wisdom Chits again (11.2.5).
3.3.2 Potential Value Chits
Place all PV Chits in an opaque container. Draw PV Chits from this container at random when necessary (6.0). Return the chits to the container when no longer needed on the map.
3.4 Inventory of Game Parts
A. A complete game of Outreach includes:
- One Rules booklet
- One Sheet of Die-Cut Playing Pieces
- One 22" x 34" Game Map
- Four Identical Sheets of Charts
- One Game Box
- One Plastic Die
B. If any parts are missing or damaged, please write:
Customer Service Simulations Publications, Inc. 44 East 23rd Street New York, N. Y. 10010
C. Questions regarding the rules of the game will be answered if accompanied by a stamped, self-addressed envelope, and if phrased to be answered by a simple one word answer. Send rules Questions to the above address and mark the envelope Outreach Rules Questions.
4.0 Sequence of Play
4.1 The Game-Turn
A. Outreach is played in Game-Turns (turns). During each turn, all players have the opportunity to move their Forces, explore unfamiliar regions of the Galaxy, interact with any other Forces with which they may come into Contact, and allocate their resources to various political, military, and economic projects as they see fit.
B. The scenarios (18.0) define the number of turns which the game will last; generally, play will continue until one or more sides have achieved a victory (as defined in each scenario).
C. All action must take place in the sequence outlined below. Any action occurring outside the sequence as outlined is a violation of the rules and is not permitted.
4.2 Turn Outline
4.2.1 Shift Order Determination Phase
The players seat themselves around the game map. Each draws a chit from among the PV Chits and totals the three numbers appearing on the chit. The player with the highest total moves first, the player immediately to the left of the first player moves second, and so forth. This procedure determines the Shift Order for that turn only.
4.2.2 Shift Phase
4.2.2.1 Regular Shifts
A. Beginning with the first player and continuing in clockwise order, all SFs may attempt movement from one hex to another hex per the rules governing Stellar Shifting (5.0).
B. As each SF (or group of SFs) is shifted, the success of the move is determined by consulting the Scatter Table (5.5). Immediately apply any effects called for by that table.
C. After all movement is complete, any eligible AFs are moved by their caretaker per the rules governing the actions of AFs (13.0).
4.2.2.2 Reserve Shifts
Beginning with the last player to complete Regular Shifts, and continuing in reverse order back to the first player to move, each may move one reserve SF or stack of SFs which did not conduct a Regular Shift earlier in the turn (5.2).
4.2.3 Exploration Phase
Beginning with the first player and continuing in order with the others, any unexplored hexes in which a player has one or more SFs may be explored. Refer to the Exploration Table to determine the success of exploration efforts (6.0).
4.2.4 Galactic Interrelation Phase
4.2.4.1 Contact Segment
For each hex in which there are Forces which do not belong exclusively to one side, consult the Contact Table to determine if the Forces in question are aware of each other's presence (7.0).
4.2.4.2 Interaction Segment
A. For each hex containing Forces controlled by different players, each of the affected players may refer to the Interaction Matrix to determine the relationships between the two players.
B. The Interaction Matrix is also used to define the relationship between a player and any AF which may be Contacted.
C. Players may change their relationship vis à vis the other players' Forces each turn, within the confines of 8.0.
4.2.4.3 Conflict Segment
For each hex containing more than one Force, Conflicts between pairs of Forces may occur (9.0), as long as Contact has been established and according to the relationships of the parties involved.
4.2.4.4 Reduction Segment
A. Reduction is the neutralization (a process which renders the gate useless) of SG counters.
B. Neutralization may occur in hexes where there is:
- An SG counter and
- One or more unfriendly Forces and no friendly Force (10.0).
4.2.5 Fate Phase
A. Beginning with the first player and continuing in order, each rolls on the Fate Table, applying, if desired, RPs to influence the results. Immediately implement applicable results.
B. In the event of the discovery of an AF, recourse to the Interaction Table and possibly the Conflict and/or Reduction Tables will be called for.
4.2.6 Resource Allocation Phase
A. Calculate RP totals based on the number of SPs each player controls.
B. Transform existing SFs into SGs or gain the allegiance of neutral settled hexes.
C. Expend RPs to construct new SFs and/or settle hexes with a Friendly SG (14.0).
5.0 Stellar Shifting
A. During the Shift Phase, each Force may conduct Stellar Shifts (movement) from one hex to another. Shifting is not movement through space, as is normally thought of, but rather it is jumping from one point in space directly to another point without having physically traversed the Intervening space. This transfer from point to point is referred to as a shift. As such, there are no Movement Allowances for SFs (as there are for units in many other SPI games).
B. The capacity of a Force to shift from one point to another is theoretically unlimited, although in practice there are several factors which enhance and/or constrain their capacity to move. For example, shifts of long distances are generally more risky than shorter shifts. A risky shift may fail and result in the shifting Force being scattered. This risk decreases as the Civilization Level increases.
C. The Movement Phase consists of Regular Shifts by each player, followed by the movement of AFs and any Reserve Shifts.
D. Starting with the first player and continuing in order (4.2), conduct Regular Stellar Shifts for as many of SFs as desired. The distance of the shift is calculated in hexes and cross indexed with a die-roll on the Scatter Table. If a scatter result is obtained, the effects are applied immediately.
E. After all Regular Shifts have been completed, conduct any Autonomous SF movements called for by the rules governing the use of AFs (12.0). Finally each player, starting with the last to conduct Regular Shifts and proceeding in reverse order, has the option to conduct Reserve Shifts for one Force (only).
5.1 How to Conduct Stellar Shifts
5.1.1 In General
During the Shift Phase, each player may move (or shift) as many or as few of her/his SFs as desired, but may shift only her/his own Forces. Players may never shift, nor examine other player or AFs or SGs.
Exception: 13.2.3.
5.1.2 Procedure
Each Force is shifted individually. Once a player stops shifting one Force and begins shifting another, the first Force may not conduct any more Stellar Shifts until a subsequent Shift Phase.
5.1.3 Forces
A. Friendly SFs occupying the same hex at the beginning of the Shift Phase may combine to form one or more Forces.
B. Friendly SFs in different hexes at the start of the Shift Phase may not combine to form one Force during that Shift Phase. Therefore, a Force which shifts from hex A to hex B may not pick up an SF in hex B and then shift to hex C during that Shift Phase.
C. The original Force, by itself, may, however, shift to hex C, providing the requirements of 5.2.1 are met.
5.1.4 Limit in Hex
There is no limit to the number of Star Fleets that may occupy any one hex. The number of SFs in a hex has no effect on the ability of any one Force to shift in or out of that hex.
5.1.5 Civilization Level Range Effect on Shifts
Each SF has a Civilization Level Range (CLR) which limits the distance over which it may shift in relative safety. The CLR of an SF is equal in hexes to the square of the owning player's Civilization Level.
Exception: Autonomous Civilization Levels (11.2).
Example: A Civilization Level of one means the CLR of all that player's SFs is one hex. If the Civilization Level increases to 3 means all that player's SFs would then have a CLR of nine hexes (3 x 3).
5.1.6 Shifts Exceeding CLR
A Force may conduct a Stellar Shift that exceeds its CLR only if it shifts from (not to) a friendly or allied SG.
5.2 The Concept of Continual Shifting
5.2.1 Successive Shifts
A Force which successfully completes a shift (i.e., does not scatter), the distance of which is less than or equal to that Force's CLR, to a hex containing a friendly or allied SG, may continue its movement by conducting another shift. There is no limit to the number of shifts which a Force may make to hexes containing friendly or allied SGs during one Movement Phase, so long as these conditions are fulfilled.
5.2.2 Shifting to Hex With Friendly/Allied SG
A Force which successfully shifts to a hex which does not have a friendly or allied SG must cease movement for that turn.
5.2.3 Effect of Exceeding CLR
A Force which successfully completes a shift which is greater in distance than that Force's CLR must cease movement for the rest of that turn (5.1.5).
5.2.4 Scatter/Attrition
A Force for which a scatter result is obtained on the Scatter Table may suffer attrition (5.5.1). Any surviving SFs are immediately transferred to their designated scatter hex (5.5.2), and must cease movement for the rest of the turn.
Exception: AFs never suffer attrition.
5.3 Reserve Shifts
5.3.1 In General
Forces that have not conducted a regular Shift in a given Game-Turn may use Reserve Shift under certain conditions. Except where noted the Rules governing Regular Stellar Shifts apply equally to Reserve Shifts.
5.3.2 Sequencing
Each player may conduct Reserve Shifts only after all AF movement (if any) has been finished.
5.3.3 Limit per Phase
Only one Friendly Force per player may be moved by Reserve Shift in any given Shift Phase. Forces which have conducted one or more Regular shifts during a given turn may not be moved by Reserve Shifting in the turn.
5.3.4 CLR Limit
A Force may only conduct Reserve Shifts that are equal to or less than that Force's CLR (5.1.5).
5.4 Scatter
All Forces which conduct Stellar Shifts of a distance greater than one hex run a risk of scatter and attrition. Scatter is involuntary, uncontrolled shifting of a Force to a hex other than the one to which it was intended the Force should shift. Certain factors and conditions affect the chances for, and the potential severity of, scatter. In addition, Forces that scatter may suffer attrition; i.e., they may lose some of their SFs.
5.4.1 Determination of Scatter and Attrition
A. Calculate the length of the shift, in terms of the number of hexes, by tracing the shortest possible path of contiguous hexes between the hex the SF(s) is shifting from and the hex it is attempting to shift into.
B. In calculating the shift length count the destination hex, but do not count the hex of origin. Roll a die and cross-reference the result with the column corresponding to the shift-length on the Scatter Table. This determines the amount of attrition (if any) the Force will suffer as well as the distance (in hexes) of any scatter.
C. A second separate roll determines the direction of the scatter (5.5.2).
5.4.2 Shifts to Friendly/Allied Gates or Beacon Stars
If a Force shifts to a hex with a friendly or allied SG or a Beacon Star, apply a +1 Die Roll Modifier (DRM) to any roll on the Scatter Table.
5.4.3 Effect of Explorer SF
If a shifting Force includes at least one Explorer SF, apply a +1 DRM to any roll on the Scatter Table.
5.4.4 Effect of All-Explorer Force
If a shifting Force consists exclusively of Explorer SFs, apply a +2 DRM to any roll on the Scatter Table.
5.4.5 Effect of Higher Civilization Levels
If a player's Civilization Level is greater than 1, apply the amount greater than 1 as a DRM to any roll on the Scatter Table.
Example: If a player's Civilization Level is 3, apply a +2 DRM.
5.4.6 Modifiers Cumulative
Multiple DRMS on the Scatter Table are cumulative.
Example: If an Explorer SF belonging to a player with a Civilization Level of 4 shifted to a Friendly SG in a hex containing a Beacon Star, a +4 DRM would be applied to the Scatter Table roll.
5.5 Effects and Implementation of Scatter
5.5.1 Effect of Shifts Greater than CLR
If a Force attempting to shift a distance greater than its CLR (5.1.6) scatters, any attrition losses are doubled. Calculate the losses in SFs from the Percentage Loss Table and then double that number. Remember AFs never suffer attrition.
5.5.2 Determining Scatter Direction
If a Force scatters, determine the direction of the scatter from the original destination hex by rolling the die on the scatter diagram. The die roll corresponds to one of the numbered directions on the scatter diagram.
Example: A Force intends to shift into hex 2020. The modified roll on the 6-8 column of the Scatter Table is 4. Therefore, the Force scatters six hexes. The die is rolled again and compared to the Scatter diagram; a 1 would send that Force to hex 2014, while a 3 would put it in hex 2623.
5.5.3 Removal Due to Scatter
A Force which scatters is removed from play if:
A. It scatters off the board;
B. Its attempted and unsuccessful shift was from or to a Galactic Nucleus hex; or
C. It has no unblocked line of sight (LOS, 15.0) to a Friendly or allied SG from the hex into which it has scattered.
Exception: A Force that scatters attempting a shift to a friendly or allied SG is not removed from play.
5.6 Effects of Special Galactic Phenomena on Shifting
5.6.1 Effects of Beacon Stars
The chances of scatter for Forces which shift into Beacon Star hexes are reduced (5.4.2).
5.6.2 Effect of Galactic Nucleus
A Force which shifts out of or into a Galactic Nucleus hex and is scattered is immediately removed from play.
5.6.3 Effect of Interstellar Dust Cloud
A Force may shift through an Interstellar Dust Cloud (16.0) hexside only if the shift is from one friendly or allied SG to another or from one hex to an adjacent hex. A Force is considered to be shifting through a Dust Cloud hexside if the LOS from the hex it is shifting from to the hex it is shifting to is blocked by a Dust Cloud hexside (15.2.5).
6.0 Exploration
Each Spiral Axis, Spiral Fringe and Inter-Spiral hex on the board has a potential SP value. At the beginning of the game each player knows only the potential SP value of a few hexes. To discover the value of an unknown hex, a player must explore that hex with SFs. This occurs during the Exploration Phase.
6.1 Procedure
A. Total the number of Friendly Explorer SFs in each hex that is to be explored and multiply by 2. Add to this the number of regular SFs.
B. Roll the die for each hex and cross-index the roll with the adjusted SF total on the Exploration Table.
C. The result states whether Exploration was successful.
D. Exploration Table rolls are resolved in turn, starting with the first player (4.2).
6.2 The Mechanics of Exploration
A. A player who successfully explores a hex which has not previously been successfully explored, and which has no PV Chit in it, randomly picks a PV Chit (3.3.2) and places it facedown in the explored hex.
B. Only the player who conducted the exploration may see the face of the PV Chit, until such time as that hex is successfully explored by another player.
C. A player who successfully explores a hex with a PV Chit already in it gains the right to see the value of the Chit.
D. A player may not explore any hex with a SG counter, even friendly, even if that hex also has a PV Chit.
Example: A player exploring a hex who receives a high PV may forestall other player exploration of that hex by building an SG.
AFs never use the Exploration Table (11.0).
E. Galactic Nucleus hexes may not be explored.
PV Chits are removed from any hex containing an SG that has a SP Value equal to the PV of the hex (14.1.6).
7.0 Contact
A. With each hex in Outreach representing a three dimensional area some 1200 by 1500 Light Years it is far from a foregone conclusion, even given a generational turn, that Contact between different Forces in the same hex will occur. This is particularly so when one side (or both) seeks to avoid Contact.
B. Whenever a hex is occupied by an SG counter and/or a Force(s) any of which are not friendly to or allied with one another, consult the Contact Table to determine whether or not all Forces involved become aware of each other's presence in that hex. At his option, a player may seek to avoid Contact.
C. Each distinct group of Friendly SFs and/or Friendly SGs (player-owned or Autonomous) in a hex must (separately) consult the Contact Table. Once Contact in a hex is established, it automatically affects all Forces and the SG (if any) in that hex. Players may only proceed to use Interaction when Contact has been established.
D. Resolve all Contact situations, starting with the lowest-numbered affected hex. For each player-owned Force and/or SG involved in a possible Contact resolution, the owner calculates the Contact Index maximum and minimum for each Force involved, then chooses a column on the Contact Table. In general, a player can choose any Index number between the maximum and minimum, according to the desired action.
E. For each Active Autonomous Force or SG, the Caretaker calculates the largest possible Contact Index.
F. For each Passive Autonomous Force or SG, the Contact Index is the number of SFs in the hex.
G. If there is an SG present (Autonomous) the Caretaker adds 3 to the Index, if the AF is Passive. The Contact Index for each distinct friendly Force/SG in each hex is now announced simultaneously, and each Index is cross-referenced with a die roll on the Contact Table.
H. If a C is the result on any roll for a particular hex, invert any one player-owned SF counter in that hex and place it on top of all the other counters and chits in that hex. That hex is now said to contain a Contact marker.
I. Repeat this procedure until all combinations of non-friendly, non-allied Forces/SGs in the same hex (that are eligible) have used the Contact Table.
7.1 How to Calculate the Contact Index
7.1.1 Highest Possible Contact Index
To determine the highest possible Contact Index, add the number of Friendly Explorer SFs in the hex to the total number of all the Friendly SFs in that hex; then add in the SP Value (14.0) of any friendly SGs present. This is the maximum possible Contact Index.
7.1.2 Lowest Possible Contact Index
A. The lowest possible Contact Index is the SP value of the Friendly SG (if any) in the hex.
B. If no friendly SG is present, then the lowest possible Contact Index is 0.
7.1.3 Selection of Contact Index
A player may select any Contact Index as long as it falls between the highest and lowest possible values (inclusive) for that hex.
7.2 Use of the Contact Marker
7.2.1 Effect of C Result
A C result on the Contact Table affects all Forces and SG (if any) in that hex. All Forces in that hex are considered to be in Contact with each other so long as they remain in that hex.
7.2.2 Shifting Into Hex With Contact Marker
At the start of the Contact Segment of each Galactic Interrelation Phase, any Forces which have shifted into a hex containing a Contact marker are placed under the Marker. Any such Forces are automatically in Contact with all other Forces and/or the SG in that hex.
7.2.3 Placing SG in Hex With Contact Marker
During the Resource Phase, any player who places an SG counter (14.1) in a hex containing a Contact Marker must place it beneath the Contact Marker. The SG is automatically considered to be in Contact with all Forces in the hex.
7.2.4 Allied Forces
A. Allied Forces (8.2) are considered to be in Contact with each other at any time that they are in the same hex. As long as all Forces and/or the SG in a hex are Allied with each other no Contact Marker is utilized.
B. However, if a non-Allied Force shifts into the hex a Contact Table resolution is required.
7.2.5 Related Alliances in a Hex
A Contact Marker is automatically placed in any hex which, at the beginning of the Contact Segment, has three or more Forces in it under the following provision: At least one Force must be allied to a second Force which in turn is Allied to a third, which is not Allied to the first Force.
Example: Player A is Allied with player B. Player B is allied with player C. Player C has never had any Force or SG in Contact with player A. At the beginning of the Contact Segment, Forces of all three players are present in a hex. Invert any of the present SF counters belonging to a player and place them on top of all other chits and counters; they are all in Contact.
7.2.6 Removal of Contact Marker
Return an inverted SF counter (Contact Marker) to faceup status whenever all Forces and/or the SG in that hex are friendly or allied (7.2.4).
7.2.7 Effect of Inversion on SF Counter
A. The inversion of an SF counter to indicate Contact in a hex has no effect on the particular Force represented by the counter. It may conduct actions such as Stellar Shifts, Conflict, and Reduction as usual.
B. If the inverted SF counter indicating Contact shifts away from the hex in which it was inverted, invert one of the remaining player-owned SF counters to indicate Contact.
7.3 Effects of Being in Contact
A. Interaction Matrix resolutions (8.2) are possible, and may be required, only in a hex containing a Contact Marker and/or between Forces/SGs in Contact.
B. Conflict (9.0) and/or Reduction (10.0) are possible only in a hex containing a Contact Marker and/or between Forces/SGs in Contact.
8.0 Interaction
A. When two distinct cultures interact, there is simply no telling what the results will be, except that they will likely be novel and may bear little direct relationship to the precontact intentions of those involved. Interstellar interactions, encompassing as they will so many unknowns, will undoubtedly prove even more unpredictable.
B. The Interaction Matrix is used to define how players in Contact may interrelate with each other (within the scope of the game) as well as with any AF with which they may come into Contact.
C. There are three Interaction Options:
- Cooperation,
- Neutral, and
- Hostile.
D. Each player picks an Option separately with regard to each other player or AF (hence, it is possible to be cooperative toward one player while being hostile toward another).
E. Record these Option choices on an Interaction Display.
F. Players may alter their choice of Options once per turn during the Interaction Segment.
G. AF Options, with regard to a player, may be altered randomly after all player Options choices have been made during the Interaction Segment.
H. By cross-referencing Options between players with Forces in Contact on the Interaction Matrix, the players can determine what courses of action they may take in reference to each other.
I. At the start of each Interaction Segment, each player determines which other players and AFs have SFs or SGs in Contact with any of his/her own SFs or SGs.
J. For each player or AF with which s/he is in Contact, place a corresponding color marker in an Option Space in the We section of the Interaction Display. Then reveal all Interaction Displays simultaneously.
K. Each player determines the Option chosen by each other player toward her/his color. Then move each color marker down into the They section, to the space in that column which corresponds to the choice toward his color of that player.
L. Any random AF Interaction Option changes (8.4) that are called for are now determined by die rolls on the appropriate AF Random Interaction Option Table column, and the Interaction Displays are adjusted accordingly.
8.1 How to Use the Interaction Displays
A. Each player has an Interaction Display. The Interaction Display shows the current Interaction Options chosen by the player vis-à-vis each other player and AF and vice versa. Each player's Interaction with each other player or AF is unique and is determined separately.
B. During the Interaction Segment, players may alter their Interaction Option choices be rearranging their Interaction Displays. After all player choices have been made, AF Options with regard to certain players may be altered randomly and the Interaction Displays adjusted accordingly.
8.1.1 Choosing Interaction Options
During the Interaction Segment players must choose Interaction Options (8.2) vis-à-vis any other player(s) and any AFs with which they have come into Contact for the first time since the last Interaction Phase.
8.1.2 Options for AFs
After all player Interaction Option choices have been made, Randomly select Options for AFs which have been Contact with one or more players for the first time since the last Interaction Phase. Use the No Previous Option column of the Random Interaction Option Table. This applies both to Passive AFs which will not have previously interacted with any players in the game, and Active AFs which will have interacted with one or more other players previously (13.2).
8.1.3 Showing Player Options on the Interaction Display
A. The horizontal dimension on the Interaction Display is used to record the owning player's Interaction Option Choices.
B. For each other player and/or AF in the game with which the owning player has at some point come into Contact, an SG counter of the appropriate color (or any other convenient marker) should be displayed in the appropriate vertical column of the Interaction Display.
C. The choice of column indicates the owning player's Interaction Option choice vis-à-vis the other.
Example: If player X has chosen Interaction Option C (hostility) with regard to player Y, Player X places a player Y SG counter in the third column of his/her Interaction Display.
8.1.4 Showing AF Options
A. The vertical dimension of the Interaction Display is used by each player to record the other player's AFs' Interaction Option choices vis-à-vis him/her.
B. The Option chosen by others determines which horizontal column the SG counters will be placed in on the Interaction Display.
8.1.5 Altering Interaction Options
During each Interaction Segment, a player may alter her/his prior choice of Interaction Options by secretly executing the Interaction Procedure.
8.1.6 Contact Requirement to Alter Options
Players may alter their Interaction Options only for players and AFs with which they are in Contact (7.2).
8.1.7 Removal of Counters From Interaction Display
A. Counters may never be removed from an Interaction Display unless a player or AF is eliminated from the game (10.2.5).
B. If a player loses Contact with another player, the latter's SG counter remains in place on the former's Interaction Display and may not be moved until Contact is reestablished.
8.1.8 AFs Contact
There are no AF Interaction Displays, and AFs may never Interact with each other.
8.1.9 Altering AF Interaction
A. AF Interaction Options may be altered during the Interaction Segment only after all player alterations have been completed and under the following conditions: If a player has had any counters on his/her Interaction Display shift from or to Option C during the current Interaction Segment, then all AFs with which s/he is in Contact are subject to random alteration of their Interaction Options in relation to him/her (only).
B. For each AF, roll a die and cross-reference it with the appropriate column of the Random Interaction Option Table to determine the Option chosen.
Exception: Player initiating Conflict or Reduction against AF (Exception to 13.2.6).
8.2 Interaction Options
A. There are three Interaction Options:
- A: Cooperation,
- B: Neutrality, and
- C: Hostility.
B. Each player picks one of these Options with regard to every other player and/or AF with which s/he comes into Contact, and vice versa.
C. These combinations of Options limit the possible Interactions (in game terms) between them.
D. During the Interaction Segment, for every player and/or AF that a player comes into Contact with, each player will select one of the three Options. After choosing Options, each interacting pair of players determines what combination of Options they have selected between the two of them.
E. Then, after any possible AF alterations are resolved, each player determines what Option combinations have resulted between him/her and each AF with which s/he is in Contact.
8.3 The Interaction Options
8.3.1 A/A
A. All Forces and SGs of both sides are considered allied. Friendly Forces may freely utilize allied SGs for shifting purposes and vice versa (5.2.1, 5.4.2).
B. Friendly and allied Forces/SGs in the same hex during the Contact Segment are automatically considered to be in Contact (7.2.4).
C. A Force may never attack a Force to which it is allied, nor may it reduce an allied SG.
8.3.2 A/B
A. The player choosing B may utilize the player choosing A's SGs for shift purposes as if they were allied, but not vice versa.
B. Contact between other A and B Forces in other, mutually-occupied hexes is not automatic.
C. Neither side may attack or reduce the other.
8.3.3 A/C
A. Contact in other, mutually-occupied hexes is not automatic. A may not attack or reduce C.
B. C's Forces may attack A's Forces or reduce A's SGs. Any such attacks are resolved two columns to the right from where they would be under normal circumstances on the Conflict Table. Any possible reductions are likewise resolved two columns to the right on the Reduction Table.
Example: If a C Force attacks an A Force of equal strength, the die roll on the Conflict Table would be cross-indexed with the 200%-299% column, rather than with the 100%-149% column.
8.3.4 B/B
A. Forces of neither side may use the other's SGs for shifting purposes, nor is Contact in other mutually-occupied hexes automatic.
B. Either side may freely initiate Conflict or Reduction resolutions against the other.
8.3.5 B/C
A. If C attacks any B Force, or attempts to reduce any B SG, the attack or reduction is cross-indexed with the column on the Conflict Table or Reduction Table one column to the right of the one which would normally be used.
B. Contact in other, mutually-occupied hexes is not automatic.
8.3.6 C/C
A. Conflict is automatic and mandatory in any hex in which both sides are in Contact.
B. Any losses incurred by the defender are doubled. (Translate the percentage loss given into a number of SFs and then double that number.)
C. Although conflict is automatic, Contact is not.
8.4 Random Interaction Option Table
A. The Random Interaction Option Table (RIOT) is used by each AF's Caretaker to determine that Force's Interrelations Options vis-à-vis each player Force it is in Contact with.
B. If there has been no previous Contact, the Caretaker uses that column. Otherwise use the appropriate (previously rolled) option column.
Exception: 13.2.6.
9.0 Conflict
9.1 In General
A. Conflict may occur during the Conflict Phase between non-friendly, non-allied Forces in hexes containing a Contact Marker, subject to the restrictions in 8.2.
B. For each hex in which Conflict is possible, each player present announces simultaneously whether or not s/he intends to attack (i.e., have Conflict).
C. AFs attack or not as mandated by the rules governing their employment (13.0).
D. All attacking players simultaneously indicate their Approximate Conflict Capacity.
E. However, for each attacking AF, the Caretaker reveals the True Conflict Capacity. The player (or AF) with the highest stated capacity attacks first, choosing a Force to attack (the defender) and both reveal their True Conflict Capacity.
- Resolve the attack on the Conflict Table.
- Losses are subtracted, then the player (or AF) with the second highest Approximate (or True) Capacity attacks (if that Force has any surviving SFs).
- Repeat this procedure until all attacks in the hex have been resolved.
- Proceed to the next hex where there will be Conflict and repeat the process.
9.2 The Mechanics of Conflict
9.2.1 Unitary Force
All Friendly SFs in a hex are considered to be one Force for the purposes of resolving Conflicts. No SFs may be held back or split into a second Force.
9.2.2 Attacking/Defending More Than Once
Each Force in a hex may attack only once during the Conflict Phase. However, a given Force in a hex may be attacked any number of times during the Conflict Phase.
9.2.3 Forces Independently Attack/Defend
Each Force attacks and defends independently. Two or more Forces may never combine for one single attack or defense.
9.2.4 True Conflict Capacity
The True Conflict Capacity of a Force is the total number of SFs in the hex minus the number of Explorer SFs plus the number of Dreadnought SFs.
Example: Player Z has 5 regular SFs, 3 Explorers, and 7 Dreadnoughts for a true capacity of 19 (15 - 3 + 7 = 19).
9.2.5 Approximate Conflict Capacity
The Approximate Conflict Capacity of a Force is its True Conflict Capacity plus or minus (at the owner's option) up to 50% of the total.
Example: A player with a true capacity of 10 may declare his/her approximate capacity to be anywhere from 5 to 15 (inclusive).
9.2.6 Dreadnought Attacking
For each Dreadnought SF in an attacking Force, apply a +1 DRM in resolving the attack on the Conflict Table.
9.2.7 Dreadnought Defending
For each Dreadnought SF in a defending Force, apply a -1 DRM in resolving the attack.
9.2.8 Applying Losses
Losses are selected by the owner as desired. However, Autonomous Dreadnought SFs are always lost last (after all regular Autonomous SFs have been lost).
9.2.9 Modified Rolls Less Than -2, Greater than 9
A roll less than -2 is treated as -2. A roll greater than 9 is treated as 9.
10.0 Reduction
A. Reduction is a process that renders an enemy SG useless. In some cases it may eliminate the SG entirely.
B. An SG that has been successfully reduced is considered Neutralized; it cannot be used for any purpose by anyone.
10.1 The Process of Reduction
A. Starting with the lowest numbered hex in which reduction is possible and continuing through to the highest, the owner of each player Force (or the Caretaker of each AF) calculates and reveals the Reduction Capacity of the Force attempting Reduction (10.2.2).
B. The strongest Force (in terms of Reduction capacity) resolves the first Reduction attempt, rolling a die and cross-referencing the result with the appropriate column on the Reduction Table.
- If it is unsuccessful, the next-strongest Force (if any) resolves the second attempt, and so on, until the SG is Neutralized and/or all Forces for which a Reduction Capacity was revealed have resolved a Reduction attempt.
- If any Reduction attempt is successful, the SG counter is inverted to indicate its Neutralization.
10.2 The Mechanics of Reduction
10.2.1 Eligible Hexes
Reduction may be conducted only in a hex which, at the beginning of the Reduction Phase, has an SG in it and which does not have any SFs Friendly to that SG in it.
10.2.2 Determining Column on Reduction Table
A. To determine the column on the Reduction Table to be used:
- Add the total number of Dreadnought SFs in the reducing Force to the Civilization Level of the owner. This is the Reduction Capacity of that Force.
- Add the SP Value of the SG to the Civilization Level of the owner.
- Subtract the second number from the Reduction Capacity.
B. Reduction may be conducted only by a Force which includes at least one Dreadnought SF.
Example: Six Dreadnoughts owned by a player with a Civilization Level of 2 attempt to reduce an SG with 3 SPs to a Civilization Level of 1. The Differential is 4: (6 + 2) - (3+1).
10.2.3 Effects of Neutralization
A. Neutralized SGs are useless; they are considered friendly to no one. They do not enhance the shifts of any player or AF into their hexes, nor do they count toward any player's SP or RP totals.
B. However, neutral SGs may be Deneutralized (to a friendly status) by any player (14.1.8).
10.2.4 Neutralization of Zero SP Value SG
If an SG with a SP Value of zero is Neutralized it is considered destroyed, removed from play, and replaced with a PV Chit of zero.
10.2.5 Effect of Loss of All Friendly SGs
A. A player with no friendly SGs (at any time) is eliminated from the game.
B. All of the player's remaining SFs are also immediately eliminated from play.
11.0 Fate
11.1 In General
During the Fate Segment, each player, starting with the First player and continuing in turn, must roll once on the Fate Table. Any relevant results are applied immediately.
11.2 How to Use the Fate Table
11.2.1 In General
A. Each player totals the number of SPs and rolls a die, cross-referencing the roll with the total SPs.
B. Die rolls may be adjusted or the SP column changed by the expenditure of RPs or by other player actions.
C. The various results are contingent upon certain preconditions and may be ignored if these conditions have not been fulfilled.
11.2.2 Adjustments for Exploration Table Results
Apply a +1 DRM to any Fate Table die roll per X the rolling player obtained on the Exploration Table during the Exploration Phase of the current turn. The adjusted die roll total may not exceed 6.
Exception: Adjustments for RP Expenditures (11.2.3).
11.2.3 Adjustments for RP Expenditures
A. Apply a +1 DRM to any Fate Table die roll per expenditure of 50 RPs by the rolling player.
Example: If a player expends 150 RPs apply a +3 DRM to such die-roll.
B. The adjusted die roll total may never exceed 8.
11.2.4 Shifts for RP Expenditures
A. Shift one column to the left on the table per 5 RPs the rolling player expends for that purpose.
B. This expenditure is in addition to and separate from the expenditure in 11.2.3.
Example: A player may expend 55 RPs to shift one column to the left and apply a +1 DRM.
11.2.5 Timing and Duration of RP Expenditures
A. A RP expenditure for the purpose of affecting a Fate Table roll must be made prior to that roll.
B. Each expenditure affects only one Fate Table roll.
11.2.6 Wisdom Chit Expenditures
A. Certain Fate Table results are preconditioned on the expenditure of Wisdom Chits (11.2). Any such expenditures must be made prior to the Fate Table roll for which they are intended.
B. The expenditure of a Wisdom Chit affects only one Fate Table die roll.
C. Expended Wisdom Chits are placed with undeployed Wisdom Chits off the board (3.3.1).
11.2.7 Results Applied Immediately
All applicable results obtained from a Fate Table die roll are applied immediately.
11.2.8 AFs
The Fate Table is never utilized by AFs.
11.2 Explanation of Fate Table Results
(Heading as printed in the source document, where it is numbered 11.2 a second time. The result explanations A through L are given in the appendix, "Explanation of Fate Table Results," at the end of this document.)
11.3 Dissolution
11.3.1 Effects
A. Dissolution results in the Neutralization of SGs friendly to the player rolling on the Fate Table.
B. Each fate result lists a percentage of the player's SPs to be Neutralized.
11.3.2 Affected SGs
A. The player rolling a Dissolution result on the Fate Table calculates the number of his/her SPs to be Neutralized (per the Fate result), rounding up to the nearest SP.
B. That player must then select a number of Friendly SGs to be Neutralized, whose total SP value is at least equal to the number of SP's to be removed. These SGs are now considered Neutralized (10.2, 14.1.7).
11.3.3 Selection of Affected SGs
Players may choose any Friendly SGs they wish to be Neutralized, so long as the total SP value of the Neutralized SGs is equivalent to the percentage of SPs that the Dissolution result calls for.
11.3.4 Recording Dissolution Results
A player may never suffer the same Dissolution Result more than once in the same game. To avoid confusion, record any Dissolution results obtained by each player or in another suitable format.
12.0 Civilization Level
12.1 In General
A. Each player's Civilization Level reflects the level of science and culture attained. Each player (and AF) is constrained in several ways by the Civilization Level.
B. It is possible for a Civilization Level to be increased or decreased.
12.2 The Effects of Civilization Level
A. All players start the game with the Civilization Level assigned in the chosen scenario.
B. The ability of a Force to conduct stellar shifts is affected by the Civilization Level of the owner or AF (5.1.5 and 5.4.5).
C. The chances of success of a particular Reduction resolution are in part dependent upon the Civilization Levels of the sides involved (10.2.2).
D. The ability of a player to Deneutralize SGs is affected by her/his Civilization Level (14.1.8).
E. The ability of a player to raise new SFs is affected by her/his Civilization Level (14.2.2).
F. Rolls on the Fate Table may result in an increase or a decrease in a player's Civilization Level (11.2). Each player keeps track of his/her current Civilization Level on a sheet of paper or in another suitable format.
G. If a Civilization Level decreases below zero, that player is eliminated. Remove all friendly SFs from the board. All friendly SGs are Neutralized.
13.0 Autonomous Units
A. AFs are called into being by Fate Table results G-J. The first player to Contact an AF becomes the Caretaker for that Force and is responsible for controlling all Forces friendly to that AF per the rules governing their actions.
B. AFs do not utilize the Fate Table, nor record SPs and RPs, nor construct new SGs.
C. AFs may conduct stellar shifts, utilize the Contact Table, Interaction Matrix, Conflict Table, and Reduction Table, and may raise new SFs, depending upon circumstances.
D. AFs do not utilize explorer SFs.
E. When a player rolls a result on the Fate Table calling for the appearance of an AF, s/he chooses at random the proper number of AF SGs and SFs from among an unused set (color) of AF counters. Without looking at or revealing the reverse-side of the counters, place them on the map (13.1). They remain in their original positions until such time as they are Contacted, at which point the Caretaker may be called upon to conduct certain actions with them per the rules governing their employment.
13.1 Placement of Autonomous Counters
13.1.1 Where AFs Are Placed
An AF may only be called into being by a Fate Table result. If such a result is obtained by a player, s/he places the called-for AF SGs and SFs in and around any hex for which s/he rolled on the Exploration Table earlier that turn (13.1.5).
13.1.2 Placement of Multiple SGs
A. Place one AF SG counter on any hex actually explored earlier that turn.
B. Refer to the Scatter Diagram printed on the map. Starting with the hex corresponding to the hex one in the diagram, and continuing in order to the hexes corresponding to hex two, three, and so forth, place one additional SG counter in each eligible (13.1.4) hex adjacent to the original (explored) hex, until all Autonomous SGs called for have been placed.
13.1.3 Excess Autonomous SGs
If the number of Autonomous SGs to be placed on the map exceeds the number of eligible (13.1.4) hexes adjacent to the original (explored) hex, the excess SGs may be placed in eligible hexes not adjacent to the original hex, as long as at least one SG is placed adjacent to the original hex and any SGs not adjacent to the original hex are adjacent to another SG which is.
13.1.4 Eligible Hexes for SG Placement
A. A hex is eligible to have an Autonomous SG placed in it if it does not contain an SG counter or a PV Chit (except for the original hex, which could contain a PV Chit, picked earlier that turn, which is removed).
B. If insufficient eligible hexes are available around any hexes explored by the rolling player, the Fate Table result which called for the AFs is invalidated, and no AFs are deployed.
13.1.5 Exploration Table Precondition
A Fate Table result calling for the placement of an AF on the board is invalidated if the player rolling the result did not roll on the Exploration Table that turn.
13.1.6 Limit on Number of AFs
A Fate Table result calling for the placement of an AF on the board is invalidated if there are currently four AFs present on the board.
13.1.7 Invalidated Fate Table Rolls
Invalidated Fate Table rolls calling for the placement of AFs are ignored. There is no substitute roll on the Fate Table.
13.1.8 Placing AF SFs
AF SF counters are distributed as evenly as possible among the hexes containing the AF's SGs, with any excess SFs going to the original (explored) hex.
13.1.9 Multiple Eligible Hexes
If the player whose Fate Table roll called for an AF has explored more than one hex that turn which satisfies the requirements of 13.1.4, the location of the AF is determined by assigning them numbers on a die and rolling the die to determine the hex.
13.2 Activity of AFs
A. Movement, Contact, Interaction, Conflict, Reduction, and Resource activity by an AF is determined by its status on the players' Interaction Matrices.
B. If an AF is not represented on any player's Interaction Matrix, it is a Passive AF. Otherwise, it is an Active AF, and the Caretaker may be required to take certain actions.
13.2.1 Passive AFs
A. Passive AFs may never move, initiate Conflict or Reduction, or raise new SFs.
B. Passive AFs may be Contacted (see 7.0).
C. Contacted Passive AFs always utilize the No Previous Option column of the Random Interaction Option Table.
13.2.2 Active AF
A. Once an AF has Interacted with a player it becomes Active.
B. Active AFs remain active permanently, unless they are eliminated from the game or all players who have Interacted with the AF are eliminated from the game. In the latter case, the AF reverts to Passive status.
13.2.3 Caretaker
A. An AF is controlled by the first player to make Contact with it. This player is called the Caretaker.
B. A Caretaker is the only player who may examine the reverse side of his AF counters. Moreover, only AFs which may be examined are those which it is necessary to expose for the purposes of resolving Contact, Conflict, or Reduction.
13.2.4 AF With Options A or B
A. If all the Interaction Options of an Active AF are As, and/or Bs, the Caretaker may shift those Forces so long as the shift attempted is to a hex which has a friendly Autonomous SG.
B. A Friendly AF in hexes not containing a Friendly Autonomous SG must be shifted to a hex that does have one.
C. The Caretaker must attempt to concentrate the Autonomous SFs in any hexes containing Friendly Autonomous SGs which are occupied by one or more player Forces.
D. No AF with Interaction Options A and/or B only may Initiate Conflict or Reduction resolutions.
13.2.5 AFs in Contact
Active AFs participate in Contact resolutions, with the Caretaker calculating the AF Contact Index (see 7.0).
13.2.6 AF Interaction Matrix
An active AF utilizes the Interaction Matrix whenever it is called for, with its Caretaker rolling on the appropriate column of the Random Interaction Option Table to select the Interaction Option (8.1.9).
Exception: Whenever a player initiates Conflict or Reduction resolutions against an AF that displays an Option other than C with regard to that player, the Interaction Option of the AF with regard to the player attacking automatically becomes C during the subsequent Interaction Segment. It remains so until one or the other is eliminated.
13.3 Hostile AFs
13.3.1 AF With Option C
If any of an AF's Interaction Options is a C, the Caretaker must split all of these AF SFs into two Forces.
A. The first Force, which must be equal in SFs to the number of Friendly Autonomous SGs, is shifted as in 13.2.4.
B. The second Force, which is composed of all excess SFs, proceeds to the nearest SG in sight (15.2.5) that belongs to the player for whom that AF has chosen a C Option. The second Force must attempt to eliminate any Force friendly to that enemy player's SG and to Neutralize the SG.
13.3.2 Hostile AF: Second Force Attacking
A. This second Force must attempt to reach that hex in one turn, utilizing any friendly/allied SGs within the AF's CLR to aid in the Shifting, if possible.
B. If such Conflict is successful in that hex, the second Force then proceeds again to the hex nearest to the previous hex, that can be sighted by any friendly AF or SG and which contains an SG belonging to a player for whom the AF has chosen a C option. It then attempts to repeat its success.
C. Any newly-raised AF SFs (13.3.4) are used first to bring SG equality Forces up to full-strength (if necessary); the remainder may then attempt to join the attacking (second) Force.
13.3.3 Hostile AF With No Enemy SGs in Sight
A. If no C option player SGs are in sight at any time, all AFs return to or remain within hexes containing Friendly Autonomous SGs.
B. An AF may always initiate Conflict and Reduction resolutions against Forces owned by a player for whom that AF has chosen a C option.
13.3.4 New SFs for Hostile AF
A. Any AF with at least one C Option on an Interaction Matrix belonging to an active player receives one new SF each turn for each two SGs deployed on the map. These SFs appear during the Resource Allocation Phase in any hex containing an SG Friendly to the AF.
B. This 2:1 ratio is always rounded down; thus if fewer than two Friendly SGs are on the map, no new SFs appear.
13.3.5 AFs Relations With Other AFs
AFs may never Interact with or conduct Conflict or Reduction resolutions against other AFs. They may not conduct Contact resolutions with other AFs; if non-Friendly, AFs coexist in the same hex with a Contact Counter they simply ignore each other.
14.0 Resource Allocation
A. Each SG has a SP value. Each turn each SG contributes to the Civilization of its friendly player (if any) one RP per SP.
B. During the Resource Allocation Phase, each player allocates RPs to construct new, and/or maintain existing, SFs.
C. Players may also expend SFs to create or augment the SP value of their SGs.
D. Players may also expend SFs to make Neutralized SGs Friendly.
E. Under certain circumstances AFs may also raise new SFs (13.2).
F. All players record their current levels of RPs on paper or other suitable format. At the start of each Resource Allocation Phase, players increase their total accumulated RPs by the value of currently friendly SPs. Then subtract from this total a number of RPs sufficient to maintain their current number of SFs (14.2.7).
G. Next, all players simultaneously determine how to expend their remaining RPs (and SFs), making any consequent adjustments in the number and disposition of SFs on the board, in the deployment of their SG counters, and on their record of accumulated RPs.
H. Finally, each player replaces any (facedown) Neutralized SGs that have been Deneutralized with faceup SG counters of their own.
14.1 Creation, Augmentation, and Deneutralization of SGs
14.1.1 Eligible Hexes
A. Players may construct SGs only on Spiral Access, Spiral Fringe, or Inter-Spiral hexes.
B. They may not construct SGs on Galactic Nucleus hexes.
14.1.2 Other Eligibility Requirements
A player may construct an SG only in a hex in which s/he has successfully explored and which has no SG counter in it.
14.1.3 Creating SGs
A player must expend two SFs (of any type) in order to create an SG. The expended SFs must have started the Resource Allocation Phase in the hex in which the SG is created. Newly-created SGs have an SP value of zero.
14.1.4 Augmenting Existing SG
A player may augment an existing Friendly SG's SP value by expending SFs (of any type) at the rate of one SP per SF expended. The expended SFs must have started the Resource Allocation Phase in the same hex as the SG.
14.1.5 Creation/Augmentation Restrictions
An SG may never be created and then augmented in the same turn. A player must wait at least one turn to augment a newly created SG.
14.1.6 Limits on Augmentation
The SP Value of an SG may never be augmented beyond the PV of the hex in which the SG is located (3.2). If the SP of an SG equals the PV of the hex it is in, remove the PV Chit and place it back among the unpicked PV Chits.
14.1.7 StarGate Characteristics
Once created, an SG is never moved or destroyed (Exception: Zero SP Value SG, 10.2.4). It may be Neutralized (10.0, 11.3), and it may also become friendly to a different player from the one who created it (14.1.8).
14.1.8 Deneutralization
A. Any player may Deneutralize a Neutralized SG by expending a certain number of SFs and RPs.
B. The number of RPs expended must be equal to the SP Value of the SG.
C. The expended SFs must have begun the Resource Allocation Phase in the same hex as the SG, and there must be no non-friendly Force in the hex during that phase.
D. The number of SFs it is necessary to expend depends on the expending player's Civilization Level.
E. Subtract the player's Civilization Level from the SP Value of the SG.
- The player must expend a number of SFs equal to the SP Value of the SG minus his/her Civilization Level, if the resulting number (SP Value minus CL) is positive.
- If that number is zero or negative then no SFs need be expended. In any case, however, at least one SF Friendly to the deneutralizing player must be present in the hex (even though it may not be expended).
14.1.9 Effects of Deneutralization
A Deneutralized SG becomes friendly to the Deneutralizing player.
14.2 Construction and Maintenance of SFs
14.2.1 Requirements
A. Players may raise new SFs only in hexes containing Friendly SGs that have an SP Value greater than zero.
B. SFs may never be raised in a hex containing an SG which has been augmented during in the same Resource Allocation Phase.
14.2.2 Effect of Civilization Level
A player may raise one SF per Civilization Level attained per hex containing a friendly SG.
Examples: A player with a Civilization Level of one may raise no more than one SF in any one hex; a player with a Civilization Level of two may raise no more than two SFs in any one hex, and so on.
Exception: A player with a Civilization Level of zero may raise new SFs as if her/his Civilization Level were one.
14.2.3 Regular SFs
A. Regular SFs cost 3 RPs each to construct.
B. A regular SF may be raised in any hex containing a Friendly SG in accord per 14.2.1 and 14.2.2.
14.2.4 Dreadnought SFs
A. Dreadnought SFs cost 8 RPs each.
B. A Dreadnought SF may be raised in any Spiral Fringe or Spiral Axis hex containing a Friendly SG, per the restrictions of 14.2.1 and 14.2.2.
14.2.5 Explorer SFs
A. Explorer SFs cost 5 RPs each.
B. An Explorer SF may be raised in any Spiral Axis hex containing a friendly SG, per the restrictions of 14.2.1 and 14.2.2.
14.2.6 Autonomous Force Construction
AFs may, under certain circumstances, raise new SFs. If so, they do so without regard to RPs. (13.3.4).
14.2.7 SF Maintenance
For each hex in which there is more than one Friendly player-owned SF at the beginning of the Resource Phase, deduct 1 RP from the appropriate player's accumulated total for each Friendly SF in excess of one. This is called maintenance.
Exception: Explorer SFs are exempt from maintenance; they never have to have RPs expended to maintain them and they do not count when determining maintenance levels.
Example: A player has six regular SFs, two Dreadnought SFs, and three Explorer SFs in a hex. At the beginning of the Resource Allocation Phase, 7 RPs (8 SFs, excluding Explorers, minus 1) must be expended by the player in order to maintain the Force in its entirety.
14.2.8 Failure to Pay Maintenance
If a player fails to allocate sufficient RPs to maintain an SF (either by choice, or because sufficient resources are lacking), the excess SFs (player's choice) are immediately removed from play.
Example: In the example in 14.2.7, if the player allocated only 5 RPs, s/he would have to remove two SFs of his/her choice.
15.0 Beacon Stars
The stars printed on the Outreach map are existing Supergiants of extremely high luminosity and/or non-visible radiation emission. Essentially, these are stars which are easily detectable from extreme distances and therefore useful for long-range navigational purposes. For spans measuring several thousand light years, one would normally have to make allowance for stellar drift over the course of time that it took the radiation from the star to travel. But since the stellar shifts in a generational-duration Outreach turn actually represent a series of shift over a long period, that minor problem is essentially self-correcting. A more serious question is the location of Beacon Stars out beyond the obstructing clouds of interstellar dust. Unless our Galaxy is a genuine singularity, based upon observations of other spirals we can safely suppose that Beacon Stars are distributed throughout its arms with approximately the same frequency as in the part we can see.
15.1 In General
A Beacon Star is any star that has a name or a number assigned to it. In addition, whenever a player-owned Force purposefully shifts (does not scatter) into any hex other than a Galactic Nucleus or Core hex from which there is no unblocked LOS to a Beacon Star, that Force discovers a variable number of new Beacon Stars as determined by a die roll. These are placed on the map.
15.2 How to Discover and Place New Beacon Stars
15.2.1 Determining Number of Beacon Stars
The player whose Force is discovering the Beacon Stars rolls the die and adds two to the result, yielding the number of Beacon Star counters to be disposed on the map.
15.2.2 Selecting Beacon Star Hexes
A. Multiplayer games: the player to the left of the player who made the die roll chooses a hex row, and the player to that player's left places a Beacon Star counter in a hex in that row, then chooses another hex row. The player to that player's left then places a Beacon Star counter in any hex in that row, then chooses another hex row. Repeat this process until all Beacon Star counters called for have been placed.
B. Solitaire play: the player chooses a hex row and rolls the die twice for each hex. For each hex where a 9 is rolled, place a Beacon Star counter in it. If necessary (and it should be), pick additional hex rows to roll for until all Beacon Stars have been placed.
15.2.3 Requirements for Selecting Hex Rows
Hex rows chosen for Beacon Star placement have three requirements:
- They must contain at least two hexes that are visible from the hex the discovering Force is in;
- They may not contain a Beacon Star that is visible from the hex the discovering Force is in; and
- They may not be the hex row containing the hex the discovering Force is in.
15.2.4 Unblocked LOS Required
Hexes chosen for Beacon Stars must have an unblocked LOS to the hex that the discovering Force is in.
15.2.5 Visible Defined
A hex is visible from another hex if there is an unblocked LOS between the two. To determine the LOS between two hexes, lay a straight edge from the center of one hex to the center of the other. The straight line so defined is the LOS. If any of the hexsides which the LOS crosses are blocking hex sides, (16.0) the LOS is considered blocked.
15.2.6 Effect of Discovered Beacon Stars
Discovered Beacon Stars reduce the chances of Scatter for Forces attempting stellar shifts into them in the same way as printed Beacon Stars (5.4.2).
16.0 Interstellar Dust
Interstellar Dust Cloud hexsides inhibit stellar shifts (5.6.3). In addition, Interstellar Dust Cloud hexsides block the LOS (15.2.5).
17.0 The Galactic Nucleus and Wisdom Chits
To the best of our knowledge a Galactic Nucleus, though obscured from the Earth by interstellar dust, exists at the center of the spiral. It is probably composed of a (relatively) closely-packed mass of very old stars. Conditions in the Nucleus are probably quite different from those in our part of the Galaxy, and we really have no way of knowing precisely what is to be found there.
A. The Galactic Nucleus is composed of Nucleus hexes. The Nucleus is generally risky to move within, and players may not construct SGs within it.
B. However, at the very center are the three Nuclear Core hexes which contain the Wisdom Chits. Otherwise they are identical to other Nucleus hexes. Wisdom Chits may be acquired by players and utilized for Fate Table die rolls in order to gain an increase in a player's Civilization Level.
C. There are ten Wisdom Chits. These are kept face-up at all times. Nine of these are blank on the reverse-side; one is marked with an X on the reverse side.
17.1 Usage of Galactic Nucleus Hexes
Galactic Nucleus hexes increase the consequences of Scatter (5.6.2) and may not be Explored (6.1.5). SGs may not be built on Galactic Nucleus hexes (14.1.1). There is no particular effect of Galactic Nucleus hexes on Contact, Interaction, or Conflict resolutions, which may then proceed normally within them.
17.2 Wisdom Chits
17.2.1 Gaining Control of Wisdom Chits
A player may gain control of any Wisdom Chit by transporting it from a Nuclear Core hex to a Friendly SG. This can be accomplished by shifting a Force into that Nuclear Core hex and then shifting a particular SF (with the Wisdom Chit) from that Force into a hex containing a friendly SG.
17.2.2 Transporting Wisdom Chits
In transporting a Wisdom Chit, a player must assign a particular SF to carry the Chit. That SF must successfully reach a friendly SG to use the chit.
If the SF is destroyed before reaching a friendly SG, the Wisdom Chit is placed with the undeployed Wisdom Chits off the board (3.3.1).
17.2.3 Multiple Forces Present in Nuclear Core
If more than one Force begins a turn in a Nuclear Core hex, the first Force to shift away (4.2) has the option of taking the Wisdom Chit.
17.2.4 Replacing Wisdom Chits in Nuclear Core
A. Whenever a Wisdom Chit is removed from a Nuclear Core hex, another Chit is immediately chosen at random from among the undeployed Wisdom Chits (if any) and placed on that hex.
B. This new chit may be taken by a second player on that hex (17.2.3).
17.2.5 Status of Wisdom Chits
Wisdom Chits are either undeployed, deployed on the map, or under the control of a player. Only a player controlling a particular Wisdom Chit may look at the reverse side of that chit.
17.2.6 Control of Wisdom Chits
A. A Wisdom Chit is considered to be under the control of a player when that player has successfully shifted it to a Friendly SG. At that point, it is removed from the board and held aside by that player until s/he chooses to expend it (11.2.6).
B. A player may not Control more than three Wisdom Chits simultaneously.
Exception: Luck of the Draw scenario (18.5.6).
17.2.7 The X Wisdom Chit
If a player gains control of the X Wisdom Chit, certain consequences and/or restrictions may result. See the individual Scenarios and Victory Conditions for these effects (18.0).
18.0 Scenarios
A. Each Scenario is self-contained, having separate setup, victory conditions, and length.
B. Star Fleet Abbreviations
| Abbr | Explanation | Abbr | Explanation |
|---|---|---|---|
| r | regular | d | dreadnought |
| e | explorer |
18.1 Conflict Over Scorpii
This is a two-player scenario.
Any civilization which finds itself spanning thousands of light years and still maintaining an appetite for expansion will inevitably be drawn out beyond the confines of its original spiral arm. If cohesion between settlements spanning the Galaxy is to be maintained, and if the nature and riches of the Galactic Nucleus are to be revealed, the control of certain crossroads regions could become critical.
18.1.1 Forces at Start
18.1.1.1 Cepheids
Resource Points Available: 3 Civilization Level: 1
| Hex | SG Value | Hex PV | SFs |
|---|---|---|---|
| 1212 | 5 | 5 | 1/d |
| 1213 | 3 | 4 | 1/r |
| 1313 | 3 | 3 | 1/r |
| 1314 | 3 | 4 | 1/r |
| 1211 | – | 4 | none |
| 1312 | – | 5 | 2/e, 1/r |
18.1.1.2 Wezens
Resource Points Available: 5 Civilization Level: 1
| Hex | SG Value | Hex PV | SFs |
|---|---|---|---|
| 1118 | 4 | 4 | 1/r |
| 1119 | 3 | 4 | 1/r |
| 1018 | 4 | 5 | 1/r |
| 1019 | 1 | 3 | none |
| 1117 | 1 | 4 | none |
| 0918 | – | 2 | 4/e, 1/r |
| 0919 | 0 |
18.1.2 Victory Conditions
A. Marginal Victory: Retain all at-start friendly SG and have a friendly SG on hex 1816 at the end of the game.
B. Substantive Victory: Fulfil the conditions for a Marginal Victory plus capture and maintain in a friendly status at the end of the game, at least one of the SGs which began the game friendly to the other player.
18.1.3 Game Length
25 turns
18.1.4 Special Rules
For this Scenario, ignore rules 11.3, 15.0, 16.0, and 17.0, and Fate Table results A, B, C, D, E, F, K, and L (if they occur).
18.2 Route to the Nucleus
Three-Player Scenario
No one on Earth (at least, no one who was talking to us) knows precisely what is to be found in the Nucleus of close-packed, ancient stars which lie at the center of the Galaxy. However, it can be supposed that if indeed something of value can be found there that it may well be protected in some manner by those who know of it, or their agents.
18.2.1 Forces at Start
18.2.1.1 Guardians
RPs Available: 12 Civilization Level: 3
| Hex | SG Value | Hex PV | SFs | Notes |
|---|---|---|---|---|
| 1118 | 3 | 3 | 2/d, 5/r, 1/e | (2nd Star Navy) |
| 1212 | 4 | 4 | 3/d, 7/r, 1/e | (3rd Star Navy) |
| 1215 | 5 | 5 | 3/d, 7/r, 1/e | (1st Star Navy) |
| 1216 | 4 | 4 | none | |
| 1314 | 5 | 5 | none |
18.2.1.2 Centaurians
RPs Available: 8 Civilization Level: 1
| Hex | SG Value | Hex PV | SFs |
|---|---|---|---|
| 1124 | 1 | 2 | none |
| 1223 | 1 | 1 | none |
| 1224 | 1 | 2 | none |
| 1323 | 3 | 3 | 1/r |
| 1324 | 4 | 5 | 1/r |
| 1024 | – | 0 | 2/r, 2/e |
| 1325 | – |
18.2.1.3 Perseits
RPs Available: 6 Civilization Level: 1
| Hex | SG Value | Hex PV | SFs |
|---|---|---|---|
| 0310 | 4 | 4 | 1/d, 1/r |
| 0410 | 2 | 2 | 1/r |
| 0510 | 3 | 3 | 2/e |
| 0511 | 3 | 3 | none |
| 0513 | 0 | 0 | 1/d, 1/r |
| 0714 | 2 | 4 | 1/r |
| 813. | 2 |
Source note: the Perseits hex "813." is printed that way in the source; it is transcribed as printed.
18.2.2 Victory Conditions
A. The Centaurians or Perseits win by constructing and maintaining for five consecutive turns a chain of friendly SGs, no more than four hexes apart from one other, from an SG that was friendly at the beginning of the game to a hex adjacent to the Galactic Nucleus. If either succeeds in this endeavor, the game is over immediately.
B. The Guardians win if neither the Centaurians or Perseits wins.
18.2.3 Game Length
50 turns.
18.2.4 Special Rules
18.2.4.1 Restrictions on the Guardians
A. The Guardians must operate under certain strictures. They may not construct new SGs or augment the value of any existing friendly SGs. They may not Deneutralize any SG that did not begin the game friendly to them.
B. Finally, they must attempt to maintain the four Star Navies as distinct, cohesive Forces, and as near to full strength as possible. Full Strength is defined as ten Dreadnoughts and one Explorer SF. (Replace the regular SFs in the Navies with dreadnoughts as the latter are constructed.)
C. The Guardians may retain a reserve of RPs of up to 20 RPs.
18.2.4.2 Rules and Fate Table Not Applicable to Guardians
The Guardians ignore rules 11.3, and 17.0, as well as Fate Table results A, B, C, D, E, F, K, and L.
18.2.4.3 Special Rules Applicable to the Centaurians and Perseits
A. The Centaurians and Perseits may not build or maintain more than one Dreadnought SF per 10 SPs owned.
B. They ignore rule 17.0 and Fate Table result K.
18.3 PSL Outleap
Solitaire Scenario
In SPI's first science fiction game, StarForce, the history of humanity was traced up through first Contact with space-faring non-human telesthetics and the subsequent formation of the Pan-Sentient League, which included two such extra-terrestrial races. An area some forty light-years in diameter (contained completely within hex 1316 on the Outreach map) comprised the map for that game. Each hex in Outreach is some 1200 Light years in diameter. Therefore, this scenario picks up a distant, and hugely expanded, PSL-descendant Civilization, occupying an area some 10,000 times its original size, and still dynamic and growing...
18.3.1 Forces at Start
Resource Points Available: 5 Civilization Level: 1
| Hex | SG Value | Hex PV | SFs |
|---|---|---|---|
| 1316 | 4 | 5 | 1/e, 1/r |
| 1216 | 2 | 4 | 1/r |
| 1215 | 2 | 4 | none |
18.3.2 Victory Conditions
Raise the Civilization Level of the PSL to two at the end of the game.
18.3.3 Game Length
25 turns.
18.3.4 Special Rule
If the player gains control of the X Wisdom Chit, (17.2.7), it signifies the discovery of the fact that the Nuclear Core has exploded, and that the explosion is spreading outwards in a gargantuan chain reaction at the speed of light. The game is automatically lost, and the player has about forty million years to entirely evacuate the Galaxy. (Give or take a few hours).
18.4 Struggle for Cygnus-Carina
Four-Player Scenario
This Scenario posits the existence of four distinct groupings of space-faring telesthetics within the near confines of the spiral arm in which Sol is located (hex 1316). (These confines include several thousand light years.)
18.4.1 Forces at Start
Prior to the first turn, each player may utilize available RPs to construct any SFs desired. These may be deployed on hexes containing friendly SGs.
18.4.1.1 Aurigaen
Resource Points Available: 10 Civilization Level: 1
| Hex | SG Value | Hex PV | SFs |
|---|---|---|---|
| 0814 | 3 | 3 | none |
| 0813 | 4 | 5 | none |
18.4.1.2 Rigelian
Resource Points Available: 25 Civilization Level: 1
| Hex | SG Value | Hex PV | SFs |
|---|---|---|---|
| 1316 | 4 | 4 | none |
| 1216 | 3 | 5 | none |
| 1215 | 2 | 2 | none |
| 1315 | 4 | 4 | none |
18.4.1.3 Wezeni
Resource Points Available: 19 Civilization Level: 1
| Hex | SG Value | Hex PV | SFs |
|---|---|---|---|
| 1118 | 4 | 4 | none |
| 1018 | 3 | 3 | none |
| 1119 | 2 | 5 | none |
18.4.1.4 Regnad-Kcin
Resource Points Available: 11 Civilization Level: 1
| Hex | SG Value | Hex PV | SFs |
|---|---|---|---|
| 1312 | 3 | 4 | none |
| 1411 | 2 | 2 | none |
| 1412 | 1 | 2 | none |
18.4.2 Victory Conditions
A. A player wins an instant victory if any of the following occurs:
- Establish and maintain a Friendly SG for five consecutive turns on any four of these hexes: 0814, 1118, 1212, 1215, 1314.
- A player's Civilization Level exceeds the combined total of the Civilization Levels of all other remaining players.
- A player is the sole remaining active player in the game due to the others having been eliminated (10.2.5, 12.1.7).
B. If no player wins an instant victory by the end of the game, then multiple each player's SPs by her/his Civilization Level. The player with the highest number wins the game.
18.4.3 Game Length
50 turns.
18.4.4 Special Rules
18.4.4.1 Restrictions Caused by Control of X Chit
A player who gains control of the X Wisdom Chit is subject to these restrictions:
A. The player may not construct any Dreadnought SFs.
B. The player may not choose Interaction Option C vis-à-vis any other player or AF unless that other's most recent Interaction Option was a C against the X player.
C. The X Wisdom chit may not be expended in a normal fashion (11.2.6) during the Fate Phase, but its possession automatically counts as the expenditure of a Wisdom Chit toward any Fate Table roll by that player.
Example: The player controlling the X chit automatically is considered to expend one Wisdom Chit for the purposes of the Fate Table. If that player expends a different Wisdom Chit, s/he is considered to expend two Wisdom Chits for the Fate Table.
18.4.4.2 Effect of Raising Civilization Level on X Chit
A. If the player controlling the X Wisdom Chit succeeds in raising her/his Civilization Level on a particular Fate Table roll, the X Chit may then be considered to have been expended and returned to among those undeployed off the board (3.3.1). In this instance, the effects of 18.4.4.1 terminate.
B. Alternately, the player may choose to retain the X Wisdom Chit, and thus retain all effects from 18.4.4.1. In that case, the player must retain the X Wisdom Chit until once again successful at raising his/her Civilization Level, at which point the choice is again open to either expend the Chit or retain it.
18.4.4.3 Disclosure of Possession of X Chit
The player gaining control of the X Wisdom Chit is not required to announce that acquisition, except whenever the possession of the Chit results directly in an increase in Civilization Level. Of course, due to the actions that possession of the Chit imposes on the player, it will often become obvious when someone is in possession of it.
18.5 Luck Of The Draw Scenario
This Scenario is playable by any number of players. Before the first turn each player rolls on the Seed Winds Table. These rolls number and location of SGs that each player begins the game with.
18.5.1 Seed Winds Table
A. Each player rolls the die twice. The first die roll yields the vertical result; the second roll is the horizontal result. These are cross-indexed to determine the Seed Winds Table result.
Example: A 1, 4 would give a G result.
B. If two or more players obtain the same result, then all such rolls are invalidated and each player must reroll.
| 1st Die Roll \ 2nd Die Roll | 1 | 2 | 3 | 4 | 5 | 6 |
|---|---|---|---|---|---|---|
| 1 | A | H | F | G | H | K |
| 2 | G | B | I | J | L | J |
| 3 | F | K | C | M | K | I |
| 4 | E | J | A |
18.5.2 Seed Table Results
| Result | Hexes (one SG in each) |
|---|---|
| *A | 0707, 0706, 0607 |
| *B | 0510, 0409, 0410 |
| C | 0814, 0813, 0714 |
| D | 1709, 1708, 1609 |
| E | 1110, 1111, 1209, 1210 |
| F | 1314, 1313, 1213, 1214 |
| G | 1215, 115, 1116, 1216, 1316 |
| H | 1118, 1117, 1017, 1018 |
| I | 1816, 1815, 1916 |
| J | 1324, 1323, 1423 |
| K | 1726, 1625, 1826 |
| *L | 4903, 4802, 4803 |
Source note: the hex "115" in result G is printed that way in the source; it is transcribed as printed. Results marked with an asterisk require Beacon Stars per 18.5.3 D.
18.5.3 Initial Setup
A. For each of the hexes listed as a result of a particular Seed Table roll, the player chooses a PV Chit.
B. The player then places a Friendly SG equal in SPs to the full PV in each hex listed.
C. Each player may also deploy SFs equal in RP Value (14.2) to two times the number of SPs with which that player shall begin the game. These must be deployed in a hex with a friendly SG.
D. For any result with an asterisk, it is necessary to place additional Beacon Star counters on the map before play begins per the procedure in 15.0. In addition, a Beacon Star counter is always placed in the first hex listed in each of the results.
Example: For a B result, the player must place a Beacon Star in 0510 and then begin the procedure in 15.0.
18.5.4 Victory Conditions
A. A player wins the game either when there are no non-friendly SGs remaining on the board, or at any time that his/her Civilization Level exceeds the combined total of the Civilization Levels of all other players and AFs (that have any friendly SGs deployed on the board).
Exception: Special Solitaire Rules (18.5.7.C).
B. If at any point all players remaining in the game maintain more than 100 SPs for ten consecutive turns, the game is declared a draw.
Exception: Special Solitaire Rules (18.5.7.C).
18.5.5 Game Length
There is no set limit to the number of turns in the game.
18.5.6 Special Rules
A. A player gaining control of the X Wisdom Chit is consequently subject to certain restrictions:
- The player may not expend Wisdom Chits to increase Civilization Level, and
- The player may not win the game except by neutralizing all non-friendly player-owned SGs on the board.
B. The player also gains some advantages.
- The restrictions on the number of Wisdom Chits which one player may hold at once (17.2.6) is waived; the player controlling the X Wisdom Chit may hold an unlimited number.
- Any Force (including both Dreadnought and Explorer SFs) friendly to that player may conduct Stellar Shifts as if the player's Civilization Level were one Level higher than it actually is.
18.5.7 Special Solitaire Rules
A. Ignore 18.5.4 and 18.5.5.
B. The player wins by maintaining a level of 100-plus SPs for five consecutive turns, during which time no non-Friendly SG counters may be on the board.
C. If the player draws the X Wisdom Chit, then the restriction on the recurrence of Fate Table results A, B, C, D, E, and F is waived, and these results may apply to the player an unlimited number of times (as an exception to 11.3.2).
19.0 Player's Notes
The grand strategic questions posed by Outreach are huge in scope, but the answers must be framed with meticulous care and subtlety for the player to be successful. These notes are comprised of firstly, a generalized discussion of the main problems which the game poses for the player; secondly, some comments on the individual Scenarios; and, finally, some miscellaneous tips on tactical-level play.
There are three essential, overriding problems facing the player. These are, in order of precedence, the synthesis of a game-winning strategy, the construction of a properly balanced collection of StarFleets, and the foreign policy question.
Depending upon the scenario being played, there is a fairly wide range of choice as to overall game strategy. Generally, the greater the number of players in the game, the greater the opportunity for the employment of subtlety and maneuver in attaining one's goals. The general objective is to increase one's Civilization Level higher and faster than anyone else; obviously, this can be attempted both directly. by trying to increase one's own level, and indirectly, by attempting to retard the progress of others. The player would do well to keep in mind that each opponent, whose short-term intentions may be in doubt, intends to thrash everyone else in the end.
The strategic choices a player makes depend, to a great extent, on the number and starting locations of other players in the game. For instance, if a player is relatively isolated then s/he can, with relative impunity, concentrate on his/her own positive achievements, whereas if s/he is in close proximity to others, then even purely non-aggressive expansion limits the Lebensraum of the other players. By the same token, the isolated player must be aware that the others, aware of his/her advantage, may very well attempt to compensate by combining against him/her, and s/he ought to prepare militarily for that eventuality. And the player finding her/himself in a crowd may be able to play off his/her neighbors, one against the other, successfully enough to allow him/her to concentrate resources on exploration and expansion rather than defense.
A most significant feature of the game is the capacity it allows for disguising one's intentions. Each player can see that the others are constructing new StarGates, exploring new territory and/or raising new StarFleets, but whether all the new StarGates being constructed by a seeming soft touch are rapidly being brought up to full potential value or are only shams to disguise the construction of a formidable defensive force cannot be determined for sure, except the hard way. An important element to be considered in electing a particular strategy is how it will be helped or hindered by one's ability to camouflage one's intentions.
Diplomatic considerations will also play an important role in the planning of strategy. The player who can maneuver others into prolonged conflict almost inevitably stands to gain, and he can even put off fighting, for a time, while doing so. By the same token, being placed at a diplomatic disadvantage often severely restricts one's strategical choice.
In essence, the key to a successful strategy lies in flexibility. Delay committing yourself to a particular strategy for as long as possible, and then delay giving away your choice for as long as is feasible after that. A hedged bet is seldom a heartbreaker. Decisive action rigorously applied will succeed in Outreach: if it turns out to have been correct. But usually, it requires time and effort to prognosticate what the correct action in a given situation will be, and in Outreach, acting, so to speak, without regard for the stars tends to be foolhardy.
The construction of a balanced force of StarFleets is the second major problem confronting the player. Regardless of the overall strategy one eventually adopts, in the early going it is desirable to expand and consolidate one's base. And for that regular and Explorer StarFleets are necessary. Later, the construction of Dreadnoughts becomes more or less crucial, depending largely upon the player's proximity to others; at a minimum, some are desirable simply to ward off nettlesome AFs.
The mix of forces is too dependent upon circumstances to be subject to hard and fast rules. However, it is safe as a general guideline to attempt to maintain as mixed a ratio as feasible, given the operative strategic goals. Regular StarFleets, in addition to being the most economical for StarGate construction and augmentation, are handy for loss absorption in conflict situations and overshift attrition; it is always useful to have some at hand. Explorers are expensive and Dreadnoughts even more so, which makes them difficult to construct at short notice. It is important, therefore, to try to anticipate the need for them so as to have a sufficient number of them available ahead of time.
Players will find that it is expensive to carry out prolonged military campaigns. The construction of a Navy of Dreadnoughts is a considerable expense, and their maintenance as a concentrated force is a constant drain. It is advisable to conduct attacks only when a considerable advantage is likely to be gained. As this is most likely through a sudden, surprise offensive, it is best for one intending such an action to keep a low profile until ready to take action. Of course, once the other players know one is armed and dangerous, this becomes more difficult to do, but a proper concentration of forces at an opportune time can still attain the advantage of surprise.
The subject of surprise attacks leads into the question of foreign policy. There are two subsidiary problems to be solved by the player so far as interstellar relations are concerned. First there is the problem of the sort of impression s/he wishes to promote among the other players, and second, there is the direct issue of how to react to Contact with other players and AFs during the course of play.
The mechanism of the Interaction Matrix, which channels player inter-relationships, provides at least as much opportunity as it does restriction. For offensive-minded players, the C option, if chosen at an opportune moment, can devastate the opposition. For would-be explorers, or players that are impelled by the game situation to cooperate, the A/A or A/B combinations can be extremely lucrative. And, of course, as there is an opportunity to alter one's options choices each turn, flexibility and deception can be readily employed.
By utilizing a combination of careful deployment and pacific Interaction Options, the offensive-minded player may conceal his/her genuine intentions until a particularly appealing victim presents her/himself. By the same token, the player intent on rapid but peaceful exploration and expansion together with an expedition to the Center, may build only a few Dreadnoughts while disguising his/her military weakness by ostentatiously maintaining a concentration of StarFleets and behaving aggressively towards any small AF which surfaces in the vicinity.
Turning to the scenarios, the first one serves as an introduction to the mechanics of movement and interaction. It is direct and limited in scope; the players have a particular territorial objective to attain and to the best beings may the spoils fall.
The second scenario provides a more subtle situation. Although the Centaurians and Perseits both are opposing the Guardian player, they are also competing against each other. Neither can concentrate a supreme effort to defeat the Guardian for fear of seeing the other rush through to the Center for victory. Similarly, the Guardians, unable to hold off the combined, ever-increasing power of the challengers, can exploit the competition between them to prolong resistance. Basically, the Guardians should repel any incursion by the others into their space, and defend tenaciously the isolated StarGates which allow them to patrol the entire span of the Galaxy. The Perseits and Centaurians are well-advised to sit back and build up a Navy capable of meeting the Guardians on equal terms and then concentrate on Neutralizing an isolated Guardian StarGate, thus clearing a path through to the Galactic Nucleus.
The third Scenario is an introduction to elements of the game that are not employed in the first two Scenarios: the utilization of Wisdom Chits and the mechanics of Civilization Level increase. Generally, the player should make a beeline for the Center. It is probably best to choose Interaction Option A or B with regard to any AFs encountered in the hope that some of their StarGates might consequently be rendered usable. And hope like hell that no AF chooses a C option.
The fourth Scenario provides the player with the greatest range of options, both in terms of objectives and means. The offensive-minded player must keep in mind the fact that s/he is outnumbered three to one, while the passive explorer must cope with the proximity of the competition. There is a lot of flexibility. It is possible, if severely pressed, for a player to entirely abandon the StarGates with which s/he began the game and still win in the race for SPs and Civilization Level while those remaining in the Cygnus-Carina Spiral Arm fight unproductively over the spoils. Of course, if two or three players follow such a strategy, then the one who remains is likely to win a quick victory! Basically, the pressure to maintain security for the starting base while expanding and mining the riches of the Galactic Core is acute, and the player who best balances these contradictory requirements will be the winner.
The fifth Scenario is, in reality, not a scenario at all, but the basic Outreach game situation. Everything that has been said concerning the fourth Scenario applies to the fifth, except that it is likely that the players will be less closely packed. The open-ended nature of play precludes the option of playing conservatively for a narrow victory on points. Experienced players will find it possible to run through the early player-turns of a game simultaneously, thus saving time and moving expeditiously to a point where Contact occurs.
Finally, there are some tactical notes the player could do well to keep in mind. Since it is possible to shift continuously to hexes containing a Friendly StarGate, so long as the shifting force doesn't scatter, a force located in a network of contiguous StarGates may freely move anywhere within that network by shifting (technically) one hex at a time. Secondly, players should keep in mind the Reserve Shift option. It is usually wise to retain a standing force somewhere within any StarGate net as described above which can shift to the hex of any invasion in order to repel it. The Reserve Shift option also has obvious offensive potentialities.
Players should also take care in their deployment of StarFleets, so as to convey as little information as possible, while projecting whatever impression the player desires. It is expensive to maintain multiple StarFleet forces, and this practice should be eschewed whenever possible. However, if one is constructing a Navy of Dreadnoughts for offensive purposes and wishes to conceal the fact, one may consider concentrating the StarFleets to disguise their number. By moving StarFleets to be hidden to a new StarGate and then condensing them in to one force (counter), the player will leave others in doubt as to whether the StarFleets have been utilized to augment the StarGate or whether they have, in fact, been combined.
Another trick to recall is the domino effect for AF Interaction Option Choices. A player may set off a possibly inconvenient series of reevaluations by AF vis-à-vis their relationships with a second player by shifting his/her Interaction Option with regard to that player to or from a C option (8.1.9). Timed correctly, this gambit can result, with a bit of luck, in AFs doing a player's dirty work for her/him. Of course, it is a double edged weapon, as the player's own relationships with AFs will also be subject to alteration.
Finally, players should cultivate an awareness of the Fate Table results that are possible vis-à-vis their current SP totals. It is often well worth the investment of RPs, or the effort of exploring an extra hex or two, to cut down on the odds of an unfavorable outcome.
20.0 Designer's Notes
The Outreach game is concerned with the galactic interplay of active, outward oriented sentient beings of high technological capacity. Some important assumptions underly the design of the game. We assume that given a high technological base, the most crucial scarce resources will be not some raw material or other, or food supply, but rather people (beings) themselves. We further assume, flagrantly extrapolating from our own (humanity's) experience that given a scarce resource of value, there will be competition between different independent factions to gain the largest possible slice of the pie. This is not to say that we anticipate that every sentient species in the universe will dutifully apply the local equivalent of the Protestant work ethic to aggressively carving out a niche and then inevitably progress to the task of making the Galaxy safe for Nichecracy; on the contrary, we are sure that somewhere, somehow, static, perfectly balanced cultures will develop and thrive, if that is an appropriate word for such condition. However, a game concerning such cultures would be about as exciting as an extinct volcano.
We do not presume to be able to guess what directions progress will take. Humanity is often considered to be overdeveloped technologically, relative to other areas of potential growth. Imaginative writers have had fun speculating on the potentialities of unbalanced development in other sectors – intellectual, cultural, sexual or whatever... We have no doubt that as more and more Contacts are made, more and more variations will be encountered, and as the ever-richer interplay and cross-affecting between the individual cultures continues, new syntheses imbued with a fresh dynamism and a renewed will to move onwards and upwards will ever be the result. Ultimately (it is our assumption), in a changing universe, it is only by growing (i.e., changing) that something lives; cessation of growth is the equivalent of death.
5.0 Stellar Shifting: As explained in SPI's Starforce game, the concept of telesthetic movement is based on the technologically enhanced efforts of telekinetic clairvoyants, who can instantaneously shift themselves and/or other matter from one familiar point in space to another. This method of locomotion had been developed only relatively crudely in the situations depicted in Starforce; in Outreach it is assumed that the capacity of telesthetics to shift accurately over much longer distances has been created with a combination of long-range mapping and highly sophisticated techniques of programmed learning which can implant an artificial familiarity with a place which the telesthete has not actually been to. The facts that these artificial impressions are, ipso facto, subject to distortion and that a telesthetic implanted with an artificial image is incapable of coping with the real McCoy if the disparity is too great, accounts to a large extent for the possibility of scatter.
6.0 Exploration: Only species that have (and utilize) the capacity for interstellar travel are represented in Outreach. Regions of space which are not occupied by such species are subject to colonization by them. Exploration of such a region of space is considered a necessary prerequisite to its utilization in any manner.
7.0 Contact: Given the powerful concentrations of telesthetics that would characterize any activity of space-faring species, in general everyone will be more or less aware of the presence of everyone else. However, possessing a vague impression of the presence of others and physically locating them in a vast region of space are two different issues, obviously. Of course, it would be easier to find and, by the same token, be more difficult to conceal actual settlements than mobile StarFleets.
8.0 Interaction: This is truly the heart of the game. Decades of study by anthropologists, historians, psychologists, and others have fairly convincingly failed to synthesize any hard and fast guidelines concerning the interrelationships of different peoples here on Earth. This unpredictability is reflected in the Interaction Rules, where one's input into a relationship is influential, but not decisive, in shaping it, and where a shift in the character of one relationship can affect others in unpredictable ways.
9.0 Conflict: This does not represent exclusively military confrontation, but also a more general competition. The losses incurred are no less felt if they result from the futile allocation of highly trained technical personnel to an overmatched attempt to convince the natives of a one-system culture to switch trading partners than if they are suffered at the hands of a marauding Navy of enemy Dreadnought StarFleets. The turns are generational; hence the Conflict Resolutions summarize long-term economic and political struggles, as well as brief or direct military battles.
10.0 Reduction: It is the influx of new blood, metaphorically speaking, which provides a Civilization with its dynamism and energy. In an era of material plenty, when specialization and interdependency are the order of the day, people (using the term loosely) are the ultimate resource. It is, therefore, desirable to have access to as many of them as possible. The civilizations which compete in Outreach are themselves grand coalitions of distinct cultures and species, and it must be assumed that the ultimate loyalty of any particular area would be local, rather than to the whole. These two factors combine with the sheer number of beings that would inhabit any settled hex to ensure that settlements on the scale envisioned would be in effect permanent. Reduction therefore represents the process of convincing the locals to switch sides, presumably with a combination of carrot and stick.
13.0 Resource Allocation: At its base, the underlying structure of Outreach is economic. The most crucial decisions the players are called upon to make concern the allocation of scarce resources, whether it be in terms of how many StarGates to construct or how many Dreadnoughts to send on an expedition to cow a presumptuous Autonomous Force. The StarFleets, in particular the nonspecialized Regular StarFleets, represent not only organized units of space ships, but also the most valuable resource of all – trained, dedicated individuals, with concomitant technology, equipped to colonize, negotiate, barter, fight, and so forth, as seems appropriate. Hence, in constructing a StarGate, or augmenting it, one expends – which is to say, reallocates StarFleets. Similarly, the presence of a StarGate in a hex indicates a commitment of resources to an explored region of space. Any StarGate (with the exception of an unaugmented one) is considered to represent actual settlements on a huge scale within an area, which, involving as it does some billions of beings, is by definition imbued with a permanency which insures the continued existence of the StarGate.
Sequence of Play and Explanation of Fate Table Results
The following appendix is reproduced from the source document's closing pages. Its Sequence of Play repeats Section 4.2 in summary form.
Sequence of Play
Shift Order Determination Phase
The players seat themselves around the game map. Each draws a chit from among the PV Chits and totals the three numbers appearing on the chit (printed as "Cit"). The player with the highest total moves first, the player immediately to the left of the first player moves second, and so forth. This procedure determines the Shift Order for that turn only.
Shift Phase
Regular Shifts
A. Beginning with the first player and continuing in clockwise order, all SFs may attempt movement from one hex to another hex per the rules governing Stellar Shifting (5.0).
B. As each SF (or group of SFs) is shifted, the success of the move is determined by consulting the Scatter Table (5.5). Immediately apply any effects called for by that table.
C. After all movement is complete, any eligible AFs are moved by their caretaker per the rules governing the actions of AFs (13.0).
Reserve Shifts
Beginning with the last player to complete Regular Shifts, and continuing in reverse order back to the first player to move, each may move one reserve SF or stack of SFs which did not conduct a Regular Shift earlier in the turn (5.2).
Exploration Phase
Beginning with the first player and continuing in order with the others, any unexplored hexes in which a player has one or more SFs may be explored. Refer to the Exploration Table to determine the success of exploration efforts (6.0).
Galactic Interrelation Phase
Contact Segment
For each hex in which there are Forces which do not belong exclusively to one side, consult the Contact Table to determine if the Forces in question are aware of each other's presence (7.0).
Interaction Segment
A. For each hex containing Forces controlled by different players, each of the affected players may refer to the Interaction Matrix to determine the relationships between the two players.
B. The Interaction Matrix is also used to define the relationship between a player and any AF which may be Contacted.
C. Players may change their relationship vis à vis the other players' Forces each turn, within the confines of 8.0.
Conflict Segment
For each hex containing more than one Force, Conflicts between pairs of Forces may occur (9.0), as long as Contact has been established and according to the relationships of the parties involved.
Reduction Segment
A. Reduction is the neutralization (a process which renders the gate useless) of SG counters.
B. Neutralization may occur in hexes where there is:
- An SG counter and
- One or more unfriendly Forces and no friendly Force (10.0).
Fate Phase
A. Beginning with the first player and continuing in order, each rolls on the Fate Table, applying, if desired, RPs to influence the results. Immediately implement applicable results.
B. In the event of the discovery of an AF, recourse to the Interaction Table and possibly the Conflict and/or Reduction Tables will be called for.
Resource Allocation Phase
A. Calculate RP totals based on the number of SPs each player controls.
B. Transform existing SFs into SGs or gain the allegiance of neutral settled hexes.
C. Expend RPs to construct new SFs and/or settle hexes with a Friendly SG (14.0).
Explanation of Fate Table Results
| Result | Explanation |
|---|---|
| A | After years of becoming increasingly separatist, a sector of the Civilization comprised mostly of one particularly unsociable species severs all ties with the main body. Effect = 10% Dissolution (11.3). |
| B | A Charismatic and Fanatical religious Leader rises to prominence in the Central System of the confederation of beings. His Belief spreads more or less rapidly from system to system; then, having seemingly approached the peak of its potential, the Belief suddenly and dramatically is imbued with an almost Universal appeal when the by now revered Leader's heir apparent is martyred by virulent anti-Belief fanatics of his own species. The Belief develops a haughty presumptuousness that transforms into intolerance when met with resistance, and things turn nasty. Eventually the Belief becomes the focal point for those who remain within the social, political, and economic fold, and the expulsion of the dissidents strengthens, rather than weakens the Civilization's cohesion. Effect = 30% Dissolution; Ignore any and all subsequent Dissolution results. |
| C | A festering and long-standing inability of two species (which are the most significant) to get along at last breaks out into irreconcilable conflict. The struggle is brief but brutal, and in its aftermath a genuine consensus finally develops – to split right down the middle. Effect = 50% Dissolution. |
| D | The discovery of a highly potent and nutritious organic drug, which combines a mildly hallucinogenic effect with irregular but frequent jolts of ecstatic euphoria, proves highly addictive to some three-quarters of the sentient populations of the Federation. The effects of its consequent wide usage are disastrous for the cohesion of the Federation. Effect = 70% Dissolution. |
| E | A gradual but irreversible trend to decay develops in the capacity of the Central Authority to retain active control. A crisis reveals the bankruptcy of the old order, and the consequence is a non-violent but virtually complete secession of most of the races from the Empire. Effect = 80% Dissolution; decrease Civilization Level by one. |
Note: the Fate Table die-roll grid, and the Exploration, Contact, Random Interaction Option, Conflict, Reduction and Scatter Tables, are printed on the game's charts (Section 3.4 lists four identical sheets of charts) and are not reproduced in this document.