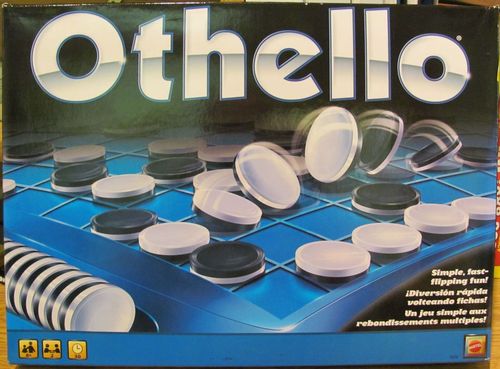
Othello
Othello Rulebook
Table of Contents
Table of Contents
Contents
- 64 Reversible disks
- 1 Playing board
- 6 Playing board "feet"
- 1 Instruction booklet
(Please remove all components from the package and compare them to the components list.)
Preparation
Insert the 6 feet into each of the holes on the base of the playing board.
Object of the Game
The object of the game is to have the majority of your color disks face up on the board at the end of the game.
A Minute to Learn
Each player takes 32 disks and chooses one color to use throughout the game.
Black places two black disks and White places two white disks as shown in Figure 1.
FIGURE 1 — The game always begins with this set-up.
A move consists of "outflanking" your opponent's disk(s), then flipping the outflanked disk(s) to your color.
To "outflank" means to place a disk on the board so that your opponent's row (or rows) of disks is bordered at each end by a disk of your color. A row may be made up of one or more disks.
Here's one example: White disk A was already in place on the board. The placement of white disk B outflanks the row of three black disks.
White flips the outflanked disks and the row now looks like this:
Othello™ Rules
-
Black always moves first.
-
If a player cannot outflank and flip at least one opposing disk, they forfeit their turn and their opponent moves again. However, if a move is available a player may not forfeit their turn.
-
A disk may outflank any number of disks in one or more rows in any number of directions at the same time--horizontally, vertically or diagonally. A "row" is defined as one or more disks in a continuous straight line. (See Figures 2 and 3).
FIGURE 2 — Disk placed here
FIGURE 3 — These disks flipped
- Players may not skip over their own color disk(s) to outflank an opposing disk. (See Figure 4.)
FIGURE 4 — This disk only outflanks and flips White disk 1.
- Disk(s) may only be outflanked as a direct result of a move and must fall in the direct line of the disk placed down. (See Figure 5 and 6.)
FIGURE 5 — Disk placed here
FIGURE 6 — These disks flipped. These disks are not flipped (even though they appear to be outflanked)
-
All disks outflanked in any one move must be flipped, even if it is to the player's advantage not to flip them at all.
-
A player who flips a disk that should not have been turned may correct the mistake as long as the opponent has not made a subsequent move. If the opponent has already moved, it is too late for a change and the disk(s) remain as is.
-
Once a disk is placed on a square, it can never be moved to another square later in the game.
-
If a player runs out of disks, but still has the opportunity to outflank an opposing disk on their turn, the opponent must give the player a disk to use. This can happen as many times as the player needs and can use a disk.
-
When it is no longer possible for either player to move, the game is over. Disks are counted and the player with the majority of their color showing is the winner.
Note: It is possible for a game to end before all 64 squares are filled.
Sample Game
Black moves first. A black disk can be placed on square C4, D3, E6 or F5 to outflank a white disk. Black decides to place a disk on square C4. (See Figure 7).
FIGURE 7
The outflanked white disk between the two black disks is flipped over. (See Figure 8.)
FIGURE 8
It is now White's turn. A white disk can be placed on square C3, E3 or C5 to outflank a black disk. White decides to place a disk on C3. (See Figure 9.)
FIGURE 9
The outflanked black disk between the two white disks is flipped over. (See Figure 10.)
FIGURE 10
The game continues in this way until neither player can move. The player with the most disks at this point is the winner.
Scoring
Players desiring to score their games may do so by determining the margin by which a player won a game. The smaller number of disks is simply subtracted from the larger number of disks.
Players may also set up their own methods of scoring. For example, establishing a predetermined number of games or points to win by a series of games.
Othello™ Strategy
Before reading any further we suggest that you play a few games first to familiarize yourself with how the game works.
The rules for Othello™ are very simple and the final goal is clear enough, but what exactly do you do in the early and middle stages of the game? Hopefully, the following ideas will help you develop winning strategies and improve your game.
The corners are special. Corner disks can never be outflanked and, often, can protect whole collections of disks from enemy capture. In Diagram 1 the black disk at H8 protects the entire black group--no matter what happens during the rest of the game, there is no way White will ever be able to capture any of the black disks already on the board.
DIAGRAM 1
At times, it might be a bad idea to place a disk next to an empty corner - you may be giving your opponent a chance to take that corner. For instance, in Diagram 2 White can now move to corner H8 because of the black disk at G7.
DIAGRAM 2
Sometimes it can be difficult or impossible to find a way to capture a corner even though your opponent has moved into one of the 'dangerous' squares right next to it. In Diagram 3 although White has a disk next to corner A1, Black cannot take the corner immediately. However, if Black plays at A3, White will have no way to stop Black from taking the corner on Black's next turn.
DIAGRAM 3
Sometimes it is possible to develop a plan for capturing a corner even though your opponent does not yet have a disk on a 'dangerous' square.
For example, Diagrams 4 and 5 illustrate what will happen if Black moves to E8.
On White's turn, the only place White can go is B2 - the only square from which White can outflank a black disk as the rules require. After this move, Black can move to corner A1.
DIAGRAM 4
DIAGRAM 5
Puzzles
Each of the following five puzzles (#1 to #5) illustrates how Black can make a move that will guarantee them the chance to capture a corner on their next move. In each case it is now Black's turn. Look at all the places Black can go (including the 'dangerous' squares) and try to find the move that will force White into offering Black a corner.
PUZZLE #1
PUZZLE #2
PUZZLE #3
PUZZLE #4
PUZZLE #5
Puzzle Solutions
PUZZLE #1 - Black should play at H2. White will have only one place to go - H7 - and Black will then be able to take corner H8.
PUZZLE #2 - Black should play at B6. This will leave White with only two alternatives - B7 and G1. If White goes to B7, Black can move to corner A8. If White should move to G1 instead, Black would be able to take the corner at H1.
PUZZLE #3 - Black should move to F8. White will have only two possible moves - B7 and B8, both of which make it possible for Black to move to corner A8.
PUZZLE #4 - Black should play at G1. This offers White only four possible choices - B8, F1, G2 and G8. Each of these moves opens up a corner to Black.
PUZZLE #5 - Black should play at G7. White is left with two possible moves - G8 and H7. Either move will make it possible for Black to capture corner H8 because White's move will change the color of Black's original disk at G7.
With careful play Black can go on to win all five of the games depicted in the puzzles.
Getting the first corner in each game will be helpful to Black, but that's not the main reason Black should win (even if you get all four corners it is still possible to lose the game). Black should win because White has lost control. In each game, there are not a lot of places White can go on their turn, although there are plenty of empty squares on the board. In contrast, each time it is Black's turn, Black has many possible moves to choose from. Black can proceed to gradually accumulate disks that White will have no access to without ever opening up a lot of new choices for White. In fact, Black could win the game shown in Puzzle #1 without ever offering White a chance to make a decision - at each turn White would have only one possible move. You can see this for yourself by setting up the board as it appears in Puzzle #1 and playing out the game through the following sequence of moves.
Black's moves are in bold: H2, H7, H8, G2, A5, A6, H1, G1, C1, C2, G7, F7, G8, F8, E8, D8, B7, B8, A8, A7, A2, B2, B1, A1. Black wins 54 to 10.
Gaining control of game is so important that players deliberately allow their opponents to capture corners when they think this will eventually give them control. In your games, try to anticipate how your moves will affect your opponent's moves. Try to leave them with as few choices as possible. It is usually a good idea not to capture too many squares in the early stages. Remember that your opponent must outflank one or more of your disks on each turn. If you have only a few disks on the board, you can minimize your opponent's options.
FIGURE 11
Handicaps
There is a slight advantage in going first. Therefore, the more experienced player may give this advantage to the less experienced player. After one game, the winner may wish to let the loser go first. These rules should be established before starting a series of games.
When a skilled player is playing against an unskilled player, the skilled player may take on a handicap by setting up the board to give their opponent a four corner advantage, as White (the skilled player) is doing in Figure 11. If the difference in skill is not so great, the more skilled player may give only one, two or three corner advantages.
© 2006 J. A. R. Games Co. All Rights Reserved. Licensed by J.A.R. Games Co. © 2006 Mattel, Inc. 333 Continental Blvd., El Segundo, CA 90245 U.S.A. All Rights Reserved. Consumer Relations 1-800-524-8697 Mattel U.K. Ltd., Vanwall Business Park, Maidenhead SL6 4UB.