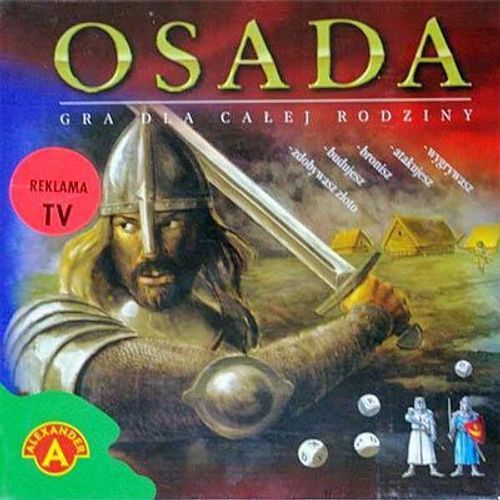
Osada
Osada Rulebook
Table of Contents
Table of Contents
Goal of the Game
Each player founds their settlement on the board. Its borders are defined by rivers. During the game, the participants try to get rich as quickly as possible, build their own army, and transform the settlement into a town. The one who first builds all the buildings of their town, while defending it effectively against the raider, becomes the winner.
Components
- Board
- Hourglass (klepsydra)
- Ship
- Knights (cardboard silhouettes with bases) - 64 pcs.
- Small buildings - 32 pcs.
- Large buildings - 32 pcs.
- Tokens - 64 pcs.
- Symbol dice - 4 pcs.
- Rulebook
Note: the rulebook's setup text states that the knight silhouettes number 108 pcs. ("108 szt."), while the component list above states 64 pcs. Both figures are transcribed as printed.
Setup
One player, chosen by the others, manages the components, distributing them to all participants during the game. The managing player is also a participant in the game.
Place the board on the table and put the hourglass in the middle of the board.
The knight silhouettes (108 pcs.) must be inserted into the plastic bases (fig. 1) and placed in the largest compartment of the box, or set up on the table next to the board beside the ship, so that they are easy to reach during the game.
Before the game starts, each player chooses their pawns - the knights. The knight silhouettes are printed on 4 different backgrounds (fig. 2).
The colour of a knight's background symbolises the player's colour and must match the colour of the square fields placed on the board (within the borders of that player's settlement), as well as the colour of their tokens and buildings (fig. 3).
Small buildings (32 pcs.), large buildings (32 pcs.), and the 64 tokens in four colours remain in the box.
Tokens symbolise resources (gold, wood, steel, stone) which each player will acquire on their turn (fig. 4a). The maximum amount of any given resource stored in a warehouse cannot exceed 4 units.
Each player's warehouse consists of 16 fields in total - circles located on the edge of the board (within the borders of the settlement) (fig. 4b). The warehouse is made up of four sections:
- gold warehouse - 6 yellow fields
- wood warehouse - 6 brown fields
- steel warehouse - 6 dark grey fields
- stone warehouse - 6 light grey fields
Sequence of Play
The game is started by the youngest participant, and the order of the following players is clockwise. The game is divided into rounds (turns). Each round is divided into 4 phases:
- 1 - harvest phase (faza zbiorów)
- 2 - building phase (faza budowy)
- 3 - recruitment phase (faza rekrutacji)
- 4 - battle phase (faza bitwy)
A player always begins their turn with the first phase. Participation in the remaining phases (within the same turn) depends on how fruitful the harvest phase was and on the player's strategy.
1. Harvest Phase
The player times the harvest phase by starting the hourglass placed in the middle of the board. Then they throw all 4 Symbol Dice simultaneously and check what came up.
Each die has letters on its faces, symbolising in order: Z, D, S, K, R, J:
- Z - gold
- D - wood
- S - steel
- K - stone
- R - knight
- J - joker
If the symbols thrown do not meet the player's expectations, they may repeat the throw any number of times (always with all 4 dice at once), until the sand runs out of the hourglass. Then the harvest phase ends. The last throw is the counting throw and determines the goods the player acquires in this phase.
Example: the player starts the hourglass and makes:
- 1st throw with four dice: K, K, D, J
- 2nd throw: Z, D, S, R
- 3rd throw: D, D, S, Z
The player, dissatisfied with the 1st throw, managed within the time measured by the hourglass to make 2 more throws. The result obtained in the last throw also does not satisfy them, but the time measured by the hourglass has ended, so they cannot throw again. Nor can they return to earlier throws. The last throw is the one that counts.
The player receives from the managing player the tokens symbolising the goods obtained, and places them on the round fields surrounding the player's settlement, thus replenishing their warehouse. In the example, their warehouse grows by 2 units of wood (2 tokens go on brown fields), 1 unit of steel (1 token on a dark grey field), and 1 unit of gold (1 token on a yellow field) - fig. 4b.
If during the harvest phase the player obtains a resource of which they already hold the maximum amount (4 pieces) in the warehouse, the thrown resources are lost.
If the letter J (joker) falls on a die, the player may increase the stock of any one resource they hold by one (up to a maximum of 4 pieces in the warehouse). The joker cannot replace a knight.
A joker thrown in the harvest phase does not double the amount of the resource for which it is substituted.
2. Building Phase
Four settlements (fig. 5) are placed on the board, separated from each other by rivers. As they are built up, they will gradually develop into towns. After throwing the Symbol Dice and replenishing the warehouse, the player may end their turn or continue it by proceeding to the second phase - building the town.
Fig. 5 shows the board with the four settlements (I, II, III and IV osada).
In their town, the player must build 7 buildings, placed on the light-green irregular fields, and an 8th object - the port. The construction of each building and of the port consists of two stages.
Stage I: If the player builds the first part of a building, this is marked by placing a small building on the building's field and paying for it with the resources acquired - fig. 6. The construction cost and the defence value of the building are shown below its square.
Fig. 6 (labels as printed): I stage of construction - the player places a small building and pays for it with 1K (stone) + 2S (steel). The construction cost and the defence of the building are shown under the square.
Stage II: If the player builds both parts of the building, i.e. the construction of this building is fully completed, the player marks this by placing a large building on the square, in place of the small one, and paying again - fig. 7. The small building then returns to the box. The cost of both stages is the same and is shown on the board, under the name of the building - fig. 7.
Fig. 7 (labels as printed): II stage of construction - the player places a large building and pays for it with 1K (stone) + 2S (steel). The defence of the building (shown under the yellow square) doubles (1 x 2) after the construction is completed (large building).
The player must always build the town gradually, i.e. they cannot place a large building in one turn straight away, skipping the earlier stage (small building). During one turn, any number of buildings may be built, but the order of the stages must be preserved.
The port is built on the same principles as the buildings.
Whenever the player builds a building (partly or fully), they must remove from the warehouse the corresponding amount of resources (the managing player returns the counted tokens from the warehouse to the box) and place the appropriate building on the corresponding field of the square.
During construction, any resource may be replaced with gold (if gold is in the warehouse). However, gold cannot be replaced with other resources.
Placing certain buildings brings the player certain benefits in subsequent turns, but these buildings must be completed:
- Mint (mennica) - in the harvest phase the player receives one more gold for each gold obtained in the throw.
- Carpentry workshop (stolarnia) - in the harvest phase the player receives one more wood for each wood obtained in the throw.
- Smithy (kuźnia) - in the harvest phase the player receives one more steel for each steel obtained in the throw.
- Stonemason (kamieniarz) - in the harvest phase the player receives one more stone for each stone obtained in the throw.
- Barracks (koszary) - in the recruitment phase the player receives one more knight for each gold obtained in the throw.
Note: the barracks entry in the building list reads "for each gold obtained in the throw", while the recruitment-phase section below states that the number of knights gained is doubled when the barracks are built. Both are transcribed as printed.
3. Recruitment Phase
If the letter R (knight) falls on the Symbol Dice during the harvest phase, the player moves to the recruitment phase, i.e. they gain a knight (they receive a knight card from the managing player). Recruited knights are needed to defend the town (its built buildings and port) and to attack other players' towns. The number of knights obtained equals the number of R letters thrown.
If the player has built the barracks (koszary), then during recruitment the number of knights obtained is doubled (the barracks building must be completed).
Knights are placed on a chosen field of a building in the town. On one field there may be up to 2 knights - fig. 8. Knights defend only the building on whose field they stand.
Fig. 8: the mint field (Mennica) is defended by 2 knights.
Each player may collect at most 16 knights in total. If knights are to defend the port, the player places them near the square labelled "port", along the shoreline.
4. Battle Phase
In the middle of the board spreads the sea, which borders the four settlements. In order to take part in the battle phase, the player must have a completed port (large building) and must buy a ship, paying for it with the goods they have gathered. The colour of the ship has no meaning; it is a component that each player may acquire before the battle, after paying the correct amount. The cost of the ship is 4D + 2S (4 x wood + 2 x steel).
The purchased ship, which makes it possible to reach another settlement, is placed by the player in their port - fig. 9.
Now the player may attack another player's town with any number of their knights. To do so, they take from their own town as many knights as they want to attack with, and place them in the middle of the board - fig. 9. Then they determine which building in the opponent's town they want to capture.
Each building has a numerical value denoting its defence (the number given on the building's field). If the building is completed (a large building stands on it), its defence is doubled.
Example: one part of the smithy (small building) has a defence of 1; the completed smithy (large building) has a defence of 2 - fig. 6, 7.
Fig. 9: the port with the ship placed in it, and the knights gathered in the middle of the board for an attack.
Calculating the Attack Strength
The attacking player declares which building and how many knights they are attacking with. Then they determine the strength of their troops. To do this, they first throw as many Symbol Dice as there are knights they attack with. For each knight that is thrown, the attack strength increases by 1. The number of attacking knights is then added to the sum obtained, and thus the attack strength arises.
Example: the player attacks with 5 knights (fig. 9), so the 1st throw is made with four Symbol Dice, and in the second throw one die is used (so that the number of dice thrown equals 5):
- 1st throw: D, R, S, R
- 2nd throw: R
In the two throws the player threw the knight 3 times, so the attack strength is: 5 knights + 3 thrown on the dice, which gives 8 in total. With this strength the player attacks the opponent's building.
Attacking with 5 knights, the player may also make a series of single throws, five throws with one Symbol Die. It is important that the sum of the symbols thrown matches the number of attacking knights.
Calculating the Defence Strength
If the opponent has any knights on the field of the attacked building, they are its defenders - fig. 10. For each knight possessed, the defending player makes one throw with a Symbol Die. If a knight falls, the defence value increases by 1. Their number is added to the building's defence (shown on the board, on the building's field), and thus the defence strength is obtained.
Example: the defending player defends their mint, whose defence value is 4 (doubled, since the mint building is completed), and there are 2 knights in the mint - fig. 10. The player throws 2 x Symbol Die, or 1 x 2 Symbol Dice.
Fig. 10 (labels as printed): the mint field is defended by 2 knights; because the mint building is completed, its defence is doubled and equals 4.
1st throw with two Symbol Dice: S, R. During the throw 1 knight fell, so the defence value is: 3 knights + 1 knight from the Symbol Dice + 4 mint defence, in total 8.
Note: the printed example reads "3 knights + 1 knight from the Symbol Dice + 4 mint defence = 8", although the mint holds only 2 knights; the arithmetic is transcribed as printed.
Battle Result
The attack strength is compared with the defence strength. If the attack strength is higher than or equal to the defence strength, the attacking player has won. If the attack strength is lower, the attacking player has lost.
If the attack succeeded, the defending player loses their attacked building and removes it from the board. If it was a building bringing benefits, the player may no longer use those benefits until the building is rebuilt.
Example: if the attack strength shown in fig. 9 is compared with the defence strength from fig. 10, the victory in this battle goes to the attacker, since the attack and defence strengths are equal.
Always after a battle, regardless of its result, the ship returns to its place beside the board, until it is bought again before the next battle.
Calculating Losses
The attacking player loses as many knights as the total defence, and the defending player loses as many knights as the total attack.
Example: the player attacks the port (fig. 11) with 4 knights. The port's defence is 2, and in addition the port is defended by 1 knight. The defence of the attacked port is 2 and is not subject to doubling (small building).
Fig. 11 (labels as printed): the defence of the attacked port is 2 and is not doubled (small building); the yellow player defends the port with 1 knight; the red player attacks the opponent's port with 4 knights.
Example, continued: the attacking player throws 4 Symbol Dice: K, K, D, J. Since the attacker did not throw a single knight, and the joker cannot be replaced with a knight, their total attack is 4.
The defending player throws one Symbol Die: D. The port's defender also did not throw a knight, so the total defence is 3 (port defence 2 + 1 knight).
The attacking player wins, but loses 3 of their knights (since that is the total defence). The defending player loses the building representing the port and the one defending knight.
After the battle is over, if the attacking player won and saved some knights, those knights return to their town, to fields of buildings of the player's choice. The ship is placed again beside the board, until the next attack. Resources the players lost in the battle return to the box.
After the 4th phase is completed, a new turn of the next player begins. The game continues until one of the players first builds their whole town.
Value of Buildings and Ship
The value (cost) of the ship and of the buildings is given symbolically and is described on the board with abbreviations (fig. 12):
- Symbols: K - stone (kamień); D - wood (drewno); S - steel (stal); Z - gold (złoto).
Value of the ship: 4D + 2S (4 x wood + 2 x steel)
Value of the buildings:
- Castle (Zamek): 4K + 4D + 4S + 4Z
- Cathedral (Katedra): 3K + 3D + 3S + 3Z
- Mint (Mennica): 2K + 2D + 2S
- Port: 1K + 2D + 1S
- Barracks (Koszary): 2K + 1D + 1S
- Carpentry workshop (Stolarnia): 2D + 1S
- Smithy (Kuźnia): 1K + 2S
- Stonemason (Kamieniarz): 2K + 1D
Fig. 12 (labels as printed): the tokens shown are 3 x steel, 3 x gold, 3 x stone and 3 x wood. Cathedral value: 3K + 3D + 3S + 3Z. In total 12 tokens, which the player gives up from the warehouse when buying the Cathedral building.
Note on the printed source: the cost list above does not include the University (Uniwersytet), which is printed on the board (fig. 4b, fig. 11). The text states that a player builds 7 buildings plus the port, while the board shows eight named buildings plus the port (Zamek, Stolarnia, Kamieniarz, Mennica, Uniwersytet, Katedra, Koszary, Kuźnia). All of this is transcribed as printed.
Defence of Buildings and Port
- Castle (Zamek): 4
- Cathedral (Katedra): 3
- Port: 2
- Barracks (Koszary): 2
- Mint (Mennica): 2
- Carpentry workshop (Stolarnia): 1
- Smithy (Kuźnia): 1
- Stonemason (Kamieniarz): 1
Fig. 13 (labels as printed): the defence of the Smithy is 1. The defence doubles if the player builds the large building placed on the square field of the Smithy.
Game Variant II (II WARIANT GRY)
The printed rulebook labels this section "II WARIANT GRY" (Game Variant II); no first variant is printed.
Players who want to shorten the playing time may agree, before the game starts, to give up building the town step by step and to place large buildings on the construction fields straight away. Small buildings then take no part in the game, and the total value of each building and its defence are not doubled and are shown on the field occupied by that building.