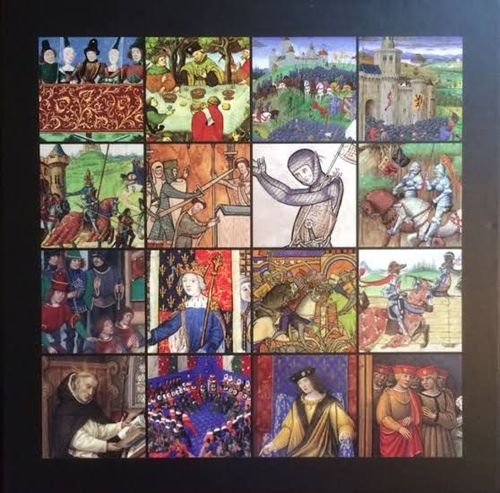
Ortus Regni
Ortus Regni Rulebook
Table of Contents
Table of Contents
- Introduction
- Ortus Regni Components
- Basic Game Concepts
- Winning the Game
- Game Setup
- Typical Earldom During a Game
- Taking a Turn
- Building an Earl Deck
- Earl Card Glossary
- Property Cards
- Face Cards
- Political Cards
- Resolving Political Struggles
- Towers
- Table Decks
- Army Deck
- Viking Deck
- Battle Deck
- King Card
- Combat
- Fielding Forces for Battle
- Resolving a Battle
- Allocating Damage to Fielded Forces
- Ransoming Lords
- Vikings
- Jousts
- Code of Honor
Introduction
Ortus Regni is a unique closed-deck, deck-design strategy card game set in the Late Anglo-Saxon era. Players take the role of Earls, building Castles and expanding their Fiefs by adding Lands, Market Towns, Churches, or the Cathedral. They can also try to destroy or capture the same from their rivals.
Earls may also gain strength by adding nobles to their entourage — Princes, Vassals, Champions, and Monks — and installing them in their Castles as Lords or holding them in the "Great Hall" of their Hand of playing cards. Earls may build up their armed forces by Recruiting Infantry or Knights, or by hiring Mercenaries. And they can add Towers to protect their Earldom's frontiers. All the while, they must keep a wary eye out for approaching Viking marauders. Earls may also engage in political Treachery and Intrigue, or attempt to gain the favor of those same dangerous Vikings.
On the field of Battle, in the Great Halls of politics, or at the Jousting tilt, all Earls hope to one day rule the entire kingdom and leave their indelible mark in the written histories of a new nation.
Ortus Regni is inspired not only by Anglo-Saxon history, but also by the art of illuminated medieval manuscripts. With a suite of 15 iconic Earl Cards (Player Cards) and simple game components, Ortus Regni provides a great depth of strategic possibilities. All cards display no words, numbers, or other identifying icons and details, only period images and artwork. While it may take time for players to distinguish one card from the other, the art of identifying each card soon becomes second nature. Ortus Regni has been designed for the sophisticated player seeking an elegant and strategic card game that can be played again and again.
We have dubbed this model a "repertory card game," because with each new game, using this small selection of iconic cards, players can try out a variety of different but related strategies. Each game unfolds in a different way and is highly dependent on the careful choices that a player makes before and during the game.
The Core Box Set of Ortus Regni provides everything that is needed to play the game with 2 players, including red and blue Earl Card Sets (Player Card Sets). The rules of Ortus Regni remain the same whether it is played as a 2-player game, 4-player game, 6-player game, or anywhere in between.
Ortus Regni is a sophisticated game that is perhaps more challenging than games of a similar nature. Once you understand its basic mechanics and learn its set of 15 Earl Cards, it is actually quite fast-paced. But it can be daunting to make this leap of faith. To ease the process, this Rule Book points you to ortusregni.com/learn for short tutorial videos on the game's cards and mechanics. We encourage you to take a look.
As you will see, the Rule Book has a good deal of redundancy throughout its chapters. This is intentional and should make it easier to reference any part of the game's rules. Pay particular attention to the main card glossary; once you master it, you will be well on your way to competing successfully in Ortus Regni.
Ortus Regni Components
- 2 Wooden Card Trays
- 2 Earl Card Sets — 91 cards: 6 each of 15 different cards, plus 1 Palace Card; 1 red set, 1 blue set
- 1 King Card
- 1 Leatherette Bag
- 40 Colored Influence Cubes — 20 red, 20 blue
- 8 Black Viking Markers
- 1 White Viking Marker
- 4 Table Decks:
- 1 Battle Deck — 24 cards: 15 Normal Battle, 3 Attacker Wins, 3 Defender Wins, 3 Church Decides
- 1 Army Deck — 24 cards: 16 Infantry, 8 Knights
- 1 Viking Deck — 24 cards: 16 Viking Infantry, 8 Viking Chieftains
- 1 Joust Deck — 24 cards: 12 No Luck, 6 Princes, 6 Vassals
- 1 Sand Timer (35 seconds)
Not shown: 2 Cloth Card Reference Tapestries, 1 Rule Book, 1 Reference Pamphlet.
Basic Game Concepts
Earl Card Set (Player Card Set) — 90 cards are available to each player, from which a 24-card Earl Deck is chosen. Each Earl Deck is color-coded and bears a unique crest. After a deck is created, remaining cards are left in the Wooden Card Tray. These are set aside and are not part of gameplay. Each set also includes a Palace Card, which is special as it begins the game on the table.
Earl Deck (Player Deck) — This is the selection of 24 cards used by a player.
Starting Hand — The 5 cards drawn from the top of a player's shuffled Earl Deck become the player's starting hand.
Hand — During the game, cards are added to and played from the player's Hand. The number of cards in the Hand will change, and there is no minimum or maximum number of cards a player may hold. Cards can only be added to a player's Hand by drawing directly from that player's Earl Deck. An Earl's Hand symbolically represents the resources of his Great Hall, including his entourage, wealth, and connections. A large Hand is intimidating to other Earls, while a small Hand or no Hand can be a sign of dire weakness. Players may always ask how many cards another Earl has in his Hand (or Army Reserve Pool), and answering this question is required.
Table Decks — The Battle Deck, Army Deck, Joust Deck, and Viking Deck are used in gameplay, but are not part of or used in the creation of a player's Earl Deck. All cards from these decks return to their respective decks' discard piles and are never discarded into a player's own discard pile.
Round of Play — A Round of Play is finished once all Earls have taken their Turns and the Vikings' Turn has been completed.
Turn — Each player's Turn consists of taking 1 Action plus any number of Actions designated as "free" (e.g. placing Towers and placing Army Cards into garrisons). To complete a Turn, a player must draw 1 card from his Earl Deck.
Action — During his Turn, a player may take 1 of the following Actions:
- Place a card from his Hand into his Earldom (i.e. placing a Property, Castle, Mercenary, or Lord on the table).
- Play a Political Card.
- Attack another Earldom.
- Send an Emissary to the Vikings.
- Recruit 1 or 2 Army Cards for his Army Reserve Pool, if he has a Land Card on the table.
- Use the special ability of a Monastery (an Abbot with a religious property in the same Fief) to force another Earl to reveal his Hand to the table.
Free Actions — These are things a player may do during his Turn that do not count as an Action. At any point during his Turn, a player can place down on the table any number of cards from his Hand as Towers for free. At any point during his Turn, a player can also place any number of Army Cards into any available Army Card garrisons in his Earldom for free (only the Mercenary Card and King Card's "Royal Army" have garrison slots). Players cannot place Towers or garrison Army Cards outside of their Turn.
Fief — A Fief is anchored by 1 Castle or 1 Palace. A Castle or Palace alone is also itself a Fief. Properties (i.e. Lands, Market Towns, Churches, or the Cathedral) can be added to a Fief. A player will likely have more than 1 Fief during gameplay and must have at least 1 Fief on the table to remain in the game.
Palace (Starting Castle and Starting Fief) — Each player begins the game with his Palace Card out on the table. Also known as the Starting Castle, the Palace is also each player's initial Fief. The Palace is special in that it is stronger than a normal Castle and begins the game already in play and on the table. In all other ways, it is simply a Castle. Losing his Palace does not remove a player from the game, as long as he has at least 1 Fief remaining in his Earldom.
Earl, Earldom — Each player is an Earl. An Earl's collection of Fiefs set out on the table before him represents his Earldom.
Lord — Putting a Face Card (e.g. a Prince, Vassal, Champion, or Monk) into a Castle or Palace as an Action on an Earl's Turn makes that personage a Lord. Only 1 Face Card can inhabit a Castle or Palace at a time. But a player can bump 1 Lord out and into the discard pile by placing another one from his Hand into its place as an Action on a later Turn. Turning a Face Card into a Lord empowers it in several ways, especially in combat. However, with the exception of the Prince Lord, this can also put the Fief that you "signed over" to this new Lord at some additional risk (see "Treachery" under "Political Cards"). Think of creating a Lord as making that Face Card a "feudal lord" within your Earldom, bound to you by his "oath of fealty."
Tower(s) — The reverse side of every card in a player's Earl Deck has a Tower image on it. During an Earl's Turn, he can place down Towers in a row in front of his Earldom to help defend all his Fiefs from attack. Any card from the Hand can become a Tower by placing it on the table with the Tower side up. This can be done at any point during that Earl's Turn as a Free Action.
Fielding — In Battle, as attacker or defender, Earls may be able to field Armies from their Army Reserve Pools, Lords from their Castles, or certain Face Cards from their Hands. Mercenaries and the special King Card can also be fielded in a Battle. These choices all have their own unique rules and limitations.
Bag — This is where the colored Influence Cubes, matching each Earl, are placed to determine a) the starting order of play, and b) which Earl controls the Vikings when they are active.
Army Reserve Pool — Earls can draw and stockpile Army Cards, both Infantry and Knights. They can also hold in reserve more than they can field at any time. These Army Cards, called the Army Reserve Pool, are kept face down in a pile to the right of each Earl, and are fielded and garrisoned as needed. Earls are allowed to view what kinds of cards are in their own, but not each other's, Army Reserve Pools. Players may always ask how many cards another Earl has in his Army Reserve Pool (or his Hand), and answering this question is required.
Garrison (Army Card Slot) — This is the empty place next to 2 kinds of cards on the table, the King Card and the Mercenary Card, where Army Cards can be placed. Placing Army Cards into available garrisons from the Army Reserve Pool is a free Action, similar to placing Towers, during an Earl's Turn. Garrisoned Army Cards are placed face up and cannot be withdrawn from their garrison on a later Turn. The Mercenary only has 1 available garrison. The Royal Army, which always accompanies the King Card, has a number of available garrisons equal to 1 fewer than the number of Earls who started the game. (Thus, in a 2-player game, the King Card has 1 available garrison for an Army Card; in a 3-player game, it has 2 available garrisons.) Importantly, a supporting Land Card is not required to field garrisoned Army Cards into a Battle.
Recruit — When an Earl has at least 1 Land Card in his Earldom, he may, as an Action, choose to Recruit and draw 1 Army Card from the Army Deck into his Army Reserve Pool. This number does not increase if that Earl has multiple Land Cards on the table. However, if an Earl has at least 1 Land Card in a Fief that also has at least 1 Market Town, then the Recruit Action allows that Earl to draw 2 Army Cards. This benefit does not increase with multiple Land Cards or Market Towns — Recruiting either provides 1 or 2 Army Cards, depending on which condition is met.
Politics — This entails using an offensive Political Card like Treachery or Intrigue against fellow Earls without going to Battle. Politics can also refer to the Political Struggle that can ensue between the Vassals of 2 Earls when a Treachery or Intrigue has been played and then countered with an Allies Card. Note: While they are categorized as Political Cards, the Banner and Banquet cards are not considered offensive Political Cards. The Allies Card is a defensive Political Card.
Properties/Buildings — The general category of Properties and Buildings includes the Palace, Castles, Lands, Market Towns, Churches, and the Cathedral. Besides Lords in their Castles or Palaces, these are the only components of an Earl's Fiefs. Properties and Buildings can be destroyed and discarded, or captured and moved to another Earl's Earldom.
Face Card — Princes, Vassals, Champions, and Monks are Face Cards that are used in gameplay in similar ways. For example, they can be played from the Hand into Combat, and they can be placed into Castles as Lords. They each have unique abilities and restrictions. The Mercenary Card is different in that it can only be set out before an Earldom, as an Action, and afterwards used in Combat. Face Cards can be thought of as representing more than the personage on their face; they also represent that personage's private entourage of retainers, supporters, and connections.
Bequeathing — When an Earl Bequeaths his Earldom to his "heir apparent," his Prince Lord, he can extend the life of his Earl Deck. This allows him to add his discards to his remaining deck and reshuffle them together to form a renewed Earl Deck. When an Earl runs out of cards to draw from his Earl Deck, he is said to perish from old age, his line is extinguished, and he is removed from the game. Because an Earl is required to draw 1 card from his Earl Deck at the end of each Turn — and he is out of the game if he cannot — Bequeathing is a preventative Action. Bequeathing also gives an Earl the chance to redraw cards that have been sent to his discard pile.
Prince Lord — Princes are special in several ways. An Earl can only have 1 Prince in play at a time — and thus can only have 1 Prince Lord in his Earldom at a time. If he does have a Prince Lord out on the table, he cannot play any more Princes from the Hand into Combat. And an Earl can never play multiple Princes from the Hand into Combat at the same time, even when he does not have a Prince Lord. The Prince Lord is valuable in 3 additional ways: 1) when a Prince Lord is assassinated with a Treachery Card, the Castle and Fief of the Prince Lord remain in the Earldom; 2) only by playing a Banner Card on a Prince Lord can an Earl Bequeath his Earldom; and 3) when an Earl fields a Prince Lord into a Raid or Siege, he may be able to capture a Property or Castle.
King — A player becomes King when he acquires the King Card by playing the required number of Banner Cards on the table. There can only be 1 King at a time. But this is merely a title as far as the other Earls are concerned; the King must still conquer the kingdom.
Archbishop — An Earl becomes the Archbishop by possessing the Cathedral, and there can only be 1 Cathedral on the table at a time. The Archbishop determines the outcome of a Church Decides Battle Card result and prevents any Earl lacking a Church in his Earldom from Bequeathing to his Prince Lord.
Vikings — This is a non-player force in the game that often appears on the table and begins attacking the Earls.
Winning the Game
The last Earl on the table is the winner of the game. If an Earl believes the cause is lost, he may concede honorably during his Turn at any time. But do not be too hasty, as the situation on the table can change in unexpected ways.
An Earldom is destroyed, and its Earl is out of the game, when it loses its last Fief. When an Earl cannot draw the required card that ends his Turn, because none remain in his Earl Deck, then that Earl is also out of the game. In this case, the Earl is considered to have passed away peacefully in the night, without an heir to carry his flag forward.
When an Earl dies, when his Earldom is destroyed (having lost his last Fief), or when he resigns, all cards remaining in his Earldom are removed from play, and all his Influence Cubes are removed from the Bag. However, cards from his Earl Deck that other Earls have seized are not removed from play at this time (but can be removed during gameplay, whenever they are meant to be discarded). Any cards from another Earl's deck that are in the destroyed Earldom are sent to their original owner's discard pile. When the game is over, all cards are returned to their original Earls.
Game Setup
- Each player selects a color, which corresponds to the back of the player's Earl Card Set and Influence Cubes.
- If they have not done so already, players place their cards into their Wooden Card Trays. The order does not matter. There are 15 slots for the 15 card types (6 cards of each), plus 1 larger first slot, which can hold a prepared Earl Deck between games as well as the Palace Card. Note: The tray can also be used to store these cards in the game box itself.
- Each player selects a 24-card Earl Deck from the 90 cards in the Wooden Card Tray (excluding the Palace Card). The tray and remaining cards are then set aside, as they are not part of the game.
- All players shuffle their 24-card Earl Decks and then ensure all the reverse-side Tower images face in the same direction. After shuffling their Earl Decks, players are not permitted to know the order of their cards. Each Earl Deck is then placed face down on the table, in front and to the left of each player. Each player's discard pile is next to his Earl Deck.
- Each player places his Palace Card on the table before him. This is each player's starting Fief.
- Players set out and shuffle the Table Decks, each consisting of 24 cards: the Battle Deck, Army Deck, Joust Deck, and Viking Deck. Note: The Army Deck is larger than 24 cards for games with more than 2 players.
- Players place the Battle, Army, and Joust decks in a row, within easy access to the side of the gaming area.
- Players place the King Card, the Bag, and the Sand Timer behind the Battle, Army, and Joust decks.
- Separately, players place the Viking Deck, its 8 Black Time Markers, and its 1 White Combat Marker to the side. These items are situated to the right of the starting player; thus, the Vikings' Turn is always the last in every Round of Play.
- Each player puts 1 colored Influence Cube into the Bag. Players randomly draw 1 Cube each to determine who the starting player is. They then put the Cubes back into the Bag, as these Cubes also represent the initial chance each player has to control the Vikings when they are active. The Vikings are placed to the right of the starting player, with their markers behind the Viking Deck.
- Each player draws 5 cards from the top of his Earl Deck as the starting hand.
Typical Earldom During a Game
An Earl's play area consists of his Fiefs set out on the table, a Mercenary with Garrison, the King with Royal Army (if he holds the King Card), a row of Towers in front of the Earldom, the Earl's Deck with its Discard Pile beside it, the Earl's Hand, and the Army Reserve Pool.
Taking a Turn
An Earl's Turn includes:
- Taking 1 Action.
- Placing any number of Towers on the table and placing any number of Army Cards into garrisons. This can occur at any point in an Earl's Turn prior to the card draw that ends his Turn.
- Drawing 1 card from his Earl Deck, which is required and officially ends the Earl's Turn. If an Earl has no card to draw, he is considered to have passed away from old age and is out of the game.
An Earl's single Action can be:
- Playing a card from his Hand. That is, placing a Property or Castle on the table, in his Earldom; creating a Lord by placing a Face Card into a Castle; placing a Mercenary Card on the table; or playing a Political Card (e.g. a Banquet, Banner, Treachery, or Intrigue card).
- Attacking another Earl by Raiding a Fief, Sieging a Castle, or attacking an Earldom's Towers.
- Recruiting an Army Card from the Army Deck. This is only possible if an Earl has at least 1 Land somewhere in his Earldom.
- Sending a Vassal or Monk from the Hand to the Vikings as an Emissary.
- Using the special ability of a Monastery to force another Earl to reveal his Hand to the table (see subsequent descriptions of Church, Cathedral, and Monk for more details).
An Earl is not required to take an Action during his Turn. If he has no Action to take, an Earl must still draw a card to end his Turn.
Building an Earl Deck
Each Earl initially has an identical Earl Card Set (sorted into 15 groups of 6 identical cards, plus 1 Palace Card, for a total of 91 cards). The cards are placed in the Wooden Card Tray, keeping the Palace Card separate in the slot at the front of the tray. Earls can choose any combination of the 90 cards (excepting the Palace Card) to build a unique Earl Deck of 24 cards. The cards may be stored in any order in their trays; this helps disguise an Earl's choices from wandering eyes.
All Earls have the same selection of cards from which to make their Earl Decks, so their choices in designing their 24-card decks influence deck strategy and behavior. Decks can be focused on a narrow play style, with fewer types of cards, ensuring certain cards will appear with greater frequency and predictably. Or decks may include a wider range of cards. This latter strategy can improve flexibility and strength in the middle and late periods of gameplay, but sacrifices speed and reliability earlier in the game. This all depends on how often you can anticipate drawing the card that you need or desire, at the right time, from your shuffled deck.
Half of the task in deck design is intuiting what kind of deck an opponent is likely to build. But even after a deck has been built, dramatic choices during gameplay may allow an Earl with a seemingly weak deck to emerge victorious nonetheless.
Sample Earl Decks are included in the separate Reference Pamphlet. These canonical Ortus Regni decks include a Lord Deck, a Land & Army Deck, a Political Deck, and an Emissary Deck. These examples are meant for 2-player games and thus are more focused and fast in development than similar multiplayer decks might be. That is, the number of certain key cards in these decks is higher than otherwise might be needed in a multiplayer game, providing more certainty that a player will draw what he needs early on in a 2-player game. Keep in mind that all these styles and more can also be incorporated into hybrid styles of varying complexity.
Earl Card Glossary
The 15 Earl Card types fall into 3 categories of 5 cards each:
- Property Cards, including Castles, Properties, and the Palace
- Face Cards, including the Mercenary Card
- Political Cards, including Banquet and Banner cards
Property Cards
Property Cards represent Castles (or Palaces) and Properties that can be attached to Fiefs, such as Lands, Market Towns, Churches, or the Cathedral. While the game begins with the Palace already in play in an Earl's Earldom, all other Properties and Castles must be placed on the table as an Action into an Earldom. Castles and Palaces each anchor their own Fiefs, but all other Properties must be attached to a specific Castle or Palace.
Palace — Also called the Starting Castle, this card plays exactly like a Castle, except that a) each Earl begins the game with his Palace on the table, and b) a Palace is stronger than a normal Castle. Losing a Palace is no different than losing any other Castle, except that it is perhaps more embarrassing to an Earl. A Palace is destroyed when it receives 3 damage points.
Castle — A Castle anchors a Fief, and there can only be 1 Castle per Fief. Other Property Cards — Lands, Market Towns, Churches, or the Cathedral — can be attached to a Castle. An Earl can install into a Castle any Face Card — a Prince, Vassal, Champion, or Monk — except for a Mercenary. Once installed, a Face Card becomes a Lord (or an Abbot, in the case of a Monk). When a Castle is successfully Sieged, all attached Properties are also lost and any Lord is discarded. An Earl must have at least 1 Fief on the table to remain in the game. A normal Castle is destroyed when it receives 2 damage points.
Land — When a Land is attached to a Fief, when placed from the Earl's Hand as an Action, the Earl immediately draws 1 Army Card (or 2 Army Cards if the Land is placed in a Fief that already has a Market Town attached) for his Army Reserve Pool. This does not occur if the Land is captured in Combat, received as Ransom, or won in a Joust. Multiple Lands can be attached to any Fief. Each Land Card on the table, anywhere in his Earldom, allows an Earl to field 1 Army Card from his Army Reserve Pool into Combat (or 2 Army Cards per Land that is in a Fief with a Market Town). Possessing at least 1 Land in his Earldom also allows an Earl to Recruit, as an Action on his Turn, 1 Army Card (or 2 Army Cards if he has a Land and a Market Town in the same Fief) into his Army Reserve Pool. No matter the number of Lands, only 1 or 2 Armies can ever be Recruited per Turn, depending on which condition is met. Land is destroyed when it receives 1 damage point.
Market Town — When a Fief includes a Market Town and a Land is subsequently attached to that Fief, the Earl draws 2 Army Cards, rather than the standard 1 Army Card (see "Land"), for that placement Action. Several Market Towns may be attached to any Fief. In addition, each Land in a Fief with a Market Town is able to field 2 Army Cards from an Earl's Army Reserve Pool into Combat (rather than the 1 Army Card that Land normally supports in the field). Having more than 1 Market Town in a Fief does not further increase this benefit. A Market Town is destroyed when it receives 1 damage point.
Church — Multiple Churches can be attached to any Fief. When a Church is in an Earldom, that Earl may Bequeath his title to his Prince Lord, even when the Cathedral is also on the table (otherwise the Archbishop will prevent Bequeathing). When an Abbot (Monk Lord) is in a Fief that also includes a religious Property (a Church or the Cathedral), then that Earl gains the special Monastery ability. Used as an Action during a player's Turn, this ability forces a targeted Earl to reveal his entire Hand to the table at that moment. Also, in the absence of an Archbishop, Churches have an additional power. In the event of a Church Decides Battle Card result, the Earl with the most Churches decides the Battle result. A tie negates this power. A Church is destroyed when it receives 1 damage point.
Cathedral — There can only be 1 Cathedral in play on the table at a time. The Earl who possesses the Cathedral is the Archbishop and is given the power to resolve the Church Decides Battle result (as either a Normal Battle, Attacker Wins, or Defender Wins result). When the Cathedral is in play, no other Earl can Bequeath to his heir apparent Prince Lord (and thus reshuffle any discards into his remaining Earl Deck), unless that Earl has a Church on the table. Also, when an Abbot (Monk Lord) is in a Fief that also includes a religious Property (a Church or the Cathedral), then that Earl gains the special Monastery ability. Used as an Action during a player's Turn, this ability forces a targeted Earl to reveal his entire Hand to the table at that moment. The Cathedral is destroyed when it receives 1 damage point.
Face Cards
All Face Cards, save for the Mercenary Card, can be made Lords (or Abbots in the case of a Monk) by placing them in Castles and Palaces. Face Cards that are made Lords gain added longevity in Normal Battles. However, once installed in Castles and Palaces, they are vulnerable to being assassinated by the Treachery Card. When a Lord (or Abbot) is eliminated using Treachery, the Castle into which that Lord or Abbot is placed, along with that entire Fief, is removed from the Earldom and discarded. However, a Prince Lord is a special case: When a Prince Lord is eliminated with Treachery, his Castle and Fief remain on the table and still belong to the defending Earl's family. Only 1 Face Card can be a Lord in a particular Castle, and once installed as a Lord, a Face Card cannot be moved to another Castle, sent as an Emissary, or withdrawn back into the Hand. One exception: The Lord can be "bumped" by the placement, as an Action, of a new Face Card from the Hand into the same Castle, which causes the old Lord to be discarded.
When used in Combat, Face and Army cards are described as being able to send and take damage. For example, the Champion is a 2/1 Face Card, meaning it sends 2 damage and takes 1 damage. All such Face Cards take only 1 point of incoming damage, which is enough to eliminate all but Lords (and the special King Card). Champions, Mercenaries, and Knight Army cards all send 2 damage, while the Prince, Vassals, and Infantry Cards all send 1 damage. The Monk, when used in Combat, sends no damage but can take 1 damage.
Face Cards played from the Hand into a Battle are discarded when the Battle is over. However, any Face Cards that are already placed into Castles and Palaces, and participate in a Battle as Lords or Abbots, will be able to absorb their 1 damage and also return home to their respective Castles. The 1 exception is when the Battle Deck Card result is unfavorable — e.g. the Attacker Wins Battle result comes up, and the attacker captures all of the defending Earl's Lords that were fielded. In that case, to ensure the safe return of all such captured Lords, they must be Ransomed. The losing Earl needs to hand over 1 Property or Castle as a Ransom to the Earl who won the Battle for each captured Lord he wishes to save. If not Ransomed, any Lord or Abbot will be killed and their card(s) discarded after the Battle. When a Lord (or Abbot) is killed in this way in Combat, the Face Card is discarded, but his Castle and its Fief remain on the table. (See "Combat" for further details.)
Prince — No matter how many Prince Cards he holds in his Hand, each Earl can only have 1 Prince in play at a time. So if an Earl has a Prince Lord in 1 of his Castles, then he cannot play a Prince Card from his Hand into a Battle. Nor can the Earl play multiple Princes into a Battle from his Hand. A Prince may be placed into a Castle and made a Lord, but an Earl can only have 1 Prince Lord in his Earldom at a time. An Earl can play a Banner Card on a Prince Lord to Bequeath his title, assuming the Archbishop does not prevent this Action. When this happens, both the Prince Lord and the Banner Card are placed in the player's discard pile, then the entire discard pile is reshuffled into the player's Earl Deck. Also, when a Prince Lord is fielded during a Raid or Siege, then the attacker has the opportunity to seize a successfully destroyed Property or Castle as a result of that Battle. This seized Property or Castle is then placed in the attacker's Earldom. Along with the Vassal, the Prince also represents 1 of the 2 Joust Deck results cards and is thus a decent tilter in the Joust. In Battle, a Prince is 1/1 (sending 1 damage, taking 1 damage).
Vassal — A Vassal can be placed in a Castle and made a Lord. An Earl can possess multiple Vassal Lords, and multiple Vassals can be fielded from the Hand into Combat. When a Vassal Lord is fielded during a Raid or Siege, then the attacker has the opportunity to seize a successfully destroyed Property or Castle as a result of that Battle. This ability does not increase with multiple fielded Vassal Lords — 1 seized Property is the limit. However, in conjunction with the fielding of a Prince Lord, this ability can be used to seize up to 2 successfully destroyed Properties or Castles. The seized Property or Castle is then placed in the attacker's Earldom. Vassals can also be sent as Emissaries to the Vikings, but only when played directly from the Hand. This places 1 additional Influence Cube of the Earl's color into the Bag for determining control of the Vikings. The sending of an Emissary also speeds up the Vikings' arrival by 1 Black Time Marker. Vassals can also be used to support Political Struggles (see "Allies Card" in "Political Cards"), either on offense or defense. During Political Struggles, Vassals can be played from the Hand, in which case they are discarded, win or lose. But if Vassal Lords are deployed in Political Struggles and their Earl wins the contest, then they return to their Castles. Along with the Prince, the Vassal also represents 1 of the 2 Joust Deck results cards and is thus a decent tilter in the Joust. In Battle, a Vassal is 1/1 (sending 1 damage, taking 1 damage).
Champion — A Champion can be placed in a Castle and made a Lord. An Earl can possess multiple Champion Lords, and multiple Champions can be fielded from the Hand into Combat. Like the Knight Army Card, the Chieftain Viking Card, and the Mercenary, the Champion sends 2 points of damage. The Champion is a wild card in a Joust, becoming either a Prince or Vassal as needed in a Joust Hand, and is thus the best tilter to use in that competition. In Battle, a Champion is 2/1 (sending 2 damage, taking 1 damage).
Monk — A Monk can be placed into a Castle and made an Abbot (Lord). An Earl can possess multiple Abbots, and multiple Monks can be fielded from the Hand in Combat. Monks can also be sent as Emissaries to the Vikings, but only when played directly from the Hand. This places 2 additional Influence Cubes of the Earl's color into the Bag for determining control of the Vikings. Sending an Emissary also speeds up the Vikings' arrival by 1 Black Time Marker. When used in Combat, the Monk sends no damage; it only accepts damage. Also, when an Abbot is in a Fief that also includes a religious Property (i.e. a Church or the Cathedral), then that Earl gains the special Monastery ability. Used as an Action during a player's Turn, this ability forces a targeted Earl to reveal his entire Hand to the table at that moment. In Battle, a Monk is 0/1 (sending 0 damage, taking 1 damage).
Mercenary — A Mercenary cannot be installed in a Castle and cannot be played from the Hand into Combat. A Mercenary can be placed, as an Action, on the table in front of a player's Earldom. The Mercenary then plays as a Knight Army Card would, but the Mercenary does not require an associated Land to be fielded into Combat. In addition, the Mercenary Card has 1 garrison next to it, into which an Earl can place an Army Card face up from his Army Reserve Pool. Placing Army Cards into a garrison is not an Action and is free in the same way that placing Towers is a free Action during an Earl's Turn. However, the Earl cannot withdraw the Army Card from this garrison. The Mercenary and any attached Army can be fielded individually, together, or not at all in any Combat. If the Mercenary is killed in Combat, then any attached Army Card is also discarded. Mercenaries are vulnerable to both Treachery and Intrigue cards. If the Mercenary is stolen with an Intrigue Card, then any attached Army Card goes with it. In Battle, a Mercenary is 2/1 (sending 2 damage, taking 1 damage).
Political Cards
Political attacks using Treachery and Intrigue cards can be devastating if used against an Earldom at an opportune moment. The 2 cards differ in this key respect: The Treachery Card destroys, while the Intrigue Card steals. However, the Allies Card may allow an Earl to prevent any such attacks from succeeding, especially if he has sufficient Vassals to back up that Allies Card in a Political Struggle. The Banquet and Banner cards are grouped with the Political Cards, but are of a different nature. With the Banquet Card, Earls can draw extra cards from their Earl Decks, though at the cost of shortening their lives. The Banner Card allows an Earl to initiate or opt out of a Joust, Bequeath to his Prince Lord, or attempt to claim the title of King.
Treachery — This card, 1 of 2 offensive Political Cards, destroys and kills. Playing a Treachery Card as an Action allows the Earl to attempt 1 of 3 acts of Treachery:
- Assassinate a Lord (or Abbot): The Earl using Treachery attempts to remove a Lord or Abbot in another Earl's Castle. If this succeeds, that Lord is discarded along with his Castle and all attached Properties, and the entire Fief is removed from play and discarded. The exception to this is the case of a Prince Lord. When a Prince Lord is assassinated, then his Castle and Fief remain on the table, staying in the defending Earl's family. However, the Prince is discarded.
- Damage an Earl's Hand: Here, Treachery is used to randomly remove 2 cards from another Earl's Hand. If the Treachery succeeds, the opposing player's Hand is presented face down and fanned out, and the attacker randomly selects 2 cards. These cards are shown to the table and discarded.
- Remove a Mercenary: Treachery also allows an Earl to attempt to remove any Mercenary Card from the table. If successful, that Mercenary is discarded and any garrisoned Army Card is sent to the Army Deck discard pile.
An Earl who is the target of Treachery may attempt to prevent it from succeeding by playing an Allies Card from his Hand. The attack is not necessarily canceled, however, as the attacker may decide to continue the Political Struggle with Vassals (see "Allies Card").
Intrigue — This card, 1 of 2 offensive Political Cards, steals. Playing an Intrigue Card as an Action allows the Earl to attempt 1 of 3 acts of Intrigue:
- Steal Properties from a Fief: The Earl using Intrigue attempts to steal up to 2 attached Properties from any single Fief (Lands, Market Towns, Churches, or the Cathedral). A Fief's Castle is never affected by Intrigue. If successful, the stolen Properties (or Property if the Fief only had 1 Property Card attached to its Castle) are placed where the attacking Earl wishes in his Earldom. If there are more than 2 attached Properties in the attacked Fief, then the defender decides which 2 are taken by a successful Intrigue.
- Steal Armies from an Army Reserve Pool: The Earl using Intrigue attempts to steal up to 2 Army Cards from any Army Reserve Pool. If successful, the victim of the Intrigue selects which Army Cards are stolen, and these cards are sent to the attacker's Army Reserve Pool. They are not shown to the table in this transfer.
- Steal a Mercenary: The Earl using Intrigue attempts to steal a Mercenary Card on the table. If successful, that Mercenary and any garrisoned Army Card attached to it are moved to the attacker's Earldom.
An Earl who is the victim of Intrigue may attempt to prevent it from succeeding by playing an Allies Card from his Hand. The attack is not necessarily canceled, however, as the attacker may decide to continue the Political Struggle with Vassals (see "Allies").
Allies — The Allies Card is used to counter the offensive Political Cards: Treachery and Intrigue. When attacked by either, an Earl can play an Allies Card from his Hand in an attempt to stop the declared attack. This does not count as an Action, as it is done outside of the defender's normal Turn. The Allies Card does not necessarily end the Political Struggle; its success depends on whether the attacker counters with a Vassal (see "Resolving Political Struggles"). If the target of a Treachery or Intrigue does not play an Allies Card, then the Treachery or Intrigue attack succeeds.
Banquet — A Banquet Card is played as an Action to draw 2 cards from the Earl Deck. An Earl may then take any free Actions, such as placing Towers or garrisoning Army Cards, and then must draw a single card to end his Turn. Thus, an Earl draws 3 cards in total on a Turn when he plays a Banquet.
Banner — Banner Cards match each Earl's deck in both color and crest. Playing a Banner Card as an Action allows an Earl to do 1 of the following:
- Bequeath the Earldom: When an Earl plays a Banner Card on his Prince Lord, both the Banner and the Prince Lord are discarded. Then the Earl's discard pile is reshuffled into his remaining Earl Deck. The Earl now has more cards in his Earl Deck, thus extending his life.
- Attempt to Become King: To try to claim the title and privileges of King, an Earl may play a Banner Card as an Action on the table in front and to the side of his Earldom. Banners played in this way will remain on the table until a King is proclaimed. To become King, an Earl must have at least 2 Banners displayed in this way along with 2 more displayed banners than any other Earl who is also attempting to claim the title. Once these conditions are met, an Earl is crowned King, and the King Card is placed before his Earldom. In addition, every Earl who has any Army Cards in his Army Reserve Pool must give up 1 Army Card (of his choice, Knight or Infantry), which is then garrisoned face up in the Royal Army alongside the King Card (see "King Card"). When an Earl becomes King, all Banners on the table played by the new King and others in their attempt to become King are discarded.
- Initiate a Joust: An Earl may toss a Banner Card into the center of the table as an Action to initiate a Joust. The Joust then proceeds clockwise, with the Earl to the left of the Joust-initiating Earl choosing his ante and which card, if any, to send to tilt in the Joust. All Earls must ante something, unless they possess only a single Castle or Palace, with no attached Properties in their Earldom. An Earl may instead play a Banner Card to opt out of the Joust, foregoing the need to ante and precluding his participation in the Joust. Even the Joust initiator may play a second Banner to opt out when it is his time to ante and enter the Joust, after the other Earls. All Banners played in this way are discarded when the Joust is resolved. (See "Jousts" for details on how the competition is resolved.)
Resolving Political Struggles
Vassals, and only Vassals, have the unique ability to back up political acts, both offensively and defensively. If the target of a political attack plays an Allies Card, then the following sequence of events can happen:
- The attacking Earl may, if desired, back up his Treachery or Intrigue by playing a single Vassal — either a Vassal from his Hand or a Vassal Lord installed in a Castle. This initiates a Political Struggle.
- The Treachery or Intrigue then succeeds, despite the Allies Card being played. Except, that is, if the defending Earl then also plays a single Vassal from his Hand or a Vassal Lord installed in a Castle to nullify the attacker's Vassal.
- The defender has then succeeded in backing up his Allies Card, and the Treachery or Intrigue attempt fails — unless the attacker then plays an additional Vassal or Vassal Lord, and so on, in a game of high-stakes and costly political "chicken."
- The Political Struggle ends when 1 side is unable or unwilling to play another Vassal or Vassal Lord. In this sequence of events, each Vassal played by the attacker is nullified by each Vassal played by the defender. As a result, the defender has the advantage and always wins a Political Struggle when an equal number of Vassals is played on both sides.
- Once the Political Struggle ends, all Vassals played from the Hands of both Earls are discarded. However, the Vassal Lords played by the winner in a Political Struggle remain in their Castles, unharmed. The Vassal Lords played by the losing Earl are discarded. Their Castles and Fiefs remain unharmed.
Towers
The reverse side of each card in an Earl Deck has a Tower image on it. Earls can place this Tower on the table in front of their Earldom as a Tower. During his Turn, an Earl can place as many cards down as Towers as he wishes from his Hand as a free Action. This does not constitute the Earl's single Action and can be done at any point during a Turn prior to the single card draw that ends an Earl's Turn. Cards placed as Towers can be destroyed through Combat but cannot be withdrawn later.
Towers protect all of an Earl's Fiefs, the entire Earldom. Each Tower absorbs, without being damaged or removed, 1 point of incoming damage from any Raid or Siege, anywhere in that Earldom. So if an Earl has 3 Towers defending his Earldom, then only the fourth point of damage from any incoming Raid or Siege (after damage is first absorbed by any fielded defending forces) can pass beyond the Towers to harm Properties or a Castle.
Towers can only be destroyed and discarded when they are specifically the target of a Tower attack. In this case, each Tower is destroyed and discarded upon taking 1 point of damage, after damage is first absorbed by any fielded defending forces.
If an Earl is Raiding a Fief or Sieging a Castle, a wall of Towers in front of the target Earldom absorbs much of the incoming damage, forcing the attacker to deploy much greater force to achieve the objective of the attack. Thus, it is often rational and necessary to attack an Earl's Towers, initially and on 1 Turn, with the goal of having unhindered access to attack the Earl's Fiefs on the next Turn. However, in between those attacks, a defending Earl may place down several more Towers on his Turn to thwart this strategy. This assumes, of course, that the Earl has enough cards remaining in his Hand to put up more defenses.
It is important for an Earl to choose carefully which cards to Tower, as these may be useful in other circumstances. While an Earl may look at the cards that he has Towered at any time, the Tower Cards' front sides remain hidden from other Earls. When Towers are destroyed, they must be shown to all players before they are discarded. When Towers are destroyed in a Tower attack, the defending Earl may choose which are destroyed and which remain, assuming any Towers in fact remain.
Table Decks
Ortus Regni includes 4 "non-player" Table Decks: an Army Deck, Viking Deck, Battle Deck, and Joust Deck. These cards are used by all players, but are never in any Earl's Hand or Earl Deck. There is also 1 unique King Card, which is used only when an Earl acquires the title and privileges of Kingship. Cards from Table Decks are only discarded back to their respective decks, never to an Earl's discard pile.
Army Deck
The Army Deck consists of:
Infantry Cards — In Battle, Infantry are 1/1 (sending 1 damage, taking 1 damage).
Knight Cards — In Battle, Knights are 2/1 (sending 2 damage, taking 1 damage).
Army Deck Setup — At the start of Ortus Regni, the composition of the Army Deck is always two-thirds Infantry and one-third Knights. In a 2-player game, the Army Deck consists of 24 cards. Once the Army Deck runs out, its discard pile is shuffled and reused as a new Army Deck. The Army Deck serves to limit the number of Army Cards that may be in the Earldoms at any time (it represents all the Army Cards that can be in Army Reserve Pools or garrisoned on the table).
When setting up the Army Deck for a game with 3 or more Earls, 12 more Army Cards are added for each additional player beyond 2. The same ratios of Infantry (2:3) and Knights (1:3) are used, adding 8 Infantry and 4 Knights per additional player. Thus, a game of Ortus Regni with 4 Earls would begin with an Army Deck of 48 Army Cards. The Army Deck is the only Table Deck that increases when there are more than 2 Earls in a game.
Recruiting Armies — Whenever a Land is attached to a Fief from the Earl's Hand and placed as an Action, the Earl draws 1 Army Card (or 2 Army Cards if the Land is placed in a Fief that already has a Market Town attached). This does not occur when Lands are captured or received as Ransom in Combat. Possession of at least 1 Land in his Earldom also allows an Earl to Recruit, as an Action on his Turn, 1 Army Card (or 2 Army Cards if he has a Land and a Market Town in the same Fief) into his Army Reserve Pool. No matter the number of Lands, only 1 or 2 Armies can be Recruited per Turn, depending on which condition is met (i.e. possessing a Land or possessing a Land in a Fief with a Market Town).
Fielding Armies — Earls may possess more Army Cards in their Army Reserve Pools than they are able to field in Battle. They can possess Army Cards in their Army Reserve Pools whether they have a Land(s) or not. But Land is still required to use the Recruit Action or to field Armies in Combat directly from an Earl's Army Reserve Pool. Army Cards that are garrisoned with a Mercenary or in the King's Royal Army do not require Lands to field and are no longer in an Army Reserve Pool. To field Armies from an Army Reserve Pool, an Earl needs 1 Land anywhere in his Earldom for every 1 Army Card (Infantry or Knight) that he wishes to field. Lands in a Fief with a Market Town are each able to field 2 Army Cards into a Battle. This ability to field Armies increases with the number of Lands in an Earl's Earldom. So possessing 3 Lands means an Earl could field 3 Army Cards, while possessing 3 Lands with 2 of those Lands in a Fief with a Market Town means an Earl could field 5 Army Cards. Lands can field Army Cards repeatedly, so if an Earl is attacked multiple times in a Round of Play, he can utilize the same Lands multiple times to field defending Army Cards into each Battle.
Viking Deck
The Vikings are a non-player force on the table. From the start of the game, they are approaching and will eventually invade if the Earls do not fight amongst themselves. They will often make an appearance in the game, causing mayhem and destruction. The Viking Deck is comprised of 24 cards of 2 types, just like the Army Deck. The Viking Deck is also similar to the Army Deck in that its 2 units, Viking Infantry and Chieftains, behave similarly to Infantry and Knights. The composition of this deck is also the same, with Viking Infantry comprising two thirds of the deck and Chieftains comprising the remaining third.
The Viking Deck consists of:
Viking Infantry — Equivalent to an Infantry. In Battle, Viking Infantry are 1/1 (sending 1 damage, taking 1 damage).
Viking Chieftains — Equivalent to a Knight. In Battle, Chieftains are 2/1 (sending 2 damage, taking 1 damage).
At the start of the game, the Viking Deck, its 8 Black Time Markers, and its 1 White Combat Marker are placed to the right of the starting Earl. These markers should be placed behind the Viking Deck, toward the edge of the table, and moved forward as required to keep track of the Vikings' approach.
The Vikings' Turn is thus last in every Round on the table. While the Vikings are approaching, and after a Round in which no Combat has taken place, 1 Black Time Marker is moved forward at the start of their Turn. When all 8 Markers have been moved forward, then the Vikings will arrive on their Turn. This includes the Vikings' Turn in which the eighth Marker is moved forward. However, if there has been Combat on any Turn in a Round of Play while the Vikings are still approaching, then a Black Time Marker is not moved forward. Instead, the White Combat Marker is moved forward each time Combat takes place in this circumstance (or left where it is if there has already been Combat that Round).
If the White Combat Marker has been moved forward, then on the Vikings' Turn, simply move it back behind the Viking Deck. In this way, Combat always delays the arrival of the Vikings, and the White Marker helps keep track of this.
Whenever an Earl sends an Emissary to the Vikings, move 1 Black Time Marker forward; this can force the Vikings to arrive earlier in the game than anticipated, regardless of the delaying effect of Combat. Once all 8 Black Time Markers have moved forward, the Vikings will arrive on their Turn, whether or not the White Combat Marker is also out. (See "Vikings" for details on how they behave on the table once they arrive.)
Battle Deck
Any time Combat occurs and forces are fielded on both sides of the Battle, a card is drawn from the top of the Battle Deck to determine the result of the Battle and the fate of the participants.
The Battle Deck is comprised of 24 cards of 4 different types. There are 15 Normal Battle Cards, 3 Attacker Wins Cards, 3 Defender Wins Cards, and 3 Church Decides Cards. After a Battle Card is drawn and the results of the Battle resolved, that card is placed in the Battle Deck discard pile. The Battle Deck is not reshuffled until the entire deck has been used (which is a very rare occurrence). As the game proceeds, players can note how often each Battle Result Card has appeared to gain some insight into the probability of future Battle outcomes. But they cannot search through the Battle Deck discard pile for confirmation.
The 4 possible Battle Card outcomes change the resolution of a Battle in the following ways:
Normal Battle — When this card is drawn, Battle damage is allocated to both sides in a balanced fashion. The attacker allocates damage to his forces first, and then the defender decides how to allocate damage to his forces and then possibly to his Towers, Properties, or Castle, depending on the type of attack.
Attacker Wins — When this card is drawn, only the attacker's damage is allocated to the defender. No damage is sent to the attacker. More importantly, all Lords that the defender fielded in this Battle are considered "captured," but can be Ransomed. To Ransom a Lord, the defender can give a Property or Castle to the attacker (1 per Lord he wishes to save). Any Lords not Ransomed are killed and discarded after the Battle. If they are killed, their Castle and Fief remain, as this is not a Treachery assassination. Ransoms are chosen by the defender and given before damage is assigned.
Defender Wins — When this card is drawn, only the defender's damage is allocated to the attacker. No damage is sent to the defender. More importantly, all Lords that the attacker fielded in this Battle are considered "captured," but can be Ransomed. To Ransom a Lord, the attacker can give a Property or Castle to the defender (1 per Lord he wishes to save). Any Lords not Ransomed are killed and discarded after the Battle. If they are killed, their Castle and Fief remain, as this is not a Treachery assassination. Ransoms are chosen by the attacker and given before damage is assigned.
Church Decides — When this card is drawn, the Archbishop (i.e. the Earl who possesses the Cathedral) can decide if the Battle is Normal Battle, Attacker Wins, or Defender Wins. If there is no Archbishop and no Cathedral in play, then the player with the most Churches in his Earldom can determine the outcome of a Church Decides result (in cases of ties where no individual Earl has more Churches than all the others, this power is negated and the Battle result is "Normal"). If there is no such player, the outcome becomes Normal Battle.
If during any Battle, the defender chooses not to meet the attacker with any force, then no Battle Card is drawn from the Battle Deck, the attack is considered a success, and damage is allocated to the defender's Towers, Properties, or Castle, depending on the type of attack.
King Card
There can only be 1 King, but that is merely a title, and the Earl who manages to acquire it must still remove all other Earls from the game to win.
An Earl becomes the King by playing on the table the necessary number of Banner Cards. Playing a Banner Card in an attempt to become King requires an Action, so it takes at least 2 Turns and 2 Actions (assuming no one contests an Earl's efforts by playing his own Banners in an attempt to become King).
To become King, a player must display at least 2 Banners and have 2 more Banners on the table than any other contesting Earl. Once these conditions are met, that Earl is crowned King, and the King Card is placed in front of his Earldom. When an Earl becomes King, his Banners on the table are discarded, and all Banners on the table played in an attempt to claim the title are also discarded.
The King Card represents an elite retinue of dedicated fighting men and bodyguards attached to the King. In Combat, it fights like a Prince or Vassal, being 1/1 (sending 1 damage, taking 1 damage). However, the only way to kill the King Card is to remove that Earl from the game.
The King Card also comes with a Royal Army, or at least the potential for one. When an Earl becomes King, all other Earls on the table with any Army Cards in their Army Reserve Pool must give up 1 Army Card of their choice to the Earl who is King. These Armies are garrisoned face up in the King's Royal Army, which is adjacent to the King Card.
The Royal Army permanently has garrisons for Army Cards equal to 1 less than the number of Earls who started the game. For example, in a 4-Earl game, the Royal Army has 3 garrisons. So when an Earl becomes King and all other players have Army Cards in their Army Reserve Pool, the other Earls must each give up 1 Army Card — then the Royal Army starts at full strength. If the Royal Army is not filled when it appears (it rarely is) or if it is later depleted in Combat, the King can place Army Cards from his Army Reserve Pool into the Royal Army garrison. (The King must follow the normal rules for garrisoning Army Cards whenever the Royal Army has available open slots.) But it is only when the Royal Army appears on the table that the other Earls are required to offer up an Army Card, if they have 1, to the Royal Army.
Like the Army Card garrisoned with a Mercenary, Army Cards in these garrisons cannot be withdrawn by the Earl, back into his Army Reserve Pool, or moved elsewhere. These Army Cards also do not require any Land(s) to be fielded in Combat. Placing Army Cards into any available open garrisons can be done anytime during the King's Turn as a free Action, similar to Tower placement. In Combat, any combination of forces garrisoned as the Royal Army, with or without the King Card itself, can be fielded; the King Card can also be fielded individually.
When an Earl who was King is removed from the game, the King is dead. The King Card is then placed back behind the Table Decks, and another Earl may again attempt to become King. Long live the King!
In the special case that multiple Earls are contesting for the title of King and the removal from the game of 1 of those contestants leaves 1 Earl with the required 2 Banners lead necessary to claim the title, then the King Card is given to that Earl. All Earls who can must then offer up an Army Card from their Army Reserve Pool to the Royal Army, as above. Note that in this special case, a new King can be crowned outside of that Earl's Turn.
Combat
As his Action, an Earl may initiate an attack on another Earldom. First, the Earl must announce who and what is being attacked. Next, he must set out, and clearly indicate, all of his attacking fielded forces — those already on the table in his Earldom, those from his Hand, and those from his Army Reserve Pool. Once he has presented his forces and declared the attack, the defending Earl decides how to react. At this point, the attacker cannot alter the composition of his forces or withdraw from the Battle. The defender then decides what forces, if any, he is fielding to defend or thwart that attack.
After the defender has fielded his forces, and assuming that he has fielded at least 1 card in defense, he has the honor of drawing a card from the Battle Deck to resolve the Battle. If the defending Earl chooses not to field any forces, then the attack is resolved without a Battle Card by allocating damage to the defender's Towers, Properties, or Castle, depending on the type of attack. But fielding just 1 card, even against a great horde, still gives the defender the chance to draw a Battle Card.
The Combat sequence is as follows:
- The attacking Earl declares what kind of attack he is initiating on an opposing Earldom.
- The White Viking Combat Marker is moved forward, indicating Combat has occurred this Round and delaying the Vikings' arrival if they are approaching.
- The attacker declares and sets out all attacking forces, after which he cannot alter his forces or withdraw from the attack.
- The defending Earl fields any defending forces.
- If the defender fields any forces, he draws a Battle Card. The Battle Card resolves the Battle.
- The attacker decides how any damage will be allocated to his fielded forces first. Then, the defender decides how to allocate damage to his fielded forces. All forces fielded on either side of the Battle must be assigned a point of their side's incoming damage, if there is enough damage to hit them all. Any remaining incoming damage that passes through a defender's fielded forces must be resolved against the target of the attack (i.e. Towers, Properties, or Castle).
The Three Ways to Attack an Earldom
1. A Tower Attack — In this attack, all damage is aimed only at the target Earldom's Towers. In this case, the Towers do not protect themselves. One Tower falls and is discarded for each point of incoming damage that makes it past the defender's fielded forces. This is the only way to destroy an Earldom's defensive Towers. When Towers are destroyed in such an attack, the defending Earl may choose which Towers are destroyed and which remain, assuming some remain. His decision may be based on which Tower Cards he wishes to return to his discard pile and which he wants the other Earls to see or not see (because all destroyed Tower Cards are revealed to the table before being discarded). Towers are never captured or seized, and cannot be offered as Ransom.
2. A Raid on a Fief — In this attack, all damage is aimed only at the Properties attached to a particular Castle or Palace. Any Lands, Churches, Market Towns, or the Cathedral in that Fief are the only target. The Castle at the heart of that Fief is untouched, even if excess damage points result from a successful Raid. Damage is first taken by any fielded defending forces. Then, each Tower possessed by the Earldom absorbs 1 point of incoming damage, and Properties take any remaining damage. All Properties are destroyed and discarded when they take 1 point of damage. If during a Raid, the attacking Earl fields a Prince Lord or Vassal Lord in the Battle, those Lords allow the attacking Earl to take up to 2 destroyed Properties home to their Earldom (1 if the attacking Earl fields 1 Prince Lord or Vassal Lord; 2 if both types of these Lords are fielded in the same attack). When Properties are destroyed in a Raid, the defending Earl may choose which are destroyed and which remain, assuming some Properties remain in that Fief.
3. A Castle Siege — In this attack, all damage is aimed only at the Castle, at the heart of the Fief. Damage is first taken by any fielded defending forces. Then, each Tower possessed by the Earldom absorbs 1 point of incoming damage, and the Castle takes any remaining damage. A Castle is destroyed and discarded when it takes 2 points of damage, while 3 points are required for a Palace, an Earl's starting Castle. If only 1 point of damage reaches a Castle, then the Siege fails and the Castle remains; if only 2 points of damage reaches a Palace, then the Siege fails and the Palace remains. When a Castle falls, any attached Properties are destroyed and discarded with it, and the entire Fief and any Lord in that Castle are also destroyed. If during a successful Siege, the attacking Earl fields a Prince Lord or Vassal Lord in the Battle, those Lords allow the attacking Earl to take up to 2 destroyed Properties (including the Castle itself) home to their Earldom (1 if the attacking Earl fields 1 Prince Lord or Vassal Lord; 2 if both types of these Lords are fielded in the same attack). Lords in any seized Castle do not go home with the victor, of course!
Fielding Forces for Battle
It is not difficult to determine the expected outcome of a Battle, as forces send either 1 or 2 damage points and can take no more than 1 damage point each. Towers and Properties only take 1 damage point when targeted; a Castle takes 2 to be destroyed, while a Palace takes 3 to be destroyed.
When fielding forces, the attacker must anticipate the response he expects from the defender and scale up his fielded forces sufficiently to allow him to achieve his desired result. An attacker cannot know for sure how many forces the defender is fielding, but he can guess reasonably well.
When fielding forces in response to a declared attack, the defender knows exactly how many forces he must deploy to thwart the attack. As a result, the defender has an intrinsic advantage — unless the purpose of the attack is simply to deplete the defender's forces in a Battle of attrition!
An Earl can field forces from several different places:
- Face Cards can be fielded directly from an Earl's Hand, but this is costly, as those cards won't return to his Hand after the Battle. They are always discarded regardless of the Battle's outcome.
- An Earl can field any number of Army Cards from his Army Reserve Pool, as long as he possesses the Lands to support them in the field — 1 Army Card for each Land he possesses in a Fief without a Market Town, 2 Army Cards for each Land he possesses in a Fief with a Market Town.
- A Mercenary Card, any garrisoned Army Card, and any garrisoned Royal Army Cards can be fielded, as desired. The King Card can also be fielded.
- Lords and Abbots can be fielded from their Castles.
Resolving a Battle
If it has not been done, move the White Viking Combat Marker out, indicating Combat has occurred this Round and delaying the Vikings' arrival if they are approaching.
If no defending forces were fielded, then no Battle Card is drawn and the result is calculated and resolved as follows: All incoming damage is allocated. If it was a Tower attack, then Towers are destroyed, 1 at a time for each point of incoming damage. If it was a Raid, then any Towers absorb incoming damage, 1 point each, and remain in place. Only then does any remaining damage hit the Fief, and Properties are destroyed for each point of damage. If the attack was a Siege, then Towers absorb incoming damage but remain in place. Only then does damage hit the Castle, which is destroyed only if it takes 2 points of damage (or 3 points for a Palace). When a Castle or Palace falls, it takes the entire Fief with it.
If there was at least 1 fielded Army Card defending, then the defending Earl draws a Battle Card to determine the Battle's outcome.
When resolving Battle damage, all fielded forces must be allocated 1 incoming damage point, if there are sufficient points for all of them. In the case of an attacker, points must be allocated to all fielded attacking forces before they go off into the void and are wasted. In the case of a defender, all incoming damage points must first be assigned to all fielded defending forces before they are either absorbed by Towers or reach Properties or a Castle.
The Battle Card can, but does not always, change the outcome of a Battle dramatically.
Allocating Damage to Fielded Forces
The various types of fielded forces suffer Battle damage in different ways. This also determines the order in which an Earl, who hopes to suffer the fewest casualties possible, assigns damage to his fielded forces.
- The King Card takes 1 point of damage in Combat and is never killed or discarded. If the King Card is used, it is the obvious first choice to accept damage.
- Face Cards (Vassals, Champions, Monks, or a Prince) played from the Hand into Combat can take 1 point of damage and are discarded upon resolution of the Battle, whether or not they take that 1 point of damage. Thus, damage can also be assigned to them first, because they have been sacrificed already.
- When Lords (Vassals, Champions, Monks, or the Prince) are fielded, they can take 1 point of damage and, unless they are captured, return to their Castles after the Battle. (This applies whether or not they take that 1 point of damage.) Thus, damage can also be assigned to them first. Even when the Battle Card goes against an Earl and his fielded Lords are captured, they still can be allocated their 1 point of damage. If they are not Ransomed, they will then be killed and discarded at the end of the Battle.
- Army Cards are killed and discarded when they take 1 point of damage, whether Infantry or Knight (as is true of Viking Cards) and whether garrisoned with a Mercenary or in the Royal Army. Because they perish in a Battle if assigned 1 damage, damage generally should be assigned to them last in a fielded force.
- A Mercenary Card is killed and discarded when it takes 1 point of damage, just like the Knight Army Card, which it essentially behaves as in Combat. The death of a Mercenary also causes any Army Card garrisoned with that Mercenary to be discarded. In this case, assign damage first to the garrisoned Army Card, if it was fielded.
Typically, the most rational sequence for an Earl assigning damage to his forces is to first place damage on the King Card (if available), then to either his Lords or Face Cards (played from the Hand). Only then should damage be assigned to any fielded Army Cards, and lastly to any fielded Mercenaries.
Ransoming Lords
When the Battle Card results in an Earl's fielded Lords being captured, then that Earl must immediately decide whether and how he will Ransom his Lords to get them back when the Battle is over. If he chooses not to Ransom his Lords, then any fielded Lords are killed and discarded when the Battle is over (their Castles will remain, however, as this is not a Treachery assassination). Captured Lords still take 1 point of damage on the field. But Ransoming must be resolved before the rest of the damage is allocated.
To Ransom his Lords, an Earl must give 1 Property or Castle from his Earldom for each Lord he wants to save. These are then given to the Earl who captured his Lord(s). The recipient of this Ransom payment places each Property and Castle in his Earldom. The Earl who must make the payment can select any Property or Castle he possesses to Ransom, even a Castle with another Lord in it (who is then discarded) or a Property or Castle he knows will be destroyed as a result of this Battle. An Earl who had 2 of his Lords captured could also use 1 captured Lord's Castle to Ransom the other, thus saving 1 Lord but dooming the other by giving away his home.
The end result of Ransoming can occasionally mean that upon resolution of the Battle, the attacker ends up with nothing more than he anticipated receiving. However, it can also mean the attacker takes home something unexpected or even more "prizes" than the normal limit of 2 (e.g. when attacking with both a Prince Lord and a Vassal Lord).
After Ransoming is resolved, the allocation of damage and the resolution of the Battle proceed as normal. The one exception: The Vikings never accept Ransoms, and any Lords captured in a Battle with the Vikings are killed and discarded after the Battle, without mercy.
Vikings
The Vikings are a non-player force on the table. From the start of the game, they are approaching and will eventually invade if the Earls do not fight amongst themselves. They will often make an appearance in the game, causing mayhem and destruction.
The Viking Timer
At the start of the game, the Viking Deck, its 8 Black Time Markers, and its 1 White Combat Marker are placed to the right of the starting Earl. These markers should be placed behind the Viking Deck, toward the edge of the table, and moved forward as required to keep track of the Vikings' approach.
The Vikings' Turn is thus last in every Round on the table. While the Vikings are approaching, and after a Round in which no Combat has taken place, 1 Black Time Marker is moved forward at the start of their Turn. When all 8 Markers have been moved forward, then the Vikings will arrive on their Turn. This includes the Vikings' Turn in which the eighth Marker is moved forward. However, if there has been Combat on any Turn in a Round of Play while the Vikings are still approaching, then a Black Time Marker is not moved forward. Instead, the White Combat Marker is moved forward each time Combat takes place in this circumstance (or left where it is if there has already been Combat that Round).
If the White Combat Marker has been moved forward, then on the Vikings' Turn, simply move it back behind the Viking Deck. In this way, Combat always delays the arrival of the Vikings, and the White Marker helps keep track of this.
Whenever an Earl sends an Emissary to the Vikings, move 1 Black Time Marker forward; this can force the Vikings to arrive earlier in the game than anticipated, regardless of the delaying effect of Combat. Once all 8 Black Time Markers have moved forward, the Vikings will arrive on their Turn, whether or not the White Combat Marker is also out.
The Vikings' Arrival
When all 8 Black Time Markers have been moved forward, the Vikings arrive on their Turn. Set the Black Markers and White Combat Marker aside, as they will play no further role in the game.
Upon the Vikings' arrival, a number of Viking Cards is drawn from the Viking Deck that is equal to the number of players who started the game plus 1 (N+1). For example, in a 4-player game, 5 Viking Cards are drawn on their arrival Turn. These drawn Viking Cards should be laid out in front of the Viking Deck.
The Vikings are immediately active and can attack on their arrival Turn. At the start of each subsequent Vikings' Turn, always draw 1 more Viking Card and add it to their force. Whenever the Viking forces have again achieved or surpassed their arrival strength (N+1 cards out), they are active and can attack on that Vikings' Turn (including on the Turn in which the final necessary Viking Card was drawn to determine their arrival strength). Thus, even if the Vikings are entirely killed off in Battle, they will rebuild and become active again. After being wiped out, however, they will only attack again when they have rebuilt to their arrival strength.
Control of the Viking Army
On any Turn in which the Vikings are active, use the Bag to determine which Earl will direct their attack on that Turn.
The Bag, from the starting player draw, will initially contain 1 colored Influence Cube for each Earl in the game. This gives each Earl equal odds to control the Vikings. But if any Earl has sent an Emissary to the Vikings, there will be additional Cubes of his color in the Bag. When an Earl is removed from the game, all of his Cubes are removed from the Bag. Players should confirm the correct number of Cubes is in the Bag at the start of any Turn in which the Vikings are active.
To determine which Earl controls the Vikings, shake the Bag and randomly draw an Influence Cube. The Earl whose Cube is drawn controls the Vikings. That Earl then decides whom and how the Vikings attack that Turn. He may also choose to have them not attack or even to have them attack his own Earldom. Whomever the Vikings attack, this is their attack alone, and the controlling Earl's forces may not support that attack in any way. The Vikings attack with all of their available forces only.
The Viking Army is identical to Army Deck Cards in Combat. It attacks as Army Cards do and takes damage as Army Cards do, with each card being killed and discarded after taking 1 damage point. But the Viking Army is always fielded into Battle, without Land. The Vikings can attack an Earl's Towers, Raid a Fief, or Siege a Castle, just as an Earl would. But they only destroy and kill; they never seize, capture or accept Ransoms.
The Viking Deck consists of:
Viking Infantry — Equivalent to an Infantry. In Battle, Viking Infantry are 1/1 (sending 1 damage, taking 1 damage).
Viking Chieftains — Equivalent to a Knight. In Battle, Chieftains are 2/1 (sending 2 damage, taking 1 damage).
The Vikings can never be attacked by an Earl; they are only attackers and never defenders. Also, the Vikings cannot be permanently driven off. In the rare event that all Viking Cards have been drawn, then reshuffle the Vikings' discard pile to start a new Viking Deck and continue drawing a Viking Card from it each Turn.
Emissaries to the Vikings: An Earl can seek to control the Vikings and speed their arrival by sending Emissaries as an Action during his Turn. Only Monks and Vassals may be sent as Emissaries, and only from an Earl's Hand. Emissaries are not discarded; they remain adjacent to the Viking Deck and can never return to the Earl.
When a Vassal or Monk is sent as an Emissary, place that card behind the Viking Deck, so that the total Emissary count and their influence can be checked by all players. Each time an Earl sends a Vassal as an Emissary, place 1 additional Influence Cube of that Earl's color in the Bag. When an Earl sends a Monk as an Emissary, place 2 additional Cubes in the Bag. In either case, each time an Emissary is sent when the Vikings are approaching, move 1 Black Time Marker forward.
An Earl can continue to send Emissaries to the Vikings after the Vikings have arrived. Whether or not the Vikings are active, more Emissaries can always be sent to gain more influence over them. But once the Vikings have arrived, there are no more Markers to be moved forward.
Jousts
Jousts are festive events where each Earl demonstrates the wealth, power, and fighting prowess of his followers. Prizes of great value are won and lost, along with the reputation and influence of the great Earls. The stakes are high and Earls must carefully consider when, how, and if they can afford to participate in a Joust.
An Earl typically must choose what to offer as his ante and can also specify which card, if any, to risk as his tilter in the Joust itself. If he does not tilt, he cannot win the pot containing all the antes on the table. An Earl can also opt out entirely by playing a Banner Card of his own, thus risking no ante or tilter. Jousts are also dramatic. As the Joust Deck Cards are dealt out around the table, Earls can immediately see who is winning or losing, or has already lost.
To initiate a Joust, an Earl tosses a Banner Card into the center of the table as an Action. The Joust setup then commences in a clockwise manner, starting with the Earl to the left of the Joust initiator. Thus, the Joust initiator is the last to make his Joust choices.
Each Earl must make 2 decisions:
- He must ante a Property or Castle in his Earldom for the competition, unless he has no Properties and only 1 Castle. An Earl cannot be forced out of the game by Jousting. However, he may still choose to Joust with his last Castle. All antes go to the winner of the Joust.
- He must decide if he is going to tilt in the Joust itself. To tilt, he must enter a Lord from 1 of his Castles or place a card from his Hand face down and out toward the center of the table.
An Earl may also opt out of the Joust entirely, offering no ante and not participating in the competition, by throwing down a Banner Card from his Hand. Even after everyone else has made their decisions, the Joust initiator may play a second Banner to opt out himself.
Once the Earls have made their choices, the Joust begins. Each Earl in the Joust then has either a tilting card from his Hand, now turned face up, on the table or a Lord he has entered as his tilter toward the center of the table. The Joust initiator then picks up the Joust Deck and deals (face up and next to the tilting cards of each Earl) a card to the first Earl to his left who entered the Joust, proceeding in a clockwise manner. He then deals a second card from the Joust Deck to each tilter to complete the 3-card Joust Hand. A Joust Hand, then, always consists of the 1 offered tilter card and 2 cards from the Joust Deck.
The Joust is resolved like a simple game of poker. Princes are the highest card of value, and Vassals are the second-highest card. No other card has any value, except the Champion, which is a wild card and can become either a Prince or Vassal.
A Joust Hand includes:
- 1 card provided by the Earl — either a Lord (or Abbot) or a card from his Hand
- 2 cards dealt to the Earl from the Jousting Deck
Joust ranking:
- Prince, 1st
- Vassal, 2nd
- Champion, wild card
The Joust Hand
An Earl may play anything from his Hand — even a Church, Banquet, or Abbot from his Castle — in the hope of getting lucky cards (e.g. a pair of Princes) dealt to him from the Joust Deck. It is an uncommon way to win, but it can happen.
The Joust Deck consists of 6 Princes, 6 Vassals, and 12 valueless "No Luck" Cards. Thus, the Champion, whether played from the Hand or as Champion Lord, is by far the most powerful tilter card in the Joust.
Joust Hands are resolved as in a simple game of poker: 3 of a kind beats 2 of a kind, and high card matters. For example, a Joust Hand with 3 Princes is the highest possible; 2 Princes and a Vassal beats 2 Princes and nothing; and 1 Prince with 1 Vassal beats only a Prince. In all cases, the Champion is as valuable as a natural Prince or Vassal.
Joust Hands, from better to worse: Three of a kind, Princes; Three of a kind, Vassals; Two of a kind, Princes; Two of a kind, Vassals, high card Prince; Two of a kind, Vassals, high card nothing; High card, Prince.
If applicable, any Earls with tied Joust Hands put aside all those cards, which are no longer part of the Joust, and are each dealt 1 card from the Joust Deck for a "sudden death" round. That is, there is 1 round of "high card wins" between those Earls still in the Joust because of tied Joust Hands in the original competition. Repeat the "high card wins" as necessary, until a victor is determined.
The winner of a Joust receives all ante'd Properties and Castles, to be placed in his Earldom. All cards played from each Earl's Hand into the Joust are discarded, as are all Lords entered into the Joust, except a winning Lord, who remains. The Joust Deck is then reassembled and reshuffled. There is no Joust Deck discard pile. The Joust is over. All Banners that were played, including the initiating Banner, are discarded. Don't forget to reshuffle the Joust Deck in preparation for the next competition!
If some Earls have ante'd up but no one has entered a card to tilt with, or if every Earl but 1 has opted out with Banners, then the Joust is canceled due to inclement weather. The initiating Banner is still discarded, and the playing of that Banner was still an Action.
Code of Honor
These conventions not only apply to "tournament" style play, but should be observed in general for good game etiquette and to ensure fair play.
- Prior to gameplay, all players may count, cut, and shuffle any decks, including other players' Earl Decks, however they like.
- Prior to gameplay, players have the right to ensure all the reverse sides (the Towers) of all Player Decks are aligned.
- At any point during gameplay, players can ask how many cards another Earl has in his Hand and how many Army Cards he has in his Army Reserve Pool. Answering these questions is required and a crucial part of gameplay!
- During gameplay, players should not count any cards; search through any cards remaining in their own Earl Deck, anyone else's Earl Deck, or any discard piles; or count any Table Decks. Obviously, when a player's Earl Deck dwindles to its last couple of cards, this is visible to the whole table.
- During gameplay, players should not search the Battle Deck's discard pile. Only the Battle Card result that was last drawn is visible to players, as it is lying on top of the Battle Deck discard pile.
- The 35-second Sand Timer exists to encourage a player who takes an inordinate amount of time to make a choice and allow the game to proceed. Any player can flip over the Sand Timer during someone else's Turn to put pressure on them to finish. The convention is that a player must then decide which Action to take or which choice to make before the timer runs out. Players can also create "house rules" concerning use of the Sand Timer. Draconian rules are typically not necessary here, as social pressure is very effective when the Sand Timer is employed.
- Resigning and conceding the game is honorable, and often encouraged. However, players should only resign on their own Turn and never in the middle of a Battle or Political Struggle.