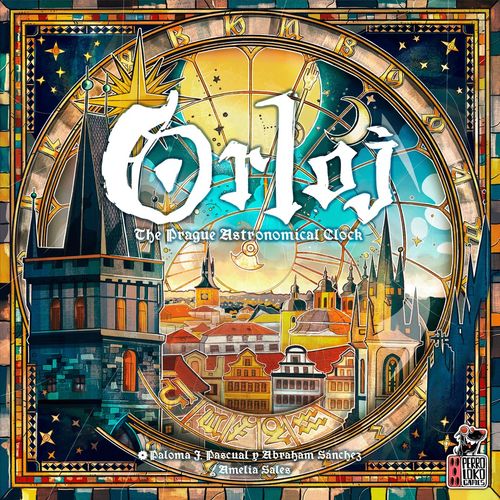
Orloj: The Prague Astronomical Clock
Orloj: The Prague Astronomical Clock Rulebook
Table of Contents
Table of Contents
- 2. Components
- 3. Component Setup
- 4. Game Setup
- 5. General Concepts
- 6. Game Flow
- 7. The Turn
- 8. Actions
- 9. The Rooster's Call
- 10. Additional Actions
- 11. End of the Game
- 12. Endgame Scoring
- 13. Solo Mode
- 13.1. Solo Mode General Setup
- 13.2. Josef Mánes' Component Setup
- 13.3. Solo Mode Game Flow
- 13.4. Particularities of Josef Mánes' Turn
- 13.5. Josef Mánes' Turn
- 13.6. Josef Mánes' Actions
- 13.7. Josef Mánes' Rewards
- 13.8. Check of Josef Mánes' Actions
- 13.9. End of Rounds 3, 6 and 9
- 13.10. End of the Solo Game
- 13.11. Solo Mode Difficulty Levels
- 14. Tips for Playing Orloj
- Appendix: Iconography
- 1. Resources
- 2. Outer Ring Sections
- 3. Clock Face Sections
- 4. Additional Actions
- 5. Worker Actions
- 6. Sculptor Actions
- 7. Common Objective Bonuses
- 8. Assistants
- 9. Deviation
- 10. Rooster Iconography
- 11. Common Objectives
- 12. Mastery Stained-Glass Windows
- 13. Royal Scrolls
- 14. Hammers
- 15. Scrolls
- 16. Rewards for Placing an Assistant
- 17. Josef Mánes' Scoring Tiles
- Prague's Orloj: A Clock That Defies Time
- Acknowledgments
2. Components
2.1. General Components
- 1 Main board
- 1 Rotation axis
- 1 Orloj clock face
- 1 Astronomical dial
- 1 Moon disc
- 1 Walk of the apostles
- 3 Orloj crowning pieces
- 2 Apostle gears
- 3 Plastic rotation axes (1 spare)
- 1 Golden rooster
- 1 Round marker
- 1 Painter
- 12 Calendar sections
- 12 Month dials
- 6 Blocked month dials
- 12 Zodiac dials
- 6 Blocked zodiac dials
- 1 Large final construction dial
- 2 Hammer discs
- 18 Assistants (3 of each type)
- 24 Scrolls (red seal)
- 6 Royal scrolls (blue seal)
- 6 Mastery stained-glass windows
- 9 Common stained-glass-window objectives (3 of each colour)
- 9 Common objective bonuses (3 of each colour)
- 21 Workshop cards
- 6 Hammer cards
- 8 Initial resource cards
- 15 Gold pieces
- 20 Paint pieces
- 20 Wood pieces
- 20 Iron pieces
- 18 Coins
- 1 Bag
2.2. Player Components
- 1 Personal board
- 1 Forge
- 1 Warehouse
- 3 Production cubes
- 1 Hammer cube
- 1 Rooster disc
- 14 Workers
- 1 Sculptor
- 3 Mastery discs
- 1 Scoring marker
- 1 Personal set of 12 apostle tiles numbered from 1 to 12 with their backs in the player's colour
- 5 Deviation tokens
2.3. Solo Mode Components
- 18 Action cards
- 3 Basic turn scoring cards
- 3 Advanced turn scoring cards
- 1 Endgame scoring card
- 5 Scoring tiles
- 3 Mastery tiles
- 3 Mastery track tiles
- 3 End-of-round action tiles
- 1 Conditions met tile
- 1 mastery track objective tile
3. Component Setup
3.1. The Walk of the Apostles
Assemble the gears onto the walk of the apostles. To do this, fit the gears together so that in the lower position, Apostle 1 (James) is displayed on the left side and Apostle 2 (Peter) on the right side. This will be the initial position for each game. Use the plastic axes included in the game for assembly.
4. Game Setup
4.1. General Setup
-
Take the main board and unfold it in the centre of the table. Place the Orloj clock face and the astronomical dial on the rotation axis in the centre to form the clock, as shown in the image.
Take the moon disc and place it in the first position to the left of the hand inside the astronomical dial.
As the starting position for each game, the Orloj clock face should be placed in a random position and the astronomical dial with the hand pointing to the starting hour of the game.
E.g. The image shows the setup for a game starting between 1:00 p.m. and 1:59 p.m.
-
Place the walk of the apostles with its gears above the main board. Rotate the gears until apostles 1 and 2 (James and Peter) are visible at the bottom.
-
Randomly take one of the Orloj crowning pieces and assemble it with the walk of the apostles. Place the round marker on the leftmost space of the round track according to the number of players in the game. Then, place the golden rooster on the general rooster track on the number indicated by the marker on the round track.
E.g. The image shows the placement of the round marker and the rooster for a two-player game.
For the first game: Take the crowning piece marked with the symbol (star).
Note: One of the crowning pieces is only for solo mode.
-
Shuffle the 6 mastery stained-glass windows and randomly place 3 of them at the top of the mastery tracks. Return the rest to the box.
-
Take the 6 royal scrolls (blue seal), shuffle them and place 3 of them face up at the top of the mastery tracks. Return the rest to the box.
-
Take the scrolls (red seal) according to the number of players. In a four-player game, use all the scrolls. Remove from the game the scrolls marked with a symbol in a three-player game, and in a two-player or solo mode game, also remove those marked with a symbol. Return the unused scrolls to the box.
Shuffle the scrolls to form a face-down reserve next to the main board, then reveal three or four of them, depending on whether it is a game with 1-2 players or a game with more than 2 players, respectively.
-
Take the common stained-glass-window objectives and separate them by the colour of their backs. Shuffle each colour separately and place one of each colour in the corresponding positions according to their backs. Return the rest to the box.
-
Take the common objective bonuses and separate them by the colour of their backs. Shuffle each colour separately and place one of each colour in the corresponding positions according to their backs. Return the rest to the box.
-
Shuffle the 21 workshop cards and place 3 of them in the designated spaces on the main board. Place the rest of the deck aside.
4.2. Individual Player Setup
Each player performs these steps:
-
Place your personal board in the centre of your play area, along with your warehouse and forge.
-
Place your 5 deviation tokens at the top of your personal board so the side that does not show the gear icon is facing up.
-
Place your rooster disc in the first position of your personal rooster track, starting from the bottom.
-
Place one cube in the bottom position of each production track and your forge track.
-
Place your workers in the indicated positions:
5.1. Three in the apostle panel 5.2. Three in the production zone 5.3. One above each workshop card on the main board.
-
Place the rest of your workers next to your personal board. These are your available workers. In three- and four-player games, return one of these workers to the box. In three- and four-player games, each player has four available workers.
-
Place your sculptor next to your personal board.
-
Place one mastery disc on the lowest space of each mastery track on the main board.
-
Place your scoring marker on space 10 of the scoring track on the main board.
-
Take your personal set of apostle tiles (with the back in your colour and numbered from 1 to 12) and place them next to your personal board.
-
Deal each player an additional actions reference card.
The last player to have visited the city of Prague will be the starting player.
4.3. Hammers and Initial Resources
Shuffle the hammer cards and reveal one more than the number of players. Then, place one initial resource card next to each of these hammer cards to form combinations. Starting with the last player and proceeding counterclockwise, each player chooses one of these combinations.
The image shows the hammer setup for a two-player game.
Each player places their hammer card underneath their forge and takes the resources indicated on the initial resource card. If this card also includes apostles, take them from your personal set and place them in your warehouse.
You may wait to take the resources from your initial resource card until just before your first turn to know the position of the astronomical dial and the Orloj clock face.
For the first game: instead of assembling combinations randomly, use the four preset initial setups, following the number in the lower right corner of each card. Randomly distribute one of these combinations to each player.
5. General Concepts
5.1. Immediate and Endgame Victory Points
In the game, there are two types of scoring: immediate scoring and endgame scoring. From now on, we will refer to Victory Points as VP.
This icon (immediate) indicates that this scoring is resolved immediately. Move your marker forward on the scoring track as many spaces as the icon indicates.
This icon (endgame) indicates that this scoring is resolved at the end of the game. Do not move your marker yet.
Flip your scoring marker to indicate a score greater than 100 VP.
5.2. Resources
In Orloj, there are different types of resources. A resource icon indicates that you take a resource from the general supply and place it in your play area. Conversely, whenever you see a resource icon crossed out with an X, it indicates a cost that you must pay by returning the indicated resource to the general supply.
Take one gold from the general supply and place it in your personal reserve.
Pay one gold. Return it to the general supply.
5.2.1. Basic Resources
Paint, wood and iron are the basic resources in the game.
This icon (die) is equivalent to one basic resource of your choice: paint, wood, or iron.
5.2.2. Special Resources
Due to the gold elements of Orloj, gold is an essential resource for construction in the game. On the other hand, coins represent money and are related to the mastery tracks. The Univerzita Karlova in Prague is one of the oldest universities in Europe and access to it was reserved for the wealthiest classes.
Gold and coins are special resources in Orloj. You can pay a special resource instead of any basic resource. However, you cannot pay with coins instead of gold or vice versa.
You can also obtain gold through basic resources. You can exchange three identical basic resources for one gold. You may perform this exchange at any time during your turn.
5.3. Deviation Tokens
Clock construction is a delicate process, but sometimes you must force the mechanism and later correct it. By forcing deviation, you will be able to perform additional movements beyond the permitted limits in the game's moving parts or fulfill conditions required for certain actions. However, be careful—these tokens may also cause you to lose points during the rooster's call.
Forcing deviation: This icon indicates that you must flip one of your deviation tokens, revealing the broken gear icon.
Each player has 5 deviation tokens available on their board. You cannot force a deviation if all your tokens already show the broken gear icon.
Whenever a force deviation icon appears next to an action, you must first force the deviation before performing the action.
Correcting deviation: This icon indicates that you may flip a deviation token back, hiding the broken gear icon.
5.4. Workers
One of the key mechanics in Orloj is worker management. If, at any point in the game, you do not have available workers, you will be forced to pass your turn or find alternative ways to unlock or recover new workers.
5.4.1. Recovering Workers
When you recover workers, you may take those that were used on the clock or the calendar, making them available again.
Note: Normally, workers are recovered only from the clock. Recovering them from the calendar may result in earning fewer VP at the end of the game.
Recover one worker. / Recover two workers. / Recover the indicated number of workers.
5.4.2. Unlocking New Workers
At the beginning of the game, you start with a set number of available workers. However, during the game, you will be able to unlock new workers and place them next to your personal board as available workers. The methods for unlocking workers are explained in their respective sections:
- Unlocking workers from your apostle panel. See section 10.1. Placing an apostle on page 14.
- Unlocking workers from workshop cards. See section 8.7. Expanding the workshop on page 12.
- Unlocking workers in your production zone. See section 8.6. Performing an upgrade on page 11.
5.5. Mastery Tracks
There are three mastery tracks in the game: Innovation, Precision and Observation. Each of these tracks corresponds to a skill that improves based on the position of your mastery disc.
"The training and knowledge of a clockmaker are their greatest virtues."
Innovation Track (blue): Indicates the maximum rotation of the astronomical dial allowed without forcing deviation. See section 5.6. Clock Mechanism on page 8.
Precision Track (pink): Indicates the steps to take when a player passes their turn. See section 7.2. Passing on page 9. Also determines the sculptor's level. See section 8.9. Activating the Sculptor on page 13.
Observation Track (yellow): Indicates the maximum number of steps the painter can move on the calendar and the number of steps when activating the moon. See sections 8.4 and 8.5 on page 11.
The image shows the levels and abilities corresponding to each of Mikel's mastery discs.
5.6. Clock Mechanism
- Outer Ring: Printed on the main board, divided into sections.
- Orloj clock face: Always moves counterclockwise and is divided into sections.
- Astronomical dial: Always moves clockwise. The hand of the astronomical dial indicates the actions a player performs on their turn.
- Moon: The moon moves clockwise along the astronomical dial and serves as the most efficient way to correct deviations.
5.7. Warehouse
The warehouse is where apostles and assistants go. There are two available spaces in your warehouse—one space is exclusively for storing an apostle, while the other can hold either an apostle or an assistant.
You may rearrange the apostles and assistants in your warehouse at any time.
6. Game Flow
The game begins with the starting player's turn. From then on, players take their turns in a clockwise order until the game ends.
7. The Turn
On each turn, you have two options:
- Activate the clock mechanism
- Pass
Regardless of the chosen option and at any point during your turn, you may perform any number of additional actions. See section 10. Additional turn actions on page 14.
7.1. Activating the Clock Mechanism
You must have at least one available worker to choose this option.
Configure the clock so that the hand of the astronomical dial points to a section of the outer ring and a section of the Orloj clock face. To do this, follow these steps:
-
Configure the astronomical dial.
The astronomical dial always rotates clockwise and must move at least one space. The maximum movement capacity of the astronomical dial is indicated by the height of your disc on the blue mastery track.
You may force deviation to rotate additional spaces. Force as many deviations as the extra spaces you wish to move the astronomical dial.
-
Configure the Orloj clock face.
The Orloj clock face always rotates counterclockwise and you are not required to move it. Force as many deviations as the number of spaces you wish to rotate the dial.
Note: The astronomical dial and the Orloj clock face are two independent components and rotating one does not affect the other.
-
Place one of your available workers on the space indicated by the hand. If there is already a worker in that space, return it to the player it belongs to. You may return your own worker to yourself.
-
Choose whether to perform the actions of the outer ring section first or the Orloj clock face section first. You cannot alternate actions between each section.
Mikel wants to perform the build action, but since he is only allowed one rotation on the blue mastery track, he must force two deviations to move three spaces to the desired position. In addition to these two, he decides to force one more deviation to rotate the Orloj clock face. He returns the worker to Carlos, places his own and chooses whether to resolve the outer ring section or the Orloj clock face section first.
7.2. Passing
Instead of activating the clock mechanism, you may pass. Typically, the pass action is done to recover workers, but you may also choose to pass even if you still have available workers in your play area.
The pass action is linked to the height of your disc on the pink mastery track and is divided into three steps:
- Recover as many workers as indicated by the height of your mastery disc on the pink mastery track. See section 5.4.1. Recovering workers on page 7.
- Activate the moon. See section 8.4. Activating the moon on page 11.
- Move the golden rooster one space to the right on the general rooster track.
8. Actions
Below are the game's actions. These actions are not mandatory and if a player does not wish to or cannot perform an action during their turn, they simply skip it.
8.1. Resource Production
Produce as many resources as indicated by your production track.
Eduardo performs the iron production action. Since his production cube is at the highest level, he produces two iron and one gold.
This icon indicates that you take one resource of your choice out of wood, paint or iron.
This icon indicates that you produce resources from a production track of your choice.
8.2. Mastery
Move one of your discs up one space on the mastery track indicated by the icon colour.
Move one of your discs up one space on a mastery track of your choice.
Pay one coin and move one of your discs up one space on a mastery track of your choice.
Gain one point if, upon receiving a mastery, you were already on the last space of the track.
8.2.1. Bonuses on the Mastery Tracks
Within the mastery tracks, there are different rewards that are obtained when your mastery disc reaches the indicated position for the bonus.
Scrolls (red seal): Take one scroll from those revealed on the main board, then replace it with a new one from the pile. Scrolls can be used as additional actions in a turn. See section 10.3. Using a scroll on page 15. Keep this scroll in your play area, whether you have used it or not.
Royal Scrolls (blue seal): Score immediately, based on the condition indicated on the scroll, up to a maximum of 10 VP. Keep this scroll in your play area after scoring it. No other player can score a royal scroll that has already been scored. All royal scrolls are described in section 13 of the Appendix: Royal scrolls on page 22.
Moon: Gain one moon activation action. See section 8.4. Activating the moon on page 11.
Assistant: Take an assistant from one of the stacks and place it in the designated space in your warehouse. Assistants can be used as additional actions during the turn. See section 10.4. Placing an assistant on page 15.
You cannot have two identical assistants with the same iconography.
Sculptor Level: This indicator shows your sculptor's level when performing an action with them. See section 8.9. Activating the sculptor on page 13.
8.3. Taking an Apostle
To give it an authentic touch, we work on the walk of the apostles, a spectacle in which, every hour, the rooster crows and the apostles appear over the Orloj in a synchronized choreography.
Take one of the two apostles displayed at the bottom of the gears from your personal set and place it at the bottom of the gears in your warehouse. Then, rotate the gears to the next position to reveal a new combination of apostles. The rotation direction of the gears is indicated at their centre.
You cannot take an apostle if your warehouse is full.
Before taking an apostle, you may choose to rotate the gears. Force as many deviation tokens as spaces you wish to rotate the gears before taking the apostle.
Mikel wants to take Apostle No. 9 (John). To do so, before taking it, he forces one deviation and rotates the gears. Now, Apostle No. 9 is positioned at the bottom of the gears and is available. Then, he takes Apostle No. 9 from his personal set and places it in his warehouse. Finally, the gears automatically rotate one more step.
Move the rooster one position to the right on the general rooster track every time one of the red teeth of the left gear aligns with the red arrow. If it reaches the last position of the track, proceed to the rooster's call. See section 9. The rooster's call on page 13.
After rotating the gears, one of the red teeth aligns with the arrow. Move the rooster one step forward on the general rooster track.
8.4. Activating the Moon
The moon moves around the astronomical dial, always in a clockwise direction. Move the moon disc as many steps as indicated by your disc on the yellow mastery track. Gain all the rewards shown in the steps taken by the moon.
Eduardo's disc is on level IV of the yellow mastery track. When activating the moon, he moves it 6 steps clockwise. He receives one wood, one paint and one iron and, additionally, corrects 3 deviations on his personal board.
In Orloj, you may also find a moon icon with a modifier. This means that you activate the moon while applying the specified modifier.
This icon indicates that, when activating the moon, you gain two additional moon steps beyond those indicated by your disc on the yellow mastery track.
8.5. Moving the Painter
The painter moves around the calendar sections and always in a clockwise direction. Move the painter up to the number of steps indicated by your disc on the yellow mastery track. Once moved, choose one of the two bonuses shown in the calendar sections to the left or right of the painter. The painter must move at least one space.
Carlos' disc is on level III of the yellow mastery track, allowing him up to 5 steps when moving the painter. He moves the painter 2 spaces and places it between two calendar sections. He chooses the right section and receives one gold and one coin.
8.6. Performing an Upgrade
Move one of your production cubes or your hammer cube one position upward.
You can unlock new workers through upgrades. In your production zone, a worker becomes available once all three production cubes reach the worker's position. Take this worker and place it next to your personal board as an available worker.
Eduardo performs an upgrade, moving his wood production cube one step up. Since all three production cubes have now reached the first worker's position, that worker is unlocked and becomes available.
Gain one point and one gold when performing an upgrade on a production track that has already reached its final position.
8.7. Expanding Your Workshop
Follow these steps to expand your workshop:
-
Choose a workshop card and pay the resources shown at the bottom of the card. The cost of each card includes one paint plus a number of resources based on the position of the card and the type of resource indicated on the card.
The cost for this workshop card is two wood and one paint.
-
If present, unlock the worker of your colour above the card and place it in your play area as a new available worker. If there is no worker, it means you have already purchased a card at that same position and you do not receive a new worker.
-
Gain the reward shown at the top of the card.
-
Take the card and place it in your play area. If it is your first workshop card, simply place it. Otherwise, place the new workshop card to the left or right of your existing workshop cards.
-
If placing the new card completes the two halves of an apostle or construction icon, immediately perform that action.
-
Slide the workshop cards to the right and refill the empty space with a new workshop card from the deck.
Carlos selects a workshop card and pays its cost: 2 iron and 1 paint. He unlocks the worker above the card. He performs an upgrade as indicated at the top of the card. By placing it next to his other workshop cards, he completes an apostle icon, so he takes an apostle in the usual way. Finally, he slides the cards to the right to reveal a new workshop card.
The action in the centre of the card is obtained by placing an assistant on it. See section 10.4. Placing an assistant on page 15.
8.8. Constructing
In the game, there are two construction zones: one for month dials and another for zodiac dials. The construction process is the same for both. A reminder of the construction steps is printed on the main board.
-
Move the hammer disc clockwise, following the blue arrows, until it reaches a position adjacent to the dial you wish to construct. The maximum movement of the hammer disc is determined by the position of your cube on your hammer card. The hammer disc may move one additional space for each deviation you force. You are not required to move the hammer disc to construct.
-
Pay the required resources shown in the row and column where the dial is located. Gain 2 VP for each resource spent.
-
Place the constructed tile in its corresponding position on the calendar, with the illustrated side up. Place an available worker on it and gain 2 VP per dial (including this one) that is part of an adjacent group of dials with workers of your colour.
Note: one dial tile with no adjacent ones is considered a group of 1.
Note: To build, you must have an available worker to place on the constructed dial.
Note: Month dials and zodiac dials are also adjacent to each other. E.g. The month XII dial has three possible adjacent positions: month I, month XI and the Capricorn zodiac dial.
-
Gain the bonus corresponding to the calendar section where the dial was built.
-
Gain the hammer bonus based on the position of your cube on your hammer card. See section 14 of the Appendix: Hammers on pages 22 and 23.
Eduardo wants to construct month VI, so he must move the hammer disc one position to place it adjacent to dial VI. This does not require forcing any deviation because, according to his hammer card, he can move it up to two spaces.
To construct it, he must pay the resources shown in the row and column, so he pays one gold, one wood and one iron. He earns 6 VP (2 VP for each resource).
Now, he places the month VI dial in position VI of the calendar and places a worker on the dial. Since it is adjacent to other dials with workers of his colour, he gains an additional 8 VP (2 VP for each dial forming a group of adjacent dials with a worker of his colour, including the one just constructed).
He receives the calendar bonus, taking one gold and one coin.
Finally, he takes his one coin hammer bonus as indicated on his hammer card.
8.9. Activating the Sculptor
At the top, from left to right, the statues our sculptor works on are Vanity, Greed, Lust and Death, which ring the bell and turn their hourglass every hour, announcing the inevitable passage of time. Below them, in the same order, are the Philosopher, Archangel Michael, the Astronomer and the Chronicler, representing the four virtues.
Move your sculptor to one of the four sculptor action spaces on the main board. If another sculptor is already there, return it to its owner, who places it back in their play area.
You must move the sculptor, meaning you cannot repeat the same action if your sculptor is already in that space.
Sculptor actions are graded based on the sculptor's level, which is determined by your disc's position on the pink mastery track.
Perform the action corresponding to your sculptor's level.
Some sculptor actions require forcing a deviation. You cannot perform the rest of the action unless you first force the indicated deviation.
The actions of the sculptor are described in section 6 of the Appendix: Sculptor actions on page 21.
In the image, the sections into which the track is divided can be seen, indicated by the level icons. Eduardo has level 1 with his sculptor, while Carlos and Mikel have level 2.
Carlos activates the sculptor and places it on a sculptor action of his choice. He returns the sculptor already in that space to its owner. Since his mastery disc indicates that his sculptor is at level 2, he forces a deviation to take one gold and two coins.
9. The Rooster's Call
Every hour, the rooster flaps its wings and, after the walk of the apostles is completed, crows to announce a new hour.
The rooster's call occurs when the rooster reaches the last position on the general rooster track. The player whose turn it is takes the rooster and places it on their personal board as a reminder, then continues their turn as usual. Once their turn is over, proceed with the following steps during the remainder of the turn. If the rooster needs to move additional steps, these are not taken into account.
-
All players correct as many deviations as indicated by their personal rooster track. If the track indicates a value higher than the number of deviations they have, they gain 1 VP for each deviation they cannot correct.
-
All players lose VP equal to the number of broken gear icons still showing on their deviation tokens.
-
Move the round marker one position to the right on the round track and place the rooster back on the general rooster track, on the number indicated by the new position of the round marker. The game then continues as usual.
The rooster always moves to the right on the general rooster track. It moves for two reasons only:
- When rotating the apostle gears, one of the red teeth on the left gear aligns with the red arrow. In this case, move the rooster one step. See section 8.3. Taking an apostle on page 10.
- When a player passes their turn. In this case, move the rooster one step. See section 7.2. Passing on page 9.
The rooster has reached the last position of the track during Eduardo's turn. He takes the rooster as a reminder, then, following these steps:
-
Eduardo corrects two deviations as indicated by his personal rooster track. All players carry out the same step. Carlos, whose rooster track allows him to correct up to four deviations, only has two, so he gains 2 VP.
-
Eduardo loses 2 VP, one for each broken gear icon still showing on his deviation tokens. All players follow the same step. Carlos loses no points.
-
The round marker moves one step to the right and Eduardo returns the rooster to the general rooster track, placing it on the number indicated by the cube. The game then continues as usual.
10. Additional Actions
These actions may be performed at any time during your turn, even if you are passing.
10.1. Placing an Apostle
To place an apostle, it must come from your warehouse.
Pay the indicated cost to place an apostle from your warehouse onto your apostle panel on your personal board. The cost is shown to the left of the row where it is placed.
To place an apostle in the indicated position, Eduardo must pay one paint resource.
The apostle must match the colour of the space where you place it.
Once placed, immediately receive the bonus shown below it.
Types of bonuses:
- Gain one coin.
- Perform an upgrade. See section 8.6. Performing an upgrade on page 11.
- Recover two workers. See section 5.4.1. Recovering workers on page 7.
- Unlock the worker in that space and place it next to your personal board as an available worker.
10.1.1. Bonuses for Completing a Row or Column in the Apostle Panel
Whenever you complete a row or column, immediately receive the corresponding bonus.
When you complete a row of apostles, gain 7 VP and perform a production on one of your production tracks of your choice.
When you complete a column of apostles, activate the moon or take an assistant.
- Bonus for completing an apostle column.
- Bonus for completing an apostle row.
10.2. Spending a Coin
Spend one coin to use it as any resource (except gold).
10.3. Using a Scroll
Flip over a scroll tile from your play area to gain the indicated bonus. Keep the used scroll in your play area. All scrolls are described in section 15 of the Appendix on page 23.
Moon: Gain an activate moon action. See section 8.4. Activating the moon on page 11.
Assistant: Take an assistant from one of the piles and place it in the designated space in your warehouse. Assistants can be used as additional actions during your turn. See section 10.4. Placing an assistant on page 15.
You cannot have two identical assistants with the same iconography.
10.4. Placing an Assistant
Pay the resource indicated below a workshop card to place an assistant from your warehouse onto the card. Gain the bonus shown in the centre of the card. Each workshop card only has one assistant space. Assistants provide additional scoring opportunities at the end of the game. To see what each assistant grants you, see section 8 of the Appendix: Assistants on page 22.
The actions you gain by placing an assistant on a workshop card are described in section 16 of the Appendix on page 23.
Carlos pays one iron and places the assistant from his warehouse onto one of his workshop cards. He receives the bonus of taking an apostle, as indicated in the centre of the card. At the end of the game, this assistant will grant him 6 VP.
10.5. Claiming an Objective
Each game of Orloj has three common stained-glass-window objectives, each displaying a condition. When you fulfill the condition, you may place one of your available workers in the uppermost available position below the condition. If you are the first player to claim it, you receive the bonus shown on the bonus tile below, then flip it over. No other player will receive this bonus for claiming the same objective. Each player may claim each objective only once.
Objectives have three reward positions for the first, second and third players to claim them, granting 8 VP, 6 VP and 4 VP at the end of the game, respectively.
In a two-player game or in a solo mode game, the second player to claim an objective must place their worker in the third position as the second position is not available.
Each objective's conditions are described in section 11 of the Appendix: Stained-glass-window objectives on page 22.
Mikel has placed his third green apostle on his panel and, since he has an available worker, he claims the objective as an additional action. Being the first player to claim it, he places his worker in the first position, which grants him 8 VP at the end of the game. He takes the bonus from the bonus tile, which gives him two coins. He flips over the bonus tile so that no other player can receive this bonus.
10.6. Exchanging Resources for Gold
You may exchange three identical resources for one gold.
11. End of the Game
The game will end after completing the round in which the last calendar dial has been constructed or after completing the round in which the fourth rooster's call occurs.
In both cases, the round is completed so that all players have played the same number of turns. At that moment, proceed with the endgame scoring.
The player with the highest score is the winner of the game. In case of a tie, the winner is determined by the player who has placed the most apostles in their panel. If the tie persists, the tied players share the victory.
11.1. Final Construction
When a player performs the last construction of a dial in the calendar, they flip the large final construction dial, enabling a special construction.
Players, on their turn, may use a construct action to pay one gold, one wood, one paint and one iron to gain 8 VP. No worker can be placed on this tile. No adjacency points or calendar section bonuses are awarded but you still receive your hammer bonus.
12. Endgame Scoring
A scoring summary is printed on the game board.
12.1. Mastery Stained-Glass-Window Scoring
Each mastery stained-glass window is scored independently. To score a stained-glass window, your mastery disc must have reached the seventh space on the corresponding mastery track.
A brick line indicates the level from which you can start scoring the stained-glass window.
Each stained-glass window has the following symbols:
-
Scoring Condition: Score this condition as many times as you meet it. The number of points depends on the height of your disc on the mastery track. All of the conditions are described in section 12 of the Appendix: Mastery stained-glass windows on page 22.
-
Primary Scoring: The player whose mastery disc is the highest value multiplies this value by the number of times they meet the condition. In case of a tie, all tied players use this value.
-
Secondary Scoring: All other players who have crossed the brick line with their mastery disc multiply this value by the number of times they meet the condition.
According to the image, both Carlos and Eduardo score 2 VP for each apostle placed on their apostle panel. Jorge, who has crossed the brick line, scores 1 VP for each apostle placed on his apostle panel. Mikel, who has not crossed the brick line, does not score his apostles.
12.2. Surplus Gold Scoring
Exchange all your resources and coins to maximize your gold collection. Three identical resources can be exchanged for one gold. Coins count as any resource type.
Score 1 VP for each gold you have.
12.3. Deviation Scoring
Lose 1 VP for each broken gear icon still showing on your deviation tokens at the end of the game.
Note: The personal rooster track does not modify this scoring.
12.4. Assistant Scoring
Score each assistant placed on your workshop cards. Assistant scoring details are found in section 8 of the Appendix: Assistants on page 22.
12.5. Common Stained-Glass-Window Objective Scoring
Each player scores according to the position of their workers on the common stained-glass-window objectives: 8 VP for the first position, 6 VP for the second position and 4 VP for the third position.
13. Solo Mode
In solo mode, you play against the studio of Josef Mánes, the painter of the Orloj calendar.
13.1. Solo Mode General Setup
Make the following changes to the standard game setup:
-
Replace step 3 of the general setup with the following:
Take the solo mode Orloj crowning piece (marked with the moon symbol) and assemble it with the walk of the apostles. Place the round marker on space 4. After each rooster's call, the rooster resets to position 1. The round marker does not move.
-
Before placing the mastery stained-glass windows, royal scrolls (blue seal) and common stained-glass-window objectives, remove the ones indicated in the image.
-
Replace steps 10 and 11 of the general setup with the following:
-
Take the solo mode action card deck, shuffle it and reveal 6 cards.
-
Place the zodiac and month dials shown on these cards directly onto the calendar. Then, place blocked zodiac and month dials in the construction area on the spaces indicated on the revealed cards.
-
Place the remaining dials in their corresponding spaces in the construction area with their non-illustrated side up.
-
In solo mode, there is only one set of apostles shared between the player and Josef Mánes. Separate the apostle tiles that appear on the revealed cards from the others. This will serve as important information during the solo game.
-
Return the 6 revealed action cards to the box. These cards will not be used in this solo game. The remaining 12 cards will be what are used for this solo game of Orloj.
-
-
Replace step 4 of the individual player setup with the following:
Place one cube in the first position from the bottom of the forge track. Place one cube in the second position of each production track. This setup unlocks a sixth worker, making it available for solo mode. See section 8.6. Performing an upgrade on page 11.
The rest of the general and individual setup steps remain the same.
13.2. Josef Mánes' Component Setup
Some of Josef Mánes' solo mode components contain the following symbol. This symbol indicates that this component should be displayed on this side for the advanced level. See section 13.11. Solo mode difficulty levels on page 20.
-
Place the conditions met tile in Josef Mánes' play area and, to its right, place the mastery track objective tile, as shown in the image.
-
Place the endgame scoring card to the right of Josef Mánes' play area.
-
Shuffle the 3 mastery tiles of Josef Mánes and reveal one in each position shown in the image.
-
Shuffle the 3 mastery track tiles and reveal one in each position shown in the image.
-
Shuffle the 3 end-of-round action tiles and reveal one in each position shown in the image.
-
Shuffle the 5 scoring tiles of Josef Mánes and reveal 3 of them, placing one in each position shown in the image. Return the remaining tiles to the box.
-
Take the 12 action cards leftover after the general setup and place them face-up as shown in the image.
-
Take the 3 basic turn scoring cards, shuffle them and place them face-down in the position indicated in the image.
-
Do not use a personal board for Josef Mánes. He does not use a forge, warehouse, deviation tokens, production cubes or a hammer cube. Instead, take only the 14 workers of his colour and place them in his play area as available workers.
-
Place one mastery disc of his colour on each mastery track and his scoring marker on space 10 of the scoring track.
Image: setup of the dials on the calendar.
- Place the top card of the action card deck in the first available position and reveal a scoring card, also in the first available position. Repeat this after each of Josef Mánes' turns, but always in the next available space. If no space is available, proceed to the end-of-round phases 3, 6 or 9, described in section 13.9 of the Appendix on page 19, before performing this step again.
13.3. Solo Mode Game Flow
Josef Mánes always plays second. Play your turn as usual, then perform Josef Mánes' turn. After turns 3, 6 and 9 for Josef Mánes, perform a maintenance phase. After turn 12, proceed to the endgame scoring.
13.4. Particularities of Josef Mánes' Turn
Josef Mánes does not gain or spend resources. He does not receive rewards for expanding the workshop, constructing, claiming objectives or advancing on the mastery tracks, except for taking scrolls and scoring royal scrolls upon reaching the corresponding positions on the mastery tracks. He does not perform the action indicated by the hand of the astronomical dial on his turn. He only follows the instructions on his action cards. He does not force or correct deviations.
There are no resources of any kind in Josef Mánes' play area.
13.5. Josef Mánes' Turn
All action cards have the following structure:
- Required workers to execute the card.
- Astronomical dial and Orloj clock face rotations.
- First action of Josef Mánes.
- Reward for performing the first action.
- Second action of Josef Mánes.
- Reward for performing the second action.
Josef Mánes carries out his action card as follows:
-
Check that he has the required available workers indicated on the card to proceed to step 2.
If he does not have enough workers, he recovers all his workers from the clock and ends his turn. Then, perform step 11 of setup of Josef Mánes' components and proceed with your turn.
-
Perform the rotations indicated at the top of the action card and place one of his workers on the outer ring section which the hand of the astronomical dial points to. If there is already one of your workers there, return it to your play area, making it available again as usual.
-
Perform the first action. If he is able to do so, he also gains the first action's reward.
-
Perform the second action. If he is able to do so, he also gains the second action's reward.
After this, perform a check of Josef Mánes' actions. See section 13.8 on page 19.
13.6. Josef Mánes' Actions
Construct a zodiac or month dial: Take the dial shown on the card and place it directly on the calendar with its unconstructed side up (the side without the illustration). Then, place one of his workers on it. If placing it forms a group of adjacent dials with his workers on them, gain 2 VP per dial, including that one. See step 3 of section 8.8. Constructing on page 12. This is the only way Josef Mánes places his workers on calendar dials.
Take an apostle: Take the apostle indicated on the card from the shared apostle set and place it in his play area. Then, rotate the gears one position.
13.7. Josef Mánes' Rewards
Advance on a mastery track: Move two steps up on the mastery track indicated by the icon colour.
If Josef Mánes reaches a scroll space, he takes a scroll from the face-down pile and places it in his play area.
If Josef Mánes reaches a royal scroll space, he scores it immediately and places it in his play area.
If his mastery disc is already on the last position on a mastery track, he gains 1 VP per step he would have advanced in the usual way.
Josef Mánes does not take assistants or activate the moon when reaching these bonuses.
Take a workshop card: Take the rightmost or leftmost workshop card, as indicated by the arrow, from the three displayed on the main board. Place it in his play area and refill the empty space as usual.
Take an assistant: Take the leftmost or rightmost available assistant, as indicated by the arrow, from those next to the board and place it in his play area.
Move the painter: Move the painter the indicated number of spaces clockwise.
13.8. Check of Josef Mánes' Actions
If Josef Mánes successfully performs all the actions indicated on his action card, proceed with the action check as described below. If not, flip over the dials constructed by Josef Mánes, end his turn and move on to the player's turn. Perform step 11 of Setup of Josef Mánes' components.
Follow the steps below to perform the check.
-
Receive the mastery bonuses indicated on the mastery tiles (two masteries for basic level and three masteries for medium and advanced levels).
-
Flip over the dial(s) constructed through the action card, place one of his workers on them and gain 2 VP per dial, including that one, forming a group of adjacent dials with his workers as usual. See step 3 of section 8.8. Constructing on page 12. This is the only way Josef Mánes places his workers on calendar dials.
-
Score the points indicated on the basic turn scoring card, moving his score marker accordingly and move the rooster as indicated. If the rooster reaches the last position of the track, perform the rooster's call as usual after Josef Mánes' turn. Ignore any additional steps the rooster cannot take during his turn. Josef Mánes does not lose points from the rooster's call.
After performing the action check, perform Step 11 of Josef Mánes' component setup and proceed with your next player turn.
Josef Mánes successfully performs all the actions indicated on his card, so he proceeds with the action check:
- He advances two positions on the blue mastery track.
- He flips over the constructed dials and places one worker on each of them. He scores 4 VP for the first dial and 2 VP for the second dial.
- He gains 6 VP from the turn scoring card and moves the rooster one step.
13.9. End of Rounds 3, 6 and 9
After completing Josef Mánes' turn in round 3, 6 or 9, follow these steps:
-
Following the end-of-round action tile instructions, place one of his workers in the first available position of the corresponding stained-glass-window objective, regardless of whether he has met the objective condition or not. If one of your workers is already there, place it in the next available position. If Josef Mánes has no available workers, he retrieves all his workers from the Orloj clock face.
Note: The icon number indicates which stained-glass-window objective he places his worker on: (1) is the leftmost of the three displayed on the main board.
-
Move the rooster one position and perform Josef Mánes' rooster's call if necessary.
-
Check the position of Josef Mánes' mastery disc for the mastery track indicated on the mastery track tile. If it is lower than the value indicated on the mastery track objective tile, flip the scoring tile to its 0 VP side. If the mastery disc is the same or higher, do not flip the tile.
Note: The first space from the bottom of the mastery track is considered space 0.
-
Flip the mastery track tile and the end-of-round action tile, revealing the hourglass icon.
-
Discard the three action cards and shuffle the turn scoring cards. Then, remove the three visible scrolls from the main board and reveal new ones.
-
Perform Step 11 of Josef Mánes' component setup and move on to your next player turn.
13.10. End of the Solo Game
A solo game ends immediately after Josef Mánes' 12th turn. Perform your scoring as usual.
To win the game, you must score more points than Josef Mánes. In the case of a tie, Josef Mánes wins.
To score Josef Mánes, follow the steps on his endgame scoring card:
- Score the mastery stained-glass windows as usual.
- Score 3 VP per assistant in his play area (6 VP in advanced mode).
- Score the scoring tiles that were not flipped.
- Score the common stained-glass-window objectives as usual.
Josef Mánes can score up to 15 VP per scoring tile. These tiles show a condition and a point value for each time that condition is met. All Josef Mánes' scoring tiles are described in section 17 of the Appendix on page 23.
1. Josef Mánes places one worker in the first position of common stained-glass-window objective 3 (rightmost stained-glass window). 2. He moves the rooster one space on the round track. 3. His yellow mastery disc is on position 5, which is below 6, so he flips the corresponding scoring tile to 0 VP. 4. He flips the mastery track tile and the end-of-round action tile, revealing the hourglass icon. 5. He discards the used action cards and reshuffles the scoring cards. 6. Before starting your turn, draw a new action card and a new scoring card, following step 11 of Josef Mánes' component setup.
13.11. Solo Mode Difficulty Levels
Many solo mode components in Orloj contain the (advanced level) symbol. This symbol indicates that the component belongs to an advanced level. You can customize the difficulty by adding or flipping components with this symbol. We suggest the following three levels of difficulty:
Basic Level: Play solo mode without any components marked with the advanced-level symbol.
Medium Level Option 1: Flip the mastery tiles and the mastery track objective tile to show the advanced-level symbol.
Medium Level Option 2: Use the 3 advanced turn scoring cards instead of the basic ones and flip the endgame scoring card to its advanced-level side.
Advanced Level: Combine medium level option 1 and medium level option 2.
14. Tips for Playing Orloj
Orloj is a complex game and reading the game state can be difficult in the first few plays. Here are some recommendations:
-
Avoid spreading yourself across all three mastery tracks. It is more effective to focus on two. Any combination can work, but some will be stronger depending on which common stained-glass-window objectives and mastery stained-glass windows are in play.
-
Pay attention to common stained-glass-window objectives. Being the first to claim them grants bonus rewards and additional scoring opportunities.
-
Avoid completely exhausting your deviation tokens and use the moon to correct deviation when needed. Passing is not always bad as it activates the moon.
-
Before constructing, it is best to observe which bonus you want from the calendar sections and check if you have the necessary resources before evaluating all the options in the construction zone.
-
Orloj is a complex game. Try to enjoy it in your first few plays before attempting to evaluate every possibility to win. In no time, you will have a deep understanding of the game and its optimization.
Appendix: Iconography
1. Resources
This icon represents one paint, one wood or one iron of your choice.
Spend one paint, one wood or one iron of your choice.
Produce the resources indicated in a production track of your choice.
Produce the resources indicated in your corresponding production track. See section 8.1. Resource production on page 9.
Take the indicated resource.
Spend the indicated resource.
2. Outer Ring Sections
Take one coin and one apostle. See section 8.3. Taking an apostle on page 10.
Activate the moon or move the painter. See sections 8.4 and 8.5 on page 11.
Take one coin and perform an upgrade. See section 8.6. Performing an upgrade on page 11.
Expand the workshop. See section 8.7. Expand your workshop on page 12.
Perform a construction. See section 8.8. Constructing on page 12.
Activate the sculptor. See section 8.9. Activating the sculptor on page 13.
3. Clock Face Sections
Pay one coin to move your disc up one space in a mastery track of your choice.
Produce the resources indicated in a production track of your choice.
Produce the resources indicated in your corresponding production track. See section 8.1. Resource production on page 9.
4. Additional Actions
Place an apostle in your apostle panel. See section 10.1. Placing an apostle on page 15.
Spend one coin. See section 10.2. Spending a coin on page 15.
Use a scroll. See section 10.3. Using a scroll on page 15.
Place an assistant on a workshop card. See section 10.4. Placing an assistant on page 15.
Place a worker on one of the common stained-glass-window objectives. See section 10.5. Claiming an objective on page 15.
Exchange three identical resources for one gold. See section 10.6. Exchanging resources for gold on page 15.
5. Worker Actions
See section 5.4.1. Recovering workers on page 7.
Recover one worker from the clock or the calendar.
Recover two workers from the clock or the calendar.
Recover workers as indicated by the numerical value from the clock or calendar. In the image, recover three workers.
6. Sculptor Actions
Many sculptor actions require forcing a deviation. You cannot perform the remaining actions unless you have first forced the indicated deviation. See section 8.9. Activating the sculptor on page 13.
Expand workshop action:
- Level 1: Force one deviation and expand your workshop.
- Level 2: Force one deviation, take one resource of your choice and expand your workshop.
- Level 3: Correct one deviation, take one gold and expand your workshop.
Painter/moon action:
- Level 1: Force one deviation and move the painter without forcing a deviation.
- Level 2: Force one deviation, take one coin and move the painter; or take one coin and activate the moon with a +1 modifier.
- Level 3: Correct one deviation, take one coin and move the painter; or take one coin and activate the moon with a +2 modifier.
Construct action:
- Level 1: Force two deviations and construct.
- Level 2: Force one deviation, take one resource of your choice and construct.
- Level 3: Correct one deviation, take one gold and construct.
Gold and coins action:
- Level 1: Force one deviation and take one gold and one coin.
- Level 2: Force one deviation and take one gold and two coins.
- Level 3: Correct one deviation and take one gold and three coins.
7. Common Objective Bonuses
See section 10.5. Claiming an objective on page 15.
Take one apostle.
Take two coins from the general supply.
Take two resources of your choice from the general supply.
Perform an upgrade on your hammer track or one of the production tracks of your choice. See section 8.6. Performing an upgrade on page 11.
Move two steps up in one mastery track, or move one step up in two different mastery tracks of your choice.
8. Assistants
Each assistant type provides a different endgame scoring bonus. To score, an assistant must be placed on a workshop card. See section 10.4. Placing an assistant on page 15.
- This assistant grants 6 VP at the end of the game.
- This assistant grants 1 VP for each upgrade in your production tracks or hammer track at the end of the game.
- This assistant grants 4 VP for each mastery disc at Level IV on any mastery track at the end of the game.
- This assistant grants 5 VP for each completed apostle column in your apostle panel at the end of the game.
- This assistant grants 3 VP for each month dial with one of your workers on top at the end of the game.
- This assistant grants 3 VP for each zodiac dial with one of your workers on top at the end of the game.
9. Deviation
Force a deviation. See section 5.3. Deviation tokens on page 7.
Correct a deviation. See section 5.3. Deviation tokens on page 7.
10. Rooster Iconography
Move the rooster one space to the right on the rooster track.
Trigger the rooster's call at the end of the current player's turn. See section 9. The rooster's call on page 13.
Move your rooster disc up one position on your personal board. Take one gold and one point if your rooster disc is already on the last position of the track.
11. Common Objectives
See section 10.5. Claiming an objective on page 15.
- Have three apostles of the indicated colour placed on your apostle panel.
- Have two assistants placed on your workshop cards.
- Have three workshop cards in your play area.
- Have five upgrades across your hammer track and production tracks.
- Have one of your mastery discs at Level III.
- Have two month dials and one zodiac dial constructed, with one of your workers on top of each.
- Have two zodiac dials and one month dial constructed, with one of your workers on top of each.
12. Mastery Stained-Glass Windows
See section 12.1. Mastery stained-glass-window scoring on page 16.
- At the end of the game, score points according to the height of your mastery disc for each scroll or royal scroll (used or unused) that you have in your play area, up to a maximum of 15 VP.
- At the end of the game, score points according to the height of your mastery disc for each apostle placed on your apostle panel, up to a maximum of 15 VP.
- At the end of the game, score points according to the height of your mastery disc for each upgrade in your hammer track and production tracks, up to a maximum of 15 VP.
- At the end of the game, score points according to the height of your mastery disc for each month dial with one of your workers on top, up to a maximum of 15 VP.
- At the end of the game, score points according to the height of your mastery disc for each zodiac dial with one of your workers on top, up to a maximum of 15 VP.
- At the end of the game, score points according to the height of your mastery disc for each workshop card in your play area, up to a maximum of 15 VP.
13. Royal Scrolls
See section 8.2. Mastery on page 10.
- Immediately score 3 VP for each scroll or royal scroll, including this one, in your play area (used or unused) up to a maximum of 10 VP.
- Immediately score 2 VP for each apostle placed on your apostle panel, up to a maximum of 10 VP.
- Immediately score 2 VP for each upgrade in your hammer track and production tracks, up to a maximum of 10 VP.
- Immediately score 3 VP for each month dial with one of your workers on top, up to a maximum of 10 VP.
- Immediately score 3 VP for each zodiac dial with one of your workers on top, up to a maximum of 10 VP.
- Immediately score 3 VP for each workshop card in your play area, up to a maximum of 10 VP.
14. Hammers
Each hammer grants a unique ability to each player, which is applied as the final step of construction. No hammer has an ability at Level I.
- Level II: Take one coin from the general supply. Level III: Take one coin from the general supply and gain 2 VP.
- Level II: Move your rooster disc up one position on your personal board. Take one gold and one point if your rooster disc is already on the last position of the track. Level III: Move your rooster disc up one position on your personal board and gain 2 VP. Take one gold and one point if your rooster disc is already on the last position of the track.
- Level II: Force one deviation and move the painter. Level III: Move the painter.
- Level II: Move one mastery disc of your choice up one space. Level III: Move one mastery disc of your choice up one space and take one coin.
- Level II: Take one apostle in the usual way. Level III: Take one apostle and correct one deviation.
- Level II: Correct one deviation. Level III: Activate the moon with a -1 modifier to what is indicated by your yellow mastery disc.
15. Scrolls
- Take one apostle. See section 8.3 on page 10.
- Activate the moon following the standard rules. See section 8.4 on page 11.
- Move the painter following the standard rules. See section 8.5 on page 11.
- Take one coin and move your rooster disc up one position on your personal board. Take one gold and one point if your rooster disc is already on the last position of the track.
- Perform an upgrade. See section 8.6 on page 11.
- Perform a construction. See section 8.8 on page 12.
- Recover two workers. See section 5.4.1. Recovering workers on page 7.
16. Rewards for Placing an Assistant
- Move your rooster disc up one position on your personal board. Take one gold and one point if your rooster disc is already on the last position of the track.
- Take one apostle. See section 8.3 on page 10.
- Activate the moon following the usual rules. See section 8.4 on page 11.
17. Josef Mánes' Scoring Tiles
- Score 3 VP for each month dial constructed with a worker on top, up to a maximum of 15 VP.
- Score 3 VP for each zodiac dial constructed with a worker on top, up to a maximum of 15 VP.
- Score 3 VP for each apostle in Josef Mánes' play area at the end of the game, up to a maximum of 15 VP.
- Score 3 VP for each scroll or royal scroll in Josef Mánes' play area at the end of the game, up to a maximum of 15 VP.
- Score 3 VP for each workshop card in Josef Mánes' play area at the end of the game, up to a maximum of 15 VP.
Prague's Orloj: A Clock That Defies Time
This astronomical clock, which has adorned the old town hall tower since 1410, is not only an advanced piece of engineering for its time but also a symbol of human ingenuity and mankind's obsession with measuring time and understanding the cosmos.
Prague's Orloj is more than just a simple clock. Its mechanism combines an astronomical dial, a calendar displaying the months of the year and a series of moving figures that perform a spectacle every hour on the hour. Among these figures, the Twelve Apostles and the figure of Death—represented by a skeleton ringing a bell—stand out, symbolizing the transience of life and the relentless passage of time.
Its history is shrouded in legends. One of the most famous says that master clockmaker Hanuš was blinded by order of the city council to prevent him from replicating his masterpiece elsewhere.
Today, Orloj remains one of Prague's main tourist attractions. Every day, thousands of visitors gather in the old town square to witness its mechanical procession. More than a simple attraction, Prague's Orloj is a living testament that, while time is relentless, it can be measured with art and precision.
Acknowledgments
A huge thank you to everyone who participated! Special thanks to all the playtesters—this project would not have been possible without you. Particularly to Motedu, Carlos, Jorge J. Barroso, Mikel, Christian, Alejandro and Cipri.
© 2025 Perro Loko Games. All rights reserved. Calle Lamarque de Novoa nº9, 3º N. 41008 Sevilla (Spain) www.perrolokogames.com