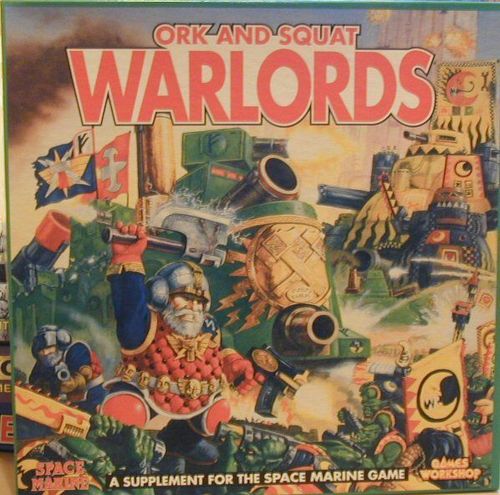
Ork and Squat Warlords
Ork and Squat Warlords Rulebook
Table of Contents
Table of Contents
Introduction
Most of the information in this volume is new, but the information about Orks from the Space Marine rulebook has been repeated so that you have a complete reference work in one book. You can mix the epic army cards from this supplement with the original Ork cards printed in Space Marine, and they are totally interchangeable. You may want to colour code the cards from Space Marine with felt tip pens or coloured markers to produce a fully integrated set.
The rules and army cards for Squats are entirely new and describe the forces of the fiercely independent Squat Homeworlds. They detail the devastating Squat war machines of the Engineers Guild such as Land Trains, gyrocopters, the Colossus and the mighty Goliath mega-cannon. The resolute fighters of the Squat Warrior Brotherhoods are unusual in that their break point is higher than any other troops in Space Marine, in keeping with their legendary tenacity and determination.
The Orks section expands the rules in Space Marine and details many new weapons, troops and machines. It also includes a section on the monstrous Ork Gargants and rules covering Mekboyz and the unique Mekboy kustom repair cards.
Some of the Mekboy weapons use artillery dice to determine their effects. These dice are marked 2, 4, 6, 8, 10 and MISFIRE. Though an artillery dice is not included in this box they are available at Games Workshop stores and can be ordered through Games Workshop mail order. If you can't get hold of an artillery dice you can roll a D6 and double the result instead — a six equals a misfire.
We're frequently asked two questions in particular about Space Marine. The first is whether the number of cards in Space Marine and its supplements is supposed to impose an overall limit on the number of units of a particular type a player may deploy. The answer is no except in a very few cases which are strictly defined. We try to supply you with all the cards we think you'll need but there are always ambitious players who want to field bigger and bigger armies!
The second question is about whether players can use army cards from more than one race together in the same army. Yes you can — in the war-torn universe of the 41st millennium nearly all the races have fought alongside or against each other at some point. Again, except for a very few obvious cases (such as Eldar and Chaos or Orks and Squats), army cards can be chosen freely within the restriction that at least one company card is chosen and that 'allied' support and special cards accompany an appropriate 'allied' company card.
Orks
Choosing the Ork Army
Orks are a tough, brutal, and remarkably successful race, and rank amongst the most powerful warriors in the whole galaxy. They control a significant part of known space, but this sprawling territory is divided amongst thousands of individual Warlords. Rival Warlords are fiercely competitive and spend much of their time fighting each other. They all want to gather the clans together and lead a huge Waa-Ork against their greatest enemies.
Were Orkdom ever to unite against the Imperium it is unlikely that humanity would survive very long.
The Waa-Ork is a sort of crusade when the Orks stop fighting each other and decide to stomp someone else instead. This overriding urge to expand and conquer is a natural part of the Orks' psychological make-up, and has greatly contributed to their success as a race.
All Orks are slightly psychic so very potent ideas tend to filter from one Ork to another. When a Warlord gets really powerful other Orks sense it and flock to join him, increasing his power and encouraging more and more Boyz to join the growing Waa-Ork. As Ork Boyz from nearby worlds gather they form into their ancestral clan groups ready to do battle. Mekboyz, the mechanics and engineers of the Orkish race, also sense that something is brewing, and begin to build huge fighting machines in readiness for war.
Your Ork force represents either part of a very large Waa-Ork or maybe an entire smaller Waa-Ork. Like other forces, troops are chosen using the epic army cards. In Ork armies the company type cards are called clan cards and each card represents one of the six different Ork clans. Other armies, such as Space Marines, are allowed as many companies as they can afford, but Orks can only ever have a maximum of six clans (one of each).
Rather than adding more clan cards to form a bigger force, the Ork player must add reinforcements to one or more of his clans to make bigger formations. This system means that Orks behave in a different way to other armies — their formations are larger and more powerful, but there will usually be less of them.
If you look at an Ork clan card (other than Snakebites) you will see that it consists of only two formations — the command unit formed of several Nobz troop stands, and the Boyz Mob formed of about a dozen Boyz stands. The Nobz can fight separately, but it is a good idea to keep them as close to your Boyz as possible because Ork formations can only be given orders if there are Nobz nearby. This is fully described below as the special Ork Command Rule.
The general rules in Space Marine apply for choosing armies: first agree a points value total for the whole army and then choose your troops using the army cards. You must choose at least one clan card and you can choose more (assuming you have the points and the models of course). For every clan card in your army you can choose up to 5 support cards and 1 special or free card.
In this respect choosing an Ork army is just like choosing a Space Marine or any other army. However, the support and special cards work slightly differently. In other armies the support and special cards act as independent formations, but in the case of Ork armies they either provide reinforcements for an existing formation or an entire new formation for the clan.
For example, the basic Goff clan consists of a command unit of 8 Goff Nobz stands plus a Boyz Mob of 15 Boyz stands. You might add two Ork Boyz support cards to the clan — increasing the size of the Boyz Mob by an extra 8 stands and making a total of 23 Goff Boyz. You might also want to add a Lungbursta Squadron support card — this adds a squadron of 3 Lungbursta tanks to the Goff clan.
Remember that any extra formations you add to your clan are bound by the Ork Command Rule described below, so they have to stick close to your Nobz if they are to operate effectively.
Some support cards can only be chosen for particular clans. Wherever this is the case the name on the card will tell you which clan they are from — for example Goff Lungburstas can only be chosen as a support card for a Goff clan, Snakebite Squiggoths can only be chosen for a Snakebite clan and so on.
The Deathskulls clan is exempt from this limitation and can choose any support card whether it is specific to a particular clan or not. This is because the Deathskulls have a habit of 'borrowing' tanks and wargear that belong to other clans without telling their owners first!
The Ork Command Rule
Orks respect strength and power — they like loud noise and enjoy fighting more than anything else. Orks who are really strong and especially good fighters may be adopted by an Ork Nob — the head of an Ork household — and if one of them fights well he may get to take over the household on the death of its master. In other words he fights his way up to become a powerful Nob in his own right. The admiration and loyalty which other Orks feel for Nobz goes beyond mere clan boundaries. The Boyz will do anything a Nob tells them to, and the Nobz see it as their duty to command and look after other Orks.
As the most courageous and battle-hardened Orks the Nobz are usually found in the thick of battle. Naturally, the Boyz like to stick close to the Nobz to make sure they don't miss out on the fun. If there are no Nobz nearby, other Orks will tend to follow their natural inclinations. To reflect this we have the special Ork Command Rule.
You can only give an order to an Ork formation if there is a command unit within 10cm. The command unit does not have to be Nobz from the same clan as the formation, it might be another clan's Nobz or it might be a different command unit (such as a Warboss or Warlord).
If there is no command unit within 10cm Orks will become confused and follow their natural instincts — no order counter is placed for them. This applies to Boyz Mobz and all other Ork formations including Boarboyz and Bikeboyz. The Orks' response won't necessarily be very sensible at the time but there is little you can do about this (Ork instincts are very hard to overcome). The only Ork troops not affected are command units and a few special cases such as Gargants and the Gibletgrinda Battle Fortress.
Ork formations which have no command unit within 10cm will react rather differently because of the distinctive nature of their clans:
BAD MOONS will not move but they will shoot at the nearest enemy within range during the first fire segment of the combat phase. The Bad Moons are the richest of the Ork clans so they always have plenty of ammo, and this makes them more than happy to blaze away at anything in range.
BLOOD AXES will move at normal rate towards the nearest table edge and will only shoot at enemy units within 25cm in the advancing fire segment. Once at the edge of the table they will stop moving. Blood Axes are well known as treacherous humie lovin' gits so they will invariably take the opportunity to slope off to a quiet corner of the battlefield if no Nobz are watching them.
DEATHSKULLS will move towards the nearest objective at normal rate and will shoot at enemy units within 25cm in the advancing fire segment. Deathskulls are avid looters and believe that the best weapons and equipment can be found where the fighting has been fiercest, like near an objective for example.
EVIL SUNZ will not shoot but will move towards the furthest table edge at between normal and double rate, and they can move into close combat with anything in their way. All Orks love going fast and Evil Sunz find it particularly exhilarating to hurtle around in buggies or battlewagons. This strong instinct for mobility affects them even when they're on foot, making them want to keep moving about.
GOFFS must move between normal and double rate towards the nearest enemy — they have no choice! If enemy are already within the Goffs' normal move at the start of the turn they must charge them. They may not shoot but if they enter close combat they will fight normally. Goffs are enthusiastic hand-to-hand fighters (they're good at it too!) and their natural response to an enemy threat is to stomp it quick.
SNAKEBITES will not shoot but may move towards the nearest enemy at up to normal rate. If they enter close combat they will fight normally. Snakebites feel that close combat is somehow more proper for an Ork than shooting and they are always happiest when fighting at close quarters. Note that Snakebites don't have to move if you don't want them to — it is an option.
KULT OF SPEED Orks come from all of the different Clans but are united by their addiction to going very, very fast! If they are out of command they will not shoot but will move at double normal rate in a direction chosen by the Ork player. They will roar along in as straight a line as possible and use up all of their movement if they possibly can. The Speed Kultists will enter close combat with any enemy models that get in their way.
Mekboy Kustom Repair Cards
Mekboyz, also known as Mekaniaks, are the technical engineers and master mechanics of Ork civilisation. Their understanding of the principles behind the technology they use is somewhat vague and crude. In fact, Mekboyz are often as mystified as the rest of the Orks as to why something they've put together actually works (but it usually does). The Meks have an instinctive talent with machines and their unlikely creations often work surprisingly well, though it must be said there are often some spectacular accidents and malfunctions.
Mekboyz have a great affinity for force fields and matter transmission devices — they particularly enjoy the crackling power and deep thrum of power fields, tractor beams and similar devices. In this area they have produced machines whose effects defy explanation even by the Adeptus Mechanicus, giving rise to the theory that the Orkoid race is the degenerate survivor of a much older, more advanced civilisation and that the Meks are recreating half-forgotten achievements of this lost race. Nonetheless inquisitiveness, experimentation, and, above all, a determination to bash the parts until they fit are the keys to the Mekboyz' success. Consequently the Meks construct many ingenious and unlikely devices that defy the principles of science.
Meks build and maintain the bewildering array of vehicles, weapons, spacecraft and machinery. They are great innovators and inventors but seldom plan their creations before they begin; rather they take an idea from something they've seen or heard about and construct it, kustomisin' it in typically Orky fashion with additional bolts and spiky bits as they go along.
Each Mek produces highly original work and every item of Ork machinery bears the indelible stamp of an individual Mek's handiwork. Often Meks 'eksperiment' with vehicles or weapons they're repairing, fitting extra armour or kustom force fields. Sometimes they charge the owners extra teef for the privilege, sometimes they forget to tell them at all. The result of all this is that Ork weapons and vehicles are seldom identical, mass produced articles — they are kustom-built.
Mekboy weapons can be chosen as support cards for Ork clans. These are potent but unpredictable experimental weapons, like huge rockets or giant force field generators, which the Mek has brought along to try out in the battle. Because there are only a limited number of Mekboyz in a clan only a single Mekboy support card can be chosen for each clan you take in your army. Evil Sunz and Blood Axes have more Mekboyz than other clans so these two clans can choose up to two Mekboyz support cards.
The Kult of Speed always attracts lots of Mekboyz who endlessly tinker with the Speed Freeks' buggies and bikes to make them "go fasta". This means the Kult of Speed can choose up to five Mekboy support cards.
Repair cards. Each Mekboy support card gives you two free Mekboy kustom repair cards, and these are used to represent the effects of repairs and kustomisin' on the rest of the Ork force. Each kustom repair card represents a particular 'improvement' made by the Mekboyz — kustom weapons for a Nobz Mob, for example, or squig fuel injection for a vehicle squadron and so on. The appropriate number of kustom repair cards is dealt randomly to the Ork player before the battle and he can give these to his squadrons and mobs — just place the kustom repair card on top of the appropriate army card as a reminder.
For example, an Ork player has an army which contains two clans, an Evil Sunz clan and a Goff clan. He chooses his full quota of Mekboy support cards so he gets three Mekboy cards — two for the Evil Sunz and one for the Goffs. This means that he gets six kustom repair cards which he can place on any squadrons or mobs in his army. He doesn't have to place four with the Evil Sunz and two with the Goffs.
The text on each kustom repair card tells you exactly what units it can be given to and the effects of the kustomisin'. If you are dealt a card which you can't use because you haven't got any of the right sort of units the card is discarded — it's just a good idea the Mekboyz had that they didn't get a chance to try out! Once they've been allocated the kustom repair cards remain in effect throughout the game.
The Forces of the Orks
Ork Boyz
Each Ork Clan is noted for its slightly different character and traditions — a reflection of the basic genetic differences between the Orks of each Clan. When the Waa-Ork is underway all the Ork Boyz in each Clan fight together in one big formation called a Boyz Mob. Each Clan provides a single Boyz Mob (as indicated on the Clan card) but the size of this Mob can be increased by adding extra Ork Boyz support cards. As each extra Ork Boyz card adds 4 Boyz stands the most extra you can have is +20 stands (i.e. 5 support cards).
Bad Moonz. Orks quite sensibly use their teeth as currency, and as the Bad Moonz' teeth grow faster than anyone else's they are the richest of all the Ork Clans. The other Orks don't see this as an unfair advantage, after all if you're hard enough you can always bash a Bad Moon on the head and steal his teeth. Bad Moonz have expensive and effective weapons, wear the best and most elaborate armour, and flaunt the most gaudy and colourful clothes in vivid yellow and black patterns.
Deathskulls. After a battle the Deathskull Boyz descend on the wreckage and salvage weapons, equipment, clothes, decoration, and anything else they can get their hands on. They are tremendously good at scrounging and looting (some would say stealing) and as a result they carry all sorts of weapons they have 'found'. They are also superstitious and often paint their skin bright blue as a good luck token. Their clothes are often patched and ragged — so as a mass they look light brown and dusty.
Snakebites. Snakebite Boyz take great comfort in traditional Orky values. They cling to old ways long since abandoned by other Orks and shun certain aspects of technological innovation. They prefer to wear pale grey or light brown clothes derived from animal skins and furs.
Goffs. Goffs are the most aggressive of all Orks — which is saying something! They pride themselves on being the most orky of all the clans — carrying the most destructive weapons and fighting even harder than the rest. Goffs like to get to where the fighting is as quickly as they can and attack their enemies at close quarters. They prefer to wear black, which is the only proper orky colour as far as they're concerned, sometimes with red trim or black and white checks.
Blood Axes. All the other clans distrust the Blood Axes because they associate with the filthy humans. They wear military pattern camouflage clothes (very unorky), salute, and do other humanish things which no self respecting Ork would do. They have been known to deal with human mercenaries, and even with the Imperium, although such affairs are often conducted through third parties or disguised Imperium officials to maintain a pretence of proper orky behaviour. As a result the Blood Axes have human style equipment which they have traded with humans. Blood Axe Boyz Mobz even have Rhinos to carry them around.
Blood Axes are not trusted by other Orks. They have a bad reputation for being treacherous gitz, who will quite happily join the Waa then run off or let you down once the going gets tough. Other Orks don't like the Blood Axes much and won't obey Blood Axe Nobz. For this reason Blood Axe Nobz can't give orders to Orks from other Clans and so don't count as a command unit to other Orks.
Evil Sunz. The Evil Sunz are strangely and uncontrollably attracted towards fast vehicles and loud noises. Actually this is true of all Orks, but in the case of the Evil Sunz the attraction is especially strong. Evil Sunz like to wear red, a colour which Orks associate with speed.
Ork Boyz data sheet (Troop Types).
| Troop Type | Move | Saving Throw | CAF | Weapons | Range | Attack Dice | Roll to Hit | Target's Save Mod. |
|---|---|---|---|---|---|---|---|---|
| Bad Moonz | 10cm | None | +1 | Bolter | 50cm | 1 | 5+ | -2 |
| Deathskulls | 10cm | None | +1 | Bolter | 50cm | 1 | 5+ | 0 |
| Snakebites | 10cm | None | +2 |
Nobz
We have already described a little about Nobz and how they behave. Nobz form command units on the battlefield. Unlike Space Marine command units these consist of several stands which fight together as a single formation. Nobz have the same general likes and dislikes as the Clans they come from and prefer the same colours, although they are much more powerful fighters as can be seen on their data sheet.
The size of a Nobz unit is fixed by the Clan card, but extra Nobz can be added to the unit as support cards. Generally speaking, a Nobz command unit can act as a command unit to any formation of Orks regardless of Clan. The exception is the Blood Axe Nobz who can't act as a command unit to Orks from other Clans. No one likes these treacherous gitz very much and having one ordering you about is just too much for any self-respecting Goff or Snakebite to bear! To compensate for this Blood Axes are cheap — you get a lot for your points.
You can make a Nobz stand by taking a Boyz troop stand and adding a banner pole to show that the Orks are Nobz. You can also make a suitable banner out of paper to decorate the pole if you wish. An alternative and much better way of representing a Nobz stand is to use the special Nobz and banner bearer models from the War Horde boxed set available separately. Stands may be made up from 1 Boss Nob, a banner bearer, 2 or 3 Nobz, and any additional Ork model to make the total up to 5.
Ork Nobz data sheet (Troop Types).
| Troop Type | Move | Saving Throw | CAF | Weapons | Range | Attack Dice | Roll to Hit | Target's Save Mod. | Notes |
|---|---|---|---|---|---|---|---|---|---|
| Ork Nobz | 10cm | None | +4 | Bolters | 50cm | 2 | 5+ | -2 | Command Unit |
Warboss
The Waa-Ork is centred upon a single mighty Ork leader called a Warboss. He fights alongside a group of select Nobz from his own household: these are the toughest Nobz and carry the best weapons. His followers may also include Meks, and other special types of Ork.
In most Waa-Orks there is only one Warboss, but sometimes two or more Waa-Orks will merge together, in which case the toughest of the Warbosses takes over the entire Waa-Ork and becomes a Warlord. This means that the Waa-Ork might have a Warlord plus one or more Warbosses. A Warboss or Warlord troop stand may be represented in the same way as a Nobz stand but it is important to mark the great leader out in some way so that he is distinguished from the other Nobz. One way of doing this is to make a much larger banner from paper and making a proper 'bosspole'. Alternatively you could place several banners on the stand to show that the Warboss is present.
Ork Warboss and Warlord data sheet (Troop Types).
| Troop Type | Move | Saving Throw | CAF | Weapons | Range | Attack Dice | Roll to Hit | Target's Save Mod. | Notes |
|---|---|---|---|---|---|---|---|---|---|
| Ork Warboss | 10cm | None | +5 | Bolter | 50cm | 2 | 5+ | -2 | Command Unit |
| Ork Warlord | 10cm | None | +7 | Bolter | 50cm | 2 | 4+ | -2 | Command Unit |
Boarboyz
The Snakebite Clan prefer riding fierce boars instead of bikes or buggies — this is typical of the Snakebites as they only feel really comfortable with good old fashioned orky ways. The Boarboyz are a separate formation but they are still part of the Clan and are bound by the Ork Command Rule explained already. A Boarboyz troop stand consists of 2 Boarboyz models, not 5 models like infantry stands, because there isn't room for any more on a 20mm square stand. The Boarboyz require gluing to the stand, or you can make your own stand from a piece of card if you prefer. Boarboyz suffer the same movement penalties and restrictions as vehicles, and so are unable to move into some sorts of terrain.
| Troop Type | Move | Saving Throw | CAF | Weapons | Range | Attack Dice | Roll to Hit | Target's Save Mod. | Notes |
|---|---|---|---|---|---|---|---|---|---|
| Ork Boarboyz | 20cm | None | +4 | Bolters | 15cm | 1 | 6+ | 0 |
Bikeboyz
As all Orks enjoy speed and loud explosions the bike is a popular weapon of war — laden with heavy cannons of course! Bikeboyz are an exciting and useful part of any Ork army. Bikes are mounted two to a base in the same way as Boarboyz. Bikes are, of course, vehicles and suffer the same movement penalties and restrictions as other vehicles.
| Troop Type | Move | Saving Throw | CAF | Weapons | Range | Attack Dice | Roll to Hit | Target's Save Mod. | Notes |
|---|---|---|---|---|---|---|---|---|---|
| Ork Bikeboyz | 30cm | None | +3 | Bolters | 15cm | 1 | 6+ | 0 |
Stormboyz
Many young Orks find that they are still too inexperienced and not quite big enough to make really good fighters. Impatient to get stuck in alongside the older Orks, they become rebellious and sometimes run away from their Nobz' household to join the infamous Stormboyz Korpz.
Stormboyz deliberately shun conventional Ork society and live together in special Stormboyz barracks. They wear uniforms and big shiny boots (which they even polish) and march around in step saluting their Stormboy Kaptins in a respectful, militaristic fashion. The older Orks regard all this posturing with a certain amount of amusement. As Stormboyz grow older and bigger they usually get fed up with the Stormboyz and return to their households although a few will stay on as Kaptins to lead fresh Stormboyz.
A Stormboyz Korps support card can be added to a Clan. The Ork command rule applies as normal, however, because the Korps has its own command unit (the Kaptin) it can fight in a quite remote part of the battlefield if you want. The Kaptin only counts as a command unit for the Stormboyz, not for other Orks, but the Stormboyz will respond to orders from any ordinary Ork command unit if their Kaptin is killed.
| Troop Type | Move | Saving Throw | CAF | Weapons | Range | Attack Dice | Roll to Hit | Target's Save Mod. | Notes |
|---|---|---|---|---|---|---|---|---|---|
| Ork Stormboyz | 10cm | None | +1 | Bolters | 50cm | 1 | 5+ | 0 |
Gretchin
Gretchin are smaller and weaker than Orks, and so they form a class of underlings, servants and hangers-on. Every Ork Nobz household includes a number of Gretchin servants who also follow the Orks to war. They eagerly carry ammunition and supplies. When they get the chance they like to join in the fighting.
As the Gretchin can only afford crude weapons like blunderbusses and shotguns they are not very good. Worse still, they have little idea of what to do, and latch on to a formation of Orks and copy them. This annoys the Orks so much that they throw rocks and rubbish at the Gretchin, who merely take this as a demonstration of comradely good humour and happily throw the stuff back!
A Gretchin Mob must be placed within 10cm of an Ork formation at the start of the game, and they will stay within 10cm of the Orks for the duration of the game. If the Orks are slain the Gretchin will latch on to the next nearest Ork formation, moving to within 10cm and following it around in the same way. The Gretchin must be given the same orders as the formation they are following as they always attempt to copy them, moving as the Orks move, firing as they fire, and so forth.
| Troop Type | Move | Saving Throw | CAF | Weapons | Range | Attack Dice | Roll to Hit | Target's Save Mod. | Notes |
|---|---|---|---|---|---|---|---|---|---|
| Gretchin | 10cm | None | -1 | Shotguns | 15cm | 1 | 4+ | 0 |
Mad Boyz
While all Orks behave in a way that would mark them as insane in human society there are some whose eccentricities are extreme even by Ork standards. Other Orks are happy to tolerate their strange behaviour — all the more so because Madboyz stick together and if you antagonise one the chances are his mates will soon come and sort you out.
In battle the Mad Boyz' unpredictable antics are impossible to control and they are often downright dangerous to all and sundry. All the Madboyz fight together in single unit called a Mad Mob. There is no point in trying to give the Mad Mob orders because regardless of whether Ork Nobz are near it will always do what it likes. Even the Mad Boyz don't really know what they're about to do until some inspired individual yells "Charge...." or "Run forrit ladz!" To represent this, no order counter is ever placed for the Mad Mob. Instead, every turn once all other orders have been revealed a dice is rolled for them. On a 1-2 the Mob has first orders, on a 3-4 advance orders, and on a 5-6 charge orders.
Mad Boyz never check morale as such — they are far too insane to react normally to casualties or danger. Who knows how Madboyz will react — the first hint of danger can send them scurrying from the battle like frightened rabbits or turn them into savage maniacs each with the strength of 10, or (more likely) they will just do something completely bananas to the utter bewilderment of friend and foe. Most of the time the Mad Boyz simply caper about getting in everybody's way. However, sometimes the Mad Mob will do something totally unexpected and devastating, turning the tide of battle in the Orks' favour by knocking out a huge enemy tank or destroying a fortified position!
In addition, whenever there is a chance the Mad Mob will do something potty a roll is made on the Mad Boy Chart (below) to show how they react. A Mad Boy roll is made every time the unit suffers a casualty up until the unit is broken. Once the unit is broken it takes a Mad Boy roll every time it takes a casualty and every time a morale check is indicated instead of taking a morale check.
Mad Boy Chart — Roll 2D6
| Roll | Result |
|---|---|
| 2 | Mob turns tail and runs for it, and the Mad Boyz spend the rest of the battle in hiding, quaking with unreasoning terror. Remove the entire Mob from the battlefield. The Mob is to all intents destroyed and your opponent gains the appropriate Victory Points. |
| 3 | The Mob is suddenly distracted by some small creature. It will do nothing else until it is called upon to take another Mad Boy roll. |
| 4 | A particularly morose Mad Boy convinces the entire Mob that they are dead. The Orks all lie down and play dead. The Mob will do nothing else until it is called upon to take another Mad Boy roll. So convincing is the ploy that no enemy are allowed to shoot at the Mad Mob or fight it in close combat. Even if enemy troops move right through them the Mad Boyz will keep up the pretence of being dead. |
| 5 | Under the inexplicable conviction that all the pins have fallen from their grenades the Orks start passing their grenades about like hot potatoes until one is foresighted enough to throw the whole lot as far away as he can. To determine where the grenades land randomly select one Mad Boy stand — this is the one that throws the grenades out from the unit. Now roll a D6 and add 5 to determine the distance the grenades are thrown. Randomly determine their direction by using the scatter dice and place a burst marker over the spot indicated. Models under the burst marker are hit as if by a normal barrage and the number of barrage points is randomly determined with a D6. No modifier is applied to the armour saves. |
| 6 | The Boyz feel suddenly exposed and make for the nearest cover. Until a different Mad Boy roll is made the Mob will head towards the nearest piece of terrain and occupy it. If the nearest terrain is already occupied by enemy troops the Mad Boyz will charge them if they can (a charge order is automatically placed in the orders phase if this is the case). |
| Troop Type | Move | Saving Throw | CAF | Weapons | Range | Attack Dice | Roll to Hit | Target's Save Mod. | Notes |
|---|---|---|---|---|---|---|---|---|---|
| Ork Madboyz | 10cm | None | +1 | Bolters | 50cm | 1 | 5+ | 0 |
Wildboyz
Wildboyz are young Orks, new to the marvels of Ork Kultur. Though they haven't really got the hang of using bolters and stikkbomz, they're willing to have a go at the enemy with swords, axes and anything else to hand. A Warboss often brings some of his Wildboyz along to a battle so they can have some fun and get a bit of experience at the same time. The Nobz always keep a special eye on the Wildboyz to make sure they don't do anything too impetuous like running through minefields or standing around in the open. After the battle Wildboyz who have done well are rewarded with a bolter and join the ranks of the Boyz Mob.
| Troop Type | Move | Saving Throw | CAF | Weapons | Range | Attack Dice | Roll to Hit | Target's Save Mod. | Notes |
|---|---|---|---|---|---|---|---|---|---|
| Ork Wildboyz | 10cm | None | +3 | Axes | None | None | None | 0 |
Freebooterz
Freebooterz are Orks who have abandoned their clans to form roving bands of outlaws. A lot of Freebooterz are very treacherous and unpleasant characters indeed and are not even tolerated in Ork society. Nonetheless, Ork Warbosses desperate for more Boyz will hire them as mercenaries with promises of loot and a good fight.
A Band of Freebooterz is led by a tough Freebooter Kaptin whose murderous outbursts and fiery temper keep the Freebooterz in line (actually, they rather expect this sort of behaviour from their Kaptin and soon replace him if he's not harsh enough). Freebooterz dress flamboyantly, sporting decorated hats and voluminous coats, stripy trousers, bandanas, eyepatches, tattoos and nose rings to mark their alienation from the Ork clans.
A Freebooterz Mob can be chosen as a special card for any Ork clan. Because the Freebooterz don't have to be paid until the end of the battle the Freebooterz card doesn't cost any points, so it can be a good choice for a player who is short on points. However, taking Freebooterz does use up one of your special cards and they are treacherous gits, so beware!
Freebooterz are subject to the Ork command rule but they have their own Kaptin so they can fight off on their own. The Freebooter Kaptin only counts as a command unit for Freebooterz and the Freebooter Boyz will not take orders from any ordinary Ork command unit if their Kaptin is killed.
If the Freebooterz Kaptin is killed all the remaining Freebooter Boyz stands in the mob which aren't in close combat will stop where they are and start fighting about who gets to be the new Kaptin. Roll a D6 for each Freebooter stand in the end phase. On a roll of a 1 that troop stand is removed as the Orks beat each other to a pulp. On a 5 or 6 the stand decides on a new Kaptin and is replaced with the Kaptin's stand or a spare Nobz stand. Stop rolling once a new Kaptin has been found.
| Troop Type | Move | Saving Throw | CAF | Weapons | Range | Attack Dice | Roll to Hit | Target's Save Mod. | Notes |
|---|---|---|---|---|---|---|---|---|---|
| Freebooterz | 10cm | None | +1 | Bolters | 50cm | 1 | 5+ | 0 |
War Buggy
As well as the largish wheeled battlewagons Meks also build small, fast, wheeled vehicles called war buggies or just buggies. Buggies have a crew of two Orks — a driver and the Ork who shoots the gun. Any suitable weapon can be fitted to a buggy, including auto-cannons, plasma guns, heavy bolters or whatever takes the owner's fancy.
| Troop Type | Move | Saving Throw | CAF | Weapons | Range | Attack Dice | Roll to Hit | Target's Save Mod. | Notes |
|---|---|---|---|---|---|---|---|---|---|
| War Buggy | 30cm | 6+ | +2 | Autocannon | 25cm | 1 | 5+ | 0 |
Battlewagon
Ork vehicles are built by craftsmen called Mekboyz (aided by their Gretchin servants) and every Mekboy likes to do things his own way. As a result no two Ork vehicles are ever quite the same. Having said that, there are some broadly similar designs which have become traditional. The battlewagon is one of these tried and tested types, others include the wartrack and the war buggy. Although battlewagons may differ one from another, they are still recognisably battlewagons with broadly comparable speed, armament and general effectiveness. The Evil Sunz, who are especially keen on vehicles, have included battlewagons in their Boyz Mobz and Nobz command units as shown on their Clan card. Other Clans can buy battlewagons as support cards.
The battlewagon moves up to 25cm. Orks love speed and are prepared to sacrifice heavy armour if it enables them to squeeze a bit more out of the engine. The battlewagon has an armour saving throw of 4 or more, so shots bounce off its hull on the D6 roll of a 4, 5 or 6 (subject to further save modifiers of course). Orks enjoy getting to grips with their enemy, driving with such natural ferocity that enemy are scattered, knocked-over, or gunned down at close range with the vehicle's main armament. This is represented by the close assault factor of +1.
Although battlewagons can be armed with almost any weapon the Ork Meks can fit to it, the most favoured weapon is a large bored cannon mounted in a turret of some kind. The cannon fires powerful explosive shells which make a satisfying shrieking noise followed by a huge boom as they land. The cannon has a range of 50cm and hits on the D6 roll of a 5 or 6. On the whole the battlewagon is a lighter and faster vehicle than the Space Marine's Land Raider and Ork players will find it is a mistake to try and take on better equipped tanks unless they have a vast advantage in numbers. The battlewagon can carry up to 3 troop stands — Orks don't mind squashing in really tight (or even hanging to the outside).
| Troop Type | Move | Saving Throw | CAF | Weapons | Range | Attack Dice | Roll to Hit | Target's Save Mod. | Notes |
|---|---|---|---|---|---|---|---|---|---|
| Battlewagon | 25cm | 4+ | +1 | Autocannon | 50cm | 1 | 5+ | 0 |
Weirdboy Battletower
All Orks are psychic to some extent, their minds constantly bubbling with energy that manifests itself as a general awareness of orkyness and occasionally as poltergeist activity of some sort. Some Orks are far more psychic than others, and they pick up psychic activity from other Orks like a sponge. They have no control over this process and even find it rather painful and frightening, especially when the build-up of energy becomes so great that it has to be released as a mighty explosion of force. These Orks are known as Weirdboyz.
Weirdboyz don't much enjoy using their powers, it hurts their heads and there is a real danger of psychic overload in which case their brains explode! As these random explosions are a danger to all and sundry, Weirdboyz are forced to live in special houses built on huge copper stilts which conduct the psychic energy away and disperse it in the ground (hopefully). They are also forced to wear special clothes, like a jester's uniform, with bright colours and a funny hat so that other Orks can see them coming and get out of the way.
Of course the potential of the Weirdboyz to cause mass destruction on the battlefield was recognised long ago. They are driven to battle in special mobile Weirdboy Battletowers, tall elegant structures which raise them above the battlefield and give them a good line of sight. Putting Weirdboyz in a tall, mobile tower also stops them running away — which Weirdboyz are prone to do as they really don't like using their powers with all the attendant risks of head explosions.
In the End Phase of every turn work out how much power the Weirdboy has soaked up from the Orks around him. For every Ork Boyz or Nobz stand within 25cm the Weirdboy automatically soaks up 1 psychic energy point. For every Ork vehicle, bike stand, Dreadnought, Stompa or artillery piece within 25cm the Weirdboy soaks up 1/2 an energy point. If there is a Gargant within 25cm the Weirdboy soaks up D6 energy points (Gargants act as a focus of orkyness and so concentrate psychic power). Keep a record of this total — this is the number of points your Weirdboy will use in the next turn.
If the total reaches 20 or more the Weirdboy may have overloaded, in which case his head explodes and he is destroyed. If the total number of energy points is 20 or more roll a D6. If the roll is a 6 the poor Weirdboy's psychically swollen bonce gives way and the whole Weirdboy Tower plus any troops within 2D6cm are destroyed in a flash of psychic force.
Assuming the Weirdboy survives he can use his psychic force to shoot one or more special psychic bolts in the combat phase. The number, range and effect of the attack varies depending on the number of psychic points accumulated. As the tower is raised far above the ground the Weirdboy can shoot his psychic bolt over the heads of troops in front of him. So long as he can see the target he can fire at it. If the Weirdboy makes no psychic attacks the energy he has accumulated is automatically flared off, sending a bright sheet of power across the sky.
Weirdboy psychic bolts
| Energy Points | Range | Attack Dice | To Hit Roll | Target's Save Modifier |
|---|---|---|---|---|
| 1-5 | 25cm | 1 | 6+ | -1 |
| 6-10 | 50cm | 2 | 5+ | -2 |
| 11-15 | 75cm | 3 | 4+ | -3 |
| 16-20 | 100cm | 4 | 3+ | -4 |
| 21-25 | 150cm | 6 | 2+ | -5 |
| Troop Type | Move | Saving Throw | CAF | Weapons | Range | Attack Dice | Roll to Hit | Target's Save Mod. | Notes |
|---|---|---|---|---|---|---|---|---|---|
| Ork Weirdboy | 25cm | 4+ | +1 | None | — | — | — | — |
Gibletgrinda Battle Fortress
In the time of the Waa-Ork the talented Ork engineers known as Mekboyz go into a frenzy of weapon building and invention. Some dedicate themselves to building the monstrous Gargants which embody the essential spirit of Orkiness, others construct massive mobile fortresses which are more akin to land battleships than ordinary tanks or battlewagons. On the attack the battle fortresses thunder forward at the head of the Ork charge, hammering the foe with salvoes from their great cannon while enemy fire bounces off their thick armour.
Gibletgrinda battle fortresses are built to literally crush the opposition with their huge spiked death rollers and are armed with plenty of turrets carrying fast-firing guns. The spiked death roller will squash any troop stand the Gibletgrinda moves over on a 4, 5 or 6 on a D6. As the death roller flattens anything in its path this monstrous battle fortress can move through woods and rubble at no penalty. This, combined with its speed of 15cm, makes the Gibletgrinda surprisingly manoeuvrable for all its great size.
Gibletgrindas have a crew of a dozen or so Orks plus innumerable Snotlings and Gretchin which crawl in amongst the thundering cogs and crankshafts to get at the bits the Orks can't reach. A powerful Ork Nob personally commands each battle fortress so they are not subject to the Ork command rule — you can always give a Gibletgrinda orders even if it isn't within 10cm of an Ork command unit. Battle fortresses can't act as command units themselves but sometimes several of them will attack together on a flank or punch through the line at one point while the Ork clans attack elsewhere. A Gibletgrinda is so big it can carry up to five troop stands in addition to its normal crew, most of whom manage to cram inside but quite a few hang on the outside anyway for the thrilling ride.
The extra thick armour plate which protects the Gibletgrinda gives it an armour saving throw of 1 or more on a D6. This means the Gibletgrinda is impervious to attacks without at least a -1 saving throw modifier unless shot at from the flank or rear, rendering Imperial Guard and Space Marine tactical troops helpless against it. In close combat the Gibletgrinda is a terror, crushing enemy infantry and vehicles as it rolls over them. Because of its unstoppable momentum the Gibletgrinda can't be pinned in close combat by anything smaller than a super heavy tank or Titan. If troop stands or lighter vehicles engage a Gibletgrinda in close combat it can simply move past them in the next movement phase, possibly crushing some of them with its death roller as it moves.
Gibletgrindas carry twin turrets backed up with a central gun tower. The actual turret weapons fitted to a Gibletgrinda vary greatly according to the whim of the Mekboy who built it — they could be twin autocannon, quick firing battlecannon, multiple rocket launchers or even bomb-lobbing catapults (particularly popular with the traditionally minded Snakebites). The weapons are always dead shooty though, producing loud bangs and satisfyingly big explosions.
| Troop Type | Move | Saving Throw | CAF | Weapons | Range | Attack Dice | Roll to Hit | Target's Save Mod. | Notes |
|---|---|---|---|---|---|---|---|---|---|
| Gibletgrinda | 15cm | 1+ | +8 | Autocannon | 50cm | 5 | 5+ | -1 | Death Roller |
Lungbursta
The Lungbursta is a particularly well armoured and sturdy Ork battle tank. It is built and used by the Goffs, the Clan who most appreciate no-nonsense and effective weapons (and ones that produce great big explosions!). The Lungbursta's boxy exterior is well armoured and its block turret conceals a mighty battle cannon which fires explosive shells.
| Troop Type | Move | Saving Throw | CAF | Weapons | Range | Attack Dice | Roll to Hit | Target's Save Mod. | Notes |
|---|---|---|---|---|---|---|---|---|---|
| Lungbursta | 20cm | 3+ | +1 | Battlecannon | 50cm | 1 | 5+ | -2 | Goffs only |
Skullhamma Battle Fortress
Skullhammas are a special sort of battle fortress commonly built by Evil Sunz or Speed Freek Mekboyz from other clans. Like the Gibletgrinda, the Skullhamma battle fortress is covered in massively thick armour plating and has twin turrets bristling with a fearsome array of weapons. Instead of having a gun tower and death roller like the Gibletgrinda, the Skullhamma has a supercharged triple-overpressure turbo engine which occupies almost half of its hull. In short, Skullhammas are built for speed.
When a Skullhamma is moving at top speed the turbo supercharger cuts in and sends it hurtling forward at mind-boggling speed, the front wheels lift off the ground and a huge plume of churned dust rises behind it. Orks find speed addictive, it stimulates their brain and causes an intense feeling of euphoria. Consequently it is common to find the crews of Skullhammas never get off their battle fortresses: they live, eat and sleep in them — just occasionally slowing down long enough to send off Gretchin servants in search of more food and fuel. Because of the specially supercharged engine on a Skullhamma it can move at triple normal rate when it is on charge orders, i.e. a maximum move of 45cm.
Like a Gibletgrinda, the Skullhamma is too big to be pinned by normal troops and vehicles in close combat, so they can break through enemy lines with ease. Unlike the Gibletgrinda, the Skullhamma is heavily armoured all round so it can flank its opponents without worrying about being hit in weaker side or rear armour.
As they are battle fortresses Skullhammas can always be given orders, even if they aren't within 10cm of a command unit — the Nob in command onboard the battle fortress tells the crew what to do. Up to five troop stands can fit into a Skullhamma — though getting the crew to slow down so they can get off is sometimes a problem! The weapons fitted to the Skullhamma are designed to devastate the enemy with long range salvoes from heavy, armour-busting weaponry. Often Skullhammas will use their high speed to get round enemy tanks and pick them off from the rear, or else hang back and use their long range guns to great effect.
| Troop Type | Move | Saving Throw | CAF | Weapons | Range | Attack Dice | Roll to Hit | Target's Save Mod. | Notes |
|---|---|---|---|---|---|---|---|---|---|
| Skullhamma | 15cm | 1+ all round | +4 | Battlecannon | 75cm | 2 | 4+ | -2 | Carries 5 stands |
Braincrusha
The Braincrusha is an Ork battle tank mounting a truly gigantic cannon. When the Braincrusha fires it bucks up into the air, the front wheels lifting as its massive cannon hurls monster shells at the enemy from exceptionally long range. The sheer size of the shells fired by a Braincrusha means they can smash armoured tanks like eggs. The weight of the shell is often sufficient to rip off turrets and overturn vehicles even if the armour isn't pierced. The Braincrusha cannon fills almost the entire body of the tank, so the crew have to squash together in a small tower over the gun's breech, which vibrates with the concussion of the cannon's recoil. This could well be the reason the gun is called the Braincrusha! Orks love loud noises and explosions so the crew are happy enough to be deafened for a few days after every battle for the opportunity to fire such a loud and destructive gun.
| Troop Type | Move | Saving Throw | CAF | Weapons | Range | Attack Dice | Roll to Hit | Target's Save Mod. | Notes |
|---|---|---|---|---|---|---|---|---|---|
| Braincrusha | 15cm | 4+ | 0 | Braincrusha cannon | 100cm | 1 | 3+ | -3 |
Gutrippa
The Gutrippa is a heavily armoured Ork battle tank. It is built exclusively by the Goffs who have improved on its sturdy design and heavy battlecannon armament with the addition of a pair of power claws on the front. The combination of the explosive firepower of the battlecannon and the deadly ripping claws for close combat make the Gutrippa a very popular Goff vehicle.
| Troop Type | Move | Saving Throw | CAF | Weapons | Range | Attack Dice | Roll to Hit | Target's Save Mod. | Notes |
|---|---|---|---|---|---|---|---|---|---|
| Gutrippa | 20cm | 3+ | +4 | Battlecannon | 50cm | 1 | 5+ | -2 | Goffs only |
Bonecruncha and Bonebreaka
The Bonecruncha and Bonebreaka are two variant types of Ork attack tanks used by all Ork clans. The main difference between the two tanks is that they carry different turret guns — twin autocannon on the Bonecruncha and a single heavy battlecannon on the Bonebreaka. Both tanks have a huge spiked death roller mounted on their front hull, like the one fitted to the Gibletgrinda battle fortress. This is what gives them their name, because they crush and break the bones of the enemies they run over!
A Bonecruncha or Bonebreaka can try to run over enemy troop stands simply by moving over them. Each stand suffers a hit on a D6 roll of 4, 5 or 6. If the troops aren't squashed or make their saving throw (assuming they have one) the Bonecruncha or Bonebreaka is bogged down in close combat and its movement ends. If it squashes the troops it can keep moving and try to squash others until it runs out of movement or fails to squash a target and gets caught in close combat.
| Troop Type | Move | Saving Throw | CAF | Weapons | Range | Attack Dice | Roll to Hit | Target's Save Mod. | Notes |
|---|---|---|---|---|---|---|---|---|---|
| Bonecruncha | 20cm | 4+ | +4 | Autocannon | 50cm | 2 | 5+ | -1 | Deathroller |
| Bonebreaka | 20cm | 4+ | +4 | Battlecannon | 75cm | 1 | 4+ | -2 | Deathroller |
Mekboy Speedsta
Ork Warbosses always try to get hold of as many Mekboyz as they can when they go to war, as without the Mekboyz to maintain and repair their vehicles, the Boyz soon find themselves walking everywhere. This is partly why Meks are the most commonly seen Oddboyz on the battlefield. As well as constantly fixing all the Wartracks and Battlewagons that have broken down, Meks spend many happy hours scavenging around wreckage for things to put in their bitz-box and use on future projects. Mekboyz are apt to be distracted by interesting wrecks and weapons so they are subject to the Ork command rule — so you can only give a Mek orders if there is a Nobz stand or other Ork command unit within 10cm of him in the orders phase. If a Mekboy has no orders he will respond appropriately, according to what clan he's from — Goffs charge, Bad Moons shoot and so on.
Meks don't just spend their time fixing stuff, they improve it too! A few extra spiky bitz here, a quick weldin' job there, and the odd complete engine rebuild — you can never be sure that you'll have quite the same vehicle left by the time a Mek's finished with it. To represent this unique 'Kustomisin' each Mekboy card you choose in your force entitles you to randomly draw two Mekboy kustom repair cards which can be played on your Ork army. Mekboy kustom repair cards and their effects are described in more detail elsewhere.
The only thing Mekboyz like more than tinkering with machines is building and tuning their wickedly fast kustom battlewagons. Every Mekboy has his own pet 'projikt' he's working on. These often lie about forgotten for months or years but when the Waa-Ork starts a Mekboy will find the time (in between building weapons and Gargants) to finish off his special Kustom Speedsta with a few more widgits and gubbins and (most of all) new, shiny kustom weapons.
Speedstas are festooned with all manner of experimental gadgets, force fields and weapons which the Mekboy usually fits without testing them first, so understandably their performace is a little unpredictable. To represent this, Mekboy Speedstas have variable statistics which change constantly during the game as the Mekboy tinkers with the Speedsta to try and get the most out of it.
Move: The basic move of a Speedsta is 30cm but the squig fuel injection systems, turbochargers and so on fitted to the Speedsta mean that every time it moves you roll 2D6 and add the result to its move. On charge orders the Speedsta's move is 60cm +4D6.
Saving Throw: The Speedsta is protected by all sorts of kustom force fields which can form a crackling, impenetrable dome of force one moment and be spectacularly shorting out with huge showers of sparks the next. Therefore each time a Speedsta has to make a saving throw roll a D6 and halve the result to find out the effectiveness of the force field against that shot — so a roll of 1-2 = a 1+ saving throw, 3-4 = 2+, and 5-6 = 3+. Roll again to find out the saving throw each time the Speedsta is fired at by a different unit.
Kustom Weapon: A Speedsta is always armed with some potent new kustom weaponry the Mekboy has invented. Giant cannon strapped to the sides of the Speedsta are popular but another great favourite is a rack of destruktor rokkits armed with experimental warheads — these let the Mekboy try out lots of different weapons without having to rebuild the Speedsta each time. A Speedsta can be armed with either of these two weapons so for simplicity we've included rules for both here rather than treating rokkit and kannon-armed Speedstas as two different vehicles and duplicating a lot of data.
The super-explosive effect of the kustom destruktor rokkits spreads destruction over a wide area so rokkits count as barrage weapons. When you shoot a Speedsta with destruktor rokkits take a barrage template and place it over an enemy model or stand which is within range and in sight of the Speedsta. As this is a direct barrage you don't need to roll for deviation. Destruktor rokkits can't be used to fire indirect barrages at targets which are out of sight. Next, roll the artillery dice to find out how many barrage points the destruktor rokkits are worth, then roll to hit everything under the template as for a normal barrage attack. Any hits are resolved with a -2 saving throw modifier. If a 'misfire' result is rolled the rokkits fail to fire momentarily — the Mekboy jumps out and fixes them automatically before the start of the next turn.
The kustom kannon fires a hail of armour-piercing explosive shells. The kustom kannon isn't very accurate because the recoil from the wildly firing kannon sends the Speedsta slewing around all over the place. Of course the Meks reckon that if they fire enough shells they'll probably hit the target anyway. When you fire the kustom kannon roll the artillery dice first to find out how many attack dice you get to roll. This means that you'll get to roll 2-10 attack dice. The to hit roll for a kustom kannon is 5 or 6 and hits have a saving throw modifier of -2, making the kustom kannon a very good weapon. Unfortunately if you roll a misfire result on the artillery dice one of the shells explodes in the breech and causes a hit on the Speedsta with a -2 saving throw modifier. If the Speedsta survives the explosion the Mekboy (slightly singed and blackened no doubt) jumps out and fixes the kannon before the start of next turn.
| Troop Type | Move | Saving Throw | CAF | Weapons | Range | Attack Dice | Roll to Hit | Target's Save Mod. | Notes |
|---|---|---|---|---|---|---|---|---|---|
| Mekboy Speedsta | 30cm +2D6 | Special | +3 | Destruktor Rokkits | 75cm | 2-10 barrage pts | -2 | ||
| Mekboy Speedsta | 30cm +2D6 | Special | +3 | Kustom cannon | 75cm | 2-10 attack dice | -2 |
Mekboy Bubble Chukka Speedsta
Ambitious Mekboyz replace the kustom cannon on their Speedstas with large force field weapons called Bubble Chukkas. The Bubble Chukka is one of the most innovative of the Mekboyz' many adaptions of force field technology. From its whirring innards the machine produces a stream of invisible, undetectable force field bubbles — much like a stream of soap bubbles. Most of the fragile bubbles burst immediately but some stick together and amalgamate into larger, stronger spheres. If a bubble hits a suitable surface, such as the hull of a vehicle, more bubbles will adhere to it increasing the size and strength of the bubble until the whole object is surrounded by a giant force field bubble.
Because the force field is invisible the entrapped crew of a vehicle have no idea of their predicament until it's too late. When the vehicle next tries to fire its guns the shots rebound off the inside of the force field bubble and hit the vehicle. This causes immense hilarity amongst any nearby Orks, who will shout 'Surprise, surprise!' and laugh uncontrollably. The Bubble Chukka always shoots at the very beginning of the combat phase, though it may not fire if it's on charge orders. Because of its unusual nature the Bubble Chukka uses special rules to secretly determine if it hits or misses.
At the beginning of the game take four Bubble Chukka counters for each Bubble Chukka in your force, ensuring that you have one 'hit' counter and three 'miss' counters. Then shuffle each set of counters face down or place them in an opaque container like a mug or cup. When you come to fire the Bubble Chukkas at the start of the combat phase draw two counters for each Bubble Chukka without looking at them. A Bubble Chukka can fire at any vehicle or Titan it can see within its 50cm range. Place one or two counters face down next to the models you want to target.
Titan shields afford no protection against the force field bubbles but you can only affect a single weapon on the Titan, so ensure you make it clear which weapon you want to target by actually placing the counter on the Titan's data sheet or on the model's weapon. Infantry stands are too small for the bubbles to adhere to so they may not be attacked with a Bubble Chukka.
If the opposing player wants to fire a vehicle or Titan that has been bubbled make sure he designates exactly which weapons he's firing and then flip the counter face up. If the counter reads 'Miss' the bubbles fail to latch on properly and the target is unaffected — complete its firing as normal. If the counter reads 'Hit' the target has been trapped in an invisible force bubble and all the weapons it's firing rebound off the inside and hit it automatically! Make saving rolls for each hit with appropriate saving throw modifiers for the weapons fired. A Titan gains no protection from its shields as the shots rebound while still inside them. The hits on a Titan strike the weapon which fired — roll the hit location dice to see if the hits are shifted to a different location, then make armour saving throws with the appropriate modifiers for the firing weapons.
In the end phase collect up all the Bubble Chukka counters and shuffle them face down ready for the next turn.
| Troop Type | Move | Saving Throw | CAF | Weapons | Range | Attack Dice | Roll to Hit | Target's Save Mod. | Notes |
|---|---|---|---|---|---|---|---|---|---|
| Bubble Chukka Speedsta | 25cm +2D6 | Special 1-3+ | +2 | Bubble Chukka | 50cm | See above | See above | See above |
Wartrack
Like the war buggy the wartrack is an extremely common type of vehicle built by Ork Mekboyz from all clans. It has a set of tracks and a bike-type front suspension so it is fast and doesn't get bogged down in mud or other bad terrain. The crew of two Orks sit behind each other with one acting as driver and the other as gunner. Wartracks are very mobile and can mount various different weapons — though autocannons are the most popular choice.
| Troop Type | Move | Saving Throw | CAF | Weapons | Range | Attack Dice | Roll to Hit | Target's Save Mod. | Notes |
|---|---|---|---|---|---|---|---|---|---|
| Wartrack | 30cm | 6+ | +1 | Autocannon | 50cm | 1 | 5+ | 0 |
Mekboy Lifta-Droppa Speedsta
The Lifta-Droppa is another Mekboy invention commonly fitted to Speedstas which utilises traktor beam technology. The device is rather large and ungainly — looking not unlike a crane, which is quite appropriate considering the way it works! When the Lifta-Droppa hits a target it latches a strong, narrow beam of traktor energy onto its victim. The Lifta-Droppa's boom-mounted projector begins to swing upwards, and the target is lifted into the air high above the battlefield. This experience is very disconcerting for the target but a great laugh for the Orks who chant 'Drop, Drop, Drop, Drop!' as the beam lifts the target higher and higher into the air, slowly at first but gaining height with each moment — until with a sadistic chuckle the Mekaniak switches off the beam and lets his victims plummet to their doom. Particularly adroit Meks favour jiggling the beam so that their victims land on top of their mates and turn them all into splutchy pancakes.
The Lifta Droppa has a range of 75cm and has to roll a 4, 5 or 6 on a D6 to hit its target. If the target is hit it has to make a saving throw with a -4 modifier. A failed save means it's been latched on to and is lifted high up into the air. The Ork player can designate where he wants to drop his victim within 6cm. Roll the scatter dice to see if the Mekboy manages to get his helpless victim on target — a 'hit' indicates he's bang on target, an arrow means the victim flies 2D6cm in the direction of the arrow before plummeting to the ground. The falling victim is automatically destroyed. A model struck by a falling model or troop stand is automatically destroyed unless its saving throw is better than the saving throw of whatever fell on it — so, for example, a troop stand landing on a super heavy tank won't do any damage, but a super heavy tank landing on a troop stand would rather messily squash it!
Titans and buildings are too big and heavy to be picked up by a Lifta Droppa but can be hit by falling models. Titans will lose a shield if struck by a falling model, or suffer a hit if they have no shields left. Roll for location as normal, the location hit will suffer damage unless its saving throw is better than the model hitting it. A building will only suffer damage if it is hit by something really big like a super heavy tank. If this happens make an unmodified saving throw for the building and if it fails it collapses into rubble.
| Troop Type | Move | Saving Throw | CAF | Weapons | Range | Attack Dice | Roll to Hit | Target's Save Mod. | Notes |
|---|---|---|---|---|---|---|---|---|---|
| Lift Droppa Speedsta | 20cm +2D6 | Special 1-3+ | +2 | Lifta Droppa | 75cm | 1 | 4+ | -4 |
Scorcher
The Scorcher is a heavily modified wartrack with an armoured turret and a fuel tank on a trailer. It takes its name from the scorcher fire thrower with which it is armed. The scorcher is a dangerous weapon which runs off the unstable compound that Orks use for fuel. The fuel is pumped from the trailer through the turret and out of a broad nozzle. A burner ignites the fuel as it passes through the nozzle and produces a sheet of flame. The burning fuel washes over and through cover, lapping through windows and doors or setting vegetation alight so that the cover provides no protection, making the scorcher particularly good against infantry.
| Troop Type | Move | Saving Throw | CAF | Weapons | Range | Attack Dice | Roll to Hit | Target's Save Mod. | Notes |
|---|---|---|---|---|---|---|---|---|---|
| Scorcher | 30cm | 6+ | +1 | Scorcher | 15cm | 1 | 4+ | 0 | Ignores to hit modifiers for cover |
Mekboy Dragster
Dragsters are stripped-down Speedstas that have had their weapons removed and replaced with a particularly sneaky device — the deflektor field. Most of the Dragster's hull is filled with thrumming capacitors and giant force field projectors which erect an invisible dome of force in a 6cm radius around the vehicle. The idea is that when anything shoots at the Dragster the deflektor field (hopefully) bounces the shot away in a random direction, sometimes even destroying the firer! Mekboy Dragsters always race to the areas of heaviest fighting and try to get really close to the enemy so they can laugh at them gawping with amazement as their shells and laser bolts bounce off the invisible dome of force.
Whenever the enemy shoots at and hits something inside or behind the deflektor field (including the Dragster itself) check to see if the shot is deflected by rolling the scatter dice. You can easily check whether a shot hits the field by placing the Gargant belly gun high-explosive template over the Dragster and drawing a straight line from the firer to the target, if the line crosses any part of the template roll to see if the shot is deflected.
If the scatter dice roll comes up as a hit the shot has penetrated the field, the intended target is hit and a saving throw is taken as normal. If an arrow is rolled the shot is deflected off in the direction shown and travels out to its remaining range — so if a weapon with a 50cm range was fired at the field from 30cm away and deflected it would travel 20cm in the direction rolled on the scatter dice. The first object in the path of the deflected shot is automatically hit unless it is also inside the field (ie within 6cm of the Dragster) in which case it is ignored — keep tracing the line of the shot until it strikes something outside the field or runs out of range. Barrage attacks which are deflected by the field don't tend to bounce so far because of their high trajectory, a barrage is deflected 4D6cm in the direction indicated. Units can fire out of the deflektor field and indirect barrages can be fired over it without problems but things trying to fire through the field always have a chance of being deflected. Unfortunately the deflektor field isn't big enough to cover Gargants or Titans so they gain no protection from it.
| Troop Type | Move | Saving Throw | CAF | Weapons | Range | Attack Dice | Roll to Hit | Target's Save Mod. | Notes |
|---|---|---|---|---|---|---|---|---|---|
| Mekboy Dragster | 35cm +2D6 | 3+ | +2 | Deflektor Shield | See above | See above | See above | See above |
Nobz Warbikes
The Nobz warbike is the ultimate in personal transport for Nobz who want fast personal mobility, with no waiting around for the rest of the Boyz. The bike is driven by one of the Boyz from the Nob's own household who can be trusted to pile on the speed and get where the action is fast! This leaves the Nob free for the real fun which (as everybody knows) is firing the biggest, loudest and most devastating weapon that he can carry.
It is particularly useful to have Nobz mounted on warbikes if the clan includes any vehicles like wartracks or buggies, as these can all too often disappear off into the middle of enemy lines never to be seen again if the Nobz can't keep up with them. You can make Nobz warbikes by sticking a banner pole onto an ordinary warbike stand or, if you are feeling more ambitious, by cutting the bases off some Nobz models and sticking them onto the back of a warbike. Bikes are mounted two to a 20mm base.
| Troop Type | Move | Saving Throw | CAF | Weapons | Range | Attack Dice | Roll to Hit | Target's Save Mod. | Notes |
|---|---|---|---|---|---|---|---|---|---|
| Nobz Warbike | 30cm | 6+ | +5 | Bolters | 25cm | 2 | 5+ | -2 | Command unit |
Evil Sunz Bowelburna
Bowelburnas are extra-fast battle buggies built by the Evil Sunz clan. They are lightly armoured but wickedly fast, reflecting the clan's complete fixation with speed. As their main armament Bowelburnas carry a scorcher, a weapon which fires a torrent of flame. The scorcher saturates the target area with burning fuel so it ignores cover, making it a particularly potent weapon against infantry in woods or buildings.
The Bowelburna's scorcher is fed from extra-large fuel tanks which are also connected to the engine. This means the Bowelburna can travel great distances without refuelling, making it good for long-range raids.
| Troop Type | Move | Saving Throw | CAF | Weapons | Range | Attack Dice | Roll to Hit | Target's Save Mod. | Notes |
|---|---|---|---|---|---|---|---|---|---|
| Bowelburna | 30cm | 5+ | +1 | Scorcher | 15cm | 1 | 4+ | 0 | Ignores to hit modifiers for cover. Evil Sunz only |
Evil Sunz Gobsmasha
The Gobsmasha is an Evil Sunz war buggy characterised by its blocky, armoured hull and four large metal wheels. The Gobsmasha benefits from having thicker, fully enclosed armour and a bigger gun than ordinary war buggies. Evil Sunz use Gobsmashas to teach their young and impetuous Wildboyz the benefits of Orkish kultur and the joys of driving around at high speed — the heavier armour comes in particularly handy when the Wildboyz keep crashing into things. In battle each Gobsmasha is crewed by two or three Wildboyz (who jump around and try to grab the steering wheel off each other) and a hoary old Ork veteran (who fires the gun and stops the young Orks doing anything too daft).
| Troop Type | Move | Saving Throw | CAF | Weapons | Range | Attack Dice | Roll to Hit | Target's Save Mod. | Notes |
|---|---|---|---|---|---|---|---|---|---|
| Gobsmasha | 25cm | 5+ | 0 | Autocannon | 50cm | 1 | 5+ | 0 | Evil Sunz only |
Evil Sunz Spleenrippa
Evil Sunz love Spleenrippas more than any other kind of battlewagon. They are very, very fast, and armed with the biggest, shootiest gun they can carry. Spleenrippas are typically characterised by the huge, gleaming exhausts jutting from their huge throbbing engines, extra fat wheels and sumptuous red flame-effect paint jobs. Evil Sunz Boyz will scrimp and save for years to buy a Spleenrippa — and the lucky Orks who've got one just grin broadly and roar into battle, leaving the envious Boyz to eat their dust.
| Troop Type | Move | Saving Throw | CAF | Weapons | Range | Attack Dice | Roll to Hit | Target's Save Mod. | Notes |
|---|---|---|---|---|---|---|---|---|---|
| Spleenrippa | 30cm | 5+ | 0 | Battlecannon | 75cm | 1 | 4+ | -2 | Evil Sunz only |
Mek Tinbotz
Some Mekboyz become fascinated by the intricacies of miniaturisation and robotics after hearing about or seeing Imperial robots in action. After some eksperimentin' they manage to copy and improve them — in a suitably Orky fashion of course! These Ork robots are called Tinbotz.
Tinbotz are very sturdily built and tend to be armed with a variety of different weapons: autocannon, heavy bolters, plasma guns, power claws and chainsaws are all very common choices. Instead of mucking about trying to get the robots to think for themselves, Mekboyz fit radio controls into the Tinbotz instead. In battle the Mekboy lurks around near his Tinbotz Mob and transmits commands to them using a special control box, giving them simple orders to move forward, turn, fire and so on.
Tinbotz Mobz are not subject the Ork command rule because they receive their instructions from the Mekboy who is doubtless concealed nearby them. However there are practical difficulties in issuing dozens of separate commands to the Tinbotz, made worse by the delay between the Tinbotz receiving their orders and executing them.
To represent these problems you have to place orders for Tinbotz at the end of the movement phase. On the first turn of the game place and reveal orders as normal. At the end of the movement phase place another order counter face down next to your Tinbotz Mob. These are the orders which you will use next turn. This means you will have to judge the situation carefully to predict what the best orders for next turn will be. You may choose any of the following orders.
Charge: The Tinbotz charge 20cm in a straight line towards the nearest enemy unit and must enter close combat if they can. Tinbotz may not fire when they are on Charge orders.
Advance: The Tinbotz advance 10cm in a straight line towards the nearest enemy unit and fire at them in the advance fire segment.
First Fire: The Tinbotz remain stationary and fire at the nearest enemy unit in the first fire segment.
Fall Back: The Tinbotz move between 10cm and 20cm directly away from the nearest enemy unit. The Tinbotz may not fire when they are on Fall Back orders.
| Troop Type | Move | Saving Throw | CAF | Weapons | Range | Attack Dice | Roll to Hit | Target's Save Mod. | Notes |
|---|---|---|---|---|---|---|---|---|---|
| Tinbot | 10cm | 4+ | +4 | Autocannon | 25cm | 2 | 4+ | 0 |
Mekboy Shokk Attack Gun
The Shokk Attack Gun is a marvellous Orky invention. Its exact workings remain a mystery even to the Mekboyz who build them, but it works none-the-less and in a particularly effective and spectacular manner. The whirling warp-spheres at the front spin round churning up the bit of space in front of the gun to create a sort of warp tunnel. The exit to the tunnel depends on where the Ork points the Shokk Attack Gun — it might be in the middle of an enemy unit, inside a tank, deep within a building, or even inside some unfortunate Terminator's armour!
You can't really be sure where the tunnel comes out until you send something down it, which is where the infamous Snotling Attack teams come in. Snotlings, the smallest and most docile of the Ork-Gretchin race, are specially trained to jump into dark holes in return for food. Their ultimate fate is to be sent enthusiastically into a warp tunnel generated by the Shokk Attack Gun, reappearing over or even inside the target.
Though Snotlings are not aggressive by nature, the journey through the warp tunnel turns them into gibbering maniacs. Half-mad with terror they suddenly appear at their target clawing and biting everything within reach, defecating uncontrollably, and screaming like frightened alley cats. This is quite disconcerting for the poor victim, especially if the deranged Snotlings suddenly appear inside an enclosed vehicle like a tank or (worst of all) down the left leg of your Terminator suit! A vehicle attacked in this way may be rendered useless while the crew disentangle themselves from frantic Snotlings, or the engines and weapons might be clogged by Snotlings caught up in the works. Exposed troops may be clawed to death, and a Terminator can suffer a terrible fate as several explosively flatulent creatures materialise inside his helmet.
The Shokk Attack Gun takes a while to generate its warp tunnel so it can only be fired if the stand has first fire orders. The weapon has an unlimited range and can be used against any target in sight. Nominate your target and roll the scatter dice and 2D6 to determine distance scattered just like a barrage.
If you roll a direct hit on the scatter dice and a double on the 2D6 then the Snotlings have not only landed on their target but many have materialised inside it as well. If this happens the target is destroyed automatically without an armour saving throw. Titans and other large fighting machines which use the Titan-style to hit diagrams and damage charts are hit once in a randomly determined location. Work out the effect by rolling on the appropriate damage chart as normal. Shields are bypassed automatically and no armour save is allowed for Titans which have been invaded by Snotlings in this way.
If you roll a direct hit on the scatter dice and any number other than a double on the 2D6 then you have hit the target area. Snotlings pop out of the air and surround the target, clinging to arms and legs, scratching, clawing and lashing out at everything close by. The number of Snotlings that make it through the warp tunnel is somewhat uncertain, and many of those who do are reduced to a helpless catatonic state. This means their effectiveness varies a great deal — from all out frenzied attack to mere inconvenience.
The effect of the attack is worked out as a round of close combat fought immediately against the target. The 2D6 roll already rolled stands for the Snotlings' close combat score. Because doubles count as immediate destruction as described above, this score varies from 3 to 11. The target makes its normal close combat roll (2D6 + its CAF). As with all close combat, void and power shields are ineffective and armour saving throws are ignored. If the target survives the Snotling attack it cannot shoot for the remainder of that combat phase and if engaged in close combat by other enemy it counts as having fought one round already. This means that any other close combat opponent rolls an extra D6 as described in the close combat rules. If attacked by more than one Shokk Attack Gun then each subsequent Snotling attack adds +1D6 exactly like any other close combat attack.
If you roll an arrow on the scatter dice the shot has scattered in the direction shown by the distance indicated by the 2D6 roll. The Snotlings will automatically materialise around the closest target within 5cm of the indicated point and attack it as described above. The new target may be friend or foe — the Snotlings are too terrified to tell the difference any more! If there are no potential targets within 5cm then the Snotlings have nothing to attack, and take the opportunity to scurry away, crawling off to hide under rocks or in the undergrowth.
Whatever the result, Snotlings only attack for one turn and then lapse into petrified silence, run off, hide, or otherwise make themselves scarce.
| Troop Type | Move | Saving Throw | CAF | Weapons | Range | Attack Dice | Roll to Hit | Target's Save Mod. | Notes |
|---|---|---|---|---|---|---|---|---|---|
| Shokk Attack Gun | 10cm | None | 0 | Shokk Attack Gun | Special Rules |
Mekboy Pulsa Rokkit
The Pulsa Rokkit is really a special force field generator which is launched into the midst of the enemy on a giant rokkit packed with a special solid fuel collected from the drops. The gigantic rokkits are usually launched from big tracked carrier vehicles, with each carrier mounting one rokkit. When the rokkit is launched it soars skyward with a great rush of flames and sparks, majestically arcing hundreds of feet up before plummeting earthward to bury its reinforced nose into the ground. Once the rokkit has come to earth the Pulsa force field sends out powerful bursts of energy, like the ripples made by a stone when it is thrown into a pool.
Anything near the rokkit when it activates will catch the full force of the expanding field with vehicles being flipped over, men being tossed up into the air, buildings crumbling and trees snapping like matchsticks as the field passes over them. The generator continues to release energy at irregular intervals until the generator burns out or blows up. Because the pulsa generator keeps battering its targets with successive waves of force it is particularly good at smashing down immobile targets like buildings and fortifications, or breaking up slow-moving enemy formations.
Unfortunately, the rokkit itself is a little inaccurate, not to say completely unpredictable. Though at first great efforts were made to teach Gretchin to fly the rokkits very few candidates proved up to the job. Meks tried to conserve the few plucky fellows that did volunteer by giving them parachutes or rokkit packs so they could jump out, but there were still a lot of casualties. Nowadays Mekboyz point the rokkit in the right direction and hope for the best. Still, this doesn't seem to worry them much and just adds to the excitement.
Pulsa rokkits can only be fired if the launchers are on first fire orders. Each battery of Pulsa rokkits can only fire one rokkit per turn as the Mekboy commanding the battery has to personally oversee the preparations for launch — bashing fins into the right shape with a hammer, filling the burner with fuel and so on. The rokkit can only fire straight ahead and you should take the opportunity to align it in the direction you want to fire during the movement phase.
When the Rokkit is fired the player decides how much fuel he is putting in the rokkit by nominating a number between 1 and 20 — 1 is very little fuel and 20 is a full load. To see how far the rokkit travels the player rolls the nominated number of D6s, adds up the total and adds it to the rokkit's basic range of 50cm. The rokkit always travels at least 50cm so it has a range of between 51cm and 170cm, depending on how many dice you decide to roll. For example if you nominated 10 for your fuel the Pulsa rokkit would travel 50+10D6cm (on average rolls 85cm) before landing. Once you know where the rokkit lands roll for scatter in the same way as for an indirect barrage — it's quite likely that the rokkit will start corkscrewing off-course while it's in flight.
The unusual thing about a Pulsa field is that it uses two different templates. It starts off the size of a normal barrage template and then as the field expands to its full size the normal barrage template is replaced with a special 12cm template. When you've worked out where the rokkit lands place the smaller template at that point.
The Pulsa rokkit starts to pulse out waves of force immediately so roll a D6 for each rokkit as it lands and look up the effect on the table below — the higher the roll the more ripples of energy the Pulsa field creates. Unless a 1 or a 6 is rolled the pulsa generator will keep working so the template is left in position on the tabletop. Titans are the only models that can move through a Pulsa template, and even they count it as difficult ground. Troops and vehicles can't see through a Pulsa template unless they occupy an elevated position and see over it, if they are in buildings or on a hill, for instance. Skimmers and Titans can always see over a Pulsa template.
After the rokkit has landed and the generator has warmed up properly the pulses of force start to cover a wider area. At the start of the next combat phase place the special 12cm diameter Pulsa Rokkit template at the landing point. Roll a D6 on the Pulsa Rokkit Table and apply the effects to anything under the template. Again, unless you roll a 1 or a 6 the template stays in place and you roll for it on the Pulsa Rokkit Table again at the start of next turn's combat phase.
Pulsa Rokkit Table
| D6 | Effect |
|---|---|
| 6 | Ka-boom! The pulsa generator crackles and sparks in a very spectacular fashion, throwing out massive force waves as it runs wild and explodes. Everything under the template is destroyed except for Titans or Gargants which suffer six hits with a -2 saving throw modifier. Anything within 6cm of the edge of the template suffers one hit with a -2 saving throw modifier on a roll of 3, 4, 5 or 6 on a D6. After you have worked out the results remove the Pulsa template. |
| 2-5 | Hummmmmm. Shock waves radiate from the pulsa field generator. Any troop stands under the template are destroyed on a 4, 5 or 6 on a D6. Vehicles, Titans and buildings under the template suffer a number of hits with a -2 saving throw modifier equal to the number rolled on the dice. Any surviving troop stands and vehicles are pushed out to the edge of the template and may not fire this turn. Leave the Pulsa template in position and roll again for its effect at the start of the next combat phase. |
| 1 | Phut! With a feeble spit of flame and a thin trail of smoke the Pulsa field generator unleashes a single ripple of force before giving up the ghost. Work out the results as for 2-5 above and then remove the Pulsa template. |
| Troop Type | Move | Saving Throw | CAF | Weapons | Range | Attack Dice | Roll to Hit | Target's Save Mod. | Notes |
|---|---|---|---|---|---|---|---|---|---|
| Rokkit Crawler | 5cm | 4+ | 0 | Pulsa Rokkit | 50cm+?D6 | See above | One shot |
Squig Katapult
Squig katapults lob large pots full of carnivorous buzzer squigs into the midst of the enemy. The pots crack open when they land and swarms of the enraged squigs pour out to attack anything nearby. Buzzer squigs are voracious insect-like creatures which are capable of stripping the flesh off a man-sized creature in seconds.
The actual katapults are constructed by Mekboyz and Runtherdz working together, building them out of wrecked vehicles with some kind of tracked tank like a Lungbursta supplying the chassis that the katapult is built onto. The katapult itself consists of two towers which house the winding mechanism and a long thrower-arm ending in a cup which holds the squig pots. Squig katapults are particularly popular with the Snakebites both because their clans have a lot of Runtherdz and because good, simple weapons such as katapults appeal to their traditional ways.
Squig katapults fire barrages but unlike most barrage weapons they can't fire at targets which they can't see. Take a special Buzzer Squig template for each katapult in the squadron which is firing and place it over an enemy model in sight and in range. Squig katapults are fairly inaccurate so roll the scatter dice and if you roll an arrow move the template 2D6cm in the direction it points in. Anything under a Buzzer Squig template is attacked by the hungry squigs and hit automatically, regardless of cover. Buzzer squigs don't like the taste of Orks and Gretchin so they are completely safe from their attentions. Other vehicles and troop stands attacked by a swarm of Buzzer squigs need to make a saving throw to survive, but because the squigs can't bore through armour very easily the save is made with a +1 modifier. This means that even units that normally don't have a saving throw (like troop stands) will get a saving throw of 6+, and some well-armoured tanks will make their saving throw automatically.
After they've attacked the Buzzer squigs burrow into the ground and the template is removed. If the squigs cause any casualties they may go into a feeding frenzy and continue to swarm. Roll a D6 and on a 6 the Buzzer squigs are still hungry and the swarm moves 2D6cm in a direction determined by rolling the scatter dice, causing casualties on any troop stands or vehicles it moves over. After they've moved the swarm will burrow into the ground so the template is removed.
| Troop Type | Move | Saving Throw | CAF | Weapons | Range | Attack Dice | Roll to Hit | Target's Save Mod. | Notes |
|---|---|---|---|---|---|---|---|---|---|
| Squig Katapult | 15cm | 3+ | +1 | Buzz Squig swarm | 50cm | See above | +1 | Swarm may move | |
| Squig Katapult | 15cm | 3+ | +1 | Tower Guns | 25cm | 2 | 5+ | 0 |
Traktor Kannon
Ork Mekboyz have an intuitive grasp of force field technology, and use it more effectively than any other race. They build all sorts of large force fields and tractor beams, which they use in all kinds of ways as weapons and protective shields. The most important use of this technology is in space where an airtight bubble is used to seal spacecraft and make them habitable — Ork spacecraft don't need airtight hulls as such!
The Traktor Kannon is a typically orky device, and the most common of the many Ork field-technology weapons. It is sometimes fitted into turrets and carried by tanks or Gargants, but it is more usually fitted onto its own mobile carriage. The Traktor Kannon projects a tight pulse of traktor energy that pins the target down to the ground, effectively immobilising it. The target cannot move or shoot, and sometimes the downwards pressure of the traktor beam is so great that the victim is actually squashed.
The following special rules govern the Traktor Kannon's use on the gaming table. Roll to hit your chosen target as with any other weapon — a basic hit roll of 5 or more is required. If the target is hit, take the saving throw as normal, with the -1 modifier indicated. If the save is passed the target is unaffected. If the target fails its save it may be immobilised in which case it cannot move, shoot, or do anything else in its following turn, or squashed in which case it is destroyed.
Roll a D6 to determine the result and add +1 if the target has no basic saving throw (ie, most infantry have no save and are more likely to be squashed).
| D6 Roll | Effect |
|---|---|
| 1-5 | IMMOBILISED. May do nothing next turn |
| 6+ | SQUASHED. Destroyed |
A Titan's shields cannot protect it from a traktor beam but it always counts its highest saving throw from all its areas, which means it is very hard to hit effectively.
Immobilised models can do nothing. If they are command units they cannot give orders, and in all respects they are 'out of it' while they are immobilised. Any psychic powers and bonuses the immobilised model normally confers are negated. Titans which have been immobilised can continue to use their shields but are otherwise incapable of doing anything. They cannot repair shields or damage for example. Models which are immobilised do not have to stay in formation, but they must join their unit as soon as possible once the effects of the Traktor Kannon have worn off.
| Troop Type | Move | Saving Throw | CAF | Weapons | Range | Attack Dice | Roll to Hit | Target's Save Mod. | Notes |
|---|---|---|---|---|---|---|---|---|---|
| Traktor Kannon | 15cm | None | 0 | Traktor Kannon | 50cm | 1 | 5+ | -1 |
Ork Dreadnoughts
Orks know a good idea when they see one and the sight and sound of Space Marine Dreadnoughts striding across the battlefield with guns blazing created a lasting impression on the Ork mind. Inspired by the success of Space Marine Dreadnoughts, Ork Mekboyz set to work making their own. Though the Orks have captured the resemblance of the human Dreadnoughts, the mechanics of their machines are typically Orky.
The Ork Dreadnought is piloted by a Gretchin which has been surgically implanted into the machine by the combined efforts of a Painboy and Mekboy. Ork and Gretchin bodies are fortunately very resilient so the Gretchin usually survives the operation and wakes up to find himself with a huge metal body that's even more Orky than Orks! This is very cheering to the Gretchin who has suffered years of being beaten around the head by his superiors. Not surprisingly his new-found power tends to go to his head, so Ork Dreadnoughts are often very hard to control.
Dreadnoughts are mobile troops and move through terrain like infantry stands. See the Terrain Chart in the Space Marine rules summary sheet for details.
Unfortunately, Ork Dreadnoughts don't always do what they're told. The Gretchin inside often gets carried away with excitement or goes crazy with power, sometimes even to the extent of bossing the Orks about. To represent this, Ork Dreadnoughts are subject to the normal Ork command rule which says they have to remain within 10cm of a command unit in order to receive orders. If they receive no orders then they behave erratically. Roll a D6 for the Dreadnought unit in the orders phase: on a 1-2 it has first fire orders, on a 3-4 it has advance orders, and on a 5-6 it has charge orders.
| Troop Type | Move | Saving Throw | CAF | Weapons | Range | Attack Dice | Roll to Hit | Target's Save Mod. | Notes |
|---|---|---|---|---|---|---|---|---|---|
| Ork Dreadnought | 10cm | 6+ | +3 | Autocannon | 50cm | 2 | 5+ | 0 |
Stompers
When the Orks are in the throes of a mighty Waa-Ork all the Mekboyz band together and work like crazy to build Gargants. Some Mekboyz manage to construct huge Great Gargants, others proudly build the smaller Slasher Gargant, but many can't find the labour or materials for such large projects and have to be content with a Stomper. Stompers don't really count as Gargants because they're too small, but they embody all the virtues of a Great Gargant in miniature. Whereas a Gargant's crew might number several dozen Orks and Gretchin (plus innumerable Snotlings) a Stomper has a small crew consisting of a few brave Orks and enthusiastic Gretchin.
Because of their small size Stompers are more like vehicles than Titans, and the game rules for them reflect this. They are treated as vehicles for purposes of travelling over different sorts of terrain and they have vehicle type game data rather than Titan data sheets.
Stompers operate in Stomper Mobs and usually accompany a Warboss — one who hasn't quite managed to get his Mekboyz to build bigger Gargants. Sometimes Stompers will be built in addition to Gargants, and the lucky Warboss can include both types in his Waa-Ork. As Stomper Mobs embody the spirit of the Waa-Ork, they do not have to take morale checks and cannot be routed.
| Troop Type | Move | Saving Throw | CAF | Weapons | Range | Attack Dice | Roll to Hit | Target's Save Mod. | Notes |
|---|---|---|---|---|---|---|---|---|---|
| Ork Stomper | 10cm | 1+ | +8 | Battlecannon | 50cm | 1 | 3+ | -4 | Stomper Mobs ignore morale checks |
| Ork Stomper | 10cm | 1+ | +8 | Bolters | 15cm | 4 | 6+ | 0 | Stomper Mobs ignore morale checks |
Snakebite Squiggoth
The Snakebite clan are the most wild and primitive of the Ork clans, with many Runtherdz and Painboyz but only a few Mekboyz. When the Waa-Ork takes a grip on a Snakebite clan the Mekboyz are all too busy building Gargants to build many battle fortresses and big tanks so the Runtherdz and Painboyz get together and start breeding really huge, mammoth-sized squigs called Squiggoths.
Squiggoths don't normally grow much bigger than a bull, but with the right fungus nutrients and tender loving care they can reach house-sized or even bigger! The Runtherd's Gretchin and Snotlings are sent scurrying out to scavenge whatever metal they can find and they build huge, ramshackle towers which are mounted on the Squiggoth's back. Because battlecannon are also hard to come by, old swivel guns and bombards are dragged out of storage and mounted in the towers. These old guns also have the added advantage that the Snots and Grots can be trusted to load them without getting stuck in the worky bitz because they don't have any worky bitz!
When the Snakebite clans march off to war they are accompanied by the trumpeting calls and the thunderous tread of the mighty Squiggoths. In battle the Runtherdz and Painboyz proudly sit high up in the swaying metal towers and bellow at the scurrying Snots and Grots to load and fire the guns, wincing as the odd Snotling loses its grip and plummets out of the tower. Squiggoths mount plenty of guns so their firepower is impressive if rather old-fashioned (Snakebites consider this a positive advantage of course).
Squiggoths are deadly in close combat, trampling foot troops and goring tanks with their huge tusks. They are also hard to kill, as their thick hide, awesome constitution and dull nervous system shields them from all but the most hideous wounds. The problem with Squiggoths is that when they finally realise that they are hurt or, indeed, dead they tend to panic and rampage around madly until they finally keel over — which can be more than a little dangerous for any troops who happen to be in the way.
When a Squiggoth is hit and fails its saving throw, roll the scatter dice. If you roll a 'HIT' the Squiggoth folds up neatly on the spot and can be removed immediately. If you roll an arrow it means the Squiggoth hasn't died yet and rampages 2D6cm in the direction indicated by the arrow before it finally expires and is removed. Any troops run over by a rampaging Squiggoth are hit on a D6 roll of 4, 5 or 6 and must make an unmodified saving throw to survive.
| Troop Type | Move | Saving Throw | CAF | Weapons | Range | Attack Dice | Roll to Hit | Target's Save Mod. | Notes |
|---|---|---|---|---|---|---|---|---|---|
| Squiggoth | 10cm | 3+ | +5 | Bombards | 50cm | 2 | 4+ | 0 | Rampages 2D6cm when dead |
| Squiggoth | 10cm | 3+ | +5 | Swivel Guns | 25cm | 3 | 5+ | 0 | Rampages 2D6cm when dead |
Hop Splat Gun
The Hop Splat gun is an ingenious artillery piece which fires a special hop-splat shell, named after the irregular way it hops across the battlefield. This shell consists of a rocket attached to a length of chain terminating in a heavy metal ball. Once the rocket shell has been fired the ball and chain becomes a whirling menace to anything in its path. When the shell hits the ground the ball is catapulted in a new direction, pulling the rocket free and sending the shell whirling off again. When a battery of Hop Splats is fired the air is filled with scything chains and whipping balls jumping erratically across the battlefield, and a lucky salvo can wipe out units of men and machines in moments.
Hop Splat guns are crewed by Gretchin and Snotlings but each battery includes several Ork Runtherdz who shout at the Snots and Grots to stop them slacking. Because of the presence of the Runtherdz a Hop Splat battery will always fire even if it doesn't have any orders. If there are no Ork command units within 10cm in the orders phase a Hop Splat battery will automatically have first fire orders. In the first fire segment of the combat phase the Hop Splats will fire at the nearest enemy unit in sight. If there is a command unit within 10cm you can pick their target as usual but otherwise the Runtherdz will just pick the nearest enemy unit they can see. Given the unpredictable nature of the hop-splat shells this can be rather dangerous to the Orks — as well as to their foes!
Hop Splat guns fire barrages but unlike most barrage weapons they can't fire at targets which they can't see. Take the barrage template and place it over an enemy model in sight and in range, roll to hit any targets under the template as for a normal barrage. Any hits scored have a -1 saving throw modifier. Now roll the scatter dice and place a second barrage template 3D6cm away in the direction indicated by the arrow. Roll to hit any new targets under the second template. Then roll again and place a third template 3D6cm away from the second template, roll to hit any new targets as above. The Hop Splat battery always shoots three barrages — in reality one barrage that hops from place to place, regardless of how many Hop Splat guns there are in the battery.
Hop Splat guns cannot move and shoot so they can only have first fire orders (in which case they can fire in the first fire segment of the combat phase but cannot move) or charge orders (in which case they can move up to 10cm but cannot shoot). There is no point in giving a Hop Splat battery advance orders.
There is no point in giving a Hop Splat battery advance orders. Hop Splat guns are commonly towed into battle by wartracks or war buggies. A wartrack or war buggy can move normally while towing a Hop Splat gun and the gun can be unlimbered at any point in the vehicle's move. Because Hop Splats can't move and shoot, a battery which has unlimbered in the movement phase can't fire in the combat phase. A Hop Splat gun can limber up again as soon as a war buggy or wartrack is moved so that the models are touching in the movement phase. The vehicle can then complete its movement towing the Hop Splat gun. A Hop Splat battery can either unlimber or limber up in one turn — it can't do both.
| Troop Type | Move | Saving Throw | CAF | Weapons | Range | Attack Dice | Roll to Hit | Target's Save Mod. | Notes |
|---|---|---|---|---|---|---|---|---|---|
| Hop Splat Gun | 10cm on charge | None | -3 | Hop-splat | 50cm | 1 barrage point | -1 | 3 Barrages |
Gargants
At the heart of the Ork expansion throughout the universe is a phenomena known as the Waa-Ork. The Waa-Ork is a spontaneous happening which starts suddenly in obscurity and then gradually gathers momentum. More and more Ork tribes become part of the gathering strength of the Waa-Ork as the whole of Orkdom becomes agitated, disturbed and dynamic. Waa-Ork is a time of resurgence of Orkdom into the universe, a time of great migrations, wars and conquest. Orks everywhere take to the warpath and the relentless power of Ork civilisation is unleashed.
At the very core of the Waa-Ork lies the construction of the gigantic Titans known as Gargants. Each Gargant is a towering war machine with awesome destructive power. It is also a titanic, mechanical, fighting, fire-belching idol made in the image of the Ork gods. Building Gargants is an act of worship for the Orks. Gork and Mork, the Ork gods of war, epitomise the Orkish character on a vast scale. They are big, carefree, boisterous beings that leave a trail of destruction in their wake. War, conquest, migration, endless feuds, the din of weapons and the war cries of countless Orks are but the crude games and raucous laughter of these strong, carefree gods.
Gargants are miracles of mechanical ingenuity, packed with whirring cogs and gears, wheezing pipes and pistons, dials, levers, stopcocks, gauges and no end of other mechanical devices that seem to work purely through the faith of their Mekboy inventors. Gargants carry awesome firepower — heavy cannon and giant flamethrowers mounted in turrets on the Gargant's shoulders and often more guns are carried on the head as well. Mounted low down in the Gargant's belly is the Gutbuster mega-cannon, a gigantic weapon of massive destructive power. Gargants are protected by banks of thrumming power field generators and thick armour. Their armoured hull is made out of all kinds of different metal and bits of armour plate scavenged from wrecked vehicles and welded or hammered into place.
A vast krew of Orks, Gretchin and Snotlings ride into battle aboard each Gargant. The Orks fire the guns and stoke the boilers under the stern eye of the Gargant Kaptin and his Nobz. Teams of Snotlings and Gretchin 'riggers' armed with spanners and oily rags are sent frantically crawling into the cramped workings to fix bits and fight fires as the Gargant suffers battle damage. Though no two Gargants are identical Ork Mekboyz commonly build one of two distinct sorts of Gargant: the short, fast Slasher Gargant and the larger, more heavily-armed Great Gargant.
An individual Slasher Gargant or Great Gargant can be bought as the special card for any Ork clan. The immensely proud Warboss of that particular clan will be the Gargant's Kaptin and some of his Nobz will take up the posts of Furst Mate (who shouts at the krew), Gunboss (who shouts at the gunners), and Flagboss (who's in charge of the signal flags Gargants use in battle — as well as shouting of course!).
The talented Mekboy who built the Gargant is rewarded with the post of Boss-Mek and gets to order around all the other Mekboyz onboard and shout at the riggers. These individuals all work together surprisingly smoothly to keep the Gargant stomping around and blasting away at the enemy. Because a Warboss is in command of the Gargant it can always be given orders even if there aren't any Nobz within 10cm of it. Any Orks within 10cm of a Gargant can be given orders by the Warboss.
Gargant Big Mobs
In the build-up to the Waa-Ork the Ork tribes are driven by the urge to build the idol-like Gargants in praise of their savage gods. Most Warbosses manage to get one or two Gargants built by industrious Mekboyz. Some of the powerful Ork Warlords can command enough resources to build many. Sometimes Ork Warbosses will join their tribes together to form an even more potent Waa-Ork. So it comes about that an Ork horde may be lucky enough to be led to war by a Gargant Big Mob.
Gargant Big Mobs usually comprise three Gargants, either all one type or a mixture. One Gargant is a frighteningly destructive creation, three is enough to send all but the bravest troops fleeing for cover. The massed firepower of a Gargant Big Mob has spelled the doom of many a battleforce under a thundering barrage of smoke and flame.
The biggest Gargant in the mob is commanded by the Warlord and is known as the Boss-Gargant. Other Gargants are both commanded by the Warlord's most trusted Nobz. In battle all the Gargants in a Big Mob have to stick close together so the Nobz can see the signal flags being waved about on top of the Boss Gargant. These tell them what their orders are and where they're supposed to be going. Because of this the Gargants in a Big Mob have to be within 20cm of the Boss Gargant and able to see it in the orders phase to be given any orders.
If one of the Gargants is too far away or can't see the Boss Gargant, the Nob in command has to guess what he's supposed to do. Roll a D6, and on a roll of 1 or 2 he picks first fire orders, on a 3 or 4 he picks advance orders and on a 5 or 6 he picks charge orders. Naturally Nobz in command of Gargants consider themselves well above the rest of the Nobz so having a Nobz stand within 10cm doesn't allow you to give them an order like most Orks — they'll take orders from the Boss Gargant and nobody else.
Note that the Boss Gargant is not a command unit, it must be given orders like any other unit. It can be singled out by the enemy and shot at — the banners, trophy poles and graffiti which festoon the Boss Gargant make it unmistakable! If the Boss Gargant is destroyed all the Gargants in the Big Mob will have to roll for their orders on the next turn. At the end of the turn the next biggest Gargant will take over as Boss.
Gargant Datacards
Datacards are supplied for both the Slasher and Great Gargant. You should photocopy one of these for each Gargant in your army and fill it out as a permanent record of that particular Gargant. Note down the weapons fitted to the Gargant in the spaces provided along with their attack dice, to hit rolls and so on. You can also use the data card to keep a note of how many Titans the Gargant has killed and how many battles it's fought in.
Power Fields
Gargants are protected by banks of power field generators. These project layers of invisible force around the Gargant which absorb the energy of shots which hit them. The Gargant has lots of power fields arranged one under the other like the layers of an onion. When each power field absorbs a hit it is knocked down but the hit does no further damage.
Unlike void shields power fields can't be repaired because the generators burn out when the field collapses. Gargant power fields are often unstable and flicker on and off unpredictably with accompanying showers of sparks.
It's not unknown for shots to penetrate a Gargant's shields through weak points, particularly if the Gargant is under heavy fire at the time. To represent this roll a D6 for each shot that hits a Gargant which still has its shields up. On a 1-5 the shot hits the shields and one power field collapses as usual, on a 6 the shot penetrates the shields without knocking down any power fields, work out hit location, saving throws and damage as normal.
When Gargants go into battle they often have less than their full complement of shields. This might be because some of the generators have broken down and burnt out before the Gargant got to the battle or because the Mekboyz haven't got round to fixing them after the last one. You'll need to roll dice to find out how many power fields each Gargant has before the start of the game. Roll a D3 (a D6 roll halved rounding up) and add 3 to the result for a Slasher Gargant. This means Slasher Gargants will have between 4 and 6 power fields.
Great Gargants have many more banks of generators so they get a D6 plus 6, giving them between 7 and 12 power fields. Keep a note of how many power fields each Gargant has remaining on its datacard. The Mekboyz always repair the power fields on the Warlord's Boss Gargant first (if they know what's good for them) so the Boss Gargant always has the maximum number of shields at the start of a game.
Battle Damage
Gargants are big and very solidly built so they can take a lot of punishment before they're destroyed. It's unlikely that a Gargant will be destroyed by a single hit, rather accumulated damage from numerous hits will gradually blow pieces off the machine until it is totally crippled. However, unlike Eldar and Imperial Titans, Gargants lack sophisticated auto-repair systems so they can't fix damage until after the battle.
As more and more shots slam into a Gargant its plates start to buckle and cracks twist open the innards of the great metal monster. To represent the accumulated wear and tear a Gargant suffers from a sustained pounding a number of damage results add bonuses to future rolls against a particular location, increasing the chances of catastrophic damage if the area is struck again. For example, on the Weapon Damage Table a roll of 3 or more will destroy the weapon but a 1 or 2 gives a result of "Add +1 to any future damage rolls against this location". This means that if you hit the same weapon again and it fails its saving throw you add one to your damage roll, so this time the weapon will be destroyed on a roll of 2 or more.
It is important to keep a note of what areas have been damaged on a Gargant. The easiest way to do this is by marking the areas hit on the datacard in pencil or using counters. Unlike weapon locations, damage bonuses accumulated against a Gargant's hull affect the whole hull and not just the particular square hit.
Fires
Lacking a dangerous plasma reactor to meltdown or vulnerable legs to cripple, a Gargant can survive almost any amount of punishment without being destroyed. When a Gargant finally blows it's almost always because fires have caught a hold throughout its gigantic structure and blazed out of control.
Some damage results will cause fires to break out. Teams of Gretchin and Snotlings dash through the Gargant and try to douse down fires before they become too fierce. Unfortunately damaged areas can catch fire all too easily as explosions ignite ammunition or fuel and the fire fighters can find themselves fighting a losing battle.
Keep track of the number of fires burning on a Gargant on its datacard. In the end phase of each turn every Gargant which has any fires burning on it has to make a roll on the fire table, adding +1 to the dice for every fire burning in excess of one. Some particularly dangerous hits can send flames shooting through the Gargant and cause an immediate roll on the Fire Table. Because of their greater size and bigger krew Great Gargants can survive a number of fires burning simultaneously, Slasher Gargants on the other hand are far more likely to be destroyed by just one or two fires.
The Fire Table, Weapon Damage Table and Force Field Damage Table referred to in these rules are printed on the Gargant datacards rather than in this book.
Gargant Fire Arcs
Because Gargant weapons are mounted rather differently to those on Imperial or Eldar Titans they have different fire arcs, as shown on the diagram below. The belly mount has a 90° arc of fire forward, the left and right arms have a 180° field of fire to the left and right respectively. If the Gargant has a turret on its head it has a 360° field of fire.
[Diagram: "90° FIRE ARC — BELLY GUN" (forward); "180° FIRE ARC" (left and right); "360° FIRE ARC" (head turret).]
Gargant Weapons
Battle Cannon Head. Many Great Gargants carry a heavy, quick-fire battle cannon mounted in their heads. Adding a gun to the Gargant's head means that fewer armour plates can be fitted, and those that are used are thinner. Because of this the saving throw for a battle cannon head is 1 point lower than that shown on the hit location template on the Gargant data sheet. The cannon head has two attack dice, a range of 75cm and needs 4+ to hit at -2 save.
Battle Cannon Turret. Battle cannon turrets can be mounted on the upper shoulders of Great Gargants. They are a popular choice with Ork krews for their long range and the loud explosions they make when they hit. The battle cannon turret has a range of 75cm and needs a 4+ to hit and a -2 save.
Cluster Buster. The Cluster Buster is mounted on Slasher Gargants. It consists of a long armour-busting gun surrounded by several smaller rapid-fire cluster guns. When the main gun is fired the cluster guns fire a tight barrage of shots into the same area, which is particularly useful for scoring multiple hits on a large target like a Titan or for breaking up mixed groups of vehicles and supporting infantry. The buster gun has a range of 75cm, one attack dice and needs a 4+ to hit, saves are at -2. Regardless of whether the buster gun hits or not place a barrage template centred over the target and roll for hits from the cluster guns against any other targets even partially under the template. The cluster guns hit on a 5+ with a -1 saving throw modifier. If the target completely fills the barrage template (like a Titan) roll six attack dice for the shots from the cluster guns.
Deth Kanon. Deth Kanon are built onto Slasher Gargants to deal with big, heavily armoured targets like Titans and super heavy tanks. The Deth Kanon fires a suitably super heavy shell for this task, easily capable of smashing through the thickest armour. Deth Kanon have a range of 100cm and roll one attack dice needing a 3+ to hit with a -3 saving throw modifier. The shells from a Deth Kanon are fitted with a special fuse so that they explode inside their targets. This means any damage rolls against a Titan add +2 to the dice.
Gatling Cannon. The gatling cannon is a rapid-fire multi-barrelled cannon commonly mounted on the lower arm mount of Great Gargants. With a range of 50cm and 8 attack dice gatling cannon are ideal for strafing enemy infantry and vehicles with a hail of fire. A 5+ is required to hit, and saves are at -1. Because of the huge amounts of ammunition used by the gatling cannon, no more than one of these weapons may be mounted on a Gargant at once.
Gork & Mork Heads. Gargants are gigantic representations of Gork and Mork, the two great Gods of the Orks, so it is quite common for them to have specially-made heads to make them look more life-like. Gork and Mork heads emphasise the idol-like nature of an Ork Gargant. If they are fitted, then any Orks within 25cm of the Gargant may ignore morale tests — no test is required for the unit. Unfortunately if the Gargant has its head blown off it's very demoralizing for any Orks nearby to see their idol's head flying through the air so all Ork units within 25cm have to take an immediate morale check. Gork heads mounted on Great Gargants include an observation platform; Mork heads on Great Gargants mount a scorcher turret on top of the head.
Gutbuster Mega-Cannon. The Gutbuster is a huge cannon which protrudes from the Gargant's belly. The weapon can fire an array of ammunition. At the start of the game the Gutbuster is loaded with one shot of the player's choice. After firing it takes a full turn to reload, and so the Gutbuster may not be fired in the next combat phase.
Ball-rounds are like immense cannonballs, and a special 3cm template is supplied for them. Place the template over your target and then roll for scatter as you would for a barrage. Anything under the template is hit and makes a saving throw with a -4 modifier. The ball will then roll another 4D6cm in a straight line along the line of fire. A template which represents the rolling ball is also supplied. Place the template so that its cupped end is around the ball and align it so that it is pointing directly away from the Gargant, then roll the dice to see how far along the template the ball rolls. Anything the ball rolls over is automatically hit and must make a save with a -4 modifier, including any buildings. The ball will plough through any operating shields on a Titan that it hits, knocking them all down one after the other. Should it hit the leg of a Titan model the save is taken with a -4 save modifier.
Chainshot consists of two or more medium sized projectiles linked together by heavy chains, which spread out and spin like bolas when they are fired. It is only used for entangling the legs of Imperial and Eldar Titans, and causes no damage to any other type of target! It will only work against Imperial Titans if they have no operating void shields at the time that it hits. When chainshot scores a hit against an eligible target it automatically causes damage to the target's legs. No hit location or saving rolls are needed, simply roll on the Leg Damage Table, adding +3 to the dice roll. For obvious reasons there must be a clear line of fire from the Gutbuster itself to the target's legs, any intervening terrain will block the shot.
High Explosive rounds are huge cannon shells packed with hundreds of pounds of explosive. They have a special 12cm diameter of effect, fully twice as large as a normal barrage attack! High Explosive is very effective against infantry and light vehicles, but not against armoured targets, so there is a +1 save. The +1 save modifier means that the opposing player can add +1 to the dice when he makes his armour saves.
Observation Turret. The observation turret is packed with all sorts of ranging equipment and has speaking tubes connected directly to the gunners. This enables the Gargant to add +1 to all to hit rolls against one target each turn. This bonus only applies to weapons fired at that target by the Gargant.
Ripper Fist. The ripper fist is a motorised saw blade capable of ripping apart the toughest close combat opponent. Gargants which carry a ripper fist roll an extra D6 to resolve combat, add +2 to damage rolls against enemy Titans, and any building hit is destroyed unless it makes its saving throw. There is a huge cannon mounted on each side of the saw blade, so the ripper can be used to make ranged attacks as well. However, the weapon can't be used to make ranged attacks and close combat attacks in the same turn.
Scorcher Turret. The scorcher turret fires a long gout of flame. It has a range of 35cm, 2 attack dice, and hits on a 3+. The scorcher is especially good at winkling out infantry that are in cover. To represent this ignore any modifiers for cover that would normally apply to the to hit roll.
Slasha Attack Gun. The Slasha attack gun only fits onto the Slasher Gargant. It has a high rate of fire and shoots hefty explosive shells. The gun has a range of 50cm, 5 attack dice, hits on a 4+ and saves are at -2. Like the gatling cannon, the Slasha attack gun needs huge amounts of ammunition, so only one can be mounted on a Gargant.
Snapper. The Snapper is a ferocious mechanical jaw powered by a reinforced boiler in the Gargant's belly. When it opens a high-pressure steam pipe spouts boiling fluid and masses of super heated steam. In close combat the Snapper is able to pull - or rather bite! - pieces off enemy Titans.
If the Gargant wins a close combat against a Titan it can choose to bite a location with the Snapper and try to tear it off. Both players roll a D6 and the attacking Gargant adds +2 to the result. If the Gargant wins the enemy Titan takes maximum damage to the nominated location. If the scores are equal roll for damage as normal. If the Titan wins it slips away without suffering appreciable damage. The Snapper can also be used to attack buildings, which are hit automatically and must make a saving throw at -4 modifier or collapse.
The extra pressure supplied by the Snapper's boiler means that any Gargant armed with a Snapper moves faster than normal. It can add 1D6 cm to its move on advance orders and 3D6 to its move on charge orders. Roll for the extra distance each time the Gargant moves.
The Snapper can also fire a blast of super-heated steam, for which the template is a triangle 15cm long and 15cm wide at the end. The narrow end of the template is placed against the Snapper's mouth. Any models under the template will be hit on a roll of 2+, ignoring modifiers for cover, and must make a saving throw to avoid destruction.
Ork Gargant Weapon Data
| Weapon | Range | Attack Dice | To Hit Roll | Target's Save Mod. | Notes |
|---|---|---|---|---|---|
| Battle Cannon Head | 75cm | 2 | 4+ | -2 | Armour save reduced by -1 point for the Gargant's head |
| Battle Cannon Turret | 75cm | 1 | 4+ | -2 | |
| Cluster Buster | 75cm | 1 | 4+ | -2 | Nearby targets hit on 5+ |
| Deth Kanon | 100cm | 1 | 3+ | -3 | Adds +2 to Titan damage rolls |
Mekboy Gargants
Just as the Mekboyz finally sit back and congratulate themselves on the excellent job they've done of building the Waa-Ork's Gargants in time, they all too often realise that they haven't got a vehicle or Gargant of their own to take on the Waa-Ork! Somehow, in the midst of all the buggies and weapons to be built, they haven't finished off their kustom Speedstas, or built any Stompas or anything!
So it is, with the Boyz already starting to load the Space Hulks the Mekboyz can be seen hammering and welding through the night, collecting whatever scrap metal is left over from the Warboss' Gargant and building another Gargant at breakneck speed. Just before the last shuttle is ready to blast off the triumphant team of Mekboyz march their newest creation up through the blast doors — a new Gargant, not a big one, but a special 'kustom' one.
All Gargants are individual creations, but Mekboy Gargants are especially varied. A Mekboy Gargant is protected by a special kustom force field and carries a powerful selection of weird experimental weaponry. Often close combat weapons are built from the remnants of mighty cranes, giant grabbers and huge circular saws used in the Mekboyz' construction work. Super Lifta Droppas or other force field weapons are fitted for long range destruction, usually backed up by a sturdy deluxe rapid-fire kustom kannon.
The Gargant is run by a devoted krew of enthusiastic Snots and Grots, commanded by the team of Mekboyz who ride in the head (or 'bridge') and shout orders down speaking tubes into the bowels of the great metal beast.
Kustom Force Field
Most Gargants are protected by banks of power field generators, but the Mekboy Gargant has a single potent kustom force field generator instead. The kustom force field is a master piece of technology, forming an impenetrable dome of force over the Mekboy Gargant making it totally invulnerable to incoming fire. Unfortunately the field generator tends to overheat fairly quickly and some even blow up with spectacular results! To overcome this the Mekboyz usually send their Gargant lumbering into the middle of the enemy as quickly as possible and rely on the kustom force field to get them there without taking any damage. Once they've got into close combat the Meks shut down the force field generator before it overloads.
At the start of each turn you can decide to shut down the force field and lose its protection for the turn. Once the field has been shut down it can't be switched on again during the game. If you don't shut the field down roll 1D6 for each consecutive turn the generator has been operating and add the rolls together — so you roll one dice on the first turn, two dice on the second turn, three dice on the third turn and so on.
If the dice score is less than 10 the generator keeps working without any problems. If the dice score comes to a total of 10 or more the force field generator overheats enough to cause damage, so make an immediate roll on the Force Field Damage Table. This means that on the first turn of operating the kustom force field will have no chance of overheating, on the second turn it has a small chance of overheating and on the third it has about a 50% chance of overheating and even the most deranged Mek will usually shut down the force field before it's been operating for four turns...
As long as the kustom force field is operational it will stop all incoming fire which doesn't bypass the field. Hence only things like tremor cannon, warp missiles and psychic attacks can penetrate the field — anything else bounces off without any effect. A vortex missile will knock down the field as long as it is in contact with it, but the field will spring up again as soon as it's out of the vortex.
The only weakness of the force field is that it tends to flicker on and off occasionally because of fluctuating power levels. If a Mekboy Gargant is hit roll a D6 for each hit. On a roll of 6 the shot penetrated the field in the fraction of a second that it flickered off.
Mekboy Gargant Weapons
Super Lifta Droppa Arm. The Super Lifta Droppa is a larger, more powerful version of the traktor beam weapon carried on a Lifta Droppa Speedsta. Instead of latching a beam of energy onto a single target the super Lifta Droppa picks up a whole area at once — pulling up trees, rocks, earth and screaming victims all at the same time. The boom is swung up into the air and its entrapped victims swing into the air too. After a little bit of jiggling with the controls the Meks drop the whole lot on some unfortunates nearby.
The Super Lifta Droppa has a range of 75cm and 'fires' a barrage template. Unlike most barrage weapons the Lifta Droppa must be able to see its target in order to fire at it. Place the barrage template anywhere in sight and within range of the Super Lifta Droppa. Anything even partially under the template is hit on the roll of a 4, 5 or 6 on a D6. If the target is hit it has to make a saving throw with a -4 modifier, and if it fails it is lifted high up into the air. Anything which isn't latched onto or makes its armour save managed to avoid the beam and is unaffected by the attack. Titans are too big to be picked up by the Super Lifta Droppa as explained below.
The Ork player can designate where he wants to drop his catch within a distance of 6cm. Roll the scatter dice to see if the Mekboyz manage to get their helpless victims on target — a 'hit' indicates they're bang on target, an arrow means the template flies 2D6cm in the direction of the arrow before plummetting to the ground. The falling victims are automatically destroyed regardless of whether the Meks are on target or not. Any models underneath the template (wherever it ends up) are struck by falling debris on a roll of 4, 5 or 6 on a D6. Models hit by falling debris are automatically destroyed unless their saving throw is better than the saving throw of the biggest thing caught on the template — so, for example Land Raiders (Sv 2+) hit by debris from a template which included a Baneblade (Sv 1+) would be crushed.
Titans are too big and heavy to be picked up even by a Super Lifta Droppa but can be hit by falling models. Titans will lose a shield if struck by a falling model, or suffer a hit if they have no shields left. Roll for location as normal. The location hit will suffer damage unless its saving throw is better than the biggest model on the template hitting it. A building hit by a Super Lifta Droppa or falling debris must make an unmodified saving throw for the building and if it fails it collapses into rubble.
Buzz Saw Arm. The buzz saw arm carries a huge diamond-toothed circular saw blade. The buzz saw gives the Mekboy Gargant an extra D6 to roll in close combat so it rolls 3D6 instead of 2D6. You add +2 to the damage roll against enemy Titans, and any building hit is destroyed unless it can make its basic saving throw. The saw is fitted to an articulated arm powered by innumerable pistons and gears, the arm is also studded with gun ports carrying cannon of various calibres. In the combat phase the arm can be used either in close combat or as a ranged weapon. It may not be used as both in the same turn.
| Name | Range | Attack Dice | To hit roll | Save mod. |
|---|---|---|---|---|
| Buzz saw | 50cm | 3 | 5+ | -1 |
Krusher Arm. The krusher arm carries a monstrous grabber filled with whirling steel teeth. In close combat a Mekboy Gargant armed with a krusher can make a special grab attack if it wins. The grab attack only affects Titans, vehicles (including super heavy tanks and battle fortresses) and buildings — infantry are too small to grab. Against enemy Titans the Mekboy Gargant can grab any location shown on the hit location chart and try to tear it off. Both players roll a D6 and the Gargant adds +1. If the Gargant's score is higher than its opponent's the location is torn off and suffers maximum damage. If the scores are equal the opponent pulls partially free of the Gargant's grasp, roll for damage normally. If the opponent rolls higher than the Gargant he wriggles free and no damage is done.
Against vehicles the grab attack picks up one enemy vehicle (destroying it in the process) and throws it up to 10cm away. Roll the scatter dice: a hit indicates the wreck hits whatever the Meks were aiming at and an arrow indicates the wreck scatters 2D6cm in the direction indicated. A model struck by a hurled wreck is automatically destroyed unless its saving throw is better than the saving throw of whatever fell on it. A building hit by the grab attack suffers a hit with a -4 saving throw modifier. Like the buzz saw arm the krusher has a number of gun ports and carries several autocannon studded along its length. The Gargant can fire its guns or attack in close combat during a turn, but not do both.
| Name | Range | Attack Dice | To hit roll | Save mod. |
|---|---|---|---|---|
| Krusher | 50cm | 2 | 5+ | 0 |
Deluxe Kustom Kannon. A Mekboy Gargant always carries a very big gun — either a gatling cannon style weapon or a single barrelled rapid-fire affair. The Mekboyz are particularly proud of the way their deluxe kustom kannon spits out a devastating hail of explosive shells - churning up whole areas of the battlefield into a seething maelstrom of fire, smoke and whizzing shrapnel. Unfortunately the deluxe kustom kannon can be a little temperamental at times, jamming up solidly or wildly firing off dozens of shots at once.
Whenever you want to fire the deluxe kustom kannon roll the artillery dice to find out how many attack dice it fires that round, which means it will fire between 2 and 10 attack dice. Each attack dice needs to roll a 4, 5 or 6 to hit and anything hit suffers a -2 modifier to its saving throw. If you roll a 'misfire' on the artillery dice something terrible has happened to the kannon - a shell might have jammed in the breech, the barrel might have warped or split or it may just be a temporary problem. Roll on the Weapon Damage Table on the back of the Mekboy Gargant datacard to find out what has happened.
| Name | Range | Attack Dice | To hit roll | Save mod. |
|---|---|---|---|---|
| Deluxe kustom kannon | 50cm | Varies | 4+ | -2 |
The Squats
When humans first began to explore the galaxy some of the earliest colonies were settled on the worlds towards the galactic core. At that time the mineral resources of the galactic centre were a rich prize, and thousands of specially adapted mining spacecraft set off to harvest the vast wealth of these inner planets.
The galactic core is characterised by extremely ancient suns which are dim in comparison with the stars of the spiral arms. Around these ancient stars orbit huge, rocky worlds, rich in minerals but in all other respects barren and lifeless. With very low levels of daylight, and extremely high gravity, these worlds are grey and cheerless, and inhospitable to life.
The original settlers were miners, and they dug homes for themselves in the rocky landscape, creating self-contained communities out of exhausted mines. To feed themselves the miners constructed hydroponic tanks to grow nutritious algae which could then be eaten or processed, and the communities quickly became self-supporting.
The high gravity and extremely harsh environment gradually changed the humans that lived there. They grew tougher, more resilient, and they also became shorter and squatter. This process took several thousand years, and during that time the new race began to develop its own cultural identity. When the galactic core was temporarily cut off from the rest of human society by warp storms, the inhabitants banded together into an independent confederacy which they called the Homeworlds.
It was about this time that the short, stocky race became generally known as Squats, although they are also called Dwarfs and many of them prefer this term. During this period of isolation the Homeworlds withstood all kinds of trials, from Ork invasions to the rampages of Chaos, environmental disaster and even internal war between the Squats themselves. The early settlements were enlarged and fortified to turn them into impregnable strongholds.
With Earth and other sources of technology denied to them, the Squats had to develop their own alternative technologies using local materials and sources of energy. As they invented and re-invented machines to keep them alive, the Squats acquired considerable expertise. This gathering of knowledge lead to the creation of the Engineers Guild — a body of individualistic warriors whose technical expertise would provide future Squat armies with many of their most successful weapons of war.
The Squat Homeworlds have remained independent ever since, and have fought their own wars against Orks and Chaos. On occasions Squats have also fought the Imperium and Eldar, but by and large the Squats prefer to fight on the same side as humans and have no particular source of dispute with Eldar. The Squats need to trade in order to acquire items not readily available on their own worlds, and so they prefer to remain as neutral as possible. Sometimes Squat Strongholds fight each other over points of honour or valuable mining rights but such wars are usually shortlived, being brought to a halt by the invocation of ancient laws or the intercession of other Strongholds. The Homeworlds rely on the Imperium for most of their trade, but they also trade with the Eldar and have even traded with Orks in the far distant past.
The Squats hate Orks with a passion ever since the ravages of Ork Warlord Grunhag the Flayer, whose surprise invasion cost many Squat lives and wiped out several ancient Strongholds. Even today, thousands of years after the invasion, the Squats send out expeditions to try and uncover lost remnants of Strongholds believed destroyed by Grunhag's horde. An epic ballad called The Fall of Imbach reminds younger generations of Squat warriors of the heroism of the Squats in those dark times and the foul treachery of the Ork invaders.
Squats are hard-working and stubborn. They are an honourable people who take great pride in paying their debts and keeping their word. This means that they are reliable allies but very dangerous foes. If a Squat gives his word to do something he would willingly die in the attempt. Squats have two characteristics which some humans find difficult to understand.
Firstly they are very materialistic. Squats will work hard to acquire money and possessions, and the more important a Squat is the greater his treasure hoard will be. When he dies his possessions are divided amongst his family and so passed on from generation to generation. A family's treasure is held very dear — it is both a source of wealth and a tangible link to its honoured ancestors.
The second quality which many humans find hard to understand is the Squats' over-riding obsession with vengeance and honour. Should a Squat be slain his family is honour-bound to avenge his death, while any harm done to one family member by an unrelated Squat will bring the whole family together to exact vengeance. Squats stick together and never forget a slight no matter how trivial or unintentional. Their stories and legends abound with examples of lone warriors battling to the death against impossible odds for their family's honour or of individuals returning from apparent death or dishonour to exact lasting and bloody revenge on their foes.
The Stronghold is the basis of Squat civilisation. A planet might have several strongholds but rarely more than half a dozen. The warriors from a Stronghold are its Brotherhoods — so called because of their close blood relationship and ties of vengeance-rights. Strongholds sometimes band together into temporary alliances called Leagues.
The leader of a Stronghold is called its Lord. The leaders of a Stronghold's Brotherhoods are called Warlords, and are usually close relations of the Lord. In battle each Warlord is accompanied by a personal bodyguard or Hearthguard, as well as his own Brotherhood. When several Strongholds from a League fight together a Grand Warlord is elected to lead the combined forces for the duration of the campaign. Election as a Grand Warlord is one of the ultimate accolades for a Squat warrior and is normally bestowed on the most honoured and revered Warlords. The Grand Warlord leads a disciplined and well armed force mostly made up of Brotherhood Warriors, but which includes fearsome weapons of war developed by the Engineers Guild.
The Engineers Guild is a powerful part of Squat society. Its knowledge and experience is legendary and its leaders hold many engineering secrets. Some of the human Technomagi of the Adeptus Mechanicus believe that the Squats have already learned the secrets of stable warp fission, by which the energy of warp space is flared off to produce limitless supplies of energy. If this is true then the Guildmasters guard their secret well, considering it too dangerous to use. The Guild has already developed the most advanced form of propulsion for spacecraft: a neoplasma reactor powered by a warp-core held in thrall by a containment field of zero-energy. No other race has ever replicated this drive mechanism, the Adeptus Mechanicus having given up their experiments with warp-core technology ever since the infamous Contagion of Ganymede.
Of course, the Squats produce many more conventional machines too, including airships, gyrocopters, and gigantic armoured crawlers. All of these machines reflect the landscape of the Squat Homeworlds, where isolated Strongholds are separated by many miles of hostile territory. Shale deserts and chromium drifts, soaring rocky pinnacles and sheer glass-sided crevasses are typical topography on the Homeworlds. To cross this tortured landscape the Squats have huge Land Trains — multi-tracked monster vehicles towing powered track-cars of ore, supplies, or living quarters. These powerful vehicles have heavy tracks which can support these vast machines on the uncertain ground surface.
All of these Land Trains are armoured to survive meteor showers and violent electrical storms. Many carry weapons and are used by the Squats as armoured battle stations, mobile versions of their Strongholds, able to survive in isolation in a hostile world. The largest of the vast machines built by the Squats is the Colossus, which is also made for the Imperium in a version called the Leviathan. These are really big machines, with exceptionally thick armour and crammed with powerful weapons. Both Land Trains and Colossus are slow moving, and to scout the way ahead and check for enemy movement the Squats use gyrocopters and airships. These flying machines are the eyes and ears of the sluggish convoys, providing the essential information about troops movements or possible ambushes for the Squat ground forces.
Choosing a Squat Force
Your Squat force represents the warriors and machines of either a single Stronghold or part of a League of Squat Strongholds. To choose your force first agree the total number of points for the battle with your opponent, then use the epic army cards to choose a force of the agreed points value.
You must choose at least one company card. For every company card you have in force you can choose up to five support cards, which represent extra units temporarily attached to your company cards to reinforce them.
The Squat cards include a number of cards representing machines and troops from the Engineers Guild. These Guild cards can be freely intermixed with the normal Squat cards so you can, for example, buy Guild support cards like bikers or robots for a Squat Warrior Brotherhood.
For each company card in your force you may also choose one special card. Special cards represent unusual individuals (such as the Grand Warlord or Living Ancestors who advise the Warlords) or potent war machines like the Land Train or Colossus which are only deployed with large supporting forces of Squat warriors.
As you choose your cards keep a running total of their points values and make sure you do not exceed the agreed value for your army. There is no obligation to buy the whole allowance of a special card and five support cards for every one of your company cards. You will have to decide how much support you need to take according to your battleplan and the enemy you are fighting.
Squat forces often fight alongside the Imperium and the Eldar against common foes such as Orks and the minions of Chaos. The Squat Homeworlds also have a number of treaties and agreements with the Imperium to supply forces to fight in the Imperial crusades in exchange for trading and mining rights on conquered worlds. The Imperium reciprocates by supplying Space Marine forces and Imperial Guard regiments to battle in defence of the Homeworlds if they come under threat.
Squat mercenaries are renowned throughout the galaxy for their tenacity and reliability, making them much sought after by Imperial planetary governors. To represent this you can choose a mixed force containing Squats and any other races apart from Orks or Chaos. Company cards can be chosen with their own support and special cards as usual but you can't choose, for example, Space Marine support cards for a Squat company card or a Squat special card for an Eldar War Host.
Squat Infantry
Solid and stubborn in defence and relentless in attack, Squats make excellent infantry. Individual Squat infantry squads are highly disciplined and fiercely determined, their pride and sense of honour both to their revered Ancestors and fellow warriors makes it impossible for them to be otherwise. Squats are particularly resolute in close combat, refusing to go down without putting up a good fight. To show this Squat infantry fighting in close combat can reroll any close combat dice which come up with a score of 1. This means they will give most opponents a run for their money as they will normally get a good (or at least reasonable) dice score.
The Squats' hatred of Orks means that when they are in close combat with Orks they can reroll close combat dice rolls of 1 and 2, reflecting their bitter hatred of the Ork race.
Squats are organised into different units to fulfil specific tactical roles according to their weaponry and status within the Stronghold. There are three types of Squat unit: Warriors, Berserkers and Thunderers.
Warrior units make up the bulk of Squat Brotherhoods, comprising the younger members of the Stronghold's War-brethren. They are formed from standard combat squads armed with lasguns and sidearms, with one Squat in every five-man squad carrying a heavy weapon such as a missile launcher or heavy bolter. A Warrior unit is normally led by the Warlord of the Stronghold if the entire Brotherhood is present, or a squad of select Hearthguard if the Warrior unit is fighting separately from the rest of the Brotherhood.
Berserker units are made up from attack squads of the most ferocious hand to hand fighters in the Stronghold. Attack squads are armed with bolt pistols, power axes or chainswords and a variety of grenades. They are expert tunnel fighters and excel at clearing buildings and fortifications ahead of the Brotherhood's advance. All Squats are doughty fighters in close combat but Squat berserker units are renowned for their tenacity and courage against the most impossible odds, battling fearlessly against even the mightiest of opponents without thought for their own losses. Because of this heroic determination berserker units automatically pass any morale checks if they are in close combat.
Thunderer units are the most heavily armed units in a Squat Brotherhood, consisting of heavy squads of hardened veterans carrying heavy weapons. Squat heavy squads are exceptional because every Squat in the unit carries a heavy weapon — either a heavy bolter, a missile launcher or a lascannon. Thunderers supply withering support fire for the Brotherhood on the battlefield, devastating concentrations of enemy troops or tanks and forming strongpoints to hold the battleline. Heavy Squads are represented by bases of five Squats armed with heavy weapons.
| Troop Type | Move | Saving Throw | CAF | Weapons | Range | Attack Dice | Roll to Hit | Target's Save Mod. | Notes |
|---|---|---|---|---|---|---|---|---|---|
| Combat Squad | 10cm | None | 0 | Lasguns | 50cm | 1 | 5+ | 0 | |
| Attack Squad | 10cm | None | +2 | Boltpistols | 25cm | 1 | 5+ | 0 | |
| Heavy Squad |
Warlord and Hearthguard
To guard against dishonourable use of Brotherhood troops by unscrupulous or avaricious Stronghold Lords, a Brotherhood is always led by a trustworthy relative of the Lord, known as the Warlord. A Warlord is trained from infancy to be a leader and act as a source of great inspiration to the Squat warriors he commands, constantly reminding them of their duty to their ancestors. Because of the inspirational effect of the Warlord any Squat units within 10cm of a Warlord may add +1 to their morale dice. The Warlord is accompanied into battle by a bodyguard of close relatives from the warrior aristocracy of the Stronghold. These potent warriors are equipped with lavishly decorated exo-armour and powerful combi-weapons decorated with traditional patterns in gold and precious stones. Often extra squads of elite warriors known as Hearthguard will take to the battlefield to lead units of Squats. These loyal retainers of the Warlord are magnificently equipped in carapace armour reminiscent of archaic styles and carry a selection of heavy weapons. Though Hearthguard do not operate as a command unit they are still mighty warriors and lead their units from the front, setting an example of courageous conduct to the other Squats.
Warlord stands can be made from four exo-armoured Squat models and a standard bearer carrying the Stronghold standard. Hearthguard stands are made up from five Hearthguard models, though a standard bearer could be substituted for one of the models if desired.
| Troop Type | Move | Saving Throw | CAF | Weapons | Range | Attack Dice | Roll to Hit | Target's Save Mod. | Notes |
|---|---|---|---|---|---|---|---|---|---|
| Warlord | 10cm | 6+ | +6 | Bolters | 50cm | 2 | 5+ | -2 | Command unit |
| Hearthguard | 10cm | 6+ | +6 | Bolters | 50cm | 1 | 5+ | -2 |
Living Ancestors
Squats typically live for about 300 years but a small percentage live longer. If a Squat survives to see his four hundredth year his longevity is greatly increased and he can expect to survive to the age of eight hundred or more. The tiny proportion of Squats that live to such great age are treated with enormous respect and become known as Living Ancestors.
As the Living Ancestor grows older he starts to develop potent psychic powers, often of a protective or precognitive nature. Psychic powers are virtually unknown among normal Squats so they are another factor which makes Living Ancestors doubly venerated. These psychic powers come from their spiritual closeness to the dead ancestors of their Stronghold, which they tap as a source of psychic energy.
The Living Ancestor's protective psychic powers give all Squat stands within 25cm a psychic saving throw of 5 or 6 on a D6 against Ork Weirdboy psychic bolts, Eldar Warlock powers, Space Marine Librarian powers and Chaos Daemon spells.
Living Ancestors are venerated as tangible members of the group of ancestor spirits which watch over the Stronghold. Their long lives have filled them with wisdom so they are their Lord's most respected and trusted advisors. On occasion a Living Ancestor accompanies a Warlord into battle to advise him on the best plans to bring victory.
A Living Ancestor can be bought for any Squat Brotherhood as a special card. As the Living Ancestor is accompanied by a number of younger relatives who act as his bodyguard on the battlefield the Living Ancestor is represented by a stand made from any spare Squat models you have available.
If a Living Ancestor is within 6cm of a Warlord at the start of the orders phase he can draw on his centuries of experience to advise the Warlord on how to position his warriors most effectively, which way the enemy is likely to advance and so on. This means that you can place a D6 extra order counters on units in the Warlord's Brotherhood. When orders are revealed you can choose which orders a unit will choose, so you're less likely to be caught out by sudden enemy attacks or charge positions bristling with opponents on first fire orders (unless you want to, of course).
| Troop Type | Move | Saving Throw | CAF | Weapons | Range | Attack Dice | Roll to Hit | Target's Save Mod. | Notes |
|---|---|---|---|---|---|---|---|---|---|
| Living Ancestor | 10cm | 6+ | 0 | Laspistols | 25cm | 1 | 5+ | 0 | Command unit |
Rhino Armoured Troop Carrier
The Rhino armoured troop carrier is the most widely used transport vehicle in the Imperium, in service with the Space Marines, the Imperial Guard and the Titan Legions. Huge numbers of Rhinos are supplied to the Squats as part of the exchange of material between the Imperium and the Squat Home Worlds. In addition the Squats build large numbers of their own Rhinos in the workshops of many Strongholds. The Rhino's enduring popularity is due to the ready adaptability of the vehicle's basic design, and the fact that it can be built from a wide range of materials, from steel to high-tech thermo-plasteen. It can be modified to suit local climates or to fulfil different military roles.
The Rhino carries two bolt guns mounted in small flat turrets (called cupolas) on its upper surface. Because of the cupolas' restricted vision and movement the bolt guns only have a short effective range, but this is enough to enable the Rhino to advance with its infantry and fight alongside them in close combat, blasting away at extremely short range. This can make all the difference to the infantry with the Rhinos, especially if you can use the Rhinos to gang up on enemy pieces to outnumber them.
The Rhino can carry ten Squats, i.e. two troop stands. The best way to use your Rhinos is to decide where you want your infantry to be right at the start of the game, then use the Rhinos to carry them there quickly, preferably in the first turn. As soon as possible get the troops out of the Rhinos and into cover, and from then on use the vehicles as support. Remember that a vehicle travelling in the open is a vulnerable and inviting target — infantry are far safer once they have left their vehicles and either dispersed or taken cover.
| Troop Type | Move | Saving Throw | CAF | Weapons | Range | Attack Dice | Roll to Hit | Target's Save Mod. | Notes |
|---|---|---|---|---|---|---|---|---|---|
| Rhino | 25cm | 4+ | 0 | Bolters | 15cm | 1 | 6+ | 0 | Carries two troop stands |
Guild Bikers
Squats use bikes and small trikes extensively for personal transportation across the bleak and inhospitable landscape of the Squat Homeworlds. A number of younger Squats get so attached to the idea of roaring around at high speed that they mount weapons on their bikes and take them out onto the battlefield. The Engineers Guild is most renowned of all for its love of bikes and trikes. The Guild often fields entire squadrons of Guild Bikers in support of the Warrior Brotherhoods or forms their own Guild Biker forces to fight their style of mobile warfare against the enemy.
To make up a base of Guild Bikers stick two biker models to a piece of card or a plastic epic base. The stats shown below are for a single stand of two biker models, just as an infantry stand has five models.
| Troop Type | Move | Saving Throw | CAF | Weapons | Range | Attack Dice | Roll to Hit | Target's Save Mod. | Notes |
|---|---|---|---|---|---|---|---|---|---|
| Guild Bikers | 30cm | None | +4 | Bolters | 15cm | 1 | 6+ | 0 |
Guild Trike
The Guild Trike is used exclusively by the renowned Squat Guild of Engineers. It is a large, reinforced trike carrying a driver and a gunner who aims a suitably devastating heavy weapon from the back of the speeding vehicle. Guild trike teams are famed for their fearless leaps and daredevil skid turns, evading enemy fire as they make their hit and run attacks with stunning bravado.
| Troop Type | Move | Saving Throw | CAF | Weapons | Range | Attack Dice | Roll to Hit | Target's Save Mod. | Notes |
|---|---|---|---|---|---|---|---|---|---|
| Guild Trike | 30cm | None | +4 | Multi-melta | 25cm | 1 | 3+ | -2 |
Guildmasters
The Engineers Guild is divided up into many different 'Lodges', each based in a different Stronghold. Each Lodge is ruled by the oldest and most respected Engineer in the Stronghold who is known as the Guildmaster. Guildmasters are privy to many of the secrets of a Stronghold's construction — its secret tunnels and hidden defences. They are responsible for coordinating the maintenance and repair of a Stronghold as well as leading the Lodges in times of war. For combat the Guildmaster dons ancient exo-armour which has been passed down through the Lodge over the centuries and roars into battle mounted on a heavily-reinforced trike.
Guildmasters lead squadrons of Guild trikes or bikers in battle. The inspirational effect of having such an honoured leader means that a Squadron led by a Guildmaster gains +1 to all of its morale dice rolls. This means Guild trikes or bikers will automatically pass their morale tests their [sic] if Guildmaster is still alive.
| Troop Type | Move | Saving Throw | CAF | Weapons | Range | Attack Dice | Roll to Hit | Target's Save Mod. | Notes |
|---|---|---|---|---|---|---|---|---|---|
| Guildmasters | 30cm | 6+ | +5 | Lascannon | 50cm | 1 | 5+ | -1 |
Rapier Laser Destroyer
The Rapier Laser Destroyer is a slow moving but potent support vehicle. It carries a modified lascannon with four separate barrels. Because the laser blast is diffused through four barrels the weapon is shortened and the blast spread slightly. As a result the Rapier is shorter ranged than a normal lascannon but more likely to hit dispersed targets such as infantry. It is designed to support advancing infantry and protect them from attack.
The Rapier Laser Destroyer model is mounted on a 20mm x 20mm piece of card or a spare epic plastic stand with 2 crew models — any spare models can be used as crew.
| Troop Type | Move | Saving Throw | CAF | Weapons | Range | Attack Dice | Roll to Hit | Target's Save Mod. | Notes |
|---|---|---|---|---|---|---|---|---|---|
| Rapier | 5cm | None | -3 | Las. Destroyer | 50cm | 1 | 4+ | -1 |
The Colossus
Squats build huge vehicles the size of city blocks which operate as mobile mining installations on unexplored worlds. These monstrous crawlers move across the planet's surface until they discover a rich lode of ore, then they halt over the spot and set up a highly efficient automated mining plant before moving on. By using the gigantic body shells of these mobile bases the Squats have developed two super-heavy fighting vehicles. The first is the Leviathan, which is used as a giant command centre by the Imperial Guard and as a heavy assault troop transporter by the Squats. The second is the Colossus: a massive mobile fortress bristling with weapons.
The Colossus is an awesome fighting machine, its firepower only overshadowed by the mightiest Titans. Unlike the Leviathan, which devotes a lot of internal space to carrying troops, the Colossus carries no troops but is packed with heavier turrets, fire control centres, magazines and extra void shield generators. Each Colossus also carries a landing pad for a special Iron Eagle recon gyrocopter which ranges ahead of it to spot targets at long range.
The thick armour of the Colossus gives it a saving throw of one or more on a D6. The Colossus is equally well armoured all round so the usual modifiers for shooting at it from the sides or rear are ignored. This means that weapons which don't have a saving throw modifier of at least -1 have no chance of harming a Colossus at all.
In addition to its armour the Colossus is also protected by six void shields. These void shields operate in exactly the same way as those on Imperial Titans so each one absorbs a hit before collapsing. Each collapsed shield can be repaired in the end phase on a roll of 5 or 6 on a D6. To supply the massive power demand of the void shield generators a Colossus carries a small plasma reactor. If a Colossus is destroyed the reactor is breached and explodes, causing a hit on everything within 2D6cm.
A Colossus supporting an attack can lumber relentlessly forward while simultaneously pounding the foe with barrages and battlecannons. Because of this a Colossus doesn't need to be given any orders: it always fires in the first fire phase and can move up to 10cm. A Colossus isn't a command unit, however, so it can always be shot at by any enemy units that can see it just like any other target. The recon gyrocopter counts as a command unit for the purposes of orders, movement etc, in all other respects it is identical to an Iron Eagle gyrocopter. The recon gyrocopter maintains a constant data-link with the Colossus' fire control centres so when the Colossus fires barrage weapons it can make the attack using the gyrocopter's line of sight if it wishes. This enables the Colossus to fire accurately and always land on target automatically. Barrages fired indirectly in this way don't scatter and always land on target automatically, just as if they'd been fired directly. Because the Colossus always fires in the first fire phase it can move and still fire indirect barrages.
The Colossus bristles with awesomely destructive weapons. Its main armament is a massive Doomsday cannon backed up by a heavy Thunderer cannon on its prow. Its armoured flanks mount heavy battlecannon turrets and racks of plasma missiles as well as numerous anti-infantry bolters. The Doomsday cannon fires a barrage with a barrage point value of 3 plus the roll of a D6, giving it a value of 4 to 9 barrage points. The Thunderer cannon fires an extremely powerful but short ranged shot, useful for winkling infantry out of cover as the terrific blast of the Thunderer shell means that to hit modifiers for cover are ignored. The battlecannon and bolters are mounted in well-positioned turrets so they can fire all round giving the Colossus potent firepower in all directions. The Doomsday cannon, missiles and the Thunderer have a rather more limited traverse so they can only fire forward.
The Colossus missile racks carry four missiles with plasma warheads. These missiles are fired individually so it's up to the Squat player whether he wants to fire some, all or none of his missiles during a turn. Whenever a missile is fired record it with a counter or a D6 placed close to the model. Once all four missiles have been fired the racks are empty and no further missile attacks can be made.
Each missile creates a barrage with 6 barrage points. If the Squat player wants to fire more than one missile barrage on the same turn all of the missile barrage templates have to be placed so that each one is touching at least one other missile barrage template.
[Diagram: four barrage markers, each touching at least one other marker.]
The massive size and weight of a Colossus means that it can only be pinned in close combat by Titans or super-heavy vehicles like Imperial Shadow Swords or Ork battle fortresses. If lighter vehicles or infantry engage a Colossus in close combat they are simply pushed aside when the Colossus next moves. Because the Colossus has a chance to rake attackers with its weapons in the first fire phase fighting one in close combat is a daunting prospect even for Titans and Gargants.
| Troop Type | Move | Saving Throw | CAF | Weapons | Range | Attack Dice | Roll to Hit | Target's Save Mod. | Notes |
|---|---|---|---|---|---|---|---|---|---|
| Colossus | 10cm max. | 1+ all round | +12 | Battlecannon | 75cm | 8 | 4+ | -2 | 6 void shields |
| Colossus | 10cm max. | 1+ all round | +12 | Doomsday Cannon | 200cm | D6+3 barrage pts | -3 | Carries recon 'copter |
Robots
Robots make solid if somewhat limited troops because they rely on a program which determines what they do on the battlefield. Despite this they have many advantages over ordinary troops, as they are stronger, better armed and do not need to check morale. The technical expertise of the Squat Engineers Guild has enabled them to maintain a substantial force of robots, some of which date back to the Age of Strife. Robot models are quite large and come with their own base, but it is a good idea to glue each robot onto a separate 20mm x 20mm square of card or a spare plastic base. Squat robots fight in detachments which consist of five models.
Robot detachments operate independently according to their program. They do not take morale checks, cannot be broken, and do not require orders.
Before starting to play, you must give each detachment of robots a program which it will follow for the duration of the game. The program consists of a list of four situations and a command for each.
The situations are:
- If there are enemy in charge reach
- If there are enemy within weapon range
- If there are enemy in sight
- In any other situation
To make a program write down the four situations in the sequence given and choose a command which applies for each. Write down the command next to the situation. You may choose any of the following commands.
Charge: Charge nearest enemy unit. The robots must enter close combat if possible. Otherwise they must move at between normal and full charge rate towards the nearest enemy.
Capture: Advance towards nearest objective counter. The robots must move at between half and full normal rate.
Advance: Advance towards nearest enemy unit. The robots must move at between half and their full normal move distance towards the nearest enemy unit and may fire upon it in the advance fire segment.
First Fire: Fire on nearest enemy in the first fire segment.
Fall Back: Move directly towards your own table edge. Robots will not approach closer to enemy as they fall back.
Ignore: Ignore the situation described.
In each orders phase consult the program for the robot detachment. Read down the list of situations, starting with 'enemy in charge reach' until you find the first condition that applies to one or more robots in the detachment. As soon as you reach a situation that applies implement the order written against it.
For example, the following program might be devised and used to send a Robot detachment to capture an objective:
- If there are enemy in charge reach — First fire
- If there are enemy within weapon range — Ignore
- If there are enemy in sight — Ignore
- In any other situation — Capture
This program would allow the Robot to attack their enemy more directly, leaving a final option to move towards an objective:
- If there are enemy in charge reach — Charge
- If there are enemy within weapon range — Advance
- If there are enemy in sight — Advance
- In any other situation — Capture
| Troop Type | Move | Saving Throw | CAF | Weapons | Range | Attack Dice | Roll to Hit | Target's Save Mod. | Notes |
|---|---|---|---|---|---|---|---|---|---|
| Robots | 10cm | 5+ | +2 | Autocannon | 75cm | 1 | 5+ | 0 | Special rules |
The Leviathan
The Leviathan super-heavy assault transporter uses the same chassis as the Colossus. This awesome vehicle is supplied to the Imperial Guard as part of the mutual exchange of materials between the Squat Homeworlds and the Imperium. The Imperium uses its Leviathans as gigantic regimental command centres for coordinating the vast numbers of men and vehicles found in Imperial Guard regiments. The Squats employ the Leviathan as a massive troop carrier to transport special 'Ironbreaker' Brotherhoods of Squat warriors into combat protected by its void shields and metres-thick armoured walls.
The immense weight and size of the Leviathan means it is very slow, and its move rate is therefore 10cm. This is its maximum move rate; the Leviathan cannot double this move if given charge orders.
Because of its thick armour the Leviathan has an armour saving throw of 1 on a D6. This applies all the way round including the sides and rear, so attackers do not get the usual bonus for side and rear shots. This means that most shots will simply bounce off unless the weapon has a save modifier of at least -1. The Leviathan also has four void shields, which work in the same way as a Titan's, so it can sustain a number of hits without taking damage.
The super-heavy Leviathan is so massive that it cannot be easily brought into close combat. To represent this the Leviathan can only be pinned in close combat by Titans or other vehicles which are described in the rules as super-heavy. Super-heavy vehicles include all Imperial super-heavy tanks (Shadow Sword, Baneblade, Storm Hammer) and Ork battle fortresses (Gibletgrinda and Skullhamma). If infantry or lighter vehicles engage the Leviathan in close combat it is not pinned and can simply move past them in the next turn, scattering opponents out of the way.
The Leviathan bristles with deadly weapons including the vast and highly destructive Doomsday Cannon mounted on its prow. This fires a barrage with a barrage point value of 3 plus the roll of a D6. The Doomsday Cannon may fire to the Leviathan's front as normal. Because of its mobile turrets and the arrangement of its other weapons these may be fired all round.
A Leviathan may be included in your army as a special card or a part of an Ironbreakers company card. There is no limit to the number of Leviathans you can take in a Squat force, assuming you've got the points to pay for them.
The Leviathan does not need to be given orders. It can move up to 10cm and fire. Because it is so huge, it doesn't count as a command unit, and may be fired at by any enemy that can see it just like any other target.
The Leviathan can carry a complete Brotherhood of Squat warriors and their supporting units (up to 30 stands). Extra troops can be allocated to be transported in the Leviathan before the game begins. They are not obliged to stay with the Leviathan but can disembark and fight as normal.
| Troop Type | Move | Saving Throw | CAF | Weapons | Range | Attack Dice | Roll to Hit | Target's Save Mod. | Notes |
|---|---|---|---|---|---|---|---|---|---|
| Leviathan | 10cm max. | 1+ all round | +12 | Lascannons | 75cm | 6 | 5+ | -1 | May carry 30 stands |
| Leviathan | 10cm max. | 1+ all round | +12 | Battlecannon | 75cm | 1 | 5+ | -2 |
Goliath Mega-Cannon
Goliath mega-cannon are huge, mobile artillery pieces which fire monster shells weighing several tons. A Goliath shell can blast apart the strongest fortifications like matchwood or shatter a super-heavy tank. Squats use batteries of Goliaths to bombard enemy emplacements at long range and pound hostile cities into rubble. This gives the Warrior Brotherhoods and giant war machines invaluable supporting fire while they move into position to launch their assaults against the weakened foe.
The power of the Goliath mega-cannon means that each cannon fires its own barrage template. A Goliath attack is worth four barrage points plus the roll of a D6, giving a score between 5 and 10. The super-heavy shells fired by the Goliath are so good at blasting walls and trees to pieces that it ignores to hit modifiers for cover altogether.
Goliath mega-cannon can move slowly from position to position propelled by their heavy track units, but because a Goliath needs time to dig in its massive recoil dampers it can't be moved and fired in the same turn. This means that there is no point placing a Goliath on advance orders — on charge orders it can move up to 10cm but can't shoot, on first fire orders it can shoot but it can't move.
The Goliath lobs its shells high into the air to achieve its mammoth range, but it can't depress its barrel to hit a very close target. This means a Goliath can't shoot at targets closer than 50cm, so it has a minimum range of 50cm.
| Troop Type | Move | Saving Throw | CAF | Weapons | Range | Attack Dice | Roll to Hit | Target's Save Mod. | Notes |
|---|---|---|---|---|---|---|---|---|---|
| Goliath | 10cm on charge | 5+ | 0 | Super-heavy Howitzer | 50-250cm | D6+4 barrage pts | -3 | Ignores to hit modifiers for cover |
Tarantula
The Tarantula weapon system is a robotic point-defence installation which can recognise the enemy and eliminate suitable targets using its two lascannons. It is especially useful for defending fixed sites where many Tarantulas can be controlled remotely from an underground bunker or other command centre away from the battlelines. The Tarantula can move under its own power, using its gravitic-reaction motors to hover. It can therefore be used to support an attack or help defend a battlefield position.
On the battlefield the Tarantula can be controlled from a position behind the front lines or from an orbital ship — this need not be represented on the tabletop. Alternatively, where there is insufficient time or opportunity to install remote control systems, a crew of one or two may operate it. You can therefore add a couple of crew models to your Tarantula and mount it on a spare stand if you want to.
The Tarantula's robotically fast reactions and double armament allow it to fire twice per turn — once in the first fire phase and once in the advance fire phase. However it cannot fire on the move — so it must be given either first fire orders (in which case it can fire but not move) or charge orders (in which case it can move up to 10cm but not fire). There is no point in giving the Tarantula advance orders.
| Troop Type | Move | Saving Throw | CAF | Weapons | Range | Attack Dice | Roll to Hit | Target's Save Mod. | Notes |
|---|---|---|---|---|---|---|---|---|---|
| Tarantula | 10cm on charge | None | -3 | Lascannons | 75cm | 1 | 5+ | -2 | Fires twice |
Thudd Gun
The Thudd Gun is a light artillery piece which fires explosive shells. It shoots rapidly, its multiple barrels pumping in and out as each shell fires in succession with a distinctive 'thud-thud-thud' noise, hence the common name of Thudd Gun. The Thudd Gun is mounted on a 20mm x 20mm card square or spare plastic stand together with 2 crewmen. The crewmen can fire the weapon and man-handle it over short distances. The Thudd Gun is used in large numbers by the Squats to provide close range support for their infantry.
| Troop Type | Move | Saving Throw | CAF | Weapons | Range | Attack Dice | Roll to Hit | Target's Save Mod. | Notes |
|---|---|---|---|---|---|---|---|---|---|
| Thudd Gun | 5cm | None | -3 | Thudd Gun | 75cm | 2 barrage pts | 0 | Fires barrage |
Mole Mortar
The Mole Mortar was actually developed by the Squats to overcome the problems of fighting on their rocky, barren Home Worlds where most habitations and fortifications are built underground.
The Mole Mortar has a crew of two operators who can also dismantle and move the weapon if needed. The Mole Mortar fires a burrowing subterranean shell called a tunnel torpedo. This travels rapidly underground before burrowing to the surface and exploding underneath its target. This causes the ground to collapse beneath the target engulfing infantry or tanks, and sometimes trapping large heavy tanks or Titans.
The Mole Mortar is mounted on a 20mm x 20mm card square or plastic epic base together with two crewmen. It may be moved by its crew, although only slowly.
Mole Mortars fire barrages, although these are underground barrages rather than conventional air-borne barrages from artillery pieces. Work out the effect exactly like a normal barrage. If the target is a super-heavy tank or a Titan work out damage as normal and then roll a further D6 to see if the target falls into the resulting crater. If you roll a 6 the target falls into the crater and is trapped.
A super-heavy tank or Titan cannot move while trapped but it is able to shoot normally. It is possible to climb out of the crater by using a charge order and then rolling a 3 or more on a D6 — the tank or Titan is then free but does not move that turn. If you wish craters can be represented using plasticine or some other suitable modelling material.
Mole Mortars can easily be moved from place to place, and they count as infantry stands for moving over difficult terrain. They may be moved into buildings and even fired from inside if required.
| Troop Type | Move | Saving Throw | CAF | Weapons | Range | Attack Dice | Roll to Hit | Target's Save Mod. | Notes |
|---|---|---|---|---|---|---|---|---|---|
| Mole Mortar | 5cm | None | -3 | Mole Mortar | 150cm | 1 barrage pt | 0 | Fires barrage |
The Mole
The Mole is an intermediate-sized tunnelling troop transporter of the type known collectively as tunnellers or miners. These mining machines tunnel their way underground while the battle rages above, bypassing enemy troops and fortifications and emerging behind their lines. Squats appreciate the value of tunnellers as assault vehicles for overcoming both surface defences and subterranean strongholds, using them in large numbers. A massed attack involving over six hundred tunnellers was a decisive factor in breaking the siege of Marbach, a feat few other races could equal.
Tunnellers can move over the ground surface as well as underground, but as they only move slowly overland it is usual to move them to battlefields on transporter vehicles. A Squat Mole is available as a support card complete with a unit of warriors led by a Hearthguard stand.
At the start of the game any tunneller models are positioned on their transports along with the rest of the army. The tunnellers themselves are assumed to be underground from the beginning of the game, and the transports are left on the table. Although transporters don't have weapons and cannot move, they continue to act as guidance stations for the tunnellers. It is possible for the enemy to force a tunneller off-course by destroying its guiding transport vehicle as described later.
A Mole may attempt to surface at any time during its side's movement. Roll a D6, and on the score of a 1 the Mole has struck a rocky obstruction and cannot emerge that turn. On the score of 2 or more the Mole breaks through to the surface. It does not move further during the turn it emerges above ground, but can move along the surface from the next turn.
If the Mole's transporter can be seen from the point where the Mole intends to emerge proceed as follows. First nominate where you want to surface, then roll the scatter dice. If you roll a hit symbol then you have emerged on target. If you roll an arrow you have missed your aiming point and instead emerge 1D6 x 5cm away in the direction indicated. This means you can end up anywhere between 5cm and 30cm from your chosen point.
If the transporter cannot be seen from the place where you want it to emerge, or if the transporter is destroyed, then roll the scatter dice in the same way but the distance will be D6 x 10cm for misses.
Troops may not disembark on the turn that the Mole emerges but may do so in the following turn or any subsequent turn. Position order counters to remind you to disembark in the movement phase. The usual rules for boarding and leaving transport vehicles apply — the infantry move is reduced in proportion to the vehicle's movement.
The Mole may move along the surface of the ground, ploughing a deep furrow in its wake. It always moves in a straight line directly forwards up to 15cm. Note that it cannot double up its move with a charge order; tunnellers have a maximum move of 15cm and can never move faster. Once the Mole has completed its move for the turn the player may turn it by up to 45° so that it can move in a slightly different direction when it moves next turn. This is the only way to turn a tunneller and, as you can imagine, it makes them rather cumbersome. For this reason it is better to keep them underground until you really want them to emerge, rather than surfacing early and relying on slow and awkward overland movement.
A Mole can move through woods, trenches, foxholes, rocks and other broken ground without slowing down, but marshes, rivers and other bodies of water are impassable once the tunneller has surfaced. Nothing, not even marshes and water, can stop a tunneller that is burrowing underground.
A Mole can emerge under a building or plough straight through one if moving overland. This is a bit reckless as the building can collapse and there is a possibility that the tunneller may be crushed by tons of plummeting rubble. To see if the building survives, roll its basic saving throw. If this is failed the building collapses and any troops inside are killed. If the building does collapse, the Mole may be trapped and destroyed. Roll a D6, and on the score of 5 or 6 the Mole is crushed by tons of debris and destroyed along with any troops still inside.
| Troop Type | Move | Saving Throw | CAF | Weapons | Range | Attack Dice | Roll to Hit | Target's Save Mod. | Notes |
|---|---|---|---|---|---|---|---|---|---|
| Mole | 15cm | 3+ | +3 | None | Carries 10 stands |
The Termite
The Termite is the smallest of the tunnellers. It carries 2 stands and is organised into squadrons of 3 carrying a Squat Berserker unit of 5 Attack Squads and a Hearthguard stand. The same rules apply as for Moles except that the Termite is trapped under a falling building on the D6 roll of a 4, 5 or 6. The Termite can be engaged in close combat in the same way as any other vehicle.
Termite squadrons all use the same tunnel, each following behind the other and branching to the surface only at the last moment. Establish where the first Termite surfaces as described for the Mole and then place the remaining two Termites anywhere you wish within 6cm. This allows the unit to maintain its formation.
| Troop Type | Move | Saving Throw | CAF | Weapons | Range | Attack Dice | Roll to Hit | Target's Save Mod. | Notes |
|---|---|---|---|---|---|---|---|---|---|
| Termite | 15cm | 4+ | +1 | None | Carries 2 stands |
The Land Train
Land Trains are rare artefacts which date back to the foundings of the Squat Home Worlds. In the hard, dangerous environment of the Home Worlds the Land Trains crawled back and forth through devastating electrical storms, earthquakes and landslides transporting vital equipment, food and raw materials between the strongholds. After the strongholds had been established the Land Trains still transported bulky loads from one place to another through the huge interconnected tunnel complexes below the surface.
Lovingly maintained by the Engineers Guild, the Land Trains survived the long Age of Isolation and the Age of Trade almost forgotten until the Ork invasion of the great Stronghold of Imbach. As swarms of green skinned invaders flooded into the mighty stronghold the Engineers Guild hastily converted their surviving Land Trains into armed fighting platforms and sent them into the tunnels. The massive, armoured Land Trains came as a great shock to the Orks, who never even suspected their existence, and for a time the Orks were hurled back.
To this day the heroic exploits of three of the Land Trains, Pride of Imbach, Lord Uri's Honour and Grunhag's Bane are celebrated in epic sagas throughout the Squat Home Worlds. After the fall of Imbach many Warlords ordered that their Land Trains be refitted with potent weapons and readied for war.
A Land Train comprises a huge, armoured engine which tows behind it a number of smaller tracked 'carriages' called Battlecars. The Land Train engine mounts two heavy battlecannon and a monstrously destructive Doomsday cannon as well as numerous bolters. Because the bolters fire from slits and cupolas positioned around the engine to rake marauding enemy infantry they can fire in any direction. The engine's other weapons can only fire to the front.
The great size and power of the Land Train means that it can't be pinned in close combat by anything smaller than a super-heavy tank or a Titan. Troops and smaller vehicles simply get shunted out of the way by the Train as it moves forward in its next movement phase. The engine and Battlecars are clad in immensely thick armour plate. Unlike most vehicles the armour on a Land Train is just as thick on the sides and rear as on the front so no modifier is made on saving throws for shots hitting the Land Train's sides or rear.
Apart from its massively thick armour the Land Train engine is also protected by two void shields which operate in exactly the same way as those on Titans, each one absorbing a single hit before it temporarily collapses. When the Land Train engine is linked to its Battlecars the void shields expand to cover the Battlecars as well as the engine itself. The extra energy supplied by the power units in the Battlecars supplements the number of void shields the engine can raise by one extra void shield for each Battlecar the engine is towing.
While the engine and Battlecars are linked up the whole Land Train is given a single order counter and moves as a single model, but the engine and Battlecars count as separate vehicles for the purposes of shooting, saving throws and close combat. This means that once the Train's void shields have been knocked down the attacker has to specify whether he is aiming at the engine or one of the Battlecars.
If one of the Battlecars is destroyed the Squat player is allowed to give the two halves of the Train separate orders. Each 'Battlecar' is an independently functioning vehicle with a computer brain controlled from the engine so if one Battlecar is destroyed and breaks the train the Battlecars can manoeuvre separately to link up again. Remember that only the half of the Train including the engine will have any void shields. If the engine is destroyed the whole Land Train will be halted and will go onto first fire orders for the rest of the game.
Mortar Battlecars mount a large barrage weapon called a Siege Mortar. The Siege Mortar fires heavy shells capable of bursting apart heavy tanks or bringing buildings crashing down into rubble. A similar weapon is carried by the Imperial Bombard, but the Land Train mounted weapon benefits from having a higher rate of fire and greater stocks of shells, allowing it to lay down a heavier barrage. Because the Siege Mortar lobs its shells up in a high arc it can't fire at targets closer than 50cm, giving it a minimum range of 50cm.
Dragon Battlecars carry a large, very heavy firethrower. This is a particularly useful weapon to carry for tunnel-fighting and battling in built-up areas, where the torrent of flames can burn out enemy infantry from side tunnels and buildings with ease. To use this weapon take the special flame template and place it so that the pointed end is touching the Dragon Battlecar and the rounded end lies away from it within the normal 180° frontal fire arc. The template represents the fall of flames and all targets within the area are hit on a 4, 5 or 6 on a D6. No hit modifiers are applied for cover as the flames burn through it or lap around and over it.
Berserker Battlecars have a crenellated battlement and an autocannon mounted in a turret, as well as numerous firing slits. They carry a unit of Squat Berserkers whose job is to attack anything that gets too close to the Land Train and clear out terrain impassable to the vehicle. While they are still aboard the Train the Berserkers can fire from the battlements, counting as being on the same orders as the Train itself. The Berserker unit of five attack squads is included for free — it costs no points and counts as a separate detachment so it can move away from the Train and operate independently.
Bomb Battlecars carry a single large missile armed with a high yield rad-bomb. This is a one-shot missile which is particularly useful for clearing concentrations of enemy forces in woods or buildings as the powerful radiation-pulse generated by the warhead passes straight through cover. The missile has effectively unlimited range and can be guided to its target with unerring accuracy by targeting systems mounted in the Land Train engine if the target is in sight of the engine, hitting the target point automatically.
The missile can also be launched at a point out of sight using the missile's internal guidance systems if the Train is on first fire orders. The missile's own guidance system is less reliable, however, so roll for deviation as for an indirect barrage weapon. When the missile is launched either remove the model from the Battlecar or mark it with a counter. The rad-pulse produced by the missile covers a large area so the 12cm Gutbuster high explosive template is used to represent its blast instead of the normal barrage template. Place the template at the landing point. Anything under the template will be hit on a 3 or more on a D6 regardless of modifiers for cover. Saving throws are taken with a -1 modifier. Unlike most barrage weapons the rad-bomb doesn't affect buildings so it has no chance of turning them into rubble.
As you can see by looking at the card, the Land Train comes supplied with one Battlecar automatically. Obviously, the exact type of this Battlecar will depend on the model you have chosen, as the Land Train comes packaged with one random Battlecar.
A Squat Land Train can be chosen as a special card to go with any Squat company card. The fighting strength of the Land Train can be increased by choosing extra Battlecar support cards for it. Each Battlecar support card adds three Battlecars to the Land Train but the engine can pull a maximum of seven Battlecars — the original Battlecar, plus up to two support cards' worth.
A Land Train must have at least one of each type of Battlecar before it can have a second Battlecar of a particular type, and it must have two of each sort of Battlecar before it can pick a third Battlecar of the same type. So, for example, a Land Train with four Battlecars would have to have one of each type — a Mortar Battlecar, a Dragon Battlecar, a Berserker Battlecar and a Bomb Battlecar. A Land Train with seven Battlecars would have to have the same selection of one each of the four Battlecars but could go on to pick a second Bomb Battlecar, a second Mortar Battlecar and a second Dragon Battlecar, for example.
| Troop Type | Move | Saving Throw | CAF | Weapons | Range | Attack Dice | Roll to Hit | Target's Save Mod. | Notes |
|---|---|---|---|---|---|---|---|---|---|
| Land Train Engine | 10cm | 1+ all round | +6 | Battlecannon | 75cm | 4 | 4+ | -2 | 2 void shields |
| Land Train Engine | 10cm | 1+ all round | +6 | Doomsday cannon | 200cm | D6+3 barrage pts | -3 |
Iron Eagle Attack Gyrocopter
Iron Eagle attack gyrocopters are armoured flying machines used to mount high speed attacks on enemy forces. By using dense terrain to cover their approach, daring Guild aeronauts can spring upon enemy artillery and HQs in lightning fast raids, swooping through them with their cannon blazing. Using its speed and manoeuvrability an Iron Eagle gyrocopter wing can strike unexpectedly almost anywhere.
The gyrocopter achieves its unprecedented manoeuvrability by combining traditional gravitic thrusters with high-powered turbofans which give it extra power and lift. Two aeronauts act as crew, one flying the machine and firing the main battlecannon armament while the other navigates and fires the tail-mounted autocannons.
Brotherhood Warlords are always more than happy to have the support of Iron Eagles to offset their slower moving ground forces and take the foe off-guard. Iron Eagles are skimmers so they can fly over impassable or difficult terrain without penalty as long as they don't finish their movement in impassable terrain. Iron Eagles can also make pop-up attacks.
The exceptional manoeuvrability of Iron Eagle attack gyrocopters means that they can fire in any direction, not just their forward 180° arc.
| Troop Type | Move | Saving Throw | CAF | Weapons | Range | Attack Dice | Roll to Hit | Target's Save Mod. | Notes |
|---|---|---|---|---|---|---|---|---|---|
| Gyrocopter | 40cm | 4+ | +3 | Battlecannon | 50cm | 1 | 5+ | -2 | Skimmer |
| Gyrocopter | 40cm | 4+ | +3 | Autocannon | 50cm | 2 | 5+ | 0 | Skimmer |
Overlord Armoured Airship
The Engineers Guild first developed giant airships to 'mine' the dense liquid metals within gas giant planets. These huge dirigibles would cruise through the upper atmosphere of the planet collecting ice crystals to use as ballast before they descended into the denser lower reaches. Even though they were armoured to withstand the great heat and pressure in the lower depths they could only remain long enough to fill their storage tanks with the precious metal before dumping their ballast and ascending again. Realising their military potential, the Engineers Guild started to develop airships that would fly in standard pressure atmospheres. The six prototype 'Overlord' class armoured airships proved a great success, and now almost every Squat Stronghold has a number of them.
With its thick armour and solid internal bracing, the Overlord armoured airship is a formidable sight. The bulk of the hull is made up from several separate gas cells which provide lift. Each cell is self-sealing and all the cells are filled with inert gases to prevent explosions in case of damage. An armoured gundola hangs underneath the hull, equipped with melta-bomb racks and battlecannon turrets. Gravitic thrusters are positioned at the rear of the hull to supply forward power and extra lift. A select crew of Guild Aeronauts operate the guns and tend the engines under the stern eye of a captain, most often the engineer who oversaw the airship's construction.
Because of their unique form of propulsion, Overlords are not given orders like other models. When the Overlord moves it can move up to 20cm in any direction. While moving the airship ignores the terrain it passes over so difficult and impassable terrain aren't a barrier to it.
At the end of its movement you can leave the Overlord on its flying stand to represent it staying at low level to lurk behind buildings, woods and hills to make use of cover. Alternatively you can place the Overlord on top of a cup to show that it is rising high up in the air. You could make special tall flying stands using brass rod or thick wire for this but an upended plastic cup works just as well. An Overlord at high level can spot targets easily, ignoring intervening terrain — just like a skimmer executing a pop-up attack.
When the Overlord is high up in the air anybody shooting at it must add 25cm to the actual range between the two models to account for the Overlord's height and the fact that the effects of gravity make it a much harder target to hit. Because the Overlord is firing down at its foes it doesn't have to add 25cm to the range. This means an Overlord can stay high up and out of the range of many weapons while pounding its foes with its battlecannon.
The Overlord is an extremely stable firing platform so it always fires in the first fire segment of the combat phase.
An Overlord can't gain or lose height as fast as an ordinary skimmer so it can't make pop-up attacks. This means that as long as the Overlord is at high level everything on the table can see the Overlord and the Overlord can see everything on the table. At low level the Overlord can see whatever you can see from the model's eye view just like anything else in Space Marine. The gun turrets on an Overlord are placed all around the gundola so they can fire in any direction.
In addition to firing its guns the Overlord can also attack targets by dropping bombs on them. This counts as a barrage with a range of 0, so the barrage template must be placed so that it is touching the Overlord's base. The barrage has a value of 2 plus the roll of a D6, giving it a score of between 3 and 8. Because the Overlord is where it's dropping its bombs it always counts as firing a direct barrage so there is no chance of the bombs scattering.
When an Overlord is hit most shots will strike the hull and pierce the gas cells. As the cells are self sealing and contain inert gas this causes no real damage to the Overlord itself. However, lucky shots might destroy the armoured gundola or even tear a huge hole in the hull, sending the Overlord tumbling out of the sky! Unless the attackers hit the gundola the saving throw modifier of the attackers has no effect on the damage caused, bolter fire is as likely to punch a hole through the gas cells if it hits in the wrong place as a Volcano cannon. Roll on the following table for every shot that hits an Overlord.
| D6 Roll | Effect |
|---|---|
| 1-3 | No Effect. The shot hits one of the gas cells, tearing a small hole which is quickly sealed up. |
| 4-5 | Gundola Hit. The shot hits the gundola which has to make a 1+ armour saving throw modified by the attacker's save modifier. If the save is failed the gundola is wrecked and the Overlord destroyed. |
| 6 | Hull Ruptured! A huge hole is torn in the hull and the Overlord starts to fall majestically out of the sky. The Overlord scatters 3D6cm in a random direction before crashing (2D6cm if it was at low level). |
Anything caught under a crashing Overlord suffers an automatic hit and must make an unmodified saving throw to survive.
An Overlord can never be pinned in close combat by another unit as it can simply drift over its opponents when it moves. Only skimmers or jet-pack equipped troops can try to fight an Overlord in close combat and it is impossible to engage an Overlord in close combat if it is at high level. Fighting an Overlord in close combat is dangerous because it always fires in the first fire segment. This means that the Overlord will get a chance to rake its opponents with gunfire before the combat is fought. If an Overlord loses a close combat don't roll on the table for the effect of the hit — the gundola is automatically destroyed without a saving throw.
| Troop Type | Move | Saving Throw | CAF | Weapons | Range | Attack Dice | Roll to Hit | Target's Save Mod. | Notes |
|---|---|---|---|---|---|---|---|---|---|
| Overlord Armoured Airship | 20cm max. | See above | +5 | Battlecannon | 75cm | 6 | 5+ | -2 | See above |
| Overlord Armoured Airship | 20cm max. | See above | +5 | Autocannon | 50cm | 4 | 5+ | 0 | See above |