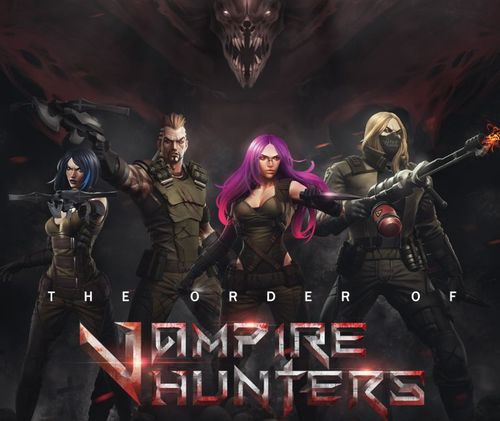
The Order of Vampire Hunters
The Order of Vampire Hunters Rulebook
Table of Contents
Table of Contents
- Game Components
- Setup
- Rules Summary
- Game Mechanics and Terms
- Miscellaneous Rules
- Objectives and Winning
- Game Options
- Campaign Rules
- Hunts
- Hunt 1: Into the Lodge
- Hunt 2: Elder Evil
- Hunt 3: A Powerful Presence
- Hunt 4: Trapped!
- Hunt 5: Coup
- Hunt 6: The Vampire Lord (Final Battle, Campaign 1)
- Hunt 7: The Warehouse
- Hunt 8: Tunnel Access
- Hunt 9: Double Trouble
- Hunt 10: Separated
- Hunt 11: Face to Face
- Hunt 12: Confrontation (Final Battle, Campaign 2)
- Game Summary
Game Components
The box includes:
- 2 double-sided Tunnel and Small Room Tiles
- 6 double-sided Map Tiles
- Hunter miniatures: Stephan, Sarah, Joshua, Magenta, and Pete and the Extractor
- Vampire Minions: 6 Guardians, 6 Giant Bats, 10 Thralls, 5 Burrowers, 6 Upyrs, 10 Warriors
- Elder Vampires: Evaki, Theyr, Kophas
- 6 Blue Hunter Identification Rings, 6 Red Turned Hunter Identification Rings
Cards
- 4 double-sided Hunter ID Cards
- 9 Vampire ID Cards
- 6 Combined Attack Reference Cards
- 5 Turned Hunter Combined Attack Reference Cards
- 4 double-sided Basic Weapon Cards
- 15 Encounter Cards
- 20 Terror Event Cards
- 25 Elder Influence Cards
- 24 Special Ability Cards
- 45 Item Cards
- 24 Day and 24 Night Vampire Activation Cards
- 29 Equipment Cards
- 16 Relic Cards
- 10 Compulsion Cards
Tokens and Other Components
- 1 Clock
- 1 Harpoon Card
- 4 Tunnel Access Tokens
- 4 Game Summary Cards
- 4 double-sided Lever Tokens
- 6 double-sided Window Tokens
- 22 double-sided Door Tokens, including Special/Locked Doors
- 4 double-sided Hunter Armor Tokens, Intact and Damaged
- 4 double-sided Dashboards
- 14 Unexplored Room Tokens
- 2 Crate Tokens
- 2 Debris Tokens
- 3 Clock Tokens
- 2 Captives Tokens
- 4 Objective Tokens
- 42 Focus Tokens
- 28 Wound Tokens
- 9 Dice, including the Custom Breakage Die
Hunter Dashboard
- Dashboard
- ID Card Slot
- Basic Weapon Card Slot
- Inventory Slots for Items, Equipment and Relics
- Hunter ID Cards
- Name and Picture
- Health Points (also see the Hunter's Armor below)
- Faith: the number of dice rolled during Faith tests
- Mind: the number of dice rolled during Mind tests
- Agility: the number of dice rolled during Agility tests
- Hunter's Special Ability
- Basic Weapon Cards
- Owner's Name
- Range: measured in Areas
- Attack Dice: the number of dice to roll when Attacking
- Accuracy: score equal to or greater than the Accuracy to Hit
- Additional Weapon Effect Icons
- Weapon Special Effect: activate by spending Focus before the dice roll
- Item Cards
- Fragile Icon: roll the Breakage die with the Attack Dice
- Blast Icon: this weapon damages the whole Area and may cause Collateral Damage (see Attack)
- Noise Icon: the Equipment is noisy and will Wake all Sleeping Vampires in the room
- Focus cost to create this weapon from the parts that are found
- Equipment Cards
- One Time Use Icon: discard card after use
Ability, Relic and Encounter Cards
- Special Ability Cards
- Name and Card Effect
- Focus Cost, paid when the Hunter uses the Ability during a Hunt
- Focus Cost, paid when the Hunter buys the training for the Ability during Downtime
- Relic Cards
- Card Effect. A Relic Card may have Range, Attack Dice, Accuracy and a Special Effect
- Combined Attack Reference Cards
- Description and Card Effect
- Cost: paid by the Hunters
- Reward: for the Hunters
- Penalty: applied to the Hunters
- Turned Hunter Combined Attack Reference Cards
- Cost: paid by the Turned Hunter
- Penalty: applied to the Turned Hunter
- Compulsion Cards
- The Compulsion you must perform each Turn
- The penalty for not performing your Compulsion
- Encounter Cards
- Card Level (Level 1, 2, 3)
- Colored bars for scaling to the number of Players
- Vampires or Cards that come into play
- The Location for placing Miniatures
- Terror Event Cards
- Card Description
- Card Effect
Vampire and Activation Cards
- Vampire ID Cards (Day)
- Name and Picture
- Shields: blocks this number of Hits
- Health Points
- Range: measured in Areas
- Initiative
- Attack Dice: the number of dice to roll when Attacking
- Accuracy: score equal to or greater than the Accuracy to Hit
- Focus Reward
- Vampire ID Cards (Night)
- The Vampire's Special Power
- Elder Influence Cards
- Attribute Test
- Card Description
- Pass and Fail Effects
- Vampire Activation Cards (Day)
- Vampire Activation Cards (Night)
- Card Level (Level 1, 2, 3)
- Spawn and Special Actions
- Move toward the Active Hunter
- Attack the Active Hunter
- General Movement, possibly affecting all Vampires
Map Tiles and Related Components
- Map Tile
- Map Tile ID Number
- Room. Note that Rooms have Spawn Locations
- Corridor. Corridors do not have Spawn Locations, but are otherwise the same as Rooms
- Area. Smaller regions inside Rooms and Corridors, defined by faint white lines
- Numbered Spawn Locations
- Line of Sight Icon
- Never Search Icon
- Tunnel Tile
- In Area
- Out Area
- Closed Door Token. Special colored Door Tokens are described in Hunts
- Open Door Token
- Unexplored Room Token
- Boarded Window Token
- Tunnel Access Point Token. Some cards refer to these Tokens by number
- Captives Token
- Crate Token
- Lever Token
Setup
Follow the Hunt definition to create the Vampire Den:
- Place the double-sided Map Tiles as shown in the Hunt minimap. Each Map Tile has an ID number to help locate them.
- Place Tokens on the Map Tiles as shown. This includes tokens for Open and Closed Doors, Unexplored Rooms, Tunnel Access Points, Captives, Levers, etc.
- Create the Encounter, Day Vampire Activation and Night Vampire Activation Decks according to the instructions in the Hunt.
When you place the Tunnel Access Tokens, ensure you have Tokens numbered 1, 2 and 3. Place the Tokens randomly at the locations shown on the minimap, the numbers do not need to match. For example, Tunnel Access 1 can be placed in any of the 3 locations shown.
Set up each Hunter's playing area. Each Hunter should:
- Take a Dashboard to organize each Hunter's play area. Use the side with 2 Inventory Slots, unless instructed otherwise.
- Place the Hunter's ID Card and their Basic Weapons Card on the Dashboard, with the Hunter side face up. Add the Armor Token to the Hunter ID Card, with the Intact side showing.
- Place any Equipment Cards on the Dashboard. In a Campaign, Equipment may be carried over between Hunts. In a Standalone game, the Hunt definition will explain what to take.
- Place all your Special Ability Cards in your playing area, beside the Dashboard. In a Campaign, Abilities are carried over between Hunts. In a Standalone game, the Hunt definition will explain what Abilities you can choose from.
- If a Hunter has a Relic, stack the Relic cards and place them on the Dashboard.
- Take the miniature for the Hunter and place a Blue Identification Ring on its base.
Set the start and end times on the Clock as defined in the Hunt.
Separate the Elder Vampire ID Cards from the regular Vampire ID Cards and the Vampire Lord ID Card. Place the Vampire and Vampire Lord ID Cards where they can be easily seen. The Day side should be showing. Shuffle the remaining Elder Vampire ID Cards and place them face down within easy reach.
Shuffle the following decks separately and place them within easy reach:
- Encounter Deck.
- Night Vampire Activation Deck.
- Day Vampire Activation Deck.
- Elder Vampire Influence Deck.
- Terror Event Deck.
- Search Item Deck.
- Relic Deck.
Place these other cards within easy reach:
- Combined Attack Reference Cards.
- Turned Hunter Combined Attack Reference Cards.
Players position their Hunter outside an entrance, being careful to check for Hunt specific placement restrictions.
If you are playing with Pete and the Extractor:
- Agree on a position for Pete outside an entrance door or a window. Place the Extractor Harpoon Card near Pete – Hunters never start the game with Harpoons.
Rules Summary
Turn Structure
The game is played over several rounds, with the starting and ending rounds marked on the clock. During each round, Hunters and Vampires activate alternately, until all Hunters have had a turn. The order between the Hunters and Vampires depends on whether it is Day or Night. Finally, there is a short End of Round phase.
- Setup Phase: Performed once at the start of the game.
- Alternating Activation Phase – Day: The current player activates their Hunter, then draws and resolves a Day Vampire Activation Card for the Vampires, or
- Alternating Activation Phase – Night: The current player draws and resolves a Night Vampire Activation Card for the Vampires, then activates their Hunter.
- End of Round Phase: Advance the Clock. Perform the Awakening, if necessary. Check if the game has ended.
Alternating Activation Phase
Players can discuss and choose the order they activate their Hunters. The order does not matter, so long as all Hunters are activated once.
In Cooperative Mode, deciding on the correct turn order will maximize how the players work together.
Hunter Activation
Each Hunter can take up to 3 Actions, in any combination, including taking the same Action multiple times. Here is a list of Actions. Full details with examples can be found later in the rule book.
Individual Actions cannot be interrupted. For example, you cannot take some of your Move, Attack and then complete the Move Action.
- Move
- Dig Free of Debris
- Search
- Trade
- Attack
- Activate Lever
- Drop
- Pick Up
Vampire Activation
Vampires are controlled by the instructions on Vampire Activation Cards. Any of the players can follow the instructions, but typically, the current player will activate both their Hunter and the Vampires.
Day and Night affects the Vampires' activation. Not only does it change the order, but there are two Vampire Activation Decks; Day and Night.
Complete instructions for resolving the cards, with examples, are given below.
End of Round Phase
Perform the Awakening at the end of round 6, including removing all remaining Unexplored Room Tokens and resolving Encounter Cards for them, Waking all Vampires and Opening all Doors. From now on, it is Night.
Advance the round marker on the Clock. If this was the Final Round specified in the Hunt, the game is over and the players have lost.
Winning the Game
The Hunt will specify objectives for the Hunter to achieve. The Hunters must achieve all Primary Objectives to win. The game ends immediately when the Hunters complete the final Primary Objective.
Game Mechanics and Terms
Movement
The Move Action gives the Hunter 2 Movement Points to spend on moving between Areas and/or Opening Doors.
Movement is only allowed between adjacent open Areas on the board. Movement is blocked by Closed Doors and walls. Hunters can move through Areas containing Sleeping Vampires normally, but movement is Impeded by Awake Vampires.
Movement: Hunters can spend 1 Movement Point to move to an adjacent Area, if the path is open.
Open Door: Hunters can spend 1 Movement Point to Open a Closed Door. Note that Opening a Door is not an Action and does not interrupt the Move Action. Doors can be opened from either side. Flip the Token to show the new state.
Impeded Movement: Awake Vampires slow the Hunters down. All movement costs are increased to 2 Movement Points when there are one or more Awake Vampires in the Area with a Hunter. This applies to moving out of the Area and Opening a Door in the Area.
Below the main level of the Vampire Den there is an intricate system of Tunnels, which are useful for making shortcuts. Areas with a Tunnel Access Token and the In/Out Areas on the Tunnel Tile are adjacent for movement. The Access Points are always open. Characters move from an Area with an Access Token to the In Tunnel Area. After moving through the Tunnel Areas, the Out Area connects to any other Access Token. Both Hunters and Vampires can use the Tunnels.
Move Actions cannot be interrupted to perform another Action and then resumed. If you stop moving to perform another Action before using all your Movement Points, any remaining Points are lost. You can choose not to spend both Movement Points for any reason, ending the Move Action early.
Example: Stephan's first Action is to open a Door for Magenta and move 1 Area. Then he Moves into the Area with an Awake Guardian. He wants to Open the bottom Door, but because he is Impeded by the Guardian and only has 1 Movement Point remaining in his Action, he must take a third Move Action. Both Movement Points are used to Open the Door.
Example: Magenta performs 3 Move Actions. First she Moves to the next Area and enters the Tunnels, then she Moves to the other end of the Tunnel. Finally, she exits the Tunnels at a different Tunnel Access Point and Moves to the bottom Area of the Room.
Entrances and Exits
Entrance Doors are shown by Open Door Tokens placed on the outer wall of the Den. Hunters do not need to spend an Action to Open the Entrance and can simply Move into the Den.
Some Hunts require the Hunters to leave the Den. They can exit through any Door on an outer wall (including Entrance Doors) and through Unboarded Windows. Doors leading outside are normal Doors: if they are Closed, Hunters must Open them and they Open during the Awakening.
Note that Exit/Entrance Doors are heavily shrouded with curtains and do not let Sunlight into the Den when they are Open.
Locked Doors
In some Hunts, certain Doors marked by a blue colored Door Token, are Locked. When the Door is Locked, it cannot be Opened by the Hunters. The Hunt will also state how to Unlock the Door, for example by Activating 1 or more Levers. When this condition is met, the Door only Unlocks, it does not Open. However, the Hunters can now Open the Door normally.
Resolving Encounters
All closed Rooms are infested with Vampires and this is shown by placing Unexplored Room Tokens during Setup. When Hunters end a Move Action in any Area of a Room containing an Unexplored Room Token, interrupt their turn and immediately resolve the Encounter. This will spawn Sleeping Vampires in the Room. Once resolved, the Hunter can discard the Unexplored Room Token and continue their turn normally.
Note: Rooms can be entered through Doors or Tunnels. Both methods will trigger the Encounter if it is the first time a Hunter has entered a Room. Opening a Door to an Unexplored Room does not by itself trigger resolving the Encounter — a Hunter must end a Move Action inside the Room.
Resolving the Encounter: Remove the Unexplored Room Token and draw an Encounter Card. You will see a list of Vampires that are placed on the numbered Spawn Locations in the Room. Each bar in the list is color-coded to scale the game for the number of Hunters.
Place the Vampire near the Spawn Location shown by the number on the right of the bar. Note that some areas have more than one Spawn Location. Try to place the Vampires near the Spawn Location, but so long as they are in the correct Area, the exact position does not matter.
Do not confuse the numbers on the Encounter Card with the number of Vampires to place. You always place one Vampire per bar in the list.
Each bar on the Encounter Card is color-coded to scale the game correctly for the number of players:
- 2 Hunters use all entries with a Green Bar.
- 3 Hunters use all entries with a Yellow Bar.
- 4 Hunters use all entries with a Red Bar.
When you resolve an Encounter Card, the new Vampires are placed on the board Asleep. Place Sleeping Vampires on their side and Awake Vampires upright. There are more details on spawning Elder Vampires below.
Finally, the Encounter Card may tell you to draw and resolve a Terror Event Card. There is more information for Terror Events below.
Terror Event Cards: All Terror Event Cards are unique. The text on the card describes an immediate and shocking situation that Hunters must deal with. When you are told to draw a Terror Event Card, interrupt the Hunter's turn, and follow the text on the card to resolve the Terror Event immediately. Unless specified on the card, resolving a Terror Event Card is not an Action. Once the card is resolved, continue the Hunter's turn normally.
Not Enough Miniatures: It is possible, but unlikely, that you will not have all the minion miniatures you need to place when resolving an Encounter or any other Card. If you cannot place a miniature for any reason, select an available miniature that has the next highest Initiative. For example, if you cannot place a Thrall (Initiative: 2), place a Giant Bat (Initiative: 3).
If you cannot place a minion Vampire with the highest initiative, start the search again, from the lowest Initiative, but place 2 miniatures. For example, if you are out of Upyrs (Initiative 7), you can place 2 Guardians instead.
These rules do not apply to unique Vampires like Elders and Lords. If all the unique Vampires are in play, simply do not place a miniature.
Attacking
All Attacks in The Order of Vampire Hunters, whether melee or ranged, made by Vampires or Hunters, with basic weapons, man-made or natural weapons follow a common system. At its core, you roll a pool of Attack Dice and cause damage for dice that are equal to or greater than the Accuracy value.
Of course, there is a little more to it than this. Start by checking the target is in Range and that there is Line of Sight.
Range: The target must be in Range. Melee weapons have a Range of 0, meaning the target must be in the same Area as the attacker. Ranged weapons specify a minimum and maximum distance to legal targets, measured in Areas. The minimum and maximum distance can be equal, in which case a single number is given. Do not count the Area containing the attacker.
Example: Sarah has 2 weapons, the Wooden Stake with a Range of 0 and the Crossbow with a Range of 1-3. A Thrall in the same area as Sarah is at Range 0: she can Attack it with her Stake. Burrowers at Range 1 and Upyrs at Range 2 are all within Crossbow Range.
Line of Sight (LOS): The attacker must be able to see the target. However, in the chaos of the Hunt, the Hunters and Vampires are in constant motion and it is hard to hide in the Den. Only the following objects block LOS:
- Walls
- Tunnel Access Points
- Closed Doors
No other objects block LOS, including other Miniatures and Tokens.
Melee weapons are the simplest case: LOS is always satisfied.
For Ranged weapons, draw a straight line between the LOS icons near the center of the Areas containing the Attacker and the Target. If that line crosses an object that blocks LOS, then there is no LOS and that target cannot be attacked. If the line is unbroken, the attacker has LOS.
Open Doors: Open Doors restrict LOS. LOS only extends to the Area immediately on the other side of an Open Door.
Remember that LOS only extends to 1 Area immediately on the other side of an Open Door. Even if the line between LOS markers were unbroken, a target 2 Areas through a Door cannot be seen because it is too far through the Door.
Door Tokens can move slightly during the game. Make sure the Token is centered on the wall section before checking LOS.
Special Effects: Even the most basic weapon may have a Special Effect. These are activated by paying the Focus cost before rolling the Attack Dice, and following the instructions on the Weapon Card.
Attack Dice and Accuracy: Every weapon/attack has a number of Attack Dice and an Accuracy value. The attacker rolls the number of dice specified and each dice that is equal to or greater than the Accuracy is a Hit.
Example: Joshua's Basic Weapon Card shows his Stake uses 2 dice and hits on a 4+. A roll of 3 and 4 scores 1 Hit. The Thrall's Attack uses 3 dice and hits on a 5+; a roll of 1, 2, and 6 also scores 1 Hit.
Wounds: If a Hit is not blocked by Armor, the Hit causes a Wound. Give the target one Wound Token per unblocked Hit, until they have as many Wound Tokens as their Health Points. If there are remaining Hits, they are wasted, unless this is a Blast Weapon, in which case they may be assigned to other targets (see the Blast Icon below).
Example: Thralls have no Armor, so a Hit causes 1 Wound. 1 Wound is enough to Destroy a Thrall and the miniature is removed from play. If the Vampire is not Destroyed by the Attack, place Wound Tokens beside the miniature to show it is wounded.
For unique miniatures, such as the Hunters and Elders, you can place the Tokens on the ID Sheet. For non-unique miniatures, it is best to place the Wound Tokens beside the actual miniature.
Armor blocks Hits and prevents them causing Wounds.
Hunter's Armor: Hunter's Armor prevents all damage from an Attack, but it quickly breaks and is lost. If your Armor is equipped and you take Hits, follow these instructions:
- When the Intact side is showing: If an Attack causes 1 or more Hits, you ignore them all and flip the Armor Token to the Damaged side.
- When the Damaged side is showing: If an Attack causes 1 or more Hits, you ignore them all and discard the Armor Token.
Blast Icon: Blast weapons may Hit more than one target.
- First apply all Hits to the target, until it has a number of Wounds equal to the number of Health Points.
- The remaining Hits are then assigned to any other Hunters in the target's Area. Apply one Hit to each other Hunter, randomizing if necessary.
- The remaining Hits are then assigned to any Vampires (and Turned Hunters) in the target's Area. The attacker can distribute the remaining Hits as they see fit.
- If there are still any remaining Hits, they are lost.
Note that only weapons with the Blast Icon cause collateral damage and only the Attack Dice rolls that are Hits need to be considered. Misses always miss everyone.
Noise Icon: Noisy weapons always Wake all Vampires in the Room when they are used. If a Hunter is shooting through an Open Door, from one Room to another, Vampires in both Rooms are Woken.
Example: 2 Upyrs attack Joshua. He starts with his Armor at full strength. The first Upyr's Attack causes 1 Hit. After ignoring this Hit, the Armor Token is flipped to the Damaged side. The second Upyr causes 3 Hits. The Armor Token still prevents all Hits, then it is discarded. Although Joshua lost his Armor in one turn, it prevented him taking 4 Wounds.
Other Icons: Shield Icon, Blast Icon, Noise Icon, Fragile Icon, One Time Use Icon, Boarded Window Icon.
Shield Icon: Vampires and other objects may be protected by Armor or be tough enough to absorb some damage. These items have a Shield Icon with a number, sometimes shown beside the Health Point Icon. The Shield Icon X means you ignore the first X Hits completely. If the Attack causes more than X Hits, the remaining Hits are converted to Wounds and applied normally. This Armor does not lose its effectiveness during the game.
Fragile Icon: If the object is Fragile, roll the Breakage Die when it is used. If the Broken Icon is rolled, use it normally, and then discard the card. For example, if this is a weapon and it breaks, you still apply any Hits rolled.
One Time Use Icon: One Time Use weapons must be discarded after making an Attack.
Boarded Window Icon: If a weapon has the Boarded Window Icon, it can be used to break the barricades on Windows, letting sunlight flood the Room, Destroying all Vampires.
If a Hunter's Attack reduces the Window Token to 0 Health Points, flip the token to the Sunlit side. During the Day, all Vampires in the Room are Destroyed by the Sunlight, simply remove them. The Hunter that uncovered the Window takes the Focus for the Vampires that were Destroyed.
Remember specific rules on cards override general rules in this book. Check the Upyr Vampire ID card: these Daywalkers ignore all effects of Sunlight.
Leave the Window Token on the map as there are ongoing effects: Vampires do not move into, or Spawn in, Sunlit Rooms. See Vampire Activation.
Example: Stephan is in a Room with 2 Vampires and attacks the Boarded Window using his Axe Staff. His roll is disastrous, just 1 Hit which is blocked by the 1 Shield of the Boarded Window. Stephan Attacks again, rolling 3 Hits this time. The 1 Shield still blocks 1 Hit, but the Attack causes 2 Wounds. Only 1 Wound is needed to break the boards, so the Token is flipped to show Sunlight streaming in. The Sunlight Destroys both Vampires in the Room immediately, so Stephan is safe and he collects 2 Focus, 1 from each Vampire.
Attacking Sleeping Vampires: Hunters have a great advantage if they can sneak up and Attack a Sleeping Vampire. After rolling the Attack Dice, the Hunter can reroll any Attack dice and/or the Breakage Die before scoring the Hits. A die may only be rerolled once and the second result must be accepted.
Attacking Elder Vampires: There is an extra step when Attacking Elder Vampires, see below.
Vampires: Vampires at 0 Health are turned to dust! Remove the miniature from play. Hunters take the Focus Reward shown on the Vampire ID card.
Tokens: Some Tokens can be Attacked and destroyed. Boarded Windows are flipped, but the other Tokens, like Crates, are discarded. The reverse of the Token will show the Focus Reward, if there is one.
Unconscious Hunters, Death and Destruction
Hunters: In the basic rules for The Order of Vampire Hunters, Hunters that are reduced to 0 Health Points are rendered unconscious. They take no further part in the game, but are rescued and revived at the end of the Hunt, if you are playing campaign games.
Optional rules (below) allow Hunters to be converted to Vampire-form and play on as Turned Hunters. See the Turned Hunters section for more information.
Attribute Tests
When Hunters are pushed to their limit, they will be required to make an Attribute Test. Hunters have 3 Attributes, Faith, Mind and Agility, and their ID Cards show the number of dice rolled for the related tests.
An Attribute Test is written as the Attribute Icon and a target number. Hunters roll the number of dice for their Attribute and pass if at least one die meets or exceeds the target. The Test will have Pass/Fail instructions that must be resolved immediately. Often one of the Pass or Fail instructions is omitted, meaning there is no special effect.
Taking an Attribute Test is not an Action, unless clearly stated on the card.
Example: Magenta draws an Elder Influence Card after declaring an Attack on an Elder. Her Faith Attribute shows that she rolls 2D6 and the Test says she must get 4 or more on at least one die. If she doesn't, she loses one die from her Attack Dice pool in the up-coming Attack due to the Fail effect on the Elder Influence Card. If she passes the Test, her attack proceeds with no penalty.
Special Abilities
All Hunters start with a Special Ability printed on their ID Card and can spend Focus in the Downtime between Hunts to learn new Abilities.
All Abilities are unique and described on the cards. Unless clearly specified, using an Ability is not an Action. However, many Abilities cost Focus to use. Abilities that affect dice rolls, by adding dice to dice pools or allowing rerolls, etc, must be declared and paid for before rolling the dice.
Focus
During the game, Hunters will collect and spend Focus. Use Focus Tokens to track the Hunters' current total.
Hunters gain Focus when they complete specific Actions:
- When Hunters Destroy Vampires, they take the Focus Reward shown on the Vampire ID Card.
- Some Tokens have Focus Rewards printed on the flip side, for example Levers. When a Hunter interacts with the Token, flip it and take the reward specified.
Hunters use Focus to activate many special effects:
- To activate Hunter's Special Abilities.
- To activate weapon Special Effects.
- To build complex items and weapons from parts they have found.
- To buy Equipment and train new Abilities between Hunts, when playing a campaign.
Hunters may spend Focus during an Action, but it is never an Action to just spend Focus.
Interacting with Tokens
Crates: Crate Tokens are placed on the Map Tiles during Setup and offer Hunters the chance to take cover.
A Hunter in the same Area as a Crate can hide behind it. This is not an Action. Stand the miniature on the Token to indicate that the Hunter is in cover. Similarly, emerging from cover is not an Action.
When Vampires activate, they still move toward and target Hunters in cover. However, they must Destroy the Crate before Attacking the Hunter directly. They Attack the Crate as described above and the Token is removed from play when it has 0 Health Points, exposing the Hunter.
A Crate only provides cover for 1 Hunter. Vampires never take cover.
Levers: Levers are used in Hunts to control other objects in the game, for example, to unlock Doors. Levers are placed in the position shown in the Hunt minimap, with the red side uppermost.
Hunters in the same area as a Lever Token can spend an Action to activate the Lever. Flip the Token to show the green side and take the Focus Reward shown. Each Lever can only be activated once. Levers can be activated when there are Vampires in the Area with the Hunter.
Debris: Vampire Dens are old and crumbling structures that often collapse in the heat of battle. Resolving certain cards will tell you to place a Debris Token.
A Debris Token is placed under the Hunter resolving the card as a reminder they are trapped by the debris. When you place the Token, the Hunter takes 1 Hit, which may be blocked by, and may damage, the Hunter's Armor.
The Hunter will need to get free before they can take other Actions. They can either free themselves or another Hunter in the same Area can free them, using the Dig Free Action. Once free, the Token can be discarded.
If a Vampire Attacks a Hunter trapped by Debris, the Vampire can reroll one Attack die.
Searching
Hunters can spend an Action to Search an area to find useful items. There are a few restrictions:
- Awake Vampires: Hunters cannot Search a Room that contains Awake Vampires.
- Never Search Icon: This Room cannot be Searched under any circumstances.
If the Hunter can Search, they spend an Action and draw an Item Card from the Search Item Deck. This must be placed on an Inventory Slot or discarded. If their Inventory is currently full, Hunters may immediately discard a card from an Inventory Slot to make space for the new Item.
There are many different Item Cards, with different effects. Item Cards are often used or resolved while completing another Action, for example weapons are used when the Hunter Attacks. If using a card is an Action of its own, it will be stated clearly on the card. For example, discarding a Medkit to heal a Hunter is an Action, but accessing cards stored in the Old Bag is free.
Some Item Cards represent a kit that must be used to build an Item, before that Item can be used. These cards can be recognized by their 2 part layout, where the 2 sections are rotated compared to each other. They are initially placed in the Inventory with the kit showing.
To build the Item, spend the Focus shown in the corner of the kit section, and rotate the card. This is not an Action, but the Hunter must be Active. Now, the Item can be used normally.
Trading
If the Active Hunter is in the same Area as another Hunter, they can spend an Action to Trade. There is a restriction:
- Awake Vampires: Hunters cannot Trade in a Room that contains Awake Vampires.
Only cards in Dashboard Inventory Slots can be Traded, including the Extractor Harpoon Card. Any number of objects can be Traded in either direction. Either player can discard cards so that they have free Inventory Slots.
Note that the complete stack of Relic Cards can be Traded, but that stack of Cards cannot be changed in any way.
Spending one Action to Trade is limited to Trade between the Active Hunter and only one other Hunter in the same Area. If the Active Hunter wants to Trade with a second Hunter, they must use another Trade Action.
Drop
The Active Hunter can Drop any number of cards from their Inventory Item Slots. These cards are placed in the same Area as the Active Hunter and can be Picked Up later.
Note that some game effects force Hunters to Drop objects in their Inventory, for example, Turning.
Pick Up
If the Active Hunter is in the same Area as cards that have been dropped by another Hunter, they can spend an Action to Pick Up 1 card and add it to their Inventory. There is a restriction:
- Awake Vampires: Hunters cannot Pick Up in a Room that contains Awake Vampires.
The player can discard cards so that they have free Inventory Slots. This applies to cards in the Dashboard Inventory Slots only, including the Extractor Harpoon Card.
Note that the complete stack of Relic Cards is picked up for 1 Action, and that stack of Cards cannot be changed in any way.
Sunset and the Awakening
Time is an important concept in The Order of Vampire Hunters and it is tracked on the Clock.
- It shows whether it is currently Day or Night, which affects many aspects of the game. See Night and Day, below.
- It also shows the Awakening, when all Vampires rouse from their slumber. See the Awakening, below.
Sleeping Vampires: During the Day, Vampires sleep and are much less of a threat to the Hunters. To show that a Vampire is asleep, place the miniature on its side. When the Vampire awakens, stand the miniature upright. Here is a quick summary of the game effects:
- Sleeping Vampires do not Impede Hunters' movement.
- Attackers may reroll any of the Attack Dice once when attacking Sleeping Vampires.
- Do not draw Elder Influence Cards when Attacking Sleeping Elders, see Attacking an Elder below.
- Sleeping Vampires do not Move or Attack for any reason.
Only Encounter Cards spawn Sleeping Vampires. When all other cards spawn Vampires, they are always spawned Awake.
Vampires can be woken up if there is noise in the Room:
- If an Attack fails to Destroy a Vampire, all the Vampires in the Room with the target are woken up.
- If a Hunter Attacks with a Noisy weapon or uses a Noisy item, all the Vampires in the Room with the Hunter are woken up.
- If a non-Encounter Card spawns a Vampire, or a Vampire Moves into a Room, it will Wake all the Sleeping Vampires in the Room.
The Awakening: Vampires are attuned to the sun and rise with an intense blood lust when it sets.
Follow these steps in order at the end of round 6:
- Resolve Encounter Cards for all Unexplored Rooms. Ignore all Terror Events generated by these Encounter Cards.
- Wake all Vampires. Stand all Vampire miniatures upright.
- Open all the normal Doors.
- Flip all the Vampire ID Cards from the Day side to the Night side, revealing their nighttime statistics and special powers.
After the Awakening, all Vampires will be Awake until the end of the game. Once a Vampire is Awake, it does not go back to Sleep.
Remember when the game continues, the turn order inverts so that Vampires activate before the Hunters.
Special Doors: Some Hunts have special Doors, marked by a blue colored Door Token. If the Awakening happens while these special Doors are Closed, resolve the Encounter for the Room, but do not Open the Door, regardless of whether the Door is Locked or not. Also see Vampires in Closed Rooms, below.
Vampire Activation
The Vampires are controlled by Vampire Activation Cards. A card is drawn each time a Hunter activates. There are 2 decks, one for use during the Day and one for the Night. Both sets of cards are the same format with similar instructions.
Since these decks control the Vampires, they play a part in setting the difficulty of the game. Each card is marked with a difficulty level in the top left corner. The Hunt will state how many Level 1, 2 and 3 cards to add to each deck. Make sure you shuffle the decks thoroughly.
The current player draws a card at a specific time during their turn:
- Day: Activate your Hunter and then draw and resolve a yellow Day Vampire Activation Card.
- Night: Draw and resolve a blue Night Vampire Activation Card and then activate your Hunter.
The Current Player then resolves all sections of the card in order, from top to bottom. These instructions are only applied to Vampires that are Awake, but if Vampires wake up while the card is being resolved, they will follow the remaining Actions on the card.
The instructions must be followed closely, but if there are equally valid interpretations, the current player decides what happens.
Vampire Activation Card icons: All Vampire Activation Cards use these three icons:
- Stalking Vampires icon: select Vampires that are not in an area with a Hunter (any Hunter, not just the Active Hunter). These Vampires are stalking a Target and the Activation Cards will move them more often.
- Fighting Vampires icon: select Vampires that are in an area with one or more Hunters. These Vampires are already in position to Attack a Target, so the Activation Cards will move them less often.
- Move Vampires icon: this icon means move Vampires.
Generally, each Vampire Activation Card is divided into 4 sections, although on some Cards a section may be empty, meaning nothing happens. The first 3 sections are normally related to the Active Hunter. The last section is normally related to all Hunters. The last section is highlighted in red to remind you of this difference. The cards are resolved as follows:
- Spawn Vampires or perform a special task.
- Move Vampires toward the Active Hunter.
- All Vampires in the Area Attack the Active Hunter.
- Move more distant Vampires closer to any/all of the Hunters.
Section 1: This section often has instructions for spawning new Vampires. Place the Vampire in the Area specified, for example the same Area as the Active Hunter, beside a numbered Tunnel Access Point, etc. These spawned Vampires are always Awake and Wake up any Sleeping Vampires in the whole Room.
Some Cards have unique effects, sometimes associated with an Attribute Test.
Section 2: This section says which Vampires will Move to the same Area as the Active Hunter.
- Start by using the red and green icons to select the Vampires. Either Fighting or Stalking Vampires, or both groups, may be selected.
- The text will specify a maximum distance along the shortest Path to the Active Hunter. When counting the distance, do not count the Area containing the Hunter, i.e. if the Vampire is in an adjacent Area, the distance is 1.
Now move the Vampires that satisfy all the selection conditions to the same Area as the Active Hunter.
Vampires do not have a Move or Speed attribute. If Vampires are selected by the icons and distance limit, they will always Move to the Area with the Active Hunter.
Section 3: All Vampires in the Area Attack the Active Hunter, in Initiative order (lowest Initiative goes first).
Vampire Attacks are made as normal using the Attack Dice pools and Accuracy values shown on the Vampire ID Cards. Don't forget Attacks may gain Special Effects at Night.
Section 4: Finally, Vampires stalk the Hunters. All Vampires far enough from the Hunters will close in. This section is a little different from the first 3, because it applies to Vampires anywhere on the board, not just near the Active Hunter. The selection procedure is similar to section 2:
- The green icons mean select the Stalking Vampires.
- Trace the shortest path from the Vampire to the closest Hunter.
- Unlike Section 2, the text gives a minimum distance from the Vampire to the closest Hunter. Check the Vampire is at least this distance away.
- Finally, move the Vampires that satisfy these conditions the given distance along the shortest path toward the closest Hunter.
If all these conditions are satisfied, the Vampire will move along the shortest path to the closest Hunter. The card says how far the Vampire moves.
Shortest Path: When checking the distance from a Vampire to a Hunter, select the shortest path through Open Doors and the Tunnels. Vampires do not open Closed Doors. Vampires may move toward Hunters in Sunlit Rooms, they will stop in the last dark Area and not actually enter the Sunlit Rooms.
Closest Hunter: This always means "closest along the shortest path". Note that there may be multiple Hunters that all count as the "closest Hunter". Select one of them using the following rules:
- Select the Hunter with the most Wounds.
- If there is still a tie, select the Hunter with the least Focus.
- If there is still a tie, select at random.
Remember, the instructions only apply to Vampires that are Awake.
Worked example: Magenta draws a Vampire Activation Card from the Day deck. She is ambushed by a Guardian. Not only does the Guardian appear right next to her (Section 1), but the other Vampire in the room Wakes up.
For Section 2, the card says to move Stalking Vampires up to 2 Areas to get to Magenta. A Burrower on the left is Stalking, but it does not move through a Closed Door, so the shortest path is far too long — much more than 2 Areas away, as measured along the shortest legal path. A second Burrower is 3 Areas away, above the limit, so none of the Burrowers Move. The Upyr is not Stalking (it's with Joshua), and the Guardian is already in the area with Magenta, so these 2 Vampires do not Move either. That leaves a Thrall, which is 2 Areas from Magenta, just in range, so it does Move to the Area with Magenta.
For Section 3, Magenta now has 2 Vampires with her and they attack her. The Guardian goes first and gets a Hit! The Thrall also gets a Hit! Magenta has already lost her Armor, so she takes 2 Wound Tokens. (Section 3 only applies to the Active Hunter — an Upyr in the Area with Joshua is not Attacked this turn because Joshua is not the Active Hunter.)
For Section 4, the general move section may cause Vampires to approach any Hunter. Some Vampires can be dismissed quickly: the Upyr, Guardian and Thrall are in Areas with Hunters and are not Stalking new targets, so they are not selected. A Burrower finds Sarah as the closest Hunter (the distance must be traced along the shortest valid path, not simple layout — the Burrower does not Open the Closed Door, so the path to Magenta is much longer than the path to Sarah); it is 2 Areas from Sarah, so it moves 1 Area closer to her. The remaining Stalking Burrower, 3 Areas from Magenta, also steps forward 1 Area, because Magenta is the closest Hunter to it (not because she is the Active Hunter).
This one Vampire Activation Card caused a lot of change: more Vampires are Awake, Magenta has been swarmed and taken hits, and a Burrower is closer to Sarah.
Not all Vampire Activation Cards have all 4 sections. A card missing the red highlight for section 4 has only sections 1-3 present; it may also add an extra Attribute Test to be resolved in section 3 before Vampires attack as usual.
Vampires in Closed Rooms
In some situations, you may see Vampires in closed Rooms completely cut off from the Hunters. When resolving cards, for example Vampire Activation Cards, completely ignore all Vampires in closed Rooms. If the Room has a Tunnel Access Point, or once a Door to the Room has been Opened, Vampires in that Room will Activate normally.
Elder Vampires
Elder Vampires are unique individuals that have existed for many centuries. Each Elder has unique abilities and statistics and is represented by a unique miniature. Their ID cards are not double-sided because these powerful adversaries are less affected by Day or Night and always have access to their special powers.
During Setup, the Elder Vampire ID Cards are shuffled into a small deck and a random Elder ID Card is drawn whenever an Elder spawns. Place the appropriate miniature on the board and leave the ID Card where it can be easily seen by all players.
If the Elder Vampire is Destroyed, discard the ID Card. If the Elder ID Card deck is empty, shuffle the discarded Elder ID Cards to restock the deck.
Attacking an Elder: Elder Vampires are terrifying foes that dominate the minds of their enemies. The Elder Influence Cards show how these mental attacks affect the Hunters.
When a Hunter Attacks an Awake Elder, they must specify the weapon they are using and then interrupt the Attack, draw and resolve an Elder Influence Card, and then complete the Attack with that weapon. The Attack may continue normally or at a disadvantage, or it may not happen at all. In all cases, the Hunter has used an Action. This process must be followed for each Attack Action, if the Hunter makes multiple Attack Actions in a turn.
To resolve the Elder Influence card, the Hunter takes the Attribute Test given at the top of the card, reads the flavor text and follows the instructions in the Pass or Fail section, depending on the result.
Sleeping Elders do not get the opportunity to influence their attackers. Make the Attack as if attacking any Sleeping Vampire.
The Vampire Lord: The Vampire Lord is an especially powerful Elder and is reserved for special narrative moments and the climactic final battle. It is not spawned at random with the other Elders, so do not shuffle its card into the Elder Deck.
Vampire Lord ID Cards are double-sided. They do not have Day and Night sides because the Lords are powerful enough to access their powers during the Day. Instead, there is a full strength and weakened side. If the Vampire Lord is in play, begin with the full strength side showing, which is the side with the highest Health Points.
Relics
When you play a Campaign, you may receive a Relic Card as a reward when you successfully complete certain Hunts. This represents a part of an ancient Relic that you have found. The Order can create a new Relic from several of these cards. All Relics must have at least 3 parts:
- Shaft: handle, grip, etc.
- Weapon: sword or dagger blade, mace or hammer head, etc.
- Holy Item: Saint's clothing, body part, etc.
You can use up to 5 cards because it is sometimes possible to have 2 Weapons and/or 2 Holy Items:
- Shaft + Weapon + Holy Item — 3 cards
- Shaft + 2 Weapons + Holy Item — 4 cards
- Shaft + Weapon + 2 Holy Items — 4 cards
- Shaft + 2 Weapons + 2 Holy Items — 5 cards
Each card will say clearly whether multiple cards can be used, but you can use at most 5 cards to make a Relic.
When you combine them, each card contributes to the overall statistics of the Relic:
- Shaft: Range.
- Weapon: Dice and Accuracy. For multiple cards: add the number of dice but use the worst Accuracy.
- Holy Item: Special power. For multiple cards: all special powers can be activated, if you can pay the Focus cost for them. Although the Relic is a weapon, these powers may be unrelated to Attacking.
When combined, the parts create a weapon with a powerful unique property, the ability to Destroy Vampire Lords.
Drawing Relic Cards: Many Hunts will tell you to draw a Relic Card if you complete them successfully. Occasionally, there will be special rules such as starting in the Den with the Relic and trying to get out. Your first 3 draws from the Relic Deck are not completely random — use these rules to ensure you can build a Relic from your first 3 Relic Cards. If you draw a card you cannot use, simply discard it. It will be shuffled into the Relic Deck when you set up the next Hunt.
- First draw: keep the first Shaft that you draw.
- Second draw: keep the first Weapon that is compatible with your Shaft.
- Third draw: keep the first Holy Item that is compatible with your Shaft and Weapon.
It is possible that you will have the cards to assemble a complete Relic part way through the campaign. If you gain more than 3 Relic rewards, simply keep your first draw from the Relic Deck. You may be able to use this Card to enhance your Relic.
Assembling the Relic: The Order will only have the time and resources to assemble a Relic at specific points during the Campaign. This will often be just before the final Hunt. In the Hunt definition, it will tell you that you can assemble your Relic.
The number of Relics you can create will be limited by the number of Relic Cards you have since each Relic needs between 3 and 5 parts. For example with 5 cards, you can only create one Relic, but if you have 6 cards you can choose between making 1 or 2 Relics. The Campaign will control how many Relic Cards you can collect. Once created, you cannot disassemble a Relic to use the Relic Cards a different way.
When you create a Relic, select the Relic Cards you want to use. Check the instructions on each card, to be certain the combination is legal. Then, at the start of the Hunt, overlap the Relic Cards and place the stack on one Hunter's Dashboard in an Inventory Slot. When you overlap the cards, you only need to be able to see the stats at the bottom.
Some Relic parts give more options — you may be able to carve and shape a part in two different ways when the Order makes the new Relic (for example, using a shaft as a short or long shaft). Rotate the card when you stack it so you can read the text for the option you want.
Some Holy Item Relic Cards may always be added to the stack as a second Holy Item, regardless of the restrictions on the other Cards you are using — this lets you build a Relic from 4 cards with 2 Special Abilities. Longer Campaigns give you more such options.
Trade, Drop, Pick Up: You can pass a Relic between Hunters once the Hunt has begun using these Actions. If the Hunter carrying the Relic is killed, the Relic is dropped in their Area and can be Picked Up later.
Turned Hunters: Turned Hunters cannot wield a Relic, or any other objects. If the Hunter carrying the Relic is Turned, the Relic is dropped in their Area. As above, another Hunter can spend an Action to Pick Up the Relic.
Note that you cannot change the Cards in the stack when you transfer it by any of these Actions.
Destroying Vampire Lords: Relics can be used as regular weapons, or as items that generate special powers. However, the real purpose of creating a Relic is to battle Vampire Lords. Only a Relic can deliver the final blow that will destroy a Vampire Lord, as described in the Vampire Lord section.
Vampire Lords
Vampire Lords are the most powerful of the Elder Vampires. They are extremely rare and there is seldom more than one Lord active at once. Kophas is the Vampire Lord in the core game.
Kophas does not appear in all Hunts. The Vampire Lord is reserved for special narrative moments and the climactic final battle. It is not spawned at random with the other Elders, so do not shuffle its card into the Elder Deck. Instead special rules in some Hunts control when Kophas appears.
All the rules for Elders apply to Vampire Lords, for example they use Elder Influence Cards. In addition:
- Although they dislike sunlight and rarely walk in the day, it has no effect on them. They are cloaked in the Night everywhere.
- Their cards are double-sided but this is not related to Day and Night. Always start with the full strength side (the side with the highest number of Health Points).
- They are too large to be affected by the Extractor.
- Lords cannot be Destroyed by normal weapons. When using the first side of the Lord ID Card, the Lord will take damage normally. But when the Lord reaches 0 Health Points, consult the Hunt description for what happens. The Lord may escape and regenerate to fight the Hunters again.
The full strength side is the side that is used at the start of most Hunts. The Vulnerable side is used when there is a change and you can Destroy the Lord. You may reveal this side part way through a battle.
Destroying a Vampire Lord: Flip the Vampire ID Card when the Lord reaches 0 Health Points and then continue the fight. When this happens:
- Complete the Hunter's Attack.
- If there are Wounds from this Attack that were not applied, they are lost.
- Remove all Wound Tokens currently applied to the Lord.
- Flip the ID Card to show the Vulnerable side.
The Lord can fight on in this weakened state, using the stats now revealed on the reverse of the card. The crucial difference is that the Lord is now immune to normal Weapons and the effects of normal Objects and Hunter Special Effects. The only way to Destroy the Lord is to Attack with a Relic. Apply Wounds from Attacks with Relics normally. If the Lord is reduced to 0 Health a second time, it is Destroyed.
Turned Hunters: Turned Hunters cannot use Relics, but in their unnatural state, their melee Attacks can Wound the Vulnerable Lord and even Destroy it.
Miscellaneous Rules
Rerolls: Whenever a special effect allows dice to be rerolled, all the dice being rerolled must be rerolled together just once and the new result must be accepted.
Stealing: When a card says Steal X resources, such as Health or Focus, resolve this like stealing X coins in real life. The target loses X resources, the "thief" gains X resources. If fewer than X resources are available, transfer as many as possible. If the thief meets a resource limit, for example their maximum Health, the target still loses as much as possible.
Vampires Move and Attack: Vampire Activation Cards are not the only cards that cause Vampires to Attack. If other cards, such as Terror Events, make the Vampire Attack a target, but the Vampire is not in position to make the Attack, move the Vampire to a position where the Attack is legal before making the Attack roll. Typically, move the Vampire to the same Area as the Target.
Objectives and Winning
Objectives and Ending a Hunt
Each Hunt has objectives for the Players. Some end the Hunt, some simply give extra rewards:
Primary Objective: Achieving the Primary Objective is the main goal for the Hunt and normally ends the Hunt immediately. It may give you important rewards, such as a Relic Card. It is up to the player that completes the last part of the Primary Objective to decide how to use or how to share these rewards.
Secondary Objectives: A Hunt may or may not have Secondary Objectives. They are optional and do not end the Hunt if they are completed.
Rewards for completing the Secondary Objectives are awarded to the player completing the Objective. It may be possible for multiple Hunters to obtain the same Secondary Objective. This will be clearly stated in the Hunt definition. Regardless of the Hunt outcome, if a Hunter fulfills the conditions of the Secondary Objective, they will be given the reward at the end of the Hunt.
There are different objectives for the Hunters or Turned Hunters. This is described further in the Turned Hunter advanced rules. When playing without Turned Hunters, ignore the Turned Hunter Objectives.
Accumulated Focus: Focus is awarded during the Hunt for some tasks, for example, Destroying Vampires and activating Levers. This Focus can be spent during the Hunt or kept for use in the Downtime. Like Secondary Objective Rewards, all players that are awarded Focus can keep it after the Hunt ends. It is not necessary to complete the Primary Objective. Even players that end the game unconscious get their Focus and Secondary Objective Rewards.
Rewards and Standalone Games: In standalone Cooperative and Competitive Mode games, you can ignore assigning the rewards, as they are not important when playing these options. The rewards are only used in Campaign games, where you gain skills and gear, as you progress from Hunt to Hunt.
A Hunt also ends when time runs out. All players lose.
Winning and Losing
First, you can't win if you lose:
Time Runs Out: If the game reaches the end of the last turn and a Primary Objective is not completed, then all Players lose immediately. Even if you are playing with your most competitive friends, it is critical that you work together to complete the Primary Objective in time.
If you did not lose, perhaps you won! Winning is simple in Cooperative Mode:
Cooperative Mode: If the Hunters complete the Primary Objective, all Hunters win the game.
The various optional rules described below change the win conditions slightly.
Game Options
Introduction
This section describes The Order of Vampire Hunters Rules options.
We start with some Advanced Rules. These are part of the core Cooperative Mode, but can be skipped while you learn your actions and how to activate the Vampires during your first few games. You will quickly learn the basics and once you try the advanced rules, we are sure you will always play with them.
Then there are various options for playing with different numbers of people, Competitive Mode, standalone/campaign play and adding Turned Hunters. This is all based on the core rules.
Advanced Rules
The Extractor
The Extractor is a mobile winch moved around outside the den by Pete Armitage, a retired Hunter. A harpoon may be carried by one of the Hunters, attached to the winch by a tough cable. When a Vampire is snagged by the harpoon, the winch winds the cable, dragging the Vampire outdoors to be destroyed by the burning light of the Sun.
Although the Extractor Destroys powerful Vampires easily, there are many restrictions that must be followed before it can be used:
- The Extractor can only be used during the Day. Discard the Harpoon Card during the Awakening.
- The Hunter must have the Harpoon equipped.
- The Harpoon is a melee weapon, so the Vampire must be in the same Area as the Hunter.
- The cable is only 5 Areas long. The Vampire must be, at most, 5 Areas from the entrance with the Extractor. If a Hunter moves 6 or more Areas from the entrance, they must discard their Harpoon Card. Place it beside Pete, to show that the Hunters can come and take it.
Pete can move between the entrances, again with restrictions:
- Pete can be positioned at any Open Entrance/Exit or at any Unboarded Window.
- Pete can only move when no Hunter is equipped with the Harpoon. The cable between Pete and the Hunters prevents him moving.
There is a new Action specific to using the Extractor:
Activate Extractor: If a Hunter satisfies all the restrictions above, they can use an Action to snag a Vampire with the Harpoon and call Pete to drag the Vampire outside. The Vampire is immediately Destroyed in the Sunlight and the Hunter takes the Focus Reward on the Vampire ID Card. Place the Harpoon Card beside Pete to show that any Hunter can come and take it.
The Extractor is a Noisy weapon. The screaming Vampire will Wake all Sleeping Vampires in the starting Area and every Area that it passes through on the way to the exit.
Even Upyrs are destroyed by the Extractor. Pete can handle one disoriented Upyr!
There are also 2 tasks that the Hunters can perform as free Actions:
Relocate Pete: If no Hunters are carrying Harpoons, a Hunter can relocate Pete to any entrance or Unboarded Window.
Take a Harpoon: When a Hunter is in an Area adjacent to Pete at an entrance, the Hunter can take a Harpoon, so long as no other Hunter has the Harpoon. This may often be done at the start of the game, as Hunters do not start with a Harpoon equipped. Only 1 Hunter can carry the Harpoon. Place the Harpoon Card on your Dashboard in an Inventory Slot to show that the Harpoon is equipped.
Note that Hunters can take the Harpoon from each other as part of the normal Trade Action.
Example: Magenta is in a perfect position to use the Extractor. She has a Harpoon, is only 4 Areas from Pete and is in the same Area as a powerful Elder that would normally be hard to kill. She spends an Action to jab the Harpoon into its fleshy thigh and calls to Pete to drag it outside to a fiery death. If there were any Sleeping Vampires in the path, this noisy Action would Wake them up. Joshua started the turn without a Harpoon Card, but is in position to take one from Pete. He grabs a Harpoon and is now ready to run back into the Den. Since taking a Harpoon from Pete is a free Action, Joshua still has 3 Actions available.
Combined Attacks
Multiple Hunters can work together to attack a Vampire. There are many unique Combined Attack Reference Cards, which describe exactly how the Hunters can gang up on the Vampires. Here are the common elements:
-
The description will specify the arrangement of the Hunters and the Target. For example, all may need to be in the same Area for some Combined Attacks, but for others, the Hunters need to be separated. There may be other more specific conditions. If the conditions are not satisfied, the Combined Attack cannot be used. The Active Hunter spends an Action to initiate the Combined Attack following all the rules in the Attack section and including any bonuses on this card. The description may restrict the type of Attack, melee or ranged.
Obviously, one or more of the Hunters will not be the Active Hunter. They must be able to participate, for example, they must not be trapped by Debris. They must also agree to participate. These Hunters do not spend an Action to take part in the Attack.
-
There will also be a Focus cost. The card will say who pays and how much. Again, if the cost cannot be paid, the Combined Attack cannot be used.
-
Combined Attacks give a better reward than Destroying a Vampire with a normal Attack. This is described in the Reward section of the card.
-
Finally, there is some risk. Combined Attacks often require one of the Hunters to get close to the Vampire. If the Vampire is not Destroyed by the Combined Attack, they may be able to counterattack immediately. This is described in the Penalty section of the card.
Playing Turned Hunters
Playing as a Turned Hunter is the biggest change made by an optional rule. It can be included in Cooperative and Competitive Mode games, as well as when playing Standalone and Campaign games. However, since it is a significant change, make sure you understand both the base game and this extension well before you try it.
When your Health Points first reach 0, instead of being unconscious, you will begin to turn into a Vampire and continue to play as a Turned Hunter with new Objectives and Compulsions. Think of this as a last opportunity to play on and win. The game will be hard, but at least you have not lost yet.
We will explain the general changes and how this affects the various game modes:
Turning: When you are reduced to 0 Health Points, interrupt the game while you turn into a Vampire. Your Hunter ID and Basic Weapon Cards are double-sided, flip them to the Vampire side. Switch your Blue Hunter Identification Ring to the Red one, so that all players can clearly see you have Turned. Place all Item, Equipment and Relic cards in the Area with the Turned Hunter. As a Turned Hunter, you will not be able to use Weapons or other objects. Other Hunters can use the Pick Up Action to retrieve these later. If you have any Special Ability Cards in play, place them to one side. You can use them in a later Hunt once you are cured. Remove all Wound Tokens, but keep your Focus Tokens. Draw a Compulsion Card, see below. If a Vampire is currently Attacking you, stop the Attack and take no further Wounds from it. If you are the Active Player, play out your remaining Actions as a Turned Hunter.
Since you are a Vampire, Hunters cannot Search, Trade, Pick Up items, etc, when you are in their Room. Hunters can Attack Turned Hunters, like any other Vampire.
Play as a Vampire: You are now a Vampire, although you control your own actions rather than being controlled by a Vampire Activation Card. Your Action list is much smaller:
- Move: You still get two Movement Points and can Open Doors. You are still Impeded by Vampires.
- Attack: You can now Attack Hunters. You cannot attack Vampires, or other Turned Hunters, unless suffering a Compulsion.
- Bite Captives: As an Action, you can Bite Captives. Using the stats on the Token, the Turned Hunter must make a successful Attack against the Captives. Flip the Captive Token, take the Focus Reward on the reverse and discard the Token. The Captives are dead!
- Activate Lever: This is exactly the same as the Hunter Action. If the Lever is linked to special effects in the game, such as unlocking a Door, the effects take place regardless of who activates the Lever.
You do not draw a Vampire Activation Card, as Vampires no longer react to your presence. When other Hunters resolve Vampire Activation Cards, the Vampires completely ignore all Turned Hunters. Play the Vampire Actions as if the Turned Hunters were not even on the game board.
Compulsion: As your mind warps, you must give in to strange new compulsions. Your unique compulsion is described on your Compulsion Card. Each card describes the tasks you must complete every turn and the penalty you suffer at the end of your Activation, if you do not complete them.
Your Compulsion may force you to Attack Vampires. If this is the case, you only act to satisfy your Compulsion. If your Compulsion is to Destroy Thralls, you cannot Attack Warriors. If your Compulsion is to Wound a Vampire, once you Wound a Vampire you cannot Attack another, etc.
Since your Compulsion may force you to Attack Vampires, Turned Hunters may need to Attack Elder Vampires. This is especially dangerous as Elders exert a strong control over the Vampires in their Den, including the newly Turned Hunters. During the Attack, follow all steps as normal but when you resolve the Elder Influence Card, always follow the "Fail" instructions.
Turned Hunter Combined Attacks: These are similar to Hunter Combined Attacks, except Turned Hunters get the Vampires to do their bidding. There is no Reward section, the benefit is simply the boosted Attack.
New Team with New Objectives: You are now playing as one of the Turned Hunters. You may be the first Turned Hunter in the game, or you may be joining other Hunters who have already been Turned.
As a Turned Hunter, you will be trying to achieve the Turned Hunter Objectives in the Hunt. There may be some overlap between both sets of Objectives. For example, the Hunters may be trying to unlock the Door to an Elder in order to get in to Destroy it. The Turned Hunters may be trying to unlock the Door to release the Elder. In these cases, it does not matter which team performs an Action to complete part of the objective, it counts as completed for both teams.
A Turned Hunter will be rewarded for any Hunter Secondary Objectives they achieved before Turning.
Turn Order: During the Day, Hunters activate before the Turned Hunters. At Night, Turned Hunters activate before the Hunters.
Focus: Turned Hunters keep the Focus they earned as Hunters and can continue to gain more Focus. However, Turned Hunters gain Focus for different tasks:
- Turned Hunters gain 3 Focus for killing Hunters.
- In addition, when Attacking Hunters, a Turned Hunter gains 1 Focus for each natural 6 rolled on the attack dice.
- Turned Hunters gain Focus for Biting Captives and Activating Levers.
- Turned Hunters gain Focus for Destroying Vampires, as normal.
Remember, Turned Hunters cannot generally Attack Vampires. They can only do this if their Compulsion forces them to do so.
0 Health Points: If the Turned Hunter is reduced to 0 Health Points, they are knocked unconscious and are out of the game. If you are playing a Campaign, they are taken back to the Order and can pay for the cure as normal, at the end of the Hunt.
Winning: As before, you cannot win unless you achieve your Primary Objective. Therefore, with 2 teams having 2 different Primary Objectives, only 1 team will win. Of course, if time runs out without either team completing their Primary Objective, both teams will lose.
These new rules are used in all game modes. Here are some clarifications:
Cooperative Mode: Follow the normal Cooperative Mode turn order rules with each team. The Hunters decide in which order the Hunters play. The Turned Hunters decide in which order the Turned Hunters play. But one group goes before the other, depending on whether it is Day or Night.
Hunters and Turned Hunters play as different teams, but the Hunters still cooperate fully with each other and the Turned Hunters cooperate fully with any other Turned Hunters.
The players win or lose as a Team. The team that actively completes their Primary Objective wins. If time runs out, both teams lose.
Competitive Mode: Details for Competitive Mode can be found below. Follow the normal Competitive Mode turn order rules with each team. Start at the First Player Marker and move clockwise round the table. You will need to make 2 sweeps round the table so that Hunters and Turned Hunters all get to activate.
The winning player must be on the team that completes its Primary Objective.
Example: a game ends when Joshua completes the Turned Hunter Primary Objective. Joshua (Turned) has 4 Focus, Sarah (Hunter) has 4 Focus, Stephan (Turned) has 3 Focus, Magenta (Hunter) has 6 Focus. Note that Magenta has the highest Focus and the Hunters have more Focus in total than the Turned Hunters. All this is irrelevant in determining the winner. The Turned Hunters completed their Primary Objective and Joshua is the Turned Hunter with the most Focus. He is the winner.
Campaign: At the end of the Hunt, Turned Hunters are captured, returned home and treated with blood transfusions, UV lamps and silver nitrate tablets. Humanity can be restored to Turned Hunters as it takes time for Vampirism to take full hold of its victims. Next Hunt, they are ready to play as normal Hunters again.
Number of Players
Playing with 2-4 Players: Each player should select 1 Hunter and follow the rules above for scaling the number of Vampires spawned to match the number of players. See the Resolving Encounters section.
Alternatively, 2 experienced game players can control 2 Hunters each and start each Hunt with 4 Hunters. This option will work best for Cooperative Mode.
Solo: Solo play is where just 1 player controls all the Hunters. Decide whether you want 2-4 Hunters in the game. The more experienced you are, the easier you will find it to control a larger number of characters at one time. Again, this works best with Cooperative Mode.
Game Modes
Cooperative Mode: With a team of Hunters entering the Vampire Den, The Order of Vampire Hunters is naturally a cooperative game. In Cooperative Mode, the Hunters should plan their turn together, make Combined Attacks and Trade inventory during the Hunt or the Downtime of a campaign.
Competitive Mode: Competitive Mode is not as different as it may sound. You are still a band of Hunters trying to rid the world of the Vampires, so there are no Hunter vs. Hunter Attacks. The difference is that you gain a way to score the games, so there is an individual winner. It also sets the expectation for the Hunters to play more for themselves, for example with less Trading.
However, there is still a need for some level of cooperation. As badly as you may want the bragging rights for a win, everyone loses if you cannot complete the Primary Objective. If Joshua and Stephan are third and fourth place in Focus, they can quickly catch up if they make a few Combined Attacks. If you hoard all the Equipment you gain during downtime, the team will not be able to complete later Hunts. So you may see some Trading, even in Competitive Mode.
Rule Change: In Competitive Mode play starts with the First Player and proceeds clockwise. During Setup, give the First Player Token to the player who gained the most Focus in the previous game (resolve draws with a dice roll). In turn order, place your Hunters at the entrances. The First Player places Pete, if the Extractor is being used.
During the End Phase, advance the First Player Marker clockwise to the next Player.
Rule Change: Once the game is completed, the player with the most Focus wins, if their Primary Objective was completed. This will change your playing style, as you will not want to use all your Focus to power up Attacks and Abilities.
The opposite may be true in Competitive Mode, where you may want to hoard the best Equipment. Remember, you may have to give some to the other Hunters, to ensure you can get through the harder Hunts.
Campaign play is described in the next section as it introduces a whole new phase to the game, Downtime.
Adjusting Difficulty
You can adjust the difficulty to suit your group:
Change Decks: When constructing the Vampire Activation and Encounter Decks, add more of the lower level cards to make the game easier, or more of the higher level cards to make it harder.
Change Day/Night Times: Move the Start and End Tokens on the Clock to change the number of rounds in the Day and Night. Shift the Start and End Token 1 round earlier to make the game easier or 1 round later to make the game harder. If you exhaust a Vampire Activation Deck, shuffle the discarded cards to form a new deck.
Spawn More Vampires: Place double the number of Vampires shown on the green bar of the Encounter Card to make the game harder.
Gameplay in Standalone Games vs Campaigns
Standalone Games: Simply select a Hunt and play it. In Cooperative Mode, there is absolutely no need to carry Focus or items forward, or save fragile weapons for the next game. So use all of your Focus to power up your Attacks and use your best weapons with abandon.
Even in Competitive Mode, there's no benefit to ending with a huge amount of Focus, as you will not be buying Equipment and Training. Spend some of your Focus to power up and defeat the Vampires and aim to win the game by 1 Focus point!
Campaigns: Campaigns add another level of strategy. Not only do you want to work toward a victory during this Hunt, but you want to gain enough Focus and gear to help with the next.
In Cooperative Mode campaigns, you may Trade inventory and share taking Focus Rewards during the Hunt, but don't forget that you can Trade Equipment during downtime.
Campaign Rules
Overview
Campaigns are a set of linked Hunts of increasing difficulty. Hunters earn Focus during each Hunt and buy Equipment and Abilities before setting out for the next Hunt.
Campaign Structure: Think of the campaign like a larger game. It has its own turn structure:
- Select the Campaign.
- Play a Hunt.
- Improve the team. Use the Focus gained in the previous Hunt to get your team ready to fight again. If there are more normal Hunts, go to step 2, if not, continue to step 4.
- Play the Final Battle. There may be some special conditions to enter this Hunt.
Select the Campaign
At the start of a new Campaign, players should select a Campaign Map.
Campaign Map: Many Hunts are described in the Hunt booklet which can be played standalone or strung together to form a campaign. The core game contains 2 Campaign Maps, indicating which Hunts should be played and in which order.
Playing the Hunts
Start at the first Hunt and play through them all in sequence. For the first Hunt, you start with the smaller Hunter Dashboard. You will have no Equipment Cards either.
As the Campaign progresses, you may use Focus to buy Equipment for use on the Hunt and you may learn more Abilities. If you successfully completed the last Hunt, you may use the larger Dashboard. Use your Inventory Slots to hold the Equipment Cards and place the Special Ability Cards nearby in your playing Area.
Downtime
After the Hunt, the Hunters have a chance to spend their Focus to improve their capabilities before the next Hunt starts. Once the Hunt is over, the Hunters complete the following steps in order:
- Discard all Item Cards, but keep the remaining Equipment, Relic and Special Ability Cards.
- If a Hunter has been Turned, they must be cured. They must spend their own Focus to pay the Transformation Cost, which is given in the definition of the Hunt just completed. If you do not have enough Focus, the cost is all the Focus you have. You will always be cured.
- Purchase Equipment and Learn Special Abilities. Each Hunter randomly draws a total of 4 cards from the Equipment and Special Ability Decks, in any combination – 4 Equipment or 4 Special Abilities or something in between. However, the Hunt may restrict what you can buy, so construct this deck accordingly. You can buy any or all of these 4 Cards, so long as you meet the Hunt restrictions and you can pay the Focus cost.
- Discard unspent Focus.
- Share any Equipment between the Hunters.
- Discard any Equipment Cards that do not fit on your Dashboard.
Note that these steps are the same for Competitive and Cooperative games. In both cases, cards must be purchased by individual Hunters, with no sharing of Focus. Also, the Equipment can be traded freely. However, it is expected that there will be more discussion about the purchases and more trading in Cooperative games. In Competitive games, discussion and trading may be limited to brokering deals and ensuring there is some minimum level of balance in the team.
Special Abilities represent learned skills. They cannot be traded and the Hunts may place restrictions on learning Special Abilities.
Playing the Final Battle
The Final Battle is the last Hunt in the Campaign. The setup and game play are exactly the same as other Hunts, but the final objective will be to kill a powerful creature. There will often be a restriction, such as having a Relic. If you do not meet the restriction, you cannot play the Final Battle and you have lost the Campaign.
Campaign 1
This Campaign Map shows how to organize the individual Hunts into Campaign 1. Follow the arrows to form a path from Hunt 1 to Hunt 6.
- You may not repeat a Hunt. You can complete the final battle against Kophas without winning every Hunt, but if you lose too many, you lose the Campaign.
- You will either play Hunt 3 or Hunt 4, not both.
- Hunt 10 will be mandatory if you only have 2 parts of your Relic. However, you may always attempt Hunt 10 if you want more equipment or another Relic Card.
- You cannot attempt Hunt 6 unless you have a complete Relic.
Campaign 2
This Campaign Map shows how to organize the individual Hunts into Campaign 2. Follow the arrows to form a path from Hunt 7 to Hunt 12.
- You may not repeat a Hunt. You can complete the final battle against Kophas without winning every Hunt, but if you lose too many, you will lose the Campaign.
- Hunt 3 is optional.
- Hunt 11 will be mandatory if you only have 2 parts of your Relic. However, you may always attempt Hunt 11 if you want more equipment or another Relic Card.
- You cannot attempt Hunt 12 unless you have a complete Relic.
Hunts
Each Hunt defines its own map, deck contents, special rules, objectives and downtime rewards. The Hunt booklet's minimaps are not reproduced here; the setup tables below give the numeric/deck configuration for each Hunt.
Hunt 1: Into the Lodge
| Setup | |
|---|---|
| Entrance | Split the Hunters into 2 forces of the same size, if possible. Place 1 force at each Entrance. |
| Clock | Start 4, End 8. |
| Encounter Deck | 8 Level-1 Encounter Cards. |
| Vampire Day Activation Deck | 2 Level-1, 7 Level-2 and 3 Level-3. |
| Vampire Night Activation Deck | 2 Level-1, 3 Level-2 and 3 Level-3. |
| Pete and the Extractor | Not available. |
| Dashboard | The Hunters use the Small Dashboard in this Hunt. |
| Standalone Play | The Hunters start with no Special Ability or Equipment Cards. |
Special Rules: The Blue Door is Locked at the start of the Hunt. Activate the Lever to unlock the Blue Door. Once Unlocked, it can be Opened normally.
A clue to the Relic's location is marked by Objective Token 1. Hunters can use the Pick Up Action to take the Objective Token and place it in an empty Inventory Slot. The Objective Token can be Traded, Dropped and Picked Up like an Item.
The Turned Hunters will try to find the Elder, so they can take his place. They can get the scent of the Elder from its nest, marked by Objective Token 2. A Turned Hunter may spend an Action in the Area with Objective Token 2 to Sniff the Nest, to begin tracking the Elder. Place the Token in that Turned Hunter's play area. This information cannot be Traded or Dropped.
Objectives:
- Hunters' Primary Objective: If a Hunter exits the Den with Objective Token 1, the Hunters gain the Relic Location reward.
- Turned Hunters' Primary Objective: If the Turned Hunter that Sniffs the Nest exits the Den, the Turned Hunters gain the Elder Location reward.
- Secondary Objectives (awarded to each Hunter for performing Actions; Turned Hunters cannot complete more Secondary Objectives but keep those completed before they were Turned): Build a weapon to gain Crafter. Use a Special Power successfully to gain Power Up. Take part in a Combo Attack and both Hunters gain Team Player.
Downtime: The excitement from the first mission overwhelms the Hunters and they learn less from their experience than normal:
- Discard all Focus obtained during the Hunt, from destroying Vampires, etc.
- Then award the Focus from the Secondary Objectives, see below.
Relic Location: If the Hunters complete their Primary Objective, they learn the location of a hidden Relic component. The Order will retrieve it while the Hunters rest and train. Take a Relic Card by following the rules in Drawing Relic Cards.
Elder Location: The newly cured Hunters retain some vague impression of the location of the Elder and give the Order this information. This confirms information the Order has, and they investigate while the Hunters recover from their ordeal. They find a dead end, an empty Den, but can use the information inside to locate a Relic component. Take a Relic Card by following the rules in Drawing Relic Cards.
Crafter, Power Up, Team Player: Hunters gain 1 Focus for each Secondary Objective completed. Each Hunter can only gain each reward once, but multiple Hunters can gain each reward.
Transformation Cost: -1 Focus.
Training: There is enough time to learn 1 new Special Ability before the next Hunt. Follow the normal rules for learning Special Abilities, but each Hunter may only learn a maximum of 1 Ability now.
Equipment: The Hunters can use their Focus to purchase Equipment normally.
Hunt 2: Elder Evil
| Setup | |
|---|---|
| Entrance | Split the Hunters into 2 forces of the same size, if possible. Place 1 force at each Entrance. |
| Clock | Start 4, End 9. |
| Encounter Deck | 8 Level-1 and 1 Level-2 Encounter Cards. |
| Vampire Day Activation Deck | 2 Level-1, 6 Level-2 and 4 Level-3 Cards. |
| Vampire Night Activation Deck | 2 Level-1, 5 Level-2 and 5 Level-3 Cards. |
| Pete and the Extractor | Pete joins the Hunt. |
| Dashboard | The Hunters use the Small Dashboard in this Hunt. |
| Standalone Play | Each Hunter randomly draws 1 Special Ability and 1 Equipment Card. |
Special Rules: Turned Hunters may attack any Elders in the Den.
Objectives:
- Hunters' Primary Objective: If the Hunters destroy every Vampire in the Den, they gain the Clear Den reward.
- Hunters' Secondary Objective: If a Hunter has 7+ Focus at the end of the Hunt, that Hunter gains the Large Dashboard reward.
- Turned Hunters' Primary Objectives — Part 1: The Turned Hunters are trying to increase the strength of their group. There must be more than 1 Turned Hunter when the Hunt ends. Part 2: The Turned Hunters are trying to gauge the strength of the Elders. A Turned Hunter must Attack an Elder to gauge its strength. If both parts are completed (in any order), the Turned Hunters gain the Intimidate reward.
- Turned Hunters' Secondary Objective 1: If a Turned Hunter has 7+ Focus before they are Turned, that Turned Hunter gains the Large Dashboard reward.
- Turned Hunters' Secondary Objective 2: If the Turned Hunters successfully Wound at least 1 Hunter, they gain the Battle Tactics reward.
Rewards and Downtime:
Clear Den: After the Hunters Clear the Den, the Order enters and scours it for anything of value. They find a carefully hidden compartment, which contains a Relic component. Take a Relic Card by following the rules in Drawing Relic Cards.
Intimidate: The Elders sense some hidden strength in the Turned Hunter that faced them down. In the early hours of the morning, the Order's scouts see an Elder slinking away from the Den, leading a few Minions with him. The Order is in luck! They can still search this Den. Take a Relic Card by following the rules in Drawing Relic Cards.
Large Dashboard: This Hunter will start the next Hunt with the Large Dashboard.
Battle Tactics: The Hunters discuss the fight between the Hunters and the Turned Hunters. Looking at it from both sides, they see how they can defend better. All Hunters gain 1 Focus for each Hunter that was wounded.
Transformation Cost: -3 Focus.
Training & Equipment: The Order has an urgent mission for you. You can purchase Equipment now, but there is no time to train new Special Abilities before you head out.
Hunt 3: A Powerful Presence
| Setup | |
|---|---|
| Entrance | Split the Hunters into 2 forces of the same size, if possible. Place 1 force at each Entrance. |
| Clock | Start 3, End 9. |
| Encounter Deck | 10 Level-1 and 1 Level-2 Encounter Cards. |
| Vampire Day Activation Deck | 3 Level-1, 8 Level-2 and 5 Level-3 Cards. |
| Vampire Night Activation Deck | 3 Level-1, 4 Level-2 and 5 Level-3 Cards. |
| Pete and the Extractor | Pete joins the Hunt. |
| Standalone Play | Each Hunter randomly draws 1 Special Ability and 2 Equipment Cards. |
Special Rules: The Blue Door is Locked at the start of the Hunt. Activate the 2 Levers, in any order, to unlock the Blue Door. Once Unlocked, it can be Opened normally.
When you Open the Blue Door, interrupt the game and read Interlude 1.
Objectives:
- Hunters' Primary Objective: If a Hunter Picks Up Objective Token 1, they gain the Relic reward.
- Hunters' Secondary Objective: If a Hunter has 7+ Focus at the end of the Hunt, that Hunter gains the Large Dashboard reward. However, if a Hunter has 2 or fewer Focus, that Hunter gains the Small Dashboard penalty.
- Turned Hunters' Primary Objectives — Part 1: Bite all the Captives. Part 2: All Turned Hunters must leave the Den. If the Turned Hunters complete both parts of the Objective they gain the Shared Blood reward.
- Turned Hunters' Secondary Objective: If a Turned Hunter has 7+ Focus before being Turned, that Turned Hunter gains the Large Dashboard reward. However, if a Turned Hunter has 2 or fewer Focus before being Turned, that Hunter gains the Small Dashboard penalty.
Interlude 1 – Open the Door: You open the door expecting to find the relic component. Instead you behold the largest Vampire you have ever seen — this is Kophas, the mighty Vampire Lord, here to steal the relic component for himself. Place Kophas in the Area marked with an X on the minimap. Kophas only uses the Full Strength side of the Vampire ID Card in this Hunt. When you Defeat Kophas, interrupt the Attack, discard unassigned Wounds and read Interlude 2.
Interlude 2 – Defeat Kophas: Kophas stumbles and drops the relic component that he is carrying. Place Objective Token 1 in the Area with Kophas and remove its miniature from the board.
Rewards and Downtime:
Relic: The Hunters find a Relic component in the Den. A complete Relic is needed to destroy a Vampire Lord like Kophas. Take a Relic Card by following the rules in Drawing Relic Cards.
Shared Blood: After feeding from the Captives in the Den, the meal shared with this Vampire Clan strengthens the Turned Hunters' psychic bond with them, revealing where Kophas stashed the Relic. After being Cured, tell the Order and take a Relic Card by following the rules in Drawing Relic Cards.
Large Dashboard: This Hunter will start the next Hunt with the Large Dashboard.
Small Dashboard: Your lack of Focus has a penalty. This Hunter will start the next Hunt with the Small Dashboard. If you do not gain one of the Dashboard rewards, continue to use the same Dashboard that you used in this Hunt.
Transformation Cost: Your proximity to Kophas makes the Cure all the more exhausting this time, the cost is -4 Focus.
Training: There is enough time to learn 1 new Special Ability before the next Hunt. Follow the normal rules for learning Special Abilities, but each Hunter may only learn a maximum of 1 Ability now.
Equipment: The Hunters can use their Focus to purchase Equipment normally.
Hunt 4: Trapped!
| Setup | |
|---|---|
| Entrance | Place all the Hunters in the starting Area in the Den shown on the Minimap. |
| Clock | Start 4, End 10. |
| Encounter Deck | 8 Level-1 and 2 Level-2 Encounter Cards. |
| Vampire Day Activation Deck | 2 Level-1, 5 Level-2 and 5 Level-3 Cards. |
| Vampire Night Activation Deck | 4 Level-1, 7 Level-2 and 5 Level-3 Cards. |
| Pete and the Extractor | Not available. |
| Standalone Play | Each Hunter randomly draws 1 Special Ability and 2 Equipment Cards. |
Special Rules: Place Objective Token 1 in a Hunter's Inventory Slot. The Relic Component is well secured. It cannot be Traded or Dropped. If the Hunter carrying it is Turned, the Turned Hunter will continue to carry it, ignorant of its value.
The Blue Door is Locked at the start of the Hunt. Activate the 2 Levers, in any order, to unlock the Blue Door. Once Unlocked, it can be Opened normally.
Objectives:
- Hunters' Primary Objective: If the Hunter carrying Objective Token 1 exits the Den, the Hunters gain the Retrieval reward.
- Turned Hunters' Primary Objective: The Turned Hunters catch the scent of 2 Elders as soon as they Turn. They know they cannot usurp 2 Elders at once and feel the need to flee. If all Turned Hunters exit the Den, the Turned Hunters gain the Retreat reward. Note: If all Turned Hunters exit, but there are still Hunters in the Den, do not end the game – some of those Hunters may get Turned.
For this Hunt, it is possible that both Primary Objectives will be satisfied. In the confusion that follows the tunnel collapse, there is no time for Secondary Objectives.
Rewards and Downtime:
Retrieval: The Hunters safely remove the broken Relic from the Den. Take a Relic Card by following the rules in Drawing Relic Cards.
Retreat: The Turned Hunters save their skins. The Order tracks down all the Turned Hunters and undoes the transformation. If the Relic component was retrieved unknowingly by a fleeing Turned Hunter, also take a Relic Card by following the rules in Drawing Relic Cards.
Note: If neither Primary Objective is achieved, the Relic is somehow lost in the confusion.
Dashboards: If you ended the game as a Hunter and the Hunters completed their Primary Objective, start the next Hunt with the Large Dashboard. If you ended the game as a Turned Hunter and the Turned Hunters completed their Primary Objective, also start the next Hunt with the Large Dashboard. Otherwise, start the next Hunt with the Small Dashboard.
Transformation Cost: After spending more time as a Vampire, the cure is quite taxing. The Transformation Cost is -3 Focus.
Training: There is enough time to learn 1 new Special Ability before the next Hunt. Follow the normal rules for learning Special Abilities, but each Hunter may only learn a maximum of 1 Ability now.
Equipment: The Hunters can use their Focus to purchase Equipment normally.
Hunt 5: Coup
| Setup | |
|---|---|
| Entrance | Split the Hunters into 2 forces of the same size, if possible. Place 1 force at each Entrance. |
| Clock | Start 3, End 10. |
| Encounter Deck | 10 Level-1 and 2 Level-2 Encounter Cards. |
| Vampire Day Activation Deck | 4 Level-1, 7 Level-2 and 5 Level-3 Cards. |
| Vampire Night Activation Deck | 3 Level-1, 6 Level-2 and 7 Level-3 Cards. |
| Pete and the Extractor | Pete joins the Hunt. |
| Standalone Play | Each Hunter randomly draws 2 Special Ability and 2 Equipment Cards. |
Special Rules: The Blue Door is Locked at the start of the Hunt. Activate the 3 Levers, in any order, to unlock the Blue Door. Once Unlocked, it can be Opened normally.
Clues to Kophas' location are scattered throughout the Den, represented by the Focus Tokens shown on the Minimap. Hunters may spend an Action to Solve a Clue, taking all the Focus Tokens in their Area as an immediate reward. Hunters cannot perform this Action if there are Awake Vampires in the Room.
This Hunt does not end when a Primary Objective is completed. Instead, end the Hunt when a Hunter exits the Den with Objective Token 1 or when all characters are unconscious.
The Turned Hunters sense the general atmosphere of rebellion. They stay loyal to Kophas and become Hostile to the Vampires in this Den for the duration of this Hunt.
Hostile Turned Hunters: Turned Hunters may Attack Vampires. Turned Hunters draw Activation Cards, and the Vampires react to Turned Hunters just like Hunters, including Attacking the Turned Hunters. Turned Hunters may still Attack Hunters and Hunters may still Attack Turned Hunters.
Objectives:
- Hunters' Primary Objective: If the Hunters Solve all the Clues in the Den, the Hunters gain Kophas' Location as a reward. Do not end the Hunt now.
- Hunters' Secondary Objective: If a Hunter exits the Den with Objective Token 1, the Hunters gain the Relic reward. End the Hunt.
- Turned Hunters' Primary Objective: If a Turned Hunter strikes the final blow and Destroys either of the Elder Vampires, they can enter the Elder's mind and gain Kophas' Location as a reward.
- Turned Hunters' Secondary Objective: If a Turned Hunter Bites a Captive, the Turned Hunter keeps the Token and gains the Secret Knowledge reward.
Rewards and Downtime:
Kophas' Location: One way or another, the team has found the location of Kophas' Den. You may proceed to Hunt 6, if you wish. If you fail to locate the Den, you must perform Hunt 10 first.
Relic: The Hunters safely remove the broken Relic from the Den. Take a Relic Card by following the rules in Drawing Relic Cards.
Secret Knowledge: When you are cured, you realize that you absorbed and retained some useful information that the captives overheard during their time in the Den. Gain +1 Focus for each Captive Token in your possession.
Dashboards: If you ended the game as a Hunter and the Hunters completed their Primary Objective, start the next Hunt with the Large Dashboard. If you ended the game as a Turned Hunter and the Turned Hunters completed their Primary Objective, also start the next Hunt with the Large Dashboard. Otherwise, start the next Hunt with the Small Dashboard.
Transformation Cost: -4 Focus.
Training: There is enough time to learn 1 new Special Ability before the next Hunt. Follow the normal rules for learning Special Abilities, but each Hunter may only learn a maximum of 1 Ability now.
Equipment: The Hunters can use their Focus to purchase Equipment normally.
Hunt 6: The Vampire Lord (Final Battle, Campaign 1)
| Setup | |
|---|---|
| Entrance | Split the Hunters into 2 forces of the same size, if possible. Place 1 force at each Starting Area. |
| Clock | Start 4, End 11. |
| Encounter Deck | 9 Level-1 and 2 Level-2 Encounter Cards. |
| Vampire Day Activation Deck | 2 Level-1, 5 Level-2 and 5 Level-3 Cards. |
| Vampire Night Activation Deck | 5 Level-1, 8 Level-2 and 7 Level-3 Cards. |
| Pete and the Extractor | Pete joins the Hunt. |
| Standalone Play | Each Hunter randomly draws 2 Equipment and 2 Special Ability Cards. Draw 3 Relic Cards following the rules in Drawing Relic Cards to assemble a complete Relic. |
Special Rules: You must have at least one assembled Relic to attempt this Hunt. If you failed to retrieve enough Relic Components in your previous battles, the Order has lost this Campaign.
The Blue Door is Locked at the start of the Hunt. Activate the 2 Levers, in any order, to unlock the Blue Door. Once Unlocked, it can be Opened normally.
After their intensive training, the Turned Hunters will instinctively attack Kophas, without any other change to the Turned Hunter rules. Turned Hunter's Attacks can Wound Kophas when it is in either form. However, their claws are relatively ineffective: Kophas rolls 1D6 for each Hit the Turned Hunters cause and avoids a Wound for each roll of 5+.
Objectives:
- Hunters' Primary Objective: You must Destroy Kophas. End the Hunt and read Epilogue 1.
- Turned Hunters' Primary Objective: You must Destroy Kophas. End the Hunt and read Epilogue 2.
- If Kophas is not Destroyed, read Epilogue 3.
Resolution:
- Epilogue 1 (Hunters win): The Hunters defeat Kophas and its minions and leave the Den. There are still other Elders out there, so the Campaign is not fully over, but this concludes the story arc.
- Epilogue 2 (a Turned Hunter deals the final blow): As the Turned Hunter destroys Kophas, they begin to change, growing in stature and strength — the corruption turns them into a new Vampire Lord. Campaigns are intended to be standalone, but if you have additional miniatures, you may retire the Hunter that Turned in this scenario and/or play your next Campaign with this new Vampire Lord.
- Epilogue 3 (Kophas is not Destroyed): Kophas kills the last Hunter standing and the Vampires feast. If you wish to extend the story, you may continue to use Kophas as the Vampire Lord in your next campaign, and may retire the Hunters that lost the fight.
Hunt 7: The Warehouse
| Setup | |
|---|---|
| Entrance | Place all Hunters at the Entrance. |
| Clock | Start 4, End 8. |
| Encounter Deck | 8 Level-1 Encounter Cards. |
| Vampire Day Activation Deck | 2 Level-1, 7 Level-2 and 3 Level-3 Cards. |
| Vampire Night Activation Deck | 2 Level-1, 3 Level-2 and 3 Level-3 Cards. |
| Pete and the Extractor | Pete joins the Hunt. |
| Dashboard | The Hunters use the Small Dashboard in this Hunt. |
| Standalone Play | The Hunters start with no Special Ability or Equipment Cards. |
Special Rules: The Blue Door is Locked at the start of the Hunt. Activate the 2 Levers, in any order, to unlock the Blue Door. Once Unlocked, it can be Opened normally.
If there are no Awake Vampires in the Secret Room, a Hunter may use the Pick Up Action to take Objective Token 1. Place it in an empty Inventory slot, like an Item Card.
Objectives:
- Hunters' Primary Objective: If a Hunter exits the Den with Objective Token 1, the Hunters gain the Stolen Relic reward.
- Turned Hunters' Primary Objective: If a Turned Hunter Bites the Captive, they gain the Surprise Find reward.
Rewards and Downtime:
Surprise Find: Driven wild by the transformation, the Turned Hunters roar as they feed on the Captive. Any remaining Vampires flee in terror and any other Turned Hunters join the feast. Finally sated, the Turned Hunters slip into a torpor and are easily captured by the Order. While removing the Captive's body, a broken Relic is found hidden in the Captive's clothing. Take a Relic Card by following the rules in Drawing Relic Cards.
Battle Skill: Each Hunter that Destroys 2+ Upyrs will start the next Hunt with the Large Dashboard. Turned Hunters retain this experience and can still be given this reward. Other Hunters start with the Small Dashboard.
Secondary Objective: Each Hunter should keep track of the number of Upyrs they Destroy. Consult Battle Skill when the Hunt is over. Turned Hunters may obtain this reward, counting the Upyrs they Destroyed before Turning.
Stolen Relic: When Hunters search the Elders' Secret Room, they find a dirty and stained box that clearly once held a priceless Relic, but it looks like the Relic has been destroyed. However, in the aftermath of the battle, they discover the Captive pocketed the broken Relic. Take a Relic Card by following the rules in Drawing Relic Cards.
Transformation Cost: -2 Focus.
Training: There is enough time to learn 1 new Special Ability before the next Hunt. Follow the normal rules for learning Special Abilities, but each Hunter may only learn a maximum of 1 Ability now.
Equipment: The Hunters can use their Focus to purchase Equipment normally.
Hunt 8: Tunnel Access
| Setup | |
|---|---|
| Entrance | Split the Hunters into 2 forces of the same size, if possible. Place 1 force at the Entrance and the other in the center Area of the Tunnel Tile. |
| Spawn | Place the Evaki miniature asleep in the Area shown on the minimap and put the Evaki Elder ID card within easy reach of the players. |
| Clock | Start 4, End 8. |
| Encounter Deck | 8 Level-1 Encounter Cards. |
| Vampire Day Activation Deck | 2 Level-1, 4 Level-2 and 6 Level-3 Cards. |
| Vampire Night Activation Deck | 2 Level-1, 3 Level-2 and 3 Level-3 Cards. |
| Pete and the Extractor | Pete joins the Hunt at the Entrance. |
| Standalone Play | Each Hunter randomly draws 1 Special Ability and 1 Equipment Card. |
Special Rules: The Blue Door is Locked. Activate the 2 Levers, in any order, to unlock the Blue Door. Once Unlocked, it can be Opened normally.
The Hunt ends when the clock runs out or all Characters are Unconscious. Check that the Objectives are achieved at the end of the game, allowing both the Hunters and Turned Hunters to complete their Objectives.
The center Area of the Tunnel can be used as an Exit during the Hunt, but Pete cannot use the Extractor at this location.
Objectives:
- Hunters' Primary Objective: If a Hunter Destroyed the Elder, the Hunters gain the Retrieve Relic reward.
- Hunters' Secondary Objective: If a Hunter Wounded the Elder, the Hunter gains the Heroic Blow reward.
- Turned Hunters' Primary Objective: The Turned Hunters feel the overwhelming presence of the Elder and must try to escape. Each Turned Hunter that left the Den, gains the Flee reward.
Rewards and Downtime:
Retrieve Relic: The Elder's body lies bleeding on the ground as the Hunters ransack the Room. A fragment of a once powerful Relic is located, caked in filth. Take a Relic Card by following the rules in Drawing Relic Cards.
Heroic Blow: Each Hunter that Wounds the Elder starts the next Hunt with the Large Dashboard, even if the Hunter is subsequently Turned in this Battle. The other Hunters continue to use the same Dashboard they used in this Hunt.
Flee: Turned Hunters that exit the Den run straight into the Order waiting outside. The Cure is begun immediately, lowering the Transformation Cost to -1 Focus. Turned Hunters that remain in the Den are further transformed by the pervasive evil presence and the Transformation Cost rises to -4 Focus.
Transformation Cost: -1 or -4 Focus, see Flee.
Training and Equipment: The Order comes to you with a special mission. If you take it, there is the chance you will locate another Relic Component, but you must leave immediately. It is your choice:
- Proceed to Hunt 3 immediately, but you may only purchase new Equipment. Then proceed to Hunt 9. (You will be able to train and equip as described in Hunt 3).
- Spend your time training. Use your Focus to purchase a maximum of 1 Skill each and Equipment as normal, skip Hunt 3 and proceed to Hunt 9.
Hunt 9: Double Trouble
| Setup | |
|---|---|
| Entrance | Place all the Hunters at the Entrance. |
| Spawn | Place Evaki and Theyr as shown on the Minimap. They start the Hunt Asleep. |
| Clock | Start 3, End 9. |
| Encounter Deck | 9 Level-1 Cards. |
| Vampire Day Activation Deck | 4 Level-1, 7 Level-2 and 5 Level-3 Cards. |
| Vampire Night Activation Deck | 2 Level-1, 5 Level-2 and 5 Level-3 Cards. |
| Pete and the Extractor | Pete joins the Hunt. |
| Standalone Play | Each Hunter randomly draws 1 Special Ability and 2 Equipment Cards. |
Special Rules: The Blue Door is Unlocked and Open. If the Hunters Activate both Levers, in any order, the Blue Door will Close and Lock permanently.
The Hunter's Primary Objective changes after the Awakening. They cannot achieve the Day Objective at Night, nor the Night Objective during the Day.
Turned Hunters are psychically linked to the Elders and can sense vague ideas without fully understanding them. The Turned Hunters feel the importance of the Relic Component the Elders are guarding and are fascinated by it. Turned Hunters can spend an Action to Steal the Relic, even if there are Vampires in the Room. If a Turned Hunter tries this Action, it attracts the Elder's attention: move all Elders currently in the Den to the Turned Hunter's Area and then Attack the Turned Hunter. If the Turned Hunter survives, they take Objective Token 1.
Objectives:
- Hunters' Primary Objective (Day): If the Hunters can Pick Up Objective Token 1 and remove it from the Elders' Nest and then Lock the Blue Door while both Elders are still in the Nest before the Awakening, they gain the Trapped Elders reward.
- Hunters' Primary Objective (Night): If the Hunters can Destroy both Elders and Pick Up Objective Token 1, they gain the Defeated Elders reward.
- Turned Hunters' Primary Objective: If a Turned Hunter can Steal Objective Token 1, they gain the Alpha Beast reward.
- Shared Secondary Objective: Record how many times your character is successfully Attacked by an Elder. If you are successfully Attacked at least once, you gain the Battle Scars reward. Both Hunters and Turned Hunters can gain this reward.
Rewards and Downtime:
Trapped Elders: The Hunters achieve a heroic victory, locking the Elders in their Nest during the Day Time. It is an easy matter for the Hunters and other members of the Order to enter the Den and quickly clear it. Take a Relic Card by following the rules in Drawing Relic Cards. All Hunters gain +2 Focus as they review their speedy tactics.
Defeated Elders: The Den goes quiet as the battle ends. The remaining Vampires slink into the Night, too frightened to face the Hunters without the Elders to command them. Take a Relic Card as described in Drawing Relic Cards.
Alpha Beast: The Turned Hunters roar as the power of the Relic courses through them. The Elders and their minions scatter into the dark, but the power rapidly overwhelms the Turned Hunters and they pass out. Take a Relic Card as described in Drawing Relic Cards.
Battle Scars: Gain 1 Focus for each successful Attack the Elders made against you. If you were injured by the Elders, start the next Hunt with the Large Dashboard, otherwise continue to use the same Dashboard you used in this Hunt.
Transformation Cost: -4 Focus.
Training: There is enough time to learn 1 new Special Ability before the next Hunt. Follow the normal rules for learning Special Abilities, but each Hunter may only learn a maximum of 1 Ability now.
Equipment: The Hunters can use their Focus to purchase Equipment normally.
Hunt 10: Separated
| Setup | |
|---|---|
| Entrance | Split the Hunters into 2 forces of the same size, if possible. Place both forces inside the Den as shown on the Minimap. |
| Clock | Start 4, End 9. |
| Encounter Deck | 9 Level-1 and 2 Level-2 Encounter Cards. |
| Vampire Day Activation Deck | 2 Level-1, 4 Level-2 and 6 Level-3 Cards. |
| Vampire Night Activation Deck | 2 Level-1, 6 Level-2 and 4 Level-3 Cards. |
| Pete and the Extractor | Pete joins the Hunt. |
| Standalone Play | Each Hunter randomly draws 2 Equipment and 2 Special Ability Cards. |
Special Rules: The Blue Door is Locked at the start of the Hunt. Activate the 2 Levers, in any order, to unlock the Blue Door. Once Unlocked, it can be Opened normally.
Objectives:
- Hunters' Primary Objective: If a Hunter leaves the Den with Objective Token 1, the Hunters gain the Safe Retrieval reward.
- Turned Hunters' Primary Objective: If all Hunters are Turned, the Turned Hunters gain the New Breed reward.
- Shared Secondary Objective: If a Hunter Destroys an Elder, they gain the Ferocious Fighter reward. Turned Hunters may obtain this reward, by Destroying an Elder before Turning.
Rewards and Downtime:
Safe Retrieval: Your teamwork has paid off! You rescue the trapped Hunters and obtain part of a Relic. Take a Relic Card by following the rules in Drawing Relic Cards.
New Breed: The Turned Hunters are bonded by the residual influence of their Hunter Training. Vampires recognize the strength of this new group and abandon the Den. Once the Order subdues the Turned Hunters, they have plenty of time to search the Den and locate the Relic. Take a Relic Card by following the rules in Drawing Relic Cards.
Ferocious Fighter: If you Destroyed an Elder, start the next Hunt with the Large Dashboard, otherwise continue to use the same Dashboard you used in this Hunt.
Transformation Cost: -4 Focus.
Training: There is enough time to learn 1 new Special Ability before the next Hunt. Follow the normal rules for learning Special Abilities, but each Hunter may only learn a maximum of 1 Ability now.
Equipment: The Hunters can use their Focus to purchase Equipment normally.
Next Mission in Campaign 2: The Order has possibly located Kophas. You think you have a location for the Vampire Lord's Den, but the creature often visits another site. The Order gives you a difficult choice. If you have the parts to create a Relic, they will create it now and you can head out directly to Hunt 12 - Confrontation. If you can't create a Relic or if you want the experience from another Den, you can go to Hunt 11 – Face to Face.
Next Mission in Campaign 1: Continue to Hunt 6 – The Vampire Lord.
Hunt 11: Face to Face
| Setup | |
|---|---|
| Entrance | Place all the Hunters in the start area in the Den, as shown on the Minimap. |
| Spawn | Place Kophas and the Giant Bats in the Den, as shown in the Minimap. All 3 Vampires are Awake. |
| Clock | Start 4, End 9. |
| Encounter Deck | 6 Level-1 and 1 Level-2 Encounter Cards. |
| Vampire Day Activation Deck | 2 Level-1, 5 Level-2 and 5 Level-3 Cards. |
| Vampire Night Activation Deck | 3 Level-1, 5 Level-2 and 4 Level-3 Cards. |
| Pete and the Extractor | Not available. |
| Standalone Play | Each Hunter randomly draws 2 Special Ability and 2 Equipment Cards. |
Special Rules: The Blue Door is Locked at the start of the Hunt. Activate the 2 Levers, in any order, to unlock the Blue Door. Once Unlocked, it can be Opened normally.
Kophas only uses the Full Strength side of the Vampire ID Card in this Hunt. When you defeat Kophas, interrupt the Attack, discard unassigned Wounds and read Interlude 1.
With all their training, Turned Hunters know on some level that Kophas is their enemy. The Vampires in the Den react to this and all Turned Hunters are Hostile for the duration of this Hunt.
Hostile Turned Hunters: Turned Hunters may Attack Vampires. Turned Hunters draw Activation Cards, and the Vampires react to Turned Hunters just like Hunters, including Attacking the Turned Hunters.
Interlude 1 (defeating Kophas): Kophas crumples, bloody and bleeding, but before you can react, it stands again despite the gaping wounds. Kophas smashes into the tunnels below and disappears. Following Kophas would be foolhardy, but in his rush he has left behind another relic fragment; escaping the den with this valuable artifact is achievement enough. Remove Kophas from the Den.
Objectives:
- Hunters' Primary Objective: If a Hunter leaves the Den with Objective Token 1, the Hunters gain the Valuable Prize reward.
- Turned Hunters' Primary Objective: All Turned Hunters must survive and be in one of the Tunnel Areas at the end of the game. The Turned Hunters gain the Resist reward. This Objective does not end game play. Play until the end of Round 9 and then check to see if the Turned Hunters have achieved the Objective.
Both the Hunters and Turned Hunters can achieve their Primary Objectives. Continue play until everyone has left the Den or Round 9 is over.
Rewards and Downtime:
Valuable Prize: You tell the Order the story of your confrontation with Kophas and show them the Relic you recovered. Take a Relic Card by following the rules in Drawing Relic Cards. Also the Hunters that get this reward start the next Hunt with the Large Dashboard.
Resist: The Turned Hunters successfully resist some of the effects of Turning. The Transformation cost is reduced to -3 Focus. Also the Hunters that get this reward start the next Hunt with the Large Dashboard.
Dashboard: If a reward did not give you the Large Dashboard, your Dashboard size does not change at the start of the next Hunt.
Transformation Cost: If the Turned Hunters Resist, the Transformation cost is -3 Focus. Otherwise it is -5 Focus.
Training & Equipment: You know Kophas' location and must proceed quickly before it can move to a new Den. You can purchase Equipment now, but there is no time to train new Special Abilities before you head out.
Hunt 12: Confrontation (Final Battle, Campaign 2)
| Setup | |
|---|---|
| Entrance | There are 4 starting locations for this Den. Split your Hunters so that you cover these locations as evenly as possible. |
| Spawn | Place Kophas as shown in the Minimap. Kophas is Asleep. |
| Clock | Start 4, End 9. |
| Encounter Deck | 11 Level-1 and 2 Level-2 Encounter Cards. |
| Vampire Day Activation Deck | 2 Level-1, 6 Level-2 and 4 Level-3 Cards. |
| Vampire Night Activation Deck | 3 Level-1, 6 Level-2 and 3 Level-3 Cards. |
| Pete and the Extractor | Pete joins the Hunt, but cannot start at the Tunnel Entrance. |
| Standalone Play | Each Hunter randomly draws 2 Equipment and 2 Special Ability Cards. Draw 3 Relic Cards following the rules in Drawing Relic Cards to assemble a complete Relic. |
Special Rules: You must have at least one assembled Relic to attempt this Hunt. If you failed to retrieve enough Relic Components in your previous battles, the Order has lost this Campaign.
After their intensive training, the Turned Hunters will instinctively attack Kophas, without any other change to the Turned Hunter rules. Turned Hunter's Attacks can Wound Kophas when it is in either form. However, their claws are relatively ineffective: Kophas rolls 1D6 for each Hit the Turned Hunters cause and avoids a Wound for each roll of 5+.
Objectives:
- Hunters' Primary Objective: You must Destroy Kophas. End the Hunt and read Epilogue 1.
- Turned Hunters' Primary Objective: You must Destroy Kophas. End the Hunt and read Epilogue 2.
- If Kophas is not Destroyed, read Epilogue 3.
Resolution:
- Epilogue 1 (Hunters win): The Hunter lands the final blow with the Relic; Kophas turns to dust. The leader of the Night is finally defeated, but other Elders remain.
- Epilogue 2 (a Turned Hunter deals the final blow): The Turned Hunter undergoes a second transformation and becomes a new Vampire Lord. If you have additional miniatures, you may retire the Hunters that Turned in this scenario and/or play your next Campaign with this new Vampire Lord.
- Epilogue 3 (Kophas is not Destroyed): Kophas kills the last of the Hunters and its minions feast on the remains. If you wish, you may continue using Kophas as the Vampire Lord in your next Campaign, and may retire the Hunters that lost the fight.
Game Summary
Turn Structure
Setup — Activation Order: Cooperative Mode: players' choice. Competitive Mode: clockwise from first player.
Day: Hunters play before Turned Hunters. Activate a Hunter. The Hunter draws a Day Activation Card.
Night: Turned Hunters play before Hunters. A Hunter draws a Night Activation Card. Activate the Hunter.
Advance the Clock. Advance the first player. Check for The Awakening or the end of the game.
Actions
Hunter Actions: Activate Extractor, Activate Lever, Attack, Dig Free, Drop, Pick Up, Search, Trade.
Hunter Movement: Move – Take 2 MP. Move to an Adjacent Area – 1 MP. Move into a Tunnel – 1 MP. Move out of a Tunnel – 1 MP. Open a door – 1 MP. Free: Relocate Pete. Free: Take Harpoon.
Turned Hunter Actions: Activate Lever, Attack, Bite Captives, Move (see Hunter Movement).
Gain Focus
Hunters: Destroying Vampires. Activate Lever.
Turned Hunters: Defeat Hunter. Roll 6 when attacking a Hunter. Destroying Vampires. Bite Captives. Activate Lever.
Special Rules
Elders: Resolve an Elder Influence Card before making the Hunter's Attack.
Harpoon: Hunters can move up to 5 Areas from Pete when they have a Harpoon. When using the Harpoon, it has a Range of 0.
Sunlight: Destroy all Vampires in the Room. Vampires do not spawn in or enter Sunlit Rooms.
Sleeping Vampires: Placed by Encounter Cards. They do not Move, Attack or Impede Movement. Hunters reroll Attack Dice once.
Waking Up Vampires: Failed Attacks. Noisy Weapons. Vampires that move into the Room. Non-Encounter Cards spawn Vampires that are Awake and this Wakes all Vampires in the Room.
Awake Vampires: Impede Movement, spend 2 Move Points to Move away from Awake Vampires.
The Awakening: Resolve all remaining Encounters. Wake all Vampires. Open all normal Doors.