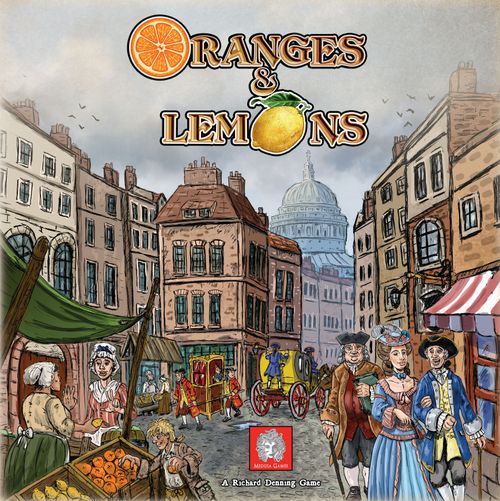
Oranges & Lemons
Oranges & Lemons Rulebook
Table of Contents
Table of Contents
Components
- 1 Main Board
- 5 Player Boards
- 5 sets of Player Pieces, one in each of five colours (5 Worker pawns, Shares Marker, Market Transaction Marker, 5 Bells per set)
- 4 Storage Upgrade Tiles per Player Board
- 100 Resource Cubes (25 each of Lemons, Bricks, Pancakes, Pans)
- 44 Cargo Tiles
- 48 EIC Ship Tiles
- 1 Ship Price Tile
- 1 Change Ships Tile
- 20 Loan Tiles
- 20 Vote Tiles
- 30 Victory Point (VP) Tokens
- 62 Coins
- 1 Customs Inspector
- 1 Ship Tiles Bag
- 6 Career Tiles
- 5 Summary / End of Round Cards
- 1 Score Pad
- 1 End Game Scoring Tile
Game Setup
- Place the Main Board in the middle of the table.
- Determine who is first player – the person who has most recently eaten an orange or a lemon. The player to their left will be 2nd player etc. Alternatively determine this randomly.
- Give each player a set of Player Pieces in their choice of colour, returning any unused sets to the box, as they will not be required in the game.
- The first player places 1 of their Workers on the turn order track (near the centre of the Main Board surrounding the Cathedral) in the first white spot next to the blue spot. 2nd player places 1 Worker in the next white spot, with each of the remaining players placing 1 Worker in the succeeding white spots. Last player then places a 2nd Worker on the next available white spot, with the remaining players each placing a 2nd Worker on the turn order track in reverse player order. Place the remaining 3 Workers for each player near location 15 of the Main Board (St Paul's) as a reserve.
- Place each player's market Transaction Marker near the St Katherine's market tracker (along the bottom of the Main Board), and Share Price Marker near the share price track in Jonathon's Coffee House (on the right-hand side of the Main Board).
- Each player should place their Bells and their Storage Upgrade Tiles on the matching spaces on their Player Boards.
- Place the Coins next to the Main Board then give 1st player 5 Gold, 2nd player 6 Gold, any 3rd player 7 Gold, any 4th player 8 Gold and any 5th player 9 Gold.
- Place the Resources in the warehouse. Fill the resource spaces on location 1 with Lemons, location 3 with Bricks, location 5 with Pancakes and location 9 with Pans. Fill all the spaces on the Shoreditch market (at the top of the Main Board on the left-hand side) with Resources of matching colours.
- Place the Loan Tiles on the Loans Office near space 4 on the Main Board (St Martins).
- Place the grey Share Price Marker on the Gold 1 space at the bottom left of the share price track.
- Sort the EIC Ship Tiles into type I, type II, type III and type IIIb. Return the type IIIb Tiles to the box as they are not needed for the base game. Put the 12 type I Tiles into the Bag, shuffle the 12 type III Tiles, add 6 to the Bag and place the remainder together with the 12 type II Tiles near to the East India Company Docks (at the top of the Main Board on the right hand side) as they will be needed later in the game.
Outline of Play
In Oranges and Lemons players take turns placing their Workers on one of the 16 locations on the Main Board inspired by the longer version of the Rhyme (see history of the Rhyme at the end of the rules). The spaces are then activated in number order around the Board. Some actions are modified by players placing Bells on the locations. Finally, there is a round end administration phase before a new round is started. The game ends when the pile of cargoes at Stepney Docks is exhausted – this will typically be 12 rounds (less if playing the shorter game or if there are five players). Players then calculate their score to determine who has obtained the highest number of Victory Points ("VPs") and so is the winner.
In order to advance in the game, the player will need to acquire both Gold and Resources. There is no limit on the amount of Gold that can be held, but a player cannot have more Resources than they have storage space (unless the Resources arrive on EIC ships when they may be stored on Board till the end of the round). At the start of the game each player has only one available transport / storage space open on their Player Board which can hold one Resource Cube (you may think of this as just what they can carry in their hands) and 2 available Workers. During the game each player can obtain up to 3 more Workers and may upgrade their storage by acquiring a warehouse (which gives one additional space) or by visiting location 10 (Aldgate) to acquire first a hand-cart, then a horse and cart and then a ship, removing the relevant Storage Upgrade Tile from the Player Board to reveal the additional storage. The maximum storage any player may obtain is eight spaces.
There is no single strategy that will lead to victory, however the nature of the scoring system is such that concentrating on one or two activities to the virtual exclusion of the others is unlikely to be successful.
Three Important Concepts: Locations, Bells and Gold
Locations
There are 16 named locations around the Main Board where actions in the game occur. Some have associated tracks and activity areas near to them.
Locations vary in appearance but share common elements:
- A The location number.
- B The benefit gained by placing a Bell here (see section: Bells).
- C A representation of the location.
- D The placement spots available for Workers.
- E The section of the Rhyme for this location.
- F The action Workers take here (see actions later).
- G The bell space where Bells are placed.
Bells
The nursery rhyme Oranges and Lemons references the Bells of many churches in the City of London and the activities which went on in their surrounding parishes. In the game, a player can choose to act as a benefactor paying to put a Bell in a church, in return for which they gain both VPs and other advantages which vary depending on the location.
Game Start
Players start the game with three small Level I Bells worth 3 VPs each, a medium Level II Bell worth 7 VPs and a large Level III Bell worth 12 VPs. By visiting location 6 (Whitechapel) a player may buy a Bell and place it on any available location (other than Whitechapel itself), removing the Bell from their player card and moving it to the bell space on their chosen location. A player cannot buy and place a Level II Bell unless they have already placed at least one Level I Bell and cannot place a Level III Bell unless they have already placed a Level II Bell.
Placing a Bell
Placing a Bell gives the player access to the Bell Power for that location – please see Locations and their Actions – for details of the bonuses for each location.
Only 1 Bell may ever be present in a bell space on a given location. However, it is possible to place a Bell of a higher level on a location which already has a Bell. In this case the lower level Bell is removed, and the player whose Bell has been supplanted may place it in any other location where they can legally do so, gaining the benefits of that space but losing the benefits of the former location (though if a player has gained a warehouse by placing a Bell on location 10 the warehouse remains even if the Bell has to be removed). If there is no available location to which the bell can be moved, the Bell is returned to Whitechapel which can house any number of Bells. The bell foundry will pay the player 3 Gold as the Bell will be melted down and the metal reused.
Gold
During the game you will both spend and receive Gold. Whenever a player needs to spend Gold the coin symbol on the Main Board will be a silver colour and the value will be printed in red numbers. Whenever a player will receive Gold the coin symbol on the Main Board will be a golden colour and the value will be printed in white numbers.
Rounds and Phases
Round Overview
Each round has three phases: the Worker Placement Phase, the Action Phase and the End of Round Phase.
Worker Placement Phase
Players take turns to place Workers onto worker placement spots on the various locations. The order depends on the arrangement of Workers on the turn order track. If a Worker is on the orange spot it will be placed first, followed by the Worker (if any) on the blue spot, then the Worker on the white spot nearest to the blue spot, then the next Worker to that and so on.
Only 1 Worker may be placed in each worker placement spot.
Example: There are no Workers on either the orange or the blue spot. Therefore, green will place their first Worker, as it is next to the blue spot. After this the neighbouring red Worker will be placed, followed by blue, then pink. Then pink will place their second Worker, then blue, then red and finally green.
The number of worker placement spots on certain locations varies depending on the number of players.
Example: Look at location 1 (St Clements). It has three worker placement spots. The second spot shows 3 player pieces in the circle. This means this space is only available if there are at least 3 players so cannot be used in a 2 player game. The third space is only available for 4 or 5 player games.
Location 7 (St Katherine's) does not have any worker placement spots. Players place their Workers directly onto the market spots they wish to use (see Location 7 – St Katherines under Locations and their Actions for a more detailed explanation).
Cost of Placing Workers
Placing Workers in most locations, such as in the example of location 1 above, costs nothing. Some worker placement spots have silver coloured coin symbols on them indicating the Gold cost for placing a Worker there. When you place a Worker in these spots you must pay the cost immediately.
Example: In Location 15 (St Paul's) placing a Worker in the worker placement spot to the left costs 3 Gold, but placing a Worker in the spot to the right costs 5 Gold. The cost must be paid at the time of placement.
Players continue placing Workers until all the Pawns on the turn order track have been placed.
Action Phase
Once all the Workers on the turn order track have been placed, each Location is activated in turn starting at Location 1 and proceeding around the Board in number order. If there are any Workers in a location resolve that location. In most cases there are 2 or 3 worker placement spots in a location. Activate these from left to right. Note: Location 12 must always be activated even if there are no Workers (see Location 12 Old Bailey under Locations and their Actions).
There are four different possible actions at Location 7 (St Katherine's): selling Lemons, Bricks, Pancakes or Pans. Each different Resource has a higher price spot and a lower price slot. Resolve the yellow spots first, followed by red, then brown, and finally black, in each case resolving the higher price spot before the lower price spot. See Locations and Actions for more detail on the actions of each location.
As each action is resolved move the Worker back to the order track starting with the white spot next to the blue spot and then continuing anticlockwise around the track. This means the order will in most cases change each round.
End of the Round Phase
This phase involves various administrative tasks as set out below and begins once all of the Workers in play have been returned to the turn order track. Once all these steps are finished, begin a new round.
- Refill any empty Resource Cube – Refill any empty Resource spaces in locations 1 (St. Clement's), 3 (St. Giles), 5 (St. Peter's) and 9 (St Anne's). Do not refill the market at location 13 (Shoreditch).
- Bell powers – Receive end of turn bonuses from Bell Powers: If you have a Bell on location 1 (St. Clement's) take 1 Lemon. If you have a Bell in location 3 (St. Giles) receive 1 Brick. If you have a Bell in location 13 (Shoreditch) take 2 Gold.
- Ship Transport – Receive 1 VP if you have the Ship Transport Upgrade.
- Loans – Receive interest on Loans you have issued. Take 1 Gold for each Level I Loan you have, 2 Gold for each Level II Loan and 3 Gold for each Level III Loan. You also gain 1 additional Coin per Loan if you have a Bell in location 4.
- EIC Ship storage – Move any Resources remaining on EIC ships into storage. Any player who does not have sufficient storage space must sell off the surplus Resources into available spots on the Shoreditch market (if any), receiving the value shown above and below the space on which the Resource is placed. If any Resources remain, they are discarded, although the player may elect to throw away Resources already in storage instead, so as to make space for the surplus Resource.
- Stepney Docks – Look at the 5 ship spaces in Stepney Docks. If there are two or more empty spaces, slide the remaining Cargo Tiles down so that the lowest spaces are full, then refill the empty spaces from the stack of Cargo Tiles. If there are no empty spaces or only one empty space, remove sufficient Cargo Tiles (starting with the space containing a Tile nearest to the discard pile and working backwards towards the draw deck) so that there are two empty spaces, then slide them down and refill as above.
- Cargo – Once in the game, when you refill the Cargo Tiles the Change Ships Tile will be revealed. When this occurs remove the Ship Price Tile from location 12 so that the higher prices are revealed. Empty the EIC Bag returning the unused Ship Tiles to the box. Now take the type II and remaining type III Ship Tiles placing all 18 in the EIC Bag.
End of Game
Placing the last Cargo Tile on the Stepney Docks initiates the last round of the game.
When the last Cargo Tile has been placed on the Stepney Docks the following round will be the last one in the game. The game typically ends at the end of round 12, though it might be earlier depending on how often more than 2 cargos are completed in a given round. Players must still complete the round end sequence for the final round.
Once the final round is completed, and before scoring, players must decide whether to sell their shares or keep them. This choice is made in turn order, with each succeeding player having the chance to act in player order as per the track. The choices are whether to keep all the shares a player holds, sell some shares receiving Gold of an amount equal to the current share price for each share sold, or sell all the shares. The player then adjusts the position of their Share Marker to reflect the number of shares they retain.
End Game Scoring
Use the score pad to record VPs gained. There are two elements to the end game scoring. Each player scores those VPs that they have accumulated through the game (see Individual Scores below). There are also additional VPs available for the player with the highest total and second highest total VP for certain categories (see Endgame Bonuses below). The scoring steps are summarised on the End Game Scoring Tile.
Individual Scores
Each player scores for the following categories:
- Number of votes – Add together the VPs on each Vote Tile (ranging from 1 to 4 VP).
- Value of Loans – Add up the VPs on the Loans issued: Level I = 2, Level II = 4, Level III = 8.
- Gold – Score 1 VP for every 5 Gold rounded down.
- Shares held – For each vote held score 1 VP. Score additional VPs as shown on the right side of the share track: 1 additional VP if a Player has at least 4 shares, or 2 VP if a player has at least 7 shares, or 3 VP if a player has 10 shares.
- Exports – Add up the VPs on any completed Cargo Tiles held by each player.
- Storage and Transportation – Add up the VPs on those transport upgrades revealed on each Player Board.
- Resource Cubes – Score 1 VP for each Lemon or Brick and 2 VP for each Pancake or Pan in storage.
- Placed Bells – Add up the VPs for Bells placed: Level I = 3, Level II = 7, Level III = 12.
- Transaction Track & miscellaneous – Each player scores VPs depending on how far their Transaction Marker has progressed along the St Katherine's transaction track, as well as any additional miscellaneous VP Tokens they have acquired during the game.
Endgame Bonuses
The endgame bonuses provide additional VPs to the 1st and 2nd placed player in certain categories.
Categories:
- Has the most VPs from Votes Tiles
- Has the most VPs from Ships Tiles
- Has the most VPs in Loans
- Has the most Gold
- Has the most VPs in placed Bells
- Has the most Cargo Tiles
- Has the most shares
- Has made the most transactions
In a 2-player game the person with the most in each category scores 5 with no VPs available for second place or if the players are tied.
For each category the person with the highest amount scores 5 VPs, and the next placed person scores 3 VPs. If there is a tie for first place then all tied players score 4 VPs (with no VPs for any other players). If there is a tie for second place each tied player receives 3 VPs.
Scoring Example
Asha wins the game with a total of 86 VP.
| Category | John | Tom | Hou | Asha |
|---|---|---|---|---|
| 1 | 0 | 6 | 6 | 4 |
| 2 | 14 | 6 | 2 | 2 |
| 3 | 6 | 1 | 2 | 0 |
| 4 | 13 | 7 | 10 | 3 |
| 5 | 4 | 12 | 0 | 12 |
| 6 |
- She gains 3+1 VPs from her Vote Tiles
- She has a Level 1 Loan for 2 VPs
- With 4 Gold leftover she gains 0 VPs
- 3 Shares gains her 3 VPs and no bonus VPs
- Her Cargo Tiles sum up to a total of 12 VPs
- Unlocking all her Storage and Transportation Upgrades scores her a total of 12 VPs
- Having a leftover Lemon scores her 1 VP
- A Level 2 Bell gains her 7 VPs and three Level 1 Bells gain her 9 VPs for a total of 16 VPs
- Being on the rightmost space on the Transaction track scores her 20 VPs; she also has 2 additional VPs in VP Tokens
- With her shared mayority with Hou in bell points she gains an additional 4 VPs
- With her mayority in Cargo Tiles points she gains an additional 5 VPs
- Having the most transactions she gains an additional 5 VPs
And the Winner Is...
The winner is the player with the most VPs. If there is a tie, then between the tied players the winner is the player who has gained the most VPs from Bells. If there is still a tie then the winner is the person with the most Gold, and if there is still a tie the winner is the player with the most Workers on the turn order track at the end of the final round of the game.
Locations and Their Actions
Location 1 St Clements
Oranges and Lemons say the Bells of St Clements
Action: Buy Lemons. Players can buy 1 Lemon for 1 Gold, 1 Lemon for 2 Gold, a set of 2 Lemons for 2 Gold, or a set of 3 Lemon for 3 Gold. Each player can choose from any available set of Lemons.
In any turn when Resources are removed from any part of the location they are not replaced until turn end.
Bell Power: Gain 1 Lemon at turn end.
Location 2 St Margarets
Bulls eyes and targets say the bells of St Margarets
Action: Enter an archery competition. The player with a Worker in the first space gains 4 Gold. The player with a Worker in the second space gains 2 Gold.
Bell Power: Take 2 additional Gold when gaining Gold from an action at this Location.
Location 3 St Giles
Brickbats and Tiles say the Bells of St Giles
Action: Buy Bricks. Players can buy 1 Brick for 2 Gold, a set of 2 Brick for 3 Gold, or a set of 3 Brick for 4 Gold. A player can choose from any available set of Bricks.
In any turn when Resources are removed from any part of the location they are not replaced until turn end.
Bell Power: Gain 1 Brick at turn end.
Location 4 St Martins
Halfpence and farthings say the bells of St Martins
Action: Issue a Loan. Players can pay 5 Gold to issue a Level I Loan, 10 Gold to issue a Level II Loan or 15 Gold to issue a Level III Loans. A player may only issue a Level II Loan if they already have at least one Level I Loan and may only issue a Level III Loan when they already have at least one Level I Loan and at least one Level II Loan. At the end of each round the player receives interest on each Loan held by them (1 Gold per Level I Loan, 2 Gold per Level II Loan and 3 Gold per Level III Loan).
Note: A player may obtain a Level II Loan by fulfilling the relevant export cargo (See Location 14 – Stepney) even if they do not then hold a Level I Loan.
Bell Power: Collect additional interest of 1 Gold per Loan at turn end.
Location 5 St Peters
Pancakes and fritters say the bells of St Peters
Action: Buy Pancakes. Players can buy 1 Pancake for 3 Gold, a set of 2 Pancakes for 4 Gold, or a set of 3 Pancake for 5 Gold. A player can choose from any available set of Pancakes.
In any turn when Resources are removed from any part of the location they are not replaced until turn end.
Bell Power: Buy Pancake with a 2 Gold discount per transaction (so per set of Pancakes, not per Pancake).
Location 6 Whitechapel
Two sticks and an apple says the bells of Whitechapel
Action: Place a Bell. Players can place a Level I Bell for the cost of 5 Gold, a Level II Bell for the cost of 10 Gold, or a Level III Bell for the cost of 15 Gold. A player must already have placed at least one Level I Bell before placing the Level II Bell and must have placed the Level II Bell before being able to place a Level III Bell.
Bell Power: Any number of Bells can be placed in Whitechapel if all other spaces are occupied. When placing a Bell here (whether it is being placed for the first time, or it has been removed from another location) receive 3 Gold.
Location 7 St Katherines
Maids in White Aprons say the bells at St Katherines
Action: Sell Resources. See Worker Placement Phase above for details of placing Workers and taking actions here. A player may sell as many Resources of a particular Resource as they possess at the price shown on the relevant spot.
Example: A player selling Lemons may do so either at 3 Gold per Lemon if the player's Worker is occupying the left-hand spot or 2 Gold per Lemon from the right-hand spot. Only two players may sell the same Resource in a turn.
Bell Power: Gain 1 additional Gold for each Resource sold here.
Note: For each type of goods sold advance the market transactions tracker in the relevant player's colour one space along the St Katherine's Market Track.
Location 8 St Johns
Pokers and Tongs say the bells of St Johns
Action: Seek Royal Favour. Each player may choose to take 3 Gold, gain 2 VPs or take either 1 Lemon or 1 Brick. The first Worker (the one placed on the blue spot) is moved to the turn order track blue space after completing its action.
Bell Power: At the end of the round just before starting a new turn move the last placed Worker of the player to the orange spot on the order track and adjust the track.
Location 9 St Annes
Kettles and Pans say the Bells of St Annes
Action: Buy Pans. Players can buy a set of 2 Pans for 4 Gold, a set of 2 Pans for 5 Gold, or a set of 3 Pans for 6 Gold. A player can choose from any available set of Pans.
In any turn when Resources are removed from any part of the location they are not replaced until turn end.
Bell Power: Buy Pans with a 2 Gold discount per transaction (so per set of Pans not per Pan).
Location 10 Aldgate
Old father baldpate say the slow bells at Aldgate.
Action: Upgrade Transport. Players can upgrade storage/transport by adding a hand cart for the cost of 3 Gold, then later a horse and cart for the cost of 7 Gold and finally by adding a ship for the cost of 10 Gold. Each upgrade may only be performed if the player already possess the cheaper upgrades. Having a ship also gives the player 1 VP per turn at turn end.
Bell Power: Gain access to the warehouse by removing the Warehouse Tile from the Player Board. This provides one additional space.
Location 11 St Helens
You owe me ten shillings say the bells of St Helens
Action: Buy or Sell Shares. For each Worker placed here a player may either:
- A Buy either 1 or 2 shares at the price shown by the share price marker on the Jonathon's Coffee House share track. The Share Marker in the player's colour should be advanced along the right-hand side of the share track to reflect the number owned.
- B Sell any number of shares at the price shown by the Share Price Marker on the left side of the share track (taking Gold from the bank). The Share Marker in the player's colour should be adjusted along the right side of the share track to reflect the number retained.
Bell Power: Buy for 1 Gold less per share and sell for 1 Gold more per share than the amount shown on the share price track.
Location 12 Old Bailey
When will you pay me say the bells of old Bailey.
Action: Invest in the East India Company. Take part in speculative trading by financing a ship. This type of investment was risky, but with substantial rewards. To reflect this, the cost of the ship must be paid at the time a Worker is placed. This cost is either 4 or 6 Gold in the early rounds of the game increasing to either 8 or 12 Gold in later rounds.
Bell Power: Draw an additional EIC Ship Tile and choose out of the three which one to put back in the EIC Bag.
Location 12 Old Bailey continued
Always take the following Customs Inspector actions even if no Worker has been placed on Location 12. The arrival of EIC Ships had a significant impact on the early stock market with the traders employing runners to bring them news from the docks. In the same way, in Oranges and Lemons the EIC Ship Tiles drawn out of the Bag whenever Location 12 is activated affect the share price as shown on the share track in Location 11. Therefore, the process of drawing EIC Ship Tiles out of the Bag and altering the share price (see paragraphs "Drawing EIC Ship Tiles" and "Altering the Shares Price" below) must be followed every game turn regardless of whether there are any Workers here. The Customs Inspector placed in the dashed circle is to remind players to do this. However, the Choosing Ships phase (as described in the paragraph "Choosing EIC Tiles") only occurs if there is at least one Workers on location 12.
Drawing EIC Ship Tiles
Draw one EIC Ship Tile out of the Bag and place it face up on the left most of the three available spaces in the East India Company docks (which run across the top edge of the Main Board). Draw another Ship Tile and place it face up on the middle space.
If there is a Bell on Location 12 draw a third Ship Tile and place it face up on the right most space.
If there is a Bell in this location the player who placed the Bell chooses which of the three Ship Tiles is returned to the Bag.
Altering the Share Price
Starting with the Ship Tile in the left most of the three East India Docks spaces, resolve the impact of EIC Ships on the share price. In the basic game each Ship Tile will show one of the following:
- Lower Share Price (a number in red) – A number in red shows the amount by which the share price is to be reduced.
- Increase Share Price (a number in green) – A number in green shows the amount by which the share price is to be increased.
- Half Share Price (a sunken ship) – A sunken ship will cause the share price to be reduced by 50% rounded up to the nearest whole number.
Adjust the share price by moving the Share Price Tracker to reflect the icon.
Choosing EIC Ship Tiles
The player who placed a Worker in the lower priced spot (costing either 4 Gold or 8 Gold) chooses an EIC Ship Tile first, followed by the player (if any) with a Worker in the higher priced spot (costing either 6 Gold or 12 Gold). Ship Tiles provide Resources, Gold, or a choice between the two. The Resources must match the colour of the icons on the relevant Ship Tile, though grey Resource Cube icons can be any Resource(s).
Some Ship Tiles provide an immediate, one time only benefit while others provide a recurring effect.
Storing Resource Cubes
Any Resource can be moved to the player's transportation / storage spaces on their player card. If a player does not have enough space, surplus Resources may remain on the Ship Tile to be sold in:
- Location 13 (Shoreditch).
- Used in Location 14 (Stepney) to fulfil a cargo.
- Used in Location 15 (St Pauls) to gain extra Workers.
If the Player does not have a Worker in any of those Locations or is otherwise unable to make use of the Resources in those Locations, they must instead be sold in the End of Round Phase.
Recurring effect: Ship Tiles with a circle arrow symbol are recurring benefits which provide Resources or Gold now and on each subsequent round when Location 12 is activated.
Ship Tiles granting recurring benefits remain face up next to the player's card, whilst Ship Tiles granting once only returns are stored face down (but must still be retained by the player as they count towards Endgame Bonuses).
Taking recurring benefits
Now players who have previously acquired Ship Tiles with a recurring benefit take the Gold or Resources due (with any Resources being moved to storage, immediately or else at turn end, or utilised in Locations 13 to 15, see "Choosing EIC Ship Tiles" above).
Example EIC Ship Tile rewards: Recurring 3 Gold; Recurring 1 Brick; One off 4 Bricks; One off 12 Gold; One off 15 Gold – or – 1 of each Resource.
Location 13 Shoreditch
When I grow rich say the bells at Shoreditch
Action: Trade Goods. Each Worker may buy any number of Resources of any type and in any combination of types at the price per Resources visible above and below the Resource to be bought. Each Worker may also sell Resources of any type at the price above and below the empty space for that Resources where they place the Cube.
Bell Power: Earn 2 Gold at each turn end phase.
Location 14 Stepney
Pray when will that be say the bells of Stepney.
Action: Export cargo. Place a Worker here in order to fulfil one of the contracts shown on the five face up Cargo Tiles by handing over the numbers and colours of Resources shown on that Cargo Tile as required. Grey Cubes can be any colour.
The player then takes the reward shown on the Cargo Tile which may be Gold, Resources, other items, or VPs (see the Cargo Tile Rewards Summary below). The Cargo Tile itself should be stored face down next to the player's Player Board as they count towards the end game scoring.
Bell Power: A player with a Bell on this location may ignore the colour of a single Resource of the required goods shown on the Cargo Tile when making delivery of the goods and substitute it with any other Resource of their choice.
Export Cargo Tile reward examples
- Discard 1 Pan to receive 10 Gold.
- Discard 1 Pan to receive a warehouse.
- Discard any 2 Resources to issue a Level I Loan.
- Discard any 3 Resources to gain an extra Worker.
- Discard any 3 Resources to upgrade your transport level.
- Discard 1 Pancake to place a Level I Bell.
- Discard any 3 Resources to issue a Level II Loan.
- Discard any 4 Resources to take two Vote Tiles.
- Discard 2 Lemons, 1 Brick and 2 Pans to score 9 VP.
- Discard 2 Lemon and 2 Pancakes to receive 18 Gold.
Location 15 St Paul's
When I grow old say the bells at St Pauls
Action: Recruit Workers. To recruit an additional Worker, place a Worker here at a cost of either 3 or 5 Gold. When the location activates the player must also hand in 1 Resource of any colour for each Worker they already have in play (so 2 Resources to gain their third Worker, 3 Resources for their fourth Worker, etc). Then they move the Worker to the order track as normal taking an additional Worker in their colour from the reserve and place it on the order track directly behind the other Worker.
Bell power: Once per turn, when a Worker is about to take an action in any of the 16 locations the player may instead move that Worker to another vacant action spot (paying the cost if any of the worker placement spot). It does not matter if the new location has already been activated, as the Worker may be placed in a worker placement spot that has already been used that turn, but then immediately resolve the action. If the location has not yet been activated that round the action is resolved when the location is activated in the usual manner.
Note: 1. If the location chosen is 12 (Old Bailey) the player chooses a EIC Ship Tile as normal, but do not perform a share price adjustment and the powers of any Bells in space 12 is ignored. 2. You may not move your Worker to the Blue spot in location 8 using this bonus.
Location 16 Bow
I do not know says the great bell of Bow
Action: Buy votes. Seek election as Mayor of London. Players with Workers here take one face down Vote Tile, examine it and place it face down in their area.
Bell Power: Instead of taking one face down vote, the player takes two face down Vote Tiles, examines them, keeps one Tile which is placed face down in their area and returns the other Vote Tile to the bottom of the stack.
Game Variants
The Shorter Game: To reduce the game length remove four Cargo Tiles marked with a III on the back during setup.
The Longer Game: To increase the game length add four Cargo Tiles marked with a III on the back during setup.
More Volatile Stock Market: To have greater stock market volatility with greater risks and greater rewards, during the set up phase stage 11 remove the type III EIC Ship Tiles and replace them with type IIIb EIC Tiles.
Using the Career Tiles
The Career Tiles give player specific in game advantages or accelerated start options to add variety to the game. If using, place these face up in a line near the Main Board. In player order each player chooses one Career Tile and places it next to their Player Board gaining the benefits below. Return any unused Career Tiles to the box.
- The Money Lender – The player starts with a Level 1 Loan.
- The Speculator – The player starts with 2 shares. The player may buy up to 3 shares per action in space 11 (St Helens).
- The Investor – The first Investment action in the game the player undertakes in Location 12 (Old Bailey) costs nothing. All other actions in this location cost 1 Gold less.
- The Politician – The player takes a 3 VP Vote Tile at Game start. The player can undertake actions in Location 16 (Bow) at 1 Gold less per action.
- The Merchant – The first cargo completed at Stepney docks by the player in the game requires no Resources. The player with a Bell on this location may ignore the colour of 1 Resource of the required goods shown on the Cargo Tile when making delivery of the goods and substitute another Resource of any colour. So if a player has the Merchant Carrier Tile and places a Bell on Stepney Docs, they can substitute 2 Resources with those of another colour.
- The Trader – The player's Transaction Marker starts in the 2nd space of the St. Katherines Track. The player may always sell Resources at the higher value even if there is another player's Worker there. This does not stop the Worker in the higher spot also selling at the high rate and does not change the player turn order.
Historical Note on the Rhyme
The game is called Oranges and Lemons as those are the first words of an English nursery rhyme which refers to the bells of churches in the city of London and the trades and activities that occurred there in the medieval and early modern period. The meaning of some lines are easy to understand, others vague and confusing. The earliest printed version appeared in Tommy Thumb's Pretty Song Book (1744) although the name of the song but no words was referenced in a book of dances dating to 1665. It is undoubtably much older. There have been a number of versions naming between them sixteen different churches although only fifteen ever appeared in one place. No doubt other versions now lost to us also existed. Out of these over the centuries the modern rhyme emerged. The Bells of St Clements Dane play the tune several times a day.
The rhyme is sung by children playing a very old game where they walk in lines through an arch created by a pair of children. When they reach the end of the last line they drop their arms trapping a child who is out of the game. That last section has a very different tune and its origin and meaning is lost to time although there are many theories related to brides on wedding nights and to King Henry the VIII and the fate of some of his wives.
"Oranges and lemons," say the bells of St Clement's. "You owe me five farthings," say the bells of St Martin's. "When will you pay me?" say the bells of Old Bailey. "When I grow rich," say the bells at Shoreditch. "When will that be?" say the bells of Stepney. "I do not know," says the great bell at Bow. Here comes a candle to light you to bed, And here comes a chopper to chop off your head! Chip chop chip chop the last man is dead.
| Name in Rhyme | Probable Associated Location | Associated Activities |
|---|---|---|
| St Clements | St Clements Eastcheap | Wharves where fruit is unloaded |
| St Clement Danes | Near Covent Garden fruit markets | |
| St Margarets | St Margarets Lothbury | Archery butts and practice. |
| St Giles | St Giles, Cripplegate | Stone masons and builders |
| Martins | St Martins Ongar, Eastcheap | Money lending |
| St Martin in the Fields | Money lending | |
| Whitechapel | Whitechapel Bell Foundry | Casting bells |
| St Peters | St Peters on Cornhill |