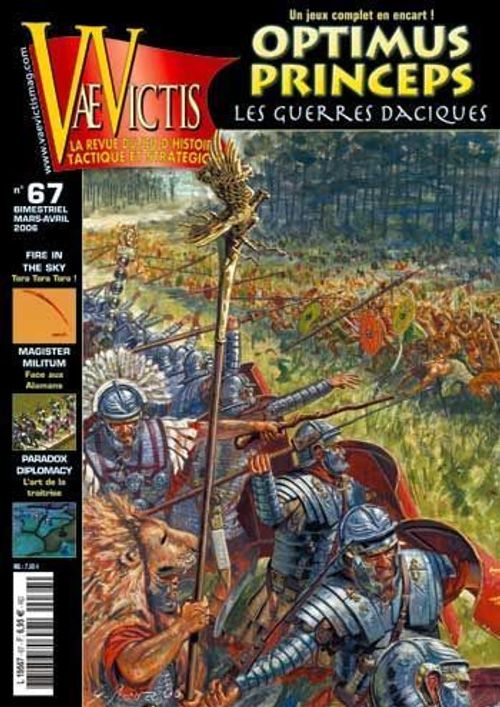
Optimus Princeps: Les Guerres Daciques
Optimus Princeps: Les Guerres Daciques Rulebook
Table of Contents
Table of Contents
- Counter Notes and Errata
- Terms and Abbreviations
- 0 - OVERVIEW
- 1 - GAME COUNTERS
- 2 - GAME SEQUENCE
- 3 - ACTIONS
- 4 - ACTIVATIONS
- 5 - MOVEMENT
- 6 - LOGISTICS
- 7 - INTERCEPTION
- 8 - THE FIELD OF BATTLE
- 9 - ENGINEERING ACTIONS
- 9.1 Besieging [see also §9.4]
- 9.2 Inhabited Regions
- 9.2.1 Defensive Value: ranges from 0 to 3 ["VD" in the French rules]
- 9.2.2 Garrison Value: ranges from 6 to 16 ["VG" in the French rules]
- 9.3 Invading an Inhabited Region
- 9.4 Besieging an Inhabited Region
- 9.5 Assaulting an Inhabited Region
- 9.6 Sorties during a Siege
- 9.7 Disengagement
- 9.8 Ending a Siege
- 9.9 Siege Attrition
- 10 - CASUALTIES
- 11 - COLLECTING BOOTY, AND ITS EFFECTS
- 12 - PILLAGE: FORAGE, HARVEST AND BOOTY
- 13 - REINFORCEMENTS AND RECRUITS
- 14 - STRATAGEMS
- Player Notes
- Scenarios
- 0 SCENARIO NOTES
- 1 - THE SCENARIOS
- Optimus Princeps: Domitian's Reign [A Campaign Scenario]
Counter Notes and Errata
[Counter notes and errata:
Counters below the red dotted line on the sheet are supposed to be single-sided ("simple face"); those above it are supposed to be double-sided ("double face").
However, the Roman fort and artillery (Scorpio) counters should be single-sided, not double-sided.
The two 2 SP fleet counters (Classis Moesica and Classis Pannonica) should in fact be 1 SP fleet counters, i.e. there should be two 1 SP fleets marked Classis Pannonica, and two 1 SP fleets marked Classis Moesica.
Cohortes Galatia and C. Lusitanorum counters, reverse side should be 1 SP, not 2 - corrected counters published in VV 69.
Legio I Italica, 3 SP counter, reverse side should be 2 SP not 3, corrected counter published in VV 69.]
Terms and Abbreviations
AP: Action Point ["PA" on the Princeps counter and in the French rules]
Inhabited region:
- Defensive Value [bottom left number in an inhabited region on the map, ranges from 0 to 3; "VD" in the French rules]
- Garrison Value [bottom right number in an inhabited region on the map, ranges from 6 to 16; "VG" in the French rules]
Leader:
- Strategic Value [bottom left number on a leader counter; "VS" in the French rules]
- Tactical Bonus [bottom right number on a leader counter; "BT" in the French rules: see the Special Rules for why Lusius Quietus has two tactical bonuses.]
Unit:
- SP: Strength Point [number in the bottom left corner; "PF" in the French rules]
- Destruction Factor [number in the bottom right corner; not all units have it, see §10.1 for the effects; "FD" in the French rules]
- L: Heavy [from the French "lourd"]
- F: Falx-equipped [the four Dacian 'Faucheurs' units, armed with scythe-like weapons so they have a better (lower) Destruction factor]
- *: Missile-equipped unit [can fire in phase 1 of combat, see 8.2]
- Transfuges: Roman advisors/deserters [can be used to make barbarian artillery]
- "Pedites Singulares": apparently these are Roman governors' bodyguards, much as the Praetorians are the emperor's.
[Note that Roman units have a colored bar behind their name. The color of this bar indicates where the unit is raised/based:
- Africa [Afrique holding box]: dark orange
- Britain [Bretagne holding box]: pink
- Dacia [Dacie, on the map]: dark reddish-brown
- Gaul [Gaules holding box]: red
- Germania [Germanies holding box]: green
- Rome and Italy [Rome & Italie holding box]: white [leaders and C. Praetoriae]
- Moesia and Greece [Mésie Inférieure, Mésie Superieure and Thrace, on the map]: pale blue
- Pannonia and Dalmatia [Pannonie Inférieure, Pannonie Supérieure, Dalmatie on the map]: dark blue
- Iberian peninsular [Péninsule Ibérique holding box]: light orange
- Syria and Turkey [Orient holding box]: light yellow
The color coding generally indicates where units which are recruited arrive. Keep this in mind when choosing which units to take as losses, unless you want to spend a loooong time bringing up reinforcements.]
MP: Movement Point SP: Strength Point
Marker translations
- Butin: Booty (plunder, loot)
- Leurre: Dummy counter
- Pillée: Pillaged
- HDC: Out of Action [markers, red text and blue-grey silhouette on black]
0 - OVERVIEW
One of the players controls the armies of Rome, the other the 'barbarian' forces.
This game requires the use of a six-sided die, termed a D6, and a ten-sided die, termed a D10. When the notation 6+ is written, this means that the result of the die roll (plus bonuses) must be 6 or higher, and inversely for 6-. [Note that, per Rule 3, the D10 is strictly a counter to display remaining Action Points and so could be substituted for ... Also note that the game appears to require a sheet of paper for each player, off-map and out of enemy view, labeled with the names of the leaders for that side, as a holding box for when those leaders are carrying combat units as an army.]
0.1 Game scale
A game turn represents a year, broken down into five seasons: thaw, spring, summer, autumn, and winter. A centimeter on the map represents around 50 km [an inch represents approximately 75 miles]. Each Strength Point (SP) represents 1000 to 2000 men or 500 to 1000 horsemen. Each naval SP represents around 50 combat and transport ships.
0.2 The Map
The map depicts central Europe. It shows Germania, Sarmatia and Dacia as well as the Roman Empire's frontiers on the Rhine and Danube. [The Rhine is not on the map, the designer is hoping to do another game using this system for campaigns in Germania] The rest of the Roman Empire, such as Rome and North Africa, is represented by spaces linked to the main map.
A country is represented by one or more overlapping regions. A region is round. The background color of each region gives its ethnicity: red for the Romans, green for the Germans, purple for the Sarmatians [French rules say pink, but probably should be purple - the Sarmatians are in two different tribes, Roxolans to the east of the Dacians, Jazyges to the west], and yellow for the Dacians. Certain regions have a colored square with a date because their ethnicity changes over time. There are two types of regions: inhabited regions (city, tribal site [also village and garrison]) and rural regions (plains, forest, mountain, or marsh). [See the terrain key, bottom right corner of the map: City is "Cité"; Garrison is "Garnison"; Village is "Village"; Tribal site is "Site tribal".]
All of the regions of a country are connected. A counter may move from one to another. Movement from one country to another (and thus from one region of one country into another region of another country) is made via a link. The link may be a trade road, a path or a Roman road. A path leaving a country departs from all of its regions.
[Paths ("chemins") are grey lines; Roman roads (Voies Romans") are wider, textured tan lines - see the terrain key in the bottom right corner of the map. There are no trade roads on the map - by special rule, the Roman roads within Dacia are trade roads before 110, i.e. in all four scenarios in this issue.]
Borders serve to indicate the population zones between different barbarian tribes as well as Roman provinces.
[Note of explanation: a 'region' is literally a colored circle; a 'country' is one to three overlapping regions; a province/tribe is composed of multiple countries. For example, Lauracium along the west edge in the north, is a country of one region. A grey line - a path - to the north links it with the German country of two regions; Roman roads link Lauracium with the countries of Vindobona and Virunum. Lauracium and Virunum are countries in the province of Noricum (Norique on the map). Also, there are two named mountain regions in Dacian territory: "Col de la tour rouge" is 'Pass of the red tower'; "Col de vulcain" is 'Vulcan's pass', Vulcan being the Roman god of the forge, Hephastius in Greek mythology.]
0.3 Stacking
Stacking of units (leaders, combat units, naval units and markers) in a region is unlimited. In an inhabited region, there cannot be more strength points (SP) than its Garrison Value.
1 - GAME COUNTERS
1.1 Leaders
Leaders represent the legates, chiefs, kings or the emperor of each army. The barbarians chiefs move about on the map with their reverse (silhouette) side showing. They are flipped to their face-up side when they are in combat.
[number in the bottom left of a leader counter is the Strategic Value; number in the bottom right is the Tactical Bonus.]
Leaders have a Tactical Bonus for combat, a Strategic Value to move troops and Movement Points (MP). [Movement points are not indicated on the leader counter. Note also that per 4.1, the facing of a leader counter indicates whether it has used its inherent Leader AP yet in an Operations Phase.]
1.2 Combat units
Combat units are represented by counters, on which are depicted the figure of a soldier (artillery ["Scorpio"], foot soldier, cavalry) or of a vehicle (boat, impedimenta [baggage]). [Unit type] has an effect on the game.
[Number in the bottom left corner of a combat unit is the Strength Points (SP); number in the bottom right is the Destruction Factor, see §10.1]
Each combat unit has a Destruction Factor, Strength Points (SP), and sometimes special symbols. [Some combat units do NOT have Destruction Factors.]
- *: missile-equipped unit
- L: Heavy unit [from the French "Lourd"]
- F: Falx-armed unit [only the four Dacian "Faucheurs" units, significance is a lower (better) Destruction Factor]
To account for losses suffered in combat and through attrition, players use counters of the same type and lesser value which are given to allow you to 'make change'.
[This is misleading. Except for the Roman legions, which are 3 SP units on their face, all other units show losses by flipping the counter to its reverse side, or eliminating it. The Roman legions each have a substitute counter, for when losses reduce them to a single SP.]
Example: a 2 SP infantry unit which suffers a loss is replaced by a 1 SP unit (back of the counter in this case).
Troops without a leader are placed upon the map.
Troops with a leader are hidden on a separate sheet. [It appears that you need to make up a sheet for each side, with a holding box for each leader.]
1.3 Booty (Plunder) Wagons
[counter has a wagon and says "Butin"]
When an army (a leader and at least one troops unit) commits pillage or wins a battle (or via stratagem), it recovers booty (slaves, livestock, amphorae of wine and gold, etc.). Place a 'Booty Wagon' marker under the army in question to remind you that its movement will be slower. A Roman army with an Impedimenta counter does not need to place a Booty wagon, as it is already slowed (the loot will be carried along with the luggage). The actual amount of Booty that an army has, is tracked on the off-map sheets. A leader alone cannot possess a Booty marker. If this occurs, he loses all of his Booty markers. [Note that per 1.4, an army without a leader also loses all of its Booty markers, but see the optional Orgy! rule under 11.3.]
A wagon may only move 1 MP per season.
1.4 Booty Markers
Booty markers are placed beneath their army. Booty is used to:
- buy Action Points (AP) (1 Booty marker = 1 AP)
- remove an Out of Action [HDC] marker after combat (1 Booty marker = 1 HDC SP restored to good order.
- reestablish the Defensive Value of an inhabited region for 3 Booty markers.
- 1 Booty marker = +1 to the attrition die roll
You must always have a leader in order to use Booty markers.
If there is no longer a leader with the army which is transporting the Booty markers, the booty is lost. [but see the optional Orgy! rule under 11.3.]
2 - GAME SEQUENCE
Optimus Princeps is played in a series of game turns which are symbolized by seasons. Each season is composed of several 'sequences'. All of the sequences are executed together [i.e. both players do the sequence at the same time], except for the Operations Sequence when the players alternate playing AP or Leader AP.
Sequence 1: Events
Seasonal event: roll a D6 (except in Spring)
Thaw: 1-3 no effect; 4-6 marshes flooded, being in them or moving through them is equivalent to crossing a major river for attrition purposes.
Spring: automatic reinforcements arrive:
- roll a D6 per pillaged ["Pillée"] region: on a 4+ it returns to normal;
- All HDC (Out of Action) units in non-pillaged inhabited regions return to normal
- Tribal sites recover their Defensive Value
- SP destroyed in the previous year may be recruited anew.
Summer: 1-3 marshes are dry and considered to be plains; 4-6 no effect.
Autumn: 1 rivers are frozen; 2-5 no effect; 6 marshes flooded, being in them or moving through them is considered equivalent to crossing a major river for attrition purposes.
Winter: 1-3 watercourses are frozen; 4-6 no effect.
Sequence 2: Acquiring APs
Roll a D6, which determines how many AP you have for this turn.
| D6 | AP available |
|---|---|
| 1 | 3 |
| 2-3 | 4 |
| 4-5 | 5 |
| 6 | 6 |
You may also buy AP with Booty, 1 Booty marker = 1 AP. You may not have more than 9 AP per turn.
Sequence 3: Initiative
The Roman player always plays first.
Sequence 4: Operations (alternating)
The first player performs an action which costs him one or more AP or Leader AP, then the second player may spend as he wishes. A player may not 'pass', but may spend 1 AP to do nothing. If one player still has AP or Leader AP and the other player does not, he plays all of the AP as one or more actions. Once neither player has any AP or Leader AP remaining, the Operations Sequence is finished.
Sequence 5: Supply
Each player checks the supply status of his units. All unsupplied units must make an attrition check.
Sequence 6: End Turn
The season ["saison"] marker is advanced one space. At the end of winter, advance the year marker ["anno"].
3 - ACTIONS
Action Points (AP) represent the action capabilities of each side.
Roll a D6 on the Action Points Table [under Sequence 2, supra] to find out how many AP you have available, and possibly add 1 AP per Booty marker spent.
Once you've determined how many AP are available, each player places his D10 so as to show how many AP he has available. You cannot have more than 9. The D10 is used only for this purpose, as a counter. 0 on the D10 indicates 0 AP remaining. The player therefore has no more actions for this season.
With each action, the player spends the required number of AP (see the Action Costs Table, appended at the end of this translation)and adjusts his D10 to show how many APs remain to him.
All Leaders have 1 Leader Action Point. This Leader AP can only be used by this leader and the units which he has in his stack at the start of the action.
4 - ACTIVATIONS
4.1 Leader Activations
Each leader has 1 Leader AP by default. The first time that he is activated, he uses it. He may add to it additional AP to perform a more costly action. He may also be activated in a future segment by using AP normally.
At the start of each season, always place your leaders with their eyes facing towards you. When a leader has used his Leader AP, rotate him to face your opponent.
4.2 Several Leaders in a region
When several leaders are together in the same region, a single leader is activated at a time. A leader may bring with him as many lower-ranking leaders as he desires. Higher-ranking leaders remain where they were.
Rank is given by the Strategic Value. The higher the Strategic Value, the higher the leader is in the hierarchy.
4.3 Activating an Army
A leader who is activated with SP represents an army. He may undertake an action with his Leader AP and normal AP.
4.4 Activating a unit without a leader
A combat unit may activate alone and perform an action. A stack of units without a leader cannot move together, as they do not comprise an army. They must be activated one by one. A unit without a leader cannot play a stratagem.
If they are attacked, they all defend together.
5 - MOVEMENT
5.1 Land Operations
A leader with or without combat units or a combat unit alone may make land moves. Units of an army are placed on a sheet (hidden from the opponent's view) with the leader's name next to them.
Movement is done from one region to an adjacent region. If the player wishes to have his counter leave a country, it must go to another country along the line that connects them.
If the counter arrives in a new country, several cases can occur. If the country has only a single region, the counter goes in this region. If the country has multiple regions, roll a D6 to determine the arrival region:
| D6 | Region |
|---|---|
| 1 | Opponent's choice |
| 2 | northernmost |
| 3 | easternmost |
| 4 | southernmost |
| 5 | westernmost |
| 6 | Your choice |
If the result is impossible (two northernmost regions for example), the opponent chooses for you. However, before rolling the die, you may automatically go to the region of your choice if: you already have 1 SP in the region or it is a inhabited region of your people. Once arrived in a region of a new or the same country, you may again move to another region of this same country or enter a new country, so long as you have MP remaining. To go from one region to another, or to a new country, costs one MP. Movement is temporarily interrupted in case of combat or siege, but the leader is free to resume his movement after defeating the enemy. If the combat or assault is lost, the activated units must end their activation for this sequence. [They can be activated again later in this same Operations phase.]
MOVEMENT ALLOWANCES TABLE
| Unit Type | MP |
|---|---|
| Leader | 4* |
| Cavalry | 2 |
| Infantry | 1 |
| Artillery | 0 |
| Impedimenta | 1** |
| Booty Wagon | 1** |
| Bridge of Boats | 0 |
| Fleet | 4 |
* may expend a maximum of 4 MP per season (including forced march) ** may expend a maximum of 1 MP per season (2 if forced march)
5.1.1 Moving an Army
An activated leader may carry with him SP equal to his Strategic Value. The forces accompanying a leader may be dropped off along the way but cannot continue moving after the leader stops. If a detached counter wishes to move, it will have to wait for a new segment of that player and use APs. The activated leader cannot carry with him more SP than his Strategic Value. The strategic value of inferior leaders accompanying him does not allow him to move more SP. An SP which is in an enemy inhabited region, cannot move to another enemy inhabited region if the first one, from which he is moving, is not under his control. Example: a leader with infantry. With one activation, the leader could move 4 MP, the infantry only 1 MP. If the leader uses more than 1 MP, he will leave the infantry behind. For the leader to use all 4 of his MP with the infantry would require multiple activations (and much attrition, since attrition is calculated after each movement action, and brings a penalty with each additional move). IMPORTANT NOTE: A leader may use a maximum of 4 MP in an entire season; an infantry unit gets only 1 MP per activation, but may be activated as many times in a season as desired (and attrition allows).
5.1.2 Moving several armies
During the same [activation], it is possible to simultaneously move several armies from the same region to the same destination. It costs 1 AP per army. Attrition calculation is based upon all of the units which took part in the move. Example: Two Roman armies are in the same region. Their generals decide to take them into a neighboring region. They may move there together at a cost of 2 AP. They will then suffer a combined attrition. They may also move there separately. The first army would move for 1 AP and suffer a lesser attrition. Then the barbarian player plays, and may perhaps attempt to attack one of the two Roman armies. Subsequently, the Roman player moves his second army for 1 AP.
5.1.2 Picking up Units
[rule section is misnumbered]
A leader may leave behind in a region through which he moves, one or more units or an lower-ranked leader which were stacked with him. He may also 'pick up' units or lower-ranked leaders which are in regions through which he moves. A leader may not use more than 4 MP in a season. [Note that this is the entire season, not per activation!]
5.1.3 Reorganizing Forces
Leaders present in the same region at the start of an action may freely reorganize their respective forces, giving or exchanging units, provided that one of the leaders is currently activated. Be careful to always respect the Strategic Value limit of a leader. Note that if even a single unit which has just been added to the army must move again, the entire army stack will suffer the attrition penalty.
5.1.4 The Supreme Leader
The Roman emperor (princeps) and the Dacian king have a Strategic Value bonus of +8 due to their rank. When he dies, he transmits this bonus, shown by a counter, to his heir or historical successor. In order to receive the counter, the heir must perform a Coronation action. Place the counter on the supreme leader. [The Roman counter is a laurels and marked "Princeps"; the Dacian counter is a helmet with what looks like a bird on top, and is marked "Roi Barbare" - 'barbarian king'.] A supreme leader who uses his Leader AP in a friendly inhabited region (non-pillaged and non-besieged) without doing anything else gains 1 Booty marker. Thus, he receives revenue by performing the Taxation action.
5.1.5 Dummy [Leurre] Counters
Dummy counters represent fake barbarian leaders and serve to create strategic uncertainty. Dummy counters move like real leader counters, paying the required APs and keeping their dummy side face down. A dummy counter also has 1 Leader AP. Movement is the only action which dummy counters can perform. If a dummy counter enters into contact with the enemy, it is immediately removed for the rest of the game. A dummy counter cannot enter enemy territory.
5.1.6 Crossing a River
Land SP cannot move at sea. Crossing a non-frozen watercourse carries an attrition penalty unless you are crossing by a bridge or Bridge of Boats. Horses also allow you to cross without attrition as they can swim. They also help infantry to cross by reducing the current. If there is 1 SP of cavalry per 2 SP of infantry, the army does not suffer the river-crossing attrition penalty.
5.1.7 Off-Map Movement
An off-map unit, army, or stack of units (even without a leader) can do one movement action per season. Moving from one space to another costs 1 MP.
5.1.8 Post-Movement Attrition
At the end of each movement, or when an army temporarily pauses for combat, the player rolls a D6 on the Attrition Table. The result is expressed in terms of [Strength Points] put Out of Action [HDC counter]. Losses from attrition are applied to all of the units that the leader moved during his activation. [I believe that this means the moving player may distribute the attrition SP among all of the units that moved with the leader that turn, including for example units which were dropped off.]
A unit which moves by itself does not suffer attrition after moving.
5.2 Naval Operations
The Romans were always master sailors. Their Empire first spread along the coast of the Mediterranean before moving deeper inland.
Like land units, naval units may be activated to perform some actions, by spending the required number of APs.
Naval units must remain in their respective major rivers and seas. For example, the Danube fleet only sails on this major river.
5.2.1 Ports
A fleet always begins and ends its move in a port. It is always in supply because in a friendly port. If this city is captured [by the barbarians], the fleet moves to the closest port in an adjacent country, otherwise it is destroyed.
5.2.2 Naval Movement
A river fleet has 4 MP and can only move into regions that border its river. [A region borders the Danube if it is connected to a path/road that crosses the river depiction; Salsovia, which is where the Danube flows into the Euxine Sea, IS on the Danube as well.]
A fleet must begin and end its movement in friendly port cities. It may land or embark any friendly SP in the regions moved through. It cannot go into a mountainous region. [Fleet movement along the river is from one region that borders the river, to another region that borders the river and is linked to the first region. For example, to move from Lauracium to Aquincum is four MPs (Lauracium-Vindobona-Carnutum-Brigetio-Aquincum); to move from Aquincum to Singidunum is also four MPs, since Mursa does not border the river)].
In winter, if the river is frozen, sailing is impossible. The boats remain in port.
5.2.3 Troop Transport
In your turn you may activate a fleet (2 AP) or an army (1 AP). The fleet will embark and debark the army. If you are moving an army, you will have to wait until the next [activation] to move it with your fleet.
One fleet SP may transport 10 SP of land units and as many leaders as desired.
A naval force may embark or debark troops in any [type of] region. Embarkation and debarkation occur during the fleet's movement and cost it 0 MP if happening in a city, 2 MP otherwise.
Example: A fleet leaves from a city. It moves to an adjacent plains region (1 MP) and here embarks an army (2 MP), then it moves into a city (1 MP) and there debarks the army () MP), for a total of 4 MP expended.
Moving in a ship does not cause attrition for the fleet or its passengers. The passengers suffer attrition only if they land in a region where there are enemy units which they attack.
5.2.4 Bridge of Boats
1 fleet SP which is in a city with a leader present may be transformed into a bridge of boats for 6 AP. Flip the fleet counter to the 'bridge of boats' ["pont de bateaux"] side. Your troops may now move to the region across from the one where your bridge is located, without suffering attrition for crossing a major river.
If the river freezes, the fleet is destroyed.
5.2.5 Combat Involving Naval Forces
An enemy army may not enter a region where there is a river fleet, if in doing so the army would have to cross the river.
If a fleet is present in a region where a land battle occurs, it may take part in the land battle, but only during the simultaneous phase 1: Harassment (see §8.2).
The fleet scores an Out of Action [HDC] result on 6+.
If a fleet which contains troops is destroyed, the troops are also destroyed.
6 - LOGISTICS
Supplying the troops, caring for the wounded, and reducing desertion is not always easy, especially in winter and in enemy territory.
Leaders do not suffer attrition. If a leader's entire army disappears from attrition, he finds himself alone to eat his saddle.
6.1 Attrition
Each time that a unit makes a land move (often just before a combat) or is unsupplied at the end of a season, it must roll a D6 on the attrition table.
ATTRITION TABLE
| Modified result | SP Out of Action [HDC] |
|---|---|
| 2+ | 0 |
| 1, 0, or -1 | 1 |
| -2 | 2 |
| -3 | 3 |
| -4 | ... |
The Attrition Table gives the number of SP which are put Out of Action. If he so desires, a player is free to convert 2 SP Out of Action into 1 SP eliminated. All losses must be applied.
There are many attrition penalties. For each Booty marker expended by the leader of the stack which is checking for attrition, add +1 to the D6.
Attrition Penalties (all penalties are cumulative)
| Cause | Penalty |
|---|---|
| Winter season | -2 (-1 if barbarian) |
| Stack of more than 10/15/etc. SP | -1/-2/etc. |
| A unit in this army has already moved 1/2/X times this season | -1/-2/-X |
| Forced March | -1 |
| Attack an enemy in enemy territory | -1 |
| Cross a major river (the Danube) | -2 |
| Cross a minor river or marsh | -1 |
| Along a path/trade road | -2/-1 |
| SP is in or has moved through a Pillaged region | -1 |
| SP enters/moves through a marsh | -1 |
| Barbarian south of the Danube in summer | -1 |
6.1.1 Crossing a River
There is no penalty if the unit uses a bridge, if the river is frozen or if there is one cavalry [SP] for every two infantry [SP] [see §5.1.6].
6.2 Supply
During the supply phase of each season, both players must check to see if their units are in supply.
A single unit is always in supply, regardless of where it is located.
An army or stack of units is automatically in supply:
- if it is in a friendly non-pillaged inhabited region, not conquered by the enemy and not besieged. In order to be supplied the number of SP in the army cannot exceed the Garrison Value of the inhabited region.
- if it is in an off-map box such as Rome (these spaces are off-limits to the barbarians).
The following supply types work only for the Roman side, but not in winter. A Roman army or stack of units is in supply if it is:
- in a region with an impedimenta or
- in a non-pillaged, non-mountainous region bordering a major river whose fleet is neither in its bridge of boats form, nor destroyed.
A besieged region does not supply units of either side. The Romans with their superior logistics, however, may still be supplied by impedimenta or fleets. The barbarians only conducted brief raids, only a victorious army will be able to subsist by pillaging or repelling the invader. Generally, a force about to be besieged would burn anything that it could not carry, as it withdrew behind its walls.
In all other cases, an army or stack of units is not in supply.
If a force is not in supply, the player rolls a D6 on the Attrition Table, applying modifiers as appropriate. Losses are immediately removed.
NOTE: An inhabited region which has been captured from the other player, is NOT friendly to you for supply purposes. So you may want to pillage/ forage/ harvest it, to gain Booty which can be used to modify the attrition roll. Annexation only happens between, not during, scenarios. This may seem to complicate the system, but it recreates the supply problems, and the time needed for an inhabited region to become 'friendly'
7 - INTERCEPTION
A unit which enters into contact with an enemy unit must stop its movement. The barbarian player reveals his leader. If it is a dummy counter, it is removed from the game. Otherwise, the leaders and combat units are revealed and the attacking army (the one which moved into the region) suffers an attrition check [due to moving].
7.1 Interception in a rural region
If two enemy units are in the same region, a battle must occur.
7.2 Interception in an inhabited region
When an enemy force enters an inhabited region, the combat unit which is there has two options. It may either remain within its defenses, or it may accept a battle in the open field. If some SP are inside and others are outside, there must be a battle with the SP which are outside the walls, before doing any engineering actions [Note that an inhabited region can only hold SP within its walls up to its Garrison Value, see 9.2.2].
8 - THE FIELD OF BATTLE
Opposing counters which are in the same region will fight. Each player deploys his units in front of him.
The engagement takes place in several phases, depending upon the type of battle.
8.1 Battle Type
Crushing
If one force has 10 times more SP than the other, it crushes. The opposing force is eliminated. Booty is automatically taken and its movement may continue.
A unit in an inhabited region cannot be crushed. You must besiege or assault the inhabited region in order to destroy it.
Skirmish
If one of the two sides has less than 10 SP, the battle is a skirmish. A skirmish takes place like a pitched battle, except that the opposing forces do not choose tactics and they may attempt an orderly retreat in phases 1 to 3 (see §8.3.2).
[A battle which would qualify as both a skirmish and a Crushing, is resolved as a Crushing, for example 10 SP vs 1 SP]
Pitched Battle (*)
If both sides have at least 10 SP, a pitched battle occurs. The battle takes place in several distinct phases as explained below.
8.2 The Engagement
It takes place in several distinct phases. Phase 0 and everything concerning tactics (*) only applies to a pitched battle.
Phase 0 (secret and simultaneous): Choosing a tactic (*)
There are four possible tactics:
Frontal Attack ["Frontale" on the counter]: Heavy infantry [marked with an 'L' on the counter] has a +1 on the D6, 50% of losses must be taken in non-missile equipped infantry.
Envelopment ["Enveloppement" on the counter]: Heavy cavalry [marked with an 'L' on the counter] has a +1 on the D6, 50% of losses must be taken from cavalry.
Dissuasion ["Dissuasion" on the counter]: Missile equipped units, except heavy missile equipped units, have a +1 to the D6, 50% of losses must be taken from missile-equipped units. At the end of phases 1 through 3, a defending player who chose this tactic may attempt an orderly retreat.
General Attack ["Attaque Generale" on the counter]: There is no bonus to the D6, but you may distribute your losses as you choose.
*: An army without a leader can only choose the tactics Dissuasion and General Attack. The chosen tactic and its effects are only revealed in phase 2.
Phase 1 (simultaneous): Harassment
Only units which are missile-equipped roll their D6. Artillery and ships only fire in this phase, they do not fight in the other phases.
50% of losses are to be taken from missile-equipped units.
*: No tactics choice applies in this phase, not even Dissuasion.
Phase 2: Melee (simultaneous)
All combat units [except artillery and ships, see above] roll a D6.
*: In a ranged battle (only), each side reveals his tactics choice and applies it.
Phase 3: Last Attacks (simultaneous)
All combat units [except artillery and ships, see Phase 1] roll a D6.
*: The player who inflicted the most losses may choose to change his tactic to General Attack before combat continues.
*: Continue to apply the effects of your chosen tactic.
Phase 4: Determine the victor
To determine who won the battle, tally the Out of Action [HDC] results of both sides. If it is equal, the combat ends. The attacker retreats from the region and no booty is taken.
Otherwise, whichever side suffer more Out of Action results is the loser. If this was a skirmish, or if the enemy army was not destroyed by the winner's chosen tactic, the winner performs a pursuit.
*: For a pitched battle, compare the chosen tactics. If the result is LD, the Losing army is entirely Destroyed. If the result is a TT, a Tacit Truce occurs because neither side attempted to dislodge the enemy from their starting position. Otherwise a Pursuit occurs. [Note that if the result was a Tacit Truce, there is no pursuit.]
Phase 4 Table
| Winner's Tactic \ Loser's Tactic | Frontal | General | Dissuasion | Envelopment |
|---|---|---|---|---|
| Frontal | P | LD | P | P |
| General | P | P | LD | P |
| Dissuasion | P | P | TT | P |
| Envelopment | LD | P | P | P |
Phase 5: Pursuit (*)
Only the winner's cavalry fights again. The winner rolls a D6 for each cavalry unit. 50% of losses are to be taken from infantry.
An army without a leader cannot perform pursuit.
Only eliminated SP count for booty purposes.
8.3 End of Combat
There are therefore several ways for combat to end:
- elimination of the enemy;
- end of all the combat phases and retreat of the losing force;
- one side succeeds in an orderly retreat. If one side does an orderly retreat at the end of a phase (1 to 3), combat ends. The retreating force leaves the region and the winner collects booty.
- Tacit Truce.
The side that remains in occupation of the field is the winner of the battle.
8.3.1 Tacit Truce
A truce was rare but possible in this era, it mainly existed to collect the dead and give them a decent burial. At the end of each phase, the players may mutually agree to end the battle. The attacker is repulsed and makes an attrition roll because of this movement. Nobody collects booty.
8.3.2 Orderly Retreat
*: At the end of phases 1 to 3, a defending player who chose the Dissuasion tactic may attempt an orderly retreat.
In a skirmish battle, both sides may do it during these phases. The defender announces an attempt first.
An army has +1 to the D6 in mountain or forest. A barbarian army which fights outside the walls in a tribal site has +1 to attempt an orderly retreat, whether it is attacking or defending.
Roll a D6. On a 6+, the attempt is successful.
[Note that per 8.4, a force which is required to retreat but unable to do so, is eliminated.]
8.4 Movement after Combat
All units that were Out of Action [HDC] remain so.
The losing force, if it has troops remaining, retreats into a different region of the country. If it cannot do so, it retreats into a region of another country [This does NOT require a roll on the 5.1 Arrival Table, the retreating force chooses which region it will arrive in.]. It may not retreat into an enemy-occupied region, nor into the region from which the enemy arrived. If the attacker lost, the attacking force retreats into the region where it was before the attack. An army which retreats must make an attrition roll because of this movement.
It is permissible to retreat into the defenses of an inhabited region where the combat took place. In such a case, there is no attrition.
If the losing force cannot retreat, it is destroyed and added to the SP eliminated during combat for booty calculation.
A victorious attacker may continue its movement, but in this case he recovers no booty!
8.5 Roman Field Fortifications (optional)
["Fort de Légion" counter, reverse side of Scorpio counter]
In theory, every evening the legionnaires would build a fortified camp. They may thus build one in a region for 1 AP. Put a fort counter in the region. If the legion leaves the region, the fort is eliminated.
If a Roman army is attacked and defeated, a fort may benefit it.
For each fort present in the region, 5 SP (of which 3 may be legions) do not suffer pursuit and cannot be eliminated for unfortunate tactics selection. After this defeat, the troops which were able to take refuge in a fort retreat normally into another region and the forts are eliminated.
9 - ENGINEERING ACTIONS
When an army enters an inhabited region, it may immediately decide to besiege, invade, or assault it (as the case may be) by spending an additional 1 AP.
If the inhabited region has no SP within the walls, it is sufficient to declare a siege and wait for the inhabitants to surrender, or attempt an invasion. If the inhabited region has SP within, it is necessary to make one or more assaults to remove the SP and then perform a siege or an invasion.
9.1 Besieging [see also §9.4]
To declare a siege in an inhabited region, the attacker spends 1 AP and places a Siege Duration marker [double-sided counter with "SIEGE 0" on one side and "SIEGE 4" on the other]. This marker is placed in position 0 (with the 0 at the top) in the besieged inhabited region. The number increases by one after each new siege action (simply rotate the counter).
A leaderless force may support and continue a siege but cannot initiate one nor launch an assault.
9.2 Inhabited Regions
Cities and tribal sites are inclusively referred to as inhabited regions.
9.2.1 Defensive Value: ranges from 0 to 3 ["VD" in the French rules]
Each inhabited region has a Defensive Value representing its militia and fortifications. If the inhabited region is pillaged, its Defensive Value is 0.
At the start of each new season, or if you have a leader in the inhabited region, you can restore the defensive value by expending booty. It costs 3 Booty markers to restore the Defensive to its original value.
Defensive Value provides a bonus during assaults and determines the duration of a siege [see 9.5, 9.4; it is also used to determine losses during an invasion, see 9.3].
Defensive Value is the left-hand number in an inhabited region on the map.
9.2.2 Garrison Value: ranges from 6 to 16 ["VG" in the French rules]
This number indicates the wealth and strength of an inhabited region due to its population. It is used to:
- know the number of friendly SP that may defend the inhabited region. Excess SP are considered to be outside the fortifications.
- determine the minimum number of besieging SP.
- calculate the booty when the inhabited region is sacked or pays tribute.
- indicates the number of friendly SP which are supplied.
Garrison Value is the right-hand number in an inhabited region.
9.3 Invading an Inhabited Region
An army may attempt to capture an inhabited region by invading it. The inhabited region must not contain enemy SP.
Roll a D6 and add the inhabited region's Defensive Value, this gives the number of friendly SP which the inhabited region puts Out of Action [HDC]. If the attacker still has more SP which are not Out of Action than the region's Garrison Value, the inhabited region is taken. Otherwise, the invader is repulsed. If the region is taken, its Defensive Value becomes 0.
It is thus always necessary to have more SP than the region's Garrison Value, both before AND after rolling the D6.
An inhabited region with a Defensive Value of 0 must still be taken by invasion.
Note that the attacker does not need to have a leader with a high Strategic Value. He simply needs a leader and more SP than the Garrison Value of the inhabited region.
Example: 20 Dacian SP accompanied by a leader with a Strategic Value of 6 invade an inhabited region with Defensive Value 3 and Garrison Value 16. Losses suffered in the invasion are: 3 (D6) + 3 (DV) = 6 SP Out of Action (HDC), or 3 SP eliminated at the attacker's choice. The Dacian player has two options: If he chooses to have 6 SP HDC, he has only 14 SP non-HDC. The invasion fails because 14 SP (not Out of Action) < GV. If he chooses to suffer the losses, he is reduced to 17 SP not Out of Action. In this case, he takes the inhabited region because 17 SP (not Out of Action) > GV.
9.4 Besieging an Inhabited Region
An inhabited region, whether it contains enemy SP or not, may be subjected to a siege instead of an invasion. The result may take longer to achieve, but is less bloody.
1) Besiege [an inhabited region]
To declare a siege, the attacking army must have:
- 1 AP
- 1 leader
- more SP than the Garrison Value of the inhabited region
If the last condition is no longer met, the siege is lifted. Once the siege is declared, place a Siege 0 marker in the besieged inhabited region.
2) Take a Siege Action
When you take a siege action, you are calling upon the inhabited region to surrender. You must have more SP than the inhabited region's Garrison Value. Spend 1 AP then roll a D6. Add or subtract the following modifiers:
Siege Modifiers
- + number of siege actions already taken [i.e. the current number on the siege marker]
- +1 per friendly artillery
- - Defensive value
- -1 besieger is German or Sarmatian
- -1 per besieged enemy SP that is not Out of Action [HDC]
On a result of 6+, the inhabited region surrenders. All enemy SP are eliminated. If your result is less than 6, rotate the siege marker to the next number, the siege will continue next turn.
Note that during a season's operations, an army may make perform as many siege actions as desired, so long as its side has the APs to pay for them. Indeed, it is strongly advised that you begin and end a siege in the same season. Thus, the army will be able to pillage/ forage/ harvest for Booty prior to the attrition die roll for ending a season in enemy territory.
Players need to plan ahead as to what they wish to accomplish with their APs, in order not to suffer excessively from attrition.
9.5 Assaulting an Inhabited Region
If the siege is ineffective, you can attempt to reduce the number of SP inside the inhabited region's defenses with an assault. An assault only kills the garrisoning SP, it does not reduce the civilian resistance. They do not surrender except by a siege action or an invasion of an inhabited region which has no SP.
Place your leaders with their units.
All of the phases are simultaneous.
The Defensive Value is converted into a bonus for the defender. In each phase, he chooses one unit which will benefit from this bonus. If he has a Defensive Value of 3, this bonus will therefore be +3 on the D6 (even for a missile-armed unit or an artillery unit).
If the inhabited region has a Defensive Value of 0, the combat is exactly the same because the homes of sedentary peoples and of nomads (the chariots of barbarians) offer some protection and disorganize the fighting formations.
Phase 0: Artillery
Artillery of both sides fires.
After the artillery result, the besieger may decide not to launch the assault. In which case, the combat ends here, otherwise go to phase 1.
Phase 1: Firing
Missile exchange continues and the enemy are now within range of bows and javelins. Only missile units (including artillery) roll their D6.
The besieger must score two 6+ results to put one enemy SP within the walls Out of Action [HDC].
The besieged units fight normally.
Phase 2: Assault
All units fight except artillery.
The besieger is penalized - Destruction Factors hit but do not double losses against defending SP [see 10.1 for Destruction Factors].
The besieged units fight normally.
If the besieged troops are still not annihilated, the besieger may make a Final Assault or stop.
Phase 3: Final Assault
Same as Phase 2.
Phase 4: End of the Assault
Verify that you still have enough SP to maintain the siege.
If the garrison still has SP, the assault ends.
If all of the defending SP are eliminated, the besieger now has the right to do a siege or an invasion without spending additional AP if he still has more SP than the Garrison Value of the inhabited region.
Example of an attack on an inhabited region:
Operation 1: A Roman army composed of 7 SP (a SP legion and two 2 SP infantry) enters an enemy inhabited region which has a Defense Value of 3 and a Garrison Value of 6. The region contains 1 SP and no leader. The Roman leader directs the legion and gives it +1 due to his Tactical Bonus.
The army passes its attrition roll when it enters the region and suffers no HDC results.
The Roman player spends 1 AP to declare a siege of the city (7 SP > 6 DV).
Operation 2: The Roman player transforms 1 SP of his legion into artillery.
Operation 3: The Roman player attempts an assault with 1 AP.
Phase 0: The artillery fires but rolls a 1, which misses.
Phase 1: The artillery fires again, result is a 2, no effect.
Phase 2: The assault progresses rapidly. The Roman rolls a 1 with his 2 SP legion (which becomes a 2 because of the leader's tactical bonus), 1 and 3 with the two infantry units. He thus inflicts no losses. The defender has 1 SP, he rolls a 2 on the D6 which becomes a 5 (because the Defense Value of the region is 3). Its Damage Factor is 5, so it puts 2 Roman SP HDC. The Roman player instead chooses to eliminate 1 infantry SP.
Phase 3: The players continue with the Final Assault. The Roman player rolls a 4 with his 2 SP legion (which becomes a 5 due to the leader's Tactical Bonus). His infantry rolls a 2 and a 1. The Roman player therefore puts 2 enemy SP HDC (not 4 because he is fighting an enemy that is behind the walls of an inhabited region). That is sufficient to eliminate the enemy SP (2 SP HDC = 1 SP eliminated).
The besieged region rolls a 3 +3 (DV) = 6. It therefore puts 1 Roman SP HDC.
Phase 4: The Roman player still has: 1 SP of artillery, 2 SP of legion, 2 SP of infantry and 1 infantry SP HDC. 0 SP remain for the barbarians.
If the Roman player still had 7 SP not HDC, he could have done a free invasion or siege action.
9.6 Sorties during a Siege
Besieged units can, during a siege, attempt to sortie by activating a leader that is present. He engages in combat with however many units he chooses to sortie (the inhabited regions' Defense Value does not count). The combat lasts only one phase. The besieger can only respond with his choice of the same number of units (within the limit of his besieging leader's Strategic Value). Leader tactical bonuses and modifiers for terrain apply as normal. [Besieged artillery cannot attempt to sortie, as it has 0 MP; besieging artillery cannot be among the units chosen to respond to the sortie as it is too slow to react - per the designer.] The besieged units are attempting to escape, not destroy the besieger. For this reason, his Destruction Factor results [see 10.1] are not doubled. [Besieger's Destruction Factors are still doubled, however.] At the end of the phase, any surviving sortied units break through the siege lines, and the besiegers remain in place. In any case, the sortied units cannot return back inside the walls of the inhabited region. Note that attrition will apply after the combat or after movement.
9.7 Disengagement
If the besieging force is attacked by an enemy force attempting to raise the siege, it cannot use all of its troops in the battle. If the besieger wishes to maintain the siege, he must leave at least as many SP as the Garrison Value of the besieged region. If there are not enough SP to maintain the siege, the siege is raised. If, as a result of this battle, the besieger is defeated (he must retreat into an adjacent region), the troops which were left to maintain the siege must retreat with the defeated force.
9.8 Ending a Siege
A siege ends in the following ways:
- The inhabited region no longer has any SP within the walls (because of assault or sortie) and surrenders after a siege action or a successful invasion action;
- The inhabited region has SP within the walls but surrenders after a successful siege action;
- The besieger leaves of his own volition or as a result of battle or attrition.
The siege duration markers are removed. When an inhabited region is taken, its Defense Value equals 0.
9.9 Siege Attrition
A besieged inhabited region cannot recruit and is no longer able to provide supply.
9.10 Rebuilding the Defenses
The inhabited region belongs to the former besieger so long as he maintains at least 1 SP there. If the besieging side leaves, the region returns to its original owner. An inhabited region is indicated by a wagon, a village, a city or a legion garrison.
9.10.1 Tribal Site (Wagon)
A pillaged tribal site no longer has a Defense Value. If the barbarian player occupies his own site in the spring, and the region no longer has a Pillaged ["Pillée"] marker, the region's Defense Value automatically returns to its maximum value. In other seasons, if the region is no longer pillaged, he may spend 3 Booty markers.
The Roman player cannot rebuild the Defense Value of a tribal site.
9.10.2 City, Village or Garrison
Only the Roman player may rebuild the Defense Value of all [cities, villages and garrisons]. The [Barbarian] player may only do so for his own cities and villages. The [inhabited region] must no longer have a Pillaged ["Pillée] marker. It costs 3 Booty markers to rebuild the Defense Value of a Roman or Dacian [city, village or garrison]. It is not automatic like the tribal sites.
9.10.3 Limes [Latin term for walls or borders, I believe pronounced 'lih-mays' ?]
[Double-sided counters, Roman limes show wooden walls ("Limes de bois"), and stone walls ("Limes de pierre"): Dacian limes show wooden walls ("Fortin dace") and stone walls ("Forteresse dace").]
It is possible to increase the Defense Value of a region by giving it limes. Note that you may only do so within the limits given by the particular scenario. Each scenario will tell you which regions may or may not have limes.
If you give a rural region limes, it is still not an inhabited region. No engineering actions apply. the Defense Value bonus applies in combat provided that the side with the limes is the defender. In each combat phase (including firing), one of his counters will benefit from this +1 or +2 bonus.
[You MAY change which unit receives the Limes benefit from phase to phase, per the designer.]
If the region is taken by the enemy, the limes is automatically destroyed.
For the Dacians, limes are called Dacian Fort ["Fortin dace" on the counter] and Dacian Fortress ["Forteresse dace" on the counter] (the famous 'murus dacicus').
Building a limes costs 1 AP, 1 SP, 1 Booty marker and requires a leader: in one season you can construct a wooden limes, then in another season transform [flip] it to a stone limes. There can only be one limes per region.
[Note that the Roman vexillations counters have their provincial Limes printed on the reverse side, to indicate that the vexillation is occupied on its own Limes and cannot fight elsewhere. According to the designer, in some scenarios, stratagems can be used to start revolts in some Roman provinces. A revolting province forces the legions that garrison it to recover their vexillations.]
9.11 Leaders and Combat
9.11.1 Tactical Bonus
At the start of each combat, a leader attaches himself to a specific unit for the duration of the combat. The unit must be in command (included in the strategic value of the leader who is directing the battle [see 9.11.2]). The unit adds his Tactical Bonus to its D6, but only in melee.
If several leaders are attached to a single unit, the tactical bonus which applies is that of the leader with the highest Strategic Value.
Roman leaders must be assigned by order of rank in the following priority: first to the Praetorians, then to legions, and finally to auxiliaries.
Barbarian leaders are placed [also by order of rank] in the following priority: first to heavy units, then to cavalry. [Heavy cavalry counts as a heavy unit; the player is free to choose between heavy cavalry and heavy infantry.]
9.11.2 Strategic Value
Strategic Value determines how many SP the leader commands during battles. These SP can benefit from a bonus to the D6 roll (due to the leader's tactics choice) during the battle and will be allowed to pursue. SP which are out of command will hit only on 6+, their Destruction Factor is ignored.
Example: A leader is with 20 SP. His strategic value is 12. He could, for example, command 6 SP of heavy infantry and 6 SP of cavalry. If he chooses the frontal attack tactic, his 6 SP of heavy infantry will have +1 to the D6 and his 6 SP of cavalry will be allowed to pursue if he is victorious. The other 8 SP that are with him will not get the +1 for the tactic even if heavy infantry, nor be allowed to pursue even if cavalry, and will hit the enemy only on 6+.
If several leaders are present in the army, use only the Strategic Value of the highest-ranked leader. the other leaders only provide their tactical bonus, and replace him if he dies during the battle. In this unhappy case, they must specify which units are still in command.
9.11.3 Leader Capture and Death
A leader has 0 SP by himself. If a leader without accompanying SP is contacted by an enemy unit, he is captured.
During each combat, a leader specifies which unit he is with. If this unit is eliminated, roll a D6. On a roll of 1-3, he is captured, otherwise he is killed.
If your supreme leader is captured, he is put to death. You'll need another.
10 - CASUALTIES
10.1 Inflicting Casualties
Each unit which can fight rolls a D6 during certain phases. The result of the D6 applies for each SP of the unit.
A result of 6+ puts one enemy SP HDC.
Example: If I roll a 4 on the D6 with my 3 SP legion, each of its SP scores a 4. This result does not inflict casualties.
On the other hand, if I have a tactical bonus of +2, because there is a leader with the unit, each SP of the legion has scored 4 + 2 = 6. The legion has 3 SP, and therefore puts 3 enemy SP HDC.
If there is a Destruction Factor (DF) on the unit which rolls the D6, it can double the losses that it inflicts upon the enemy. To do so, it must score the same number (D6 plus bonuses) as its Destruction Factor. The DF of a unit is generally the number 5 [Falx and Artillery have Destruction Factors of 4-5, i.e. 4 and 5 both.]
Example: An undamaged legion counter has 3 SP. If it rolls 6+, it puts 3 enemy SP HDC. If it rolls a 5 on the D6, it puts 6 SP HDC. An infantry unit with only 1 SP can only put HDC 1 SP, or 2 if it scores its Destruction Factor. A foot archer unit can only score HDC results because it does not have a Destruction Factor. It must therefore always score 6+ on the D6 to inflict an HDC on the enemy.
The bonus given by a general or a tactics choice does not make it easier to double the losses inflicted, but rather increases the likelihood of getting a normal HDC result.
10.1.1 Missile-Equipped Cavalry
Cavalry which can fire (marked with a red star) cannot use its Destruction Factor during the fire phase. Only results of 6+ count.
10.1.2 Penalties and Bonuses
In forests, the Destruction Factor of heavy units [marked with an 'L' on the counter] inflicts only normal losses (not doubled). In mountains, the Destruction Factor of heavy cavalry units [cavalry marked with a 'L' on the counter] inflicts only normal losses (not doubled). Out of Command troops hit only on a 6+. Their Destruction Factor is ignored. A leader applies his Tactical Bonus to whichever unit he is attached. An HDC unit does not fight, it only suffers results. Advice: To speed combat resolution, use different colors of D6 for each unit type. This will make it easier for you to determine the casualties.
10.2 Suffering Losses
The term Out of Action (or HDC, for "hors de combat") denotes that the SP is too demoralized, disorganized, or under strength to fight offensively. However, it can participate in a defensive manner. Once it is Out of Action, place a HDC marker on the unit. An HDC SP cannot attack (do not roll the D6), but can still suffer losses. If it is again put Out of Action, it is eliminated. Example: If a 1 SP unit gets a single HDC marker, it is Out of Action. If a 1 SP unit gets two HDC markers, it is eliminated. If a 2 SP unit gets 4 HDC markers, it is eliminated. If a 2 SP unit gets 2 HDC markers, you can either flip it to its reverse side (eliminating 1 SP and removing the 2 HDC markers) or leave the 2 HDC markers and have the unit entirely out of action. If a 2 SP unit gets 3 HDC markers, flip it to its reduced side, and the remaining 1 SP is HDC. HDC markers are provided in values of 1, 2, and 3. The number represents the number of SP which are out of action.
10.3 Allocation of Losses
Each player allocates among his own units the losses which his side suffered, within the limits imposed by his tactics choice or the pursuit rules. Required losses are rounded up. For example, during a pursuit a player suffers 3 SP out of action, he will therefore have to put at least 2 infantry SP HDC.
10.4 Roman Blood
Roman blood must be spared if possible. Therefore, auxiliaries must always be allocated losses before legions, and legions before praetorians. You must still meet the mandatory losses requirements. So if you have only cavalry and legions and are subject to a pursuit, 50% of the losses will have to come from your legions.
10.5 Artillery, Boats and Impedimenta
Artillery, boats and impedimenta cannot be put out of action, they are destroyed instead. These are the last SP to be lost in a battle.
Booty chariots do not count towards losses.
11 - COLLECTING BOOTY, AND ITS EFFECTS
The winner in a battle, siege or invasion captures all of the loser's booty, plus gains booty from looting the dead and selling prisoners of war into slavery. You must collect booty immediately after the victory, you cannot postpone it until later.
The amount of booty collected varies with the situation, and depends upon a die roll.
11.1 Defeated in the Open Field
When an army loses an open field battle, you must automatically collect booty. Count the number of the defeated side's SP put out of action to determine [which column to use on the Sacking Table].
11.2 Capture of an inhabited region
You are not required to collect booty. You can grant the inhabited area clemency, in which case you will later be able to impose tribute.
If you collect booty in an inhabited area, it is automatically considered pillaged. Note that an inhabited region cannot be pillaged more frequently than once every 12 months. If an inhabited region is pillaged, it no longer provides supply. In addition, if it is in a mountainous or forested country, the inhabited region is now considered mountain or forest until the "Pillée" counter is removed.
For calculating booty, count the garrison value of the inhabited region rather than the destroyed SP of any garrison. If there were any SP in garrison, you only add +1 to the D6 [and only if the garrison was eliminated just before the assault, see 11.3 modifiers].
The inhabited region belongs to the former besieger so long as he has at least 1 SP there. If that SP leaves, the region returns to its original owner.
11.3 Sacking Table
Roll a D6 on the Sacking Table and apply modifiers as appropriate:
| SACKING TABLE: SP put Out of Action OR Garrison Value of the inhabited region | 1-5 | 6-10 | 11-14 | 15-20 | 21+ |
|---|---|---|---|---|---|
| D6 0 or less | - | - | - | - | - |
| 1 | - | - | - | 1 | 2 |
| 2 | - | - | 1 | 2 | 3 |
| 3 | - | 1 | 2 | 3 | 4 |
| 4 |
[The designer indicates that '15' does indeed belong in the fourth column.]
Modifiers
- Defeated army was Germans: -1
- Enemy army annihilated: +1
- Per Praetorian or Legion unit eliminated: +1
- Per leader killed or captured: +1
- Supreme leader killed or captured: +2
- Per impedimenta counter destroyed: +1
- Garrison eliminated just before the assault: +1
The result gives the number of Booty markers recovered from the enemy. A leaderless army which has just collected booty immediately spends it on drink because nobody was there to divide it fairly.
Optional Rule: Orgy!
A leaderless unit which has Booty markers only loses its booty if the opposing player yells "Orgy!". If he does not declare "orgy!" during the operation, the unit keeps its Booty markers.
11.4 Rally After Combat
At the end of combat, you may spend 1 AP and 1 Booty marker for each SP which is Out of Action to restore it to good order. Otherwise you must either spend the Booty marker later, or wait for spring.
12 - PILLAGE: FORAGE, HARVEST AND BOOTY
12.1 – [This rule section was omitted in the Vae Victis rules, but its contents were integrated in the remainder of this section.]
12.2 Pillage and Forage
A region which has been pillaged or foraged cannot be pillaged/foraged again until the Pillaged ["Pillée"] marker disappears in spring after rolling 4+. You can only pillage/forage enemy regions and only with an army.
12.2.1 Looting a Rural Region: Forage
Roll a D6 on the Harvest Table. [AND place a Pillaged ("Pillée") marker on the region.]
12.2.2 Looting an Inhabited Region: Pillage
An army which occupies an inhabited region may pillage it. This prevents any enemy recruitment in the region so long as the Pillaged ["Pillée"] marker remains. In addition, the region no longer supplies anyone. Roll a D6 on the Sacking Table (see 11.3).
12.3 Imposing Tribute and Harvesting
An army can do this once per season, The region cannot be currently pillaged. These actions allow you to gather resources without necessarily destroying enemy (or friendly) infrastructure.
12.3.1 Harvest a Rural Region
Roll a D6 on the Harvest Table, in summer or autumn only.
12.3.2 Impose Tribute on a Controlled Inhabited Region
Roll a D6 on the Harvest Table. If you roll a 1 on the D6, you have sparked a revolt. Reroll the D6, that is how many SP are put out of action by citizens refusing to pay the tax.
HARVEST TABLE
| D6 | Plains | Inhabited Region | Other |
|---|---|---|---|
| 1 | Revolt | Revolt | Revolt |
| 2-4 | - | - | - |
| 5 | 1 | 1 | - |
| 6 | 1 | 1 | 1 |
| 7 | 2 | 2 | 1 |
| 8+ | 2 | 3 | 2 |
Modifiers
- -1 Winter (rural harvest prohibited)
- +2 Foraging
- +2 Roman region
- +1 Inhabited region with Garrison Value > 10
The result is the number of Booty markers gathered.
13 - REINFORCEMENTS AND RECRUITS
13.1 Automatic Reinforcements
In spring, reinforcements arrived automatically. All HDC units which are in their own territory (not that of an ally), in a non-pillaged and non-besieged inhabited region, return to normal status.
13.2 The Recruiting Action
In order to recruit, a leader must be in a friendly non-besieged, non-pillaged inhabited region. The Roman player may recruit without a leader in the Roman off-map provinces (Africa, Spain ...). Choose the area where you wish to recruit, then roll a D6 to find out how many SP are willing to march off to war. If you roll more SP than you have units available, the excess SP are lost. The SP arrive where the recruiting took place. Barbarians can only recruit in their original tribal sites. Roman auxiliary units may only be recruited in their province of origin.
REINFORCEMENTS TABLE
| DR | SPs |
|---|---|
| 2 or less | 0 |
| 3-4 | 1 |
| 5-6 | 2 |
| 7+ | 3 |
Modifiers
- +1 Your side won the most recent battle
- +1 per Booty marker spent
- +1 Supreme leader is doing the recruiting
- +1 Captured eagle in the barbarian inhabited region
A destroyed unit cannot be recruited again until spring of the following year. A legion which is entirely destroyed can never be recruited again.
13.3 Recovering the Ranks Action
It is also possible to recover troops that are in a friendly recruitment center. For 1 SP of reinforcements, you can return 2 SP which are HDC to good order.
13.4 The Legion and its Eagle
You can only recruit a legion by using a stratagem. However, you can recover a legion's losses in an inhabited region of the Empire. A destroyed legion cannot be recruited again. If the barbarians win a battle and destroy a legion, the barbarian player keeps the eagle [reverse side of the 1 SP legion counter] with his army. The eagle is automatically recaptured by the Roman player if he defeats the army which possesses it. [The designer clarifies that the eagle marker remains in play, can be carried around by Roman units, and CAN be recaptured by the barbarians.]
14 - STRATAGEMS
Stratagems are events or situations manipulated to influence the course of the war. To play a stratagem, you must first purchase it with AP, and there must be a leader in the region/country/province that the stratagem concerns. Certain stratagems are given at the start of a scenario. They are also sometimes limited to only one side. Stratagems are kept by the player until they are played. Stratagems which have been played are discarded for the rest of the game. A stratagem can be played at any time, but only one per leader and per season. Each stratagem may be played once by each player [Exception, the Forced March stratagem may be played multiple times by both players, but only once per player per season]. [The designer clarifies that when you purchase stratagems, you are only required to announce how many APs you are spending, you need not announce which stratagems you are purchasing (though you should write them down on a piece of paper to avoid disputes).]
STRATAGEMS TABLE
| Stratagem | Faction | AP | Effects |
|---|---|---|---|
| Artillery deployed | Roman | 2 | At a cost of 2 AP per artillery, the Roman (in defense only) transforms his legions into artillery. |
| Night battle | All | 1 | This combat has neither missile phase nor pursuit. [Designer clarifies that if used during an Assault, this stratagem annuls both phase 0 and phase 1.] |
| Spy | All | 3 | Lets you know what troops a leader commands. Flip the target unit. [The army must be in territory enemy to it, i.e. a Roman army in non-Roman territory.] |
| Infiltration | Barbarians | 4 | One barbarian army may use 1 additional MP into the region of its choice (even if from one enemy inhabited region to another). |
| Forced March* | All | 1 | One army may use 1 additional MP [note that there is a penalty for this on the attrition table]. |
* Each player may play this stratagem multiple times, but only once per season.
Player Notes
In Antiquity, often a single large battle would determine victory, followed by a series of sieges to reduce enemy resistance. Therefore look to wear down the invader before counter-attacking. Be careful not to sacrifice your best leader.
Romans: Take your time and plan your war over several seasons: you may be nearly invincible on the battlefield, but attrition will greatly weaken an army that is outside of your empire. So, only strike outside when it is useful. Fleets provide supply and allow you to move very quickly. Use them to surprise your opponent.
Barbarians: Wear down the Romans, then counterattack if possible in winter. You must make him maneuver and chase your dummies.
Attrition: Do not hesitate to make a forced march during Thaw, in order to get into a friendly inhabited region. Thus in Spring, you will be able to recover all of your HDC SP.
Engineering: Rather than attempt an invasion (bloody for the attacker), it is better to conduct a siege, especially if you have artillery and plenty of AP. It is best to declare a siege at the start of a season and dedicate Ap to it. That will cost you fewer SP.
Stratagems: Do not forget to play stratagems, especially those specific to a scenario. They are there to help you win. Sometimes, it is better not to move during a season but rather to accumulate stratagems.
AP System: The rules offer lots of possible actions, so don't be boring: to charge forward and fight is not sufficient. Wear down the enemy with feints and then strike at the opportune moment.
Scenarios
0 SCENARIO NOTES
0.1 The map
- Dacia:
Through numerous wars, Dacia was never the same size: vast under Trajan, it was reduced (to the Sarmatians' benefit) under Hadrian.
Dacian Control Table
| Regions | 101-102 | 103-104 | 105-106 | 106-117 | 118+ |
|---|---|---|---|---|---|
| Dacia | Dacian | Dacian | Dacian | Roman | Roman |
| 103 | Dacian | Roman | Roman | Roman | Jazyge |
| 104 | Jazyge | Jazyge | Dacian | Roman | Jazyge |
| 118 | Dacian | Dacian | Dacian | Roman | Roxolan |
Years are all CE, i.e. after Jesus Christ.
- Drobeta bridge
Built in 105. After 117, it can be destroyed.
- Roads
Before 110, the 'Roman roads' in Dacia are in fact trade roads.
- Sarmizegetusa
The country printed on the main map is in fact the Roman 'Sarmizegetusa Regia'. Before the Roman conquest, you must use the additional map of Sarmizegetusa and its fortresses. It is the centerpiece of Dacian resistance. As long as there are no Roman counters in a fortress region of Sarmizegetusa, Sarmizegetusa and its fortresses are considered one single country. It therefore costs a single MP to enter or leave. It is a single country with several regions.
However, once a Roman counter is present, it becomes several separate countries. When the Roman player announces that he is entering Sarmizegetusa, the Dacian player apportions his SP there as he wishes.
The inhabited region of Sarmizegetusa receives a +1 to its Defense Value for each of its fortresses still under Dacian control.
After 106: the Sarmizegetusa fortresses disappear. Only the Sarmizegetusa inhabited region printed on the map exists.
0.2 The Counters
- Vexillations
A vexillation represents 1000 soldiers detached from a legion. Their mission is to be sent far from their limes of origin to reinforce a failing limes or an invasion.
You can either have a specific vexillation counter (vex III Augusta for example) or not. In the latter case (Pannonnia legions) use a counter of the corresponding legion with 1 SP. If the SP is destroyed, the legion does not lose its legion eagle because the legion is not entirely destroyed.
- Legions
If a legion is not indicated in the setup, it is not used in the scenario.
- Special troop availability
| Special troops | Available |
|---|---|
| Dacian deserters | 89-106 [two counters, Transfuges] |
| XXX Ulpia | from 105 [two counters, 3/2 SP and 1 SP/Eagle: created during play in the Second Dacian War scenario] |
| Dacian auxiliaries | after 106 [three counters: Ala Dacorum, Sagittifer Dacorum, Cohors Dacorum] |
| German Symmachiarii | after 100 [one counter, Symmachiarii] |
| Cataphractarii | after 117 [one counter, Catafractari] |
- Leaders
A leader is described thus: Legate (12, +1). This is a leader with a strategic value of 12 and a Tactical Bonus of +1.
0.3 Special Rules
- Barbarian alliance
If the barbarians are in an allied inhabited region, they cannot hide behind the inhabited region's defenses nor profit from attrition bonuses.
Allied barbarians do not fight together in an open field battle. If a Roman army encounters a Dacian army and a Sarmatian army, it first fights the Sarmatians, then the Dacians (provided that it won the first battle, of course). The Roman layer fights against them in this priority: Sarmatians, Germans then Dacians.
For engineering actions (siege, invasion, assault), barbarians can be mixed together. Note however that the presence of Germans and Sarmatians lowers the siege efficiency.
- Supplementary Stratagems
The supplementary stratagems are only available for that particular scenario. Each stratagem can only be played once.
- Automatic Victory (optional)
If all of the leaders of one side are killed.
- Lusius Quietus (Roman leader with a tactical bonus of +1(+2))
[Note that per the designer this rule seems to have accidentally been omitted from the French rules.]
Lusius Quietus was a Moorish (Numidian) prince. When he gives his tactical bonus to Moorish cavalry (the Ala Numidarum counter), his tactical bonus is +2, otherwise it is +1.
Lusius Quietus nearly became emperor. Hadrian, at the start of his reign, had the prince assassinated for his own peace of mind.
1 - THE SCENARIOS
S1. 101-102: Trajan's First Dacian War
S1.1 Background
Rome no longer wishes to pay the subsidy sent by Domitian. Trajan directs all his forces against the Dacian capital in order to loot its riches and overthrow Decebalus. He razes the Dacian fortresses but does not take the capital because the Dacians and their allies (the Sarmatians and the Germans) counterattack by pillaging Moesia. Trajan returns to the empire and prevents them from fleeing with their booty.
All of southern Dacia comes under Roman control. Peace is signed. It is a partial Roman victory.
Dates: Thaw 101 through Spring 102
Supreme leaders: Trajan and Decebalus.
S1.2 Setup
First set up the Dacians, then the Romans, then the Sarmatians and Germans.
S1.2.2 The Barbarians
The Dacians
Leaders: Use all of the Dacian leaders except Usimas. There must be at least one Dacian leader on its silhouette side [i.e. it could be a dummy] in Tapae and Sarmizegetusa. The others are placed in Dacian inhabited regions of your choice, and in Tapae.
SP: The Dacian player starts with 28 SP of his choice and 2 SP of transfuges. There must be 6 SP in the country of Sarmizegetusa. The other SP may be placed in Dacian inhabited regions of your choice, and in Tapae.
Fortifications: A Dacian Fortress at Tapae, a Dacian fortress in each of the inhabited regions around Sarmizegetusa.
Tribute Sent by Domitian: The Dacians have received the subsidies sent by Domitian. Give 10 Booty to the Dacian leader of your choice.
The Roxolan Sarmatians
Leaders: All of the Roxolan Sarmatian leaders [three plus a dummy].
SP: 16 SP drawn at random. 20 SP max in the game.
Placement: The SP and leaders are placed in Sarmatian inhabited areas of your choice.
The Germans
Choose either the Bures or the Bastarnes. Historians are not sure which German people took part in this war.
Leaders: All of the German leader counters.
SP: 16 SP drawn at random. 16 SP max in the game.
Placement: They start in two of the regions marked 118 (if Bastarnes) [southeastern Dacia] or 103 (if Bures) [southwestern Dacia].
S1.2.3 The Romans
In Viminacium:
Leaders: Trajan (16, +2), Claudius Livianus (14, +1), Hadrian (6, +1), Lusius Quietus (9, +1)
3 SP Legions: XIII Gemina and I Minervia
Vexillations: I Adiutrix, X Gemina Felix, XIV Gemina, XV Apollinaris, VII Gemina, VI Victrix
Auxiliaries: 8 SP of Iberians [C. Funditorum, C. Hispanorum, C. Lusitanorum and Ala Hispanorum], 2 SP of Numidians [Ala Numidarum], 2 SP Symmachiari, 4 SP of Pannonians [Cohors Pannoniorum and Ala Panno.].
Others: 4 SP Praetorians [Eq. Praetoriani and C. Praetoriae], 2 SP Pannonia fleet (on its Bridge of Boats side), 1 SP Pedites Singulares, 1 SP Impedimenta.
In Drobeta:
A Bridge of Boats (Moesia fleet) [Recall that the Drobeta bridge printed on the map has not in fact been built yet.]
Leaders: Laberius Maximus [14, +1], Pompeius Longinus [6, +1], Quadratus Bassus [12, +1]
3 SP Legions: I Italica, V Macedonica, IV Flavia Felix, VII Claudia Pia Fidelis
Vexillations: III Galicia, IV Scythica, XII Fulminata, III Augusta
Auxiliaries: 6 SP of Orient [2x Sagittifer Syria, Cohortes Galatia], 6 SP from Moesia [Sagittifer Moesia, Ala Moesica, Ala Thracum], 2 SP from Africa [Sagittifer Afrorum], 2 SP from Britain [Cohors Britannica].
Elsewhere in the Empire:
Auxiliaries Garrisons: Place 1 Auxiliary counter in Tyras and 1 counter in 3 inhabited regions (without a leader) of your choice bordering the Danube. [These would have to be the Gallorum auxiliaries, since all of the other auxiliaries counters are either in use, or out of play (the Dacian auxiliaries).]
Limes: Wooden limes in each inhabited region bordering the Danube.
S1.3 Supplementary Stratagems
Roman Stratagems
- Jazyges Allies (2 AP): The Roman player may recruit a Jazyge counter of his choice in an occupied Dacian inhabited region which has a path leading to a Jazyge region. This counter refuses to fight against other Sarmatians.
- Imperial bandages (4 AP): After a victorious open field battle, Trajan returns 1D6 SP which are HDC to good order. "As bandages had begun to run short, he did not spare, it is said, his own clothes, and cut them into pieces."
- Dacian Booty (2 AP): If Trajan takes part in the capture of a Dacian fortress, play this stratagem: +1 to Roman recruitment for the season. "Trajan took fortified mountains, and here he found weapons, machines, captives and the insignia taken from Fuscus."
- Pro-Roman Dacian Noble (4 AP): If the Roman holds at least 4 Dacian inhabited regions: -3 to Dacian recruitment for the entire season.
- Sister of Decebalus (2 AP): If [Laberius] Maximus takes part in the capture of one of the Sarmizegetusa fortresses, play this stratagem. -1 to Dacian recruitment for the season. "Maximus had taken his sister and a stronghold."
Dacian Stratagems
- Gete Allies (3 AP): The Dacian has +1 to his siege D6 versus a city in Moesia for the entire year.
- Burn the Capital (4 AP): A besieged army may flee Sarmizegetusa without combat. The city then has a Defensive Value of 0.
- Message on a Hide (4 AP): Play this stratagem once Trajan is in Dacia. -3 to attrition for a Roman army the first time that it attacks an army of Germans.
- Pillagers (2 AP): If the Sarmatians or Germans win a battle, they recover one counter of their choice in their army, wherever it is.
- Precautions (2 AP): A Dacian army at Tapae or in a pass [col de la tour rouge; col de vulcain] has +2 to the D6 to attempt an orderly retreat. This works for the entire battle.
- Deserters (1 AP): A Dacian chief automatically recruits a Transfuges counter in a Dacian inhabited region bordering the Danube. "He attracted to himself a large number and among the most valiant."
S1.4 Victory [misnumbered as S1.3]
Historical Roman Victory: The Roman occupies 6 Dacian inhabited regions including at least 3 inhabited regions among the fortresses of Sarmizegetusa. He has also destroyed the Dacian fortress at Tapae.
Almost Historical Barbarian Victory: Collect 15 Booty south of the Danube and bring it back to an inhabited region north of the Danube. In a mountain or forest for the Germans.
Barbarian Automatic Victory: Death of Trajan and capture of 3 eagles.
Roman Automatic Victory: Death of Decebalus and capture of Sarmizegetusa.
Any other result is a draw.
S2. 104-105: THE DACIAN-JAZYGES WARS
S2.1 Background
"Decebalus was ravaging the lands of those who had previously fought against him. He had taken lands belonging to the Jazyges."
One player plays the Dacians, the other the Jazyges.
Dates: Spring 104 through Summer 105.
S2.2 Setup
The Jazges player sets up all of his units first.
S2.2.2 The Barbarians
The Dacians
Leaders: Use all of the Dacian leaders except Usimas.
SP: The Dacians begin with 30 SP of his choice. He cannot start with the Transfuges counters. He can recruit them during play.
Fortifications: None
Deployment: The Dacian leaders and SP are set up in Dacian inhabited regions of your choice.
The Sarmatian Jazyges
Leaders: All of the Sarmatian Jazyges leader counters [3 plus a dummy]
SP: 20 SP drawn at random. 20 SP max in the game.
Deployment: The leaders and SP are placed in Sarmatian Jazyges inhabited regions of your choice. Place at least 1 SP per inhabited region.
S2.2.3 The Romans
All the regions marked 103 are occupied by the (non-player) Romans and as such are out of play.
S2.3 Victory
Dacian Historical Victory: Hold all of the regions marked 104.
Any other result is a Jazyges victory.
S3. 105-106: TRAJAN'S SECOND DACIAN WAR
S3.1 Background
"The Senate again declared Decebalus an enemy of Rome. For the second time, Trajan took personal charge of the war."
His kingdom partially occupied by the Romans, Decebalus does not keep the peace. He exterminates Roman garrisons, attempts to call for allies, and again raises his walls. Isolated and trapped in his capital, he sets it on fire and flees. Quickly run to ground by Roman cavalry, he kills himself. Dacia then becomes a Roman province.
Dates: Spring 105 through Spring 106.
S3.2 Setup
The Roman places all of his counters first.
S3.2.1 The Dacians
Leaders: All of the Dacian leaders except Usimas.
SP: The Dacians begin with 30 SP of their choice. They cannot take Transfuges counters at start. They can recruit them during play.
Limes: Dacian fort ["Fortin dace"] in the Sarmizegetusa fortresses. the fortresses can be rebuilt as they were in 101 [i.e. upgraded to fortresses].
Deployment: Leaders and SP are placed in Dacian inhabited regions of your choice.
S3.2.2 The Romans
Same as for the First Dacian War scenario, except that Trajan and the Praetorians are in Rome, and there are no auxiliaries south of the Danube and at Tyras. [This presumably refers to the 'Elsewhere in the Empire' section of 1.2.3].
In Dacia: one auxiliary counter at Sarmizegetusa, Arcidava, Racari and Romula Malva. [These presumably are the Gallorum auxiliaries].
S3.3 Special Rules
Dacian Garrisons: Liberation
In 105, all the Roman troops placed at the start of the scenario in Dacian inhabited regions do not benefit from the defenses until a Roman leader escorted by an army has visited them.
Thus if a Dacian army attacks them before the visit of a Roman army, they are considered to be in plains, this isn't a Dacian invasion, but a liberation!
S3.4 Supplementary Stratagems
Roman Stratagems
- Jazyges Allies (2 AP): [Same as in S1.3]
- Pro-Roman Dacian Noble (3 AP): "Many Dacians had gone over to Trajan's side."
- Cut the Water Supply (4 AP): The Defensive Value of a besieged city is henceforth zero.
- Creation of the XXX Ulpia Traiana (4 AP): This legion is created in Germanies. It may be activated during the scenario.
- Tiberius Claudius Maximus (3 AP): If Decebalus flees from a battle (not an orderly retreat), this officer runs him down and Decebalus commits suicide.
Dacian Stratagems
- Burn the Capital (3 AP)
- Precautions (2 AP)
- Deserters (1 AP)
- Dacian Allies (3 AP): The Dacians have +1 to the siege D6 versus a city in Dacia for the entire year.
- Assassination of Trajan (3 AP): If a Transfuges counter without a Dacian leader arrives where Trajan is located in the Roman Empire, roll a D6: on a 5 or 6, Trajan is killed. "He sent against him in Moesia deserters charged with assassinating him."
- Pillagers (2 AP): If the Dacian wins a battle, he recovers one counter of his choice to his army, wherever it is located.
- Pompeius Longinus Captured (3 AP):
"Longinus had, on his invitation, gone to an interview with him under the pretext that he would submit, and Decebalus seized him."
If the Longinus counter has not yet fought, the counter is moved directly to Decebalus. Either the Roman player may have it commit suicide and all the Roman leaders' tactical bonus becomes 0 for the season, or the Roman player may recover the Longinus counter and the Dacian player gains 3D6 Booty.
S3.4 Victory
Historical Roman Victory: Capture of Sarmizegetusa and death of Decebalus.
Barbarian Near-Historical Victory: Hold Sarmizegetusa.
Barbarian Automatic Victory: Death of Trajan and capture of 2 eagles.
Any other result is a draw.
S4. 107-108: ROMAN-JAZYGES WAR
S4.1 Background
"(Decebalus) had taken lands belonging to the Jazyges, lands that Trajan then refused to return when they again asked for them."
Dates: Spring 107 through Summer 108
S4.2 Setup
Place the Romans, then the Jazyges.
S4.2.1 The Jazyge Sarmatians
Leaders: All [three plus a dummy]
SP: 40 SP, drawn at random. 40 SP max in the game.
Deployment: The leaders and SP are placed in Jazyge Sarmatian inhabited regions of your choice.
S4.2.2 The Romans
The Romans control all of the Dacian regions (Dacie, 103, 104, 118).
Choice of Vindobona or Aquincum:
Leaders: Hadrien (6, +1), Governor (6, +0)
3 SP Legions: X Gemina and XIII Gemina
Auxiliaries: 6 SP of auxiliaries drawn at random
Others: 1 SP Pannonia fleet, 1 SP Pedites Singulares
Brigetio:
Leaders: Marcius Turbo (8, +1)
3 SP Legions: XXX Ulpia Victrix, XV Apollinaris
Auxiliaries: 6 SP of auxiliaries drawn at random
Others: 1 SP Pannonia fleet, 1 SP Pedites Singulares
Apulum:
Leaders: one Legate (12, 0) or (12, +1), drawn at random
3 SP Legions: XIV Gemina and I Adiutrix
Auxiliaries: 6 SP of Dacian auxiliaries [Ala Dacorum, Sagittifer Dacorum, Cohors Dacorum]
Sarmizegetusa:
Leaders: one Legate (6, +1) or (6, 0) drawn at random
3 SP Legions: IV Flavia Felix
Auxiliaries: 4 SP drawn at random
Elsewhere in the Empire:
Auxiliaries Garrisons: 6 SP. You may place 1 SP of auxiliaries of your choice in each of the inhabited regions bordering the Danube.
Limes: Wooden Limes in each of the inhabited regions bordering the Danube.
S4.3 Special Rules
Recent Conquest
There must always be 3 Roman legions in the Roman Dacian provinces at the end of a season, otherwise Dacia revolts and the Roman player loses.
S4.4 Jazyges Stratagems
- Jazyge Allies (3 AP): The Jazyge has +3 to his D6 siege roll in an inhabited region marked '104' for the entire season.
- Opportunistic Germans: If the Jazyge player pillages a region under Roman control, he raises a German army. He takes a German leader at random (not a dummy). Then, he assigns to him as many [German!] SP as the leader's Strategic Value. Draw the SP at random. He may place the army at either the Bures [regions marked 103] or the Bastarnes [regions marked 118]. He controls this army but may not recruit with it. The Romans may not attack the army until it has attacked.
S4.4 Victory
Whoever occupies the most inhabited regions marked 103 and/or 104 at the end of the scenario wins.
S5. 117-118: DACIAN REVOLT AND SARMATIAN WAR: Difficult Beginning to Hadrian's Reign
[Scenario published I believe in VV 69. That issue also included two Roman Colonist markers, and a marker to show the Drobeta Bridge destroyed.]
Background
Trajan has just died. His wife Plotine adopts Hadrian before the Empire plunges into civil war. Problems break out everywhere. Hadrien personally resolves the greatest crisis in Dacia, despite troublesome Sarmatian raids.
"Having then learned of the Sarmatian and Roxolan incursions, [Hadrian] sent his armies forward and went to Moesia. He provisionally gave Turbo, after his service as prefect in Mauritania, the prefectures of Pannonia and Dacia, as well as the insignia of this new honor."
Hadrian abandoned three of the Oriental provinces that Trajan had created.
"He recalled the Roman armies from Assyria, Mesopotamia and Armenia, and he desired that the Euphrates be the Empire's border."
Will you help him to hold Dacia, or will he have to evacuate it as well?
"He would also have abandoned Dacia, but his friends prevented this."
Dates: Summer 117 through Winter 118.
The map
Roman roads in Dacia are indeed Roman roads, not trade roads.
All yellow (Dacian) regions and the numbered regions belong (for the moment) to the Roman province of Dacia.
Special Rules
Dacia Ravaged
An army which pillages, forages, or harvests in Dacia has a -1 to the die roll because the province had been devastated by the previous wars.
"to cultivate its fields and populate its cities emptied by Decebalus's long wars."
Barbarian Liberation
If a Dacian army captures a Dacian village, that becomes a Dacian region. Likewise for the Jaziges for tribal sites in [regions marked] 104, and Roxolans in the village 118 [yellow region, marked Daces, west of Troesmis].
Roman Colonists
Roman Colonist counters cannot move. They may fight normally.
"[Hadrian's] friends told him that [to abandon Dacia] was to deliver over to the barbarians a horde of Roman citizens; that Trajan, after conquering Dacia, had sent to there from all parts of the empire, colonists beyond count."
Setup
First the Dacians, then the Romans, and finally the Sarmatians.
Dacians
Leaders: All unnamed leaders, and the dummy [Leurre] leader SP: Random.
Deployment: For each Dacian inhabited region which is not occupied by Roman SP, roll 1D6 plus the region's Defense Value. This gives the number of Dacian SP (chosen at random). Once the SP are set up, put each leader on a different stack of SP.
Transfuges units can not be used in this scenario.
Jazyges Sarmatians
Leaders: All
SP: 20 SP chosen at random, max. 20 SP in the game.
Deployment: Leaders and SP in Jazyges Sarmatian inhabited regions of your choice.
Roxolan Sarmatians
Leaders: All
SP: 20 SP chosen at random, max. 20 SP in the game.
Deployment: Leaders and SP in Roxolan Sarmatian inhabited regions of your choice.
Romans
Aquincum
3 SP legions: X Gemina, XIII Gemina
Auxiliaries: 6 SP of auxiliaries, chosen at random
Others: 1 SP Pannonia fleet
Brigetio
Leaders: Legate (6, +1) or (6, 0) at random
3 SP legion: XXX Ulpia Victrix
Auxiliaries: 3 SP of auxiliaries, chosen at random
Others: 1 SP Pannonia fleet
Apulum
Leaders: Legate (12, +1) or (12, 0) at random
3 SP legions: XIV Gemina and I Adiutrix
Auxiliaries: 6 SP of auxiliaries, chosen at random
Others: 2 SP of Roman colonists
Sarmizegetusa
Leaders: Governor
3 SP legions: IV Flavia Felix
Auxiliaries: 3 SP chosen at random
Others: 2 SP of Roman colonists
Troesmis
2 SP legions: V Macedonica, I Italica
Auxiliaries: 4 SP chosen at random
Novae
2 SP legion: VII Claudia Pia Fidelis
Auxiliaries: 2 SP cataphractarii
Danube Limes
You may place one remaining auxiliaries counter of your choice in each inhabited region bordering the Danube.
Limes: Wooden limes for every inhabited region bordering the Danube.
Orient holding box
Leaders: Hadrian (15, +1) (to be named princeps), Quadratus Bassus, Marcius Turbo (14, +2), Lusius Quietus (14, +1(+2))
1 SP legions: V Macedonica, I Italica, VII Claudia Pia Fidelis
Auxiliaries: 2 SP Ala Numidica [Numidarum?], 3 SP chosen at random
Others: Praetorians [C. Praetoriae, Eq. Praetoriani]
Barbarian Stratagems
"Besides the peoples that Trajan had forced to submit and who had again turned against us, the Moors never ceased to trouble us. The Sarmatians made open war against us, Britain had thrown off the yoke, Egypt was rife with plotting, Lycia and Palestine were in full revolt."
- Brigantes Revolt (3 AP) in 118: The Roman player cannot recruit in Britain [Bretagne holding box]. All troops from Britain return here automatically. [Red version of this scenario has this as 1 AP?]
- Moors Revolt (3 AP) in 118: As above, but in Africa [Afrique holding box] and Iberia [Péninsule ibérique holding box]. [Red version of this scenario has this as 4 AP?]
- End of the Jewish Revolt (3 AP) in 117: As above, but in the Orient [Orient holding box]. [Red version of this scenario has this stratagem costing 4 AP?]
- Plotters (1 AP): If Hadrian is named emperor, he executes 4 former consuls, including Lusius Quietus.
Roman Stratagems
- Subsidies (0 AP): For each Booty spent, 1 Roxolan Sarmatian SP does not return for the entire game. The Barbarian player decides which SP are removed. This stratagem may be played multiple times. "The Roxolan king complained that his annuity had been reduced. Hadrian learned of the matter, and made peace with him." [Red version of this scenario has this as 1 AP?]
- Destruction of the Drobeta Bridge (1 AP) in 117: The bridge is destroyed. Until it is destroyed, both players may use it to cross the Danube, thus avoiding the river-crossing attrition penalty.
"Fearing that the barbarians would occupy the fortifications that protected the bridge, and thus easily cross the Danube, [Hadrian] had the deck destroyed." (Cassius Dio, LXVIII, 13, 6)
Victory
Roman Victory: Hold all of the Dacian inhabited regions which are cities (not villages).
Barbarian Victory: Any other result.
Barbarian Automatic Victory: Death of Hadrian (if Princeps) and capture of 3 legion eagles, or no Princeps at the start of Thaw 118, or destruction of 3 colonist SP.
Optimus Princeps: Domitian's Reign [A Campaign Scenario]
[from VV 68]
The two sons of Vespasian
In 69, Nero's legendary excesses touched off another civil war. Vespasian then decided to try for the imperial purple. This man who had fought in all of the provinces of the Empire from Britain to the Orient became princeps by the edge of his sword. His elder son, Titus, had helped him to put down the Jewish revolt and had also played a role in civil, religious and military matters. His younger son, Domitian, was only symbolically associated with the government. In 70, with the emperor and Titus in the Orient, Domitian was in Rome and represented his father in the Senate. He then began to develop a taste for power. He who had been neglected by his father and who had lived in a certain degree of poverty found himself at age 18 propelled to the command of the greatest empire in the Mediterranean. On Vespasian's return, Domitian's hopes were dashed. Rhe revolt of the Romanised Gauls and Batavian auxiliaries was put down before Domitian could get there, nor was he able to help the Parthians against the Alans. Jealous of the honors and responsibilities entrusted to Titus, Domitian waited for his chance.
An unexpected emperor
After having reunified the Roman Empire, Vespasian died in 79. Titus then reigned, continuing the policies of his father. Educated, a good soldier and an experienced man, his reign promised to be glorious. Its first year was marred by plots fomented by his younger brother, whom he continuously kept from power. In the second year of his reign, he fell ill and died. As Titus lay dying, Domitian had himself proclaimed princeps. His enemies said that he had poisoned Titus. At the age of 30, Domitian became the emperor.
First victory against the Chatti
Although he was princeps, Domitian had no military glory. Power in Rome was founded upon the victories of his best general, who then became an imperator (a victorious general). In 83, Agricola crushed the Caledonians at Mons Graupius, securing all of Britain for decades. That same year, Domitian took advantage of an official visit to Gaul to attack the Chatti. At the time, they were the strongest germanic people on the Rhine. With eight legions stationed in Roman Germania, the barbarians were crushed. The Rhine limes had become Germanicus, the favored grounds for Roman punitive expeditions to avenge Varus' disaster. Domitian had finally become a victorious general. Although his enemy had lost some of its former prowess, his success was glorious because it truly made it possible to reinforce the Roman presence on this front. In 84, Agricola was relieved of his duties because he overshadowed the princeps' glory.
Pyrrhic victory against the Dacians
After the crushing of the Batavians, the uprooting of the Cherusci and the defeat of the Chatti, there was no further military glory on the Rhine. It was to be found on the Danube. The first barbarians to begin hostilities were the Dacians. Divided into five kingdoms under the Julian emperors, they were reunited into a single kingdom under Domitian. In 85, their chief, the famous Decebalus, launched a series of raids into Moesia. Oppius Sabinus, the governor of the province, died in battle. The Dacians pillaged and then fled to take refuge in their Transylvanian fortresses. Domitian, escorted by his Praetorian guard, left with his Praetorian prefect, Cornelius Fuscus. They chased the Dacians from the province and the leader of the imperial guard was given the task of pursuing the Dacians into their mountains. This opportunist, who had supported Vespasian during the civil war in 69, was a feeble general. According to Juvenal, "He had learned the art of war ensconced in his marble palace." In 86, Decebalus taught him a lesson in the Tapae valley. The prefect lost the battle, the military standards, the war engines and his life.
Domitian then sent Tettius Julianus. He had beaten the Roxolans in 69 during their Moesia raid. Domitian gave him a British legion and the one from Dalmatia. This officer required his men to put their name, and that of their centurion, on their shield in order to tell the good soldiers from the bad. In western Antiquity, to abandon one's shield was the worst form of cowardice. A mother would rather see her son returned dead upon his shield than alive without it. Tettius Julianus crossed the Danube, and this time Decebalus was beaten at Tapae. Tettius Julianus began to head for the Dacian capital, then reversed course, for two reasons. The first was prudence: the Dacians were tenacious defenders in a country well suited to ambushes. The second was internal to the Roman Empire.
The Usurpation of 89
While the Romans were gaining the upper hand against the Dacians, Antonius Saturninus attempted to usurp the throne. This legate from Germania had two legions under his orders. He wished to take advantage of the Senate's unhappiness with the emperor, and an alliance with the Chatti, to overthrow Domitian. Loyal to his emperor, Trajan went to Domitian's rescue with his Spanish legion [Legio VII Gemina]. Arriving in Gaul, he learned that the other German legate had defeated the usurper. The Chatti who had been unable to join their ally due to high water on the Rhine were then exterminated.
Lasting Wars
Domitian, alarmed by the usurpation, made peace with the Dacians. Decebalus became a client king and was to receive in return subsidies and advisors. He kept his word until Trajan's invasion. Domitian was thus free to seek revenge. He began by executing the guilty senators, then the Suebi (Quadi and Marcomanni) ambassadors who had refused to give him men for his war against the Dacians. Three German legions were sent to garrison Pannonia, including the two that had followed the usurper. The war lasted from 89 to 92. Then from 92 to 93, the Jaziges Sarmatians allied with the Germans who were against fighting against Domitian. Legio XXI Rapax was destroyed by the Suebi in this fighting. By the end of 93, everybody had returned to their own side of the border.
Reorganization of the limes and the army
Domitian was no soldier, but he knew how to adapt. He made himself popular by increasing the soldiers' pay by a quarter. The legions had been demanding this since their revolts in 6. He forbid having two legions in the same camp, as that assisted usurpations. He divided Germania and Pannonia into two provinces each. Above all, he understood where the danger lay. He took five legions from Germania, Britain and Dalmatia and placed them in Pannonia and Moesia, where the barbarians were most threatening. He raised the I Minervia legion in Germania to replace the destroyed XXI Rapax. His greatest military works were the Agri Decumates [a region settled with semi-civilized barbarians, who had to pay a 1/10th tithe, hence the name] which let him create a fortified junction between the Rhine and the Danube. To Roman minds, it was yet possible to conquer new lands. The frontiers were not yet fixed as Augustus and Hadrian had led them to believe.
The bald Nero
This emperor, who was remarkably skilled with a bow (like Titus during the siege of Jerusalem) was very fortunate. Britain was quickly suppressed by Agricola, the Orient, Africa and the internal provinces did not trouble him with war. He need be concerned only by the Rhine and especially the Danube. The latter was carefully fortified, leaving Trajan an excellent base to launch his invasion. Little loved by the senators because of his excessive arrogance and paranoia (he had mirrors placed everywhere in his palace), Domitian saw plots everywhere. He himself had fomented some against his own brother and did not forget how his father had won the throne. He could trust no general with a command for long, fearing to see him usurp the laurels. This princeps who at the start of his reign was praised for his sense of justice, and of religion (he caused a vestal virgin who had taken a lover to be buried alive) and his love of games became hated and feared. Power was in the emperor's hands, but the Senate was not yet ready to accept an all-powerful princeps.
Damnatio memoriae
Disliked by the intellectuals who he exiled, and especially by the bureaucrats of the Roman Empire, he became more pitiless after the usurpation in 89. Domitian killed only a few senators, but he did so with cruelty and cynicism under the pretext of crimes against the state. In 96, his advisers reported a nw plot. His wife, the Praetorian prefects, his chamberlain and some senators managed to have him killed by some gladiators and one of his slaves. Although his court betrayed him, the army did not. Nerva, the new princeps named by the Senate, had to deal with a military crisis. Legions on the Rhine and Danube attempted to revolt in Domitian's honor, and his assassins were killed by the Praetorian guard. Nerva then had a brilliant idea: rather than take a member of his family as heir and successor, he would adopt a renowned general, popular and from a good family: Trajan. This brought calm back. The name of Domitian was chiseled out of all public monuments, and Trajan ascended to power. The two emperors were continually compared to Trajan's advantage although he was in the end more autocratic than Domitian towards the Senate, but he did it within the rules and through military victories. [It was traditional for the Senate to vote to deify a deceased emperor, adding him to the official Imperial pantheon. Domitian was so disliked, however, that instead the Senate voted him damnatio memoriae, accursed!]
DOMITIAN'S REIGN, 81-96
[This scenario was published in VV 68, along with 29 additional counters needed to play it. 9 of these counters were subsequently corrected in VV 69. Note that the German (6, +2) leader is used only in this scenario, and is used in addition to the regular German leaders.]
Victory
Domitian's reign was a succession of wars, scandals and plots. The goal of the Roman player is for Domitian to accumulate POP (Points Optimus Princeps, or Popularity). On the other side, the barbarian player does what he can to make Domitian lose them.
-
POP of 200+: felicior augusto (happy as Augustus)
-
POP of 150-199: melior Traiano (better than Trajan)
-
POP of 100-149: worthy of his father Vespasian
-
POP of 50+: a placeholder emperor
-
negative POP: damnatio memoriae
-
-1 POP per Booty taken from the Romans and spent at home by the barbarians
-
-5 POP per Roman leader eliminated
-
-10 POP per historic leader eliminated, legion destroyed, truce
-
-30 POP per Roman defeat, Domitian's premature death (end of the game)
-
-100 POP if Rome falls
-
+1 POP per Booty taken from the barbarians and spent at home by the Romans
-
+5 POP per eagle recovered, barbarian leader eliminated (dummy counter does not count)
-
+10 POP per historical leader eliminated
-
+20 POP per Roman partial victory
-
+40 POP per Roman total victory
-
+50 POP for capture of Sarmizegetusa
Setup
Roman player
In Rome
Leaders: Domitian (8, +1) (not yet princeps), Cornelius Fuscus (14, 0) Praetorian prefect (replace him with Tettius Julianus (14, +1) if he dies)
Others: 4 SP of Praetorians [C. Praetoriae, Eq. Praetoriani], 1 legio impedimenta
In Britain [Bretagne holding box]
3 SP legion: II Adiutrix (Sirmium in 87)
In Gaul [Gaules holding box]: Cohortes Lugdununensis
In Germania [Germanies holding box]:
Leaders: Lappius Maximus (12, +1)
3 SP legions: VI Victrix, XXI Rapax (Aquincum in 90), XXII Primigenia, X Gemina, I Adiutrix (Brigetio in 90), VIII Augusta, XI Claudia, XIV Gemina (Vindobona in 90)
Auxiliaries: 8 Gaul SP, 8 Iberian SP
Others: 1 legio impedimenta, 1 Pedites Singulares
Dalmatia (city of Salonae): IV Flavia Felix legion (Singidunum in 91)
Moesia [Mésie]:
Leaders: Oppius Sabianus (12, +1) (replace him with the governor if he dies), Legate (6, 0 or +1 at random)
3 SP legions: XIII Gemina (in Vindobona) and XV Apollinaris (in Carnutum)
Auxiliaries: 4 SP Pannonia, 6 SP Orient
Others: 2 SP fleet
Iberian Peninsula [Péninsule Ibérique holding box]: VII Gemina legion
Remaining counters: put each auxiliary and vexillation counter in its off-map box. Put at least one auxiliary counter with each legion. Brigetio, Aquincum and Lauracium are not yet garrisons, but Roman cities. Their Defense Value is 0.
Barbarian player
The Dacian player always has a fort in Tapae. Use the inset map of Sarmizegetusa and its fortresses. However, these regions cannot be fortified with Dacian forts or fortresses. Barbarian troops arrive randomly with the wars. The barbarian SP are drawn randomly at the start of each conflict. Only reinforcement SP are chosen. At the end of each war (not during a truce), remove all of the barbarian troops in the game which correspond to this war. The barbarian player always gets AP during each new season, even if none of his peoples are at war. Reminder: Eliminated SP cannot return to the game before spring of the next year. Suggestion: Have a different cup to drawn from for each barbarian people.
Events and Stratagems of Domitian's Reign
The scenario includes many new stratagems to represent Domitian's reign. Most involve the gain or loss of POP. If Domitian is in Rome, these stratagems cost the barbarian player 1 additional AP. Events which do not have an AP cost (some wars, for example), occur automatically. [Some events and stratagems have a notation #+, for example Dominus (3+). In a two-player game, ignore the (3+), it only applies to the solitaire campaign.]
81: Autumn
The Senate confers all imperial powers (tribune power, Grand Pontificate and the title of Father of the Nation) on Domitian, age 30. He can become Princeps.
- Dominus (3+): 2 AP (Barbarians); -5 POP Domitian has his counselors call him Dominus et Deus [master and god].
82: Thaw
- Self-proclaimed Consul (3+): 1 AP (Barbarian); -1 POP Domitian claims the consulship without official Senate approval.
83: Thaw
- Self-proclaimed Consul (3+): 1 AP (Barbarian); -1 POP
83: Spring
The Chatti War
Domitian goes to Mayence [Mainz?] and drives back the Chatti along the crests of the Taunus. Chatti setup: The Chatti leader and two random German leaders plus 30 German SP. The Chatti are in the Germanies off-map box, which they can not leave for the duration of the war. Roman Total Victory: Must occur before Winter 83. All the German counters must be eliminated or Out of Action [HDC]. Roman Partial Victory: Must occur before Thaw 84. At least 20 German SP must be eliminated or Out of Action [HDC]. Roman Defeat: any other situation. Once the war against the Chatti ends, Domitian becomes (15, +1)
83: Summer
- Mons Graupius (3+): 4 AP (Romans); +10 POP Agricola crushes Calgacus' Caledonians at Mount Graupius.
83: Autumn
- Discovery (3+): 2 AP (Roman); +5 POP The Britain fleet circumnavigates Scotland and discovers the Shetlands and Orkneys.
83: Winter
- Domitia Longina divorced (3+): 2 AP (Barbarian); -10 POP The empress is denounced and exiled for her adultery with the actor Paris, who is executed.
Pay Raise: 4 AP (Roman): for the year 84, the Roman has +3 on all recruitment die rolls.
84: Thaw
-
Self-proclaimed Consul (3+): 1 AP (Barbarian); -1 POP
-
Family Scandal (3+): 2 AP (Barbarian); -10 POP Domitian has his first cousin Flavius Sabinus executed. His wife Julia, daughter of Titus (Domitian's brother), becomes the emperor's mistress.
-
Exile of Dion of Pruse, philosopher and rhetorician (4+): 1 AP (Barbarian); -5 POP
85: Thaw
- Self-proclaimed Consul (3+): 1 AP (Barbarian); -1 POP
85: Spring
Raising of Legio I Minervia: 6 AP (Roman) Based in Bonna (Bonn), in Germania. It reinforces the Danube legions with British contingents.
- Domitian is sole Consul (3+): 1 AP (Barbarian); -5 POP
- Devaluation of the Currency (3+): 2 AP (Barbarian and Roman); -10 POP The Roman player gains 2D6 Booty in Rome, as Domitian devalues the currency to meet military expenses.
85: Autumn
Dacian War The Dacians raid in Moesia and kill Oppius Sabinus. Dacian setup: All the Dacian leaders plus 30 Dacian SP. The Barbarian player sets his pieces up as he wishes in inhabited [Dacian] regions. 6 SP must always be in the capital. Solo game: Make two defensive armies of two randomly selected leaders and place them at Tapae and Sarmizegetusa. A third, offensive, army is made using the three remaining leaders and is placed randomly in Arcidava, Desa, Racari or Romula Malva. Roman Total Victory: Must occur before Winter 86. Capture of Sarmizegetusa. Roman Partial Victory: Must occur before Winter 86. Occupation of Tapae. Otherwise: Truce in 87, the Romans and Dacians return home without pillaging and without fighting in Winter 86, otherwise they are automatically destroyed.
85: Winter
- Domitian, censor for life (3+): 1 AP (Barbarian); -5 POP
86: Thaw
Trajan (8, +2) appears in Spain [Peninsule iberique holding box]
- Self-proclaimed Consul (3+): 1 AP (Barbarian); -1 POP
86: Spring
Construction of the Flavian Palace (Domus Flavia): 2 AP (Roman); +5 POP This palace will become the emperors' residence until Diocletian.
Domitian Inaugurates the 'Capitoline Games': 2 AP (Roman); +10 POP
86: Winter
Division of Moesia into two provinces (Upper and Lower) [Mésie superieure and Mésie inferieure]: 4 AP (Roman) Legions are now based as follows: Upper Moesia: IV Flavia in Singidunum, VII Claudia in Viminacium. Lower Moesia: I Italica in Troesmis, V Macedonica in Durostorum.
87: Thaw
- Self-proclaimed Consul (3+): 1 AP (Barbarian); -1 POP
British Legion to Pannonia: 2 AP (Roman) Legio II Adiutrix is now based in Sirmium, place it there immediately.
88: Thaw
Dacian War resumes if there was a truce.
- Self-proclaimed Consul (3+): 1 AP (Barbarian); -1 POP
Rome Celebrates its Centennial Games, in honor of the "Golden Century": 2 AP (Roman); +10 POP
Antonius Saturninus (12, 0) arrives in Germanies holding box: automatic
88: Winter
Usurpation of Lucius Antonius Saturninus aided by the Chatti. Usurper setup: Antonius Saturninus, legio XIV Gemina, legio XXI Rapax, the Chatti leader (14 , +1), and 14 German SP in Germania [Germanies holding box]. Any Gallic auxiliaries that meet the usurper switch to his side. In Thaw, the usurper and his army may enter Gaul [Gaules holding box], and then Rome in Spring. He can recruit Gallic auxiliaries in Gaul, if there are any available. Roman setup: Trajan, his legion and the Lyon cohort may move within Gaul, Germania and Rome. Lappius Maximus controls the other legions and auxiliaries in Germania. Roman Total Victory: Death of the usurper and the Chatti leader, before Spring 89. Roman Partial Victory: Death of the usurper and the Chatti leader, before Summer 89. Any other result: Domitian is assassinated and the game ends.
The Rhine Floods: 4 AP (Roman) The usurper and the Chatti cannot fight together during this battle as the river has overflowed and prevented their joining forces.
89: Thaw
Reinforcement of the Agri Decumates (2+): 2 AP (Barbarian) +5 POP All of the Rhine legions call back their vexillations. Immediately adjust the legions' status. For the entire year 89, the Rhine legions cannot detach vexillations. Gallic auxiliaries are removed from the map, but may be recruited again. Domitian settles German and Gallic colonists under the protection of Rome. They are subject to a 1/10th tithe, hence the name Decumate.
89: Spring
End of the Dacian War if there was a truce. Roman Total Victory: Sarmizegetusa must have been captured before Spring 89. Roman Partial Victory: Tapae must have been occupied before Spring 89. Roman Defeat: Any other result, or if the Dacians returned at least 20 Booty to their capital.
War with the Quadi and Marcomanni Quadi setup: The Quade leader, Quade dummy [Leurre], two randomly selected German leaders, and 20 German SP. The Barbarian player places his forces as he wishes in his tribe's inhabited regions. Solitaire game: Make two armies with two randomly chosen leaders (always on their hidden side). Put the defensive army in a Quadi mountainous inhabited region, and the offensive army in a Quadi inhabited forested region. If several regions are eligible, select randomly. Marcomanni setup: As Quadi. Roman Total Victory: Must occur before Winter 92. Four barbarian inhabited regions must be pillaged, at least one from each tribe. Roman Partial Victory: As Total Victory, but only three regions. Roman Defeat: Any other result, or if each tribe brings at least 10 Booty back to one of their inhabited regions.
89: Summer
Pannonia province is split into two and reinforced from Germania: 4 AP (Roman) The following legions change their base: XIV Gemina to Vindobona, XXI Rapax to Aquincum, I Adiutrix to Brigetio. Immediately place them in Lauracium or Virunum.
- Fierce Reprisals: 2 AP (Barbarian and Roman); -10 POP, +2D6 Booty in Rome. Domitian purges the Rhine army and the Senatorial aristocrats. He has the Stoic philosophers executed.
89: Winter
Creation of Legio I Minervia: 4 AP (Roman) The legion is based in Germania [Germanies holding box]
90: Thaw
Domitian takes back his wife, Domitia Longina: 2 AP (Roman) +5 POP
Construction of Domitian's Stadium in Rome: 2 AP (Roman): +5 POP
91: Thaw
- Domitian deifies Julia Titii (3+): 1 AP (Barbarian); -5 POP Pregnant by Domitian, she dies during an abortion operation.
Dalmati legion moves to Moesia: 2 AP (Roman) Legio IV Flavia Felix becomes garrisoned at Singidunum, put it there immediately.
92: Thaw
Fiscus judaicus: 2 AP (Roman); +10 POP [Special tax on Jews, as monotheistic and not supportive of the imperial pantheon, is] extended to Christians. Gain 1D6 Booty in Rome.
- Edict on vineyards in the Roman Empire (3+): 4 AP (Barbarian) Auxiliaries from Gaul [Gaules] and the Orient are removed from the map. They can be recruited subsequently. [Viticulture was to be limited throughout the empire in order to boost the production of foodstuffs.]
Domitian creates the fortified camps of Brigetio and Aquincum: 4 AP (Roman); +10 POP Their Defense Value rises to 1 (as shown on the map).
93: Thaw
War with the Quadi, Marcomanni and Jaziges. Same as the previous war, the war must end before Winter 93. Jaziges setup: same as Quadi. Solo campaign: Randomly place the offensive army in an inhabited region bordering the Danube. Randomly place the defensive army in another inhabited region.
96: Autumn
Domitian is assassinated. End of the campaign, determine the final POP and campaign result.
Playing the Campaign Solitaire
In the solitaire campaign. you play the Roman side. The barbarians are randomly generated by the system. There are several rules unique to the solitaire campaign.
Historical Events
To simulate Domitian's reign, certain special stratagems become potential historical events. At the start of each season, before rolling for the weather, determine whether historical events occur this season. Each event has an occurrence number [EX: 5+]. If you roll the number or higher on a D6, the event occurs. If Domitian is in Rome, there is a -1 modifier to the D6 if the event is not favorable for the emperor. Some historical events (wars, for example) do not have an occurrence number, these occur automatically. A historical event noted as 5+ occurs if you roll 5 or 6 on a D6. On any other number, the event does not occur. If Domitian is in Rome and this event is not beneficial to him, the die roll result would have to be a 6.
Barbarian Troops
When a barbarian leader is revealed (he is attacked or is within the Roman Empire), he gets some of his tribe's SP. Randomly draw the number of SP corresponding to the Strategic Value of the barbarian leaders present in the army. Once an army is revealed, its counters (troops and leaders) remain face up. Note that a barbarian army is not subject to attrition while it is not revealed. Once its SP and leaders are known, it is subject to attrition. If it attacks a Roman army or enters the Roman Empire, it suffers attrition since it is necessarily revealed.
Barbarian Activation
Each time that the Roman player performs an action (moves and army, plays a stratagem, recruits ...), each barbarian tribe at war randomly activates one army. There are two types of barbarian armies, defensive and offensive. When an army is activated, roll a D6 to determine what it does. If the action is impossible, the army does nothing.
Barbarian Actions
Barbarian Actions
| D6 | Defensive | Offensive |
|---|---|---|
| 1 | Recruit 4 SP | Move 2 MP |
| 2 | Recruit 2 SP | Move 1 MP |
| 3 | Stay | Stay |
| 4 | Stay | Stay |
| 5 | Stay | Stay |
| 6 | Barbarian Events, roll 1 D6 | Barbarian Events, roll 1 D6 |
Move: If the army does not have at least 5 Booty, it moves within or towards the Roman Empire. It chooses the direction where its attack is most likely to succeed: no Roman army, low Defense Value, no garrison. Once within the Empire, it pillages. If it is certain to succeed in an Invasion, it performs one automatically, otherwise it performs a Siege. If there is a garrison which it could destroy, it performs an Assault. A barbarian army which is within the Roman Empire automatically reveals its leaders and determines its SP if it has not already done so. If the barbarian army has at least 5 Booty, it moves directly towards the location of its tribe's defensive army. Once it arrives there, the Booty vanishes and is counted towards POP.
Barbarian Events: Roll 1D6 on the Barbarian Events Table. A barbarian event last only for this season. It only applies to the tribe which rolled it. If the event is impossible, nothing happens. If it could affect several spaces, randomly determine which space receives the barbarian event.
Barbarian Events Table
| D6 | Barbarian Event |
|---|---|
| 1 | Future uncertain: The auguries do not foresee anything special |
| 2 | Former barbarian slave: for the next invasion or siege, the Defense Value of the Roman inhabited region has a -1 modifier |
| 3 | Barbarian fervor*: All barbarian nobles (and Tarabostes) have +1 in melee for the next battle. |
| 4 | Ambush*: For the next battle in a barbarian region, barbarian psiloi have +1 to their D6 roll in the first phase of the battle |
| 5 | Healing: 2 Out of Action barbarian SP are returned to good order. |
| 6 | Rest and Relaxation: 4 Out of Action barbarian SP are returned to good order. |
*These events are not cumulative
Recruit: The army must be in a friendly, non-pillaged, inhabited region. Add the randomly drawn SP to the army.
Stay: If it is in the Roman Empire, the army pillages or performs a siege action if possible.
Contact with an unrevealed barbarian army
When you send a counter or an army against an unrevealed barbarian army, there is a new step to perform. First perform attrition due to movement, as usual, then your army suffers 1D6 SP minus the Tactical Bonus of the Roman commander (leader with the highest Strategic Value) put Out of Action [HDC]. If you still have good order counters, you can reveal the barbarian army and fight. Otherwise, your Roman forces retreat. Initially, a barbarian army always defends in the open field. If it loses, it retreats within the walls to defend its inhabited region.
Barbarian Tactical Choice
Draw the barbarian tactical choice at random. If the barbarians are Dacian, 'Envelopement' becomes 'Harassment'; if the barbarians are German, 'Envelopment' becomes 'Frontal Assault'; if the barbarians are Sarmatian, 'General Attack' becomes 'Harassment'.
New Rules
New German troops
These two types of counters cannot move by themselves, there must be a unit of German infantry with them. If this is not the case, they are eliminated automatically.
Dogs [Chiens]: They allow a unit of German infantry to take part in Pursuit as if it were cavalry. The Dogs counter also pursues. Dog SP never count when calculating attrition.
Eat the dogs! stratagem (German), 1 AP: +1 to the attrition D6 per Dog SP eaten.
German civilians: One German infantry receives +1 on the melee D6 [impress the women!].
Roman Army Fronts
Legions and Vexillations
Roman leaders and their legions are based in the province to which they are assigned at the start of Domitian's reign. They can only leave by a stratagem or special event which concerns them. Only the emperor and the praetorian prefect can move freely throughout the Roman Empire. Naturally, leaders and their legions can go fight an enemy which is adjacent to their province. Only Domitian does not have the right to enter Dacia. [Yes, this last sentence means what it says. The designer explains: "Yes, Domitian never went there! He always sent other leaders in his place. Trajan showed his courage by going there in person. The Dacians tried to assassinate [Trajan] several times."].
A leader or legion in Lower Pannonia [Pannonie infériure] can enter Upper Pannonia [Pannonie supérieure] and Noricum [Norique]. Likewise for Moesia [Mésie] and Thrace. If there are no more legions in Dalmatia, all the Danube legions may go there.
Now you sometimes have the vexillation counter and the two legion counters: VII Gemina in Spain, VI Victrix in Germania. The three counters cannot all be in the game at the same time. A legion cannot have more than 3 SP. A legion cannot leave the region in which it is based. Recall that you can detach a legion's vexillation counter and send it to any province. VII Gemina could therefore be in Spain [Espagne holding box] with 1 or 2 SP and send its vexillation anywhere within the Roman Empire. Due to countermix limitations, not all of the legions have their vexillations represented in the game. However, nothing prevents you from sending 1 legion SP elsewhere. If this SP is eliminated, you do not lose the eagle, because the legion itself is still alive back home. However, if the 2 SP legion is destroyed, the eagle is lost.
Other Troops
Auxiliaries may go to any region. Their only limitation is that they can only be recruited in their province of origin. The Cohort Lugdununensis cannot leave Gaul [Gaules holding box]. Bodyguards can go anywhere. A Pedites Singulares (governor's bodyguard) must always be with a leader. A praetorian must always be with the emperor or a praetorian prefect. If the units do not meet these conditions, they can only move towards Rome.
Barbarians
The Quadi and the Marcomanni
They can only go into Pannonia (upper or lower) [Pannonie supérieure, inférieure], in Noricum [Norique], and Dalmatia. Regions marked 104 are Jazyges Salmatian. Quadi and Marcomanni can fight together when they are in a German rural region or in the Roman Empire. Otherwise, the Roman first fights the army of his choice. The Quadi and Marcomanni cannot exchange troops or Booty.
Dacians and Roxolan Sarmatians
They can only enter Upper and Lower Moesia [Mésie supérieure, Mésie inférieure] and Thrace. All the yellow regions are Dacian under Domitian. They can only build a Dacian fort at Tapae. They are not permitted forts, fortifications or "Transfuges" counters. If Decebalus dies, first Usimas then Diegis becomes 'barbarian king' ["roi barbare"].
Off-Map Holding Boxes
Movement in Holding Boxes: 5.1.7: one move per season, from one holding box to another at a cost of 1 AP. Forces may not leave a holding box while it also contains enemies. Chatti always appear in the Germanies holding box. They can move into Gaul [Gaules], then into Italy [Italie].
Combat within a Holding Box
If an enemy is already in a holding box when your forces enter, make an attrition check before combat. To fight in a holding box where an enemy is already present, spend 1 AP and make an attrition check. An army which is defeated in a holding box can either remain there, or retreat into another holding box (with all of its SP). The Chatti army cannot retreat if it is beaten in the Germanies holding box.
Recruit a generic Roman leader
For this campaign, you can recruit a legate or governor who has just been eliminated for 6 AP, or 3 AP if he was captured. He automatically arrives in Rome. If he died, randomly determine if his Tactical Bonus is 0 or +1. A captured historical leader can be ransomed in the same way if the barbarian player decides not to kill him. A leader who leaves from Rome, must take the shortest and fastest route to return to the province to which he is assigned.
A legionnaire is trained not only in pilum and sword but also shield, bow and sling. He must also be a good horseman. It sometimes happens that he even fights without heavy armor. [I suspect that this was the caption to an illustration?]