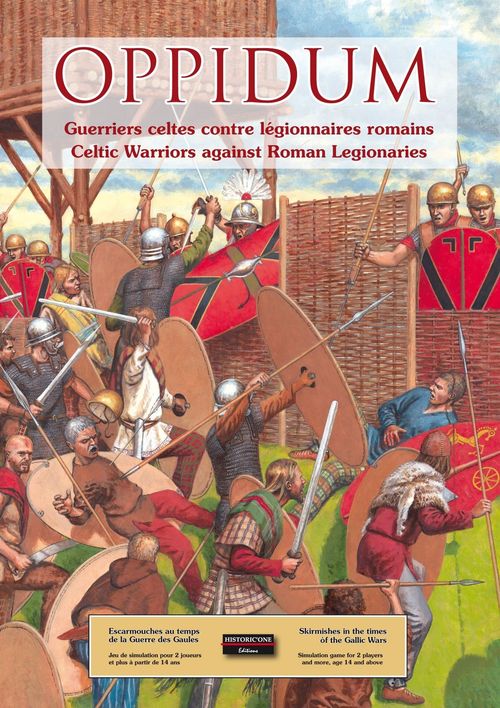
OPPIDUM: Celtic Warriors Against Roman Legionaries
OPPIDUM: Celtic Warriors Against Roman Legionaries Rulebook
Table of Contents
Table of Contents
1 - The Characters
1.1 - Time scale and distance
OPPIDUM is a game that simulates man-to-man combat on tactical maps. In other words, each game turn represents a very short period of real time: a few seconds at most. Enough time to throw a pilum, to strike a blow with a gladius, or to run a few metres. The width of a hexagon is equivalent to two metres (6 feet), a space sufficient for one soldier to wield his weapon comfortably but not enough for a rider on a horse. It is for this reason that each mounted character occupies two hexes, and that it is forbidden to have two living characters in the same hex.
1.2 - Counters and characters
Each foot character is represented by two double-sided counters. The first shows on one side the character in good health and on the reverse the character stunned. The second counter shows on one side the same character when he is wounded, and on the opposite side... dead.
Characters possessing a mount have four counters: two represent them on foot and two others mounted. On the back of the healthy mounted rider's counter is a picture of the horse without a rider, and on the back of the wounded mounted rider is the dead horse. Horse riders have a small triangle to indicate where the head of the horse is, hence the direction of the movement.
On each counter are the name and picture of the character, as well as three numbers:
- a black number: It represents the attack strength of the character. Its amount is determined by the length and heaviness of the weapon, the skill of the person using it, and his physical condition.
- or a green number: The attack strength of characters carrying pila, spears or javelins is coloured green. The number of missiles they can hurl before switching to a sword or gladius is managed with the various Weapon Tracking Sheets (see 1.3). Note that Roman and Celt riders are represented without any missile weapon when dismounted and have their attack strength coloured black instead. Roman legionaries always carry a pilum, hence their green attack strength, whatever their illustration shows.
- a red number: It represents the defence strength of the character. Its amount is determined by the skill of the character in parrying and dodging blows, as well as the physical condition. Characters in armour (which in this game means a mail shirt) have their red number surrounded by a circle.
- a blue number: It represents the movement allowance of the character, in other words the number of movement points (MP) that the character can spend each game turn. Its amount is determined by the mode of transport (on foot or on horseback), the weight of armour worn, and the physical condition of the character.
A code of three letters describes the characteristics of the character. The first letter provides the character origin, Celt (C), Roman (R) or a member of a Germanic tribe (G). The second letter designates the type, cavalry (c) or infantry (i). The last of the letters designates the function, legionary (g), centurion (t), principales (p for the Romans), scorpion servants (e), medium infantry (m), light infantry (l), archers (a), javelin throwers (j), slinger (s), peasants (p for the Celts), charioteer (h) and civilians (c).
The two-sided counter system is identical for all characters in the game. It should be noted that a stunned character cannot move or attack, and that his defensive strength is reduced to the passive protection of the equipment he is wearing.
Counter illustrations (example character Lucius):
- Counter A face: Healthy mounted character. Reverse: Horse without its rider.
- Counter B face: Wounded mounted character. Reverse: Killed horse.
- Counter C face: Healthy foot character. Reverse: Stunned character.
- Counter D face: Wounded foot character. Reverse: Killed character.
1.3 - The Weapon Tracking Sheets
The Weapon Tracking Sheets are used to keep track of certain statuses of the character, especially ammunition (see 4.5), defensive fire (see 4.6) or disabled shields (see 13.2). Spare counters of the characters (wounded counter for a healthy character, healthy counter for a wounded character) are placed on the Weapon Tracking Sheet of their fraction in the boxes corresponding to their unit type and status. In the case of mixed factions (mostly Romans), players can also use the same Weapon Tracking Sheet for allied units.
2 - Sequence of Play
Each scenario is made up of a succession of game turns. In a game turn, the starting player gets to make his characters shoot, move, and fight, all in separate phases. After the starting player has finished all his phases, the second player does the same. This is repeated during each following game turn. Each scenario will state which side gets to start.
The players phases are:
- MISSILE FIRE PHASE: Shooters of the active player can shoot.
- MOVEMENT PHASE: Characters of the active player can move, subject to defensive fire by the enemy.
- COMBAT PHASE: Characters of the active player in contact with enemy characters can attack them.
- RECOVERY PHASE: All stunned characters of the active player recover.
3 - The Terrain
Each hex on the maps displays a specific type of terrain with its own characteristics which can impact various aspects of the game.
| Hex type | Movement point cost per hex | Cover | Effect of terrain on combat |
|---|---|---|---|
| Flat terrain | 1 | None | 0 |
| Scrub | 2 - Foot, 4 - Horse | Yes | - |
| Tree | 2 - Foot, Impassable to Horses | Yes | - |
| Slope | 2 - Foot, 4 - Horse | Yes, if shot crosses the top lip | - |
| Creek | 2 | None | - |
| Water Fall | 4 - Foot, Impassable to Horses | None | - |
As we will see later, the type of cover affects shooting at a distance, while the disadvantage attached to certain terrain (-) affects hand-to-hand combat.
4 - Missile Fire Phase
The game features several types of missile weapons: the bow, the sling, the pilum and the spear or javelin. They and their characteristics are listed in the Missile Weapons Table. Note that the game treats spears and javelins alike, whereas the pilum has some distinct features.
To resolve missile fire, the active player first selects a character with a ranged weapon, the shooter, and a certain hex as the target hex. It takes one roll to determine if the shot hits the target hex or an adjacent hex, the impact hex and an additional roll to determine the effect of that hit on a character, if any.
A character adjacent to any enemy character cannot shoot unless that enemy character is stunned or not in a position to attack the shooter.
4.1 - Line of fire
A character can shoot at the target hex if there is an unobstructed line of fire between the shooter and the target. The line of fire is an imaginary straight line that can be traced from the centre of the shooter's hex to the centre of the target hex.
Count the number of hexes from the shooter to the target hex and compare this to the range of the weapon used. If this number exceeds the Long Range of the weapon used, the shot is impossible. Otherwise, the difficulty of the shot depends on the number of hexes being within the Short, Medium or Long Range of the weapon used by the character.
If the line of fire crosses a hex containing either a character or a type of terrain other than flat terrain, the shot can be subject to the restrictions explained below.
4.1.1 - Terrain
Some types of terrain break the line of fire. It is not possible to shoot through tree hexes. It is possible, however, to fire out of a tree hex or into a tree hex so long as the line of fire does not cross any other tree hex. Hills and ramparts can break the line of fire, as they provide elevation, see 4.1.3. Buildings also break the line of fire. For those and other types of terrain, see 11.1 and 12.1.
4.1.2 - Other characters
If the line of fire passes through a hex occupied by a character, friend or foe, or an animal alive, shooting is impossible, unless that character is stunned or killed.
4.1.3 - Shooting and different levels of elevation
Certain terrain types provide elevation, which allows for shooting over other characters and other obstacles. Hexes beyond the upper end of slopes provide one level of elevation, a battlement two levels of elevation. The upper, elevated end of the slope is represented by the lip of the slope which is marked by the sharp dark line. These are cumulative: two rows of slopes and one battlement mean four levels of elevation, for example.
Hexes providing elevation above target and shooter between them break the line of fire, e.g. a hill or a rampart.
When shooting at a target one level of elevation below, characters on the lower-level don't block the line of fire, provided the shooter stands at the edge of the elevation (next to a slope, on a battlement hex). When shooting from further back, the edge blocks the line of fire, if the target is closer to the edge than the shooter. Other characters on the lower-level don't block the line of fire, if they are closer to the edge than the shooter.
When shooting at a target one level of elevation above, characters on the same level don't block the line of fire, provided the target stands at the edge. When shooting at a target further back, the edge blocks the line of fire if the higher character is further away from the edge than the shooter.
With shots between shooters and targets with a difference of two or more levels of elevation, line of fire is never blocked by characters in-between or the edges. If the difference in elevation is three or more, a shooter can also shoot into or over tree or over tent hexes at lower levels, but not over or into buildings.
Example: Three Roman auxiliary shooters, Alkaios, Adherbal and Tuccius, shoot at Crixus and Orgetorix. For Alkaios and Adherbal, Crixus benefits from cover as the fire crosses the top lip of the slope. However, they can't shoot at Orgetorix who is closer to the slope than they are. For Tuccius, Orgetorix and Crixus don't benefit from any protection as the fire doesn't cross the top lip of the slope.
4.2 - Targeting riders and mounted shooters
A rider in the target hex counts as being one level of elevation higher than his actual terrain. Note that this allows riders to be targeted behind other characters or mounted shooters to fire over other characters. Only riders with a green attack score can use their javelins as ranged weapons. They can only shoot at targets within their front and side arcs (red hexes in the illustration).
4.3 - Roll to hit
To hit the target hex, a roll of 4 or lower is needed at Short Range. This roll is modified by +1 for Medium Range, by +2 for Long Range, and by +1 for a wounded shooter.
If this roll is successful, the target hex is the actual impact hex. If the modified roll is from 5 to 10, a neighbouring hex is the impact hex. Consult the scatter diagram to determine which. The scatter diagram is aligned with the writing on the map the impact hex is on, regardless of the direction of the shot. If there is no line of fire from either the shooter or the target hex to the impact hex (it is, for example, within a building), the shot has missed.
If the modified roll is above 10, the shot missed.
4.4 - Rolling for damage
If any character, enemy or friendly, is in the impact hex, a second roll is made to determine the result of the shot. Check the Missile Table and the column corresponding to the type of target (infantry or rider). This roll is modified by +2 for the target being armoured, by +1 for a wounded shooter and by +2 for cover or +4 for heavy cover. For the scorpio the roll is modified by -3 and it also ignores all other modifiers (see 10.3).
If the impact hex is of a certain terrain type, the target is provided cover. The Terrain Type Table lists which types of terrain provide cover. A character on the slope hex is only in cover, if the line of fire passes over the lip of the slope (see 4.1.3), be it in the impact hex or anywhere else.
If the shooter is on an elevation higher than the target, some terrain types like scrub, slope or fence hexes do not provide cover.
4.5 - Ammunition
Archers, slingers and scorpios are assumed to have sufficient ammunition for the purpose of the game. Characters with pila or spears carry only one missile weapon. Characters with javelins carry three missile weapons. Some Germanic characters (Gil) carry a combination of three spears and javelins instead, as shown on their illustrations. See their names noted on the Weapon Tracking Sheet.
After any shot, their supply of missiles is reduced by one, which is noted by using the Weapon Tracking Sheet (see 1.3). Once a character has no ammunition left, the yellow box depicting the melee weapon is used and shooting is no longer possible. A character with ammunition can supply a character who initially had ammunition by taking a Short Action (see 8) in an adjacent hex. Reduce the ammunition count of the donor and increase the recipients by the same amount.
4.6 - Defensive fire
Only archers can use defensive fire. Regardless of whether an archer has shot during the missile phase, an archer that doesn't move during the movement phase has prepared for defensive fire. This is tracked by using the second counter of the archer in the defensive fire box on the respective Weapon Tracking Sheet (see 1.3), or one of the Defensive Fire markers provided.
During the other players next movement phase, any or all defensive shooters can at any time, before, after or during the movement of any character, shoot at any opponent. Every shooter can only engage in defensive fire once per enemy turn. If the defensive shooter is forced to retreat, stunned or wounded before he fired the defensive shot, he immediately loses the preparation for defensive fire for this turn.
Any result of the shot is applied immediately. Upon a result of retreat, the target instead loses one MP for each hex of the retreat. If a target is wounded, it immediately loses a MP number equal to the difference between the original MP and the wounded MP. A target stunned, killed, or unhorsed cannot continue its move. If the affected target has MP left, it may continue to move, but can be subject to defensive fire again, by other shooters.
5 - Movement Phase
Each turn a player can move all his characters, using all or a part of the movement allowance for each. Unused movement cannot be transferred from one character to another, nor can it be kept in reserve for future turns.
Each character has a number of Movement Points (MPs) printed on its counter (as a blue number). Each hex entered requires the spending of several MPs corresponding to the difficulty of the terrain encountered (see the Terrain Types Table). Some types of terrain have a different MP cost for mounted characters or for characters on foot. If a character doesn't have enough MP to enter a certain hex, he cannot do so.
Characters cannot move off the map unless the rules of a scenario specifically allow this. Characters or units (such as carts) with large or multiple counters have only exited a map once they are completely off map. If a scenario calls for characters entering the map, they start their movement as if they are positioned in a hex just outside the map edge.
5.1 - Restrictions on movement
Characters cannot pass through hexes containing living enemy characters unless they are stunned. On the other hand, it is possible to cross hexes containing friendly characters. The character may not end his movement in a hex containing any character, including stunned ones.
Partial hexes at the edge of the map can be moved through, but not stopped in.
Walls are impassable. Houses can only be entered through doors and windows. Only characters on foot can pass through a window or over a low wall, for a cost of 3 MP in addition to the cost of entering the hex.
Characters on horseback cannot pass through a tree hex, a hex containing stairs or a building interior hex. But they can access courtyards or occupy door hexes. Horses without a rider and led by the bridle can cross tree hexes.
5.2 - Effects of corpses on movement
Hexes containing three dead characters, or one dead horse cost one movement point more than the normal cost. Hexes containing six dead characters, or two dead horses become impassable. Three dead persons plus one dead horse also block a hex. By taking a Long Action, one character can move a human corpse from an adjacent hex into any hex adjacent to him. Two characters can take a long action to move a dead horse in the same way.
5.3 - Infiltration of enemy lines
If the character moves from a hex adjacent to an enemy to another hex adjacent to the same or another enemy, entering that hex has a cost of 2 MP in addition to the cost of entering the hex due to terrain. Additionally, if that hex is adjacent to at least another enemy, a Risk roll (see 7.5) is made.
Both effects are applied for per hex, regardless of the number of enemies. For riders, only the front part of their counter is considered for Infiltration. Enemies not eligible to attack the moving character, due to terrain or being stunned, are ignored for these purposes.
The Infiltration restrictions do not apply to the final hex of the movement. Thus, there is no additional movement cost and no Risk roll, when the character ends his movement.
Example: Epenos wants to attack Vettius, but he will have to go past Gaius and Decimus first. The first hex will cost him 4 MP (2 for the scrub hex + 2 for infiltration). The cost of the second hex is 3 MP, but he will have to make a Risk roll as there are 2 adjacent Romans. The third hex is only 1 MP, as Epenos ends his movement there.
5.4 - Movement of riders
For riders, the cost in movement points is calculated by moving the front section of the counter (the side with the direction arrow) into the hex in front of the rider or one of the hexes next to it. Note that some terrain types have a higher movement cost for riders than for infantry. The back section follows behind.
As part of their movement, riders can pivot in place, with the back section staying in place and only the front section turning at a cost of one additional MP per hex, in addition to the regular terrain cost.
Example: Cotuatos can move forward in any of the 3 hexes in his vision arc (highlighted in orange) at the standard terrain cost (i.e. 4 for the scrub hex). If he wants to pivot in place, he will have to spend an additional MP per hex on top of the cost of the terrain. If he wants to pivot clockwise towards the hex in the upper left corner, he will have to spend 2 MP per hex pivoted (1 for flat terrain + 1 additional MP), for a total of 8 MP. If he wants to pivot counterclockwise, he will have to spend 5 MP to pivot into the scrub hex (4 for the scrub hex, 1 additional MP) and 2 MP for the final hex, for a total of 7 MP.
Instead of all other movement, the rider may move one hex backwards.
5.5 - Mounting and dismounting
Riders on foot can mount any riderless horse, from one of the hexes adjacent to either hex of the horse's counter, for a cost of 3 MP. Dismounting a horse is the same MP cost. Exchange the counters of the rider on foot and the riderless horse for the counter of the rider, or vice versa.
Any remaining MP can be used for movement. MP available during that turn don't increase by mounting. After dismounting, these are limited by the MP of the dismounted rider minus the 3 MP for dismounting.
A character mounting or dismounting from a hex with an adjacent enemy into a hex adjacent to at least one other enemy, is subject to a Risk roll, as per the Infiltration rules. Horses without a rider stay immobile until they are mounted or led by the bridle (see 9.1).
6 - Combat Phase
Any character that did not fire in the Missile Fire Phase can make one melee attack on a character in an adjacent hex. An attack is not possible, if the attacker is restricted from entering the hex the defender is in by regular movement, e.g., riders cannot attack through a window or into a tree hex.
To resolve a combat, calculate the difference between the attack strength (black or green figure) and the defence strength (red figure). You get a differential that corresponds to a column of possible outcomes listed in the Combat Table on the Play Sheet 2. The attacker then rolls the die to determine the exact result of the combat in question. A '0' on the die means '10'.
If the defender is armoured, this roll is modified by +1. Any result above 10 is treated as 10.
6.1 - Advantage (+) and disadvantage (-)
In any combat, certain circumstances favour either the attacker or the defender, regardless of their skill or equipment. For each advantage for the attacker and for each disadvantage of the defender, the column of the Combat Table is shifted one column to the right. For each advantage for the defender and each disadvantage to the attacker, the column of the Combat Table is shifted one column to the left. The column shifts are cumulative, one advantage and one disadvantage cancel each other out.
6.2 - Effects of terrain on combat
The Terrain Types table (see Play Sheet 1) defines terrain to be neutral (0), disadvantageous (-) or advantageous (+) to the defender. The attacker receives a disadvantage from being on disadvantageous terrain and an advantage, if the defender is on disadvantageous terrain. He receives a disadvantage if the defender is on advantageous terrain. Note that these modifiers are cumulative with each other and other sources of advantage or disadvantage. A mounted character is considered to occupy the least advantageous terrain of the two hexes occupied. Being in a hex with a number of corpses which confer movement penalties (see 5.2), a character attacks and defends with an additional disadvantage.
6.3 - Attacks by more than one character
When two characters (or more) can attack the same enemy character, they can attack individually, without any special rules or alternatively they can attack jointly, under the following rules.
Joint attackers add their attack strength to create a single total factor which is used to calculate the odds against the defender's defence in a single attack roll.
Additionally, the joint attackers gain advantage (+). This rule does not apply when attacking a mounted character unless he is attacked by several riders.
If the attackers decide to attack jointly and they are on different types of terrain, the least advantageous terrain will be counted to compare with that occupied by the defender.
Example: A group of fierce Britons is confronting a few Romans from Caesar's expeditionary force.
- The nude warrior Moltonei could attack the legionary Quintus, but the combat differential would only be (12-7=5), which would be solved in the risky 5/8 column in the Combat Table. Uxouinos could instead join and attack Quintus with Moltonei, resulting in a combat differential of (12+11=23 and 23-7=16). They have an advantage (+) for a joint attack which is counterbalanced by the disadvantage (-) that Uxouinos has being in a Scrub hex. The result is read in the 13/16 column, with much higher chances for success.
- Brennos and Luernios can jointly attack the Roman rider Lucius, but they won't benefit from any advantage (+) for a joint attack as they are on foot against a cavalryman.
- The 3 Briton riders can attack Antonius, but their advantage (+) is being counter-balanced by Abalanis' disadvantageous (-) position on a slope. The combat differential of (21+23+20=64 and 64-14=50) is read in the 31/50 column. Should Abalanis decide not to engage Antonius, then the combat differential would be (21+23=44 and 44-14=30), but with an advantage (+) as they are both riders attacking jointly. The combat result would be read in the 31/50 column, so no different than fighting with 3 riders.
7 - Effects of Missile Fire and Combat
Characters hit by missile fire, or in combat, can be forced to retreat, become stunned or wounded, or even outright killed. With mounted characters, they can additionally be dismounted or have their horses killed. All effects are applied to the affected character immediately, before the next attack is resolved.
7.1 - Retreating
The retreating character (either defender or attacker) moves one hex away from his opponent in combat (attacker or defender, respectively). A retreat is not possible into hexes which the retreating character may not enter normally, e.g. a rider may not retreat into a tree hex.
The retreating character can displace friendly characters, by moving those to an adjacent hex. These can also displace friendly characters, resulting in a cascading retreat.
As a result of ranged combat, a character can retreat across hexes occupied by friendly characters. The retreating characters may not retreat to a position which is closer to the shooter.
If the retreat is not possible, the retreating character is wounded instead.
MP cost is not relevant in a retreat. Moving onto a ladder is not possible during a retreat, but away from a ladder is, regardless if up or down.
If the retreating character or a displaced friendly character enters a hex adjacent to any number of enemy characters, a Risk roll (see 7.5) is made. Enemies not eligible to attack the retreating character, due to terrain limitations or being stunned, are ignored for these purposes.
In the case of a joint attack (see 6.3) all attackers must retreat on a AR1 result on the combat table.
Examples: Orgetorix attacks Gaius, but as he is adjacent to Titus and Quintus, he attacks with disadvantage, so the result is read in the 0/4 column instead of the 5/8 column (12-6=6). Ambiorix and Crixus attack Quintus who needs to retreat. He can exchange his position with Paullus who is just behind him.
7.2 - Stunning, wounding and killing
A character that is stunned or wounded is turned from the healthy side to the stunned side or exchanged for the wounded counter. A stunned or wounded character dies immediately if wounded or stunned again. Wounded shooters get a +1 modifier on their roll to hit (see 4.3).
A stunned character that is forced to retreat is also killed. A stunned character may not shoot, move or attack and is very weak on the defence, while a wounded character is weaker and slower.
In the case of a joint attack (see 6.3) only one attacker chosen by their player is affected on an AW result on the combat table.
7.3 - Affecting riders
Attacks against mounted riders are resolved in the same way as attacks against infantry, with the following modifications.
Riders retreat by moving away from the shooter or the attacker under their normal movement rules (see 5.4). In combat, they must evacuate one hex adjacent to the attacker, to allow the attacker to Advance.
If the rider cannot retreat according to these rules, he is wounded instead.
A Risk roll is only necessary if the rider's counter enters a hex adjacent to another enemy which the rider has not been previously adjacent to before or during the retreat.
A stunned rider is automatically dismounted. The combat table specifies if the horse is killed (HK). In that case, the rider is dismounted in addition to any other effect. If a thus dismounted rider enters a hex adjacent to at least one other enemy, a Risk roll (see 7.5) is made.
When a rider is dismounted following combat or missile fire, the owning player places the appropriate counter (rider stunned, wounded or dead) on one of the hexes adjacent to his horse. If all the adjacent hexes are occupied, a friendly character may be shifted one hex to make room for the dismounted rider. If there are no available hexes for the dismounted rider, he is automatically killed. The horse itself remains in the same place and must be represented by its own counter, unless it is killed.
Riderless horses are treated as infantry when attacked (see 9.3).
7.4 - Advance after combat
If as the result of an attack during the combat phase the defender has been forced to retreat, been stunned, or been killed, the attacking character (or one of them, in the case of a joint attack by several characters) can advance one hex or by a number of MPs equal to half of its movement allowance. Any extra MP cost and Risk rolls from the Infiltration rule are waived. The first hex crossed must always be one of the hexes evacuated by the enemy (or the hex of the stunned or killed character). If the attacker or attackers are forced to retreat or killed, the defender can advance in the same way.
Advance after combat is not obligatory but it must be carried out immediately, without waiting for the resolution of the other combats in that phase. The MPs used during the advance after combat do not prevent the concerned character from moving normally during the next game turn.
7.5 - Risk rolls
A battlefield is a dangerous place. In certain situations, characters can be randomly affected by unfortunate circumstances other than direct enemy attacks.
Certain rules will have these unlucky characters subjected to a Risk roll, which will take effect immediately.
| Roll | Effects |
|---|---|
| -5 | No effect |
| 6-7 | Movement ended |
| 8 | Stunned (& dismounted) |
| 9+ | Wounded |
| Modifiers |
|---|
| -1 for being armoured during Infiltration or Retreat |
| -1 for a Rider during Infiltration or Retreat |
| +2 for falling |
| +2 additional for being armoured when falling |
7.6 - Recovery Phase
All stunned characters of the active player are turned to the healthy side in the last phase of this active player's turn, even those stunned during the same turn.
8 - Actions
During the battle, characters can pursue other activities besides shooting, moving and fighting. Stunned characters cannot perform actions, but wounded ones can.
A Short Action can be made in the combat phase instead of a melee attack. A shooter who has made a ranged attack this turn, may not perform a Short Action.
To perform a Long Action, the character may not do anything else during the whole turn - no shooting, no moving, no fighting. The effect of the Long Action occurs at the end of that players turn.
A list of all the possible actions is available in Play Sheet 2, with the number of characters needed to perform them.
9 - Riderless Horses and Carts
These rules apply to animals, especially riderless horses and draft horses, but not chariots (see 10.2). They are generally treated as characters but never considered enemy characters for any purpose.
9.1 - Movement of animals
Riderless horses and draft horses stay immobile until a character leads them by the bridle.
To lead any animal, a character must enter one of the 3 hexes adjacent to the animal's front hex. A character on foot can lead up to three animals or one draft animal with a cart. A rider can lead only one riderless horse, but not draft animals with a cart. Leading animals by the bridle is not possible while there is any enemy character adjacent to the animal's front hex.
For the remainder of this movement phase, the leading character will be followed by the animal, which is treated as an extension of the character leading it. The animal may not move further than its own MP score, if it has one, or be lead more than once during the same player's turn. The animal uses the MP cost for riders and cannot enter terrain a rider cannot.
Example: Cornelius must be in one of the 3 orange hexes to lead the draft horse.
9.2 - Movement of carts
A cart is immobile but can be attached to a draft horse. The cart will move whenever the animal is moved, following behind the animal counter. To harness or unharness a draft animal to or from a cart, a character must take a Long Action (see 8) adjacent to the animal and the cart.
A draft horse can be led by a character like any animal as in 9.1, with the animal following the movement of the character and the cart following the animal. This is not possible, if the cart is controlled by a coachman. A coachman is a character in the hex of the cart adjacent to the draft animal. Instead of moving himself, the coachman can move the draft animal with the cart following behind. In that turn, the coachman may not attack or shoot.
Characters can enter a cart hex for 3 MPs. Only characters on foot can end their movement on a cart hex. They will remain on the cart counter as passengers when it is moved.
9.3 - Animals and carts during combat
Animals and carts block the line of fire like foot characters.
If attacked or shot upon, animals are treated like characters on foot. Animals cannot be stunned or wounded; they are killed instead.
Characters in a cart hex benefit from cover. They are not restricted in attacking or shooting. A character in a cart can be attacked in combat. If attacked from outside the cart, the character defends with an advantage (+).
Don't read any further! You can already play the scenarios in Group 1.
10 - Special Units and Tactics
Several units have unique features which can be showcased by the following rules.
10.1 - Roman legions
Roman legions were outstanding in their training not as individual warriors, but as soldiers fighting in formations. The following tactics are available to Roman legionnaire infantry (Rig), their centurions (Rit) and principales (Rip), unless otherwise noted.
10.1.1 - Pilum throwing
A legionary (Rig only) that has used his pilum for a ranged attack can still attack in melee combat during the same game turn. This is not available to centurions.
10.1.2 - Defensive training
An attack against a legionary (Rig, Rip or Rit) adjacent to at least two other such legionaries, who are not stunned and on the same level of elevation, is done with a disadvantage (-) to the attacker.
10.1.3 - Keeping formation
During the movement phase, two legionaries (Rig, Rip or Rit) can exchange hexes instead of their regular movement. Also, when a legionary is forced to retreat due to an enemy attack in combat, he can retreat into a hex occupied by another legionary, exchanging their places. This happens before the enemy can advance.
10.2 - Celtic chariots
The age of the chariot was long gone on the continent, but Celtic tribes in Britannia still made use of it in tribal warfare.
10.2.1 - The counters
In game terms, the chariot is a unit unlike any other. It is made of two counters: One representing the chariot itself, showing the intact chariot or a broken chariot, the other one representing the two ponies, either going fast or slow. The ponies counter shows the movement and defence value of the chariot assembly. This unit has no innate attacks. It can be used to carry one charioteer (Cih) and one infantry character, here called the passenger, usually a javelin thrower or a warrior, taxied into combat. The two characters can be stacked on top of the chariot counter.
For the purposes of this game, the horses cannot be separated from the chariot. These are ponies, neither trained nor suitable to be ridden.
10.2.2 - Movement
A chariot can move as long as it is conducted by a charioteer. Depending on how far it moves in a movement phase, it is either a slow chariot (uses up to 6 MP) or a fast chariot (more than 6 MP). This can change once during the movement phase. This is depicted by flipping the pony counter either to the side with 6 MP (slow) or 12 MP (fast).
A slow chariot moves and pivots in place like a rider, but it cannot go backwards. Once a slow chariot spends more than 6 MP in one move, it immediately becomes a fast chariot, allowing it to use 12 MP in total.
A fast chariot moves like a rider but cannot pivot in place or go backwards. If a fast chariot ends its movement and has not spent more than 6 MP during that move, it becomes a slow chariot. This can happen involuntarily, if the fast chariot cannot move further, for example due to terrain.
A fast chariot can move through hexes with enemy infantry. These characters are moved to a neighbouring hex of their player's choice and are subject to a Risk roll (see 7.5). Moving a chariot through enemy infantry is not possible if the enemy infantry character is next to two or more other enemy characters.
A chariot is affected during its movement by the Infiltration rules like a rider. For the opponent, it counts as an enemy character, unless it is empty.
The chariot can carry one passenger in addition to the charioteer. If there is no passenger, any friendly character can move onto a slow chariot for 3 MP and become a passenger. The passenger and the charioteer will be moved with the chariot. A passenger or a charioteer on a slow chariot can move off the chariot before or after the chariot movement for 3 MP. The passenger and the charioteer cannot move off a fast chariot.
An empty chariot is treated like a riderless horse, including combat.
10.2.3 - Combat
The chariot and the charioteer can neither shoot nor attack.
The passenger carried by the chariot may shoot in the missile phase under the normal rules for missile attacks. Shooting is not restricted by the chariot's movement, nor by firing arcs. Like a rider, the chariot provides one level of elevation for shooting and being shot at. Each chariot carries 4 spears which can be used by the passenger in addition of his own. Two markers are provided to manage the number of javelins per chariot on the Celtic player's Weapon Tracking Sheet. A passenger can attack during the attack phase, provided the combat rules allow for it.
When subject to missile fire or combat, the chariot is treated as a single unit, including the ponies, the charioteer and passenger. Charioteers, ponies or passengers cannot be individually targeted or attacked. A chariot in a hex hit by missile fire is affected like a rider. It cannot benefit from cover. When attacked in combat, it uses the defence strength of the chariot (on the ponies counter, depending on its speed) or the defense strength of any passenger, if the latter is higher.
The chariot ignores results of retreat. Any result of S, W or K is applied to the charioteer, if there is no passenger. Otherwise, the passenger is affected if the unmodified die roll was odd, the charioteer if it was even. If the charioteer is stunned or killed, the chariot crashes. Any result of HK leads to a crash.
These rules also apply when the chariot is affected by a Risk roll. If the chariot crashes, the charioteer and any passenger make a Risk roll (see 7.5) for falling. Any effect is in addition to the result of the attack. The chariot is destroyed after a crash: Flip the chariot counter to show its broken side. It affects movement like a dead horse (see 5.2). The ponies counter is removed from the board. Both charioteer and passenger counters are placed in that or adjacent hexes.
Examples:
1 - The chariot ensemble has been riding at high speed towards the legionary. It is starting the turn as a fast chariot, because it moved more than 6 MP last turn. During the missile phase, the warrior could throw a javelin.
2 - In the movement phase, the chariot only moves one hex, thus slows down (flip the Ponies counter to show the 6 MP side).
3 - As it is now a slow chariot, Sumaros decides to move off the chariot for 3 MP. He could now use his remaining MP to engage Vettius and then attack during the Combat Phase.
4 - During the Roman player's next combat phase, Vettius has moved and attacked the chariot instead of Sumaros. He rolled a HK result and the chariot has been destroyed. The chariot counter is flipped to show its Broken side and the Ponies counter is removed from the map. The charioteer was forced to a Risk roll and got stunned while being thrown from the platform during the accident.
10.3 - Scorpios
The Roman scorpio is a type of ballista. It was a unique weapon not found among Rome's enemies. The scorpio depicted here is immobile for game purposes, as it is too large to be transported and set up on the scale of the game. Also, it is assumed to have an effectively unlimited missile supply.
A loaded scorpio can fire during the missile fire phase if two Roman characters are in neighbouring hexes. At least one of them must be a servant (Rie) (whether wounded or healthy). As shooters, these can neither move nor attack during this turn. It gets a -3 modifier on the roll to damage. Additionally, it ignores the modifiers for cover, heavy cover and armour.
After firing, the scorpio needs to be reloaded. Two characters must take Long Actions (see 8) for two turns to reload the scorpio. Use the special markers to manage the reload process for each scorpio on the Weapon Tracking Sheet.
Unless specified otherwise by the scenario, the scorpio will start a game loaded.
Don't read any further! You can now play the scenarios in Group 2.
11 - Houses and Other Structures
11.1 - Terrain types
| Hex type | Movement Point Cost per Hex | Cover | Effect of terrain on combat |
|---|---|---|---|
| House ground floor | 1 - Foot, Impassable to Horses | None | 0 |
| Window in Building Wall | 1 - Foot, (+3 MP to cross), Impassable to Horses | Yes | Def. + |
| Doorway in Building Wall | 1 | Yes | Def. + |
| Building Wall | Impassable | Total if fire crosses the wall | 0 |
| Porch | 1 - Foot, Impassable to Horses | None | 0 |
| Fence | 1 - Foot, (+3 MP to cross), Impassable to Horses | Yes (if shot crosses through) |
11.2 - Houses and structures on the map
The layout of houses and other artificial structures is usually not aligned with the hexes on the map. When a hex combines multiple terrain types, the terrain which covers at least 60% of the hex is the one to be considered.
Example: The red hexes signal which ones are considered Tent hexes. The 4 corners are excluded as they don't cover 60% of their hex and are considered as open terrain.
11.3 - Houses: Line of fire
Walls block line of fire, except when firing through a doorway or a window.
A character that is either outside or inside a building can shoot through a doorway so long as no section of a wall blocks his line of sight. Shooting through a window is only possible when either the shooter or the target is next to the window. The line of sight is then determined from the middle of the window's edge, not from the centre of the hex.
11.4 - Houses: Cover
A target shot at through a window or a target inside the building shot at from the outside benefits from cover, unless the shooter is in a doorway hex or immediately behind the window. A character directly behind a fence benefits from cover.
11.5 - Houses: Crossfire
Characters in doorways benefit from cover. Characters in hexes containing a building corner benefit from cover if the shooter has no line of fire to both sides of the building. This cover is limited to one side of the door or the edge. The character must select his covered side in case of crossfire. He will get no cover when shot at from the other side.
Example of crossfire: Two Celts shoot, in the same turn, at a Roman centurion who is in a building corner hex. He can't benefit twice from cover, so the Roman player will not benefit from cover if hit for the second time.
11.6 - Houses: Movement
Walls are impassable. To enter a building, a character must be on foot and must cross through a doorway or a window. Only foot characters can cross a window hex. Note that wounded characters with armour cannot cross a window hex due to their reduced movement points, as 4 points are necessary to cross a window.
Horses, with or without a rider, cannot enter a building interior hex. They are allowed in doorway hexes.
11.7 - Houses: Combat
When combat is fought across a doorway or a window, the defender is always considered to be on advantageous terrain (+), regardless of whether he is inside or outside.
11.8 - Terrain: Fences
They are designed to stop chickens and pigs, but not men-at-arms. A character in the hex directly behind a fence benefits from cover. A character can cross them at a cost of 4 MP (3 MP to cross the fence + 1 PM for the flat terrain hex). In combat, a defender behind a fence is on advantageous terrain (+).
11.9 - Terrain: Tents
The tents are normally entered through one of the marked entrances on each side. A character can cut his way through any other side by taking a Short Action next to a tent side, after which he is placed onto an adjacent hex inside the tent.
Missile fire into a tent is only possible against a character directly behind the tent side. A character can be attacked through a tent side, but defends with advantage (+). Tents are not considered to be permanently damaged by any of those actions for the purposes of the game.
Don't read any further! You can now play the scenarios in Group 3.
12 - Siege Warfare
Both Romans and Gauls used various offensive and defensive methods to secure and breach fortifications. As in other aspects, Romans had the technological and organisational edge, but the Gauls adapted to this new kind of warfare quickly.
12.1 - Terrain types
| Hex type | Movement Point Cost per Hex | Cover | Effect of terrain on combat |
|---|---|---|---|
| Rampart | Impassable | None | - |
| Staircase | 2 - Foot, Impassable to Horses | None | - |
| High Battlement (Murus Gallicus) | 1 - Foot, (from other battlement hexes), Impassable from ladder | Heavy (if shot crosses through) | 0 |
| Low Battlement (Murus Gallicus) | 1 - Foot, (4 from a ladder) | Yes (if shot crosses through) | 0 |
| Gate | 1 if open, Impassable if closed | None | 0 |
| High Battlement (Platform) | 1 - Foot, (from other battlement hexes), Impassable from ladder |
12.2 - Battlements
The ramparts of Gaul oppida, called murus gallicus, and those of the structures Caesar had constructed around Alesia, circumvallation and contravallation, are similar in game terms. They were made of an earth and turf rampart, with a wooden platform on top, protected to the outside by a wooden palisade or a stone wall in the case of the murus gallicus, here called battlements. In the battlements, the palisade alternates with higher and lower parts. The low battlement allows for missile fire and is coloured light. The high battlement is dark brown.
The green hexes of the rampart and the stairs are all considered to have one level of elevation, while the platform hexes have two levels of elevation (see 4.1.3). Thus, missile fire is not possible from the outside of the fortification over the wall to the inside, or vice versa. Missile fire is possible up to the platform, from the inside or from the outside.
Shooting from the platform across the battlement to the outside is only possible from hexes adjacent to battlement windows. A character behind a high battlement cannot shoot across the battlement. Shots across the battlement to or from platform hexes not adjacent to the battlement are not possible, regardless of elevation.
Low battlement grant cover against shots across the battlement, while high battlement grants heavy cover.
12.3 - Towers
Observation towers are built over the platform. Characters can enter the hexes of the platform below the tower, regardless of any character on the tower in the same hex. They are platform AND battlement hexes. The towers provide three levels of elevation. They are protected on all sides by the same type of battlement as the platform. The turret can be reached via a fixed ladder from the platform for 3 MP or by using a scaling ladder set up on an adjacent platform hex (see 12.11). Only one character can be in the ladder hex.
Example: Adherbal and Horatius are defending the battlement while Decimus and Quintus are further up in an observation tower. Horatio and Decimus are protected by the (high) battlement and enjoy heavy cover. Both Adherbal and Quintus can take advantage of the openings in the battlement to hurl javelins and pilums at the attacking Gauls. Horatio could move into the hex under Decimus, if he wanted to throw a pilum.
12.4 - Gates
Characters can enter the hexes under the platform leading to the inside, where the gates are. The gates of the oppidum or circumvallation consist of two sections which are opened independently.
To open or close one section of a gate, a character in an adjacent hex on the inside of the fortification must take a Long Action. At the end of this turn, the gate may be opened or closed by flipping the counter.
A closed gate is treated like a wall regarding line of fire and movement and combat.
12.4.1 - Smashing the gate open
A gate can be smashed open by two attackers placed on hexes adjacent to the gate (and on the same side), both taking Long Actions for two consecutive turns. Once smashed, the gate remains open until the end of the game.
Example: Both Saevius and Titus are trying to smash the right gate of the oppidum while they are being shot at by Cilurnos from the battlement (first image). They succeeded in smashing the gate open, but they now need to face Litaviccos and Sumaros who are waiting behind the gate (second image).
12.5 - Obstacles
The Romans used various types of obstacles in front of their fortifications to hinder approaching enemies.
12.5.1 - Stimuli
A series of thin, barbed iron spikes firmly embedded in wooden stakes hammered into the ground, with only the point protruding. The spike would be driven through the foot of any enemy who would stand upon it.
These hexes are impassable to horses and cost 2 MP on foot. The character must undertake a Risk roll when crossing a Stimuli hex.
12.5.2 - Lilia
These pits were arranged in checkerboard configuration and contained a sharpened wooden stake. They were not designed to kill but to slow the progression of the enemy through foot or calf wounds.
These hexes are impassable to horses and cost 2 MP on foot. The character must undertake a Risk roll when crossing a Lilia hex.
12.5.3 - Cippi
Several rows of branches with their ends lopped off and sharpened to form a hedge of spikes facing the enemy. Enough to slow down any attack, keeping the attackers exposed to missile fire from the walls.
These hexes are impassable to horses and cost 2 MP on foot. The character must undertake a Risk roll when crossing a Cippi hex.
12.5.4 - Ditches
Two types of ditches were used to delay the enemy's progression: Dry ones and flooded ones after diverting the water flow of nearby streams. These hexes are impassable to horses and cost 3 MP on foot if dry or 4 MP if flooded. They can be crossed using gangways (see 12.9).
12.5.5 - Pikes
The outer wall of the circumvallation and contravallation are studded with sharp wooden pikes, designed to hinder or wound anyone trying to climb the wall. Any character moving up or down a ladder in a pike hex must undertake a Risk roll.
12.6 - Handling siege equipment
Various types of siege equipment can be handled (picked up, carried and set up) by characters on foot. The number of characters needed is different for each type of equipment: baskets of dirt and fascines can be handled by a single character, while gangways, ladders and screens need two characters to be handled.
The piece of equipment can be picked up at any point during the movement phase, provided the character(s) have not shot during the missile phase and have two MP left. If two characters, they are moved simultaneously in this case. During this movement the counter of the equipment is moved with the character(s). The movement of the character(s) is reduced by 2. Characters may not shoot or attack during any turn they are or have been carrying siege equipment. If a character carrying equipment is forced to retreat, stunned or killed, the equipment stays behind in the same hex and can be picked up by other character(s).
After movement, the equipment can be set up or put down in the hex of one of the characters or adjacent to one of them. If put down, it cannot be carried further during this movement phase by other characters. If set up, other characters are affected by the equipment during the same movement phase, e.g. another character can climb a ladder just set up during the same movement phase.
12.7 - Siege equipment: Baskets of dirt
Baskets are used to carry dirt to fill the Lilia hexes, to allow the attackers to cross them. One foot character can handle a basket counter (see 12.6). If set up, flip the counter to show its 'Filled pit' side. Characters can cross a filled pit hex with no MP penalty or Risk roll.
Example: Excincos is carrying a basket full of dirt and can set it up to fill another pit next to the two already filled.
12.8 - Siege equipment: Fascines
The fascines are used to fill the ditches to allow the attackers to cross them. One foot character can handle a fascine counter (see 12.6). Characters can cross a ditch hex with a fascine at a cost of 2 MPs.
Example: Cassitalos is carrying a fascine to widen the path to cross the ditch while Orgetorix is already leveraging an existing fascine to cross.
12.9 - Siege equipment: Gangways
The wooden gangways are used to cross the ditches. Two characters can handle a gangway (see 12.6). When set up, the gangway covers one ditch hex which can then be crossed at a cost of 1 MP.
A gangway can be thrown into a ditch if one adjacent character performs a Short Action (see 8). Flip the counter to show its 'Fallen gangway' side. The gangway can be put back in place by two characters adjacent to the side which is still at ground level (the larger one). Both need to take Long Actions (see 8) simultaneously.
Note that ladders (use the two-hex counter) can also be used as gangways to cross ditches.
Example: Sentios can easily cross the ditch on a gangway, but he will be blocked at the next one as the gangway fell in the ditch by the pikes. Behind him, Ambiorix and Luernios are putting another gangway back in place after it fell in the ditch.
12.10 - Siege equipment: Screens
Screens are used to provide protection against missile fire. Two characters can handle a screen (see 12.6). While a screen is carried by two characters, they benefit from cover.
The screen can be set up facing the side or the corner of a hex. After the screen is set up, the screen hex can be entered without additional cost in MP. For combat purposes, it is disadvantageous terrain (-).
A set up screen can be moved one hex or faced in a different direction within the same hex, by two adjacent characters taking a Short Action.
A character in the screen hex benefits from heavy cover (see 4.4), but only if the shot is from within the front arc protected by the screen (as indicated by the black arrow on the counter). A character in the screen hex cannot shoot in the direction of its front arc.
Characters in adjacent hexes benefit from regular cover, if the line of fire crosses the screen hex.
Example: Oclino and Uonatorix moved the screen in place next to the flooded ditch. In their position, they get cover from any missile coming from the battlement, and which would cross the hex in which the screen is. Samo in the screen hex gets heavy cover if shot at from the red hexes but he can't shoot towards the Roman battlements. Ducarios is protected by another screen. Its front arc is shown by the blue hexes.
12.11 - Siege equipment: Ladders
Scaling ladders allow reaching the battlements from outside the fortification. They can be handled by two characters (see 12.6), using a two hex counter and can be set up in a hex adjacent to the battlement or a murus gallicus. If set up, the two hex counter is exchanged for its 1-hex version. It can be set up only in open terrain or a ditch hex already covered by a gangway or filled with fascines.
Moving onto a scaling ladder costs 3 MP. Characters can move from the ladder onto an adjacent rampart hex at a cost of 4 MP or as a result of Advance after combat (see 7.4).
Example: After a fascine was thrown into the ditch to fill it, the Gauls were able to raise a ladder against the palisade and through the pikes. Damos can climb the ladder at a cost of 3MP, subject to a Risk roll because of the Pikes, spend 4 MP to go over the battlement.
Characters on a ladder do not benefit from any cover and fight (attacking and defending) with disadvantage in combat. Moving onto a ladder is not possible during a retreat, but away from a ladder is, either up or down.
An upright ladder can be moved one hex or faced in a different direction within the same hex, by an adjacent character taking a Short Action. It is impossible to move or turn a ladder if someone is on it.
A character in an adjacent hex can topple the ladder by taking a Short Action (see 8). This is automatically successful if the ladder is empty. If a character is on the ladder, toppling is only successful on a roll of 1 - 6 with the d10. If the ladder is toppled, its counter is exchanged for the horizontal version. The character stays in the same hex and is subject to a Risk roll (see 7.5), using the modifiers for falling.
A raised scaling ladder can be lifted onto the battlement or murus gallicus in a low battlement hex by two characters adjacent to the ladder taking long actions, at least one of them on the wall. Once this is done, it can be handled (see 12.6) on the rampart.
A scaling ladder can be used to cross two rampart hexes, for 2 MP per hex, either from above or from below, by using the two-hex counter.
Example: The Romans have been able to access the top of the murus gallicus of the oppidum using ladders. But the Gauls are strongly defending the access to the staircase on the rampart. Quintus and Sabinus have lifted one ladder onto the rampart, then moved one hex carrying it and set it up down the rampart to by-pass the Gallic warriors and access the town. Horatius and Vettius could lift another ladder onto the murus gallicus.
13 - Optional Rules
The following optional rules address special situations on the battlefield. They add complexity and thematic flair. They can be used together or individually without affecting balance.
13.1 - Testudo formation
Against enemy missile fire, legionaries (Rig, Rip or Rit) can form the infamous testudo, or tortoise formation, with some soldiers locking their shields to the front and the ones behind them covering them with their shields from above.
At the beginning of the player's turn, a testudo can be formed out of a minimum of 7 legionaries. Each of these legionaries needs to be on the same level of elevation and adjacent to at least three others of those legionaries. At least one legionary needs to be adjacent to 6 others. On this legionary (or one of those), a testudo marker is placed, with the arrow noting its facing.
In the subsequent movement phases, the testudo can move at a speed of 3 MP by moving the testudo counter into one of the hexes in its front arc. All legionaries in that testudo move simultaneously, all keeping their adjacency to each other. Movement cost per hex is the highest cost of all hexes entered by any legionary in that testudo.
Instead of moving, the testudo can be turned by rotating the testudo counter without moving any legionary.
Legionaries in testudo formation can neither engage in ranged nor melee combat. They do not receive the bonus for Defensive training (see 10.1.2) nor can they make use of Keeping formation (see 10.1.3).
Every legionary in testudo formation is assumed to be under heavy cover if the shooter is within the front arc of the testudo. Additionally, any legionary in testudo formation forced to retreat can ignore that result.
Note that the realistic testudo simulated here cannot be used to lift legionaries over enemy defensive structures, as some ancient sources imply.
13.2 - Disabled shields
Shields were becoming ineffective if hit by a pilum, javelin or spear, as the weight of the missile weapon forced the warrior to discard his shield to continue the fight. This happens when a character shown to carry a shield gets a DS result on the Missile Damage Table. After that, he defends with a disadvantage (-).
The character can rearm himself with the equipment of a fallen comrade or enemy, to get rid of this status. To do this, the character without a shield can take a Short Action (see 8) in a hex with a dead character, who has been equipped with a shield.
This can be tracked on the respective Weapon Tracking Sheet (see 1.3). For characters with both shields and missile weapons, the lower part of their box is used. For all other characters, the box labelled Disabled shield is used. You can also use one of the Disabled Shield markers provided.
13.3 - German warriors
German riders were accompanied into battle by light infantry equipped with javelins. According to Caesar, they would grab the tail of the horse, enabling them to run faster and keep up with the rider.
If at the beginning of the movement phase, a healthy German javelin thrower (Gij) starts next to one of the three hexes at the back of a German rider (Gcl), both are allowed to move simultaneously at 10 MP, if the infantry unit follows the rider. Both characters are individually subject to the Infiltration rule.
You can now play all the scenarios!