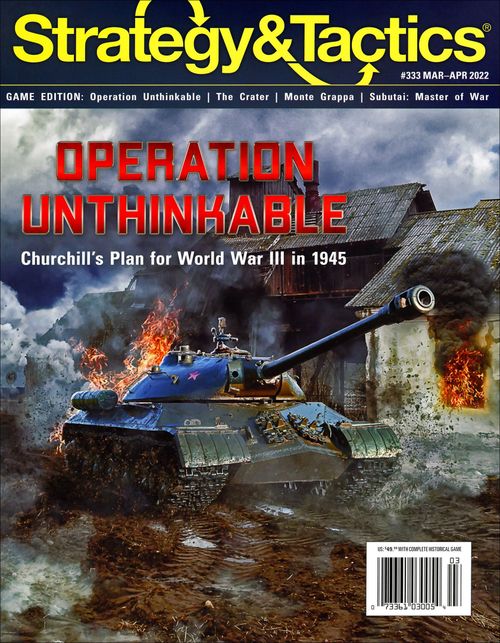
Operation Unthinkable
Operation Unthinkable Rulebook
Table of Contents
Table of Contents
1.0 Introduction
Operation Unthinkable, From the Elbe to the Oder is an alternative history wargame intended to explore the strategic parameters that would have been in place during the first month of operations had the Anglo-Allies and Soviets gone to war against each other starting circa July 1945.
1.1 Scale
Each hexagon on the map represents five miles (8 km) from side to opposite side. The Soviet units of maneuver are corps or corps equivalents (western division equivalents). Those on the Allied side are mostly divisions, along with separate brigades and regiments. The rules abstractly represent air power with the presumption that the Allies would have unchallengeable air supremacy. Each full game turn represents half a week of real time.
1.2 Side Definitions
If a rule states it applies to Soviet units, that means it applies to all the units of that side. If a rule states it applies to Allied units, that means it applies to all the units of that side, regardless of their nationalities. If a rule applies only to a national or unit type subset, the rule will specifically state the nationality or unit type.
Designer's Note: The two Communist Polish units in the Soviet order of battle are nominally armies, the assumption is that all the men within those two armies who were not ardent communists, along with those fearing reprisals against their families back in Poland, have deserted. Thus, there are no special rules needed for their handling in play: treat them for all purposes as two Red Army corps-sized units.
2.0 Components
A complete game of Operation Unthinkable includes a 22×34-inch game map, rule set, and a sheet of 228 9/16-inch counters. Players must provide one six-sided die (1d6) to resolve combat and other probabilistic game events.
2.1 Game Map
The map illustrates the militarily significant terrain found in and around this portion of Germany in 1945.
Map Errata: Movement Factors Chart, change "Static Unit: 0" to read "Allied Airborne: 4". See back page for revised table.
- Printed over the map is a hexagonal (hex) grid to regulate the placement and movement of units.
- A unit can only be in one hex at any one time.
- Every hex has a unique four-digit identification number printed within it. Hex numbers can help players find exact locations quickly and allow players to record unit positions if players take a game down before completion.
2.1.1 West & East Map Edges
For certain rules, it is important to precisely delineate the west and east map edges.
a) The west map edge consists of the single column of hexes from 1005 through 1044, inclusive.
b) The east map edge consists of the single column of hexes from 4205 through 4244, inclusive.
2.1.2 Hex Control
The idea of hex control (which side owns a hex at any given instant) is important for purposes of tracing supply (9.0). Do not confuse the idea of hex control with that of zones of control (8.0).
Important: The projection of a ZOC into an enemy-controlled hex does not (by itself) cause the control status of that hex to switch from one side to the other.
- The control status of a hex switches from one side to the other whenever a ground unit from the other side enters the hex.
- Control switching is immediate and may occur and reoccur in the same hexes any number of times during play.
- At the start of play the Soviet side controls all hexes to the east of the frontline as determined in 3.3.
- The Allied side controls all the hexes to the west of the frontline.
- Players should use hex control markers (2.5) to help keep track of which side controls which hexes in areas where the deployment of actual units does not make that clear.
2.2 Unit Counters
Most counters represent combat formations with other counters provided as informational markers and game aids.
2.3 Combat Units
Each combat unit counter displays specific pieces of information: nationality, specific historic identification, unit type and size, combat strengths, and any special status.
[Counter diagram labels: Size Symbol, Type Symbol, Nationality, Unit ID, Attack Factor, Defense Factor.]
2.3.1 Nationality
Unit counter colors and two letter national abbreviation identifies a unit's nationality.
Soviet
- Guards Cavalry (Mechanized) Units: White on Red.
- Non-Mechanized Units: Black on Orange.
- Other Mechanized Units: Black on Red.
- Communist Polish Units: Black on Yellow.
Allied Units
- US Army Group:
- US Armored Cavalry Units: White on Olive Drab.
- Other US Units: Black on Olive Drab.
- UK Army Group:
- Polish 2nd Corps Units: Red on White.
- German Units: White on Black.
- UK Units: Black on Tan.
- Not assigned:
- 1AAA Units: Black on Blue.
Important: Allied army groups set up and operate separately (3.4).
2.3.2 Historical Identification & Abbreviations
All units have their specific identities noted by the numbers or names used to designate those formations during this period.
- 1AAA: 1st Allied Airborne Army
- Cn: Canadian
- Co: Commando
- G: Guards
- PC: Polish Communist
- SU: Soviet Union
- RM: Royal Marines
- UK: United Kingdom & Associated Powers
- UKG: United Kingdom German
- UKP2: United Kingdom Polish 2nd Corps
- US: United States
2.3.3 Unit Sizes
Unit size symbols are above the unit type symbols. These symbols indicate the size of the units and determine the stacking limits in each hex.
- XXXX: Army
- XX: Division
- III: Regiment
- XXX: Corps
- X: Brigade
2.3.4 Unit Types
The following symbols in each counter's unit-type box distinguish the various combat arms employed. All Allied units are mechanized units except the two 1AAA corps units which are non-mechanized. Soviet units are mechanized units or non-mechanized.
- Armor or Tank (Mechanized)
- Amphibious Tank (Mechanized)
- Artillery (Mechanized)
- Artillery (Non-Mechanized)
- Rifle (Non-Mechanized)
- Motorized Infantry or Motorized Rifle (Mechanized)
- Combined Arms (Mechanized)
- Armored Cavalry or Guards Cavalry (Mechanized)
- Airborne (Non-Mechanized)
2.3.5 Combat Factors (CF)
Attack factors (AF) and defense factors (DF) are the measures of each unit's ability to conduct those types of combat operations (11.0).
2.3.6 Movement Factors (MF)
This number is a measure of a unit's ability to move across the hex grid printed on the map (10.0).
Important: Unit counters do not depict the unit's movement factor.
- Each type of unit has a specific movement factor:
- Mechanized Units: 12
- Non-Mechanized Units: 8 (Soviet only)
- Allied Airborne Corps: 4
2.3.7 Step Strength
Step strength is an arbitrary term used to express the ability of a unit to absorb a certain amount of combat losses before ceasing to be an effective formation (a measure of its "robustness" in current US Army jargon).
- Units with combat factors printed on only one side of their counters are one-step units.
- Units with factors on both sides of their counters are two-step units.
- If a two-step unit suffers a one-step loss, flip the unit over so its one-step side (with the lower combat factors) shows.
- If a one-step unit, or a two-step unit (already reduced) suffers a step loss, eliminate it (remove from the map) and place it in a dead pile off to the side.
Exception: The 1AAA/18th Airborne Corps has four steps, represented by two counters, only one of which is ever in play on the map at any one time. Treat the first step loss as above. When the unit suffers a second step loss, remove the counter, and replace it with the second counter. Eliminate the unit when it suffers its fourth step loss.
2.4 Reinforcement & Starting Units
All Allied units other than the two 1AAA corps begin play set up on the map.
On the Soviet side, units with an R in the upper left corner of the counter enter play after the game has begun (6.0).
2.5 Markers
Important: Counter limitations precluded the inclusion of a game turn marker. Players may use a coin as a substitute for the game turn marker.
- Allied Control Marker (2.1.2)
- UK Heavy Bomber Marker
- US Heavy Bomber Marker
3.0 Set Up
The players should first decide which side each will control. One player commands all the Soviet forces while the other commands all the Allied forces. After determining sides, the players should each take the units under their command and sort them onto and around the map's edge according to the instructions and sequence below.
3.1 Allied Hex Control Markers
Set them off to the side of the map within easy reach.
3.2 Reinforcements
The Allied player should set aside the three counters that constitute the 1AAA. The Soviet player should put all R units (2.4) into any conveniently handy large-mouth opaque container, such as a coffee mug or cereal bowl.
3.3 Determine Frontline
There are two possible frontline situations. To determine the front line for each game, the Allied player rolls 1d6. If the result is:
- 1–3: Elbe River Line, the starting frontline running along the hexsides from 1005 to 1530, then along the Elbe River to 2535, then direct to 2543.
- 4–6: Mulde River Line, the northern portion of the Elbe River Line remaining unchanged until reaching 1530/1531, where it pivots south to run along the Mulde River to 2244.
3.4 Allied Army Group Boundary Line
The Allied force contains two army groups, one US and one UK.
- The Allied player must always maintain a dividing line between those two groups' operations.
- The Allied player should use either two coins or two control markers to delineate its initial line.
- The Allied player may divide the map:
- a) Along a southwest-northeast hex file; or,
- b) Along a northwest-southeast hex file; or,
- c) Along a zigzagging east-west hex row.
- No matter which method the Allied player chooses:
- a) The US Army Group units set up and operate only on or south of the dividing line.
- b) The UK Army Group units set up and operate only in hexes to the north of the dividing line.
Example: US Army Group units can move into or attack into hexes on the dividing line, UK Army Group units can only move or attack into hexes north of the dividing line.
Important: The army group line has no effect on the operations of Soviet units.
Example: The Allied player may divide the map along the southwest-northeast hex file of 1019–3805, or along the northwest-southeast hex file of 1015–4231. The Allied player could divide the map along the zigzag path of 1021–1121–1221 direct to 4021–4121–4221.
- The Allied player may change the boundary at the start of each game turn. If such a change finds one or more units on the wrong side of the line:
- a) If not adjacent to a Soviet unit, the Allied unit may not move adjacent to a Soviet unit until they it is on their own army group's side of the new line.
- b) If adjacent to a Soviet unit, the Allied unit must move away from the front line and move by the most direct route possible until on their own army group's side of the line.
Exception: 1AAA (5.3).
3.5 Soviet Set Up
The Soviet player sets up all starting units anywhere to the east of the frontline designated in 3.3. There is no requirement for the Soviet player to have a unit or ZOC in every hex of the front line. Stacking limits apply per 7.0.
3.5.1 Optional Soviet Hidden Set Up
The Soviet player places all units face down (combat unit side down). The Soviet player only reveals the units after the Allies have set up and prior to initiating 3.7.
3.5.2 Optional Soviet Preparedness
Historically, the Soviets had been made aware of the existence of British plans for Operation Unthinkable by Guy Burgess, and Zhukov ordered Soviet forces in Poland to full defensive positions in June 1945 in anticipation of a British/US attack.
- The Soviet player places all "R" units on any supplied east map edge hex during the Soviet Reinforcement Phase of Game Turn 1. These units may move and conduct combat on Game Turn 1. Do not use the procedures in 6.1 when using this optional rule.
3.6 Allied Set Up
The Allied player then sets up all units (Exception: 1AAA) anywhere generally to the west of the frontline designated by 3.3 and 3.4. Stacking limits apply per 7.0.
- All two-step units are set up at their full two-step strength.
- There is no requirement for the Allied player to have a unit or ZOC in every hex of the front line.
3.7 Soviet Maskirovka
The Soviet player may shift unit deployment.
- If the frontline die roll made in 3.3 was a 4 through 6, the Soviet player rolls 3d6 and totals the results. The Soviet player may then redeploy the number of units equal to the resulting total anywhere on their side of the frontline.
- If the frontline die roll made in 3.3 was a 1 through 3, the Soviet player rolls 2d6 and totals the results. The Soviet player may then redeploy the number of units equal to the resulting total anywhere on their side of the frontline.
Designer's Note: Both sides reached the (Elbe River) start line in late April. From there the US pulled back in stages to what then became the boundary between East and West Germany. The first pullback was to the farther west line along the Mulde River, which the Allies accomplished by V-E Day. Since we cannot know exactly when the Anglo-Allies would have committed themselves to this new war (thereby aborting all farther pullbacks) we must determine that time randomly. If they did so early after the initial April meeting with Soviet forces at Torgau, that would in turn have given the Soviets that much more time to understand what was being prepared for them and put their usual Maskirovka (deception) operations into effect sooner. A similar effect takes place when conducting the Soviet reinforcement die rolls (6.1).
4.0 How to Win
The Allied player is on the offensive, trying to win by driving east to the Oder River area on as broad a front as possible. The goal was to accomplish that within the first month of the new war's operations, thereby setting the stage for the following month's advance into and across Poland, the seizure of which was assumed to be decisive in getting Stalin to agree to a new overall peace settlement allowing for Polish incorporation into the Western camp.
4.1 Soviet Sudden Death Victory
The Soviet side may win a sudden death victory any time beginning with Game Turn 4.
- If the Soviet player exits 20 or more units off any hexes on the map's west edge (2.1.1), play stops immediately, and the Soviet player wins the game at that time.
Important: The Allied side cannot achieve a sudden death victory.
4.2 End Game Victory
Players determine end game victory at the end of Game Turn 8.
Optional: Prior to beginning the game, the players may agree to extend the game to 10 game turns. After completing Game Turn 8, move the turn marker back to Game Turn 1 and play through for two full game turns.
Allied Victory: If the Allied player exits five units off the east map edge (2.1.1), the Allied player wins the game. All units must exit the map within five hexes of any other unit that exits the map.
-
The Allied player must be able to trace supply to each of the qualifying hexes (9.0). In this case 1AAA units must be able to trace supply in accordance with 9.0.
-
The Allied army group boundary has no bearing on victory. Either army group may fulfill the above condition alone or the two may accomplish it together in any proportion.
Soviet Victory: If the Allied side is unable to meet its victory requirement, the Soviet player wins the game.
5.0 Turn Sequence
Game turns consist of a sequenced series of phases. Each full sequence of phases (5.1) makes up one game turn.
There is a maximum of eight game turns in one game of Operation Unthinkable. Once a player has finished a phase, or a specific activity within a phase, they may not go back to perform a forgotten action or redo a poorly executed one unless their opponent graciously permits it.
5.1 Turn Sequence
Players must conduct actions during the appropriate phase and conduct each phase in the order given below:
- Allied Airborne Entry Phase
- Allied Movement or Combat Phase
- Allied Combat or Movement Phase
- Soviet Movement or Combat Phase
- Soviet Combat or Movement Phase
- Soviet Reinforcement Phase
- Allied Recycling Phase
5.2 Ending a Turn
After completing all phases in Game Turn 1 through 7, the players move the turn marker one box forward on the Game Turn Record Track. At the end of Game Turn 8, the players determine end game victory (4.2).
Exception: See Soviet Sudden Death Victory (4.1).
5.3 Allied Airborne Entry Phase
In any game turn the Allied player may airdrop one or both 1AAA units. Once both units have conducted the drop, the Allied Airborne Entry Phase no longer occurs.
Important: There is no requirement for the Allied player to conduct the airborne operation. If not airdropped, the two corps remain out of play.
- The Allied player declares if the drop will take place this Airborne Entry Phase and if one or both airborne units will drop. If the player declares the drop, the player must place each deploying unit in any clear hex, or any autobahn hex.
Important: Airborne units may not move during the game turn that they are dropped.
- If an autobahn hex is the drop hex, the player ignores all other terrain.
- Airborne units may land anywhere on the map and fight, ignoring the Allied Army Group Boundary limits.
- The hex cannot contain any Soviet units; however, the hex can be within a Soviet unit's ZOC.
- There is no requirement for the two units to drop into adjacent hexes.
- After deploying, the two 1AAA units:
- May attack singly or in conjunction with any other Allied unit from either army group. Exception: German units (7.1.2).
- Are always automatically in supply.
- Do not suffer the concentric shifts if defending against a concentric attack (11.2).
- When defending, convert a DR result to a BB.
- Do not recycle when eliminated.
5.4 Move/Fight or Fight/Move
Each game turn both players must declare whether the player will conduct their friendly Movement Phase or Combat Phase first.
- The Allied player declares the sequence at the start of Phase 2. The player may choose to:
- a) Conduct Phase 2 as a Movement Phase and then Phase 3 as a Combat Phase; or,
- b) Conduct Phase 2 as a Combat Phase and then Phase 3 as a Movement Phase.
Optional: Prior to beginning the game, the players may agree to allow the two Allied army groups to each choose the order of play separately, where one army group could fight/move and the other move/fight.
- The Soviet player declares the sequence at the start of Phase 4. The player may choose to:
- a) Conduct Phase 4 as a Movement Phase and then Phase 5 as a Combat Phase; or,
- b) Conduct Phase 4 as a Combat Phase and then Phase 5 as a Movement Phase.
- That decision is always up to each player. The decision of one player has no effect on the decision of the other player.
- There are no penalties or bonuses for either player based on the phase order choice each turn.
6.0 Reinforcements & Recycling
6.1 Soviet Reinforcement Phase
The Soviet player has a pool of units available to reinforce their at-start units on the map (3.2). During the Soviet Reinforcement Phase of Game Turn 1 through 7, the die roll determines the number of units that arrive.
Important: This section is not conducted when optional rule 3.5.2 is used.
- The Soviet player rolls 1d6 and modifies the result as follows: a) Add the current game turn number; and, b) Add one to the result if the frontline was the Elbe River Line (3.3).
- The result of the modified die roll is the number of units the Soviet player receives that game turn.
- The Soviet player blindly draws the number of units from the pool of Soviet reinforcements (3.2).
- The Soviet player must immediately place all drawn units during the Soviet Reinforcement Phase. The Soviet player cannot withhold drawn units.
- The Soviet player then places all drawn units in any supplied east map edge hex (2.1.1).
- Placement must adhere to stacking limits (7.0).
- All placed units may move and/or conduct combat normally the following game turn.
Designer's Note: The Soviet reinforcement pool consists of all the corps that were historically in the Soviet High Command (Stavka) reserve.
6.2 Allied Recycling Phase
The only Allied reinforcements are the two corps of the 1AAA (5.3).
6.2.1 Recycling Eliminated Allied Units
Recycling is the method by which certain eliminated Allied units may reorganize and reenter play.
- Soviet units and the below Allied units may not recycle:
- Units of any type and nationality eliminated while out of supply (9.0).
- Allied 1st Airborne Army (two 1AAA corps).
- Polish 2nd Corps units.
Important: Recycled two-step units only recycle to their one-step strength. Such units never regain their full two-step strength.
Designer's Note: No Soviet unit ever recycles because, put plainly, while the Anglo-Allies were experiencing a manpower shortage by this time, the Soviets were simply out of replacements.
6.2.2 Recycling Procedure
During each turn, the Allied player should place their eliminated recycle-eligible units off to the side of the map.
- The Allied player conducts the recycle procedure in the Allied Recycling Phase of Game Turn 1 through 7 by following the below steps:
- Move units from the current game turn box and place them on the map (6.3).
- Pick one eligible eliminated unit at a time (6.2.1).
- For each eligible unit, roll 1d6 and modify the result: +1: If the unit belongs to the UK army group.
- The result of the die roll is the number of game turns the unit spends recycling.
Example: During Phase 7 of Game Turn 1, the player selects a UK eligible unit and rolls 1d6 and then adds 1 to the die roll with a result of 4. The player would place the unit in the Game Turn 5 box on the Game Turn Record Track. The unit would be available to arrive during the Allied Recycling Phase of Game Turn 5.
- If the result is such that the unit would return on Game Turn 7 or later, place the unit aside, it will not return to the game.
6.3 Reentering Allied Units
In step 1 of the recycle procedure, the Allied player must place all available units immediately in any supplied west map edge hex (2.1.1).
- The player cannot withhold units.
- Placement must adhere to stacking limits (7.0).
- All placed units may move and/or conduct combat normally the following game turn.
7.0 Stacking
Stacking is the term used to describe having more than one friendly unit in the same hex at the same time. Both players are always free to examine all stacks on the map and the Game Turn Record Track, both friendly and enemy.
- Opposing ground units cannot stack together.
- Markers do not count for stacking.
- Stacking rules are in effect for both sides during set up and through every phase of every turn.
- Players may not move a unit through a hex that would create an overstack situation while moving through a hex.
Exception: Airborne Stacking (7.1.1).
Important: Players need to be careful regarding the order in which they move units; otherwise, moves made carelessly early in the Movement Phase may work to jam up your units up later.
- At the end of any phase, if a player finds a hex to be over-stacked, the owning player must eliminate enough excess units from that stack (player's choice) to bring the hex into compliance with the stacking rules.
Important: The number of remaining steps a unit possesses has no bearing on the unit's stacking value.
7.1 Allied Stacking Limit
The Allied stacking limit is 2.5 divisions. Brigades and regiments each count as half a division for stacking purposes.
Important: Units from the two different Allied army groups may not stack together.
7.1.1 Allied Airborne Corps
The 1st and 18th Airborne Corps cannot stack with any other unit, including each other.
Exception: If either (or both) corps are in a hex containing an autobahn, any Allied unit (either army group or German units) moving along an autobahn may move through the airborne corps. The unit may not end its movement in the hex with the airborne corps.
7.1.2 German Restrictions
German units may only stack and attack in conjunction with other German units despite being part of the UK army group.
Important: The UK Polish units (P2C) and German units may never end a Movement Phase adjacent to each other, nor may they participate in a single attack.
Designer's Note: Polish units had been collaborating with the Allies throughout the war, so they can be included in attacks with UK units.
7.2 Soviet Stacking Limit
The Soviet stacking limit is 2.5 corps.
- The two Polish Communist armies each count as one corps.
- Each Guards Cavalry Corps counts as half a corps.
- Soviet artillery corps counts as 2.5 corps thus those units never stack with any other unit.
8.0 Zones of Control
The six hexes immediately surrounding a hex containing one or more ground units constitute the zone of control (ZOC) of the units in that hex. There is no difference in effect between a ZOC projected by units of different sides into the same hex. Opposing units may simultaneously project their ZOC into the same hexes.
Important: A unit's supply status has no effect on the unit's ability to project a ZOC.
Example: Zone of Control. [Diagram omitted.]
8.1 Terrain & ZOC
ZOC project into, out of, and across all types of terrain and water barriers.
Exception: ZOC do not extend across all-lake hexsides.
8.2 Enemy Zones of Control & Movement
A moving unit must stop its movement for that phase when it first enters a hex containing an enemy ZOC (EZOC). The presence of a friendly unit in an EZOC hex does not negate that EZOC for purposes of movement. See 9.1 for the effect of EZOC on supply lines.
- A unit may move from a hex in an EZOC directly into another hex in an EZOC; however, it must immediately stop its movement for that phase.
Example: The above rule allows a unit to move from one hex in the EZOC of one unit into an EZOC of another unit or move from a hex in an EZOC to another hex in an EZOC projected by one unit. [Diagram omitted.]
8.3 EZOC & Retreat After Combat
See 11.3 for the effects of EZOC on retreating units.
Important: The presence of a friendly unit negates the effect of an EZOC for retreat purposes.
8.4 EZOC & Advance After Combat
EZOC do not inhibit or stop the ability of victorious units to advance after combat (11.4).
9.0 Supply
For a unit to be able to move and fight at its full potential, it must be in supply.
- Supply for movement is determined when a given unit begins to move and, once determined, that status lasts for the remainder of that Movement Phase.
- Supply for combat is determined at the start of each individual combat for all participating units (attacking and defending).
9.1 Tracing Supply Lines
There are no counters representing the materiel consumed by the combat units. Players determine if a unit is in supply by tracing a valid supply line of any length from the unit's supply source to the unit. A unit that cannot trace a valid supply line is out of supply.
- Players may not trace a supply line into enemy-occupied hexes.
- Players may trace supply lines into, but not out of or through an EZOC.
Important: A friendly unit in the EZOC hex negates this restriction.
- Players may trace supply lines into, across, and through all kinds of terrain and water barriers (including lake hexsides).
- Both sides may trace supply through, out of, and into all hexes not occupied by, or in the ZOC of an enemy unit.
9.2 Allied Supply Sources
An Allied supply source is any friendly-controlled hex along the map's west edge (2.1.1).
Important: Allied army groups may trace through and/or into the same hexes. Army group affiliation has no effect on supply.
9.3 Soviet Supply Sources
A Soviet supply source is any friendly-controlled hex along the map's east edge (2.1.1).
Important: Both sides' supply source hexes lose their supply providing capacity while enemy controlled, but they regain it the instant the hex is friendly-controlled.
9.4 Out of Supply Effects
Units that are out of supply may remain out of supply indefinitely. Do not reduce or eliminate units that are out of supply.
9.4.1 Movement
If a unit or stack is out of supply at the start of its move, halve the movement factor of the unit or stack for the remainder of the current Movement Phase. Players may intentionally move units into a hex that is out of supply.
9.4.2 Combat
Units that are out of supply suffer penalties if participating in combat.
Allied Units:
- Attacking: Halve the combat strength of all attacking units (round up).
- Defending: Do not suffer any penalties.
Soviet Units:
- Artillery Corps: May not conduct an attack or support an attack. They may defend against adjacent attacks normally; however, they must use their defense factor when supporting a defense.
- All Other Attacking: Halve the combat strength of all attacking units (round up).
- All Defending: Halve the combat strength of all defending units (round up).
10.0 Movement
A unit's movement factor is the number of movement points (MP) available during each Movement Phase. See 2.3.6 or on the map under the Game Turn Record Track to determine the number of movement factors possessed by each unit.
- Units move from hex to adjacent hex expending MP depending on the terrain in, and barriers along the sides (hexsides) of, the hexes entered.
- A player may move units individually or as stacks (10.1).
- The movement of a player's units takes place only during that side's friendly Movement Phase.
- Units may not accumulate MP from turn to turn or phase to phase, nor may a unit loan MP to another unit, or stack.
- A player may move any number of friendly units in each friendly Movement Phase throughout the game.
- Each unit can expend the number of MP up to the moving unit's movement factor.
Exception: Units that are out of supply (9.4.1).
- A moving unit must have enough remaining MP to pay all required MP costs to enter a hex.
Important: There is no minimum movement.
- Units cannot enter a hex containing enemy units.
- A player must complete the movement of each unit or stack of units before that of another begins.
- A player may only change the position of an already moved unit or stack if their opponent agrees to allow it.
Important: Retreats and advances after combat are not movement and do not expend MP (11.3 & 11.4).
10.1 Stack Movement
Rather than move each unit individually, a player may move a stack of units.
- To move together as a stack, units must begin a friendly Movement Phase stacked together in the same hex.
- When moving a stack, the player may halt it temporarily to allow a unit or sub-stack to split off and move away on a separate course.
- The player may then resume the movement of the units left behind in the original (parent) stack and may split off other units as above.
- Once a player begins moving an entirely different parent stack, or an individual unit that began in a different hex than the current moving parent stack, the player may no longer resume the movement of the earlier stack without the opponent's permission.
10.2 Terrain
All terrain features on the map fall into two broad categories; natural and manmade. Each category contains different types of terrain. The Terrain Effects Chart (TEC) summarizes movement and combat effects of each terrain type.
-
To provide a more natural appearance, more than one type of terrain may appear in a hex. a) When moving, always use the terrain with the highest MP cost.
Exception: Moving along autobahns (10.2.3).
b) When determining the terrain for combat, always use the terrain most beneficial to the defender.
Exception: Hexside terrain and in-hex terrain features are cumulative.
Example: In the below diagram the Soviet unit would receive one shift in the Soviet's favor (1L) for the forest and both US units would halve their attack factors (crossing the river) for a total of 12 attack factors. [Diagram omitted.]
10.2.1 Cavalry Scouting
If a US armored cavalry unit or Soviet Guards cavalry unit starts a friendly Movement Phase stacked with other units, that cavalry unit may scout for the units stacked with it.
- Units that move as a stack with one of the above type units pays the MP costs for hexside and hex terrain as if they were an armored cavalry or Guards cavalry unit.
Example: In the below diagram, the 4G Motorized Rifle Corps would normally expend 3 MP to enter hex 1823 and another 3 MP to enter hex 1922 (both marsh hexes); however, if the 4G Motorized Rifle Corps and the 1G Armored Cavalry Corps move into the hexes as a stack, both units would only expend 1 MP per hex (See TEC). [Diagram omitted.]
10.2.2 Natural Terrain & Water Barriers
There are the following types of natural terrain and hydrographic features on the map: clear, forest, marsh, river hexsides, and all-lake hexsides.
Clear Terrain: The base terrain of the game and is devoid of any natural features that would enhance defense or slow movement at this level of operations. Each clear hex costs all ground units one MP to enter.
Forest Terrain: Units expend the below number of MP to enter a forest hex:
- Soviet Non-Mechanized: 1 MP
- Soviet Guards Cavalry: 1 MP
- US Armored Cavalry: 1 MP
- All Other Units: 2 MP
Marsh Terrain: Units expend the below number of MP to enter a marsh hex:
- Soviet Non-Mechanized: 1 MP
- Soviet Guards Cavalry: 1 MP
- US Armored Cavalry: 1 MP
- All Other Units: 3 MP
River Hexsides: Rivers run between hexes, along the hexsides. Units may expend additional MP to cross a river hexside. The MP cost for crossing a river is in addition to the MP cost to enter a hex. Units expend the below number of MP to cross a river:
- Soviet Non-Mechanized: +1 MP
- Soviet Guards Cavalry: +1 MP
- US Armored Cavalry: +1 MP
- All Other Units: +2 MP
Exception: The UK 79th Armored Division may cross river hexsides at no additional MP cost. If moving as part of a stack, any unit stacked with the 79th gains this benefit.
All-Lake Hexsides: Units may not cross all-lake hexsides.
Exception: The UK 79th Armored Division may cross all-lake hexsides at no additional MP cost. If moving as part of a stack, any unit stacked with the 79th gains this benefit.
Designer's Note: Towards the end of the war, the 79th Armored Division had been equipped with a multitude of amphibious transport and had specifically trained to support other formations in river crossings.
10.2.3 Manmade Terrain
Manmade terrain exists in the following types: cities and autobahns.
Cities: The cost for entering city hexes is one MP for all units.
Autobahns: The cost for entering an autobahn hex is one-half a MP, but only if the moving unit is moving from autobahn hex to autobahn hex across a hexside overlapped by the autobahn symbol.
Important: Autobahns do not negate river-crossing costs.
11.0 Combat
Combat takes place between adjacent opposing units during the Combat Phase in each player turn.
Exception: Soviet artillery units (11.1).
- Units may not attack across lake hexsides.
Exception: The UK 79th Armored Division and any units stacked with the division may attack across lake hexsides without penalty.
- Units from one Allied army group cannot conduct an attack with units from another Allied army group.
Exception: The Allied 1st Airborne Army units may combine with units from either army group, except the Germans.
- German units can never participate in an attack with any other Allied nationality.
- Combat is always voluntary; the mere fact of an enemy unit being adjacent to a friendly does not require a unit to attack the enemy units. Both players may always choose not to attack.
- The attacker is always the player with the current Combat Phase, regardless of the general situation.
- A unit can only conduct one attack each Combat Phase and each unit may only suffer one attack each Combat Phase.
Exception: If a unit retreats into a friendly-occupied hex and if the units in that hex are subsequentially attacked, the retreated units will suffer the results (but do not contribute to the defense) of that attack.
- A player cannot split a unit's combat factor between multiple combats.
- An attacking player cannot attack more than one hex in each combat.
- All defending units in a hex defend as a single unitary force. An attacking player cannot attack part of a unit or part of a stack.
- A player may attack an enemy-occupied hex with as many friendly units as can be brought to bear from one, some or all the surrounding hexes.
- There is no requirement for all units in a stack to participate in the same attack. Units in a stack might attack into one hex while others attack into another hex or not attack at all.
- The defending player may never refuse combat; all units in an attacked hex must participate in its defense.
- There is no arbitrary limit on the number of attacks each player may resolve during a friendly Combat Phase.
- The attacker need not declare all their attacks beforehand and may resolve each attack in any order.
- The attacking player must fully resolve each attack before beginning a subsequent attack.
11.1 Soviet Artillery
In-supply Soviet artillery units may attack adjacent enemy units normally and may also participate in an attack or defense into hexes up to three hexes away from the artillery unit's hex.
Important: Soviet artillery units use their attack factor when supporting an attack or defense and are not adjacent to enemy attacking or defending units. Their defense factor is only used when defending against adjacent attacks.
- Count from the artillery unit's hex to the enemy attacking or defending hex (only one of the attacking hexes need meet this range requirement). Do not count the artillery unit's hex; do count the enemy occupied hex. Terrain does not block an artillery unit's ability to fire into or across it. Do not modify a non-adjacent artillery unit's combat strength for river hexsides.
Important: Soviet artillery can support both Soviet attacks and Soviet defenses in the same game turn.
- At least one Soviet non-artillery unit must be involved in the attack/defense.
- There is no limit on the number of artillery units that may participate in a single combat.
- The Soviet player adds each artillery unit's attack/defense combat factor to the total combat factors of other participating units.
- Non-adjacent Soviet artillery units do not suffer results generated by the combat. The Soviet player cannot use them to satisfy required losses.
11.2 Combat Procedure
Each combat during a Combat Phase must follow the below steps:
-
The attacking player declares the attack, identifying the attacking units and the defending hex.
-
Each player determines the supply status of their participating units.
-
Each player determines the total combat strength for their side by: a) Halving the printed combat factors for each out of supply unit (round up); and then, b) Halving the combat factors of all units attacking across a river hexside (round up).
Exception: The UK 79th Armored Division and any units stacked with the division do not suffer the river hexside penalty.
Important: a) and b) are cumulative.
c) Totaling the modified combat factors of all participating units.
Important: The Soviet player adds all participating non-adjacent artillery unit's combat factors to the total.
-
The players then divide the defender's total into the attacker's total to establish an odds ratio (combat odds). a) If the attacker's total modified combat factors are equal to or greater than the defender's total modified combat factors, round down any remainders. b) If the attacker's total modified combat factors are less than the defender's total combat factors, round any remainders up.
Example: 26 attack factors attacking 7 defense factors (27/7 = 3.71, rounded down), yields an odds ratio of 3:1 (three to one). 8 attack factors attacking 12 defense factors (8/12 = .76, rounded up), yields an odds ratio of 1:2.
-
The attacking player consults the Combat Results Table (CRT) and locates the corresponding odds column on the table. a) If the US 1AAA, German, or Polish 2nd Corps units are conducting the attack, use the upper row of combat odds. b) If Soviet or UK units are conducting the attack, use the lower row of combat odds.
-
Players determine and apply all combat shifts. Terrain (hex and/or hexside), concentric attacks and Allied heavy bomber support may modify the combat odds. All applicable odds shifts are cumulative. Apply all applicable shifts to get one final left or right shift. Leftward shifts favor the defender; rightward shifts favor the attacker.
Important: If the odds column derived in step 5 is greater than 6:1/7:1 or less than 1:2/1:3 make all column shifts using those columns.
- 1AAA Units: If 1AAA units are attacking or defending against at least one Soviet tank or mechanized units and there are no other Allied units participating in the combat, the 1AAA receive:
- One left column shift if attacking.
- One right column shift if defending.
- Forest: Units defending in a forest hex receive one left column shift.
- Cities: Units defending in a city hex receive two left column shifts. Do not apply concentric attack shifts to units defending in a city. Convert all DR results to BB results.
- Concentric Attacks: The attacking side receives one right shift if attacking a defending hex from: a) Units in opposite hexes; or, b) Units from three surrounding hexes with one hex between each; or, c) Adjacent attacking units in more than three hexes.
Exception: Do not apply the concentric attack shift against units of the 1AAA or against any units defending in a city hex.
- Allied Heavy Bomber Support: The Allied player may commit heavy bomber support to an attack by Allied forces. Each marker may only support one attack per Allied Combat Phase. a) The US marker may support units belonging to the US army group and/or units of the 1AAA. b) The UK marker may support units belonging to the UK army group and/or the 1AAA.
Important: If a 1AAA unit is attacking with UK units the UK marker must be used; if a 1AAA unit is attacking with a US unit, the US marker must be used.
The Allied player rolls 1d6 for each attack supported by heavy bomber markers. The player halves the result (round down). If the modified result is:
- 0: The heavy bombers dropped their bombs short of target (i.e., on friendly units) and the attacker automatically suffers an AL1 result.
- 1: There is no effect. The ground attack must still take place.
- 2–3: Award the Allied player that number of right shifts for that combat.
If, after applying all shifts, the total sum of shifts has moved the attack column higher or lower than the limits on the CRT, the player resolve the combat as follows:
- a) If the odds column is greater than 6:1/7:1 the defender automatically receives a DE result. Combat resolution is complete.
- b) If the odds column is less than 1:3/1/2, the attacker automatically receives an AL1 result. Combat resolution is complete.
- c) If neither of the above apply continue to step 7.
- After applying all applicable odds shifts, the attacker rolls 1d6 and cross-indexes that result beneath that proper odds ratio column to get the combat result.
Note: The Combat Results Table (CRT) referenced in steps 5 and 7 is not reproduced in the rules text of this publication.
11.3 Combat Results
Players resolve combat using the below results. Players must resolve each result in the order given in the explanation. The owning player apportions step losses to friendly units as desired.
Exception: A player may not eliminate a one-step unit until all two-step units have suffered at least one step loss.
DE: Defender Eliminated: Remove to the dead pile all involved one-step defending units, then reduce all two-step units to one step. Surviving units do not retreat.
BB: Bloodbath:
- Both sides lose one step (total) from among their involved units.
- The attacking player may then eliminate another friendly step (attacking player's choice). If the player decides to not eliminate an additional step, no further actions are taken.
- The defending player must then eliminate one friendly step, or retreat all defending units one hex towards a friendly supply source (9.2 & 9.3). If the defender chooses the retreat option, the attacking player may advance after combat and combat resolution is complete.
- If in step 3 the defender chose to remain in place and lose a step, the attacker may eliminate another friendly step. This cycle may continue until: a) The attacker chooses to not take another step loss, or the attacker has only one step remaining. The attacker cannot choose to eliminate the last attacking step; or, b) The defender chooses to retreat, or the defender has eliminated all friendly units.
AL1: Attacker Loses 1 Step: The attacking player must eliminate one step (total) from among his involved units.
DR: Defender Retreat: The defending player must retreat all defending units one hex towards a friendly supply source (9.2 & 9.3). Units cannot retreat into enemy-occupied hexes. If there are no eligible hexes that a unit could retreat into, or if the unit would be forced to retreat off the map, the unit is eliminated.
Exceptions:
a) Defending Soviet artillery units cannot retreat. The Soviet player must eliminate all Soviet artillery that receive a DR result. b) 1AAA units and units in a city hex convert all DR results to BB results.
- Defending stack must retreat as a stack, unless 3 below applies.
- If a stack or unit retreats into an EZOC not occupied by a friendly unit, one unit must lose one step.
Exception: US armored cavalry and Soviet Guards cavalry may retreat into EZOC (friendly-occupied or not) without penalty. Units stacked with the above types are also exempt from the penalty.
- If the only available hexes for retreat would recreate an overstack, the owning player may retreat individual units to different hexes to avoid creating overstacks. Units may still only retreat one hex.
11.4 Advance After Combat
If, after resolving each combat, all defending units have vacated the defending hex (eliminated or retreated), the attacking player may advance any or all attacking units into the defending hex.
- The attacking player must conduct all advances after combat for one combat prior to commencing a subsequent combat.
- The attacking player must adhere to stacking limits after advancing.
- EZOC and supply status has no effect on advance after combat.
Terrain Effects Chart
| Terrain Type | Movement Cost (Non-Mech / Mech) | Combat Effects |
|---|---|---|
| Clear | 1 / 1 | No Effect |
| Forest | 1 / 2* | Shift odds 1L |
| Marsh | 1 / 3* | No Effect |
| City | 1 / 1 | No concentric; shift odds 2L & convert DR to BB |
| River Hexside | +1 / +2* | Attacker halved, but see 11.14 |
| Lake Hexside | Generally not allowed, but see 10.12 | Generally not allowed. Exception: 11.2 |
| Autobahn | 0.5** | No Effect; determined by other terrain |
*US Armored Cavalry & Soviet Gds Cavalry pay Non-Mech movement cost.
**Only when moving from autobahn hex to autobahn hex across a hexside containing an autobahn symbol. Autobahns do not negate river-crossing costs.
Note: The cross-references in the Terrain Effects Chart (11.14, 10.12, 11.2) are reproduced as printed.
Movement Factors
- Mechanized Units: 12 MP
- Non-Mechanized Units (Soviet only): 8 MP
- Allied Airborne Corps: 4 MP