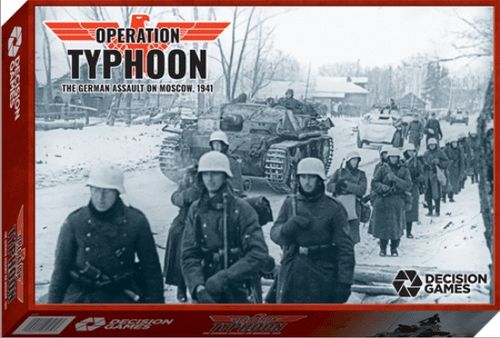
Operation Typhoon: The German Assault on Moscow, 1941
Operation Typhoon: The German Assault on Moscow, 1941 Rulebook
Table of Contents
Table of Contents
- 2.0 Game Equipment
- 3.0 Setting Up the Map
- 4.0 Sequence of Play
- 5.0 Movement
- 6.0 Zones of Control
- 7.0 Stacking
- 8.0 Limited Intelligence
- 9.0 Combat
- 10.0 Cadre and Headquarters Units
- 11.0 Support
- 12.0 Supply
- 13.0 Weather and Winterization Levels
- 14.0 Entrenchments
- 15.0 Reinforcements
- 16.0 German Victory Points and Russian Unit Commitment
- 17.0 Air Power
- 18.0 Scenarios
- 19.0 Optional Rules
- 20.0 Order of Battle
- 21.0 Bibliography
- 22.0 Strategy and Tactics
- 23.0 Play-by-Mail
- Designer's Notes
2.0 Game Equipment
2.1 The Game Map
The game map is composed of three separate 22" x 34" mapsheets which, when placed together, form the Moscow battlefield. A hexagonal grid is printed on the map to regulate movement and location of playing pieces.
2.2 Charts and Tables
Various visual aids have been provided with the game to illustrate and display certain game functions. These include the Combat Results Table, the Terrain Effects Chart, the German Support Table, the German Army Display, the Turn Record and Reinforcement Track, and the Master Reinforcement Schedules. The use of these charts is explained in the appropriate rules section.
2.3 The Playing Pieces
There are 800 playing pieces in two die-cut sheets included with Operation Typhoon. These are called counters. Some counters represent military formations; others are simply markers used to record certain game mechanics.
2.31 How to Read the Counters
There are two different armies represented in Typhoon: the Soviet and the German. Each army is portrayed by a color unique to that army. It is important for the Players to understand how these counters are read, for each counter displays certain information that is vital to the play of the game.
Notes on Counters: Unless otherwise indicated, all German units are regiments. Soviet units printed black on red background are Poor Winterization Level units; all other Soviet units are Good; all German units are Poor. Note that the backs of both Players' Strength Chits are distinguished by type color from the fronts for easy identification.
2.32 Sample Units
Sample counters illustrate the fields printed on each type of playing piece:
- Tank Battalion (German): Designation, Size, Unit Type symbol, Combat Strength, and Movement Allowance are printed on the front; the back is blank.
- Headquarters (German): Designation, Size, Unit Type symbol (HQ), Combat Strength, and Movement Allowance appear on the front (Supported); the back shows the same unit's Unsupported side.
- Infantry Division (Soviet): Designation, Size, Unit Type symbol, Combat Class, Movement Allowance, and Morale Rating appear on the front; the back shows the unit's reduced Cadre side.
- Strength Chit (Soviet): The front lists Combat Classes (A, B, C) with a corresponding Combat Strength for each, plus the Morale Rating; the back shows the reduced-side Combat Strengths for the same Classes.
2.33 Summary of Unit Types
German Units (combat symbols, front and back where applicable): Infantry, Mechanized Infantry, Tank, Headquarters (Supported and Unsupported sides), SS Mechanized Infantry, SS Infantry, Cavalry, Parachute, Ski, Anti-tank, Anti-aircraft. German markers: Strength Chit, Railroad Marker, Accelerated Assault Marker, Air Point, German Army Display Chits, Victory Point Indicator, German Control Marker.
Soviet Units: Infantry, Mechanized Infantry, Tank (and the same additional unit types listed above where applicable to the Soviet Player), each with a reduced Cadre or strength-chit back side.
Neutral Markers (front and back): Out of Supply (back: Isolated), Weather, Ground Condition, Snow, Game-Turn.
2.34 A Note on the Reading of the Unit Designations
In Operation Typhoon, the designation of a unit plays an important part in the flow of the game. Therefore, Players must become familiar with the reading of unit designations. For the most part, German designations are given in the sequence regiment/division/corps, although German HQ units are simply corps/army. In addition, German panzer battalions have their designation preceded by "I" or "II", indicating 1st or 2nd battalion.
Soviet designations are usually division (or brigade)/army, although some units may be styled regiment/division/army.
Examples:
- 55/17/13 = 55th Regiment, 17th Division, 13th Corps (German)
- 146/20 = 146th Brigade, 20th Army (Soviet)
- 41/3PzA = 41st Corps HQ, 3rd Panzer Army
2.4 Glossary of Game Terms
Combat Strength: Quantification of a unit's strength in attack and defense.
Movement Allowance: Quantification of a unit's relative mobility in terms of Movement Points.
Combat Class: A letter (A, B, or C) expressing the relative size of a unit in terms of manpower.
Morale: A quantification of a unit's ability to perform in sustained combat; the higher the number, the better chance of the unit being strong in combat.
Strength Chit: A marker carried under the majority of combat units. Each Strength chit determines the Combat Strength of the parent unit "carrying" the chit. Hidden from the opposing Player, strength chits suggest the "fog of war" and the inability of the Enemy to comprehend entirely what he is up against.
Winterization Level: Units are judged to be either "poor" or "good" in terms of their ability to withstand eccentricities of the weather.
2.5 Game Scale
Each hexagon on the map represents approximately 2.7 miles. Each Game-Turn represents one day of real time.
2.6 Inventory of Game Parts
A complete game of Operation Typhoon includes:
- One rules booklet
- Three map sections
- Four different countersheets (800 counters)
- Two different Track/Chart sheets
- Two dice
- One game box assembly
3.0 Setting Up the Map
GENERAL RULE: The three map sections have been designed to overlap each other slightly when placed together. Players should note that three scenarios are playable on single map sections.
PROCEDURE: The three map sections are identified by letter: A, B, and C. On each map, each hex is identified by Map Letter and hex number (i.e., A3531). The map sections should be arranged to conform to the following diagram: Map A to the north, Map B in the middle, Map C to the south.
4.0 Sequence of Play
4.1 The Game-Turn
Typhoon is played in Game-Turns, each of which represents a single day of real-time. Each Game-Turn comprises numerous independent Stages plus two Player-Turns (one Russian and one German). Note that one Stage (the German Support Allocation Stage) is used only on certain Game-Turns. The Player whose Player-Turn is in progress is termed the Phasing Player. Each Game-Turn must proceed strictly as described in the Game-Turn Sequence Outline (Case 4.2).
4.2 Game-Turn Sequence Outline
The following Game-Turn Sequence Outline indicates the progression of each Game-Turn. It is a detailed explanation of the flow of play and readers may be slightly confused after the completion of the first reading. Many of the concepts covered here are explained later in the rules. It is recommended that Players only glance through this Outline before going on to the body of the rules. Then the Outline can be used as a quick reference guide once play has begun. Follow the Sequence of Play Stage by Stage, Phase by Phase, and Segment by Segment until the flow of play has been mastered.
A. WEATHER AND GROUND CONDITION DETERMINATION STAGE
At the beginning of each Game-Turn, the Russian Player rolls one die and consults the Weather Table to determine the state of the weather for this entire Game-Turn (one single day). He adjusts the Weather marker on the appropriate Track, if necessary. The German Player then rolls one die and consults the Ground Table to determine the condition of the ground for this entire Game-Turn. He adjusts the Ground marker on the appropriate Track, if necessary. Finally, both Players determine if the combined effects of this Game-Turn's weather condition and ground condition call for snow on the ground. The Snow marker is adjusted on the Snow Track if necessary.
B. GERMAN SUPPORT ALLOCATION STAGE (every fourth Game-Turn only, starting Game-Turn One)
On every fourth Game-Turn (starting with Game-Turn One), the German Player must allocate 10 Support Points among his four Armies in any way he sees fit. (Note that the Game-Turns in which these Stages are utilized are also indicated on the Turn Record and Reinforcement Track.) By allocating Support, the German Player dictates which of his four Armies will receive priority in terms of supply and attack-potential in the upcoming four Game-Turns. Next, the German Player must roll one die for each of his four Armies while consulting the German Support Table. He cross-references the number of Support Points that he has allocated for the Army in question with the die roll. The result indicates the number of Corps HQ units subordinate to this Army that the German Player may place in Support for the upcoming four Game-Turns. The German Player then immediately refers to the map, flipping all Corps HQ units of this Army that he wishes to place in Support to their normal counter-sides (of course, never exceeding the numbered result obtained for this Army in the immediately preceding die roll), while flipping all those Corps HQ units which were not allocated Support to their Unsupported counter-sides. When the German Player has completed this operation for all four of his Armies on the map, this Stage is considered completed. In general, only combat units that are subordinate to Corps HQ units that are In Support will be able to conduct combat efficiently.
C. GERMAN PLAYER-TURN
- Mutual Supply Determination Phase. Both Players determine the supply status of all their units on the map. Supply lines are traced to Friendly HQ units (or, in some cases, directly to Friendly supply sources), which in turn must trace a supply line to a Friendly supply source. Units are determined to be either In Supply, Out of Supply, or Isolated. The supply status as determined in this Phase lasts until the next Mutual Supply Determination Phase.
- Movement Phase a. Tactical Movement Segment: The German Player may now move all of his units (that are eligible to move) by using Tactical Movement. Units' Movement Allowances are printed directly on the counters. All normal Movement rules apply (see Section 5.0). b. Strategic Movement Segment: The German Player may now move any of his eligible units by using Strategic Movement. However, no unit that moved in the immediately preceding Tactical Movement Segment may be moved in this Segment. Units moving by Strategic Movement must remain at least three hexes away from Enemy units at all times during this Segment (including at the start and at the end of the Segment). Units moving by Strategic Movement may receive all road movement benefits as listed on the Terrain Effects Chart.
- Combat Phase. German units must attack all adjacent Russian units as per the normal Combat rules. A combat ratio is determined for each attack, and two dice are rolled. Retreats and advances after combat are performed as called for on the Combat Results Table.
- Interdiction Phase. The German Player may place up to three Air Point markers on any hex on the map traversed by a Railroad (weather permitting).
D. SOVIET PLAYER-TURN
- Mutual Supply Determination Phase. As in German Player-Turn.
- Movement Phase a. Commitment Segment: The Russian Player determines which of his uncommitted units have been committed due to the movement of German units in the immediately preceding German Player-Turn. Next, he checks the number of German Victory Points on the German Victory Point Index at this time and rolls the die. He cross-references this die roll with this Victory Point Total on the Russian Commitment Table. The resulting number is the quantity of uncommitted Russian units that the Russian Player may immediately commit. b. Tactical Movement Segment: As in German Player-Turn. c. Rail Movement Segment: The Russian Player may move any of his committed units that occupy rail hexes by using rail movement. Only five units (of any type or size) may be moved in this Segment in this fashion. The units may move 60 hexes apiece, but — as in Strategic Movement — they must remain at least three hexes away from German units at all times. A unit that used Tactical Movement in the immediately preceding Segment may not use Rail Movement. d. Strategic Movement Segment: As in German Player-Turn, with the addition that any unit that used Rail Movement in the immediately preceding Segment may not use Strategic Movement during the current Segment.
- Combat Phase. As in German Player-Turn.
E. GAME-TURN INDICATION STAGE
The German Player determines the number of Russian units he has destroyed plus the number of Victory Points from German-controlled Cities. He adjusts the markers on the German Victory Point Index to indicate this total. Finally, the Game-Turn marker is advanced on the Turn Record Track to indicate the start of a new Game-Turn.
ABBREVIATED SEQUENCE OF PLAY
- A. Weather and Ground Condition Determination Stage
- B. German Support Allocation Stage (every fourth Game-Turn, starting with Game-Turn One)
- C. German Player-Turn
- Mutual Supply Determination Phase
- Movement Phase a. Tactical Movement Segment b. Strategic Movement Segment
- Combat Phase
- Interdiction Phase
- D. Soviet Player-Turn
- Mutual Supply Determination Phase
- Movement Phase a. Commitment Segment b. Tactical Movement Segment c. Rail Movement Segment d. Strategic Movement Segment
- Combat Phase
- E. Game-Turn Indication Stage
5.0 Movement
GENERAL RULE: During the Movement Phase, the Phasing Player may move as many or as few of his units as he desires (exception: see Case 16.2, Russian Unit Commitment). Each unit may be moved as many or as few hexes as desired as long as its Movement Allowance is not exceeded in a single Movement Phase. Unused Movement Points may not be accumulated from Game-Turn to Game-Turn or transferred from unit to unit. Players should note that Movement is basically divided into three types: Tactical, Strategic (which can be used by both the German and the Russian Player) and Rail Movement (which can be used only by the Russian Player). Each unit may utilize only one of these types of movement in its Friendly Player-Turn.
5.1 How to Move Units
5.11 During a Movement Phase, all, some, or none of the Phasing Player's units may be moved in any order the Phasing Player desires. Movement is calculated in terms of Movement Points, which are expended in various amounts depending on the type of terrain a unit is entering. These movement costs are summarized on the Terrain Effects Chart (5.73).
5.12 Combat may never occur during the Movement Phase.
5.13 During his Player-Turn, the Phasing Player must decide how each of his units will move (if at all) during his Movement Phase — whether Tactically or Strategically (for the German Player) or Tactically, Strategically, or by Rail (for the Russian Player). The Phasing Player may never combine two of these movement options for one unit during the same Movement Phase.
5.2 Movement Inhibitions and Prohibitions
5.21 A Friendly unit may never enter a hex occupied by an Enemy unit.
5.22 A unit that enters an Enemy-controlled hex (see Section 6.0, Zones of Control) must stop movement completely and move no further during that Segment. However, a unit may leave an Enemy-controlled hex and enter another hex in a subsequent Tactical Movement Segment by expending one-half of its Movement Point Allowance (round fractions down) in addition to the cost of the terrain in the hex entered. A Friendly unit may leave an Enemy-controlled hex only if it moves immediately into a hex that is not Enemy-controlled. Furthermore, a unit may never enter another Enemy Zone of Control in the Tactical Movement Segment in which it exited an Enemy-controlled hex.
5.23 Units moving by Strategic Movement or Rail Movement must remain at least three hexes away from the nearest Enemy units during the appropriate Movement Segment (see Cases 5.4 and 5.5).
5.24 A unit may not expend more Movement Points than its total Movement Point Allowance in a single Movement Segment. A unit may expend all, some, or none of its Movement Points in a given Movement Segment. However, a unit may not save Movement Points for another Game-Turn or Movement Segment, nor may unused Movement Points be transferred to another unit.
5.25 Units may move only during their Friendly Movement Phase, although some movement may occur as a result of combat (in terms of advances or retreats). These combat results are not considered movement and do not require the expenditure of Movement Points.
5.26 Units that are Out of Supply or Isolated may have their movement capabilities restricted to some degree (see Section 12.0). In addition, a given unit's movement capability may be affected by the condition of the ground and by snow (if there is any). See Section 13.0 for a full explanation of the effects of weather upon movement.
5.27 A non-mechanized unit (only) may always move at least one hex per Friendly Movement Phase, even if it does not possess enough Movement Points (due to supply or weather penalties) to accomplish this movement. However, if such a unit begins a Friendly Movement Phase in an Enemy-controlled hex, it may never move directly into another Enemy-controlled hex.
5.3 Unit Movement Classes
5.31 There are two classes of units as far as movement is concerned in Typhoon: mechanized and non-mechanized. Mechanized units are either tank or mechanized infantry units. Non-mechanized units are all other unit-types (including infantry, cavalry, anti-tank, anti-aircraft, etc.).
5.32 Units of different Movement Classes (as defined above) pay different Movement Point costs for each hex entered. These costs vary depending on the type of terrain in the hex moved into (or hexside moved across). See the Terrain Effects Chart (5.73) for a complete explanation of Movement Point costs by terrain and by Movement Class. For example, an infantry unit need only expend one Movement Point to enter a Woods hex. However, a tank unit must expend five Movement Points to enter the same type of hex (unless there is a ground freeze — see Case 13.2, Ground Condition Determination — in which case the cost for the tank unit would be four Movement Points).
5.33 Each Player possesses headquarters units. These units possess some special characteristics with regard to movement (see Case 5.9, Headquarters Units).
5.4 Tactical Movement
Tactical Movement is the means by which combat units move in close proximity to the Enemy. It is the "formation" in which units anticipate combat, and as such is considered to be somewhat less efficient than other types of movement.
5.41 Subject to all Zone of Control, Weather, and Supply rules, units may always use Tactical Movement if the owning Player so desires. Unlike Strategic Movement and Rail Movement, a unit may enter Enemy Zones of Control when using Tactical Movement, and perform combat after having used this type of movement.
5.42 The Tactical Movement Segment is the first Movement Segment in the Phasing Player's Movement Phase (see Case 4.2, Game-Turn Sequence Outline). Note, however, that Players are not obligated to rigidly adhere to the sequence of moving units first Tactically, then Strategically, and then (for the Russian Player) by Rail. This Sequence is structured in this fashion simply to help the Players remember how units have been moved during the Movement Phase. Units may be moved by various means informally in any order the Phasing Player desires. However, a unit may never move by more than one method in a single Movement Phase.
5.43 A unit moving by Tactical Movement uses its printed Movement Point Allowance and the Movement Point costs for each type of hex entered (or hexside crossed) as summarized on the Terrain Effects Chart (5.73).
5.44 A unit moving Tactically which enters a hex through a hexside crossed by a road may ignore the Movement Point cost of that hex (and hexside, if applicable), and treat that hex as Clear. For example, if during a Ground Freeze Game-Turn, a mech unit moving Tactically along a road entered a Woods hex, the Movement Point cost for that hex would be 1. In addition if it had crossed a Stream hexside to enter that hex, the cost for that Stream would have been ignored.
5.5 Strategic Movement
Strategic Movement is the means by which combat units move when the chances of contact with the enemy are slim. Such units usually move along roads, and as such, move somewhat faster than when in the proximity of the enemy.
5.51 A unit may move by Strategic Movement only if it did not use any other type of movement during the current Movement Phase. A unit may only use Strategic Movement if it remains at least three hexes away from Enemy units at all times during the Movement Segment (including at the start and at the end of the Segment). In order to count the distance in hexes from an Enemy unit to a moving unit, count from the Enemy unit's hex (exclusive) to the moving unit's hex (inclusive).
5.52 Obviously, since a unit using Strategic Movement may never move within two hexes of an Enemy unit, such a unit may never enter an Enemy Zone of Control and, as a result, initiate a combat (see Section 9.0).
5.53 A unit moving by Strategic Movement uses its printed Movement Allowance and the Movement Point costs for each type of hex entered or hexside crossed (as in Tactical Movement). A unit never receives an increase to its printed Movement Allowance by using Strategic Movement. However, units using this type of Movement may utilize the Movement Point bonuses provided by Roads as listed on the Terrain Effects Chart (5.73). For example, a tank unit using Strategic Movement could move along a Road at ½ MP's per hex entered. However, if the same unit had been using Tactical Movement, the cost would have been 1 or 2 Movement Points, depending on the Ground Condition during that Game-Turn (see Case 5.44).
5.54 A unit may only receive the Movement Point benefit provided by a Road if it enters a particular hex through a hexside containing a Road feature. Simply moving into a hex in which a Road is featured does not necessarily provide a movement benefit.
5.6 Rail Movement
5.61 Only the Russian Player may move his units by Rail Movement (and only if those units did not move by any other type of movement in the same Phase). The Russian Player is allowed to move five units (of any size or type) in this fashion in a single Rail Segment. Five Rail markers are provided to indicate which units have moved by Rail in the Phase.
5.62 In order to move a unit by Rail, the unit must start the Rail Movement Segment in a Rail hex and it must finish that Segment in a Rail hex. It may move only along the railroad from Rail hex to adjacent (and connected) Rail hex. When moving a unit by Rail, place a Rail marker directly on top of the unit in question. The marker can be removed at the end of the Russian Player-Turn (they are provided simply to clarify to the Russian Player which of his units — up to the limit of five — have moved by Rail during his Movement Phase).
5.63 Units moving by Rail are under the exact restriction applying to units using Strategic Movement (see Case 5.51): that is, they must remain at least three hexes away from the nearest Enemy unit at all times during the Rail Movement Segment (including at its start and at its end).
5.64 A unit moving by Rail does not use its printed Movement Allowance. Rather, all units moving by Rail may move 60 hexes in a single Rail Movement Segment. Terrain has no effect on Rail Movement.
5.65 A unit's supply status has no effect upon a unit's ability to move by Rail.
5.66 German Air Interdiction may influence the movement of Russian units by Rail (see Case 17.3).
5.7 Effects of Terrain on Movement
5.71 Mechanized units may not cross River hexsides unless these hexsides are traversed by Roads. The movement may be accomplished either Tactically or Strategically.
5.72 The standard Movement Point costs for entering hexes or crossing hexsides may be influenced by the Ground Condition (see Case 13.2).
5.73 Terrain Effects Chart
| Terrain | Non-Mech units | Mech units |
|---|---|---|
| Clear | 1 | 2 (1 if Freeze) |
| Woods | 1 | 5 (3 if Freeze) |
| Rough | 2 | 7 (5 if Freeze) |
| City, Town | 1 | 1 |
| Lake | P | P |
| Stream | +1¹ | +2¹ |
| River | +2¹ | P¹ (unless through hexside crossed by road) |
| Road (Strategic Movement) | ½ | ⅓ (½ if Snow) |
| Road (Tactical Movement) | 1 | 2 (1 if Freeze) |
| Railroad | Same as other terrain in hex (see Case 5.6) | Same as other terrain in hex (see Case 5.6) |
P = Prohibited
¹ These costs are negated for both Streams and Rivers if there is a River Freeze, and negated for Streams only if there is a Stream Freeze. In addition, the costs are negated if the movement is accomplished through a hexside crossed by a road.
5.8 Effects of Other Friendly Units on Movement
5.81 A Friendly unit may move through hexes occupied by other Friendly units at no additional cost in Movement Points. However, the number of Friendly units that may end the Movement Phase "stacked" in the same hex is subject to limitations (see Section 7.0, Stacking).
5.82 There is no limit to the number of Friendly units that may be moved through a particular hex in a single Movement Phase.
5.83 Friendly-controlled hexes never interfere with the movement of Friendly units.
5.9 Headquarters Units and Movement
5.91 Each Player possesses headquarters units. These units are not specifically designated as being either permanently mechanized or permanently non-mechanized. The owning Player is completely at liberty to move these units in any manner he sees fit, either as a mechanized unit or as a non-mechanized unit. An HQ unit may begin a Movement Segment as a non-mechanized unit, switch to a mechanized unit in the middle of the Segment, and end the Segment again as a non-mechanized unit. It may switch from mechanized to non-mechanized an unlimited number of times during a game. For example, an HQ unit may move through Woods hexes at a cost of one Movement Point per hex (non-mechanized) and then move along a Road by expending ½ Movement Point per hex (mechanized; only, of course, if the HQ unit is moving Strategically).
5.92 HQ units possess special movement capabilities if attacked during the Enemy Combat Phase (see Case 10.2).
6.0 Zones of Control
GENERAL RULE: The six hexagons immediately surrounding a unit (or stack of units) constitute that unit's Zone of Control. These Zones of Control affect movement, combat, and supply. Hexes upon which units exert Zones of Control are called "Controlled hexes."
6.1 Which Units Exert Zones of Control
6.11 In Typhoon all units exert a Zone of Control except the following: battalion and company-size units, cadre units, and headquarters units. These units do not exert any Zones of Control (exception: see Case 6.12).
6.12 Regardless of unit size or type, any unit occupying an Entrenchment hex exerts a Zone of Control (see Section 14.0, Entrenchments).
6.2 Effectiveness of Zones of Control
6.21 Any unit that exerts a Zone of Control exerts it at all times during the Game-Turn (exception: see Case 9.98B).
6.22 A unit never pays an additional cost to enter an Enemy-controlled hex. However, units do pay a Movement Point penalty to leave an Enemy-controlled hex (see Case 6.32).
6.23 If an Enemy unit and a Friendly unit, both of which exert Zones of Control, are adjacent to each other, each unit is affected by the other unit's Zone of Control.
6.24 Zones of Control extend into all six hexes surrounding the controlling-unit's hex. No terrain ever affects Zones of Control.
6.25 There is no additional effect in having more than one unit exert its Zone of Control into a given hex.
6.3 Zones of Control and Movement
6.31 All units must cease movement immediately upon entering an Enemy Zone of Control. Such units may move no further during the entire Movement Phase.
6.32 A unit occupying an Enemy-controlled hex at the beginning of its Movement Phase may leave that hex, but only if it moves directly to a hex that is not Enemy-controlled. Units may never move directly from one Enemy-controlled hex to another, except as a result of combat. Units exiting an Enemy Zone of Control must pay a special Movement Point penalty. This penalty is equal to one-half the moving unit's Movement Point Allowance (round fractions down) plus the terrain cost of the hex entered. Note that if a unit's Movement Point Allowance has been reduced due to supply or weather, the Movement Point penalty is equal to one-half the unit's modified (not printed) Movement Point Allowance. For example, an isolated infantry unit with a Movement Point Allowance of 4 is exiting an Enemy Zone of Control in order to enter a Clear hex. The unit has a modified Movement Point Allowance of 2. It spends one Movement Point to exit the hex and another Movement Point to enter the Clear hex. Its movement is thus terminated in this hex.
6.33 A unit which begins a Movement Phase in an Enemy-controlled hex and leaves this hex may never enter another Enemy-controlled hex for the duration of the Movement Phase.
6.34 A unit may move freely and without penalty into and through hexes that are adjacent to units that do not exert Zones of Control.
6.35 Friendly units do not negate Enemy Zones of Control in the hexes they occupy for the purposes of movement.
6.4 Zones of Control and Combat
6.41 All Friendly units which are in Enemy-controlled hexes at the beginning of the Combat Phase must attack all of those Enemy units exerting the Zones of Control in some way during the Friendly Combat Phase. (There are certain critical exceptions to this rule; see Case 9.14, Which Units May Attack.)
6.42 Friendly units do not negate Enemy Zones of Control for the purposes of tracing Paths of Retreat.
6.43 A unit may retreat through Enemy Zones of Control as a result of combat. For each and every Enemy-controlled hex entered, the retreating stack would lose one "step" of strength (see Case 9.93, Retreat and Advance After Combat).
6.5 Zones of Control and Supply
6.51 An Enemy-controlled or Enemy-occupied hex blocks the tracing of Friendly supply through that hex (exception: see Case 6.52).
6.52 Friendly units (not Friendly Zones of Control) negate the presence of Enemy Zones of Control in the hexes they occupy for the purposes of tracing supply.
7.0 Stacking
GENERAL RULE: There is a limit to the number of Friendly units that may end the Friendly Movement Phase stacked in the same hex. This limit is different for the German Player than it is for the Russian Player. The German Player may never have more than three combat units stacked in the same hex at the end of his Movement Phase. The Russian Player may never have more than two combat units stacked in the same hex at the end of his Movement Phase. However, there are certain critical exceptions to these general rules which allow the Players to stack some types of units for "free" on their stacks. In addition, there are certain vital rules which regulate the number of combat units that may perform combat out of a given hex (see Case 7.2, Stacking and Combat).
7.1 Stacking Restrictions
7.11 Stacking restrictions apply only at the end of a Friendly Movement Phase. During the Movement Phase, Friendly units may freely enter and pass through stacks to an unlimited degree — as long as the stacks comply with the restrictions of the General Rule of this Section at the end of the Friendly Movement Phase. If stacks of units exceed these restrictions at this time, the excess must be immediately eliminated by the owning Player.
7.12 There is no Movement Point cost to stack or unstack.
7.13 Neither Players' headquarters units count against stacking restrictions. One HQ unit may be placed on any stack for "free," even if this addition would violate the General Rule of this Section for either the German or the Russian Player. However, no more than a maximum of one HQ unit may ever occupy a single hex.
7.14 Neither Players' "cadre" units (see Section 10.1) count against stacking restrictions. One cadre unit may be placed on top of any Friendly stack for "free," even if this addition would violate the General Rule of this Section for either the German or the Russian Player. However, no more than one cadre unit may ever occupy a single hex.
7.15 The Russian Player possesses battalion and company-sized units. These units do not count against stacking restrictions for the Russian Player. One such unit may be placed on top of any Russian stack for "free," even if this addition would violate the two-high combat unit restriction of the General Rule of this Section. However, no more than one battalion or company-size unit may ever occupy a single hex at the end of a Russian Movement Phase.
Example: Two Russian infantry divisions, 53/43 and 133/20, are stacked in the same hex. This is the maximum stacking limit for the Russian Player according to the General Rule of this Section. However, the battalion-size tank unit 11 may stack with these two divisions for "free" at the end of the Russian Movement Phase.
7.2 Stacking and Combat
Regardless of the stacking limitations listed for both the German and the Russian Player, there are further restrictions for both Players with regard to the number of units that may perform combat in a single hex during a particular Combat Phase.
7.21 In a German stack, a maximum of one regimental-size unit plus two battalion-size units may ever participate in combat during either Player's Combat Phase. Similarly, three German battalion-size units may participate in combat from the same stack.
7.22 In a Russian stack, a maximum of one divisional-size unit plus one brigade or regiment-size unit may ever participate in combat during either Player's Combat Phase. Similarly, two Russian brigade-size units may participate in combat from the same stack.
7.23 Both Players' headquarters units and cadre units may always participate in combat in a Friendly stack, regardless of the number and type of the other Friendly units in the hex (see Cases 7.13 and 7.14). Similarly, Russian battalion and company-size units may also participate in combat from any Friendly stack without regard to the other Friendly units in the stack.
7.24 The choice of which units in a stack will participate in combat during a particular Combat Phase according to the restrictions of Cases 7.21 and 7.22 is left entirely to the owning Player. For example, if the German Player were attacking with a stack composed of three regimental-size units, only one of these regiments could participate in the ensuing combat according to the restrictions of Case 7.21. Immediately before the resolution of the combat, the German Player can pick which one of the three units he will use to perform this combat. The units that do not participate in this combat are affected by the results of the combat, whether it succeeds or not. The non-participating units may not utilize their Combat Strengths for the duration of the Combat Phase, although they may be used to fulfill Divisional Integrity requirements (see Case 9.4).
7.25 The stacking restrictions concerning combat apply to both attack and defense.
7.26 Note that, since stacking restrictions apply only at the end of a Friendly Movement Phase, units may retreat as a result of combat onto Friendly stacks in violation of stacking restrictions. This situation must be corrected by the end of the next Friendly Movement Phase, however.
8.0 Limited Intelligence
COMMENTARY: In actual war, commanding officers are rarely able to ascertain the strengths and abilities of their own troops, not to mention those of the enemy. In the German attack on Moscow in December 1941, this problem faced the leaders of both parties. The German attack was launched with units woefully short of equipment and men. Because the offensive was launched on very short notice, these deficiencies may or may not have been recognized by the commanding officers of these units. On the Russian side, not only were "untried" units thrown into this battle to a great degree, but battered divisions — reduced by weeks of prolonged fighting — were heavily involved as well. Most of these units were great question marks to not only the German commander, but the Russian as well.
In general, the aim of the following rules is to simulate the "fog of war" as it seemed to work in this campaign. Almost universally, commanding officers were unable to accurately guess at the "odds" of their attack succeeding. The most they knew — especially in the battle for Moscow — was that a unit of a certain size and questionable morale value opposed their front.
GENERAL RULE: In almost all cases in Typhoon, combat units do not have Combat Strengths printed on their counters. Rather, all these units are of indeterminate strengths until they have participated in combat for the first time during a game. This strength will be a function of the unit's Combat Class and Morale Rating (both printed on the counter itself). The unit's strength will be represented on a numbered chit (chosen at the moment of first combat), which is carried underneath this combat unit until it is eliminated as a result of combat. In general, the Enemy Player may never examine an owning Player's chit unless the owning Player's unit is about to perform combat.
PROCEDURE: At the moment in which a combat unit is performing combat (either in the attack or in the defense) for the first time, the owning Player must pick a Strength chit for this unit. The Player determines the Morale of the unit in question, picking a chit from the corresponding "Morale Pool." This chit is immediately placed under the combat unit. The owning Player determines the unit's Combat Class and locates this letter on the unit's Strength chit. The number immediately adjacent to this letter on the Strength chit is the Combat Strength of the unit in question.
8.1 Combat Classes
8.11 Most combat units in Typhoon belong to a specific Combat Class. In general, a Combat Class is simply a letter which appears on the unit counter, indicating in very general terms the size of the unit in question (in terms of manpower and equipment).
8.12 The German Player possesses units with Combat Classes of "A" or "B" (exception: see Case 8.14).
8.13 The Russian Player possesses units with Combat Classes of "A," "B," and "C" (exception: see Case 8.14). "A" Class units are usually infantry divisions, "B" Class units are usually cavalry divisions and rifle brigades, and "C" Class units are usually tank brigades.
8.14 Both Players possess a variety of units that do not belong to any Combat Class. These units are headquarters units, cadre units (see Section 10.1), and German tank battalion units. Note that these types of units do not have a Combat Class letter printed on the counters; they simply have a Combat Strength and a Movement Allowance.
8.2 Morale Ratings
8.21 Almost every combat unit in Typhoon possesses an individual Morale Rating. In general, the Morale Rating is a number which appears on the unit counter, indicating in very general terms the capabilities of the unit in question (in terms of previous combat efficiency and experience).
8.22 The German Player possesses units with Morale Ratings of 2 or 3 (exception: see Case 8.24).
8.23 The Russian Player possesses units with Morale Ratings of 1, 2, or 3 (exception: see Case 8.24).
8.24 Both Players possess a variety of units that are not considered to have any Morale Ratings. These units are headquarters units, cadre units (see Section 10.1), and German tank battalion units. Note that these types of units do not have a Morale Rating printed on the counters. Rather, they simply portray a Combat Strength and a Movement Allowance.
8.25 In terms of quality, the higher the unit's Morale Rating, the greater chance that the unit will be relatively "strong" in combat.
8.3 Strength Chits
8.31 In a game of Typhoon, when a unit is about to perform combat for the first time, the owning Player picks a Strength Chit for that unit. This is nothing more than a counter with a set of numbers on both sides, one number of which will represent the Combat Strength of the unit in question. From the moment the Strength Chit is picked, it must remain underneath its "parent" combat unit until that unit is eliminated due to combat or reduced to cadre status (see Section 10.0). Once a unit has picked a Strength Chit, it may never pick another one for the remainder of the game.
8.32 When a unit is engaging in combat for the first time (and thus is required to have a Strength Chit picked for it), the owning Player must choose this chit at random from a "Morale Pool" corresponding to the Morale Rating of the combat unit in question (see Case 8.34). The chosen chit would immediately be placed underneath this unit.
8.33 In order to determine the Combat Strength of a unit that possesses a Strength Chit, it is necessary to compare the unit's Combat Class letter (see Case 8.1) with the corresponding letter on the Strength Chit currently underneath the unit. The number adjacent to this letter on the Strength Chit is the Combat Strength of the unit.
8.34 The German Player has two states of morale (2 or 3), while the Russian Player has three (1, 2, or 3). Each one of these states of morale has a set of differently numbered Strength Chits. Each one of these five sets of counters representing morale states should be separated from the others and placed in its own Morale Pool — preferably in a wide-mouthed cup, but anything that can hold all these chits is acceptable. This separation should be performed before the start of play so that the German Player will have two Morale Pools (identified as 2 and 3) and the Russian Player three (identified as 1, 2, and 3). Of course, it would be wise for the Players to keep these Morale Pool chits separated by Rating in the game-tray even when the game is not being played.
8.35 Note that each Strength Chit is front and back-printed with different sets of numbers. One side is the stronger side and one side is the weaker side (this concept is utilized when units lose "steps" of strength; see Case 9.8, Combat Resolution). When a Strength Chit is first chosen for a combat unit, it is always placed with its stronger (front) side showing. The weaker (reverse) side is used if the unit is "reduced" due to combat.
8.36 It is important to remember that Strength Chits are always placed underneath their parent combat units so their strength does not show. There will be certain rules that will restrict the Enemy Player from examining the chits of Friendly units (see Case 8.4).
Example: The German infantry regiment 62/7/7 is performing combat for the first time (assume it is being attacked in the Russian Combat Phase). The unit is Morale Level 3, so the German Player picks the chit whose front and reverse sides are portrayed for that class. The chit is immediately placed underneath 62/7/7 with the front side facing upwards. Since 62/7/7 is Combat Class A, the strength of the unit in this defense is considered 8. If the unit had been Combat Class B, its strength would have been 5. The reverse side of the Strength Chit is only used if the unit has been reduced in combat.
8.37 Note that only units that are about to perform combat for the first time have Strength Chits picked for them. Due to stacking and combat restrictions, some units may be adjacent to Enemy units but are unable to attack or defend (see Case 7.2). Such units would not have Strength Chits picked.
8.4 Limited Intelligence
8.41 Strength Chits for units that are performing combat for the first time are chosen by the owning Player at the instant of combat. It is important for Players to note that this first combat may be either in the owning Player's Combat Phase (i.e., his units are attacking) or in the Enemy Player's Combat Phase (i.e., his units are defending). It is perfectly permissible for the owning Player to pick Strength Chits for his units in the Enemy Combat Phase.
8.42 The owning Player must pick Strength Chits for his applicable units after all his attacks (or the Enemy Player's attacks) have been declared — that is, immediately before the die roll resolving the combat for an attack (or defense) involving such units. Once a unit has been committed to an attack (or has been attacked), it may not be withdrawn from the combat due to a "low" chit pick, even if the odds have proven to be unfavorable to the owning Player.
8.43 Obviously, neither Player will know the exact strength of any of his units that are about to perform combat for the first time (although the Players should be able to make rough estimates from the unit's Morale Rating and Combat Class). Once a combat unit has picked a Strength Chit it must remain underneath its parent unit until that unit is eliminated due to combat or reduced to cadre status.
8.44 After a unit has been in combat for the first time (and thus has had a Strength Chit picked for it), the owning Player is always free to lift up the parent combat unit to examine the Strength Chit beneath in order to determine the unit's Combat Strength. This examination may occur at any time during the Game-Turn, as frequently as the owning Player desires. However, the Enemy Player may never lift up the owning Player's combat unit in order to examine his Strength Chits unless those units are about to engage in combat, either offensively or defensively. This examination may occur only at the moment of combat, immediately before the combat ratio is determined. After the die roll resolving the combat takes place, the Enemy Player may not examine the Owning Player's Strength Chits until those chits' parent units are again involved in combat.
Player's Note: It should be clear to the Players by now that they will be forced to remember the Combat Strengths of Enemy units that have been "tried" in combat. Unless they have a photographic memory, this will be a super-human task. It is strictly forbidden for either Player to ever write down the strength of an Enemy unit on a piece of scrap paper for future reference. In fact, pen and paper are not really necessary in the play of Typhoon, so it is suggested that they be banned from the play area entirely.
8.45 Aside from the examination of Enemy units permitted at the moment before combat (see Case 8.44), a Player may never touch or examine an Enemy unit or stack of units during the course of the game.
8.5 Stacking and Strength Chits
8.51 Strength Chits never count for stacking purposes. A combat unit and its Strength Chit are considered a single unit in themselves.
8.52 Due to combat reduction, a unit may be forced to eliminate its Strength chit and reduce itself to cadre status. All cadres have a Combat Strength of one, obviating the need for limited intelligence and Strength Chits. When a Strength Chit is removed from play due to any circumstances, it is always placed back in the same cup or Pool from which it had come. It may be chosen later at random by the owning Player.
8.6 Units Without Strength Chits
Both Players possess units that never utilize Strength Chits. These are all HQ units, all cadre units, and all German tank (panzer) battalions. All these units have constant Combat Strengths, thus removing the need for maintaining Strength Chits. Such units have a printed Combat Strength directly on the counter. Since the strengths are constant, it is unnecessary to "hide" them from the Enemy Player. Cadre units and German tank battalions all have a Combat Strength of one. German HQ units have a strength of one, while Russian HQ units have a strength of two.
9.0 Combat
GENERAL RULE: Friendly units that are adjacent to Enemy units during the Friendly Combat Phase must attack those Enemy units subject to the restrictions of Case 7.2, Stacking and Combat. A given unit possesses a Combat Strength which is used when attacking and defending. This strength may not be divided among different combats either on the attack or defense. The Phasing Player is termed the attacker and the non-Phasing Player is termed the defender regardless of the overall strategic situation.
PROCEDURE: Total the Combat Strengths of all units participating in combat against a specific hex by examining the Strength Chits possessed by the applicable units or the Combat Strength printed on the counter. Next, the Defending Player does the same for all of his units participating in the defense. Compare the total Combat Strength of the Attacker to the total Combat Strength of the Defender and state this comparison as a probability ratio: Attacker's strength to Defender's strength. Round the ratio in favor of the Defender to conform to the simplified ratio columns found on the Combat Results Table. Next, determine the terrain in the hex occupied by the Defender. Cross index this terrain line with the proper ratio column on the Combat Results Table. Make whatever "shifts" in the ratio column that are necessary due to Divisional Integrity or Combined Arms in this combat. To resolve the attack, roll two dice and read the result on the appropriate line under the proper ratio. Apply the result immediately, before resolving any other attacks. Separate combats may be resolved in any order the Phasing Player desires, so long as all of his necessary combats are resolved at some time during the Combat Phase.
9.1 Which Units May Attack
9.11 Every non-Phasing unit adjacent to a Phasing unit must be attacked by some Phasing unit during that Combat Phase (exceptions: see Cases 9.12 and 9.14). The Phasing Player may resolve all these attacks in any order desired within the restrictions of Case 9.12.
9.12 Remember that only a certain number of combat units may participate in combat from the same stack (see Cases 7.21 and 7.22).
9.13 All the Phasing Player's units ending their Movement Phase adjacent to Enemy units must attack some unit during the ensuing Combat Phase (exceptions: see Cases 9.12 and 9.14). Note that it is permissible to move out of an Enemy Zone of Control during the Friendly Movement Phase if the Phasing Player wishes to avoid mandatory combat (see Case 5.22). The Phasing Player may choose which Friendly units will attack each adjacent Enemy unit as long as all adjacent Enemy units are attacked (unless, of course, they exceed the stacking restrictions listed in Cases 7.21 and 7.22).
9.14 Any units occupying Town, City, or Entrenchment hexes are not obligated to attack adjacent Enemy units during the Friendly Combat Phase. They may remain in these positions until they leave of their own accord or are forced out by combat. Enemy units adjacent to Friendly units in these positions during the Enemy Combat Phase are still obligated to attack those Friendly units (unless of course the Enemy units also occupy a Town, City or Entrenchment hex).
9.15 No unit may attack more than once per Combat Phase, and no unit may be attacked more than once per Combat Phase.
9.2 Multiple Unit and Multi-Hex Combat
9.21 If a Phasing Player's unit is adjacent to more than one Enemy unit, it must attack all those adjacent Enemy units (subject to stacking restrictions) which are not engaged by some other attacking unit.
9.22 Units in two or more different hexes may combine their Combat Strengths to attack a single, adjacent hex.
9.23 All units in a given hex must be attacked as a single Combat Strength. The Defender may not withhold a unit in a hex under attack, except as called for in the stacking-combat restriction described in Cases 7.21 and 7.22. When more than one unit occupies a single hex, those units may not be attacked individually. An attack on a hex involves all possible combat units in that hex.
9.24 When a single hex contains more than one unit, each of those units may attack a different hex at the owning Player's discretion subject to the restrictions of Cases 7.21 and 7.22.
9.25 A single attack may involve numerous attacking or defending units. For an attack to be resolved as a single combat, however, all attacking units must be adjacent to all defending units.
9.26 If multiple units subject to a single attack are defending in more than one hex, use the terrain on the Combat Results Table most favorable to the defender.
9.3 Effects of Terrain on Combat
9.31 Except in one instance (see Case 9.32), there are no increases or decreases in a unit's Combat Strength due to terrain. (However, see "Entrenchments," Section 14.0.) Instead, terrain effects are "integrated" into the Combat Results Table. After determining the combat ratio, simply determine the terrain type occupied by the defending unit(s) and locate the corresponding line on the Combat Results Table. Cross-index this line with the proper ratio in order to determine the result (after the die roll).
9.32 If units are attacked entirely across River hexsides, then those units have their Combat Strengths doubled. (Note that if a unit was forced to have its Combat Strength halved due to supply or weather considerations, the halving would be performed first (rounding fractions down) and the doubling second.)
9.4 Divisional Integrity Combat Bonus
Only the German Player may ever receive a Divisional Integrity Combat Bonus in the attack or in the defense.
9.41 If, at the moment of resolution of a German attack, the German Player has all the regiments of a particular division adjacent to the Enemy unit(s) that is the subject of that attack, the German Player receives a Divisional Integrity Combat Bonus. It is not required that all these regiments actually participate in the attack itself (although at least one must participate); it is only necessary for them to be adjacent to the Enemy units at the moment of combat resolution. Regiments fulfilling this requirement may be stacked in the same hex.
9.42 If, at the moment of resolution of a Soviet attack against a German regiment, the German Player's regiment is adjacent to or stacked with another regiment of the same division, the German Player receives a Divisional Integrity Combat Bonus.
9.43 When the Divisional Integrity Combat Bonus is applied to a German attack, shift the final ratio column one to the right on the appropriate line on the Combat Results Table for each German participating division fulfilling the requirements of Case 9.41 (however, see Case 9.44). When the Divisional Integrity Combat Bonus is applied in a German defense, shift the final ratio column one to the left on the appropriate terrain line on the Combat Results Table. (Note that these shifts are in addition to any other shifts that may be applied to a German attack or defense.)
9.44 The maximum number of Divisional Integrity shifts that may be awarded to each German attack is three. The maximum number of Divisional Integrity shifts that may be awarded to each German defense is one.
9.45 Note that in German panzer divisions, tank battalions are ignored when computing Divisional Integrity. It is only necessary for these divisions to possess their two mechanized infantry regiments in order to receive the Integrity Combat Bonus.
9.5 Combined Arms Combat Bonus
9.51 Both Players are eligible to receive the Combined Arms Combat Bonus when attacking. In order to receive such a bonus, the owning Player must possess an attacking stack of units comprising at least one infantry (or mechanized infantry, cavalry, ski, parachute, or militia) unit, plus at least one tank unit. For each tank unit in such an attacking stack (regardless of size), the owning Player may shift the final ratio column one to the right on the appropriate terrain line on the Combat Results Table. Subject to stacking restrictions, the attacking Player is permitted an unlimited number of shifts due to Combined Arms in a single combat. It is permissible to have more than one Combined Arms shift awarded from different attacking stacks, as long as each individual stack fulfills the requirement of having at least one infantry unit and one tank unit.
Example: In one attacking stack there is an infantry unit and a tank unit; the owning Player would be permitted a Combined Arms Bonus due to the presence of both unit types in the stack. If a stack lacks an infantry-type unit, the owning Player would not be permitted a Combined Arms Bonus. If this stack were attacking an Enemy unit by itself, it would have the ensuing combat ratio shifted one column to the right on the Combat Results Table. If an identical stack was attacking the same Enemy unit in conjunction with this stack, a two-column shift to the right on the Combat Results Table would be permitted to the attacking Player.
9.52 If a stack of units being attacked possesses at least one infantry (or mechanized infantry, cavalry, ski, parachute, or militia) unit, plus at least one tank (or anti-tank) unit, then the attacking Player may never receive any Combined Arms Combat Bonuses against those defending units during the Combat Phase. This is known as a Combined Arms Defense, and it negates the attacker's Combined Arms attack. However, it is purely defensive, meaning that no shifts to the left in the combat ratio may ever be awarded to the defending Player who possesses such a stack of units.
9.6 Accelerated Assaults
Accelerated Assaults represent increased effort on the part of the attacker, due in part to increased provision of supply at higher echelons. Obviously, Accelerated Assaults are a form of attack that cannot be sustained for very long.
9.61 At certain stages of the game, both Players are permitted to make Accelerated Assaults. The German Player is permitted to make such assaults throughout the entire length of a game of Typhoon. The Russian Player, however, may only make Accelerated Assaults on Game-Turn Sixteen or after.
9.62 Each German corps HQ unit is permitted one Accelerated Assault per game. To declare that a specific corps HQ is making an Accelerated Assault, the German Player simply declares this fact at the beginning of any Friendly Combat Phase (before the resolution of any combat). The German Player may declare as many Accelerated Assaults per Combat Phase as he desires, as long as no single Corps HQ makes more than one per game. At the end of a Combat Phase in which a German corps HQ unit(s) has made an Accelerated Assault, the German Player must place an Accelerated Assault marker on this HQ, indicating that it may never make another Accelerated Assault for the remainder of the game. For the effects of Accelerated Assault, see Case 9.64.
9.63 Each Soviet army HQ unit is also permitted one Accelerated Assault per Game, but only after Game-Turn Sixteen. To declare an Accelerated Assault, the Soviet Player follows the same requirements listed in Case 9.62 for the German Player.
9.64 Any and all units subordinate to an HQ unit making an Accelerated Assault have their Combat Strengths doubled during the Friendly Player-Turn only. For example, if German unit 40/17P/24 is attacking while corps HQ 24/2PzA is making an Accelerated Assault, 40/17P/24 would have its Combat Strength doubled.
9.65 The Soviet Player may double the Combat Strength of his units only if these units are within six hexes of their parent HQ which is making an Accelerated Assault. The range determination is made at the instant of combat.
9.7 Diversionary Attacks
9.71 In making a series of attacks, a Player may allocate his attacking units so that some attacks are made at "poor" ratios in order that adjacent attacks may be made at more advantageous ratios. These attacks are known as diversionary or holding attacks.
9.72 It is not necessary for an attack to meet minimum ratio requirements as listed on the Combat Results Table. Any attack made at a ratio lower than the lowest as printed on the Combat Results Table uses this column. For example, if a Russian unit is attacking a German unit in the Woods at 1-7 odds, this attack is treated as a 1-4. Similarly, ratios higher than the highest as printed on the Combat Results Table utilize the right-hand most column on the Combat Results Table.
9.73 The Phasing Player may never reduce the ratio of a given attack voluntarily.
9.8 Combat Resolution
9.81 Each unit in Typhoon consists of a number of "steps" of strength, indicating the amount of losses that the unit may take in combat before being eliminated from play entirely. A step loss will reduce the unit's Combat Strength (or, in some cases, eliminate the unit from play). The vast majority of units in Typhoon consist of three steps of strength. Some small combat formations may consist only of two steps of strength. All HQ units, cadres, and German tank (panzer) battalions consist of only one step of strength.
9.82 The following is a summary of the number of steps possessed by each unit-type in Typhoon:
A. Each combat unit whose Strength Chit possesses a Combat Strength of three or more has three steps of strength. When such a unit must take a one step loss, it flips its Strength Chit over to its reduced side to indicate this loss (obviously, its new Combat Strength will be smaller than the original). When the unit must take a two step loss (or the unit takes a one step loss after having taken a previous one step loss), the Strength Chit is removed from play entirely (see Case 8.52) and the parent combat unit is flipped to its "cadre" counter-side (see Section 10.0). This cadre is now considered a combat unit with a strength of one (and worth one step). When a unit worth three steps of strength loses three steps in combat, the Strength Chit is removed from play and the parent combat unit is eliminated.
B. Each combat unit whose Strength Chit possesses a Combat Strength of two or less has two steps of strength. When such a unit takes a one step loss, its Strength Chit is removed from play (see Case 8.52) and the parent combat unit is flipped to its cadre counter-side. (Note that when flipped over, such a unit's Strength Chit will indicate a zero strength; this is not considered to be a step of strength.) When a unit worth two steps takes a loss of two steps in combat, its Strength Chit is removed from play and the parent combat unit is eliminated.
C. All HQ units, cadre units, and German tank battalion units consist of one step of strength only. If any of these unit-types are ever forced to lose a step in combat, they are immediately eliminated from play. They never possess Strength Chits and have a constant Combat Strength of one (except Russian HQ's, which have a Combat Strength of two).
9.83 All combat results are expressed in terms of steps lost and/or hexes retreated. The letters "A" and "D" on the Combat Results Table stand for attacker and defender, respectively.
9.84 All combat results are expressed in terms of a number(s) preceded by the letters "A" or "D."
9.85 All numbers in the combat result which are parenthesized indicate mandatory step losses for the affected Player (see Case 9.86).
9.86 All numbers in the combat result which are not parenthesized signify that the affected unit(s) must retreat the indicated number of hexes and/or take a step loss equal to the unparenthesized number result. All units in the affected stack are affected by the combat result, although all units do not have to lose one step if a one step loss is called for. However, two or more units in a stack may take losses if more than a one step loss is called for.
Example: As a result of combat, a German stack receives a D2(2) combat result. Immediately, this stack loses two steps of strength (German Player's choice). Next, the German Player must choose one of the following options available to him:
A. He may take two more step losses in place (only, of course, if he has these steps available to him in this stack).
B. He may retreat two hexes (see Case 9.9).
C. He may lose one step of strength and retreat one hex (or vice versa).
9.87 If the owning Player is required to take step losses due to a combat result, he must first take these losses from those units that actually participated in the combat. If there are not enough steps available among these units, he may take these losses from units that did not participate in the combat.
9.88 If the owning Player is required to take step losses due to his own attack (i.e., he has achieved an "A" result), he must first take these losses with any of his tank units that participated in the combat. If, in such an attack, the owning Player possessed no tank units, he is under no further restrictions with regard to the manner in which these losses are applied.
9.89 Combat Results Table
Defender's Terrain and combat ratio headers (Attacker to Defender):
| Defender's Terrain | 1st col | 2nd | 3rd | 4th | 5th | 6th | 7th | 8th | 9th | 10th | 11th | 12th | 13th |
|---|---|---|---|---|---|---|---|---|---|---|---|---|---|
| City, Rough | 1-3 | 1-2 | 1-1 | 2-1 | 3-1 | 4-1 | 5-1 | 6-1 | 7-1 | 8-1 | 9-1 | 10-1 | 11-1+ |
| Woods, Town | 1-4 | 1-3 | 1-2 | 1-1 | 2-1 | 3-1 | 4-1 | 5-1 | 6-1 | 7-1 | 8-1 | 9-1 | 10-1+ |
| Clear | 1-5 | 1-4 | 1-3 | 1-2 | 1-1 | 2-1 | 3-1 | 4-1 | 5-1 | 6-1 | 7-1 | 8-1 | 9-1+ |
Die roll results (columns correspond to the ratio columns above; results in bold are Breakthroughs):
| Die | col.1 | col.2 | col.3 | col.4 | col.5 | col.6 | col.7 | col.8 | col.9 | col.10 | col.11 | col.12 | col.13 |
|---|---|---|---|---|---|---|---|---|---|---|---|---|---|
| 2 | A2(3) | D1(1) | A2(3) | A2(2) | D2(1) | A2(2) | A1(2) | A1(2) | A1(1) | D3(2) | A1 | D4(3) | D4(3) |
| 3 | A1(2) | A1(1) | D2(1) | D1 | D1 | D2(1) | D2 | D2(2) | A1 | A1 | D3(2) | D3(2) | D3(3) |
| 4 | A1(2) | A1(2) | A1(1) | D1(1) | D1(1) | D1(1) | D1(1) | D2(1) | D2(2) | D2(2) | D2(2) | D3(2) | D3(2) |
| 5 | A1(2) | A1(2) | A1(2) | A1(1) | A1(2) | D1 | D1 | D1(1) | D2(1) | D2(2) | D2(2) | D2(2) | D2(2) |
| 6 | A2(2) | A2(2) | A1(2) | A2(2) | A1(2) | A1(2) | D1(1) | D1(1) | D1 | D1(1) | D1(1) | D1(2) | D2(2) |
| 7 | A3(3) | A2(3) | A2(2) | A1(2) | A2(1) | A1(1) | A1(1) | D1(1) | D1(1) | D1(1) | D1(1) | D1(1) | D1(1) |
| 8 | A2(2) | A1(1) | A1(1) | A2(1) | A1(1) | A1(1) | D2(1) | A1(1) | D1(1) | D1(1) | D1(1) | D2(1) | D2(2) |
| 9 | A1(1) |
Notes: 1. Letters preceding results indicate to whom results apply. A = Attacker; D = Defender. Ratios greater than the right-hand column (less than the left-hand column) are resolved on the right-hand (left-hand) column. 2. The unparenthesized number indicates the number of hexes the owning Player retreats his units and/or the number of steps lost from the owning Player's units (see Case 9.86). The number in parentheses is the number of mandatory step losses incurred by the owning Player's units. These losses must be taken immediately before any retreat result is fulfilled. 3. A result in bold typeface indicates a "Breakthrough" (see Case 9.98). All retreating units lose their Zones of Control for the duration of the Combat Phase. In addition, victorious units may advance after combat one hex more than the normal permissible advance.
Ratio Column Shifts — Shifts to the Right: 1. Divisional Integrity in the attack (see Case 9.4). 2. Combined Arms Bonus in the attack (9.5). 3. Air units in ground support role allocated to attack (see Case 17.2).
Shifts to Left: 1. Divisional Integrity in the defense (Case 9.4). 2. Two air units in ground support role allocated to the defense (see Case 17.2).
Note: Any unit subordinate to a corps or army HQ unit that is making an Accelerated Assault (see Case 9.6) has its Combat Strength doubled for that entire Game-Turn.
9.9 Retreats and Advances After Combat
9.91 A Player may always lose steps instead of retreating (see Case 9.86). However, if he chooses to retreat his units according to the unparenthesized combat result, he must adhere to all the rules that follow. Note that retreats are expressed in hexes, not Movement Points.
9.92 Retreats are always conducted by the owning Player. When a retreat is called for, move the stack as a whole (not each unit individually) according to the following priorities:
A. To a hex that is the maximum possible distance from any Enemy unit, given the combat result.
B. To a non-Enemy controlled hex.
In accordance with these two priorities, the owning Player may retreat his units in any way he sees fit as long as no retreating unit or stack enters the same hex more than once.
9.93 A unit may retreat through Enemy Zones of Control, regardless of whether the Enemy-controlled hexes are occupied by Friendly units. However, for each Enemy-controlled hex entered during a retreat, the owning Player must lose one step of strength from a single unit in the retreating stack.
9.94 A unit may retreat in violation of stacking limitations so long as this situation is corrected by the end of the next Friendly Movement Phase (see Case 7.26). However, if a unit is forced to retreat into a Friendly-occupied hex and that hex then undergoes an attack in the same Phase, the retreated unit may never add its Combat Strength to those of the units already in the hex. If units in that hex proceed to suffer an adverse combat result in this new combat, the previously retreated unit is automatically eliminated from play (its step losses do not count in the determination of step losses in the new combat).
9.95 Whenever an Enemy stack is forced to retreat as a result of combat, it will leave a path of vacant hexes behind it called the Path of Retreat. Any victorious units which participated in the combat (or which are stacked with units which participated) are allowed to advance along this Path of Retreat and sometimes deviate from it (see Case 9.96). An advance after combat may always be up to as many hexes as the defeated unit retreated (exception: see Case 9.98). For example, if a "D2" result were called for and the defeated unit retreated two hexes, the victorious unit(s) may advance two hexes. If a defending or attacking unit is eliminated due to combat, the victorious unit(s) may freely advance the number of hexes remaining in the eliminated unit's unparenthesized retreat result obligation. For example, if a cadre unit received a "D2" result and the owning Player wishes to eliminate the cadre by losing its single step, the victorious unit(s) could advance one hex, since that is the number remaining in the cadre's numbered retreat obligation.
9.96 Advances after combat are conducted as follows:
A. Move each victorious unit individually. The first hex entered must be the hex formerly occupied by the retreating units.
B. All units except those bearing a tank or mechanized infantry symbol may advance the permissible number of hexes along the Path of Retreat just conducted by the defeated Player. This move is conducted hex-by-hex, and may not deviate from the Path of Retreat.
C. Units bearing a tank or mechanized infantry symbol may now advance the permissible number of hexes. However, these units may deviate from the Path of Retreat — they are not obligated to strictly follow it.
D. Regardless of what type of unit the advancing units are, they must stop their advance immediately upon entering an Enemy Zone of Control, exclusive of the first hex entered in this advance. Note: Victorious units may cease their advance at any point during their movement. They are never required to advance.
9.97 Mechanized infantry or tank units may never advance or retreat across River hexsides unless those hexsides are traversed by a road. Otherwise, terrain never influences advances or retreats. Units forced to retreat off the map are eliminated.
9.98 Note that some combat results on the Combat Results Table are in bold face. These results are considered particularly successful attacks, and are labeled "Breakthroughs." Breakthrough attacks differ from normal attacks in the following ways:
A. The attacking Player determines the Path of Retreat.
B. All units retreating due to this combat lose their Zones of Control for the duration of the current Combat Phase.
C. The defending Player may not take step losses in lieu of retreating (see Case 9.86).
D. The attacking Player may advance all his participating units one hex extra than the advance after combat normally permitted by this result (if the units are non-tank, non-mechanized infantry, they may deviate from the Path of Retreat in the last hex advanced into).
9.99 Note that combat results take effect after all attacks from a single hex have been rolled for. If two units in a single hex are attacking two different hexes, no combat results may be applied until the second attack has been resolved (the attacker applying results to his units first). If, in one attack, the defender is permitted to advance, and in the other the attacker may advance, then neither Player may advance his units after combat.
10.0 Cadre and Headquarters Units
GENERAL RULE: Both the Russian and the German Player possess cadre and HQ units. Both these types of units possess certain special properties with regard to movement, stacking, and combat.
10.1 Cadre Units
10.11 Every non-HQ, non-German tank battalion combat unit in Typhoon is back-printed with a cadre side. When a unit is in its cadre state, it is considered to be badly battered due to previous combat. All cadre units have a Combat Strength of one and a Movement Allowance (note that these are the only two numbers to appear on a unit's cadre counter-side). The cadre's Combat Class and Morale Rating are no longer considered to be relevant.
10.12 Cadres may only be formed when a unit takes a step loss (or step losses) in combat. If a unit is originally considered to possess three steps of strength (see Case 9.82a), the cadre side of the parent unit is considered to be the third step of strength. If a unit is originally considered to have two steps of strength (see Case 9.82b), the cadre side of the parent unit is considered to be the second step of strength.
Example: A unit whose original strength chit reveals a strength of eight is forced to take two step losses in combat. The first step is lost by flipping over the strength chit to reveal a strength of five. The second step is lost by removing the strength chit from play (see Case 8.52) and by flipping the parent combat unit over to its cadre side. Note that if the original strength chit had revealed a strength of two, a one step loss would have reduced the parent unit to cadre status, while a two step loss would have eliminated the unit from play entirely.
10.13 Cadre units are always considered to have one step of strength.
10.14 Cadre units never exert Zones of Control.
10.15 Cadre units have special characteristics in terms of stacking. One cadre unit may be placed on top of any Friendly stack "for free" (see Case 7.14).
10.2 Headquarters Units
10.21 All headquarters units do not possess a Combat Class or a Morale Rating. They have a constant Combat Strength (which is printed directly on the counter), and as such do not require strength chits.
10.22 All HQ units are considered to have one step of strength.
10.23 All HQ units never exert Zones of Control.
10.24 HQ units have special characteristics in terms of stacking. One HQ unit may be placed on top of any Friendly stack "for free" (see Case 7.13).
10.25 HQ units possess special characteristics in terms of combat. Any HQ unit that is being attacked by the Enemy Player when it is alone in a hex may retreat one hex before the resolution of the combat. If the Owning Player chooses this option, the combat is not resolved. The attacking units may advance two hexes, but may not attack again in the Combat Phase. Note that if the HQ were obligated to retreat into an Enemy Zone of Control, it would be eliminated (see Case 9.93).
11.0 Support
COMMENTARY: The German offensive against Moscow which began on 15 November 1941 was not a well-prepared assault. Most units had only a few days notice that a major attack was about to begin. Similarly, the German supply situation on the Central front had reached a critical stage well before this offensive had even been conceived. The Germans were woefully short of equipment of all types on 15 November and it was inconceivable that all four armies positioned from Kalinin to Tula could be supported simultaneously with supplies for a concerted attack. The most they could hope for was for chosen corps to attack furiously for short periods of time while at the same time other less important formations would simply attempt to hold their front in a stagnant fashion.
GENERAL RULE: Only the German Player is required to determine support. He performs this function every fourth Game-Turn (starting on Game-Turn One). By allocating support, the German Player is dictating which of his four armies (and their subordinate corps) will receive priority in terms of supply and attack-potential in the upcoming four Game-Turns. After rolling the die for each army and consulting the German Support Table, the German Player must determine which of his corps units will be "in support" and which will be "unsupported" for the next four Game-Turns. In general, a supported corps' subordinate units will function normally in all ways. However, an unsupported corps' subordinate units will all be restricted in many critical functions.
11.1 When to Determine Support
The German Player must determine support every fourth Game-Turn, starting with Game-Turn One (i.e., on Game-Turns One, Five, Nine, Thirteen, Seventeen, etc.). Note that there is a specific German Support Allocation Stage in the Sequence of Play. Also, the Game-Turns in which the German Player must determine support are indicated on the Game-Turn Track (15.3, see separate sheet). The German Player may never change his Support Point allocations until the following German Support Allocation Stage (four Game-Turns later).
11.2 How to Determine Support
11.21 During every German Support Allocation Stage, the German Player receives ten "Support Points", which he must allocate among his four armies in any way he sees fit. In general, the more Support Points allocated to a given army, the more subordinate corps units of that army will be able to function efficiently in the attack. Note that in some one-map scenarios, the German Player may be allocated less than ten Support Points.
11.22 The four German armies in Typhoon are: (1) 2nd Panzer Army, (2) 3rd Panzer Army, (3) 4th Panzer Army, (4) 4th Army.
When the German Player is allocating Support Points, he consults the German Army Display (11.4). He must allocate his ten Support Points among these four armies in any way he desires during the appropriate Stage. He does this by placing a numbered chit (representing the number of Support Points that he wishes to allocate to an army) in that army's appropriate box on the German Army Display. Note, of course, that the total figure after the German Player has finished allocating his Support Points must equal ten.
11.23 Next, the German Player must roll one die for each individual army. He consults the German Support Table (11.5), cross-referencing this die roll with the number of Support Points that this army had allocated to it (see Case 11.22). The resulting number is the number of corps HQ units that are subordinate to this army that may be placed "in support" for the upcoming four Game-Turns (see Case 11.24). If this number is different from the chit which appears in the German Army Display for the army just rolled for, the German Player must replace this chit with a new one whose number is equal to the result just obtained.
Example: The German Player is rolling the die for 2nd Panzer Army (which had four Support Points allocated to it). He rolls a 5, which yields a result of 3. The chit in 2nd Panzer Army box is immediately replaced with a 3. After the German Player has rolled the die once for an individual army, he repeats this procedure three more times — once for each remaining army.
11.24 Each army in the German Army Display will now have a numbered chit representing the number of corps HQ units subordinate to that army that may be placed "in support" by the German Player. In general, only combat units that are subordinate to corps HQ's in support will be capable of sustained offensive action. If there are more corps HQ's in this army than can be placed in support, the remaining corps HQ's must be considered "unsupported" (flipped over to their unsupported counter-sides). Combat units that are subordinate to corps HQ's that are unsupported will not be capable of efficient offensive action. During the German Support Allocation Stage, it is purely up to the whim of the German Player as to which corps HQ's will be considered in support and which unsupported.
Example: In the example given in Case 11.23, the German 2nd Panzer Army has three corps HQ units that it may place in support. The German Player refers to the map, locating all corps HQ units subordinate to 2nd Panzer Army. These are 24/2PzA, 43/2PzA, 47/2PzA, and 53/2PzA (four HQ's in all). The German Player may only place three of these HQ's in support. He decides that all corps except 53/2PzA will perform attacks in the next four Game-Turns. Therefore, he decides to place 24/2PzA, 43/2PzA, and 47/2PzA in support (he leaves these corps HQ's on their supported counter-sides). However, 53/2PzA must be unsupported. He flips this unit over to its unsupported side.
11.25 No aspect of German support may be changed except in German Support Allocation Stages. This includes changing Support Point allocation to armies or changing the status of supported or unsupported corps HQ's.
11.3 Effects of Being Supported or Unsupported
For the full explanation of the effects of being supported or unsupported (subordinate to corps HQ's that are either supported or unsupported), see Cases 12.41 and 12.51. Note: It is obviously vital for Players to have a thorough grasp of how unit designations on the counters read. For a full explanation, see Case 2.34.
11.4 German Army Display
(see separate sheet)
11.5 German Support Table
(see separate sheet)
12.0 Supply
GENERAL RULE: Units must be considered to be in supply in order to use their Combat Strengths and Movement Allowances without penalty. There are three possible states of supply in Typhoon: In supply, out of supply, and isolated.
PROCEDURE: Supply determination for all purposes is made by both Players during the Mutual Supply Determination Phase of each Player-Turn. A unit in supply at the beginning of a Player-Turn is considered to be in supply at all times during that Player-Turn, including during the Combat Phase. A unit that is considered to be out of supply at the beginning of a Player-Turn is out of supply for the entire Player-Turn, even if the unit moves back into supply during its Movement Phase. In order to be considered in supply, a unit must trace a supply line to its proper HQ unit which in turn must trace a supply line to a supply source. Note that the length of supply lines varies from Player to Player.
12.1 German Supply Determination
12.11 In order to be considered in supply, a German unit must be able to trace a supply line six hexes (not Movement Points) or less in length to its proper parent corps HQ unit. In turn, this corps HQ unit must be able to trace a supply line six hexes or less in length to a supply source (see Case 12.12). For a definition of supply lines, see Case 12.3.
12.12 The German Player has two types of supply sources: (a) any hex on the westernmost hexrow of the map (0001 hexes). (b) Any hex traversed by a road, which in turn leads off the western edge of the map along a continuous series of Road hexes of any length (although note that once this path begins to trace along the Road to an appropriate map edge, it may never leave that Road). This Road may never enter an Enemy-occupied or Enemy-controlled hex (unless occupied by a Friendly unit). Any number of units may be supplied from the same supply source.
12.13 Note that German supply is strongly affected by corps support (see Cases 11.2 and 12.4).
12.14 During any Game-Turn in which there is snow on the ground, the length of German supply lines (from unit to HQ or from HQ to supply source) is reduced to four hexes (see Case 13.58).
12.2 Russian Supply Determination
12.21 In order to be considered in supply, a Russian unit must be able to trace a supply line to its proper parent army HQ unit or directly to a supply source. If the supply line is to an HQ unit it may be of any length. If the supply line is directly to a supply source, it must be three hexes or less in length. Note that if a supply line is traced to an HQ unit, this HQ unit is not obligated to trace another supply line to a supply source (as is the case with German units).
12.22 The Russian Player has two types of supply sources: (a) Any hex on the easternmost edge of the map (0053 or 0054-type hexes), (b) Any City hex.
12.23 Russian supply line lengths are never affected by snow.
12.3 Supply Lines
12.31 A supply line is defined as a path of continuous hexes from a combat unit to its proper HQ or from that HQ to a supply source. These hexes may never pass through Enemy-occupied or Enemy-controlled hexes (unless they are occupied by Friendly units). Terrain never affects the tracing of supply.
12.32 The length of a supply line varies from Player to Player. See Cases 12.1 and 12.2 for a full explanation of these lengths.
12.4 Out of Supply
12.41 A German unit is considered to be Out of Supply under the following circumstances:
(a) A unit is able to trace a supply line six hexes or less (although see Case 12.14) in length to its parent HQ unit, but this HQ unit in turn cannot trace a supply line under six hexes in length to a supply source. (Although the HQ could trace a supply line of a length greater than six to a supply source.)
(b) A unit is able to trace a supply line six hexes or less in length to its parent HQ unit, which in turn is able to trace a supply line six hexes or less in length to a hex traversed by a road. However, this road is unable to trace a continuous series of road hexes off the western edge of the map.
(c) A unit is only able to trace a supply line greater than six hexes to its parent HQ unit.
(d) A unit is only able to trace a supply line six hexes or less in length to an HQ to which it is not directly subordinate.
(e) A unit is considered to be in supply (see Case 12.1), but whose parent corps HQ unit is unsupported (see Section 11.0).
12.42 A Russian unit is considered to be Out of Supply under the following circumstances:
(a) A unit is tracing a supply line to a City hex (or the easternmost hexrow) that is over three hexes in length.
(b) A unit is tracing a supply line to an HQ unit to which it is not directly subordinate.
12.43 Place an Out of Supply marker on all units that are determined to be Out of Supply during the Mutual Supply Determination Phase of each Player-Turn.
12.44 All units that are considered Out of Supply may have their Combat Strengths and Movement Allowances decreased as summarized below:
(a) If the units are attacking, their Combat Strengths are halved (round fractions down). Note that a unit's Combat Strength may never be halved more than once, even if it is subject to an additional penalty, such as snow (exception: see Case 12.54a). Also note that in Typhoon, all units have a minimum Combat Strength of one.
(b) If the units are defending, their Combat Strengths remain the same.
(c) If the units are tank or mechanized infantry, their Movement Allowances are halved (round fractions down). As with units' Combat Strengths, Movement Allowances may never be halved more than once due to additional penalties.
(d) If the units are non-tank, non-mechanized infantry, their Movement Allowances remain the same.
12.5 Isolation
12.51 A German unit is considered to be Isolated under the following circumstances:
(a) A unit is unable to trace a supply line of any length to its proper parent HQ unit or to any other HQ unit in six hexes or less (although see Case 12.14).
(b) A unit is considered to be Out of Supply (as per Cases 12.41a, b, c, and d), but whose parent HQ unit is unsupported (see Section 11.0).
12.52 A Russian unit is considered to be Isolated under the following circumstances:
(a) A unit is unable to trace a supply line of any length to a supply source hex and
(b) The unit is unable to trace a supply line to any Friendly HQ unit.
12.53 Place an Isolated marker on all units that are determined to be Isolated during the Mutual Supply Determination Phase of each Player-Turn.
12.54 All units that are considered to be Isolated have their Combat Strengths and Movement Allowances decreased as summarized below:
(a) If the units are attacking, their Combat Strengths are considered to be one. (Note that this is an exception to Cases 12.44 and 13.55, which states that units' Combat Strengths may never be penalized by more than one halving.)
(b) If the units are defending, their Combat Strengths are halved (round fractions down).
(c) If the units are tank or mechanized infantry, their Movement Allowances are considered to be three MP's. (Note that this is an exception to Cases 12.44 and 13.55, which state that units' Movement Allowances may never be decreased by more than one halving.)
(d) If the units are non-tank, non-mechanized infantry, their Movement Allowances are halved. As with units' Combat Strengths, Movement Allowances may never be halved more than once due to additional penalties.
12.6 Automatic Supply
12.61 All HQ units are always considered to be in supply (although they may be considered to be unsupported).
12.62 All units which enter the map as reinforcements are considered to be in supply during the first two Game-Turns in which they have entered the map.
13.0 Weather and Winterization Levels
COMMENTARY: The dramatic influence played by the weather on the Battle for Moscow has been universally recognized. As early as 7 November 1941, the Germans were beginning to suffer from frostbite and exposure. By the beginning of the German offensive, this was developing into a most serious drain on German manpower. Meanwhile, the Russians remained relatively unaffected. On 21 November, General Guderian wrote, "The icy cold, the lack of shelter, the shortage of clothing ... all makes the duty of a commander a misery, and the longer it goes on the more I am crushed by the enormous responsibility which no one, even with the best will in the world, can share."
GENERAL RULE: Both the weather and the ground condition are determined at the beginning of each Game-Turn. Certain combinations of weather and ground conditions may produce snow. Each state of weather and ground can affect combat units' Combat Strengths and Movement Allowances, as well as affecting the use of Air Points. The degree to which units are affected by snow is purely a function of their Winterization levels.
13.1 Weather Determination
13.11 During the Weather and Ground Condition Determination Stage of each Game-Turn, the Soviet Player rolls one die and consults the Weather Table (13.14) in order to determine the weather for the entire Game-Turn. He then adjusts the marker on the Weather Track if necessary.
13.12 There are three possible weather states: Clear, Overcast, and Precipitation.
13.13 The weather on Game-Turn One is always Overcast.
13.14 Weather Table (see separate sheet)
13.2 Ground Condition Determination
13.21 During the Weather and Ground Condition Determination Stage of each Game-Turn, the German Player rolls one die and consults the Ground Condition Table (13.24) in order to determine the state of the ground for the entire Game-Turn. He then adjusts the marker on the Ground Condition Track if necessary.
13.22 There are five possible states of the ground: Warm, Normal, Ground Freeze, Stream Freeze, and River Freeze.
13.23 The Ground Condition on Game-Turn One is always Ground Freeze.
13.24 Ground Condition Table (see separate sheet)
13.3 Snow
13.31 Some combinations of weather and ground condition may produce snow. Snow is caused if the weather condition is Precipitation and, during the same Game-Turn, the ground is determined to be in any type of Freeze (Ground, Stream, or River). The Players must now adjust the marker on the Snow Track to indicate this condition.
13.32 Snow may never accumulate, that is, if there is snow on the ground and additional snow has fallen during a new Game-Turn, there is no additional effect.
13.33 Snow is considered to remain on the ground Game-Turn after Game-Turn unless it "melts" (see Case 13.34). Thus, if it snows on Game-Turn 5, snow is considered to be in effect in all following Game-Turns until it melts.
13.34 Snow never melts automatically from Game-Turn to Game-Turn. One of two ground condition requirements must be met in order for snow to melt. These are: (a) The ground condition is Warm (b) The ground condition is Normal. In either of these cases, the marker on the Snow Track would be adjusted so as to read "No Snow".
13.35 Snow Track (see separate sheet)
13.4 Winterization Levels
In Typhoon, snow may affect many types of units detrimentally whereas others are completely unaffected by this condition.
13.41 Every combat unit in Typhoon is considered to possess a "Winterization Level" (of which there are only two types: "Good" and "Poor"). A Winterization Level is a quantification of a unit's ability to withstand extreme cold and — more importantly — heavy accumulations of snow.
13.42 All German units in Typhoon are considered to possess Poor Winterization Levels.
13.43 Russian units can either be Poor or Good in terms of Winterization Levels. This status for each individual unit can be determined by examining the counter in question for either the Good or Poor Winterization Level symbology (see Case 2.3).
13.44 Units with Good Winterization Levels are unaffected by the presence of snow on the ground (exception: see Case 13.53). Units with Poor Winterization Levels have their Movement Allowances and Combat Strengths halved (round fractions down) when there is snow on the ground (see Case 13.55).
13.5 Effects of Weather
The state of the weather may have an important effect on certain critical unit functions in Typhoon, such as Combat Strength, Movement Allowance, and Air Point availability.
13.51 If it is determined that there is any type of Freeze (Ground, Stream, or River) during a Game-Turn, tank and mechanized infantry units may have their Movement Point cost per hex slightly reduced. Check the Terrain Effects Chart (5.73) for full explanation of these Movement Point cost reductions.
13.52 If the ground condition is Stream Freeze, no types of units ever pay any Movement Point costs for crossing Stream hexsides. Similarly, if the ground is considered to be River Freeze, no unit types ever pay Movement Point penalties to cross Stream or River hexsides. Furthermore, during a River Freeze, units never receive any Combat Strength increment for defending behind River hexsides (see Case 9.32).
13.53 If there is snow on the ground, a Mech unit's ability to move along Roads by utilizing Strategic Movement is slightly impaired (it spends ½ MP per hex, not ⅓). Note that this increased MP cost for Road Movement is applicable regardless of a unit's Winterization Level.
13.54 The weather can affect the number of Air Points that each Player may use during a Game-Turn (see Section 17.0): (a) If it is Clear, both Players may use all of their Air Points. (b) If it is Overcast, both Players may only use one-half of their Air Points. (c) If it is Precipitation, no Air Points may ever be used.
13.55 All units with "Good" Winterization Levels are unaffected by snow (exception: see Case 13.53). However, if there is snow on the ground, all units with a "Poor" Winterization Level have both their Movement Allowances and Combat Strengths halved (round fractions down). Remember that a unit's Combat Strength and Movement Allowance may never be halved more than once, even if the unit is subject to additional penalties, such as being Out of Supply (exception: see Case 12.54a). For example, if an Out of Supply unit with a Combat Strength of 9 was subject to snow penalties, its Combat Strength when attacking would be 4, not 2.
13.56 The presence of snow on the ground also affects the length of German supply lines. When there is snow, the length of German supply lines is reduced from six to four hexes (see Case 12.14).
13.57 Weather Effects Summary (see separate sheet)
14.0 Entrenchments
COMMENTARY: The Russian defense of Moscow depended to a great extent on the extensive lines of entrenchments encircling the city on three sides. Constructed for the most part on pure man (and woman) power, these defensive positions combined anti-tank ditches, pillboxes, and minefields into a truly formidable military obstacle.
GENERAL RULE: Some hexes on the map are permanently designated as Entrenchments. These hexes can only benefit the Russian Player. Any Russian unit in an Entrenchment hex has its Combat Strength for defensive purposes doubled.
14.1 Entering Entrenchments
14.11 There is no Movement Point penalty to enter an Entrenchment hex. A unit moving into such a hex simply pays the normal terrain cost indicated on the Terrain Effects Chart (5.73).
14.12 Entrenchment hexes are permanent. They may never be destroyed by either Player.
14.13 Entrenchments may never be "constructed" by either Player. The only Entrenchment hexes that may ever appear on the map are those that are permanently printed on it.
14.2 Effects of Entrenchment Hexes
14.21 Only the Russian Player may ever benefit from Entrenchment hexes, and then only when his units are defending in the hex in question. All Russian units that are defending in an Entrenchment hex have their Combat Strength doubled.
14.22 Russian units occupying Entrenchment hexes are not obligated to attack any adjacent German units during the Russian Combat Phase, although they may do so. (Note that this is an exception to Case 6.41).
14.23 Entrenchment hexes have no "facing"; that is, Russian units occupying such hexes have their Combat Strengths doubled in defense no matter what direction they are attacked from.
15.0 Reinforcements
GENERAL RULE: Both Players receive reinforcements. These units appear during the Owning Player's Movement Phase on the Game-Turn indicated on the Game-Turn Record and Reinforcement Track (15.3). This Track possesses a Reinforcement Schedule for both Players which lists the Game-Turn of appearance, the number of units, the designations of those units, and the "Entry Area" of the map on which these units will be brought into play.
15.1 Movement of Reinforcements
15.11 During the Movement Phase, the Owning Player places any scheduled reinforcements near the appropriate map edge of the Entry Area called for on the Reinforcement Schedule. These units may be placed in such a position at any time during the Owning Player's Movement Phase. These reinforcements may only be brought onto the map through the map edge hexes comprising that Entry Area.
15.12 In several cases, more than one unit is scheduled to appear in the same Entry Area in the same Game-Turn. These units are deployed off-map, one behind the other, with the lead unit poised adjacent to a desired hex of entry. As each of these units enters the map, it will pay the terrain cost for the type of terrain in this hex plus any additional cost for hypothetical hexes that it would have to traverse in order to enter this entry hex. These hypothetical hexes are assumed to be of the same terrain type as the desired entry hex itself.
15.13 Once on the map, reinforcements may be moved normally.
15.14 It is permissible for reinforcements to use Strategic Movement in their Game-Turn of entry, as long as they remain at least three hexes away from Enemy units at all times during the Movement Phase.
15.2 Restrictions
15.21 Reinforcements may not enter a hex of an Entry Area that is currently occupied by an Enemy unit or an Enemy Zone of Control.
15.22 If an Entry Area is totally occupied by Enemy units or Enemy Zones of Control, the owning Player may enter his reinforcements on any adjacent Entry Area. However, such an action entails a one Game-Turn delay in the entry of these units.
15.23 Reinforcements may be purposefully delayed by the owning Player for as long as he wishes (although the owning Player may never willingly alter the Entry Area of reinforcements).
15.24 Reinforcements are automatically considered to be in supply during the first two Game-Turns in which they have entered the map.
15.3 Soviet Reinforcement Schedule
(see separate sheet)
15.4 German Reinforcement Schedule
(see separate sheet)
16.0 German Victory Points and Russian Unit Commitment
GENERAL RULE: During the course of the game, the German Player accumulates Victory Points through the capture of Russian cities and by the elimination of Russian units. The number of German Victory Points will affect the activation of Russian uncommitted units during the course of play, as well as determining the victor of Typhoon at the end of the game.
16.1 German Victory Points
16.11 Only the German Player may gain Victory Points in Typhoon. The German Player's Victory Point total is kept track of on the German Victory Point index (16.3) with appropriate markers.
16.12 There are two methods by which the German Player may accumulate Victory Points: (a) By the elimination of Russian units. (b) By the capture of Russian City (not Town) hexes.
16.13 Whenever a Russian unit is eliminated from play (regardless of its size), it is immediately placed in the Destroyed Russian Units box (16.4). It can never be brought back into play and will remain in this box for the duration of the game. For every Russian unit in this box, the German Player receives one Victory Point (see Case 16.15).
16.14 The German Player receives a varying amount of Victory Points for each Russian City hex captured:
(a) Ten VP's for Tula.
(b) Five VP's for every other Russian City hex on the map. To "capture" a City means that the German Player must have a combat unit in the hex in question or have been the last Player to have had a unit pass through that hex. Furthermore, that City must be able to trace a continuous path of hexes, free from Enemy units or their Zones of Control, to the western or southern map edges. This path may be of any length. Friendly units negate Enemy Zones of Control in the hexes they occupy for this purpose. For every City hex that meets these requirements, the German Player places a German Control marker on the hex in question.
16.15 German Victory Point totals are only calculated in the Game-Turn Indication Stage. At this time, the German Player simply totals the number of counters in the Russian Destroyed Units box, yielding the number of VP's he has achieved due to this factor. Next, he scans the map for German Control markers on Russian City hexes. He awards VP's as described in Case 16.14 for these markers, totalling the number of VP's for capturing Cities. He then totals the number of VP's he has achieved due to Russian elimination and to the capture of Cities. This figure is indicated on the German Victory Point Index with the appropriate markers.
Example: During the German Player-Turn of Game-Turn One, the German Player eliminates four Russian units and captures the city of Tula. However, during the Russian Player-Turn of the same Game-Turn, the German units are forced out of Tula. During the Game-Turn Indication Stage of this Game-Turn, the German Player would be awarded only four Victory Points (for the destroyed Russian units). He would not be awarded 14, because Tula was not held during the Game-Turn Indication Stage.
16.2 Russian Unit Commitment
16.21 In a few scenarios, some Russian units may be considered "uncommitted" at the start of the game. See each individual scenario for a list of which units begin each game uncommitted.
16.22 Uncommitted units may neither move nor perform combat until they have become committed (see Case 16.23).
16.23 Uncommitted Russian units may be committed in two ways: (a) Through die rolls during the Russian Commitment Segment (see Sequence of Play, Case 4.2, and Case 16.24) or, (b) By the German Player moving one of his units within seven hexes of the Russian unit in question (see Case 16.25).
16.24 During his Commitment Segment of the Russian Player-Turn, the Russian Player may roll one die and consult the Russian Commitment Table (16.27) in order to determine the number of uncommitted Russian units that may begin to perform normally. This action is purely a function of the number of German Victory Points at the time the Russian Player rolls the die. At this time, the Russian Player simply cross-references his die roll with the German VP total to obtain a result. This result (a number) is the number of Russian uncommitted units that may be immediately committed by the Russian Player. The Russian Player is completely at liberty to choose any uncommitted unit on the map to commit at this time. Only one such die roll is permitted per Commitment Segment.
Example: During the Russian Commitment Segment of Game-Turn Three, the German Player has a total of nine VP's. The Russian Player rolls a four, yielding a result of 1. Therefore, the Russian Player could immediately commit one unit of his choice.
Note: There may be modifiers to the Russian Commitment die roll. See the Commitment Table (16.27) for full explanation.
16.25 At the instant a German unit moves within seven hexes of an uncommitted Russian unit, that Russian unit is automatically committed. This commitment does not count against the number of Russian units committed due to his die roll (see Case 16.24). Of course, a Russian unit that is committed in this manner may not move or perform offensive combat until the Russian Player-Turn.
16.26 Russian units that have been committed are free to move normally and perform combat normally for the duration of the game.
16.27 Russian Commitment Table (see separate sheet)
16.3 German Victory Point Index
(see separate sheet)
16.4 Destroyed Russian Unit Box
(see separate sheet)
17.0 Air Power
COMMENTARY: The dramatic losses suffered by the Russian Air Force in the opening weeks of Operation Barbarossa did not lead to German air supremacy over the Eastern Front for the remainder of 1941. Rather, the huge size of the Red Air Force before the war at last began to pay dividends. In the drive on Moscow in late 1941, the Germans found that they were unable to keep up both effective counter-air operations along with extensive support of ground forces. This, coupled with the fact that the Germans were outrunning their air bases while the Russians were moving back towards them, indicated that the Germans would not be in control of the skies during the final push on Moscow during Operation Typhoon. Regardless of who controlled the skies, the weather proved to be so abominable during this campaign that both sides' air forces tended to be negated.
GENERAL RULE: Both Players possess a certain number of Air Points. These are not historical units per se; rather, they are abstract counters representing an indeterminate number of airplanes of varying types. Each Air Point may be used once per Game-Turn in a variety of functions. These functions are Ground Support and Interdiction (which is only permitted for the German Player). Note that Air Points are only considered to be markers — under no circumstances should they be considered combat counters. They have no Zones of Control and do not affect stacking.
17.1 Availability of Air Points
17.11 Each Game-Turn, the German Player is permitted the use of six Air Points (exception: see Case 17.13). Each Air Point is represented by a single counter.
17.12 Each Game-Turn, the Russian Player is permitted the use of ten Air Points (exception: see Case 17.13). Each Air Point is represented by a single counter.
17.13 During any Game-Turn in which the weather is determined to be Overcast, both Players may only use one-half of their available Air Points per Game-Turn (i.e., the German Player may use three and the Russian may use five). During any Game-Turn in which the weather is determined to be any state of Precipitation, both Players may never use any of their Air Points.
17.14 Air Points may never be eliminated during the course of play of a game of Typhoon.
17.15 Each Air Point may only be used once per Game-Turn. Both Players keep track of their Air Points on their respective Air Displays (17.16 and 17.17). At the beginning of any Game-Turn (after the determination of the weather) both Players should place their available Air Points for the Game-Turn in the "Air Points Available" box of their Air Display. After each Air Point is used, it should be shifted to the "Air Points Used" box of the same Display.
17.16 German Air Display (see separate sheet)
17.17 Russian Air Display (see separate sheet)
17.2 Ground Support
17.21 Ground Support is a means by which Friendly attacks may be increased in effectiveness or Enemy attacks reduced in effectiveness. Both Players' Air Points may be utilized for Ground Support in either the Friendly or the Enemy Combat Phase.
17.22 The Phasing Player may decide to allocate Air Points to some of his attacks during his Combat Phase. For each Air Point allocated to an attack, the Phasing Player may "shift" the final ratio column one to the right on the same terrain line on the Combat Results Table. However, a maximum of two Air Points may ever be allocated to Ground Support for a single combat. When allocating Air Points in this fashion, the Owning Player simply removes them from the "Air Points Available" box of his Air Display and places them directly on top of the Enemy unit(s) that is to be the subject of this attack. There is no limit to the number of Air Points that may be allocated to Ground Support in a single Game-Turn (subject of course to a Player's Air Point availability), as long as no more than two Air Points are allocated to a single attack.
17.23 The non-Phasing Player may decide to allocate Air Points to some of his units that are defending during the Enemy Player's Combat Phase. For every two Air Points allocated to a defense, the non-Phasing Player may "shift" the final ratio one column to the left on the same terrain line on the Combat Results Table. However, this number of Air Points (two) is the maximum amount that may be allocated per hex to Ground Support in the Enemy Player's Combat Phase (i.e., a maximum of one shift to the left on the Combat Results Table is permitted per combat). When allocating Air Points in this fashion, the owning Player simply removes them from the "Air Points Available" box of his Air Display and places them directly on top of the Friendly units that are being attacked during this Combat Phase. Again, the non-Phasing Player may allocate as many of his Air Points as he desires to Ground Support during the Enemy Combat Phase, as long as no more than two are allocated in support of a given defense. Note that the same Air Point may not be utilized for Ground Support during both Combat Phases of the same Game-Turn.
17.24 Alterations in the ratio column of a given attack due to Ground Support are cumulative. That is, it is perfectly permissible for the ratio first to be shifted to the right and then back to the left if both Players had allocated Air Points to Ground Support for this particular combat.
Example: The German Player is attacking the Russian Player during the German Player-Turn of Game-Turn Two. The ratio for this attack is 4-1. However, the German Player has allocated two Air Points to Ground Support for this attack, making the ratio 6-1. However, the Russian Player has also allocated two Air Points to his unit's defense, so the final ratio would be 5-1.
17.25 There is a sequence to the way in which Air Points are allocated to Ground Support in a Combat Phase. First, the Phasing Player must declare if he is allocating any Air Points to each of his attacks. Next, the non-Phasing Player must declare if he is using any of his Air Points for Ground Support in any of the combats in which his units are being attacked.
17.26 Immediately after a combat involving any Player's Air Points is resolved, all participating Air Points are placed back onto the Owning Player's Air Display — specifically into the box labeled "Air Points Used". All Air Points in this box may not be allocated again until the next Game-Turn.
17.27 Air units may never participate in combats that do not involve Friendly ground units.
17.3 German Air Interdiction
17.31 Only the German Player is permitted to use Air Interdiction. During the Interdiction Phase of the German Player-Turn, the German Player may place a maximum of three Air Points on any hexes traversed by a railroad on the map.
17.32 When being placed in the German Interdiction Phase, a maximum of one Air Point may be placed in the same rail hex per Game-Turn.
17.33 German Air Points used for Interdiction only affect the ability of Russian units to move by Rail Movement. They have no other effect in the game whatsoever. For every interdicted Rail hex entered by a Russian unit utilizing Rail Movement, the Russian Player must count that hex as ten hexes out of his Rail Movement Allowance of sixty.
17.34 German Air Points used for Interdiction may be placed in Russian-occupied hexes.
17.35 German Air Points placed on the map during the German Interdiction Phase are always removed at the conclusion of the Russian Movement Phase.
17.36 When German Air Points allocated to Interdiction are removed from the map, they are always placed in the "Air Points Used" box of the owning Player's Air Display. Air Points in this box may not be used for any manner until the next Game-Turn. Note that this means that they may never be used for Interdiction and Ground Support in the same Game-Turn.
18.0 Scenarios
COMMENTARY: Typhoon is presented as a series of four distinct scenarios, each of which may be played as a separate game. Three scenarios are single map simulations of the German November 15, 1941 offensive in different sectors. The last scenario is a campaign game, which simply links together the single map games. We suggest that Players begin the play of Typhoon with a single map scenario in order to gain familiarity with the game-system.
GENERAL RULE: Each scenario represents a distinct game with different starting set-ups, special rules, and Victory Conditions. Note that before the start of any scenario, the opposing Players must agree as to whether they will utilize a rigid historical starting set-up for both of their forces or a more liberal semi-free set-up for their armies.
18.1 Panzergruppe Guderian: One Last Push for the Panzer Leader
HISTORICAL NOTES: The proud Second Panzer Army under Heinz Guderian had made a name for itself in the opening engagements of Operation Barbarossa. Victory upon victory had pushed them ever eastward into the heart of Russia. 15 November 1941 found this Army positioned for a final decisive dagger strike at the Russian capital. At least this is how the situation looked to General von Bock (commander of Army Group Center) and the German High Command.
Guderian, however, had extreme misgivings over his assigned mission. His formations were not only very much understrength, but they were also drawn out along the long road to Orel, well behind the front line. To plan an attack for a day in which the Army's full force could not be drawn up along the front line was to risk disaster, or so Guderian thought. He openly expressed his views on this subject, although he faithfully carried out his somewhat disorganized offensive on 18 November. It was also becoming clear to him that the weather was making German offensive operations well-nigh impossible.
Guderian's ill-defined aim was to head in the general direction of Moscow. The major obstacle of the Oka River stood directly in Guderian's way, although the Colonel-General felt sure he would not even get nearly that far. The offensive began well-enough, due mostly to the fact that the Russians in the front line were just as badly off as Guderian. The elite 24th Panzer Corps (under the command of Gen. Geyr von Schweppenburg) made breakthroughs that would have been decisive given good weather and more support forces. However, the cold (consistently well below zero) and the snow limited attacking columns to roads — which were practically impassable in themselves. Nevertheless, a few motorized divisions drove to the east, capturing the critical road junction of Mikhaylov. A column also came within a hair's breadth of taking the town of Kashira, directly on the Oka.
Guderian's lack of preparation for this assault soon began to tell, however. First, Russian reserve forces were striking his completely open right flank from the east, an area that had to remain open for the Germans if a drive on Moscow was to be fulfilled. Also, the fortress city of Tula ("Little Moscow") could not be taken, causing supply problems for the Germans similar to those they would face three years later in the Ardennes when Bastogne would not fall. For the most part this was due to Guderian's utilization of all available forces for his drive to the north — a gamble which Guderian felt was justified given the orders he had received from OKH. The Russian exploitation of this gamble immediately indicated to Guderian that the offensive could get nowhere unless Tula was taken and his eastern flank was protected — something which he knew was impossible given the forces at his disposal. This realization came to Guderian after only five days of fighting. On 23 November, he visited Army Group Center HQ, indicating to von Bock that his men could go no further and, in fact, were in danger of destruction in the positions they occupied at the moment. Von Bock listened politely, agreeing in his heart but not in his conscience. Both of them phoned von Brauchitsch, the German Commander-in-Chief, to ask that the strategic offensive be stopped. But the German High Command was unable to visualize the plight of the German soldiers in the field. The answer consistently given was that Moscow must fall, although both Guderian and von Bock realized that it was Hitler who had made this decision.
Of course, Guderian was physically unable to advance further, although the decisions of the Fuhrer were to have dire consequences all along this front when the Russians struck back in early December. For Guderian, this episode meant the end of the high point of his career. He was soon to be relieved of his command by the Fuhrer on 26 December 1941, never to receive another field command for the duration of the Second World War. The career of the "Creator of the Blitzkrieg" was in effect, at an end.
18.11 Scenario Length. Panzergruppe Guderian begins on 15 November (Game-Turn One) and ends on 30 November (Game-Turn Sixteen).
18.12 Initial Deployment
(a) Only Map C is used in this scenario.
(b) When using the historical set-up, each unit listed is given its organization designation, a starting hex, and (in parentheses) a unit type abbreviation. Abbreviations are as follows: I = infantry; M = mechanized infantry; T = tank; H = headquarters; C = cavalry; P = parachute infantry; S = ski; AT = anti-tank; AA = anti-aircraft.
(c) Before the start of the game, both Players must agree upon one of two starting set-up options: (1) Historical or (2) Free.
(1) Historical Set-up:
German: All units must be set-up either on or within one hex of the listed hex. No unit may ever begin the game on the front line or to the east of it. Hex numbers are in bold.
0121: 339/167/53(I), 315/167/53(I), 331/167/53(I); 0521: 110/112/53(I), 256/112/53(I), 258/112/53(I); 0912: 40/17P/24(M), 139/17P/24(T); 0922: 12/4P/24(M), 33/4P/24(M), 135/4P/24(T), 1135/4P/24(T); 1220: 3/3P/24(M), 394/3P/24(M), 16/3P/24(T), II6/3P/24(T); 1418: 1/GDM/24(M); 1716: 2/GDM/24(M); 2411: 17/31/43(I), 82/31/43(I), 12/31/43(I); 2712: 431/131/43(I); 3010: 433/131/43(I); 3210: 432/131/43(I); 3411: 163/52/13(I); 3612: 181/52/13(I); 3814: 460/260/13(I); 53/2PzA(H), 24/2PzA(H), 43/2PzA(H): Anywhere west of front line (exclusive).
Russian: All units must be set-up precisely on hex listed. Hex numbers are in bold.
0630: 41/50(C); 0828: 299/50(I); 1026: 260/50(I); 1225: 32/50(T); 1423: 413/50(I); 1622: 154/50(I); 1820: 290/49(I), Tula/49(I); 2018: 108/49(C); 2217: 198/49(M); 2416: 31/49(C); 2615: 42/49(T); 2814: 7Gd/49(I); 3013: 258/49(I); 3214: 238/49(I); 3414: 109/330/49(I); 3616: 111/330/49(I); 3817: 113/330/49(I); 2132: Vnev/50(I), 2920: 21R/49(I); 1346: 50/Bldin(H); 2132: 49/Zhrkn(H).
(2) Free Set-up:
German: All German units listed under the Historical starting set-up may be deployed by the German Player anywhere west of the front line (exclusive). The German Player sets-up first.
Russian: All Russian units belonging to 50th Army under the Historical starting set-up may be deployed by the Russian Player anywhere south of hexrow 1700 and east of the front line (exclusive). This does not apply to Vnev/50, which must begin the game set-up in Venev (2132). Similarly, all Russian units belonging to 49th Army under the Historical set-up may be deployed anywhere north of hexrow 1600 and east of the frontline (exclusive). This does not apply to Tula/49, which must begin the game set-up in Tula (1820).
18.13 Air Power
(a) German: Ignore Case 17.11. The German Player receives two Air Points per Game-Turn.
(b) Russian: Ignore Case 17.12. The Russian Player receives three Air Points per Game-Turn.
18.14 Weather
(a) The weather on Game-Turn One is automatically considered to be Overcast.
(b) The ground condition on Game-Turn One is automatically considered to be Ground Freeze.
(c) There is no snow on the ground at the start of this scenario.
18.15 German Support
(a) The German Player is only obligated to roll the die every fourth Game-Turn (starting Game-Turn One) for Support purposes for the 2nd Panzer Army (see Section 11.0).
(b) The German Player receives three Support Points every Support Allocation Stage, which must be allocated to 2nd Panzer Army. At the appropriate time, he rolls the die, consults the Support Table, and determines the number of corps HQ's of 2nd Panzer Army that may be placed in support for the next four Game-Turns.
18.16 Reinforcements
(a) German: Between Game-Turns One and Sixteen, the German Player receives only those reinforcements listed for Entry Areas One and Two on the Master Reinforcement Schedule. These units appear on the indicated Game-Turns.
(b) Russian: Between Game-Turns One and Sixteen, the Russian Player receives only those reinforcements listed for Entry Areas Two, Three, Four, and Five on the Master Reinforcement Schedule. These units appear on the indicated Game-Turns. In addition, the Russian Player receives the following reinforcements at hex 3934: Game-Turn 9: 871/20(AA), 1R/20(AA), 2R/20(AA). Game Turn 12: 112/20(T), 4Gd/20(C). Game Turn 14: 173/20(I), 312/20(I), 5N/20(I).
18.17 Uncommitted Russian Units. There are no uncommitted Russian units at the beginning of a game of Panzergruppe Guderian. The Russian Player should skip the Commitment Segment of the Russian Movement Phase.
18.18 Special Rules
(a) Due to the lack of adequate preparation time given to 2nd Panzer Army, the German Player is under certain critical supply restrictions for the first three Game-Turns. During these Game-Turns, no German unit of the 2nd Panzer Army may ever be deemed to be in supply, regardless of normal supply and support rules. Any unit that would normally be considered to be in supply is automatically out of supply. Units that would normally be considered out of supply retain this condition, as do units that would normally be considered isolated. On Game-Turn Four, the German Player determines supply for his units normally.
(b) No Russian unit belonging to the 49th Army may move south of hexrow 1700 in Game-Turns One, Two, and Three. Units of the 50th Army possess no special movement restrictions.
(c) For purposes of this scenario, the German Player should consider all units of the 13th Corps to belong to the 43rd Corps instead. These units trace supply to 43rd Corps HQ and are considered to be in support if 43rd Corps HQ is placed in support.
(d) No Russian unit may ever move west of the front line (exclusive) during Game-Turns One, Two, and Three.
(e) No Victory Points are ever recorded in this scenario, regardless of the number of Russian units destroyed or Cities captured.
(f) The Soviet Player may only move two units by rail during each Rail Movement Segment.
18.19 Victory Conditions. The game ends at the end of Game-Turn 16. At this time, both Players must evaluate their performance and declare a victor.
Decisive German Victory: The German Player must exit at least four combat (non-HQ) units off the north edge of the map east of hex 3932. At the end of the game, an imaginary German unit tracing supply from the hex(es) in which these units exited the map must be considered in supply or out of supply, not isolated. To exit the map, the German Player must have his unit enter a hypothetical hex at a cost in Movement Points equal to the hex the unit is exiting the map from. Once exited, units may never return to play. In addition, the German Player must have a unit in (or have been the last to pass through) the city of Tula, as well as three of the following five towns: Kashira, Venev, Mikhaylov, Zaokskoye, and Mordveso.
Substantive German Victory (two methods of obtainment):
(a) The German Player must have a unit in (or have been the last to pass through) all of the following towns: Kashira, Venev, Mikhaylov, Zaokskoye, and Mordveso. Or,
(b) The German Player must have a unit in (or have been the last to pass through) the city of Tula, as well as three of the following five towns: Kashira, Venev, Mikhaylov, Zaokskoye, and Mordveso.
Marginal German Victory (two methods of obtainment):
(a) The German Player must have a unit in (or have been the last to pass through) at least four of the five aforementioned towns. Or,
(b) The German Player must have a unit in (or have been the last to pass through) the city of Tula, as well as two of the aforementioned five towns.
Marginal Soviet Victory (two methods of obtainment):
(a) The German Player has a unit in (or was the last to pass through) the city of Tula, but fewer than two of the five aforementioned towns. Or,
(b) The German Player does not have a unit in Tula (nor was he the last Player to pass through). In addition, the German Player has a unit in (or was the last to pass through) less than four of the five aforementioned towns.
Substantive Soviet Victory: Same as Marginal Soviet Victory (b), except the German Player has a unit in (or was the last to pass through) less than two of the five aforementioned towns.
Decisive Soviet Victory: The German Player does not have a unit in (nor was he the last to pass through) any of the five aforementioned towns and Tula.
VICTORY CONDITION MODIFIERS: If the German Player has exited at least five combat (non-HQ) units off the eastern mapedge, the level of victory is shifted one step in favor of the German Player (i.e., a Soviet Marginal Victory would become a German Marginal Victory).
18.2 Hoepner and Reinhardt: Objective — Moscow
HISTORICAL NOTES: The main punch of the German November offensive was to be delivered by the two closest mechanized armies to the Russian capital of Moscow: 3rd and 4th Panzer Groups, under the commands of Generals G. H. Reinhardt and Erich Hoepner, respectively. Both of these formations occupied front line positions less than 100 kilometers from their objective, faced by seemingly disorganized and demoralized Russians. However, both groups faced similar problems to those being faced by Guderian well to the south at this same time. Ammunition stocks were dangerously low for the expected prolonged combat in the Moscow suburbs. Moreover, mobile operations were severely restricted by the fact that the current supply of vehicle fuel allowed operations for only 200 miles of driving for each machine. For these reasons, both Reinhardt and Hoepner could be no more confident of success than their compatriot to the south.
3rd Panzer Army's mission was to strike towards Klin and the Moscow-Leningrad railway. Then, an assault would be aimed at the Moscow-Volga canal (near the town of Dmitrov), combined with a push to the south directly into Moscow. 4th Panzer Army's job sounded somewhat simpler, although the lack of promised support from the 4th Army to the south made Hoepner's task dangerous. 4th Panzer Army's first objective was the historic village of Istra (formerly known as Voskresensk), from where it was to jump off against the fortified lines northwest of Moscow.
The day of the new German offensive dawned bright and cold (approximately 30 degrees below zero centigrade). Reinhardt's badly depleted and widely strung-out panzer formations attacked successfully south of the Volga and headed for the old textile center of Klin. On the next day, Hoepner's more concentrated army made a more potent attack, driving the Russian line in by five miles and completely breaking through on numerous division fronts. The first optimistic reports filed by both army commanders to high command led Hitler to believe that the Russian line was crumbling. However, day by day, Russian resistance was hardening. Klin did not fall until 23 November, and Istra until 26 November, (both towns having nothing left behind but thousands of booby-traps). By this point, the Germans had lost at least one-third of their armored vehicles — mostly due to the weather, mechanical failure, or to lack of fuel.
The presence of Germans less than 25 miles from the Kremlin made Stalin very nervous, and he remained in constant touch with his West Front commander, General Zhukov, during most of this time. Zhukov seemed to comprehend the plight of the Germans in the face of the bitter Russian weather better than anyone, for he steadfastly insisted to Stalin that it was inconceivable that Moscow would fall. In fact, for most of these critical days, he kept a good portion of the reserve 20th Army inactive in the vicinity of Moscow, preparing it for an early December counter-offensive. Zhukov knew that for every day the German forces continued their offensive without taking Moscow, the more disorganized and demoralized these formations would be at the point when their offensive must halt. A fresh Russian counter-offensive could thus finish them off. Of course, this great military gamble was one that kept Stalin awake at nights.
After the fall of the initial objectives, the German forces were in something of a quandry. From where should the advance be pushed? Reinhardt seemed to think that the way to Moscow from the northwest (Hoepner's route) would be fiercely resisted, and should thus be avoided. Instead, he recommended an advance into the Russian capital directly from the north, the path of least resistance. However, this plan was not to be. At this point, Reinhardt was given something of a subsidiary role: his last remaining mobile formations were to push to the line of the Moscow-Volga canal and take up defensive positions. No offensive action to the south was to be taken aside from maintaining a firm connection with Hoepner. Naturally, Hoepner — who was advancing directly into the Moscow suburbs — was meeting far greater resistance than Reinhardt. On 28 November, 4th Panzer Army was still steadily advancing and Moscow was less than 15 miles away. But on the next day, Hoepner had to admit that the German offensive was spent. The heavy snows and bitter cold, the fast-arriving Russian reinforcements, and the ever-increasing resistance around the fortified lines made this decision inevitable. Within a week, a vicious Russian counter-attack would send the Germans reeling back in defeat. Army Group Center was defeated, and in so doing had opened itself up to even greater defeats in the upcoming brutal Russian winter.
18.21 Scenario Length. Hoepner and Reinhardt begins on 15 November (Game-Turn One) and ends on 30 November (Game-Turn Sixteen).
18.22 Initial Deployment
(a) Only Map A is used in this scenario.
(b) Before the start of the game, both Players must agree upon one of two set-up options: (1) Historical or (2) Free.
(c) Unit type abbreviations as in Case 18.12b.
(1) Historical Set-up:
German: All units must be set-up either on or within one hex of the listed hex. No unit may ever begin the game on the front line or to the east of it. Hex numbers are in bold.
0210: 452/252/9(I), 461/252/9(I), 472/252/9(I); 0409: 3/DasR/40(M), 4/DasR/40(M); 0603: 110/11P/46(M), 111/11P/46(M), 115/11P/46(T), II15/11P/46(T); 0709: 69/10P/40(M), 86/10P/40(M), 17/10P/40(T), 117/10P/40(T); 1007: 13/5P/46(M), 14/5P/46(M), 131/5P/46(T), II31/5P/46(T); 1406: 2/2P/46(M), 304/2P/46(M), 13/2P/46(T), 113/2P/46(T); 1707: 34/35/5(I), 109/35/5(I), 111/35/5(I); 2007: 239/106/5(I), 240/106/5(I), 241/106/5(I); 2308: 6/7P/56(M), 125/7P/56(T), II25/7P/56(T); 2607: 53/14M/56(M); 2908: 4/6P/41(M), 111/6P/41(T); 3208: 167/86/41(I); 3408: 184/86/41(I); 3608: 216/86/41(I); 3808: 303/162/41(I); Anywhere west of front line (exclusive): 9/4PzA(H), 40/4PzA(H), 46/4PzA(H), 5/4PzA(H), 56/3PzA(H), 41/3PzA(H).
Russian: All units must be set-up precisely on hex listed. Hex numbers in bold.
0313: 25/16(T); 0512: 258/78/16(I); 0712: 131/78/16(I); 0911: 40/78/16(I); 1110: 50/16(C); 1112: 27/16(T); 1209: 28/16(T); 1409: 4/16(T); 1609: 316/16(I); 1809: 108/16(I); 2010: 17/16(C); 2020: 18R/16(I); 2210: 126/30(I); 2410: 107/30(M); 2711: 5/30(I); 2917: 101/30(I); 2911: 9/30(I); 3211: 185/30(I); 3512: 251/30(I); 3811: 257/30(I); 0337: 1/1Sh(S), 2/1Sh(S); 0336: 3/1Sh(S), 4/1Sh(S); 0338: 56/1Sh(I), 71/1Sh(I); 0440: 55/1Sh(I); 0439: 47/1Sh(I), 50/1Sh(I); 0438: 29/1Sh(I), 44/1Sh(I); 0521: 16/R'sky(H); 2020: 30/L'nko(H); 0440: 1Sh/Kuz(H).
(2) Free Set-up:
German: All German units listed under the Historical starting set-up may be deployed by the German Player anywhere west of the frontline (exclusive). The German Player sets-up first.
Russian: All Russian units belonging to 30th Army under the Historical starting set-up may be deployed by the Russian Player anywhere north of hexrow 2100 (inclusive) and east of the frontline (exclusive). All Russian units belonging to the 16th Army may be deployed anywhere south of hexrow 2100 (inclusive) and east of the frontline (exclusive). All units of 1st Shock Army must be deployed in their indicated hexes according to the Historical set-up.
18.23 Air Power
(a) German: Ignore Case 17.11. The German Player receives two Air Points per Game-Turn.
(b) Russian: Ignore Case 17.12. The Russian Player receives four Air Points per Game-Turn.
18.24 Weather
(a) The weather on Game-Turn One is automatically considered to be Overcast.
(b) The ground condition on Game-Turn One is automatically Ground Freeze.
(c) There is no snow on the ground at the start of the scenario.
18.25 German Support
(a) The German Player is only obligated to roll the die every fourth Game-Turn (starting Game-Turn One) for Support purposes for the 3rd and 4th Panzer Armies.
(b) The German Player receives six Support Points every Support Allocation Stage, which must be divided among the 3rd or 4th Panzer Army. At the appropriate time, he rolls the die and consults the Support Table, determining the number of corps HQ's of 3rd and 4th Panzer Armies that may be placed in support for the next four Game-Turns.
18.26 Reinforcements
(a) German: Between Game-Turns One and Sixteen, the German Player receives only those reinforcements listed for Entry Areas 13 and 14 on the Master Reinforcement Schedule. These units appear on the indicated Game-Turns.
(b) Russian: Between Game-Turns One and Sixteen, the Russian Player receives only those reinforcements listed for Entry Areas 8, 9, 10, and 11 on the Master Reinforcement Schedule. These units appear on the indicated Game-Turns. In addition, the Russian Player receives the following reinforcements at any of these hexes: 0125, 0127, 0129, or 1030: Game-Turn 5: 22/20(T), 31/20(T). Game-Turn 6: 28/1Sh(I), 41/20(T). Game-Turn 7: 17/20(T). Game-Turn 12: 20/26(C). Game-Turn 14: 871/20(AT), 1R/20(AT), 2R/20(AT).
18.27 Uncommitted Russian Units. All units of the 1st Shock Army ("1Sh") are uncommitted at the beginning of the game. During the Commitment Segment of the Russian Movement Phase, the Russian Player makes his commitment die roll normally (see Case 16.24), except he adds one to each die roll (in addition to any other modifiers). Of course, these units may also be committed due to a German unit moving within seven hexes (see Case 16.25). Note that the German Player must keep track of his Victory Points (see Case 16.1) in this scenario.
18.28 Special Rules
(a) All German units that belong to the following corps are automatically out of supply during Game-Turn One: 9th Corps, 40th Corps, 46th Corps, and 5th Corps. These units are out of supply regardless of normal support or supply considerations. On Game-Turn Two, supply is traced normally for units of these corps.
(b) Aside from the hex in which some Russian units enter the map (see Case 18.26b), no unit may ever be moved into the southernmost hexrow of Map A (hexrow 0100) for the duration of the scenario (exception: see Victory Conditions, Case 18.29).
(c) All Soviet units belonging to the 20th Army are automatically considered to be in supply for the duration of the scenario.
(d) The Soviet Player may only move two units by rail during each Rail Movement Segment.
18.29 Victory Conditions. The game ends at the end of Game-Turn Sixteen (30 November, 1941). At this time, both Players must evaluate their performance and declare a victor.
Decisive German Victory: At least 6 combat (non-HQ) units must exit the map between hexes 0126 and 0133 (inclusive). "Exiting the map" is defined as entering the 0100 hexrow, at a cost in Movement Points of the terrain in the hex entered. Once "exited", units may never return to play. At the end of the game, an imaginary German unit tracing supply from the hex(es) in which the units exited the map must be determined to be in supply or out of supply (not isolated). In addition, the German Player must have a unit (or have been the last to pass through) six of the following Cities or Towns: Klin (2020), Solnechnogorsk (1423), Istra (0521), Radov (0323), Dmitrov (1734), Dubna (3534), Mytischi (0234), Ivanteyevka (0537), Zagorsk (1443), and Aleksandrov (1453).
Substantive German Victory: Same as above, except the German Player is obligated to exit four units off the map between the listed hexes and control five of the 10 Cities or Towns.
Marginal German Victory: Same as above, except the German Player is obligated to exit at least two units off the map between the listed hexes and control four of the 10 Cities or Towns.
Marginal Soviet Victory:
(1) The German Player has exited less than 2 units off the map between the listed hexes by game's end or
(2) The German Player has a unit in or was the last to pass through 3 or fewer of the 10 listed Towns or Cities.
Substantive Soviet Victory: The German Player has exited no units off the map between the listed hexes. Additionally, the German Player has a unit in or was the last to pass through two or fewer of the 10 listed Towns or Cities.
Decisive Soviet Victory: As Substantive Soviet Victory, except the German Player must have a unit in (or have been the last to pass through) no more than one of the 10 listed Cities or Towns.
VICTORY CONDITION MODIFIERS:
(1) If the German Player has accumulated more than 15 Victory Points by game's end, the "level" of victory is shifted one step in favor of the German Player (i.e., a Marginal Soviet Victory would become a Marginal German Victory).
(2) If the German Player has exited at least 3 combat (non-HQ) units off the eastern mapedge, the level of victory is shifted one step in favor of the German Player. To exit the map, a unit spends MP's equivalent to the MP cost of the hex being exited from. Exited units may never return to play.
18.3 Von Kluge on the Nara
HISTORICAL NOTES: One of the most controversial and puzzling aspects of the 1941 Moscow campaign was the failure of the German 4th Army to participate actively in the main assault. 4th Army was primarily an infantry army (it possessed only two panzer divisions), commanded by Field Marshal Gunther von Kluge.
Most of von Kluge's divisions had reached the Nara River weeks before the planned jump-off date for the Moscow assault — in fact, 4th Army's position along this River had begun to resemble a World War One trench-system more than a modern battlefield! Towards the end of October and the beginning of November, von Kluge's forces had successfully contained some Soviet offensives on their front, a development that may well have influenced von Kluge's thought and planning in the upcoming weeks.
Upon receiving word of the planned attack on Moscow for 15 November, von Kluge was taken somewhat aback. He was the only one of the four German army commanders who was unwilling to optimistically commit himself to an offensive. No one knew whether he believed Moscow could be taken or not. It seems certain that his carefully-planned defensive positions on the Nara and his preparations for the bitter Russian winter led him to believe that an attack against Moscow was foolhardy. To a certain degree, he was able to convince von Bock (Army Group Center's commander) of this, for he was permitted a certain grace period of inactivity while 3rd and 4th Panzer Armies (to the north) and 2nd Panzer Army (to the south) commenced their attacks. Von Bock's plan was to allow the attacks on 4th Army's flanks to begin on the scheduled date. About five or six days later, it was expected that enough Soviet formations would have been withdrawn from von Kluge's front to make an attack in this sector feasible. Nevertheless, it was December 1 before 4th Army initiated any offensive action, and then only with parts of two corps. By this time, Reinhardt's, Hoepner's, and Guderian's drives had completely petered out. In particular, Hoepner's 4th Panzer Army suffered severely due to this inactivity. In his fairly successful drive towards Moscow, Hoepner's right flank was continually exposed to Russian attacks because of von Kluge's lack of support. Hoepner spoke on the phone with von Kluge every day, but to no avail.
As a result, the Soviet command was able to virtually ignore a wide expanse of front directly to the west of Moscow. What had formerly been relatively heavily defended was stripped to such a degree that Russian reinforcements from this area were able to directly influence the course of battle to both the south and the north. This tactical flexibility on interior lines was something that Zhukov had not counted on — in fact, in later years, this Soviet Marshal was to say that 4th Army's lack of initiative was by far the worst mistake made by the Germans in this battle.
It is hard to allocate blame for 4th Army's failure. Von Kluge was hesitant and von Bock unfirm. In a conversation with Berlin, von Bock said, "Kluge is difficult to convince. On his own volition, he has delayed attacking several times. I have given him all available reserves. There have been some local breakthroughs, but nothing on a broad scale. And even these are being snipped off as fast as they develop."
Von Kluge on the Nara is something of a fantasy scenario. An accurate representation of the battle on this front would not be a game. What would have happened had von Kluge been forced to attack and been given all the support that he required? Would Moscow have fallen? Or would the pressure at least make the going easier for 4th Army's neighbors to the north and south?
18.31 Scenario Length. Von Kluge on the Nara begins on 15 November (Game-Turn One) and ends on 30 November (Game-Turn Sixteen).
18.32 Initial Deployment
(a) Only Map B is used in this scenario.
(b) Before the start of the game, both Players must agree upon one of two set-up options: (1) Historical or (2) Free.
(c) Unit type abbreviations as in Case 18.12b.
(1) Historical Set-up:
German: All units must be set-up either on or within one hex of the listed hex. No unit may ever begin the game on the front line or to the east of it. Hex numbers in bold.
0214: 470/260/13(I), 480/260/13(I); 0415: 205/52/13(I); 0813: 468/268/13(I), 488/268/13(I), 499/268/13(I); 0814: 55/17/13(I), 21/17/13(I), 95/17/13(I); 0913: 463/263/12(I), 483/263/12(I), 485/263/12(I); 0917: 81/15/12(I), 88/15/12(I); 1012: 447/137/13(I), 448/137/13(I), 449/137/13(I); 1216: 80/34/12(I), 107/34/12(I), 253/34/12(I); 1416: 106/15/12(I); 1615: 282/98/12(I), 289/98/12(I), 290/98/12(I); 1912: 73/19P/57(M), 74/19P/57(M), 127/19P/57(T), II27/19P/57(T); 2112: 59/20P/57(M), 112/20P/57(M), 121/20P/57(T), II21/20P/57(T); 2310: 330/183/57(I), 343/183/57(I), 351/183/57(I); 2608: 8/3M/57(M), 29/3M/57(M); 2807: 507/292/20(I), 508/292/20(I), 509/292/20(I); 2704: 458/258/20(I), 479/258/20(I), 478/258/20(I); 3008: 19/7/7(I), 61/7/7(I), 62/7/7(I); 3308: 321/197/7(I), 332/197/7(I), 347/197/7(I); 3508: 467/267/7(I), 487/267/7(I), 497/267/7(I); 3709: 195/78/9(I), 215/78/9(I), 238/78/9(I); 3911: 173/87/9(I), 185/87/9(I), 187/87/9(I); Anywhere west of front line (exclusive) 13/4A(H), 7/4PzA(H), 12/4A(H), 57/4A(H), 20/4A(H).
Russian: All units must be set-up precisely on hex listed. Hex numbers in bold.
0318: 5Gd/43(I); 0419: 7R/43(I); 0520: 145/43(T); 0721: 194/43(I); 0820: 31/43(T); 1020: 1Gd/43(C), IV/43(I); 1219: 415/43(I); 1419: 53/43(I), 24/43(T); 1618: 93/43(I); 1917: 26/43(T), 2Gd/43(C); 2015: 113/33(I); 2214: 110/33(I); 2413: 1/33(M); 2614: 222/33(I); 1423: 17/43(I); 2612: 201/33(P); 2811: 151/5(M); 3011: 82/5(I); 3211: 32/5(I); 3717: 18/5(T), 19/5(T); 3412: 20/5(T); 3613: 50/5(I); 3814: 144/5(I); 3628: 28/20(I), 41/20(T), 43/20(I); 3729: 9/20(T), 17/20(T), 1nd/20(T); 22/20(T); 3829: 871/20(AT), 871/20(AA), 11/20(T); 3329: 1R/20(AA), 1R/20(AT), 21/20(T); 3229: 2R/20(AA), 2R/20(AT), 31/20(T); 1232: 43/Glbev(H); 2527: 33/Efnv(H); 3217: 5/Gvrov(H); 3229: 20/Vlasv(H).
(2) Free Set-up:
German: All German units listed under the Historical starting set-up may be deployed by the German Player anywhere west of the frontline (exclusive). The German Player sets-up first.
Russian: All Russian units belonging to the 43rd Army under the Historical starting set-up may be deployed by the Russian Player anywhere between hexrows 0200 and 1900 (inclusive), east of the frontline (exclusive). All units belonging to the 33rd Army may be deployed anywhere between hexrows 2000 and 2700 (inclusive), east of the frontline (exclusive). All units of the 5th Army may be deployed anywhere north of hexrow 2700 (exclusive), east of the frontline (exclusive). All units of the 20th Army must be deployed in the indicated hexes according to the Historical set-up.
18.33 Air Power
(a) German: Ignore Case 17.11. The German Player receives two Air Points per Game-Turn.
(b) Russian: Ignore Case 17.12. The Russian Player receives three Air Points per Game-Turn.
18.34 Weather
(a) The weather on Game-Turn One is automatically Overcast.
(b) The ground condition on Game-Turn One is automatically Ground Freeze.
(c) There is no snow on the ground at the start of the scenario.
18.35 German Support
(a) The German Player is only obligated to roll the die every fourth Game-Turn (starting Game-Turn One) for Support purposes for the 4th Panzer Army and 4th Army.
(b) Since Von Kluge on the Nara is something of a fantasy scenario, it should be up to the Players to decide how many Support Points should be provided for the German Player.
(1) If the Players are attempting to simulate the actual battle, the German Player should be provided only one (or at most two) Support Points. This will not give the German Player much of a chance, however.
(2) Assuming 4th Army was commanded by a more active and aggressive leader, the German Player should be provided three or four Support Points.
(3) Assuming optimum conditions of supply and command, the German Player should be provided five Support Points. In reality, Army Group Center would have found it almost impossible to carry out such an attack.
18.36 Reinforcements
(a) German: Between Game-Turns One and Sixteen, the German Player receives only those reinforcements listed for Entry Area 15 on the Master Reinforcement Schedule. These units appear on the indicated Game-Turns.
(b) Soviet: Between Game-Turns One and Sixteen, the Russian Player receives only those reinforcements listed for Entry Area 7 on the Master Reinforcement Schedule, plus those listed for entry directly in any Moscow hex. These units appear on the indicated Game-Turns.
18.37 Uncommitted Russian Units. All units of the 20th Army are uncommitted at the beginning of the game. During the Commitment Segment of the Russian Movement Phase, the Russian Player makes his commitment die roll normally (see Case 16.24), except he adds two to each die roll (in addition to any other modifiers). Of course, these units may also be committed due to a German unit moving within seven hexes (see Case 16.25). Note that the German Player must keep track of his Victory Points (see Case 16.1) in this scenario.
18.38 Special Rules
(a) Regardless of normal support or supply considerations, all German units on the map are out of supply during Game-Turn One. Starting with Game-Turn Two, supply is traced normally for all German units.
(b) No unit may ever enter the southernmost hexrow of Map B (hexrow 0100) for the duration of the game.
(c) All German units which belong to the 9th Corps are considered to belong to the 7th Corps for the duration of the game.
(d) Starting with Game-Turn Five, the Russian Player must roll one die at the beginning of his Commitment Segment. These die rolls take place each Game-Turn until the end of the game. If the Russian Player rolls a 1 or a 2, one uncommitted unit belonging to the 20th Army must be immediately picked up and removed from the map (it is considered that this unit has been withdrawn to aid in the defense of another sector of the line). If a 3, 4, 5, or 6 is rolled, nothing further is done until the next Commitment Segment. Units removed from the map due to these die rolls are not considered eliminated. If there are no more uncommitted 20th Army units on the map, the Russian Player may discontinue these die rolls.
(e) The Soviet Player may only move one unit by rail during each Rail Movement Segment.
18.39 Victory Conditions. The game ends at the end of Game-Turn Sixteen (30 November). At this time, both Players must evaluate their performance and declare a victor.
Decisive German Victory:
(a) The German Player must have a unit (or have been the last to pass through) eight of the following twelve Cities or Towns: Zvenigorod (3717), Naro-Fominsk (2512), Serpukov (0621), Micinevo (1232), Podol'sk (2527), Kuntsevo (3427), Lenino (2931), Brinnizsi (2139), Kolomna (0646), Yegor'yevski (1652), Kurovskoye (2352), and Klimovsk (2126). In addition, the German Player must have at least one unit in hex 3531 (Kremlin) that is not isolated at the end of the game.
(b) Same as above except the German Player is not obligated to have a unit in hex 3531. Instead, he must have at least ten unisolated combat units east of the Moskva River, south of hexrow 3200 at the end of the game.
Substantive German Victory: There are two methods of obtaining this victory condition.
(a) Same as (a) above, except the German Player is only obligated to control six of the twelve listed Cities or Towns.
(b) Same as (b) above, except the German Player must have at least five unisolated units east of the Moskva River, south of hexrow 3200 at the end of the game.
Marginal German Victory: There are two methods of obtaining this victory condition:
(a) The German Player must have at least one unisolated combat unit in hex 3531 at the end of the game (regardless of the control of any other Cities or Towns), or
(b) At the end of the game, the German Player must control at least six of the listed Cities or Towns.
Marginal Russian Victory: The German Player does not have an unisolated combat unit in hex 3531 at the end of the game. In addition, at this time, the German Player controls less than six of the listed Cities or Towns.
Substantive Russian Victory: Same as above, except the German Player controls less than five of the listed Cities or Towns.
Decisive Russian Victory: Same as above, except the German Player controls less than four of the listed Cities or Towns.
VICTORY CONDITION MODIFIER: If the German Player has exited at least three combat (non-HQ) units off the eastern mapedge, the level of victory is shifted one step in favor of the German Player (i.e., a Soviet Marginal Victory would become a German Marginal Victory). Exited units may never return to play.
18.4 The Campaign Game: The Battle for Moscow
"It's Moscow now behind us men! Let's die defending Moscow then, Like our brothers died before us!" — Soviet poem
The Battle for Moscow was a military operation of enormous size, both in terms of area and personnel. Four German and eleven Soviet armies were to clash on a front of 350 kilometers. The fighting had one aim only: the capture of Moscow.
The Campaign Game is simply a combination of the three previous single-map scenarios. It simulates the offensive made by the four German armies of Army Group Center against Moscow, starting on 15 November, 1941. Note that if the Players desire, they may wish to extend the Campaign Game to 15 December, 1941 by playing scenario 18.5. This will represent in part the beginnings of the Soviet counter-offensive around Moscow that was eventually to prove so disastrous to the German cause.
18.41 Scenario Length. The Battle for Moscow begins on 15 November (Game-Turn One) and ends on 30 November (Game-Turn Sixteen).
18.42 Initial Deployment
(a) All three maps are used in this scenario.
(b) Before the start of the game, both Players must agree upon one of two set-up options: (1) Historical or (2) Free.
(1) Historical Set-up:
German: The German Player simply follows the set-up instructions of Cases 18.12(1), 18.22(1), and 18.32(1). All units must be deployed either on or within one hex of the listed hex. No unit may ever begin the game on the front line or to the east of it.
Russian: The Russian Player simply follows the set-up instructions of Cases 18.12(1), 18.22(1), and 18.32(1). All units must be deployed precisely on the listed hexes.
(2) Free Set-up:
German: All German units listed under the Historical starting set-ups for Cases 18.12(1), 18.22(1), and 18.32(1) may be deployed by the German Player anywhere west of the front line (exclusive). The German Player sets-up first.
Russian: The Russian Player simply follows the set-up instructions of Cases 18.12(2), 18.22(2), and 18.32(2). The Russian Player sets-up second.
18.43 Air Power. Follow Cases 17.11 and 17.12 for Air Point availability.
18.44 Weather
(a) The weather on Game-Turn One is automatically Overcast.
(b) The ground condition on Game-Turn One is automatically Ground Freeze.
(c) There is no snow on the ground at the start of the scenario.
18.45 German Support. The German Player follows the instructions of Section 11.0 (i.e., he must allocate support every fourth Game-Turn to each of his four armies with ten Support Points).
18.46 Reinforcements. Both Players receive reinforcements exactly as listed on the Master Reinforcement Schedule (see Case 15.3) between Game-Turns One and Sixteen.
18.47 Uncommitted Russian Units. All Russian units of two armies are considered to be uncommitted at the start of the game. These armies are the 1st Shock Army ("1Sh") and the 20th Army. During the Commitment Segment of the Russian Movement Phase, the Russian Player makes his commitment die roll exactly as described in Case 16.2.
18.48 Special Rules. The following special rules from the three previous scenarios are in effect for the Campaign Game: 18.18(a), 18.18(b), 18.28(a), and 18.38(a).
18.49 Victory Conditions. Before the start of the game, the German Player must secretly choose one of three "Plans". Depending on the Plan chosen, the German Player will have various objectives in the attack. There are different Victory Conditions for each Plan. The Plan is revealed to the Soviet Player only at the end of the game, when the Players must evaluate their performances and declare a victor.
-
Historical Plan: A direct assault on Moscow by all four participating armies.
-
Strategic Encirclement Plan: An encirclement of Moscow, with the goal of cutting the city's arteries off from the rest of Russia.
-
Broad Front Plan: An advance in a general eastward direction by all four armies, with the aim of taking as much Soviet territory as possible before the coming of the worst portion of the Russian winter. 2nd and 3rd Panzer Armies would ignore Moscow entirely.
HISTORICAL PLAN VICTORY CONDITIONS
Decisive German Victory: Accumulate at least 120 Victory Points by game's end.
Substantive German Victory: Accumulate at least 80 Victory Points by game's end.
Marginal German Victory: Accumulate at least 50 Victory Points by game's end.
Marginal Soviet Victory: The German Player has accumulated between 30 and 49 Victory Points (inclusive) by game's end.
Substantive Soviet Victory: The German Player has accumulated between 15 and 29 Victory Points (inclusive) by game's end.
Decisive Soviet Victory: The German Player has accumulated less than 15 Victory Points by game's end.
STRATEGIC ENCIRCLEMENT PLAN VICTORY CONDITIONS
Decisive German Victory:
(1) Accumulate at least 50 Victory Points by game's end. In addition, at this time, Moscow must be "encircled". Moscow is considered encircled if an imaginary unit in the Kremlin hex (B3531) cannot trace a continuous path of road hexes, uninterrupted by Enemy units or their Zones of Control, to the eastern edge of the map. Friendly units negate Enemy ZOC's in the hexes they occupy. Or,
(2) Accumulate at least 50 Victory Points by game's end. In addition, at this time, the German Player must have exited at least 30 non-HQ combat units off the east edge of the map in Entry Areas 6, 7, or 8. Each unit exited off Entry Area 7 counts as two units exited for the German Player. Exited units are never returned to play.
Substantive German Victory:
(1) Same as (1) above, except the German Player has accumulated at least 35 Victory Points by game's end.
(2) Same as (2) above, except the German Player has accumulated at least 35 Victory Points.
Marginal German Victory: Accumulate at least 50 Victory Points by game's end.
All Soviet Victory Conditions: As in Historical Plan (note that if the German Player fulfills his Substantive Victory, a Soviet Marginal Victory is voided).
BROAD FRONT PLAN VICTORY CONDITIONS
Substantive German Victory: Accumulate at least 50 Victory Points by game's end. In addition, at this time, the German Player must have exited at least 30 non-HQ combat units off the east edge of the map in Entry Areas 5, 6, 7, 8, and/or 9.
Marginal German Victory:
(1) Accumulate at least 50 Victory Points, or
(2) Exit at least 30 non-HQ combat units off the east edge of the map in Entry Areas 5, 6, 7, 8, and/or 9, in addition to accumulating at least 40 Victory Points by game's end.
All Soviet Victory Conditions: As in Historical Plan (note that if the German Player achieves a Marginal Victory (2), a Soviet Marginal Victory is voided).
EXPLANATION OF VICTORY LEVELS
Decisive German Victory: The coup de grace to the Soviet nation and the perfect culmination (in Hitler's eyes) of the German campaigns of 1941. The Soviet government moves back to Gorky, while Stalin orders a general withdrawal on the Eastern Front towards the Urals. The capture of the road and rail junction of Moscow removes any possibility of a quick Soviet concentration for a counter-offensive in the next few months. In addition, a crippling blow is dealt to Soviet industry due to the loss of the industrial heartland of the nation. The Germans will be well-prepared to end the war in the East in the Spring of 1942 — in fact, many Russians are willing to end it now.
Substantive German Victory: The Soviets make a general, fighting withdrawal to the east, despite this decisive defeat. The retreat is performed in good order, although the long-awaited Soviet counter-attack will have to be postponed until early Spring, 1942. Most Germans see some hope of ending the war in the next year.
Marginal German Victory: The Soviet line just barely manages to hold its ground along the Eastern Front. As the Winter comes, the Germans are hard-pressed to maintain themselves in their newly-won positions, despite their supreme effort of November. A Soviet counter-offensive in December achieves little at great cost in Russian lives. The Germans will regain the initiative come the Spring of 1942.
Marginal Soviet Victory: The great German gamble has failed, and the price is paid in the frigid Winter months on the Russian steppes. A Soviet counter-offensive comes close to breaking the German line entirely in early 1942. Come Spring 1942, both exhausted armies will have recovered and the battle for Moscow will be renewed on a furious scale.
Substantive Soviet Victory: The Soviets hold the line handily, and strike back at the point of the most severe German over-extension. The counter-blow is crippling to Army Group Center, which takes tremendous casualties and loses almost all of its vehicles in the precipitous rout. Many high-ranking officers are sacked by Hitler in the ensuing weeks.
Decisive Soviet Victory: Army Group Center is virtually destroyed by its own fruitless assaults and the Soviet counter-thrust. The disaster at Moscow forces a general withdrawal all along the Eastern Front for German forces, losing much of the hard-won ground of September and October 1941. Moscow will never again be threatened during the war. The quantity of German reinforcements brought from other fronts indefinitely postpones the planned Spring 1942 offensives against Rostov, Stalingrad, and the Caucasus.
18.5 The Extended Campaign Game
This game is a 15 Game-Turn extension of the normal Campaign Game (Case 18.4). It continues the game through Game-Turn 31 (December 15, 1941). If Players wish to play this scenario, initial deployment and game-play should proceed according to the restrictions of Case 18.4. Weather, air power, German support, reinforcements, and Russian commitment for Game-Turns 17 through 31 are played in the same manner as the first 16 Game-Turns.
With one exception, the Victory Conditions of the Extended Campaign Game are identical to those of the shorter game. That exception is if the Soviet Player ends the game with at least 12 non-HQ combat units west of the front line. If this occurs, the Soviet Player shifts the Victory Level one "step" in his own favor (i.e., a Soviet Marginal Victory would become a Soviet Substantive Victory). Similarly, if at least 12 non-HQ Soviet combat units exit the western map edge by the end of the game, the Soviet Player shifts the Victory Level another step in his favor.
19.0 Optional Rules
GENERAL RULE: The following Optional Rules may be used individually or collectively by mutual agreement of both Players at the start of the scenario.
19.1 German Hedgehogs
19.11 German infantry regiments (whether regular or mechanized) may form hedgehogs. A hedgehog enhances the ability of a unit to defend, but in so doing the unit in question forfeits its Zone of Control.
19.12 A German infantry regiment may form a hedgehog at any time during its Movement Phase as long as that unit does not move for the duration of that Phase. At the conclusion of the Movement Phase, the unit is considered to be in hedgehog formation. As such, a blank marker should be placed on the unit to indicate this status.
19.13 If attacked, any German unit in hedgehog formation has the final ratio column shifted one to the left (i.e., a 2-1 attack made by the Russian Player would become a 1-1 attack). Any unit in hedgehog formation does not possess a Zone of Control.
19.14 A unit may leave hedgehog formation simply by exiting the hex in which it had entered it. This may be performed during the Friendly Movement Phase. A unit is forced to leave hedgehog formation if, due to an adverse combat result, it must retreat out of the hex in which it had entered hedgehog.
19.15 If any unit in a hex is in hedgehog formation, then all units in that hex (or which subsequently enter that hex) are considered to be in hedgehog formation. No unit in such a hex may ever exert a Zone of Control. If a hex in which certain units had entered hedgehog formation is vacated, then the hedgehog in that hex is no longer considered existent.
19.16 Russian units may never enter hedgehog formation.
19.2 Soviet Ski Troops
19.21 The Soviet Player possesses a number of ski units. These units receive certain benefits when there is snow on the ground, both in terms of movement and combat.
19.22 For movement purposes, ski units are never detrimentally affected by snow.
19.23 When there is snow on the ground, any ski unit that participates in combat receives a bonus. If any ski unit is defending against a German attack (whether it is stacked with other defending Soviet units or not), that German attack ratio is shifted one column to the left on the Combat Results Table (i.e., a 3-1 attack would become 2-1). If any ski unit is participating in an attack, the Soviet attack ratio is shifted one column to the right. Note that this bonus is only applicable in snow Game-Turns.
19.3 Alternative German Support
After a scenario or two of Operation: Typhoon, Players should grasp that the German offensive against Moscow was something of a haphazard venture. No single unit was prepared for a major offensive by November 15, 1941, either logistically or in terms of command. The Support rules reflect this situation. The German Player will usually find it difficult to use his army as a whole. Although this situation reflects the Battle for Moscow accurately, Players may wish to vary these key rules for any reason they consider valid. For example, the Players may wish to postulate what would have happened had the Germans been better-prepared for this offensive on November 15. As such, they might want to give the German Player 12 (or any number they can agree on) Support Points to allocate to his armies during the Support Allocation Stage. Similarly, if the German Player is far more experienced than the Soviet Player, it may be agreed to limit the German Player to less than 10 Support Points. Of course, any alteration to German Support Point allocation must only be performed upon mutual agreement of both Players.
20.0 Order of Battle
SOVIET UNION
West Front: Marshal G.K. Zhukov
50th Army: Lt. Gen. I. V. Boldin. Infantry Divisions: 239th, 413th, 154th, 6th Guards; 299th, 260th. Cavalry Division: 41st. Tank Brigades: 11th, 133rd, 32nd. Militia: Venev Infantry Battalion.
49th Army: Lt. Gen. I.G. Zakharkin. Infantry Divisions: 238th, 258th, 21st Reserve, 290th, 7th Guards, 330th, 198th (Mechanized). Cavalry Divisions: 31st, 108th. Tank Brigade: 42nd. Militia: Tula Worker Brigade.
43rd Army: Lt. Gen. K.D. Golubev. Infantry Divisions: 93rd, 194th, 415th, 7th Reserve, 53rd, 17th, 1st Volunteer ("People's"), 5th Guards. Cavalry Divisions: 1st Guards, 2nd Guards. Tank Brigades: 24th, 31st, 26th, 145th.
33rd Army: Lt. Gen. M.G. Efremov. Infantry Divisions: 110th, 113th, 222nd, 1st (Mechanized). Parachute Brigade: 201st.
5th Army: Maj. Gen. L.A. Govorov. Infantry Divisions: 32nd, 144th, 82nd, 50th. Infantry Brigade: 151st (Mechanized). Tank Brigades: 18th, 19th, 20th.
16th Army: Maj. Gen. Rokossovsky. Infantry Divisions: 316th, 18th Reserve, 108th, 3rd Guards, 78th Siberian. Cavalry Divisions: 17th, 50th. Cavalry Brigade: Doratov. Tank Brigades: 4th, 27th, 25th, 28th.
30th Army: Maj. Gen. D.D. Lelyushenko. Infantry Divisions: 256th, 257th, 9th, 312th, 251st, 101st, 43rd, 5th, 185th, 242nd, 107th (Mechanized). Cavalry Division: 18th. Tank Brigades: 8th, 21st.
10th Reserve Army: Lt. Gen. F.I. Golikov. Infantry Divisions: 322nd, 323rd, 324th, 325th, 326th, 327th, 328th, 333rd, 212th, 269th, 19th. Cavalry Division: 75th.
26th Army: Maj. Gen. A.V. Kurkin. Infantry Divisions: 331st, 340th, 365th, 371st, 12th, 31st, 133rd, 309th, 354th. Cavalry Divisions: 44th, 20th. Parachute Brigade: 10th. Ski Brigade: 22nd. Infantry Brigades: 37th, 40th, 17th, 18th, 31st, 57th, 64th. Tank Brigades: 1st, 146th.
20th Army: Maj. Gen. A.A. Vlasov. Infantry Divisions: 129th, 173rd, 233rd, 3rd Reserve, 312th, 20th, 5th NKVD. Cavalry Divisions: 24th, 4th Guards. Anti-tank/Anti-aircraft Brigades: 871st, 1st Reserve, 2nd Reserve. Infantry Brigades: 28th, 43rd, 69th NKVD. Tank Brigades: 112th, 108th, 5th, 9th, 124th, 17th, 22nd. Tank Division: 58th. Tank Battalions: 1st, 2nd, 3rd, 4th. Tank Company: Independent Heavy.
1st Shock Army: Lt. Gen. V.I. Kuznetsov. Infantry Divisions: 28th, 348th. Ski Brigades: 1st, 2nd, 3rd, 4th. Infantry Brigades: 35th, 43rd, 47th, 55th, 56th, 44th, 50th, 71st, 29th. Tank Brigade: 83rd.
GERMANY
Army Group Center: Field Marshal Fedor von Bock
2nd Panzer Army: Col.-Gen. Heinz Guderian. 24th Corps: 3rd, 4th, 17th Panzer Divisions; Grosse Deutschland Motorized Infantry Regiment. 43rd Corps: 31st, 56th, 131st Infantry Divisions. 47th Corps: 10th, 25th, 29th Motorized Infantry Divisions. 53rd Corps: 112th, 167th, 296th Infantry Divisions.
4th Army: Field Marshal Guenther von Kluge. 12th Corps: 15th, 34th, 98th, 263rd Infantry Divisions. 13th Corps: 17th, 52nd, 137th, 260th, 268th Infantry Divisions. 20th Corps: 258th, 292nd Infantry Divisions. 57th Corps: 183rd Infantry Division, 3rd Motorized Infantry Division, 19th, 20th Panzer Divisions.
4th Panzer Army: Col.-Gen. Erich Hoepner. 5th Corps: 35th, 106th Infantry Divisions. 7th Corps: 7th, 197th, 256th, 267th Infantry Divisions. 9th Corps: 78th, 87th, 252nd Infantry Divisions. 40th Corps: SS Das Reich Motorized Infantry Division; 10th Panzer Division. 46th Corps: 2nd, 5th, 11th Panzer Divisions
3rd Panzer Army: General G.H. Reinhardt. 41st Corps: 86th, 162nd, 23rd Infantry Divisions; French SS Infantry Regiment; 900th Motorized Infantry Regiment; 1st and 6th Panzer Divisions. 56th Corps: 14th, 36th Motorized Infantry Divisions; 7th Panzer Division.
21.0 Bibliography
The following works were all found to be extremely useful in the design and development of Operation: Typhoon.
Beloborodov, Gen. A. They Did Not Pass. Moscow: Progress Publishers, 1970.
Bethell, Nicholas. Russia Besieged. New York: Time-Life, 1977.
Carell, Paul. Hitler Moves East. New York: Little Brown, 1964.
Dunnigan, James F., ed. War in the East. New York: Simulations Publications, Inc., 1977.
Erickson, John. The Road to Stalingrad. New York: Harper and Row, 1975.
Guderian, Gen. Heinz. Panzer Leader. New York: Ballantine, 1957.
O'Ballance, Edgar. The Red Army. New York: F. Praeger, 1964.
Pospelov, P.N., ed. Great Patriotic War of the Soviet Union. Moscow: Progress Publishers, 1970.
Seaton, Albert. The Battle for Moscow. New York: Stein and Day, 1971.
___. The Russo-German War. London: Arthur Barker, 1971.
___. Stalin as Military Commander. New York: Praeger, 1976.
Servuk, Vladimir. Moscow-Stalingrad — Recollections, Stories, Reports. Moscow: Progress Publishers, 1974.
Tessin, Georg. Verbande und Truppen der Deutschen Wehrmacht und Waffen SS im Zweiten Weltkrieg 1939-1945. Frankfurt: Verlag E.S. Mittler.
Wagner, Ray, ed. The Soviet Air Force in World War Two. New York: Doubleday, 1973.
Documents: Truppen-Ubersicht und Kriegsgliederungen, Rote Armee, August 1944.
A Note on the Maps
The maps for Operation: Typhoon were drawn from a variety of sources. The most important of these were the "Lage Ost" maps of Central Russia. These maps were daily situation maps prepared for the German High Command on all fronts of the war. Not only do they provide vital geographical and geological information, but incredibly detailed military data as well. Each map positions the location of every German and Soviet division on the front as of the previous day. Although the Lage Ost maps were difficult to read, they proved to be indispensable. Also valuable was the Landscape Atlas of the USSR, published by the Dept. of Earth, Space and Graphic Sciences at the USMA (West Point). Modern 1:250,000 maps of the Moscow area were obtained from Washington which were consulted to some degree. Finally, the German Weltforest atlas (delineating forestation in the Soviet Union) was also used.
22.0 Strategy and Tactics
German Strategy
In Typhoon, the burden of attack is placed entirely on the shoulders of the German Player. He is obligated to maintain an almost constant offensive throughout the game if he is to have any hope of winning. This is made doubly difficult by the fact that as the game progresses the Soviet Player builds up a potent offensive force as well. Due to the restrictions of German support, the German Player will never come close to maintaining pressure all along the front at a given time. As such, the Soviet Player will have the advantage of being able to freely switch forces from one point of crisis to another. The German Player must not allow the Soviets to perform these re-deployments with impunity. Although support can occur only once every four days, it is probably wise for the German Player to attempt to support different corps each Support Allocation Stage (unless a particular corps has been dramatically successful in the assault). It goes without saying that only the most powerful corps should be allocated support at the start of the game. To keep the Soviet Player on his toes, it may be wise to risk attacks in an unsupported condition against extremely weak points in the line. In playtesting, this tactic surprisingly often led to breakthroughs against a napping Soviet Player.
It is also probably wisest to utilize the single corps accelerated assault at the beginning of the game, if not on the first Game-Turn. It is at this point that the Soviet line is most vulnerable and the most dramatic results can be achieved. The German playtesting maxim was "break the Soviet line early or not at all." The fast-arriving Soviet reinforcements and the retreat toward a central position oftentimes make late-game German attacks quite fruitless.
As far as where the initial German Schwerpunkts should be launched, there is no set strategy that proved unbeatable for the German Player. The most advantageous attack position probably lies with Guderian's 2nd Panzer Army in the south, but these units have a long distance to travel and are, in effect, punching into thin air. The 4th Army faces the toughest resistance and lacks mobile forces — but this army is closest to Moscow. If allocated enough support, it may be able to dash into Moscow before Soviet reinforcements build up. The 4th Panzer Army is very powerful and positioned moderately close to Moscow. These corps should almost always be given priority to some degree. 3rd Panzer Army is very weak, but in playtesting oftentimes made decisive breakthroughs. It is always conceivable that these divisions will be able to punch into Moscow from the north.
German Tactics
The crux of the German offensive capability is the panzer division. Such a division kept together on the attack is worth at least three shifts on the CRT. Their mobility in the advance after combat can be truly decisive, especially in a "Breakthrough" attack. The German Player must be extremely careful, however, as panzer battalions are the first units to go in any adverse combat result. As such, it is probably wise to utilize panzer divisions only in attacks that are moderately certain of success. Also, in advances after combat, the German Player must be careful not to split up his panzer divisions, as any well-coordinated Soviet counter attack is usually fatal against the somewhat weak Combat Strengths of this formation, minus divisional integrity.
In any area where it is possible, it is absolutely necessary for the German Player to use the divisional integrity combat bonus to his advantage. For example, in areas where infantry divisions are in plentiful supply, the German Player should stack all three regiments of these divisions together while attacking the same set of units. As such, the maximum number of shifts in the CRT can be achieved. The German Player will discover that the positioning of his HQ units is vital. He should always be prepared for snow (in which case the supply line length is reduced). It is sometimes wise to almost permanently attach an HQ to a successfully-advancing division, so that it may never become isolated. Don't rule out the possibility of units attacking while out of supply (or in snow). Sometimes these attacks can be decisive against an unprepared Soviet line.
Soviet Strategy
In Typhoon, the Soviet side is somewhat easier to play, if only for the fact that the Victory Conditions put the burden of movement on the German Player. The Soviet Player clearly has the classic military advantage of the interior lines — that is, he is defending a position in which it is relatively simple to shift units from one front to another with impunity (especially given the open knowledge of German support allocations). What's more, the Soviets are defending a central location. Every hex retreated brings them closer to the source of their reinforcements, closer to the Moscow fortified line, and closer to extensive uncommitted units.
The Soviet Player should always keep in mind his relative freedom with supply. It is always wise to let units get surrounded in key cities in order to deny the roads and Victory Points to the German Player. Both Tula and Klin can turn into veritable Bastognes for the Soviet Player. The Soviet Player must remember that Moscow may well not be the object of a German offensive.
It is not a wise policy to defend Moscow at the expense of everything else. German units exiting off the east edge of the map almost always affect the outcome of the game.
Soviet Tactics
There are few tactics that can be called absolute doctrine for the Soviet cause. Of course, the Soviet Player should always try to maintain an impervious defensive belt of units. Always try to shift tank brigades to areas in which German panzer divisions are active, for a single tank brigade stacked with an infantry-type unit can negate the numerous CRT ratio shifts of the combined arms bonus. In general, don't be afraid of giving up territory in order to ensure that the defensive line is as strong as possible (i.e., each stack of Soviet units can be attacked by as few stacks of German units at once as possible).
23.0 Play-by-Mail
It is possible to play Typhoon by mail (although at some expense in realism and enjoyment). This can be done two ways:
- Ignore the Limited Intelligence System. Instead every unit in the game is given a constant Combat Strength depending on its Combat Class and Morale. These Strengths are as follows:
Soviet Morale Level One: Combat Class A: 4 (full-strength)/2 (reduced). Combat Class B: 2/— (directly to cadre). Combat Class C: 2/—.
Soviet Morale Level Two: Combat Class A: 9/5. Combat Class B: 5/3. Combat Class C: 4/2.
Soviet Morale Level Three: Combat Class A: 16/8. Combat Class B: 8/4. Combat Class C: 6/3.
German Morale Level Two: Combat Class A: 4/2. Combat Class B: 3/1.
German Morale Level Three: Combat Class A: 6/3. Combat Class B: 4/2.
- Or, if Players prefer, they may pick Strength Chits for each unit in the game before the start of play. Obviously, this choice is only applicable if the two Players can meet face-to-face before the start of the game. The chit picked for each unit would be that unit's Combat Strength for the rest of the game. However, the Limited Intelligence system would be ignored. That is, both Players should have absolute and open information regarding the Combat Strengths of all opposing units.
Designer's Notes
Being a freelance game designer is probably the most thankless job in the world. Game designers certainly take their share of criticism. It doesn't make much difference if the designer is thorough in research or meticulous in detail. What makes or breaks a game at SPI is the feedback. And I don't mean that the feedback is a poor way of judging sales. What I do mean is that the feedback challenges any creativity that the game designer has.
The worst problem encountered in designing Typhoon for me, anyway (poor Joe Balkoski's job was even worse) was that the feedback question was poorly worded, and the public didn't even care if the feedback forced the designer into a poor situation. According to the feedback, the game begins in November. Typhoon actually began much earlier. The November and December battles are a test of environment, not a show of how to take Moscow. After arguing uselessly with the initial developer (not Joe, but a former employee who shall remain nameless) the game was set during the worst time of the campaign. (Even the person who put in the feedback question is gone.)
In my usual game design style, I kept to the feedback format and drove down to Washington, D.C. to consult the National Archives, photocopying all the Lage Ost maps (daily German and Russian positions) from November 15, 1941 until the same date of the next month. This precisely described the flow of the battle in a way that no verbal account could. With my usual procedure of counting rifles, I came up with offensive and defensive combat factors for each German battalion, each Soviet rifle and artillery regiment, and battalions in the other branches of the service. Further research gave winterization levels for each unit and morale ratings based on past and actual performance! The list of counters filled up 115 SPI Manuscript Sheets. By superimposing the Lage Ost map and a German forestry map on three mapsheets (using an overhead projector), I rapidly and precisely arrived at every terrain feature in an accurate position. There were even cliff hexsides that were impassable. But the game, accurate and following the Wacht am Rhein system, was really clumsy due to the restrictions of the feedback question. Even though rules were included to give infantry, motorcycle, motorized infantry, reconnaissance, engineer, parachute, artillery, rocket, tank, anti-tank, and air units specific special abilities, the game lacked something: enough time for anyone to play it. Every detail had been included and the game worked using the Wacht am Rhein system (which was well received) but it was really a monster. It took 3 hours to set up the campaign game! Boy, was I disgusted.
I then sent the design off to Joe, and he came to the same conclusion: that things had to be revised. I consider Joe one of the best developers, especially since he got around the one major obstacle that I could never get around — following the feedback question exactly. He changed the game from something only a hard core big gamer would drool over (and there aren't too many of them) into a playable, challenging game.
Needless to say, Joe spent most of his time shaping a monster simulation into a game, and a bit of the historical research fell by the wayside. For example, many of the unit designations are altered to fit in with their parent unit and make each parent unit about as valuable. Similarly, some of the terrain on the map was changed (there are no longer any cliffs, for example). I know some inaccuracies and abstractions are there, but the game does not suffer from them. Just give Joe a big hand for fixing up a poor situation, and hope that in the future either the feedback questions are better phrased or that the readers do a bit more thinking before they give every question a 9 or 1 just because Nazi or World War II is mentioned. I would have loved to do this game using the Panzergruppe Guderian system starting at the beginning of the campaign instead of in the middle. Life would have been so much easier and much more enjoyable.