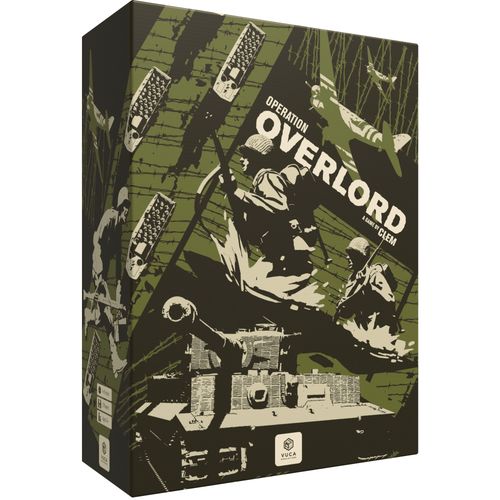
Operation Overlord
Operation Overlord Rulebook
Table of Contents
Table of Contents
Component Overview
- Game board
- 4 sticker sheets
- 111 blocks
- 7 army boards
- 153 cards
- 3 marker sheets
- 4 scenario sheets
- Rulebook
- 2 player aids
Unit Blocks
A unit block shows: unit patch, unit type, nationality, combat value, characteristics and unit id. Unit types: Infantry Division, Airborne Division, Static Division, Armored Division, Army Corps. Two sticker versions exist (NATO version and illustrated version).
Support Markers
A support marker has a front and a back. The front shows the support type, the support drawing, the special effect, the attack/defense bonus, and a symbol meaning "remove permanently if destroyed". The back shows the side symbol.
Common Icons
- Attack Bonus (ATK)
- Attack Penalty (MATK)
- Defense Bonus (DEF)
- Defense Penalty (MDEF)
- Supply Points (SP)
- Spy (INT)
- Bomb
Stickering Guide
- Apply side stickers to one of the faces of each wooden block according to color: German forces on grey blocks, British forces on tan blocks, U.S. forces on green blocks.
- Choose the set of unit stickers of your preference. A choice between unit drawings and NATO symbols is possible. Only the layout and depiction varies between both sets. You may also prefer to mix NATO symbols for infantry and drawings for armored divisions. Keep in mind that there are enough wooden blocks in the game box to make a single set of unit blocks, not two.
- Apply your chosen set of unit stickers to the other face of the unit blocks. Use half blocks for Divisions and full blocks for Corps (for each of the U.S. (green), British (tan) and German (grey) forces).
1 - General Course of the Game
1.1 Scenarios
This game includes 3 scenarios, one for each month, June, July and August, as well as a campaign covering the entire Battle of Normandy, from June 6 to the end of August.
The June, July and August scenarios simulate a month of the campaign and are played in four rounds, each round representing a week.
The Normandy Campaign simulates three months of the campaign and is played in 12 rounds, each representing a week.
Each scenario sheet explains how to set up the game, the victory thresholds and the scenario-specific rules.
1.2 Sequence of Play
Preparing for the Month
- Plan the month's Operations. The SHAEF player must define his objectives for the month. Depending on the scenario, he chooses a certain number of Operations cards and draws other Operations cards at random.
- Select Festung tiles. Among those displaying the current month, the German player chooses 2 Festung tiles corresponding to the sectors he will try to hold on to throughout the month.
During the Normandy Invasion Campaign, the Preparing for the Month phase is completed at the start of each of the three months.
Week Sequence
- Beginning of the Week (see p.16)
- Each player shuffles their Combat cards (for Tests).
- Players may discard 1 Event card of their choice (not in the first turn).
- Players draw Event cards so that they have a hand of 5 cards.
- Remove the "Shaken" markers, then flip the 'Exhausted' markers to their "Shaken" side for any unactivated Divisions that are not adjacent to enemy units and are connected by a road to an army corps of the same faction (German or SHAEF).
- Stand the blocks of activated Units upright, so that the opponent cannot see them.
- Flip Doctrine markers over to their non-activated side.
- Discard the Bad Weather marker if it is present in the Weather box.
- Intelligence Phase (see p.16)
- The German player places 1 Spy marker on a week of his choice on the Operations Board.
- The German player may place as many additional Spy markers as he wishes on a week of his choice (on the Operations Board). He must spend 2 victory points for each Spy marker.
- The German player attempts to reveal one or more Operations cards for the current week.
- Supply Phase (see p.16). This phase is ignored during the first round of each game.
- Players collect their Supply Points.
- Players spend these Supply Points to improve the state of their Divisions and to buy Supports.
- Players keep remaining Supply Points for later use.
- Reinforcements Phase (see p.17). This phase is ignored during the first round of each game. Both players bring in their reinforcements according to the calendar defined by the scenario.
Then, a new Week sequence is played.
End of Game (see p.26)
Players add up their Victory Points, and the one with the most wins. The scale of his victory depends on the number of Victory Points he has accumulated during the game.
2 - Battlefield
The game board includes: the German North Reinforcements Box, the German East/Paris Reinforcements Box, the German South Reinforcements Box, the German Bretagne Reinforcements Box, the SHAEF Supply Points Track, the German Supply Points Track, the SHAEF Scheduled Reinforcements & Destroyed Supports Box, the German Support Reinforcements & Destroyed Supports Boxes, the Weather Box, the Damage, VP & Round Tracks, and the Operations Board. Sectors marked T are Train Stations (TD = Train Station and Depot), H are Harbours, S are Sea Sectors.
2.1 Major Sectors
These Sectors are strategic locations or important urban centers.
- The capacity of a Major Sector is 2 Divisions or 1 Army Corps (and all Divisions in its Order of Battle).
- Major Sectors bring a -2 Attack Penalty to the attacker's Combat value (see 8.3 - Combat).
2.1.1 Objective Sectors
Major Sectors with a red border are Objective Sectors.
- Objective Sectors bring a -3 Attack Penalty to the attacker's Combat value.
- When a player takes or retakes control of an Objective Sector, he scores 1 Victory Point (see 5 - Victory Points).
- An Objective Sector with a SHAEF Control marker is considered to have 1 Division. This Division cannot prevent German Units to enter the Sector, except if it is reinforced (see 8.3.4. Reinforcing the Defense).
2.1.2 Train Stations
Some Major and Starting Sectors (see 7.4.2) are Train Stations.
- Train Stations are only used when German reinforcements enter the game. For other movements and combat, these Sectors are treated as regular Major Sectors.
- Train Stations are linked by railroads (railroads are also roads).
- Train Stations can be destroyed by a Special Operations card. This has no effect on the Sector, but trains can neither cross nor stop in a Sector containing a Destroyed Train Station marker.
2.1.3 Harbours
Le Havre and Cherbourg are important harbours for SHAEF supplies.
- If, at the start of a Reinforcements Phase, no German units are present in either of these two Major Sectors, the SHAEF player has the right to place units in the Sea Sectors in front of the Harbour. He may then attempt to land there in the Activation Phase.
- Once under his control, the SHAEF player can land his reinforcements there and benefit from the corresponding Supply Points, indicated on the game board.
- Harbours are Train Stations and Depots as well.
2.1.4 Sea Sectors and Landing Beaches
The Sea Sectors in front of Omaha, Utah, Gold, Sword and Juno represent the Allied fleet. SHAEF units enter the game through these Sectors.
- SHAEF reinforcements are placed in these Sectors.
- Each Sea Sector has 1 or 2 Depot symbols.
- If the SHAEF player controls the corresponding Sector, he will receive 1 or 2 Supply Points during the Supply Phase (see 7.3 - Supply Phase).
- It is possible to move from a Sea Sector to another if they are linked by an arrow.
- Sectors linked to the Landing Beaches are protected by Atlantic Wall Fortifications Strategic Points (see 8.3.6 The Atlantic Wall).
- Once these fortifications have been destroyed (ie. the corresponding Sector is controlled), place a Bridgehead marker on the Sea Sector if the Landing Beach has 1 Depot Symbol, or a Mulberry Harbour if it has 2 Depot Symbols. Once in place, these markers cannot be removed.
2.1.5 Depots
When setting up, place 2 Supply Points (SPs) markers in Sectors with a Depot symbol. If, during the Supply Phase, the SHAEF player controls a Sector where a Depot with SP markers is located, he takes those SPs.
2.2 Secondary Sectors
Though not as important as Major Sectors, these locations may still be the target of some Operations cards.
- The capacity of a Secondary Sector is 2 Divisions but no Army Corps (except because of an Event card).
- Secondary Sectors provide a -1 Attack Penalty.
2.3 Drop Zones
Airborne Divisions start the month of June in any of the Sectors marked with the Airborne pictogram. The SHAEF player chooses which Sector to deploy them in.
- 2 Airborne Divisions cannot start in the same Sector.
- If the Drop Zone Sector is free, nothing happens.
- If the Drop Zone Sector is occupied by an enemy unit, the SHAEF player's first activations will be to fight in these Sectors. The SHAEF player and the German player cannot support these combats (see 8.3 - Combat), but one of the two American Airborne Divisions can support the other (see 8.3.2 Reinforcing the Attack and 8.3.4 Reinforcing the Defense).
2.4 Sector Control
Controlled Sectors have an impact on unit movement.
2.4.1 Objective Sectors
By default, Objective Sectors are considered to be controlled by the German player. If a SHAEF division, army corps or control marker is present, the German player no longer controls it.
SHAEF control markers are placed on an Objective Sector the first time a SHAEF Unit enters it. The markers remain in place even if there are no longer any SHAEF Units there. The SHAEF control marker is removed when a German Unit enters the Objective Sector at which point, control reverts to the German side.
2.4.2 Other Sectors
Major and Secondary Sectors are controlled only if they contain at least one Division. If no Division is present, nobody controls it.
2.5 Strategic Points
Some Sectors are separated by a Strategic Point. A Defense bonus is added to the defender's Combat Value if an attack route passes through a Strategic Point adjacent to said defender's location (see 8.3 - Combat).
Attack passing through a Strategic Point:
- Crossroad: +1 Defense bonus
- Bridge: +2 Defense bonus
- Bocage: +3 Defense bonus
- Fortifications / Atlantic Wall: +4 Defense bonus
- Only the German player benefits from the Defense bonus provided by Fortifications and Atlantic Wall Strategic Points.
- In addition, combats involving Atlantic Wall Strategic Points are governed by special Combat rules (see 8.3.6 Atlantic Wall).
Diamonds are Strategic Points linked to a Special Operation (see 6.1 - Operations) or a historical event.
2.6 German Reinforcements Box & Starting Sectors
The board shows Starting Sectors, Scheduled Reinforcements and Additional Reinforcements.
Scheduled and Additional Reinforcements in Reinforcement Boxes may enter play during the Reinforcements Phase. When they do so, they are freely distributed from the Reinforcement Box to any of its adjacent Starting Sectors the German player wishes to put them in.
Starting Sectors are Objective Sectors.
A Reinforcements Box is considered blocked if the SHAEF player controls all its Railway Station Starting Sectors (see 7.4.2 German Reinforcements). If this is the case, reinforcements can no longer arrive through this blocked Reinforcements Box and the German player no longer receives the corresponding Supply Points (see 7.3 Supply Phase).
During a Reinforcements Phase, units present in a blocked Reinforcements Box may move to an adjacent Reinforcements Box and will enter the game in the next Reinforcements Phase.
2.7 Boxed Locations
A Sector or a Crossroad Strategic Point is considered controlled if it is surrounded by two Sectors occupied by enemy units, i.e. if a unit must cross an imaginary line connecting these two sectors occupied by the enemy in order to reach the surrounded sector or to pass through the surrounded Crossroad Strategic Point. It is then said to be "Boxed".
Some Sectors along the coast are Boxed if a specific Sector, designated by an arrow, is occupied by the enemy. These Sectors are flagged with a special symbol.
(Example: the Coulvain Sector is boxed by 2 German units. The Crossroad Strategic Point is boxed by 2 American units.)
Boxed Locations have an impact on unit movement (see 8.2.2 Movement and Boxed Locations).
3 - Troops
3.1 Army
- An Army has a Doctrine marker but is not represented with a counter on the battlefield.
- An Army has a board to display its composition. The Army board contains the Order of Battle of each subordinate Army Corps.
- An Army is a group of Army Corps.
3.1.1 Doctrine
- An Army provides its Army Corps with the bonus of its personal Doctrine.
- A Doctrine can only be used once per round (once it has been used, flip the marker over).
- An Army Doctrine can be used in Combat as long as the attacked Sector is 1 or 2 Sectors away from an Army Corps belonging to this Army.
3.2 Army Corps
An Army Corps is represented by a double sized block and its Order of Battle on the Army board.
- An Army Corps has a Combat value.
- The composition of an Army Corps is determined by the Division blocks and Supports placed in its Order of Battle.
- When placing Divisions in its Order of Battle, respect the symbols (Infantry, Armored, Support), as well as nationality. Don't mix British and Americans! Canadians are under British command, and the only French unit is under US command.
- A US Army Corps cannot support a combat in which British Divisions are involved, and vice versa.
- If a Division block is present in an Order of Battle, this means it is part of the corresponding Army Corps.
- If a Division block is placed on the game board, it is acting independently of an Army Corps.
- An Army Corps can only be stationed in a Major Sector.
- When an Army Corps moves, it may take with it any Divisions whose blocks are present in its Order of Battle. It may detach any of its Divisions at the start of, or during its movement.
- All Divisions moving with an Army Corps are activated.
- To be able to attack, an Army Corps must have at least one Division in its Order of Battle.
- An Army Corps State can never deteriorate, but an Army Corps can be destroyed. In this case, place in the Army Reserve the Supports present in its Order of Battle.
- During a Combat, an Army Corps can assign support to a Combat in which it is participating, or to a Combat taking place 1 or 2 Sectors away, even if the units engaged in this Combat are not part of its Order of Battle.
- An Army Corps may place a Control marker when it leaves an Objective Sector.
3.3 Division
A Division is represented by a block.
- A Division has a Combat value.
- A Division State (see 3.4) can deteriorate.
- A Division can move into any type of Sector.
- A Division may place a Control marker when leaving an Objective Sector.
3.3.1 Infantry Division
- They bring a -1 Attack Penalty to the Attacker's Combat value (see 8.3 - Combat).
- They move less far than Armored Divisions during a Breakthrough (see 8.3.10) or Counterattack (see 8.3.11).
- They cost less to supply than Armored Divisions (see 7.3.2 Supplying Divisions).
3.3.2 Airborne Division
- They are Infantry Divisions.
- Depending on the scenario, an Airborne Division may start the game in a Drop Zone Sector.
3.3.3 Armored Division
- During a Breakthrough (see 8.3.10) or Counterattack (8.3.11), they move farther than Infantry Divisions.
- They cost more to supply than Infantry Divisions (see 7.3 Supply Phase).
Army Corps and Divisions are called units.
3.4 Division States
A Division usually starts the game in its Fresh state, but in certain scenarios it may start in a different state. Its state may deteriorate as a result of Combat or the effect of an Event or Operations card.
Deteriorating the state of a Division
A Division's State may deteriorate as a result of Combat or the effect of an Event card. The states, in order, are Fresh, Shaken, Exhausted, Destroyed.
- Fresh: No special rules.
- Shaken:
- A Shaken Division can fight (attack or defend) with a -1 penalty to its Combat Value.
- During the Beginning of the Week Phase, a Shaken Division that has not been activated in the previous round (week) improves its state for free and reverts to Fresh, if it is not adjacent to an enemy unit.
- Exhausted:
- An Exhausted Division cannot attack. It can, however, defend with a -2 penalty to its Combat Value.
- An Exhausted Division cannot support Combat.
- Destroyed:
- The Division is permanently removed from the game, and the opposing player scores 2 Victory Points.
- When a German Division is Destroyed during combat, use a Kampfgruppe* Support for the same unit type (infantry, armor or Fallschirmjäger) to create a new Kampfgruppe (see 8.3.5 Supports). Place this replacement in the next week's Supports Reinforcements Box.
- A new Kampfgruppe can only be created if a suitable Kampfgruppe* Support is available.
Improving the state of a Division
It is possible to improve a Division's State by one step by spending Supply Points (see 7.3.2 Supplying Divisions).
3.5 Supports
A Support is represented by a marker.
- A Support is a bonus used during Combat.
- A Support must be present in an Army Corps' Order of Battle in order to be used.
- An Order of Battle can contain the same Support twice.
- When used, Supports are placed in the corresponding Army Support Reserve Box.
- Supports can be destroyed during combats (see 8.3.7 Combat Resolution).
- Destroyed Supports marked with a "remove permanently" icon are permanently removed from the game.
- Destroyed Supports without an icon are placed in the Destroyed Support Box and can be bought back in a future Supply Phase.
- Kampfgruppe* Supports are set aside rather than being removed.
- Supports are described in 8.3.5 Supports.
4 - Cards and Festung Tiles
4.1 Event Cards
An Event card shows: title, Remove after play marker, Alternative bonus, Cost, Condition and Effect.
- During a Round, a player may play as many Event cards as he wishes.
- At the Beginning of the Week, both players draw Event cards so that they have a hand of 5 cards.
- Everything players need to know is written on the Event cards.
- Some cards have an Alternative bonus: +1 Supply Point or +1 Attack or Defense bonus that can be used at any time. If they are used for their Alternative bonus they cannot be used for their Effect.
- The cost (1 Victory Point / 1 Supply Point) indicated on the card must be paid only if the player uses it for its Effect, not the Alternative bonus.
- A card bearing the "remove after play" mark must be permanently removed from the game if it has been used for its Effect, but is discarded if it has been played for its Alternative bonus.
Note on the German "Initiative" Event card: it must be played before all phases (i.e. before drawing new Event cards).
4.2 Combat Cards
- Each player has a deck of 10 Combat cards.
- These cards are used for various Tests during the Intelligence and Reinforcement Phases, or because of an Event card, then for Combats during the Activation Phase (see 8).
- At the start of the Activation Phase, each player shuffles all his Combat cards to build a deck.
4.2.1 Combat
- During Combat, players draw a Combat card and play it.
- If the 0 Combat card is drawn, it is played and then set aside.
- Other drawn Combat cards are discarded.
- When the deck is empty, the player can only play his 0 Combat card.
All Combat cards are reshuffled at the beginning of the next game turn for any Tests (see 7. Beginning of the week), then again at the start of the next Activation.
4.2.2 Breakdown
Each player's deck of 10 Combat cards (the card art also carries Spy and Bomb icons used for Tests):
- SHAEF: 1 x 0, 1 x 1, 2 x 2, 3 x 3, 2 x 4, 1 x 5.
- German: 1 x 0, 2 x 2, 3 x 3, 2 x 4, 2 x 5.
4.2.3 Tests
During the Intelligence (see 7.2) and Reinforcement (see 7.4) Phases, or because of an Event card, a player may be asked to make a Test.
- For each new Test, the opponent shuffles their own Combat cards and builds a face-down deck.
- The testing player draws one or more Combat cards (depending on the situation) from his opponent's deck.
- If the Combat cards contain the icon corresponding to the action, it's a success: Spy (Intel), Bomb (Reinforcements, Events).
- Some Tests require more than one success.
4.3 Operations Cards
These cards are chosen at the beginning of the month by the SHAEF player(s) and are used to define their strategy and objectives.
They are detailed in chapter 6.1 Operations.
4.4 Festung Tiles
These tiles are chosen at the beginning of each month by the German player. They represent the Sectors the German High Command wishes to keep at any cost.
They are detailed in chapter 6.2 Festungen.
5 - Victory Points
Victory Points are used to win the game, as well as to carry out certain actions such as paying the cost of an Event card and, for the German player only, buying Spy markers (see 7.3 Intelligence Phase) or bringing in additional reinforcements (see 7.4.2 German Reinforcements).
Each scenario explains in which space of the VP Track the Victory Points marker is placed at the beginning of the game.
You may decide to place the VP marker in different spaces at game start to make the game easier or more difficult for one side.
The extent of the victory depends on the number of Victory Points earned by the winner. For each scenario and each degree of victory, a short text explains the consequences, extrapolated or historical, of that victory.
5.1 Earning VPs
When a player scores victory points, move the VP marker as many spaces to the right if the marker displays the symbol of his side (SHAEF or German), and as many spaces to the left if the marker displays the symbol of his opponent's side. If the marker moved down below 0, it is flipped over and moved to the right by as many spaces as there are VPs left to count.
| Player | Phase | Condition | VPs |
|---|---|---|---|
| Both | Activation Phase | Destroy a Division or an Army Corps. If an Army Corps is destroyed while containing Divisions in its Order of Battle, the player scores VPs for both the Corps and the Divisions. | 2 VPs |
| Both | Activation Phase | Conquer an Objective Sector | 2 VPs (as printed here; 2.1.1 states 1 Victory Point) |
| German | Intelligence Phase | Reveal an Operations card from the Operations Board | Variable |
| German | End of the Week / Month | Keep control of a Festung | Variable |
| SHAEF | End of the Week | Successfully complete an Operation | Variable |
| German | End of the Week |
6 - Planning Phase
6.1 Operations
During the Planning Phase of each month, the SHAEF player plans the Strategic and Special Operations he will have to complete. Depending on the current month, he selects the Operations cards and places them, face down, on the Operations Board.
He can schedule several Operations (Strategic and Special) in the same week.
Each Operation must be completed by the end of the week in which it was scheduled.
Some Strategic Operation cards are part of a Plan. The completion of several operations forming part of the same Plan rewards the SHAEF player with Victory Points.
- He is not obliged to schedule them in the same week or month.
If multiple Strategic Operations in the same plan have been successfully carried out, the SHAEF player scores 1 additional Victory Point for each Strategic Operation in the plan at the end of the game.
For a Strategic Operation to be successful, the Sector represented on the card must be controlled by the SHAEF player when the card is revealed, at the End of the Week.
6.1.1 Planning Strategic Operations
Strategic Operation card elements:
- A. Operation name: * means that this is a fictional operation, or that this Objective Sector does not belong to a real operation.
- B. If the Operation is part of a Plan, it is marked as follows: "1/3" meaning that the Plan comprises 3 Strategic Operations.
- C. Sector name + zone.
- D. Sector's image.
- E. Liberation date: it is given as an indication only, but is a clue to the difficulty of achieving the objective earlier.
- F. Victory Points for successful / failed Operations (see 9.1 Operations Resolution).
- G. Benefits for successful Intelligence Operation (see 7.3 Intelligence phase).
Strategic Operations represent the objectives the SHAEF player wants to achieve. They are always Objective Sectors to conquer.
During the Planning Phase of each month, the SHAEF player takes ALL Strategic Operation cards and selects any 4, 5 or 6 (player's choice) cards he wishes to schedule for the month.
He cannot choose a Strategic Operation from a Sector he already controls. He may, however, choose a Strategic Operation from a Sector he has lost control of.
During the Normandy invasion campaign, the SHAEF player can also choose all or some of the Strategic Operations that he was unable to carry out in the previous month. These Operations cards would be located in the Failed Operations or Canceled Operations slots of the Operation Board.
He places the ones he has selected on the side of the Operations Board, face down, in the space corresponding to the week (round) of his choice.
It is not mandatory to schedule Operations every week.
6.1.2 Planning Special Operations
Special Operation card elements:
- A. Operation name: * means that this is a fictional operation.
- B. Date: the month when the Special Operation is available.
- C. Conditions to meet.
- D. Victory Points for successful / failed Operations.
- E. Benefits for successful Intelligence Operation.
Special Operations are operations imposed by High Command and carried out parallel to the main operations. Some are imaginary, others are historical, whether or not they were actually undertaken.
After planning the Strategic Operations, the SHAEF player selects all Special Operation cards available for the current month (the month is specified under its title), shuffles them and forms a deck with them.
He then draws 4, 5 or 6 (player's choice) Special Operation cards and plans them, face-down, in the slots corresponding to the weeks (rounds) of his choice.
He must plan all the Special Operation cards he has drawn and shuffles all Special and Strategic Operation cards planned for the same week, so that the German player does not know which type of Operations a card is. The SHAEF player may inspect all Operations cards at any time.
(The cards are placed face down until they are revealed during the Intelligence Phase or at the end of the week.)
6.1.3 Operation Fortitude
Some Special Operations are decoys designed to confuse the opponent (see 7.2 Intelligence Phase).
If the German player reveals an Operation Fortitude card during the Intelligence Phase, he places it in the Fortitude slot of the Operations Board. Later, he can discard this card to bring in reinforcements (see 7.4.2 German Reinforcements).
If an Operation Fortitude is not revealed, the SHAEF player scores 1 Victory Point at the end of the week.
6.2 Festungen
German High Command designated certain cities as Fortresses (Festung) to be defended to the death.
After the SHAEF player has planned his Operations cards, the German player must select 2 Festung tiles, from among those corresponding to the month that is about to begin. These tiles are placed face-up next to the Operations Board.
A Sector designated as a Festung inflicts an additional -2 Attack Penalty on the SHAEF player's Combat value (see 8.3 - Combat).
Festung tile elements: A. Attack penalty. B. Victory points scored at the end of each week. C. Victory points scored at the end of the game.
At the end of each Week, the German player scores the Victory points indicated in the "Per Week" box.
At the end of the game, the German player scores the Victory points indicated in the "End of the Game" box.
They are permanently removed from the game when the SHAEF player conquers the corresponding Sectors.
7 - Beginning of the Week
7.1 Reset
7.1.1 Combat cards
Players shuffle their Combat cards in preparation for possible Tests.
7.1.2 Event cards
Players may discard a single Event card or not (not in the first turn), and then they draw Event cards to refill their hand to 5 cards.
7.1.3 Repositioning the blocks
- Players remove Shaken markers from Divisions that are not adjacent to enemy units, and were not activated the previous round (their blocks are standing, and they have not moved or fought, either attacking or defending). Sea Sectors are considered as not adjacent to any other Sectors.
- Players then stand upright the blocks of units activated during the previous round, so that the opponent cannot see them.
- Flip the Doctrine markers used in the previous round.
- Discard Train and Interdiction markers.
- Train marker: see 7.4 Reinforcement Phase, "only one train per week can depart from the same railway station (Place a marker as a reminder)."
- Air Ban marker: see SHAEF Action card.
7.2 Intelligence Phase
The German player can try to reveal the SHAEF's Operations cards (Strategic or Special) in order to deprive him of the VPs linked to their completion.
The German player places 1 Spy marker on a week of his choice on the Operations Board. He may place as many additional Spy markers as he wishes on any week of his choice (on the Operations Board). He must spend 2 victory points for each Spy marker.
Then he attempts to reveal one or more Operations cards for the current week.
To check whether the Intelligence Operation is a success, the German player has to do a Test:
- He draws one Combat card for each Spy marker present in the current week.
- All Spy markers used are discarded.
- For each success (Spy icon) he draws during the Test, he reveals an Operations card of his choice from the current week's Operations cards. When the German player reveals an Operations card, he gains a number of Victory Points equal to the number printed in the "Successful Intel Benefits" box. If a symbol is printed, the card is discarded from the game and the German player doesn't score VPs.
- If the card is a Strategic Operation, it is placed in the Cancelled Operations slot of the Operations Board and the SHAEF player can no longer fulfill this objective. In the Normandy Invasion campaign, the SHAEF player can, if he doesn't control the objective, plan it again in the Planning Phase of the following month.
- If this is a Special Operation, the card is removed from the game.
7.3 Supply Phase
Note: This phase is ignored during the first round of each game.
During this phase, both players gain Supply Points, which they record on their Supply Points track. Supply Points can be used to improve a Division's State and bring back destroyed Supports.
7.3.1 Gaining Supply Points
Depending on the Sectors he controls, the SHAEF player receives the corresponding Supply Points:
- Creully gives access to Juno (2 SPs for the Mulberry Harbour) and Sword (1 SP for a Bridgehead) = 3 SPs
- Colleville gives access to Omaha (Mulberry Harbour) = 2 SPs
- Bayeux gives access to Gold (Bridgehead) = 1 SP
- Sainte-Mere-Eglise gives access to Utah (Bridgehead) = 1 SP
- Cherbourg (Deep-water Harbour) = 3 SPs
- Le Havre (Deep-water Harbour) = 3 SPs
- If, during the Supply Phase, the SHAEF player controls a Sector where a Depot is located, he takes the remaining Supply Points.
The German player receives:
- For each Reinforcement Box not blocked (see 2.6 German Reinforcement Boxes) = 3 SPs
7.3.2 Supplying Divisions
Both players can spend their Supply Points to improve the state of their Divisions.
In order to improve its state, a Division must:
- be included in an Army Corps' Order of Battle,
- or be linked by road or railroad to an Army Corps (a road is cut if it passes between 2 enemy-controlled or occupied Sectors, or through an enemy-controlled or occupied Sector),
- or be a German Infantry Division located in a Sector with a Depot (see below).
Divisions whose state was improved during the Beginning of the Week Phase can be improved again during this phase.
During a Supply Phase, a German Infantry Division, not included in an Army Corps' Order of Battle nor linked by road to a German Army Corps, but present in a Sector where a Depot is located, can use the Supply Points present there to improve its state.
- Players must spend 2 SPs to improve the state of an Infantry Division by one step.
- Players must spend 3 SPs to improve the state of an Armored Division by one step.
It is not possible to improve a Division state from Exhausted to Fresh during the same Supply Phase.
7.3.3 Mobilizing support
A player may also spend Supply Points to move Supports from the Destroyed Supports Box to an Army Support Reserve Box of his choice. The cost is 1 SP per support.
7.4 Reinforcements Phase
Note: This phase is ignored during the first round of each game.
When the game is set up, some Divisions and Army Corps of both players are placed in the calendars of their respective Reinforcements Boxes and come into play during the Reinforcements Phase of the corresponding round (week).
Note: Some Special Operations or Event cards allow you to bring forward the date of their deployment, or bring in units that historically never took part in the Battle of Normandy.
7.4.1 SHAEF Reinforcements
SHAEF units arriving as reinforcements are placed, standing up, on any Sea Sectors in front of the Landing Beaches.
They may also be placed in the corresponding Sea Sectors in front of Cherbourg or Le Havre if the German player has no units in these Harbour Sectors.
- An Army Corps can integrate Divisions arriving at the same week into its Order of Battle.
- You must respect the maximum number of units per Sea Sector (up to 2 Divisions or 1 Army Corps and all Divisions in its Order of Battle).
- If a unit cannot be deployed due to lack of space, it is moved to the following week.
7.4.2 German Reinforcements
German units arriving as reinforcements are placed, standing up, in the Starting Sectors of their respective Reinforcements Boxes.
- An Army Corps can integrate Divisions arriving at the same week and at the same location into its Order of Battle.
- You must respect the maximum number of Units per Sector (up to 2 Divisions or 1 Army Corps and all Divisions in its Order of Battle).
- If a unit cannot be deployed due to lack of space, it is moved to the following week.
Reinforcing units will begin their activation (8.0) by taking the route from one of the Starting Sectors of their Reinforcements Box.
Railway Station
If the Starting Sector is a Railway Station, the German player can decide to have his units move by train during their activation (8).
- Only one train per week can depart from the same railway station (Place a marker as a reminder).
- Trains move along railroads from station to station.
- A train can carry 1 Division or 1 Army Corps with a single Division in its Order of Battle to a distance of up to 3 Stations.
- A train can carry 2 Divisions or an Army Corps with more than one Division in its Order of Battle to a distance of up to 2 Stations.
- A train can neither cross nor stop at an opponent-occupied station or a Sector containing a Destroyed Station marker.
- A train cannot cross a Destroyed Bridge marker.
- Nor can a train cross a Sector boxed by 2 Sectors controlled by the SHAEF player, but it can stop in such a sector (see 8.2 Movement).
- A train can only drop off units at the final station of its current move.
- Once dropped off by a train, units may move 1 additional Sector via normal Movement rules before completing their activation.
Additional Reinforcements
If a Reinforcements Box is not blocked (see Loss of access to a Reinforcements Box below), the German player can spend Victory Points to bring in units present in the corresponding Additional Reinforcements Box but he must first convince High Command of the seriousness of the situation to obtain its agreement.
Historically, these units were never deployed in Normandy, but they could have been if High Command had been able to see the real danger of the Allied invasion of Normandy, despite Operation Fortitude.
The German player must make a Test and obtain at least 3 Bomb symbols in total. For this test, he draws 1 Combat card for each Major Objective Sector conquered by the SHAEF player.
If the Test is successful, the High Command authorizes the sending of additional reinforcements. During the following Reinforcement Phases, it is no longer necessary to carry out this Test to bring in additional reinforcements.
- The German player must spend 1 VP per Division that he wishes to take from the Additional Reinforcements Box and place it in one of the corresponding Starting Sectors of this Reinforcements Box.
- Once per Reinforcements Phase, the German player may also bring a single Army Corps from any Additional Reinforcements Box into play for free. He can only do so if this Army Corps contains in its Order of Battle at least one Division from the same Additional Reinforcements Box (and therefore spends at least 1 Victory Point).
Once High Command has given its consent, there's no need to repeat the Test for the rest of the game.
Operation Fortitude
As explained on the card, during the Reinforcement Phase, the German player can bring in one Division for free from any Additional Reinforcements Box for each Operation Fortitude card he discards from the Operations Board.
Loss of access to a Reinforcements Box
If, at the start of a Reinforcements Phase, the German player no longer has control of a Reinforcements Box (see 2.6 - German Reinforcements Boxes), he may move all or part of the units present in the current week's calendar Box of the blocked Reinforcements Box to an adjacent Reinforcements Box.
He places them in the next week's square of the new Reinforcements Box. They can come into play in the next Reinforcements Phase.
Units in the Additional Reinforcements Box do not move this way and thus cannot come into play as long as their Reinforcements Box is blocked.
The German player can "reopen" a Reinforcements Box by regaining control of the Sectors leading to it.
7.4.3 Managing supports
Supports also arrive in the game according to the reinforcement calendar. When available, they are placed in the Army Support Reserve Boxes, at the player's discretion.
First, players can move Supports from the Order of Battle of an Army Corps to the Army Support Reserve Box.
Then all Support units in an Army's Reserve Box (both those arriving as reinforcements and those moved or already present) are freely distributed among the Army Corps present in the Army's Order of Battle.
7.4.4 Army Corps transfer
Historically, the US VIII and XV Army Corps and the British 1st Army Corps were reassigned to another Army. These Army Corps are present on two different Army Boards.
During this phase, the SHAEF player can transfer certain Army Corps from one Army Board to another. To do this, he must move the Divisions (and their status markers, if any) and Supports present in the Army Corps Order of Battle to the new Army Board, as long as the Army Corps patch is printed on it.
(Examples are shown for train movement of a Division, a reinforcement route, and moving units to adjacent Reinforcement Boxes.)
8 - Activation Phase
Starting with the player with the Initiative (usually the SHAEF player, except if the German Initiative Event card has been played), players alternatingly activate one or more units present in one same Sector, i.e. one Army Corps (and all Divisions present in its Order of Battle), or up to two Divisions.
Once activated, units are laid down in the Sector in which they end their activation. This includes Divisions on an Army Corps' Order of Battle. Laid down means that the block is placed so it is lying horizontally, rather than standing upright. Activated units are laid down face-down if they have not fought, or laid face-up if they have fought.
A unit can be activated only once per turn.
Players may activate a unit that does nothing in order to pass without losing the ability to activate further units.
The player may pass without having activated all his units. In this case, his opponent activates all or some of his remaining units (one Sector at a time) and the Activation Phase ends.
8.1 Shuffle Combat Cards
Before the first Activation, both players shuffle their Combat cards.
8.2 Movement
Activated units can move up to 3 sectors connected by a road. When a unit moves, treat railroads as roads. Units can never move by train except during the Reinforcements Phase.
Moving units can move through a Sector occupied by units of the same side even if the Sector's capacity is thereby exceeded.
Moving units entering a sector occupied by enemy units must engage them in combat (see 8.2.1 Movement and Combat).
At the end of their movement, if they have not engaged any enemy units in Combat, their blocks are laid face down.
8.2.1 Movement and Combat
If, during their movement, the moving units are able to reach a Sector occupied by one or more enemy units, they can attempt to enter it, but must first engage them in Combat (see 8.3 Combat). This movement is considered an Attack.
The attacking unit's blocks are then laid down, face-up, in the adjacent Sector from which they are attacking, and the Combat is resolved (see 8.3 - Combat).
After the combat, the moving units will not be able to continue their movement, unless some of them conduct a Breakthrough (see 8.3.11).
8.2.2 Movement and Boxed Locations
Moving units cannot cross a Boxed Location if, as explained in 2.7, they cross a virtual line connecting the two Sectors occupied by enemy units that surround the Boxed Location.
(Example: the American unit cannot cross the Coulvain Sector to reach La Beny-Bocage Sector. The German unit cannot cross the Crossroad Strategic Point to reach the Cabourg Sector.)
Moving units may stop in a Boxed Sector. Moving units can nevertheless reach one of the sectors controlled by the enemy that surround the Boxed Location, and thus trigger a combat.
In the illustrated example the American Unit could not move beyond the Coulvain sector but it could move from the Coulvain sector into Aunay-sur-Odon and trigger an attack.
Moving Units starting their movement in a Boxed Sector can move normally.
Boxed Locations example: Units cannot cross a Boxed Sector or Strategic Point (see 2.7), or a Sector flagged with the coastal symbol, but they may stop in such a Sector.
- They still can attack an adjacent enemy-controlled Sector.
- If they start their movement in such a Sector, they can move normally.
8.2.3 Army Corps
- An Army Corps can only end its movement in a Major Sector (except with the use of an Event card) but may cross Secondary Sectors.
- An Army Corps takes with it the Divisions present in its Order of Battle. Some may be left behind before leaving the Sector, while others may be left along the way.
- Divisions left behind in the Sector of departure are not activated, while those left along the way are activated.
- An Army Corps can pick up non-activated Divisions it encounters en route.
- Picked up Divisions are integrated into its Order of Battle and activated.
- An Army Corps which ends its movement in a Sector occupied by friendly Divisions, automatically integrates them without activating them. If there is no free slot in its Order of Battle, the Army Corps cannot make this move.
8.2.4 Division
- 1 Division can pick up another Division or Army Corps (with or without Divisions in its Order of Battle) it encounters en route.
- This picked up Division is activated.
- A Division may begin its movement independently and finish it as part of the Order of Battle of an Army Corps it encountered along the way. The Army Corps and all Divisions in its Order of Battle are then activated.
- If a Division ends its movement in a Major Sector occupied by an Army Corps, the Division is automatically integrated into that Army Corps. This action activates neither the Army Corps nor the Divisions already integrated into it, and these units can be activated later in the turn.
- If there is no free slot in the Army Corps Order of Battle, the Division cannot make this move.
- When moving, a Division can join the Order of Battle of an already activated Army Corps. This does not end the Division's activation, so it may attack. However, the Army Corps and any activated Divisions in its Order of Battle would not support it.
8.2.5 Destroyed bridges
- A Bridge (Strategic Point) can be destroyed by a Special Operations card.
- Place the Destroyed Bridge marker on the Strategic Point.
- To cross a Destroyed Bridge, a unit must move only one Sector during its activation (the bridge crossing). In other words it must start adjacent and end adjacent to the Destroyed Bridge.
- This movement, if made into an enemy occupied Sector, will lead to a Combat.
- The defender benefits from the +3 Defense bonus of the Destroyed Bridge.
8.3 Combat
8.3.1 Combat sequence
- The player attacks a Sector occupied by one or more enemy units (see below for the special case of an Army Corps attacking a Secondary Sector and the Atlantic Wall). The blocks of the attacking units are laid down, face-up, in the adjacent Sector from which they are attacking.
- The attacker moves up to 2 Divisions to reinforce this attack (see 8.3.2 Reinforcing the Attack).
- The attacker selects any Supports (from any Army Corps as long as they are situated up to 2 Sectors away) that he wants to use, and places them face down (see 8.3.5 Supports).
- The attacker draws a Combat card from his Combat card deck, without looking at it and places it face down.
- The defender decides whether his units stay in the combat or withdraw (see 8.3.3 Withdrawal).
- The defender activates any remaining units and may move 1 Division to join the defense (see 8.3.4 Reinforcing the Defense).
- Following the same rules as the attacker, the defender selects the supports they wish to use and places them all face down.
- The defender draws a Combat card from his Combat card deck, without looking at it and places it face down.
- The attacker decides if he wants to use 1 Doctrine marker and places it face up.
- The defender decides if he wants to use 1 Doctrine marker and places it face up.
- The attacker's Combat card and Supports are revealed.
- The defender's Combat card and Supports are revealed.
- In any order, both players can play as many Event cards as they wish, as long as they pay any costs. They can play a card, wait for the opponent to play one, then play another. Once both players have decided to stop playing Event cards, the combat is resolved (see 8.3.7 Combat Resolution). It is possible to choose at the last moment whether an Event card is played for its effect or for its alternative bonus.
- Apply combat result (see 8.3.8 combat results). Used Supports are placed in the corresponding Army Support Reserve Box, used Doctrines are placed back on their Army Board, "used" side up, destroyed Supports are placed in the Destroyed Supports Box and destroyed Divisions are set aside.
Army Corps
- An Army Corps cannot attack from a Secondary Sector, as it cannot stop there.
- An Army Corps may attack a Secondary Sector adjacent to a Major Sector, but cannot move into it. In the event of victory, the Army Corps can only send 1 or 2 Divisions to occupy the conquered Sector.
- All or some of the Divisions included in the Order of Battle of an Army Corps engaged in Combat may take part.
8.3.2 Reinforcing the Attack
Up to 2 attacker's non-activated, non-exhausted Divisions (not Army Corps) which are 1 or 2 Sectors away from the attacked Sector, can move to a Sector, empty of any enemy units and adjacent to the attacked Sector, without exceeding its capacity, in order to take part in the combat.
- They must move 1 or 2 Sectors, respecting the rules of movement (see 8.2 Movement).
- They may end this movement in a Sector adjacent to enemy units.
- These Divisions may come from different Army Corps as long as the Army Corps are located 1 or 2 Sectors away from the attacked Sector.
- They can come from any Army Corps' Order of Battle.
- They are activated, with their blocks laid down, face-up, in their respective Sectors.
- American units never reinforce British units, and vice versa.
8.3.3 Withdrawal
Once the attacker has activated his units, drawn his Combat card, and selected his Supports, the defender can decide which units leave the Sector and which remain.
- These units must not have been activated.
- One of the Withdrawing Divisions has its state being deteriorated (owner's choice).
- A SHAEF unit may Withdraw into a Sea Sector.
- An Exhausted Division can Withdraw.
- Withdrawing Divisions are not activated.
- It is not possible to exceed the Sector Capacity.
Army Corps
- If an Army Corps with no Division in its Order of Battle is attacked and no Division reinforces it (8.3.4), it must withdraw and move to a Major Sector situated 2 Sectors away. If this is impossible, the Army Corps is destroyed, which earns the opponent 2 Victory Points.
If after any withdrawals there are no units left in the sector:
- The attacker must occupy it with at least one unit.
- The attacker discards the Combat card he has drawn.
- Supports selected by the attacker for this combat are placed in the Army's Reserve Box.
- The attacker may perform a Breakthrough (see 8.3.11).
Remaining units present in a Sector under attack must take part in the combat except if the attacker has fewer Divisions than the defender. In this case, and before reinforcing the defense (see 8.3.4), the defender may decide not to activate all his Divisions present in the attacked sector, but he must activate his Army Corps.
- Units the defender does not activate do not take part in the combat and cannot receive damage.
- Units the defender activates have their counter placed face up and must take part in the combat.
- Units previously activated must take part in the combat.
8.3.4 Reinforcing the Defense
- A single non-activated, non-exhausted defender's Division in a Sector adjacent to the attacked Sector can move to reinforce it.
- It is not possible to exceed the Sector Capacity.
- Its counter is laid down, face up, in the Sector under attack.
- If an Army Corps is in the Sector under attack, the Division is included into its Order of Battle and is laid down, face up.
- American units never reinforce British units, and vice versa.
- An Objective Sector with a SHAEF Control marker is considered to have 1 Division and can therefore be reinforced.
8.3.5 Supports
An Army Corps can use its Supports if it is attacking a Sector during its Activation, or if it is defending the Sector in which it is located. Several Army Corps can send their Support to a combat 1 or 2 Sectors away, if the roads linking them to this Sector do not cross sectors occupied by enemy units, nor Boxed Sectors or Boxed crossroads.
English Army Corps cannot support American units, and vice versa.
- You may select several Supports of the same type.
- Depending on the situation, all the effects of a Support can be used.
- Once the combat has been resolved, any Supports that have not been destroyed are placed in the Reserve of the Army to which the Army Corps that sent Supports belongs.
- When you use a Support in combat, place it under the corresponding Army Board to remind you where it came from.
- When a Support is destroyed, it is placed in the Destroyed Supports Box, and can be bought back in a future Reinforcements Phase.
- After destruction, a Kampfgruppe* Support is set aside for later use. All other Supports with an asterisk (*) are permanently removed from the game once they are destroyed and thus cannot be bought back.
In addition to their specific effects, every Support adds an Attack or Defense bonus to their side's Combat value. This bonus is indicated on the Support counter.
Combat Supports table (Attack/Defense bonus; specific effect; removed permanently after destroyed?)
| Type | Attack / Defense bonus | Specific effect | Remove permanently after destroyed |
|---|---|---|---|
| Armor | +2 Attack / +1 Defense | No specific effect. | No |
| Artillery | +1 Attack / +1 Defense | Each Artillery Support cancels the Defensive Penalty of 1 Infantry Division. | No |
| Aviation | +1 Attack / +1 Defense | (Optional) After applying combat results (see 8.3.8), destroy this Support to deteriorate the state of a retreating (not withdrawing) Division (opponent's choice). Cannot be used if the "Y'r'pleut" Event card has been played. | No |
| Aviation (Luftwaffe) | +1 Attack / +1 Defense | (Optional) After applying combat results (see 8.3.8), destroy this Support to deteriorate the state of a retreating (not withdrawing) Division (opponent's choice). Cannot be used if the "Y'r'pleut" Event card has been played. | Yes |
| Beutepanzer Abteilung | +1 Attack | No specific effect. |
8.3.6 The Atlantic Wall
If the SHAEF player attacks a Landing Beach Sector devoid of any German units, and at least one of his units passes through an Atlantic Wall Fortification Strategic Point, the German player may, according to the rules (see 8.3.4 Reinforcing the Defense), activate 1 Division from an adjacent Sector and move it to reinforce the defense.
If he doesn't, the Sector can still defend itself. Combat is then resolved as if a Division, with a Combat value of 0, were present in the Sector under attack.
- The attacked sector's Defense bonus must be taken into account. But there is no -2 Attack Penalty for a defending Infantry Division if the Sector defends itself. Likewise if any defending unit withdraws, the sector will not be able to defend itself.
- Both players can play Event cards and assign Supports as usual.
- The attacker must apply the damage he receives.
- If the Sector contains no Division, the attacker must score at least 8 points of damage to conquer it.
If the SHAEF player wins the battle, he places a Bridgehead or Mulberry Harbour marker in the Sea Sector(s) the attack was coming from and the Atlantic Wall Fortification Strategic Point is canceled for the rest of the game.
8.3.7 Combat resolution
- Determine the Combat value for the attacker and defender.
- Place each player's Combat marker on the Damage Track.
- The attacker and the defender may use the specific effects of engaged Support (Flak, Hobart Funnies, Recon, Artillery) to modify the Combat values.
- The defender applies the combat result to his units and Supports.
- The attacker can use the specific effects of engaged Supports (Aviation, Flak 88, Nebelwerfer Brigade).
- The attacker applies the combat result to his units and Supports.
- The defender can use the specific effects of his remaining engaged Supports.
Calculating Combat Value
| Attack bonus / penalty | Defense bonus / penalty | |
|---|---|---|
| Combat card value | See card | See card |
| Combat value of all Divisions and Army Corps | See block(s) value(s) | See block(s) value(s) |
| Objective Sector | -3 | |
| Major Sector | -2 | |
| Secondary Sector | -1 | |
| Crossroad | +1 | |
| Bridge | +2 | |
| Bocage | +3 | |
| Fortifications / Atl. Wall |
8.3.8 Combat Results
First, the player must destroy 1 support if any destruction symbol is present in the square where his opponent's marker is located.
Then, for each full step of 4 Damage points (e.g. 14 = 3 steps) he suffers, the player must apply one of the following combat results:
- A. Deteriorate the state of a Division
- B. Retreat a Division
- C. Destroy two Supports
He can do this in any order he likes. For example, he can make a Division retreat, then deteriorate its State.
A. Deteriorate the state of a Division
If a Division is destroyed, the opponent gains 2 VPs.
B. Retreat a Division
- A Division can only retreat once per combat.
- The Division must move 1 or 2 Sectors according to the rules of movement.
- It cannot end this movement on a Sector adjacent to an opponent's Unit, or on an Objective Sector controlled by the enemy (reminder: an Objective Sector is controlled by default by the German player, or by the SHAEF player if a SHAEF Control marker is present). When defender Divisions retreat, consider the attacked Sector as not yet occupied by the attacker.
- If it is impossible to retreat, it cannot retreat and its State deteriorates.
- A SHAEF unit may retreat into a Sea Sector, even if it is still adjacent to enemy units.
- If the Division is integrated into an Army Corps, it leaves it.
- An Exhausted Division can retreat.
C. Destroy 2 Supports
A player cannot choose this combat result if they only have one Support to destroy.
8.3.9 Voluntary Support Special Effects
Once a player has applied the combat results to his units and Supports, the opposing player can destroy some of his Supports to trigger special effects (see 8.3.5 Supports).
8.3.10 Battle Aftermath
- If, after all combat results have been applied, a defending Army Corps with no Division in its Order of Battle remains in the Sector, it must retreat to a Major Sector situated 2 Sectors away, according to the rules of movement. If this is impossible, the Army Corps is destroyed, which earns the opponent 2 Victory Points.
- If, after the victory of the attacker, there are no defenders left in the Sector, the attacker must move 1 Division there. He may move additional Divisions and 1 Army Corps as long as the Sector's capacity is not exceeded. These units must have participated in the combat and not have retreated.
- His other units involved in the battle remain in the Sectors they occupy.
- The attacker gains 2 Victory Points if it is a Major Sector.
- Once the combat results have been applied, each player draws an Event card and places it in their hand, even if they did not play any.
8.3.11 Breakthrough
The attacker can then choose up to 2 Divisions that have just occupied the Sector under attack to make a Breakthrough.
- Infantry Divisions can move 1 Sector, Armored Divisions can move 2 Sectors.
- Due to the chaos caused by the battle, the units that carry out a breakthrough take the enemy by surprise. For this reason, this movement can cross a Boxed Location.
- This movement may lead to a new Combat, and therefore to the activation of new units and Supports.
- A Division can only perform 1 Breakthrough per round.
8.3.12 Counterattack
If, once the Combat has been resolved, the attacker has not managed to capture the attacked Sector and has had to abandon at least one of the Sectors from which he launched his attack (due to the retreat or the elimination of one or more of his units), the defender may launch a Counterattack.
- The defender can use up to 2 of the Divisions that took part in the Combat to carry out this Counterattack.
- Infantry Divisions can move 1 Sector, Armored Divisions can move 2 Sectors, starting from the attacked Sector.
- Due to the chaos caused by the battle, the units that carry out a Counterattack take the enemy by surprise. For this reason, this movement can cross a Sector framed by two enemy-controlled Sectors.
- This movement may lead to a new Combat, and therefore to the activation of new units and Supports.
- These Divisions can link up a Counterattack and a Breakthrough.
Attack Example
The offensive on Caen begins! The British I Army Corps launches an attack on the I SS-Panzerkorps in Caen. It takes with it the 49th and 43rd Infantry Divisions along with the 11th Armoured Division.
He uses the 3 Supports of this Army Corps and 1 from the XXX Army Corps, situated 2 Sectors away. Two more Infantry Divisions enter the Combat, the 50th and the 15th moves to Pegasus Bridge sector (it can join the combat because Pegasus Bridge sector is a Boxed Sector, but the 15th is attacking Caen, one of the two surrounding enemy sectors). Then the attacker draws and plays 1 Combat card face-down. Then, both players reveal their Supports and their Combat card.
The German player decides that his 716. Infantry Division withdraws, because it is already Shaken. This Division becomes Exhausted (see 8.3.3 Withdrawal). One of his 2 Divisions may reinforce Caen, the 12. SS Division or the 91. Luftlande Division, because they are adjacent to the attacked Sector. He chooses the 12. SS Division that is integrated in the I SS-Panzerkorps Order of Battle in the slot vacated by the 716. Infantry Division.
Resolution of Combat Example
Allied side (attacker): total combat strength = 18 (Divisions and Army Corps values). Attacking Support = +5 Attack bonus. Combat card value = 3. Sector attacker penalty = -3 because the attacked Sector is an Objective Sector. An Artillery Support cancels 1 Infantry Division's attack penalty (defending Infantry Division's attacker penalty 0, cancelled by Support). Attacker total: 18 + 5 + 3 - 3 = 23.
German side (defender): total combat strength = 13. Defending Support = +4 Defense bonus. Combat card value = 2 (13 + 2 = 15). Strategic Point bonus = 1 (the Crossroad Strategic Point bonus is reduced by 1 because of the British Recon Brigade Support specific effect). Defender total: 15 + 4 + 1 = 19.
Combat results. Starting with the defender, both players apply the damage they received.
Defender damage: The German player must first destroy one of his Supports. He chooses the Aufklarung Battalion. He then has 5 combat results to apply. He decides to use 4 of them so that the 17. SS Division and 21. Panzer Division retreat and reduce their State to Shaken. The fifth combat result reduces the State of the 12. SS Division to Shaken, but the Division remains in Caen.
Attacker damage: The SHAEF player destroys his R.A.F. Support to deteriorate the State of a retreating Division. The German player chooses the 21. Panzer Division that becomes Exhausted. The SHAEF player also has 4 combat results to apply. One of his Infantry Divisions retreats and becomes Shaken, two Infantry Divisions retreat. Caen didn't fall...
9 - End of the Week
9.1 Operations Resolution
At the end of each week, the Operations cards for the corresponding week that were not revealed during the Intelligence Phase are checked in the order chosen by the SHAEF player.
If the Operation is a success (the objective is met)
The SHAEF player gains the Victory Points and any additional rewards and the card is discarded.
- If it is a Special Operation, the card is removed from the game.
- If it is a Strategic Operation, the card is placed in the Successful Operations slot of the Operations Board for the End of the Game Phase.
If the Operation fails
- The German player wins the Victory Points.
- If it is a Special Operation, the card is removed from the game.
- If it is a Strategic Operation, the card is placed in the Failed Operations slot and the SHAEF player may reschedule it for the following month.
- During the Normandy Invasion campaign, the SHAEF player can reschedule it for the following month if he doesn't control it.
9.2 Festungen
At the end of each week, the German player wins the Victory Points shown at the bottom of the Festung tiles he selected at the start of the game if he still controls the corresponding Sectors.
10 - End of the Game
- The German player scores the Victory Points indicated in the center of the Festung tiles corresponding to the Sectors he still controls.
- If the SHAEF player has planned more than one Strategic Operation as part of the same Plan, he scores 1 additional Victory Point for each Operation successfully completed.
- Example: the SHAEF player planned 3 Strategic operations as part of the COBRA plan. The German player managed to reveal one of them thanks to an espionage operation, but the SHAEF player completed the other two. He therefore scored the VPs of the two successful missions during the corresponding end of the week phases. Now, at the end of the game, he scores a bonus of 2 VPs (+1 VP for each of the two successful strategic operations of plan COBRA).
- Both players score 1 additional Victory Point for each Exhausted enemy Division.
Once these Victory Points have been awarded and the Victory token moved accordingly, check the consequences described by the Victory Board.
11 - Advanced Rules
11.1 Three-Player Game
The Allied side can be played by two players. One plays the Americans, the other the British.
Operations
- Together, they decide which Operations to plan and when.
- In the event of disagreement, the British player has the final say.
Victory Points
- They earn VPs together, for Operations, battles and Event cards.
Event Card
- Each SHAEF player's Event card hand is 3. German player's Event card hand is 5.
- SHAEF players may exchange Event cards at any time, but they may not give Event cards to each other.
Turn Order
- Each round, the two SHAEF players choose which of them will play first.
The order of the round is as follows: SHAEF player 1, German player, SHAEF player 2, German player, ...
Supply
Together, they decide how to allocate their Supply Points. In the event of disagreement, the British player has the final say.
11.2 Advanced Supply Rules
11.2.1 Unit cut off from supplies
At the start of the Supply Phase, players check the status of their units. An Unsupplied marker (see 11.2.2 New States) is assigned to any Division that is cut off from supply. Railroads are considered Roads for the purpose of determining whether a Division is resupplied or not.
- A Division is cut off from supplies if it is no longer connected by road to a supplied Army Corps, or if it is in the Order of Battle of an Army Corps which is itself cut off from supplies.
- An Army Corps is cut off from supplies if it is no longer connected by road to a Reinforcements Box for the German player, or to an Allied-controlled Harbour (Omaha, Juno, Cherbourg or Le Havre) or Beach (Utah, Gold or Sword) for the SHAEF player.
- A road is cut if it passes through an opponent-occupied, Boxed or controlled Sector, or a Boxed Strategic Point.
- If a Division is to receive an Unsupplied marker, the player can prevent it by discarding 1 SP present in the Depot of the same Sector as the Division.
If a unit is no longer Unsupplied, remove the Unsupplied marker.
11.2.2 New States
Unsupplied
- It is not possible to improve the State of an Unsupplied Division.
- An unsupplied Division can move and fight as an attacker or defender. If it does, at the end of its activation, it flips its Unsupplied marker to its Out Of Supply side.
Out of Supply
- It is not possible to improve the State of a Division Out Of Supply.
- An Out Of Supply Division can only move 1 Sector.
- An Out Of Supply Division cannot attack. It can, however, defend itself with a -2 penalty.
- An Out Of Supply Division whose State is deteriorating surrenders and is destroyed.
- An Out Of Supply Division that must retreat surrenders and is destroyed.
- Removing an Out Of Supply marker costs 1 Supply Point.
These State-related penalties are cumulative with the Shaken and Exhausted State-related penalties.
11.3 Static Infantry Divisions
Some German Infantry Divisions are called "static" (Bodenstandige Infanterie Division). They move with greater difficulty and are marked by a red outline and a red line at the bottom of their block.
- To move a static division, or to reinforce an attack with a static division, the German player must spend 1 SP. There is no need to spend SPs to reinforce an attacked Sector with a static Division.
- This penalty is ignored as soon as the Static Division is integrated into an Order of Battle.
- This penalty is also ignored when a Static Division enters the game from a Reinforcements Starting Box (see 7.4.2 German reinforcements).
- If a Static Division has to withdraw or retreat (see 8.3 Combats), it can move only 1 Sector.
12 - Scenarios
June 1944 - Operation Neptune
Set-up 10 minutes. Duration: 2 h to 3 h.
Set-up
Each player takes 3 Supply Points. Place 1 Depot marker on each Depot Sector (Cherbourg, Saint-Lo, Caen, Argentan, Le Havre and Dieppe).
Scenario rules
- This game is played in 4 rounds.
- During the Planning Phase, the SHAEF player selects 4 to 6 Strategic Operation cards, draws 6 to 8 Special Operation cards and schedules them on the Operation Board.
- The SHAEF player cannot schedule more than 2 Strategic Operations in the same week, but can schedule as many Special Operations as desired each week.
- During the Planning Phase, the German player selects 2 Festung tiles.
- Activated units can move from 1 to 2 Sectors in the first round of June (6th June), then from 1 to 3 Sectors in subsequent rounds.
- No Breakthrough nor Counterattack during first turn (June 6th).
- To activate LXXXI Armee-Korps for the first time, the German player must spend 2 Victory Points.
- The German player cannot bring in Additional Reinforcements in June without the help of Event cards.
Difficulty
- Easy for the SHAEF player: Place the Victory counter on the 0 Victory Point square of the Victory Board.
- Balanced: Place the Victory counter on the German 5 Victory Points square of the Victory Board.
- Easy for the German player: Place the Victory counter on the German 10 Victory Points square of the Victory Board.
Victory levels (SHAEF)
- From 15+ Victory Points - Major Victory: What a victory! We swept through the German defenses as if they were made of paper. The bridgehead is solid, the Mulberry ports are set up and important towns have been liberated well ahead of schedule. Let's keep this up and we'll be in Paris next month.
- From 10 to 14 Victory Points - Historical Victory: Bravo Field Marshal! Neptune went just as we expected. We can now head inland. The main cities of Normandy are within our grasp, and the second phase of Operation Overlord can begin.
- From 5 to 9 Victory Points - Minor Victory: Neptune's success didn't live up to our expectations. Beachheads have been put in place, but they are too weak to withstand a major counterattack. We have to prepare for the possibility of having to withdraw our troops. In the meantime, let's consolidate our positions and pray that Adolf is still convinced that the real landing will take place further north.
Draw (0 to 4 Victory Points): A long status quo.
Victory levels (German)
- From 5 to 9 Victory Points - Minor Victory: You've done what you could in difficult circumstances. From now on, we will have to contain the steady influx of enemy troops. This Allied operation is proof that the danger lies on the French coast, forcing us to withdraw troops from the Eastern Front to ensure an impregnable line of defense stretching from Brittany to Nord-Pas-de-Calais.
- From 10 to 14 Victory Points - Major Victory: What a pathetic attempt at invasion! You can smell the amateurism and fear in their strategy. Any child of the Reich would have come up with a far superior plan. As you're having trouble retaking the beaches, we'll be sending you reinforcements from northern France as soon as possible.
- From 15+ Victory Points - Total Victory: Bravo Herr Generalfeldmarschall! The pitiful Allied landings didn't give them a foothold in Normandy. It's only a matter of time before we throw them back into the sea. Thanks to your dedication, we can lighten the coastal defenses, which will enable us to reinforce our forces fighting bravely on the Eastern Front.
July 1944 - Cobra
Set-up 15 minutes. Duration 2 h to 3 h.
Set-up
Each player takes 3 Supply Points. Place 1 Depot marker on each Depot Sector except Cherbourg (Saint-Lo, Caen, Argentan, Le Havre and Dieppe).
Scenario rules
- This game is played in 4 rounds.
- During the Planning Phase, the SHAEF player selects 4 to 6 Strategic Operation cards, draws 6 to 8 Special Operation cards and schedules them on the Operation Board.
- The SHAEF player cannot schedule more than 2 Strategic Operations in the same week, but can schedule as many Special Operations as desired each week.
- During the Planning Phase, the German player selects 2 Festung tiles.
- Activated units can move from 1 to 3 Sectors.
- British I Corps is transferred to Canadian 1st Army in the third week of July.
- To activate LXXXI Armee-Korps for the first time, the German player must spend 2 Victory Points.
Difficulty
- Easy for the SHAEF player: Place the Victory counter on the 0 Victory Point square of the Victory Board.
- Balanced: Place the Victory counter on the German 5 Victory Points square of the Victory Board.
- Easy for the German player: Place the Victory counter on the German 10 Victory Points square of the Victory Board.
Victory levels (SHAEF)
- From 15+ Victory Points - Major Victory: Hats off to you, General! The Germans fled like rabbits, leaving behind equipment, prisoners and intelligence. Their divisions are disorganized, weakened and at our mercy. Keep up the pressure and the gates of Paris will open sooner than expected.
- From 10 to 14 Victory Points - Historical Victory: Bravo General! Cobra is a success. The British troops have held off the German units long enough for General Patton's 3rd US Army to prepare for the liberation of Brittany. Operation Totalize, led by Canadian troops, is about to be launched. We hope to encircle the German divisions retreating eastwards. Victory is ours!
- From 5 to 9 Victory Points - Minor Victory: Operation Cobra was not the success we had hoped for. Our troops got bogged down in the Normandy bocage and fell several months behind schedule. The enemy was able to transfer reinforcements from other fronts, challenging the next phases of the Normandy campaign. The general staff is currently working on a desperately needed new strategy which, hopefully, will accelerate this campaign.
Draw (0 to 4 Victory Points): A long status quo.
Victory levels (German)
- From 5 to 9 Victory Points - Minor Victory: We would like to congratulate you, while emphasizing the seriousness of the situation. You have succeeded in slowing down the invaders, but they are still advancing and still receiving reinforcements by sea. We're going to send you extra troops to help you push them back towards the coast, but don't expect miracles. The Red Army's advance obliges us to maintain a considerable number of divisions on the Eastern Front. The future of the Reich is in your hands!
- From 10 to 14 Victory Points - Major Victory: The Allies have made no progress and are entangled in their June positions. Thanks to your dedication and courage, you have enabled the Reich to gain time and concentrate its efforts against the Russians. Final victory is still a long way off, but we can already see the skies clearing. The order is formal and remains the same: not a step backwards!
- From 15+ Victory Points - Total Victory: It's incredible! You've managed to contain the invasion and even repel it. It's a feat of war that will go down in the annals of our thousand-year-old Reich. The Fuhrer and the German people can only be proud of you.
August 1944 - Haaaa Paris!
Set-up 20 minutes. Duration 4 h.
Set-up
Each player takes 3 Supply Points. Place a SHAEF Control marker on Cherbourg and La Haye Dupuis. Place 1 Depot marker on each Depot Sector except Cherbourg, Saint-Lo and Caen, (Argentan, Le Havre and Dieppe).
Scenario rules
- During the Planning Phase, the SHAEF player selects 6 to 8 Strategic Operation cards, draws 6 to 8 Special Operation cards and schedules them on the Operation Board.
- The SHAEF player cannot schedule more than 2 Strategic Operations in the same week, but can schedule as many Special Operations as desired each week.
- During the Planning Phase, the German player selects 2 Festung tiles.
- Activated units can move from 1 to 2 Sectors.
- This game is played in 4 rounds with 2 Activation Phases and 2 Supply Phases per round. The week sequence is:
- Beginning of Week (not during first turn)
- Intelligence Phase
- Supply Phase #1 (not during first turn)
- Reinforcement Phase (not during first turn)
- Activations Phase #1
- Supply Phase #2
- Activations Phase #2
- End of the week
- Use the marker provided to count the Activation Phases.
- The German player has the Initiative for the second Activation Phase.
- At the beginning of the second Activation Phase, Doctrine markers are flipped on their available side, counters of Activated units are straightened, Combat card decks are shuffled and both players may allocate the Supports present in the Army's Reserve Boxes.
- To avoid destruction, the German player may disengage his troops out of Normandy.
- When an Exhausted Division or an Army Corps ends its movement in a Starting Sector, it is removed from the game and the German player scores 1 VP.
- An Exhausted Division or an Army Corps may also leave the battlefield by withdrawing or retreating (before being removed from the game, all damage must be applied).
Difficulty
- Easy for the SHAEF player: Place the Victory counter on the 0 Victory Point square of the Victory Board.
- Balanced: Place the Victory counter on the German 5 Victory Points square of the Victory Board.
- Easy for the German player: Place the Victory counter on the German 8 Victory Points square of the Victory Board.
Victory levels (SHAEF)
- From 15+ Victory Points - Major Victory: Once again, General, well done! You emerge from Normandy in glory, and Paris opens its arms to you. The enemy can no longer stop you. The losses you have inflicted on him will not allow him to turn the tide, and we are on his heels, destroying the routing divisions. At this rate, it's only a matter of weeks before the Reich collapses.
- From 10 to 14 Victory Points - Historical Victory: Despite that not all objectives were achieved, the campaign was still a success. And that's the most important thing! We're ready to move on to the final phase of the operation, and Paris is right in front of us, ready to fall. The world, and especially France, are grateful to you. The liberation of Europe will still take time, but we are confident of its conclusion.
- From 5 to 9 Victory Points - Minor Victory: The breakthrough outside Normandy has not been as dynamic as we had hoped. The operation took an extra month to complete which cost us 24% more casualties than expected. Nevertheless, we salute the efforts and courage of your men. They have fought with honor, and victory is within our grasp.
Draw (0 to 4 Victory Points): A long status quo.
Victory levels (German)
- From 5 to 9 Victory Points - Minor Victory: You've won a great victory, but it's not enough. Despite all your efforts, you've only postponed the inevitable by a few weeks. The coming hours will be dark for the German people. They are counting on you to give them hope of victory in the near future.
- From 10 to 14 Victory Points - Major Victory: The enemy stops, unable to break through your lines. Herr Reichsmarshall, you have shown yourself to be imperial! A worthy officer of the great Reich's army. So don't rest on this success, the Allies must not cross the Seine, it's a matter of life and death. Though the Fuhrer has great confidence in you, he still demands your best effort in the near future.
- From 15+ Victory Points - Total Victory: You've been declared a hero of the Reich by our Fuhrer himself! Your victory is above all that of the German people. The gates of Walhalla have opened wide to welcome all the Allied soldiers you have sent there. The enemy is retreating, retreating all along the front. We will send you reinforcements to take back the lost ground. The reconquest of Normandy begins now!
Normandy Campaign
Set-up 30 minutes. Duration 6 h to 8 h.
Set-up
Each player takes 3 Supply Points. Place 2 Supply Points on each Depot Sector (Cherbourg, Saint-Lo, Caen, Argentan, Le Havre and Dieppe).
Scenario rules
- This game is played in 12 rounds.
- During the Planning Phase of each month, the Allied player selects 4 to 6 Strategic Operation cards, draws 4 to 6 Special Operation cards, and schedules them on the Operation Board.
- The SHAEF player cannot schedule more than 2 Strategic Operations in the same week, but can schedule as many Special Operations as desired each week.
- Activated units can move from 1 to 2 Sectors in the first round of June (6th June), then from 1 to 3 Sectors in subsequent rounds.
- No Breakthrough nor counterattack during first turn (June 6th).
- To activate LXXXI Armee-Korps for the first time, the German player must spend 2 Victory Points.
- German Bretagne Reinforcements, June 3rd week, 353. Infanterie Division must use a different Starting Sector to that of the II FJG. Army Corps.
- German Paris/East Reinforcements, July 1st week, 16. Feld Division must use a different Start Sector to that of the II. SS-Panzerkorps.
- The German player cannot bring in Additional Reinforcements in June without the help of Event cards.
- At the end of the Preparing for the Month Phase, remove Broken Railroads/Broken Bridge markers.
Difficulty
- Easy for the SHAEF player: Place the Victory counter on the 0 Victory Point square of the Victory Board.
- Balanced: Place the Victory counter on the German 5 Victory Points square of the Victory Board.
- Easy for the German player: Place the Victory counter on the German 8 Victory Points square of the Victory Board.
Victory levels (SHAEF)
- From 15+ Victory Points - Major Victory: With this victory, you enter the pantheon of history's greatest strategists forever! In the wake of the Normandy disaster, the German generals dismissed Hitler from office. Today, he languishes in a Berlin prison. Peace is signed in October 1944, but the Red Army does not intend to stop there, and continues its advance. The peace will last only a few months...
- From 10 to 14 Victory Points - Historical Victory: What a feat you've just achieved in Normandy! Hitler is forced to clear the Eastern Front to counter our armies, allowing the Reds to sweep into Germany... The Third Reich capitulates on May 8, 1945, but a new kind of war begins...
- From 5 to 9 Victory Points - Minor Victory: Overlord was a mixed success. The Normandy campaign is more difficult than expected. Hitler doesn't transfer enough divisions from the Eastern Front, and the Red Army struggles to make headway. The Third Reich capitulates on April 28, 1946...
Draw (0 to 4 Victory Points): A long status quo.
Victory levels (German)
- From 5 to 9 Victory Points - Minor Victory: It was a great victory. Unfortunately, you didn't succeed in driving the Allies back into the sea. They will continue to land men and material on the beaches of Normandy. You have bought Germany a little time, but our fate is inescapable. The Third Reich will capitulate on December 14, 1945.
- From 10 to 14 Victory Points - Major Victory: Bravo Herr Reichsmarshall! The Allies are bogged down in Normandy. They will soon control only a derisory amount of territory, just enough to save their soldiers from annihilation. Now, we have to hold out until 1947, but defeat awaits us, whatever we do. Let's hope our enemies tear each other apart in the meantime...
- From 15+ Victory Points - Total Victory: What a victory! All the Allies have to do now is re-embark in their miserable boats. The superiority of our armies is beyond question. We can now negotiate a separate peace in the West. But let's not be naive: the war will continue for decades to come, as long as the Russian bear is roaring at our doorstep.