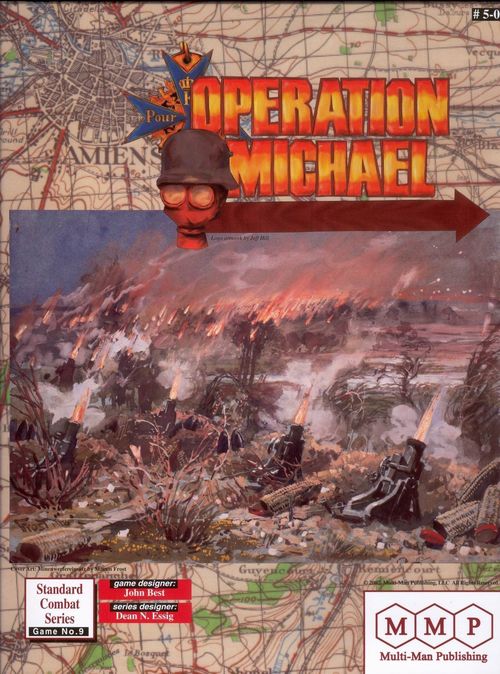
Operation Michael
Operation Michael Rulebook
Table of Contents
Table of Contents
- Players and Counter Colors
- General Information
- Sequence of Play
- Map Notes
- 1.0 General Special Rules
- 2.0 Allied Special Rules
- 3.0 German Special Rules
- 4.0 Optional Rules
- 5.0 Basic Scenario Rules
- 6.0 Campaign Scenarios
- 7.0 Battle Scenarios
- Terrain Effects Chart
- Combat Results Table
- Barrage Table
- Designer's Notes
- Players Notes
- Errata (22 March 2004)
Players and Counter Colors
The German player controls all German units. The Allied player controls all other units.
German units are grey. Allied units are: Brown (British), Light Brown (Canadian), Tan (Australian), Green (New Zealand), Light Tan (American), and Blue (French).
Unit symbols: Infantry, Cavalry, Artillery, Static, Sturmblock, Engineer, Railroad Engineer (RR), Tank.
General Information
Scale
Each turn is 1 day. Each hex is approximately 1.2 miles (2 kilometers). Units vary in size from battalions through divisions. Artillery units represent groups, while German Sturmblock units represent regimental sized assault groups.
Stacking
No more than 4 stacking points may occupy a single hex. Divisions are 3 stacking points each. All other combat units are 1 stacking point each. Game markers are 0 stacking points. Stacking point values are set and never change based on circumstances. Stacking is enforced only at the end of the Movement Phase.
Sequence of Play
German Player Turn
- Replacement
- Break Down
- HQ Replenishment
- Barrage
- Movement
- Combat
- Exploitation
- Recombination
- Supply
- Clean-Up
Allied Player Turn
- Replacement
- Repair Broken-down tank units
- HQ Replenishment
- Barrage
- Movement
- Place reinforcements
- Place Exploit Capable markers
- Combat
- Exploitation
- Supply
- Clean-Up
Map Notes
Multiple Terrain Types in a Hex
Hexes containing more than one terrain type (e.g., 23.28) use the terrain type with the highest MP cost for movement, and the highest defense combat effect for combat.
1.0 General Special Rules
1.1 Exploit Capable Units, and Markers
1.1a Units marked with a Yellow Tag over their unit values, and any unit with an Exploit Capable Marker (ECM) are Exploit Capable.
1.1b In Campaign Scenario 6.2, the Allies will be able to convert standard moving units into exploit capable units. When non-Exploit Capable units are stacked with an ECM they become Exploit Capable.
1.1c Place ECMs in the Allied Movement Phase on any Allied infantry or HQ unit. Each unit being marked requires its own marker. ECMs may be placed on units that begin the Movement Phase in an EZOC, or in any other status (to include those that have already completed their movement). The markers must remain with those units until the player chooses to remove them (in any subsequent friendly Movement Phase). An ECM cannot be used to confer movement benefits to more than one unit during any specific movement phase. If a unit marked by an ECM is destroyed, the marker returns to the player's pool for later use. ECMs are never lost or destroyed.
1.1d ECMs may not be placed on Artillery units or Tanks.
1.1e French divisions can use ECMs. However, three ECMs are required to produce the exploit capable effect for one French division.
Design Note: These markers were designed explicitly for British and Commonwealth brigades. While they can be used on French units, the lack of efficiency will rarely see them used so.
1.1f Units marked with an ECM must still pay +2 Movement Points to enter an EZOC.
1.2 Headquarters (HQs)
Typical HQ unit: the counter shows the HQ name, Steps, Supply Range, Movement Allowance and Defense Strength (e.g., Gayl, [5]-1-4, movement allowance 6 MP).
1.2a HQ units have no attack strength and a defense strength of 1. HQ Supply Range is given in hexes.
1.2b The HQ's front side indicates a Replenished HQ, while the back side indicates a Depleted HQ. To attack at their normal combat strength, units must trace attack supply (see 1.5) to a Replenished HQ. Units unable to do so may still attack, but do so at 1/2 attack strength.
1.2c HQ units are never permanently eliminated. Any HQ subject to a step loss is placed on the Turn Record Track two turns later. It arrives as a reinforcement on that turn. All HQs enter with their Replenished side up.
Example: On Turn 4, the Germans eliminate a Depleted British HQ. The eliminated HQ is removed from play and placed on the Turn Record Track on Turn 6. In the British Replacement Phase of Turn 6, the HQ returns as a reinforcement, Replenished side up.
1.2d HQs arrive on any hex containing a friendly town or city, or a unit of the HQ's command. In either case, the HQ must be able to trace supply at the instant of entry and the hex cannot be in an EZOC. HQs scheduled to arrive may be voluntarily delayed. If there are no hexes which satisfy the entry criteria at the time the HQ is due to enter, then the HQ must remain on the Turn Record Track until such a hex is available in a subsequent turn.
1.2e Any HQ which provides attack supply (see 1.5) [EXC: Barrage Attacks, Overrun Attacks, Defense] becomes Depleted (and flipped to its Depleted side) at the end of the Combat Phase of that turn.
1.3 HQ Replenishment
1.3a During the HQ Replenishment Phase, each HQ must attempt Replenishment [EXC: Out of Supply HQs may not check for Replenishment]. In order to be Replenished (and flipped to its Replenished side), each HQ must make a die roll greater than or equal to that nation's Replenishment Number located on the Turn Record Track for that turn. If the die roll is less than the indicated number, the HQ remains Depleted. Only one attempt may be made per HQ each turn.
1.4 Supply
Introduction: During the Supply Phase, HQs trace a supply line of unlimited length, but free of EZOC, to an appropriate supply source. These HQs in turn supply any/all non-Artillery combat units within their supply range. Artillery units trace supply to an appropriate Supply Source separately (as if they were an HQ).
1.4a Units that cannot trace supply are Out of Supply until the next friendly Supply Phase. Mark such units with an Out of Supply marker.
1.4b German units may use any east map edge hex as a valid supply source. British/Commonwealth units use any north or west map edge hex as a valid supply source. French units use any south map edge hex as a valid supply source.
1.4c Reinforcements must trace supply normally on the turn they enter. In Campaign Scenarios, units initially set up outside the Supply Range of an HQ begin the scenario Out of Supply. Their supply status is determined normally thereafter.
Design Note: This simulates reinforcing troops being hastily flung into battle without adequate staff preparation or integration into an existing command structure. The Out of Supply mechanic is a good representation of the effects of such rapid deployment.
1.4e There is no limit to the number of combat units that can trace supply to a single HQ. Allied units may freely use British or French HQs.
1.4f Depleted HQs still provide supply for non-Artillery combat units within their Supply Range.
1.4g Out of Supply units move normally, but attack and defend at 1/2 strength. An Out of Supply unit retains any ZOC it would normally have. Out of Supply artillery has no Barrage Strength or Gas firing capability. The Attack Strength modifier for being Out of Supply is in addition to that imposed for Attack Supply (see 1.5). A Depleted HQ that is Out of Supply cannot be replenished.
1.5 Attack Supply
1.5a Attacking units [EXC: Barrage, Overrun] must check for Attack Supply when the attack is declared. In order to be in Attack Supply, each combat unit must be within Supply Range of a Supplied, Replenished friendly HQ.
1.5b A single HQ can provide Attack Supply to any number of units or attacks within range. The HQ becomes Depleted at the end of the current Combat Phase [EXC: an Out of Supply HQ may provide Attack Supply for only one attack, regardless of the actual number of units involved in the attack].
Design Note: This enables an HQ stacked with units that have been cut off to provide Attack Supply for an attempt to get back to friendly lines while also limiting the HQ's contribution to the breakout effort. If the attempt fails, then the HQ will be a depleted HQ that is Out of Supply, and thus unable to make a Replenishment dr.
1.5c Units unable to receive Attack Supply attack at half strength. This effect is cumulative with any other effects (e.g., Out of Supply, DG, etc.).
Example: A British Infantry Brigade (printed attack strength 4) is Out of Supply, DG, and without Attack Supply. Its attack strength would be 0.5 (4 x 1/2 x 1/2 x 1/2).
1.6 Step Losses
Typical combat unit: the counter shows Unit Designation, Parent Unit (HQ), Steps, Attack Strength, Defense Strength and Movement Allowance (e.g., 10-9-6).
Divisions, Brigades, Infantry Battalions, and Sturmblocks have two steps each. All other units have one step. Any two step unit subject to a step loss is flipped to its reduced strength side. Any single step unit (or a two step unit already on its reduced strength side) subject to a step loss is eliminated and placed in the dead pile [EXC: eliminated Sturmblocks are placed in the German player's pool of available Sturmblocks for future use].
1.7 Artillery Units
Typical artillery unit: the counter shows Unit Designation, Barrage Strength, Range and Movement Allowance.
1.7a In lieu of Attack and Defense Strengths, Artillery units have Barrage Strength and Range. Artillery units' Barrage Strength can only be used in Barrage attacks (i.e., it can never be added to any other attack). Artillery units can apply their Barrage Strength to any enemy unit within range. Line of sight, obstacles, friendly and enemy units have no effect on Range. So long as the number of hexes from the Artillery unit to the target hex is less than or equal to the Artillery unit's Range, Barrage is possible. Any number of friendly Artillery units within range can participate in a single Barrage attack. Conventional and Gas Barrages are conducted during the Barrage Phase. Resolve Barrage attacks as follows.
To make a barrage attack, the phasing player announces:
- the hex that is the target of the barrage
- the friendly unit "spotting" for the barrage (if any)
- all Artillery units that are firing
- the total Barrage Strength
Adjust the total Barrage Strength for terrain and spotting effects, cross index the adjusted total with the die roll and implement the results immediately. Flip all participating artillery units to their Fired side. At the conclusion of the Barrage Phase, flip all Fired Artillery units to their unfired (front) sides. Artillery units which conduct a Barrage attack may still move in the Movement Phase.
1.7b A single hex may be the target of a Barrage attack only once per Barrage Phase [EXC: a single hex may be attacked with both a conventional Artillery Barrage and one or more Gas Barrage(s) in the same Barrage Phase].
1.7d Out of Supply Artillery may not conduct Barrage attacks.
1.7e Artillery units have a Defense Strength of one.
1.7f An Artillery unit may not split its Barrage Strength into more than one attack, nor may a single Artillery unit participate in more than one Barrage attack per Barrage Phase.
1.7g Any Barrage Attack made vs. a target hex with no friendly unit adjacent (i.e., with no spotter) suffers a one column shift (in favor of the target) on the Barrage Table.
1.7h Losses called for by the Barrage Table may be satisfied by any units within the target hex as the owning player sees fit. Excess step losses are ignored (i.e., if step losses remain to be taken after the last unit in the target hex is eliminated, ignore the remaining step losses).
1.8 Replacements
Introduction: The Allies suffered approximately 250,000 casualties during Operation Michael. The Germans lost approximately 300,000 men. This resulted in the effective loss of many divisions on both sides. As the campaign unfolded however, many units took on lightly wounded or leaderless soldiers from other units. Additionally, there was a well-tested replacement program on both sides. The replacement procedure simulates the armies' ability to regroup, and to incorporate new men (both experienced and recruits) into existing units.
1.8a Each player receives Replacements in the Replacement Phase. Consult the Turn Record Track for the number of Replacement Points available that turn. German Replacement Points are indicated by a German flag while British Replacement Points are indicated by a British flag. French Replacement Points are indicated by a French flag. Each Replacement Point may be used to recover one step from an eligible two step unit.
1.8b Out of Supply units may not receive Replacements.
1.8c Units that go to the dead pile may not be rebuilt using Replacements. Reduced-strength German Assault Divisions currently off map (i.e., represented by Sturmblock counters) may not receive Replacements (though they could recombine and receive Replacements on a subsequent turn).
1.8d Replacements may be taken in an EZOC and may be taken by DG units.
1.8e Replacement Points may not be carried over or accumulated from one turn to the next. Unused Replacements are lost.
1.9 Disorganized Units
Units become DG only as a result of the Barrage Table. When the Barrage Table gives a DG result, mark all units in the target hex with a DG Marker.
1.9a DG units have their Attack, Defense, and Barrage Strengths halved. DG units may not conduct Overruns. DG units have no ZOC and have no Exploit capability. HQs that are DG retain their ability to provide supply and attack supply. There is no additional effect for multiple DG results.
1.9b Recovery of DGs. At the end of his player turn, the phasing player removes all DG markers from his units. Being Out of Supply does not affect the ability to recover from DG status.
2.0 Allied Special Rules
2.1 Tanks
Introduction: Although they played only a minor role in the actual battle, the British nevertheless had seven battalions of tanks available. Their impact on the battle was unpredictable, but often telling.
2.1a Unless Broken Down (2.1c), Tanks are always Exploit capable. Tanks have one step. Broken Down Tanks are flipped to their Broken Down side.
2.1b Infantry and/or Cavalry that participate in the same attack (i.e., vs. the same hex) with 1 or more Tanks have their Attack Strength tripled. The units need not be stacked with the Tank to get this effect. Broken Down Tanks never produce this effect.
2.1c Tanks were likely to break down mechanically before and during combat, with resulting limitations in effectiveness. At the beginning of each Allied Movement Phase in which there is still 1 or more non-Broken Down Tanks, roll one die. On a 1-3, Tank Break Downs occur. Other results have no effect. On a Tank Break Down result, the German player selects one Tank to Break Down, and the British player does the same to another Tank [EXC: if only one non-Broken Down Tank remains, that Tank Breaks Down].
2.1d Broken Down Tanks function as any other combat unit using the printed values on the Broken Down side of the counter.
2.1e Any Broken Down Tank that begins an Allied Replacement Phase stacked with a supplied Allied HQ is automatically repaired; flip the Tank unit(s) back to the functioning side. The Tank's supply status, and/or the presence of EZOCs has no effect on repair.
2.1f Tanks must always be the top-most unit in a stack.
3.0 German Special Rules
3.1 Sturmblocks
Sturmblocks are two step units representing regimental-sized assault units. Sturmblocks pay only +1 MP to enter or move through an EZOC. Sturmblocks may conduct Overrun attacks without paying the Overrun MP cost.
3.1a In the Break Down Phase, the German player may break down any of his full or reduced strength assault divisions into Sturmblocks. The total Attack Strength of the Sturmblocks must be equal to or less than the current strength of the division, but the number of counters and the number of steps chosen to replace the division are not otherwise restricted. Thus an 11-9-6 assault division may be broken down into a stack consisting of two 4-3-6s and one 3-3-6, or a stack consisting of five 2-2-6s, or any other combination so long as the total Attack Strength of the selected Sturmblocks is 11 or less. The number of assault divisions that can be broken down is limited by the number of currently available Sturmblock counters; at least one Sturmblock counter must be placed on the map for each assault division removed. Place the new Sturmblock units in the hex currently occupied by the division. Stacking may be momentarily violated, but must be within stacking limits by the end of the Movement Phase.
3.1b Sturmblock units may be recombined into divisions in the Recombination Phase. The number of Sturmblocks needed to recombine into a division must occupy the same hex at the beginning of the Recombination Phase and must be within Supply Range of a supplied HQ. The total Attack Strength of the recombining Sturmblocks must equal or exceed that of the desired division. As with breaking down divisions, the number of units and steps is not otherwise restricted. Place the division in the hex currently occupied by the Sturmblocks and return the Sturmblocks to the pool. Divisions that were full-strength off the map may be recombined at reduced strength, and divisions that were at reduced-strength off the map may only be recombined at reduced-strength.
3.1c Out of Supply and DG assault divisions may be broken down, but any Sturmblocks share the same Out of Supply and/or DG status. Out of Supply and Disorganized Sturmblocks can be recombined into divisions, but if any of the recombining Sturmblocks is Out of Supply or DG, then the division is as well.
3.1d Only German assault divisions (those with a movement allowance of 6) may break down into Sturmblock units.
3.1e There is no limit to the number of times a single Sturmblock counter may enter and be removed from the map and there is no delay from a Sturmblock's destruction until it can be reused, within the constraints of the turn structure.
3.2 Gas Warfare
3.2a Unless specifically stated otherwise in the scenario instructions, only the Germans can Barrage with Gas. The Turn Record Track lists how many Gas Barrages the player can make each turn [EXC: unless specified otherwise in the scenario instructions]. Gas Barrages may not be saved for later turns; unused Gas is lost.
3.2b To use a Gas Barrage, the German player identifies which Artillery unit is using Gas, subtracts one Gas Barrage from the number available, and places a Gas marker on the target hex. Gas Barrages are made in the German Player's Barrage Phase. Any Artillery unit can fire a Gas Barrage to any hex in range (no spotter is required to get the full effect of Gas). A hex can be the subject of more than one Gas Barrage in a phase, with cumulative effects on the target units [EXC: ZOC loss can occur only once]. An Artillery unit firing Gas cannot also fire a conventional Barrage in that phase. No die rolling is required for the Gas Barrage; Gas always works.
3.2c The defense strengths of units marked with a Gas Marker are halved, and they do not possess a ZOC. The Gas marker stays with the units if they retreat. In other words, it's not the Gas that's persistent; it's the effects of being gassed that linger. Remove all Gas markers (and their effects) at the end of the next Combat Phase. (See Errata 1: German Gas markers are removed at the end of the German Combat Phase; British Gas markers, an option, are removed at the end of the British Combat Phase.)
4.0 Optional Rules
The optional rules can be used to increase the game's historical depth, or possibly to rebalance the game. For example, the use of rules 4.1 and 4.2 favor the Allied player, while 4.3 helps the German player. It is also permitted to use the rules other than unilaterally. For example, forcing the Allies to follow 4.1 while the Germans are free to trace attack supply to any HQ, might help a less experienced German player enjoy the game against a more experienced Allied player.
4.1 Parental Headquarters
4.1a Infantry and cavalry brigades, and infantry divisions, are described as being subordinate to a specific HQ. This HQ, the "parental" HQ of those units, is the only HQ they can use for any supply purpose, including Attack Supply. Combat units belong to the HQ whose designation appears on the right side of their unit symbol. Units with no such designations (e.g., Sturmblocks, Tanks) may use any HQ within range. Artillery units continue to trace supply directly to a Supply Source and are not otherwise affected by this rule.
4.1b Units subordinate to an HQ currently offmap (e.g., on the Turn Record Track) will be Out of Supply the entire time that their HQ is not on the map.
4.1c Even if all subordinate units of a particular HQ are destroyed, the HQ can still serve to supply combat units not subordinate to any particular HQ. Similarly, the destruction of all its subordinate units does not result in the removal of an HQ currently on the map.
Design Note: Even if all of its originally organic units are destroyed, the HQ may still be used as a supply source for other "non-Corps" units. In essence forming an ad-hoc Corps. Historically, this happened on a number of occasions on the Allied side. Note that using this rule means that if combat units from different HQs attack the same target, multiple HQs will become Depleted. This effect is significant and should not be underestimated.
4.2 Artillery Defensive Strengths
4.2a Artillery units with a movement allowance of 3 (field guns) use their Barrage Strength when defending in combat (instead of the 1 Defense Strength normally assigned to Artillery units).
Design Note: Throughout the battle, there were several instances of British artillery holding sections of the line while firing over open sights at the enemy. This rule allows players to utilize their field guns in minor defensive roles in case of emergency.
4.3 British Set Up Restrictions
4.3a In all scenarios, British units must be set up so that only one component brigade of each division is placed in a Forward Zone trench hex of its Corps set up area. For example, if there are a total of three British divisions (nine infantry brigades) in a given Corps set-up area, then only three brigades (one from each of the three divisions) may be placed in that Corps' Forward Zone trench hexes. Each brigade selected for Forward Zone placement must be set up in a separate hex within the Corps set up area (see 5.0g). The player must set up the minimum number of brigades in the Forward Zone, but may set up no more than the minimum.
Design Note: This rule simulates the British reliance on reserves, almost to a fault. The nearby British units will be available to rapidly move to the fighting, but will be absent from the initial German surge. This rule, on the surface, favors the Germans. However, do not discount the additional survivability of the British brigades. They will initially be more difficult to surround and cut off.
5.0 Basic Scenario Rules
5.0a The German Player Turn is first.
5.0b The Allied player sets up first.
5.0c A unit placement with the notation "r" means the unit sets up reduced. An HQ placement with the notation "d" means that the HQ is set up Depleted.
5.0d Units may not set up in a trench complex hex on the enemy side of the dividing line. Each player should take care to set up his units on his own side of the line in those instances where a unit could potentially set up in the enemy's trench system.
5.0e Each Corps set-up area includes all trench system hexes on/between the Corps' boundary lines marked on the map.
5.0f In all Campaign Scenarios (and some Battle Scenarios), all Artillery units must set up in trench hexes. British Artillery units must set up within the appropriate Corps set-up area. German Artillery units must set up in a Corps set-up area belonging to the appropriate army (the scenario information lists the Corps belonging to each German army).
5.0g In all Campaign Scenarios (and some Battle Scenarios), the Allied player may not stack combat units in Forward Zone hexes. Forward Zone hexes are defined as trench hexes containing only a single line of trenches, and adjacent to 1 or more German set-up areas. British Artillery units and HQs may not set up in Forward Zone hexes.
5.0h Use the values on the Turn Record Track for Replacements, HQ Replenishment, and Gas Availability unless indicated otherwise in the scenario instructions.
5.0i HQs may not set up adjacent to an enemy unit (nor in a hex that could end up adjacent to an enemy unit, should that side set up first). Following set up, but prior to the start of play, any HQs found adjacent to an enemy unit is repositioned by the controlling player to the nearest non-adjacent hex.
6.0 Campaign Scenarios
6.1 Operation Michael
This scenario depicts the entire campaign from the opening German maneuvers to the final, desperate attacks by depleted German stosstruppen against their equally weary, but dogged enemies.
General Information:
- First Turn: 1 (March 21, 1918)
- Last Turn: 16 (April 5, 1918)
- Game Length: 16 turns
- Map Area: entire map
German Information:
Set Up:
- 1 BavR Corps set-up area: (HQ, 5 BavR, 187, 240 Inf Div)
- 18 Corps set-up area: (HQ, 2 GdR, 6 Bav, 111, 221, 234, 239 Inf Div)
- 6 Res Corps set-up area: (HQ, 1GdR, 5 Bav, 17, 24, 195 Inf Div)
- 14 Res Corps set-up area: (HQ, 3 Gd, 20, 39 Inf Div)
- 11 Corps set-up area: (HQ, 24 Res, 53 Res, 4, 119 Inf Div)
- 17 Army artillery: (17 Army: 1 Bav R, 18, 6 Res, 14 Res, 11 Corps): 2x 3-4-3, 3x 5-5-2, 2x 6-7-1, 2x 10⁻⁹-1
- 39 Res Corps set-up area: (HQ, 16 Res, 21 Res Inf Div)
- 13 Corps set-up area: (HQ, 3 Mar, 54 Res, 27, 107, 183 Inf Div)
- 23 Res Corps set-up area: (HQ, 9 Res, 50 Res, 79 Res, 13, 18, 199 Inf Div)
- 14 Corps set-up area: (HQ, 4 Gd, 1, 25, 228 Inf Div)
- 51 Corps set-up area: (HQ, Gd Ers, 19, 208 Inf Div)
- 2 Army artillery: (2 Army: 39 Res, 13, 23 Res, 14, 51 Corps): 2x 3-4-3, 3x 5-5-2, 2x 6-7-1, 2x 10⁻⁹-1
- 3 Corps set-up area: (HQ, 5, 6, 23, 28, 88, 113, 206 Inf Div)
- 9 Corps set-up area: (HQ, 1 Gd, 5 Gd, 45 Res, 50, 231 Inf Div)
- 17 Corps set-up area: (HQ, 1 Bav, 7 Res, 10 Res, 9, 10, 36, 238 Inf Div)
- 4 Res Corps set-up area: (HQ, 33, 34, 37, 103 Inf Div)
- Gayl set-up area: (HQ, 47 Res, 13 Ldw, 211, 223 Inf Div)
- 18 Army Artillery: (18 Army: 3, 9, 17, 4 Res, Gayl Corps), 3x 3-4-3, 3x 5-5-2, 3x 6-7-1, 2x 10⁻⁹-1
- 23.35: 23 Res Inf Div
- 42.32: 243 Inf Div
- 45.27: 51 Res Inf Div
- 53.11: 43 Bav Inf Div
Allied Information:
British Set Up:
- 17 Corps set-up area: (HQ, 10/4, 11/4, 12/4, 44/15, 45/15, 46/15 Inf Bde)
- w/i 1 13.33: 1/Gd, 2/Gd, 3/Gd Inf Bde
- 6 Corps set-up area: (HQ, 8/3, 9/3, 76/3, 101/34, 102/34, 103/34, 176/59, 177/59, 178/59 Inf Bde)
- w/i 1 17.29: 119/40, 120/40, 121/40 Inf Bde
- 4 Corps set-up area: (HQ, 16/6, 18/6, 71/6, 152/51, 153/51, 154/51, 56/19, 57/19, 58/19 Inf Bde)
- w/i 1 21.29: 7/25, 74/25, 75/25 Inf Bde
- 5 Corps set-up area: (HQ, 50/17, 51/17, 52/17, 140/47, 141/47, 142/47, 188/63, 189/63, 190/63, 5/2, 6/2, 99/2 Inf Bde)
- 7 Corps set-up area: (HQ, 47/16, 48/16, 49/16, SA/9, 26/9, 27/9, 62/21, 64/21, 110/21 Inf Bde)
- w/i 1 28.22: 116/39, 117/39, 118/39 Inf Bde
- 19 Corps set-up area: (HQ, 17/24, 72/24, 73/24, 197/66, 198/66, 199/66 Inf Bde)
- w/i 1 19.09: 149/50, 150/50, 151/50 Inf Bde
- 18 Corps set-up area: (HQ, 21/30, 89/30, 90/30, 107/36, 108/36, 109/36, 182/61, 183/61, 184/61 Inf Bde)
- w/i 1 32.10: 59/20, 60/20, 61/20 Inf Bde
- 3 Corps set-up area: (HQ, 41/14, 42/14, 43/14, 53/18, 54/18, 55/18, 173/58, 174/58, 175/58 Inf Bde)
- w/i 1 3.34: 1/2Can 2/2Can, 3/2Can Inf Bde
- w/i 1 35.24: 1/1, 2/1, 9/1 Cav Bde
- w/i 1 41.10: 3/2, 4/2, 5/2 Cav Bde
- w/i 1 38.21: (HQ (Cav) 6/3, 7/3, Can/3 Cav Bde)
- w/i 1 18.22: 122/41, 123/41, 124/41 Inf Bde
- w/i 1 30.29: A, B, C Tank Bn
- w/i 1 21.19: D, E Tank Bn
- w/i 1 33.23: F, G Tank Bn
French Set Up:
- 54.06: 1/161 Inf Rgt
- 55.04: 2/161 Inf Rgt
- 56.01: 3/161 Inf Rgt
American Set Up:
- 09.11: Eng Bn
- 09.10: Railroad Eng Bn
Victory Conditions:
The Germans win at game end if they currently occupy (or were the last to occupy) Victory Point hexes worth 12 VP or more. Otherwise, the Allies win [EXC: If the German VP total is 11 VP, the game ends in a draw]. Historically, the Germans held 11 VP worth of terrain (all of the 1 VP hexes except Villers-Bretonneux).
Reinforcements:
British:
| Turn | Hex | Units |
|---|---|---|
| 3 | 1.26 | 1/8, 2/8, 3/8 Inf Bde |
| 4 | 2.00 | 1/35, 2/35, 3/35 Inf Bde |
| 4 | 1.26 | 1/42, 2/42, 3/42 Inf Bde |
| 5 | 2.00 | 1/62, 2/62, 3/62 Inf Bde |
| 5 | 2.00 | 1/NZ, 2/NZ, 3/NZ Inf Bde |
| 6 | 1.33 | 1/3 Aus, 2/3 Aus, 3/3 Aus Inf Bde |
| 6 | 1.33 | 1/32, 2/32, 3/32 Inf Bde |
| 6 | (as printed: "2.0") | 1/12, 2/12, 3/12 Inf Bde |
French:
| Turn | Hex | Units |
|---|---|---|
| 3 | 50.00 | HQ (11 Corps), 1 Gren/11, 1/11 Inf |
| 4 | 31.01 | HQ (12 Corps), 62/12 Inf |
| 4 | 50.00 | 10/11 Inf |
| 5 | 34.00 | HQ (10 Corps), 1 Cuir/10, 9/10 Inf |
| 5 | 31.01 | HQ (18 Corps), 35/18 Inf |
| 5 | 40.0 | 22/11, 125/11 Inf |
| 6 | 31.01 | 55/10, 77/12, 56 Inf |
| 7 | 12.00 | 70/12 Inf |
| 8 |
6.2 The British Prepare
In this variant, the Allied player has the chance to explore some outcomes that may have taken place if British and/or French offensive tactical doctrine had undergone the same evolution as the Germans.
General Information:
All General Information regarding game length, map area, set-up, reinforcements, and victory, is the same in this scenario as it is in 6.1.
Special rules:
a. Each British or Commonwealth infantry and cavalry brigade has 6 movement points.
b. Each British or Commonwealth cavalry brigade is Exploit capable.
c. The British had a significant Gas program that was used, like the Germans, mostly to support attacks. As a result, in the historical Michael attacks, the British were not in a position to use Gas. In this scenario, the British have a Gas capability of two Gas Barrages per turn. Use the same procedure as German Gas Barrages to fire British Gas Barrages. Their effects are the same as the German Gas Barrages.
d. The Allies have their full complement of Exploit Capable Markers available beginning on Turn 1.
6.3 The French To The Rescue
Historically, the French were very concerned that Operation Michael was simply a preliminary attack that presaged a main effort on their own front whose goal was nothing less than the capture of Paris itself. This Campaign Scenario Variant begins with the assumption that the French successfully interpreted Operation Michael as an attempt to possibly peel the British units away from their own, thus paving the way for the capture of Paris more quickly than any direct attack could ever hope to do. In this Variant, the French respond to the threatened breakthrough with greater alacrity than they historically showed.
General Information:
All General Information regarding game length, set-up, map area, British reinforcements, and victory, is the same in this scenario as it is in 6.1.
Special Rules:
a. French Reinforcements arrive at their scheduled entry hexes two turns ahead of the schedule shown in Scenario 6.1.
b. The Special Rules of this scenario can be combined with the Special Rules of Campaign Scenario 6.2 and 6.4.
6.4 The Germans Sustain the Drive
This Variant explores the effects of the German replacement capabilities. It supposes that the Germans were able to counteract the tendency of their units to become increasingly brittle as the campaign wore on without the achievement of the hoped-for decisive victory.
General Information:
All General Information regarding game length, set-up, map area, reinforcements, and victory, is the same in this scenario as it is in 6.1.
Special Rules:
a. German Replacement Point availability is increased by one per turn.
b. The Special Rules of this scenario can be combined with the Special Rules of Campaign Scenario 6.2 and 6.3.
7.0 Battle Scenarios
The Battle Scenarios divide up the entire campaign and depict portions of the battlefield at critical junctures. The Artillery units for the Battle Scenarios are specified for the Germans. The British always have all Artillery units for each Corps, or portion of each Corps, that is listed in the scenario. Artillery units trace supply to the same edge of the "frame area" as their appropriate map edge, in those scenarios using only a portion of the map. In Battle Scenarios beginning with the British holding a portion of their trench system, infantry brigades comprising each division must be set up in accordance with the stipulations of 5.0g.
7.1 Training Scenario: Butler's Defense
Of all the Corps commands in the British army on 21 March, Sir Richard Butler's 3rd Corps had to be the unluckiest. Forced to cover a front of more than 10 miles, Butler's 3rd Corps faced the full fury of Group Gayl and the 4th Reserve Corps on the morning of the opening assault. With the initial attack shearing the corps off from its neighbors to the north, Butler's undergunned troops were forced to yield ground from the beginning. They fought with a stubborn determination at the Crozat Canal, holding off the German 1st Bavarian division (detached from 17th Corps) all day on 22 March until the British 2nd Cavalry Division came up to stiffen their lines. By 24 March, the British line had been forced back to the village of Villeselve, which was surrounded, but remained untaken that day, in a kind of preview of the battle of Bastogne that would occur in a future war.
General Information:
- First Turn: 1 (March 21, 1918)
- Last Turn: 4 (March 24, 1918)
- Game Length: 4 turns
- Map Area: area bounded by hexes 40.05, 40.13, 54.20 and 54.12 (inclusive)
- Replacements: Neither side receives any replacements in this scenario.
German Information:
Set Up:
- 4 Res Corps set-up area: (HQ, 33, 34, 37, 103 Inf Div)
- Gayl set-up area: (HQ, 47 Res, 13 Ldw, 211, 223 Inf Div)
- Set up the following artillery units of the 18th Army in the German trench system hexes of the Gayl Corps, or the 4th Reserve Corps: 2x 6-7-1, 1x 5-5-2, and 2x 3-4-3.
Sturmblocks Available: 4x 4-3-6, 5x 3-3-6.
Gas Points Available: 1 per turn
Allied Information:
British Set Up:
- 14th Div: (41/14, 42/14, 43/14 Inf Bde)
- 18th Div: (53/18, 54/18, 55/18 Inf Bde)
- Artillery units: 3rd Corps artillery: 1x 5-4-3, 1x 4-7-1 Arty Grp.
- HQ: 3rd Corps HQ
- Set up the above British units according to the provisions of Section 5.0g.
- w/i 1 41.10: 3/2, 4/2, 5/2 Cav Bde
Reinforcements:
British:
| Turn | Hex | Unit |
|---|---|---|
| 1 | 40.13 | 173/58 Inf Bde |
| 2 | 40.13 | 174/58 Inf Bde |
| 3 | 40.13 | 175/58 Inf Bde |
French:
| Turn | Hex | Unit |
|---|---|---|
| 1 | 41.09 | 1/161 Inf Regt |
| 2 | 41.09 | 2/161 Inf Regt |
| 3 | 41.09 | 3/161 Inf Regt |
Victory Conditions:
The side which occupies (or was the last to occupy) Villeselve (43.12) at game end is the winner.
7.2 The Agony of the Fifth Army
Sir Hubert Gough commanded the four Corps of British 5th Army, each of which suffered grievously in the onslaught of 21 March. Although General Haig, the commander of the British forces, realized that the 5th Army front was the place where he could most afford to yield ground, he was nevertheless surprised and dismayed at the speed with which the 5th Army recoiled in the face of the attack. Haig made no direct intervention on Gough's front until he visited Gough on the afternoon of 23 March. By then, Gough's troops were already behind the Somme line. Following the meeting with Gough, Haig wrote in his diary "...I cannot make out why the Fifth Army has gone so far back without making some kind of a stand". At that point, no one could have known that Gough's 12 divisions had been attacked by as many as 43 specially trained assault divisions. Nevertheless, Gough received the bulk of the blame. Haig reluctantly relieved Gough of his command. This scenario provides players with an opportunity to determine if Gough was justified in withdrawing so rapidly.
General Information:
- First Turn: 1 (March 21, 1918)
- Last Turn: 6 (March 26, 1918)
- Game Length: 6 turns
- Map Area: area bounded by hexes 17.01, 17.22, and 43.35 (inclusive).
- Replacements: Neither side receives any replacements in this scenario.
German Information:
Set Up:
- 3 Corps set-up area: (HQ, 5, 6, 23, 28, 88, 113, 206 Inf Div)
- 9 Corps set-up area: (HQ, 1 Gd, 5 Gd, 45 Res, 50, 231 Inf Div)
- 17 Corps set-up area: (HQ, 1 Bav, 7 Res, 10 Res, 9, 10, 36, 238 Inf Div)
- 4 Res Corps set-up area: (HQ, 33, 34, 37, 103 Inf Div)
- Gayl set-up area: (HQ, 47 Res, 13 Ldw, 211, 223 Inf Div)
- 18 Army artillery: (18 Army: 3, 9, 17, 4 Res, Gayl Corps): 3-4-3 x3, 5-5-2 x3, 6-7-1 x3, 10-9-1 x2 (in the Corps set-up areas belonging to the 18th Army).
- 23 Res Corps set-up area: (HQ, 9 Res, 50 Res, 79 Res, 13, 18, 199 Inf Div)
- 14 Corps set-up area: (HQ, 4 Gd, 1, 25, 228 Inf Div)
- 51 Corps set-up area: (HQ, Gd Ers, 19, 208 Inf Div)
- 2 Army artillery: (2 Army: 23 Res, 14, 51 Corps): 3-4-3 x1, 5-5-2 x2, 6-7-1 x1, 10-9-1 x1 (in the Corps set-up areas belonging to the portion of the 2 Army actually on the map).
- 42.32: 243 Inf Div
- 45.27: 51 Res Inf Div
- 53.11: 43 Bav Inf Div
- 53.10: 1/1 Inf Rgt
- 54.08: 2/1 Inf Rgt
- 55.07: 3/1 Inf Rgt
- 55.05: 1/2 Inf Rgt
- 56.03: 2/2 Inf Rgt
- 57.02: 3/2 Inf Rgt
Sturmblocks Available: 12x 4-3-6, 12x 3-3-6.
Gas Points Available: 8 points on Turn 1, thereafter follow the number listed on the Turn Record Track.
Allied Information:
British Set Up:
- 7 Corps set-up area: (HQ, 47/16, 48/16, 49/16, SA/9, 26/9, 27/9, 62/21, 64/21, 110/21 Inf Bde)
- w/i 1 28.22: 116/39, 117/39, 118/39 Inf Bde
- 19 Corps set-up area: (HQ, 17/24, 72/24, 73/24, 197/66, 198/66, 199/66 Inf Bde)
- w/i 1 19.09: 149/50, 150/50, 151/50 Inf Bde
- 18 Corps set-up area: (HQ, 21/30, 89/30, 90/30, 107/36, 108/36, 109/36, 182/61, 183/61, 184/61 Inf Bde)
- w/i 1 32.10: 59/20, 60/20, 61/20 Inf Bde
- 3 Corps set-up area: (HQ, 41/14, 42/14, 43/14, 53/18, 54/18, 55/18, 173/58, 174/58, 175/58 Inf Bde)
- British Artillery: Set up all British artillery units from the 7 (1x 6-7-1, 1x 6-4-3), 19 (1x 5-7-1, 1x 5-4-3), 18 (1x 5-7-1, 1x 6-4-3) and 3 (1x 4-7-1, 1x 5-4-3) Corps in trench hexes of their named Corps areas.
- w/i 1 35.24: 1/1, 2/1, 9/1 Cav Bde
- w/i 1 41.10: 3/2, 4/2, 5/2 Cav Bde
- w/i 1 38.21: (HQ (Cav) 6/3, 7/3, Can/3 Cav Bde)
- w/i 1 18.22: 122/41, 123/41, 124/41 Inf Bde
- w/i 1 30.29: A, B, C Tank Bn
- w/i 1 21.19: D, E Tank Bn
- w/i 1 33.23: F, G Tank Bn
French Set Up:
- 54.06: 1/161 Inf Rgt
- 55.04: 2/161 Inf Rgt
- 56.01: 3/161 Inf Rgt
Reinforcements:
British:
| Turn | Hex | Units |
|---|---|---|
| 6 | 17.29 | 1/8, 2/8, 3/8 Inf Bde |
French:
| Turn | Hex | Units |
|---|---|---|
| 3 | 50.00 | HQ (11 Corps), 1 Gren/11, 1/11 Inf |
| 4 | 31.01 | HQ (12 Corps), 62/12 Inf |
| 4 | 50.00 | 10/11 Inf |
| 5 | 34.00 | HQ (10 Corps), 1 Cuir/10, 9/10 Inf |
| 5 | 31.01 | HQ (18 Corps), 35/18 Inf |
| 5 | 41.00 | 22/11, 125/11 Inf |
| 6 | 31.01 | 55/10, 77/12, 56 Inf |
Victory Conditions:
The side occupying (or was the last to occupy) Albert (19.20), Cappy (24.18), Roye (31.08), and Noyon (41.05) at game end wins the game. Any other result is a draw.
7.3 The Flesquieres Salient
The Flesquieres salient was all that remained of the British gains in the Battle of Cambrai from the previous year. The Germans envisioned that elements of the 2nd and 18th Armies would attack the shoulders of the salient, and, in a double pincer movement, cut it off on the first day of Operation Michael. The entire salient was heavily gassed during this phase of the battle. The furious onslaught drove the 6th and 51st divisions to the rear of their Battle Zone on the first day. But on the southern shoulder of the salient, the 16th (Irish) division fought with ruthless determination, as did the 9th division. The next day saw British field artillery brigades firing over open sights, and later laying smoke for a British counter attack by tank forces. The object of the tank counterattack, the German 24th Reserve division, was smashed as it infiltrated its way into the Battle Zone. But the Germans had broken through in the South and the British were forced to evacuate the salient to maintain their line.
General Information:
- First Turn: 1 (March 21, 1918)
- Last Turn: 4 (March 24, 1918)
- Game Length: 4 turns
- Map Area: area bounded by hexes 27.35, 27.25, 35.25, and 35.35 inclusive.
- Replacements: Neither side receives any replacements in this scenario.
German Information:
Set Up:
- 39 Res Corps set-up area: (HQ, 16 Res, 21 Res Inf Div)
- 13 Corps set-up area: (HQ, 3 Mar, 54 Res, 27, 107, 183 Inf Div)
- 2 Army artillery: (2 Army: 39 Res, 13 Corps): 3-4-3 x2, 5-5-2 x3, 6-7-1 x1, 10-9-1 x1
- 14 Res Corps set-up area: (HQ, 3 Gd, 20, 39 Inf Div)
- 11 Corps set-up area: (HQ, 24 Res, 53 Res, 4, 119 Inf Div)
- 17 Army artillery: (17 Army: 14 Res, 11 Corps): 3-4-3 x2, 5-5-2 x2, 6-7-1 x1, 10-9-1 x1
Sturmblocks Available: 8x 4-3-6, 7x 3-3-6
Gas Points Available: 21-23 March 6 points, 24 March 2 points.
Allied Information:
British Set Up:
- 4 Corps set-up area: (HQ, 16/6, 18/6, 71/6, 152/51, 153/51, 154/51, 56/19, 57/19, 58/19 Inf Bde)
- 7 Corps set-up area: (HQ, SA/9, 26/9, 27/9, Inf Bde)
- 5 Corps set-up area: (HQ, 50/17, 51/17, 52/17, 140/47, 141/47, 142/47, 188/63, 189/63, 190/63, 5/2, 6/2, 99/2 Inf Bde)
- w/i 1 30.29: A, B, C Tank Bn
- British Artillery: Set up all British artillery units from the 4th Corps (1x 4-7-1, 1x 3-4-3), 7th Corps (1x 6-7-1, 1x 6-4-3), and the 5th Corps (1x 5-7-1, 1x 4-4-3) in trench hexes of their named Corps areas.
Reinforcements:
British:
| Turn | Hex | Units |
|---|---|---|
| 1 | 31.25 | 176/39 Inf Bde |
| 2 | 31.25 | 177/39 Inf Bde |
| 3 | 31.25 | 178/39 Inf Bde |
Victory Conditions:
The Germans win at game end if they occupy (or were the last to occupy) 5 or more Battle Zone (i.e., double-trench) hexes. Otherwise, the British win.
7.4 On The French Flank
This scenario depicts the efforts of the French to relieve the pressure on the southern flank of the battle. Most of the remaining units of the British 3rd Corps had come under the direct command of the French, as had the British artillery. During the time period 26-30 March, the French attempted to counterattack. The German forces were still too strong, forcing the French to relinquish even more territory.
General Information:
- First Turn: 6 (March 26, 1918)
- Last Turn: 10 (March 30, 1918)
- Game Length: 5 turns
- Map Area: area bounded by hexes 43.01, 43.12, 19.12, and 19.01 (inclusive).
- Replacements Available: Germans, 1 replacement point per turn; British, 1 replacement point per turn. The French do not receive any replacements.
German Information
Set Up:
- 29.12: 231 Inf Div
- 30.11: 45 Res
- 30.10: 50 Inf Div
- 31.10: HQ, 9th Corps, 1 Gd Inf Div
- 31.09: 5 Gd Inf Div
- 32.08: 7 Res Inf Div
- 33.08: 36 (r) Inf Div
- 33.11: 5-5-2 Arty Grp
- 34.07: 9 Inf Div
- 34.12: 1x 6-7-1, 1x 10⁻⁹-1 Arty Grps
- 35.07: HQ, 17th Corps, 10 Res Inf Div
- 35.08: 3-4-3 Arty Grp
- 36.06: 1 Bav (r) Inf Div
- 36.07: 3-4-3 Arty Grp
- 37.06: 238 (r) Inf Div
- 41.07: 5-5-2 Arty Grp
- 38.05: 10 (r) Inf Div
- 38.06: 3-4-3 Arty Grp
- 39.05: 103 Inf Div
- 43.06: 5-5-2 Arty Grp
- 40.04: HQ, 4th Res Corps, 37 Inf Div
- 40.06: 10-9-1 Arty Grp
- 41.04: 34 (r) Inf Div
- 42.04: 33 Inf Div
- 42.05: 6-7-1 Arty Grp
- 43.05: HQ, Gayl, 211 Inf Div
- 43.10: 2x 6-7-1, 1x 10⁻⁹-1 Arty Grp
- 46.09: 2x 6-7-1 Arty Grp, 1x 10⁻⁹-1 Arty Grp
Note: These artillery units are set up initially outside the play area. They may barrage from this initial location to any hex within range. They may move only to enter the play area. Once on map, they may not leave it.
Gas Points Available: 2 points/turn
Sturmblocks Available: 7x 4-3-6, 8x 3-3-6
Allied Information:
British Set Up:
- 23.09: 90/30 (r) Inf Bde
- 24.08: 21/30 (r) Inf Bde
- 25.09: 89/30 (r) Inf Bde
- 25.07: 109/36 (r) Inf Bde
- 26.06: 108/36 (r) Inf Bde
- 26.07: 107/36 (r) Inf Bde
- 28.11: 73/24 (r) Inf Bde
- 28.11: HQ, 19th Corps
- 29.11: 17/24 (r) Inf Bde
- 29.10: 72/24 (r) Inf Bde
- 28.08: HQ, 18th Corps, 1x 5-7-1 Arty Grp
- 29.10: 1x 6-4-3 Arty Grp
- 30.09: 60/20 (r) Inf Bde
- 30.08: 59/20 (r) Inf Bde
- 31.08: 61/20 (r) Inf Bde
- 33.05: 1x 5-4-3 Arty Grp, (19th Corps artillery)
- 35.04: 1x 5-7-1 Arty Grp (19th Corps artillery)
- 40.01: HQ, Cav. Corps, 7/3 (r), Can/3 Cav Bde
- 40.02: 6/3 (r) Cav Bde
- 41.01: 53/18 (r), 55/18 (r) Inf Bde
- 41.02: HQ, 3rd Corps, 54/18 (r) Inf Bde
- 42.02: 4/2 (r) Cav Bde
- 43.02: 5/2 (r) Cav Bde
- 43.03: 3/2 (r) Cav Bde
French Set Up:
- 28.06: 22/11 Inf Div
- 31.01: HQ 12th Corps, 62/12 Inf Div
- 31.04: 1 Cuir/10 Inf Div
- 33.07: 1/11 Inf Div
- 35.06: HQ 11th Corps, 1 Gren/11
- 37.05: 10/11 Inf Div
- 39.04: HQ 10th Corps, 9/10 Inf Div
- 41.03: HQ 18th Corps, 35/18 Inf Div
- 43.04: 125/11 Inf Div
Reinforcements:
French:
| Turn | Hex | Unit(s) |
|---|---|---|
| 6 | 31.01 | 55/10, 77/12, 56 Inf |
| 9 | 23.01 | 70/12, 16/10, 169/18 Inf |
| 10 | 23.01 | 36/18 Inf |
Victory Conditions:
The Allies win at game end if they occupy (or were the last to occupy) two of the following three hexes: Lassigny (35.04), 31.01, and/or Montdidier (24.02). Otherwise, the Germans win. Historically, the Germans captured both Lassigny and Montdidier.
7.5 Final Drive on Amiens
The German drive had clearly exhausted itself by 30 March. Following a lull lasting a few days, Ludendorff once again ordered his battle-weary troops to make a final drive on Amiens. This attack made good initial progress, but British counterattacks, including all remaining armor, solidly prevented any possibility of a breakthrough. With the breakthrough effort thwarted, any real chance of a German military victory in World War I was gone. The Allies would find themselves in crisis several more times in 1918, but they had survived their most severe challenge. Note that the arrival of the French GAR has been accelerated (i.e., all French units are available at start) to ensure their arrival at Amiens.
General Information:
- First Turn: 12 (April 1, 1918)
- Last Turn: 16 (April 5, 1918)
- Game Length: 5 turns
- Map Area: entire map.
German Information:
Set Up:
Note: German artillery units can be drawn from any of the three armies in this scenario.
- 20.35: 187 Inf Div
- 20.34: 5 Bav R Inf Div
- 21.34: HQ 1 Bav R (d), 240 Inf Div
- 21.33: 23 Res Inf Div
- 20.32: 239 Inf Div
- 20.31: HQ 18th Corps (d), 6 Bav Inf Div
- 19.31: 2 Gd R Inf Div
- 19.30: 1 Gd R (r) Inf Div
- 20.30: 3-4-3 Arty Grp
- 21.30: 5-5-2 Arty Grp
- 21.29: 6-7-1 Arty Grp
- 19.29: HQ 6th Res Corps (d), 24 Inf Div
- 19.28: 5 Bav (r)
- 19.27: HQ 14 Res (d), 3 Gd Inf Div
- 18.76: 20 (r) Inf Div
- 18.25: 39 Inf Div
- 17.25: HQ 39 Res Corps (d), 16 Res Inf Div
- 17.24: 21 Res Inf Div
- 18.23: 3 Mar Inf Div
- 19.23: 54 Res Inf Div
- 20.23: 5-5-2 Arty Grp
- 21.24: 6-7-1 Arty Grp
- 20.22: 3-4-3 Arty Grp.
- 19.22: HQ 13th Corps (d), 107 Inf Div
- 19.21: 183 (r) Inf Div
- 19.20: 79 Res (r) Inf Div
- 19.19: 199 Inf Div
- 19.18: HQ 23rd Res Corps (d), 9 Res Inf Div
Gas Points Available: 2 points/turn
Sturmblocks Available: 4x 4-3-6, 5x 3-3-6
Allied Information:
British Set Up:
Note: The parenthesis after each Arty Grp shows the Corps from which that Artillery Unit is drawn.
- 19.35: 12/4 Inf Bde
- 19.34: 11/4 Inf Bde
- 20.33: 10/4 Inf Bde
- 18.33: 45/15 Inf Bde
- 19.33: 46/15 Inf Bde
- 19.32: 44/15 Inf Bde
- 17.33: HQ 17th Corps (d) 4-7-1 Arty Grp (17th Corps)
- 16.32: 3-4-3 Arty Grp (17th Corps)
- 16.32: 3/2 Can (r) Inf Bde
- 17.32: 1/2 Can (r) Inf Bde
- 18.32: 2/2 Can (r) Inf Bde
- 14.34: 3/1 Can Inf Bde
- 14.33: 1/1 Can Inf Bde
- 15.34: 2/1 Can Inf Bde
- 17.31: 2/Gd Inf Bde
- 18.31: 3/Gd Inf Bde
- 18.30: 1/Gd Inf Bde
- 18.29: 1/32 Inf Bde
- 17.29: 3/32 Inf Bde
- 18.28: 2/32 Inf Bde
- 16.28: 4-4-3 Arty Grp (6th Corps)
- 16.27: 5-7-1 Arty Grp (6th Corps)
- 17.28: 3/42 (r) Inf Bde
- 17.27: 2/42 (r) Inf Bde
- 18.27: 1/42 (r) Inf Bde
- 17.26: 74/25 (r) Inf Bde
- 16.26: 4-7-1 (4th Corps)
- 16.25: HQ 4th Corps (d), 75/25 (r) Inf Bde
French Set Up:
- 20.08: 125 Inf
- 19.08: 10 Inf
- 21.07: 22 Inf
- 21.05: HQ 11th Corps, 1 Inf
- 22.05: 1 Gren Inf
- 23.04: 29 (r) Inf
- 23.03: 56 (r) Inf
- 23.02: 67 Inf
- 25.01: HQ 12th Corps (d), 77 Inf
- 27.02: 165 Inf
- 29.02: 62 Inf
- 31.02: 70 (r) Inf
- 33.02: 2 Gren Inf
- 35.02: 169 Inf
- 36.02: HQ 18th Corps (d), 36 Inf
- 38.02: 35 Inf
- 40.02: 39 Inf Div
- 43.04: 16 Inf Div
- 46.05: HQ 10th Corps (d), 9 Inf Div
- 48.07: 1 Cuir Inf Div
- 51.06: 55 Inf Div
- 53.05: 1/161 Inf Regt
- 54.03: 2/161 Inf Regt
- 55.02: 3/161 Inf Regt
Victory Conditions:
The side occupying (or was the last to occupy) Amiens (09.10) at game end wins the game.
7.6 The Approach To The Hindenburg Line
This scenario did not occur during Operation Michael, but rather five months later. In this scenario, three Corps of the rested British 3rd Army, still under the command of J. Byng, attack the German positions. Haig had come to realize that the pursuit phase of the Western Front had finally arrived. He believed that the Germans could not stand against repeated blows by British, French, and American troops. Haig's appreciation of the German position was essentially correct, but the Germans had vastly improved their defensive positions. Known to the Germans as Siegfried Stellung, and to the Allies as the Hindenburg Line, the trench line had been fortified into a massive defensive works. As Haig and others watched, the Germans conducted an orderly retreat into this warren of bunkers and fire zones. Fighting on the Western Front would now complete its inevitable, savage descent into utter annihilation.
General Information:
- First Turn: 1
- Last Turn: 6
- Game Length: 6 turns
- Map Area: area bounded by hexes 14.31, 14.18, 24.18, and 24.31 (inclusive)
- Note: only trench lines within the play area and printed on the map are in play; all trenches begin the game under German control
- Replacements Available: Both the Germans and the British receive 1 Replacement Point per turn
- Gas Points Available: Both the Germans and British may make up to 1 Gas Barrage attack per turn.
- HQ Replenishment (1.3a): Both sides have an HQ Replenishment number of 4.
German Information:
Set Up:
Note: German artillery units are drawn from the 17th Army.
- 19.31: 240 Inf Div
- 19.30: 5 Bav Inf Div
- 20.30: 243 Inf Div, 3-4-3 Arty Grp
- 19.29: HQ 1 Bav R Corps, 187 Inf Div
- 20.28: 43 Bav Inf Div, 5-5-2 Arty Grp
- 19.28: 6 Bav (r) Inf Div
- 19.27: 111 (r) Inf Div
- 18.26: 239 Inf Div
- 19.26: HQ 18th Corps, 234 (r) Inf Div
- 18.25: 2 Gd R (r) Inf Div
- 17.25: 221 (r) Inf Div
- 17.24: 195 (r) Inf Div
- 18.23: 1 Gd R (r) Inf Div
- 19.24: 17 (r) Inf Div
- 20.23: 5-5-2 Arty Grp
- 20.23: 51 Res, 5-5-2 Arty Grp
- 19.23: HQ 6th Res Corps, 23 Res Inf Div
- 19.22: 24 Inf Div
- 19.21: HQ 14th Res, 20 (r) Inf Div
- 20.21: 3-4-3 Arty Grp
- 19.20: 39 (r) Inf Div
- 19.19: 3 Gd (r) Inf Div, 6-7-1 Arty Grp
Sturmblocks Available: 4x 4-3-6, 4x 3-3-6
British Information:
Set Up:
Note: Artillery units drawn from the Corps whose HQs are present.
- 18.31: 3/Gds Inf Bde
- 18.30: 1/Gds Inf Bde
- 17.31: 2/Gds Inf Bde
- 17.30: HQ 6th Corps, 3-4-3, 5-7-1 Arty Grps
- 18.29: 1/8 Inf Bde
- 18.28: 2/8 Inf Bde
- 17.29: 3/8 Inf Bde
- 16.29: 8/3, 9/3, 76/3 Inf Bde
- 18.27: 176/59 Inf Bde
- 17.28: 178/59, 177/59 Inf Bde
- 16.28: D, E Tank Bns
- 17.27: 74/25 Inf Bde
- 17.26: 75/25 Inf Bde
- 16.27: 7/25 Inf Bde
- 16.26: 152/51, 153/51 Inf Bde
- 15.26: HQ 4th Corps, 3-4-3, 5-7-1 Arty Grps
- 16.25: 1/42 Inf Bde
- 15.25: 154/51 Inf Bde
- 16.24: 2/42, 3/42 Inf Bde
- 15.24: A, B, C Tank Bns
- 16.23: 1/NZ Inf Bde
- 17.23: 3/NZ Inf Bde
- 18.22: 2/NZ Inf Bde
- 18.21: 32/17 Inf Bde
- 17.21: 50/17 Inf Bde
- 18.20: 51/17 Inf Bde
- 17.20: 189/63 Inf Bde
- 18.19: 190/63 Inf Bde
Victory Conditions:
The British win at game end if they occupy (or were the last to occupy) 8 or more VP hexes. Each trench hex (11 VP total) is worth 1 VP, Bapaume (23.28) and Albert (19.20) are worth 1 VP each. Otherwise, the Germans win.
Terrain Effects Chart
| Type | Movement | Combat |
|---|---|---|
| Clear | 1 | — |
| Devastated Zone | 2 | — |
| Single Trench | 1 | Dx2 |
| Multiple Trench | 1 | Own Trench: Dx3; Enemy Trench: Dx2 |
| Woods | 2 | Dx2 |
| Road | 1/2 | — |
| Village | 1 | — |
| Town | 1 | Dx2 |
| Devastated Town | 2 |
Combat Results Table
| DR | 1:2 (1) | 1:1 | 2:1 | 3:1 | 4:1 | 5:1 | 6:1 (1) |
|---|---|---|---|---|---|---|---|
| 2 | A4r3 | A4r3 | A4r2 | A4r2 | A4r2 | A3r1 | A3r1 |
| 3 | A4r2 | A4r2 | A4r2 | A3r1 | A3r1 | A3r1 | A3 |
| 4 | A3r2 | A3r2 | A3r1 | A3r1 | A2 | A2D1 | A2D1 |
Legend: A = Attacker Result; D = Defender Result; r = Number of Retreat Hexes (2); # = Step Losses.
Notes:
- Odds less than 1:2 are resolved on the 1:2 column; Odds greater than 6:1 are resolved on the 6:1 column. (But see Errata 7 below.)
- Length of retreat is halved (FRD) if unit begins its retreat from a trench hex.
Barrage Table
| dr | <1* | 1-6 | 7-12 | 13-18 | 19-24 | 25+ |
|---|---|---|---|---|---|---|
| 1 | — | — | — | — | — | DG |
| 2 | — | — | — | — | DG | DG |
| 3 | — | — | — | DG | DG | DG |
| 4 | — | — | DG |
Legend: — = No Effect; DG = Disorganized; 1 = Step Loss and Disorganized.
Shift one column left if no spotter adjacent to target.
* This column is only available via the above shift (see Errata 7).
Designer's Notes
Private W.W. Francis, a British soldier assigned to the 7th King's Shropshire Light Infantry, 8th Infantry Brigade, 3rd Infantry Division, survivor of Operation Michael, said, "I have read many books about World War One, written mostly from the point of view of the officer class, most of whom, in my opinion, above the rank of Lieutenant-Colonel should have been suffocated at birth. For God's sake and common humanity do not write about honour and glory. There was none. War, especially ours, was a stinking, ugly, horrible, business. Please treat it as such" (Middlebrook, 1978).
It falls to me to discuss what was done to bring a "stinking, ugly, horrible business" to an exciting and enjoyable game format. In order to properly cover this process, I must cover some of the design decisions faced, and the basis behind some of these decisions. I'll also address some features of the game to explain the intended effect with those features.
Campaign Scenarios and Battle Scenarios
Many wargame scenarios, particularly those including a campaign game of some sort, represent pieces of the complete campaign game. Scenarios utilized in this manner are entirely separate from each other. In other words, the outcome of a particular scenario has no necessary implications for the outcome of any other scenario. The Battle Scenarios in Operation Michael fall into this category. The Battle Scenarios offer a smaller bite of wargaming in terms of time than the Campaign Scenarios.
The Campaign Scenarios are all quite lengthy. Each represents a set of assumptions or preparations that shaped the course of the battle (or in some cases, may have). Each Campaign Scenario adds significant depth to the picture emerging from the Battle Scenarios. It is for this reason that the Campaign Scenarios offer gaming and educational value far in excess of the considerable time and effort expended during play.
As an example of the types of differences in the various Campaign Scenarios, consider a relatively small design manipulation such as an increase in German replacement capability by one per turn. In this case, the additional replacement point actually affects the German Sturmblock generation capability. In turn, this dramatically extends their ability to withstand losses; most German casualties tend to be borne by the Sturmblock units. I highly encourage players to enjoy all of the Campaign Scenarios. Each has its own unique flavor and value.
Attack Depletion and Replenishment
Campaign accounts discuss the increasing difficulty faced by the Germans bringing ammunition forward. This was particularly troublesome for crew-served weapons organic to the Sturmblock units. The gradual, lowering probability of German HQ replenishment attempts to portray this situation. The steadily increasing British replenishment probability ensures the British do not have too many full-strength counterattack possibilities early in the game. Historically, the German advance was so violent and rapid (by World War I standards at least) that it is unclear if the Allied army was able to stand firmly on its own two feet before the end of the campaign. The British replenishment increase serves effectively as a time governor to prevent ahistorical Allied counterattacks.
Order of Battle Considerations
Official sources are littered with a host of inconsistencies. For example, most authoritative sources disagree about the number of German divisions allocated to the attack (ranging from 68-76 total divisions). These inconsistencies naturally complicate locating the divisions involved at various stages of the campaign. Official German unit histories helped alleviate this, but this topic remains much debated. Allied units were a bit easier. Even the American engineers were easily traced; they sustained significant casualties during Operation Michael. Interestingly, The American Railroad Engineer Battalion represents a group of approximately 600 workers pressed into service during the darkest days of the offensive. They fought near Amiens with Carey Force, an ad hoc British group named for its commander. The French OB was particularly tricky and required some potentially controversial decisions. In response to Operation Michael, the French built a large ad hoc formation called The Group of Armies of the Reserve (GAR). Rather than flesh out this structure with already existing Corps and divisions, in many cases the French leadership built new, smaller Corps. In other cases, they parceled out divisions from existing Corps. Depicting this structure resulted in an over-representation of HQs, given the low total number of divisions. Due to the heavy reliance on HQs for counterattack and supply, using the Corps' identities actually included in the GAR created an exceptionally powerful French force. To prevent this, I used the after action estimates of available French divisions. Thus, the French units in the game are those forces that would have fought in their historical Corps designations if the GAR had not been formed. Fortunately, the French were basically in a defensive posture and there is no game action that hinges on the specific identity of any individual French division.
The Map
The road net was established using 1:100,000 American Department of Defense 1942 aerial reconnaissance maps. The devastated zone in the middle of the map was created by the Germans as they retreated the previous fall in a line-shortening move. During this retreat, the Germans destroyed the towns, the rail net, and some portions of the road net. By the spring of 1918, some contemporary accounts mention portions of the rail net as usable. Additionally, most accounts describe military movement on at least the major roads throughout the area. The principal townships in the devastated zone (Bapaume, Albert, and Ham) were still uninhabitable. No civilians were permitted in these towns.
Out of Supply Effects
In most SCS games, an out of supply unit receives a movement penalty and a combat strength penalty. While very reasonable for WWII, it proved too restrictive for WWI units. The lack of movement effects represents the reliance of very little of the troops in any WWI unit on fuel.
Storm Troops
Describing precisely what and how the Germans accomplished the development of infiltration troops is complicated and difficult. Classifying these specialized units as simply attached units could not be farther from the truth. Although they were sections of infantry with special training and weapons, these units were integrated into entire divisions. These divisions were trained in the essential elements of the Hutier tactics, namely complete disregard for flank security with a heavy emphasis on continual forward motion. Additionally, these units possessed a larger concentration of heavy weapons. Flamethrowers, trench mortars, infantry guns, grenades, and of course, machine guns were all found in much greater quantities. In game terms, these differences are modeled via two mechanisms. The first is a slightly higher attack strength for the first and second wave assault divisions compared to a typical full-strength British division. When these divisions break down into their sturmblock components, this difference in firepower is retained. The second is the movement point allowances and EZOC costs have been altered to provide added maneuverability. The extra movement points allow a German division to move from a reserve position one hex further back than a comparable British division could. When added to the reduced EZOC costs, this flexibility is magnified. These assault troops proved much more difficult to pin down with fire than other infantry. The combination of infantry-borne firepower, continual motion, and suppressive artillery fire enabled the sturmblocks' success during the first few days of the campaign.
Tanks and Break Downs
Had the British tanks actually arrived on the front line, their effect could have been key. However, most of the tanks committed to attacks failed to arrive. The existing rule simulates well the frustration of the Allied player as he will never be able to count on any particular tank unit.
Exploit Capable Markers
Basically, these markers are used to show what the British Army could have done, had it undergone doctrinal changes similar to the Germans. More specifically, the markers simulate features such as improved command and communications structure, improved leadership and initiative, less concern by all officers for flank security, etc. Some will charge that such counters are completely ahistorical and were not the characteristics that the British army displayed in 1918. In the purest of historical senses, I concur. Still, British army doctrine had undergone continual evolution since 1914. By 1917, they were able to fully appreciate the power of the tank, to recognize some of the immense changes in the nature of artillery warfare, and the limitations and potential of horse mounted soldiers. The British we find in Operation Michael are not the same old 1914 Tommies repeating the same old schemes. The exploitation markers are an attempt to model what the British might have done had that evolution taken a slightly different course. Besides, they make the game a lot more fun for the British. For those who simply cannot accept them, deleting them should have no notable affect on play balance.
One Last Historical Tidbit
On the morning of the 21 March, the 6th Bavarian Division was located in hex 25.33. In one of its regiments was a MELDEGANGER (or messenger) named Adolf Hitler.
Players Notes
Germans
First and foremost, guard against overconfidence. The British 5th Army will not offer significant resistance. You feel that you are on an express train whose next stop is Amiens. However, after the first phase of the campaign game (the first 5-7 turns), things will start to turn against you. Seemingly insignificant individually, they will add up. An HQ failing to replenish, gas points no longer so plentiful, etc. It will then be clear that this is no walk in the park for the Germans. Overall, the Germans have the harder task. Be fully prepared for that. Make hay while the sun shines and use the first few turns to set up your best chances as the game advances. Then roll up your sleeves and get to work.
Second, take a patient approach against the British 3rd Army. The trench lines will slow you down a bit, but if you get too aggressive you will suffer too many casualties. Similarly, resist the temptation to attack British brigades in their own Battle Zone with your assembled assault divisions. If you continue to press these attacks, results will begin to go against you, and that will make it much more difficult to sustain attacks when you finally breach the trenches.
Third, it is crucially important for you to carefully manage your artillery. This involves a number of elements. First, always use gas points first, and use your lightest artillery units to make gas attacks. In the early phases of the campaign, carefully consider how many gas points are needed for each of the German armies. Concentrate gas attacks in one sector each turn, but give each German army at least some gas capability. Keep in mind that units under the effects of gas have no EZOC. The duration of this effect is often long enough for the sturmblocks to get by that particular unit.
The other main element of the artillery plan is the strength and focus of artillery attacks. Where will the breakthrough be? Plan the breakthrough point on a frontage of no more than three or four hexes. In general, at least one of the hexes that you are planning to breakthrough should be the target of a maximum strength artillery attack. As the game progresses, your front will outrun your heavy artillery. It's most important that you make up your mind early and use that artillery where you need it while it can be used. It is not mobile enough to shift to a different sector once it catches up to the front in the mid-game.
Another main point as the Germans concerns breaking down the assault divisions. One theory is to maintain all of the sturmblock counters in play, and to attack only with them unless late in the game when the situation was desperate. This theory supposes that step losses resulting in the loss of one or two strength points is better than one that results in a loss of three or four attack strength points. In the purest sense, this might be true. However, the loss of strength points occurs not only by step losses. Remember that reconstituting divisions with more than the minimum attack strength points needed will also cause a loss of strength points overall. The temptation to do this, especially in the mid and end game, will be strong. You must balance your reconstitution efforts with the breakdown of the assault divisions. Now, a few words on sturmblock planning. Carefully consider where sturmblocks need to be on the next turn. Sturmblock capacity is fixed by the countermix. Thus, the only option available to get more sturmblocks is to recombine divisions during the Recombination phase. This may help free up sturmblock counters for use in another sector. Occasionally, this might entail recombination of a division that was broken down earlier on that same turn! At face value, this may seem like a waste of time. What will be gained will be due to the reduced EZOC costs paid by the sturmblocks. The division, in essence, has leapfrogged a hex or two farther by breaking down and reassembling.
Finally, keep moving. Even in the end-game, you must constantly be alert for breakthrough opportunities with your remaining sturmblocks. The falling HQ replenishment rate will limit the opportunities to attack at full strength late in the game. Take full advantage of every replenished HQ available during the end-game. Don't be lulled into thinking you are going to lose if it's turn 12 or 13 and Villers-Bretonneux and/or Amiens seem too far away; you may still achieve a breakthrough. Judicious use of gas points, husbanding your artillery assets, maximizing use of replenished HQs, and a sense of grim determination may give you the final edge you need.
The Allies
The Allied dead pile will increase at what seems to be an alarming pace. Do not be frightened by this. It is inevitable. Avoid the tendency to have British units stand in the trenches. Though these units enjoy a defensive benefit, the German movement advantage will be even more of a force multiplier than the trenches. British units hunkering down in the trenches quickly be cut off and out of supply. Historically the Third Army was reluctant to retreat from the Cambrai salient (around Flesquieres). This area had been so hotly contested in recent months, that they did not want to simply abandon it to the Germans. The resulting casualties prove the folly of this plan. Learn from history and run for it! The force you will preserve will be able to retake (or at least threaten to) this ground later in the campaign. Near Arras, the British may be able to hold for a longer period. Beware of staying too long. The German maneuver advantage early in the game is sizable. Do not underestimate it. Make sure to withdraw all of your artillery, using the roads, as quickly as possible. Their value later in the game is so high that risking their loss in the early stages of the game is foolish. This is especially true in the Flesquieres salient. The point of all this is to retreat during turns 1-4. Give ground judiciously but steadily and preserve your forces. Stay calm. Do not panic. The French units will show up shortly. Your situation will begin to seem more stable immediately. Now what to do with these French units?
Wise use of the French requires a certain appreciation of their role historically. The GAR was committed to battle piecemeal. Insufficient artillery support and inadequate small arms ammunition in severely limited their effectiveness. Thus the French combat soldiers were ill prepared for the counterattack role planned for them. You must take this to heart and instinctively know that the French counterattack capability is extremely limited. However, the French divisions can be tough for the Germans to evict from natural defensive positions in the devastated zone. Make up your mind where you want the French to defend and get them there by the quickest route possible. Move these units into good defensive positions. Let the Germans pay heavily to push the French aside from critical road junctions in the devastated zone. The French are crucial to Allied victory. Do not throw them away in fruitless counterattacks. Do not take this to mean that counterattacks will not be required. A successful Allied player must be a good counter-puncher. Knowing when and where is the trick.
When you counterattack, use tanks to attack assembled assault divisions. Attacking a full strength German assault division using a tank in support will give you a nominal 3:1 Assault (assuming you are using British units to attack). The 3:1 column on the CRT results in roughly equal losses for each side. The German player cannot afford an attrition battle. The Allied player can. Avoid attacking sturmblocks when possible. Remember that these units are not truly destroyed, they are only removed from the map temporarily. A way to help preserve tank units for the later stages of the game is to only use them with high quality infantry. This way, the tank unit is not required to take the first loss in combat.
Wise use of artillery is key. The Allied artillery puzzle is a different sort than the one faced by the Germans. The Allies start the game with a total of 16 artillery counters possessing a total barrage strength of 74 factors. You can expect to lose half of these counters in the opening stages of the campaign game. It follows that you will seldom have the luxury of using the maximum column on the barrage table. Make counterattacks highest priority for available artillery firepower. If no counterattack is planned for that turn, consider using the artillery as spoiling attacks on advanced assault divisions. Any DG result will restrict the German's breakdown options next turn.
Plan ahead of time how you will use your reinforcements. The Allies receive a sizeable amount of units as reinforcements. You will have difficulty shifting units from sector to sector on the battlefield. Evaluate where these units are needed and get them there safely. This may mean taking an extra turn or two to avoid marauding Germans, but it is essential that the Allied army arrives as intact as possible. The Germans want you to try and "chase the battle" all over the map. Do not fall for this trap. Decide where to send the reinforcement and then get them there. You will get more next turn. Use them to blunt the latest German assault. Eventually, your superiority in manpower will become telling.
Errata (22 March 2004)
- In 3.2c, German Gas markers are removed at the end of the German Combat Phase. British Gas markers (an option) are removed at the end of the British Combat Phase.
- The rules place the Reassembly Phase before the Supply Phase, the map shows the opposite. The rules are correct.
- Counters of 3, 4, and 5 British Corps should be brown, as all other British units, instead of green. 50/17 British Brigade unit symbol should be filled with yellow like the other 5 Corps units.
- American units are olive green, not light tan.
- Stacking is enforced at each phase's end as per the series rules, not only at the end of the movement phase. Nevertheless, units may temporarily stack during the movement phase provided such overstacking is broken before the end of the phase.
- British artillery units ID corresponds to the Corps owning the artillery groups. At the start of the campaign games all British artillery units must set up within the boundaries of owning Corps.
- Note #1 of the CRT is not correct. Odds less than 1:2 should be resolved as per series rule 7.4. First column in the Barrage Table should be headed by "<1*".
- There are no terrain effects affecting Barrage Strength; only spotting effects apply.
- British reinforcements are wrongly listed as 1, 2, 3/Division. Brigade numbers are wrong and counters are correct. Division number is correct and should be enough to know what reinforcements must enter the game.