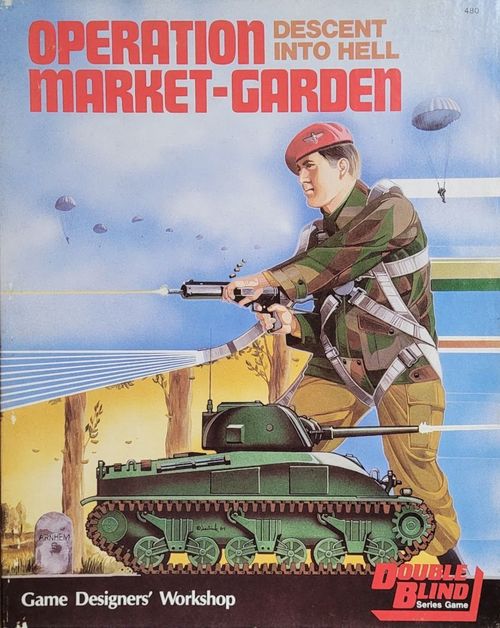
Operation Market Garden: Descent Into Hell
Operation Market Garden: Descent Into Hell Rulebook
Table of Contents
Table of Contents
- 1. Game Components
- 2. Sequence of Play
- 3. Territorial Control
- 4. Movement
- 5. Stacking
- 6. Combat
- 7. Terrain Effects in Combat
- 8. Armor and Antitank
- 9. Movement After Combat
- 10. Airborne Operations
- 11. Supply
- 12. Water Barriers
- 13. Reinforcements
- 14. Victory
- 16. Suggestions
- 15. Initial Deployment
- Historical Notes
- Unit Identification Chart
1. Game Components
Operation Market-Garden consists of the following components:
A. Maps. There are two identical maps. Movement of units in the game is hidden, and each player uses one of the maps for his own units. The game box or another equally suitable object should be placed as a screen between the two players so that neither can see the other's map. A hex grid is superimposed on the map to regulate the placement and movement of units. The hexes are numbered for easy reference during play. The distance across each hex represents 2 miles. The partial hexes along the south edge of the map are in play.
B. Counters. There is one full sheet and one half sheet of counters, providing 360 counters. Counters are divided into two types: units and markers. The Unit Identification Chart explains the information printed on the counters.
C. Rules. This rulebook.
D. Tables. There are two Combat Results/Terrain Effects Tables, one for each player. There is one Game Display Chart, used by both players. The Unit Identification Chart is on the last page of the rulebook.
E. The die. One die is included; it is used to resolve combat.
Translator's note: the source refers to several charts and tracks that are not printed in this document: the Combat Results Table, the Terrain Effects Table, the Game Display Chart, the Turn Record Track, the Weather Table, the Scatter Table, the Anti-Aircraft Fire Table, and the Air Transport Point Cost Table. The German Order of Battle list is printed with the unit identification pages (reproduced at the end of this rulebook); the other charts are not part of the source PDF, so their values are not transcribed here, and where the text states a value it is given in the text itself.
2. Sequence of Play
The game is played in a series of turns, each representing one day. A turn consists of the following segments and phases, in the order indicated:
- Initial Segment: The Allied player may attempt to put airborne supply markers into play. Both players determine the supply status of their units for the turn.
- Allied Player's Turn: The Allied player moves and attacks with his units.
- German Player's Turn: The German player moves and attacks with his units.
- Final Segment: The Allied player decides whether he wishes to call off the operation. If he does not, he advances the turn marker on the Turn Record Track and a new turn begins.
Players move and attack with their units during their turns. Each turn consists of the following impulses and phases:
- A. First Impulse
- Movement Phase
- Combat Phase
- B. Second Impulse
- Movement Phase
- Combat Phase
Each impulse and phase is carried out in order. During the Allied player's turn, he is the player performing the phase and the German player is the one not performing it. During the German player's turn, these roles are reversed.
In each turn, the player performing the phase has a Road impulse and an Off-Road impulse. At the beginning of each turn, the player performing the phase decides which of these impulses will be first and which will be second. Example: In turn 3, the Allied player decides at the beginning of his turn that the Off-Road impulse will be first (thereby making the Road impulse second). On his next turn, the Allied player decides to take the Road impulse first.
Movement and combat differ between the two impulses, as explained in the following rules.
3. Territorial Control
All hexes controlled by a player are friendly territory, and all others are enemy territory. At the start of the game, all hexes south of the starting line are controlled by the Allied player, and all others by the German player. During play, control of hexes will change as units move. When a unit successfully enters a hex controlled by the enemy, that hex immediately comes under the control of the player who entered it.
Players show the extent of enemy territory on their maps by placing territory markers (with the enemy territory symbol face up) on all enemy-controlled hexes adjacent to hexes controlled by the friendly side. Thus, at the start of the game, the Allied player places German territory markers on all hexes adjacent to and north of the starting line, while the German player places Allied territory markers on all hexes adjacent to and south of the starting line. During play, players adjust their territory markers as hexes change control.
4. Movement
A player moves his units during his movement phases.
A. General Rule. A unit's movement rating is the maximum number of movement points (MP) it may use in a movement phase. Units move from one hex to an adjacent hex, spending MP to do so. MP are spent when entering hexes and when crossing adjacent hexsides; the amount of MP spent varies according to the impulse (Road or Off-Road) and the terrain of the hex entered and of the adjacent hexside crossed. The Terrain Effects Table lists the MP costs for each terrain type. The cost of crossing a hexside is added to the cost of entering a hex. Certain terrain types do not affect movement and are indicated as such on the table. Hexes marked as prohibited on the table may not be crossed by a unit.
MP costs are added up for the unit as it moves. A unit may end its movement before spending all of its MP. It may never spend more movement points than it has available in a movement phase. If a unit cannot pay the full cost of moving into a hex, it may not move into that hex.
-
Road Impulse: During the Road impulse movement phase, units may move only into road hexes. A unit may not enter a non-road hex, nor move if it begins the phase in a non-road hex. The Road impulse section of the Terrain Effects Table is used to determine MP costs. A unit spends ½ MP to enter a road hex. A motorized unit (as defined on the Unit Identification Chart) spends ¼ MP per hex while moving along a road; it may use the road rate only when moving from one road hex to an adjacent road hex along the road.
Example: An AFV unit (which is a motorized unit) starts in hex 0402. During its Road impulse movement phase, it moves to hex 0403 and then to hex 0504, having spent a total of 1 MP (½ MP per hex) so far. It then travels along the highway to hex 0603 and then to 0704, where it stops; it spends ½ MP moving along the highway (¼ MP per hex). It spends a total of 1½ MP in the movement phase.
Note: Because of the density of the road network in the Dutch countryside, the presence or absence of a road in a hex is indicated by shading it. The rest of the terrain in a hex has no effect during the Road impulse movement phase. For example, hexes 1517, 1518 and 1417 are all road hexes that cost ½ MP each, even though they are clear, woods and marsh respectively.
-
Off-Road Impulse: During the Off-Road impulse movement phase, the distinction between hexes with and without road is ignored. Instead, the terrain of the other hexes is used, and the Off-Road impulse section of the Terrain Effects Table is used to determine MP costs. Motorized and non-motorized units spend different amounts of MP in certain terrain types, as indicated on the table.
Example: A motorized unit starts in hex 1025. It moves to hex 1026 (clear terrain, 1 MP), then to hex 1027 (clear terrain, 1 MP) and finally to hex 928 (woods, 3 MP), spending a total of 5 MP in this phase. The fact that hex 1026 has a road and hexes 1027 and 928 do not does not affect the unit's movement during the Off-Road impulse movement phase. Note: Hills do not affect movement. The MP cost of a hill hex is determined by the rest of its terrain. For example, hex 1410 is woods for Off-Road movement.
During the Off-Road impulse movement phase, motorized infantry units (those bearing the motorized infantry symbol) may move as non-motorized infantry. A unit moving in this way has 3 MP and uses the non-motorized infantry column of the Terrain Effects Table. A motorized infantry unit must move either as motorized or as non-motorized for the entire movement phase; it may not change between the two modes during the phase.
B. Water Barriers: River and canal hexsides may not be crossed, except at bridges and ferries, during the movement phases of both impulses. There is no MP cost to cross a water barrier at a bridge. A unit using a ferry to cross a water barrier must spend half of its printed movement allowance (rounding fractions down). For example, a unit with 6 movement points moving from hex 0108 to hex 0208, using the ferry to cross the river, spends 4 MP in the Off-Road impulse movement phase (3 MP to use the ferry and 1 MP to enter the free hex).
Only German units may use the ferries printed on the map. Allied units may not.
Water barriers are treated in more detail in rule 12.
C. Hidden Movement: A player moves his units within his own territory without revealing their movements to the enemy player. However, to enter a hex of enemy territory, the unit spends the movement points needed to enter the hex, and the player announces the number of the hex it enters. The other player announces whether or not he has a unit in the hex. If there is one or more units, he only states that there is a unit in the hex, without specifying which or how many. If there is no enemy unit in the hex, the moving unit enters successfully and takes control of it; the territory markers on both maps are adjusted to show the change. The unit may continue moving, if possible. If there is an enemy unit in the hex, the moving unit must attack the hex during the following combat phase. Other units may also attempt to enter the hex, paying the MP cost to do so and thereby joining the attack against the hex.
5. Stacking
A player may stack up to three of his units in one hex. A player may not voluntarily move units so that more than three friendly units are in a hex at the end of any phase (movement or combat). During the Off-Road impulse movement phase, units may exceed stacking limits while moving, provided the limit is not exceeded at the end of the phase. However, during the Road impulse movement phase, a special stacking limit is used to show the effects of traffic jams. In this phase, units that begin stacked together may move individually or in groups of two. Three units in one hex may not move as a single group; the three may move individually, or two may move as a group and the other individually. During the phase, a moving unit or group may never enter a hex containing other friendly units.
During the combat phase, units may exceed the stacking limit while retreating. If possible, units must not exceed the stacking limit at the end of their retreat. If this is not possible, the retreating units may exceed the stacking limit. Units that exceed the stacking limit due to retreat are ignored for combat purposes for as long as they continue to exceed that limit. They may not fire or be attacked during combat. On the other hand, if all the units that do not exceed the stacking limit in the hex are retreated or eliminated in combat, the other units present must immediately retreat, following the standard retreat rules.
Translator's note: the Spanish text of this paragraph reads "impulso terrestre" (ground impulse). The traffic-jam rationale and the rest of the rulebook indicate this refers to the Road impulse, so it is rendered as "Road impulse" here.
6. Combat
Attacks that a player announces during his movement phase are resolved during his combat phase. During the combat phase, the player whose turn it is is the attacker, and the player whose turn it is not is the defender.
A. General Procedure: Attacks are resolved in the order the attacking player wishes. Each attack (the resolution of all combat for each attacked hex) consists of an exchange of fire between the attacking and defending units. In each attack, the attacking units are all those attempting to enter the attacked hex, and the defending units are all those occupying it.
When an attack is resolved, all units involved are placed on the combat display and are visible to both players. The defender places his defending units in the central hex of the display. The attacker places his attacking units in the hexes that correspond to the hexes from which they attack. The combat display serves to show both players all the units involved in an attack, keeping the correct placement of units in the hexes; it has no other function. Once the attack is resolved, the players return their units to the corresponding hexes on the map and play continues.
Example: The Allied player attacks the German units at Oss; the attacking Allied units occupy hexes south and southeast of Oss. The German player places his units in Oss in the central hex of the combat display. The Allied player places the units attacking Oss from the south in the south hex of the combat display, and those attacking Oss from the southeast in the southeast hex. The combat is resolved, and then the players return their units from the display to their maps.
Note: If a defending hex contains units that are not taking part in the combat, they are shown to the attacking player. However, they must be placed to one side of the combat phase, not in the central hex. Units that have retreated into the attacked hex during the current combat phase, and units that are stacked over the limit in the hex because of retreats in earlier combat phases, do not take part in the combat.
B. Fire Resolution: An attack is resolved by an exchange of fire between enemy units. Units fire using their firepower and defend using their defensive strength. Each unit involved may fire only once. Each unit fires individually; two or more units may not combine their firepower. After each shot, the results are applied immediately, before any other unit fires.
In each attack, all defending units fire before the attacking units. Since the results of combat are implemented immediately after each shot, the attacking units are affected by defensive fire before firing themselves; they may have their firepower reduced (by losses) or be rendered unable to take part in the attack (due to retreat or elimination).
The owning player may order the firing of his units as he wishes. Each of his units may fire at any of the enemy units. A unit may not fire at two or more units combined, nor divide its firepower to fire separately at two or more units; it may fire only at a single enemy unit. A unit may fire at an enemy unit that another friendly unit has already fired at, provided the enemy unit is still present in the combat.
For each shot, the firepower of the firing unit is compared with the defensive strength of the attacked unit, forming a firepower ratio: defensive strength. For example, a unit with a firepower of 7 firing at a unit with a defensive strength of 2 produces a ratio of 7:2. Reduce the ratio so that it corresponds to one of the odds on the Combat Results Table; if rounding is necessary, always round in favor of the defender. For example, a ratio of 7:2 is reduced to a ratio of 3:1. Roll the die and determine the result on the attacked unit by comparing the roll with the odds on the Combat Results Table. Four results are possible:
- No Effect: The unit is not affected by the fire.
- Retreat/Repulse: An "R" result means retreat for defending units; the unit receiving this result must retreat. An "R" result means repulse for attacking units; the unit receiving this result may not fire or advance in the current combat phase.
- Step Loss and Retreat/Repulse: The unit loses one step. If it is defending, it must retreat; if it is attacking, it is repulsed.
- Eliminated: The unit is eliminated and removed from the game.
The odds on the Combat Results Table range from 1:2 to 8:1. If the odds of a shot are less than 1:2, the shot automatically has no effect. If the odds are greater than 8:1, the shot is resolved at 8:1.
C. Steps and Losses: All units have one or two steps. Some units are printed on the reverse, with one side of maximum strength and one side of lesser strength. The side of maximum strength has two steps and the side of lesser strength has one step. Some units have no printing on the reverse and therefore have only one side of maximum strength; in these cases, they have only one step.
Units are reduced or eliminated when they suffer losses from fire. A unit with two steps is reduced to its one-step side when it suffers a loss. A unit with one step is eliminated (removed from the game) when it suffers a loss.
7. Terrain Effects in Combat
The Terrain Effects Table lists the effects of terrain on combat. All effects are cumulative, except that a unit may never have its firepower doubled more than once. Terrain effects in combat apply when combat is resolved.
The defensive strength of a defending unit is doubled if the unit occupies a woods, marsh or city hex. The defensive strength of an attacking unit is never doubled.
During the Off-Road impulse, the firepower of a defending unit is doubled if it fires at a unit that is attacking across a bridge or ferry. During the Road impulse, the firepower of a defending unit is doubled regardless of terrain.
The firepower of any unit (attacking or defending) is doubled if the unit is in a hill hex and fires at a unit that is not in a hill hex.
8. Armor and Antitank
AFV, mechanized and reconnaissance units are armored units. Armored units are less vulnerable to enemy fire than unarmored units, except to fire from enemy units well equipped with antitank weapons. Mechanized and reconnaissance units have light armor and are more vulnerable to fire than AFV units.
All units are coded according to their antitank firepower. A unit with a red dot on its counter has full antitank capability; its firepower is not affected when firing at an armored unit. A unit with a black or white dot on its counter has partial antitank capability; its firepower is halved when firing at an AFV unit, but is not affected when firing at a mechanized or reconnaissance unit. A unit with no dot on its counter has very limited antitank capability. It may not fire at an AFV unit, and its firepower is halved when it fires at a mechanized or reconnaissance unit.
9. Movement After Combat
Under certain circumstances, attacking and/or defending units may move during the combat phase.
A. Retreat: Whenever a unit must retreat as the result of an attack, it must do so immediately, as directed by the player who controls it. In general, it must retreat 2 hexes from its original position, although in certain cases it may retreat only 1 hex. It must follow the retreat priorities while doing so.
For the first retreat hex, the priorities are:
- To a hex in friendly territory that is not adjacent to any enemy hex.
- To a hex in friendly territory adjacent to enemy territory.
- To a hex in enemy territory. The retreating player states the number of the hex it enters; if it is unoccupied, the retreating unit enters it (and the territory markers are adjusted). If the hex is occupied by an enemy unit, the retreating unit is eliminated.
For the second retreat hex, the priorities are the same. However, a unit is not required to retreat into enemy territory on its second hex; it may end its retreat after one hex. The owning player may choose to retreat a unit into enemy territory on its second retreat hex, following the procedure described above. On the second retreat hex, a unit may not retreat into the hex from which it began its retreat, nor into a hex adjacent to that hex. If no other retreat route is possible, the unit ends its retreat on its first hex.
Within these priorities, a unit must try not to end its retreat by violating the stacking limit. If this is not possible, the unit may violate the stacking limit (see rule 5 for its effects).
Regardless of the impulse, a unit may not retreat toward or through any hex, or cross any hexside, that it is prohibited from entering or crossing during the Off-Road impulse. (These hexes are listed in the Off-Road terrain section of the Terrain Effects Table. Motorized infantry may retreat as non-motorized infantry.) A unit may not end its retreat in a hex from which another friendly unit began the combat phase but has since retreated. If a unit cannot retreat from its first hex because of these restrictions, it is eliminated. If it cannot retreat from its second hex because of these restrictions, it ends its retreat on the first retreat hex.
If a unit ends its retreat in a hex that is subsequently attacked in the same combat phase, the retreated unit is ignored during combat. It may not fire or be attacked. If all other defending units in the hex retreat or are eliminated, the unit must retreat, following the rules above.
B. Advance: If all defending units are eliminated and/or retreat from the attacked hex, the attacking player must advance at least one unit into the hex. He may advance units up to the stacking limit in the hex. During the combat phase of the Road impulse, the stacking rules that govern movement during the impulse also apply to advances. A unit that attacks a hex that was repulsed by enemy fire may not advance.
10. Airborne Operations
The Allied player has several airborne units, as shown on the Unit Identification Chart. These units, together with the airborne supply markers, enter play by air transport. The airborne supply markers and all airborne units, except air-landed infantry and airfield repair units, may make airdrops. These two types of units may not make airdrops; they must be flown in to captured airfields.
All airborne units are available to enter play from the first turn. However, the Allied player is limited to the number of units he can bring into play by his air transport points. Each turn, the Allied player receives a quantity of air transport points, as indicated on the Turn Record Track. The Allied player may use these points to bring airborne units onto the map in that turn. Air transport points not used in the turn they are received are lost; they may not be accumulated for use in later turns. Airborne units use different quantities of air transport points depending on the exact type of unit; these quantities are indicated on the Air Transport Point Cost Table. For example, a paratroop infantry unit requires 1 air transport point, while a glider infantry unit requires 3 points. It should be noted that British glider infantry units with "GP" in their designation use only 1 air transport point each, not 3.
In the Initial Segment, the Allied player may use his air transport points to put airborne supply markers into play. At the start of each Allied movement phase, he may use his air transport points to put airborne units into play by airdrops and air landings.
Note: Except for airfield repair units, all Allied airborne units must enter play by air transport. Airfield repair units may enter play by air transport or in the same way as regular Allied ground units, at the choice of the Allied player.
A. Airdrop: The Allied player carries out his airdrops in the following sequence: 1) He determines the weather conditions for the phase. 2) He places all units making airdrops in that phase on their target hexes. If the weather is adverse, its effects on the drops are evaluated. 3) German anti-aircraft fire against the dropping units is evaluated. 4) The effects of terrain and combat during the landings are evaluated. 6) The rest of the movement phase is carried out; surviving airborne units may move.
Translator's note: the source numbering of this sequence runs 1), 2), 3), 4), 6); step 5 does not appear in the source, and the numbering is reproduced as printed.
-
Weather: At the start of each Allied impulse, the Allied player determines the weather conditions for that impulse. If the Allied player intends to drop airborne supply markers during the Initial Segment, he determines the weather at that time; the resulting weather governs both that segment and its first impulse. A die is rolled and the weather table is consulted. There are three weather conditions:
- Good: The weather does not affect airdrops.
- Marginal: The Allied player may attempt airdrops. For each unit making an airdrop, a die is rolled. If a 1 is obtained, the airdrop is cancelled and the unit does not enter play in this phase. It may attempt to enter play in a later Allied movement phase. Its air transport points are spent in that turn. If a result between 2 and 5 is obtained, the unit is scattered. If a 6 is obtained, the unit lands on its target hex.
- Bad: The Allied player may not attempt any airdrops.
Weather is automatically good in the first Allied impulse. From then on, the weather must be determined using the weather table.
If a unit is scattered, roll a die and consult the scatter table to determine into which adjacent hex it scatters. This hex becomes the unit's new target hex. If a unit would scatter into a hex where it would violate the stacking limit, the scatter die is rolled again. If it is impossible to scatter a unit without violating the stacking limit, the unit is eliminated.
-
Target Hexes: Any hex may be selected as a target hex for airdrops. However, the terrain of the hex may cause losses, as described in section 4 below. Up to three airborne units may be dropped into one target hex. Once units have been assigned to their target hexes and any scattering has been resolved, the Allied player announces the numbers of all target hexes for the phase. Note that all units must have their target hexes assigned before they are announced.
-
If a target hex contains, or is adjacent to, a German unit, a German-controlled city, or a German-controlled airfield, the units dropped onto that hex are subject to German anti-aircraft fire. A unit may receive anti-aircraft fire only once; if it could receive anti-aircraft fire from several sources, resolve only the fire with the greatest chance of causing losses to the unit and ignore the rest. The German player rolls a die and consults the anti-aircraft fire table for a result. Three results are possible:
B. Air Landing: Air-landed infantry and airfield repair units may not make airdrops. They may be flown by air to the battlefield and land at airfields. Other airborne units may also land by air, instead of making airdrops, at the choice of the Allied player. The airfield must be under Allied control at the start of the Allied player's turn in order to be used for an air landing in that turn. Landing at an airfield follows the same procedures as an airdrop, including receiving anti-aircraft fire if it lands next to a German unit or a German-controlled city. However, a unit landing at an airfield is never scattered because of weather. That is, during adverse weather conditions, treat rolls of 2 to 5 as a roll of 6. Except for airfield repair units, airborne units may only land at friendly, repaired and controlled airfields. Airfield repair units may land at friendly, damaged and controlled airfields.
C. Airborne Supply Markers: An airborne supply marker is used to supply airborne units (see rule 11). It does not count for stacking. It may not move. If it is alone in a hex, it does not prevent German units from entering it. If the German player comes to control a hex occupied by an airborne supply marker, the marker is eliminated and removed from the game.
Airborne supply markers are dropped in the Initial Segment, following the standard airdrop rules, with one exception: an airborne supply marker may not be dropped into enemy territory. The Allied player must choose target hexes in friendly territory for these markers. If a marker is scattered into enemy territory because of the weather, it is eliminated.
An airborne supply marker is eliminated if it suffers a loss from anti-aircraft fire.
Translator's note: the English sequence-of-play aid calls these "supplyhead markers"; the Spanish text uses "marcadores de suministro aerotransportado" ("airborne supply markers"), which is used here.
D. Airfields: There are four airfields, all controlled by the Germans at the start of the game. When the Allied player takes control of an airfield hex, it is automatically damaged. Air-landed infantry units may not land on a damaged airfield. Airfield repair units may repair damaged airfields.
An airfield repair unit is restricted to the road: it may move only during the Road impulse movement phase; it may not move during the Off-Road impulse movement phase. (It may land in either impulse.) An airfield repair unit does not count for stacking when it is on an Allied-controlled airfield hex. An airfield repair unit has only one step.
During the Road impulse, an airfield repair unit may repair a damaged airfield. The airfield is repaired if the unit begins the impulse on the airfield and spends the whole impulse there, without moving or firing. At the end of the impulse, flip the unit to show the airfield printed on its reverse; this indicates that the airfield in the hex has been repaired. Once flipped, the airfield repair unit is treated as a marker: it may not move and has no firepower or defense. It is removed from the game if the German player regains control of the hex.
E. British Glider Pilots: British glider infantry units with unit designations "GP" represent the pilots of the British glider battalions. When a British 6-5-3 glider unit is dropped, a British 2-4-3 "GP" glider unit must be dropped with it. Treat both units as a single unit for all airdrop purposes (such as scattering), but they count as two units for stacking. Any anti-aircraft result obtained against that stack applies to each unit in the stack separately.
11. Supply
Units require supply to take part in combat at full effectiveness. There are two types of supply: regular ground supply and air supply. Supply is traced for all units during the Initial Segment of each game turn; the supply status a unit has at that moment (with or without supply) determines its supply status for the whole turn.
A unit, including an airborne unit, has supply if it can trace a supply line to a regular ground supply source. The regular ground supply sources for German units are the off-map entry areas; a German unit has supply if a line can be traced off the map to such an area. The regular ground supply sources for Allied units are the off-map area south of the starting line; an Allied unit has supply if a line can be traced off the map to this area.
An Allied airborne unit has supply if it can trace a supply line to an airborne supply marker. Any number of airborne units may trace supply to such a marker. If any unit obtains supply from the marker, the marker is removed from the map once all supply for the turn has been traced.
A supply line is traced from a unit to a supply source and may only be traced through friendly territory. It may not be traced across rivers or canals, except at bridges. Up to three hexes of the line may be traced through hexes that are not roads; all other hexes of the line must be traced through road hexes.
If a unit cannot trace a supply line to a supply source, it is out of supply. A unit out of supply adds 2 to its die roll each time it fires during a combat phase. Modified rolls above 6 are treated as 6. Being out of supply has no other effect on units.
All units that enter play during a turn, whether by ground or by air transport, have supply for that turn.
12. Water Barriers
Rivers and canals are water barriers. Water barriers may only be crossed by bridges and ferries.
A. Bridges: Several bridges are printed on the map; all but one are under German control at the start of the game. A unit may cross a water barrier by a bridge controlled by an Allied player; there is no movement point cost for using the bridge. Translator's note: the Spanish text reads "no hay coste de puntos de mando" (no command point cost). Elsewhere (rule 4.B) the same rule is stated for movement points, so "movement points" is used here.
The German player may attempt to demolish the bridges under his control to prevent them from being captured and used by the Allied player. The demolition attempt is made immediately when the Allied player takes control of a hex adjacent to the bridge side. If the attempt succeeds, the bridge is demolished. Place a destroyed bridge marker on the bridge; both sides treat the bridge side as a water barrier (river if next to a river; canal if next to a canal) for the rest of the game. When the German player attempts to demolish a bridge, he rolls a die. The bridge is destroyed if the roll is 1 or less. The roll is modified as follows (all modifications are cumulative):
- −1 for a bridge over a river.
- −1 for a road bridge over a canal.
- −2 if a German engineer unit is adjacent to the bridge hex.
- +1 if an Allied engineer unit (including airborne and glider engineers) is adjacent to the bridge hex.
If the demolition attempt fails, the German player may not try again until he regains full control of the bridge. He regains full control of the bridge only if he controls both hexes adjacent to the bridge. Once he regains control of the bridge, he may attempt to demolish it following the procedure described above. (As before, he may only attempt it when an Allied unit controls a hex adjacent to the bridge.)
The Allied player may not attempt to demolish a bridge.
Note: The German player is not obliged to attempt to demolish a bridge when the Allied player takes control of a hex adjacent to it; he may choose to keep the bridge intact. However, he may not attempt to demolish the bridge until he regains full control of it.
A bridging unit may build a bridge over a water barrier. To build a bridge, the unit must begin its Road impulse adjacent to the water barrier; both hexes adjacent to the hexside to be bridged must be under Allied control. The unit must remain in the hex for the whole impulse, without moving or firing. At the end of the impulse, the unit is flipped, showing the bridge printed on its reverse. It is placed on the hexside of the hex that is building the bridge.
While it remains on the hexside, the owning player treats that hexside as a bridge side.
Once flipped, the unit may be flipped back to its bridging-unit side at the start of any Allied impulse; it is placed in either of the hexes adjacent to the hexside. The water-barrier hexside is then no longer connected, but the unit may move and connect another hexside. If an enemy unit takes control of a hex adjacent to a connected hexside, the unit is flipped to its connection-unit side and placed in the remaining Allied hex adjacent to the hexside; the water-barrier hexside is then no longer connected.
A bridging unit has one step. While it is flipped to its connection side, it does not count for stacking.
B. Ferries: A unit may use a ferry to cross a water barrier, spending half of its printed movement allowance plus the MP cost to enter the hex on the other side of the barrier.
Only a limited number of units may use each ferry in a movement phase: only one unit per movement phase may use a ferry to cross a river hex; only two units per movement phase may use a ferry to cross a canal hex.
In the combat phase, any number of units may retreat across a water barrier by ferry.
Only German units may use the ferries printed on the map. Allied units treat these hexes as water-barrier hexes.
Engineer units and bridging units may be used as ferries. To use them, the unit must be in a hex adjacent to the water-barrier hex (it need not begin the impulse or phase in the hex). The unit may transport itself across the water barrier. It may transport other units across the water barrier. To be transported, a unit must move into the hex of the transporting unit if it is on the same side of the water barrier as the transporting unit, crossing the water-barrier hex to an adjacent hex. If it is on the other side of the water barrier, the unit must move to a hex adjacent to the transporting unit and then be transported across the water barrier into the hex of the transporting unit. When transporting other units, but not itself, into a hex occupied by the enemy, the transporting unit may not fire or be attacked in the following combat phase as a result of this action.
Note: Engineer units, including motorized, paratroop and glider engineers, may transport units, but the assault engineer unit has no transport capacity.
13. Reinforcements
Both sides receive reinforcements during the course of the game. Once units enter the map, they may not leave it. If they are forced to retreat off the map, the units are eliminated. Reinforcements enter the map from off the map, at certain places, as specified below. A unit may attempt to enter the map in a hex controlled by the enemy. If the hex is unoccupied, the attempt succeeds. If the hex is occupied by the enemy, the unit may not enter the map in that movement phase; it may try again in the next friendly movement phase.
A. Allied: Allied airborne units enter play by air transport, as described in rule 10.
Allied regular ground reinforcements enter play by ground, entering the map in any hex on the south edge that is directly south of the starting line. (That is, hexes 1032, 1132, 1232 and 1332.)
Starting with turn 2, the Allied player receives 3 deployment points (DP) per turn for the rest of the game. DP are spent to activate regular ground reinforcements; only activated regular ground units may enter play. DP are spent as follows:
- 2 DP activate the rest of the British 43rd Division (the units with "43" as their division designation).
- 2 DP activate the rest of the British 50th Division.
- 2 DP activate four independent British armored vehicle, reconnaissance or mechanized units. (An independent unit is a unit without a division designation.)
- 1 DP activates the three Dutch units.
- 1 DP activates the non-airborne units of the British 52nd Division.
- 1 DP activates two bridging or airfield repair units (or one of each type). Note that airfield repair units should only be activated if they enter play by ground; it is not necessary to activate them if they enter by air transport.
B. German: German reinforcements enter play on specific turns, as indicated on the German Order of Battle table. The table specifies which off-map entry areas units are available from. The German player may bring units in from these areas or exchange them between them, as described below.
At the start of the German player's turn, before reinforcements are taken and before the German player selects the order of his impulses, the units in the off-map entry areas may move to an adjacent area. For example, units in the west entry area may move to the southwest entry area or to the northwest entry area. After moving the units in the entry areas, the German player places that turn's reinforcements in their specified entry areas; these units may not change entry area during this turn. After this, the German player chooses the order of his impulses and continues his turn.
During German movement phases, units in off-map entry areas may enter play. They may enter any hex adjacent to their off-map entry area.
14. Victory
Translator's note: the Spanish text lists "14. Victoria" with subsections "A. Duración del juego" (length of the game) and "B. Niveles de victoria" (victory levels) in its table of contents, but the body of section 14.A does not appear in the source document (the heading and its text are absent from the text layer and the pages). Section 14.A below is therefore supplied from the English sequence-of-play aid (prefetch file 6813.pdf), not from the Spanish text. Section 14.B is translated from the Spanish text as printed.
A. Duration of the Game: The game ends at the conclusion of turn 10 unless it has ended sooner. Starting with turn 3, the Allied player may call off the operation during the Final Segment. The game ends immediately if the Allied player meets the conditions for a Strategic Victory (14.B).
B. Victory Levels: The Allied player achieves a strategic victory if he brings an Allied armored vehicle unit off the map to the north off-map entry area and can trace a line from the starting hex to an Allied regular ground supply source. This line is traced exactly like a supply line. The game ends immediately when the Allied player meets this victory condition.
The Allied player achieves an operational victory if he can trace a line from a unit north of the Lower Rhine/IJssel rivers to an Allied regular ground supply source. This line is traced exactly like a supply line. Note: North of the Lower Rhine/IJssel rivers means north of the river line running from hex 0108/0109 to hex 1401/1501.
The Allied player achieves a tactical victory if he manages to trace a line from a unit north of the Lower Rhine/IJssel rivers to an Allied regular supply source. This line is traced similarly to a supply line, except that it may pass through enemy territory. It may only cross water barriers at bridges controlled by the Allies.
The German player achieves a tactical victory if the Allied player achieves no victory.
The German player achieves an operational victory if there are no Allied units north of the Maas river.
16. Suggestions
A large quantity of territory markers is provided. However, in some cases (such as after many scattered airdrops), there may not be enough markers to place one on every hex of the front line. There are two ways to make better use of the markers:
- Place some markers on hexsides, indicating that both hexes adjacent to that side are enemy territory. For example, a marker on the hexside 0720/0721 is equivalent to markers on hexes 0720 and 0721. This method is most effective on fronts where the territory does not change hands quickly.
- When interior lines are held (which will happen in most airdrops), marking one's own front line instead of the enemy's can save many markers. Simply place a territory marker (with the symbol of your side face up) on the hexes controlled by the Allied forces, adjacent to the enemy front line.
If you have trouble knowing which units are out of supply, orient all your units with supply toward one side (for example, facing north) and all your units without supply toward the other side (for example, facing south).
If a player has difficulty playing one side, use the following to make things easier for him: 1) For the German player, allow the initial German forces to be deployed anywhere within a radius of 3 hexes of their indicated hexes, instead of 2. 2) For the Allied player, add 1 to the weather die roll and, during adverse weather conditions, use the following scatter result: 1: abort; 2, 3 or 4: scatter; 5 or 6: land on the target hex.
15. Initial Deployment
The German player deploys his initial forces according to the German Order of Battle list. Each unit may be deployed in any hex within two hexes of its indicated hex. However, no German unit may be placed south of the starting line. No more than three units may be placed per hex.
The Allied player deploys his initial forces in any hex south of the starting line. No more than three units may be placed per hex. The Allied initial forces are: all units of the British Guards Armoured Division (all units with "GA" as their division designation), any three units of the British 43rd Division, and any three units of the British 50th Division.
All hexes north of the starting line are territory controlled by the Germans; all hexes south of the starting line are territory controlled by the Allies.
Historical Notes
Translator's note: in the source, the day labels for turns 2, 3 and 8 read "2 de marzo", "3 de marzo" and "8 de marzo" ("2 March", "3 March", "8 March") rather than "Turno 2", "Turno 3" and "Turno 8"; they are reproduced as printed, and each is followed by the source's own date (18, 19 and 24 September 1944). Other printed oddities (such as hex numbers printed as times, or "506th Division" for a regiment) are also reproduced as printed and marked [as printed] or [sic].
Turn 1 (17 September 1944)
The initial landing of the airborne troops went without setbacks. The paratroopers of the American 101st Airborne Division secured the area from Zon (hex 0922) to Veghel (hex 0819). Although the Veghel bridge was taken intact, the Zon bridge was destroyed by German engineers. In the afternoon, a battalion of militarized police based in Tllburg [as printed in the source] launched some attacks, but the paratroopers repelled them with relative ease. Most worrying was the arrival of the vanguard of the German 59th Division in the Boxtel area.
The American 82nd Airborne Division also achieved complete surprise and, by nightfall, had taken the bridge over the Maas at Grave and the Maas-Waal canal bridge at hex 1311. The remaining elements of the division occupied the wooded heights southeast of Nijmegen.
The British 1st Airborne Division had two brigades north of the Rhine: the 1st Air Landing Brigade in the vicinity of Oosterbeek and the 1st Parachute Brigade on the outskirts of Arnhem. On landing, it was discovered that the Oosterbeek bridge had been destroyed.
However, the ground advance immediately ran into difficulties in the face of strong resistance from Kampfgruppe Walther. At that time, Kampfgruppe Walther was made up of approximately three regiments. In the centre was the Luftwaffe Hoffmann Replacement Regiment (without its 2nd Battalion, which was occupied with rear security), supported by the heavy tank destroyers and antitank guns of the antitank battalion (Panzerjäger) of the 10th SS Panzer Division. On the left (east) was a provisional unit called "Sperrverband Heinke", made up of two SS infantry battalions from the 9th and 10th SS Panzer Divisions. The 6th Parachute Regiment occupied the right flank (west), together with the 6th Luftwaffe Penal Battalion. The Guards Armoured Division managed to advance only about ten kilometres (roughly two hexes) by nightfall.
2 March (18 September 1944)
During the day, additional airborne reinforcements arrived, made up of a glider battalion of the American 101st Airborne Division and the rest of the British 1st Airborne Division.
The 101st Airborne Division held its two bridges throughout the day against weak attacks by elements of the German 59th Division, which continued to arrive. However, the attempt to drive the Germans out of Best failed. In the afternoon, a parachute regiment was sent southeast, toward Eindhoven, and by nightfall had freed the city from German resistance.
The 82nd Airborne Division had a busy day. Elements of the division attacked northeast along the Maas-Waal canal and took the bridge at hex 1010, although it was badly damaged during the fighting. The attack continued toward the outskirts of Nijmegen but was halted by strong enemy resistance. Further east, the division's troops repulsed repeated attacks by elements of the German 406th Reserve Division.
In the British 1st Airborne Division's sector, however, the situation was becoming complicated. Elements of the 1st Parachute Brigade (made up mainly of the 2nd Parachute Battalion) had taken the north end of the Arnhem bridge (hex 1004), but were now isolated from the rest of the division by German reserves. The troops encountered belonged to the 9th and 10th SS Panzer Divisions, reinforced by various miscellaneous units. The bulk of the division repeatedly tried, without success, to link up with the troops at the bridge.
In the south, the Guards Armoured Division resumed its attacks in the face of continued resistance and advanced very little until the 101st Division captured Eindhoven from the rear. Resistance then began to decline, and by nightfall the division's leading tanks had made contact with the American paratroopers.
3 March (19 September 1944)
Bad weather hampered air reinforcement on the 19th, and the glider regiment of the American 82nd Airborne Division remained in Britain. However, the two remaining glider battalions of the 101st Airborne Division arrived north of Zon just in time to help repel a German attack on the bridge. In general, the 101st Division had to fight hard all day to keep the road open, which it did, in addition to capturing Best and the road bridge. However, the tanks and mechanized infantry of the German 107th Panzer Brigade began to press the 101st Division's lines from the east.
The 82nd Division also suffered heavy fighting as German pressure increased from the east and southeast. New attempts to take the Nijmegen bridge again failed. The Nijmegen bridge was now in the hands of the reconnaissance battalion of the 9th SS Panzer Division (which had succeeded in crossing the Arnhem bridge before the British paratroopers took it).
The situation of the British 1st Airborne Division was becoming critical. The 2nd Parachute Battalion still held out at Arnhem, but a large attack to relieve them by the rest of the 1st Parachute Brigade and one battalion from each of the division's other two brigades resulted in the attacking force being encircled and practically annihilated. The rest of the division (two parachute battalions, two glider battalions and the glider pilots) continued to hold a wide perimeter around Oosterbeek against mounting German pressure from the main body of the 9th SS Panzer Division (from the east) and Kampfgruppe Tettau (from the west).
Meanwhile, the Guards Armoured Division finally had a clear road ahead and attacked with all its strength. It raced down the motorway toward Grave and then (because the motorway bridge at 10:10 was too damaged to be used) turned right and crossed the Maas-Waal canal at 12:11. The division's leading elements (the Guards Grenadier Group, made up of the 1st and 2nd Battalions of the Grenadier Guards) then joined a battalion of the 82nd Airborne Division and launched a last attack against Nijmegen. However, the attack again failed. At the same time, the Coldstream Guards Group was detached together with the 82nd Division to support its defence in the east. The delay of the 82nd Division's glider regiment was causing serious problems in the operations around Nijmegen.
South of the armoured base of the Guards, much of the remaining ground forces were concentrated around Eindhoven, repelling German counterattacks and neutralizing pockets of resistance. However, the 43rd Infantry Division began to advance north.
Turn 4 (20 September 1944)
The weather worsened and no additional troops were sent by air to the operations zone.
Pressure on the 101st Airborne Division seemed to ease. A German tank-supported attack against Zon caused some concern, but was repulsed with the help of the Shermans of the 15th Hussars and the 44th Royal Tank Regiment, the German 107th Panzer Brigade suffering a heavy defeat. However, the remnants of the 85th Division had moved into the area between Oss and Boxtel. Although the division's remaining strength did not exceed one battalion, the division commander, Lieutenant General Chill, soon gathered various units (including the 6th Parachute Regiment) and began operations against the road.
The 82nd Airborne Division still lacked its glider regiment and therefore had a serious shortage of infantry. While the 508th Regiment, reinforced by the Coldstream Guards, continued to repel German attacks by the 406th Division, elements of the 505th and of the Grenadier Guards fought for Nijmegen, and the 504th prepared to cross the Waal by assault. By then, the defence of Nijmegen was in the hands of a battalion of the 10th SS, since the 9th SS Reconnaissance Battalion had moved slightly north in support. While elements of the 504th crossed just northwest of Nijmegen, the Grenadier Guards resumed their attack, and the last German resistance in Nijmegen finally gave way.
In the 1st Airborne Division's sector, the 2nd Parachute Battalion held its positions throughout the day at the north end of the bridge, but with very reduced strength. The main elements attacking the troops in Arnhem then consisted of the 10th SS Reconnaissance Battalion, Kampfgruppe Knaust and several Tiger tanks of the 502nd and 504th battalions (with a combined strength of probably no more than 20 Panzer VI). The bulk of the division consolidated the Oosterbeek position, which included the ferry crossing at 08:05.
Turn 5 (21 September 1944)
Bad weather persisted and the glider regiment of the 82nd Division remained in England. However, two battalions of the Polish Parachute Brigade were dropped at Oriel (hex 0906) [sic; the source prints "Oriel"] to secure the south bank of the Rhine and facilitate the transport of reinforcements to the British 1st Airborne Division.
The 101st Airborne Division had a quiet day (at least compared with the previous four days), and German resistance in the Eindhoven area had been neutralized enough to allow the 506th Regiment to advance north of the Wilhelmina Canal and help push the Germans back on both flanks of the road.
The 82nd Airborne Division spent the day repelling strong attacks by the 406th Division. However, the 130th Brigade of the 43rd Division took over the defence of Nijmegen, which allowed the 504th Parachute Battalion to withdraw south of the Waal and reinforce the division's defences to the east. The British 1st Airborne Division was under increasingly intense attack and its perimeter around Oosterbeek began to shrink. Additional troops arrived to reinforce the assault forces, the most important being an assault engineer battalion (the 9th Lehr). In the evening, the last paratroopers in Arnhem were finally annihilated.
The Guards Armoured Division attempted a rapid advance toward Arnhem along the road, but was stopped by the reconnaissance battalion of the 9th SS Panzer Division, which was defending hex 1006. Since at that time the Coldstream Guards Group was fighting with the 82nd Airborne Division and the Welsh Guards Group was defending the Grave bridge, the division lacked the strength to advance further. However, by nightfall, the rest of the 43rd Division was in Nijmegen and preparing to resume the attack in the morning.
Turn 6 (22 September 1944)
More bad weather. With England completely isolated by fog, no troop transport could take off.
With more infantry occupying the corridor, elements of the 101st were freed to advance north and improve the security of the road between Veghel (hex 0819) and Uden (hex 0917). However, German attacks led by the 107th Panzer Brigade managed to cut the road at hex 0918 and attacked hex 0919. The 501st Parachute Division [as printed], supported by the 44th Royal Tank Regiment and elements of the 506th, managed to hold the bridgehead.
The 82nd Airborne Division, now reinforced by the Shermans of the Nottinghamshire Cavalry, began to clear the southern banks of the Waal to increase the security of the Nijmegen bridgehead.
The 1st Airborne Division was again the object of heavy attacks and again lost ground.
The main advance north of Nijmegen would be led by the 43rd Division. While the 1st Brigade 29 [as printed] attacked along the road toward Arnhem, the 214th Brigade attacked toward the northwest, but was slowed down by tenacious German resistance. By nightfall, the 5th Duke of Cornwall's Light Infantry had joined the Poles, as had the armoured vehicles of the 2nd Household Cavalry Regiment. The rest of the 214th remained near hex 0907 to keep the route open. The continued direct attacks toward Arnhem and the attempts by the Guards Armoured Division to widen the bridgehead to the east were stopped by strong German resistance.
Kampfgruppe Knaust, with its Tiger tanks and the 10th SS Reconnaissance Battalion attached, now occupied hex 1006, while the rest of the 10th SS Panzer Division was in hexes 1107 and 1207.
Turn 7 (23 September 1944)
The weather finally improved, which allowed the 325th Glider Regiment of the 82nd Airborne Division to be dropped north of Grave, while the remaining battalion of the Polish Parachute Brigade was dropped just to the east.
The 101st Division continued to defend the motorway bridge at Veghel and repelled attacks from both east and west. In the afternoon, the 506th Division attacked north along the motorway and met the Welsh Guards Group, which was attacking south to clear the motorway of German agents [as printed].
The 82nd Division continued to patrol actively, and the newly arrived glider regiment passed into divisional reserve. Since German pressure was intensifying again, owing to the arrival of the 190th Reserve Division, its arrival was timely.
In the area between Nijmegen and Arnhem, now known as "the island", the Guards Armoured Division continued to hold open the right flank of the salient while the 43rd Division resumed its attacks. The 130th Brigade moved north to the ferry area, with the intention of transporting it to reinforce the British 1st Airborne Division. However, German activity on the more southerly road had delayed the arrival of engineer equipment, and no transfer was possible.
Meanwhile, the 129th and 214th Brigades continued attacking the tenacious German defences in hex 1006, but without success. By then, the Tigers of the 506th Tiger Battalion had arrived to reinforce the 10th SS Panzer Division and Kampfgruppe Knaust.
The situation of the 1st Airborne Division continued to deteriorate.
8 March (24 September 1944)
Bad weather again made flying impossible.
The 101st Division seemed to have gained the initiative against its opponents, consolidating the road from approximately hexes 08:21 to 09:17 [as printed]. However, a late-afternoon attack south of Veghel by the 107th Panzer Brigade cut the road again.
The 82nd Division continued close-quarters combat with German troops in the Reichswald, and the 325th Airborne Infantry Regiment entered the battle line, as did most of the German 190th Division.
North of the Waal, the Guards Armoured Division (with fewer detachments, but now under the command of the 69th Brigade of the 50th Division) protected the right flank of the bridgehead and tried to advance east toward hexes 1107 and 1207. However, the tenacious resistance of the 10th SS Panzer Division frustrated the advance. The 43rd Division improved its position in the corridor toward Oriel (hex 0906) [as printed] by bypassing the 130th Brigade to the north. The bridging engineers remained trapped in road traffic to the south, so the planned transfer of the Polish brigade and one battalion of the 130th Brigade could not be carried out.
To the south, other troops of the 43rd Division, supported by Sherman tanks of the 4th Guards Dragoons, finally drove the Germans out of Elst (hex 1006).
The 1st Airborne Division continued to give up ground slowly and to suffer heavy blows. By nightfall, no more than 2,000 soldiers remained in the division's position.
Turn 9 (26 September 1944)
The weather began to improve, but given the deterioration of the situation of the 1st Airborne Division, it was decided not to deploy the 52nd Division and instead to attempt to evacuate the British paratroopers during the night.
The 101st Division attacked again, trying to clear the road near Veghel. While the 506th Parachute Battalion attacked from the north, elements of the British 50th Division arriving from the south attacked along the road and, by nightfall, had cleared it again.
The 82nd Division continued to hold and aggressively patrol its front, but German pressure from the Reichswald went on increasing. It was evident that additional troops would most probably be needed to deal with this threat.
North of the Waal, in the "island", the Guards Armoured and 43rd Divisions continued with the same objectives as the day before. However, the continued delay in the arrival of engineering equipment, the almost constant interruption of road traffic in the Veghel area, and the rapid deterioration of the 1st Airborne Division turned the objective into a rescue mission, rather than an attempt to reinforce and consolidate a bridgehead.
The survivors of the 1st Airborne Division held out throughout the day of the 25th and, on the night of the 25th to the 26th, were ferried across the Lower Rhine.
Turn 10 (26 September 1944)
The 101st Airborne Division and the 50th Division again managed to clear and secure the road, keeping it open against minor enemy attacks for the rest of the day.
Further north, the Welsh Guards launched a very successful attack west of Grave, which resulted in the capture of Oss and a considerable extension of the left flank, while elements of the 50th Division advanced east from the Grave area.
The 82nd Airborne Division continued to hold its positions, but plans were already being prepared to relieve it with the 43rd Division.
North of the Waal, the Guards Armoured and 43rd Divisions finally began to advance in strength against the 10th SS Panzer Division and significantly enlarged the bridgehead. The remnants of the 1st Airborne Division and the Polish Brigade withdrew south of the Waal.
Unit Identification Chart
The Unit Identification Chart is printed on the last two pages of the rulebook. Its unit entries are transcribed below in the order printed. The chart's column headings are not reproduced in the source; the three numbers on each entry are shown as printed, with the unit-type and nationality codes in parentheses. Abbreviations are translated from the Spanish key printed on the chart: Afld Rpr = airfield repair; Gldr = glider; Mech Inf = mechanized infantry; Mot = motorized; Para = parachute; Parachute Eng = parachute engineer; Recon = reconnaissance.
Translator's note: the unit entries and chart labels are reproduced as printed in the English chart; the chart key itself was printed in Spanish and is rendered in English above. Entry "15-56f" for unit 4DG and the lower-case "l" suffix on some entries are reproduced exactly as printed on the chart.
German Units
| Formation | Unit | Type | Values |
|---|---|---|---|
| 9th SS Panzer Division, remnants / 19th Panzergrenadier Regiment | I | Mot Infantry II | 5-5-6p (SS) |
| 9th SS Panzer Division, remnants / 19th Panzergrenadier Regiment | II | Mot Infantry II | 4-5-6p (SS) |
| 9th SS Panzer Division, remnants / 20th Panzergrenadier Regiment | II | Mot Infantry II | 4-5-6p (SS) |
| 9th SS Panzer Division, remnants / Divisional Troops | 9 | Recon II | 8-5-8f (SS) |
| 9th SS Panzer Division, remnants / Divisional Troops | 9A KG | Mot Infantry II | 3-4-6p (SS) |
| 9th SS Panzer Division, remnants / Divisional Troops | 9P KG |
Allied Units
| Formation | Unit | Type | Values |
|---|---|---|---|
| 1st Airborne Division / 1st Parachute Brigade | 1 | Para Infantry II | 4-5-3p |
| 1st Airborne Division / 1st Parachute Brigade | 2 | Para Infantry II | 4-5-3p |
| 1st Airborne Division / 1st Parachute Brigade | 3 | Para Infantry II | 4-5-3p |
| 1st Airborne Division / 4th Parachute Brigade | 10 | Para Infantry II | 3-4-3p |
| 1st Airborne Division / 4th Parachute Brigade | 11 | Para Infantry II | 3-4-3p |
| 1st Airborne Division / 4th Parachute Brigade | 156 | Para Infantry II |