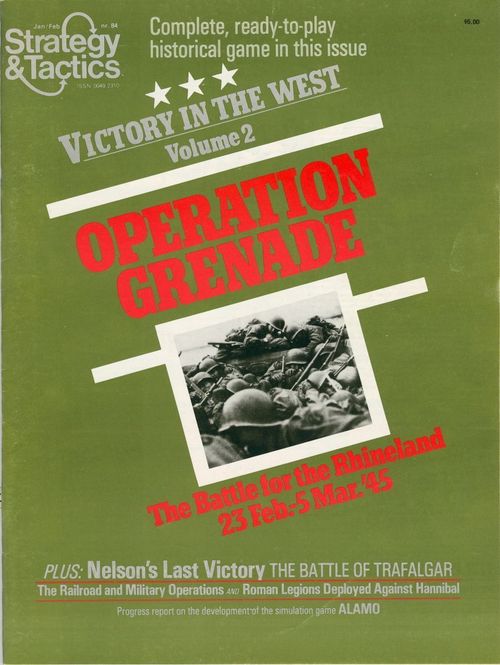
Operation Grenade: The Battle for the Rhineland 23 Feb. - 5 Mar. '45
Operation Grenade: The Battle for the Rhineland 23 Feb. - 5 Mar. '45 Rulebook
Table of Contents
Table of Contents
- Victory in the West Standard Rules
- [1.0] Introduction
- [2.0] Game Equipment
- [3.0] Glossary
- [4.0] Sequence of Play
- [5.0] Movement
- [6.0] Zones of Control
- [7.0] Stacking
- [8.0] Limited Intelligence
- [9.0] Combat
- [9.1] Which Units May Attack
- [9.2] Multiple Unit and Multi-Hex Combat
- [9.3] Effects of Terrain on Combat
- [9.4] Divisional Integrity
- [9.5] Combined Arms
- [9.6] Artillery Units
- [9.7] Combat at High and Low Ratios
- [9.8] Combat Resolution
- [9.89] Combat Results Table
- [9.9] Retreats and Advances After Combat
- [10.0] Cadre Units
- [11.0] Supply
- [12.0] Entrenchments
- [13.0] Air Power
- [14.0] Reinforcements
- Operation Grenade Exclusive Rules
Victory in the West Standard Rules
[1.0] Introduction
Victory in the West is a set of regiment/battalion level simulations of critical campaigns that occurred on the western German frontier in the fall and winter of 1944-1945. Each of the games in this set simulates an engagement between the Allied and German forces in a period that was to mark the beginning of the end for Hitler's Third Reich.
[2.0] Game Equipment
[2.1] The Game Maps and Charts
Each Game-Map is a 22" x 34" representation of the battlefields over which the simulated campaigns were fought. A hexagonal grid is printed on the maps to regulate movement and placement of playing pieces. Also printed on the map or in the rules are charts and various visual aids.
[2.2] The Playing Pieces
The cardboard pieces represent the actual military units that took part in the simulated engagements. Each "counter" contains certain information that is vital to the play of the game.
[2.21] How to Read the Counters
Each game's countermix includes forces from various nationalities and armies. Each nationality is portrayed by a color unique to that force.
[2.22] Sample Units
- Infantry Regiment (US): the front shows the unit designation, the Combat Class (A, B or C) with its Morale Rating, the unit size, the unit type, the Movement Allowance, and the set-up hex or reinforcement hex. The back is the Cadre side, showing a Combat Strength and a Movement Allowance.
- Tank Battalion (US): front only; the front shows the designation, Combat Strength, size, type and Movement Allowance. The back is blank.
- Artillery Brigade (German): front only; shows designations, set-up hex, Combat Strength, size, type and Movement Allowance. The back is blank.
- Strength Chit: the front shows the Combat Classes (A, B, C) and the Combat Strengths adjacent to them, and the Morale Rating. The back shows a different (weaker) set of Combat Strengths.
- Markers: Strength Chit, U.S. Support Marker (e.g., 12th Corps), Out of Supply, Isolated, Mud.
A Note on Unit Designations and Types:
- In all games, a unit's designation plays an important role. Thus, it is absolutely necessary that Players familiarize themselves with the reading of unit designations. For the most part, a unit's regimental number (or, in the case of some smaller formations, its battalion number) is printed on the left-hand side of the counter opposite the unit's type classification. The numbers across the top of each counter are given in the sequence division/corps (or, in the case of corps level troops, simply by corps number).
- In the game Patton's Third Army, a German unit belonging to the Metz garrison has the letter "M" printed on its left hand side, opposite its type symbology.
- A unit's size plays an important role in combat: II = Battalion; III = Regiment; X = Brigade.
[2.23] Summary of Unit Types
Unit types are shown on the counters by symbols: Tank; Mech Infantry; Reconnaissance; Self-Propelled Artillery; Non-Mechanized Infantry; Artillery; Anti-Tank.
[2.3] Parts Inventory
- 1 22" x 34" game-map
- 1 200 die-cut counter-sheet
- 1 8 page standard rules booklet
- 1 4 page exclusive rules booklet
- 2 6-sided dice (non-subscription edition only)
- 1 Game box assembly (non-subscription edition only)
[3.0] Glossary
Combat Class: A letter (A, B, or C) expressing the relative size of a unit in terms of manpower.
Combat Strength: A quantification of a unit's strength in attack and defense.
Morale Level: A quantification of a unit's skill in combat; the higher the number, the greater the chance of the unit being strong.
Movement Allowance: A quantification of a unit's mobility expressed in Movement Points.
Strength Chit: A marker carried under most combat units that determines the Combat Strength of the unit "carrying" the chit. Strength chits are always hidden from the Enemy Player except at the moment of combat.
[4.0] Sequence of Play
[4.1] The Game-Turn
Each game is played in Game-Turns, each of which consists of two Player-Turns (one Allied and the other German). The Player whose Player-Turn is in progress is termed the Phasing Player.
[4.2] Game-Turn Sequence Outline
Each Game-Turn must proceed strictly as described in the following Game-Turn outline:
A. ALLIED PLAYER-TURN
- Mutual Supply Determination Phase: Both Players determine the supply status of all their units on the map.
- Movement Phase
- A. Tactical Movement Segment: The Allied Player may move all of his eligible units by employing tactical movement.
- B. Strategic Movement Segment: The Allied Player may move all of his eligible units by employing strategic movement. (No unit may move both tactically and strategically in the same Player-Turn.)
- Combat Phase: Allied units must attack adjacent German units as per the combat rules.
B. GERMAN PLAYER-TURN
- Mutual Supply Determination Phase: As in Allied Player-Turn.
- Movement Phase: As in Allied Player-Turn, except German units may move.
- Combat Phase: As in Allied Player-Turn, except German units attack.
C. GAME-TURN INDICATION STAGE
The Game-Turn marker is advanced on the Game-Turn Track to indicate the start of a new Game-Turn.
[5.0] Movement
GENERAL RULE:
During the Movement Phase, the Phasing Player may move as many or as few units as he desires. Movement is calculated in terms of Movement Points, which are expended in varying amounts as a unit moves from hex to hex depending on terrain. As long as a unit's Movement Allowance is not exceeded in a single Movement Phase, it may be moved as many or as few hexes as desired. Unused Movement Points may not be accumulated or transferred to another unit. Movement is inhibited by the presence of Enemy units. A unit's movement may also be affected by whether that unit is mechanized or non-mechanized, by its supply status, and by whether it is executing tactical or strategic movement.
PROCEDURE:
During the Movement Phase, the Phasing Player may move his units in any order he wishes. Eligible units are moved individually, tracing a path of contiguous hexes through the hexgrid. Once a Player begins moving a particular unit, he must complete its movement before any other unit is moved. Units expend Movement Points from their Movement Allowance for each hex entered (or hexside crossed) according to the type of terrain in the hex.
CASES:
[5.1] How to Move Units
[5.11] During a Movement Phase, all, some or none of the Phasing Player's units may be moved. Movement Point costs are summarized on the Terrain Effects Chart (5.62).
[5.12] Combat may never occur during the Movement Phase.
[5.13] During his Movement Phase, the Phasing Player must decide if each of his units will move as tactically or strategically, if they move at all (see 5.4 and 5.5).
[5.2] Movement Inhibitions
[5.21] A unit may never enter a hex occupied by an Enemy unit.
[5.22] A unit must stop immediately upon entering an Enemy-controlled hex (see 6.0) and may move no further during that Movement Phase. However, a unit may leave an Enemy-controlled hex at the beginning of its Movement Phase by expending one-half of its Movement Allowance (round fractions down) in addition to the cost of the terrain in the hex entered. Such a movement may only be accomplished if the unit moves directly into a hex that is not Enemy-controlled. Furthermore, a unit may never enter another Enemy Zone of Control in the Phase in which it exits an Enemy-controlled hex.
[5.23] A unit may expend all, some, or none of its Movement Points in a single Movement Phase.
[5.24] Advances or retreats due to combat are not movement and do not expend Movement Points.
[5.25] As long as it does not move from one Enemy Zone of Control to another, a non-mechanized unit may always move at least one hex per Friendly Movement Phase, even if it does not possess enough Movement Points to accomplish this movement.
[5.3] Unit Movement Classes
[5.31] Each unit belongs to one of two movement classes: mechanized or non-mechanized. Mechanized units are tank, mechanized infantry, self-propelled artillery, or reconnaissance. Non-mechanized units include all other types.
[5.32] Mechanized and non-mechanized units pay different Movement Point costs for each hex entered or hexside crossed (see 5.62).
[5.4] Tactical Movement
[5.41] In a Friendly Movement Phase, a given unit may employ either tactical or strategic movement, but never both. When using tactical movement, a unit may enter Enemy Zones of Control and perform combat in the ensuing Combat Phase.
[5.42] A unit using tactical movement employs its printed Movement Allowance and the Movement Point cost for each type of hex entered (or hexside crossed) as summarized on the Terrain Effects Chart.
[5.43] Any unit which enters a hex through a hexside crossed by a road while employing tactical movement may ignore the normal Movement Point cost of that hex (and hexside, if applicable) and pay one Movement Point only to enter the hex.
[5.44] The Tactical Movement Segment is the first Movement Segment in a Player's Movement Phase. However, Players are not obligated to adhere rigidly to the sequence of moving units first tactically and then strategically. The sequence is structured in this fashion simply to help Players remember how units have been moved. Units may be moved by either method in any order the Phasing Player desires.
[5.5] Strategic Movement
[5.51] In a Friendly Movement Phase, a given unit may employ either tactical or strategic movement, but never both. A unit may only employ strategic movement if it remains at least three hexes away from Enemy units at all times during the Movement Segment (including at the start and at the end of the Segment). In order to count the distance from an Enemy unit to a moving unit, count from the Enemy unit's hex (exclusive) to the moving unit's hex (inclusive).
(An example diagram shows a permissible execution of strategic movement. Note that if the moving unit began the Segment in hex A, or moved into hex A during the course of the Segment, strategic movement would not be permitted.)
[5.52] A unit using strategic movement employs its printed Movement Allowance and the Movement Point cost for each type of hex entered (or hexside crossed) as summarized on the Terrain Effects Chart. However, units employing strategic movement may use the Movement Point bonuses provided by roads. For example, a mechanized unit moving along a road would only spend 1/3 of a Movement Point per hex entered when employing this type of movement. However, note that a road benefit is only provided if a unit enters a hex through a hexside containing a road feature.
[5.6] Effects of Terrain on Movement
[5.61] Mechanized units may not cross river hexsides unless these hexsides are traversed by roads. This movement may be accomplished either tactically or strategically.
[5.62] Terrain Effects Chart (see charts and tables)
[5.7] Effects of Other Friendly Units on Movement
[5.71] A Friendly unit may move through hexes occupied by other Friendly units at no additional Movement Point cost. There is no limit to the number of Friendly units that may be moved through a particular hex during a Movement Phase. However, there are limitations with regard to the number of Friendly units that may end the Movement Phase "stacked" in the same hex (see 7.1).
[5.72] Friendly-controlled hexes never interfere with the movement of Friendly units.
[6.0] Zones of Control
GENERAL RULE:
The six hexes immediately surrounding a unit (or stack) constitute that unit's Zone of Control. Zones of Control affect movement, combat, and supply. Hexes upon which units exert Zones of Control are called "controlled hexes."
CASES:
[6.1] Which Units Exert Zones of Control
All units exert Zones of Control except cadre, artillery, and battalion-size units.
[6.2] Effectiveness of Zones of Control
[6.21] Any unit that exerts a Zone of Control exerts it at all times during the Game-Turn (Exception: See Case 9.97).
[6.22] A unit never pays an additional cost to enter an Enemy-controlled hex. However, units do pay a Movement Point penalty to leave an Enemy-controlled hex (see 6.32).
[6.23] No terrain ever affects Zones of Control. There is no additional effect in having more than one unit exert its Zone of Control into a given hex.
[6.3] Zones of Control and Movement
[6.31] All units must cease movement immediately upon entering an Enemy Zone of Control. Such units may move no further during the Movement Phase.
[6.32] A unit occupying an Enemy-controlled hex at the beginning of its Movement Phase may leave that hex, but only if it moves directly into a hex that is not Enemy-controlled. Units may not move directly from one Enemy-controlled hex to another, except as a result of combat. When a unit exits an Enemy-controlled hex at the beginning of the Movement Phase, it must expend one-half of its Movement Allowance (round fractions down) plus the terrain cost of the hex entered. If a unit's Movement Allowance has been reduced due to supply, this Movement Point penalty is equal to one-half the unit's modified (not printed) Movement Allowance. Remember that if a unit exits an Enemy Zone of Control in the Movement Phase, it may not enter another Enemy-controlled hex for the duration of this Phase.
[6.33] A unit may move without penalty into and through hexes that are adjacent to units that do not exert Zones of Control.
[6.34] Friendly units do not negate Enemy Zones of Control in the hexes they occupy for the purposes of movement.
[6.4] Zones of Control and Combat
Friendly units do not negate Enemy Zones of Control in the hexes they occupy for the purposes of tracing paths of retreat (see 9.9).
[6.5] Zones of Control and Supply
[6.51] An Enemy-controlled or Enemy-occupied hex blocks the tracing of Friendly supply through that hex (Exception: See Case 6.52).
[6.52] Friendly units (not Friendly Zones of Control) negate the presence of Enemy Zones of Control in the hexes they occupy for the purposes of tracing supply.
[7.0] Stacking
GENERAL RULE:
A maximum of three units may end the Friendly Movement Phase stacked in the same hex.
CASES:
[7.1] Stacking Restrictions
[7.11] Stacking restrictions apply only at the end of a Friendly Movement Phase. During a Movement Phase, Friendly units may freely enter and pass through stacks to an unlimited degree. If stacks of units exceed stacking restrictions at the end of a Friendly Movement Phase, the excess must be eliminated by the owning Player.
[7.12] There is no Movement Point cost to stack or unstack.
[7.13] A cadre unit counts as a battalion-size unit, regardless of its original size.
[7.2] Stacking and Combat
[7.21] No more than one regiment or brigade-sized unit may attack from or be attacked in any single hex during a given Combat Phase. (Exception: Up to 3 artillery brigades may provide "Support" [see 9.6] from the same hex). All battalion-sized units in a hex must always attack or be attacked.
[7.22] When more than one regiment or brigade is in a single hex, the owning Player may choose which units will participate in combat immediately before the resolution of the combat. Units that do not participate in any combat but are in a hex where other units attack from or are attacked are affected by the combat results. Non-participating units may not attack nor be attacked for the duration of the Combat Phase, although they may be used to fulfill divisional integrity requirements (see 9.4).
[8.0] Limited Intelligence
GENERAL RULE:
Many combat units do not have Combat Strengths printed on their counters. Rather, these units are of indeterminate strength until they have participated in combat for the first time during a game. This strength is a function of a unit's Combat Class and Morale Rating (both printed on the counter itself). The unit's strength will be represented on a numbered chit (chosen at the moment of first combat), which is carried underneath its "parent" combat unit until it is eliminated as a result of combat. In general, the Enemy Player may never examine an owning Player's chit unless the owning Player's unit is about to perform combat.
PROCEDURE:
At the moment in which a regiment or brigade-sized combat unit is first performing combat (either attacking or defending), the owning Player must pick a strength chit for this unit. The Player determines the morale of the unit in question and picks a strength chit from the corresponding morale pool. This strength chit is immediately placed underneath the combat unit. The owning Player determines the unit's combat class and locates this letter on the unit's strength chit. The number immediately adjacent to this letter on the strength chit is the Combat Strength of the unit in question.
CASES:
[8.1] Combat Classes
Regimental and brigade-sized combat units belong to a specific combat class. A combat class is simply a letter which appears on a combat unit counter indicating in very general terms the size of the unit in question. Both Players possess units of combat classes "A" (largest), "B," and "C" (smallest).
[8.2] Morale Ratings
Regimental and brigade-sized combat units possess an individual morale rating. A morale rating is a number which appears on a combat unit counter indicating in very general terms the capabilities of the unit in question. Both Players possess units with morale ratings of 1 (worst), 2, and 3 (best).
[8.3] Strength Chits
[8.31] A strength chit is simply a counter with a set of numbers and letters on both sides. One of these numbers will represent the Combat Strength of a regimental or brigade-size combat unit that is about to engage in combat for the first time in the game. The letters represent the combat classes of the potential "parent" unit which "owns" the strength chit when chosen. From the moment a strength chit is picked, it must remain underneath its parent combat unit until this unit is eliminated or reduced to cadre status due to combat. Once a unit has had a strength chit picked for it, it may not own another for the remainder of the game.
[8.32] Both Players possess units of three different morale ratings (1, 2, and 3). Each one of these states of morale has a set of differently numbered strength chits. Before the start of the game, each one of these different sets of strength chits should be separated and placed in their own morale pool - preferably in a wide-mouthed cup, but anything that can hold each entire set is acceptable. Of course, it would be wise for the Players to keep each morale pool separated by rating even when the game is not being played.
[8.33] When a regimental or brigade-size unit is engaging in combat for the first time, the owning Player must choose a strength chit at random from the "morale pool" corresponding to the morale rating of the combat unit in question. The chosen strength chit should be immediately placed underneath the parent combat unit.
[8.34] In order to determine the Combat Strength of a unit that possesses a strength chit, it is necessary to compare the unit's combat class (see 8.1) with the corresponding letter on the unit's strength chit. The number adjacent to this letter on the chit is the Combat Strength of the unit in question.
[8.35] Note that each strength chit is front and back-printed in a different color. One side is the "stronger" side and the other side is the "weaker" side. When a strength chit is first chosen for a combat unit, it is always placed with its stronger (front) side showing. The weaker (reverse) side is used if the unit is "reduced" due to combat.
[8.36] Due to certain stacking-combat restrictions (see 7.2), some units may be adjacent to Enemy units but are unable to attack or defend. Such units would not have strength chits picked for them.
Example: The German infantry regiment 126/48/13 is performing combat for the first time. The unit is morale level 1, so the German Player picks a chit from morale pool #1. The chit is immediately placed underneath 126/48/13 with the front side facing up. Since 126/48/13 is combat class C, the combat strength of this unit is 3.
[8.4] Limited Intelligence
[8.41] The owning Player must pick strength chits for his applicable units after his attack (or the Enemy Player's attack) has been declared (i.e., immediately before the die roll resolving each combat takes place). Once a unit has been committed to an attack (or has been attacked), it may not be withdrawn from the combat due to a "low" chit pick, even if the ensuing ratio proves to be unfavorable to the owning Player.
[8.42] Obviously, neither Player will know the exact strength of any of his units that are about to perform combat for the first time (although rough estimates are possible from a unit's combat class and morale rating). After a unit receives a strength chit, the owning Player is always free to lift up the parent combat unit to examine the strength chit beneath in order to determine the unit's Combat Strength. This examination may occur at any point during the Game-Turn, as frequently as the owning Player desires. However, the Enemy Player may never lift up the owning Player's combat units in order to examine their strength chits unless those units have been committed to combat. This examination may occur only at the moment of combat, immediately before the combat ratio is determined. After the die roll resolving the combat takes place, the Enemy Player may not examine the owning Player's strength chits until those chits' parent units are again involved in combat. Note: It is strictly forbidden for either Player to ever write down the strength of a "tried" Enemy unit on a piece of scrap paper.
[8.5] Stacking and Strength Chits
[8.51] Strength chits never count for stacking purposes. A combat unit and its companion strength chit are considered a single unit in themselves.
[8.52] Due to combat losses, a unit may be reduced to cadre status, and its strength chit removed from play (see Section 10.0). When a strength chit is removed from play (due to any circumstance), it is always placed back in the same morale pool from which it had come. It may be chosen later in the game at random by either Player.
[8.6] Units Without Strength Chits
Cadre, battalion-size, and artillery units never use strength chits. These units have constant Combat Strengths, obviating the need for strength chits (their Combat Strengths are printed directly on the counter). Since their strengths are constant, it is unnecessary to "hide" them from the Enemy Player.
[9.0] Combat
GENERAL RULE:
Subject to the stacking-combat restrictions of Case 7.2, Friendly units which are adjacent to Enemy units during the Combat Phase must attack those Enemy units. A given unit possesses a Combat Strength which is used when attacking and defending. This strength may not be divided among different combats. The Phasing Player is termed the attacker and the non-Phasing Player is termed the defender regardless of the overall strategic situation. The outcome of any given attack may be affected by terrain, whether the attacking and/or defending units have divisional integrity, whether the attacker is eligible for a combined arms bonus, whether either Player allocates artillery support or air support, and by the supply status of the attacking and defending units. Combat results include losses to involved units (listed in terms of "steps"; see 9.8) and/or retreats.
PROCEDURE:
Total the Combat Strengths of all units participating in a given combat by examining the strength chits possessed by the applicable units or the Combat Strengths printed directly on their counters. Next, the defending Player does the same for all of his participating units. Compare the total Combat Strength of the attacker to the total Combat Strength of the defender and state this comparison as a probability ratio: attacker's strength to defender's strength. Round the ratio down in favor of the defender to conform to the simplified ratio columns found on the Combat Results Table (CRT). Next, determine the terrain in the hex occupied by the defender. Cross-index this terrain line with the proper ratio column on the CRT. Make whatever shifts in the ratio column that are necessary due to divisional integrity, ground support, hilltops, air power, or combined arms. To resolve the attack, roll two dice and read the result on the appropriate line under the proper ratio. Apply the result immediately before resolving any other attacks. Separate combats may be resolved in any order the Phasing Player desires, so long as all of his necessary combats are resolved at some time during the Combat Phase.
CASES:
[9.1] Which Units May Attack
[9.11] Every non-Phasing unit adjacent to a Phasing unit must be attacked by some Phasing unit during that Combat Phase (Exception: see 7.2 and 9.13).
[9.12] All the Phasing Player's units ending their Movement Phase adjacent to Enemy units must attack some unit during the ensuing Combat Phase (Exception: see 7.2 and 9.13). The Phasing Player may choose which Friendly units will attack each adjacent Enemy unit so long as all adjacent, Enemy-occupied hexes are attacked.
[9.13] Any units occupying town or entrenchment hexes (German units only - see 12.0) are not obligated to attack adjacent Enemy units during the Friendly Combat Phase. If they choose to attack adjacent Enemy units, they are only obligated to attack one adjacent stack, although they may attack more if the owning Player desires. Enemy units adjacent to Friendly units in towns or entrenchments are still obligated to attack those Friendly units during the Enemy Combat Phase (unless of course, the Enemy units also occupy a town or entrenchment hex).
[9.14] No unit may attack more than once per Combat Phase, and no unit may be attacked more than once per Combat Phase.
[9.2] Multiple Unit and Multi-Hex Combat
[9.21] If a Phasing Player's unit is adjacent to more than one Enemy unit, it must attack all those adjacent Enemy units (subject to stacking restrictions) that are not engaged by some other attacking unit (Exception: see 7.2 and 9.13).
[9.22] Units in two or more different hexes may combine their Combat Strengths to attack a single, adjacent hex.
[9.23] All units in a given hex must be attacked as a single, combined Combat Strength. The defender may not withhold a unit in a hex under attack except due to stacking restrictions (see 7.2).
[9.24] When a single hex contains more than one unit, each of those units may attack a different hex at the owning Player's discretion subject to the restrictions of Case 7.2.
[9.25] A single attack may involve numerous attacking and defending units. However, for an attack to be resolved as a single combat, all attacking units must be adjacent to all defending units.
[9.26] If several units subject to a single attack are defending in more than one hex, use the terrain line on the CRT most favorable to the defender.
[9.3] Effects of Terrain on Combat
[9.31] Except in one instance (see 9.32), there are no modifications to a unit's Combat Strength due to terrain. Instead, terrain effects are "integrated" into the CRT. After determining the combat ratio, simply determine the terrain type occupied by the defending units and locate the corresponding line on the CRT.
[9.32] If a unit is attacked entirely across river hexsides, its Combat Strength is doubled. If such a unit also occupies an entrenchment hex (see 12.0), it is tripled in strength.
[9.33] If, at the instant a combat is being resolved, a Player has a unit occupying a hilltop hex that is within two hexes of a unit defending in the combat, the Player receives a hilltop combat bonus. When determining the distance between the hilltop and the defending hex, count from the hilltop (exclusive) to the defending hex (inclusive). Note: The hilltop combat bonus is available to both the attacker and defender; however, see 9.35.
[9.34] Each occupied hilltop hex may provide as many hilltop combat bonuses as there are defending stacks within a two hex radius. An occupied hilltop hex may provide a hilltop combat bonus even if it is in an Enemy Zone of Control at the instant of combat resolution. However, an occupied hilltop hex may never provide a hilltop bonus for itself if it is being attacked.
[9.35] A Player who is permitted a hilltop combat bonus may "shift" the combat ratio one column in his favor. (If a Friendly unit is defending within two hexes of an occupied hilltop, shift the ratio one column to the left; if an Enemy unit is defending within two hexes of an occupied hilltop, shift the ratio one column to the right.) A maximum of one hilltop combat bonus per combat is allowed. If both the attacking and the defending Player are eligible for a hilltop combat bonus, only the defending Player receives it.
[9.4] Divisional Integrity
Both Players may receive a divisional integrity combat bonus in the attack or defense.
[9.41] If, at the moment of resolution of an attack, the Phasing Player has all the regiments of a particular division adjacent to the Enemy units that are the subject of the attack, the Player receives a divisional integrity combat bonus. It is not required that all these regiments actually participate in the attack (although at least one must participate); it is only necessary for them to be adjacent to the Enemy units at the moment of combat resolution. Regiments fulfilling this requirement may be stacked in the same hex.
[9.42] If a regiment of the non-Phasing Player is being attacked and, at the moment of resolution of this combat, it is adjacent to or stacked with another regiment of the same division, the non-Phasing Player receives a divisional integrity combat bonus.
[9.43] When a divisional integrity combat bonus is applied to an attack, shift the final ratio column one to the right on the CRT for each participating division fulfilling the requirements of Case 9.41. When a divisional integrity combat bonus is applied to a defense, shift the final ratio column one to the left on the CRT. (Note that these shifts are in addition to any other shifts that may be applied to a combat.)
[9.44] The maximum number of shifts that may be awarded in an attack due to divisional integrity is two. The maximum number of shifts that may be awarded to a defense due to divisional integrity is one.
DIVISIONAL INTEGRITY REQUIREMENTS: (a diagram shows the unit compositions of an Infantry Division (full), an Armored Division (U.S.), and a Panzer or Panzergrenadier Division (German).)
Note: In order to fulfill divisional integrity, it is not necessary for German panzer or panzergrenadier divisions to employ their component tank battalions.
[9.5] Combined Arms
[9.51] Both Players are eligible to receive a combined arms combat bonus when attacking. In order to receive such a bonus, the attacking Player must possess a stack of units containing both a tank unit and a non-tank unit (Exception: see 9.52).
[9.52] Any unit whose combat class identification letter is parenthesized automatically receives one combined arms bonus if it participates in an attack. (Exception: see 9.54). Such a unit does not have to have a tank unit stacked with it in order to receive the bonus. However, the cadre side of a unit whose combat class is parenthesized does not automatically receive the combined arms bonus.
[9.53] For each attacking stack that meets the requirements of Case 9.51, the attacking Player may shift the ratio column one to the right on the CRT.
[9.54] If a stack of defending units possesses at least one non-tank and one tank (or anti-tank) unit, then the attacking Player may never receive any combined arms bonuses against this stack. This is known as combined arms defense, although no shifts are awarded on the CRT - it simply negates combined arms attack. Similarly, no combined arms shifts may ever be awarded against German units defending in an entrenchment hex (see 12.22) or a stack that contains a unit with a parenthesized combat class (see 9.52).
[9.55] If an attack is being made entirely across river hexsides, the maximum number of combined arms bonuses that may be awarded for this attack is one.
Combined Arms Example: 10/5/20 and 737/12 are eligible for a combined arms bonus because one is a tank unit and the other is a non-tank unit.
[9.6] Artillery Units
Artillery units may be used in combat in two ways: either normally (using their printed Combat Strengths) or "in support" (providing more advantageous combat ratios to units within range).
[9.61] An artillery unit that is adjacent to Enemy units in either Player's Combat Phase must employ its printed Combat Strength in combat (be it an attack or defense). It may not employ a "support bonus" (see 9.62).
[9.62] If, at the beginning of any Combat Phase, an artillery unit is not adjacent to any Enemy units but is within three hexes of an Enemy or Friendly unit that is defending in a combat, the owning Player may apply a support bonus to that combat. Each support bonus applied indicates that the subsequent combat is resolved one column in the owning Player's favor on the CRT (to the left if a Friendly unit is defending or to the right if an Enemy unit is defending).
[9.63] In order to provide a support bonus, an artillery unit must be part of the same corps formation as at least one unit in the Friendly attacking or defending stack.
[9.64] Each artillery unit may provide a maximum of one support bonus per Combat Phase. After it is used, the artillery unit should be flipped over to remind the Players that it may not be used in a support role again for the remainder of the Phase. The total number of support bonuses that may be applied per combat by a Player is two if an Enemy stack is defending or one if a Friendly stack is defending. It is possible for both Players to apply support bonuses to the same combat. (In all combats, the attacking Player first announces if he is applying any support, and then the defending Player. This announcement is made before the revelation of strength chits - if any.)
[9.65] If, due to advances or retreats after combat, an artillery unit that began the Combat Phase not adjacent to an Enemy unit finds itself adjacent to such a unit, the artillery unit may still apply support bonuses to units within range for the remainder of the Combat Phase.
[9.7] Combat at High and Low Ratios
Any attacks made at ratios lower or higher than those printed on the CRT use the lowest or highest ratio columns provided by this Table. Any shifts in the ratio column are made from the lowest or highest ratio column. No ratio may ever be reduced voluntarily.
[9.8] Combat Resolution
[9.81] Each unit consists of a number of "steps" of strength, indicating the amount of losses that the unit may take before being eliminated from play. A step loss will reduce the unit's Combat Strength (or, in some cases, eliminate it from play). Most units consist of three steps of strength. Some smaller units may consist of only two steps. All artillery, cadre, and battalion-size units consist of a single step only.
[9.82] The following is a summary of the number of steps possessed by each unit-type:
- Each combat unit whose original strength chit possesses a Combat Strength of three or more has three steps of strength. When such a unit takes a one step loss, its strength chit is flipped over to its reduced side. Of course, its new Combat Strength will be smaller than the original. When the unit takes a two-step loss (or it takes a one step loss after having previously taken a one step loss), the strength chit is removed from play entirely (see 8.52) and the parent combat unit is flipped to its cadre side (see 10.0). When a unit worth three steps loses three steps in combat, its strength chit is removed from play and the parent combat unit is eliminated.
- Each combat unit whose original strength chit has a Combat Strength of two or less has two steps of strength. When such a unit takes a step loss, its strength chit is removed from play and the parent combat unit is flipped over to its cadre side. (Note that when flipped over, such a unit's strength chit will indicate zero strength - this is not considered a step.) When a unit worth two steps takes two step losses in combat, its strength chit is removed from play and the parent combat unit is eliminated.
- All artillery, cadre, and battalion-size units consist of a single step of strength only. If any of these units are forced to lose a step in combat, they are immediately eliminated from play. They never possess strength chits.
[9.83] All combat results are expressed in terms of steps lost and/or hexes retreated. The letters "A" and "D" on the CRT stand for attacker and defender, respectively.
[9.84] All combat results are expressed in terms of a number(s) preceded by the letters "A" or "D."
[9.85] All numbers in the combat result which are parenthesized indicate mandatory step losses for the affected Player's units. Those numbers which are not parenthesized signify that the affected unit(s) must retreat the indicated number of hexes and/or take a step loss equal to the unparenthesized number. All attacking units are subject to any "A" result. All defending units are subject to any "D" result. Thus, if a Player elects to retreat, all of his units involved in a combat must retreat. If a Player elects to (or must) incur step losses, any one (or more) of his units involved in the combat may be reduced as long as the total number of steps lost equals the requirement.
Example: A German stack receives a D2(2) result. Immediately, the German Player reduces two units in the stack by one step each. (Alternatively, he could have chosen to reduce one unit by two steps instead.) Next, the German Player must choose one of the following options:
- He may take two more step losses and not retreat (only, of course, if he has these steps available to him in the stack).
- He may retreat two hexes (see 9.9).
- He may lose one step of strength and retreat one hex (or vice versa).
[9.86] If the owning Player is required to take step losses, he must first take these losses from those units that actually participated in the combat. If there are not enough steps available among these units, he may take losses from units that are stacked on the same hex but did not participate in the combat.
[9.87] If the owning Player is required to take step losses due to his own attack, he must first take these losses from any of his tank units that participated in the attack. If the attacking Player possessed no tank units, he is under no further restrictions with regard to the manner in which these losses are applied.
[9.88] Combat Results Table (see map)
[9.89] Combat Results Table
Combat ratios are attacker to defender. The three lines of ratios below correspond to the Defender's Terrain: first line = Hilltop, City, Level 4-6; second line = Woods, Swamp, Town, Level 2-3; third line = Clear, Level 1. Results in bold are Breakthroughs.
| Dice | Hilltop, City, Level 4-6 | 1-3 | 1-2 | 1-1 | 2-1 | 3-1 | 4-1 | 5-1 | 6-1 | 7-1 | 8-1 | 9-1 | 10-1 | 11-1 |
|---|---|---|---|---|---|---|---|---|---|---|---|---|---|---|
| Woods, Swamp, Town, Level 2-3 | 1-4 | 1-3 | 1-2 | 1-1 | 2-1 | 3-1 | 4-1 | 5-1 | 6-1 | 7-1 | 8-1 | 9-1 | 10-1 | |
- The letters preceding the results indicate to whom the results apply. A: Attacker; D: Defender. Ratios that are greater than the right-hand column are resolved using the right-hand column; ratios that are less than the left-hand column are resolved using the left-hand column.
- Unparenthesized numbers indicate the number of hexes the player owning the affected units must retreat those units and/or the number of steps lost from the owning player's units (see 9.85). The parenthesized number is the number of mandatory step losses incurred by the owning player's units. These losses must be taken immediately, before any retreat result is fulfilled.
- A result in bold type indicates a Breakthrough (see 9.97). All retreating units lose their Zones of Control for the duration of the Combat Phase. In addition, victorious units may advance after combat one hex more than the normal permissible advance.
Note that all shifts are cumulative, and that the exclusive rules for each game may modify these shifts. Note also that not all terrain listed on the Combat Results Table is present in every game in the Victory in the West Series. Consult the map terrain key of the game being played. For instance, hilltops, woods, towns, and clear are not considered terrain in Sicily (although a defender in a town receives a column shift to the left).
SUMMARY OF SHIFTS TO THE RATIO COLUMNS
A. Shift one column to the right (if employed in the attack) or shift one column to the left (if employed in the defense):
- Divisional integrity (9.4).
- Artillery support bonus (9.62).
- Hilltop combat bonus (9.3).
- Ground support (13.1).
- Naval gunfire support (Sicily, 25.3).
B. Shift one column to the right:
- Combined arms combat bonus (9.5).
C. Shift one column to the left:
- If mud Game-Turn is in effect (Patton, 20.2).
- If defender is in a town hex (Sicily, 25.16).
D. Shift applicable number of columns right or left:
- For any difference in elevation (Sicily, 25.14).
[9.9] Retreats and Advances After Combat
[9.91] A Player may retreat his units due to an unparenthesized combat result (see 9.85). All retreats are expressed in hexes, not Movement Points. Retreats are always conducted by the owning Player. When a retreat is called for, move the stack as a whole (not each unit individually) according to the following priorities:
- To a hex that is the maximum possible distance from any Enemy unit.
- To a non-Enemy-controlled hex.
In accordance with these priorities, the owning Player may retreat his units in any way he sees fit as long as no retreating stack enters the same hex more than once.
[9.92] A unit may retreat through Enemy Zones of Control (see 6.4). However, for each Enemy-controlled hex entered, the owning Player must lose one step of strength from any one unit in the retreating stack.
[9.93] A unit may retreat in violation of stacking limitations so long as this situation is corrected by the end of the next Friendly Movement Phase. However, if a unit retreats onto a Friendly occupied hex and that hex then undergoes an attack in the same Phase, the retreated unit may never add its Combat Strength to those of the units already in the hex. If units in that hex then suffer an adverse combat result, the previously retreated unit is eliminated from play (its step losses do not count in the determination of step losses in the new combat).
[9.94] Whenever a stack is forced to retreat as a result of combat, it will leave a path of vacant hexes behind it called the path of retreat. Any victorious units which participated in the combat (or which are stacked with units which participated) are allowed to advance along this path of retreat and sometimes deviate from it (see 9.95). An advance after combat may not exceed the number of hexes the defeated unit retreated (Exception: see 9.97). If a defending or attacking unit is eliminated due to combat, the victorious units may freely advance the number of hexes remaining in the eliminated unit's retreat result obligation.
[9.95] Advances after combat are conducted as follows:
- Move each victorious unit individually. The first hex entered must be the hex formerly occupied by the retreating units.
- All units except those bearing a tank or mechanized infantry symbol may advance the permissible number of hexes along the path of retreat just conducted by the retreating Player. This move is conducted hex-by-hex and may not deviate from the path of retreat. If an Enemy unit retreats through an Enemy-occupied hex, the advance along the path of retreat would have to cease prior to that hex.
- Units bearing a tank or mechanized infantry symbol may now advance the permissible number of hexes. These units may deviate from the path of retreat - they are not obligated to strictly follow it (except for the first hex - see 9.95 "1").
- Regardless of what type the advancing units are, they must halt their advance immediately upon entering an Enemy Zone of Control, exclusive of the first hex entered in this advance. Victorious units are never required to advance. They may halt their advance at any time during the course of the advance.
[9.96] Mechanized infantry or tank units may never advance or retreat across river hexsides unless those hexsides are traversed by a road. Units forced to retreat off the map are eliminated.
[9.97] Some combat results on the CRT are in bold face. These are considered particularly successful attacks and are labeled breakthroughs. Breakthrough attacks differ from normal attacks in the following ways:
- The attacking Player determines the path of retreat.
- All units retreating due to this combat lose their Zones of Control for the duration of the current Combat Phase.
- The defending Player may not take step losses in lieu of retreating (unless he is completely surrounded by Enemy Zones of Control).
- The attacking Player may advance all his participating units one extra hex more than the advance normally permitted by this result (if the units are non-tank, non-mechanized infantry, they may deviate from the path of retreat in the last hex advanced into).
[10.0] Cadre Units
GENERAL RULE:
Every non-artillery or battalion-size combat unit is back-printed with a cadre side. All cadres have a printed Combat Strength and Movement Allowance (they do not employ a combat class or a morale rating). Cadres are formed when units take step losses in combat. If a unit originally consisted of three steps of strength, the cadre side of the parent unit is considered the third step of strength. Similarly, if a unit originally was worth two steps of strength, the cadre side is considered the second step. All cadre units themselves are worth one step of strength. Cadres never exert Zones of Control, and are considered a battalion-size unit for stacking purposes.
[11.0] Supply
GENERAL RULE:
Units must be considered in supply in order to use their Combat Strengths and Movement Allowances without penalty. There are three possible states of supply: in supply, out of supply, and isolated.
PROCEDURE:
Supply determination for all purposes is made by both Players during the Mutual Supply Determination Phase of each Player-Turn. A unit in supply at the beginning of a Player-Turn is considered in supply at all times during that Player-Turn. A unit that is out of supply at the beginning of a Player-Turn is considered out of supply for the duration of the Turn, even if it moves back into supply during its Movement Phase.
CASES:
[11.1] Supply Lines
A supply line is defined as a path of continuous hexes traceable from a combat unit to a road hex, and then in turn from that road hex along a contiguous path of road hexes to a Friendly mapedge hex. None of these hexes may be Enemy-occupied or Enemy-controlled hexes (unless they are occupied by Friendly units). Terrain does not affect the tracing of supply lines.
[11.2] When a Unit Is "In Supply"
[11.21] In order for any combat unit to be in supply, the owning Player must be able to trace a supply line (see 11.1) six hexes (not Movement Points) or less in length to a road hex from that unit and, in turn, must be able to trace a supply line of contiguous road hexes of any length from this road hex to a "Friendly" mapedge road hex.
[11.22] Unless otherwise stated, the western mapedge is Friendly to the Allied Player and the eastern mapedge is Friendly to the German Player.
[11.3] When a Unit Is "Out of Supply"
[11.31] A unit is out of supply under the following circumstances:
- It is able to trace a supply line to a road hex, but this supply line is over six hexes in length, and/or...
- The road hex to which a supply line is traced is unable to trace a series of continuous road hexes to a Friendly mapedge.
[11.32] Place an Out of Supply marker on all units that are determined to be out of supply during the Mutual Supply Determination Phase.
[11.33] All units that are out of supply have their Combat Strengths and Movement Allowances decreased as follows:
- If the units are attacking, their individual Combat Strengths are halved (round fractions down).
- If the units are defending, their Combat Strengths remain the same.
- If the units are tank, mechanized infantry, or reconnaissance, their Movement Allowances are halved (round fractions down).
- If the units are not tank, mechanized infantry, or reconnaissance, their Movement Allowances remain the same.
Note: All units have a minimum Combat Strength of one.
[11.4] When a Unit Is "Isolated"
[11.41] A unit is isolated when it is completely unable to trace a supply line to a road hex. Place an Isolated marker on all units that are determined to be isolated during the Mutual Supply Determination Phase.
[11.42] All units that are isolated have their Combat Strengths and Movement Allowances decreased as follows:
- If the units are attacking, their Combat Strengths are one.
- If the units are defending, their final Combat Strengths are halved individually (round fractions down).
- If the units are tank, mechanized infantry, or reconnaissance, their Movement Allowances are three Movement Points.
- If the units are not tank, mechanized infantry, or reconnaissance, their Movement Allowances are halved (round fractions down).
[11.5] Automatic Supply
[11.51] All units which enter the map as reinforcements are automatically in supply during the first two Game-Turns in which they have entered the map.
[11.52] All units which occupy a Friendly mapedge hex (see 11.22) or a hex adjacent to a Friendly mapedge hex are automatically in supply.
[11.53] All German units which occupy entrenchment hexes (see 12.0) are automatically in supply.
[12.0] Entrenchments
GENERAL RULE:
Some hexes on the map are permanently designated as entrenchments. These hexes can only benefit the German Player.
CASES:
[12.1] Entering Entrenchments
There is no Movement Point penalty to enter an entrenchment hex. Entrenchment hexes are permanent. They may never be destroyed by either Player.
[12.2] Effects of Entrenchments
[12.21] German units defending in entrenchment hexes have their Combat Strengths doubled (if attacked exclusively across river hexsides, their Combat Strengths are tripled). It makes no difference what direction the attack on the entrenchment hex is coming from.
[12.22] Allied units participating in an attack against German units in entrenchment hexes may never receive a combined arms bonus (see 9.5).
[12.23] German units occupying entrenchment hexes are not obligated to attack adjacent Allied units during the German Combat Phase, although they may do so.
[13.0] Air Power
GENERAL RULE:
Each Player possesses a certain number of Air Points. Each Air Point may be used once per Game-Turn in a "ground support" role. During each Game-Turn, the owning Player must keep track of the employment of his Air Points on a separate sheet of paper. Air Points may never be eliminated.
CASES:
[13.1] Ground Support
[13.11] Both Players' Air Points may be used for ground support during either Player's Combat Phase. For each Air Point allocated by the Phasing Player to an attack, the combat ratio is shifted one column to the right on the CRT. For each Air Point allocated by the non-Phasing Player to a defense, the combat ratio is shifted one column to the left on the CRT. When using an Air Point, the owning Player need only state this fact aloud while noting its use on a separate piece of paper.
[13.12] A maximum of one Air Point may be allocated by each Player per combat.
[13.13] Air Points must be allocated by both Players to a combat before strength chits (if any) are revealed. The Phasing Player announces his Air Point allocations first, followed by the non-Phasing Player.
[14.0] Reinforcements
GENERAL RULE:
Both Players may receive reinforcements. These units appear during the owning Player's Movement Phase on the Game-Turn indicated on the particular game's Game-Turn Track. Each listing of reinforcements includes the designation of the reinforcing unit as well as its "entry hex."
CASES:
[14.1] Movement of Reinforcements
[14.11] During his Movement Phase, the owning Player places any scheduled reinforcements near the entry hex on the map called for. If more than one unit is scheduled to appear in the same entry hex during the same Game-Turn, these units are deployed off-map, one behind the other, with the lead unit poised adjacent to the entry hex. As each unit enters the map, it must pay the terrain cost for the type of terrain in the hex plus any additional cost for hypothetical hexes that it would have to traverse in order to enter this entry hex. These hypothetical hexes are considered to be of the same terrain type as the entry hex itself.
[14.12] It is permissible for reinforcements to employ strategic movement in their Game-Turn of entry as long as they remain at least three hexes away from Enemy units at all times during the Movement Phase.
[14.2] Restrictions
[14.21] If an entry hex is occupied or in the Zone of Control of an Enemy unit, the Phasing Player may bring his reinforcements onto the map within three (or more, if necessary) hexes of the original entry hex without delay.
[14.22] Reinforcements may be purposefully delayed by the owning Player for as long as he wishes.
Operation Grenade Exclusive Rules
[15.0] Introduction
Operation Grenade is a simulation of the US Ninth Army's February 1945 offensive in the Rhineland area of Germany. Each Game-Turn represents one day of real time and each hex represents approximately 2.4 miles across.
[16.0] Setting Up the Game
GENERAL RULE:
After Players have chosen sides, they may deploy their forces on the map. This may be performed by either following the instructions of this Section or by reading the set-up hexes listed on the counters themselves.
CASES:
[16.1] German Set-Up
(Hex number: units)
- 0112: 941/353/58
- 0110: 942/353/58
- 0310: 943/353/58
- 0410: 27/12/58
- 0510: 48/12/58
- 0609: 49/12/58
- 0709: 1156/363/81
- 0808: 1157/363/81
- 0908: 1158/363/81
- 1008: 1034/59/81
- 1207: 1035/59/81
- 1209: 1036/59/81
- 1307: 1150/183/12
- 1406: 1151/183/12
- 1506: 1152/183/12
- 1705: 1218/176/12
- 1605: 1219/176/12
- 1807: 1220/176/12
- 2108: 1224/190/2
- 2209: 1225/190/2
- 2510: 1226/190/2
- 1804: 22/8FJ/2
- 2006: 24/8FJ/2
- 0614: 9P/81, 33/9P/81, 244/9P/81
- 1412: 11P/81, 15/11P/81, 301/11P/81
- 0809: 403/81
- 0312: 407/58
- 2218: Pol/12
- 2521: 668/58
[16.2] US Set-Up
- 0407: 4Cav/7
- 0108: 13/8/7, 28/8/7, 121/8/7
- 0308: 413/104/7, 414/104/7, 415/104/7
- 0303: Hze/3A/7, Bd/3A/7, Hky/3A/7
- 0504: 329/83/19, 330/83/19, 331/83/19
- 0707: 115/29/19, 116/29/19, 175/29/19
- 0508: 117/30/19, 119/30/19, 120/30/19
- 0605: 113/19
- 0403: A/2A/19, B/2A/19, R/2A/19
- 0703: A/5A/13, B/5A/13, R/5A/13
- 1106: 333/84/13, 334/84/13, 335/84/13
- 1004: 11Cav/13
- 0906: 405/102/12, 406/102/13, 407/102/13
- 1703: A/8A/16, B/8A/16, R/8A/16
- 1305: 134/35/16, 137/35/16, 320/35/16
- 1403: 15Cav/16
- 0801: 313/79/16, 315/79/16
- 1504: 314/79/16
- 2004: 289/75/12
- 2306: 290/75/12
- 2507: 291/75/12
All remaining US tank and infantry battalions, artillery and self-propelled artillery brigades: Either stacked with or adjacent to any regimental or brigade-sized unit belonging to the same corps, but never in a German Zone of Control.
[17.0] Roer River Flood
GENERAL RULE:
Before the start of the game, the German player must declare the type of flood he wishes to create throughout the Roer River valley. He must choose one of two possible types of flood: a flash flood (17.1) or a gradual flood (17.2).
CASES:
[17.1] Flash Flood
[17.11] If a flash flood is declared by the German player before the start of the game, all hexes shaded to indicate that they are part of the Roer River Valley become swamp hexes, including towns. Except for roads, all other terrain features lying within the valley should be ignored.
[17.12] If a flash flood is declared, the game must begin on 17 February. Place the Start marker in this box on the Game-Turn Track, indicating this day as Game-Turn 1.
[17.13] If a flash flood is declared, the Roer is considered a normal river for the duration of the game. There is no difference between the upper Roer and the lower Roer.
[17.14] If a flash flood is declared, all units that are defending in hexes that were originally swamp hexes within the Roer valley use the CRT line entitled Hilltop when resolving this combat. However, these hexes are not considered hilltops for movement or observation purposes.
[17.2] Gradual Flood
If the German player declares a gradual flood, the date on which the game starts is subject to the US player's declaration of D-Day (18.0). When D-Day is declared on a particular date, the Start marker should be placed in the corresponding date on the Game-Turn Track, indicating this day as Game-Turn One. In the event of a gradual flood, all Roer River Valley hexes maintain their original terrain type throughout the game.
[18.0] Declaring D-Day (Gradual Flood Only)
GENERAL RULE:
If the German player declares a gradual flood, the US player is obligated to declare a day between 17 February and 24 February (inclusive) as D-Day (the day in which the game will begin). After D-Day is announced, the Start marker should be placed in the corresponding box on the Game-Turn Track, indicating this day as Game-Turn One. The US Player then rolls a single die in order to determine the current of the Roer River on D-Day, modifying this die roll depending on the date on which D-Day is declared.
CASES:
[18.1] Roer River Current
The US player must roll a single die after declaring D-Day, modifying this die roll according to the instructions of Case 18.12. No die roll may ever be modified above 6 or below 1.
[18.11] The following are the types of Roer River current that are created by the US player's die roll:
a. 5 or 6 (Torrent): If a unit is attacked exclusively across an upper Roer hexside, its Combat Strength is multiplied by five. If it is attacked exclusively across Roer hexsides, at least one of which is a lower Roer hexside, its Combat Strength is multiplied by four (five if in an entrenchment).
b. 2, 3, or 4 (Rapid): If a unit is attacked exclusively across an upper Roer hexside, its Combat Strength is multiplied by four. If it is attacked exclusively across Roer hexsides, at least one of which is a lower Roer hexside, its Combat Strength is multiplied by three (four if in an entrenchment).
c. 1 (Normal): If a unit is attacked exclusively across an upper Roer hexside, its Combat Strength is multiplied by three. If it is attacked exclusively across Roer hexsides, at least one of which is a lower Roer hexside, its Combat Strength is multiplied by two (three if in an entrenchment).
[18.12] The following are the modifiers to the US player's Roer River die roll:
- +1: If D-Day is 17, 18, or 19 February;
- No modification: If D-Day is 20 February;
- -1: If D-Day is 21 February;
- -2: If D-Day is 22 February;
- -3: If D-Day is 23 February;
- -4: If D-Day is 24 February;
[18.13] The current of the Roer as determined on D-Day is in effect up to and including 24 February. Starting on 25 February, the entire Roer (both upper and lower) becomes a normal river for the remainder of the game.
[18.14] All Roer hexsides are considered normal river hexsides for purposes of movement, regardless of the current.
[18.15] Gradual Flood: (Modifiers to Roer River Die Roll Summary) (see map)
[18.16] Gradual Flood: (Roer River Currents and Effects Summary) (see map)
[18.2] US Surprise Combat Bonus
[18.21] If the US player declares D-Day to be 23 February or earlier, each attack conducted by US forces on Game-Turn One receives a Surprise Combat Bonus. Each surprise combat bonus allows the US player to shift the combat ratio one column to the right on the CRT. No attack may receive more than one surprise combat bonus.
[18.22] If D-Day is declared to be 24 February, no surprise combat bonus may ever be awarded to US attacks during this Game-Turn. Similarly, no surprise bonus may ever be awarded to the US player if the German player has declared a flash flood (17.0).
[19.0] Movement and Supply Restrictions
GENERAL RULE:
Both players' initial forces may be restricted in movement and supply capabilities during the opening turns of the game.
CASES:
[19.1] German Movement Restrictions
[19.11] On Game-Turn One, none of the three units of the 9th Panzer Division may move. On Game-Turns One and Two, none of the three units of the 11th Panzer Division may move.
[19.12] No German unit belonging to the 2nd Corps may move unless a strategic withdrawal has been obtained (19.2). However, if any unit of this corps is attacked, all units of the 2nd Corps may move without further restriction for the remainder of the game.
[19.2] German Strategic Withdrawal
[19.21] At the beginning of all German Player-Turns starting with Game-Turn Three, the German player must roll a single die in order to determine if a Strategic Withdrawal occurs. A die roll of 1 indicates that a strategic withdrawal takes place - all other die rolls indicate no effect. Once a strategic withdrawal occurs, the German player ceases to roll for it for the remainder of the game.
[19.22] Starting with Game-Turn Eight, all German strategic withdrawal die rolls are reduced by one. (However, no die roll may be reduced below one.)
[19.23] German Strategic Withdrawal Summary (see map)
[19.3] US Movement Restrictions
[19.31] Throughout the first three Game-Turns, no US mechanized unit may move (although self-propelled artillery units may be used in support). On Game-Turn Four, mechanized units may move without restriction.
[19.32] No US unit belonging to the 7th Corps may ever move north of the 0900 hexrow during the course of the game.
[19.4] US Supply Restrictions
[19.41] All US 12th Corps units are automatically out of supply throughout the first six Game-Turns, regardless of normal supply considerations.
[19.42] All US 16th Corps units are automatically out of supply throughout the first two Game-Turns, regardless of normal supply considerations.
[20.0] Improved Positions
CASES:
[20.1] Improved Positions Hexes
Certain hexes on the map are designated as improved positions hexes. All improved positions hexes are considered normal entrenchment hexes with one exception: German units defending in improved positions hexes are not doubled. Instead, each stack defending in such a hex is increased in Combat Strength by two (this addition is made after the stack's Strength is multiplied by a certain factor due to an attack across a river hexside). Like entrenchments, improved positions may benefit only the German player.
[20.2] US 739th (Mine-Clearing) Tank Battalion
The US 739/19 Tank Battalion was equipped with mine-clearing tanks. In addition to functioning as a normal unit, if this unit ever participates in an attack against an improved positions hex, this improved position is ignored when determining the combat ratio for this attack. In addition, US stacks may be awarded a combined arms combat bonus (9.5) in this combat. (Exception: If 739/19 is participating in an attack across a river hexside, improved positions are not ignored.)
[21.0] German Volkssturm
GENERAL RULE:
Some German towns possess a Volkssturm Value (a parenthesized number following the town name). These towns are eligible to receive Volkssturm units at the moment the first US unit enters an adjacent hex.
CASES:
[21.1] How Volkssturm Units Are Created
[21.11] The first time a US unit enters a hex adjacent to a German town possessing a Volkssturm Value (either through movement or advance or retreat after combat), the movement of that US unit is temporarily interrupted while the German player rolls a single die in order to determine if Volkssturm units are created. On a die roll equal to or greater than the town's Value, no Volkssturm units are created, and the US unit may resume its movement. On a die roll less than this Value, a number of Volkssturm units equivalent to the difference between the die roll and the Value are immediately made available to the German player.
[21.12] If Volkssturm units are created, they must be chosen at random by the German player from those Volkssturm units not currently being used in the game. After they are chosen, they must be placed in any of the hexes of that town. They may be placed in US Zones of Control, and, if more than one is created, they may be stacked in the same hex. However, it is not permissible to violate stacking limits with the placement of Volkssturm units (if this is unavoidable, newly-created Volkssturm units may be placed in any adjacent hex not occupied by US units).
[21.13] After Volkssturm units are deployed, the US unit (whose movement was interrupted) may continue to move normally. (Since Volkssturm units are battalion-sized, they exert no Zones of Control.)
[21.2] Restrictions
[21.21] Each German town possessing a Volkssturm Value may only conduct a Volkssturm die roll once per game. After this die roll occurs (if ever), the German player should note this fact on a separate sheet of paper, indicating that no more Volkssturm units may be created by this town for the remainder of the game.
[21.22] The number of Volkssturm units in the countermix is an intended limit. If Volkssturm units are created and there are no more remaining off-map, the German player does not receive these units. However each time a Volkssturm unit is eliminated, it immediately becomes available for use again by the German player.
[21.23] If a US unit moves adjacent to more than one town possessing a Volkssturm Value, the German player rolls the die for each town before the US unit may resume its movement.
[21.24] Volkssturm units are battalion-sized. It is permissible for them to function like normal units in all respects after their creation.
[22.0] The Rhine River
CASES:
[22.1] Movement and Attack Restrictions
[22.11] US units may neither move nor attack across Rhine River hexsides, except across an unblown bridge hexside (22.2). US units may remain adjacent to German units without attacking when separated by Rhine River hexsides, although they are subject to normal Movement Point penalties when leaving a German unit's Zone of Control (6.32).
[22.12] German units may move and attack across Rhine hexsides as if it were a normal river. However, they may remain adjacent to US units without attacking when separated by Rhine hexsides, although they are subject to normal Movement Point penalties when leaving a US unit's Zone of Control (6.32).
[22.2] The Rhine Bridges
There are 10 bridges across the Rhine displayed on the map. At certain times, the German player may attempt to blow these bridges.
[22.21] The first time a US unit enters the western, northwestern, or southwestern (hereafter, simply "western") terminus hex of a Rhine bridge (either through movement or advance or retreat after combat), the movement of this unit is temporarily interrupted while the German player rolls two dice in order to determine if this bridge is successfully blown. The German player may attempt to blow each Rhine bridge only once per game, and only at the moment a US unit first enters its western terminus hex. For example, the western terminus hex of the bridge at Koeln is 0419.
[22.22] Blowing Rhine Bridges:
a. If a non-Volkssturm German unit occupies the eastern terminus hex of the Rhine bridge at the moment the dice are rolled, the bridge is successfully blown on any roll between 3 and 11, inclusive. For example, the eastern terminus hex of the bridge at Koeln is 0320.
b. If no non-Volkssturm German unit occupies the eastern terminus hex of the Rhine River bridge at the moment the German dice roll takes place, the bridge is successfully blown on any roll between 4 and 11, inclusive.
c. If a US "ruse" is being attempted (22.23), the Rhine bridge is successfully blown on any roll between 5 and 11, inclusive, regardless of the whether there are any German units in the eastern terminus hex.
[22.23] Only once per game, the US player may declare a "ruse" immediately before the German player is about to roll the dice in an attempt to blow a Rhine bridge (see 22.22c for the effects of a "ruse").
[22.24] If a US unit enters the western terminus hex of more than one Rhine bridge, the German player rolls the dice once for each bridge comprising this terminus hex.
[22.25] US units may conduct attacks across non-blown Rhine bridge hexsides and, providing the combat result is favorable, may advance after combat over such hexsides. A US unit attacking across a Rhine bridge may only attack the German unit(s) occupying the eastern terminus hex of this bridge, and no other. However, German units defending in this hex are tripled in Combat Strength whenever they are attacked across a Rhine bridge hexside.
[22.26] Rhine Bridge Blowing Summary (see map)
[23.0] Variable German Reinforcements
GENERAL RULE:
At the beginning of each German Movement Phase, the German player must perform three reinforcement die rolls: once for the south, once for the east, and once for the north map-edges. A die roll of 1 for the south or east map-edges indicates that German reinforcements are available from this direction in the current Movement Phase (23.1 and 23.2). A die roll of 1 or 2 indicates that German reinforcements are available from the north in the current Movement Phase (23.3). Once the available reinforcements from a particular map-edge have been exhausted, the German player ceases to roll the die for this map-edge for the remainder of the game.
CASES:
[23.1] South Map-Edge Reinforcements
All reinforcements from the south must enter the map on Entry Hex B (0121). If reinforcements are made available from the south, they must be taken in the following order:
a. First die roll of 1: 757/338/58, 758/338/58, 759/338/58.
b. Second die roll of 1: 3PG/58.
c. Third die roll of 1: 2106/106/58, 106/58.
[23.2] East Map-Edge Reinforcements
All reinforcements from the east must enter the map on Entry Hex C (1421). If reinforcements are made available from the east, they must be taken in the following order:
a. First die roll of 1: Utfr/406/12, NCO/406/12.
b. Second die roll of 1: 15PG/12.
c. Third die roll of 1: 21SS/10P/58, 22SS/10P/58, 10SS/10P/58.
[23.3] North Map-Edge Reinforcements
All reinforcements from the north must enter the map on Entry Hex D (2618). If reinforcements are made available from the north, they must be taken in the following order:
a. First die roll of 1 or 2: Lr/12, 130/Lr/12.
b. Second die roll of 1 or 2: 2FJ/12.
c. Third die roll of 1 or 2: 7FJ/12.
[23.4] Variable German Reinforcement Summary (see map)
[24.0] Weather and Mud
GENERAL RULE:
The state of the weather influences air operations as well as the condition of the ground.
CASES:
[24.1] Weather
[24.11] At the beginning of every Game-Turn, the US player should roll a single die and consult the Weather Table in order to determine the state of the weather for the rest of the Game-Turn.
[24.12] If the weather is clear, both players may use all of their assigned Air Points during the current Game-Turn (25.0). If the weather is light overcast, only one-half of each player's Air Points may be used. If the weather is heavy overcast, then neither player may use Air Points for the duration of the Game-Turn.
[24.13] Some results on the Weather Table may call for rain or thaw. If rain or thaw occurs, mud is created (24.2).
[24.14] If the weather in the immediately preceding Game-Turn was clear, the US player should subtract 1 from his weather die roll. If the weather in the immediately preceding Game-Turn was heavy overcast, the US player should add 1 to his weather die roll.
[24.15] Weather Table (see map)
[24.2] Mud
[24.21] Mud is in effect during each Game-Turn in which rain or thaw occurs, as well as the following Game-Turn. Place the Mud marker on the Game-Turn Track one space ahead of the Game-Turn in which rain or thaw occurs. Example: There is a thaw on Game-Turn Two. Mud is in effect during Game-Turns Two and Three. If there is a thaw on Game-Turn Three, mud would also be in effect during Game-Turn Four.
[24.22] During mud Game-Turns, the following special rules are in effect:
a. All stream hexsides are considered river hexsides;
b. All mechanized units pay increased Movement Point costs for certain types of terrain (4 in clear, 6 in woods, and 8 in hilltop). In addition, non-mechanized units pay 2 Movement Points to enter a woods hex, and 3 Movement Points to enter a swamp hex.
c. In all combats, the combat ratio on the CRT is shifted one column to the left (in favor of the defender).
[24.3] Game-Turn One Weather
On Game-Turn One, the US player should subtract 1 from his weather die roll.
[25.0] Air Point Availability
GENERAL RULE:
The US player has six Air Points available to him each Game-Turn of the game. The German player has two Air Points available to him from Game-Turn Two through the end of the game.
[26.0] US Bridges
GENERAL RULE:
Due to the proficiency of American forces in constructing bridges at short notice, US mechanized units have a limited capability to cross non-Rhine River hexsides. If any US mechanized unit begins the US Movement Phase adjacent to a river hexside, not in an enemy Zone of Control, that unit may expend its entire Movement Allowance to move across that hexside. However, such a maneuver is only possible if the unit does not enter an enemy Zone of Control upon crossing the hexside. This movement may be accomplished even if the unit is out of supply or isolated.
[27.0] Special Rules
CASES:
[27.1] Swamp Hexes
No mechanized unit may ever enter, exit, or retreat into a swamp hex unless this movement is performed through a hexside crossed by a road. Non-mechanized units must pay two Movement Points (three in mud Game-Turns) to enter a swamp hex through a non-road hexside. Units defending in swamp hexes employ the same line as town and woods hexes on the CRT when resolving combat.
[27.2] Special German Divisions
[27.21] The 406th Infantry Division and the 8th Fallschirmjager (Parachute) Division consist of only two regiments. These units may receive a divisional integrity combat bonus when attacking, even though only two regiments are adjacent to the Enemy unit which is the subject of the attack.
[27.22] The units 9P/81, 11P/81, Lr/12, 15PG/12, 7FJ/12, 2FJ/12, and 3PG/58 are kampfgruppen (battle-groups). They represent only portions of their parent divisions. None of these units may ever receive a divisional integrity combat bonus, although they employ strength chits in the same manner as other regiments.
[27.3] US Reinforcements
Due to a gradual flood declaration (see 18.0), Game-Turn One may occur anywhere between 17 and 24 February. The Start marker should be placed in the corresponding box on the Game-Turn Track, indicating this day as Game-Turn One.
[27.31] On Game-Turn 4, the US player receives the 99th Division (393/99/7, 394/99/7, 395/99/7) as a reinforcement.
[27.32] On Game-Turn 5, the US player receives the 95th Division (377/95/19, 378/95/19, 379/95/19) as a reinforcement.
[27.33] All US reinforcements enter the map through Entry Hex A (0301).
[28.0] Victory Conditions
GENERAL RULE:
The game ends at the end of the March 4, 1945 Game-Turn. At this point, the US player must add up the number of Victory Points he has accumulated over the course of the game in order to determine a victor. The German player may never accumulate Victory Points - the winner is based entirely on the number of Victory Points accumulated by the US player.
CASES:
[28.1] Victory Points for German Towns
The US player receives the following Victory Points for either occupying or having been the last to pass through German town hexes at the end of the game. (Note: The US Player must occupy or pass through the parenthesized hex number in the case of multi-hex towns).
a. 3 Victory Points: Koeln(0419), Geldern(2613), Rheinberg(2618), Moers(2218).
b. 1 Victory Point: Neuss(1317), Moenchengladbach(1513), Viersan(1812), Krefeld(1916), Venlo(2209), Roermond(1804).
[28.2] Victory Points for Rhine Bridges
[28.21] The US player receives 5 Victory Points for each unblown Rhine River bridge which at least one US unit has crossed from west to east (either moving or as a result of combat) during the course of the game (Exception: 28.22).
[28.22] In order for the US player to receive five Victory Points for an unblown Rhine River bridge, at least one US unit which crossed that same bridge must end the game east of the Rhine River, regardless of the presence of enemy Zones of Control.
[28.23] Victory Point Summary (see map)
[28.3] Determining a Victor
At the end of the game, the US player must add up the Victory Points he has accumulated and consult the following Victory Conditions in order to determine the winner of the game:
- German Decisive Victory: The US player has accumulated fewer than 9 Victory Points.
- German Substantive Victory: The US player has accumulated between 9 and 11 Victory Points, inclusive.
- German Marginal Victory: The US player has accumulated between 12 and 14 Victory Points, inclusive.
- US Marginal Victory: The US player has accumulated between 15 and 17 Victory Points, inclusive.
- US Substantive Victory: The US player has accumulated between 18 and 22 Victory Points, inclusive.
- US Decisive Victory: The US player has accumulated more than 22 Victory Points.
[28.4] Victory Condition Summary (see map)
Player's Notes
US Strategy
In order to win the game, the US player must attack constantly when the battle line is stationary and move as rapidly and as far as possible when fluidity develops. In the event of a Gradual Flood, the declaration of D-day will be the most important decision the US player will make in the game. The earlier the US player declares D-day, the more time he will have to achieve his victory conditions. However, an early declaration increases the German defensive capability considerably, while a late declaration insures a relatively quick breakthrough over the Roer River line. In playtesting, D-day was usually declared on 22 or 23 February. Once a breakthrough of the German lines has been made, the US player must use his armored divisions to rapidly exploit German disintegration. A major drive to the northeast must be combined with a less ambitious attack toward Cologne in order to gain enough Victory Points to insure victory. Capturing a Rhine bridge can only be achieved through luck.
The US player has a truly monumental force at his disposal at the start of the game. However, due to the extremely narrow frontage on which his army deploys, he will be incapable of employing more than a fraction of his force for the first few Game-Turns. After this period, his army should develop into a veritable steamroller. Don't forget to employ the 739th Tank Battalion to good advantage against German improved positions.
German Strategy
Initially, the German player should defend the Roer line as vigorously as possible. The extremely weak forces at his disposal at the start of the game can only attempt to make a stand in improved positions or entrenchments. The Roer can also enhance their defensive capabilities considerably. Meanwhile, the meager reinforcements or reserves available to the German player should prepare rear-area positions to await the inevitable US breakout. The rear positions do not have to be linear; rather, the German player should attempt to defend only those areas rich in Victory Point value. All in all, the German Player faces a seemingly monumental task in Grenade, but an initial vigorous defense followed by judicious retreats can put all of the pressure on the US player.