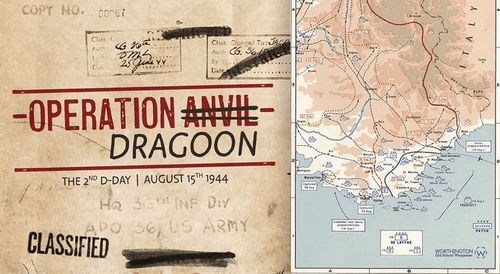
Operation Dragoon 1944
Operation Dragoon 1944 Rulebook
Table of Contents
Table of Contents
Introduction
Operation DRAGOON was a qualified success. The primary objective was the capture of the ports of Marseille and Toulon and in this it was spectacularly successful. Both ports were captured in just 2 weeks, relieving the strain on Allied logistics for the drive into Germany. The maneuver campaign against the German 19th Army was a much less clear-cut victory. While inflicting over 150,000 casualties on the German forces, a substantial number of German units, were able to escape the envelopment at Montélimar and re-group to fight again. You take the role of General Patch, commander of the US 7th Army, against an autonomous German player, referred to as the BOT.
See if you can do better, smashing the German 19th Army while simultaneously capturing the key fortress ports.
Game Board
On the map, there are five Allied unit advancement routes across southern France shown by green, blue and red arrows connecting location circles and fortress ports. There is also a German withdrawal route shown by black arrows.
German BOT controlled units attempt to advance into adjacent locations, put up a desperate defense or to escape from southern France. The Allied player attacks German occupied locations to push them back, advance along routes, occupy objectives and eliminate German units. The game board shows deployment, arriving units, an eliminated unit's box, Sequence of Play, Allied Actions, Attack Results and a Turn Track for use by the player.
Game Components and Set Up
The game markers represent Allied and German units, support assets and game trackers.
The Allies have 5 units: 2 Corps, 2 Infantry Divisions and the Airborne Task Force. The German side has 10 units: 1 Panzer Division (PzD) and 9 infantry type units — 7 infantry divisions (IDs) and 2 Army Rear Security (RS) units. A six-sided die is used to determine outcomes/choices and results.
Place the 5 Allied units in the invasion boxes. Place the designated 5 German unit markers on each of the German starting locations of the 5 advancement routes; place the 5 escape column German units on the Arrive at Arles from West box. Free French of the Interior (FFI) and Air Support markers are kept off the board until used.
Sequence of Play Each Turn
- Allied RPs: Based on the RP Chart, the Allied Player receives designated RPs or rolls a die to determine how many Resource Points (RPs) are available.
- Allied Actions: Using the available RPs, the Allied player chooses the Actions to play or complete.
- German Movement: Move the units of the German Retreat Column.
- German BOT Actions: Roll a die to determine the German BOT action to use for the turn and follow its instructions. Play/apply the BOT action.
- Turn End: Advance the turn track marker 1 location. Begin a new turn and repeat the turn sequence.
Using Action Charts
The Allied player uses RP to play actions, the German BOT does not need RP. The Allied player can play 2-4 actions per turn based on the number of RP received. RP cannot be saved from turn to turn. It costs 1 RP to play 1 action. Actions are:
- Attack an adjacent German unit, make an unopposed attack on empty location or invade.
- Flip an Allied unit marker from stalled to active
- Add 1 FFI marker to an Allied unit
An Allied unit can flip to active status and attack on the same turn. An Allied unit cannot attack more than once in a single turn. An Allied unit cannot attack on the turn it invades or lands.
German BOT actions are completed after Allied player actions and German movement are completed. Roll 1 die and use the result on the German action chart following its instructions.
Several German actions can cause a "stalled" result to an Allied unit. When this occurs flip the Allied unit marker to its "stalled" side. Allied units in a "stalled" status may not attack. It costs an action to remove the "stalled" status and flip the unit to "active" status.
Resolving Unit Attacks
Roll 1 die to resolve attacks or counterattacks and consult the Attack/Counterattack Results chart.
Allied attacks on locations occupied by enemy units result in advances for the attacker or no advance. If the Allied player advances, move their unit marker into the location and retreat the German unit marker. Generally, if there is no empty location for the German unit to retreat into, the German unit is eliminated, but the 148th ID (that retreats to Italy) and the 11th PzD can never be eliminated. German units that have reached the last location on their track (19th Army RS at Crest, 244th ID at Marseilles, 338th ID at Orgon and 242nd ID at Toulon) are eliminated if forced to retreat. Attacks on port fortress locations controlled by the Germans apply a -1 die roll modifier (DRM) to the die roll result. This fortress -1 DRM is cumulative with a unit's desperate defense -1 DRM, resulting in a -2 DRM.
Invasions and unopposed attacks on vacant locations by Allied units result in an automatic advance and possible "stalled" status.
Successful German BOT attacks on "active" Allied units result in "stalled" status for the Allied unit or no result. German BOT attacks on "stalled" Allied units result in advances for the German attacker or no result. If the German unit advances, the "stalled" Allied unit is retreated. If a "stalled" Allied unit is in a landing beach or drop zone, it may not be attacked. Allied units are never eliminated.
Allied attacks on invasion beaches, drop zones and unopposed vacant locations always result in an advance, but if a "1" is rolled the advancing Allied unit becomes "stalled."
The French landings on Alpha Beach on turns 16 and 18 neither require a die roll nor cost any RP. The units are simply placed in the Alpha Beach location and may be stacked.
Example: On the French II Corps advancement route the Allied player attacks Toulon from Hyeres. The II Corps attack is supported by Air and FFI. The die roll is modified -2 (-1 for the fortress at Toulon plus -1 for the desperate status of the German 242nd Infantry Division) and +1 for the Allied Air, giving a total -1 DRM. The Allied player rolls a 3, which is modified to a 2 resulting in No Advance (a 3 or better was required). Using his FFI support, the Allied player re-rolls a 5, modified to a 4, resulting in an Advance. The German 242nd Infantry Division has no location to retreat into from Toulon and is eliminated. The II Corps marker is placed in Toulon, scoring the Allied player 3 VP (2 VP for capturing Toulon plus 1 VP for eliminating the German 242nd Infantry Division). Place the eliminated German unit marker in the Eliminated Units box. The Air and FFI markers are removed from play.
Example: On the US 3rd Infantry Division advancement route the German BOT result calls for the German 338th Infantry Division in Orgon to attacks the "stalled" US 3rd Infantry Division in Salon. The player rolls a 4 for the German attack, resulting in an Advance (a 3 or better was required). The "stalled" US 3rd Infantry Division is retreated from Salon to Aix and the German 338th Infantry Division advances from Orgon into Salon. Had the US 3rd Infantry Division been in an "active" status, it would instead have been flipped to "stalled" and not retreated.
French Forces of the Interior (FFI)
When FFI are added, place the marker under or next to the Allied unit being supported. Limit 1 FFI per unit. FFI may be used to re-roll a die on an attack (as attacker or defender) of the unit being supported. When used, the FFI marker is removed from play.
Air Support
The Allied player may use the Air marker to support 1 attack per turn, unless bad weather was the German BOT result on the previous turn. The Air marker is placed beside the attacking unit and provides a +1 DRM for an attack. The +1 DRM may also be applied to an FFI re-roll of an attack. Air support may not be used for invasions or to support an attack on an empty location. After use, the Air marker is removed from the board.
German Desperate Defense
German units may acquire the desperate defense modifier in the following ways: the 11th PzD at start; the 148th, 242nd, 244th and 338th IDs and 19th Army RS unit upon retreating into Cannes, Toulon, Marseilles, Orgon and Crest; and through several German BOT actions. Desperate status is put in play by flipping a German unit to its -1 or -2 DRM side. When the German unit is attacked, apply a -1 or -2 DRM to the Allied attack die roll. If the Allied unit wins the attack and advances, then retreat the German unit back a location and flip the marker to the non-desperate defense side (or eliminate the unit if no location is available). If the Allied attack fails, the German unit remains in desperate status. The German desperate defense DRM has no effect on German counterattacks.
German Movement
4 German infantry units and the 11th PzD form the escape column and move north along the Rhone valley withdrawal route, following the decreasing-numbered location (Arles-Avignon-Orange-Bollene-Montélimar-Escaped to German Frontier box). Infantry units of the escape column may stack with the 11th PzD. In this case, only the top unit may be attacked by an Allied unit. Units of the escape column always retreat north to the next lower numbered location, until reaching Montélimar. If located in Montélimar and attacked, a German infantry unit is eliminated instead of retreating.
Movement Phase Sequence
- Starting with the unit in the lowest numbered location, move all units of the escape column north one location to the next lower numbered location towards the Escaped to German Frontier box. Infantry units may not stack with other infantry units, so if the next lower numbered location is occupied by another unit, the unit cannot move.
- Check for an arriving unit and place it in Arles. This unit does not move on the turn it is placed.
11th PzD Special Rules
- The 11th PzD neither retreats nor can it be eliminated.
- One German infantry unit may stack with the stationery 11th PzD.
- The 11th PzD, when in desperate -2 DRM status, is placed on top of the infantry unit. If the 11th PzD is attacked and defeated, it is flipped from desperate -2 DRM status to normal status and placed under the infantry unit.
- Only the unit stacked on the top can be attacked by the Allies.
- Turn 17: When 11th PzD enters Avignon, it ceases movement and remains in Avignon until the US VI Corps enters Crest.
- Turn 21 or later: Once the US VI Corps enters Crest, the 11th PzD (in desperate -2 DRM status) is placed in Montélimar during the next German movement phase and remains in Montélimar for the remainder of the game.
Allied Advance/German Retreat Restrictions
- Avignon: The Allied player may attack the units located in Avignon from Orgon, but the US 3rd ID cannot advance into Avignon until the German 198th ID has entered Avignon first.
- Montélimar: The Allied player may attack the units located in Montélimar from Crest and/or Bollene, but Allied units can never advance into Montélimar. The Allied player may make 2 attacks on the units (11th PzD and an infantry unit) located in Montélimar from Crest and Bollene, if he has a unit in both locations and pays RP for both attacks.
- German Retreats: German units forced to retreat from Avignon, Orange and Bollene must retreat north to the next lowest-numbered location. German units forced to retreat from Montélimar must retreat south to Bollene. German infantry units forced to retreat into a location already occupied by a German infantry unit are eliminated.
How to Win
The game ends at the end of the 29 Aug turn. If neither the fortress port of Marseilles nor Toulon is controlled by the Allies, it is an automatic GERMAN VICTORY. If either or both fortress ports are controlled by the Allies, proceed to calculate Victory Points.
Victory Points (VP) are earned or lost as follows:
- Add 2 VPs if Marseilles is controlled by the Allies.
- Add 1 VP if Cannes is controlled by the Allies.
- Add 1 VP if Toulon is controlled by the Allies.
- Add 1 VP for each German unit eliminated.
Score
- 6 VP OR LESS = GERMAN VICTORY
- 7 VP = DRAW. The historical result
- 8 VP OR MORE = ALLIED VICTORY
A Brief History
Operation DRAGOON (initially code named Operation ANVIL) was the code name for the landing operation of the Allied invasion of Provence (Southern France) on 15 August 1944. The invasion sought to secure the vital ports on the French Mediterranean coast and increase pressure on the German forces by opening another front. On D-Day, August 15th, the Allied 1st Airborne Task Force (1st ABTF) parachuted onto drop zones near le Muy in the pre-dawn hours. At daybreak, the US 7th Army, under General Patch, amphibiously invaded the Côte d'Azur of Provence. The US VI Corps landed the 3rd Infantry Division (3rd ID) on Alpha beach, the 45th ID on Delta beach and the 36th ID on Camel beach. Over the next two days, the French II Corps brought four divisions ashore: the 1st Free French Division (1re DFL), 3rd Algerian Infantry Division (3e DIA), 9th Colonial Infantry Division (9e DIC) and the 1st Armored Division (1re DB).
The Allies were opposed by the thinly stretched divisions of the German 19th Army. Hindered by Allied air supremacy and a large-scale uprising by the resistance fighters of the French Forces of the Interior (FFI), the weak German forces were swiftly defeated and pushed back. Patch ordered a rapid pursuit, with the French Algerian 3rd ID targeting Marseilles and most of French II Corps advancing on Toulon. US 3rd ID covered the French flank and struck for the Rhine at Avignon while the remainder of US VI Corps, led by the ad hoc mechanized Task Force Butler, conducted a wide outflanking drive, first north to Die and then west towards Montélimar. This advance met only scattered resistance, but fuel shortages often caused delays.
VI Corps was able to overtake the Germans and partially block their route at Montélimar. The ensuing battle between VI Corps on one side and the 11th Panzer Division (11th PzD), shepherding a large column of retreating Germans, on the other, was a hard fought, see-saw affair. The Germans were finally able to complete their withdrawal, but only after suffering severe losses. While the Germans were retreating, the French managed to capture the important ports of Marseille and Toulon, soon putting them into operation. Meanwhile, the 1st ABTF had driven the German 148th ID back into Italy, securing the right flank of the US 7th Army. The German retreat ultimately came to a stop at the Vosges mountains, where Army Group G was finally able to establish a stable defense line. Units of Patch's 7th Army met elements Patton's 3rd Army, advancing from Normandy, on 11 September.
Operation DRAGOON was a qualified success. The Allies liberated most of Southern France in just four weeks. The primary objective of Operation DRAGOON was the capture of the ports of Marseille and Toulon, and in this it was spectacularly successful. Both ports were captured in just 2 weeks, relieving the strain on Allied logistics for the drive into Germany. It was estimated that the ports in northern France could support up to 35 divisions, while those in southern France doubled that capacity. As 68 divisions were fielded in 1945, the southern ports were absolutely essential. The maneuver campaign against 19th Army was a much less clear-cut victory. While inflicting over 150,000 casualties on the German forces, a substantial number of German units, particularly the 11th PzD, were able to escape the envelopment at Montélimar and re-group to fight again.